Download User Manual - GPS Golf Watch
Transcript
Welcome
1.
Congratulations on the purchase of your ESN WR67. This manual was created to
quickly guide you through the many functions of your device, and to assist you with the initial
setup thereof. Please take a few minutes to read through the manual, after which you may
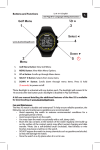
begin using your WR67 and enjoying its many features. Also, please visit us on the web at
www.golfesn.com to register your device and for support help.
All rights reserved. Except as expressly provided herein, no part of this manual may be reproduced, copied, transmitted, disseminated,
downloaded, or stored in any storage medium, for any purpose without the express prior written consent of Expresso Satellite Navigation,
INC. Information in this document is subject to change without notice. Expresso reserves the right to change or improve its products
and to make changes in the content without obligation to notify any person or organization of such changes or improvements. Visit
www.golfesn.com for current updates and supplemental information concerning
Date: March 2013
the use and operations of this and other Expresso Satellite Navigation, Inc. products.
Version: UMWR67R3
Computer Requirements
2.
• The WR67 is ready to use out of the box without the requirement of any additional software
or hardware; however, a computer and internet access are required in order to receive
course updates. Compatible operating systems include:
- PC (Windows XP/Vista/7/8), Browser: Internet Explorer 8 or newer, 32-bit version **Windows is
a registered trademark of Microsoft Corporation in the United States and other countries.
- Mac (OS X, version 10.6 INTEL or newer) Browser: Safari (32-bit is recommended) **Mac and
Mac OS are trademarks of Apple Inc, registered in the USA and other countries.
For more information contact ESN, www.GolfESN.com
Customer support contact information:
Email: [email protected]
Website: www.golfesn.com
Toll-free USA/Canada: 866-691-1350 Ext 2007
Toll-free Australia: 855-770-5990
Toll-free New Zealand: 855-770-5991
Toll-free United Kingdom: 855-770-5992
Toll-free Ireland: 855-770-5993
Package Includes
3.
1 WR67 Designer Golf GPS Watch
1 USB Clip
Welcome
1.
Congratulations on your purchase of the Expresso WR67. This manual was created to
quickly guide you through the many functions of your device, and to assist you with the initial
1 WR67 Quick Start Guide
setup thereof. Please take a few minutes to read through the manual, after which you may
begin using your WR67 and enjoying its many features. Also, please visit us on the web at
www.golfesn.com to register your device and for support help.
All rights reserved. Except as expressly provided herein, no part of this manual may be reproduced, copied, transmitted, disseminated,
downloaded, or stored in any storage medium, for any purpose without the express prior written consent of Expresso Satellite Navigation,
INC. Information in this document is subject to change without notice. Expresso reserves the right to change or improve its products
and to make changes in the content without obligation to notify any person or organization of such changes or improvements. Visit
www. golf esn. com f or current updat es and supplement al inf ormat ion concerning
Date: February 2013
the use and operations of this and other Expresso Satellite Navigation, Inc. products.
Version: QSGWR67R1
Table of contents
Care & Maintenance..........(5)
Charging Battery...............(6)
WR67 Overview..................(7)
Features..............................(8)
Play Golf Overview.....(9-13)
DST..............................(25)
Format.........................(26)
Golf Setup......................(27)
Yards and Meters...........(28)
iGolf Hazards Glossary...(14)
Auto Off Settings.........(29)
Apps...........................(15)
Battery...........................(30)
Odometer.....................(16)
Stopwatch.....................(17)
Alarm............................(18)
Timer............................(19)
Location........................(20)
Settings.............................(21)
Odometer Settings........(31)
Sound Settings..............(32)
About WR67..................(33)
Reset Device.................(34)
Troubleshooting
Time/Date.....................(22)
& FAQs.......................(35-38)
Set Time By GPS..........(23)
FCC Statement................(39)
Set Time Manually........(24)
Warranty...........................(40)
4.
Care & Maintenance
5.
The WR67 is durable and waterproof. In order to utilize its features, it is advisable to
use the watch in accordance with the following guidelines:
• Av o i d e x p o s i n g t h e w a t c h t o e x t r e m e c o n d i t i o n s f o r a p r o l o n g e d p e r i o d o f t i m e .
• Av o i d s e v e r e i m p a c t s o n t h e w a t c h .
• Yo u m a y c l e a n t h e w a t c h o c c a s i o n a l l y w i t h a s o f t a n d d a m p c l o t h .
• Brush the clip contacts at the bottom of the watch regularly. Dirt build-up on the s ur f a c e
of t h e c o n t a c t p oi nts ma y affe ct no rmal char ging and data transfer. (*Note: Use
a soft-bristled brush. Hard bristles or wire brushes may leave scratches on the
watch).
• DO NOT expose the watch to strong chemicals such as gasoline and alcohol, as
they will damage the watch.
• Store the watch in a dry place when it is not in use.
Charging Battery
6.
To check remaining battery life, press the Menu button, then select “Battery” from Menu 1.
The USB cable is compatible with any type of USB port, including A/C chargers.
To recharge the battery,
attach the 4-pin end of
the USB cable to the
receptors and connect
to your computer. The
screens to the left indicate
*Note: It is estimated that
charging from empty to full will
take 2-3 hours. Using GPS
functions deplete the battery
at a faster rate than non-GPS
functions.
the connection and charge
completion.
WR67 Overview
• Enable backlight with a
single push (5 seconds)
7.
• Scroll up through menu
items
• Press and hold to toggle
backlight ON/OFF (10
minutes maximum ON)
*
*
• Select menu items
*
• Press for Main Menu
options
• Press to exit Main Menu or
to return to previous Menus
from Sub-Menus
*
• Press and hold (5 seconds) to
power on/off
(Powers off from Time Screen only)
• Scroll down through menu items
Features
8.
The WR67 is preloaded with many great applications. To access these, power the watch on
and select the “Menu” button. Scroll through the menu options using the “Front” and “Back”
buttons. Select the desired feature or function by pushing the “Hazards” Button.
Play Golf *
Tee Time*
Apps:
- Odometer *
- Stopwatch
- Alarm
- Timer
- Location*
* GPS Features – These features require satellite signal. To ensure reception, make sure
you are outdoors away from tall buildings and trees, with a clear view of the sky.
Play Golf Overview
9.
After selecting “Play Golf” from Menu 1, the WR67 will search for satellite signal. Upon
GPS Lock, the WR67 will display a list of local courses. Scroll the list using the “Back” and
“Front” buttons, and select your course using the “Hazards” button. When you select your
course, Hole 1 will display on the main screen showing Front, Center, and Back of the Green
distances, as well as par information.
Hole Number: The hole # will
automatically advance as you play
the course.
Par Information
Center of the Green Distance
Front of the Green
Distance
Back of the Green
Distance
Maximum Distance Displayed 999
Play Golf Functions
Track Shot Distance
Pressing the Shot Dist.
button will set Point A (where
you are standing) to 0. After
walking to your ball (Point
B), the WR67 will display
the distance between Point
A and Point B in a straight
line. Press Hazards, Front, or
Back to exit Shot Distance.
View Golf Menu Options
The Golf Menu allows you to view
remaining battery life, manually
change holes, or exit the game.
*Note: Upon exiting the game, a
Round Info odometer will pop up for
10 seconds. This displays your total
round time and distance traveled.
10.
Distance to Back of Green
Pressing this button will display the distance to
the back of the green for 10 seconds.
Hazard Distances
Pressing this button will
display the distances
to key hazards for 10
seconds.
Distance to Front of Green
Pressing this button will display the distance to the
front of the green for 10 seconds.
Set Tee Time
11.
Tee Time is a useful feature that allows you to set a tee time up to 1 week (6 days, 23 hours, 59 minutes)
in advance. When a Tee Time is set, the WR67 will automatically enter Play Golf mode, and search for local
courses 7 minutes prior to the set time. Simply select your course from the list, and enjoy your round of
golf!
To set a Tee Time, press the menu button and select Tee Time from the Menu 1 (Fig 1). From the set
Tee Time screen (Fig 2), press the Hazards button to activate the Hours field. Use the Front and the Back
buttons to toggle the time up and down. Press the Hazards button after each field is set to toggle to the
next field. After the Day field has been set, the Tee Time feature has been activated, and will show ON.
A Flag Icon will also appear in the upper right-hand corner of the Home (Time) screen indicating that
a Tee Time is set.
*Note: The Tee Time feature is a one-time setting, meaning once the Tee Time has performed it’s function,
it will not reactivate. To set another Tee Time, follow the steps above. If you play golf at the same time
on the same day each week, you can simply select Tee Time from the Golf Menu, then press the Front
button to turn the Tee Time ON again (pressing the Front button toggles Tee Time ON/OFF based upon
the current Time/Day settings).
Fig 1
Fig 2
Auto-Off
12.
The Auto-Off feature is designed to automatically exit Play Golf mode when the preset time has
expired. When in Play Golf mode, after the preset time has expired, an Auto-Off message will appear
on the watch. Select Resume to return to the round; the Auto-Off message will appear again after
1.5 hours. Select Exit Game to immediately exit the round and return to the Home (Time) screen.
If no selection is made for 10 minutes, the WR67 will automatically exit the round and return to the
Home (Time) screen, and power down the GPS module to preserve battery.
To set the Auto-Off time, press the Menu button, then scroll to Menu 2 and select Settings (Fig 1). From
the Settings 1 menu, select Golf Setup (Fig 2), then select Auto-Off from the Golf Setup Menu (Fig 3).
From the set Auto-Off screen (Fig 4), use the Front and Back buttons to toggle the time up and down.
Auto-Off is always set to whatever current time is showing on the set Auto-Off page. Time can be
set between 1.5 and 9 hours (in .5 hour increments), or select Disable to turn the feature off.
Fig 1
Fig 2
Fig 3
Fig 4
Additional Course Downloads
13.
The WR67 can accomodate downloading up to 50 courses that are not part of the preloaded
golf course database. It may also be necessary to download updated course information
periodically. To download courses, follow the steps below.
1. Go to http://expresso.igolf.com, and create an account (if you have already created
an iGolf account, login at this website). The site will prompt you to install and run a plug-in from
L1 Technologies. You will need to allow this. *Note this plug-in is browser-specific; Windows
users must use Internet Explorer 8 or newer (32-bit version). Mac users must use Safari (32-bit
version is recommended).
3. Follow the device setup process in its entirety. This will download and install any
necessary drivers to your computer, and will check for WR67 firmware updates.
4. Once your account is setup and you are logged in, you may connect your watch.
5. Select the Search Courses button.
6 . E n t e r t h e n a m e o f a c o u r s e i n t o t h e s e a r c h b a r, t h e n s e l e c t t h e S e a r c h b u t t o n .
7. Select the course from the list of results.
8. On the course results screen, make sure the box to the right is showing that the watch is
connected. Once the connection is confirmed, select the Download GPS Course File button.
When the download is successful, you will see a Sync Complete message.
iGolf Hazard Glossary
14.
Hazards within the iGolf application are shown as abbreviations. These
abbreviations are defined as follows:
1. LFB- Left Fairway Bunker
12. LGB- Left Green Bunker
2. MFB- Middle Fairway Bunker
13. BGB-Back Green Bunker
3. RFB- Right Fairway Bunker
4. LFW- Left Fairway Water Layup
5. LFWC- Left Fairway Water Carry
14. RGW- Right Green Water
15. FGWC- Front Green Water Carry
16. FGW- Front Green Water Layup
6. MFW- Middle Fairway Water Layup
7. MFWC- Middle Fairway Water Carry
8. RFW- Right Fairway Water Layup
9. RFWC- Right Fairway Water Carry
17. LGW- Left Green Water
18. BGW- Back Green Water
19. CRK- Creek Layup
10. FGB- Front Green Bunker
20. CRKC- Creek Carry
11. RGB- Right Green Bunker
21. EOF- End of Fairway
Apps
15.
Upon selecting Apps within Menu 2, you will find a list of aditional applications on the watch (Apps
1 and Apps 2). The Apps 1 (fig 1) menu lists Odometer and Stopwatch. The Apps 2 (fig 2) menu
lists the Alarm and Timer.
Fig1
fig2
Odometer
16.
The odometer is a GPS function. When odometer is selected, the WR67 will search for satellite
signal. Once signal has been acquired, the odometer allows you to track distance, speed,
and total activity time.
Total distance traveled
Start time / Pause time
Total time elapsed
Speed
Exit Odometer
Reset Time and Distance to zero
(these settings will only reset
when time is paused)
Stopwatch
17.
A useful and convenient stopwatch feature is included in the WR67.
Start Stopwatch
Exit Stopwatch
Restart time when paused
When time is stopped,
pressing restarts time
from 0
Exit Stopwatch
Stop Stopwatch
Alarm
18.
The WR67 features a standard alarm clock function.
Toggle time up on Hours/Minutes
Enable/Disable
saved Alarm
Cycle between AM/PM
Activate fields to adjust time and
AM/PM
Exit Alarm when no fields
are active
Toggle between fields (Hours/
Minutes/AM/PM)
Enable Alarm once all fields
are set accordingly
Toggle time down on Hours/
Minutes
Cycle between AM/PM
Timer
19.
T h e W R 6 7 t i m e r f u n c t i o n w o r k s l i k e a k i t c h e n t i m e r. S e t t h e d e s i r e d t i m e ,
and an alarm will sound when time expires.
Toggle Time Up
Activate timer from main
Timer screen
Exit Timer when no fields
are active
Return to main Timer
screen once all fields are
set accordingly
Activate fields to adjust time
Toggle between fields (Hours/
Minutes/Seconds)
Toggle Time Down
Location
20.
The location feature is a GPS function. When location is selected, the WR67 will search for
satellite signal. Once signal is acquired, the WR67 will display the GPS Status (signal strength
and quality) along with your GPS position in latitude/longitude coordinates.
GPS Status
- Sat number shows the number of
satellites the watch is locked onto.
- HDOP number: This is the
Horiziontal Dilution of Precision.
It reflects the signal quality by
indicating the accuracy of the
current GPS lock. The example
shown reflects accuracy within 0.9
yards/meters
Latitude
Longitude
Exit Location
Settings
21.
From the settings menu, you can set the time and date, adjuste Golf Settings, adjust
Odometer settings, disable the key tones (Sound options), view your software version,
and perform a system reset.
Time/Date
22.
This option allows you to set the time and date, adjust daylight savings settings, set the time zone,
adjust the GPS update settings, and set the preferred time format.
Set Time and Date either By
GPS or Manually
See page 23 for setting time
by GPS
See page 24 for setting time
manually
Turn Daylight Savings Time
on or off. Changing this setting
will adjust the time forward or
backward by 1 hour automatically.
See page 25 for details on
Daylight Savings Time.
Set time format to standard or
military. For standard time, select
12h. For military time, select 24h.
See page 26 for details.
Set Time By GPS
23.
The easiest way to set the time on the WR67 is By GPS. Make sure you are outside away from buildings
and trees, with a clear view of the horizon. Press the menu button, and use the “Front” or “Back” key
to scroll to Menu 2, and select Settings (Fig 1). From the Settings 1 menu, select Time-Date (Fig 2), then
select Set Time (Fig 3). From the Set Time menu, select By GPS (Fig 4). The WR67 will search for GPS
signal, and upon GPS Lock, will return to the Home (Time) screen, where the time and the date will be
set via your longitude position. When the selection arrow is pointing at By GPS on the Set Time menu,
the other GPS features (Play Golf, Odometer, GPS Status) will update your time via your longitude
position as well, which is convenient for the travelling golfer. *Note: In rare instances, time zone
boundaries may conflict. In these cases, it may be necessary to manually adjust the time as detailed
in the Set Time Manually section.
Fig 1
Fig 2
Fig 3
Fig 4
*Note: Daylight savings time varies from year to year. When daylight savings is in effect
(Spring-Fall), DST should be set to “On.” From Fall-Spring, DST should be set to “Off.”
Set Time Manually
24.
To set the time manually, press the menu button, use the “Front” or “Back” key to scroll to Menu 2,
and select Settings (Fig 1). From the Settings 1 menu, select Time-Date (Fig 2), then select Set Time (Fig
3). From the Set Time menu, select Manually (Fig 4). The WR67 will then go to the set time screen,
where the seconds field will be flashing. Use the “Hazards” key to toggle between fields. Use the
“Front” and “Back” keys to toggle the time up or down. After the date has been set, the WR67 will
return to the Set Time menu, and the Time and Date has been set accordingly. When the selection
arrow remains pointing at “Manually,” GPS features will not update the time/date.
Fig 1
Fig 2
Fig 3
Fig 4
DST
25.
Press the menu button, and use the “Front” or “Back” key to scroll to Menu 2, and select Settings (Fig 1).
From the Settings 1 menu, select Time-Date (Fig 2), then scroll to and select DST (Fig 3). Toggle between
ON/OFF in the DST screen (Fig4) using the “Front” or “Back” keys and select the desired option using the
“Hazards” key. This will automatically set your time forward or backward by 1 hour.
*Note: DST (Spring/Fall) = ON, DST (Fall/Spring) = OFF.
Fig 1
Fig 2
Fig 3
Fig 4
Format
26.
Press the menu button, and use the “Front” or “Back” key to scroll to Menu 2, and select Settings (Fig
1). From the Settings 1 menu, select Time-Date (Fig 2), then scroll to and select Format (Fig 3), this
option allows you to scroll to and select a 24 hour format or a 12 hour time format (Fig 4).
*Note: 12 hour format is the default format.
Fig 1
Fig 2
Fig 3
Fig 4
Golf Setup
27.
Press the menu button, and use the “Front” or “Back” key to scroll to Menu 2, and select Settings (Fig
1). From the Settings 1 menu, select Golf Setup (Fig 2). From this Golf Setup menu you can set the units
of measurement, adjust the Auto-OFF settings and check/charge the Battery.
Fig 1
Fig 2
Yards or Meters
28.
Press the menu button, and use the “Front” or “Back” key to scroll to Menu 2, and select Settings (Fig
1). From the Settings 1 menu, select Golf Setup (Fig 2), then select Yds or M (Fig 3), this option will
allow you to scroll and select the Yards or Meters (Fig 4) to be used as the unit of measurment within
Play Golf Mode.
Fig 1
Fig 2
Fig 3
Fig 4
Auto OFF Settings
29.
To set the Auto-Off time, press the Menu button, then scroll to Menu 2 and select Settings (Fig 1). From
the Settings 1 menu, select Golf Setup (Fig 2), then select Auto-Off from the Golf Setup Menu (Fig 3).
From the set Auto-Off screen (Fig 4), use the Front and Back buttons to toggle the time up and down.
Auto-Off is always set to whatever current time is showing on the set Auto-Off page. Time can be
set between 1.5 and 9 hours (in .5 hour increments), or select Disable to turn the feature off.
Fig 1
Fig 2
Fig 3
Fig 4
Battery
30.
To check the Battery press the Menu button, then scroll using the “Font” or “Back” buttons to Menu
2 and select Settings (Fig 1). From the Settings 1 menu, select Golf Setup (Fig 2), then scroll to and
select Battery from the Golf Setup Menu (Fig 3) This option allows you to see the amount of Battery
life remaining on the device (Fig 4).
Fig 1
Fig 2
Fig 3
Fig 4
Odometer Settings
31.
To set the Unit of Measurement for the Odometer press the Menu button, then scroll using the “Font”
or “Back” buttons to Menu 2 and select Settings (Fig 1). From the Settings 1 menu scroll to and select
Odometer (Fig 2), this option allows you to scroll and select the preferred unit of measurement, Miles or
Kilometers (Fig 3). This option affects both the odometer and the “Round Info” pop-up that occurs upon
exiting the golf game.
Fig 1
Fig 2
Fig 3
Sound Settings
32.
To turn ON/OFF the Sound press the Menu button, then scroll using the “Font” or “Back” buttons to
Menu 2 and select Settings (Fig 1). From the Settings 2 menu scroll to and select Sound (Fig 2). This
option allows you to turn the key tone sounds On or Off (Fig 3).
Fig 1
Fig 2
Fig 3
About the WR67
33.
The About option allows you to view the version of firmware that is installed on your WR67. To view
this infomation, press the Menu button, then use the “Font” or “Back” buttons to scroll to Menu 2 and
select Settings (Fig 1). Then, scroll to Settings 2 and select About (Fig 2). The About screen is shown
in Fig 3 below.
Fig 1
Fig 2
Fig 3
Reset Device
34.
To perform a software reset, press the Menu button, then use the “Font” or “Back” button to scroll to
Menu 2 and select Settings (Fig 1). Then, scroll to Settings 2 and select Reset (Fig 2). From the Defaults
screen, select Reset; this will restore the device to the default settings (Fig 3).
Fig 1
Fig 2
Fig 3
Troubleshooting & FAQs
35.
For any issue that you may experience with the WR67, first try
performing a software reset by selecting “Reset” from the
“Settings” menu. If you still have trouble after the software
reset, perform a hardware reset by pressing and holding the 4
“corner” buttons (Front, Back, Shot, & Menu) simultaneously
until the screen goes blank. The device will automatically
reboot. *Note: you will need to recharge your WR67 after
performing a hardware reset.
If this Troubleshooting & FAQs guide doesn’t resolve your
issue, please contact ESN support at 1-866-691-1350 ext
2007 or email [email protected].
How do I power ON/OFF the WR67?
• Turning ON- Hold the “front” button until the WR67 powers ON.
• Turning OFF- From the main screen (Day and Time) hold the
“front” button until the WR67 powers OFF.
Troubleshooting & FAQs
36.
Are there any fees for using the WR67?
• There are no fees for using the WR67 or downloading courses.
You also receive a free membership to expresso.igolf.com
w h e n y o u register the WR67. This allows you access to their
worldwide database of GPS courses, a handicap tracker and
many more great features.
Where can I find the WR67 serial number/product identification
number?
• The serial number/product identification number is located
inside the box, on top of the inner carton, and begins “WR67SR”.
Troubleshooting & FAQs
37.
Will the WR67 have any effect on my golf swing?
• The WR67 is designed to be comfortable and light; however, we
advise wearing the watch to a driving range to practice your swing
in order to grow accustomed to golfing with a watch on your wrist.
If my golf course is not accurate what can I do?
• Please contact ESN directly to report course mapping issues.
What courses are preloaded on the WR67?
• The WR67 version from ESN is preloaded with courses for the
United States and Canada. Contact ESN support for information on
where to purchase international versions in your region.
Troubleshooting & FAQs
38.
How long will the battery last on and off the course?
• You should expect about 14 hours of battery life on the course. If
you are using the WR67 as an everyday (time only) watch you can
get a full year on a single charge.
Why won’t my watch connect and charge?
• Make sure you are connecting from either the Home
( Ti m e ) s c r e e n , t h e B a t t e r y s c r e e n , o r w i t h t h e w a t c h
powered off. Make sure to align the plastic tab on the
USB clip (in front of the 4 pins) with the notch on the
bottom of the watch, then align the 4 pins with their
r e c e p t a c l e s . I f u s i n g a c o m p u t e r, m a k e s u r e i t i s p o w e r e d
on and does not enter “sleep” mode. It is also necessary
to periodically clean the receptacle area on the bottom
of the watch, as built-up sedimient will affect charging.
Can I replace the battery?
• No, you cannot replace the battery. If you experience issues
with WR67 battery please contact ESN support.
FCC Statement
39.
This device complies with Part 15 of the FCC Rules. Operation is subject to the following two
conditions: (1) This device may not cause harmful interference, and (2) This device must accept
any interference received, including interference that may cause undesired operation.
WARNING: Changes or modifications to this unit not expressly approved by the party
responsible for compliance could void the user’s authority to operate the equipment.
NOTE: This equipment has been tested and found to comply with the limits for a class B
digital device, pursuant to Part 15 of the FCC Rules. These limits are designed to provide
reasonable protection against harmful interference inn a residential installation. This
equipment generates, uses and radiates radio frequency energy. If it is not installed and
used in accordance with the instructions, it may cause harmful interference to radio
communications.
However, there is no guarantee that interference will not occur in a particular installation. If
this equipment does cause harmful interference to radio or television reception, which can
be determined by turning the equipment off and on, the user is encouraged to try to correct
the interference by one or more of the following measures:
• Reorient or relocate the receiving antenna.
• Increase the seperation between the equipment and receiver.
• Consult the dealer or an experienced radio/TV technician for help.
Warranty
40.
READ THE USER GUIDE CAREFULLY BEFORE USING THE PRODUCT.
The WR67 Golf GPS Watch is warranted to be free from defects in materials or workmanship for two years from the date
of purchase. Within this period, EXPRESSO SATELLITE NAVIGATION, INC. will, at its sole option, repair or replace any
components that fail in normal use. Such repairs or replacement will be made at no charge to the customer for parts or
labor, provided that the customer shall be responsible for any transportation cost. This warranty does not apply to: (i)
cosmetic damage, such as scratches, nicks, and dents. (ii) consumable parts, such as batteries, unless product damage
has occurred due to a defect in materials or workmanship. (iii) damage caused by accident, abuse, misuse, water, flood,
fire, or other acts of nature or external cause. (iv) damage caused by service performed by anyone who is not an authorized
service provider of EXPRESSO SATELLITE NAVIGATION, INC.; or (v) damage to a product that has been modified or altered
without the written permission of EXPRESSO SATELLITE NAVIGATION, INC. In addition, EXPRESSO SATELLITE NAVIGATION,
INC. reserves the right to refuse warranty claims against products or services that are obtained and/or used in contravention
of the laws of any country.
Note: Repairs have a 90 day warranty. If the unit sent in is still under its original warranty, then the new warranty is 90 days or to
the end of the original two year warranty, depending upon which is longer.
THE WARRANTIES AND REMEDIES CONTAINED HEREIN ARE EXCLUSIVE AND IN LIEU OF ALL OTHER WARRANTIES, WHETHER
EXPRESS, IMPLIED, OR STATUTORY, INCLUDING ANY LIABILITY ARISING UNDER ANY WARRANTY OF MERCHANTABILITY
OR FITNESS FOR A PARTICULAR PURPOSE, STATUTORY OR OTHERWISE. THIS WARRANTY GIVES YOU SPECIFIC LEGAL
RIGHTS, WHICH MAY VARY FROM STATE TO STATE.
IN NO EVENT SHALL EXPRESSO SATELLITE NAVIGATION, INC. BE LIABLE FOR ANY INCIDENTAL, SPECIAL, INDIRECT OR
CONSEQUENTIAL DAMAGES, WHETHER RESULTING FROM THE USE, MISUSE, OR INABILITY TO USE THE PRODUCT OR
FROM DEFECTS IN THE PRODUCT. SOME STATES DO NOT ALLOW THE EXCLUSION OF INCIDENTAL OR CONSEQUENTIAL
DAMAGES, SO THE ABOVE LIMITATIONS MAY NOT APPLY TO YOU.
EXPRESSO SATELLITE NAVIGATION, INC. retains the exclusive right to repair or replace (with a new or a newly-overhauled
replacement product) the product or software or offer a full refund of the purchase price at its sole discretion. SUCH REMEDY
SHALL BE YOUR SOLE AND EXCLUSIVE REMEDY FOR ANY BREACH OF WARRANTY.
Online Auction Purchases: Products purchased through online auctions or unauthorized third parties are not eligible for warranty
coverage. Online auction confirmations are not accepted for warranty verification. To obtain warranty service, an original or copy of
the sales receipt from the original authorized retailer is required. EXPRESSO SATELLITE NAVIGATION, INC. will not replace missing
components from any package purchased through an online auction or unauthorized third party.
Call or email an EXPRESSO SATELLITE NAVIGATION, INC. Technical Support Specialist to describe the problem and request
a return material authorization (RMA) number. You will need to provide the unit’s serial number (if applicable), your original
receipt of purchase from an authorized EXPRESSO SATELLITE NAVIGATION, INC. dealer, your return shipping address, and a
daytime phone number.
Phone: 1-866-691-1350 E-mail: [email protected]
Once you have received the RMA number, ship the unit (insured) to the following address and include the assigned RMA
number and proof of purchase:
• Expresso Satellite Navigation, INC. • 824 Lincolnway, 3rd floor • La Porte, IN 46350 •


