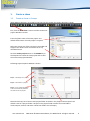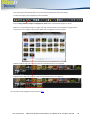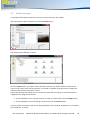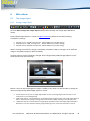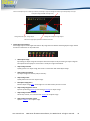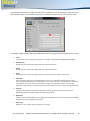
1
User manual Version 3.3 – August 2011 Email [email protected] - website www.DGFectsAV.com 2009 - 2011 © DGFectsAV Software, the Netherlands Introduction Seeing is believing DGFects Discovery is an advanced and powerful multimedia program that enables you to create beautiful, digital full HD (High Definition) presentations by means of user friendly functions and features. Dynamic presentations that speak to everyone’s imagination. This multi-track program is intuitive and versatile in use and offers you a wide range of possibilities. Images DGFects Discovery offers you the possibility to edit or create an unlimited number of images and position each image in different sizes and locations on the screen. The number of image tracks is unlimited. Images can be drag and dropped to the imagepool or directly to a show in various ways. Easily zoom in, zoom out, pan, rotate and fit image to screen or set custom zoom on individual images within a show. In addition the duration, transparency and visual effects of each image can be changed in detail. Numerous images can also simultaneously be layered in various sizes and locations on the screen. And by means of advanced (soft edge) masking technology the most divergent, beautiful dynamic visual effects can be realized in a trice. Audio And if you like to add music and sounds to your show then the program offers you an unlimited number of audio tracks. The procedure for adding audio data to a show is the same as for images. For each audio fragment the desired sound volume can be set in detail as well as edited with a variety of audio filters like echo and reverb. By means of a synoptic timeline images and audio fragments can be exchanged, modified and synchronized fast and easy! Export possibilities Audio-visual shows can be exported as EXE presentations, screen savers and video. Performance DGFects Discovery is compact (< 4mb!), does not require program related dynamic link libraries (dll) and can be installed on your Windows computer fast and easy. Free updates of the program can be downloaded from website www.DGFectsAV.com at any time. System requirements Your creativity is limited only by the power of your computer hardware. DirectX 9.0c or higher is required on your system. OpenGL 2.0 or higher is strongly recommended. Compatibility DGFects Discovery is compatible with Windows XP, Windows Vista and Windows 7 (32bits/64bits). Image material Gratefully: Gijs van Gent, copyright ©2011 User manual v3.3 2009-2011 © DGFectsAV Software, the Netherlands. All rights reserved. 2 Index 1. Create a show................................................................................................................................. 6 1.1 Create a show in 5 steps ................................................................................................................. 6 1.1.1 Step 1 – add images to a project ......................................................................................... 7 1.1.2 Step 2 – add audio to a project ........................................................................................... 7 1.1.3 Step 3 – rip an audio CD ...................................................................................................... 8 1.1.4 Step 4 – add images to a show .......................................................................................... 12 1.1.5 Step 5 – add music and sound to a show .......................................................................... 13 1.2 Save a show .................................................................................................................................. 14 1.3 Open a show ................................................................................................................................. 14 2. Run a show ................................................................................................................................... 15 2.1 The small preview screen ............................................................................................................. 16 2.2 The full preview screen................................................................................................................. 16 2.2.1 3. The controls panel ............................................................................................................. 16 The timeline ................................................................................................................................. 18 3.1 The image track ............................................................................................................................ 18 3.2 The audio track ............................................................................................................................. 20 3.3 The marker track .......................................................................................................................... 22 4. The mediapool ............................................................................................................................. 23 4.1 The imagepool .............................................................................................................................. 23 4.2 The audiopool ............................................................................................................................... 27 5. The Project explorer .................................................................................................................... 28 5.1 Archive a project........................................................................................................................... 29 6 Edit a show ................................................................................................................................... 30 6.1 The image object .......................................................................................................................... 30 6.1.1 Settings image object ........................................................................................................ 30 User manual v3.3 2009-2011 © DGFectsAV Software, the Netherlands. All rights reserved. 3 6.1.2 Edit image object ............................................................................................................... 31 6.1.3 Split or cut image object .................................................................................................... 33 6.1.4 Edit image object filters..................................................................................................... 33 6.1.5 Move image objects simultaneously ................................................................................. 36 6.1.6 Magnetize image objects .................................................................................................. 37 6.2 Dynamic keyframe control ........................................................................................................... 38 6.2.1 Object image - pan and zoom............................................................................................ 38 6.2.2 Object image - rotation ..................................................................................................... 43 6.2.3 Object image - transition ................................................................................................... 47 6.3 Dynamic masking .......................................................................................................................... 50 6.4 The audio object ........................................................................................................................... 55 7. 6.4.1 Edit audio object................................................................................................................ 55 6.4.2 Split or cut audio object .................................................................................................... 56 6.4.3 Edit audio object filters ..................................................................................................... 57 Menus and functions ................................................................................................................... 58 7.1 Imagepool functions ..................................................................................................................... 58 7.2 Audiopool functions ..................................................................................................................... 60 7.3 Image track functions ................................................................................................................... 62 7.4 Image object functions ................................................................................................................. 65 7.5 Audio track functions.................................................................................................................... 70 7.6 Audio object functions.................................................................................................................. 72 7.7 Marker track functions ................................................................................................................. 74 7.8 Marker object functions ............................................................................................................... 74 7.9 Small preview screen functions .................................................................................................... 75 7.10 Full preview screen functions ....................................................................................................... 75 7.11 Timeline functions ........................................................................................................................ 77 User manual v3.3 2009-2011 © DGFectsAV Software, the Netherlands. All rights reserved. 4 8. Create an output file .................................................................................................................... 79 8.1 Create an EXE presentation .......................................................................................................... 79 8.2 Create a SCR screen saver ............................................................................................................ 80 8.3 Create an AVI video ...................................................................................................................... 81 9. 8.3.1 Video codecs...................................................................................................................... 81 8.3.2 Video settings .................................................................................................................... 82 8.3.3 Play video .......................................................................................................................... 82 Tools ............................................................................................................................................. 83 9.1 Create a text label......................................................................................................................... 83 9.2 Resize an image ............................................................................................................................ 85 9.3 Crop an image ............................................................................................................................... 87 9.4 Cut an audio file ............................................................................................................................ 89 10. Program settings .......................................................................................................................... 90 10.1 Show objects settings ................................................................................................................... 90 10.2 Show editor settings ..................................................................................................................... 94 10.3 Screens settings ............................................................................................................................ 97 10.4 Other settings ............................................................................................................................. 101 12. Appendices ................................................................................................................................. 103 User manual v3.3 2009-2011 © DGFectsAV Software, the Netherlands. All rights reserved. 5 1. Create a show 1.1 Create a show in 5 steps When DGFects Discovery is started for the first time the Create new project Window is shown. Else, click the New show... button and the Create new project Window is shown. Enter the folder name of the new project. The default folder name of a new project is Project1. Select the screen size of the new show. The width and height of the show screen can also be set to any desirable format. Click the Create project button or the ENTER key on the keyboard to create the new project and to close the Create new project Window. Following Project explorer Window is shown. Step 1 – add images to a project. Step 2 – add audio to a project. Step 3 – rip an audio CD. Ripped audio is automatically added to the audio list of the project. DGFects Discovery has created a new project folder as shown in the project contents panel. The default name of a project folder is Project1. This project folder contains four new folders: Audio, Output, Pictures and Video. These four folders are still empty. User manual v3.3 2009-2011 © DGFectsAV Software, the Netherlands. All rights reserved. 6 1.1.1 Step 1 – add images to a project Click the Images button and the Add or drag-and-drop selected images to Project explorer Window is shown. Following file formats can be added to your project: Bitmap (bmp), Jpeg (jpg) and Ping (png) files. Select an image folder and drag-and-drop one or more selected images to the Project explorer Window, or click the Add button to automatically add the selected image(s) to the project. Added project images are automatically added to the imagepool. An image can also be added to the project by double-clicking the image with the left mouse button. 1.1.2 Step 2 – add audio to a project Click the Audio button and the Add or drag-and-drop selected audio to project explorer Window is shown. Following file formats can be added to your project: Wave (wav) and Mp3 (mp3) files. Select an audio folder and drag-and-drop one or more selected audio fragments to the Project explorer Window, or click the Add button to automatically add the selected audio fragments to the project. Added project audio fragments are automatically added to the audiopool. An audio fragment can also be added to the project by double-clicking the audio fragment with the left mouse button. User manual v3.3 2009-2011 © DGFectsAV Software, the Netherlands. All rights reserved. 7 1.1.3 Step 3 – rip an audio CD Click the Rip audio CD button and the Rip audio CD tool Window is shown. With the Rip audio CD tool a selected CD track or an entire audio CD can be ripped fast and easy. Put an audio CD in the CD tray and close it. DGFects Discovery verifies and reads the audio CD. If your computer is connected to the internet DGFects Discovery will download the title of the audio CD including the titles of all CD tracks and store the retrieved CD data in the CD library. The Rip audio CD tool Window includes following functions: 1. CD player - play audio CD 2. CD player – pause audio CD 3. CD player – stop audio CD 4. CD player – previous track audio CD 5. CD player – next track audio CD 6. CD player – eject audio CD User manual v3.3 2009-2011 © DGFectsAV Software, the Netherlands. All rights reserved. 8 7. Rip CD track A CD track can be ripped to a wav or an mp3 file. Default a CD track is ripped to a wav file. Select the desired CD track to be ripped with the Select previous track button or the Select next track button. The filename is added by default. It is possible, after selection of the CD track to be ripped, to change this filename. If you would like to rip a CD track to an MP3 file then select the mp3 format. This mp3 format also allows you to change the bit rate of the mp3 file. The higher the bit rate in kbit/sec, the better its resulting audio quality. The lowest selected bit rate results in a much smaller mp3 file. However the audio quality will be much poorer. Once a CD track and its audio file format (mp3 or wav) has been selected the CD track can be ripped. Click the Rip CD track button. The CD track will be ripped. When ripping is ready the created audio file will be automatically added to the audiopool of the project. 8. Rip CD It is also possible to rip an entire audio CD: Click the Rip CD button. All CD tracks present on the audio CD will be ripped one by one and automatically added to the audiopool of the project. 9. Cancel During ripping of a CD track or an entire audio CD it is possible to cancel the ripping process. Click the Cancel button to do so. 10. CD Library Click the CD library button. The Audio CD library Window is shown giving an overview of all ripped audio CD’s (in case successfully downloaded from the internet) including all ripped CD titles and CD track data. It is possible to change the description for each CD track by doubleclicking the left mouse button on the description field of a CD track. Changes can be stored by clicking the Save button. The Rip audio CD tool Window can also be opened by clicking the Show rip audio CD tool button. User manual v3.3 2009-2011 © DGFectsAV Software, the Netherlands. All rights reserved. 9 While performing step 1, step 2 and step 3 project images and (ripped) audio fragments are automatically added to the mediapool of the project. Imagepool Imagepool button Audiopool audiopool button Close the Project explorer Window as soon as you are ready with adding images and audio fragments to the project. You return to the main program. The main Window of DGFects Discovery looks as follows: main menu menu buttons Actual time position timeline imagepool small preview screen vu meters start, stop, previous/next page, rewind/forward, start again buttons User manual v3.3 2009-2011 © DGFectsAV Software, the Netherlands. All rights reserved. 10 The timeline The timeline includes all image and audio tracks. As you wish images can be added to image tracks and audio fragments can be added to audio tracks. Each created image and audio object can be easily arranged and edited in detail. In case an image or audio fragment is dragand-dropped to the timeline then automatically an image track or audio track is created. It is also possible to manually create an image track or audio track before adding images or audio fragments to a show. Click the Create image track button to add an image track to the timeline, click the Create audio track to add an audio track to the timeline. The small preview screen Scalable screen to preview and evaluate dissolves, transitions, dynamic keyframe control and rotation of images and text. The VU meters A pair of meters (representing the left and right audio channel) displaying the audio volume of playing audio fragments in DB. The mediapool The mediapool includes all project images and project audio fragments. Arranged images are shown on the imagepool. It is possible to change the order of imagepool images by simply drag-and-dropping an image to another image. It is also possible to drag-and-drop an imagepool image in-between imagepool images. The size of images on the imagepool is adjustable to small, medium or large. Click the or the button to change the size of imagepool images. Click the show imagepool button to display the imagepool. Click the show audiopool button to display the audiopool. The audiopool display audio file data in detail like the file format (wav/mp3), duration, mode (mono/stereo) and the file size. During editing a show it is always possible to show or hide/close the mediapool. Click the hide mediapool button if the mediapool is shown, click the same show mediapool button if the mediapool is hidden/closed. User manual v3.3 2009-2011 © DGFectsAV Software, the Netherlands. All rights reserved. 11 1.1.4 Step 4 – add images to a show Click the Show imagepool button, select an image from the imagepool with the left mouse button and drag-and-drop it to the timeline. DGFects Discovery automatically creates an image track (if required) and an image object. Add several images to the show by drag-and-dropping them to the timeline one by one. It is not possible to add an image to an audio track. It is also possible to add images to the show by drag-and-dropping them directly from Windows Explorer to the timeline. Click the drag-and-drop image files to imagepool or show button and Windows Explorer is shown. Select one or more images and drag-and-drop these images to an existing image track or to the timeline. DGFects Discovery creates one or more image tracks (if required) and image objects for all drag-and-dropped images. Images that are not present on the projects’ imagepool are automatically added to the imagepool. User manual v3.3 2009-2011 © DGFectsAV Software, the Netherlands. All rights reserved. 12 1.1.5 Step 5 – add music and sound to a show Click the Show audiopool button, select an audio file from the audiopool with the left mouse button and drag-and-drop it to the timeline. DGFects Discovery automatically creates an audio track (if required) and an audio object. Add several audio files to the show by drag-and-dropping them to the timeline one by one. It is not possible to add an audio file to an image track. Audio files audio data audiopool It is also possible to add audio files to the show by drag-and-dropping them directly from Windows Explorer to the timeline. Click the drag-and-drop audio files to audiopool or show button and Windows Explorer is shown. Select one audio file and drag-and-drop this audio file to an existing audio track or to the timeline. DGFects Discovery creates an audio track (if required) and an audio object for the drag-and-dropped audio file. An audio file that is not present on the projects’ audiopool is automatically added to the audiopool. User manual v3.3 2009-2011 © DGFectsAV Software, the Netherlands. All rights reserved. 13 1.2 Save a show Click the Save show... button and the Save show as... Window is shown. If a show has been saved before the Save show… Window is shown. Enter the filename of the show. The default name of a new show is noname.shw. Click the Save button to save your new show, or the Cancel button not to do so. The Save show as... Window closes automatically. 1.3 Open a show Click the Open show... button and the Open show... Window is shown. Select a show (.shw file) and click the Open button. Click the Cancel button not to do so. User manual v3.3 2009-2011 © DGFectsAV Software, the Netherlands. All rights reserved. 14 2. Run a show locator – marks the actual time position 1. Click the Play show button or press the SPACE bar on the keyboard to run a show 2. Click the Stop show button or press the SPACE bar on the keyboard to stop a show 3. Click the Previous timeline button to go to the previous timeline 4. Click the Rewind show button to rewind the locator 5. Click the Forward show button to forward the locator 6. Click the Next timeline button to go to the next timeline 7. Click the Reset show to 0:00 sec button or press the HOME key on the keyboard to restart a show The locator can also be relocated manually. Position the mouse cursor on the locator. The mouse cursor changes to a diagonal arrow. Click the left mouse button, the locator can now be relocated in the desired direction. If during manual relocation of the locator the end of the timeline is passed then the next timeline is automatically selected. If during manual relocation of the locator the beginning of the timeline is passed then the previous timeline is automatically selected. User manual v3.3 2009-2011 © DGFectsAV Software, the Netherlands. All rights reserved. 15 2.1 The small preview screen By default, the small preview screen is located on top of the main Window of the program. Among other things the small preview screen renders dissolving images and text, transitions and dynamic keyframe control. Change the size of the small preview screen If you wish to change the size of the small preview screen, simply click the border of this screen with the left mouse button and keep the left mouse button pressed. Now reposition the border until the screen is resized to the desired size. Relocate the small preview screen You can relocate the small preview screen by simply dragging it to another location on the screen (or another screen). Click the left mouse button on the title bar of the small preview screen en keep the left mouse button pressed. Now relocate the small preview screen by moving the mouse cursor across the screen. Change the format and position of an object image If the keyframe of an object image is displayed on the small preview screen then it is possible to manually change the format and position of the selected object image. The image name of the selected object image is displayed on the title bar of the small preview screen. By pressing the F5 key on the keyboard the keyframe of a next, simultaneously rendered, object image is selected and displayed. If the small preview screen is closed then click the Show small preview screen button to show it. 2.2 The full preview screen If you wish to run a show on the full preview screen then click the Show full preview screen button or press the F12 key on the keyboard. 2.2.1 The controls panel The controls panel is shown by default as soon as the full preview screen is shown. The controls panel is closed by clicking the button or by clicking the F2 key on the keyboard. If the controls panel is closed it can be shown by pressing the F1 key on the keyboard. User manual v3.3 2009-2011 © DGFectsAV Software, the Netherlands. All rights reserved. 16 The controls panel includes following controls buttons: 1. Click the Play show button or press the SPACE bar on the keyboard to run a show 2. Click the Stop show button or press the SPACE bar on the keyboard to stop a show 3. Click the Previous show page button to go to the previous timeline 4. Click the Rewind show button to rewind the locator 5. Click the Forward show button to forward the locator 6. Click the Next show page button to go to the next timeline 7. Click the Reset show to 0:00 sec button or press the HOME key on the keyboard to restart a show Scale the screen size of a show with the controls panel slider. Activate frames (screenframe and keyframe) on the full preview screen by ticking the frames box. Deactivate frames by un-ticking the frames box. If the keyframe of an object image is displayed it is possible to (1) edit the image object filters and (2) change the size or location of the object image on the full preview screen. The name of the selected object image is shown on the controls panel. By pressing the F5 key on the keyboard the keyframe of a next, simultaneously rendered, object image is selected and displayed. Return to the main program by clicking the Return to small preview screen button or by pressing the ESC key on the keyboard. User manual v3.3 2009-2011 © DGFectsAV Software, the Netherlands. All rights reserved. 17 3. The timeline The timeline offers you numerous editing possibilities to create beautiful full HD (High Resolution) presentations in a trice. Image tracks and audio track enable you to add, edit and rearrange show images, music and sound fragments. All used image tracks and audio tracks on the timeline are well organized and can be easily rearranged as well. 3.1 The image track Each image track in the timeline contains so called image objects and is thus constructed: Image track header Image track Image object Transparency area Remove image object Add an image track to the timeline Click the Create image track button to add an image track to the timeline. If an image is drag-and-dropped from the imagepool to the timeline an image track is created automatically. Empty image track Position the mouse cursor on the photo pictogram of the image track header and click the right mouse button. The header menu of the image track is shown. Click following header menu item: If the image track contains image objects a warning message appears. In case you empty the image track all image objects in the image track will be removed. Remove an image track from the timeline Position the mouse cursor on the photo pictogram of the image track header and click the right mouse button. The header menu of the image track is shown. Click following header menu item: If the image track contains image objects a warning message appears. In case you remove the image track all image objects in the image track will be removed as well. Switch on/off image track Double click the left mouse button on the photo pictogram of the image track header to switch off an image track. All image objects in the image track are not rendered (transparency area colours gray). Double click (again) the left mouse button on the photo pictogram of the image track header to switch on an image track. All image objects in the image track are rendered (transparency area colours light blue). User manual v3.3 2009-2011 © DGFectsAV Software, the Netherlands. All rights reserved. 18 Add an image to an image track Each image track contains image objects. An image object can be created as follows: An image is drag-and-dropped from the imagepool to the timeline An image is drag-and-dropped from the imagepool to an image track An image is inserted in an image track An image is drag-and-dropped from one image track to another image track An image is pasted in an image track from the clipboard Increase or decrease image track height The height of an image track can be changed as follows: 1. Click the button. The image track height is maximized in the timeline; 2. Click the button. The image track height is normalized in the timeline. Rearrange an image track An image track in the timeline can be rearranged in two different ways: 1. Click the button. The image track is rearranged one image track up in the timeline; 2. Click the button. The image track is rearranged one image track down in the timeline. Click the left mouse button next to the photo pictogram of the image track header and keep the left mouse button pressed. It is now possible to move the image track. Relocate the mouse cursor to the photo pictogram of another image track header and release the mouse button. Timeline before drag-and-dropping an image track User manual v3.3 2009-2011 © DGFectsAV Software, the Netherlands. All rights reserved. 19 Timeline after drag-and-dropping an image track 3.2 The audio track Each audio track in the timeline contains so called audio objects and is thus constructed: Audio track header Audio track Audio object Audio pictogram Remove audio object Add an audio track to the timeline Click the Create audio track button to add an audio track to the timeline. If an audio fragment is drag-anddropped from the audio pool to the timeline an audio track is created automatically. Empty audio track Position the mouse cursor on the loudspeaker pictogram of the audio track header and click the right mouse button. The header menu of the audio track is shown. Click following header menu item: If the audio track contains audio objects a warning message appears. In case you empty the audio track all audio objects in the audio track will be removed. Remove an audio track from the timeline Position the mouse cursor on the loudspeaker pictogram of the audio track header and click the right mouse button. The header menu of the audio track is shown. Click following header menu item: If the audio track contains audio objects a warning message appears. In case you remove the audio track all audio objects in the audio track will be removed as well. Switch on/off audio track Double click the left mouse button on the loudspeaker pictogram of the audio track header to switch off an audio track: All audio objects in the audio track are not played (audio pictogram colours gray). Double click (again) the left mouse button on the loudspeaker pictogram of the audio track header to switch on an audio track. All audio objects in the audio track are played (audio pictogram colours light blue). User manual v3.3 2009-2011 © DGFectsAV Software, the Netherlands. All rights reserved. 20 Add an audio fragment to an audio track Each audio track contains audio objects. An audio object can be created as follows: An audio fragment is drag-and-dropped from the audio pool to the timeline An audio fragment is drag-and-dropped from the audio pool to an audio track An audio fragment is inserted in an audio track An audio fragment is drag-and-dropped from one audio track to another audio track An audio fragment is pasted in an audio track from the clipboard Increase or decrease audio track height The height of an audio track can be changed as follows: 1. Click the button. The audio track height is maximized in the timeline; 2. Click the button. The audio track height is normalized in the timeline. Rearrange an audio track An audio track in the timeline can be rearranged in two different ways: 1. Click the button. The audio track is rearranged one audio track up in the timeline; 2. Click the button. The audio track is rearranged one audio track down in the timeline. User manual v3.3 2009-2011 © DGFectsAV Software, the Netherlands. All rights reserved. 21 3.3 The marker track By using marker objects you can influence the flow of a DGFects Discovery show. Markers are handy in use for Speaker Support. Currently pause markers are available. By using a pause marker object it is possible to pause a running show automatically. As soon as the SPACE bar is pressed on the keyboard running of a show is resumed. Eventually it will be made possible to you to influence the flow of a DGFects Discovery show by means of a remote control / iPod. Each marker track in the timeline contains so called marker objects and is thus constructed: Marker track header Marker track Marker object remove marker object Add a marker track to the timeline Click the Create marker track button to add a marker track to the timeline. You can add one marker track only to the timeline per project. Empty marker track Position the mouse cursor on the marker pictogram of the marker track header and click the right mouse button. The header menu of the marker track is shown. Click following header menu item: If the marker track contains marker objects a warning message appears. In case you empty the marker track all marker objects in the marker track will be removed. Remove a marker track from the timeline Position the mouse cursor on the marker pictogram of the audio track header and click the right mouse button. The header menu of the marker track is shown. Click following header menu item: If the marker track contains marker objects a warning message appears. In case you remove the marker track all marker objects in the marker track will be removed as well. Switch on/off marker track Double click the left mouse button on the marker pictogram of the marker track header to switch off a marker track: all marker objects in the marker track are inactive. Double click (again) the left mouse button on the marker pictogram of the marker track header to switch on a marker track: all marker objects in the marker track are active. Add a marker to a marker track A marker track contains marker objects. A marker object can be created as follows: A marker is added to the timeline: a marker track is created automatically A marker is added to a marker track User manual v3.3 2009-2011 © DGFectsAV Software, the Netherlands. All rights reserved. 22 4. The mediapool DGFects Discovery offers you a convenient and comprehensive mediapool that includes all images and audio files for your show. New images and audio files can be easily added to the mediapool. Non used images and audio files can be directly removed from the imagepool or from the audiopool. The left side of the mediapool includes buttons to access the imagepool and the audiopool. In time the videopool will be made available. Increase or decrease the pictogram size for imagepool images Show imagepool button Show audiopool button a 4.1 The imagepool Click the Show Imagepool button to display the imagepool. Mediapool bar Images are clearly displayed on the imagepool as pictograms. Each imagepool image includes its filename and an image counter, which indicates how often it is used in a show. Double click on the mediapool bar to maximize the imagepool on your screen. Double click (again) on the mediapool bar to dock the imagepool to its default location in the main Window. When an imagepool image is used in a show and you need to know its render location within the show, simply double click the left mouse button on the image counter. DGFects Discovery searches for the related image object and automatically relocates the locator to the start position of this image object in the show. In case the imagepool images is used more than once in a show double click on the image counter repeatedly to relocate the locator to the next image object. Image counter Image filename Image pictogram Double click the Image filename bar to request and display its image details. User manual v3.3 2009-2011 © DGFectsAV Software, the Netherlands. All rights reserved. 23 Double click the Image pictogram to view an imagepool image in detail. The buttons at the bottom of the View image Window allow to view an image adjusted to the size of its Window or view the image at real size, as well as navigation buttons to view other images contained by the imagepool. These functions are also available by means of using following arrow keys on your keyboard: ARROW UP ARROW DOWN ARROW TO LEFT ARROR TO RIGHT Show full size image Adjust image size to size of Window Previous imagepool image Next imagepool image The imagepool offers you more functions and features: Change the order of images on the imagepool Exchange images Drag-and-drop an imagepool image on another imagepool image. Both images exchange places. Change order of images Drag-and-drop a picture before the first image or after the last image on the imagepool, or drag-and-drop an image in between two other imagepool images on the imagepool. In both cases the order of images on the imagepool will change, Increase or decrease the pictogram for imagepool images Increase the pictogram for imagepool images by clicking the button, decrease the pictogram for imagepool images by clicking the button. There are three pictogram sizes available, i.e. small, medium and large. send a project image from the imagepool to the recycle bin Click the right mouse button on the imagepool image. Click following imagepool menu item: The image is removed from the projects’ imagepool and sent to the recycle bin. Images placed in the recycle bin can always be restored to the projects’ imagepool. Once the recycle bin is emptied this is obviously not possible anymore. User manual v3.3 2009-2011 © DGFectsAV Software, the Netherlands. All rights reserved. 24 Remove an image from the imagepool Click the right mouse button on an imagepool image. Click following imagepool menu item: The image is removed from the projects’ imagepool but remains in the project folder Pictures. It is always possible to restore this image to the imagepool. To do so click the right mouse button on the imagepool. Click following imagepool menu item: Al images contained by the projects’ Pictures folder are re-added to the imagepool. The old order of imagepool images is maintained! Add new images to the imagepool New images can be easily added to the imagepool. Large images can automatically be scaled back before being added to the projects’ imagepool. With this program setting you can save a lot of editing time! For automatically resizing images, do the following: Click the Show program settings button and the Program settings Window shows. Now click the Screens button. There are four settings available to scale down large images: 1. No automatic image scaling Currently the image size of images is limited to 2048x2048 pixels. With this setting images greater than 2048 pixels or higher than 2048 pixels are not added to the imagepool. In time image size restriction will be lifted to any desirable size. 2. Scale down images to screen size of show Large images are scaled so that it fits precisely within the screenframe of the show. 3. Scale down images to full screen size of show Large images are scaled so that, if the aspect ratio of the image allows, fill the full screen size of a show. 4. Scale down images to width = 2048 or height = 2048 pixels Large images are scaled down to the (current) maximum image width or height of 2048 pixels. User manual v3.3 2009-2011 © DGFectsAV Software, the Netherlands. All rights reserved. 25 Close the Program settings Window once you’ve selected the desired scale down setting. To add new images to the imagepool proceed as follows: Click the Drag-and-drop images to imagepool or show button and Windows Explorer is shown. Select on or more Windows Explorer images and drag-and-drop these to the imagepool. Images that are not present on the imagepool will be both added to the imagepool and to the project. Imagepool before drag-and-dropping images from Windows Explorer to imagepool Imagepool after drag-and-dropping images from Windows Explorer to imagepool You can find all other imagepool menu functions here. User manual v3.3 2009-2011 © DGFectsAV Software, the Netherlands. All rights reserved. 26 4.2 The audiopool Click the Show Audiopool button to display the audiopool. The audiopool lists the file data for each projects’ audio file in detail like the audio type (wav/mp3), duration, modus (mono/stereo) and size. To add new audio files to the audiopool, follow these steps: Click the drag-and-drop audio files to audiopool or show button and Windows Explorer is shown. Select one or more Windows explore audio files and drag-and-drop these to the audiopool. Audio files that are not present on the audiopool will be both added to the audiopool and to the project. Audiopool before drag-and-dropping audio files from Windows Explorer to audiopool Audiopool after drag-and-dropping audio files from Windows Explorer to audiopool You can find all other audiopool menu functions here. User manual v3.3 2009-2011 © DGFectsAV Software, the Netherlands. All rights reserved. 27 5. The Project explorer DGFects Discovery offers a convenient and comprehensive Project explorer. The Project explorer Window is shown by clicking the Show Project explorer button. With the Project explorer you may at any time add new images and audio files to your project. From the Project explorer you can also open the Rip Audio CD Window and rip Audio CDs. The Project explorer also allows you to change the screen size of a show at any time. The contents of a project is clearly displayed in an indented outline called Project contents. The displayed folders can each be opened to view its specific content. Click an image file in the Pictures folder to view its pictogram. Double click an audio file in the Audio folder to play the audio file. The Project explorer also informs you about the total number of used object images and object audio in a show as displayed in the show statistics box. It is also possible to archive a complete project. This certainly is handy in case you would like to save or backup an entire project including show, image and audio files. User manual v3.3 2009-2011 © DGFectsAV Software, the Netherlands. All rights reserved. 28 5.1 Archive a project It is possible with DGFects Discovery to archive a project fast, easy and reliable. Open the Project explorer Window and click the Archive button. The Archive project Window is shown. Click the Create button. If a project archive already exists then you will be asked to overwrite this archive. Your project (with your permission) is archived as a zip file. All project shows, images and audio files are stored in the project archive. Export files like EXE, SCR and AVI are not stored since these files can always be recreated with the unzipped show, image and audio files. If you would like to view a project archive or verify its contents then click the Verify button. If you would like to cancel archiving a project then click the Cancel button. It is also possible to maximize the Archive project Window. This increased, dependent on the number of archived files, its clarity. User manual v3.3 2009-2011 © DGFectsAV Software, the Netherlands. All rights reserved. 29 6 Edit a show 6.1 The image object 6.1.1 Settings image object Click the Show settings new image object button and the Settings new image object Window is shown. Newly added image objects to a show are alpha rendered by default and include following transparency settings: Set fade in time (0-100% coverage rate) , default 6000 msec (variable setting); Set display time (100% coverage rate) , default 4000 msec (variable setting); Set fade out time (100-0% coverage rate), default 6000 msec (variable setting). With a coverage rate of 0% the image is completely transparent. With a coverage rate of 100% the image is completely opaque (if alpha rendered). All these settings can be individually changed. Once changed newly added images objects to your show will take over these settings. Before a series of selected imagepool images is added to your show it is also possible to change the interval of sequentially added image objects in a show. 0 msec interval: as soon as an image object fades out, the next image object starts to fade in. This could result in a so called light dip; -1000 msec interval: 1 second before an image object starts to fade out the next image object starts to fade in. Generally the average coverage rate is maintained at 100% resulting in the nicest dissolve; +1000 msec interval: 1 second after an image object has faded out the next image object will fade in. Now there is a chance that the resulting image rendering on the screen turns black for 1 second. User manual v3.3 2009-2011 © DGFectsAV Software, the Netherlands. All rights reserved. 30 6.1.2 Edit image object A default image object, positioned in an image track, looks as follows: image pictogram Transparency curve (green) image object bar transparency curve node image track Each image object includes following handy functions and features: The transparency curve The course of a transparency curve can be changed by moving the white curve nodes as present on the transparency curve. Once the mouse cursor is placed on a curve node, this curve node is selected and colours green. The curve node can now be moved by pressing the left mouse button and moving the mouse cursor in the desired direction. If the mouse cursor is placed on a transparency curve (green polygon) you can add a new curve node immediately by pressing the left mouse button. If you want the newly added curve node can be moved immediately in the desired direction. A curve node can be easily removed by selecting the curve node with the mouse cursor and then pressing the right mouse button. A popup menu shows, select menu item Remove and the curve node is removed. A curve node can be locked by selecting the curve node with the mouse cursor and then pressing the right mouse button. A popup menu shows, select menu item Lock and the curve node is locked (curve node colours red). To unlock a curve node, select menu item Unlock and the curve node is unlocked (curve node colours white). The image object bar The image object can be moved to the left or to the right in the image track by placing the mouse cursor on the image object bar. A selected image object bar colours green. By pressing the left mouse button it is now possible to move the image object in the image track. Once an image object bar is selected it is also possible to drag-and-drop the image object from one image track to another or to the timeline. In the latter case a new image track is created automatically. In the image object bar a Remove image object button is located on the right (optional). By clicking this button it is possible to remove the entire image object from your show. The image object size The image object can be lengthened or shortened by placing the mouse cursor on the left or right side of the image object (the mouse cursor changes). The image object size can now be changed by pressing the left mouse button and moving the mouse cursor in the desired direction. User manual v3.3 2009-2011 © DGFectsAV Software, the Netherlands. All rights reserved. 31 Move a transparency curve node up or down, to the left or right to change the course of a transparency curve for an object image (0-100% coverage rate) Change the size of an image object Change the size of an image object Move an image object forward or backward in time Image object tool buttons Each image object includes eight tool buttons. By using these tool buttons following object image related functions and features can be performed: 1. Mask object image By masking an object image all black pixels become transparent. By unmasking an object image all black pixels become opaque. This function is handy for usage of text labels. 2. Object image location Quickly position an object image, best used in combination with Scale object image. 3. Object image orientation Flip object image horizontally and/or vertically. 4. Object image scale Quickly define the size of an object image. 5. Edit object image filters Edit the object image filters. All changes are non-destructively stored in a show. 6. Object image keyframe control Dynamic positioning (panning) and resizing (zooming) an object image. 7. Object image rotation control Horizontal, vertical, 2 or 3 dimensional rotation of an object image. 8. Object image transition control Specific transition of an object image. User manual v3.3 2009-2011 © DGFectsAV Software, the Netherlands. All rights reserved. 32 6.1.3 Split or cut image object An image object can be easily split or cut as follows: 1. Place the mouse cursor on the image object; 2. Click the right mouse button. The locator relocates to the desired split/cut position; 3. A popup menu shows, click one of the following three menu items: Cut left part Part of the image object on the left side of the locator is removed. Cut right part Part of the image object on the right side of the locator is removed. Divide The image object is split into two parts, one part on the left side of the locator and one part on the right side of the locator. 1. 2. 3. 4. Original image object Left side of image object is cut Image object is split into two image objects Right side of image object is cut 6.1.4 Edit image object filters Click the Edit image filters button and the Edit object image filters Window is shown. The Edit object image filters Window offers you a range of image filters and settings to quick and easy change the appearance of an object image. A filter is activated by ticking the corresponding box. A filter is deactivated by un-ticking the corresponding box. For a number of filters a slider is included enabling you to change a filter to the desired value. User manual v3.3 2009-2011 © DGFectsAV Software, the Netherlands. All rights reserved. 33 By clicking the left arrow on a slider the filter value is reduced by one, by clicking the right arrow on a slider the filter value is increased by one. These arrow buttons enable you to tune a filter in detail. Each object image includes following editable filters which can be previewed instantly on the screen: Invert Invert the value of all image pixels, whether the image is monochrome or RGB (Red/Green/Blue). Monochrome Change the color value of all image pixels into monochrome tone. Flaxen Change the color value of all image pixels into distinctive flax tone. Sepia Change the color value of all image pixels into distinctive sepia tone (dark brown color). Saturation Color saturation refers to how vivid and intense a color is. For example, a display with poor color saturation will look washed out or faded. When a color’s saturation level is reduced to 0, it becomes a shade of gray. Of course a default monochrome image can’t be transformed into a color image Saturation is the intensity of a hue from gray tone (no saturation) to pure, vivid color (high saturation). Contrast Increase or decrease the contrast of image pixels. Increasing contrast increases the apparent difference in lightness between lighter and darker image pixels. Brightness Increase or decrease the brightness of image pixels. Low brightness will result in dark tones while high brightness will result in lighter, pastel tones. Color noise Add more or less random color noise pixel to an image. User manual v3.3 2009-2011 © DGFectsAV Software, the Netherlands. All rights reserved. 34 Mono noise Add more or less random monochrome noise to an image. Posterize Sometimes referred to as ‘banding’ makes certain areas of the image (especially gradients) lose their original smoothness and appear as a series of bands or segments of color. The posterize filter reduces the black, white, and gray tones within a monochrome image, and it reduces the number of colors in a full color image. With abrupt changes from one tone to another. Black pixel threshold Image pixels become transparent if its pixel value is lower than the currently set black pixel threshold value. White pixel threshold Image pixels become transparent if its pixel value is higher than the currently set white pixel threshold value. Red/Green/Blue Filter the red/green/blue color value for all image pixels. Eight color combinations are possible by simply ticking or un-ticking one or more red/green/blue color boxes. Click the Apply button to non-destructively store a filtered object image in a show or the Cancel button not to do so. With the Reset button all image object filter settings before editing are restored. A filtered object image can also be saved as a new project image by clicking the Save as… button. The Save FX image as… Window is shown. Enter the filename of the new image. Click the Save button to save the image or click the Cancel button not to do so. A new image can be saved as a bmp of jpg file. A saved image is automatically added to the imagepool of your project. User manual v3.3 2009-2011 © DGFectsAV Software, the Netherlands. All rights reserved. 35 6.1.5 Move image objects simultaneously Shift multiple image objects in image track Place the mouse cursor on an image track and click the right mouse button. A popup menu shows, click following menu item: Place the mouse cursor on an image object bar. The mouse cursor changes to <=> and the image object bar colours yellow. All next image object bars located in the same image track color yellow. Press the left mouse button. All yellow marked image objects can now be moved in the desired direction in the image track. By clicking the same menu item once more above mentioned functionality is switched off. Move multiple image objects in all image tracks Click the Shift multiple image objects on image tracks button. The button remains down and colours yellow. Place the mouse cursor on an image object bar. The mouse cursor changes to <-> and the image object bar colours yellow. All next image object bars located on all image tracks color yellow. Press the left mouse button. All yellow marked image objects can now be moved in the desired direction in the image tracks. By clicking the Shift multiple image objects on image tracks button once more its functionality is switched off. The button is released and colours blue. User manual v3.3 2009-2011 © DGFectsAV Software, the Netherlands. All rights reserved. 36 6.1.6 Magnetize image objects By using the magnetize image objects function image objects on several image tracks can easily be aligned or synchronized. Click the Magnetize image objects button. The button remains down and colours green. If (1) an image object is moved to the left and nears the locator, the image object will automatically magnetize with the locator. If (2) an image object is moved to the right and nears the locator, the image object will automatically magnetize with the locator. By clicking the Magnetize image objects button once more its functionality is switched off. The button is released and color blue. User manual v3.3 2009-2011 © DGFectsAV Software, the Netherlands. All rights reserved. 37 6.2 Dynamic keyframe control Your show gets an extra dimension by dynamically controlled images. This might sound difficult, but with a little handiness dynamic keyframe control is a piece of cake. By default a show image is rendered static, in other words the image does not move or change size whilst a show is running. DGFects Discovery offers you handy tools with which each image can individually zoom in, zoom out, rotate and move across the screen. And all these dimensional movements can easily be combined among themselves using multiple layer technology! A keyframe indicates the size and location of an image on the screen. Keyframes allow you to specify different zoom or pan settings in an image object at different points in time. Keyframes can be used throughout your show with any feature whose parameters can be changed over time. The zoom or pan settings of an image object automatically adjust from one keyframed level to another using a keyframe curve. 6.2.1 Object image - pan and zoom Click the Create keyframe curve button on an image object. If no keyframe curve exists you will be asked to create one. Click the Yes button to create a keyframe curve or the No button not to do so. In case you’ve clicked the No button the Edit coordinates Window is shown. This Window offers you a limited number of possibilities to edit a single keyframe as no keyframe curve exists. If you have clicked the Yes button then the Edit keyframes Window is shown. In case no keyframe curve exists it is automatically created. A keyframe curve colours blue. The keyframe of a rendered object image without keyframe curve colours green, the keyframe of a rendered object image with keyframe curve colours blue. Click any blue-framed rectangle in the black box to quickly position an object image keyframe at a corresponding location on the preview screen. If you click the white-striped rectangle in the middle of the black box then the object image keyframe is centered on the preview screen. User manual v3.3 2009-2011 © DGFectsAV Software, the Netherlands. All rights reserved. 38 The Edit keyframes Window also includes following functions and features: Only render this image If this setting is ticked then only the object image keyframe is rendered on the preview screen. Render image opaque If this setting is ticked then the object image keyframe is rendered 100% (opaque) on the preview screen, independent of the course of the transparency curve. Mipmaps DGFects Discovery is capable to pre-calculate optimized collections of images, intended to increase rendering speed and reduce aliasing artifacts. The technique is known as mipmapping. The letters MIP in the name are an acronym of the latin phrase Multum In Parvo meaning much in a small space. As a matter of fact a mipmap is a sequence of textures, each of which is a progressively lower resolution representation of the same image. The height and width of each image, or level, in the mipmap is a power of two smaller than the previous level. Mipmaps do not have to be square. A high-resolution mipmap image is used for objects that are close to the viewer on the screen. Lowerresolution images are used as the object appears farther away on the screen. Mipmapping improves the quality of rendered textures however at the expense of using more memory! When using mipmaps by ticking this setting, more memory is needed to store the various image levels in the video card memory. As a result loading of a mipmapped image takes more time! Therefore be careful using this setting, use it only if strictly necessary. Depending on the available hardware and processor speed of your computer it can be used without any problems. Timeline follows keyframe If this setting is ticked then the locator will continuously synchronize with a keyframe curve node whilst it is moved on the keyframe curve. Tool buttons 1. Mask object image By masking an object image all black pixels become transparent. By unmasking an object image all black pixels become opaque. This function is handy for usage of text labels. 2. Object image location Quickly position an object image, best used in combination with Scale object image. 3. Object image orientation Flip object image horizontally and/or vertically. 4. Object image scale Quickly define the size of an object image. Keyframe nodes A default keyframe curve includes two keyframe nodes, a so called start node and a stop node. A selected node colours blue. Each node represents a keyframe. You can easily change the keyframe parameters (zoom/pan) for each keyframe in detail with the keyframes editor. Each node on the keyframe curve can easily be moved to the left or right by placing the mouse cursor on the keyframe node and pressing the left mouse button. A non-selected keyframe node colours green. User manual v3.3 2009-2011 © DGFectsAV Software, the Netherlands. All rights reserved. 39 Keyframe curve If the mouse cursor is placed on the blue keyframe curve a new node can be added immediately by clicking the left mouse button. The locator synchronizes with the added node. The added node is selected simultaneously and colours bleu. A keyframe node can be easily removed by clicking the node with the right mouse button. A popup menu shows, click menu item Remove and the node is removed. The start node and stop node on a keyframe curve can’t be removed. 1. Go to previous keyframe A previous keyframe is selected. The related node colours blue and the locator synchronizes with the node. It is now possible to modify the related keyframe parameters. 2. Go to next keyframe A next keyframe is selected. The related node colours blue and the locator synchronizes with the node. It is now possible to modify the related keyframe parameters. 3. Reset adjustments selected keyframe If keyframe parameters have been modified the keyframe parameters before editing are restored. 4. Add a keyframe If the locator does not synchronize with a node then a new keyframe node can be added. The added node colours blue and the locator synchronizes with this node. It is now possible to modify the related keyframe parameters. 5. Align locator with selected keyframe The locator synchronizes with the selected keyframe (blue node). The location and size of a selected keyframe can only be changed by means of the three sliders if the locator synchronizes with this selected keyframe. 6. Copy settings of currently selected keyframe to next keyframe The keyframe parameters of a selected node are copied to the next keyframe on the keyframe curve. 7. Copy settings of currently selected keyframe to all other keyframes The keyframe parameters of a selected node are copied to all other keyframes on the keyframe curve. Change the size and location of a keyframe 1. Increase or decrease the size of a keyframe The keyframe size can be increased or decreased with the slider button. Click on the left arrow to decrease a keyframe size with 1%, click on the right arrow to increase a keyframe size with 1%. It is also possible to enter the required percentage value in the percentage box. The smallest size of a keyframe is 0%, the largest size of a keyframe is 1600%. User manual v3.3 2009-2011 © DGFectsAV Software, the Netherlands. All rights reserved. 40 2. Move the keyframe to the left or to the right The keyframe can be moved to the left or to the right with the slider button. Click the left arrow to move a keyframe 1 pixel to the left, click the right arrow to move a keyframe 1 pixel to the right. It is also possible to enter the desired pixel value in the position box. The entered value determines the number of pixels a keyframe moves to the left (-) or right (+) on the preview screen. 3. Move the keyframe up or down The keyframe can be moved up or down with the slider button. Click the left arrow to move a keyframe 1 pixel down, click the right arrow to move a keyframe 1 pixel up. It is also possible to enter the desired pixel value in the position box. The entered value determines the number of pixels a keyframe moves down (-) or up (+) on the preview screen. Change the size and location of a keyframe on the preview screen It is also possible to change a keyframe on the preview screen. Dependent of the presence/absence of a keyframe curve you proceed as follows: The keyframe curve does not exist 1. Place the mouse cursor within the keyframe of the image. The mouse cursor changes into a cross. Press the left mouse button, it is now possible to move the keyframe on the preview screen. 2. Place the mouse cursor on one of the corner nodes of the keyframe. The mouse cursor changes into a diagonal arrow and the node colours red. Press the left mouse button, the size of the keyframe can now be changed. The keyframe curve does exist User manual v3.3 2009-2011 © DGFectsAV Software, the Netherlands. All rights reserved. 41 The method for positioning or sizing a selected keyframe with keyframe curve is the same as for a keyframe without a keyframe curve. However, a keyframe can now only be changed on the preview screen when the locator synchronizes with this keyframe (blue node). Therefore it is easier to use the keyframes editor to position or size a selected keyframe. 3. Place the mouse cursor within the keyframe of the selected keyframe. The mouse cursor changes into a cross. Press the left mouse button, it is now possible to move the keyframe on the preview screen. 4. Place the mouse cursor on one of the corner nodes of the keyframe. The mouse cursor changes into a diagonal arrow and the node colours red. Press the left mouse button, the size of the selected can now be changed. By adding several nodes to a keyframe curve and setting its corresponding keyframe, the most different dynamic keyframe effects can be realised! Following example explains how to zoom in a keyframe: Zooming in/out a keyframe can be accelerated by decreasing the distance between two keyframe nodes. Zooming in/out a keyframe can be delayed by increasing the distance between two keyframe nodes. User manual v3.3 2009-2011 © DGFectsAV Software, the Netherlands. All rights reserved. 42 During editing of keyframes it is always possible to run a show and preview the various keyframe settings on the screen. It is also possible to relocate the locator in the timeline if necessary. Also, new keyframe nodes can be easily added to or removed from the keyframe curve of an image object: a newly added keyframe node colours blue and the locator synchronizes with it. All keyframe parameters are non-destructively stored in a show. 6.2.2 Object image - rotation Click the Create rotation curve button on an image object. If no rotation curve exists you will be asked to create one. Click the Yes button to create a rotation curve or the No button not to do so. If the No button is pressed you return to the main program. If you have clicked the Yes button then the Edit rotationframes Window is shown. In case no rotation curve exists it is automatically created. A rotation curve colours brown. Click the left mouse button on one of the nine white nodes in the black box. This allows you to select the rotation position of a rotation frame of an object image. In case you click the centered node then the center of the object image will rotate around the horizontal/vertical axis or (counter-) clockwise of the selected rotationframe on the preview screen. The Edit rotationframes Window also includes following functions and features: Only render this image If this setting is ticked then only the object image rotationframe is rendered on the preview screen. Render image opaque If this setting is ticked then the object image rotationframe is rendered 100% (opaque) on the preview screen, independent of the course of the transparency curve. User manual v3.3 2009-2011 © DGFectsAV Software, the Netherlands. All rights reserved. 43 Rotationframe nodes A default rotation curve includes two rotationframe nodes, a so called start node and a stop node. A selected node colours brown. Each node represents a rotationframe. You can easily change the rotationframe parameters (horizontal/vertical/(counter-)clockwise) for each rotationframe in detail with the rotationframe editor. Each node on the rotation curve can be moved to the left or right by placing the mouse cursor on the rotationframe node and pressing the left mouse button. A non-selected rotation node colours green. Rotation curve If the mouse cursor is placed on the brown rotation curve a new node can be added immediately by clicking the left mouse button. The locator synchronizes with the added node. The added node is selected simultaneously and colours brown. A rotationframe node can be removed by clicking the node with the right mouse button. A popup menu shows, click menu item Remove and the node is removed. The start node and stop node on a rotation curve can’t be removed. 1. Go to previous rotationframe A previous rotationframe is selected. The related node colours brown and the locator synchronizes with the node. It is now possible to modify the related rotationframe parameters. 2. Go to next rotationframe A next rotationframe is selected. The related node colours brown and the locator synchronizes with the node. It is now possible to modify the related rotationframe parameters. 3. Reset adjustments selected rotationframe If rotationframe parameters have been modified the rotationframe parameters before editing are restored. 4. Add a rotationframe If the locator does not synchronize with a node then a new rotationframe node can be added. The added node colours brown and the locator synchronizes with this node. It is now possible to modify the related rotationframe parameters. 5. Align locator with selected rotationframe The locator synchronizes with the selected rotationframe (brown node). The angle of a selected rotationframe can only be changed by means of the slider if the locator synchronizes with this selected rotationframe. 6. Copy settings of currently selected rotationframe to all other rotationframes The rotationframe parameters of a selected node are copied to all other rotationframes on the rotation curve. Select the rotation direction of a rotationframe You can make a choice of eight different rotation directions. Tick one or more rotation directions to achieve the desired result. User manual v3.3 2009-2011 © DGFectsAV Software, the Netherlands. All rights reserved. 44 Change the angle of a rotationframe The rotation angle of a rotationframe can be changed with the slider button. Click on the left arrow to decrease a rotationframe angle with 1°, click on the right arrow to increase a rotationframe angle with 1°. It is also possible to enter the required rotation angle value in the rotation angle box. The minimum rotation angle of a rotationframe is -360°, the maximum rotation angle of a rotationframe is +360°. Select the rotation axis and the rotation point of a rotationframe If you wish to rotate an object image horizontally then only tick the rotate horizontally direction box. Now determine its rotation axis as follows: 1. Click one of the three top nodes: the object image will rotate around the horizontal top side of the rotationframe; 2. Click one of the three middle nodes: the object image will rotate around the horizontal central axis of the rotationframe; 3. Click one of the three bottom nodes: the object image will rotate around the horizontal bottom side of the rotationframe. If you wish to rotate an object image vertically then only tick the rotate vertically direction box. Now determine its rotation axis as follows: User manual v3.3 4. Click one of the three left nodes: the object image will rotate around the vertical left side of the rotationframe; 5. Click one of the three middle nodes: the object image will rotate around the vertical central axis of the rotationframe; 6. Click one of the three right nodes: the object image will rotate around the vertical right side of the rotationframe. 2009-2011 © DGFectsAV Software, the Netherlands. All rights reserved. 45 If you wish to rotate an object image (counter-) clockwise then only tick the rotate (counter-) clockwise direction box. Now determine its rotation point as follows: 7. Click the central node: the object image will rotate around its center point; 8. Click the top right corner node: the object image will rotate around its top right corner point; 9. Click one of the remaining nodes: the object image will rotate around that corresponding point. Besides the explained examples you can imagine that a wide range of other rotation combinations is possible! Following picture shows the rotation of an object image in both horizontal, vertical and (counter-) clockwise direction. This is simply achieved by ticking all three rotation direction boxes: Rotating an object image can be accelerated by decreasing the distance between two rotationframe nodes. Rotating an object image can be delayed by increasing the distance between two rotationframe nodes. During editing of rotationframes it is always possible to run a show and preview the various rotationframe settings on the screen. It is also possible to relocate the locator in the timeline if necessary. Also, new rotationframe nodes can be easily added to or removed from the rotation curve of an image object: a newly added rotationframe node colours brown and the locator synchronizes with it. All rotationframe parameters are non-destructively stored in a show. User manual v3.3 2009-2011 © DGFectsAV Software, the Netherlands. All rights reserved. 46 6.2.3 Object image - transition Click the Create transition curve button on an image object. If no transition curve exists you will be asked to create one. Click the Yes button to create a transition curve or the No button not to do so. If the No button is pressed you return to the main program. If you have clicked the Yes button then the Edit transition Window is shown. In case no transition curve exists it is automatically created. A transition curve colours yellow. The Edit transition Window also includes following functions and features: Only render this image If this setting is ticked then only the object image transition is rendered on the preview screen. Render image opaque If this setting is ticked then the object image transition is rendered 100% (opaque) on the preview screen, independent of the course of the transparency curve. Transition nodes A default transition curve includes two transition nodes, a so called start node and a stop node. A selected node colours yellow. The start node initiates the beginning of a transition, the stop node finishes a transition. Both nodes on the transition curve can easily be moved to the left or right by placing the mouse cursor on the transition node and pressing the left mouse button. A non-selected transition node colours green. It is not allowed to add a new node to the transition curve. The start node and stop node on a transition curve can’t be removed. User manual v3.3 2009-2011 © DGFectsAV Software, the Netherlands. All rights reserved. 47 1. Go to first transitionframe The first or start node initiates the beginning of a transition. The node colours yellow and the locator synchronizes with the node. It is now possible to modify the related transitionframe parameters. 2. Go to last transitionframe The end or stop node finishes a transition. The node colours yellow and the locator synchronizes with the node. It is now possible to modify the related transitionframe parameters. Select a transition You can make a choice from a series of transitions. Once you’ve selected a transition then the related pictogram will be shown in the transition editor as well as on the image object. It is possible to preview a transition before assigning it to an image object. Click the Preview transition button (camera pictogram). The complete course of a selected transition is executed on the screen. Select an offset for a transitionframe Start and stop offsets can be used to execute only part of a transition. The start and stop offset of a transition can be changed with the slider button. 1. Change the start offset of a transitionframe Click on the left arrow to decrease a transition start offset with 1%, a transition will be initiated earlier. Click on the right arrow to increase a transition start offset with 1%, a transition will be initiated later. It is also possible to enter the required start offset value in the start offset box. The minimum start offset of a transition is 0%, the maximum start offset of a transition is +100%. 2. Change the stop offset of a transitionframe Click on the left arrow to decrease a transition stop offset with 1%, a transition will finish earlier. Click on the right arrow to increase a transition stop offset with 1%, a transition will finish later. It is also possible to enter the required stop offset value in the stop offset box. The minimum stop offset of a transition is 0%, the maximum stop offset of a transition is +100%. User manual v3.3 2009-2011 © DGFectsAV Software, the Netherlands. All rights reserved. 48 Following example shows a Horizontal reveal from centre to total transition. The transition has been completed for 50%: An object image transition can be accelerated by decreasing the distance between the two transition nodes. An object image transition can be delayed by increasing the distance between the two transition nodes. During editing of a transition it is always possible to run a show and preview the transition settings on the screen. It is also possible to relocate the locator in the timeline if necessary. All transition parameters are non-destructively stored in a show. Gain instant access to the keyframe-, rotation- and transition editor by double-clicking a related dynamic curve node. Once an editor is shown, use the navigation buttons to select the desired frame to be edited. User manual v3.3 2009-2011 © DGFectsAV Software, the Netherlands. All rights reserved. 49 6.3 Dynamic masking By default, images are rectangular in shape. With advanced image editing programs like Photoshop it is then possible to make certain image areas transparent. After editing an image, it can be saved as a PNG file and added to a DGFects Discovery show. Disadvantage is that the transparent areas of an edited image are statically stored in its file. Of course the PNG image can be rendered dynamically, but the transparent areas of the image remain in place. Using dynamic masks you have full control over what you may or may not want to show on the screen. And that is what the visual power of dynamic masking is really about! It is possible to control dynamic (soft-edge) masks at any position and size on the screen and thus concealing or revealing varying parts of one or more image(s). You can certainly imagine that with this technique you can achieve stunning visual effects. A PNG (ping; for Portable Network Graphics) file forms the basis of a dynamic mask. PNG is a file format for images with compression in lossless fashion (meaning all image information is restored when the file is decompressed during rendering). PNG images consume little space in comparison with uncompressed file formats like BMP (bitmap), but without any loss in image quality as generally is the case with for example JPEG. PNG supports partial transparency by means of an Alpha Channel. The Alpha Channel specifies for each pixel the amount of transparency, or when you like it the other way round the amount of opacity. You can not only make one color transparent, but you can control the degree of transparency for each RGB (Red/Green/Blue) pixel in detail. With the use of an Alpha Channel you can create all kinds of fading or shadowing (soft-edge technique). It is also possible to create images that are not rectangular. The image is of course still a rectangle, but with the Alpha Channel you create a mask that you can give any shape you like. A PNG image can be added to any desired image track. As a BMP or JPEG image a PNG image can be animated to move on the screen e.g. a PNG text label is a PNG image that can move, zoom, pan and vary in transparency. In this chapter a PNG image is used as a dynamic mask object as follows: It is best to place a PNG image on an image track on top of an image that you wish to mask (present in an underlying image track). Next, place the mouse cursor on the image object of the PNG image and click the right mouse button. The locator relocates to the current mouse cursor position. The image object menu shows, select menu item Dynamic mask. The PNG image object is immediately set as a dynamic mask object. The transparency area of the dynamic mask object colours dark blue. The image object in an underlying image track is automatically linked to the dynamic mask object and also colours dark blue. The transparent area of a dynamic mask conceals or hides parts of the linked image, the opaque part of a dynamic mask reveals or shows parts of the linked image. User manual v3.3 2009-2011 © DGFectsAV Software, the Netherlands. All rights reserved. 50 Condition for automatic linking of an image object to a dynamic mask object is that the image object falls within the time domain of the dynamic mask object at all times. Time domain dynamic mask object You can also set a PNG image object as a dynamic mask object by simultaneously pressing the CTRL+ALT+M keys on the keyboard. This can be undone by simultaneously pressing the CTRL+ALT+M keys once more on the keyboard. Place, before pressing these keys, the mouse cursor on the PNG image object to be dynamically masked. User manual v3.3 2009-2011 © DGFectsAV Software, the Netherlands. All rights reserved. 51 Following examples explain how you have to apply dynamic masking. Example 1 Basis: no image object is dynamically masked, three images are rendered by default. First images are placed in the desired position and size on the preview screen. (2) Part of the mushroom image, the forest floor with pine needles, needs to be masked (hidden). Goal is to place the mushroom in front of the forest. (1) To achieve this the circle image is placed on top of the mushroom. The black area of the circle image will reveal the mushroom once the circle image is dynamically masked. The transparent area of the circle image will conceal the area around the mushroom once the circle image is dynamically masked. Using a PNG soft-edge mask image the resulting rendered masked mushroom image will beautifully blend with the forest background. (1) Dynamic mask object (2) Dynamically masked (linked) image object Result: (1) the soft-edge circle image is set as dynamic mask object. (2) the mushroom image object is dynamically masked or linked to this dynamic mask object. (3) The non-linked forest image acts as the default rendered background. User manual v3.3 2009-2011 © DGFectsAV Software, the Netherlands. All rights reserved. 52 Example 2 It is also possible to link (dynamically mask) multiple images to the same dynamic mask object. As a result linked images, for example, dissolve within the dynamic mask! Place the mouse cursor on the image object to be dynamically masked (linked) and click the right mouse button. The image object menu shows, select menu item Mask image dynamically. The selected image object is linked (dynamically masked) to the dynamic mask object and colours dark blue. Dynamic mask object You can also directly link a selected image object to a dynamic mask object by simultaneously pressing the CTRL+ALT+I keys on the keyboard. This can be undone by simultaneously pressing the CTRL+ALT+I keys once more on the keyboard. Place, before pressing these keys, the mouse cursor on the image object to be linked (dynamically masked) to the dynamic mask object. Result: (1) the soft-edge rectangular image object is set as dynamic mask object. (2) The fern image object is linked (dynamically masked) to this dynamic mask object, as well as (3) the heath image object. (4) The non-linked rainbow image object acts as the default rendered background. Just like image objects, dynamic mask objects can zoom in, zoom out, rotate (counter-) clockwise and pan. It is not possible to apply a transition to a dynamic mask object. The dynamic mask object itself already creates a unique dynamic transition! In case you wish to set an image object as a dynamic mask object but this image object includes a transition curve, then the transition curve has to be removed first. User manual v3.3 2009-2011 © DGFectsAV Software, the Netherlands. All rights reserved. 53 You can download four examples of free dynamic (soft-edge) masks from our website. Click main menu item Help. A popup menu shows, click menu item Download dynamic masks. The Dynamic masks (examples) Window shows. Click the Download … mask button to download the desired PNG mask image. Your computer has to be connected to the internet. The downloaded file is automatically added to the projects’ imagepool and can now be added to your show to be set as dynamic mask object. These four PNG images have been exclusively created for you with Photoshop to use in DGFects Discovery shows. Of course you can create your own PNG images with Photoshop or any other suitable image editing program, add them to the imagepool and to your show for any visual purpose! User manual v3.3 2009-2011 © DGFectsAV Software, the Netherlands. All rights reserved. 54 6.4 The audio object 6.4.1 Edit audio object A default audio object, positioned in an audio track, looks as follows: audio pictogram (graphical presentation of audio peaks per channel) Volume curve (green) audio bar volume curve node audio track Each audio object includes following handy functions and features: The volume curve The course of a volume curve can be changed by moving the white curve nodes as present on the volume curve. Once the mouse cursor is placed on a curve node, this curve node is selected and colours green. The curve node can now be moved by pressing the left mouse button and moving the mouse cursor in the desired direction. If the mouse cursor is placed on a volume curve (green polygon) you can add a new curve node immediately by pressing the left mouse button. If you want the newly added curve node can be moved immediately in the desired direction. A curve node can be easily removed by selecting the curve node with the mouse cursor and then pressing the right mouse button. A popup menu shows, select menu item Remove and the curve node is removed. A curve node can be locked by selecting the curve node with the mouse cursor and then pressing the right mouse button. A popup menu shows, select menu item Lock and the curve node is locked (curve node colours red). To unlock a curve node, select menu item Unlock and the curve node is unlocked (curve node colours white). The audio bar The audio object can be moved to the left or to the right in the audio track by placing the mouse cursor on the audio object bar. A selected audio object bar colours green. By pressing the left mouse button it is now possible to move the audio object in the audio track. Once an audio object bar is selected it is also possible to drag-and-drop the audio object from one audio track to another or to the timeline. In the latter case a new audio track is created automatically. In the audio object bar a Remove audio object button is located on the right (optional). By clicking this button it is possible to remove the entire audio object from your show. User manual v3.3 2009-2011 © DGFectsAV Software, the Netherlands. All rights reserved. 55 Move a volume curve node up or down, to the left or right to change the course of a volume curve for an object audio fragment (0 - -60db) Move an audio object forward or backward in time 6.4.2 Split or cut audio object An audio object can be easily split or cut as follows: 1. Place the mouse cursor on the audio object; 2. Click the right mouse button. The locator relocates to the desired split/cut position; 3. A popup menu shows, click one of the following three menu items: Cut left part The part of the audio object on the left side of the locator is removed. Cut right part The part of the audio object on the right side of the locator is removed. Divide The audio object is split into two parts, one part on the left side of the locator and one part on the right side of the locator. 1. 2. 3. 4. Original audio object Left side of audio object is cut Audio object is split into two audio objects Right side of audio object is cut User manual v3.3 2009-2011 © DGFectsAV Software, the Netherlands. All rights reserved. 56 6.4.3 Edit audio object filters The Edit object audio filters Window offers you a range of audio filters (like echo, reverb, chorus and flanger) and settings to quick and easy add audio effects to each audio object. Echo filter An echo filter simulates repetition of sound produced by the reflection of sound waves from for example a wall, mountain, or other obstructing surface / a sound heard again near its source after being reflected. Reverb filter A Reverb filter simulates the component of sound that results from reflections from surrounding walls or objects. It is in effect a room simulator. Sound in a church sounds much more hollow than in a living room. The reverb filter adds the illusion of depth to sound. Chorus filter A chorus filter creates an effect that sounds like there are multiple sources emitting the same sound with slight variations coming from each source--hence the name "chorus". This effect is achieved by modulating the original sound by a sinusoid low frequency oscillator. Flanger filter A flanger filter produces a mixture of two identical signals, with one signal delayed by a small and gradually changing period, usually smaller than 20 milliseconds. Balance Balance refers to the volume ratio between the left and right channels of audio. An audio filter can be enabled by ticking the corresponding audio filter box. Once the audio filter is enabled you can freely adjust the audio filter related parameters by using the slides. A filter is disabled by un-ticking it. All audio filters have many component parts, operated by sliders and it is worth experimenting with these to achieve the desired sound. Click the Apply button to store the enabled filters and settings in a show. Click the Cancel button not to do so. c Audio filter settings are also stored in EXE presentations and SCR screen savers (DirectX 9.0 + is required). User manual v3.3 2009-2011 © DGFectsAV Software, the Netherlands. All rights reserved. 57 7. Menus and functions DGFects Discovery includes a series of menus and functions. Apart from the main menu all menus and associated functions can easily be accessed by clicking the right mouse button on parts, like buttons, pictograms, tracks and timeline, of the program. 7.1 Imagepool functions Place the mouse cursor on an imagepool image and click the right mouse button. The imagepool menu shows. Click the left mouse button on a desired menu item to select its function. View image details The Image details window displays the filename, project folder and image properties. Move the mouse cursor to another imagepool image to refresh its corresponding image details. Move the mouse cursor to an image object in the show to refresh its corresponding image details. Send project image file to the recycle bin An imagepool image will be removed from the imagepool and project folder Pictures. If this image is used in a show then a warning message appears. If you confirm to remove an image that is used in a show then the transparency area of the corresponding image object colours gray. Also, the image object is no longer rendered. Since the image no longer exists in the project folder Pictures it will be automatically removed from the show once DGFects Discovery is restarted. A removed image is sent to the recycle bin. Images placed in the recycle bin can always be restored to the projects’ Audio folder and imagepool. Once the recycle bin is emptied this is obviously not possible anymore. User manual v3.3 2009-2011 © DGFectsAV Software, the Netherlands. All rights reserved. 58 Remove image from imagepool An imagepool image will be removed from the imagepool. If this image is used in a show then a warning message appears. Although a removed imagepool image is no longer present on the imagepool, it still exists in the project folder Pictures. If you wish to place it back on the imagepool then simply update the imagepool (Update Imagepool menu item) or drag-and-drop this image from Windows Explorer to the imagepool once more. Empty imagepool All images are removed from the imagepool and from the project. If images are used in a show then a warning message appears. Images that are used in any show of the same project are not removed! Update imagepool The imagepool is refreshed. All images that are present in the Projects’ Picture folder are placed on the imagepool. Add image files to imagepool Edit image width ... Image resize tool image Image crop tool image Image filter tool image Explanation follows. Select pool image Select an imagepool image, it can also be selected by clicking the left mouse button on the image. Select all pool images All imagepool images are selected. Unselect pool image Unselect an imagepool image. Unselect all pool images All imagepool images are unselected. Add all selected imagepool images to show Add all consecutive imagepool images to a show in accordance with their order on the imagepool. Show hand control unit Explanation follows. View image View an imagepool image with the View image Window. User manual v3.3 2009-2011 © DGFectsAV Software, the Netherlands. All rights reserved. 59 7.2 Audiopool functions Place the mouse cursor on the audiopool and click the right mouse button. The audiopool menu shows. Click the left mouse button on a desired menu item to select its function. Play audio The Audio player Window is shown. The player display the filename and duration of the audio file. Two VU meters (left and right channel) display the audio volume (DB) when the audio file is playing. 1. 2. 3. Play audio file; Pause audio file if playing; Replay audio file; 4. If the instant play box is ticked then instantly play an audio file when the Audio player Window is opened or another audio file is selected whilst the Audio player Window is open. This is handy if you would like to quickly listen to audio files in the audiopool when you are searching for a specific audio file. Successively double click the left mouse button on audio files in the audiopool. A selected audio file is immediately opened and can (un-ticked box) or will (ticked box) instantly be played in the audio player; 5. By clicking on the progress meter with the left mouse button, the audio position of the audio file changes. Audio cut tool audio file Send project audio file to recycle bin An audio file will be removed from the audiopool and project folder Audio. If this audio file is used in a show then a warning message appears. If you confirm to remove an audio file that is used in a show then the audio pictogram of the corresponding audio object colours gray. Also, the audio object is no longer played. Since the audio file no longer exists in the project folder Audio it will automatically be removed from the show once DGFects Discovery is restarted. A removed audio file is sent to the recycle bin. Audio files placed in the recycle bin can always be restored to the projects’ Audio folder and audiopool. Once the recycle bin is emptied this is obviously not possible anymore. User manual v3.3 2009-2011 © DGFectsAV Software, the Netherlands. All rights reserved. 60 Update audiopool The audiopool is refreshed. All audio files that are present in the Projects’ Audio folder are placed in the audiopool. Add audio files to audiopool Rip audio CD tool Audio details The Audio details Window displays the filename, project folder and audio properties. Move the mouse cursor to another audio file in the audiopool to refresh its corresponding audio details. Move the mouse cursor to an audio object in the show to refresh its corresponding audio details. User manual v3.3 2009-2011 © DGFectsAV Software, the Netherlands. All rights reserved. 61 7.3 Image track functions 1. Place the mouse cursor on the photo pictogram and click the right mouse button. The image track header menu shows. Click the left mouse button on a desired menu item to select its function. Photo pictogram Empty image track After confirmation, all image objects in the image track are removed. Remove image track After confirmation, all image objects in the image track including the image track are removed. Minimize height image track The height of the image track is minimized. Standard height image track The height of the image track is set to its standard height. Maximize height image track The height of the image track is maximized. Render alpha If taken over, all object images are rendered alpha. Each object image usually includes three channels, Red, Green and Blue (RGB 24 bits). If an object image includes a fourth channel, called the Alpha Channel, then it is possible to influence the transparency of the object image. Using the Alpha Channel an object image can be rendered fully transparent (invisible) or fully opaque. In case an object image is rendered opaque simultaneously rendered (under laying) object images are not visible. If Render alpha is ticked then Render additive is automatically un-ticked. Render additive If taken over, all object images are rendered additive. If Object images render additive then colors are mixed, in other words all simultaneously rendered object image pixels are summed up resulting in color overlays: Additive primary colors The colors red, green and blue are referred as additive primary colors. By merging these three colors all colors of the spectrum can be produced. No other combination of color can produce red, green or blue: by mixing these three colors white light is produced, hence the term additive. Additive secondary colors These colors are produced by a combination of two primary colors: red + green = yellow red + blue = magenta green + blue = cyan black does not sum up, its pixel value is 0 (R=0; G=0; B=0). If Render additive is ticked then Render alpha is automatically un-ticked. User manual v3.3 2009-2011 © DGFectsAV Software, the Netherlands. All rights reserved. 62 2. Place the mouse cursor on an image track and click the right mouse button. The image track menu shows. Click the left mouse button on a desired menu item to select its function. Shift multiple image objects on image track Place the mouse cursor on an image object bar. The mouse cursor changes to <-> and the image object bar colours yellow. All next image object bars located on the image track color yellow. Press the left mouse button. All yellow marked image objects can now be moved in the desired direction in the image track. By clicking the same menu item once more above mentioned functionality is switched off. Insert image at locator position The Insert image Window is shown. Select an image and click the Open button. The selected image is inserted in the show at the locator position. In case there is no space left in the required image track to insert the new image object then a new image track is created and the new image object is inserted in this new image track. Click the Cancel button not to do so. User manual v3.3 2009-2011 © DGFectsAV Software, the Netherlands. All rights reserved. 63 Paste image from clipboard at locator position If an image object is available in the clipboard, in other words a complete image object is copied into the clipboard, then the clipboard image object is pasted at the locator position. In case there is no space left in the required image track to paste a clipboard image object then a new image track is created and the image object is pasted in this new image track. Insert Text label at locator position Once a text label is created it will automatically be inserted as a new image object at the locator position. In case there is no space left in the required image track to insert the new image object then a new image track is created and the new image object is inserted in this new image track. Lock all track images All image objects in the image track are locked. The image object bar colours red. All image objects in the image track can’t be moved. Unlock all track images All image objects in the image track are unlocked. The image object bar colours blue. All image objects in the image track can be moved. Minimize track The height of the image track is minimized. Maximize track The height of the image track is maximized. Standard height of the image track Double click the left mouse button on the image track number to maximize the height of the image track. Double click the image track number once more to select the standard height of the image track. User manual v3.3 2009-2011 © DGFectsAV Software, the Netherlands. All rights reserved. 64 7.4 Image object functions Place the mouse cursor on an image object and click the right mouse button. The locator relocates to the mouse cursor position. The image object menu shows. Click the left mouse button on a desired menu item to select its function. Details The Image details Window displays the filename, project folder and image properties. Move the mouse cursor to another image object in the show to refresh its corresponding image details. Move the mouse cursor to an imagepool image to refresh its corresponding image details. Edit Edit the Image object filters. Remove After confirmation, the image object is removed from the image track. User manual v3.3 2009-2011 © DGFectsAV Software, the Netherlands. All rights reserved. 65 Change The Change image Window is shown. Select an image and click the Open button. The object image is changed into the newly selected image. Click the Cancel button not to do so. Copy image object The entire image object (including all image object curves) is copied into the clipboard. Paste image object at locator position The entire stored image object (including all image object curves) is pasted from the clipboard at the location position. In case there is no space left in the required image track to paste a clipboard image object then a new image track is created and the image object is pasted in this new image track. Cut left part, cut right part, divide image object Edit image with … Lock The image object in the image track is locked. The image object bar colours red. The image object can’t be moved in the image track. Unlock The image object in the image track is unlocked. The image object bar colours blue. The image object can be moved in the image track. User manual v3.3 2009-2011 © DGFectsAV Software, the Netherlands. All rights reserved. 66 Transparency curve Clear transparency curve The transparency curve of the image objects is erased. The object image no longer renders. Manual transparency curve The transparency curve of the image object is erased. Place the mouse cursor on the image object. The mouse cursor changes in a cross. Press the left mouse button and draw the desired transparency curve in the image object. Once the mouse button is released the newly drawn transparency curve is stored in the image object. You can use this function as many times until you have achieved the desired transparency curve. It is also possible to draw a transparency curve whilst a show is running. The object image is rendered in real time in accordance with the course of the drawn transparency curve! Dependent on the rendered object image a widely varying or audio tailored transparency curve can be achieved. Next a newly created transparency curve can be perfected in detail by means of tuning the transparency curve nodes. Auto create transparency curve Lock transparency curve The transparency curve of the image object is locked. All transparency curve nodes color red and can’t be moved. Unlock transparency curve The transparency curve of the image object is unlocked. All transparency curve nodes color white and can be moved. Keyframe curve Create keyframe curve Remove keyframe curve The keyframe curve of the image object is erased. Related dynamic keyframe control is no longer applicable. User manual v3.3 2009-2011 © DGFectsAV Software, the Netherlands. All rights reserved. 67 Rotation curve Create rotation curve Remove rotation curve The rotation curve of the image object is removed. Related rotation control is no longer applicable. Transition curve Create transition curve Remove transition curve The transition curve is removed. Related transition control is no longer applicable. Copy curves of image object All curves from the image object are copied into the clipboard. Paste curves of image object All stored curves from an image object are pasted from the clipboard into the image object. Clear copied curves of image object All stored curves from the image object are removed from the clipboard. Show keyframe The keyframe of an object image is displayed if this item is ticked. The keyframe of an object image is not displayed if this item is un-ticked. If object images are rendered simultaneously then it is possible to select other object image keyframes by pressing the F5 key on the keyboard. Edit image coordinates Transparency curve control unit Explanation follows. Aspect ratio If ticked then the aspect ratio of a rendered object image is fixed. If not ticked then it is possible to change the width and height independently. In other words an object image can now be stretched both horizontally and vertically. Render image If ticked the object image is rendered, its transparency area colours light blue. If un-ticked the object image is not rendered, its transparency area colours gray. Mask image dynamically If ticked the image object is linked (dynamically masked) to a dynamic mask object and its transparency area colours dark blue. If un-ticked the image object is not linked (dynamically masked) to a dynamic mask object and its transparency area colours light blue. Condition for automatic linking of an image object to a dynamic mask object is that the image object falls within the time domain of the dynamic mask object at all times. User manual v3.3 2009-2011 © DGFectsAV Software, the Netherlands. All rights reserved. 68 Render alpha The object image is rendered alpha. An object image usually includes three channels, Red, Green and Blue (RGB 24 bits). If an object image includes a fourth channel, called the Alpha Channel, then it is possible to influence the transparency of the object image. Using the Alpha Channel an object image can be rendered fully transparent (invisible) or fully opaque. In case an object image is rendered opaque simultaneously rendered (under laying) object images are not visible. If Render alpha is ticked then Render additive is automatically un-ticked. It is possible to compose a show with both alpha and additive rendered object images. Render additive The object image is rendered additive. If Object images render additive then colors are mixed, in other words all simultaneously rendered object image pixels are summed up resulting in color overlays: Additive primary colors The colors red, green and blue are referred as additive primary colors. By merging these three colors all colors of the spectrum can be produced. No other combination of color can produce red, green or blue: by mixing these three colors white light is produced, hence the term additive. Additive secondary colors These colors are produced by a combination of two primary colors: red + green = yellow red + blue = magenta green + blue = cyan black does not sum up, its pixel value is 0 (R=0; G=0; B=0). If Render additive is ticked then Render alpha is automatically un-ticked. It is possible to compose a show with both alpha and additive rendered object images. Using additive render techniques you can achieve very nice image combinations. Example Object image 1 renders additive, object image 2 renders alpha. The preview screen shows the mixed result. The background of the fern image is dark. As a result the lake image is clearly visible. A so called third image is the result. View image The object image is viewed with the View image Window. User manual v3.3 2009-2011 © DGFectsAV Software, the Netherlands. All rights reserved. 69 7.5 Audio track functions 1. Place the mouse cursor on the loudspeaker pictogram and click the right mouse button. The audio track header menu shows. Click the left mouse button on a desired menu item to select its function. Loudspeaker pictogram Empty audio track After confirmation, all audio objects in the audio track are removed. Remove audio track After confirmation, all audio objects in the audio track including the audio track are removed. Minimize height audio track The height of the audio track is minimized. Standard height audio track The height of the audio track is set to its standard height. Maximize height audio track The height of the audio track is maximized. 2. Place the mouse cursor on an audio track and click the right mouse button. The audio track menu shows. Click the left mouse button on a desired menu item to select its function. Insert audio at locator position The Insert audio Window is shown. User manual v3.3 2009-2011 © DGFectsAV Software, the Netherlands. All rights reserved. 70 Select an audio file and click the Open button. The selected audio file is inserted in the show at the locator position. In case there is no space left in the required audio track to insert the new audio object then a new audio track is created and the new audio object is inserted in this new audio track. Click the Cancel button not to do so. Paste audio from clipboard at locator position If an audio object is available in the clipboard, in other words a complete audio object is copied into the clipboard, then the clipboard audio object is pasted at the locator position. In case there is no space left in the required audio track to paste a clipboard audio object then a new audio track is created and the audio object is pasted in this new audio track. Lock all track audio All audio objects in the audio track are locked. The audio object bar colours red. All audio objects in the audio track can’t be moved. Unlock all track audio All audio objects in the image track are unlocked. The audio object bar colours blue. All audio objects in the audio track can be moved. Minimize track The height of the audio track is minimized. Maximize track The height of the audio track is minimized. Standard height of audio track Double click the left mouse button on the audio track number to maximize the height of the audio track. Double click the audio track number once more to select the standard height of the audio track. User manual v3.3 2009-2011 © DGFectsAV Software, the Netherlands. All rights reserved. 71 7.6 Audio object functions Place the mouse cursor on an audio object and click the right mouse button. The locator relocates to the mouse cursor position. The audio object menu shows. Click the left mouse button on a desired menu item to select its function. Details The Audio details Window displays the filename, project folder and audio properties. Move the mouse cursor to another audio object in the show to refresh its corresponding audio details. Move the mouse cursor to an audiopool audio file to refresh its corresponding audio details. Edit Edit the audio object filters. Copy audio object The entire audio object (including all audio object curves) is copied into the clipboard. Remove After confirmation, the audio object is removed from the audio track. Cut left part, cut right part, divide audio object Refresh audio pictogram The audio pictogram is refreshed. Lock The audio object in the audio track is locked. The audio object bar colours red. The audio object can’t be moved in the audio track. User manual v3.3 2009-2011 © DGFectsAV Software, the Netherlands. All rights reserved. 72 Unlock The audio object in the image track is unlocked. The audio object bar colours blue. The audio object can be moved in the audio track. Volume curve Clear volume curve The volume curve of the image objects is erased. The object audio no longer plays. Auto create volume curve A default volume curve is created in the audio object. The course of the volume curve determines the audio volume for the entire audio object. Lock volume curve The volume curve of the image object is locked. All volume curve nodes color red and can’t be moved. Unlock volume curve The volume curve of the image object is unlocked. All volume curve nodes color white and can be moved. Volume enabled If ticked the object audio is played, its audio pictogram colours light blue. If un-ticked the object audio is not played, its audio pictogram colours gray. User manual v3.3 2009-2011 © DGFectsAV Software, the Netherlands. All rights reserved. 73 7.7 Marker track functions 1. Place the mouse cursor on the marker pictogram and click the right mouse button. The marker track header menu shows. Click the left mouse button on a desired menu item to select its function. marker pictogram Empty marker track After confirmation, all marker objects in the marker track are removed. Remove marker track After confirmation, all marker objects in the marker track including the marker track are removed. Place the mouse cursor on an marker track and click the right mouse button. The marker track menu shows. Click the left mouse button on a desired menu item to select its function. 2. Insert pause marker at locator position A pause marker object is inserted in the show at the locator position. In case there is no marker track available then a new marker track is created and the new pause marker object is inserted in this new marker track. Lock all track markers All marker objects in the marker track are locked. The marker object bar colours red. All marker objects in the marker track can’t be moved. Unlock all track markers All marker objects in the marker track are unlocked. The marker object bar colours blue. All marker objects in the marker track can be moved. 7.8 Marker object functions Place the mouse cursor on a marker object and click the right mouse button. The locator relocates to the mouse cursor position. The marker object menu shows. Click the left mouse button on a desired menu item to select its function. Remove After confirmation, the marker object is removed from the marker track. Lock The marker object in the marker track is locked. The marker object bar colours red. The marker object can’t be moved in the marker track. Unlock The marker object in the marker track is unlocked. The marker object bar colours blue. The marker object can be moved in the marker track. User manual v3.3 2009-2011 © DGFectsAV Software, the Netherlands. All rights reserved. 74 7.9 Small preview screen functions Place the mouse cursor on the small preview screen and click the right mouse button. The small preview screen menu shows. Click the left mouse button on a desired menu item to select its function. play show - the show plays. Stop show - the show stops. Reset show to 0:00 sec - the show replays. Insert image The Insert image Window is shown. Select an image and click the Open button. Click the Cancel button not to do so. If the Open button is clicked then the selected image is inserted in the show and is immediately rendered opaque. The locator automatically relocates to the first opaque transparency curve node. In case there is no space left in any image track to insert the new image object then a new image track is created and the new image object is inserted in this new image track. If the inserted image is not present on the imagepool it will be automatically added to it as well as to the project. Paste image object at locator position The entire stored image object (including all image object curves) is pasted from the clipboard at the location position. In case there is no space left in the required image track to paste a clipboard image object then a new image track is created and the image object is pasted in this new image track. Show keyframe The keyframe of an object image is displayed if this item is ticked. The keyframe of an object image is not displayed if this item is un-ticked. If object images are rendered simultaneously then it is possible to select other object image keyframes by pressing the F5 key on the keyboard. 7.10 Full preview screen functions Place the mouse cursor on the full preview screen and click the right mouse button. The full preview screen menu shows. Click the left mouse button on a desired menu item to select its function. Return to small preview screen The full preview screen is closed and the main Window shows including its small preview screen. The full preview screen can also be closed by pressing the ESC key on the keyboard. User manual v3.3 2009-2011 © DGFectsAV Software, the Netherlands. All rights reserved. 75 play show - the show plays. Stop show - the show stops. Reset show to 0:00 sec - the show replays. Insert image The Insert image Window is shown. Select an image and click the Open button. Click the Cancel button not to do so. If the Open button is clicked then the selected image is inserted in the show and is immediately rendered opaque. The locator automatically relocates to the first opaque transparency curve node. In case there is no space left in any image track to insert the new image object then a new image track is created and the new image object is inserted in this new image track. If the inserted image is not present on the imagepool it will be automatically added to it as well as to the project. Make new color image of rendering A color screen copy is made of the simultaneously rendered images on the full preview screen. Next the Save rendering as new color image Window is shown. Click the Save button to save the new color image and it will be automatically added to the imagepool and to the project. Click the Cancel button not to do so. Make new sepia image of rendering A sepia screen copy is made of the simultaneously rendered images on the full preview screen. Next the Save rendering as new sepia image Window is shown. Click the Save button to save the new sepia image and it will be automatically added to the imagepool and to the project. Click the Cancel button not to do so. Make new monochrome image of rendering A monochrome screen copy is made of the simultaneously rendered images on the full preview screen. Next the Save rendering as new monochrome image Window is shown. Click the Save button to save the new monochrome image and it will be automatically added to the imagepool and to the project. Click the Cancel button not to do so. Show keyframe The keyframe of an object image is displayed if this item is ticked. The keyframe of an object image is not displayed if this item is un-ticked. If object images are rendered simultaneously then it is possible to select other object image keyframes by pressing the F5 key on the keyboard. User manual v3.3 2009-2011 © DGFectsAV Software, the Netherlands. All rights reserved. 76 7.11 Timeline functions Place the mouse cursor on the timeline and click the right mouse button. The Timeline menu shows. Click the left mouse button on a desired menu item to select its function. Insert image at locator position The Insert image Window is shown. Select an image and click the Open button. An image track is automatically added to the timeline and the selected image is added to this new image track at the locator position. Click the Cancel button not to do so. Insert audio at locator position The Insert audio Window is shown. Select an audio file and click the Open button. An audio track is automatically added to the timeline and the selected audio file is added to this new audio track at the locator position. Click the Cancel button not to do so. User manual v3.3 2009-2011 © DGFectsAV Software, the Netherlands. All rights reserved. 77 Insert pause marker at locator position One (maximum) marker track is automatically added to the timeline and the pause marker is added to this new marker track at the locator position. Create image track An image track is added to the timeline. Create audio track An audio track is added to the timeline. Create marker track One (maximum) marker track is added to the timeline. Paste object (image / audio) from clipboard at locator position If an image object is available in the clipboard, in other words a complete image object is copied into the clipboard, then the clipboard image object is pasted at the locator position. In case there is no space left in the required image track to paste a clipboard image object then a new image track is created and the image object is pasted in this new image track. If an audio object is available in the clipboard, in other words a complete audio object is copied into the clipboard, then the clipboard audio object is pasted at the locator position. In case there is no space left in the required audio track to paste a clipboard audio object then a new audio track is created and the audio object is pasted in this new audio track. User manual v3.3 2009-2011 © DGFectsAV Software, the Netherlands. All rights reserved. 78 8. Create an output file 8.1 Create an EXE presentation An EXE presentation is an autonomous Windows compatible executable file with extension .exe. This file includes all components for a digital Audio-Visual presentation (Title(s), images, dissolves, transitions, dynamic keyframe control, music, narration, etc.) . It also includes a built-in multi media player that takes care of running the Audio-Visual presentation on each Windows computer*, also in case DGFects Discovery is not installed on a computer. This type of presentation offers you the highest image and audio quality and is therefore best suitable for digital projection. *DirectX 9.0c or higher needs to be installed on your Windows computer! Click the Create EXE presentation button and the Create EXE presentation Window is shown. 1. Enter the filename of your EXE presentation. 2. Select a start modus: - Run an EXE presentation at once, or - press the SPACE bar on the keyboard to run the EXE presentation. 3. Tick the repeat EXE presentation box if required. If ticked running EXE presentation will repeat indefinitely until the ESC key is pressed on the keyboard. The running EXE presentation will then be terminated. Click the Create button to create the EXE presentation or the Close button not to do so. Once the EXE presentation is created the associated icon is automatically placed in the desktop of your computer. The EXE presentation file is stored in the projects’ Output folder. User manual v3.3 2009-2011 © DGFectsAV Software, the Netherlands. All rights reserved. 79 8.2 Create a SCR screen saver Windows provides several shipped screen savers. A screen saver is automatically started if you haven’t used your computer for a while. With DGFects Discovery you can create your own screen savers in a trice. Your synchronized images, audio and narration are dynamically shown on the computer screen! Click the Create SCR screen saver button and the Create SCR screen saver Window is shown. 1. Enter the filename of your SCR screen saver. Click the Create button to create the SCR screen saver or the Close button not to do so. Once the SCR screen saver file is created the associated icon is automatically placed in the desktop of your computer. The SCR screen saver file is stored in the projects’ Output folder. User manual v3.3 2009-2011 © DGFectsAV Software, the Netherlands. All rights reserved. 80 8.3 Create an AVI video Width DGFects Discovery it is possible to convert your show into an AVI video. The AVI (Audio Video Interleave) format was developed by Microsoft. The AVI format is supported by all computers running Windows, and by all the most popular web browsers. It is a very common format on the Internet, but not always possible to play on non-Windows computers. Videos stored in the AVI format have the extension .AVI. Eventually it will also be possible to convert your show into an MPEG video. Click the Create AVI video button and the Create AVI video Window is shown. 8.3.1 Video codecs The name codec is short for coder-decoder, which is pretty much what a codec does. Most audio and video formats use some sort of compression so that they don't take up a ridiculous amount of disk space. Audio and video files are compressed with a certain codec when they are saved and then decompressed by the codec when they are played back. Common codecs include MPEG and AVI for video files and WAV and AIFF for audio files. Also DGFects Discovery, like Windows Media Player and other multimedia programs, uses codecs to create and play multimedia files. Nowadays many audio/ and video codecs are available. An number of codecs is created by Microsoft, but the majority of codecs is created and maintained by other suppliers. The Windows operating system includes a range of codecs like Windows Media Audio, Windows Media Video and MP3. However it is also possible to play your multimedia files compressed with a codec other than the ones shipped with the Windows operating system or Windows Media Player (for example a multimedia file that is compressed with an XVID video codec). In many cases video codecs can be downloaded free of charge (or by payment) from the internet and be installed on your computer. You can also use codecs that have been installed by other multimedia programs to create and play your multimedia files. User manual v3.3 2009-2011 © DGFectsAV Software, the Netherlands. All rights reserved. 81 8.3.2 Video settings Before creating a DGFects Discovery AVI video please observe following video settings: 1. Enter the filename of the AVI video. 2. Select a suitable video codec. You can select one of the video codecs as installed on your computer. DGFects Discovery automatically has compiled a video codec list for you to make a choice. Each individual codec includes its specific configuration parameters, to be accessed by codec Windows. 3. Choose the number of frames per second (fps), the number of still pictures per unit of time of video. European standards specify 25 frames per second. The minimum frame rate to achieve the illusion of a moving image is about 15 frames per second. Video game standards specify 60 frames per second to provide a smooth rendering quality. Nowadays high-definition televisions (HDTV) and digital projectors (beamers) are capable of resolutions up to 1920×1080p60, i.e. 1920 pixels per scan line by 1080 scan lines, progressive, at 60 frames per second. DGFects Discovery offers you full HD capabilities to transfer your Audio Visual shows into video to ensure optimal image quality. It is advised when using dynamic keyframe control (especially in case of short, fast motion) in a show to choose a frame rate higher than 30 frames per second. Recording an AVI video will take more time in case a higher frame rate is selected. However the resulting quality will be visibly smoother than in case a lower frame rate is selected. With a carefully selected high-quality video codec the size of an AVI video file can be reduced considerably without visibly loss of quality. 4. Select the size of a video (width and height in pixels). The selected size of a video also depends on the selected video codex. DGFects Discovery supports the feature to create a full HD (High Resolution) AVI video. However, not all video codecs support this format! Again carefully consider which video codec is best to create your AVI video. 5. Select the compression quality. A compression factor of 100% provides the best quality (larger video file). A lower set factor will go at the expense of quality (smaller video file). 6. Tick the Record audio box to add audio to your AVI video. Currently one audio fragment, present in the first audio track of a show, is added to an AVI video. Eventually all audio files in a show are mixed into one audio file to be added to an AVI video. Click the Create button to create an AVI video file or the Close button not to do so. Once the AVI video file is created the associated icon is automatically placed in the desktop of your computer. The AVI video file is stored in the projects’ Output folder and can be played with Windows Media Player or with a media player of your choice. 8.3.3 Play video A recorded video can be instantly played with the Windows Media Player. Press the Play Video button to play your video. It is also possible to play another video on your system. Press the Select video button and select a video (AVI, MPEG, WMV) to be played. User manual v3.3 2009-2011 © DGFectsAV Software, the Netherlands. All rights reserved. 82 9. Tools 9.1 Create a text label Using the Text label tool it is possible to create a text label in a trice. Click the Create text label button and the Create text label Window is shown. The text label tool includes following choices to create a text label: Preview all the fonts currently installed on your computer and choose the desired font type. Choose the desired font size. Align the text label (left or centered) within the example canvas. Choose a font color by clicking the left mouse button in the solid color panel. A color Window shows, select the desired color and click the OK button. Choose a font style (Bold, Italic, Underlined) by ticking the desired box(es). Tick the Outline box to display the fonts outline. Choose a font outline color by clicking the left mouse button in the outline color panel. A color Window shows, select the desired color and click the OK button. Choose a font shadow (none, standard, gradient). If you have selected a standard or gradient font shadow then it is possible to change its shadow offset in horizontal (X) and vertical (Y) direction. Use the related shadow offset boxes to achieve the desired font shadow. The intensity of a font shadow can be changed by clicking the black and white gradient panel with the left mouse button. User manual v3.3 2009-2011 © DGFectsAV Software, the Netherlands. All rights reserved. 83 Choose the background of a text label (white, silver, black or transparent (png)). If you’ve chosen a transparent background it is indicated by silver&white squares on your example canvas. In the final PNG text label file these silver&white squares have been replaced by transparent pixels. Enter the desired title or text in the edit text label box. The example canvas displays how the final text label is going to look like. If the entered title or text does not fit in the example canvas then you can easily enlarge this canvas by selecting one of the sides or corners of the Edit text label Window. Next press the left mouse button and the Edit text label Window can be resized. Make sure to optimize the title or text within the example canvas, in other words minimal pixel overhead results in smallest text label file. Optimized scaled text label Non optimized text label Click the Create button to save the text label. The New text label Window is shown. Click the Cancel button not to do so and to close the Text label tool. Enter the filename of your new text label and save it by clicking the Save button or click the Cancel button not to do so. A text label can be saved as a bmp or a png file. If the filename of the text label already exists then a warning message appears whether to overwrite this file or not. A text label image that is not present on the projects’ imagepool is automatically added to the imagepool and to your project. The text label image is now ready to be used in your show. In case the created or modified text label already exists in a show then the object image(s) as well as the rendered image(s) will automatically refresh. A text label image can also fade in, fade out, zoom in, zoom out, rotate and move across the screen! User manual v3.3 2009-2011 © DGFectsAV Software, the Netherlands. All rights reserved. 84 9.2 Resize an image The Image resize tool offers you the possibility to resize a single image or a series of images at once. Using this tool an image can be resized according to a fixed percentage as well as with a customized width and height. The aspect ratio of the image is kept. A resized image is always smaller than its original. This tool can also be used to make one or more image copies. The Image resize tool Window can be shown in two ways: Place the mouse cursor on an imagepool image and click the right mouse button. The imagepool menu shows. Click the left mouse button on following menu item to select its image resizing function: The Image resize tool Window is shown, the clicked imagepool image is automatically loaded into the Image resize tool Window. Click the Show Image resize tool button and the Image resize tool Window is shown. Now you have to select the image yourself to be resized. Click the Browse button in case no image is open. The Browse for image to be copied or resized Window is shown. Select an image and click the Open button to open the image in the Image resize tool or click the Cancel button not to do so. Resize an image in just three steps 1. Select a fixed scaling percentage: 25% / 50% / 75% OR customize the new image size yourself by entering the width or height in pixels; 2. Select the file type (jpg or bmp) and enter the filename (for jpg see Lossy technique); 3. Click the Create image button. The new, resized image is added to the imagepool and to your project. The image is now ready to be used in your show. User manual v3.3 2009-2011 © DGFectsAV Software, the Netherlands. All rights reserved. 85 Lossy technique A data compression technique in which some data is deliberately discarded to achieve massive reductions in the size of the compressed file. Lossy compression techniques can reduce a file to 1/50 of its former size (or less), compressed to the average of one-third achieved by lossless compression techniques. Lossy compression is used for graphics files in which the loss of data - such as information about some of the graphic's several million colors - isn't noticeable. An example is the JPEG compression technique. Lossy compression is a method of compressing data (digital multimedia) and then decompressing it to retrieve the data, though the decompressed one may be slightly different than the original one. Lossy compression method is used to compress multimedia data comprising of digital audio, video and still images. Although, digital still images do not need to be compressed, still lossy method serves as an important compression tool for it. If a digital image is compressed using lossy technique, the decompressed format certainly suffers from generation loss. Thus, if an image is repeatedly compressed and then decompressed, it will lose quality. But, for digital images, a minor change in color might be unnoticeable. If an original photograph and decompressed photographs are placed side by side, you will hardly notice any changes. Technically, lossy method increases similar pixel pattern to match other pixel patterns, thus allowing an efficient compression technique. Lossy compression technique is not recommended for anything that needs to be reproduced exactly. Resize a series of images in just three steps It is also possible to scale a series of images. This can be handy in case you wish to add multiple images to the imagepool without the need to manually resize images one by one. The latter case can be a time consuming process! 1. Select a Scale factor. For more information click the Show example button. 2. Click the Create Images button. The Browse for images to be copied or resized Window is shown. Now select a series of images: 3. Next click the Open button. All selected images are now resized one by one and added to the imagepool and to your project as new image files. The images are now ready to be used in your show. Click the Cancel button not to do so. User manual v3.3 2009-2011 © DGFectsAV Software, the Netherlands. All rights reserved. 86 9.3 Crop an image With the Image crop tool it is possible to crop an image easily without loss of quality. By cropping an image you can set the focus on a specific part or leave out irrelevant details. An image can also be cropped to the exact size of your show screen. The Image crop tool Window can be shown in two ways: Place the mouse cursor on an imagepool image and click the right mouse button. The imagepool menu shows. Click the left mouse button on following menu item to select its image cropping function: The Image crop tool Window is shown, the clicked imagepool image is automatically loaded into the Image resize tool Window. Click the Show Image crop tool button and the Image crop tool Window is shown. Now you have to select the image yourself to be cropped. Click the Browse button in case no image is open. The Browse for image to be cropped Window is shown. Select an image and click the Open button to open the image in the Image crop tool or click the Cancel button not to do so. The Image crop tool includes 4crop lines (white striped). An image is cropped as follows: Place the mouse cursor on one of the four crop lines (white striped) and press the left mouse button. The selected crop line can now be moved in the desired direction. Repeat moving any other crop lines across the image until the required crop size is set. User manual v3.3 2009-2011 © DGFectsAV Software, the Netherlands. All rights reserved. 87 A cropped image can be saved as a bmp or a jpg file (for jpg see Lossy technique). If the filename of the cropped image already exists then a warning message appears whether to overwrite this file or not. It is not allowed to save an image that is not cropped, a cropped image can be saved without loss of quality if you select the bmp file type. Enter the filename of the cropped image and save it by clicking the Create button or click the Cancel button not to do so. If you click the Save button the new resized image is added to the imagepool and to your project. The image is now ready to be used in your show. As soon as the cropped image has been saved the Image crop tool will auto set the new image size and reposition the crop lines. For more accurate image cropping it is possible to enlarge or maximize the Image crop tool Window Lossy technique A data compression technique in which some data is deliberately discarded to achieve massive reductions in the size of the compressed file. Lossy compression techniques can reduce a file to 1/50 of its former size (or less), compressed to the average of one-third achieved by lossless compression techniques. Lossy compression is used for graphics files in which the loss of data - such as information about some of the graphic's several million colors - isn't noticeable. An example is the JPEG compression technique. Lossy compression is a method of compressing data (digital multimedia) and then decompressing it to retrieve the data, though the decompressed one may be slightly different than the original one. Lossy compression method is used to compress multimedia data comprising of digital audio, video and still images. Although, digital still images do not need to be compressed, still lossy method serves as an important compression tool for it. If a digital image is compressed using lossy technique, the decompressed format certainly suffers from generation loss. Thus, if an image is repeatedly compressed and then decompressed, it will lose quality. But, for digital images, a minor change in color might be unnoticeable. If an original photograph and decompressed photographs are placed side by side, you will hardly notice any changes. Technically, lossy method increases similar pixel pattern to match other pixel patterns, thus allowing an efficient compression technique. Lossy compression technique is not recommended for anything that needs to be reproduced exactly. User manual v3.3 2009-2011 © DGFectsAV Software, the Netherlands. All rights reserved. 88 9.4 Cut an audio file First select the audiopool. Place the mouse cursor on an audio file and click the right mouse button. The Audiopool menu shows. Click the left mouse button on following menu item to select its audio cut function: The Audio cut tool Window is shown. Zoom in audio pictogram Zoom out audio pictogram Reset markers Save marked audio fragment To cut an audio file proceed as follows: 1. Position the right marker (red) at the end of the new audio fragment to be created by using (1) the corresponding slider or (2) by clicking the right mouse button on the pictogram of the audio file; 2. Position the left marker (green) at the beginning of the new audio fragment to be created by using (1) the corresponding slider or (2) by clicking the left mouse button on the pictogram of the audio file; 3. Press the play key to playback the marked audio fragment. The yellow locator indicates the progress during playback of the marked audio fragment; 4. Tick the Repeat playback box to repeat playback of the marked audio fragment; 5. Tune the green and red markers until the desired audio fragment is obtained. Both markers can be tuned in detail to the left or right by clicking in the corresponding slider(s)! 6. Stop playback of the audio fragment; 7. Click the Save marked audio button. The Save marked audio Window shows; 8. Enter the filename of the new audio fragment and save it by clicking the Save button or click the Cancel button not to do so. If you click the Save button the marked audio fragment is saved as a new wav file and is automatically added to the audiopool and to your project. The new audio file is now ready to be used in your show. User manual v3.3 2009-2011 © DGFectsAV Software, the Netherlands. All rights reserved. 89 10. Program settings DGFects Discovery offers a range of program settings to customize how the program works and displays. The program settings apply for all objects, projects and shows. Specific program settings are also stored in your shows. 10.1 Show objects settings Display tool buttons Each image object contains tool buttons, also called selection keys. These tool buttons can be displayed or hidden. Tick the Display tools buttons box to display these buttons, un-tick the Display tools buttons box to hide these buttons. Display tool button hints The tool button hints can be activated or deactivated. If the mouse cursor is placed on a tool button a hint appears. Tick the related Display tool button hints box to activate hints, un-tick this box to deactivate (hide) hints. Display node hints If the mouse cursor is placed on an object node a hint appears. Tick the Display node hints box to activate node hints for both image and audio objects, un-tick the Display node hints box to deactivate (hide) node hints. User manual v3.3 2009-2011 © DGFectsAV Software, the Netherlands. All rights reserved. 90 Display curvetype hints If the mouse cursor is placed on an object curve a hint appears. Tick the Display curvetype hints box to activate curvetype hints for both image and audio objects, un-tick the Display curvetype hints box to deactivate (hide) curvetype hints. Display object position hint If the mouse cursor is place on an object bar an object bar hint appears. This hint indicates the start position of an object in a show. Tick the Display object position hint box to activate object position hints for both image and audio objects, un-tick the Display object position hint box to deactivate (hide) object position hints. Display remove button object With the remove button an image or audio object can be removed from a show. The remove button can be displayed or hidden by respectively ticking or un-ticking the Display remove button box. Snap first and last <curvetype> node Tick the Snap first and last <curvetype> node box to snap or lock its start and stop node to respectively the left and right side of an image object: if the object size of an image object is changed the curvetype start (left object side repositioned) and stop (right object side repositioned) nodes move as well. Un-tick the Snap first and last <curvetype> node box not to do so. User manual v3.3 2009-2011 © DGFectsAV Software, the Netherlands. All rights reserved. 91 Node size object curves There are four node sizes to be set: 2x2 pixels (smallest node) 4x4 pixels 6x6 pixels 8x8 pixels (largest node) Drag-and-drop or copy-and-paste If you drag-and-drop an existing image or audio object from respectively one image or audio track to another image or audio track OR drag-and-drop an existing image or audio object to the timeline it is possible to simultaneously make an object copy. Tick the Drag-and-drop or copy-and-paste box to simultaneously make an object copy, un-tick the Drag-and-drop or copy-and-paste box not to make an object copy. Determine order of image layers by order of image tracks User manual v3.3 2009-2011 © DGFectsAV Software, the Netherlands. All rights reserved. 92 Object images can be rendered in two ways (independently stored in show): In accordance to the order of image tracks in a show As long as an object image in an image track is rendered opaque then all simultaneously rendered images in underlying image tracks will not be visible (default setting). Example – object image 1 is rendered opaque (see white vertical line). Simultaneously rendered object image 2 in the underlying image track is not visible. o In accordance to render order of image objects if running a show If a show is running a next object image in the timeline will be rendered on top of all simultaneously rendered object images in a show. Independent in which image track object images are positioned. This method of rendering looks like analogue slideshow projection. Example – object image 2 fades in (see green vertical line). Simultaneously rendered object image 1 will gradually be less visible (dissolve) and fully invisible as soon as object image 2 renders opaque. Display both audio channels 1. Tick the Display both audio channels box to display both audio channels of an audio object; 2. Un-tick the Display both audio channels box to display the audio peaks of an audio object. User manual v3.3 2009-2011 © DGFectsAV Software, the Netherlands. All rights reserved. 93 10.2 Show editor settings Order of tracks 1. If the Display image track prior to audio tracks box is ticked then the audio tracks will be located beneath the image tracks in the timeline; 2. If the Display audio track prior to image tracks box is ticked then the image tracks will be located beneath the audio tracks in the timeline. Timeline 1. If the Locator moves during playback of show box is ticked then the locator moves during playback of a show; 2. If the Locator moves during playback of show box is un-ticked then the timeline moves during playback of a show. User manual v3.3 2009-2011 © DGFectsAV Software, the Netherlands. All rights reserved. 94 Drag-and-drop pictogram If the Show pictogram of image object box is ticked: If an image object is drag-anddropped from its image track to another image track OR to the timeline a clear, transparent pictogram is shown of the existing image object, in combination with a position marker. If the Show pictogram of imagepool image box is ticked: If an image is drag-anddropped on the imagepool a clear, transparent pictogram is shown of the imagepool image object. If an imagepool image object is drag-and-dropped from the imagepool to the timeline a clear, transparent pictogram is shown of the imagepool image, in combination with a position marker. User manual v3.3 2009-2011 © DGFectsAV Software, the Netherlands. All rights reserved. 95 If the Show pictogram of audio object box is ticked: If an audio object is drag-anddropped from its audio track to another audio track OR to the timeline a clear, transparent pictogram is shown of the existing audio object, in combination with a position marker. User manual v3.3 2009-2011 © DGFectsAV Software, the Netherlands. All rights reserved. 96 10.3 Screens settings Show keyframe Keyframe node - yellow if not selected; - red if selected. Keyframe - green if no keyframe curve exists; - blue if a keyframe curve exists. If the Show keyframe box is ticked then the keyframe will be displayed on the small and full review screen. Keyframes are not displayed in an output file (EXE, SCR, AVI). In case a rendered object image does not include a keyframe curve its keyframe colours green; In case a rendered object image does include a keyframe curve its keyframe colours blue. User manual v3.3 2009-2011 © DGFectsAV Software, the Netherlands. All rights reserved. 97 Linear interpolation / anti-aliasing Aliasing Anti-Aliasing In computer graphics, antialiasing is a well-known software technique for diminishing jaggies - stair step-like lines that should be smooth. Antialiasing reduces the prominence of jaggies by surrounding the stair steps with intermediate shades of gray (for gray-scaling devices) or color (for color devices). Although this reduces the jagged appearance of the (1) lines, it also makes them (2) fuzzier. DGFects Discovery uses antialiasing techniques to smoothen rendering of object images on the screen if needed. If the Linear interpolation / anti-aliasing box is ticked then for example greatly enlarged object images are smoothened as a result of which its pixels are not visible (see image 2) on the preview screen. The Linear interpolation / anti-aliasing setting is also stored in a show. Automatically Scale down large images Wait for vertical synchronization (full preview screen) Vertical synchronization is an option found in most systems, wherein the video card is prevented from doing anything visible to the display memory until after the monitor has finished its current refresh cycle ( to prevent screen tearing which creates a torn look as edges of objects (such as a wall or a tree) fail to line up). During the vertical blanking interval, the driver would order the video card to either rapidly copy the off-screen graphics area into the active display area ( double buffering), or treat both memory areas as displayable, and simply switch back and forth between them (page flipping). When vertical synchronization is in use, the frame rate of the rendering engine will exactly equal the monitor's refresh rate, if it was higher. Although this feature normally results in improved video quality, it is not without trade-offs in some cases. When one wishes to benchmark a video card or rendering engine, it is generally implied that the hardware and software render the display as fast as possible, without regard to monitor's capabilities or the resultant video tearing. Otherwise, the User manual v3.3 2009-2011 © DGFectsAV Software, the Netherlands. All rights reserved. 98 monitor and video card will throttle the benchmarking program, causing it to generate invalid results. Vertical synchronization also introduces visual delay that may be perceived as input lag, which is most noticeable when playing video games. Vertical synchronization can also lead to artifacts in video and movie presentations, as they are generally recorded at frame rates significantly lower than the typical monitor frame rates (24-30 frame/s). When such a movie is played on a monitor set for a typical 60 Hz refresh rate, the video player will miss the monitor's deadline fairly frequently, in addition to the interceding frames being displayed at a slightly higher rate than they were intended for, resulting in an effect similar to judder. DGFects Discovery benefits well from vertical synchronization, as its rendering engine is normally expected to build each frame in real time, based on whatever the engine's variables specify at the moment a frame is requested. DGFects Discovery renders 60 frames per second, its timing is precise and reaction times are very fast. Hardware rendering If the Hardware rendering box is ticked then DGFects Discovery will make optimized use of processors in your system to make as many calculations as possible to render your shows. This setting is mainly useful in case shows make use of (complex) dynamic keyframe control, in order to create very smooth motion. If DGFects Discovery shows do not contain any dynamic keyframe control then there is no need to tick this setting. The Hardware rendering setting is also stored in a show. User manual v3.3 2009-2011 © DGFectsAV Software, the Netherlands. All rights reserved. 99 Scale screen size of show A handy setting with which it is possible to scale the screen size of a show on the preview screen. The white striped screenframe indicates the actual screen size of a show. The screenframe is not displayed in an output file (EXE, SCR, AVI). Also, the screen size of an output file (like an EXE presentation) is rendered 1 to 1 (100%). With a scaled screen size, rendered object images outside the screenframe are now visible! This makes it much easier to position object images outside your show screen, for example whilst panning or zooming into the show screen during running a show. Default location of small preview screen If you click the Apply button then the default location of the small preview screen is restored on the main Window of the program. User manual v3.3 2009-2011 © DGFectsAV Software, the Netherlands. All rights reserved. 100 10.4 Other settings Image editing Favourite image editing program DGFects Discovery offers the possibility to select your favourite image editing program to edit your images. For example, if you are a licensed user of the well-known program Photoshop with which you’d like to edit your images then click the button and the Select image editor Window is shown. Select the EXE file for Photoshop on your system and click the Open button. From now on Photoshop will automatically start if you wish to edit a DGFects Discovery project image. Click the Cancel button not to do so. Default image editor mspaint.exe Backup Make a backup of a show. It is possible to automatically make backups of DGFects Discovery shows. Tick the backup box to enable this function. Enter the desired time interval (in minutes) for your shows (bak files) to be backed up. Website On website www.DGFectsAV.com you will find current news about DGFects Discovery. The program and program updates can be downloaded at any time from this website. If you are not a licensed user of DGFects Discovery then take the advantage of the free 30-day trial period to evaluate it. As a licensee of the program you can always download free updates of the program from the website. The English user manual is also free to download. User manual v3.3 2009-2011 © DGFectsAV Software, the Netherlands. All rights reserved. 101 11. Shortcut keys Shortcut keys are computer key or key combination that causes a specified action to occur, regardless of what else the computer is currently doing. Use shortcut keys to perform following handy functions: DGFects Discovery CTRL+C CTRL+O CTRL+S CTRL+D CTRL+E CTRL+M HOME SPACE BAR PAGE UP PAGE DOWN ESC F1 F2 F5 F12 ARROW UP ARROW DOWN ARROW TO LEFT ARROW TO RIGHT CTRL+ALT+M CTRL+AL+I Create a new show Open a show Save a show Show the Project Status Window Show the Project explorer Window Show the Mediapool Replay a show Run or pause a show Increase queue speed to forward or rewind a show Decrease queue speed to forward or rewind a show Close the full preview screen and return to the main program Show the controls panel on the full preview screen Hide the controls panel on the full preview screen Toggle keyframes of simultaneously rendered object images Switch to the full preview screen View image – show fill size image View image – adjust image size to size of Window View image – previous imagepool image View image – next imagepool image Set a PNG image object as a dynamic mask object Directly link a selected image object to a dynamic mask object EXE presentation and SCR screen saver ARROW UP ARROW DOWN ARROW TO LEFT ARROW TO RIGHT HOME ESC PAGE UP PAGE DOWN User manual v3.3 Run output file Pause output file Rewind output file Forward output file Restart output file Terminate output file Increase queue speed to forward or rewind an output file Decrease queue speed to forward or rewind an output file 2009-2011 © DGFectsAV Software, the Netherlands. All rights reserved. 102 12. Appendices Appendix 1 – scale options for rendered object images User manual v3.3 2009-2011 © DGFectsAV Software, the Netherlands. All rights reserved. 103 Appendix 2 - lossy technique for jpg files Compression quality 5% - image format: 512x384 pixels – file size: 27,8kb Compression quality 100% - image format: 512x384 pixels - file size: 216kb User manual v3.3 2009-2011 © DGFectsAV Software, the Netherlands. All rights reserved. 104