1
1. Preparation
This chapter describes necessary preparations before using
ScanSnap.
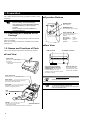
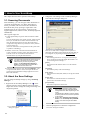
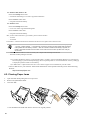
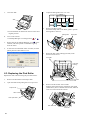
Operation Buttons
Do not connect the scanner to your PC
before installing "ScanSnap Manager".
If the scanner is connected before installing
ScanSnap Manager, it will not operate
correctly.
Refer to Chapter 2 for the installation of
ScanSnap Manager.
[SCAN] button
Starts scanning.
[POWER] button
Turns on/off the power supply.
SCAN
POWER
Power Indicator
Indicates the scanner status of
the power supply to the
scanner.
Blue (Solid):
Ready
Blue (Blinking): Scanning
Orange:
Error
Light off:
Power off
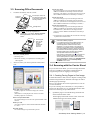
1.1. Checking the Contents of the
Package
When you unpack the scanner package, make sure that all
parts are included.
Refer to the package contents list included in the scanner
package box.
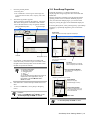
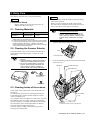
Rear View
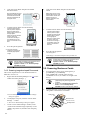
1.2. Names and Functions of Parts
USB connector
This section describes the names and functions of parts.
AC adapter connector
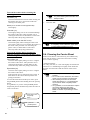
Front View
Paper chute
Open this cover when using
the scanner.
Opening the cover turns ON
the scanner.
Seal (reminds you that the
supplied software has to be
installed first): After installing
ScanSnap Manager onto your
computer, remove this seal to connect
the scanner to the PC.
Cover open lever
Pull this lever to open the ADF cover.
Paper chute
Open it and load the documents onto this
part when scanning documents.
Side guide
Adjust these guides to the documents
width for preventing skewed
ADF
(ADF: Automatic Document
Feeder)
Stacker
For using this part, pull it out
Operation Buttons
as shown in the figure.
Documents are ejected from the ADF onto this tray.
6
HINT
Security cable slot
Plug a commercially
available security cable
into this slot (anti-theft)
For the Document Specification, refer to the
“ScanSnap S510 Operator’s Guide” stored in
ScanSnap Setup CD-ROM.
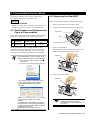
The scanner is turned on/off automatically, when
you open/close the Paper chute cover.
To turn off the scanner when the cover is opened,
press the [POWER] button.