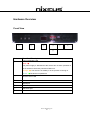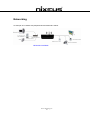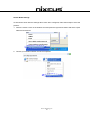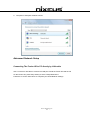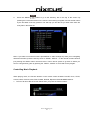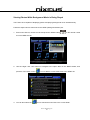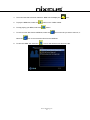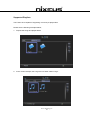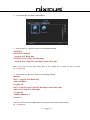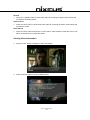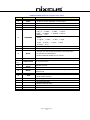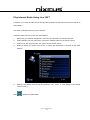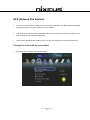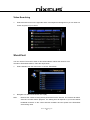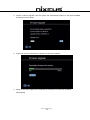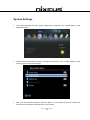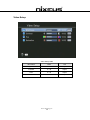
1
Fusion HD
User Manual
Nixeus Technology, Inc.
Version 1.0
Content Index
Safety Information ............................................................................................................... 6
About This Manual .............................................................................................................. 8
Basic Setup............................................................................................................................ 9
Package Contents .........................................................................................................................................9
Hardware Overview........................................................................................................... 10
Front View ................................................................................................................................................. 10
Rear View .................................................................................................................................................. 11
Installation and Connection .............................................................................................. 12
Video & Audio ........................................................................................................................................... 12
Storage Devices .......................................................................................................................................... 13
Network Connection .................................................................................................................................. 13
HDD Installation ......................................................................................................................................... 14
Networking ......................................................................................................................... 16
Wired Network Setup ................................................................................................................................ 17
Wireless Network Setup ............................................................................................................................ 19
Wireless Setup for your PC......................................................................................................................... 23
Wireless Connection without an Access Point ............................................................................................ 28
Advanced Network Setup........................................................................................................................... 34
TV Mode ............................................................................................................................. 35
Nixeus Technology, Inc.
2
Remote Control .......................................................................................................................................... 35
TV Mode Setup .......................................................................................................................................... 38
Playing Media from the Local Network........................................................................... 39
UPnP Servers ............................................................................................................................................. 39
NFS (Network File System) ......................................................................................................................... 45
Network Shared Folders (Samba Client) ..................................................................................................... 45
Local Storage Devices ................................................................................................................................. 46
Playing Music, Photo and Video files ............................................................................... 53
Music ......................................................................................................................................................... 53
Photos........................................................................................................................................................ 61
Video ......................................................................................................................................................... 65
DVD Menu Navigation................................................................................................................................ 73
Web Browser ...................................................................................................................... 74
Starting the Web Browser .......................................................................................................................... 74
Internet Media.................................................................................................................... 80
TM
Playing Internet Video Using Fusion Channel .......................................................................................... 80
Play Internet Radio Using Live 365™ ........................................................................................................... 81
My iMedia - My Video ............................................................................................................................... 82
Adjusting the Screen Size ........................................................................................................................... 84
Add/Delete Internet Radio/TV Station Lists ............................................................................................... 85
NFS (Network File System) ............................................................................................... 86
Nixeus Technology, Inc.
3
Viewing Youtube Content .................................................................................................. 89
Video Searching ......................................................................................................................................... 90
ShoutCast ............................................................................................................................ 90
Flickr ................................................................................................................................... 91
BitTorrent Client ................................................................................................................ 92
Enabling the BitTorrent Client .................................................................................................................... 93
Add A New Torrent And Start Downloading ............................................................................................... 94
BitTorrent Management ............................................................................................................................. 95
Firmware Upgrade and Reset to Default ......................................................................... 99
Firmware Upgrade via Direct Internet Access ............................................................................................. 99
Firmware Upgrade via USB Device ........................................................................................................... 101
Reset to Default ................................................................................................................ 103
System Settings ................................................................................................................. 104
System Setup..................................................................................................................... 105
Language.................................................................................................................................................. 106
TV Mode Setup ........................................................................................................................................ 107
Audio Setup ............................................................................................................................................. 108
Video Setup ............................................................................................................................................. 109
Other Settings .......................................................................................................................................... 110
Media Setup............................................................................................................................................. 111
LCD Setting ............................................................................................................................................... 112
Nixeus Technology, Inc.
4
Auto Sync ................................................................................................................................................. 112
Hard Disk Share Setup .............................................................................................................................. 112
Bit Torrent Setup ...................................................................................................................................... 113
Troubleshooting.................................................................................................................114
FAQ ....................................................................................................................................117
Limited Warranty & Licensing information ..................................................................118
Nixeus Technology, Inc.
5
Safety Information
WARNING: Failure to follow these safety instructions could result in fire, electric shock,
or other injury or damage.
•
Read these instructions
•
Keep these instructions
•
Heed all Warnings
•
Follow all instructions
•
Do not use this apparatus near water.
•
Clean only with dry cloth.
•
Do not install near any hear sources such as radiators, stoves, or other apparatus (including
amplifiers) that produce heat.
•
Unplug this apparatus during lightning storms or when unused for long periods of time.
WARNING: To reduce the risk of electronic shock, do not remove the cover.
WARNING: The device can display static images, which can cause “burn in” on certain
display screens.
Avoid leaving static images (such as photos or paused video) on screen for long periods of time.
WARNING: This device should be used only indoors in well-ventilated areas. Do not
operate this device outside the temperature range of 41°F~95°F To reduce the risk of fire, electric
shock, or interference, do not expose this appliance to rain, liquid, moisture, excessive heat, or
naked flame. For technical support, please go to http://www.nixeus.com
Nixeus Technology, Inc.
6
CAUTION: About Laser and LED
Use of controls or adjustments, or performance of procedures other than those specified herein may
result in hazardous radiation exposure.
This device complies with International Standard IEC 60825-1:2001-08 for a Class 1 and Class 2
laser product.
This device also complies with 21CFR 1040.10 and 1040.11 except for deviations pursuant to Laser
Notice No. 50, dated July 26, 2001.
Class 1 Laser Devices
Beam description: Collimated (parallel) beam of infrared light (invisible to user)
Laser power output: <716 microwatts (at 832 nanometers) to 834 microwatts (at 865 nanometers)
Emitted laser wavelength: nominal: 850 nanometers, range: (832 – 865 nanometers)
A Class 1 laser product is safe under reasonable foreseeable conditions of operation as described
by IEC 60825-1 and 21 CFR 1040.10. However, it is recommended that you not direct the laser
beam (which is emitted from the bottom of the device) at anyone’s
eyes.
Nixeus Technology, Inc.
7
About This Manual
This User Manual gives you a step-by-step explanation of how to install and setup your Fusion HD
Media Player.
For quick help, press the “
” button on the remote control.
(This key function will be supported later through firmware upgrades.)
Nixeus Technology, Inc.
8
Basic Setup
Package Contents
The product package should contain the following items:
•
•
•
•
•
•
•
•
•
•
Fusion HD media player
USB Wi-Fi Dongle
Remote Control/AAA batteries * 2
12V/2.5A Power supply
Mini USB to A type USB cable
HDD SATA Data and power cable (attached in the box)
AV phone jack to RCA cable
LAN Cable
4 screws for mounting the HDD
Quick Start Guide
WARNING: Ensure you use the power adapter shipped with the unit.
Other power adapters may damage or even destroy the unit.
Nixeus Technology, Inc.
9
Hardware Overview
Front View
1
○
3
○
4
○
5
○
7
○
8
○
6
○
No#
1
○
Front Panel Description
Power on/Standby LED
“Red”: ●
The power supply is attached but the device has not been powered on
yet or the device has been powered off after use.
“Orange” ●: The device is in standby or in the process of turning on.
“Green” ●The device is operational.
3
○
Remote control LED
4
○
Remote sensor
5
○
eSATA port
6
○
USB host port
7
○
USB client port
8
○
Power On /Off button
Nixeus Technology, Inc.
10
Rear View
1
○
2
○
3
○
4
○
5
○
No#
1
○
Rear Panel Description
2
○
LAN
3
○
USB host port
4
○
S/PDIF Optical connector
5
○
S/PDIF Coaxial connector
6
○
A/V Phone Jack
7
○
HDMI port
6
○
7
○
Power Adaptor
Standby Mode: When you press the Power key on the remote control or the On/Off button on the
unit, the system will enter standby mode.
Power Off: If you want to power off the system, please press the power key on the remote control
for more than 2 seconds when the unit is operating or the On/Off button for more than 5 seconds
when the unit is in standby mode.
Do not press the On/Off button for more than 5 seconds when the unit is operating, because this will
force the unit to power-off and some data may be lost (eg. BitTorrent downloaded data)
Nixeus Technology, Inc.
11
Installation and Connection
Video & Audio
•
The HDMI port is used for connecting your unit to your TV so you can view high-definition video
and audio.
•
The Optical and Coaxial S/PDIF connections are for connecting your unit to an external
decoder or amplifier for high definition audio.
•
Press the
hotkey button on the remote control and go to ‘System Setup’ → ‘Audio
Setup’ to select Analog or Digital Audio Output.
•
The A/V Phone jack is for connecting your unit to the CVBS/Analog audio RCA connectors on
your TV. The adapter cable pictured below is included in the product package.
Nixeus Technology, Inc.
12
Storage Devices
•
The eSATA port is for connecting the unit to your PC so that you can copy files from your PC to
the device.
•
eSATA connections are faster than the USB client ports on the device.
•
The USB client port is another option for you to connect the unit to your PC and copy files from
your PC to the unit.
•
The USB host port can be used to connect external HDD enclosures, flash drives, Wi-Fi Dongles,
Mice or keyboards to the unit.
Network Connection
•
The Ethernet port or wireless dongle can be used to connect the unit to your home network
router for local area network (LAN) or Internet connections.
Nixeus Technology, Inc.
13
HDD Installation
To install a HDD into your unit, follow the instructions below;
1. Use a screwdriver to remove the screws on the device.
2. Carefully remove the top cover.
3. Fit the HDD in as shown below.
Nixeus Technology, Inc.
14
4. Connect the power/data cable to the HDD.
5. Using a screwdriver, secure the HDD to the unit with the 4 screws provided.
6. Refit the cover back onto the unit and secure in place with the screws previously removed.
Nixeus Technology, Inc.
15
Networking
An example of a network with peripheral devices attached is below.
NETWORK DIAGRAM
Nixeus Technology, Inc.
16
Wired Network Setup
1.
Press the
“Setup” hotkey on the remote control or select “SETUP” mode from the Main
Menu.
2.
Select “Network Setup” to configure and make changes to your network settings.
Nixeus Technology, Inc.
17
3.
Once in “Network Setup”, Select “IP Setup”, and Enable DHCP or set your static IP address
according to your network settings.
Nixeus Technology, Inc.
18
Wireless Network Setup
The unit supports wireless networking with a USB Wi-Fi dongle supplied with your unit. To enable
wireless function, please make sure you plug the Wi-Fi dongle into the USB port before powering on
the unit.
Please note that a USB Wi-Fi dongle not supplied with the unit may NOT be supported.
For high-definition video streaming a wired Ethernet connection between the unit and your network
is recommended. Playback of normal video (eg. AVI or XviD) and music and photo viewing is
recommended with the wireless connection.
1. Press the
“Setup” hotkey on the remote control or select “SETUP” from the Main Menu.
Nixeus Technology, Inc.
19
2. Select “Network Wizard” from setup main menu to start the setup wizard.
3. Once the wizard has started, choose the “Wireless” option.
4. Select
to look for all the available wireless networks and choose the one you wish
to use.
Nixeus Technology, Inc.
20
5. If the network you choose is locked by password, a “Lock” icon will be shown. And the signal
strength is indicated by the red (poor quality), yellow (fair quality) or green (good quality) light.
6. Select “Key Value”, and have your password ready to enter.
7. The Key Length of each Key Format is described in the table below.
For WPA and WPA2 format, the unit will detect and switch automatically.
Key Format
Key Length
WEP64(ASCII)
5 digits
WEP64(HEX)
10 digits
WEP128(ASCII)
13 digits
WEP128(HEX)
26 digits
WPA-PSK/WPA2-PSK
8 digits or more
Nixeus Technology, Inc.
21
8. Input your password and choose “Enter” to save.
Hidden Wireless Networks
If you can’t find the ESSID (Network Name) on the “ESSID Device List”, follow these steps to
configure the wireless network manually.
1. Select Wireless Setup.
2. Select Network type as “Infrastructure” mode.
3. Press the “Back” button to accept the setting or press “OK” to change the setting.
4. Enter a value of up to 32 characters for the SSID by using the on-screen keyboard.
5. Input other related information eg. “Authentication”, “Key Format”, and proper “Key Value” of this
hidden wireless network.
6. Press the “Back” or “Left” buttons to leave the wireless setup page and save the configuration.
Nixeus Technology, Inc.
22
Wireless Setup for your PC
When using a wireless network, you have to ensure your PC is also setup to use the same AP as
your Fusion HD
Follow the information below to ensure you have the correct settings.
Windows XP
1.
Place the mouse cursor on the wireless icon down on the taskbar near the clock and press the
right mouse button and select “View Available Wireless Networks” in the menu that pops up
Nixeus Technology, Inc.
23
2.
Choose the Wireless Network you want to use and click “Connect”.
3.
Input your network key if necessary.
4.
Network is successfully connected.
Nixeus Technology, Inc.
24
Windows Vista
1.
Select “Control Panel”.
2.
Click on “Network and Internet”
Nixeus Technology, Inc.
25
3.
Select “Network and Sharing Center” and click on “Connect to a network”
4.
Select the right Access Point and click on “Connect”.
5.
Input your network key if necessary.
Nixeus Technology, Inc.
26
6.
Network is successfully connected.
Nixeus Technology, Inc.
27
Wireless Connection without an Access Point
The Fusion HD supports wireless Ethernet with a USB Wi-Fi dongle. To enable wireless
function, please make sure you plug the Wi-Fi dongle into the USB port before powering on the unit.
1.
Press Setup hotkey or select “Setup Main Menu”.
2.
Select “Wireless Network Setup”, and set ‘Network Type” as “Ad-hoc” mode.
3.
Configure an ESSID with software as you wish.
4.
You may choose to configure security settings for this connection or not.
5.
Press “BACK” button on remote control to save the settings.
6.
Go to your PC to configure your PC to wireless network.
Wireless Configuration In Windows XP
Wireless Network Configuration
1. Click right button of mouse on wireless icon and select “View Available Wireless Networks”
Nixeus Technology, Inc.
28
2. Choose the wireless network you want and click “Connect”.
3. Peer-To- Peer network is successfully connected.
Nixeus Technology, Inc.
29
Ad-hoc Mode Settings
If it still doesn’t work after the settings above have been configured, follow these steps to solve the
problem.
1. Place the mouse cursor on the wireless icon and press the right mouse button and select “Open
Network Connections”
2. Choose your wireless network and click “Properties”
Nixeus Technology, Inc.
30
3. Choose the “Wireless Networks” Tab, and click “Advanced”
4. Select “Computer-to-compute (ad-hoc) mode” networks only and click on “Close”
Nixeus Technology, Inc.
31
Wireless Configuration In Windows Vista
Wireless Network Configuration
1. Select “Control Panel”
Nixeus Technology, Inc.
32
2. Select “Network & Internet”
3.
Choose “Network and Sharing Center” and click on “Connect to a network”
4. Select the network you want and click “Connect”
Nixeus Technology, Inc.
33
5. Computer to Computer network is done.
Advanced Network Setup
Connecting The Fusion HD to PC directly by LAN cable
Use a crossover LAN cable to connect the LAN port of both the Fusion HD and the PC
On the Fusion HD, press Setup hotkey or select “Setup Main Menu”.
Follow the on-screen instructions to complete your Wired Network settings.
Nixeus Technology, Inc.
34
TV Mode
Remote Control
The remote control is used to navigate menus and to select and watch videos, listen to music, or
view photos on your TV.
Nixeus Technology, Inc.
35
1
2
3
5
4
8
11
10
12
14
13
37
16
17
15
18
19
20
22
21
23
24
27
25
26
28
30
31
33
29
32
34
36
35
Nixeus Technology, Inc.
36
The table below lists the button functions of the remote control.
REMOTE CONTROL KEY FUNCTION TABLE
No.
1
2
3
4
5
KEYPAD
POWER
HOME
OUTPUT
HELP
SETUP
8
BGM
10
COPY
11
MUTE
12
NUMBERS
13
PREV
14
NEXT
15
BACK
16
17
18
19, 20
INFO
VOLUME ─
VOLUME ┼
1. Skip to the previous page when browsing media files.
2. Skip to the previous file when playing media files.
1. Skip to the next page when browsing media files.
2. Skip to the next file when playing media files.
1. Return to previous page. Save/cancel setting in setup pages.
2. Escape from Web Browser.
Display media info. Pressing twice will show more information.
Decrease the volume.
Increase the volume.
DIRECTIONS
To move the cursor for item selection.
22, 23
24
25
26
27
28
29
OK/Play
Pause
VIDEO
MUSIC
PICTURES
iMedia
SUBTITLE
STOP
30
REPEAT
31
32
33
LANG
ZOOM
ROTATE
34
MENU
35
36
37
A-B
SLOW/SLIDE
:/
21
FUNCTION DESCRIPTION
Turn the unit On/Off.
Hotkey to return to Main Menu.
Switch the video output type to CompositeHDMI in sequence.
(Reserved)
Hotkey to the Setup main page.
Add/Remove a music file or iMedia station being used as
background music.
Copy files or folders between external USB storage devices and
SATA HDD, or delete
Mute audio output.
1. Input numbers when required.
2. Go to 00%-99% progress of current video or music file.
1. Play or pause media files
2. Enter the highlighted item.
Press to jump to VIDEO mode
Press to jump to MUSIC mode
Press to jump to PHOTO mode
Press to jump to Internet Media mode
Select different subtitles
Stop playback.
1. Video & Music: Repeat current file or Repeat all files in this
folder or cancel repeat function.
2. Photo: Repeat Background music.
Select different languages/audio tracks
Zoom video or photo.
Rotate the picture being viewed.
1. Go to the Menu of DVD films.
2. Choose directory levels when navigating.
Set/Cancel A-B repeat mode.
Slow forward/backward the media with speed 1/2x, 1/4x,1/8xS
Go to the specified time of current file.
Nixeus Technology, Inc.
37
TV Mode Setup
Please set the video source selector of your TV to match the connection to your unit. For example, if
you use HDMI, set the TV to use the correct HDMI input port.
1. Turn on the unit. The LED on the front panel of the unit will turn orange during system startup
and then green when it’s ready.
START-UP PAGE
2. Check the TV display by going to ‘Setup’ → ‘System Setup’ → ‘TV Mode Setup‘ → ‘Video
Output’.
3. The default display of the unit is Composite (CVBS). If you use HDMI, use the remote control to
press the
“Output” button and cycle through the TV output modes to get the correct
display mode.
Nixeus Technology, Inc.
38
Playing Media from the Local Network
The Fusion HD supports several network protocols for media streaming. Some popular usages are
described in the following sections.
UPnP Servers
The unit will automatically detect all available UPnP AV compliant content servers on boot-up and list
them on the UPnP column of the main menu. No additional setup is necessary.
TM
TVersity
is a popular and free UPnP server software. Please refer to http://tversity.com for more
information and to download the software.
Nixeus Technology, Inc.
39
Disabling The Firewall In Windows Vista
Some firewall and Anti-Virus tools will block the “UPnP” protocol. That will affect the connection
between the “UPnP Server” and the unit. It is suggested to allow the “UPnP Server” to pass through
your firewall or temporarily turn off your firewall when you are using the unit.
Follow the steps below to disable the firewall:
1. Select ‘Control Panel”
2.
Select “Security” and click “Allow a program through Windows firewall”.
Nixeus Technology, Inc.
40
3. Choose “Exceptions” Tab, and click “Add programS”
Nixeus Technology, Inc.
41
4. Click “BrowseS” to browse for the UPnP Server program
5.
Follow the steps below to search for you UPnP server software in program files.
6.
Click “Computer”.
Nixeus Technology, Inc.
42
7.
Click “Program files”
8. Click on the folder that matches the name of your UPnP Server software
Nixeus Technology, Inc.
43
9. The UPnP Server is successfully included to the exceptions.
10. Click “OK” to finish.
11. Click “Allow” to add this program.
Nixeus Technology, Inc.
44
NFS (Network File System)
Please refer to page 86 of this manual for detailed information.
Network Shared Folders (Samba Client)
The Samba Client protocol allows the Fusion HD to access media files from samba shares on
windows based PCs on the network
As long as there is a connection to your network and there are no firewalls blocking the shares from
remote sites, there are no additional steps needed to enable this feature.
The following steps show how to access media through the Samba Client Protocol.
1. Select “Network Shared Folders” in the main menu and all available sources will be detected
and shown automatically.
Nixeus Technology, Inc.
45
2.
Press the “down” button on the remote control to choose which target machine you wish to
navigate to and play back the files on it.
3. Press the “MENU”
button on the remote control to go to the ‘directory’ bar on the top of
the screen.
4. Pressing the numerical buttons on the remote control during navigation will sort the file names
by the first letter of the key pressed. This will help you find the file you want when there are many
files in the folder list.
Note: If you want to use some functions (like iMEDIA or audio settings etc) while you’re navigating
directories and files, press the hot keys such as ‘HOME’, ‘SETUP’Son the remote control instead of
just pressing the ‘BACK’ button numerous times. Then it will be quicker to go back to where you
were in a long directory path by pressing the ‘VIDEO’, ‘MUSIC’ or ‘PICTURE’ hot keys again.
Local Storage Devices
The unit supports external USB flash disks, USB HDDs SATA HDDs (via the eSATA port).
In the main menu select “Removable Device” and navigate to the device to play the files you wish to
play.
The number of USB ports can be extended by using an externally powered USB hub, please take
into consideration the extra power consumption of the additional devices as the unit itself supplies
only a limited amount of power to the USB port.
Nixeus Technology, Inc.
46
File Management by Remote Control
1. Go to “Removable Device” on the Main Page.
2. Select the name of your storage device from the list and press “COPY”.
5. Select the source and destination then Press “OK” to proceed or “No” to go back.
Nixeus Technology, Inc.
47
6. Press the “MENU”
button on the remote control to go to the ‘directory’ bar on the top of
the screen.
7. By pressing the numerical buttons on the remote control during navigation will sort the file
names by the first letter of the key pressed. This will help you find the file you want when there
are many files in the folder list.
Note: If you want to use some functions (like iMEDIA or audio settings etc) while you’re navigating
directories and files, press the hot keys such as ‘HOME’, ‘SETUP’Son the remote control instead of
just pressing the ‘BACK’ button numerous times. Then it will be quicker to go back to where you
were in a long directory path by pressing the ‘VIDEO’, ‘MUSIC’ or ‘PICTURE’ hot keys again.
Nixeus Technology, Inc.
48
Copy/Delete local files from your PC
The unit supports Samba server function which shares your local storage space with a client PC
over the network. For PC with a Windows OS installed it is known as My Network Places.
To access your unit, type in the IP address of your unit (which you can find by checking in ‘Setup’)
onto the address bar of the file manager on the remote PC and press the enter key to continue. The
default user name and password to login are both “admin”.
The following example is an alternative way based on the Microsoft Windows XP platform.
Please note that when both eSATA HDD and USB disks exist, the eSATA device will be the sole
storage device in this instance
1. Click the “My Network Places” icon on your PC.
My Network
Places
Nixeus Technology, Inc.
49
2. Click “Entire Network” → “Workgroup”
Nixeus Technology, Inc.
50
3. The units default local network location is “Workgroup”. Double click “Workgroup” and you
should see the unit listed as an icon.
4. Double click the icon and a login menu will pop up. Input the default user name and password
“admin” and click “OK” to continue.
Nixeus Technology, Inc.
51
5. You can use a mouse to copy, move and delete your media files between your PC the units local
HDD.
Nixeus Technology, Inc.
52
Playing Music, Photo and Video files
Music
Supported Music Formats
The following music formats are supported;
Format
File Extension
AAC+
AAC, MP4, M4A
AAC-LC
AAC, MP4, M4A
AC3 / Dolby Digital 5.1 Downmixing AC3
AC3 Pass through
AC3
DTS Pass through
DTS
LPCM
WAV, PCM
MP3
MP3
OGG Vorbis
OGG
WMA
WMA, ASF
WMA Voice
WMA, ASF
WMA Pro
WMA, ASF
FLAC
FLAC
Note: WMA Lossless is not supported.
Nixeus Technology, Inc.
53
(ID3 tag supported)
Music Playing
1.
Navigate to the media source from you desired location using UPnP or Samba shares, USB or
eSATA devices and select the file you want to play.
2.
All available files will be listed. Just press the “OK” button on the remote control.
3.
If you use an UPnP server, the music files will be organized by “Album”, “Artist”, or “Genre”
automatically due to the UPnP protocol.
4.
You can select “All Music” to see all the music files.
5.
You can also select “My Folder” to view the music files that are organized in several subfolders
as it would be on your PC.
6.
The ID3 Tag showing “Artist”, “Album”, “Title”, and “Genre” will be displayed on your screen.
7.
If the Album contains a photo, it will also be displayed on the screen.
8.
The layout of the files can be changed by pressing the icon on the right side.
Nixeus Technology, Inc.
54
9.
Press the “MENU”
button to go to the ‘directory’ bar on the top of the screen. By
pressing the numerical buttons on the remote control during navigation will sort the file names
by the first letter of the key pressed. This will help you find the file you want when there are
many files in the folder list.
Note: If you want to use some functions (like iMEDIA or audio settings etc) while you’re navigating
directories and files, press the hot keys such as ‘HOME’, ‘SETUP’Son the remote control instead of
just pressing the ‘BACK’ button numerous times. Then it will be quicker to go back to where you
were in a long directory path by pressing the ‘VIDEO’, ‘MUSIC’ or ‘PICTURE’ hot keys again.
Controlling Music Playback
When playing music, the function buttons on the remote control includes: PAUSE, PLAY, STOP,
Volume, Mute, Previous, Next, Fast Forward, Rewind, Repeat A-B and NUMBER buttons.
1. The icon will show like the screen below when you press the function button.
Nixeus Technology, Inc.
55
Viewing Photos While Background Music is Being Played
The Fusion HD is capable of displaying photos and playing background music simultaneously.
Follow the steps below to add music to the “BGM” (Background Music) list.
1. Enter music files list, choose one file and press the “BGM” hotkey
on the remote control
to invoke BGM tool bar.
2. Use the “Right” and “Left” buttons to navigate to the option tabs on the “BGM” toolbar, then
press the “OK” button on the “
3. You can also select the “
” icon to add the current music files to the “BGM” list.
” icon to add all the music files in the current folder.
Nixeus Technology, Inc.
56
4. The music files that have been added to “BGM” list will display the “
5. To play the BGM files, select the “
”button on the “BGM” toolbar
6. To stop playing your BGM, select the “
” button.
7. To remove music files from the BGM list, select the “
select the “
” icon.
” icon on the file you want to remove, or
” icon to remove all the files from the BGM list.
8. To view the “BGM” list, select the “
” icon to view all the music files in the list.
Nixeus Technology, Inc.
57
Supported Playlists
The Fusion HD is capable of supporting .m3u and .pls playlist files.
Please see the following examples below;
1. Prepare the songs and playlist below
2. In the current example, the songs are in a folder called “songs”
Nixeus Technology, Inc.
58
3. The playlists are in a folder called “Playlist”
4. The content of a .m3u file is shown in the following example:
#EXTM3U
#EXTINF:0,All RISE
../songs/01.ALL RISE.mp3
#EXTINF:0,Can't Fight The Moonlight
../songs/01.Can't Fight The Moonlight (Latino Mix).mp3
Note: You must use the mp3 folder path in the playlist file to show the file’s location;
eg. ../songs/xxxx
5. The content of a .pls file is shown in the following example:
[playlist]
File1=../songs/01.ALL RISE.mp3
Title1=All RISE
Length1=50
File2=../songs/01.Can't Fight The Moonlight (Latino Mix).mp3
Title2=Can't Fight The Moonlight
Length2=50
NumberOfEntries=2
Version=2
Note: You must use the mp3 folder path in the playlist file to show the file’s location;
eg. ../songs/xxxx
Nixeus Technology, Inc.
59
6. Select the playlist file and press the OK button.
7. All the songs in the playlist will then be shown like the example below
8. Select the song you want to play as shown like the example below:
Nixeus Technology, Inc.
60
Photos
Supported Photo Formats
The following photo formats are supported;
Format
File Extension
BMP
BMP
EXIF SUPPORT
JPEG, JPEG, JPE, TIFF, TIF
GIF
GIF
JPEG
JPEG, JPG
JPEG2000
JPG, JPEG, JPE
PNG
PNG
TIFF
TIFF, TIFF
Windows Media Photo
WDP, HDP
Photo Playback
1. Navigate to the media source from your desired location using UPnP or Samba shares, USB or
eSATA devices and select the file you want to play.
2. All available files will be listed. Select the media server/source you wish to use and press the
“OK” button on the remote control.
Nixeus Technology, Inc.
61
3. If the file source is from an UPnP media server, you will need to choose the right category and
select “All Images” to see all the shared image files.
4. Use the “Up” and “Down” buttons on the remote control to navigate to those folders, and select
the options by pressing the “OK” or “Right” buttons on the remote control to access.
5. Select the folder that contains the image files or the subfolders you want to view and press the
“OK”, or “Left” buttons on the remote control to play it.
Playing a Photo Slideshow
1. To start playing a photo slideshow (all photos in one folder), you need to press the
“PLAY” button “twice” on the remote control to enable this function.
2. Navigate to the first photo of each folder and press the ‘Play” button to view this photo.
3. Press the “Play” button again if you want to enable the Photo Slide Show feature.
4. The icon
will be displayed when the Photo Slide Show feature is enabled.
5. Press the “Stop” button to end the function. The icon
Photo Slide Show feature has been stopped.
Nixeus Technology, Inc.
62
will then be displayed when the
Photo Playback Control
Play, Pause and Stop
1. Press the “PLAY” button on the image files list to enable slideshow playing.
2. Press the “STOP” button to stop it.
Skip to the Next or Previous File:
3. Press the “Next” or “Down” buttons to skip to the next video file.
4. Press the “PREV” or “UP” buttons to skip to the previous music file.
Viewing Photo Information
1. Press the “Info” button to get the image information.
Nixeus Technology, Inc.
63
Zoom in/out
1. Press the “ZOOM” button while viewing the photo that you want to manipulate
2. Press the “Zoom” button and then press the “Left” button to enlarge the image.
3. When the image being displayed is larger than the TV screen, press the “Zoom” button again
and press the “directions” buttons to move the image.
Rotate
1. Keep pressing the ‘Zoom’ button while viewing the photo to enable the rotate function.
Nixeus Technology, Inc.
64
Video
Supported Video Formats
The following movie formats are supported;
Format
File Extensions
DivX 3
AVI, DivX
DivX 4
AVI, DivX
DivX 5 HD
AVI, DivX
DiVX 5 SD
AVI, DivX
DivX 6 HD
AVI, DivX
DivX 6 SD
AVI, DivX
H. 264 AVC MPEG4 part 10 (HD) MPG, MP4, MOV, AVI
H. 264 AVC MPEG4 part 10 (SD) MPG, MP4, MOV, AVI
Matroska
MKV
MJPEG
AVI
MPEG-1
MPG, MPEG, DAT
MPEG-2 HD
MPG, MPEG
MPEG-2 SD
MPG, MPEG
MPEG-2 VOB
MPG, MPEG, VOB
MPEG-4 part 2 ASP
MP4, AVI, M4V
VC-1 HD 1080i
WMV
VC-1 HD 720p
WMV
WMV 9
WMV, ASF
WMV HD 1080i
WMV, ASF
WMV HD 720p
WMV, ASF
WMVPro
WMV, ASF
XviD
AVI, MP4
HD 1080i/p
AVI, MP4, MOV
DVD
ISO, IFO
Nixeus Technology, Inc.
65
Video Playback
1. Navigate to the media source from you desired location using UPnP or Samba shares, USB or
eSATA devices and select the file you want to play.
2. All available files will be listed. Select the media server/source you wish to use and press the
“OK” button on the remote control to access them.
3. If the file source is from an UPnP media server, you will need to choose the video category or
select “All Videos” to see all the shared video files.
4. Please use the “Up” and “Down” buttons on the remote control to navigate to those folders, and
select the options by pressing the “OK” or “Right” button on the remote control.
Nixeus Technology, Inc.
66
Video Playback Control
Volume Control
1. Press the “Volume+” or “Volume-” buttons on the remote control to adjust the volume
Mute
1. Press the “Mute” button to mute or un-mute the video.
Pause and Play
1. Press the “PLAY” button while the video is playing to pause the video.
2. Press the “PLAY” button again to resume the video playback
Skip to the Next or Previous File
1. Press the “Next” or “Down” buttons to skip to the next video file.
2. Press the “PREV” or “UP” buttons to skip to the previous music file.
Fast Forward
1. Press the “>>(FF)” button to fast forward the video file. Pressing the button several times will
increase the speed.
Nixeus Technology, Inc.
67
Rewind
1. Press the “<<(REW)” button to rewind the video file. Pressing the button several times will
increase the rewinding speed.
Slow Forward
1. Press the “Slow” button to slow forward the video file. Pressing the button several times will
increase the speed.
Slow Rewind
1. Press the “Slow” button and press the “Left” button to slow rewind the video file. Press “Left”
button several times to increase the speed.
Viewing Video Information
1. Press the “Info” button to display the video information.
2. Press the button again to see any additional info.
Nixeus Technology, Inc.
68
Video Viewing Effects
Zoom in/out
1. While the video is playing, press the “ZOOM” button to enable the zoom in/out function.
2. Press the “Zoom” button and press the “Left” button to enlarge the video.
3. When the video being displayed is larger than TV screen, press the “Zoom” button again and
press the “directions” buttons to move the video.
Repeat and Repeat All
You can turn on the repeat function to continuously play individual videos or videos within a folder.
Repeat Once
1. Press the “Repeat” button once to repeat playing the current video file.
Repeat All
1. Press the “Repeat” button twice to repeat all the video files in the current folder.
Repeat Off:
1. Press the “Repeat” button three times to disable the repeat mode.
Nixeus Technology, Inc.
69
Subtitles and Languages
If you are playing files with several subtitles and audio tracks, the “SUBTITLE” and “LANGUAGE”
buttons are available for subtitle and audio track switching.
Note: To use your subtitle files, make sure that the file is in the same folder as your video
file and that they are both named the same.
Video Resuming
The Fusion HD supports video resuming to the previous playback point where the video was last
played.
Note:
The device needs to be kept powered on to enable this function.
The default setting is that you will “Always” be asked if you wish to resume.
If you want to change the setting, please follow the steps below:
1. Go to “Setup Main Menu “ →“Media Setup” → “Video Playing Option”
Nixeus Technology, Inc.
70
Automatic Next Video Playback
The default setting is the all the video files in one folder will be played continuously until the last file.
If you want to play only the selected file and then return to the main menu,
1. Go to “Setup Main Menu “ →“Media Setup” → “Video Playing Option” to disable the function.
Video Seek
The Fusion HD provides two options for video seeking. One is to seek by the percentage of the total
file length and the other is to seek by time.
Seek by Percentage
•
While the video is playing, you can press the numeric keys on the remote control to jump to your
destination.
•
For example, when you press “7” + “0”, you will jump to 70% of the total file length.
Numeric keys on the
remote control
Start playing from 70% of the file length
Nixeus Technology, Inc.
71
Seek by Time
•
Press “0(GOTO)” on the numeric keys on the remote control to enter into the time seek mode.
•
You can the input the time frame that you want to use to search.
Input the time by numeric key
The total time length of
the file
Nixeus Technology, Inc.
72
DVD Menu Navigation
The Fusion HD supports viewing DVD files as if you are playing a DVD.
Follow the steps below to enable the DVD menu navigation feature.
1.
When you select a DVD file, choose the item with
2.
The Menu will appear.
3.
Use the navigation buttons
and press “Play”
on the remote control to select the item you want to
use.
Nixeus Technology, Inc.
73
Web Browser
Starting the Web Browser
1.
Press the Home' button on the remote control to return to the main menu as shown below.
Select the icon which shows ‘Web Browser’ and press ‘ok’.
2.
The homepage of the web browser will be displayed, then you can surf the web using the
remote control or keyboard and mouse.
Using the Remote Control for navigation
A USB keyboard and mouse can be plugged in to facilitate the web surfing. While using the remote
control, the key definition is as follows:
Nixeus Technology, Inc.
74
1
2
3
5
4
6
8
9
11
7
10
12
14
13
37
16
17
15
18
19
20
22
21
23
24
27
25
26
28
30
31
33
29
32
34
36
35
Nixeus Technology, Inc.
75
WEB BROWSER REMOTE CONTROL KEY TABLE
No.
2
KEYPAD
HOME
6
SORT
Invoke on-screen keyboard or cancel input.
8
BGM
Caps Lock when on-screen keyboard invoked.
9
RECORD
11
* MUTE
12
NUMBERS
FUNCTION DESCRIPTION
Back to Home Page
Save current page to bookmark, press again to add.
Mute current Video/Music
Caps Lock Mode:
1: 1@._#
2: 2ABC
3: 3DEF
5: 5JKL
6: 6MNO
7: 7PQRS
9: 9WXYZ
0: 0:/
4: 4GHI
8: 8TUV
Small:
1: 1@.?&
5: 5jkl
2: 2abc
6: 6mno
9: 9wxyz
3: 3def
7: 7pqrs
4: 4ghi
8: 8tuv
0: 0:/
13
14
PREV
NEXT
Previous history page
Next history page
15
BACK
1. Escape from the browser and return to the main menu
2. In text field, it’s Back Space
3. Under bookmark window, it’s for cancel.
17,18
19,20,
22,23
* VOLUME+/-
Increase/Decrease the volume of current Video/Music
DIRECTIONS
To move the cursor
24
OK/Play
Pause
VIDEO
25
MUSIC
27
iMedia
28
SUB
29
30
* STOP
REPEAT
31
LANG
32
34
35
* ZOOM
MENU
A-B
21
Left-click or Enter
Left-click of the mouse
Press to enter keyboard mode and press again to be back to
mouse mode
Right-click the mouse
1. Increase font size
2. Enter bookmark entry
Stop playing current Video/Music
Reload current page
1. Decrease font size
2. Delete bookmark entry
Toggle current video on web to full screen/normal
Invoke Bookmark List or cancel
Stop loading web page
Nixeus Technology, Inc.
76
•
Once the web browser has loaded, the homepage of the web browser will be displayed and then
you can surf the web using the remote control or keyboard and mouse.
A USB keyboard and mouse can be plugged to use when web surfing.
Make sure you plug it before you enter the Web Browser.
•
If you like to use the remote control unit for web browsing, press the
button to have the
URL bar appear like below.
•
A virtual keyboard is also available there by pressing the
•
Press the yellow button for help and you will get instructions for all the function hot keys shown
below.
Browser Toolbar
Nixeus Technology, Inc.
77
button to ease ‘keying in’.
Browsing A Web Page
1.
Press the
button and enter the web address you would like to go to.
2.
Page Viewing
3.
Web pages being loaded can be stopped or reloaded by choosing the icon from ‘View’.
4.
Text size can also be changed and the whole page can be zoomed in or out for more
convenient viewing.
Nixeus Technology, Inc.
78
Bookmark Function
1. Bookmarks can be added, loaded and deleted by using ‘Bookmark’.
Exit
1. To exit from the web browser, select ‘Exit’ or press the ‘Back’ button on the remote control.
Nixeus Technology, Inc.
79
Internet Media
Playing Internet Video Using Fusion ChannelTM
TM
Fusion Channel
is an Internet video service that provides free TV channels. The video is streamed
directly over the Internet.
Follow the steps below to access the video channels:
1.
Make sure your network settings are correct and you are able to access the Internet.
2.
Select “iMedia” from the main menu or press the “iMedia” button on the remote control.
3.
Select “Fusion Channel ” and press the “OK” button on the remote control and select a
TM
category.
Nixeus Technology, Inc.
80
Play Internet Radio Using Live 365™
Live365™ is an Internet radio service that provides unlimited on-demand access to thousands of
radio stations.
The audio is streamed directly over the Internet.
Follow the steps below to access the radio stations:
1.
Make sure your network settings are correct and you are able to access the internet.
2.
Select “iMedia” from the main menu or press the “iMedia” button on the remote control.
3.
Select “Live 365” and press the “OK” button on the remote control.
4.
Select a catalog you prefer from the list, or select “All Broadcasts” to browse all the radio
stations.
5.
Select a radio station from the list, and press the “OK”, “Play”, or “Left” button on the remote
control to play it.
Note:
stands for a radio station.
Nixeus Technology, Inc.
81
Note: Press the “BGM” hotkey on the remote control to add the station into the background music
list.
My iMedia - My Video
1. Make sure your network settings are correct and you are able to access the internet.
2. Select “iMedia” from the main menu or press the “iMedia” button on the remote control.
3. Select “My iMedia” and press the “OK” button on the remote control.
4. Select “My Video” and press “OK” to enter.
Nixeus Technology, Inc.
82
5. There are some video stations listed as default, you can select one of the stations from the list
and play it.
6. You can also add your favorite radio stations manually by selecting “Add New Entry”.
Note:
stands for a video station.
7. Select “Add New Station” or “Add New Folder” to configure a new radio station or folder, then
enter the related information of this new radio station or folder.
Nixeus Technology, Inc.
83
Adjusting the Screen Size
1. Press the
key on the remote control and the zoom in/out icon will show up.
2. Press the “right” or “left” navigation buttons to enlarge or reduce the screen size
Screen enlarged
Screen reduced
Nixeus Technology, Inc.
84
Add/Delete Internet Radio/TV Station Lists
You can manage the iMedia list using the Fusion HD on-screen menu.
Through The Fusion HD On-screen Menu
1.
Go into “My Video”. Press the MENU key
on the remote control, the Menu list will pop up.
2. You can now add, modify, delete or backup your iMedia list.
Nixeus Technology, Inc.
85
NFS (Network File System)
•
The Fusion HD supports the NFS protocol to access media files on a NAS (Network Attached
Storage) machine or any other machine over the network.
•
First, have the IP address and the subfolder name of your target source ready (for example, your
NAS’ IP address and subfolder of the NAS)
•
There are two options below detailing how to access your target source by the NFS protocol.
Through The Fusion HD On-screen Menu
1. Select and enter “iMedia” from the Main Page.
Nixeus Technology, Inc.
86
2. Select “My Favourites” and enter “Add New Station”.
3. Key in the nickname (for example “nfs”) and the URL of your target source.
Note The url link must be entered in as shown in the following example:
nfs://ipaddress/export_directory (eg. nfs://192.168.2.112/mnt/hd_a2)
4. In the example, the IP address is 192.168.2.112 on the target machine you want to access and
mnt/hd_a2 is the subfolder name of your target source.
5. After the URL is saved, go back to the main menu page of “My iMedia”.
6. You will now find the entry you just made on the “My iMedia” list.
Nixeus Technology, Inc.
87
7. Go into and access the share you just made, and select the files you want to play. You don’t
need to put in any username or password.
Nixeus Technology, Inc.
88
Viewing Youtube Content
You can use the Fusion HD to view Youtube content without the need for a PC.
To view YouTube content, follow the steps below:
1.
Select “iMedia” from the main menu or choose “YouTube”.
2.
Choose a video to play.
Note:
Because the content is being directly streamed from the Internet, The content will take a
short time to buffer before playback. The waiting time will depend on your local network
bandwidth and also on the current internet conditions and the speed of the YouTube
server being used.
Nixeus Technology, Inc.
89
Video Searching
1.
Select the search icon on the right side and a virtual keyboard will appear so you can enter in a
search keyword of your choice.
ShoutCast
You can use the Fusion HD to listen to ShoutCast stations without the need for a PC.
To listen to ShoutCast stations, follow the steps below:
1.
Select “iMedia” from the main menu or choose “ShoutCast”.
2.
Navigate to a station and choose one to play.
Note:
Because the content is being directly streamed from the Internet, The content will take a
short time to buffer before playback. The waiting time will depend on your local network
bandwidth and also on the current internet conditions and the speed of the ShoutCast
server being used.
Nixeus Technology, Inc.
90
Flickr
You can use the Fusion HD to view pictures on the Flickr website without the need for a PC
To view pictures on the Flickr website, follow the steps below:
1.
Select “iMedia” from the main menu or choose “Flickr”.
2.
Navigate to choose a picture you wish to view. Press play to view in full-screen mode and
press play again to watch in a slideshow.
Nixeus Technology, Inc.
91
BitTorrent Client
A BitTorrent client is supported by the Fusion HD when either an external eSATA HDD or USB
storage device is connected before the unit is powered on.
To enable and use this function, please note that:
•
This function is only enabled when an external storage device is attached before power-on.
•
If you attach the HDD after power on, this function won't be enabled.
•
The eSATA HDD is the default storage space for you downloaded files.
•
A USB disk drive will be the alternative when the eSATA HDD is absent.
•
Storage devices with FAT16 and FAT32 file system are not supported because the limitation of
file size. Please use a HDD with either NTFS or EXT3 file systems.
•
Before removing the eSATA HDD, please make sure the BitTorrent client is disabled or system is
powered off properly.
•
If you remove the external HDD when the BiTorrent client is enabled or powered off incorrectly,
all your BiTorrent downloads will be cleared next time you use it.
Nixeus Technology, Inc.
92
Enabling the BitTorrent Client
After the HDD is installed, follow the steps below to start the download.
1.
Go to “Setup Main Menu” and choose “BitTorrent Setup”
2.
Select “Enable BitTorrent”.
3.
The option, Max Upload Connection, is used to prevent the outgoing network traffic from being
too heavy and to keep the unit’s CPU operating at high efficiency.
4.
The options, Max Upload Rate and Max Download Rate, is for users to utilize their available
bandwidth according to their individual needs.
5.
The option, Listen Port and DHT Port, is for users to configure their unit so they can achieve
maximum network efficiency tailored to their individual network setup.
Nixeus Technology, Inc.
93
Add A New Torrent And Start Downloading
1.
Go to the main page and select BT.
2.
Have your .torrent file ready on a USB storage device, SATA HDD or on your Local Network.
3.
Select “Add New Torrent” and press “OK”
Nixeus Technology, Inc.
94
4.
Enter in the location where you want the .torrent file to be stored.
5.
Select the torrent file and press “OK”.
5. Once this is done, your new downloads will appear on the BT menu page.
Note:
Make sure that the Fusion HD is connected to the Internet to keep your Bit Torrents
active.
The downloaded files will be stored in a directory named “bt”.
BitTorrent Management
The BitTorrent Control Menu offers you the ability to start, stop, set priority and remove the files.
You can press “MENU”
key on the remote control to enter the control menu.
1.
Use the Navigation keys on your remote control to select the torrent files you want to manage.
2.
Press the “MENU” key in the remote control and the “BT Control” Menu will appear.
Nixeus Technology, Inc.
95
3.
Use the Navigation keys on the remote to select the function you want to perform.
Removing Torrent files
On the “BT Control” Menu, you can highlight the torrent files and select “Remove Torrent” to remove
the torrent files which are downloading.
Remove Completed Files
If the files have completed downloading, there may be some other data along with the main torrent
files.
You can highlight these files and press “OK” to view their contents.
Nixeus Technology, Inc.
96
1. Highlight the completed files
2. Press “OK” to view their contents.
3. If you want to remove any files, you can highlight them and select “Remove BT” and remove all
the data which is stored on the local HDD.
.
Nixeus Technology, Inc.
97
Display File Info
1. You can press the “Info” key on the remote control to view the file info.
File info
Nixeus Technology, Inc.
98
Firmware Upgrade and Reset to Default
Firmware Upgrade via Direct Internet Access
•
There’re two ways to upgrade the firmware. Go to ‘Setup’ in the main menu and select ‘Version’.
The current firmware version is shown there (eg. 01.00.02.14).
•
The first way to upgrade the firmware is by ‘Internet Upgrade’ which is a convenient option
without the necessity of a PC.
•
Make sure the Fusion HD is connected to the Internet before attempting a firmware upgrade.
Follow the steps below to update your firmware via the internet:
1. Go to “Setup Main Menu”, Select “Version” and then choose ‘Firmware upgrade”.
Nixeus Technology, Inc.
99
2. Choose “Internet Upgrade” and the system will automatically search for the latest available
firmware from the Internet.
3. Follow the onscreen instructions to perform the firmware upgrade.
4. When the firmware upgrade has completed successfully, the Fusion HD will reboot
automatically.
Nixeus Technology, Inc.
100
Firmware Upgrade via USB Device
An alternative way to update the firmware on you unit is to use the “USB Upgrade” option.
Follow the steps below to update your firmware using a USB device:
1. The latest firmware file is compressed and located on http://www.nixeus.com.
2. An example of the file name is v01.00.02.14.00.zip or upgrade.zip.
3. Download the firmware file and store it on your USB device.
4. Uncompress the firmware file to get the ‘upgrade.bin’ file and put it in the root directory of your
USB device.
5. Insert the USB device to the USB port of the Fusion HD.
6. Go to “Set Up Main Menu”, Select “Version” and then choose ‘Firmware upgrade”.
7. Choose “USB Upgrade” and the system will automatically search for the ‘upgrade.bin’ file on
your USB device.
WARNING: Do not power off the system or remove the USB device while the upgrade
process is running.
Nixeus Technology, Inc.
101
8. Follow the onscreen instructions to perform the firmware upgrade.
Note:
Ensure that the power DOES NOT turn off during the firmware update process or it will
render your unit unusable.
9. When the firmware upgrade has completed successfully, the Fusion HD will reboot
automatically.
WARNING: Do not power off the system or remove the USB device while the upgrade
process is running.
Nixeus Technology, Inc.
102
Reset to Default
You can restore the unit back to its factory default state by following the steps below:
1.
Go to “Set Up Main Menu”, Select “Version” and choose “Reset to Default”.
2.
Make sure you want to do this and then press the “OK” button to restore the system to the
default settings.
WARNING:
Restoring the FusionHD to its default settings will
erase the network set up and media server configuration. You will need to set
up the FusionHD again to run on your network and to access media files.
Nixeus Technology, Inc.
103
System Settings
•
The system language and other system settings are configured in the “System Setup” of the
Setup Main Menu”.
•
Please select the item that you want to configure and press the “OK” or “Right” buttons on the
remote control to enter the sub-page.
•
After you have finished configuring, press the “Back” or “Left” buttons to leave the setup menu
and save the configuration changes that you have made.
Nixeus Technology, Inc.
104
System Setup
If you want to change your system configuration, you can select “Setup” from the Main Page, and
then select “System Setup” from the Setup Main Menu.
You can the select, configure or adjust your Language, TV mode, Audio, Video, HDD sharing and
other settings here.
System Setup main page
The table below is a brief description of the System Setup.
Item Name
Language
TV Mode Setup
Audio Setup
Video Setup
Other Setting
HardDisk Share Setup
Value
Use
Language
Select
TV System/ Video Output/
Video Scale
Digital Audio Output/Analog
Audio Output
Brightness/ Contrast/ HUE/
Saturation
Music, Photo & Video Display
Option /Advance Setting
User Name / Password
SYSTEM SETUP TABLE
Nixeus Technology, Inc.
105
Configure
Configure
Adjust
Configure
Configure
Language
Language Table
Item Name
Language
Value
English/German/French/Italian/Spanish/Portugese
/Turkish/Netherlandish/Serbian/Hebrew/Traditonal
Chinese
Nixeus Technology, Inc.
106
Use
Select
TV Mode Setup
You can go to the “System Setup” menu to change the TV mode settings, including the Video output,
TV system and aspect ratio.
TV Mode Setup Table
Item Name
Value
Use
Video Output
P-SCAN Composite/ HDMI
Select
TV System
NTSC/480p/720p60/1080i60/1080p24/1080p60
Select
Aspect Ratio
4:3 PS/ 16:9/ 4:3 LB
Select
HDMI EDID
Enable/Disable
Switch
HDMI Color Depth
12/10/8 Bit
Select
Nixeus Technology, Inc.
107
Audio Setup
For DTS (Digital Theater System) audio tracks, the device passes it through the digital audio output
port (Optical or Coaxial cable) to an external decoder.
Please make sure the Digital Audio Output mode (SPDIF-PCM / SPDIF-RAW) is turned on if you are
connecting the Optical/Coaxial cable.
Audio Setup Table
Item Name
Value
Use
Digital Audio Output
On/Off
Switch
Analog Audio Output
MONO R/ MONO L/ MIX
MONO/ STEREO
Select
DTS
SPDIF/RAW PCM
Select
AAC
SPDIF/RAW PCM
Select
AC3
SPDIF/RAW PCM
Select
WMA PRO
SPDIF/RAW PCM
Select
Nixeus Technology, Inc.
108
Video Setup
Video Setup Table
Item Name
Value
Use
Brightness
0 ~ 32
Adjust
Contrast
0 ~ 32
Adjust
HUE
0 ~ 32
Adjust
Saturation
0 ~ 32
Adjust
Nixeus Technology, Inc.
109
Other Settings
This section contains the following items and their descriptions in detail are in the table below.
Nixeus Technology, Inc.
110
Media Setup
This section contains the following items and their descriptions in detail are in the table below
Other Settings Table
Category
Item Name
Value
Use
Photo Display Opton
Photo Display Setup
List / Thumbnail
Switch
Slide Show Time
1 sec ~ 3 min
Select
Orientation Correction
Enable/Disable
Switch
Music Playing Option
Music Auto Play
One Time/Repeat
Switch
Video Playing Option
Video Resume Playing
Ask/Always/Off
Switch
Play Next Video
Enable/Disable
Switch
Video Subtitle
Enable/Disable
Switch
DVD Settings
Preferred Subtitle/Audio
Select
Auto Sync
Enable/Disable
Switch
DVD Setting
Nixeus Technology, Inc.
111
LCD Setting
The brightness of the LCD panel can be adjusted.
1. Go to Setup → System Setup → Other Settings → Advanced Setting → LCD Setting →
LCD Tone Level to adjust it.
Auto Sync
Some films are produced with 24 frames per second. You may see some poor quality on your screen
due to frame rate conversion.
1. Turn on Auto Sync and then the TV output will be adjusted automatically to the correct mode.
2. Make sure HDMI EDID is turned on at the same time.
Hard Disk Share Setup
Once you have installed a HDD into your Fusion HD, you will be able to see “Hard Disk Share Setup”
page so you can configure your HDD Settings.
Note:
You can rename the default Share Name, Group Name, User Name and Password by
using the on-screen keyboard.
Nixeus Technology, Inc.
112
Bit Torrent Setup
Please refer to the section named “Internet Media & Bit Torrent” for details on how to set your unit for
to use the BitTorent Client.
Nixeus Technology, Inc.
113
Troubleshooting
•
No picture on the TV or poor display quality
Make sure your TV is turned on and switched to the correct input.
Make sure the Fusion HD is turned on and switched to the correct TV mode.
If the TV Mode that you are using is not the right one for your television, you may not be able to see
the display on television. To fix this problem, push the “Output” key on the remote control. You can
cycle through each of the possible TV modes to find and select the correct one.
Make sure you are using the correct video cables and that they are connected firmly to the Fusion
HD and to your TV.
The power cords for the Fusion HD and your TV are securely connected to a working
power source.
•
Unstable Display with 1080p24 films
Some films are produced with 24 frames per second. You may see some poor quality on your screen
due to frame rate conversion.
Select 1080p24 as the TV output mode and turn on the “Auto Sync” function.
Nixeus Technology, Inc.
114
•
The Fusion HD does not find my network.
If you use wireless networks, make sure that the Wireless Network Name (SSID) and the
security settings of the Fusion HD and media server match exactly.
If you use a wired network, make sure the cable is secured correctly in the Ethernet port on the
rear of the unit.
•
The Fusion HD does not receive a valid IP Address.
Verify that a working DHCP server is on your network. Devices on the network should get
IP addresses in the correct range.
You can use a Static IP Address if there is a problem connecting to a DHCP server.
If you are using a wireless network, verify that the Fusion HD is associated with the
correct SSID, and that the WEP settings on the Fusion HD match the setting on your
access point.
•
No Subtitle when playing “mpeg2” files.
Make sure to enable the “subtitle” function by pressing the “subtitle” button every time when
you are watching an mpeg2 video file
If you have enabled the “Transcoding” function, the subtitle function may not work for some
video files.
•
Cannot add music files to BGM list?
Ensure you did not add more than 500 music files to the BGM list due to the capacity of the
BGM list is limited to 500 files.
Nixeus Technology, Inc.
115
•
Cannot find the Firmware Upgrade file on the USB device
Check to make sure you put the latest firmware file in the root directory of the USB device or
the Fusion HD system cannot find it.
Nixeus Technology, Inc.
116
FAQ
Q:
Is the format of my file supported?
Answer: The Fusion HD is able to support most file formats except for the list below. (Transcoding
using UPnP server software on a PC over the network would be a playback option)
Music: WMA Lossless
Video: RM, RMVB, FLV.
Q:
Why Does My Video Stutter And Lag When I Play It?
Answer: Answer:
If you are playing back high bitrate files over your wireless connection, the
playback of video can be affected.
Performance may vary based on setup configuration
and equipment..
Q:
Is My 3.5” USB External HDD Enclosure supported?
Answer: Only externally powered 3.5” USB HDD Enclosures are supported.
Nixeus Technology, Inc.
117
Limited Warranty & Licensing information
Limited Warranty
Nixeus Technology, Inc. (“Nixeus”) provides this Limited Warranty:
• Only to the person or entity that originally purchased the product from Nixeus or its authorized reseller or distributor,
and
• Only for products purchased and delivered within the the United States, the District of Columbia, U.S. Possessions or
Protectorates, U.S. Military Installations, or addresses with an APO or FPO, and Canada.
Limited Warranty:
Nixeus warrants this product will be free from material defects in workmanship and materials under normal use from the
original date of purchase.
• Product (excluding power supplies): Two (2) year
• Power supplies: Two (2) year
• Spare parts and spare kits: Ninety (90) days
Under this Limited Warranty will be, at Nixeus’s option, to either repair or replace the defective Product during the
Warranty Period at no charge to the original owner excluding shipping and handling fees.
The replacement product
needs not to be new nor have identical make, model or part. Nixeus may replace the defective Product or any part
thereof with any factory reconditioned product that Nixeus determines is equivalent in all material respects to the
defective Product.
Replacement or repaired Product will be warranted for the remainder of the original Warranty Period
or ninety (90) days, whichever is longer.
Non-Applicability of Limited Warranty:
Limited Warranty of Nixeus’s products will not be applied to and does not cover any refurbished/reconditioned product
and any product purchased through clearance or liquidation sale or other sales in which Nixeus, the sellers, or the
liquidators expressly disclaim their warranty obligation, whereas the product is being sold “As-Is” without any warranty.
RMA (Return Merchandise Authorization) Request:
The customer shall return the product with proof of purchase to Nixeus for RMA processing.
In case the return policy
period has expired from the retailer or distributors and the product is within warranty, the customer shall submit a RMA to
Nixeus as described below:
Nixeus Technology, Inc.
118
• Customer (End User) must submit a RMA request with the product as part of the claim with a written detailed
description of the Product issue allowing Nixues to confirm the same, along with proof of purchase of the product (dated
receipt).
• The customer must first contact technical support from Nixeus Technical Support at [email protected], who will
attempt to assist and remedy the customer in resolving their issues and concern with the product.
If the product is
considered defective or malfunctioning, the Customer (End User) must obtain a Return Material Authorization (“RMA”)
number by completing the RMA form and entering the assigned RMA Number assigned by [email protected].
• After an RMA number is assigned, the defective/malfunctioning product must be packaged securely in the original or
other suitable shipping package to ensure that it will not be damaged in transit to Nixeus Technology, Inc.
number must be visibly and clearly marked on the outside of the package.
The RMA
Do not include any manuals or accessories
in the shipping package, Nixeus will only replace/repair the defective/malfunctioning product and will not ship back any
accessories.
• The Customer (End User) is responsible for all incoming shipping charges to Nixeus.
RMA replacements need be fully
insured by the customer expense and shipped to Nixeus Technology, Inc., 12981 Ramona Blvd., Suite C, and Irwindale, CA
91706.
Nixeus will not be held responsible for lost packages shipped during transit to Nixeus’s Office.
back the repaired or replacement package any common carrier selected by Nixeus.
Nixeus will ship
Return shipping fees shall be paid
by Nixeus, if a United States address is used, otherwise the product will be shipped to you using freight collect.
Expedited shipment methods are available at Customers (End Users) expense upon request.
We “Nixeus” reserve the
right to deny and reject any returned products if guidelines/instructions and request are not met, return shipment will
be charged to the Customers “End Users” at their expense.
What Is Not Covered Under Limited Warranty:
The Limited Warranty provided by Nixeus does not cover the following:
Improper or incorrectly performed service maintenance or repairs voids this Limited Warranty.
Products that Nixeus’s
judge to have been subjected to abuse, accident, alteration, modification, tampering, negligence, misuse, faulty
installation, repair or service in any way that is not contemplated in the documentation for the product, or if the model or
serial number has been altered, tampered with, defaced or removed, product failures due to power outages, and cosmetic
damage, and does not limit damage that are caused by shipment, due to act of God.
Any hardware, firmware or other
products or services provided by anyone other than Nixeus.
Limitation of Liability:
NIXEUS IS NOT LIABLE UNDER ANY CONTRACT, NEGLIGENCE, STRICT LIABILITY OR OTHER LEGAL OR
EQUITABLE THEORY FOR ANY LOSS OF USE OF THE PRODUCT, INCONVENIENCE OR DAMAGES OF ANY
CHARACTER, WHETHER DIRECT, SPECIAL, INCIDENTAL OR CONSEQUENTIAL (INCLUDING, BUT NOT
LIMITED TO, DAMAGES FOR LOSS OF GOODWILL, LOSS OF REVENUE OR PROFIT, WORK STOPPAGE,
COMPUTER FAILURE OR MALFUNCTION, FAILURE OF OTHER EQUIPMENT OR COMPUTER PROGRAMS
TO WHICH NIXES’S PRODUCT IS CONNECTED WITH, LOSS OF INFORMATION OR DATA CONTAINED IN,
STORED ON, OR INTEGRATED WITH ANY PRODUCT RETURNED TO NIXEUS FOR WARRANTY SERVICE)
Nixeus Technology, Inc.
119
RESULTING FROM THE USE OF THE PRODUCT, RELATING TO WARRANTY SERVICE, OR ARISING OUT OF
ANY BREACH OF THIS LIMITED WARRANTY, EVEN IF NIXEUS HAS BEEN ADVISED OF THE POSSIBILITY
OF SUCH DAMAGES TO THE MAXIMUM EXTENT PERMITTED BY LAW,.
THE SOLE REMEDY FOR A
BREACH OF THE FOREGOING LIMITED WARRANTY IS REPAIR, OR REPLACEMENT OF THE DEFECTIVE
OR NONCONFORMING PRODUCT.
THE MAXIMUM LIABILITY OF NIXEUS UNDER THIS WARRANTY IS
LIMITED TO THE PURCHASE PRICE OF THE PRODUCT COVERED BY THE WARRANTY.
THE FOREGOING
EXPRESS WRITTEN WARRANTIES AND REMEDIES ARE EXCLUSIVE AND ARE IN LIEU OF ANY OTHER
WARRANTIES OR REMEDIES, EXPRESS, IMPLIED OR STATUTORY.
Governing Law:
This Limited Warranty shall be governed by the laws of the State of California.
Some states do not allow exclusion or
limitation of incidental or consequential damages, or limitations on how long an implied warranty lasts, so the foregoing
limitations and exclusions may not apply.
This Limited Warranty provides specific legal rights and you may also have
other rights which vary from state to state.
Nixeus Technology, Inc.
120
GPL Source Code
This Nixeus product includes software code subject to the GNU General Public License (“GPL”).
As applicable, information obtaining access to the GPL code and LGPL code used in this product
can be found at http://www.nixeus.com .
The GPL source code used in this product are distributed WITHOUT ANY WARRANTY.
For details,
see the GPL code for this product and the terms of the GPL.
OBTAINING GPL SOURCE CODE BY MAIL
NIXEUS will provide upon written request via email and/or by standard paper mail the applicable
GPL source code files by CD-ROM for a charge no more than our cost and shipping.
Please direct all GPL inquiries to the following email/address.
Email:
[email protected]
Mail:
Attn: GPL SOURCE CODE REQUEST
Nixeus Technology, Inc.
12981 Ramona Blvd., Suite C
Irwindale, CA 91706
Nixeus Technology, Inc.
121
GNU GENERAL PUBLIC LICENSE
Version 2, June 1991
Copyright (C) 1989, 1991 Free Software Foundation, Inc.,
51 Franklin Street, Fifth Floor, Boston, MA 02110-1301 USA
Everyone is permitted to copy and distribute verbatim copies of this license document, but changing it is not allowed.
Preamble
The licenses for most software are designed to take away your freedom to share and change it. By contrast, the GNU
General Public License is intended to guarantee your freedom to share and change free software--to make sure the software
is free for all its users. This General Public License applies to most of the Free Software Foundation's software and to any
other program whose authors commit to using it. (Some other Free Software Foundation software is covered by the GNU
Lesser General Public License instead.) You can apply it to your programs, too.
When we speak of free software, we are referring to freedom, not price. Our General Public Licenses are designed to make
sure that you have the freedom to distribute copies of free software (and charge for this service if you wish), that you receive
source code or can get it if you want it, that you can change the software or use pieces of it in new free programs; and that
you know you can do these things.
To protect your rights, we need to make restrictions that forbid anyone to deny you these rights or to ask you to surrender the
rights.
These restrictions translate to certain responsibilities for you if you distribute copies of the software, or if you modify it.
For example, if you distribute copies of such a program, whether gratis or for a fee, you must give the recipients all the rights
that you have. You must make sure that they, too, receive or can get the source code. And you must show them these
terms so they know their rights.
We protect your rights with two steps: (1) copyright the software, and (2) offer you this license which gives you legal
permission to copy, distribute and/or modify the software.
Also, for each author's protection and ours, we want to make certain that everyone understands that there is no warranty for
this free software.
If the software is modified by someone else and passed on, we want its recipients to know that what they
have is not the original, so that any problems introduced by others will not reflect on the original authors' reputations.
Finally, any free program is threatened constantly by software patents. We wish to avoid the danger that redistributors of a
free program will individually obtain patent licenses, in effect making the program proprietary. To prevent this, we have made
it clear that any patent must be licensed for everyone's free use or not licensed at all.
The precise terms and conditions for copying, distribution and modification follow.
Nixeus Technology, Inc.
122
GNU GENERAL PUBLIC LICENSE
TERMS AND CONDITIONS FOR COPYING, DISTRIBUTION AND MODIFICATION
0. This License applies to any program or other work which contains a notice placed by the copyright holder saying it may be
distributed under the terms of this General Public License. The "Program", below, refers to any such program or work, and a
"work based on the Program" means either the Program or any derivative work under copyright law: that is to say, a work
containing the Program or a portion of it, either verbatim or with modifications and/or translated into another language.
(Hereinafter, translation is included without limitation in the term "modification".) Each licensee is addressed as "you".
Activities other than copying, distribution and modification are not covered by this License; they are outside its scope. The
act of running the Program is not restricted, and the output from the Program is covered only if its contents constitute a work
based on the Program (independent of having been made by running the Program). Whether that is true depends on what
the Program does.
1. You may copy and distribute verbatim copies of the Program's source code as you receive it, in any medium, provided that
you conspicuously and appropriately publish on each copy an appropriate copyright notice and disclaimer of warranty; keep
intact all the notices that refer to this License and to the absence of any warranty; and give any other recipients of the
Program a copy of this License along with the Program.
You may charge a fee for the physical act of transferring a copy, and you may at your option offer warranty protection in
exchange for a fee.
2. You may modify your copy or copies of the Program or any portion of it, thus forming a work based on the Program, and
copy and distribute such modifications or work under the terms of Section 1 above, provided that you also meet all of these
conditions:
a) You must cause the modified files to carry prominent notices stating that you changed the files and the date of any
change.
b) You must cause any work that you distribute or publish, that in whole or in part contains or is derived from the Program or
any part thereof, to be licensed as a whole at no charge to all third parties under the terms of this License.
c) If the modified program normally reads commands interactively when run, you must cause it, when started running for
such interactive use in the most ordinary way, to print or display an announcement including an appropriate copyright notice
and a notice that there is no warranty (or else, saying that you provide a warranty) and that users may redistribute the
program under these conditions, and telling the user how to view a copy of this License. (Exception: if the Program itself is
interactive but does not normally print such an announcement, your work based on the Program is not required to print an
announcement.)
Nixeus Technology, Inc.
123
These requirements apply to the modified work as a whole.
If identifiable sections of that work are not derived from the
Program, and can be reasonably considered independent and separate works in themselves, then this License, and its
terms, do not apply to those sections when you distribute them as separate works. But when you distribute the same
sections as part of a whole which is a work based on the Program, the distribution of the whole must be on the terms of this
License, whose permissions for other licensees extend to the entire whole, and thus to each and every part regardless of
who wrote it.
Thus, it is not the intent of this section to claim rights or contest your rights to work written entirely by you; rather, the intent
is to exercise the right to control the distribution of derivative or collective works based on the Program.
In addition, mere aggregation of another work not based on the Program with the Program (or with a work based on the
Program) on a volume of a storage or distribution medium does not bring the other work under the scope of this License.
3. You may copy and distribute the Program (or a work based on it, under Section 2) in object code or executable form under
the terms of Sections 1 and 2 above provided that you also do one of the following:
a) Accompany it with the complete corresponding machine-readable source code, which must be distributed under the
terms of Sections 1 and 2 above on a medium customarily used for software interchange; or,
b) Accompany it with a written offer, valid for at least three years, to give any third party, for a charge no more than your cost
of physically performing source distribution, a complete machine-readable copy of the corresponding source code, to be
distributed under the terms of Sections 1 and 2 above on a medium customarily used for software interchange; or,
c) Accompany it with the information you received as to the offer to distribute corresponding source code.
(This alternative
is allowed only for noncommercial distribution and only if you received the program in object code or executable form with
such an offer, in accord with Subsection b above.)
The source code for a work means the preferred form of the work for making modifications to it.
For an executable work,
complete source code means all the source code for all modules it contains, plus any associated interface definition files, plus
the scripts used to control compilation and installation of the executable.
However, as a special exception, the source code
distributed need not include anything that is normally distributed (in either source or binary form) with the major components
(compiler, kernel, and so on) of the operating system on which the executable runs, unless that component itself accompanies
the executable.
If distribution of executable or object code is made by offering access to copy from a designated place, then offering
equivalent access to copy the source code from the same place counts as distribution of the source code, even though third
parties are not compelled to copy the source along with the object code.
4. You may not copy, modify, sublicense, or distribute the Program except as expressly provided under this License. Any
attempt otherwise to copy, modify, sublicense or distribute the Program is void, and will automatically terminate your rights
under this License.
However, parties who have received copies, or rights, from you under this License will not have their
licenses terminated so long as such parties remain in full compliance.
Nixeus Technology, Inc.
124
5. You are not required to accept this License, since you have not signed it.
modify or distribute the Program or its derivative works.
However, nothing else grants you permission to
These actions are prohibited by law if you do not accept this License.
Therefore, by modifying or distributing the Program (or any work based on the Program), you indicate your acceptance of this
License to do so, and all its terms and conditions for copying, distributing or modifying the Program or works based on it.
6. Each time you redistribute the Program (or any work based on the Program), the recipient automatically receives a license
from the original licensor to copy, distribute or modify the Program subject to these terms and conditions. You may not
impose any further restrictions on the recipients' exercise of the rights granted herein. You are not responsible for enforcing
compliance by third parties to this License.
7. If, as a consequence of a court judgment or allegation of patent infringement or for any other reason (not limited to patent
issues), conditions are imposed on you (whether by court order, agreement or otherwise) that contradict the conditions of this
License, they do not excuse you from the conditions of this License. If you cannot distribute so as to satisfy simultaneously
your obligations under this License and any other pertinent obligations, then as a consequence you may not distribute the
Program at all. For example, if a patent license would not permit royalty-free redistribution of the Program by all those who
receive copies directly or indirectly through you, then the only way you could satisfy both it and this License would be to
refrain entirely from distribution of the Program.
If any portion of this section is held invalid or unenforceable under any particular circumstance, the balance of the section is
intended to apply and the section as a whole is intended to apply in other circumstances.
It is not the purpose of this section to induce you to infringe any patents or other property right claims or to contest validity of
any such claims; this section has the sole purpose of protecting the integrity of the free software distribution system, which is
implemented by public license practices.
Many people have made generous contributions to the wide range of software
distributed through that system in reliance on consistent application of that system; it is up to the author/donor to decide if he
or she is willing to distribute software through any other system and a licensee cannot impose that choice.
This section is intended to make thoroughly clear what is believed to be a consequence of the rest of this License.
8. If the distribution and/or use of the Program is restricted in certain countries either by patents or by copyrighted interfaces,
the original copyright holder who places the Program under this License may add an explicit geographical distribution
limitation excluding those countries, so that distribution is permitted only in or among countries not thus excluded.
In such
case, this License incorporates the limitation as if written in the body of this License.
9. The Free Software Foundation may publish revised and/or new versions of the General Public License from time to time.
Such new versions will be similar in spirit to the present version, but may differ in detail to address new problems or concerns.
Each version is given a distinguishing version number.
If the Program specifies a version number of this License which
applies to it and "any later version", you have the option of following the terms and conditions either of that version or of any
later version published by the Free Software Foundation. If the Program does not specify a version number of this License,
you may choose any version ever published by the Free Software Foundation.
Nixeus Technology, Inc.
125
10. If you wish to incorporate parts of the Program into other free programs whose distribution conditions are different, write to
the author to ask for permission. For software which is copyrighted by the Free Software Foundation, write to the Free
Software Foundation; we sometimes make exceptions for this. Our decision will be guided by the two goals of preserving
the free status of all derivatives of our free software and of promoting the sharing and reuse of software generally.
NO WARRANTY
11. BECAUSE THE PROGRAM IS LICENSED FREE OF CHARGE, THERE IS NO WARRANTY FOR THE PROGRAM, TO
THE EXTENT PERMITTED BY APPLICABLE LAW.
EXCEPT WHEN OTHERWISE STATED IN WRITING THE
COPYRIGHT HOLDERS AND/OR OTHER PARTIES PROVIDE THE PROGRAM "AS IS" WITHOUT WARRANTY OF ANY
KIND, EITHER EXPRESSED OR IMPLIED, INCLUDING, BUT NOT LIMITED TO, THE IMPLIED WARRANTIES OF
MERCHANTABILITY AND FITNESS FOR A PARTICULAR PURPOSE.
THE ENTIRE RISK AS TO THE QUALITY AND
PERFORMANCE OF THE PROGRAM IS WITH YOU. SHOULD THE PROGRAM PROVE DEFECTIVE, YOU ASSUME
THE COST OF ALL NECESSARY SERVICING, REPAIR OR CORRECTION.
12. IN NO EVENT UNLESS REQUIRED BY APPLICABLE LAW OR AGREED TO IN WRITING WILL ANY COPYRIGHT
HOLDER, OR ANY OTHER PARTY WHO MAY MODIFY AND/OR REDISTRIBUTE THE PROGRAM AS PERMITTED
ABOVE, BE LIABLE TO YOU FOR DAMAGES, INCLUDING ANY GENERAL, SPECIAL, INCIDENTAL OR
CONSEQUENTIAL DAMAGES ARISING OUT OF THE USE OR INABILITY TO USE THE PROGRAM (INCLUDING BUT
NOT LIMITED TO LOSS OF DATA OR DATA BEING RENDERED INACCURATE OR LOSSES SUSTAINED BY YOU OR
THIRD PARTIES OR A FAILURE OF THE PROGRAM TO OPERATE WITH ANY OTHER PROGRAMS), EVEN IF SUCH
HOLDER OR OTHER PARTY HAS BEEN ADVISED OF THE POSSIBILITY OF SUCH DAMAGES.
END OF TERMS AND CONDITIONS
HOW TO APPLY THESE TERMS TO YOUR NEW PROGRAMS
If you develop a new program, and you want it to be of the greatest possible use to the public, the best way to achieve this is
to make it free software which everyone can redistribute and change under these terms.
To do so, attach the following notices to the program. It is safest to attach them to the start of each source file to most
effectively convey the exclusion of warranty; and each file should have at least the "copyright" line and a pointer to where the
full notice is found.
<one line to give the program's name and a brief idea of what it does.>
Copyright (C) <year>
<name of author>
This program is free software; you can redistribute it and/or modify it under the terms of the GNU General Public License as
published by the Free Software Foundation; either version 2 of the License, or (at your option) any later version.
Nixeus Technology, Inc.
126
This program is distributed in the hope that it will be useful, but WITHOUT ANY WARRANTY; without even the implied
warranty of MERCHANTABILITY or FITNESS FOR A PARTICULAR PURPOSE. See the GNU General Public License for
more details.
You should have received a copy of the GNU General Public License along with this program; if not, write to the Free
Software Foundation, Inc., 51 Franklin Street, Fifth Floor, Boston, MA 02110-1301 USA.
Also add information on how to contact you by electronic and paper mail.
If the program is interactive, make it output a short notice like this when it starts in an interactive mode:
Gnomovision version 69, Copyright (C) year name of author
Gnomovision comes with ABSOLUTELY NO WARRANTY; for details type `show w'.
This is free software, and you are welcome to redistribute it under certain conditions; type `show c' for details.
The hypothetical commands `show w' and `show c' should show the appropriate parts of the General Public License. Of
course, the commands you use may be called something other than `show w' and `show c'; they could even be mouse-clicks
or menu items--whatever suits your program.
You should also get your employer (if you work as a programmer) or your school, if any, to sign a "copyright disclaimer" for
the\program, if necessary. Here is a sample; alter the names:
Yoyodyne, Inc., hereby disclaims all copyright interest in the program `Gnomovision' (which makes passes at compilers)
written by James Hacker.
<signature of Ty Coon>, 1 April 1989
Ty Coon, President of Vice
This General Public License does not permit incorporating your program into proprietary programs. If your program is a
subroutine library, you may consider it more useful to permit linking proprietary applications with the library.
you want to do, use the GNU Lesser General Public License instead of this License.
Nixeus Technology, Inc.
127
If this is what
This product is manufactured under license from Dolby Laboratories. “Dolby” and
the double-D symbol are trademarks of Dolby Laboratories.
This product is manufactured under license under U.S. Patent #’s: 5,451,942;
5,956,674; 5,974,380; 5,978,762; 6,487,535 & other U.S. and worldwide patents
issued & pending. DTS and the Symbol are registered trademarks, & DTS 2.0+
Digital Out and the DTS logos are trademarks of DTS, Inc.
Nixeus Technology, Inc.
128