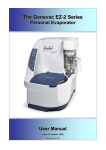
Download Genevac EZ-2 Series Personal Evaporator
Transcript
Genevac EZ-2 Series Personal Evaporator User Manual Original instructions Part number 04-6589 Issue 3-3 August 2014 Contents Overview ................................................ 2 Safety ..................................................... 4 Warnings and cautions ............................... 4 Risk assessment ......................................... 4 Precautions ................................................. 4 Combustible solvents .................................. 5 Electrical earthing ....................................... 5 Emergency shutdown ................................. 5 Strong acids ................................................ 5 Nitric acid .................................................... 6 Low auto-ignition point solvents .................. 6 High boiling point solvents .......................... 6 Inert Gas Purge ................................... 28 Inert gases ................................................ 28 Set Password ............................................ 28 Inert gas purge enable .............................. 28 Inert gas blanket ....................................... 29 Disconnection ........................................... 29 Maintenance ........................................ 30 Power up ..................................................... 7 Standby mode ............................................. 7 Controls ....................................................... 8 LCD Screen ................................................ 9 Opening the Lid......................................... 10 Recommended practice ............................ 30 System test ............................................... 30 Periodic maintenance ............................... 31 General cleaning....................................... 31 IR sensor .................................................. 32 Sample holders ......................................... 32 Inert gas purge systems ........................... 32 Planned maintenance and servicing......... 33 IR lamp assembly ..................................... 34 Lid seal ..................................................... 36 Condenser jar seal.................................... 37 Software upgrade ..................................... 38 Getting started .................................... 11 Unpacking and Setting Up.................. 39 Basics .................................................... 7 Selecting a method ................................... 12 Sample temperature ................................. 12 Loading Samples ...................................... 13 Use of correct accessories ....................... 13 Sample holders ......................................... 13 Mass limit .................................................. 14 Loading the rotor ....................................... 14 Starting the evaporator ............................. 15 Evaporation in progress ............................ 15 Stopping .................................................... 16 Pausing ..................................................... 16 Condenser ........................................... 17 Waste solvent ........................................... 17 Defrosting .................................................. 17 Manual defrost .......................................... 18 Condenser jar ........................................... 18 Condenser back-light ................................ 18 Exhaust catch-pot ..................................... 18 Method Guide ...................................... 19 Solvent groups .......................................... 19 Acceptable solvents .................................. 20 Choosing the right method ........................ 21 Solvent mixtures ....................................... 21 Low solvent volumes ................................ 21 Custom methods ....................................... 21 Advanced Features ............................. 22 File transfer ............................................... 22 Adjustable method parameters ................. 23 Time to final stage..................................... 24 Final stage time......................................... 25 Reduce odour ........................................... 25 Set max temp ............................................ 26 System information ................................... 26 Method ID ................................................. 26 View method ............................................. 26 ® Dri-Pure ................................................... 26 Wait to cool ............................................... 27 Wait to heat ............................................... 27 Packaging ................................................. 39 Lifting ........................................................ 39 Installation site .......................................... 40 Setting up .................................................. 41 Installing systems with inert gas purge ..... 42 Final checks .............................................. 42 Troubleshooting.................................. 43 Audible and visual alerts ........................... 43 Faults and errors....................................... 43 Rectifying faults or errors .......................... 44 Clearing faults and errors ......................... 46 IR lamp failure ........................................... 46 Opening the lid without power .................. 46 Fuses ........................................................ 47 Other troubleshooting ............................... 48 Options ................................................ 50 HCl resistance .......................................... 50 Inert gas purge .......................................... 50 Infinity trolley ............................................. 50 Sample Holders ........................................ 51 Technical Data..................................... 52 Specifications ............................................ 52 EC Declaration of Conformity ................... 53 Warranty statement .................................. 54 Consumable items .................................... 54 Returning equipment to Genevac ............. 54 Patents ...................................................... 55 Amendment control................................... 56 Useful information ..................................... 58 Genevac EZ-2 Series Personal Evaporator User Manual Overview 12 1 2 11 3 4 10 5 9 8 6 2 7 04-6589 Issue 3-3 August 2014 User Manual Item 1 2 3 4 5 6 7 8 9 10 11 12 Genevac EZ-2 Series Personal Evaporator Feature Function USB port (On side panel.) Software updates and new Method files may be transferred from a computer to the EZ-2 via a USB data key. Data log files may be copied from the EZ-2 to a USB data key. LCD screen Quick access to everyday functions and intuitive guidance to advanced features is provided by an intuitive menu system. SET MAX TEMP °C Easily set the maximum sample temperature. SELECT control Twist to highlight menu options on the LCD screen, press to select. Start, stop, pause buttons Control the evaporation process using the selected method. Vacuum pump At the heart of EZ-2 is a robust, solvent resistant vacuum pump (the HCl compatible version of EZ-2 Plus can handle nitric acid). Rotor Accommodates a wide range of Genevac sample holders for compatibility with most common sample formats, including: round bottom flasks (up to 500 ml in volume), tubes (up to 160 mm in length), custom reaction blocks and shallow or deepwell microplates. EZ-2 is also compatible with the revolutionary Genevac Sample Genie™ system. Lid Unlocks only when safe to open. Press the LID button and manually lift the lid when the LED illuminates. IR sensor access panel Easy access to the IR lamp when replacement is required. Condenser jar Highly efficient cold trap captures all solvents as liquid (even water) in an easy to empty glass collection jar. Exhaust catch-pot High volatiles are captured before being expelled to the laboratory extraction system. Quick reference guide At-a-glance guidance to basic operation. 04-6589 Issue 3-3 August 2014 3 Genevac EZ-2 Series Personal Evaporator User Manual Safety Warnings and cautions This symbol is used within this manual to highlight Warnings and Cautions. Warning: highlights a risk of personal injury or material damage. Caution: highlights a risk of material damage. Risk assessment Caution: Carry out a risk assessment for each solvent before use. Consider the possible consequences of applying vacuum to solvent mixtures, especially organic solvents. For example, H2O2 gives off O2 under vacuum, creating an oxygen rich atmosphere. Precautions Observe the following safety precautions when using the evaporation system: Only operate the system in a ventilated space. Make sure exhaust / ventilation hoses are securely fitted and take solvent vapours away from the equipment and from the operator. Only use sample holders and / or swings that are approved for use by Genevac. Do not place objects on top of the evaporator. Do not start or restart a system without checking it is evenly loaded; do not leave the system unevenly loaded, someone else may start it. Check the condenser jar has been emptied before starting the evaporator. Take care when removing the condenser jar. It is heavy when full of solvent. Inspect the condenser jar frequently. Do not use it if it is cracked or damaged in any way. Do not allow the condenser jar to fill above the MAX line. Do not leave samples in the evaporator before or after evaporation. Refer to the Genevac published list of acceptable solvents for solvent compatibility information. Clean up any solvent spillage immediately. Dispose of waste solvents in accordance with local environmental regulations. Caution: Incorrect loading may result in damage to samples and to the system. Only allow users who are familiar with all the issues outlined in this User Manual to operate the equipment. If personnel lack the training or experience to comprehend the hazards that can arise when operating the system, do not allow them to use it; personnel without such training require thorough instruction. The information contained within this User Manual may form the basis of such training. 4 04-6589 Issue 3-3 August 2014 User Manual Genevac EZ-2 Series Personal Evaporator Combustible solvents Warning: Risk of vapour ignition. Only operate the system in a well-ventilated environment and consider safety when evaporating any combustible solvents. Genevac's position regarding the evaporation of such solvents, particularly with respect to the European ATEX directive, is available on our website, at www.genevac.com, or from your local Genevac representative. Electrical earthing Warning: Risk of electric shock. This equipment must be earthed. The evaporation system is a safety class I product according to IEC classification. It must never be used with any interruption to the safety earth conductor. It is an installation class II product and is intended to operate from a normal single-phase supply. Emergency shutdown All Genevac evaporators are designed to be safe with respect to samples when they are switched off in an emergency. The system will automatically vent and the rotor will spin down slowly when power is removed. To shutdown in an emergency, switch off the power socket at the wall and unplug (or simply unplug if there is no switch). Users should familiarise themselves with the location of the connection to the mains supply and make sure the power socket and plug is always accessible. Strong acids Caution: Do not attempt to evaporate nitric acid, HCl, thionyl chloride, or other acid chlorides, in non-HCl compatible evaporators. The solvent compatibility of the EZ-2 Series evaporator is indicated on the lid. If the lid is marked NOT HCl COMPATIBLE do not attempt to evaporate this class of solvent. If the lid is marked HCl COMPATIBLE the system is compatible with HCl. Note: HCl COMPATIBLE implies only resistance to HCl vapours. Any liquid spillage should be cleaned up immediately and in compliance with your local solvent spillage procedures. 04-6589 Issue 3-3 August 2014 5 Genevac EZ-2 Series Personal Evaporator User Manual Nitric acid Caution: Do not attempt to evaporate nitric acid except in an HCl resistant EZ-2 Plus. The following additional safety precautions and maintenance procedures apply when nitric acid is used. The HCl version of the EZ-2 Plus is designed to resist nitric acid vapours, but is not able to withstand immersion in liquid acids for any length of time. It is particularly important, when evaporating nitric acid, to clean up any acid spillage immediately. To help prevent spillage, be especially careful with glassware. Do not use any damaged, chipped or scratched glassware. Where possible, use new glassware every time. Do not mix nitric acid with any other acids in the evaporator. If other acids have been evaporated before using nitric acid, select the Aqueous method and evaporate at least 50 ml of demineralised water from the sample holders. Then empty and rinse the condenser jar. Always enable Reduce Odour when evaporating samples containing nitric acid. After every use of nitric acid, select the Aqueous method and evaporate at least 50 ml of demineralised water from the sample holders. Then empty and rinse the condenser jar. Clean the EZ-2 and its sample holders weekly. Refer to the Maintenance section for cleaning instructions. To ensure the evaporator continues to function correctly for nitric acid evaporation, the system must be serviced annually by a Genevac authorised service technician. Failure to follow this guidance could result in invalidation of the warranty. Low auto-ignition point solvents Warning: Risk of vapour ignition. Do not attempt to evaporate diethyl ether, pentane or other low auto-ignition solvents unless the evaporator is fitted with an inert gas purge system. High boiling point solvents Caution: Do not evaporate high boiling point solvents (170°C or above at atmospheric pressure). This includes DMSO, DMI and NMP. Attempting to evaporate these solvents is likely cause damage to the evaporator vacuum system. 6 04-6589 Issue 3-3 August 2014 User Manual Genevac EZ-2 Series Personal Evaporator Basics Power up Check the EZ-2 is connected to a mains power outlet and the mains power is switched on. Power cable Switch on the EZ-2 using the power switch on the front. The display shows: UPDATE MANAGER – LOOK FOR USB DATAKEY while the EZ-2 performs a short software self-test. The software version is then shown briefly before the EZ-2 powers up fully. Blue LEDs illuminate the condenser jar to indicate the condenser is operating. Power switch Standby mode While the system is idle, press the STOP button to enter standby mode. In standby mode: The LCD screen shows the software version. The LCD screen back-light is switched off. The condenser is powered down. The lid cannot be opened. Methods cannot be viewed. Settings cannot be adjusted. To restart the system, press any button. The evaporator automatically switches to standby mode if inactive for more than one hour. This feature allows the system to be left unattended; it will evaporate the samples safely and turn itself off when done. 04-6589 Issue 3-3 August 2014 7 Genevac EZ-2 Series Personal Evaporator User Manual Controls 1 2 3 8 4 7 5 6 1. Display: LCD screen with back-light, provides icon, text and numeric information for programming methods and monitoring evaporation progress. 2. SET MAX TEMP °C control: Turn to adjust sample temperature setting. 3. SELECT control: Turn and press to browse and select method options. 4. Start / Stop buttons: Press the appropriate button once to start or stop an evaporation. 5. Pause button: Press once to pause and again to restart an evaporation. 6. Lid LED: Green LED lights up when it is safe to open the lid. 7. LID unlock button: Press the button once to unlock the lid. 8. Dri-Pure LED: Yellow LED lights up when selected method includes a Dri-Pure stage. 8 04-6589 Issue 3-3 August 2014 User Manual Genevac EZ-2 Series Personal Evaporator LCD Screen The LCD screen provides information relating to method selection, method progress or evaporator status. 1 2 6 7 3 4 5 Lower screen section Displayed text relates to evaporator status, methods or errors. 1. Temperature: The sample holder temperature during evaporation. 2. Pressure: The chamber pressure, from atmospheric to ultimate system vacuum. 3. Time: The time remaining (when known) or the time elapsed. An arrow next to the displayed time indicates whether the timer is counting down (time remaining) or counting up (time elapsed). Note: Time remaining is unknown throughout most of the evaporation when the method setting: Run to AutoStop is selected. 4. Method description: Available methods and method parameters, interacts with the SELECT control to allow the user to browse and select settings. 5. Status: The current status of the evaporator. If a fault or error is encountered, a reference number and a brief description of the problem are shown. 6. System busy indicator: Animates to show when the system is waiting for a process to complete. 7. Progress indicator: Shows sample drying progress from 80% to 20% completion. Segments within the test tube icon extinguish sequentially, use this for approximate guidance only. A sample pellet icon, in the bottom of the test tube, flashes to indicate when the evaporation is complete. 04-6589 Issue 3-3 August 2014 9 Genevac EZ-2 Series Personal Evaporator User Manual Opening the Lid The lid cannot be opened when the rotor is moving or when the chamber pressure is below atmospheric pressure. When the evaporator stops, a countdown timer appears on the display. If the LID button is pressed while the evaporator is operating, or during the countdown, a double beep sounds and the lid remains locked. The countdown also appears when the evaporator is first powered up. When the countdown reaches 0, a short beep sounds and the lid LED lights up to indicate that the lid can be opened. The lid also remains locked when the system is switched off or when the mains power is disconnected. Lid LED LID button 10 04-6589 Issue 3-3 August 2014 User Manual Genevac EZ-2 Series Personal Evaporator Getting started The following guide is a quick reference reminder for getting started. For more detailed operating instructions and descriptions of features, refer to the relevant sections within this user manual. 8 9 1 3 4 5 2 Start-up procedure 1. 2. 3. 4. 5. Empty the condenser jar and refit it to the evaporator. Switch on the power. Press the START button and wait for the safety countdown to complete. When the lid LED lights up, press the LID button. Open the lid. 04-6589 Issue 3-3 August 2014 6. 7. 8. 9. Load the balanced sample holders onto the rotor. Close the lid. Using the SET MAX TEMP °C control, set the desired maximum temperature. Using the SELECT control, select the required method. Press the START button. 11 Genevac EZ-2 Series Personal Evaporator User Manual Selecting a method In idle mode, turn the SELECT control. The available methods appear in the lower section of the LCD screen. When the required method is shown, press the control to select it. Sample temperature Turn the SET MAX TEMP °C control to set the desired sample control temperature. The control temperature appears in the lower section of the LCD screen and increments up or down as the menu control is turned. Stop turning when the desired control temperature is displayed, the new setting is accepted after a short time and the display reverts to showing the method status. Once evaporation commences, the EZ-2 controls the temperature of the sample holders; the sample control temperature may be adjusted at any time during operation or when the EZ-2 is in idle mode. Note: The evaporator controls the sample holder temperature. Due to evaporative cooling the actual sample temperature during evaporation may be considerably lower than the sample holder temperature. The sample control temperature should be considered the maximum temperature (or cut-off point) that the EZ-2 will allow the samples to reach. Some methods specify a sample control temperature and will not allow adjustment by the user. For these methods, sample temperature control is locked out and the display shows a padlock icon if the user attempts to adjust the setting. 12 04-6589 Issue 3-3 August 2014 User Manual Genevac EZ-2 Series Personal Evaporator Loading Samples Use of correct accessories Samples in the evaporator are subjected to accelerations of up to 500 g (a force equal to 500 times gravity) during evaporation. It is therefore important for the operator to understand the safety requirements and to gain familiarity with the safe loading procedure outlined below. Take care to make sure that the correct sample holders are used, follow this guidance at all times: Sample holders A range of sample holders is available to suite a wide variety of plates, vials, tubes, beakers, flasks, etc, as well as the revolutionary Genevac SampleGenie™ system. Sample holders are interchangeable, lifting straight out of the rotor to allow samples to be loaded quickly and easily. Some sample holders are a one-piece integral holder and swing, others consist of a sample holder block, which fits into a separate swing. Only use swings and sample holders that are approved for the system (it is particularly important to check this if more than one Genevac system is in use). Only use the tubes or vials that are approved for the sample holder (incompatible tubes may appear to fit a holder they could be too long when loaded onto the rotor). Use matched pairs of sample holders on opposing positions of the rotor. Do not use sample holders intended for side-bridge swings in open swings (they may appear to fit but could be too tall when loaded onto the rotor). If using heat transfer plates, insert each plate into the swing with the flat metal base plate facing downwards so it contacts the swing (heat transfer plates are for use with microtitre plates only). The Genevac Accessories Brochure indicates the maximum tube length that each holder can take and includes notes (e.g. For use in side-bridge swing only). Integral swing / tube holder Note: Some Bohdan Miniblock system sample holders exceed the mass limitations of Genevac systems. If you plan to use Bohdan Miniblocks in a Genevac system, please contact Genevac for a list of the relevant weights. Tube holder and side bridge swing To see the range of sample holders available, contact your local Genevac representative and request a Genevac Accessories Brochure. 04-6589 Issue 3-3 August 2014 Caution: With the exception of microtitre plates, do not load any non-Genevac holders into a system without gaining approval from Genevac. 13 Genevac EZ-2 Series Personal Evaporator User Manual Mass limit The mass limit for Genevac EZ-2 evaporators is 1.5 kg per swing. This is the total mass that can be loaded onto each position of a swung rotor, and includes: The swing The sample holder The tubes or vials The sample solutions. Do not exceed the mass limit under any circumstances. In most cases, with normal solvent volumes, loaded Genevac sample holders will fall within this limit. If in any doubt, load up a swing and weigh it. Loading the rotor Check the condition of sample holders and (where applicable) swings before loading them onto the rotor. Refer to Maintenance – Sample holders. When preparing sample holders to be loaded onto the rotor, do not exceed the maximum load capacity of 1.5 kg per swing. This is important as samples in the evaporation chamber can be subject to a centrifugal force approximately 500 times greater than gravity. Balance the sample holders to within 10 g. Distribute tubes in balanced configurations in the sample holders. Load the sample holders carefully, making sure they are located correctly on the rotor pins. Place both sample holder swings onto the rotor. Rotate the rotor by hand. Check that all tubes, holders, plates, etc are correctly located and swings are able to swing freely. Only use the sample holders that were supplied with the system or are specified for use with the system; never use nonGenevac approved sample holders. Note: Genevac Ltd cannot accept responsibility for any loss of samples or damage to the EZ-2 incurred as a result of improperly or excessively loaded rotors. Caution: Failure to load a system correctly can lead to unrecoverable sample loss or damage to the system. As with all centrifuges, Genevac centrifugal evaporators must be loaded correctly to remove the risk of damage. 14 04-6589 Issue 3-3 August 2014 User Manual Genevac EZ-2 Series Personal Evaporator Starting the evaporator Press the START button to begin evaporating using the selected method. Note: Once the evaporator starts, the method may not be changed. Evaporation in progress On the LCD screen, a test tube graphic animates to show that evaporation is in progress and the time elapsed or (when known) time remaining is shown. The Dri-Pure LED indicator lights up during Dri-Pure enabled methods. During the DriPure part of a method, the display shows the message: Ramping Vacuum. The message: Defrosting may be displayed periodically during certain methods, this indicates the automatic defrost operation of the SpeedTrap. A sample pellet icon, in the bottom of the test tube, flashes to indicate when the evaporation is complete. 04-6589 Issue 3-3 August 2014 15 Genevac EZ-2 Series Personal Evaporator User Manual Stopping Automatic stop The evaporator stops automatically when all stages of the selected method are complete. Automatic stop can be set to trigger when the Heatflow detection system senses a slowdown in the evaporation rate, or can be set to occur after a preset time. For heatflow to function adequately, 50% of the holder must be filled with samples, each tube must be at least 50% full and the sample temperature selector must not be set to LAMP OFF. The Heatflow method is inappropriate in situations where little or no heat is required from the IR lamp (such as when small volumes of volatiles are evaporated at low temperature). In this instance, the system runs for a pre-programmed time instead. The time required is mapped by the software and depends on the run selected and the control temperature. If user experience shows that the default time is longer than necessary, a shorter time can be set. Manual stop To stop the evaporator manually, press the STOP button. The evaporator vents to atmospheric pressure and the rotor slows down and stops. Defrost starts automatically. Pausing Press the PAUSE button to stop the EZ-2 temporarily in order to examine the samples. To resume evaporation, close the lid and press the START button. If the STOP button is pressed, the EZ-2 will reset and the evaporation cannot be resumed. Dri-Pure is not applied when resuming from paused, inert gas purge enabled evaporators will re-purge when the method resumes. A defrost may be initiated manually while the EZ-2 is paused. 16 04-6589 Issue 3-3 August 2014 User Manual Genevac EZ-2 Series Personal Evaporator Condenser The condenser powers up when the evaporator is switched on and is deactivated if it enters standby mode. When powered, the condenser jar is illuminated by blue LEDs. The EZ-2 does not allow evaporation to commence until the condenser has cooled down to operating temperature. Waste solvent Waste solvents collect as liquid in the Condenser jar. Under certain conditions, ice may form in the jar. If this happens, allow it to thaw naturally; if necessary, add cold water to the condenser jar to accelerate the thawing process. To perform evaporation processes where the solvents freeze, a second Condenser jar may be useful and can be purchased from Genevac Defrosting Defrosting of the condenser coil is fully automatic. The LCD screen shows Defrost boost, and the blue condenser jar illumination flashes to indicate the defrost cycle is operating. At the end of the defrost cycle, a different flash sequence indicates that defrosting has finished and the condenser is cooling back down to operating temperature. For more details, refer to: Troubleshooting – Visual alerts. A defrost cycle occurs: Caution: Do not use implements to break the ice as this may damage the jar. Note: Waste solvent boiling and reflux in the condenser jar, during evaporation, is normal. 04-6589 Issue 3-3 August 2014 when the condenser first starts. periodically during operation of some methods. on completion of the method. Caution: Water or solvent may drip from the condenser coil during defrost. Do not remove the condenser jar when the condenser is defrosting. 17 Genevac EZ-2 Series Personal Evaporator User Manual Manual defrost Condenser jar In addition to automated defrosting, an extended defrost cycle can be initiated manually while the evaporator is paused or in idle mode. Empty the condenser jar when the evaporator stops, but not when the defrosting message is displayed. To remove, support the weight of the jar and rotate to the left a quarter turn. To activate manual defrost, turn the SELECT control. When the display shows: Manual Defrost, press the SELECT control. The condenser jar illumination flashes to show the defrost cycle is active. The defrost lasts for 30 minutes. To cancel the manual defrost, press the SELECT control or select a method and press the START button. The extended defrost cycle cannot be activated when the EZ-2 is evaporating, in standby mode, or reporting an error message. Empty the condenser jar after every use. Clean the condenser jar when necessary. Check the condenser jar for cracks or scratches before every use; do not use if it is cracked or damaged in any way. To refit, position the jar with its handle is to the front, lift and rotate to the right a quarter turn, or until resistance is felt. Condenser back-light The condenser back light provides illumination so that the solvent level in the condenser jar can be seen, in addition the blue condenser backlight flashes to alert the user in various modes of operation. For more information, refer to: Troubleshooting - Visual alerts. Caution: The condenser jar may be heavy when full of solvent. Exhaust catch-pot Under certain circumstances, small amounts of solvent may collect in the exhaust catchpot. There may also be discolouration of the catch-pot glass. This is normal. Empty the catch-pot regularly and do not allow it to fill above the half-full marker. To remove the catch-pot, grasp it and twist counter clockwise. 18 04-6589 Issue 3-3 August 2014 User Manual Genevac EZ-2 Series Personal Evaporator Method Guide The EZ-2 is supplied from the factory with a number of methods preloaded. The factory loaded methods are listed below. If custom methods are installed, they replace some or all of the factory loaded methods. 04-6589 Issue 3-3 August 2014 < 90ºC < 90ºC Plus Approximate boiling point (at atmosphere) <40°C Envi Factory loaded method Solvent group description Very low BP A very volatile solvent where bumping is not expected Very low BP mix Mixtures of very volatile solvents where bumping is expected Low BP A volatile solvent where bumping is not expected Low BP Mixture Mixtures of volatile solvents, bumping can be expected. Medium BP Less volatile solvents, generally bumping is not expected. Med + Low BP Mixtures with a volatile solvent that is mixture prone to bumping with a less volatile solvent that requires low pressure to evaporate Aqueous Water based where freezing at 0ºC is anticipated but bumping is not expected H2O + NH3 NH3 or HCl (if compatible) when dissolved in water or MeOH HPLC Water/acetonitrile or Water/methanol fractions Centrifuge only With or without heat Envi Method 1 2 ramps, optimised for DCM volatile mixtures Envi Method 2 Ethyl acetate with solvent keep System Test Standard Solvent groups ■ ■ ■ ■ ■ ■ ■ ■ ■ ■ ■ ■ 90°C to 155ºC ■ 40°C to 155ºC ■ N/A N/A ■ ■ ■ ■ ■ ■ ■ ■ ■ ■ ■ ■ ■ ■ ■ 19 Genevac EZ-2 Series Personal Evaporator User Manual Acceptable solvents Recommended method MeCO2H Aqueous Medium BP Low BP H2O + NH3 Low or Medium BP Medium BP Low BP Medium BP Aqueous Medium BP Very Low BP Low BP Low BP Very Low BP Very Low BP Low BP Medium BP Medium BP Aqueous Low BP Low BP Aqueous Low BP Low BP H2O + NH3 Medium BP Low BP Low BP H2O + NH3 Very Low BP Medium BP Low BP Low BP Low BP Low BP Medium BP Aqueous Low BP H2O + NH3 Low BP Low BP Low BP Low BP Aqueous HPLC HPLC H2O + NH3 H2O + NH3 H2O + NH3 Low BP Mix MeCN, ACN NH3OH MEK tert-butanol CHCl3 DCE DCM DIPE DMF EtOH EtOAc HCO2H HBr H2O2 MeOH MTBE HNO3 pet ether IPA, iso-propanol Acetone NaOH THF SOCl2 Et3N TFA TFE H2O ammonium hydroxide ■ □ m p 20 Plus Other names Acetic acid Acetic anhydride Acetonitrile Amonium hydroxide 1-Butanol 2-Butanol Butanone Butyl acetate tert-Butyl alcohol Chlorobenzene Chloroform Cyclohexane 1,2-Dichloroethane Dichloromethane Diethyl ether Diisopropyl ether Dimethyl acetamide N,N-Dimethyl formamide 1,4-Dioxane Ethanol Ethyl acetate Formic acid Heptane Hexane Hydrobromic acid Hydrogen peroxide Methanol Methyl teriary butyl ether Nitric acid Pentane 1-Pentanol Petroleum ether 1-Propanol 2-Propanal Propanone Pyridine Sodium hydroxide (aqeous) Tetrahydrofruran Thionyl chloride Toluene Triethylamine Trifluroacetic acid 2,2,2-Trifluoroethanol Water Water & Acetonitrile Water & Methanol Water & Ammonia Water & HCl Methanol & HCl TFA & DCM Envi Solvent Std Carry out a risk assessment for each solvent or solvent mixture before use. The inclusion of a solvent in the following table indicates it is not damaging to the evaporator providing appropriate methods are followed. Contact your local Genevac representative for advice before using solvents which are not listed or for information on obtaining custom methods. ■ ■ ■ ■ ■ m ■ ■ ■ ■ ■ ■ ■ ■ ■ ■ p ■ ■ ■ ■ ■ p ■ ■ ■ ■ ■ ■ ■ ■ ■ ■ ■ ■ ■ ■ ■ ■ ■ ■ p p ■ ■ ■ ■ ■ ■ ■ ■ ■ □ □ ■ ■ ■ ■ ■ ■ ■ ■ □ □ ■ ■ ■ ■ ■ ■ ■ ■ ■ ■ ■ ■ ■ ■ ■ ■ ■ p ■ ■ ■ ■ ■ ■ ■ ■ ■ ■ □ ■ ■ ■ p ■ ■ ■ ■ ■ ■ ■ ■ □ ■ ■ ■ ■ ■ ■ ■ ■ □ □ ■ ■ ■ ■ ■ ■ m m m ■ Solvent may be evaporated using EZ-2 Only compatible if EZ-2is HCl resistant Requires special method – contact your local Genevac representative Only compatible if the EZ-2.3 has an inert gas purge system 04-6589 Issue 3-3 August 2014 User Manual Genevac EZ-2 Series Personal Evaporator Choosing the right method Solvent mixtures Each factory-preloaded method is designed to provide optimal evaporation conditions for a specific group of solvents or solvent mixtures. Method selection is intuitive, most method names being based on solvent boiling points. When evaporating solvent mixtures, select the evaporation method suitable for the lowest boiling point solvent. For example, for: Refer to the tables on the previous pages to place a solvent in a solvent group and or to look up the most suitable method for a given solvent. For solvents that may be considered borderline, or may fall into more than one solvent group, two methods are recommended in the Solvent groups table. In these cases, the first method generally provides better solvent recovery; the second may facilitate slightly quicker drying times. By default, almost all methods are configured to evaporate samples to dryness. If you require to concentrate, rather than dry, please contact your local Genevac representative who will be happy to assist in optimising a method. Note: When choosing a method, the boiling point of the solvent(s) under vacuum is critical, although a solvent has a relatively low boiling point at atmospheric pressure, its behaviour under vacuum may differ. DCM / methanol mixtures use: Low BP Mixture. DMF / DCM mixtures use: Med + Low BP Mixture. Low solvent volumes Where the volume of solvent is low or the number of sample tubes is small, the EZ-2 automatic stop facility may not work. For further information, refer to: Advanced Operations: Automatic stop limitations. Custom methods Your local Genevac agent is able to supply custom methods, which can be easily installed, for specific or unusual applications. When new methods are installed they replace some or all of the factory-preloaded methods. For instructions on how to install, refer to: Advanced Operation – File transfer. For further advice on selecting and optimising methods, please contact your local Genevac representative or email: [email protected] 04-6589 Issue 3-3 August 2014 21 Genevac EZ-2 Series Personal Evaporator User Manual Advanced Features The EZ-2 is supplied from the factory with a number of methods pre-loaded. Each method incorporates a set of control parameters that optimise the evaporator for use with a particular group of solvents. Refer to: Method Guide for further details. Most method parameters are fixed (as they define that method) but some are variable and may be changed by the operator to provide greater flexibility. Custom methods may be installed prior to delivery, or at any time during the life of the EZ-2 Elite. File transfer The file transfer function allows new methods to be transferred to the EZ-2 via a USB data key (not supplied). To copy method from a USB data key to the EZ-2: 1. Create a root folder called EZ2 on a USB data key and copy the method files to it. 2. Plug the data key into the USB port (located on the left hand side of the EZ-2). 3. Turn the SELECT control until File Transfer appears in the lower part of the screen, then press the SELECT control. 4. Follow on-screen instructions to select the method(s) required (individual methods from 1 to 10 may be selected or all methods may be selected). Note: This function is only available on EZ-2 evaporators with a USB port. 22 04-6589 Issue 3-3 August 2014 User Manual Genevac EZ-2 Series Personal Evaporator Adjustable method parameters Method parameters may be adjusted in order to optimise the evaporator for specific applications: Time to Final Stage Final Stage Time Reduce Odour. These parameters may be adjusted at any time, including when the evaporation is in progress. Any changes made to the method parameters will apply to any future use of the method. Use the SELECT control to browse the available options and enter the required settings. The new setting is accepted after a three second thinking time delay; acceptance is confirmed by a short beep. When parameters are adjusted while evaporation is in progress, the following rules apply: The time elapsed is not reset The method advances to a later stage if the new stage time exceeds the time already elapsed. The evaporation stops immediately if the new total-method-time exceeds the time already elapsed. The maximum sample temperature can also be adjusted at any time, using the SET MAX TEMP °C control. The new temperature setting is accepted immediately. 04-6589 Issue 3-3 August 2014 23 Genevac EZ-2 Series Personal Evaporator User Manual Time to final stage The time to final stage is the total duration of all the method stages that lead up to the final stage. The following example of pressure control during a multi stage method shows a Dri-Pure stage (1st stage) followed by an evaporation stage (2nd stage) and a final drying stage (Final stage). Time to final stage Final stage time In this example, any alteration to the time to final stage affects the duration of both 1st and 2nd stages, the allocated time (or time to final stage) being divided proportionately between them. Note: When setting the time to final stage, make sure enough time has been allocated for any Dri-Pure stages. Options Select one of two options for time to final stage: Preset: May be a specific time defined within the method, or may be automatic detection using HeatFlow. hh:mm: Adjust the time setting manually. How to set 1. Turn the SELECT control until the display shows: Time to Final Stage. 2. Press the SELECT control to browse the options. 3. Turn the SELECT control to increment the time setting up or down, or set time < 0 to select Preset. 4. Press the SELECT control to enter the setting. 24 04-6589 Issue 3-3 August 2014 User Manual Genevac EZ-2 Series Personal Evaporator Final stage time Samples may be subjected to a final drying stage, which commences after automatic stop is triggered or the pre-set time elapses. The EZ-2 then vents, the rotor slows down and stops. Altering the Final Stage Time does not affect the preceding stages. Options Select one of two options for final stage time: Preset: A time setting contained within the method. hh:mm: Adjust the time setting manually. How to set 1. Turn the SELECT control until the display shows: Final Stage Time. 2. Press the SELECT control to browse the options. 3. Turn the SELECT control to increment the time setting up or down, or set time < 0 to select Preset. 4. Press the SELECT control to enter the setting. Reduce odour The Reduce Odour function adds a repeated vent and vacuum cycle to the end of a method, which purges the evaporation chamber of residual solvent vapours. Select ↑ 100 bar for low boiling point solvents, select ↑ 50 mbar or ↑ 20 mbar for higher boiling point solvents. Experimentation may be required to find the most effective settings for specific solvents. For further information, visit www.genvac.com to download a copy of the applications note: Eliminating Odours. Options Select one of four options: Off ↑ 100 mbar ↑ 50 mbar ↑ 20 mbar. Note: Only setting options appropriate for the selected method are available. How to set Turn the SELECT control until the display shows: Reduce Odour. Press the SELECT control to browse the options. Turn the SELECT control to change the Reduce Odour setting. Press the SELECT control to enter the setting. 04-6589 Issue 3-3 August 2014 25 Genevac EZ-2 Series Personal Evaporator User Manual Set max temp System information To view the sample control temperature setting for the currently selected method, turn the SELECT control until the display shows: Set Max Temp. Then press the SELECT control. To view the current pressure inside the vacuum system or the condenser gas temperature, press the SELECT control and turn untill the display shows System information, then press and turn to display either Pressure or Gas Temperature. Note: If the sample temperature control is locked out by the method, this is the only way to view the target temperature setting. Method ID Each method has a unique identification. To view, turn the SELECT control until the display shows: Method ID. Then press the SELECT control. Dri-Pure® Methods for low boiling point solvents or solvent mixtures, include a Dri-Pure® stage. When a Dri-pure enabled method is selected the Dri-Pure LED indicator lights up on the control panel and vacuum ramping is controlled to prevent samples bumping during the initial evacuation of the chamber. View method Parameters of the selected method can be viewed using the SELECT control. Global parameters apply to the entire method, Stage # parameters apply only to the specified stage. 26 04-6589 Issue 3-3 August 2014 User Manual Genevac EZ-2 Series Personal Evaporator Wait to cool Wait to heat Methods designed for low boiling point solvents or solvent mixtures may also include a Wait to Cool stage. The system checks the evaporation chamber temperature, if the chamber temperature is not within a specified range the system waits for it to cool before allowing the evaporation to proceed, further minimising the risk of sample bumping. A cooling fan circulates air around the outside of the evaporation chamber to assist the process. This operation applies only to the EZ-2 Plus. Before an evaporation method commences, the EZ-2 Plus checks the evaporation chamber temperature. If the chamber temperature is not within a specified range, the system automatically selects a Wait to Heat stage. During the Wait to Cool stage the rotor spins, the display timer icon animates, and the message: Wait to Cool appears on the LCD screen. 04-6589 Issue 3-3 August 2014 Pre-heating prevents the condensation of medium boiling point solvents on the chamber walls; the required chamber temperature range is defined within the selected method. During the wait to heat stage, the rotor spins, the display timer icon animates and the message: Wait to Heat appears on the display. 27 Genevac EZ-2 Series Personal Evaporator User Manual Inert Gas Purge The inert gas purging system displaces air in the evaporator with inert gas prior to starting the evaporation run, it also vents with inert gas at the end of evaporation process. Oxygen levels within the vacuum system are maintained safely below the minimum level that would be required for the combustion of solvents. After the evaporator stops, an inert gas blanket can be maintained to prevent samples reacting with elements in the air. Warning: Risk of asphyxiation. Inert gas will leak from the evaporator during operation. Only operate the evaporator in a ventilated environment. Gas must be available to maintain the specified pressure and flow rate for the duration of the evaporation. If inert gas is supplied from a bottle, make sure there is sufficient gas in the bottle before starting the evaporator. Do not switch off the evaporator or the inert gas supply until the evaporator has stopped, the condenser has been drained and samples have been removed. Set Password An Inert Gas Purge Password can be set to prevent unauthorised or unintended deactivation off of the inert gas purge system. The factory setting is “0000” but can be changed to any combination of letters and digits. To change the IGP password, go to the Maintenance menu and select IGP Password. The current password must be entered before the new password can be set. Inert gas purge enable When enabled, Inert Gas Purge activates before every evaporation, regardless of which method is selected. Purging takes approximately seven minutes, during which time a countdown timer appears on the LCD screen. To enable or disable inert gas purge, go to the Maintenance menu and select Inert Gas Purge. The function can only be enabled or disabled if the IGP Password is known. Inert gases Nitrogen or argon (which must be dry) are suitable for use with the inert gas purge system. Consult your Genevac representative for advice before using an alternative gas. 28 04-6589 Issue 3-3 August 2014 User Manual When starting an evaporation with inert gas purge enabled, Please open the lid may appear on the screen . Opening the lid allows the system to take an atmospheric pressure reading. During the process the screen displays Please wait. Once complete, the screen displays Please close the lid and then Please press start button. The process may take up to 15 minutes to complete (or may take place unnoticed while the lid is open for samples to be loaded). Note: Inert Gas Blanket is automatically enabled when Inert Gas Purge is enabled. Inert gas blanket Genevac EZ-2 Series Personal Evaporator Disconnection While Inert Gas Purge and Inert Gas Blanket may be disabled from the Maintenance menu, the evaporator will continue to vent with inert gas as long as the inert gas supply remains connected to the evaporator. For temporary use with IGP disabled, disconnection of the inert gas supply is optional; however the gas supply may be disconnected if the use of IGP is no longer required. To disconnect, turn off gas supply, then disconnect the inert gas hose (press the quick release tab and pull the hose connector away from the EZ-2). After the evaporator stops, inert gas is flushed into the evaporator to prevent samples reacting with elements in the air; an additional benefit is that the inert gas is dry. When enabled, Inert Gas Blanket activates at the end of every evaporation, regardless of which method is selected. The inert gas blanket is maintained by a five-second inert gas “puff” which occurs once every two minutes. Fit the IGP disconnection filter (supplied) to the vent inlet. Do not switch off Inert Gas Blanket until condenser draining is complete. To enable inert gas blanket, go to the Maintenance menu and select Inert Gas Blanket. IGP disconnection filter Note: If both Inert Gas Blanket and Reduce Odour are enabled, Inert Gas Blanket overrides Reduce Odour. 04-6589 Issue 3-3 August 2014 Caution: Failure to fit an IGP disconnection filter may result in damage to the vacuum system. 29 Genevac EZ-2 Series Personal Evaporator User Manual Maintenance Any maintenance or repair of this product, other than that specified within this user manual, must be carried out by Genevac personnel (or approved representatives of Genevac) using only approved spare parts. Warning: Risk of contamination. Solvents can condense in the exhaust line. Wear suitable personal protective equipment when carrying out maintenance procedures, this is particularly important for HCl compatible systems. Warning: Risk of electric shock. Live voltages are exposed when access covers are removed. Isolate the EZ-2 from the mains supply before removing access covers. Recommended practice Before use Check / empty the exhaust catch pot as necessary. Check / empty the condenser catch-pot. Check the condition of sample holders and (where used) swings before every use. After use System test The System test method can be used to verify the correct operation of the IR lamp, and to test the ultimate vacuum of the system. 1. Empty the condenser jar. 2. Set the sample temperature to approximately 60°C. 3. Select System test. Press the START button . Observe the IR lamp by looking through the window in the EZ-2 lid. The IR lamp switches on once vacuum is achieved. If the IR lamp fails to switch on, refer to the Maintenance section for instructions on how to replace the IR lamp. Caution: To avoid overheating the EZ-2 rotor mechanism when no samples are loaded, turn the SET MAX TEMP °C control to LAMP OFF once the lamp operation is verified. To facilitate pressure calibration by Service Engineers, the system controls at 45 mbar for 10 minutes, then reaches ultimate vacuum after approximately 30 minutes (software V1.01 onwards). If the vacuum fails to reach a sufficient level, contact Genevac service for advice. Empty the condenser jar at the end of every run. Depending on the type of solvent used, it may be advisable to clean the evaporation chamber and sample holders following every run; cleaning should be performed if any trace of solvent is evident on the inside of the evaporation chamber, or if any solvent is spilled. Refer to the instructions below for General cleaning and Cleaning sample holders. 30 04-6589 Issue 3-3 August 2014 User Manual Genevac EZ-2 Series Personal Evaporator Periodic maintenance General cleaning Check the condition of the exhaust hose and make sure that solvent vapours are taken away from the system safely. Avoid forming U-bends in the pipe as this could cause condensed solvent to gather and block the line. Cleaning should be performed as and when required, depend on the solvents being used this may range from monthly to following every use. If any deterioration in performance is noticed, firstly check that all users are adhering to the Before use and After use checks, and General cleaning instructions listed above. Inspect the following parts frequently and clean when necessary: Rotor Lid seal Inside of the evaporation chamber Underside of the lid IR lamp lens. Use ethanol or methanol applied to a paper towel or soft, lint free cloth. If the system has been in contact with biological agents, a cloth dampened with bleach solution may be used. Use ethanol or methanol applied to a paper towel or soft, lint free cloth. If the system has been in contact with biological agents, a cloth dampened with bleach solution may be used. For routine cleaning, the IR lamp lens may be cleaned in situ. If excessive contamination has occurred, the IR lamp and lamp lens will have to be removed for thorough cleaning or replacement. Refer to IR lamp and Lamp glass assembly. 04-6589 Issue 3-3 August 2014 31 Genevac EZ-2 Series Personal Evaporator User Manual IR sensor Clean the IR sensor using methanol or ethanol applied to a cotton bud or similar implement. IR sensor Sample holders Clean the sample holders regularly or following any incident that involves glass breakage or solvent spillage. Note: The most common cause of repeat glassware breakage is fragments, from a previous breakage, which have become stuck to the sample holder wells. Visually inspect the swings and sample holders to check for any spilled solvent or debris, especially in the sample holder wells. Spilled solvent can cause debris to stick to the sample holders, causing high points that stress the glassware. Clean off any adhered dirt or debris by washing the sample holders in soapy water or using a cleaning solvent such as methanol or acetone. The sample holders should then be rinsed in clean water. Alternatively, wash in a dishwasher at 90°C. Check to make sure that all adhered dirt, debris or solvent residue is removed. Always dry the sample holders thoroughly after cleaning and never place wet sample holders in a Genevac system. 32 The colouring of sample holders may vary, in addition repeated use of sample holders with strong acids may cause colour fading over time; this is normal and does not affect the performance or integrity of the sample holders. Caution: Excessive build-up of deposit on the pivoting faces of the sample swings and rotor can cause the sample swings to stick in the out position when the rotor stops, resulting in unrecoverable sample loss. Caution: Scratches or superficial damage on the surface of sample holders will not affect performance, however if there is any structural damage (if any part of the swing or sample holder is bent or deformed, or if there is any sign of a crack) do not use it. Contact Genevac Service for evaluation. Inert gas purge systems Components of the inert gas purge system should be replaced annually; this can be done by Genevac as part of a planned maintenance schedule. The operator’s risk assessment should consider the use of low auto ignition point solvents and should include provision for maintenance and testing. In the unlikely event of solvent detonation occurring, internal components must be checked, and where necessary, replaced before continuing to use the evaporator. Contact Genevac Service for assistance. 04-6589 Issue 3-3 August 2014 User Manual Genevac EZ-2 Series Personal Evaporator Planned maintenance and servicing Whilst every effort is made to design and manufacture evaporation systems to the highest possible standard, there will be some degree of degradation due to wear and ageing of parts such as seals and bearings within the evaporator, condenser and pump. The extent of wear and ageing depends on the use of the system, the severity of temperature cycling and the nature of the solvents used. In addition, some solvents may eventually cause pinhole corrosion in the connecting tubes, resulting in a decline in performance. 04-6589 Issue 3-3 August 2014 In order to maintain peak performance and avoid costly and unscheduled down time, Genevac strongly recommend implementing a schedule of planned maintenance. Changing parts in the field is complex and requires a high level of skill. Genevac offers a range of preventive maintenance, service and breakdown contracts designed to keep the equipment in top condition. 33 Genevac EZ-2 Series Personal Evaporator User Manual IR lamp assembly Description Lamp assembly (non-HCl) Lamp assembly (HCl) IR lamp only Part number 70-1116/S 70-1156/S AC9060 Note: Lamp assemblies consists of lamp, lamp holder, glass and seals. For systems with Red Robax glass, contact your Genevac distributor for information on replacement lamp assemblies. IR Lamp - removal 1. Open the lid. 2. Isolate the EZ-2 from the mains power supply. 3. Using a 4 mm Allen key, unscrew three securing screws and remove the lamp access panel from the right-hand-side of the EZ-2. Warning: Risk of burns. The IR lamp and surrounding areas may be hot after system has been in use. Allow the IR lamp to cool before proceeding. Lamp access panel removed 34 04-6589 Issue 3-3 August 2014 User Manual Genevac EZ-2 Series Personal Evaporator Lamp glass assembly - removal Caution: For EZ-2 systems with inert gas purge, do not attempt to adjust or remove the four spring loaded bolts near the IR lamp assembly. 3. Using a 4 mm Allen key, remove the lamp glass assembly retaining screw. 4. Gently pull the left-hand-side of the lamp glass assembly away from the EZ-2 chamber and disengage the retaining clip on the right-hand-side. 5. Remove the lamp glass assembly from the EZ-2. Refitting 1. Gently pull the ceramic connector to disconnect electrical connector from the 1. Check all parts are clean and undamaged, also check the sealing face IR lamp (do not pull on the electrical of the EZ-2 chamber is undamaged. wires). 2. Slide the IR lamp to the left and withdraw 2. Fit the lamp glass assembly to the EZ-2, make sure the O-rings are properly it from the retaining clip. seated, hold the assembly in place while refitting the lamp glass assembly retaining screw. 3. Slide the IR lamp sideways into the retaining clip. 4. Carefully push the ceramic connector onto the IR lamp contacts. 5. Refit the lamp access panel with three securing screws. 6. Reconnect the mains power supply. Testing 7. Select System Test. 8. Set the sample temperature to 60ºC 9. Press the START button. 10. Check that lamp illuminates. 04-6589 Issue 3-3 August 2014 35 Genevac EZ-2 Series Personal Evaporator User Manual Lid seal Description Lid seal Part number 04-5094/S Warning: Risk of contamination. Solvent traces may be present that could be harmful to health or lead to material damage. Removal 1. Switch on the EZ-2. 2. Press the lid unlock button and open lid. 3. Check for solvent traces wipe the lid seal clean before removal. Note: The seal material may absorb significant quantities of some solvents. 4. Manually remove the lid seal from the chamber by carefully pulling the seal away from the chamber. Do not use tools that may damage the chamber coating. Testing 1. 2. 3. 4. 5. Close the lid. Select System Test. Set the sample temperature to 60ºC Press the START button. Ensure that the pressure drops below 500 mbar and continues to drop. Note: Manual pressure may be required on the lid to assist to the new lid seal to bed in on the first use. If the pressure fails to drop, check the lid seal is correctly located on the vacuum chamber and repeat the test. 6. Allow the method to continue and check that normal operating pressure is achieved. 7. After running for approximately 30 minutes, stop the EZ-2, reseat the lid seal and repeat points 1. to 5. of the test procedure. Note: An instructional video is available for viewing on the Genevac website. Refitting 1. Unpack the replacement lid seal. 2. Position the new lid seal on top of the vacuum chamber wall with ‘lip’ pointing towards the centre. 3. Firmly work the lid seal into position using only fingers, press the seal fully home. 36 04-6589 Issue 3-3 August 2014 User Manual Genevac EZ-2 Series Personal Evaporator Condenser jar seal Description Jar seal kit Part number 70-1494/S PTFE flat seal Sealing ring 3. Remove the flat PTFE seal and sealing ring. Refitting Screws and washers Thread inserts Jar seal kit The condenser jar seal and thread inserts (supplied in the condenser jar seal kit) should be replaced if the jar does not seal properly with a quarter turn. Refitting is a reversal of the removal procedure, though it can be tricky to hold the seals in place during assembly. The easiest way to proceed is as follows: 1. 2. Removal 1. Remove the condenser jar. 2. Using a screwdriver (Pozi No2) undo the screws and remove three thread inserts that retain the condenser jar seal. 04-6589 Issue 3-3 August 2014 3. Using the new parts from the jar seal kit, hold the flat PTFE seal in place and loosely fit one of the replacement thread inserts. Hold the sealing ring in place and fit the remaining two thread inserts. Refit the condenser jar. Testing 1. Select System Test. 2. Set temperature to 60ºC. 3. Press the START button. 4. Ensure that pressure drops. 37 Genevac EZ-2 Series Personal Evaporator User Manual Software upgrade Systems with USB port Systems without USB port Software upgrades may be sent by Email and uploaded to the EZ-2 via a USB data key. For systems built before March 2014 (serial numbers up to 3699) software updates can be sent on a data key. If a software upgrade is required, full instructions will be provided, your local Genevac representative will be happy to provide you with details. To upload software: 1. Copy the software upgrade files to a USB data key. 2. Switch off the EZ-2. 3. Insert the USB data key into the USB socket (located on the left hand side of the EZ-2). 4. Switch on the EZ-2. 5. When the screen shows START TO INSTALL – STOP TO CANCEL, press the START button. On completion, the screen shows UPDATE COMPLETE. 38 Software data key To upload software: 1. Switch off the EZ-2. 2. Remove the EZ-2 lower serial port blanking cap (located on the back of the EZ-2). 3. Plug the software data key into the serial port. 4. Switch on the EZ-2. 5. The new software version loads automatically. Note: The uploading process takes several minutes, during the process the display shows: SEARCHING FOR SOFTWARE UPDATE UNINSTALLING CURRENT SOFTWARE INSTALLING SOFTWARE UPDATE 6. When uploading is complete, remove the Data key. 7. Refit the EZ-2 serial port blanking cap. 04-6589 Issue 3-3 August 2014 User Manual Genevac EZ-2 Series Personal Evaporator Unpacking and Setting Up Upon receipt of the equipments, please check the packaging for damage before signing for it. If there is any damage, contact the Genevac Service department or your local distributor immediately. Refer to the Genevac website: www.genevac.com for up to date contact details of Genevac representatives. Packaging To unpack the wooden crate, undo the lid retaining screws and remove the lid. Undo the screws from the base of the timber sleeve and carefully lift the sleeve clear of the evaporator. Where possible, retain the packaging. In the unlikely event that the EZ-2 needs to be returned to Genevac, the packaging can be reused. Replacement packaging may be supplied but will be subject to a charge for the material and any shipping costs incurred. Lifting Make sure enough people are present to share the lifting safely. Carefully lift the EZ-2 slightly at first to feel the weight and to find the centre of gravity. When ready, manually lift the EZ-2 into position using the handholds in the base. Alternatively, use mechanical lifting equipment such as a lifting table or forklift. Caution: The handholds are for manual lifting only. Do not insert lifting forks into the handholds. Left hand side hand holds Right hand side hand hold 04-6589 Issue 3-3 August 2014 39 Genevac EZ-2 Series Personal Evaporator User Manual Installation site Carry out a risk assessment when selecting a suitable installation site. The evaporator must be sited on a sturdy surface that is flat, level, resistant to chemical spillage, and secured to prevent movement or vibration. There must be enough space to position the evaporator away from the edge of the bench and 50 mm clear of any breakable objects or areas where entrapment could occur. 50 mm (2”) 50 mm (2”) Note: The EZ-2 may be placed in a fume cupboard. To maintain a vapour free environment around the EZ-2, do not store vessels containing solvents or acids within the fume cupboard. 40 04-6589 Issue 3-3 August 2014 User Manual Genevac EZ-2 Series Personal Evaporator Setting up 1. Place the drip-plate in the moulding recess to the right of the lid. Make sure the jar is correctly aligned 4. Taking care to avoid dropping the vent filter inside the EZ-2 cladding, carefully insert the vent filter into the hole in the service panel and screw onto the threaded connector. 2. Fit the catch pot by screwing it into the retainer on the side of the EZ-2. 5. Push the exhaust hose (supplied) on to the spigot on top of the exhaust catch-pot and secure the connection with the hose clip supplied. Connect the other end of the exhaust hose to the laboratory fume extraction system. 3. Fit the condenser jar. 6. Arrange the exhaust hose so it takes solvent vapours away from the evaporator safely. Make sure the hose is free from kinks, constrictions or U-bends as this could cause condensed solvent to gather and block the exhaust line. 7. Connect the mains supply lead. Before powering up, check all parts of the system are installed correctly. 04-6589 Issue 3-3 August 2014 41 Genevac EZ-2 Series Personal Evaporator User Manual Installing systems with inert gas purge Final checks Evaporators with inert gas purge are supplied with a 2.5 m hose which has a 3/8” BSP female connector, for connection to a pressure regulated inert gas supply (for inert gas supply requirements, refer to: Specifications). Carry out a safety assessment before operating the evaporator. Make sure the exhaust hose takes solvent vapours away from personnel, and from the instrument, safely. The evaporator must only be operated in a ventilated environment. Genevac strongly recommend installing evaporators with inert gas purge in a fume cupboard. Warning: Risk of solvent ignition. Backpressure in the exhaust line can prevent the condenser draining. If more than one evaporator is installed, each one must be connected to a suitable laboratory fume extraction system by a separate exhaust hose. If personnel lack the training or experience to comprehend the hazards that can arise when using the equipment, do not allow them to use it. Personnel without such training require thorough instruction. The instructions contained within the User Manual may form the basis of such training. Maintain a solvent vapour free environment around the evaporator. Do not use the free space around the instrument for the storage of vessels containing solvents or acids. This instruction applies, even if the EZ-2 is installed in a fume cupboard. Genevac recommend that evaporators, equipped with inert gas purge, are installed by an authorised Genevac representative. 42 04-6589 Issue 3-3 August 2014 User Manual Genevac EZ-2 Series Personal Evaporator Troubleshooting Audible and visual alerts Audible Button acknowledge Illegal button press Evaporator stopped Shutdown errors Visual Evaporator stopped Error encountered Short beep. Short double beep. Three beeps when the system comes to rest. Repeats every minute until user intervenes (press button, turn SELECT control, open lid). Repeated beeps until user intervenes (press button, turn SELECT control, open lid). Condenser back-light flash: 3 x flashes – pause. Condenser back-light flash: 1 second on – 1 second off and error message appears on the display. Faults and errors In the unlikely event that an error occurs that could affect the physical condition of the evaporator or its ability to safeguard the integrity of the samples (a critical error) the system will stop automatically. A fault number and a description of the problem appears on the LCD screen. If a non-critical error occurs, the system continues to operate (possibly with reduced efficiency), for certain errors a description of the problem is shown and the condenser backlight flashes to alert the user. An example of a non-critical error could be the failure of an IR lamp, the evaporator would continue to operate without compromising the safety of samples, but the evaporation rate would slow down. The EZ-2 will not allow an evaporation to start when a fault or error is displayed. 04-6589 Issue 3-3 August 2014 43 Genevac EZ-2 Series Personal Evaporator User Manual Rectifying faults or errors A summary of faults and errors that may appear on the LCD screen are listed below. Additional details, including recommended actions, may also be shown on the LCD screen. Error 01 - 04 05 Indication Err No Lid not locked Cause Lid sensor system failure Lid lock sensor indicates unlocked during evaporation 06 Lid not unlocked 07, 08 09, 10 11 Err No Err No Chamber pressure out of range low Set max temp out of range low Err No Lid lock sensor indicates locked when unlock solenoid is energised Motor fault Temperature sensor failure Pressure sensor failure 12 13, 14, 15 16 17 18, 23, 24 19 20 21 22 25, 26 27 28 Contact Genevac Service Contact Genevac Service Contact Genevac Service System or sensor fault Contact Genevac Service Vibration sensing failure Contact Genevac Service System test failed Software failed Datakey test failed System checksum failure System checksum failure Data key failure IR body temp Err 20 Chamber heat fail Chamber cool fail EEPROM error Software write failed Vacuum loss IR sensor failure Vibration sensing failure Fail to heat to start temp Fail to cool to start temp System failure System failure Pressure 150 mbar above control pressure Purge signal System failure IGP senses below normal pressure when disconnected Defrost valve failure IGP fail during operation No data in EEPORM Refer to specification Sensor indicates unlocked when lid should be locked. Contact Genevac Service Contact Genevac Service Re-programme or try different USB storage device Contact Genevac Service Contact Genevac Service Contact Genevac Service Contact Genevac Service Contact Genevac Service Contact Genevac Service Contact Genevac Service 30 31 37 Err 30 ADC data fail Flow pressure low 41 42 43 44 45, 46 Err 41 Err 42 Err 43 Supply voltage Lid unlocked / fault 48 Out of balance 44 Rectification Contact Genevac Service Do not attempt to open lid once the EZ-2 is started. Press the lid unlock button - open and reclose lid Press the lid unlock button open and reclose lid Samples imbalanced at start up or due to uneven evaporation Contact Genevac Service Contact Genevac Service Contact Genevac Service Contact Genevac Service Contact Genevac Service Contact Genevac Service Fault is external to evaporator Press the lid unlock button open and reclose lid. Check if latch release screw has been adjusted, refer to: Opening lid without power Balance sample holders within 10 g 04-6589 Issue 3-3 August 2014 User Manual Genevac EZ-2 Series Personal Evaporator Error 49 Indication No vacuum Cause Fail to reach 200 mbar in 15 mins 50 51 52 53 Unexpected calibration values Condenser fails to reach -20°C Temp sensor failure Temp sensor failure Temp sensor failure Contact Genevac Service Connection / sensor failure Contact Genevac Service System failure Contact Genevac Service Temperature sensor failure Contact Genevac Service Temperature sensor failure Contact Genevac Service 60 ADC gain / offset Defrost failure Gas temp low Chamber temp out of range high Rotor temp out of range high Chamber pressure out of range high Set max temp out of range high IR body temp out of range high Condenser gas temp out of range high Lid closed sensor stuck Gas supply high Rectification Check vacuum pump is operating. Check the condenser jar is correctly fitted. Check the lid seal (restart and push lid down manually to assist sealing) Contact Genevac Service Contact Genevac Service Contact Genevac Service Contact Genevac Service Lid unlocked but not opened multiple times Inert gas supply pressure too high (IGP systems only) 61 Gas supply low Inert gas supply pressure too low (IGP systems only) 62 HeatFlow failed to arm, some stages may run to time Sample volume too small, sample temperature too low, or combination of both 63, 64 Lid temp out of range Inert purge fault Temperature sensor failure Clear the error, always open lid after unlock button is pressed Reset inert gas supply pressure regulator. Refer to Technical Data: Specifications Check gas supply, reset inert gas supply pressure regulator. Refer to Technical Data: Specifications Increase sample volumes or adjust SET MAX TEMP °C control. Alternatively allow EZ2 to run to time Contact Genevac Service 54 55 56 57 58 59 65 - 70 71 Vacuum integrity fault 72 Incompatible software version 80 USB error 81, 83, EEPROM fail 84 82 IR sensor fail 85 ADC overrun Inert gas purge system failure Fails to pull vacuum at start of pump down Incorrect software inadvertently loaded Detected by CPU Software fails to respond / read / wright No response from IR sensor Data conversion failure Check inert gas supply. In the event of failure to vent due to inert gas problems, assess the risk before turning the system off. Contact Genevac Service Contact Genevac Service Contact Genevac Service Contact Genevac Service Contact Genevac Service Contact Genevac Service Contact Genevac Service If the recommended actions fail to resolve a problem, contact your local Genevac representative for assistance. 04-6589 Issue 3-3 August 2014 45 Genevac EZ-2 Series Personal Evaporator User Manual Clearing faults and errors Once the problem is resolved, press and hold the STOP button for five seconds. Cancellation of the error is confirmed by a beep. If the display then shows another error, hold down the STOP button; each error will clear, one after another. IR lamp failure Errors that cause the IR lamp to switch off (including the failure of the IR lamp itself) will also cause the end of run detection system to deactivate. If this happens, the evaporation continues for a predetermined time, and then stops automatically. Opening the lid without power In the event of power failure, the vacuum system vents automatically, the rotor may take up to two minutes to stop spinning. Once the rotor is stationary and the vacuum system is at atmospheric pressure, inset a 2.5 mm Allen key into the hole in the lid and engage it with the latch release screw. Latch release screw Using the Allen key, turn the latch release screw clockwise (approximately 15 turns) until resistance is felt. Remove the Allen key and open the lid. Turn the latch release screw fully counter-clockwise before closing the lid. 46 04-6589 Issue 3-3 August 2014 User Manual Genevac EZ-2 Series Personal Evaporator Fuses Mains live and mains neutral fuses are located on the evaporator service panel. Isolate the evaporator from the mains power supply by disconnecting the mains power cable before removing fuses. To remove a fuse, turn the holder a ¼ turn counter-clockwise using a flat blade screwdriver. Mains inlet / outlet fuses Fuse types vary according to regional mains power supply. Mains power 230 V 50 Hz 120 V 60 Hz 100 V 60 Hz 100 V 50 Hz Fuse FS6 & FS7 FS6 & FS7 FS6 & FS7 FS6 & FS7 Rating 6.3 A 10 A 16 A 16 A Specification 1¼” x ¼” Antisurge (T) ceramic 1¼” x ¼” Antisurge (T) ceramic 1¼” x ¼” Antisurge (T) ceramic 1¼” x ¼” Antisurge (T) ceramic Manufacturer’s ID SIBA 70-065-65-6.3 SIBA 70-065-65-10 SIBA 70-065-65-16 SIBA 70-065-65-16 Part No 04-3587 04-3588 04-3766 04-3766 Caution: Fuses should only be replaced by suitably trained personnel. If a fuse blows repeatedly, contact Genevac service for assistance. 04-6589 Issue 3-3 August 2014 47 Genevac EZ-2 Series Personal Evaporator User Manual Other troubleshooting Symptom Display not illuminated Evaporator does not appear to start Evaporator does not start and screen displays Please open the lid (IGP systems only) Rotor will not start to spin No vacuum Vacuum begins to pull down, but fails to get below 900 mbar Cause Power supply failure Fuse failure System in standby mode Waiting to heat or waiting to cool Error has occurred IGP method requires valid atmospheric pressure reading (automatically sampled every 15 minutes, requires lid to be open) Drive belt failure Drive motor fuse failure Pump fuse failure Pump failure Lid not fully closed Lid not sealing Condenser jar not sealing Vacuum pulls down to 500 mbar then rate slows dramatically Vacuum pulls below 900 mbar but takes longer than usual, or fails to achieve expected level of vacuum Method includes a DriPure stage Condenser jar seal damaged Lamp glass cracked Condenser jar full of volatile solvent Condenser fuse failed Lamp glass seal damaged Vacuum stops pulling down at 215 mbar, 115 mbar and / or 30 mbar. Solvent boils in condenser Lid will not open System waiting for condenser to cool No problem No power Lock jammed Lid seal stuck to glass due to excessive solvent on the lid seal. 48 Rectification Check the power supply is connected and switched on See Fuses Press the START button The evaporation will start when the system is ready Check the display for information messages and refer to fault or error rectification tables Open the lid, wait until prompted to reclose then press the START button Contact Genevac service Contact Genevac service Contact Genevac service Contact Genevac service Stop evaporator and check for obstructions Stop evaporator, check fit and condition of lid seal, check for obstructions Check the condenser jar and condition of the jar seal The system is operating correctly Contact Genevac service Stop evaporator, inspect / replace lamp glass assembly. Refer to Maintenance section Empty condenser jar after every use Contact Genevac service Stop evaporator, inspect / replace lamp glass assembly. Refer to Maintenance section The system is operating correctly. This optimises solvent recovery and extends pump life The system is operating correctly Reconnect power and try again Refer to: Opening the lid without power Allow the solvent to evaporate before further use. Clean seal and lid 04-6589 Issue 3-3 August 2014 User Manual Symptom Lid glass feels loose Method takes longer than expected to complete Samples not dry after automatic stop Samples dry but not dry enough Poor solvent recovery or excessive quantity of solvent in exhaust catch pot Body of system gets hot Excessive vibration Excessive noise Condensation inside chamber Cannot unlock and open lid (lid LED not lit) Genevac EZ-2 Series Personal Evaporator Cause Rectification The lid glass is designed to The system is operating correctly float Lamp failure Check lamp is illuminated (by looking through lid glass). Replace lamp if necessary. Vacuum leak Perform a System test Incorrect method selected Stop the evaporator, reselect an appropriate method and restart Low control temperature Reset the correct sample set temperature for the compound IR lamp lens Stop the evaporator. Inspect, clean, replace the lamp glass. Refer to Maintenance section IR sensor contaminated Clean IR sensor lens. Refer to Maintenance section Condenser fuse failure Contact Genevac service Incorrect sample holder for Contact Genevac applications sample format Excessive sample volume Top up low volume samples to similar variation level. Alternatively adjust method parameters to increase Time to final stage Final stage too short Adjust method parameter to increase final stage time Various factors can cause Contact Genevac applications for this advice Incorrect method selected Check that method selected is most appropriate Condenser jar full Empty condenser jar after every use Vacuum leak Perform System test Condenser fuse failed Contact Genevac service Volatile solvent Contact your local Genevac agent to request special methods for EZ-2 Envi or EZ-2 Plus This is normal The system is operating correctly High out of balance Stop evaporator, rebalance samples Pump anti-vibration Contact Genevac service mounts worn Incorrect method selected Stop the evaporator. Select the most appropriate method and restart Safety count-down still Wait until count-down reaches zero active then try again Lid unlock button pressed Wait for system to re-enable lid lock too often in 5 minutes (LED will light) If the recommended actions fail to resolve a problem, contact Genevac your local Genevac representative for assistance. 04-6589 Issue 3-3 August 2014 49 Genevac EZ-2 Series Personal Evaporator User Manual Options There is a choice of models in the EZ-2 range: EZ-2 is suitable for drying aqueous and volatile solvents. EZ-Envi incorporates customisable parameters to provide greater flexibility for concentration. EZ-2 Plus combines programmable flexibility with a more powerful vacuum pump and is equipped with chamber heating, giving it capability to remove medium boiling point solvents. Features Chamber heating Two head (< 11 mbar) vacuum pump Four head (< 3 mbar) vacuum pump Reprogrammable method parameters HCl resistance Inert gas purge EZ-2 EZ-Envi ■ ■ ■ □ □ □ ■ □ EZ-2 Plus ■ ■ ■ □ □ Standard feature Option Note: For even greater flexibility and for compatibility with a wider range of solvents, EZ-2 Elite includes a high vacuum scroll pump in addition to the features of EZ-2 Plus. EZ-2 Elite is covered by a separate user manual. HCl resistance HCl resistant systems are built specifically to resist attack from HCl and nitric acid, with all vulnerable parts being manufactured from inert material. Inert gas purge The use of inert gas purge is mandatory for the safe evaporation of diethyl ether, pentane and other low auto-ignition point solvents. In addition, samples can be protected from reaction with elements in the air at the end of the evaporation process. Infinity trolley Infinity Trolley is a modular trolley system. The lower shelf can be pulled out to provide access to for maintenance and any number of units can be bolted together, side by side. EZ-2 on Infinity Trolley 50 04-6589 Issue 3-3 August 2014 User Manual Genevac EZ-2 Series Personal Evaporator Sample Holders A wide range of swings and sample holders is available to cover plate, tube, vial and flask formats, as well as the revolutionary Genevac SampleGenie™ system. The illustration shows just a few of the sample holders available. Sample holders are manufactured in solid aluminium and are anodised to improve heat absorption. The contact area is maximised to provide good physical support, optimum heat transfer and even heat distribution for drying loads. For further details of sample holders, contact your local Genevac representative to request a Genevac Accessories Brochure or visit the Genevac web site at www.genevac.com. 04-6589 Issue 3-3 August 2014 51 Genevac EZ-2 Series Personal Evaporator User Manual Technical Data Specifications Evaporator Max rotor speed 2150 rpm Max load per swing 1.5 kg Max operational imbalance 40 g Dimensions (w x d x h) 597 x 645 x 700 mm Weight (varies with build options) 82 to 88 kg Width includes catch-pot. Vacuum pump (integral) Type Plus: 4 head diaphragm Std / Envi: 2 head diaphragm Ultimate system vacuum Plus: < 3 mbar Std / Envi: < 11 mbar Inert gas supply (IGP option only) Max pressure 2 bar g (3 bar absolute) Min pressure 1.5 bar g (2.5 bar absolute) Flow rate (nominal) 50 litres / minute @ STP Max consumption - purge cycle 250 litres Max consumption rate - blanket 110 litres/hour Hose length 2.5 m 3 Connector type /8” BSP female Condenser (integral) Type Single stage vapour compression Refrigerant R404a Lowest possible temperature -50°C Nominal operating temperature -35°C For the purpose of air conditioning requirement calculations, all power consumed by the system is dissipated as heat. Storage / transportation environment Ambient temperature 0°C to 40°C (-10°C permissible during transportation) Relative humidity 10% to 80% non-condensing Store upright Emissions Typical noise level is 58 dB (A) at one metre from the evaporator during normal operation. PTFE hose (6 mm ID, 8 mm OD) is supplied to connect the evaporator to a laboratory fume extraction system. Operational environment Ambient temperature 15°C to 30°C Relative humidity 10% to 80% non-condensing Altitude Sea level to 1600 m Ventilation air-gap 50 mm Ingress protection rating IP30 The evaporator is designed for use in a pollution degree 2 environment (normally only non-conductive pollution occurs). Electical Supply 120 60 Hz 230 50 Hz 100 50 Hz 100 60 Hz Current (A) 15.0 7.0 12.0 12.0 Peak power consumption (W) 1800 1610 1200 1200 The power cable supplied is 2 m in length and appropriate to the region to which the unit is delivered. Note: To prevent nuisance tripping, the mains power supplies to the evaporator should be fitted with suitably rated type “D” (or equivalent) mains circuit breakers. 52 04-6589 Issue 3-3 August 2014 User Manual Genevac EZ-2 Series Personal Evaporator EC Declaration of Conformity EC Declaration of Conformity: EZ-2 Series Evaporators Manufacturer’s Name: Genevac Ltd Manufacturer’s Address: Farthing Road Ipswich Suffolk IP1 5AP UK Type of Equipment: Laboratory Equipment This is to certify that the following product(s): EZ-2 Standard EZ-2 Envi EZ-2 Plus EZ-2 Elite (all variants, including HCl and inert gas purge options) From serial Number : 3100 onwards Conform to the Essential Health and Safety requirements of European Directives: Machinery Directive (2006/42/EC) EMC Directive (2004/108/EC) and Low Voltage Directive (2006/95/EC) RoHS2 Directive (2011-65/EU) A technical construction file for this product is held at the above address Conformity is demonstrated by compliance to the following standards: Signed: BS EN 61010-1:2010 Safety requirements for electrical equipment for measurement, control, and laboratory use. General requirements. BS EN 60204-1:2006 + A1:2009 Safety of machinery. Electrical equipment of machines. General requirements. BS EN 61326-1:2006 Electrical equipment for measurement, control and laboratory use. EMC requirements BS EN 12100:2010 Safety of machinery. General principles for design. Risk assessment and risk reduction. BS EN 378-2:2008 + A1:2009 Refrigerating systems and heat pumps. Safety and environmental requirements. Design, construction, testing, marking and documentation. Name: G Broadbent Position: Research and Development Manager Date: 18 July 2014 th Being the person appointed by Genevac Ltd to sign on their behalf 04-6589 Issue 3-3 August 2014 53 Genevac EZ-2 Series Personal Evaporator User Manual Warranty statement This product is guaranteed for period of 12 months from the date of delivery to site. In the unlikely event of any defect arising due to faulty materials or construction resulting in system failure, the unit will be repaired free of charge. This includes all labour and component costs incurred. This warranty is subject to the following provisions: The system must be sited, installed and operated in accordance with instructions in this user manual. Exhaust vapours must be ducted away from the system as described in the Setting up instructions within this user manual. The system may only be used for the purpose for which it was sold and in accordance with the Genevac List of Approved Solvents. Preventive maintenance and cleaning must be carried out as detailed in the Maintenance section of this user manual. Nitric acid must not be evaporated, except in an HCl resistant EZ-2 Plus. Additional maintenance and cleaning procedures must be carried out before and after evaporating nitric acid, as detailed in the Safety section. Power leads supplied with a system are for use with that system only. If items are replaced by the owner, only Genevac approved parts may be used. In the event of a vacuum pump failure, the pump may be exchanged for a refurbished unit. Failure to adhere to the above will invalidate the warranty and result in a charge being made for the cost of repairs. This warranty does not cover accidental damage, modification, misuse or inappropriate repair by untrained personnel, consumable items are covered against manufacturing defects only. Consumable items Consumable items include: lid seal, condenser jar seals and thread inserts, IR lamp bulb, glass and seals. Returning equipment to Genevac The equipment is supplied in reusable packaging. Where possible, this should be retained for reuse in the unlikely event that system needs to be returned for repair. If the packaging is not retained, a charge will be made for replacement packaging and any shipping costs incurred. Genevac will not accept any delivery of equipment which is not accompanied by appropriately completed Safety Declaration paperwork. This applies to all equipment and / or parts. To obtain the necessary Safety Declaration paperwork, or for details of Returns Authorisation procedure, contact your local Genevac representative or Genevac Service Department. Contact details are shown on the back cover of this user manual. 54 04-6589 Issue 3-3 August 2014 User Manual Genevac EZ-2 Series Personal Evaporator Patents Genevac products are protected by the following patents or patent applications: 1297874 CH 699 18 734.6-08 2362590 1297873 CH 699 18 733.8-08 2363745 6,878,342 7,252,803 1556149 1556149 1556149 FR 2396575 4465277 7,503,997 03769683.8 (pending) 2395772 7461465 7,498,175 04-6589 Issue 3-3 August 2014 6,682,631 1196757 CH 600 07 636.9-08 2351683 7,179,651 1153278 FR 55 Genevac EZ-2 Series Personal Evaporator User Manual Amendment control Issue Reason for change Date issued O-ring part numbers for lamp glass added. Condenser jar seal 2-3 22-Feb-13 instructions added. Consumable items list updated and moved to Technical Details, 2-4 Condenser jar seal part number correction. Lamp glass assy 12-Mar-13 disassembly instructions added. Infinity trolley option added. Specifications updated. Allen key size 2-5 28-May-13 for emergency lid open: 2.5 mm (correction). Emergency shutdown instruction added. Storage / transportation 2-6 temperature specification revised. Pause time limit removed to 15-Jul-13 reflect software change. 4 mm Allen key no longer supplied. Acceptable solvents statement added. Specifications amended: 2-7 05-Aug-13 IGP gas consumption, rotor speed, store upright. US Contact address updated. Atmospheric pressure sampling for 2-8 22-Oct-13 IGP methods described. Time to final stage clarification. Sample holder / swings image updated. Infinity image updated. 2-9 22-Nov-13 IGP instructions revised. Illuminated power switch removed. Limitations requiring HCl option added to acceptable solvents. IR lamp glass assy part number replaces lamp glass part number. Exhaust hose clip instruction added. Original instructions 2-10 statement added. Condenser jar replaces collection jar and 09-Jan-14 SpeedTrap jar. Sample holder colour variation noted. EC Declaration of Conformity updated. Drip-plate replaces catch-plate. Type “D” or equivalent replaces type “D” mains circuit breaker. Ingress protection rating specification added. File transfer and 45 mbar System Test stage added for software V1.01 onwards. 2-11 03-Mar-14 Timer arrow illustrated. HCl lamp assy added. Seals upgrade for non-HCl lamp assy removed. 2-12 HTP orientation instruction added. 09-Mar-14 IGP disconnection instructions clarified. HTP for use with microtitre 2-13 26-Mar-14 plates only instruction added. Statement: “powers up in Standby mode” removed. System Test 2-14 information moved from Advanced Operation to Maintenance. 09-May-14 Error 72 to 85 added to Troubleshooting guide. Layout revised. Vacuum pump specifications revised. SpeedTrap 3-1 temperature revised. Acceptable solvents revised. Options table 04-Jul-14 revised. Software upgrade method for non-USB systems added. Boot-up description updated to reflect software changes. System 3-2 21-Jul-14 information instructions added. DoC updated. Overview replaces introduction. 3-3 Specification for operating environment humidity revised. 10-Aug-14 56 04-6589 Issue 3-3 August 2014 Useful information Genevac Limited The Sovereign Centre Farthing Road Ipswich IP1 5AP United Kingdom Sales and Service Hotlines Service: +44 (0) 1473 243000 Sales: +44 (0) 1473 240000 Fax: +44 (0) 1473 461176 Email: [email protected] [email protected] [email protected] Web site: http://www.genevac.com Genevac Inc SP Industries 3538 Main Street Stone Ridge NY 12484 United States of America Sales and Service Hotline (1) 845 267 2211 Read these instructions before operating the EZ-2 and keep them near the system for easy reference. Your attention is drawn in particular to the Safety section. These instructions are correct at time of going to press and may be subject to change without notice. Some of the features and software functions described within this user manual may not apply to equipment manufactured before this manual’s publication date; this includes systems that have been upgraded. No part of these instructions may be reproduced in any form or be processed, duplicated or distributed by electronic or optical means without the written permission of Genevac Limited. If you need to contact Genevac for assistance, use either the telephone or fax Hotlines shown. Please have the instrument serial number at hand. Alternatively, email or visit our web site. The evaporator should not be discarded in your regular disposal stream. Contact your Representative or Genevac for proper disposal instructions. Within the EU, it is Genevac’s responsibility under the WEEE directive to provide for the recycling of Genevac products. Fax (1) 845 267 2212 Email: [email protected] [email protected] All rights reserved. © Genevac Ltd 2014.


