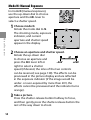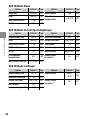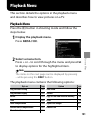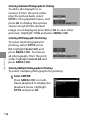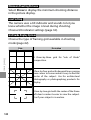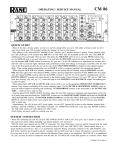
1
GXR DIGITAL CAMERA BODY
Camera Body User Guide
The product serial number can be found on the bottom of
the camera body.
Before You Begin
Before using your camera body, take a few moments to familiarize
yourself with the controls and displays (pages 1–10). Refer to this
section as you read through the rest of the manual.
Basic Photography and Playback
Read this section before using the camera for the first time. It covers the
steps involved in readying the camera for use, taking photographs,
and playing them back (pages 11–44).
Reference
Read this section for information on topics not covered in “Basic Photography
and Playback.” It covers advanced shooting and playback options, and
describes how to print photographs, customize camera settings,
and copy pictures to a computer (pages 45–187).
The rechargeable battery needs to be charged before use. The
battery is not charged at the time of purchase.
Package Contents
Confirm that the package contains the items listed
below.
*The actual appearance of included items may differ.
GXR camera body
The serial number
can be found on
the bottom of the
camera body.
USB cable with
mini-B connector
Connect the
camera body to
a computer or
printer.
Hot shoe cover
The cover comes
mounted on the
hot shoe of the
camera body.
DB-90 rechargeable
battery
Connector Cap
The cap
comes
mounted on
the camera
body.
BJ-9 battery charger
• CD: Contains software and a Software User Guide.
• Camera Body User Guide (this manual)
• Neck strap
• Warranty
Tip: Attaching the Neck Strap
Put the ends of the neck strap
through the strap eyelets on each
side of the camera body, and
thread the ends through the clips
as shown.
ii
A/V cable
Connect the
camera body to
a TV.
Notices
• Safety precautions: Read all safety precautions thoroughly to ensure
safe use.
• Test shots: Take test shots to ensure that the camera is working
properly before taking photos on important occasions.
• Copyright: Reproduction or alteration of copyrighted documents,
magazines, and other materials, other than for personal, home,
or other similarly limited purposes, without the consent of the
copyright holder, is prohibited.
• Exemption from liability: Ricoh Co., Ltd. assumes no liability for failure to
record or display images as a result of product malfunction.
• Warranty: This product is manufactured to local specifications and the
warranty is valid within the country of purchase. The manufacturer
assumes no responsibility for servicing the product in other countries
or bearing any expense thereby incurred.
• Radio interference: Operating this product in the vicinity of other
electronic equipment may adversely affect both the camera and
the other device. Interference is particularly likely if the camera is
used in close proximity to a radio or television. This can be resolved
by moving the camera as far as possible from the other device,
reorienting the radio or television antenna, or plugging the radio or
television into a different outlet.
© 2009 RICOH CO., LTD. All rights reserved. This publication may not
be reproduced in whole or in part without Ricoh’s express written
permission. Ricoh reserves the right to change the contents of this
document at any time without prior notice.
Every effort has been made to ensure the accuracy of the information in
this document. Should you nevertheless notice any errors or omissions,
we would be grateful if you would notify us at the address listed on the
back cover of this booklet.
Microsoft, Windows, Windows Vista, and Internet Explorer are registered
trademarks of Microsoft Corporation in the United States of America
and other countries. Macintosh and Mac OS are registered trademarks of
Apple Inc. in the United States of America and other countries. Adobe,
the Adobe logo, and Adobe Reader are trademarks of Adobe Systems
Incorporated.
HDMI, the
Logo and High-Definition Multimedia Interface are
trademarks or registered trademarks of HDMI Licensing LLC.
All other trade names mentioned in this document are the property of
their respective owners.
iii
Safety Precautions
Warning Symbols
Various symbols are used throughout this instruction manual and
on the product to prevent physical harm to you or other people and
damage to property. The symbols and their meanings are explained
below.
Danger
This symbol indicates matters that may lead to
imminent risk of death or serious injury if ignored or
incorrectly handled.
Warning
This symbol indicates matters that may lead to death
or serious injury if ignored or incorrectly handled.
Caution
This symbol indicates matters that may lead to injury
or physical damage if ignored or incorrectly handled.
Sample Warnings
The symbol alerts you to actions that must be performed.
The symbol alerts you to prohibited actions.
The symbol may be combined with other symbols to indicate
that a specific action is prohibited.
Examples
Do not touch
Do not disassemble
Observe the following precautions to ensure safe use of this
equipment.
Danger
Do not attempt to disassemble, repair or alter the equipment
yourself. The high-voltage circuitry in the equipment poses
significant electrical hazard.
Do not attempt to disassemble, alter or directly solder the
battery.
iv
Do not put the battery in a fire, attempt to heat it, use it in a
high temperature environment such as next to a fire or inside a
car, or abandon it. Do not put it into water or the sea or allow it
to get wet.
Do not attempt to pierce, hit, compress, drop, or subject the
battery to any other severe impact or force.
Do not use a battery that is significantly damaged or deformed.
Warning
Turn off the power immediately in the event of abnormalities
such as smoke or unusual odors being emitted. Remove the
battery as soon as possible, being careful to avoid electric
shocks or burns. If you are drawing power from a household
electrical outlet, be sure to unplug the power cord from the
outlet to avoid fire or electrical hazards. Discontinue use of the
equipment immediately if it is malfunctioning. Contact the
nearest service center at your earliest convenience.
Turn off the power immediately if any metallic object, water,
liquid or other foreign object gets into the camera body.
Remove the battery and memory card as soon as possible,
being careful to avoid electric shocks or burns. If you are
drawing power from a household electrical outlet, be sure to
unplug the power cord from the outlet to avoid fire or electrical
hazards. Discontinue use of the equipment immediately if it
is malfunctioning. Contact the nearest service center at your
earliest convenience.
Avoid any contact with the liquid crystal inside the picture
display, should the monitor be damaged. Follow the
appropriate emergency measures below.
• SKIN: If any of the liquid crystal gets on your skin, wipe it off
and rinse the affected area thoroughly with water, then wash
well with soap.
• EYES: If it gets in your eyes, wash your eyes with clean water
for at least 15 minutes and seek medical advice immediately.
• INGESTION: If any of the liquid crystal is ingested, rinse the
mouth out thoroughly with water. Have the person drink a
large amount of water and induce vomiting. Seek medical
assistance immediately.
Follow these precautions to prevent the battery from leaking,
overheating, igniting or exploding.
• Do not use a battery other than those specifically
recommended for the equipment.
• Do not carry or store together with metal objects such as
ballpoint pens, necklaces, coins, hairpins, etc.
• Do not put the battery into a microwave or high pressure
container.
• If leakage of battery fluid or a strange odor, color change, etc.
is noticed during use or during charging, remove the battery
from the camera body or battery charger immediately and
keep it away from fire.
Please observe the following in order to prevent fire, electrical
shock or cracking of the battery while charging.
• Use only the indicated power supply voltage. Also avoid the
use of multi-socket adapters and extension cords.
• Do not damage, bundle or alter power cords. Also, do not
place heavy objects on, stretch or bend power cords.
• Do not connect or disconnect the power plug with wet hands.
Always grip the plug section when disconnecting a power
cord.
• Do not cover equipment while charging.
vi
Keep the battery and SD memory card used in this equipment
out of the reach of children to prevent accidental ingestion.
Consumption is harmful to human beings. If swallowed, seek
medical assistance immediately.
Keep the equipment out of the reach of children.
Do not touch the internal components of the equipment if they
become exposed as a result of being dropped or damaged. The
high-voltage circuitry in the equipment could lead to an electric
shock. Remove the battery as soon as possible, being careful
to avoid electric shocks or burns. Take the equipment to your
nearest dealer or service center if it is damaged.
Do not use the equipment in wet areas as this could result in fire
or electric shock.
Do not use the equipment near flammable gases, gasoline,
benzene, thinner or similar substances to avoid the risk of
explosion, fire or burns.
Do not use the equipment in locations where usage is restricted
or prohibited as this may lead to disasters or accidents.
Wipe off any dust that accumulates on the electrical plug as this
may lead to fire.
To avoid the risk of fire, electric shock or injury, do not use
the battery charger with commercially available electronic
transformers when traveling abroad.
vii
Observe the following precautions to ensure safe use of this unit.
Caution
Contact with fluid leaking from a battery can lead to burns. If
part of your body comes in contact with a damaged battery,
rinse the area with water immediately. (Do not use soap.)
If a battery starts to leak, remove it immediately from the
equipment and wipe the battery chamber thoroughly before
replacing it with a new battery.
Plug the power cords securely into the electrical outlets. Loose
cords pose a fire hazard.
Do not allow the camera body to get wet. In addition, do not
operate it with wet hands. Both pose the risk of electric shock.
Do not fire the flash at drivers of vehicles, as this may cause the
driver to lose control and result in a traffic accident.
Safety
Precautions for
Accessories
viii
When using optional products, carefully read the
instructions provided with the product before
using that product.
Product Manuals
The following manuals are provided with the GXR camera body:
Camera Body User Guide (this booklet)
This guide describes how to use your camera and install the
supplied software.
*Read this guide along with the documentation provided
with the camera unit.
Software User Guide (pdf file)
The Software User Guide describes how to copy pictures from
your camera body to a computer for display and editing. It is
available in several languages, each in its own folder in the
“DC Manual” folder on the supplied CD.
For ease of reference, copy the
pdf file from the CD to your
computer hard disk.
“Irodio Photo & Video Studio” image viewing and editing software
is also included with this product. For information on using this
software, see the Help menu in Irodio Photo & Video Studio or
telephone one of the following customer support centers:
• North America (U. S. A.):
+1–800–458–4029 (toll free)
• U. K., Germany, France, and Spain: +800–1532–4865 (toll free)
• Other European countries:
+44–1489–564–764
• China:
+86–21–5385–3786
• Other Asian countries:
+63–2–438–0090
Business hours: 9:00 AM to 5:00 PM
ix
Table of Contents
Package Contents....................................................................................................... ii
Notices.............................................................................................................................. iii
Safety Precautions.....................................................................................................iv
Product Manuals.........................................................................................................ix
Before You Begin
1
Read this section before using your camera body for the first time.
Introduction..................................................................................... 2
Parts of the Camera Body......................................................................................2
Basic Photography and Playback
11
Read this section before using your camera for the first time.
First Steps........................................................................................12
Charging the Battery.............................................................................................. 12
Inserting the Battery.............................................................................................. 14
Inserting Memory Cards...................................................................................... 15
Attaching the Camera Unit to the Camera Body................................. 17
Turning the Power On and Off........................................................................ 18
Basic Setup................................................................................................................... 20
Taking Photographs......................................................................21
Holding the Camera............................................................................................... 21
Taking a Photograph.............................................................................................. 22
Zoom............................................................................................................................... 26
Close-ups (Macro Mode)..................................................................................... 27
Flash Photography.................................................................................................. 28
Self-Timer...................................................................................................................... 31
Tilt Indicator................................................................................................................. 32
Viewing and Deleting Photographs...........................................34
Viewing Photographs............................................................................................ 34
Deleting Photographs........................................................................................... 39
O (DISP.) Button.................................................................................................... 42
Reference
45
Read this section for more information on camera functions.
More on Photography..................................................................46
Mode P: Program Shift.......................................................................................... 46
Mode A: Aperture Priority................................................................................... 48
Mode S: Shutter Priority....................................................................................... 49
Mode M: Manual Exposure................................................................................ 50
4 Mode: Settings for Various Scenes............................................... 52
“MY” Modes: Using Custom Settings........................................................... 57
Shooting Menu......................................................................................................... 58
Playback Functions.......................................................................94
Viewing Movies......................................................................................................... 94
Viewing MP Files....................................................................................................... 95
Playback Menu.............................................................................101
Playback Menu....................................................................................................... 101
Viewing Pictures on TV...................................................................................... 118
Printing Photographs.................................................................120
Connecting the Camera Body...................................................................... 120
Printing........................................................................................................................ 122
Camera Settings...........................................................................126
Key Custom Options........................................................................................... 129
Setup............................................................................................................................. 139
Copying Pictures to a Computer...............................................151
Windows..................................................................................................................... 151
Macintosh.................................................................................................................. 162
Technical Notes............................................................................167
Troubleshooting.................................................................................................... 167
Specifications.......................................................................................................... 175
Optional Accessories.......................................................................................... 178
Using the Product Abroad.............................................................................. 183
Precautions for Use.............................................................................................. 183
Care and Storage................................................................................................... 185
Warranty and Servicing..................................................................................... 186
NOTICES...................................................................................................................... 187
Index..............................................................................................188
xi
xii
Before You Begin
Read this section before using your camera
body for the first time.
First-time user? Read this.
Introduction............................................................... 2
Introduction
First-time user? Read this.
This manual describes how to take pictures and play
them back. To ensure that you get the most from this
product, read this manual thoroughly before use and
keep it handy when using the product.
Parts of the Camera Body
For more information, refer to the page number to the
right of each item.
Front
12
3 456
7
8 9 10
14
13
12 11
1
2
3
4
5
6
7
8
Up-down dial.................................5
Mode dial lock release....................4
Mode dial.......................................4
Shutter-release button...........21, 23
Power switch..........................18, 21
AF auxiliary light..................31, 140
Hot shoe.....................................181
Flash cover...................................29
9 Microphone................................... –
10 Strap eyelet....................................ii
11 Alignment mark for attaching
camera unit..................................17
12 Connector.....................................17
13 Camera unit release lever.............17
14 Flash.............................................28
Back
5
9 10 11
1
2
3
12
First-time user? Read this.
13
14
4
22 21 20 19 18
15
6 7 8
17
16
23
1
2
3
4
5
6
7
8
9
10
11
12
13
DIRECT button...............................5
OPEN/f(flash) button.................29
VF/LCD button.............................42
Picture display................................8
Autofocus/flash lamp
. ............................... 18, 22, 29 ,141
Connector for USB cable
. ......................... 120, 159, 160, 162
Connector for A/V cable..............118
Connector for HDMI mini cable....119
ADJ. lever...............................5, 134
6 (playback) button
. ............................... 19, 34, 94, 101
N (macro) button.......................27
8 (telephoto)/z (enlarged
view) button..........................26, 36
9 (wide-angle)/Z (thumbnail
display) button.......................26, 36
14 Directional pad.............................37
+ (!)......................................137
– (%)......................................137
Fn1 (Function1) (#)................136
Fn2 (Function2) ($)................136
15 C/D button
. ................................... 58, 101, 126
16 O (DISP.) button.....................42
17 t (self-timer)/d (delete) button
. .............................................31, 39
18 Tripod screw hole.......................176
19 Battery/card cover..................14, 15
20 Release lever..........................14, 15
21 Speaker......................................... –
22 Strap eyelet....................................ii
23 Connector cover..................118, 121
First-time user? Read this.
Mode Dial
Before shooting, press the
mode dial lock release (1)
and rotate the mode dial
to choose a shooting mode
(2).
P (program shift):
You choose from
combinations
of
shutter
speed
and aperture that
produce the same
exposure (page 46).
A (aperture priority): You
choose an aperture
and let the camera
adjust the shutter
speed for optimal
exposure (page 48).
5 (auto): The camera
sets shutter speed
and aperture for
optimal
exposure
(page 21).
MY1, MY2, MY3 (“my settings”): Recall settings
saved using Reg. My Settings (pages 57,
129).
1
2
S (shutter priority): You
choose a shutter
speed and let the
camera
adjust
aperture for optimal
exposure (page 49).
M (manual exposure):
You choose shutter
speed and aperture
(page 50).
4 (scene):
Optimize settings for
the current subject
or scene, or shoot
movies (page 52).
First-time user? Read this.
Up-down Dial and ADJ. Lever
Up-down dial
When viewing pictures or
navigating the menus, you can
use the up-down dial in place of
+ and –, and the ADJ. lever in place
of Fn1 and Fn2. The ADJ. lever and
up-down dial can also be used to
select shutter speed and aperture
in P, A, S, and M modes.
ADJ. lever
You can assign frequently-used shooting menu items
to the ADJ. lever for easy access (page 134). To display a
shooting menu item, center the ADJ. lever and press it in;
you can then use the lever and up-down dial to select an
option.
Note
The M Mode Dial Options and Playback Mode Dial Options
items in the key custom options tab can be used to change the
assigned functions of the up-down dial and ADJ. lever (page 138).
DIRECT Button
Press the DIRECT button in the
shooting mode to display the
current shooting settings.
DIRECT
DIRECT screen
For more information, refer to the page number to the
right of each item.
1
2
3
8
4 5
First-time user? Read this.
7
9
10
6
13
12
18
11
1
2
3
4
5
6
7
8
9
15
Shooting mode...............................4
Aperture........................... 46, 48, 50
Shutter speed................... 46, 49, 50
Flash mode...................................28
Flash compensation/manual
flash amount..........................78, 79
Exposure compensation...............85
ISO................................................90
White balance..............................86
Focus mode..................................64
14 16 17
10
11
12
13
14
15
16
17
18
Exposure metering.......................70
Image settings.............................71
Picture quality/size/movie size.....61
Bracketing....................................75
Continuous...................................73
Information area............................7
Macro mode.................................27
AE Lock.......................................136
Self-timer.....................................31
Changing the Shooting Settings on the DIRECT screen
On the DIRECT screen, move the cursor using +, –, Fn1,
Fn2 or the ADJ. lever (left and right) to highlight an item,
and change the setting directly using the up-down dial.
The exposure compensation can be adjusted using +
and – instead of the up-down dial.
First-time user? Read this.
Displaying the Options for the Shooting Settings
Pressing the ADJ. lever when an item is highlighted on
the DIRECT screen displays the options for the setting
item. Select the desired option using + and –, or the updown dial, and then press the ADJ. lever or the C/
D button to set the option.
Caution
The settings of shooting mode, macro mode, self-timer, and flash
mode for built-in flash cannot be changed by selecting the item
on the DIRECT screen. Change the settings using the mode dial
or the buttons on the camera body.
Notes
• Pressing the DISP. button changes the setting of background
image (page 140).
• Pressing C/D on the DIRECT screen will display the
shooting menu (page 59).
• After setting the exposure compensation, press Fn1, Fn2, or the
ADJ. lever (left or right) to move the cursor to other items.
• When in manual exposure mode, the exposure indicator to
achieve optical exposure will be displayed instead of the
exposure compensation slider.
• When in program shift mode, the value of shutter speed and
aperture will be changed at the same time to produce the same
exposure.
• The item name of shooting menu corresponding to the
selected item on the DIRECT screen will be displayed in the
information area.
Displaying the Next or Previous Page
If the items displayed on a screen extends over multiple pages,
you can display the next or previous page by pressing + or –, or
rotating the up-down dial while pressing the DIRECT button.
Picture Display
The following indicators may be displayed during
shooting and playback.
Shooting (still photography)
1 2
567
3 4
8
Shooting (movie mode)
37 38
First-time user? Read this.
4:3 N
21
22
23
24
26
25cm-
20
32
25
F 2.5
27 28
1/50
29
200
30
9
10
11
12
13
14
15
16
17
18
19
31
33
34
35
36
F 2.5
1/50
1 Flash mode............. 28
2 Flash compensation/
manual flash amount
. ........................78, 79
3 Scene mode............ 52
Continuous..............73
4 Shooting mode......... 4
5 Number of exposures
remaining *........... 177
6 Destination............. 15
7 Snap focus distance
. ........................64, 68
8 Picture quality/size
. ............................. 61
200
9 Focus mode/full
press snap.........64, 69
10 White balance/
white balance
compensation....86, 89
11 Exposure metering
. ............................. 70
12 Image settings....... 71
13 Bracketing.............. 75
14 Histogram.............. 44
15 Distortion correction
. ............................. 81
16 Noise reduction...... 80
17 Camera shake
correction............... 92
18 Date imprint........... 84
19 Battery level........... 10
20 Autoexposure lock
. ........................... 136
21 Self-timer............... 31
22 Macro mode........... 27
23 Minimum shooting
distance................ 144
24 Digital zoom ratio
. ............................. 26
25 Zoom bar................ 26
26 Interval shooting.... 83
27 Exposure indicator
. ............................. 50
28 Aperture......46, 48, 50
29 Shutter speed
. ..................46, 49, 50
30 Exposure
compensation........ 85
31 ISO.......................... 90
32 Tilt indicator........... 32 36 Focus bar................ 64
33 Exposure
37 Movie length...63, 177
warning.................. 86 38 Time available *. ..... 55
34 Blur warning.....24, 93
35 Depth of field......... 64
First-time user? Read this.
* Approximation only; actual capacity varies with shooting conditions
and make of memory card. Display shows “9999” when memory remains
for over 9,999 images.
Note
The shooting settings can be viewed by pressing the DIRECT
button (page 5).
Playback (photographs)
1
23
4
5 6 7
Playback (movies)
8
4:3 N
15
16
2010/01/01 00:20
2010/0101 00:20
9
1
2
3
4
F 2.5 1/50
ISO 200 EV+0.7
10 11
17
18
12 13 14
File number..............–
Current frame...........–
Total frames.............–
Playback mode
indicator...................–
5 Protected image... 112
6 DPOF print
indicator............... 115
7 Source.................... 15
8 Picture quality/size
. ............................. 61
9 Date of recording
. ......................20, 149
10 Aperture......46, 48, 50
11 ISO.......................... 90
12 Exposure
compensation........ 85
13 Shutter speed
. ..................46, 49, 50
14 Battery level........... 10
15 Length/elapsed time
. ...............................–
16 Progress indicator.....–
17 White balance........ 86
18 White balance
compensation..........89
Notes
• The picture display may also display warnings and messages.
4:3 N
• Additional information can be viewed
by pressing the DISP. button (page 42).
2.5
200
First-time user? Read this.
The Battery Level Indicator
Battery level is shown by the icon at the bottom right
corner of the picture display.
Icon
(green)
(green)
(orange)
10
Description
Battery fully charged.
Battery partially discharged.
Low battery. Charge or replace as soon as possible.
Basic Photography and
Playback
First-time user? Read this.
Read this section before using your camera
for the first time.
First Steps................................................................. 12
Taking Photographs.................................................. 21
Viewing and Deleting Photographs........................... 34
11
First Steps
Prepare the camera for use.
Charging the Battery
First-time user? Read this.
The rechargeable battery (DB-90) supplied with the
camera body is not charged at the time of purchase.
Charge the battery in the supplied BJ-9 battery charger
before use.
the battery in the charger.
  1Place
Place the battery label up with the “+” and “–” labels
oriented to match the labels on the charger.
Caution
Be sure the battery is in the correct orientation.
the power cord to the charger, and then
  2Connect
plug in.
The charger lamp will light while the battery
charges. An exhausted battery will recharge in
about five hours at 25 °C.
Note
If the charger lamp blinks, a battery or charger fault may
have occurred. Unplug the power cord and remove the
battery from the charger.
12
the battery.
  3Remove
Charging is complete when the charger lamp turns
off. Unplug the power cord and remove the battery
from the charger.
First-time user? Read this.
Cautions
• Rechargeable Li-ion battery: Use only a genuine DB-90 battery. Do
not use a battey not specifically designated by Ricoh for use in
this camera body.
• The battery may be hot immediately after use. Before removing
the battery, turn the power off and wait for the battery to cool
down.
• Remove the battery if the camera will not be used for extended
periods.
Tip: Battery Capacity
The number of shots that can be taken with a fully-charged
DB-90 battery differs depending on the camera unit. The tests
are conducted according to CIPA standards under the following
conditions: at the temperature of 23 °C (73 °F); with the picture
display on; shoot every 30 seconds with flash fired every other
shot; turn the camera off and on every 10 shots taken. See the
documentation provided with the camera unit for details.
13
Inserting the Battery
Be sure the power is off before inserting or removing the
battery.
First-time user? Read this.
the battery/card cover.
  1Open
Unlatch (1) and open
(2) the cover.
1
the battery.
  2Insert
Using the battery to keep
2
the battery latch pressed
downward, slide the
battery in. The latch will
click into place when the
battery is fully inserted.
the battery/card cover.
  3Close
Close (1) and latch (2)
the cover.
Caution
Be sure the cover is latched.
2
1
Removing the Battery
Unlatch and open the battery/card cover, press the latch
downward to release it, and then remove the battery. Be
careful not to drop the battery.
Caution
If the camera will not be used for an extended period, remove
and store the battery in a cool dry place.
14
Inserting Memory Cards
Pictures can be stored in the camera body’s 86 MB
internal memory, or optional SD and SDHC memory
cards. Internal memory is used if no card is inserted; if a
card is inserted, the card will be used instead.
First-time user? Read this.
Be sure the power is off before inserting or removing a
memory card.
the battery/card cover.
  1Open
Unlatch (1) and open (2)
the cover.
1
2
the card.
  2Insert
Holding the memory card
in the orientation as shown,
slide it in until it clicks into
place.
the battery/card cover.
  3Close
Close (1) and latch (2) the
cover.
2
1
15
Removing Memory Cards
Unlatch and open the battery/card cover, and then press
the memory card in to eject it. The card can then be
removed.
First-time user? Read this.
Cautions
• Pictures will not be saved to internal memory when a memory
card is inserted, even if the memory card is full.
• Keep the memory card contacts clean.
Tip: Write Protection
Slide the write-protection switch on
memory card to “LOCK” to keep data
from being written to or deleted from
the card and to prevent the card from
being formatted.
Pictures cannot be taken when the memory card is locked; lock
the card only to prevent accidental loss of data and be sure to
unlock the card before shooting.
Notes
• Format memory cards before first use or after they have been
used in a computer or other device (page 139). Be sure to back
up any important data before formatting.
• See page 177 for information on memory card capacity.
• Pictures can be copied to memory cards from internal memory
(page 115).
16
Attaching the Camera Unit to the Camera Body
First-time user? Read this.
Be sure the power is off before attaching or removing
the camera unit to/from the camera body.
Remove the connector caps
from the camera body and
camera unit respectively. Align
the left side of the camera unit
with the alignment mark on the
camera body, and then slide the
Alignment mark for
camera unit to the left until it
attaching camera unit
clicks.
Removing the Camera Unit from the Camera Body
Slide the camera unit
release lever to the right,
and remove the camera
unit.
Be careful not to drop the
camera body and camera
unit when removing the
camera unit from the
camera body.
17
Turning the Power On and Off
First-time user? Read this.
Shooting Mode
Slide the power switch to ON to
turn the camera on. The camera
will play the start-up sound. The
autofocus/flash lamp blinks for
several seconds while the camera
starts up.
To turn the camera off, slide the
power switch to OFF. The number
of pictures taken so far that day
will be displayed before the
camera turns off (zero is displayed
if the camera clock has not
been set; if you turn the camera off after changing the
clock (page 20), the camera will display the number of
pictures taken after the clock setting was changed).
Caution
Changes to continuous (page 73), interval (page 83), and selftimer (page 31) settings are lost when the camera is turned
off. Turning the camera off restores settings for MY modes to
the values saved with Reg. My Settings. Other settings are
unaffected.
18
First-time user? Read this.
Playback Mode
When the power is off, pressing
the 6 button for about a second
turns the camera on in playback
mode. Press the 6 button again
to turn the power off.
Tip: Sleep Mode and Auto Power Off
The camera will turn the display or power off automatically to
save power if no operations are performed for the specified time
in the Sleep Mode (page 141) and Auto Power Off (page 141).
19
Basic Setup
First-time user? Read this.
A language-selection dialog is displayed the first time
the camera is turned on. Follow the steps below to
choose a language and set the time and date. To exit
before setup is complete, press the DISP. button. The
language, time, and date can be changed at any time in
the setup menu (page 149).
a language.
  1Select
Press +, –, Fn1, or Fn2 to
highlight a language, and
press C/D.
the clock.
  2Set
Press Fn1 or Fn2 to highlight
the year, month, day, hour,
minute, or date format, and
then press + or – to change.
After checking that the date
is correct, press C/D.
A confirmation dialog will be
displayed; press C/D
to set the clock.
Notes
• If you leave the battery in the camera body for at least two
hours, the clock and language settings are retained for about a
week after the battery was removed.
• The time and date of recording can be imprinted on
photographs (page 84).
20
Taking Photographs
First-time user? Read this.
After setting up the camera
as described in “First Steps”
(page 12), you are ready to take
photographs. Slide the power
switch to ON to turn the camera
on, and rotate the mode dial to
5.
Holding the Camera
the camera in both hands.
  1Hold
Hold the camera in both
hands with your elbows
lightly pressed against your
body.
Caution
Be sure that your fingers, hair or
the neck strap do not obstruct the
lens or flash.
ready to shoot.
  2Get
Rest the finger on the
shutter-release button.
21
Taking a Photograph
  1Focus.
Frame your subject in the center of the picture
First-time user? Read this.
display and press the shutter-release button halfway
to set focus and exposure.
4:3 N
Autofocus/flash lamp
If the camera is able to focus, the
focus frames for the objects in
focus are displayed in green
(up to nine frames).
If the camera is unable to focus, the
focus frame blinks red and the
autofocus/flash lamp blinks
Focus frame
green.
a picture.
  2Take
Gently press the shutter-release button the rest
of the way down to take the picture. The picture
is displayed immediately after shooting for a few
seconds (page 142), and saved to internal memory
or memory card.
22
Tip: Shutter-Release Button
The camera has a two-stage shutter-release button. To focus,
lightly press the shutter-release button until you feel resistance.
This is called “pressing the shutter-release button halfway.” Press
the shutter-release button the rest of the way down to shoot.
Focus status
Focus frame
First-time user? Read this.
Tip: Focus
The autofocus/flash lamp and the focus frame show whether the
subject is in focus.
Autofocus/flash lamp
Before focusing
White
Off
Subject in focus
Green
On (green)
Unable to focus
Red (blinks)
Blinks (green)
The camera may be unable to focus on the following:
• Objects that lack contrast, such as the sky, a wall that is only one
color, or the hood of a car
• Flat objects containing only horizontal lines
• Fast-moving objects
• Objects that are poorly lit
• Objects with bright reflections or backlighting
• Flickering objects, such as fluorescent lights
• Point light sources, such as light bulbs, spotlights, or LEDs
Note that one or more focus frames may be displayed in green
even if the camera is unable to focus on the above subjects;
check focus in the picture display before shooting. If the camera
is unable to focus, lock focus on another object at the same
distance from the camera as your subject, then recompose the
photograph and take the picture (page 25).
23
First-time user? Read this.
Tip: Avoiding Blurred Pictures
To prevent blurring caused by the camera movement when the
shutter is released (“camera shake”), press the shutter-release
button smoothly and gently. Blurring is particularly likely to occur
if:
• The flash is off and lighting is poor
• Using digital zoom (page 26)
In situations in which photographs are especially prone to
blurring caused by camera shake, a J icon will be displayed
in the picture display. Hold the camera steady and try focusing
again, or attempt one of the followings:
• Turning the flash on ( ) or using auto flash ( ; see page 28)
• Choosing a higher ISO (page 90)
• Using the self-timer (page 31)
• Using the camera shake correction (page 92)
Notes
• If the flash will fire when the picture is taken, a pre-flash will be
emitted to assist focus and exposure.
• In the case of overexposure or underexposure, a
icon will
be displayed.
• You can choose how long pictures are displayed in the picture
display after shooting. If desired, photographs can be displayed
until the shutter-release button is pressed halfway (page 142).
24
Focus Lock
Use focus lock to compose photographs in which the
subject is not in the center of the frame. Focus lock can
also be used if the camera is unable to focus.
First-time user? Read this.
  1Focus.
Position your subject in the center of the picture
display and press the shutter-release button halfway
to focus.
4:3 N
the photograph.
  2Recompose
Keeping the shutter-release button pressed halfway
to lock focus, recompose the photograph.
Final composition
Main subject
a picture.
  3Take
Gently press the shutter-release button the rest of
the way down to take the picture.
Caution
If the distance between the camera and subject changes while
focus lock is in effect, focus again at the new distance.
25
Zoom
The 8 (telephoto) button can be used to zoom in and
the 9 (wide-angle) button to zoom out.
4:3 N
4:3 N
First-time user? Read this.
9 8
Zoom Zoom
out
in
  1Frame the picture using the 8 and 9 buttons.
  2Focus.
Press the shutter-release
button halfway.
a picture.
  3Take
Gently press the shutter-
release button the rest of the
way down.
Notes
• If using the camera unit without optical zoom, digital zoom
works instead of optical zoom.
• If using a camera unit equipped with optical and digital zoom,
to switch from optical zoom to digital zoom, release the 8
button once at the maximum magnification by the optical
zoom, and then press the 8 button again. To switch from
digital zoom to optical zoom, press and hold the 9 button.
• You can check the amount of optical zoom with the zoom bar
in the picture display. When using the digital zoom, the zoom
ratio is displayed in the picture display.
• When RAW is selected for Picture Quality/Size (page 61),
digital zoom cannot be used.
26
Close-ups (Macro Mode)
Use macro mode for close-ups of small objects.
the N button.
  1Press
A N icon will be briefly
  2Focus.
Frame the subject in the
First-time user? Read this.
displayed in the center of
the picture display. N will
then appear at the upper
left of the display.
4:3 N
picture display and press
the shutter-release button
halfway.
  3Take a picture.
Gently press the shutter-release button the rest of
the way down.
To exit macro mode, press the N button again.
Note
Even if Multi AF, Snap, ∞ is selected for Focus, Spot AF is used
in macro mode (page 64).
27
Flash Photography
The flash only fires when it is raised. Press the OPEN/f
button to raise the flash, and press the button again to
choose from the following flash modes:
First-time user? Read this.
Mode
Description
Flash Off The flash is off.
Auto
The flash fires automatically when required.
Red-Eye
Flash
Reduces “red-eye” in portraits taken with the flash.
Flash On The flash fires with every shot.
Combines the flash with slow shutter speeds. Use when
Flash
taking portraits that include details of the background or
Synchro. nightscape. Use of a tripod is recommended to prevent
blur.
Manual
Flash
The flash fires with every shot. The amount of flash can
be set in Manual Flash Amount (page 79).
Note
The effective range of the flash differs depending on the camera
unit. See the documentation provided with the camera unit for
details.
28
Using the Built-in Flash
the flash.
  1Raise
Press the OPEN/f button.
First-time user? Read this.
OPEN
a flash mode.
  2Select
Press the OPEN/f button to select a flash mode. The
flash mode icon appears at the top left corner of the
display.
Notes
• The selected flash mode remains in effect until a new
mode is chosen.
• The autofocus/flash lamp blinks while the flash charges.
Photographs can be taken when the lamp stops blinking.
and shoot.
  3Focus
If the flash will fire when the picture is taken, a preflash will be emitted to assist focus and exposure.
29
First-time user? Read this.
30
Notes
• To close the flash when it is not in use, gently press the center of
the flash cover down until it latches.
• The flash turns off automatically in movie, continuous, and
bracketing modes.
• Do not use the built-in flash when an optional flash is attached.
Failure to observe this precaution could cause damage to the
product.
Caution
Do not use the flash unit in close proximity to your subject’s eyes.
Particular care should be observed when photographing infants.
Do not direct the flash at the operator of a motor vehicle.
Self-Timer
a self-timer mode.
  1Choose
Press the t button once to
First-time user? Read this.
Choose from ten-second, two-second, and custom
setting timers. Use the two-second timer to prevent blur
caused by camera movement when the shutter-release
button is pressed. With the custom setting, a specified
number of pictures can be taken at a specified interval.
Set the shooting interval and number of pictures with
Custom Self-Timer in the shooting menu (page 82).
4:3 N
select the ten-second timer,
twice to select the twosecond timer, and three times
to select the custom setting
timer. Pressing the button the
fourth time turns the timer off.
The current selection is displayed in the picture
display.
Note
The selected self-timer mode remains in effect until a new
mode is chosen.
the timer.
  2Start
Press the shutter-release button to lock focus and
start the timer. If the ten-second timer or custom
setting timer is selected, the AF auxiliary light will
light.
Note
Press C/D to cancel the custom setting timer during
shooting.
31
Tilt Indicator
Use the tilt indicator to level the camera when
photographing buildings or landscapes. It is particularly
useful for compositions in which the horizon is visible.
First-time user? Read this.
options.
  1Display
Press and hold the O (DISP.)
button until level setting
options are displayed.
an option.
  2Select
Press + or – to highlight an option, and press
C/D to select the highlighted option.
Option
Off
Description
Tilt indicator is not displayed.
Tilt indicator is shown in the picture display. The amount
and direction of tilt can be checked in the tilt indicator.
The indicator turns green when the camera is level, orange
when the camera is tilted, and red if the degree of tilt
Display
exceeds the maximum degree that can be displayed with
the indicator. Tilt indicator is not shown if the display is
off, indicators are hidden, or the framing grid is displayed
(page 42).
Disp + Same as Display, except that a beep sounds periodically
Snd
when the camera is level.
Sound
32
A beep sounds periodically when the camera is level. The
tilt indicator is not displayed in the picture display.
Understanding the Tilt Indicator
4:3 N
4:3 N
Green
Camera tilted left
4:3 N
Camera level
First-time user? Read this.
Orange
4:3 N
Red
Camera tilted too far to the
right
Camera tilted 90 ° left
Note
Tilt indicator settings can also be adjusted in the setup menu
(page 144).
Cautions
• The tilt indicator is not displayed when the camera is upside
down, movies are being recorded, or the interval timer is on.
• The beep does not sound if the camera’s volume is set off (page
142).
• The tilt indicator is intended as a guide only and should not
be used as a spirit level or in other applications in which a
high degree of precision is required. Accuracy drops when the
camera is in motion or you are shooting on a vehicle or other
moving platform.
33
Viewing and Deleting Photographs
Pictures can be viewed in the picture display.
Viewing Photographs
First-time user? Read this.
Press the 6 button in shooting
mode to display the last
photograph viewed.
Press the 6 button again to exit
to shooting mode.
Tip: If the Camera Is Off
If the power is off, press the 6 button
for about a second to turn the camera
on in playback mode.
Press Fn2 to view photographs in the recorded order, Fn1
to view in reverse order. Press – to skip ten frames ahead,
+ to go back ten frames.
34
4:3
4:3 N
N4:3 N
4:3 N4:3 N
Back ten photos
20102010
2010
20102010
+
4:3 N
N4:3 N
4:3
4:3 N4:3 N
4:3 N
N4:3 N
4:3
4:3 N4:3 N
Fn1
2010
20102010
20102010
F 2.5
2.5
F 2.5
FF 2.5
200
F 2.5
200 200
200 200
2010
20102010
20102010
First-time user? Read this.
Back one photo
FF 2.5
2.5
F 2.5
F 2.5
200 200
F 2.5
200
200 200
4:3 N
N4:3 N
4:3
4:3 N4:3 N
Fn2
F 2.5
2.5
F 2.5
FF 2.5
200
F 2.5
200 200
200 200
2010
20102010
20102010
–
4:3 N
N4:3 N
4:3
4:3 N4:3 N
F 2.5
2.5
F 2.5
FF 2.5
200
F 2.5
200 200
200 200
Ahead one photo
Ahead ten photos
20102010
2010
20102010
2.5
FFF 2.5
F 2.5
2.5
200 200
F 2.5
200
200 200
Caution
The camera records JPEG copies of RAW images for display in the
picture display. When a RAW image is selected for playback, the
camera shows the JPEG copy and a RAW indicator is displayed.
If the JPEG copy has been deleted using a computer or other
device, the camera will display a small preview of the RAW
image, but you will not be able to view the image at larger
magnifications. See pages 62, 63 for information on recording
RAW images.
Tip: Viewing Pictures in Shooting Mode
Photographs are displayed in the picture display immediately
after shooting. You can choose how long pictures are displayed
using LCD Confirmation Time in the setup tab (page 142).
35
First-time user? Read this.
Tip: Viewing the Pictures in Internal Memory
If a memory card is inserted, the pictures on the memory card
will be displayed; the pictures in internal memory cannot be
viewed even if the memory card is empty. The pictures in internal
memory will only be displayed if no card is inserted in the camera
body.
Tip: Auto Rotate
If On is selected for Auto Rotate in the setup tab (page 143),
pictures will be automatically displayed in the correct orientation
in the picture display.
Viewing Multiple Photographs
Press the z or Z button
to choose the number of
photographs to display from one,
20, and 81, or to choose to sort
photographs by the date that
photographs were taken.
Single frame
20 frames
Last File
4:3 N
2010
F 2.5
200
Sort by date
36
2010
F 2.5
81 frames
4:3 N
Multi-frame views can be used to select images for
display or deletion.
In multi-frame views, use the directional pad to highlight
photographs.
First-time user? Read this.
Tip: Directional Pad
The cursor can be moved in an oblique direction by pressing the
diagonal portions on the directional pad.
Notes
• To display a photograph full frame, press the ADJ. lever in multiframe view.
• To display the photographs on the previous or next page in the
multi-frame view:
• In the 20- and 81-frame view, press +, –, Fn1, Fn2, or ADJ. lever
(left or right), or rotating the up-down dial while pressing the
DIRECT button.
• In the sort by date view, pressing + or –, or rotating the updown dial while pressing the DIRECT button displays the next or
previous page. Pressing Fn1, Fn2, or ADJ. lever (left or right) while
pressing the DIRECT button displays the photographs taken
next or previous date. If pressing Fn2, or ADJ. lever to the right
with the cursor at the last photograph, the photographs taken
the next date is displayed.
37
Playback Zoom
Press the z button or rotate the up-down dial to the
right to zoom in on the photograph currently displayed
full frame. To zoom in to the magnification selected with
One Press Zoom Ratio (page 143), press the ADJ. lever.
First-time user? Read this.
The following operations can be performed:
Use
z
To
Zoom in.
Up-down
Rotate right to zoom in, left to zoom out.
dial
When an image is magnified, press to display the image
in the magnification ratio selected for One Press Zoom
C/D Ratio. If an image is displayed at the magnification
selected for One Press Zoom Ratio, pressing C/D
cancels zoom.
Directional pad Move the areas to be displayed.
ADJ. lever
Z
Press left or right to view other images at same zoom ratio.
Zoom out.
Notes
• Maximum magnification varies with image size:
Image size
Maximum magnification
L, M, 5M, 3M
16 ×
1M
6.7 ×
VGA
3.4 ×
• Playback zoom is not available with movies or pictures taken
using M-Cont Plus.
• If Setting2 is selected for Playback Mode Dial Options in the
key custom options tab (page 138), the ADJ. lever and up-down
dial can be used to view other areas of the image.
38
Deleting Photographs
Follow the steps below to delete photographs.
Deleting Individual Photographs
First-time user? Read this.
a photograph.
  1Display
Display a photograph you want to delete in singleframe playback (page 34).
the d button.
  2Press
The options will be displayed
(you can change the
photograph by pressing Fn1
or Fn2).
Delete One.
  3Select
Press + or – to highlight Delete One, and press
C/D.
A message is displayed during deletion. Repeat
steps 2 and 3 to delete additional photographs, or
highlight Cancel and press C/D to exit.
Deleting All Files
To delete all files, press the d
button to display delete options
as described above, and select
Delete All. A confirmation dialog
will be displayed; press Fn1 or
Fn2 to highlight Yes, and press
C/D.
39
Deleting Multiple Files
Follow the steps below to delete multiple files.
the d button.
  1Press
In multi-frame playback,
First-time user? Read this.
proceed to step 2. In singleframe playback, the options
shown at right will be
displayed. Highlight Delete
Multi and press C/D.
Sel. Indiv. or Sel. Range.
  2Select
To select images one at a
time, highlight Sel. Indiv.,
press C/D, and
proceed to step 3. To select
images by specifying ranges,
highlight Sel. Range, press
C/D, and proceed to step 3.1. Press the DISP.
button to exit at any time without deleting files.
a photograph.
  3Select
Use the directional pad
(page 37) to highlight
photographs, and press
C/D. Selected picture
is marked with a d icon.
To deselect a photograph,
highlight it and press C/D again.
40
4:3 N
Tip: Selecting Ranges
To switch from Sel. Indiv. to Sel. Range, press the ADJ. lever
and follow the steps below:
3.2Use the directional pad to
highlight the last image, and
press C/D to select.
The selected images are
marked with a d icon.
4:3 N
First-time user? Read this.
3.1Use the directional pad to
highlight the first image of a
range, and press C/D
to select. The selected image
is marked with a d icon. To
deselect the image, press the
DISP. button.
4:3 N
Repeat steps 3.1–3.2 to select additional ranges, or press the
ADJ. lever to return to step 3 to select or deselect individual
photographs.
the d button.
  4Press
A confirmation dialog will be
displayed.
Yes.
  5Select
Press Fn1 or Fn2 to highlight
Yes, and press C/D.
41
O (DISP.) Button
Press the O (DISP.) button to display the information in
the picture display in shooting and playback modes.
First-time user? Read this.
Turning the Picture Display On/Off
Pressing the VF/LCD button while the picture display is on turns
the picture display off. Some camera operations are not available
when the picture display is off. Pressing the VF/LCD button again
turns the picture display on.
When a LCD viewfinder is attached, pressing the VF/LCD button
switches between the LCD viewfinder and the picture display.
Shooting Mode
Press the O (DISP.) button to cycle through the
following displays:
Indicators
displayed
4:3 4:3
N N
4:3 4:3
N N
No
indicators
Tip: The Framing Grid
See page 144 on choosing a type of framing grid.
42
4:3 4:3
N N
4:3 4:3
N N
Indicators +
histogram
Framing
grid (no
indicators)
Note
If Display or Disp + Snd is selected for Level Setting (page 32), a
tilt indicator appears when indicators are displayed.
Indicators
displayed
2010 2010
2010
2010
4:3 N
N 4:3
4:3 N
N
4:3
Details +
histogram
4:3
4:3 N
N 4:3
4:3 N
N
2.5
2.5 2.5
2.5
FF 2.5
2.5FF 2.5
2.5
200
200
200 200
First-time user? Read this.
Playback Mode
Press the O (DISP.) button to cycle through the
following displays:
200
200
200 200
2010
2010 2010
2010
4:3
4:3 N
N 4:3
4:3 N
N
No
indicators
WhiteWhite
White
Saturation
Saturation FF 2.5
White
Saturation
2.5FF 2.5
Saturation
2.5
2010
2010 2010
2010
200 200
200
200
Highlights
Tip: Highlights
The flashing portions of the highlights display indicate “washed
out” areas in which details may have been lost to overexposure.
Check images with the highlights display after shooting in direct
sunlight or in other conditions in which parts of the image may
be overexposed. If it seems important details may have been lost,
choose a lower exposure compensation value and shoot again
(page 85). Note that the display is intended only as a guide and
may not be entirely accurate.
43
First-time user? Read this.
Tip: Histogram
The histogram is a graph showing the distribution of pixels
of different brightness in the image. Brightness is plotted on
the horizontal axis, with shadows at the left and highlights
at the right. The vertical axis gives the number of pixels. The
histogram can be used to assess exposure and check for loss of
detail in highlights and shadows without the brightness of your
surroundings affecting your judgement. A histogram in which
pixels are clustered on the right indicates that the image may be
overexposed, while a histogram in which pixels are clustered on
the left indicates that the image may be underexposed.
Overexposed
Underexposed
If the image appears to be incorrectly exposed, you may be
able to use exposure compensation to correct exposure in
subsequent photographs of the same subject (page 85; note
that exposure compensation may be insufficient to produce the
correct exposure in some cases). The histogram can also be used
as a guide when adjusting contrast in photographs after shooting
(page 107).
The histogram is intended as a guide only and may not be
completely accurate, particularly in cases in which the flash is
used or ambient lighting is poor.
44
Reference
Read this section for more information on
camera functions.
More on Photography................................................ 46
Playback Functions................................................... 94
Playback Menu.........................................................101
Printing Photographs...............................................120
Camera Settings.......................................................126
Copying Pictures to a Computer................................151
Technical Notes........................................................167
45
More on Photography
This section provides information on P, A, S, M, 4,
and MY modes and on using shooting menu options.
Mode P: Program Shift
More on Photography
When the mode dial is rotated
to P (program shift), you can use
the up-down dial to choose from
several combinations of shutter
speed and aperture, all of which
produced the same exposure.
mode P.
  1Choose
Rotate the mode dial to P. The
4:3 N
shooting mode is shown by
an icon in the picture display.
exposure.
  2Measure
Press the shutter-release
button halfway to measure
exposure. The current shutter
speed and aperture appear in
the display.
2.5
shutter speed and aperture.
  3Choose
Release the shutter-release
button and rotate the
up-down dial to select a
combination of shutter speed
and aperture.
46
200
4:3 N
Note
Shutter speed and aperture can be adjusted for ten seconds
after releasing the shutter-release button.
a picture.
  4Take
Gently press the shutter-release button all the way
down to take the photograph.
More on Photography
Note
The combinations of shutter speed and aperture available at each
exposure value differ depending on the camera unit. See the
documentation provided with the camera unit for details.
47
Mode A: Aperture Priority
In mode A (aperture priority),
you choose the aperture and
the camera selects the shutter
speed. Choose large apertures
(low f-numbers) to emphasize the
main subject by blurring background and foreground
details. Choose small apertures (high f-numbers) to
bring both the background and main subject into focus.
More on Photography
mode A.
  1Choose
Rotate the mode dial to
4:3 N
A. The current aperture is
displayed in orange.
an aperture.
  2Choose
Rotate the up-down dial to
choose an aperture. Your
selection only takes effect when the photograph is
taken; the effect cannot be previewed in the picture
display.
 3
Press the shutter-release button halfway.
Press the shutter-release
button halfway to set focus and
exposure. The shutter speed
selected by the camera will be
displayed in the picture display.
4:3 N
a picture.
  4Take
Gently press the shutter-release button the rest of
the way down.
48
Note
If auto aperture shift is on (page 92), the camera will adjust
aperture for optimal exposure.
Mode S: Shutter Priority
In mode S (shutter priority), you
choose the shutter speed and
the camera selects the aperture.
Choose fast shutter speeds to
“freeze” motion, slow shutter
speeds to emphasize motion by blurring moving
objects.
More on Photography
mode S.
  1Choose
Rotate the mode dial to S.
4:3 N
The current shutter speed is
displayed in orange.
shutter speed.
  2Choose
Rotate the up-down dial to
choose a shutter speed.
the shutter-release button halfway.
  3Press
Press the shutter-release
button halfway to set focus
and exposure. The aperture
selected by the camera will
be displayed in the picture
display.
2.5
200
a picture.
  4Take
Gently press the shutter-release button the rest of
the way down to shoot.
Note
Maximum aperture (i.e., the lowest possible f-number) may not
be selected at slow shutter speeds, even when the subject is
poorly lit.
49
Mode M: Manual Exposure
In mode M (manual exposure),
use the up-down dial to choose
aperture and the ADJ. lever to
select a shutter speed.
mode M.
  1Choose
Rotate the mode dial to M.
4:3 N
More on Photography
The shooting mode, exposure
indicator, and current
aperture and shutter speed
appear in the display.
an aperture and shutter speed.
  2Choose
Rotate the up-down dial
to choose an aperture and
–2 EV
+2 EV
press the ADJ. lever left or
right to select a shutter
speed (if desired, the roles of the two controls
can be reversed; see page 138). The effects can be
previewed in the picture display and are reflected
in the exposure indicator (if the image would be
under- or over-exposed by more than 2 EV, the
effects cannot be previewed and the indicator turns
orange).
a picture.
  3Take
Press the shutter-release button halfway to focus,
and then gently press the shutter-release button the
rest of the way down to shoot.
50
More on Photography
Notes
• The shutter speeds that can be set depend on the camera unit
and the aperture setting. See the documentation provided with
the camera unit for details.
• If Auto or Auto-Hi is selected for ISO Setting (page 90),
ISO value will be fixed in manual exposure mode. The fixed
value for ISO differs depending on the camera unit. See the
documentation provided with the camera unit for details.
• Choose slower shutter speeds for longer exposure times.
To reduce blur caused by camera shake, hold the camera
steadily in both hands or use a tripod. The picture display
turns off while the shutter is open. At slow shutter speed, the
camera automatically processes photographs to remove noise,
increasing the time needed to record images to about twice the
shutter speed.
• Autoexposure (AE) lock is not available in manual exposure
mode. If AE Lock is selected for Set Fn1 Button or Set Fn2 Button in
the key custom options tab, pressing the assigned button in
manual exposure mode will set shutter speed or aperture to
a value close to that needed for optimal exposure. Similarly, if
Exposure Comp. is selected for +/– Button Settings (page 137)
in the key custom options tab, pressing the + and – buttons
will not display exposure compensation options in manual
exposure mode, but will instead set shutter speed or aperture to
a value close to that needed for optimal exposure. This is useful
when you want to use optimal exposure as a starting point for
modifying exposure. The One Press M Mode (page 138) option
in the key custom options tab determines whether shutter
speed or aperture is altered to achieve optimal exposure.
51
4 Mode: Settings for Various Scenes
Select 4 mode to shoot
movies or to choose one of the
options that are suitable for
particular scenes. Camera settings
are automatically optimized for
the selected subject type.
More on Photography
The following is some of the options that can be
selected in the 4 mode.
Option
Description
Movie
Shoot movies with sound (page 54).
Portrait
Use when taking portrait pictures.
Sports
Use when taking pictures of moving objects.
Landscape
Use when taking scenery pictures with abundant
greenery or blue sky.
Nightscape
Use when shooting night scenes.
In nightscape mode, the flash fires when all of the
following conditions are satisfied:
• The flash is set to Auto.
• The flash is determined to be necessary because it is
dark.
• There is a figure or another object nearby.
Reduce the effects of perspective when photographing
Skew Correct
rectangular objects, such as message boards or
Mode
business cards (page 56).
52
To select a scene mode option:
the mode dial to 4.
  1Rotate
The option currently selected
for 4 mode appears in
the display.
C/D.
  2Press
A menu for scene mode is
displayed.
More on Photography
an option.
  3Select
Press +, –, Fn1 or Fn2 to highlight an option and press
C/D to return to shooting mode with the
selected option shown at the top of the display.
a picture.
  4Take
• Movie mode: See page 54.
• Skew correct mode: See page 56.
53
More on Photography
Tip: Using the Menus
To access the shooting, key custom
options and setup menus in 4
mode, press C/D to display the
scene mode menu and press Fn1 to
highlight the mode tab. Press + or – to
highlight the shooting menu tab (page
58), key custom options tab (page
127), or setup tab (page 128), and press
Fn2 to place the cursor in the selected
menu. See page 59 for information on
the shooting menu options available in
each mode.
1
2
3
4
1 Mode tab
2 Shooting menu tab
3 Key custom options
tab
4 Setup tab
Recording Movies
Shoot movies with sound. Movies are stored as AVI files.
3 in 4 mode.
  1Select
Press + or – to highlight 3 (movie), and press
C/D.
The mode is shown by an
icon in the picture display.
  2Shoot.
Press the shutter-release button to begin recording;
press again to end. Recording ends automatically
when memory is full.
54
Cautions
• A
icon blinks, and the recording time and remaining
available time are displayed during recording.
• Sounds made by the camera may be recorded with the movie.
• Movies may be up to 90 minutes in length or 4 GB in size.
Depending on the type of memory card used, shooting may
end before this length or size is reached. The maximum total
length of all movie files that can be stored in internal memory
or on a memory card varies with the options selected for Movie
Size (page 61).
More on Photography
Notes
• The flash cannot be used in movie mode.
• The camera focuses when the shutter-release button is pressed
to begin recording.
• The amount of time remaining is calculated based on the
amount of memory available and may not diminish at an even
rate.
• Shooting menu options differ from those available in other
modes (page 60).
• Charge the battery before shooting. For long recordings, choose
memory cards with high write speeds and check the amount of
memory available before shooting.
55
More on Photography
4 Mode: Skew Correct
To take pictures in skew correct mode, frame the subject
so that it occupies as much of the frame as possible and
press the shutter-release button to take the photograph.
If the camera detects an object of which perspective
can be corrected, the object is shown surrounded by an
orange frame. The camera can detect up to five objects;
press Fn2 to select a different object, or press + to record
the photograph without correcting perspective. If the
camera is unable to detect a suitable object, an error
message will be displayed and the photograph will be
recorded without modification.
Caution
The camera records two images: the unmodified photograph
and a copy that has been processed to correct perspective. No
photograph will be taken if memory is insufficient to record two
images. The camera may be unable to correct perspective if:
• The subject is out of focus.
• The four edges of the subject are not clearly visible.
• There is little contrast between the subject and the background.
• The background contains many fine details.
Tip: Skew Correction
The Skew Correction in the playback menu can be used to
correct perspective of saved photographs (page 110).
56
“MY” Modes: Using Custom Settings
To take photographs using
settings saved in MY1 option
with Reg. My Settings in the key
custom options tab (page 129),
rotate the mode dial to MY1. Select
MY2 to take photographs using the settings saved with
MY2, MY3 to take photographs using the settings saved
with MY3.
More on Photography
the mode dial to MY1, MY2, or MY3.
  1Rotate
The shooting mode saved
4:3 N
using Reg. My Settings will
be displayed in the picture
display.
Note
Settings can be adjusted in MY modes. The settings saved
with Reg. My Settings are restored when another mode is
selected or the camera is turned off.
Tip: Choosing a Shooting Mode
To choose a shooting mode in MY mode without changing
other settings, use the Switch Shooting Mode option in
the shooting menu (page 92). Switch Shooting Mode is
not available for MY modes that a scene mode is assigned
to.
a picture.
  2Take
See the section on the selected shooting mode for
more information.
57
Shooting Menu
Use the +, –, Fn1, Fn2, and C/D buttons to
navigate the menus.
Caution
The shooting menu is not displayed when the camera unit is not
attached to the camera body.
the shooting menu.
  1Display
In modes other than 4,
More on Photography
pressing C/D in
shooting mode displays the
shooting menu.
Tip: 4 Mode
In 4 mode, pressing
C/D displays the mode
menu; press Fn1 to highlight the
mode tab, press – to display the
shooting menu, and Fn2 to place
the cursor in the menu.
a menu item.
  2Select
Press + or – to highlight a
menu item and press Fn2
to display options for the
highlighted item.
Note
The items on the next page can
be displayed by pressing – while
pressing the DIRECT button.
58
Scroll bar shows
position in menu
an option.
  3Select
Press + or – to highlight an option. Press C/
D to select and exit to shooting mode, or press Fn1
to select and return to the shooting menu.
The items available in the shooting menu differ
depending on the shooting mode.
5, P, A, S, M, MY1, MY2 and MY3 Modes
Option
Default
Page
Option
Page
Off
81
64 Custom Self-Timer
2Pics, 5Sec.
82
68 Interval Shooting
—
83
L 4:3 N
61 Auto Macro
Focus
Multi AF
2.5 m
Snap Focus Distance
Full Press Snap
On
69 Date Imprint
Off
84
Pre-AF
Off
70 Exposure
1
70 Compensation *
0.0
85
Exposure Metering
Image Settings
Multi
Standard
Continuous Mode
Off
Auto Bracket
Off
Flash Exposure
Compensation
0.0
Manual Flash Amount
Flash Synchro Settings
Noise Reduction
Noise Reduction ISO
Distortion Correction
71 White Balance
73 White Balance
Compensation
75
ISO Setting
78 Restore Defaults *2
3
79 Auto Aperture Shift *
1st Curtain 79 Switch Shooting
Mode *4
Off
80
Camera Shake
Over ISO 401 80
Correction *5
Off
81
1/2
More on Photography
Default
Picture Quality/Size
Multi-P AUTO 86
A: 0, G: 0
89
Auto
90
—
91
Off
92
—
92
On
92
59
4 Mode: Movie
Default
Page
Movie Size
Option
VGA640
61 White Balance
Auto
86
Focus
Multi AF
64 White Balance
68 Compensation
A: 0, G: 0
89
Default
Page
Off
81
2Pics, 5Sec.
82
68 Date Imprint
Off
84
0.0
85
Snap Focus Distance
Pre-AF
Default
2.5 m
Off
Page
Option
70
4 Mode: Portrait/Sports/Nightscape
Option
Default
Page
Option
More on Photography
Picture Quality/Size
L 4:3 N
61 Distortion Correction
Focus
Multi AF
64 Custom Self-Timer
Snap Focus Distance
2.5 m
Full Press Snap
On
69 Exposure Compensation
Pre-AF
Off
70 White Balance
Flash Exposure
Compensation
0.0
78
1st Curtain
79
Flash Synchro Settings
Camera Shake
Correction *5
Multi-P AUTO 86
On
92
Default
Page
Multi-P
AUTO
86
On
92
4 Mode: Landscape
Option
L 4:3 N
Distortion Correction
Off
Page
Option
61 White Balance
81
Date Imprint
Off
82 Camera Shake
Correction *5
84
Exposure Compensation
0.0
85
Custom Self-Timer
60
Default
Picture Quality/Size
2Pics, 5Sec.
4 Mode: Skew Correct
Default
Page
Picture Quality/Size
Option
1M 4:3 F
61 Flash Synchro Settings
1st Curtain
79
Focus
Multi AF
64 Distortion Correction
Off
81
68 Date Imprint
Off
84
0.0
85
Snap Focus Distance
Default
2.5 m
Page
Option
Full Press Snap
On
69 Exposure Compensation
Pre-AF
Off
70 White Balance
Exposure Metering
Multi
Standard
Flash Exposure
Compensation
0.0
*1Not available in mode M.
*25 mode only.
*3Mode A only.
71 Camera Shake
Correction *5
78
Auto
90
On
92
More on Photography
Image Settings
70 ISO Setting
Multi-P AUTO 86
*4Mode MY1, MY2 or MY3 only.
*5This function is not available depending on
the type of camera unit.
Picture Quality/Size / Movie Size
Image size determines the number of photographs and
movies that can be stored in internal memory or on a
memory card.
For still images, the aspect ratio and picture quality
can be selected for each option. The picture size differs
depending on the combination of the selected option,
aspect ratio and quality.
For movies, select the desired option.
61
For Still Images
Option
Aspect ratio
Compression rate
Description
More on Photography
RAW
16:9*2, 4:3, FINE/NORMAL/
3:2*2, 1:1*3 VGA*1
• Suitable for further image
processing or editing on a
computer.
L
16:9*2, 4:3, FINE/NORMAL
3:2*2, 1:1*3
M
16:9*2, 4:3, FINE/NORMAL
3:2*2, 1:1*3
• Suitable for printing at
larger size or cropping the
image on a computer.
5M
4:3
FINE
3M
4:3
FINE
1M*4
4:3
FINE
• Suitable for taking large
number of photographs.
VGA*4
4:3
FINE
• Suitable for taking large
number of photographs,
attaching the images to
e-mail or posting images
on the web.
• Suitable for printing.
*1The setting is applied for the JPEG copy.
*2The upper and lower parts on the display are blacked out.
*3The left and right sides on the display are blacked out.
*41M and VGA are the options available in the Skew Correct mode.
Notes
• See the documentation provided with the camera unit for
details on the picture size for each option.
• Options for Picture Quality/Size can be displayed by pressing
the ADJ. lever (page 134).
62
More on Photography
Tip: Picture Quality
The camera supports the following picture qualities:
• Normal: JPEG compression is used to reduce file size.
• Fine: Compression rate is low to achieve high picture quality. File
size becomes larger comparing to Normal quality.
• RAW: RAW image data are saved in DNG format; JPEG copies
are also created. The camera displays only the JPEG copy;
DNG files can be viewed and edited on a computer using the
supplied Irodio Photo & Video Studio Software (Windows only)
or commercially-available applications that support the DNG
format.
Unlike normal- and fine-quality images, RAW images are not
compressed. This increases file size but avoids the loss of quality
associated with JPEG compression. Note the following when
shooting RAW images:
• Some functions of the shooting menu are not available for
shooting RAW images. See the description of each setting for
details. Image Settings and Date Imprint options apply only
to JPEG copies and have no effect on the DNG files.
• The number of RAW photographs that can be taken in a single
burst in continuous mode differs depending on the camera unit
and the settings of shooting menu.
For Movies
Option
Image size
VGA640
640×480
QVGA320
320×240
Notes
• The options for movies differ depending on the camera unit.
See the documentation provided with the camera unit for
details.
• Movies may be up to 90 minutes in length or 4 GB in size.
63
Focus
Choose how the camera focuses. By default, the camera
uses autofocus.
Option
Description
Multi AF*
The camera selects the focus area with the closest
subject, preventing out-of-focus shots by keeping
the camera from focusing on the background.
Spot AF*
Focus on the subject in the center of the frame.
More on Photography
MF
Focus manually (page 65).
(manual focus)
Snap
Focus is fixed at distance selected with Snap Focus
Distance (page 68) for quick shutter response.
∞ (infinity)
Fix the focus distance at infinity when photographing
distant scenes.
* The icon is displayed on the DIRECT screen only.
When MF, Snap, or ∞ is selected,
the current selection is shown by
an icon in the picture display.
4:3 N
Tip: Depth of Field
Depth of field is the portion (range of distance) that appears sharp
in an image. Small apertures (high f-numbers) increase depth of
field, bringing more of the scene into focus; large apertures (low
f-numbers) decrease depth of field, emphasizing the main subject
by blurring the foreground and background. At settings of MF,
Focus bar
Snap, and ∞, the focus bar shows depth
(distances are
of field in shooting modes M, A, and P
approximate)
(in mode P, depth of field is only shown
when the shutter-release button is
Depth of field
pressed halfway and aperture values are
(green)
displayed).
64
Notes
• Fn1 and Fn2 buttons can be used to switch back and forth
between autofocus and manual or snap focus (page 136).
• To zoom in on the subject in the
center of the picture display and
check focus, press and hold C/
D. Press and hold the button again
to return to the normal shooting
display.
30
2.5
4:3 N
MF (manual focus) in the Focus menu.
  1Select
The focus mode and focus
More on Photography
Focus: MF (Manual Focus)
Manual focus can be used to lock focus or to focus when
the camera is unable to focus using autofocus.
4:3 N
bar are displayed in the
picture display.
2.5
30
the focus distance.
  2Choose
While pressing the N button, rotate the up-down
dial to focus. When using the camera unit with the
focus ring, adjust the focus using the ring.
a picture.
  3Take
See the section on the selected shooting mode for
more information.
Note
In manual focus mode, the camera can focus on the subject at
close range (macro) even if macro mode is not set.
65
Choosing the Focus and Metering Target
Target selection can be used to set focus and exposure
for off-center subjects without moving the camera,
making it easier to use a tripod.
target selection.
  1Activate
Press the ADJ. lever in the
More on Photography
focus modes other than MF,
and then press the lever to
the left or right to highlight
P. Press + or – to highlight
one of the following options
and press C/D to select.
Option
Description
Spot metering and spot autofocus; choose the focus and
AE/AF
exposure target.
AF
Spot autofocus; choose the focus target. Exposure is
metered using the option selected for Exposure Metering
(page 70).
AE
Spot metering; choose the metering target. Focus is set
using the option selected for Focus (page 64).
Off
Target selection is off.
the target.
  2Position
Use the directional pad
(page 37) to position the
cross hairs over your subject,
and press C/D.
To return to the target
selection menu, press the
DISP. button.
66
a picture.
  3Take
Press the shutter-release button halfway to set focus
and/or exposure for the selected subject and then
gently press the shutter-release button the rest of
the way down to take the picture.
More on Photography
Notes
• Target selection is not available in manual focus mode (page
65).
• The selected target remains in effect until a new target is
selected. Note that target will be reset if you choose a new
option in the target-selection menu or select manual focus.
• When macro mode is on in 4 mode, the focus target
for macro mode can be selected by pressing the ADJ. lever,
selecting U, and using the directional pad to position the
cross-hairs as described on page 68.
• The Fn buttons can be used for focus target selection in macro
mode (page 68). Note that if the Fn buttons have been used to
select the focus target, the ADJ. lever cannot be used for target
selection until the target is reset.
67
More on Photography
Macro Target Selection
If Macro Target is assigned to the Fn1
or Fn2 button (page 136), you can select
macro mode by pressing the assigned
button in shooting mode. The crosshairs shown at right will be displayed;
use the directional pad (page 37) to
position the cross-hairs over your
subject, and press C/D (to exit without setting the target,
press the DISP. button). Press the shutter-release button halfway to
focus on the selected target, and then gently press the shutterrelease button the rest of the way down to take the picture.
If the ADJ. lever has been used to select a focus target (page 66),
you cannot select macro target mode by pressing Fn1 and Fn2
until the target is canceled.
Snap Focus Distance
Select the distance at which the camera focuses when
Snap is selected for Focus (page 64) or Full Press Snap
is on (page 69). Choose from 1 m (3.3 ft.), 1.5 m (4.9 ft.),
2 m (6.6 ft.), 2.5 m (8.2 ft.), 3 m (9.9 ft.), 3.5 m (11.5 ft.), 5 m
(16.4 ft.), and ∞ (infinity).
Note
When Snap is selected for Focus or Full Press Snap is on, the
snap focus distance can also be selected by rotating the updown dial while pressing the N button.
68
Full Press Snap
Take photographs without pausing to focus the camera
when Multi AF or Spot AF is selected for Focus (page
64).
Option
Description
The function is off.
On
If the shutter-release is pressed all the way down in one
motion, the camera will take a picture at the focus distance
selected for Snap Focus Distance. Choose when quick
shutter response is required.
Auto-Hi ISO
Same as On, except that ISO sensitivity is automatically set
to Auto-Hi (page 90).
More on Photography
Off
Note
The snap focus distance can be changed by rotating the updown dial while pressing the N button.
Tip: Autofocus
The camera will focus normally if you press the shutter-release
button halfway.
Cautions
• Full press snap is not available in macro mode or when MF,
Snap, or ∞ is selected for Focus (page 64).
• Care is required to avoid blur caused by camera movement.
69
Pre-AF
If On is selected when Multi AF or Spot AF is selected for
Focus (page 64), the camera will continue to focus even
when the shutter-release button is not pressed halfway
(the focus range is narrower than for normal focus). This
may decrease the time needed to focus, potentially
improving shutter response.
More on Photography
Cautions
• Pre-AF is not available when MF, Snap, or ∞ is selected for
Focus (page 64).
• Using pre-AF increases the drain on the battery.
Exposure Metering
Choose how the camera measures light for exposure.
Option
Description
Multi* The camera measures light in 256 areas of the frame.
The camera measures light in the entire frame but assigns
the greatest weight to the center. Use when the subject
Center
in the center of the frame is brighter or darker than the
background.
Spot
The camera measures light with the subject in the center
of a frame, ensuring the optimal exposure even when it is
markedly brighter or darker than the background.
* The icon is displayed on the DIRECT screen only.
When Center or Spot is selected,
the current selection is shown by
an icon in the picture display.
70
4:3 N
Image Settings
Adjust contrast, sharpness, and vividness (color depth)
or take monochrome photographs.
Option
Description
Standard*
Normal contrast, sharpness, and vividness.
Natural
Creates a softer image with decrease in contrast,
sharpness, and vividness.
Black & White
Take photographs in black and white. Contrast and
sharpness can be adjusted manually.
B&W (TE)
(Toning Effect)
Creates monochrome photographs with a sepia,
red, green, blue, or purple tint. Vividness, contrast,
and sharpness can be adjusted manually.
Setting 1
Setting 2
Make individual adjustments to vividness, contrast,
sharpness, colors and hue to create custom settings
that can be recalled as desired.
More on Photography
Vivid
Take vivid photographs with heightened contrast,
sharpness, and vividness.
* The icon is displayed on the DIRECT screen only.
At settings other than Standard,
the current selection is shown by
an icon in the picture display.
4:3 N
To make individual adjustments to the settings for Black
& White, B&W (TE), Setting1, or Setting2, highlight the
desired option and press Fn2.
71
custom color reproduction settings.
  1Adjust
• Black & White: Press + and
– to highlight an option and
press Fn1 and Fn2 to change.
More on Photography
• B&W (TE): Adjust vividness,
contrast, and sharpness as
described above. To choose
a tint, highlight Toning
Effect and press Fn2. Press +
and – to highlight an option
and press Fn1 to select.
• Setting1/Setting2: Adjust
vividness, contrast, and
sharpness as described
above. To adjust individual
colors, highlight Individual
Color Settings and press Fn2.
Press + and – to highlight an option and press Fn1
and Fn2 to change. Press C/D to exit when
settings are complete.
To call the registered settings, highlight Recall
Settings and press Fn2. Press + or – button to
highlight an option and press C/D.
to the Image Settings menu.
  2Return
Press C/D when settings are complete.
to shooting mode.
  3Exit
Press C/D, or press Fn1 and then press
72
C/D.
The option currently selected
for Image Settings will be
displayed in the picture
display.
4:3 N
Note
Options for Image Settings can be displayed by pressing the ADJ.
lever (page 134).
More on Photography
Continuous Mode
Shoot photographs in continuous sequence.
• Continuous: The camera shoots
while the shutter-release button
is pressed.
All the photographs taken in this
mode are saved as individual
still images.
• M-Cont Plus (memory-reversal continuous plus): The camera
shoots while the shutter-release button is pressed.
Consecutive still images taken before releasing
the shutter-release button are saved as one MP file
(page 95).
M-Cont Plus can be selected from M-Cont + (HI) and
M-Cont + (LO).
When you remove your finger
from the shutter release button…
…the camera records consecutive still images.
73
Note
For M-Cont + (HI) and M-Cont + (LO) options, image sizes and
the number of images saved as one MP file differ depending
on the camera unit. See the documentation provided with the
camera unit for details.
At settings other than Off, the
current selection is shown by an
icon in the picture display.
More on Photography
Caution
Digital zoom is available at settings M-Cont Plus even if Auto
Resize is selected for Digital Zoom Image.
Notes
• At settings other than Off, the flash turns off automatically,
focus and exposure are fixed with the first shot in each series,
and Auto white balance is used in place of Multi-P AUTO (page
86).
• If you release the shutter-release button before reaching
the number of images that are saved as one MP file, the
photographs taken while pressing the button will be saved as
one MP file.
Tip: MP file
MP is a file format for recording a set of still images.
74
4:3 N
Auto Bracket
The camera records two or three copies of an image
with variations in exposure, white balance or color.
Option
Description
Auto bracket function is off.
OFF*
AE-BKT
The camera records three copies of a photograph in the
specified variation of exposure value.
CL-BKT
More on Photography
The camera records three copies
of each photograph: one with a
“warm,” reddish cast, a second
at the white balance currently
selected in the shooting menu
WB-BKT (page 86), and a third with a “cool,”
blueish cast. Choose when you
find it difficult to select the correct
white balance.
Display after shooting
Record photographs in both black-and-white and color or in
black-and-white, color, and tinted monochrome (page 77).
* The icon is displayed on the DIRECT screen only.
The current selection is shown by
an icon in the picture display.
4:3 N
75
Notes
• Bracketing is not available when an option other than Off is
selected for Continuous Mode. White balance bracketing is not
available when shooting monochrome photographs.
• White balance bracketing and color bracketing are not available
when RAW is selected for Picture Quality/Size (page 61).
• The flash turns off automatically when bracketing is in effect.
• Auto white balance is used in place of Multi-P AUTO when AEBKT is selected.
More on Photography
AE-BKT: Exposure Bracketing
To specify variations for exposure value:
AE-BKT.
  1Select
Highlight AE-BKT and then press Fn2.
the exposure compensation value.
  2Specify
Move the cursor using Fn1
or Fn2, press + or – to specify
the compensation value, and
then press C/D.
to shooting mode.
  3Return
Press C/D, or press Fn1 and then press
C/D.
Notes
• If the same exposure compensation value is set, only one image
will be displayed for the same value.
• The step value of the compensation can be set with Exposure/
Flash Comp. Step in the setup tab (page 140).
76
CL-BKT: Color Bracketing
The number and type of photographs recorded when
CL-BKT is selected for Auto Bracket depends on the
option selected for CL-BKT Black & White (TE) in the
setup tab (page 146):
• Off: The camera records two
copies of each photograph, one
in black and white and a second
in color.
More on Photography
• On: The camera records three
copies of each photograph, one
in black and white, a second in
color, and a third using the tint
selected for B&W (TE) in the
Image Settings menu (page 71).
B&W (TE) copy
Tip: Contrast, Sharpness, and Color Depth
The contrast, sharpness, and vividness of the images in the
bracketing sequence are determined by the options selected
in the Image Settings menu (page 71). The black-and-white
copy is recorded at the settings most recently selected for Black
& White, the tinted monochrome copy at the settings most
recently selected for B&W (TE), and the color copy at the setting
currently selected for Image Settings (if Black & White or B&W
(TE) is selected, the color copy will be recorded at a setting of
Standard).
77
Flash Exposure Compensation
Adjust flash amount between
–2.0 to +2.0 in steps of 1/2 or
1/3 EV. Selecting Flash Exposure
Compensation in the shooting
menu displays the slider shown at
right; press + or – to choose a flash
exposure compensation value and press C/D.
More on Photography
Flash exposure compensation is
displayed in the picture display
except when the flash is off.
Notes
• See page 28 for information on using the flash.
• The step value of the compensation can be set with Exposure/
Flash Comp. Step in the setup tab (page 140).
Caution
Flash exposure compensation may have no effect outside the
range of the flash. See the documentation provided with the
camera unit for details on the range of flash.
78
4:3 N
Manual Flash Amount
Choose amount of light produced by the flash in manual
flash mode (page 28). Flash amount is expressed as a
fraction of full power (all values are approximate):
FULL 1/1.4
1/2
1/2.8
1/4
1/5.6
1/8
1/11
1/16
1/22
1/32
Flash level is displayed in the
picture display in manual flash
mode.
1/64
4:3 N
More on Photography
Note
Flash exposure compensation is not available in manual flash
mode.
Caution
Do not direct the flash at a person operating a motor vehicle or
use the flash close to the subject’s eyes. Particular care should be
observed when photographing infants.
Flash Synchro Settings
Choose how the flash synchronizes with the shutter.
• 1st Curtain: The flash fires at the beginning of the
exposure. Recommended in most situations.
• 2nd Curtain: The flash fires at the end of the exposure.
This option produces trails of light behind moving light
sources.
79
Noise Reduction
Choose Weak or Strong to reduce noise (random
variations in brightness and color) in photographs taken
4:3 N
at high ISO sensitivities. The minimum ISO sensitivity
at which noise reduction applies can be selected using
Noise Reduction ISO.
is displayed when noise
reduction is on.
More on Photography
80
Notes
• When RAW is selected for Picture Quality/Size (page 61), noise
reduction applies only to the JPEG copy, not to the DNG file.
• The time needed to record photographs varies with the option
selected for Noise Reduction.
Noise Reduction ISO
Select the minimum ISO sensitivity to apply noise
reduction function to when Weak or Strong is selected
for Noise Reduction. Choose from All (noise reduction
applies at all ISO sensitivities), Over ISO 201, Over ISO
401, Over ISO 801, Over ISO1601, and ISO3200.
Distortion Correction
Set Distortion Correction to On to shoot by
automatically correcting the distortion of the image.
4:3 N
is displayed when distortion
correction is on.
More on Photography
Cautions
• Even if Distortion Correction is set to On, the correction is not
applied depending on the type of camera unit or when it is
not necessary depending on the zoom position. However, the
distortion correction symbol will appear in playback mode for
the images without the correction applied.
• The distortion correction function is not available for DNG files,
JPEG copies for raw data, MP files, and movies.
• When Distortion Correction is set to On, the angle of view will
change.
• The corrected image will not be displayed in the picture display
even if Distortion Correction is set to On.
Auto Macro
With Auto Macro set to On, the camera automatically
switches to the macro mode when focusing on a subject
close to the lens even if the camera is not in macro
mode.
N is displayed when the camera switches to macro
mode.
81
Custom Self-Timer
To set the number of photographs to take and the
interval of shooting for the custom setting of the selftimer option, select Custom Self-Timer in the shooting
menu and follow the steps below:
the number of photographs to take and
  1Choose
the interval of shooting.
More on Photography
82
Press Fn1 or Fn2 to highlight the numbers, and press
+ or – to change. Press C/D to return to
shooting mode.
shooting.
  2Start
Press the shutter-release button. The specified
number of photographs will be taken automatically
at the selected interval.
Press C/D to cancel the self-timer before
finishing shooting the specified number of
photographs.
Interval Shooting
To take photographs automatically at intervals of from
five seconds to one hour, select Interval Shooting in the
shooting menu and follow the steps below:
an interval.
  1Choose
Press Fn1 and Fn2 to highlight
Interval is displayed in the
picture display.
More on Photography
hours, minutes, or seconds
and press + and – to change.
Press C/D to return to
shooting mode.
4:3 N
shooting.
  2Start
Press the shutter-release button. Photographs will
be taken automatically at the selected interval.
shooting.
  3End
Press C/D to end shooting.
Cautions
• The interval timer is not available in 4 mode.
• The interval resets to zero when the camera is turned off.
• If the time needed to record photographs is longer than the
selected interval, the next photograph will not be taken until
recording is complete.
• The external flash unit will not fire in interval shooting mode.
Use the built-in flash instead.
83
Notes
• Use a fully-charged battery and be sure that sufficient space
remains in internal memory or on the memory card. Interval
timer photography ends automatically when the internal
memory or memory card becomes full.
• Photographs can be taken at any time by pressing the shutterrelease button.
• If Continuous or M-Cont Plus is selected for Continuous
Mode, continuous shooting turns off automatically.
More on Photography
Date Imprint
The camera imprints the shooting date on a picture. 4:3 N
Select an option from Date (YY/MM/DD) and Date and
Time (YY/MM/DD hh:mm).
DATE is displayed when date
imprint is on.
Notes
• Date imprint is not available when the clock is not set. Set the
clock (pages 20, 149) before using date imprint.
• The date cannot be imprinted on movies.
• When RAW is selected for Picture Quality/Size, the date is
imprinted only on the JPEG copy, not the DNG file.
• The date is permanently imprinted on the image and cannot be
removed.
84
More on Photography
Exposure Compensation
Exposure compensation may be required in the
following situations:
• Very bright backlighting: Subjects that are very strongly
backlit may be underexposed. Try increasing exposure
compensation.
• The frame is dominated by very bright objects: The subject
may be underexposed. Try increasing exposure
compensation.
• The frame is mostly dark (for example, a spotlit subject on
a darkened stage): The subject may be overexposed.
Try reducing exposure compensation.
the exposure compensation slider.
  1Display
Highlight Exposure
Compensation in the
shooting menu, and press Fn2
to display the slider shown at
right.
exposure compensation.
  2Adjust
Press + or – to adjust an exposure compensation
value. Press the shutter-release button to take a
4:3 N
picture or press C/D to return to shooting
mode.
At settings other than 0.0,
exposure compensation is
displayed in the picture display.
85
Caution
Exposure compensation is not available in mode M.
Note
The step value of the compensation can be set with the
Exposure/Flash Comp. Step option in the setup tab (page 140).
More on Photography
White Balance
At the default setting of Multi-P AUTO, the camera
automatically adjusts white balance so that a white
subject will appear white regardless of the color of the
light source. It may however be necessary to match
white balance to the light source under mixed lighting
or when photographing a subject that is a solid color.
Option
Auto*
Description
The camera adjusts white balance automatically.
The camera adjusts white balance to account for
Multi-P AUTO differences in lighting in separate areas of the frame (in
continuous mode, this option is equivalent to Auto).
Outdoors
Use when shooting in daylight under clear skies.
Cloudy
Use when shooting in daylight under cloudy skies.
Incandescent
Use with incandescent lighting.
Lamp
Fluorescent
Lamp
Use with fluorescent lighting.
Manual
Settings
Measure white balance manually (page 88).
Detail
Make fine adjustments to white balance (page 88).
* The icon is displayed on the DIRECT screen only.
86
At settings other than Auto, the
current selection is shown by an
icon in the picture display.
4:3 N
Cautions
• Auto white balance may not produce the desired results in
scenes without white objects. This can be corrected by adding a
white object to the scene before shooting.
• Options other than Auto may not produce the desired results
when the flash is used. Select Auto when using the flash.
More on Photography
white balance options.
  1Display
Highlight White Balance in shooting menu, and
press Fn2 to display options.
an option.
  2Select
Press + or – to select an option.
Press the shutter-release button to take a picture
or press the ADJ. lever or C/D to return to
shooting mode.
Note
Options for White balance can be displayed by pressing the ADJ.
lever (page 134).
87
Manual: Measuring White Balance
To measure a value for white balance:
Manual Settings.
  1Select
Highlight Manual Settings
in the white balance menu.
white balance.
  2Measure
Frame a blank piece of paper
More on Photography
or other white object so that
it fills the frame and press the
DISP. button. Repeat steps 1 and 2 until the desired
effect is achieved.
to shooting mode.
  3Return
Press C/D to return to shooting mode.
Note
Selecting an option other than Manual Settings resets manual
white balance.
Detail: Making Fine Adjustments to White Balance
To make fine adjustments to white balance:
Detail.
  1Select
Highlight Detail in the
white balance menu and
press the DISP. button.
88
a setting.
  2Choose
Press + or – to choose a white
balance. Press C/D
when settings are complete.
to shooting mode.
  3Return
Press C/D to return to shooting mode.
More on Photography
Note
Selecting an option other than Detail resets detail white balance.
White Balance Compensation
Compensate for color casts by modifying white
balance on the green-magenta or blue-amber axis. The
modifications apply to the option currently selected
for white balance and to all options selected while the
modifications are in effect.
Selecting White Balance
Compensation in the shooting
menu (page 58) displays the
controls shown at right. Choose
white balance compensation
using the directional pad (page
37). Press the DISP. button to reset
white balance compensation to
a neutral value. Press C/D
to save changes and exit, or press
the DISP. button twice to cancel.
Blue
Amount
Green
Amber
Magenta
89
White balance compensation is
shown in the picture display.
4:3 N
More on Photography
Notes
• White balance compensation can be
assigned to the ADJ. lever (page 134).
To reset, highlight Reset and press
C/D.
• White balance compensation can also
be assigned to the Fn buttons (page
136).
• When the mode dial is rotated to 4, white balance
compensation is only available in movie mode.
• The White Balance Compensation option in the playback
menu (page 109) does not use the same values as the shooting
menu option.
ISO Setting
Adjust the camera’s sensitivity to light. Higher values can
be used for faster shutter speeds when the subject is
poorly lit, preventing blur.
• Auto: The camera automatically adjusts sensitivity
according to brightness, the distance to the subject,
the options selected for macro mode, and picture
quality and size.
• Auto-Hi (high sensitivity auto): The camera
automatically adjusts sensitivity according to shooting
conditions. Comparing to the Auto setting, higher
sensitivities can be selected for the subject poorly lit.
The maximum sensitivity can be selected with ISO
Auto-High Settings in the setup tab (page 140).
90
• ISO (value): The camera shoots with the selected ISO
value. Available ISO values differ depending on the
camera unit. See the documentation provided with the
camera unit for details.
2.5
ISO 200
More on Photography
The current sensitivity is shown
in the picture display (if Auto or
Auto-Hi is selected, the sensitivity
selected by the camera is shown
when the shutter-release button
is pressed halfway).
an ISO sensitivity option.
  1Select
Press + or – to select an option.
or return to the shooting mode.
  2Shoot
Press the shutter-release button to take a picture, or
press C/D to return to shooting mode.
Notes
• Options for ISO setting can be displayed by pressing the ADJ.
lever (page 134).
• The sensitivity when using the flash and the range of available
sensitivities differ depending on the camera unit. See the
documentation of the camera unit for details.
• “Noise” (random variations in brightness and color) may appear
in photographs taken at high sensitivities.
Restore Defaults
To restore default shooting menu settings (page 59),
rotate the mode dial to 5 and select Restore Defaults
in the shooting menu. A confirmation dialog will be
displayed; highlight Yes and press C/D to restore
default values and exit to shooting mode.
91
Auto Aperture Shift
When On is selected, the camera will automatically
adjust aperture to prevent overexposure in the aperture
priority mode.
Note
Auto aperture shift is available only in the aperture priority mode.
More on Photography
Switch Shooting Mode
When the mode dial is rotated
to a MY mode (page 57), you can
use this option to switch between
5, P, A, S, and M modes without
rotating the mode dial to a
new setting. This option is only
available in MY modes, however, it is not available if a
scene mode is assigned to MY mode.
Camera Shake Correction
Select Camera Shake Correction to On to prevent blur
caused by camera shake.
E is displayed when camera shake correction is on.
92
More on Photography
Cautions
• This function is not available depending on the camera unit.
• The camera shake correction function is not available in movie
mode, continuous mode, or when the shutter speed is set to 1
or more seconds in manual exposure mode. If the function is set
on in continuous mode or when the shutter speed is set to 1 or
more seconds in manual exposure mode, E changes to F,
and in the movie mode, E disappears.
• The camera shake correction function cannot prevent the blur
caused by the movement of the subject (caused by wind, etc.).
• Effects of the camera shake correction function differ
depending on the surroundings.
Note
J appears in the picture display when camera shake is likely
to occur.
93
Playback Functions
This section describes how to view movies and MP files.
Viewing Movies
Follow the steps below to view movies.
the 6 button.
  1Press
Press the 6 button to display pictures in the
picture display.
the movie.
  2Display
Press +, –, Fn1, and Fn2 (page
Playback Functions
34) to scroll through pictures
until the first frame of the
movie is displayed. Movies are
indicated by a 3 icon.
2010
 3
Start playback.
Press the ADJ. lever to start playback. Progress
is shown in the playback display. The following
operations can be performed:
To
Press
Description
Hold the z button to fast forward, and the
Z button to rewind. If movie is paused, press
Advance/
z/Z the z or Z button to advance or rewind
rewind
one frame; keep the button pressed for slow
advance or rewind.
94
Pause/
resume
ADJ.
Press the ADJ. lever to pause; press again to
resume.
Adjust
volume
+/–
Press + to increase volume, – to decrease.
Viewing MP Files
When you shoot images with M-Cont Plus, the images
are recorded as one MP file. Follow the steps below to
view MP files.
Note
Images shot in normal continuous mode can be played back in
the same way as normal still images.
  1Press the 6 button.
the MP file.
  2Display
The MP file is displayed with the S symbol.
The display changes as follows.
z
ADJ. lever
6/6
2010/03/01 14:09
F 3.3 1 55
z
ADJ. lever
100-0001
Z
66
F 3.3 1/55
2010/01/01 02:33 ISO 200 EV +1.0
Playback Functions
F 3.3 1/55
ISO 200 EV +1.0
2010/03/01 14:09
Display for step 2
• Press the DISP. button to change between
“Normal” and “No Display”.
• The images cannot be enlarged even if
the z button is pressed. The images are
displayed in thumbnail view.
Z • The other operations are the same as those
for normal still images.
Thumbnail view
• The MP file images are displayed in
thumbnail view.
• Use the directional pad (page 37) to select
a frame.
• The DISP. button is disabled.
Single frame view
• Single frame selected on the thumbnail
view is displayed.
• Press the z button to enlarge the image.
ADJ. lever
95
100-0001
26
Stop
F 3.3 1/55
2010/01/01 02:33 ISO 200 EV +1.0
Slide Show
• Images are displayed automatically in the
order they were consecutively shot, starting
with the displayed frame.
The operations during slide show are shown below.
Playback Functions
96
Pause/Playback
Press the ADJ. lever.
Fast Forward
Press and hold z during playback.
Rewind
Press and hold Z during playback.
Slow Playback
Press and hold z during pause.
Slow Rewind
Press and hold Z during pause.
Next Frame
Press z during pause.
Previous Frame
Press Z during pause.
First Frame
Press the ADJ. lever to the left during pause.
Last Frame
Press the ADJ. lever to the right during pause.
Cautions
• The DPOF, Trim, Resize, Skew Correction (playback mode),
Level Compensation, and White Balance Compensation
functions are not available for MP files.
• Flag Function Setting and Protect cannot be set for individual
frames in an MP file. If Flag Function Setting or Protect is set
when the thumbnail view or single image view is displayed, the
setting will be applied to the MP file instead of an individual
frame.
• Individual frame of an MP file cannot be deleted.
Exporting MP Files
Follow the steps below to extract specific frames from
an MP file and save each frame as an individual still
image.
Notes
• The extracted image is saved in the same size as the original.
• The original files will be retained after extraction.
  1Press the 6 button.
the MP file you want to export.
  2Display
The MP file is displayed with
the S symbol.
2010/03/01 14:09
Playback Functions
To export multiple frames,
you can also press the z
button to display thumbnail
view, and then go to step 3.
F 3.3 1/55
ISO 200 EV +1.0
C/D.
  3Press
The playback menu appears.
+ or – to select Export
  4Press
Still Images, and then press
Fn2.
97
Selecting One Frame
+ or – to select 1 Frame.
  5Press
Press Fn1 or Fn2 to select the
frame.
  6Press C/D.
Specifying Multiple Frames Separately
+ or – to select Sel Mult, and then press
  5Press
C/D.
Playback Functions
If thumbnail view was
displayed in step 2 on page
97, skip step 5.
+ or – to select
  6Press
Sel. Indiv., and then press
C/D.
the frame, and then press C/D.
  7Select
Press the ADJ. lever to switch to the display for
specifying a range of frames. See step 7 and beyond
on page 99.
step 7 to select all the frames.
  8Repeat
To deselect a frame, highlight the frame and press
C/D.
  9Press the N button.
10Select Yes, and then press C/D.
98
Specifying a Range of Multiple Frames
+ or – to select Sel Mult, and then press
  5Press
C/D.
If thumbnail view was
displayed in step 2 on page
97, skip step 5.
+ or – to select
  6Press
Sel. Range, and then press
C/D.
the starting point for the range of frames
  7Select
you want to specify, and press C/D.
Playback Functions
If you make a mistake when selecting the starting
point for the range of frames, press the DISP. button
to return to the screen for selecting the starting
point.
Press the ADJ. lever to switch to the display for
specifying frames separately. See step 7 and beyond
on page 98.
the ending point for
  8Select
the range of frames you
Export Still Images
want to specify, and press
C/D.
Start
Execute
  9Repeat steps 7 and 8 to specify all ranges.
10Press the N button.
11Select Yes, and then press C/D.
99
Selecting All Frames
+ or – to select
  5Press
All Frames, and press
C/D.
Yes, and then press
  6Select
C/D.
Playback Functions
100
Playback Menu
This section details the options in the playback menu
and describes how to view pictures on a TV.
Playback Menu
Press the 6 button in shooting mode and follow the
steps below.
the playback menu.
  1Display
Press C/D.
to display options for the highlighted item.
Note
The items on the next page can be displayed by pressing
– while pressing the DIRECT button.
Playback Menu
a menu item.
  2Select
Press + or – to scroll through the menu and press Fn2
The playback menu contains the following options:
Option
Page
Option
Page
Flag Function Setting
102 Slide Show
111
Flag Function Display
103 Protect
112
Resize
104 Copy to Card from Internal Memory
115
Trim
105 DPOF
115
Level Compensation
106 Export Still Images
97
White Balance Compensation
109 Recover File
117
Skew Correction
110
101
Note
The menus for camera setup can be accessed from the playback
menu (page 126).
Flag Function Setting
Register the frequently viewed image files to Flag
Function Setting (up to 20 files) to recall the images
easily by selecting Flag Function Display at a later time.
Setting/Canceling One File at a Time
To set or cancel one file at a time, play the picture back and press
C/D. Highlight Flag Function Setting in the playback
menu and press Fn2 button. Highlight Set or Cancel, and then
press C/D.
Playback Menu
Notes
• When a file is set, the symbol appears on the screen.
• If 20 files have already been set, no more files can be set. Cancel
some files and set desired files.
Setting/Canceling Multiple files at a Time
Follow the steps below to set or cancel multiple files at
a time.
the thumbnail view.
  1Display
Press the z button in playback mode.
a picture.
  2Select
Highlight a picture and press C/D.
Flag Function Setting and then press Fn2.
  3Select
Selected pictures are marked with the icon.
102
additional photographs.
  4Select
Press Fn1 or Fn2 to highlight additional photographs
and press C/D. Repeat this procedure to set
or cancel all the desired files. To cancel the selected
photographs, press C/D when the file is
selected.
Playback Menu
Cautions
• If the name of the file set to Flag Function Setting is changed
using a computer, Flag Function Setting is canceled for the
file.
• When the contents of the internal memory are copied to an SD
memory card, Flag Function Setting that have been set for the
files in the internal memory is canceled.
• When a file in an SD memory card is set to Flag Function
Setting, [CLIPINFO] folder and CLIP.CLI file are created on the
SD memory card. If these are deleted, Flag Function Setting is
canceled for the corresponding files.
• If the name of a file is changed using a computer, Flag
Function Setting may not be able to be set to the files.
• Only images taken using this camera body can be set to Flag
Function Setting.
Flag Function Display
To display the images set to Flag Function Setting,
select Flag Function Display in the playback menu.
Notes
• The file set to Flag Function Setting with the smallest file
number is displayed.
• Pressing the shutter - release button or the 6 button switches
to shooting mode.
103
• If no files are set to Flag Function Setting, a message appears
and the display returns to the playback menu.
• If multiple files are set to Flag Function Setting, pressing the
N button displays the image with the smallest file number.
• When a file set to Flag Function Setting is displayed in the
full frame, pressing the +, –, Fn1 or Fn2 buttons switches to the
previous or next image.
Resize
To create a small copy of a photograph, select Resize in
the playback menu (page 101) and choose a size. The
photographs taken in L, M, 5M or 3M size (page 61) can
be copied in 1M or VGA size, and the photographs taken
in 1M can be copied in VGA. Movies and RAW-quality
photographs cannot be resized.
Playback Menu
104
Notes
• The images are copied in the aspect ratio of 4 : 3. If the aspect
ratio of original photograph is 16 : 9, 3 : 2, or 1 : 1, the left and
right, or the upper and lower parts of images are trimmed and
displayed with black border on the screen.
• See page 61 for information on choosing the size of
photographs during shooting.
Trim
Follow the steps below to trim a still image and then
save it as a separate file.
a photograph.
  1Display
Display the photograph to be copied in playback
mode.
Trim.
  2Select
Press C/D to display the playback menu,
highlight Trim, and press Fn2. To cancel trimming,
press the DISP. button.
the photograph.
  3Trim
Set the size of the trimming frame with the z or
Cautions
• Only images taken using this camera body can be trimmed.
• Movies and MP files cannot be trimmed.
• For RAW images (page 61), trimming function applies only to
the JPEG copy.
• Images can be trimmed repeatedly, however, the quality of the
image will be degraded each time by recompression.
Playback Menu
Z button, and the position of the trimming frame
with the directional pad (page 37), and then press
C/D.
Notes
• If an image is trimmed, the compression rate changes to Fine.
For images in other sizes, the compression rate will be the same
as the original’s.
• The available settings for the trimming frame size differ
depending on the original image size. Each time you press the
z button, the trimming frame decreases in size by one level, at
the maximum of 13 levels.
105
• The trimmed image size differs depending on the image’s
original size and the trimming level (the size of trimming frame).
Level Compensation
Create copies that have been processed to adjust
brightness and contrast. Correct brightness and contrast
automatically or make manual adjustments using a
histogram.
Auto: Automatic Level Compensation
a photograph.
  1Display
Display the photograph to be copied in playback
mode.
Level Compensation.
  2Select
Press C/D to display
Playback Menu
the playback menu, highlight
Level Compensation, and
press Fn2.
Auto.
  3Select
Highlight Auto and press
Fn2. If the camera is able to
create a copy, a preview will
be displayed with the original
image displayed at upper left,
the corrected copy at right. If
the camera cannot create a copy, an error message
will be displayed and the camera will exit to the
playback menu.
106
the image.
  4Copy
Press C/D. To exit without creating a copy,
press the DISP. button. A message will be displayed
while the camera copies the photograph.
Manual: Manual Level Compensation
Display the photograph to be copied and select Manual
for Level Compensation in the playback menu to
display a preview as described on the preceding page,
then follow the steps below.
the black point, white point, or mid-point.
  1Select
The manual preview contains
Playback Menu
a histogram showing
how pixels of different
brightnesses are distributed
in the image, with dark pixels
(shadows) on the left and
From left to right:
bright pixels (highlights) on
black point, midthe right. Press the ADJ. lever
point, white point
in to cycle through the black
point, mid-point, and white point and press Fn1
or Fn2 to position the selected point for enhanced
brightness and contrast as described on the
following page. For help, press the N button; press
the button again to return to the preview display.
the image.
  2Copy
Press C/D. To exit without creating a copy,
press the DISP. button. A message will be displayed
while the camera copies the photograph.
107
Tip: Choosing the Black Point, White Point, and Mid-Point
• Adjusting brightness: To make the
image brighter, move the mid-point
to the left. Moving the mid-point to
the right makes the image darker.
Playback Menu
• Correcting exposure: If the image is
overexposed, move the black point
to the right until it lines up with the
darkest pixel in the histogram (see
right). If the image is underexposed,
move the white point to the left until
it lines up with the brightest pixel.
You can then move the mid-point left
or right to adjust brightness.
• Increasing contrast: To increase contrast,
align the black point and white point
with the darkest and brightest pixels
as shown at right. You can then move
the mid-point left or right to adjust
brightness.
Correcting overexposure
Cautions
• Level compensation is available only with still images taken
using this camera body. It is not available with movies or
pictures taken using M-Cont Plus. The desired results may not
be achieved with monochrome images.
• Level compensation can be applied multiple times, however,
the quality of the image will be degraded each time by
recompression.
108
White Balance Compensation
Create copies with modified white balance.
a photograph.
  1Display
Display the photograph to be copied in playback
mode.
White Balance Compensation.
  2Select
Press C/D to
display the playback menu,
highlight White Balance
Compensation, and press
Fn2.
white balance.
  3Adjust
Choose white balance
Playback Menu
compensation using the
directional pad (page 37).
Press the DISP. button to reset
white balance compensation
to a neutral value.
C/D.
  4Press
Press C/D to copy the image (to exit without
creating a copy, press DISP. twice). A message will be
displayed while the camera copies the photograph.
109
Cautions
• White balance compensation is available only with still images
taken using this camera body. It is not available with movies or
pictures taken using M-Cont Plus. The desired results may not
be achieved with monochrome images.
• White balance compensation can be applied multiple times,
however, the quality of the image will be degraded each time
by recompression.
Skew Correction
Create copies that have been processed to reduce the
effects of perspective on rectangular objects, such as
message boards or business cards.
a photograph.
  1Display
Display the photograph to be copied in playback
Playback Menu
110
mode.
Skew Correction.
  2Select
Press C/D to display
the playback menu, highlight
Skew Correction, and press
Fn2. If the camera is able to
detect an object that can be
used to correct perspective,
a message will be displayed with the object shown
by an yellow frame. The camera can detect up to
five objects; to select a different object, press Fn2,
or press + to exit without correcting perspective. If
the camera is unable to detect a suitable subject, an
error message will be displayed.
C/D.
  3Press
A message will be displayed while the camera
copies the photograph. Copying takes from about 2
to 46 seconds, depending on image size.
Caution
Skew correction is available only with still images taken using
this camera body. It is not available with movies or pictures taken
using M-Cont Plus. For RAW images (page 61), skew correction
applies only to the JPEG copy.
Notes
• The copy is the same size as the original. More time is needed to
create a copy for larger image sizes:
Time (approx.)
Size
Time (approx.)
L
24 sec.
3M
8 sec.
M
18 sec.
1M
5 sec.
5M
12 sec.
VGA
2 sec.
To reduce the time required, create a small copy of the original
using Resize (page 104) and perform skew correction on the
copy.
• The time required for skew correction differs depending on the
camera unit.
• Skew correction can also be performed during shooting (page
56).
Playback Menu
Size
Slide Show
Selecting this option starts an automated slide show.
Pictures are displayed at three second intervals in the
recorded order. When a movie is displayed, movie
playback begins automatically.
The slide show repeats until stopped; press any button
to end the slide show.
111
Protect
Protect pictures from accidental
deletion. Protected files are
indicated by the icon shown at
right.
Caution
Formatting erases all files, including protected files.
Playback Menu
112
Protecting Individual Pictures
To protect or remove protection
from individual files, play the
picture back, select Protect in
the playback menu, and press Fn2
to display the options shown at
right (if the desired image is not
displayed, press Fn1 or Fn2 to view
other pictures). Highlight 1 File and press C/D.
4:3 N
Changing the Protect Status of Multiple Files
Follow the steps below to change the protect status of
multiple selected files.
Protect in the playback menu, and press
  1Select
Fn2.
In multi-frame playback,
proceed to step 2. In singleframe playback, the options
shown at right will be
displayed. Highlight Sel Mult
and press C/D.
Sel. Indiv. or Sel. Range.
  2Select
Select Protect in the
a photograph.
  3Select
Use the directional pad
Playback Menu
playback menu, and press Fn2
to display the options shown
at right. To select images
one at a time, highlight Sel.
Indiv., press C/D, and
proceed to step 3. To select images by specifying
ranges highlight Sel. Range, press C/D, and
proceed to step 3.1.
4:3 N
(page 37) to highlight a
photograph, and press
C/D. Protected
pictures are marked with a
icon. To remove protection
from a photograph, highlight it and press C/
D again.
113
Tip: Selecting Ranges
To switch from Sel. Indiv. to Sel. Range, press the ADJ. lever
and follow the steps below:
3.1Use the directional pad to
highlight the first image of the
range, and press C/D
to select. The selected image
is marked with an icon. To
deselect the image, press the
DISP. button.
3.2Use the directional pad to
highlight the last image, and
press C/D to select.
The selected images will be
marked with a
icon.
4:3 N
Playback Menu
Repeat steps 3.1–3.2 to select additional ranges, or press the
ADJ. lever to select or deselect individual photographs as
described in step 3.
the N button.
  4Press
A message will be displayed while the camera
protects the selected files. The camera will then
return to normal playback.
Protecting or Removing Protection from All Files
To protect all files, select Protect
and press Fn2. Highlight Select All
and press C/D. To remove
protection from all files, highlight
Cancel All and press C/D.
114
4:3 N
Copy to Card from Internal Memory
To copy all files from internal memory to a memory card,
insert the memory card in the camera body and select
Copy to Card from Internal Memory in the playback
menu. A message will be displayed while copying is
in progress; the camera will return to playback when
copying is complete.
Notes
• If the space available on the memory card is insufficient to copy
all the files in internal memory, a message will be displayed. To
copy only those files that will fit in the space available, highlight
Yes and press C/D; to exit without copying any files,
select No.
• Files cannot be copied to internal memory from a memory card.
Playback Menu
DPOF
To request professional prints of the photographs on
a memory card, first use this option to create a digital
“print order” listing the photographs you wish to print
and the number of prints, and then take the memory card
to a digital print service center that supports the DPOF
standard.
Note
If a RAW file is selected for printing, only the JPEG copy will be
printed.
Tip: DPOF
DPOF (Digital Print Order Format) is a standard used to specify
the photographs to be printed and the number of prints.
Photographs selected for printing are marked with a DPOF print
indicator (page 9).
115
Selecting Individual Photographs for Printing
To add a photograph to or
remove it from the print order,
play the picture back, select
DPOF in the playback menu, and
press Fn2 to display the options
shown at right (if the desired
image is not displayed, press Fn1 or Fn2 to view other
pictures). Highlight 1 File and press C/D.
Playback Menu
Selecting All Photographs for Printing
To select all photographs for
printing, select DPOF, press
Fn2, highlight Select All, and
press C/D. To remove
all photographs from the print
order, highlight Cancel All and
press C/D.
Selecting Multiple Photographs for Printing
To select multiple photographs for printing:
DPOF.
  1Select
Press C/D in multi-
frame playback to display the
playback menu. Highlight
DPOF and press Fn2.
116
photographs and choose the number of
  2Select
prints.
Press Fn1 or Fn2 to highlight additional photographs
and + or – to choose the number of prints. To
remove a photograph from the print order, press
– until zero is displayed.
C/D.
  3Press
A message will be displayed while the camera
creates the print order. The camera will then return
to multi-frame playback.
Recover File
To restore all the deleted files, select Recover File in
playback menu, and then press Fn2. The confirmation
message appears. Select Yes and then press C/D.
Cautions
The files cannot be restored after performing any of the following
operations.
• Turning the camera off
• Switching from playback mode to shooting mode
• Using DPOF, Resize, Copy to Card from Internal Memory,
Skew Correction, Level Compensation, White Balance
Compensation or Trim function.
• Deleting files with DPOF settings
• Initializing Internal memory or SD memory card
• Setting or canceling files for Flag Function Setting
• Exporting MP files using Export Still Images
Playback Menu
Note
If there are no files to be restored, a message appears.
117
Viewing Pictures on TV
To view pictures on a TV, connect the camera body using
the supplied A/V cable.
the camera body off.
  1Turn
Be sure the power is off before connecting or
disconnecting the A/V cable.
the A/V cable to the TV.
  2Connect
Insert the white plug into the Video input (yellow)
audio input connector, the
yellow plug into the video
input connector. Be sure the
plugs are securely connected.
Do not use force.
Playback Menu
Audio input (white)
the camera body.
  3Connect
Open the connector cover and
plug the cable into the A/V
cable connector. Do not use
force.
the television to the
  4Tune
video channel.
Select video input. See the television manual for
details.
the camera body on.
  5Turn
Press the 6 button for about a second to turn the
118
camera body on in playback mode. The camera
body’s picture display and speaker will turn off, and
photographs and movies will be played back on the
TV.
Caution
Do not use force or tug the A/V cable when handling the camera
body with the A/V cable connected.
Playback Menu
Notes
• The camera body can be connected to the video input
connector on a video recorder, and pictures can be recorded to
video or DVD.
• The camera body can be connected to TVs that support
HDMI using an HDMI mini cable (sold separately). See the
documentation provided with TVs for details.
• If connecting or disconnecting the HDMI mini cable, the display
switches to single-frame view. When the menu is displayed,
it will not switch to single-frame view even if connecting or
disconnecting the HDMI mini cable.
• When connecting the camera body to a TV using an HDMI mini
cable, the operational sounds turn off.
• The camera body supports the following video standards:
NTSC (used in North America, the Caribbean, parts of Latin
America, and some East Asian countries) and PAL (used in the
United Kingdom and much of Europe, Australia, New Zealand,
and parts of Asia and Africa). SECAM is not supported. Where
possible, it is set to the standard used in your country or
region before shipment; before connecting the camera body
to a device that uses a different video standard, choose the
appropriate video mode (page 149).
119
Printing Photographs
The camera body can be connected to a printer via
the supplied USB cable, and photographs can be
printed directly from the camera body without using a
computer.
Caution
Movies cannot be printed. If a RAW file is selected for printing,
only the JPEG copy will be printed.
Printing Photographs
Note
The camera body conforms to PictBridge, a standard widely
used for direct printing, and direct printing is consequently
only available with PictBridge-compliant printers. See the
documentation provided with your printer for information on
whether it supports PictBridge.
Connecting the Camera Body
Connect the power to the printer using the supplied
USB cable.
the camera body off.
  1Turn
Be sure that the power is off before connecting or
disconnecting the USB cable.
the USB cable to the printer.
  2Connect
Connect the USB cable to the printer and turn the
printer on.
120
the camera body.
  3Connect
Open the connector cover
and plug the cable into the
USB cable connector.
Note
If you do not press the ADJ. lever while the above message
is displayed, it may in some cases be replaced after two
seconds by a message stating that the camera body is
connecting to a computer. Turn the camera body off and
press the ADJ. lever again.
Printing Photographs
Press the ADJ. lever. The
camera body will turn on and
the message shown at right
will be displayed; press the
ADJ. lever again immediately.
The message will be replaced by the PictBridge
playback display (if the PictBridge playback
display does not appear, the camera body is still
establishing a connection to the printer).
Caution
Do not use force when connecting the USB cable or when
handling the camera body with the cable connected.
121
Printing
Photographs can be printed one at a time or multiple
photographs can be selected for printing. If a memory
card is inserted, the pictures will be printed from the
memory card; otherwise pictures will be printed from
internal memory.
Caution
Do not disconnect the USB cable while printing is in progress.
Printing Photographs
Note
If an error is displayed during printing, check the printer and take
the appropriate action.
Printing Photographs One at a Time
To print a selected photograph:
a Photograph.
  1Select
Press Fn1 or Fn2 until the
desired Photograph is shown
in the PictBridge playback
Cancel
display and press the ADJ.
1 File
All Files
lever. The menu shown
at right will be displayed;
highlight 1 File and press C/D.
Execute
Tip: Printing One Copy of All Photographs
To print one copy of all Photographs, press the ADJ. lever to
display the options shown above and select All Files.
122
printer settings.
  2Adjust
The menu shown at right
Item
Description
Paper Size
Choose the paper size.
Paper Type
Choose the paper type.
Layout
Choose the number of pictures per page.
Date Print
Include the time and date of recording. See pages
20 and 149 for information on selecting the order
in which the time and date are displayed. If the
picture was taken using Date Imprint (page 84),
only the imprinted date will be printed.
File Name Print
Include the file name.
Optimize Image
Choose whether the printer optimizes photo data.
Print Size
Choose the print size.
Print Quality
Choose the print quality.
Report Print *
Print a report.
Printing Photographs
will be displayed; highlight
an item and press Fn2 to
view the options available,
or choose Printer Select to
use the default setting for
the current printer (the options available vary with
the type of printer; items not supported by the
connected printer cannot be selected). Press + or
– to highlight an option and press C/D to
select and return to the direct print menu.
Printing Quantity Choose the number of copies.
Toner Saving *
Use less toner during printing.
1-Side/2-Sides *
Print on one or both sides of the paper.
* Ricoh printers only. Visit http://www.ricoh.com/ for details.
123
Note
To select the highlighted option
as the default for the current
printer when the camera body is
connected, press the ADJ. lever.
The menu shown at right will be
displayed; highlight Set and press
C/D. Select Cancel to exit without changing the
default setting.
printing.
  3Start
To start printing, press C/D when the direct
Printing Photographs
124
print menu shown in step 2 is displayed. A message
is displayed during printing; to exit before printing
is complete, press the DISP. button. The PictBridge
playback display will appear when printing is
complete.
Printing Multiple Photographs
To print multiple photographs:
the Z button.
  1Press
Photographs will be
4:3 N
displayed in multi-frame
playback.
a picture.
  2Select
Highlight a picture and press
C/D.
number of prints. Selected
pictures are marked with
a icon; to deselect a
photograph, press – until
zero is display.
Printing Photographs
the number of prints.
  3Choose
Press + or – to choose the
additional Photographs.
  4Select
Press Fn1 or Fn2 to highlight additional photographs
and press + or – to choose the number of prints.
printer settings.
  5Adjust
Press C/D to display the direct print menu.
Adjust settings as described on page 123.
printing.
  6Start
To start printing, press C/D when the direct
print menu is displayed. A message is displayed
during printing; to exit before printing is complete,
press the DISP. button. The PictBridge playback
display will appear when printing is complete.
125
Camera Settings
The menus for modifying the camera settings can be
accessed from the shooting and playback menus (pages
58 and 101).
the menus.
  1Display
Press C/D to display the menu for the
current mode on page 58 (in scene mode, a MODE
tab will be displayed).
a tab.
  2Select
Press Fn1 to highlight the tab
Camera Settings
1
for the current menu and
2
press + or – to highlight the
key custom options tab (page
127) or the setup tab (page
128). Press Fn2 to place the
1 Key custom options
cursor in the selected tab.
tab
2 Setup tab
a menu item.
  3Select
Press + or – to highlight a
menu item and press Fn2
to display options for the
highlighted item.
an option.
  4Select
Press + or – to highlight an option and press
C/D to select and exit (the procedure may
differ for some items; see the page for the item).
126
The key custom options tab contains the following
options.
Option
Default
Reg. My Settings
—
Recall My Settings
—
Edit My Settings
—
My Settings for Fn
Settings
Off
My Settings WB Comp.
ADJ Lever Setting 1
ADJ Lever Setting 2
ADJ Lever Setting 3
ADJ Lever Setting 4
Page
Option
129 ADJ Shutter
131 Confirmation
Page
Off
135
AF/MF
136
132 Set Fn1 Button
Set Fn2 Button
Manual Flash 136
133
+/– Button Settings Exposure Comp. 137
Off
133 Playback Mode Dial
White Balance 134 Options
ISO
134 M Mode Dial Options
Quality
Default
134 One Press M Mode
Setting1
138
Setting1
138
Aprtr Priority
138
Image Settings 134
Camera Settings
127
The setup tab contains the following options:
Option
Default
Page
Option
Format [Card]
—
139 Level Setting
Format [Internal
Memory]
—
139
LCD Brightness
—
139 Fn Button Display
Default
Page
Display
144
Grid Guide Display
Options
144
On
145
Show My Setting Name
Off
145
Shooting Info. Display
Frame
Off
145
CL-BKT Black & White
140 (TE)
On
146
DIRECT Screen
Transparency
Normal
140
Exposure/Flash Comp.
Step
1/3EV
140
ISO Auto-High Settings
AUTO 400
140 Color Space Set
sRGB
146
Sleep Mode
5 minutes
141 Digital Zoom Image
Normal
147
Auto Power Off
5 minutes
Playback Screen
LCD
141 Store Menu Cursor
141 Position
Off
147
LCD Auto Dim
On
On
148
AF Auxiliary Light
Camera Settings
LCD Confirmation Time
Operation Sounds
Volume Settings
One Press Zoom Ratio
Auto Rotate
Minimum Shooting
Distance
On
0.5 seconds
All
(medium)
9.8 ×
On
Show
142 Card Sequence No.
142 Date Settings
142 Language/L
Video Out Mode
142
HDMI Output
143 Start Settings Readout
—
149
(Varies *)
149
(Varies *)
149
AUTO
149
Body
150
143 * Varies with country or region of purchase.
144
Cautions
• The options displayed in the key custom options tab and
setup tab may differ depending on whether the camera unit is
attached to the camera body.
• The options displayed in the key custom options tab and setup
tab may differ depending on the camera unit.
128
Key Custom Options
Reg. My Settings
Settings saved using Reg. My Settings can be
recalled by rotating the mode dial to MY1, MY2, or MY3,
allowing you to easily create and recall up to six sets of
frequently-used shooting settings.
settings.
  1Adjust
Set the camera to the desired settings. The following is
Note
The settings that can be saved in MY settings differ depending
on the camera unit. See the documentation provided with the
camera unit for details.
Camera Settings
some of the settings that can be saved in MY settings:
• Camera settings: Shooting mode (5, P, A, S, M, or
4 mode), zoom position (in 4 mode),
aperture (in A and M modes), shutter speed (in S
and M modes), manual focus, macro, flash, selftimer and display modes.
• Shooting menu options: All options except Interval
Shooting, Auto Aperture Shift, and Switch
Shooting Mode. White balance compensation can
be assigned if My Settings WB Comp. is on (page
133).
• Setup options: Set Fn1 Button/Set Fn2 Button (if
My Settings for Fn Settings is on; see page 133),
+/– Button Settings, ISO Auto-High Settings,
Exposure/Flash Comp. Step, Minimum Shooting
Distance, Level Setting, Grid Guide Display
Options, Shooting Info. Display Frame, CL-BKT
Black & White (TE), and Digital Zoom Image.
129
Reg My Settings.
  2Select
Highlight Reg. My Settings in
the key custom options tab,
and press Fn2.
settings.
  3Save
To assign the settings to MY1,
MY2, or MY3 on the mode dial,
highlight MY1, MY2, or MY3,
and press C/D (to exit
without saving settings, press
the DISP. button).
Camera Settings
130
To save the settings to a “box”
to be recalled and assigned
to the mode dial at a later
date (page 131), select My
Settings Box and press Fn2.
Highlight the desired box
and press C/D.
Unnamed boxes will be
named using the current
date. If the box has already
been assigned a name, the
dialog shown at right will be
displayed. Select Yes to use
the current name, No to use
a name based on the current
date.
Recall My Settings
Copy settings from a “box” to MY1, MY2, or MY3.
Select Recall My Settings in the key custom options tab,
press Fn2, and follow the steps below.
a destination.
  1Select
Highlight the destination
for the stored settings (MY1,
MY2, or MY3) and press Fn2.
the source.
  2Select
Highlight the settings that
To exit without assigning settings to the mode dial,
press the DISP. button.
Camera Settings
will be assigned to the
selected position on the
mode dial and press C/
D.
Caution
If Edit My Settings is used to edit boxes that are currently
assigned to the mode dial, the changes will be reflected when
the mode dial is rotated to the position assigned to the box.
Changes to settings assigned directly to MY1, MY2, or MY3 are not
however reflected in the boxes currently assigned to the mode
dial, and if the boxes are subsequently changed, these changes
will not be reflected in the settings assigned to MY1, MY2, or MY3.
131
Edit My Settings
Edit and rename settings saved with Reg. My Settings.
Select Edit My Settings in the key custom options tab,
press Fn2, and follow the steps below.
a setting.
  1Select
To edit the settings assigned
to MY1, MY2, or MY3 on the
mode dial, highlight MY1,
MY2, or MY3 and press Fn2.
Camera Settings
To edit “box” settings, select
My Settings Box and press
Fn2. Highlight the desired box
and press Fn2.
settings.
  2Edit
Press + or – to highlight items
and press Fn2 to edit (see the
section for each item in this
manual for more information).
After editing each item, press
Fn1 to return to the settings
list, where you can edit
additional settings.
changes and exit.
  3Save
Press C/D to save changes and exit (to exit
without saving changes, press the DISP. button).
132
Tip: Naming My Settings
Name area
Select Name in step 2 to rename
the setting. The current name is
highlighted in the name area; to edit
the current name, press Fn1 or Fn2
to position the cursor in the name
area and press – to place the cursor
in the keyboard area (to delete the
Keyboard area
current name, press – while the name
is highlighted). Highlight characters
using +, –, Fn1, or Fn2, and press C/D to enter the
highlighted character at the current cursor position (to delete the
character at the current cursor position, select [Delete]). Press the
t button to switch between upper and lower case. Names can
be up to 32 characters long. Press the ADJ. lever to exit, or press
the DISP. button to exit without renaming the settings.
My Settings WB Comp.
Select On to save the white balance compensation
setting (page 89) to MY settings saved in Reg. My
Settings.
Camera Settings
My Settings for Fn Settings
Select On to save the settings assigned to the Fn buttons
(page 136) to MY settings saved in Reg. My Settings.
133
ADJ Lever Setting
Assign up to four frequently-used options to the ADJ.
lever for quick access in 5, P, A, S, and M modes. At
default, the ADJ. lever can be used for white balance
(page 86), ISO setting (page 90), picture quality
(page 61), and image setting (page 71). The following
functions can also be assigned; white balance
compensation (page 89), focus (page 64), metering
(page 70), continuous (page 73), bracketing (page 75),
flash compensation (page 78), manual flash amount
(page 79), and exposure compensation (page 85).
In 4 mode, the ADJ. lever can be used to select
white balance and exposure compensation (exposure
compensation is not available for Movie mode).
Camera Settings
134
Using the ADJ. Lever
To select an option currently assigned to the ADJ. lever:
options.
  1Display
Press the ADJ. lever in shooting mode, and press the
lever to the left or right, or press Fn1 or Fn2 to view
the options assigned to the lever.
Setting 1
Setting 3
an option.
  2Select
Press + or – to highlight an option, and press the ADJ.
lever or press C/D.
Camera Settings
Setting 4
Setting 2
Tip
Press and hold the ADJ. lever to page rapidly through the available
options.
ADJ Shutter Confirmation
Select On to use the shutter-release button to select the
highlighted option in the ADJ. mode.
135
Set Fn1/Fn2 Button
Choose the functions assigned
to the Fn1 and Fn2 buttons with
Set Fn1/Fn2 Button in the key
custom options tab.
The following is some of the functions that can be
assigned to the Fn1 and Fn2 buttons.
Option
Description
AF/MF
Switch between multi AF or spot AF and manual focus
(page 64). *1, 3
AF/Snap
Switch between multi AF or spot AF and snap focus (page
64). *4
AE Lock
Lock exposure. *2, 5
Camera Settings
If options other than RAW is selected for Picture Quality/
JPEG>RAW *10 Size, pressing the Fn button selects a RAW option with the
same aspect ratio (page 61). *5, 6
Color>B&W
Select Black & White for Image Settings (page 71). *7
Color>TE
Select B&W (TE) for Image Settings (page 71). *7
Exposure Comp. Display the exposure compensation slider (page 85). *5
White Balance Display white balance options (page 86).
WB Correction
Display white balance compensation controls (page
89). *9
ISO
Display ISO sensitivity options (page 90). *7
Quality
Display picture quality/size options (page 61).
Focus
Display focus options (page 64). *4
Image Settings Display image setting options (page 71). *7
Expo. Metering Display exposure metering options (page 70). *7
136
Cont. Mode
Display continuous shooting options (page 73). *8
Auto Bracket
Display bracketing options (page 75). *8
Macro Target
Position the focus target in macro mode (page 68). *3
Flash Comp.
Display the flash compensation slider (page 78). *4, 5
Option
Flash Amount
Description
Adjust manual flash output (page 79). *8
*1 If focus is locked in autofocus mode (page 64), selecting manual focus
sets the focus distance to the distance at which focus is locked.
*2 Exposure cannot be locked in mode M. Pressing the Fn button in mode
M sets shutter speed and aperture to values close to those needed for
optimal exposure.
*3 Not available when Portrait, Sports, Landscape or Nightscape is
selected in 4 mode.
*4 Not available when Landscape is selected in 4 mode.
*5 Not available when Movie is selected in 4 mode.
*6 Not available when Skew Correction is selected in 4 mode.
*7 Not available in 4 mode other than Skew Correction.
*8 Not available in 4 mode.
*9 Not available in 4 mode other than Movie.
*10The image sizes of the files switched to RAW differ depending on the
settings selected in Picture Quality/Size.
Sizes in RAW Data
L (4:3), M (4:3)
RAW (4:3)
L (3:2), M (3:2)
RAW (3:2)
L (1:1), M (1:1)
RAW (1:1)
Camera Settings
Settings in Picture Quality/Size
L (16:9), M (16:9), 5M, 3M, 1M, VGA RAW (16:9)
By default, AF/MF is assigned to the Fn1 button and Flash
Amount to the Fn2 button.
+/– Button Settings
Choose the functions to assign to the + and – buttons.
Choose from Off, Flash Comp. (page 78), Flash Amount
(page 79), and Exposure Compensation (page 85).
137
Playback Mode Dial Options/M Mode Dial Options
Choose the functions to assign to the ADJ. lever and updown dial for playback zoom and in mode M.
Playback Mode Dial Options
Setting1
ADJ.
lever
Updown
dial
Setting2
M Mode Dial Options
Setting1
Setting2
Next/previous
Scroll left/right Shutter speed
frame
Aperture
Scroll up/
down
Shutter speed
Zoom in/out
Aperture
Camera Settings
One Press M Mode
When exposure compensation is assigned to the + and
– buttons (page 137) or AE lock is assigned to the Fn1
and Fn2 button (page 136), pressing the assigned button
in manual exposure mode sets shutter speed and/or
aperture to values close to those needed for optimal
exposure. Select a setting from the following options.
• Aprtr Priority: Aperture remains at the selected value;
shutter speed is adjusted for optimal exposure.
• Shttr Priority: Shutter speed remains at the selected
value; aperture is adjusted for optimal exposure.
• Program: Both aperture and shutter speed are
adjusted for optimal exposure.
Note
In manual exposure mode, exposure compensation cannot
be performed with the + and – buttons, nor can AE lock be
performed with the Fn buttons.
138
Setup
Format [Card]/Format [Internal Memory]
Select Format [Card] to format the memory card before
first use, after using it in another device, or if a card error
is displayed when the card is inserted in the camera
body. Select Format [Internal Memory] if a message is
displayed prompting you to format internal memory.
Cautions
• Formatting permanently deletes all data on the card or in
internal memory. Before formatting, copy any data you wish to
keep to a computer (page 151).
• Selecting Format [Card] when no memory card is inserted
displays an error message. Turn the power off and insert a
memory card.
Camera Settings
Tip: Write Protection
To prevent memory cards from being formatted, slide the writeprotect switch to the “LOCK” position (page 16). Restore the
switch to its original position to resume normal operation.
LCD Brightness
Selecting this option displays
the control shown at right. Press
+ or – to adjust picture display
brightness, and press C/D
to return to the setup menu.
Press C/D again to exit to
shooting or playback mode.
139
Note
The brightness display shows the view through the lens
(shooting mode) or the most recently viewed picture (playback
mode; if no picture is available for playback, no image will be
shown in the brightness display).
DIRECT Screen Transparency
Choose the density of the background image displayed
on the DIRECT screen from Dark, Normal, Light, or
Image OFF.
Exposure/Flash Comp. Step
Choose the step value for the exposure compensation
and flash compensation. Choose from the value of
1/2EV or 1/3EV.
Camera Settings
Note
In the shutter priority mode, step value is set to 1/3EV even if
1/2EV is selected for Exposure/Flash Comp. Step.
ISO Auto-High Settings
Choose the maximum sensitivity selected by the camera
when Auto-Hi is selected for ISO Setting in the shooting
menu (page 90). Choose from settings of ISO 200 (AUTO
200), 400 (AUTO 400), 800 (AUTO 800), 1600 (AUTO
1600) or 3200 (AUTO3200).
Note
Noise (random variations in brightness and color) may appear in
photographs taken at high sensitivities.
AF Auxiliary Light
If On is selected, the AF auxiliary light will light to assist
the focus operation when the subject is poorly lit.
140
Sleep Mode
Choose the delay before the picture display enters
sleep mode. Choose from Off, 1 minute, 5 minutes or
30 minutes. Autofocus/flash lamp lights in sleep mode.
Press any button to cancel the sleep mode.
Cautions
• The camera body does not enter sleep mode when:
• Shooting, playback, key custom optins or setup menu is
displayed.
• The camera body is turned on by pressing the 6 button with
the power switch at OFF position.
• The lens of camera unit is not retracted in the sleep mode.
Note
When Sleep and Auto Power Off are set, Auto Power Off works
after the specified time for Sleep has elapsed.
Camera Settings
Auto Power Off
Choose the delay before the camera turns off
automatically to save power when no operations are
performed. Select from Off (the camera does not turn off
automatically), 1 minute, 5 minutes, and 30 minutes.
Playback Screen
Choose the screen to display playback images from LCD
(picture display) or VF (viewfinder) for when the LCD
viewfinder (VF-2) is attached to the camera body.
When the viewfinder is not attached, the playback
images are displayed in the picture display regardless of
the setting for Playback Screen.
141
LCD Auto Dim
If On is selected, the picture display dims to save power
when the camera is not moved for approximately five
seconds in shooting mode. Move the camera or press any
button to return to the original picture display brightness.
LCD Confirmation Time
Choose how long photographs are displayed in the
picture display immediately after shooting. Select from
0.5, 1, 2, and 3 seconds, Hold (photograph is displayed
until shutter-release button is pressed halfway and can
be viewed with playback zoom or deleted; see pages 38
and 39), and Off (photographs are not displayed in the
picture display after shooting).
Camera Settings
Operation Sounds
Choose when the camera plays a sound.
Option
Description
All
Sounds are played at startup, when the shutter is released,
when the camera focuses, and when an error occurs. If Sound
or Disp + Snd is selected for Level Setting (page 32), the camera
will also beep at regular intervals when the camera is level.
Level
Sound
If Sound or Disp + Snd is selected for Level Setting, the camera
will beep at regular intervals when the camera is level.
Sounds are played when the shutter is released or an error
Shutter
occurs. If Sound or Disp + Snd is selected for Level Setting, the
Sounds
camera will beep at regular intervals when the camera is level.
Volume Settings
Select the volume for the sounds described in
“Operation Sounds.” Choose from
(off ),
(low),
(medium), and
(high).
142
One Press Zoom Ratio
Select the magnification at which pictures are displayed
when zoomed in using the C/D button or ADJ.
lever (page 38). Choose from 5.7 ×, 9.8 ×, and 16 ×.
Notes
• Maximum magnification ratio differs depending on the image
size (page 38).
• If the maximum magnification ratio of an image size is smaller
than the setting specified in One Press Zoom Ratio, the image
can be magnified at the maximum ratio for the image size
(page 38).
Auto Rotate
Select On to automatically display pictures in the correct
orientation during playback.
Camera Settings
Caution
Movies, pictures taken using M-Cont Plus (page 73), and pictures
taken with the camera upside down or tilted sharply forward or
back are not rotated for display. Pictures are not rotated when
the camera unit is not attached to the camera body, during
slide shows, in multi-frame playback, or when displayed on a TV,
nor are they rotated when the camera is upside down or if the
camera is rotated during playback zoom or while skew correction
is in progress.
Note
During bracketing or when taking pictures using Continuous,
the camera only records the orientation for the first photograph
in each series. The remaining photographs will not be displayed
in the correct orientation if the camera was rotated during
shooting.
143
Minimum Shooting Distance
Select Show to display the minimum shooting distance
in the picture display.
Level Setting
The camera uses a tilt indicator and sounds to let you
know whether the image is level during shooting.
Choose tilt indicator settings (page 32).
Grid Guide Display Options
Choose the type of framing grid available in shooting
mode (page 42).
Item
Description
Camera Settings
A three-by-three grid for “rule of thirds”
composition.
A four-by-four grid with diagonal lines running
from corner to corner makes it easy to find the
center of the subject. Use for architectural
photography or photographing products for
display.
A two-by-two grid with the center of the frame
left clear to make it easier to view the subject.
Use if your subject is in motion.
144
Fn Button Display
Select On to display the options
currently assigned to the Fn
buttons when the camera is
turned on, shooting mode is
selected, or a new mode is
selected with the mode dial.
Show My Setting Name
Select On to display the name
of the settings assigned to the
current position on the mode dial
when the dial is rotated to MY1,
MY2, or MY3.
4:3 N
2010
4:3 N
Camera Settings
Shooting Info. Display Frame
Select On to display shooting
icons in a frame surrounding
the view through the lens (page
8), making it easier to frame
photographs in the picture
display. The frame is not displayed
in movie mode.
4:3 N
145
CL-BKT Black & White (TE)
Choose the number and type of copies created with
color bracketing (page 77). Select On to record three
copies of each shot (one in black and white, a second
in color, and a third using a monochrome tint), Off
to record two copies (one in black and white and the
second in color).
Note
Regardless of the selected setting, three copies of each
photograph will be recorded if B&W (TE) is selected for Image
Settings.
Camera Settings
146
Color Space Setting
Choose the color space used to record photographs.
sRGB is widely used to reproduce digital images but
offers a smaller gamut of colors than AdobeRGB.
Caution
The Adobe RGB color space was developed by Adobe Systems,
Inc., and is compatible with the default color space used in
Adobe Photoshop and other image editing software. Note,
however, that colors will only be reproduced correctly in
software that supports the Adobe RGB color space. Also note
that specialized equipment is required to print the full range of
colors in the Adobe RGB gamut; when printed using consumer
household printers or digital photo print services, colors will
generally be less vivid than in photographs that use the sRGB
color space.
Caution
Auto Resize has no effect when M-Cont Plus or Skew
Correction is selected in 4 mode, or when RAW is selected
for Picture Quality/Size.
Camera Settings
Digital Zoom Image
Choose how the image taken using the digital zoom will
be saved.
• Normal: Normal digital zoom. It crops a portion of
an image and enlarges the portion back to the size
selected in Picture Quality/Size, resulting in lower
image quality.
• Auto Resize: It crops a portion of an image and save
the image in the cropped size. It keeps from decreasing
the image quality, however, the image size becomes
smaller. The sizes of cropped image differ depending
on the zoom ratio. See the documentation provided
with the camera unit.
Auto Resize zoom is available only when 4:3 for L is
selected for Picture Quality/Size (page 61).
4:3 N
The current picture size is
displayed in the picture display
when the camera is zoomed in.
Store Menu Cursor Position
If On is selected, the most-recently accessed item will be
highlighted when menus are displayed.
147
Card Sequence No.
Choose how the camera names image files when saving
photographs to a memory card.
• On: File names consist of “R” followed by a seven-digit
number (e.g., “R0010001.jpg”), assigned in ascending
order from 0010001 to 9999999. When a new memory
card is inserted, file numbering continues from the last
number used.
• Off: File names consist of “RIMG” followed by a fourdigit number (e.g., “RIMG0001.jpg”), assigned in
ascending order from 0001 to 9999. When a new
memory card is inserted, file numbering is reset to
0001.
Camera Settings
Notes
• This option applies only to memory cards. The names of
Photographs in internal memory consist of “RIMG” and a fourdigit number.
• Photographs copied to a computer using DL-10 (page 151) are
given new names consisting of “RIMG” and a four-digit number.
• Photographs taken with AdobeRGB selected for Color Space
Setting (page 146) are indicated by file names beginning with
an underscore (e.g., “_R010001.jpg” or “_RIMG001.jpg”).
Caution
When On is selected, no further photographs can be stored if the
memory card contains a folder numbered 999 and a file name
ending in 9999; when Off is selected, no further photographs
can be stored if the memory card contains a file numbered 9999.
To take additional Photographs, format the card after copying its
contents to a computer.
148
Date Settings
Set the camera clock (page 20).
Note
If you leave the battery in the camera body for at least two hours,
the battery can be removed for about a week without resetting
the clock.
Language/L
Choose the language in which camera messages and
menus are displayed.
Option
Description
Japanese
Option
Русский
Description
Russian
English
Simplified Chinese
Deutsch
German
Traditional Chinese
Français
French
Korean
Italiano
Italian
Thai
Español
Spanish
Video Out Mode
When connecting the camera body to a TV or VCR
(page 118), choose a video out mode that matches the
standard used in the device. The camera body supports
NTSC and PAL; SECAM is not supported.
Camera Settings
English
HDMI Output
Choose the resolution of image output using an HDMI
mini cable. Choose the setting from AUTO or Manual.
Note
Normally, select AUTO. If the resolution of image displayed on TV
is low with the Auto setting, select Manual. The image may be
improved.
149
Start Settings Readout
When the camera turns off, the settings are saved both
in camera body and camera unit.
Choose the destination to read out the settings from
Body or Camera Unit.
Camera Settings
150
Copying Pictures to a Computer
This section describes how to copy pictures from
the camera body to your computer. Instructions for
Windows may be found below; those for the Macintosh
begin on page 162.
Note
The dialogs shown in this section may differ from those displayed
by your computer.
Windows
Note
Detailed instructions may be found in the Software User Guide on
the supplied CD (page ix).
Copying Pictures to a Computer
You can copy pictures to your computer by either of the
following methods:
• Install the supplied DL-10 software (page 153) and use
it to copy pictures as described on page 159.
• Copy pictures without using DL-10 or other image
copy software. (page 160).
151
System Requirements
Before using the supplied CD, check that your
computer meets the following requirements. See the
documentation provided with your computer for details.
OS
Windows 2000 Professional SP 4, Windows XP Home
Edition/Professional SP 3, Windows Vista SP 2
CPU
Windows 2000/Windows XP: Pentium® lll 500 MHz or faster
Windows Vista: Pentium® lll 1 GHz or faster
RAM
Windows 2000/Windows XP: 256 MB or more
Windows Vista: 512 MB or more
Free disk space A minimum of 160 MB required for installation
Video
Miscellaneous
Copying Pictures to a Computer
152
1024 × 768 pixels or more with 16-bit color or better
• Compatible CD-ROM drive
• Compatible USB port
Cautions
• 64-bit operating systems are not supported. Operating
systems that have been upgraded from an earlier version are
not supported, as USB may fail to function as expected. The
supplied software may not function as expected with systems
that have been patched or updated with Service Pack releases.
• Connect the camera body directly to a built-in USB port. USB
ports added via PCI-bus or other extension boards or cards are
not supported. The camera body may not function as expected
when connected via a USB hub or keyboard.
• More RAM may be required when handling movies and other
large files.
Supplied CD
Inserting the supplied CD in a
CD-ROM drive displays the dialog
shown at right.
• Installing the software: Install the
following software.
• Browse User’s Manual (Software Version): View the Software
User Guide in pdf format (page ix). Acrobat Reader or
Adobe Reader is required; if necessary, install Adobe
Reader as described on page 156.
• Browse CD-ROM Content: View the contents of the CD,
which include Adobe Reader (page 156). To install
Irodio Photo & Video Studio without installing other
software, open the “Irodio Photo & Video Studio” folder
and double-click Irodio Photo & Video Studio.exe.
Copying Pictures to a Computer
DL-10: Copy pictures to the
computer in a single operation.
Irodio Photo & Video Studio: View, manage, edit pictures on
the computer. For more information, see the Help menu in
Irodio Photo & Video Studio or visit the following website:
http://www.pixela.co.jp/oem/irodio/e/irodio_digitalphoto_
videostudio/
USB driver: Connect earlier Ricoh cameras to computers
running Windows 98, Windows 98 SE, Windows Me, or
Windows 2000. Not required for this product.
WIA driver: Connect earlier Ricoh cameras to computers
running Windows XP or Windows Vista. Not required for this
product.
153
Installing the Software
Follow the steps on the next page to install the supplied
software. Illustrations are from Windows XP.
Cautions
• If the camera body is connected to the computer, disconnect
the camera body before beginning installation.
• Users of existing “Caplio” software should note that the “DC”
software supplied with the camera body replaces the following
items in the Caplio software package:
Caplio software
Copying Pictures to a Computer
154
DC software
RICOH Gate La
DL-10
Caplio Viewer
DU-10 *
Caplio Server
SR-10 *
Caplio Setting
* Not used by this product.
ST-10 *
If the above Caplio software is currently installed, you will be
prompted to uninstall it before installing the supplied DC
software. Follow the on-screen instructions. Installing the DC
software replaces Caplio Viewer, Caplio Server, and Caplio
Setting with the software listed above, which can be used in
the same way as the Caplio versions (note that those software
will not be installed if you uninstalled the Caplio software as
described on page 158 before installing the DC software). Note
that uninstalling the software for earlier Ricoh cameras may
reset user preferences for DL-10 or RICOH Gate La.
• Administrator privileges are required for installation.
• DL-10 is for use in a stand-alone environment and cannot be
run over a network.
the supplied CD.
  1Insert
Turn the computer on and
insert the supplied CD in a
CD-ROM drive.
• Windows Vista: An Autorun
dialog will be displayed.
Click Run Autorun.exe to
display the installer dialog.
• Other versions of Windows: The installer dialog will be
displayed automatically.
Installing the software.
  2Click
• Windows Vista: A “User Account Control” dialog will
a language and click OK.
  3Select
The dialog shown at right will
be displayed. Click Next.
Copying Pictures to a Computer
be displayed. Click Allow to display a languageselection dialog.
• Other versions of Windows: A language-selection
dialog will be displayed.
a destination.
  4Select
The supplied software will be
installed to the folder shown
under Destination Folder.
Click Next.
155
the destination location and then click [Next].
  5Confirm
The Irodio Photo & Video
Studio installer will start
(depending on your
computer, the splash screen
at right may be displayed for
some time before installation begins). Follow the onscreen instructions to install the supplied software.
Finish.
  6Click
The dialog shown at right will
be displayed when installation
is complete. Click Finish.
Copying Pictures to a Computer
the computer.
  7Restart
A message will be displayed
prompting you to restart your
computer. Select Yes, I want to restart my computer
now and click Finish to restart the computer.
DL-10.
  8Unblock
A Windows security dialog will be displayed when
the computer restarts. Click Unblock for DL-10.
Note
See page 158 for information on uninstalling the software.
Installing Adobe Reader
Adobe Reader is required to view the Software User
Guide. If Adobe Reader is not already installed, it can be
installed from the supplied CD as described below.
156
Cautions
• Disconnect the camera body before beginning installation.
• Administrator privileges are required for installation.
the supplied CD.
  1Insert
Turn the computer on and
insert the supplied CD in a
CD-ROM drive.
• Windows Vista: An Autorun
dialog will be displayed.
Click Run Autorun.exe to
display the installer dialog.
• Other versions of Windows: The installer dialog will be
displayed automatically.
Browse CD-ROM Content.
  2Click
The contents of the CD will be displayed.
double-click the folder for the language of your
choice. Double-click the file beginning with
“AdbeRdr910” and follow the on-screen instructions.
If a “User Account Control” dialog is displayed, click
Continue.
Notes
• See the Adobe Reader Help menu for information on Adobe
Reader.
• Installation of Adobe Reader 9.1 requires MSI (Microsoft
Windows Installer) version 3.1 or later and either Microsoft
Internet Explorer 6.0 or later or Firefox 2.0 or later. Microsoft
Internet Explorer and Microsoft Windows Installer are available
via Microsoft Update.
Copying Pictures to a Computer
Adobe Reader.
  3Install
Double-click the “Adobe Reader” folder and then
157
Uninstalling the Software
Follow the steps below to uninstall DC software or Irodio
Photo & Video Studio.
Cautions
• Administrator privileges are required for uninstallation.
• Exit any applications that may be running before proceeding.
the “Add/Remove Programs” Control Panel.
  1Open
Open the Windows “Start” menu and select Control
Panel (Windows XP or Windows Vista) or Settings >
Control Panel. Double-click Add/Remove
Programs.
the software.
  2Uninstall
Select the software you wish to uninstall (DC
Copying Pictures to a Computer
158
Software or Irodio Photo & Video Studio) and click
Change/Remove. A confirmation dialog will be
displayed; click OK. If a message appears warning
that a shared file has been detected, select Don’t
display this message again and click Yes.
Close any open windows when the uninstall process
is complete. After uninstalling Irodio Photo & Video
Studio, restart the computer.
Copying Pictures Using DL-10
After installing DC software, follow the steps below to
copy pictures to your computer.
  1Turn the camera body off.
the supplied USB cable.
  2Connect
Connect the cable to the
computer USB port.
Cautions
• Do not use force when
connecting the cable or when
handling the camera body with
the cable connected.
• Do not move the camera body with the cable connected.
Copying Pictures to a Computer
Connect the cable to the
camera body as shown. The
camera body will turn on, DL10 will start, and transfer will
begin automatically. Pictures
are copied to folders in the
“Digital Camera” folder in “My Documents” (if you were
previously using Caplio software, pictures will instead
be copied to folders in the “Caplio” folder). Pictures are
sorted into separate folders by date of recording; make
sure the camera clock is set to the correct date and time
before shooting.
the cable when transfer is complete.
  3Disconnect
See page 161 for more information.
159
Note
If transfer does not begin automatically, try the following procedures.
Click Save in the DL-10 window.
Check that Saves automatically when connected to USB is
selected in the DL-10 “Option Settings” dialog.
Restart the computer and repeat the above steps.
Copying Pictures Without Using DL-10
If DL-10 is not installed, you can copy pictures to the
computer as described below. The illustrations in this
section are from Windows XP.
  1Turn the camera body off.
the supplied USB cable.
  2Connect
Connect the cable to the computer USB port and
Copying Pictures to a Computer
160
then to the camera body. The camera body will turn
on automatically.
files from the camera body to the computer.
  3Copy
The camera body will
be listed as a removable
drive in “My Computer”
with pictures stored
in folders as shown at
right. If a memory card
is inserted in the camera
body, the drive will be
named as shown at right and the contents of the
memory card will be displayed. If no memory card
is inserted, the drive will be named “RICOHDCI” and
the contents of internal memory will be displayed.
Copy pictures to the desired location on your
computer.
Cautions
• Do not turn the power off or disconnect the USB cable until
copying is complete.
• Files in the destination folder with the same name as the pictures
being copied will be overwritten. If necessary, rename files before
copying begins.
• Do not use a computer to view or edit pictures on a memory
card. Pictures that have been viewed or modified on a
computer can no longer be displayed on the camera body.
Copy pictures to the computer for viewing and editing.
Notes
• A warning may be displayed if the USB cable is disconnected
without first removing the camera body from the system as
described above. Be sure to remove the camera body from the
system before disconnecting the cable.
• Confirm that transfer is complete before removing the camera
body from the system and disconnecting the cable.
Copying Pictures to a Computer
Disconnecting the Camera Body
Before disconnecting the camera
body from the computer, click the
“Safely Remove Hardware” or “Unplug or Eject Hardware”
icon in the taskbar (the illustration above shows the icon
for Windows XP) and select Safely Remove USB Mass
Storage Device or Stop USB Mass Storage Device from
the menu that appears. You can then disconnect the
USB cable.
161
Macintosh
The camera body can be used with Mac OS X versions
10.4–10.5.7.
Caution
The VM-1 software (page 164) and Software Users Guide (only on
computers with Acrobat installed) can be used with Macintosh
computers.
Copying Pictures to a Macintosh
  1Turn the camera body off.
the supplied USB cable.
  2Connect
Connect the cable to the
computer USB port.
Copying Pictures to a Computer
162
Cautions
• Do not use force when
connecting the cable or when
handling the camera body with
the cable connected.
• Do not move the camera body with the cable connected.
Connect the cable to the
camera body as shown. The
camera body will turn on
automatically.
files from the camera body to the computer.
  3Copy
The camera body will
appear as a volume on
the desktop with pictures
stored in folders as shown
at right. If a memory
card is inserted in the
camera body, the drive
will be named as shown
at right and the contents of the memory card will
be displayed. If no memory card is inserted, the
drive will be named “RICOHDCI” and the contents of
internal memory will be displayed. Copy pictures to
the desired location on your computer.
Notes
• A warning may be displayed if the USB cable is disconnected
without first removing the camera body from the system as
described above. Be sure to remove the camera body from the
system before disconnecting the cable.
• Confirm that transfer is complete before removing the camera
body from the system and disconnecting the cable.
• Connecting the camera body to a Macintosh computer may
result in the creation of “FINDER.DAT” or “.DS_Store” files that will
be listed by the camera body as unmatched files. These files can
be deleted without risk.
Copying Pictures to a Computer
Disconnecting the Camera Body
Before disconnecting the camera body from the
computer, drag the camera body volume into the Trash
or select the camera body volume and choose Eject
from the File menu. You can then disconnect the USB
cable.
163
Using the MP File Viewer
When you shoot images with M-Cont Plus, the images
are recorded as one MP file. By using the VM-1 MP file
viewer, you can play back MP files on your Macintosh
computer and export still images.
This section explains how to install and uninstall the
VM‑1 software that is included on the supplied CDROM. For details on how to play back MP files on your
computer or export still images from MP files using the
MP file viewer, see the “Software User Guide” available
from the supplied CD-ROM.
Copying Pictures to a Computer
System Requirements for Using the Supplied MP file viewer
The following environments are necessary for using the
supplied MP file viewer.
Please check your computer, or the computer’s user
manual.
Operating Systems Supported Mac OS X 10.4 to 10.5.7
Macintosh computer
Apple Inc. Macintosh Series
Internal Memory
Mac OS X 10.4 256 MB or more
Mac OS X 10.5 512 MB or more
Hard Disk Available Memory
5 MB or more
CD-ROM Drive
A CD-ROM drive compatible with the
above-mentioned Macintosh computer
Note
VM-1 supports Japanese, English, French and Chinese (Simplified).
164
Installing VM-1
the supplied CD.
  1Insert
Turn on the Macintosh computer and insert the
supplied CD in a CD-ROM drive.
the disk for installation.
  2Select
Double-click the RICOH icon > VM-1 folder > VM-1
Installer.pkg icon. The Install VM-1 window will be
displayed; click Continue. When the window for
selecting the installation location appears, select
the disk for installation, and then click Continue.
VM-1.
  3Install
Click Install and enter your name and password,
Copying Pictures to a Computer
and then click OK. A message that the installation is
complete will be displayed; click Close.
To change the installation location, click Change
Install Location....
To upgrade VM-1, click Upgrade.
165
Uninstalling VM-1
Cautions
• If you have any other software applications running or data that
has not been saved, quit the other software applications and
save the data before uninstalling VM-1.
• If an error occurs during the uninstallation process, update your
Mac OS to the latest version.
the VM-1 utility folder.
  1Open
Open the Applications folder > Utilities folder >
VM‑1 Utility folder.
the VM-1 Uninstaller icon.
  2Double-click
The uninstall confirmation dialog will be displayed.
Click OK.
Copying Pictures to a Computer
166
your name and password, and then click OK.
  3Enter
A message that the uninstallation is complete will
be displayed; click OK.
Technical Notes
Troubleshooting
Error Messages
If an error message is displayed, take the steps listed
below.
Message
Insert card
Solution
No memory card is inserted. Insert card.
Set date.
Camera clock is not set. Set camera clock.
File Number Over Limit Camera is out of file numbers. Insert another card.
—
15
112
16
—
39,
139
125
139
139
139
—
—
Technical Notes
Camera cannot display file. Use computer to check file contents
and delete file.
Insufficient memory. Space on memory card is insufficient to copy all files. Insert
Continue?
another card.
Protected
File is protected and cannot be deleted.
Card Is Write-Protected. Card is write protected (locked). Unlock card.
Print settings cannot be
File is a movie or other file that cannot be selected for printing.
set for this file.
Insufficient memory to store additional files. Delete existing files
Insufficient Memory/ or increase amount of memory available.
Maximum number of images selected for printing. Set number of
Capacity short
prints for other images to zero.
Format internal
Internal memory is not correctly formatted. Format internal
memory.
memory.
Format card.
Card is not correctly formatted. Format card in camera body.
Card Error
Format card. If message persists, card is faulty; discontinue use.
Writing Data
Camera is saving data. Wait until save is complete.
No File
No files available for playback.
Memory is full. Use another card or remove card and use internal
Cannot Record
memory.
Unmatched File
Page
15
20,
149
15,
148
15
167
Camera Body-Related Problems
Power Supply
Problem
Technical Notes
168
Cause
Solution
Page
Check that battery is correctly
Battery is exhausted or not
inserted.
Charge
battery 12, 14
inserted.
The camera does
(rechargeable battery only).
Battery is incompatible.
Use supplied battery.
13
not turn on.
Battery is not in correct Insert battery in correct
14
orientation.
orientation.
Camera has turned off
18
Turn camera on.
automatically to save power.
The camera turns
Charge battery (rechargeable
Battery is exhausted.
12
off during use.
battery only).
Battery is incompatible.
Use supplied battery.
13
The camera does
Camera malfunction.
Remove and reinsert battery.
14
not turn off.
Low battery
indicator displayed
or camera turns off Battery is incompatible.
Use supplied battery.
13
when battery has
charge remaining.
Battery cannot be Battery has reached end of
Replace with a new battery.
14
charged.
charging life.
Ambient temperature is very high
—
—
Battery is quickly or very low.
Poor lighting requires extensive
exhausted.
—
—
use of flash.
Shooting
Problem
No picture taken
when shutterrelease button is
pressed.
Cause
Solution
Page
Charge battery (rechargeable
Battery is exhausted.
12
battery only).
Slide the power switch to ON to
Power is off or not in shooting
turn camera on or press 6 to 18, 34
mode.
select shooting mode.
Press 6 to select shooting
34
Camera is in playback mode.
mode.
Shutter-release button was not Press shutter-release button all
22
fully pressed.
the way down.
Memory card is not formatted. Format card.
139
Memory card is full.
Insert new card or delete files. 15, 39
Memory card has reached end of
Insert new card.
15
working life.
Wait until flash lamp stops
Flash is charging.
29
blinking.
Memory card is locked.
Unlock card.
16
Memory card contacts are dirty. Clean with soft, dry cloth.
—
Technical Notes
Cannot view
Photographs after Display time is too short.
Choose longer display time.
142
shooting.
Power is off or picture display is Turn camera on or adjust picture 18,
dark.
display brightness.
139
Press the VF/LCD button to turn
Picture display is Picture display is off.
42
picture display on.
blank.
Display has been switched to the Press the VF/LCD button to switch
42
LCD viewfinder.
to the picture display.
A/V cable is connected.
Disconnect cable.
118
–
Lens is dirty.
Clean with soft, dry cloth.
Camera unable to Subject is not at center of frame. Use focus lock.
25
focus in autofocus Subject not suitable for autofocus. Use focus lock or manual focus. 25, 65
Use macro mode or move away
mode.
Subject is too close.
27
from subject.
169
Problem
Technical Notes
170
Cause
Solution
Page
Use a tripod. Use the camera
Camera moved during shooting. shake correction function. Press 21, 92
Pictures are
elbows against your body.
blurred.
Use the flash. Choose higher ISO 29,
Lighting is poor and shutter
J
setting. Use the camera shake 90,
speeds are slow.
correction function.
92
Press OPEN/f button (flash open/
29
Flash is not raised.
setting) to open the flash.
—
Flash cover is not fully open.
Do not obstruct flash cover.
The flash cannot be used in the
following cases:
• When exposure bracket, white
54, 73
balance bracket, or color Change camera settings.
75
Flash does not fire
bracket is set
or will not charge.
• In continuous mode
• In movie mode
Open the flash. Press OPEN/f
Flash is off.
button (flash open/setting) to 29
cancel flash off.
Charge battery (rechargeable
12
Battery is exhausted.
battery only).
The distance to the subject
–
Move closer to subject.
exceeds the flash range.
Flash does not
Subject is dark.
Increase flash output.
78
illuminate subject.
Flash output is too low.
Increase flash output.
78
Flash cover is not fully open.
Do not obstruct flash cover.
—
Reduce flash output, move away
Flash output is too high.
from subject, or use different light 78
Photographs are
source.
Use exposure compensation or
too bright.
Photograph is overexposed.
50, 85
choose faster shutter speed.
Picture display is too bright.
Adjust picture display brightness. 139
Flash is off and subject is poorly Press OPEN/f button (flash open/
29
lit.
setting) to open the flash.
Photographs are
Use
exposure
compensation
or
too dark.
Photograph is underexposed.
50, 85
choose slower shutter speed.
Picture display is too dark.
Adjust picture display brightness. 139
Problem
Colors are
unnatural.
Cause
Solution
Page
Camera unable to adjust white Include white object in
balance for shooting conditions Photograph or choose another 86
using auto white balance.
white balance option.
Photograph
information not Indicators are hidden.
Press DISP. to display indicators.
displayed.
Picture display
Ambient lighting is poor or differs This is normal and does not
brightness changes
from that used for autofocus.
indicate a malfunction.
during focusing.
Vertical streaks
This is normal and does not
(“smear”) appear Subject is bright.
indicate a malfunction.
in photographs.
Off or Sound selected for Level
Choose Display or Disp + Snd.
Setting.
Tilt indicator is not
Indicators are hidden.
Press DISP. to display indicators.
displayed.
Hold the camera in the correct
The camera is upside down.
orientation.
Photograph is not Camera was moving when Do not take pictures from moving
level, although tilt Photograph was taken.
objects.
indicator showed
Check the subject.
that camera was Subject is not level.
level.
42
—
—
32
42
21
—
—
Playback/Deletion
Problem
Page
19, 34
118
149
141
Technical Notes
Cannot play
pictures back.
Cause
Solution
Camera is not in playback mode. Press 6.
A/V cable incorrectly connected. Reconnect A/V cable.
Video mode does not match TV. Choose another video mode.
The playback screen displays in
Set Playback Screen to LCD.
the LCD viewfinder.
171
Problem
Cause
Solution
Memory card empty or not
Insert card that has been
inserted.
Card was not formatted in camera formatted in camera body and
contains pictures recorded with
body.
Pictures were created with other camera body.
Cannot view
device.
pictures on
Memory card contacts are dirty. Clean with soft, dry cloth.
memory card.
Insert another card. If you can
view pictures on second card, first
Card malfunction.
card has probably malfunctioned;
discontinue use.
Charge battery (rechargeable
Battery is exhausted.
Picture display has
battery only).
Camera has turned off
turned off.
Turn camera on.
automatically to save power.
File is protected.
Remove protection.
Cannot delete file.
Memory card is locked.
Cannot format
Unlock memory card.
Card is locked.
card.
Page
15,
139
—
—
12
18
112
16
Miscellaneous
Problem
Cannot insert
memory card.
Technical Notes
172
Cause
Solution
Card is not in correct orientation. Insert in correct orientation.
Page
15
Charge battery (rechargeable
12
battery only).
Turn camera off and then on
18
Camera malfunction.
again.
Remove and reinsert battery.
14
Set clock to correct date and
Clock is not set correctly.
20, 149
time.
Battery has not been inserted for Set clock to correct date and
20, 149
about a week.
time.
Battery is exhausted.
Camera controls
have no effect.
Date is incorrect.
Date has been
reset.
Camera does
not turn off
automatically.
Camera does not
beep.
Off is selected for Auto Power
Choose another setting.
Off.
Beep is muted.
141
Choose another option for
32, 142
Volume Settings.
Problem
Pictures are not
displayed on TV.
Cause
Solution
Video mode does not match TV. Choose another video mode.
A/V cable not connected.
Connect A/V cable.
TV is not tuned to VIDEO IN
Tune TV to VIDEO IN channel.
channel.
Page
149
118
—
Computer-Related Problems
For more information, refer to the Software User Guide,
available in pdf format on the supplied CD.
Security Alerts (Windows Vista/Windows XP)
Consult the following if Windows XP Service Pack 3 or
Windows Vista Service Pack 2 displays a security alert
when the camera body is connected or DL-10 starts. The
illustrations in this section are from Windows XP.
If a security alert is displayed, confirm
that the program is from a reliable
source and click Unblock.
Technical Notes
Caution
If you cannot identify the program and source, click Keep
Blocking to prevent your computer from being affected by virus
or malware.
173
If you clicked Keep Blocking to block a Ricoh application, you can
remove the block in Windows Firewall.
the “Windows Firewall” Control Panel.
  1Open
Open the “Start” menu and
select Control Panel, then
double-click Windows
Firewall (if Windows Firewall
is not listed, click Switch to
Classic View at the top left
corner of the Control Panel window).
the Ricoh application Internet access.
  2Allow
In the “Windows Firewall”
Technical Notes
174
dialog, click the Exceptions
tab and check whether DL-10
is listed under “Programs and
Services.” If it is, place a check
in the check box next to
DL-10 and click OK. If it is not
listed, click Add Program…
to add DL-10 to the list of
exceptions.
If you clicked Ask Me Later to block DL-10, a security alert will
be displayed the next time the program starts. Click
Unblock to remove the block.
Specifications
Mode
Range (built-in
flash)
Flash
Flash
compensation
Manual flash
amount
Picture display
Shooting mode
Picture quality
Storage
5M
File
3M
size *2
1M
(approx.)
VGA
Photographs
File
Movies
format
Compression
Other shooting options
Interface
Video signal format
Power source
Battery life (based on
CIPA standard) *7
See the documentation provided with the camera unit.
±2.0 EV in increments of 1/2EV or 1/3EV
FULL, 1/1.4, 1/2, 1/2.8, 1/4, 1/5.6, 1/8, 1/11, 1/16, 1/22, 1/32, 1/64
3.0˝ transparent LCD; approx. 920,000 pixels
Auto, program shift, aperture priority, shutter priority, manual, scene,
“My Settings”
Fine, Normal, RAW (DNG) *1
SD/SDHC memory card, internal memory (approx. 86 MB)
FINE: approx. 2287KB/frame
FINE: approx. 1474KB/frame
FINE: approx. 812KB/frame
FINE: approx. 197KB/frame
JPEG (Exif Ver. 2.21) *3, RAW (DNG)
AVI *4 (OpenDML Motion JPEG compliant)
JPEG baseline compliant (photographs and movies)
Continuous shooting (continuous, M-Cont Plus); self-timer (shutter
release delay of approx. 10 s or 2 s, or custom setting); interval timer
(intervals of 5 s to 1 hour in increments of 5 s) *5; color bracketing;
B&W (TE); color space selection; noise reduction; histogram display;
framing grid; depth-of-field indicator; tilt indicator; hot shoe
Auto image rotation; multi-frame playback; playback zoom (up to
16 ×); resize
USB 2.0 (High-Speed) Mini-B connector; Mass Storage *6; audio
output 1.0 Vp-p (75 Ω), HDMI mini cable connector (Type C)
NTSC, PAL
DB-90 rechargeable battery (3.6 V)
Technical Notes
Other playback options
Auto (flash fires when lighting is poor or subject is backlit), red-eye,
on, slow sync, manual, off
See the documentation provided with the camera unit.
175
Dimensions (W × H × D) 113.9 mm × 70.2 mm × 28.9 mm (excluding projections)
• Camera body (excluding battery, memory card, neck strap, and
Weight (approx.)
connector cap): 160 g
• Battery, neck strap, and connector cap: 66 g
1/4-20UNC
Tripod screw hole
Date storage time
Approx. 1 week
Operating temperature 0 °C to 40 °C
Operating humidity
85% or less
Storage temperature
–20 °C to 60 °C
*1A JPEG file is also recorded (the JPEG file may be a fine- or normalquality file with the dimensions as the RAW file or a VGA file). RAW files
use the standard DNG format promoted by Adobe Systems, Inc.
*2For details on RAW, L, M sizes, see the documentation provided with the
camera unit.
*3Compatible with the Design rule for Camera File system (DCF, a
JEITA standard) and DPOF. Full compatibility with other devices is not
guaranteed.
*4Audio: PCM 32 kHz, 16 bit monaural
*5Flash off.
*6Mass Storage is supported under Windows 2000, Windows XP, Windows
Vista, and Mac OS X 10.4–10.5.7.
*7Measured according to CIPA standard. For reference only; actual
number of shots varies greatly according to how camera is used.
Technical Notes
176
Internal Memory/Memory Card Capacity
The approximate number of frames or length of movies
that can be stored in internal memory or on a memory
card at different settings varies depending on the type
of camera unit. See the documentation provided with
the camera unit.
Notes
• Each movie can be up to 90 minutes long (4 GB in size).
• The maximum number of shots that can be taken in a single
burst is 999. If memory remains for more than 999 exposures,
“999” is shown in the display.
• Depending on the subject, the number of pictures that can be
taken may differ from the number of exposures remaining.
• Capacity varies with shooting conditions and the make of
memory card.
• Use a high-speed memory card when shooting for extended
periods.
Technical Notes
177
Optional Accessories
The GXR camera body can be used with the following
optional accessories:
Camera unit
Technical Notes
178
DB-90 rechargeable
battery
BJ-9 battery charger
CA-1 cable switch
A wired remote shutter release that
attaches to the USB connector of
the camera body.
VF-2 LCD viewfinder
An electrical viewfinder that
attaches to the hot shoe of the
camera body. This offers viewfinder
coverage of 100% and can be
adjusted up to 90° without any
parallax, and enables easy lowangle shooting.
GF-1 external flash
An external flash that is developed
for digital camera with TTL autoflash system.
ST-3 neck strap
SC-55S soft case
SC-55L soft case
Notes
• Before using optional accessories, read the manual provided
with the product.
• For the latest information on optional accessories, visit the Ricoh
website (http://www.ricohpmmc.com/).
Technical Notes
179
Camera System and Accessories
GF-1 flash unit
VF-2 LCD
viewfinder
SC-55S/SC-55L soft
case
ST-3 neck strap
Attach to hot shoe
Attach camera unit
Attach to USB
connector
CA-1 cable switch
DB-90 rechargeable
battery (supplied)
Camera unit
Technical Notes
180
BJ-9 battery
charger (supplied)
The GF-1 Flash Unit (Optional)
An optional GF-1 flash unit can be connected to the hot
shoe.
  1Close the flash cover (page 2).
the flash.
  2Attach
Turn the camera and the
Hot shoe
GF-1 off and attach the
GF-1 to the hot shoe.
  3Turn the flash and camera on.
  4Press the DIRECT button.
the optional flash mode item.
  5Select
Move the cursor using
+, –, Fn1, Fn2 or the ADJ.
lever (left and right) to
highlight the item.
Technical Notes
a flash mode.
  6Select
Rotate the up-down dial to select a flash mode.
Note
• The optional flash mode item is not displayed when the GF-1 is
turned off.
• Turn the GF-1 off to shoot without the flash.
• If the optional flash mode item is not displayed, turn the GF-1
and camera off and then remove and reattach flash.
181
Other Flash Units
Use only flash units with one signal terminal, which must
be an X-contact with a positive voltage of no more than
20 V. Use a flash that covers the angle of view of the lens.
  1Close the flash cover (page 2).
the flash.
  2Attach
Turn the camera and the optional flash unit off and
attach the flash to the hot shoe.
aperture manually.
  3Set
Turn the camera on, select mode A or M, and choose
an aperture (pages 18, 48, 50).
a manual ISO sensitivity setting.
  4Choose
Select an option other than Auto for ISO sensitivity
(page 90).
the flash on.
  5Turn
Turn the flash on and set it to auto mode. Set
aperture and ISO sensitivity to the values selected
with the camera. Take a test shot and adjust flash
aperture and ISO settings as necessary.
Technical Notes
182
Turn the optional flash unit off before removing it from
the camera.
Cautions
• If the external flash is on, it will fire with every shot regardless to
the flash mode selected with the camera. Turn the flash unit off
to shoot without the flash.
• Optional flash units are in principle for use at ranges that exceed
the range of the built-in flash. Using an optional flash unit at
shorter ranges may result in overexposure.
Using the Product Abroad
Using BJ-9 Battery Charger
This product is for use with currents of 100–240 V and
50 or 60 Hz. Before travelling, purchase a travel adapter
for connection to the type of outlets used at your
destination. Do not use these products with electrical
transformers, as this could damage the product.
Warranty
This product was manufactured for use in the country
of purchase, and the warranty is not valid in other
countries. Should the product fail or malfunction while
out of the country, the manufacturer assumes no
responsibility for servicing the product locally or bearing
any expenditure incurred thereby.
Precautions for Use
• The warranty is not valid in other countries. Should the product
fail or malfunction while out of the country, the manufacturer
assumes no responsibility for servicing the product locally or
bearing any expenditure incurred thereby.
Technical Notes
Television Playback
The supplied A/V cable can be used to connect this
product to televisions and monitors equipped with a
video input terminal. This product supports the NTSC
and PAL video formats; before connecting the product
to a video device, select the appropriate video output
mode.
183
Technical Notes
184
• Do not drop this product or subject it to physical shocks. When
carrying the product, be careful that it does not strike other
objects. Particular care is required to protect the picture display.
• The flash may overheat if fired many times in succession. Do not
use the flash more than necessary. Do not use the flash in close
contact with your body or other objects. Failure to observe
these precautions could result in burns or fire.
• Using the flash unit in close proximity to your subject’s eyes
could cause temporary visual impairment. Particular care should
be observed when photographing infants. Do not direct the
flash at the operator of a motor vehicle.
• Battery may become hot with extended use. Wait for the battery
to cool before removing it from this product.
• The picture display may be difficult to read in direct sunlight.
• You may notice that picture display varies in brightness or
contains pixels that do not light or that are always lit. This is
common to all LCD monitors and does not indicate a malfunction.
• Do not apply force to the picture display.
• Abrupt changes in temperature may cause condensation,
resulting in visible condensation inside this product, or
malfunction. This can be avoided by placing this product in a
plastic bag to slow the temperature change, and removing it
only after the air in the bag has reached the same temperature
as its surroundings.
• To prevent damage to the product, do not insert objects into
the holes in the microphone and speaker coverings.
• Keep the terminals of the connector free of dust.
• Keep this product dry and avoid handling it with wet hands.
Failure to observe these precautions could result in product
malfunction or electric shock.
• Take a test shot to ensure that this product is functioning
properly before using it on important occasions such as travel
or weddings. We recommend that you keep this manual and
spare batteries at hand.
Tip: Avoiding Condensation
Condensation is particularly likely to occur if you move to an
area with a sharply different temperature, if humidity is high, in a
cold room after the heater has come on, or where this product is
exposed to cold air from an air conditioner or other device.
Care and Storage
Caring for this product
• Clean the picture display by wiping it with a soft cloth
dampened with a small amount of any monitor cleaner that
does not contain organic solvents.
• Clean this product thoroughly after using it at the beach or
handling cosmetics. Do not expose this product to volatile
substances such as thinner, benzene, or pesticides. Failure to
observe this precaution could result in damage to this product
or its finish.
• In the unlikely event of malfunction, visit a Ricoh Repair Center.
• This product contains high-voltage circuits. Do not disassemble.
• The picture display is easily scratched; avoid touching it with
hard objects.
Storage
Technical Notes
• Do not store this product where it will be exposed to: extreme
heat or humidity; large changes in temperature or humidity;
dust, dirt, or sand; severe vibration; prolonged contact with
chemicals, including mothballs and other insect repellent,
or with vinyl or rubber products; strong magnetic fields (for
example, in the vicinity of a monitor, transformer, or magnet).
• Remove the battery if the product will be left unused for a long
period of time.
Before Cleaning
Turn the power off and remove the battery.
185
Warranty and Servicing
Technical Notes
186
1. This product is backed by a limited warranty. During the warranty period mentioned in the Warranty
supplied with this product, any defective parts will be repaired free of charge. In the event of a malfunction,
contact the dealer from which you purchased this product or your nearest Ricoh Repair Center. Please note
that you will not be reimbursed for the cost of bringing this product to the Ricoh Repair Center.
2. This warranty does not cover any damage resulting from:
1 failure to follow the instructions in the instruction manual;
2 repair, modification or overhaul not conducted by an authorized service center listed in the instruction
manual;
3 fire, natural disaster, act of God, lightning, abnormal voltage, etc.;
4 improper storage (noted in the “Camera Body User Guide”), leaking of battery and other fluids, mold, or
otherwise insufficient care of this product.
5 submergence in water (flooding), exposure to alcohol or other beverages, infiltration of sand or mud,
physical shock, dropping of this product, or pressure on this product, and other unnatural causes.
3. After the warranty period has passed, you will be liable for all repair fees, including those incurred at an
authorized service center.
4. You will be liable for all repair fees, even within the warranty period, if the warranty card is not attached or
if the distributor’s name or the purchase date have been changed or are not indicated on the card.
5. Expenses for overhaul and thorough inspection by special request of the customer will be charged to the
customer, whether or not they are incurred during the warranty period.
6. This warranty only applies to this product and not to the accessories, such as the case and strap, nor does it
apply to the battery and other consumables provided.
7. Any consequential damages arising from failure of this product, such as expenses incurred in taking pictures
or loss of expected profit, will not be reimbursed whether they occur during the warranty period or not.
8. The warranty is only valid in the country in which this product was purchased.
* The above provisions refer to repairs offered free of charge, and do not limit your legal rights.
* The intention of the above provisions is also described in the warranty card provided with this product.
9. Parts essential to the servicing of this product (that is, components required to maintain the functions and
quality of the product) will be available for a period of five years after this product is discontinued.
10.Please note that if this product is seriously damaged by flooding, submergence, infiltration of sand or
mud, violent shocks or dropping, it may not be repairable, and restoration to its original condition may be
impossible.
Notes
• Before sending this product in for repair, check the battery and read the
instruction manual again to ensure proper operation.
• Some repairs require a significant amount of time to complete.
• When sending this product to a service center, please include a note which
describes the defective part and the problem as precisely as possible.
• Remove all accessories not related to the problem before sending this product
to the service center.
• This warranty does not apply to data stored on memory cards or in internal
memory.
NOTICES
USA FCC Part 15 Class B
The equipment has been tested and found to comply with the limits for a Class
B digital device, pursuant to part 15 of the FCC Rules. These limits are designed
to provide reasonable protection against harmful interference in a residential
installation. This equipment generates, uses, and can radiate radio frequency
energy and if not installed and used in accordance with the instructions, may cause
harmful interference to radio communications. However, there is no guarantee that
interference will not occur in a particular installation. If this equipment does cause
harmful interference to radio or television reception, which can be determined by
turning the equipment off and on, then user is encouraged to try to correct the
interference by one or more of the following measures:
• Reorient or relocate the receiving antenna.
• Increase the separation between the equipment and receiver.
• Connect the equipment to an outlet on a circuit different from that to which the
receiver is connected.
• Consult the dealer or an experienced radio/TV technician for help. (FCC 15.105B)
Changes or modifications not expressly approved by the party responsible for
compliance could void the user’s authority to operate the equipment. (FCC 15.21)
Properly shielded and grounded cables and connectors must be used for
connection to a host computer in order to comply with FCC emission limits. (FCC
15.27)
RICOH AMERICAS CORPORATION
5 Dedrick Place, West Caldwell NJ, 07006 Tel.: 1-800-225-1899
Note to Users in Canada
Note: This Class B digital apparatus complies with Canadian ICES-003
Technical Notes
COMPLIANCE INFORMATION STATEMENT
Product Name: CAMERA BODY
Model Number: GXR
This device complies with Part 15 of the FCC Rules.
Operation is subject to the following two conditions:
(1)This device may cause harmful interference, and
(2)This device must accept any interference received, including interference that
may cause undesired operation.
Remarque Concernant les Utilisateurs au Canada
Avertissement: Cet appareil numérique de la classe B est conforme a la norme NMB003 du Canada.
IMPORTANT SAFETY INSTRUCTIONS—SAVE THESE INSTRUCTIONS
DANGER—TO REDUCE THE RISK OF FIRE OR ELECTRIC SHOCK, CAREFULLY FOLLOW
THESE INSTRUCTIONS.
187
Index
Symbols
5 (auto) mode.................................. 4, 21
d (delete) button............................. 3, 39
O (DISP.) button............................. 3, 42
N (macro) button............................. 3, 27
OPEN/f(flash) button...................... 3, 29
6 (playback) button.......3, 19, 94, 101
t (Self-Timer)..................................... 3, 31
8/z button......................... 3, 26, 36, 38
9/Z button........................ 3, 26, 36, 38
A
A (aperture priority) mode............. 4, 48
A/V cable............................................ ii, 118
ADJ. lever....................................... 3, 5, 134
ADJ Shutter Confirmation................ 135
Adobe Reader....................................... 156
AF auxiliary light.......................2, 31, 140
Alert.......................................................... 173
Aperture......................................46, 48, 50
Aperture Shift..........................................92
Autofocus...........................................22, 64
Autofocus/flash lamp
........................................3, 18, 22, 29, 141
Auto Power Off..................................... 141
Auto Rotate............................................ 143
B
Backlighting.............................................85
Battery........................................................12
Battery/card cover...................... 3, 14, 15
Battery charger.............................. 12, 183
Battery level..............................................10
Black & White....................................71, 75
Blur..............................................................24
Bracketing.................................................75
Brightness..............................44, 106, 139
C
188
Cable switch.......................................... 178
Camera shake correction.....................92
Caplio....................................................... 154
Card Sequence No. ............................. 148
CD..................................... ix, 153, 155, 157
CL-BKT Black & White (TE)................ 146
Clock................................................. 20, 149
Close-up.....................................................27
Color.......................................71, 75, 86, 89
Color Space Setting............................ 146
Computer............................................... 151
Connector cover....................................... 3
Connector for A/V cable......................... 3
Continuous Mode..................................73
Contrast........................................... 71, 106
Copy to Card from Internal Memory
................................................................. 115
D
Date Imprint.............................................84
Defaults...................................59, 127, 128
Deleting Photographs..........................39
Depth of Field..........................................64
Digital zoom.............................................26
Digital Zoom Image............................ 147
DIRECT button.......................................3, 5
DL-10...............................................153, 159
DNG.............................................................63
DPOF........................................................ 115
E
Edit My Settings................................... 132
Error Messages..................................... 167
Exposure.............................................50, 85
Exposure Metering................................70
F
Flash, optional...................................... 181
Flash amount...........................................79
Flash compensation........................... 136
Flash cover.................................................. 2
Flash Exposure Compensation..........78
Flash mode...............................................28
Flash Synchro Settings.........................79
Fn1, Fn2 button................................3, 136
Fn Button Display................................ 145
Focus...........................................................64
Focus Lock.................................................25
Focus target..............................................66
Format [Card]........................................ 139
Format [Internal Memory]................ 139
Full Press Snap.........................................69
G
Grid.................................................... 42, 144
H
HDMI...............................................119, 149
Highlights..................................................43
Histogram....................................... 44, 108
Hot shoe................................... 2, 181, 182
I
Image Settings........................................71
Interval Shooting....................................83
Irodio Photo & Video Studio............ 153
ISO Auto-High Settings..................... 140
ISO Setting................................................90
J
JPEG.............................................................63
K
Key custom options............................ 127
L
Language/L.................................... 149
LCD Brightness..................................... 139
LCD Confirmation Time..................... 142
Level Compensation.......................... 106
Level Setting......................................... 144
M
M (manual exposure) mode.......... 4, 50
Macintosh.............................................. 162
Macro Mode.............................................27
Manual Focus...........................................65
Memory, internal.......................... 15, 139
Memory card.................................. 15, 139
C/D button.........3, 58, 101, 126
Metering....................................................66
Microphone................................................ 2
M Mode Dial Options......................... 138
Mode dial................................................2, 4
Monochrome....................................71, 75
Movie mode.............................................54
Movie size..................................................63
Multi-frame playback............................36
MY modes............................................ 4, 57
My Settings for Fn Settings.............. 133
My Settings WB Comp....................... 133
N
Neck strap.......................................... ii, 179
Noise Reduction.....................................80
Noise Reduction ISO..............................80
NTSC................................................149, 183
O
One Press M Mode.............................. 138
One Press Zoom Ratio....................... 143
Operation Sounds............................... 142
Optional accessories.......................... 178
P
P(program shift) mode.................... 4, 46
PAL...................................................149, 183
PictBridge............................................... 120
Picture display................................3, 8, 42
Picture Quality/Size...............................61
Playback, movies....................................94
Playback, photographs........................34
Playback, TV........................................... 118
Playback Menu..................................... 101
Playback Mode Dial Options........... 138
Playback Zoom........................................38
Power switch....................................... 2, 18
189
Pre-AF.........................................................70
Printing.................................................... 122
Protect..................................................... 112
R
RAW.............................................................62
Recall My Settings............................... 131
Reg. My Settings.................................. 129
Restore Defaults......................................91
RICOH Gate La...................................... 154
S
S(shutter priority) mode................. 4, 49
4 mode....................................... 4, 52
SD, SDHC...................................................15
Setup........................................................ 128
Sharpness..................................................71
Shooting Info. Display Frame.......... 145
Shooting Menu.......................................58
Show My Setting Name.................... 145
Shutter-release button.................... 2, 23
Shutter speed...................................46, 49
Skew correction............................ 56, 110
Slide Show............................................. 111
Snap Focus Distance.............................68
Software.................................................. 154
Speaker........................................................ 3
Start Settings Readout...................... 150
Store Menu Cursor Position............. 147
Switch Shooting Mode.........................92
T
Tilt Indicator.............................................32
Tripod screw hole..................................... 3
TV.............................................................. 118
U
Up-down dial.........................................2, 5
USB cable.................... 120, 159, 160, 162
V
190
Video Out Mode................................... 149
Viewing Photographs...........................34
VM-1................................................165, 166
Volume............................................. 94, 142
W
White Balance..........................................86
White Balance Compensation...........89
Z
Zoom...........................................................26
Telephone Support Numbers in Europe
UK
Deutschland
France
Italia
España
(from within the UK)
(from outside of the UK)
(innerhalb Deutschlands)
(außerhalb Deutschlands)
(à partir de la France)
(en dehors de la France)
(dall’Italia)
(dall’estero)
(desde España)
(desde fuera de España)
http://www.service.ricohpmmc.com/
02073 656 580
+44 2073 656 580
06331 268 438
+49 6331 268 438
0800 88 18 70
+33 1 60 60 19 94
02 696 33 451
+39 02 696 33 451
91 406 9148
+34 91 406 9148
From environmental friendliness to environmental conservation and to environmental management
Ricoh is aggressively promoting environment-friendly
activities and also environment conservation activities
to solve the great subject of management as one of the
citizens on our precious earth.
To reduce the environmental loads of digital cameras,
Ricoh is also trying to solve the great subjects of "Saving energy by reducing power consumption" and "Reducing
environment-affecting chemical substances contained in products".
If You Encounter a Problem with This Product
See “Troubleshooting” (page 167) in this manual. If the problem persists, contact a Ricoh office.
Ricoh offices
3-2-3, Shin-Yokohama Kouhoku-ku, Yokohama City, Kanagawa 222-8530, Japan
RICOH COMPANY, LTD.
http://www.ricoh.com/r_dc
5 Dedrick Place, West Caldwell, New Jersey 07006, U.S.A.
RICOH AMERICAS CORPORATION 1–800–22RICOH
http://www.ricoh-usa.com/
Oberrather Str. 6, 40472 Düsseldorf, GERMANY
RICOH INTERNATIONAL B.V.
(innerhalb Deutschlands)
06331 268 438
(EPMMC)
(außerhalb Deutschlands) +49 6331 268 438
http://www.ricohpmmc.com/
(from within the UK)
02073 656 580
RICOH UK LTD. (PMMC UK)
(from outside of the UK) +44 2073 656 580
RICOH FRANCE S.A.S. (PMMC
(à partir de la France)
0800 88 18 70
FRANCE)
(en dehors de la France) +33 1 60 60 19 94
(desde España)
91 406 9148
RICOH ESPANA, S.A. (PMMC SPAIN)
(desde fuera de España) +34 91 406 9148
(dall’Italia)
02 696 33 451
RICOH ITALIA S.p.A. (PMMC ITALY)
(dall’estero)
+39 02 696 33 451
RICOH ASIA PACIFIC OPERATIONS
21/F, One Kowloon, 1 Wang Yuen Street, Kowloon Bay, Hong Kong
LIMITED
Support for Irodio Photo & Video Studio
+1–800–458–4029 (toll free)
North America (U. S. A.)
UK, Germany, France and Spain: +800–1532–4865 (toll free)
Europe
Other countries: +44–1489–564–764
Asia
+63–2–438–0090
China
+86–21–5385–3786
Business hours: 9:00 AM to 5:00 PM
Ricoh Company, Ltd.
Ricoh Building, 8-13-1, Ginza, Chuo-ku, Tokyo
104-8222, Japan
2009 Decenber
EN USA GB
Printed in China
EN
GB
AE
AE
*L754 2971A*