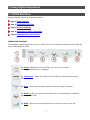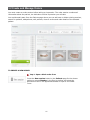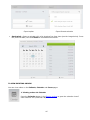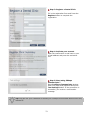
1
i
Contents
1 Getting Started ..................................................................................................................... 4
1.1 Introduction .................................................................................................................... 4
1.2 Indications ...................................................................................................................... 4
1.3 System Description ..........................................................................................................5
2 How Do I - Task List...............................................................................................................5
2.1 Configuration ...................................................................................................................5
2.2 Orders ............................................................................................................................ 6
2.3 Scanning ......................................................................................................................... 6
2.4 Analysis .......................................................................................................................... 6
2.5 Maintenance .................................................................................................................... 6
3 Taking Digital Impressions ......................................................................................................7
3.1 TRIOS Workflow ...............................................................................................................7
3.2 Create and Manage Orders .............................................................................................. 11
3.3 General Scanning Workflow and Tools............................................................................... 20
3.3.1 Heating and Mounting Scanner Tip .............................................................................. 20
3.3.2 Scanning ................................................................................................................. 23
3.3.3 General Scanning Tools ............................................................................................. 29
3.3.4 Align Occlusion ......................................................................................................... 33
3.3.5 Analyze Scan ........................................................................................................... 35
3.4 Specific Scanning Workflows ............................................................................................ 39
3.4.1 How Do I Scan One or More Preparations .................................................................... 39
3.4.2 How Do I Make a Pre-preparation Scan ....................................................................... 39
3.4.3 How Do I Make an Implant Scan ................................................................................. 40
3.4.4 How Do I Make Post and Core Scan ............................................................................ 42
3.5 Tips to Obtaining a Good Scan ......................................................................................... 45
3.6 Scanning Strategies........................................................................................................ 46
4 Options and Settings ............................................................................................................ 51
4.1 General Options and Settings .......................................................................................... 56
4.2 Operator Options and Settings ......................................................................................... 57
4.3 Connection Settings........................................................................................................ 58
ii
4.4 Lab Connections............................................................................................................. 61
4.5 Scan Options and Settings............................................................................................... 63
4.6 Help Options .................................................................................................................. 64
4.7 Closing Options .............................................................................................................. 66
4.8 TRIOS Client .................................................................................................................. 67
4.9 Wi-Fi Installation Considerations ...................................................................................... 70
5 Communication With the Lab ................................................................................................. 71
5.1 Create 3Shape Communicate™ Account ............................................................................ 72
5.2 Connect to the Lab ......................................................................................................... 74
5.3 Send Order to the Lab .................................................................................................... 79
5.4 Communicate with the Lab .............................................................................................. 81
6 Maintenance ....................................................................................................................... 84
6.1 Scanner Calibration ........................................................................................................ 84
6.2 Cleaning, Disinfection and Sterilization.............................................................................. 87
6.3 Disposal of the Scanner Tip ............................................................................................. 87
6.4 System Upgrades ........................................................................................................... 88
iii
1 Getting Started
1.1 Introduction
Dear Customer,
Congratulations on your purchase of the 3Shape TRIOS® - a next generation intraoral digital
impression solution.
This online help system will assist you in setting up your TRIOS® system, as well as guide you
through the steps for scanning and handling digital impressions.
Please see the section How Do I - Task List for specific help topics.
Note! Before connecting or operating TRIOS, please be sure to read the TRIOS Safety and
Setup Guide for assembly and safety instructions and observe all its safety information and
warnings.
Thank you,
3Shape
1.2 Indications
3Shape TRIOS® supports the following indications:
•
Single crowns
•
Inlays
•
Onlays
•
Veneers
•
Implants (single abutments)
•
Post & core
•
Up to 5-unit bridges
•
Orthodontics (Orthodontics is only available after purchase of add-on module)
4
1.3 System Description
Note! Please refer to the TRIOS Safety and Setup Guide for instructions regarding
assembly of TRIOS® and getting started for the first time.
Note! Please refer to the TRIOS Safety and Setup Guide for a system description of the
TRIOS models T12A and T12P (TRIOS is also available as model TRIOS11A which is
supplied with a cart with built-in PC).
Note! Information about the supplied model can be found on the label at the back of the
cart and of the Pod.
2 How Do I - Task List
This section helps you quickly find information about specific tasks when performing:
2.1 Configuration
2.2 Orders
2.3 Scanning
2.4 Analysis
2.5 Maintenance
2.1 Configuration
How do I start using TRIOS
How do I access the keyboard
How do I load a new order template
How do I update my license
How do I get online support
How do I create a new operator
How do I turn scanner sound effects on/off
How do I connect TRIOS via wireless
How do I install TRIOS Client
How do I share cart data
How do I set up 3Shape Communicate
5
2.2 Orders
How do I create a new order
How do I view an existing order
How do I send an order
How do I exchange comments with the lab
2.3 Scanning
How do I prepare for scanning
How do I find the best scanning approach
How do I scan a posterior quadrant
How do I scan a full arch
How do I trim the scan
How do I align scans
2.4 Analysis
How do I set insertion direction
How do I add annotations
How do I perform the post-processing of the model
How do I measure occlusion clearance
2.5 Maintenance
How do I perform scanner calibration
How do I autoclave the scanner tip
How do I clean, disinfect and sterilize the system
How do I update the system
6
3 Taking Digital Impressions
3.1 TRIOS Workflow
3Shape TRIOS® realizes a full digital workflow:
Step 1: Order creation
Step 2: Impression scanning
Step 3: Clinical validation
Step 4: Uploading of digital impression
Step 5: Communication with the lab
WORKFLOW TOOLBAR
The Workflow toolbar appears at the top or bottom of the main window and guides you through the
main TRIOS workflow steps:
(1) Home - Opens the last visited item from the Service toolbar:
Patients/Calendar/Cases or Messages.
(2) Order form - Opens the Order form for creating an order and specifying
order details.
(3) Scan - Opens the scanning window for taking a digital impression.
(4) Analyze - Opens a window with special tools for inspecting and validating
your impression scan.
(5) Send - Opens the form that allows you to send your order to the lab.
7
(6) 3Shape Communicate - Opens a window for exchanging comments with the
Lab, viewing sent orders and receiving design of 3D models from the Lab for
visual inspection and approval.
•
A step is check marked when completed successfully
.
•
A step appears disabled if the previous step has not been completed.
•
The current step in the workflow is highlighted.
NOTIFICATIONS
Notifications may appear on the screen throughout the
TRIOS workflow. A few examples of notifications are
license and order form updates, incomplete steps,
connection status, insufficient scan data, and other.
Please read notification information carefully and follow
the instructions.
SERVICE TOOLBAR
The Service toolbar is on the left side of the screen. It provides access to the main TRIOS system
settings and options:
•
Opens patient information page with
order sessions history overview.
•
Opens a calendar with orders.
8
•
Opens a search and filter page of all
existing order cases.
•
Opens a page with notifications about
incoming messages and designs.
•
Opens the system configuration
settings.
•
Opens the help menu options.
9
•
KEYBOARD
Opens the closing options.
To enter a text, press on the text field and
use the virtual keyboard (for cart version)
that appears on the screen.
Press the Home button when you need to return from the workflow pages to the
service toolbar.
10
3.2 Create and Manage Orders
You must create an order session before taking an impression. The order session combines all
information about the patient, the indication and the impression you will take.
You would usually start from the Patients page where you can add new or delete existing sessions,
search for patients, add patients, edit patients, observe orders and order details of the selected
patient.
TO CREATE A NEW ORDER
Step 1: Open a blank order form
Press the New session button in the Patients page for the chosen
patient or press Calendar in the Service toolbar and select the
desired time slot in the appeared calendar to open a new Order
Form:
11
Step 2: Lab selection
When entering the Order page, you are asked to choose a lab. A default lab can be chosen, which will
be used for all future orders. Lab selection can be opened by pressing the Change lab button.
Note! Templates can be customized for specific labs and therefore, the fields and settings
available in the order form may vary.
Step 3: Patient information
Patient is pre-selected (if the order form was opened from the Patients page) and can be changed, a
new patient can be added.
Step 4: Specify Delivery information
12
Step 5: Add Patient images (optional)
Step 6: Select Construction details for the restoration
Choose the necessary teeth in the map and specify the job Type (Crown, Implant etc.).
Open Shade Tool
Press the Open shade tool button to access tools for placing markings and annotations on the teeth,
allowing you to relay specific instructions to the lab:
•
Draw - You can draw a line by pressing on a tooth and dragging your finger across.
•
Type text - Pressing on a tooth opens a virtual keyboard and allows you to type specific
comments.
•
Color name - Lets you select the desired color from the table (e.g., A1). Press on a tooth to
assign the selected color.
13
•
To edit a specific tooth, press its icon
when there are many.
. Use the scroll bar to scroll through and select teeth
•
Press OK to save the changes and close the Color Tool.
Study model – Used for scanning study models and orthodontic cases. When used, it is not
necessary to define construction details.
Add pre-preparation scan - Enables you to add a pre-preparation scan to your order.
Step 7: Add comments
Use the Comments field under the General tab to add special instructions or comments for the lab.
14
Order Form Tools Menu
•
View - Opens the order details in a separate page for printing.
•
Preprep - This button is only available if a Prepreparation copy of the
order has been created previously (see description of the Copy button
below). Pressing the Preprep menu opens the original order.
•
Export - Allows you to export configured and scanned orders in a
selected format.
•
Reschedule - Opens a calendar with a list showing free time slots (see
the image below). Press the preferred date, time and Select to
reschedule the session.
•
Delete - Deletes the entire order after confirmation.
•
Copy - Creates a Standard or Prepreparation copy of an order (read the
description to learn the difference):
For export, press the Export button and select the required format. DDX orders are uploaded to the
server, while orders in other formats are saved locally for further processing. When Direct Connect is
listed under the Export drop-down selection menu, you can export your order to Direct Connect and at
the same time send it to an external lab.
15
Export option
•
Export format selection
Reschedule - Opens a calendar with a list showing free time slots (see the image below). Press
the preferred date, time and Select to reschedule the session.
TO VIEW EXISTING ORDERS
You can view orders on the Patients, Calendar and Cases pages.
1. Viewing orders via Calendar
Press the Calendar button in the Service toolbar to open the calendar view of
order sessions for a particular day.
16
•
Existing sessions are displayed as
calendar slots showing session time, order
number, patient name and the order
status icon.
•
The
Left / Right buttons allow
you to scroll through the calendar dates.
•
The Today button brings you back to the
current day in the calendar if you have
navigated away.
Order status icons are explained below:
Created - An order has been created.
Scanned - All preparations have been marked.
Sending - Only seen if returning to the calendar page right after pressing Send on
the Send page.
Sent - The order has been sent.
Waiting Receive - The case has been received/downloaded by the lab, but neither
approved or rejected yet.
Received Approved - Dental Manager or 3Shape Communicate web site approved
the order.
Rejected - The lab has rejected the order.
Warning - The order sending has failed.
Linked - The order is a prepreparation copy and thus linked to the original order.
2. Viewing orders via Cases function
Press the Cases button in the Service toolbar to open a list of all existing
order sessions.
•
•
The list displays orders status, patient names, numbers, delivery dates and labs.
You can sort orders in the list by pressing the corresponding column headers.
17
The search options allow you to:
•
Type text into the Search field to find the necessary order(s).
•
Use Unsent, Sent, Rejected, Approved and Designed filters to narrow your search results.
•
Use the rotation menu to select orders within the given time interval.
TO OPEN AN EXISTING ORDER
Step 1: Find the required order
Use Calendar or Cases (see help on TO VIEW EXISTING ORDERS described above).
Step 2: Press the order to open its details
Note! Each operator has his own 3shape communicate account and can only change his
own orders.
Orders created by other operators appear with the lock icon in the list and can only be
viewed.
A notification massage comes up informing you that the selected locked order cannot be modified.
18
Orders created by other operators appear locked on the Patients page
Orders created by other operators appear locked on the Calendar page
19
3.3 General Scanning Workflow and Tools
3.3.1 Heating and Mounting Scanner Tip
This help topic describes how to make preparations for taking a digital impression.
The scanner tip is assisted with heating in systems supplied with the external heater, while systems
without it use only the heater inside the scanner tube.
Step 1: Warm up the scanner
Note! Make sure the calibration tip is not attached to the scanner as the tip may become
very warm.
The warming of the scanner depends on the TRIOS model:
•
TRIOS11A: Turn on the cart to activate the heating system and attach the protection and heater
tip. Allow about 10 minutes for the scanner-tube to fully warm up to prevent condensation on the
scanner window during scanning. It is recommended to attach the protection and heater tip to
the scanner at the end of each order (ensure the scanner is cleaned and disinfected). This way,
the warming of the scanner-tube commences immediately at the next power up.
•
T12A: Turn on the cart and attach a clean and sterile scanner tip. Allow about 10 minutes for the
scanner-tube to fully warm up to prevent condensation on the scanner window during scanning.
•
T12P: Turn on the PC, start-up TRIOS application software and attach a clean and sterile scanner
tip. Allow about 10 minutes for the scanner-tube to fully warm up to prevent condensation on the
scanner window during scanning
Note! For systems having an internal heater, a progress bar on the screen shows you the
process of heating. It is still possible but not recommended to start scanning before the
heating ends.
20
Step 2: Prepare the patient for scanning
Preparations for scanning in the mouth are no different from the preparations applied before taking a
physical impression.
1. Prepare the tooth as usual by using at least 1 gingival retraction cord to retract the gingiva
(3Shape recommends using 2 cords).
2. Extract the cord(s) just before scanning.
3. Start by scanning the preparation(s).
Step 3: Create an order or open an existing order
See Create and Manage Orders chapter for instructions on creating/opening orders.
Step 4: Select the scanning option
1. Press the Scan button in the workflow bar at the top to go to the scanning
screen.
2. Select the button for the scan you require: upper jaw, lower jaw or
occlusion.
Note! The scanning option can also contain buttons for scanning implants, post and core
on upper and/or lower jaw(s) if a corresponding job type has been selected in the Order
Form (see the images below):
Abutment Screwretained Crown
job type selected in the Order Form
(1) Scan lower scanbody
(2) Scan upper scanbody
Post and Core job type selected in the Order Form
(1) Scan lower scanbody
(2) Scan upper scanbody
21
Step 5: Prepare your scanner
1. Warm up the scanner tip to avoid
condensation.
TRIOS11A: Just before scanning, remove the
protection and heater tip and mount a clean
and sterile scanner tip onto the scanner. The
scanner tip must be positioned facing down in
order for the heater to warm it up. Return the
scanner to the scanner-mount on the cart and
allow the scanner tip to warm up. The tip is
ready when the heater turns off.
About heating the scanner tip:
To avoid condensation, the scanner tip must be warmed up by the cart heater before scanning. When
you open the scanning screen, the heater turns on automatically if the scanner is placed on the
scanner mount with the scanner tip facing down. The heater measures the temperature of the
scanner tip and turns itself off when the scanner tip is warm enough. The heater continues to monitor
the scanner tip (as long as it is on the scanner mount with the tip facing down) and will re-heat the
scanner tip if the temperature drops below the optimal temperature.
•
•
T12A: Follow the same approach as for TRIOS11A except that a clean and sterile scanner tip is
already mounted onto the scanner.
T12P: A clean and sterile scanner tip is already mounted onto the scanner and the tip has
already been heated.
2. Once the scanner tip is warmed up, you may need to change its position depending on the jaw you
are about to scan:
Scanning the lower jaw - Tip Mirror is facing down
Scanning the upper jaw - Tip Mirror is facing up
(1) Heater
(2) Scanner Mount
Continue to the Scanning chapter.
22
3.3.2 Scanning
Once the preparation steps have been completed, you can start scanning.
The scanning toolbar is described in the help chapter General Scanning Tools.
Step 1: Start scanning
1.
Insert the scanner tip into the patient’s mouth and point at the area to scan.
Press the Scan Activation button on the scanner or press the Scan button at the bottom of the screen to initiate the
scanning process.
Either a color or monochrome 2D image indicates the scanner's field of view:
Monochrome scanning
Color scanning
A 3D model appears in the center of the window when the scanning process starts.
The colored frame outlines the scanner's field of view with the color indicating the current capture
quality. When the frame is:
•
•
•
Green - the capture is optimal.
Yellow - the capture is less than optimal e.g., due to the scanner being moved too fast.
Red - there is no capture at all.
23
The images below illustrate possible colors of the rectangle during scanning:
Black rectangle
Yellow rectangle
Touch the screen to get a new Warns you when the scanner is
starting view
moved too fast.
Green rectangle
Scanning has resumed
alignment
Red rectangle
The alignment is lost
Tip! If you miss the alignment, roll back to the previous spot or move to the occlusal
surface (molar). You can also press on the model during scanning. The view of the model
will go to the best suited spot and indicate the direction you should continue from (the
starting view).
Note! Please see the Scanning Strategies and Tips to Obtaining a Good Scan for
instructions.
Step 2: Scanning process
Gradually slide the scanner over the teeth you wish to scan following the scan paths shown in the
Scanning Strategies section.
The tip can rest on the teeth to help with getting a more steady scanning.
Tip! It is possible to stop scanning and then resume from where you have left. Simply press
the Scan Activation button to continue the scanning process.
Ensure that the digital impression does not have critical holes. The distal and mesial facets of the
ordinary teeth are hard to scan completely however, this is not required for most clinical cases.
24
Note! When making color scans please avoid the light from the dentist chair lamp
pointing directly into the patient's mouth as this will affect the color quality.
HD PHOTO OPTION
You can add several high definition photos (HD Photos) of the scan model, for example, to supply the
lab with visual appearance of the neighboring teeth or assist them with placing the margin line, etc.
To take HD Photos:
•
Press the HD Photo button at the scan step once the model is scanned.
•
(Optional: Press the area on the model you would like to take an HD Photo of to define the
scanbox starting position. Start scanning and when the frame of the scanbox becomes green,
press the Scan activation button once to take a photo.
•
A scrolling thumbnail menu of the added HD Photos appears on the scan page, it shows a
corresponding scan in the main window when a thumbnail is pressed. The "center"
button in the selected thumbnail positions the direction of view to the one when the photo was
taken, while the 'delete'
button removes the photo.
25
Note! HD Photo feature only works for color and monochrome scanners that have a
firmware version equal to or higher than revision 1.03.02, otherwise this option is
disabled.
Dental laboratory requires Dental System 2014 or later to be able see the HD photos in
scans.
Step 3: Mark Preparation
Mark preparation menu automatically appears at the bottom of the screen when you stop scanning
or it can be opened by tapping the Mark Preparation button. The menu consists of buttons
numbered according to the corresponding teeth. When one preparation is marked, the system
automatically selects the button of the next preparation. Make sure to mark the right preparation for
every numbered button. The currently active button has a darker color.
26
Once all preparations are marked the Mark preparation menu closes.
Step 4: Scan antagonist
Continue by scanning the antagonist if required. The workflow is similar to the steps described above
apart from making preparations.
Step 5: Scan occlusion
Scan occlusion, until the jaws align themselves automatically when using the "Live" alignment
method. There is also an alternative to choose "Automatic" or "Manual" method to perform the
alignment after the process of scanning is done. The bite alignment operation method is chosen in
Configure->Scan: Manual, Automatic or Live. Please see the Align Occlusion chapter for details.
27
28
3.3.3 General Scanning Tools
General scanning tools are located in the toolbar at the bottom of the screen:
•
Scan / Pause scanning (typically the Scan Activation button on the
scanner is used).
•
Mark preparation - Used to mark prepared teeth for further postprocessing once scanning is completed.
High resolution - Captures areas that are difficult to scan, with higher
amount of details.
Follow these instructions to use the High res feature:
1. Scan with normal resolution.
2. Inspect the scan and determine where high resolution is required.
3. Set to High res. Note, that high resolution can only be applied to a
region around a preparation mark
4. Re-scan the desired area.
5. Turn off High res if continued scanning is needed.
•
•
HD Photo - Lets you take and add high quality photos of the area of
interest to your order.
•
Trim - Provides tools for cleaning and trimming the scan:
o
o
o
All patches - Automatically removes all "islands" and "peninsulas"
having slim attachment to the main surface e.g., accidentally
scanned fingers and the tongue.
Before
After
29
o
o
Patch - Manual removal of “island” surfaces. Remove a small area
disconnected from the largest surface by tapping it once.
Before
•
•
After
o
o
Brush 4, 2, 1 mm - Selection of the trimming tool thickness.
Removes the drawn, colored part of the scan.
o
Undo - Cancels the last action / Redo - Reverses the Undo action.
o
Cancel - Closes the trimming tool without applying changes.
o
Done - Accepts changes and closes the trimming tool.
Clear - Removes the whole scan to start over.
Tools
menu
30
o
Playback scan - Plays back the scanning process.
o
Swap scans - Swaps upper and lower jaw scans. Requires user
confirmation. This is useful if the operator accidentally scanned the
wrong jaw.
o
Color calibration - Used to calibrate a color TRIOS scanner.
o
Shade Measurement - Allows you to determine the color shade of
teeth near the preparation and send this information to the lab.
o
Lock surface - Apply by painting the area to lock. Locked (colored)
area will not be updated by further scanning. Use this feature to fix
retracted gingiva after immediate scanning as it might collapse and
possibly degrade the scan area otherwise. Locking does not affect
trimming, you can still trim the locked surface. Deleted locked surface
can be re-scanned.
31
•
o
Snapshot - Adds a snapshot to the order.
o
Training Center - Opens a window with links to view various training
material.
Indicates scanner's orientation.
Visualization Toolbar
You can change the model viewing modes: Center, Rotation, Translation, Zoom and Color by
pressing the corresponding buttons in the Visualization toolbar.
Center - Centers the model and places it in a middle of the screen.
Rotate - Rotates the model.
Pan - Moves the model.
Zoom - Allows you to zoom the model in/out by moving the finger up/down.
Color - the button is present in the toolbar when a color scanner is connected. It
can be used to toggle between color and B&W scan image representations.
Margins - Toggles the visibility of the margin line.
32
3.3.4 Align Occlusion
Bite alignment operation method is chosen in Configure->Scan: Manual, Automatic or Live.
LIVE ALIGNMENT
If you have Bite alignment operation set by default to "Live", the bite alignment process is shown and
run during the scanning process in real time, therefore you don't have to wait for it after scanning.
AUTOMATIC ALIGNMENT
The software automatically aligns the scanned preparation and antagonist using the bite scan.
However, you can always re-align the scans manually if needed. In order to start or adjust the
alignment of the scanned jaws tap the Align button at the bottom.
Align - Opens alignment tool bar.
•
Auto Align - automatically aligns the scanned preparation
and antagonist using the bite scan when pressed if the Use
automatic bite alignment feature in Scan Settings was
disabled.
•
Optimize occlusion - Automatically adjusts the occlusion for
an optimal bite.
•
Clearance - Analyzes the distance between preparation and
antagonist. You can also find the Clearance option on the
Analyze page.
•
Reset - Cancels the alignment changes and allows you to realign the scans again.
•
Undo - Cancels the last action / Redo - Reverses the Undo
action.
•
Cancel - cancels the changes and closes the toolbar.
33
•
Done - Accepts changes and closes the alignment tool.
•
Bite 1 - Always required: For quadrants, Bite 1 is the only bite scan required. For
full arches, it is one of the two bite scans required.
•
Bite 2 - Only required if scanning full arches. Must be the opposite side to Bite 1.
MANUAL ALIGNMENT (optional)
The software lets you perform the alignment of one or two bite scans manually:
Step 1: Reset automatic alignment
Press the Reset button in the scanning toolbar to cancel the Live/Automatic Bite alignment
operation if it was enabled in Scan Settings.
Step 2: Place marker points
Follow the instructions on the screen to place marker points on the upper/lower jaws and occlusion
scans. Alignment is processed on placing the last marker point.
Step 3: Complete alignment
The Undo button allows you to cancel the last action while, pressing the Done button completes the
alignment and closes the alignment tool.
34
3.3.5 Analyze Scan
The Analyze page provides instruments for inspecting and validating the
impression scans.
1. Press the Analyze button to start once you are satisfied with your
impression.
2. Use the provided tools to apply additional validation options.
Setting insertion direction for the restoration
By optimizing the insertion direction you minimize undercuts. The undercuts are graphically
represented by the color scale.
You can set the insertion direction in two ways:
1. Use the Auto detect button. The system automatically calculates and sets the insertion direction.
OR
2. Press the Use view button. The program sets the insertion direction based on your view of the
scan.
35
The undercut area is automatically measured and its value displayed on the screen.
Press Done when finished.
Placing the margin line
TRIOS automatically detects and presets the margin line. You can manually edit the margin line by
pointing or drawing its new position.
You can switch between margin lines when you have a few by pressing the Next/Previous buttons.
Press Done when finished.
Margin line visibility is toggled with the Margins button. The button appears at Analyze Scan step
when the Margin Line tool is active or after you edited the margin line.
Identifying distances between preparation and antagonist
To determine whether additional preparation of a tooth is required, open the Clearance tab by
pressing the button and viewing the color scale indicating a range of distances between the
preparation and antagonist. The distance values are shown in millimeters.
36
The clearance display is changed by dragging inside of the color scale. Switch view button lets you
toggle between opened and closed jaws views. Press Done when finished.
Placing annotations on the model
You can add comments to the digital impression:
Step 1: Placing annotation
Mark the target point for a new annotation by pressing the point on the 3D model.
Step 2: Typing annotation text
Enter your comment into the blank field and press Done. Use the Delete button to remove your
annotation if needed.
Annotations are sent together with the digital impression to the lab. Lab technicians can see the
annotations in 3Shape Dental System design software.
Allows you to determine the color shade of teeth near the
preparation
This tool is also available at the scanning step. You can use it to measure the color shade of the teeth
near the preparation and send the information in the order to the lab:
Step 1: Place color shade measurement
Press Tools->Add button and indicate the area on a tooth you want to measure the color shade of.
The indicated area is marked with a circle and the attached label displays its color shade.
Step 2: Define the standard color shade value
Press and move the shade measurement circle to make sure the selected value becomes with a green
tick as the yellow color indicates that the color shade is out of the given range.
37
Shade measurements can be deleted by pressing the Remove button and indicating the shade
measurement you want to remove.
Shade measurements only works on upper and lower jaw, and not on extra scans. It is only shown
while the feature is active.
Note! Shade measurement requires a shade enabled color scanner.
Tools menu
•
Snapshot - Add a snapshot to the order.
•
Model Post-processing
Pressing the Post process button, automatically:
• Optimizes 3D model for better details around
the preparation(s).
• Reduces noise of the 3D model.
• Closes holes within the model.
Post-processing might take a couple of minutes to
complete.
Tip! Post-processing will be done automatically
during order sending if the post-process button
was not activated by the operator. However, it is
recommended to do post-processing at the
Analyzing step and inspect the result in order to
avoid the risk of overlooking changes introduced
by post-processing.
38
3.4 Specific Scanning Workflows
3.4.1 How Do I Scan One or More Preparations
Dentist should perform the following operations when scanning preparations:
Step 1: Prepare patient's teeth.
Step 2: Retract the gingiva around the preparation for the preparation lines to stand out clearly by
using at least 1 gingival retraction cord to retract the gingiva (3Shape recommends using 2 cords).
Step 3: Dry the teeth lightly using compressed air. Be sure to reach the narrow regions between
teeth. Consider using saliva ejector and/or tampons.
Step 4: Scan preparation and the rest of preparation jaw. Scan antagonist and bite (two bites for
full arch cases).
Step 5: Send your preparation order to the lab.
3.4.2 How Do I Make a Pre-preparation Scan
An order can include a pre-preparation scan as a reference when designing the new restoration, so
that the new and the old tooth look alike. Pre-preparation scans are allowed for all restorations except
Post and Core, and Abutments.
There is a choice of two options to follow when performing a pre-preparation scan:
Option 1
Step 1: Mark the restoration tooth in the order form.
Step 2: Select the indication type.
Step 3: A checkbox appears called “Add pre-preparation scan”.
Step 4: Tap the checkbox.
Step 5: Proceed to the Scan page.
Step 6: Select the pre-preparation scan page (already selected if restoration is in lower jaw).
Step 7: Scan the required area.
Step 8: The Mark preparation tool opens.
Step 9: Mark the center/top of the tooth.
Step 10: Go to the preparation scan page.
Step 11: The marked area is now auto deleted, and the rest is locked to avoid unwanted
changes to the scan.
Step 12: Finish your preparation and begin scanning until the deleted area is filled out again.
39
Option 2
Step 1: Scan patient's teeth before their preparation is done. This order is called a prepreparation order.
Step 2: Send pre-preparation order to the lab to have them make the temporaries.
Step 3: Patient comes in for a second appointment once the Dentist receives the temporaries.
Step 4: Open the existing pre-preparation order and select Copy with the pre-preparation
scan option.
A new order is created automatically and the content of the pre-preparation order is copied into
the new order.
Step 5: Prepare patient's teeth.
Step 6: Go to the preparation scan page. The marked area has been automatically deleted,
and the rest of the scan is locked to avoid unwanted changes to the scan.
Step 7: Re-scan the preparation area starting from the surface next to the preparation (for the
system to recognize some of the 3D structures to start on.
Step 8: Send the new order which will include pre-preparation and preparation scans to the
lab.
3.4.3 How Do I Make an Implant Scan
Dentist should perform the following operations when scanning implants:
Step 1: Create an order and select "Implant" for the restoration type.
The Add additional scanbody scan checkbox on the order form is marked by default. It creates an
extra implant scan step automatically, you need to unmark the checkbox if the extra scan page is not
required.
40
Step 2: Select first page of implant scan, the one without the scan body icon:
Please continue to Step 11 if you have unmarked the Add additional scanbody scan checkbox on
the order form and thus do not require an extra implant scanning step.
Step 4: Remove the healing abutments.
Step 5: Make first scan.
Step 6: Mark implant locations using the Mark preparation tool.
Step 7: Attach the scan body to implant.
Step 8: Select the second page of the implant scan with the scan body icon:
Step 9: The area around the scan bodies is automatically removed.
41
Step 10: Trim the areas, if the automatic removal was insufficient.
Step 11: Scan the scan body starting from the surface 1-2 teeth away from the scan body for the
system to recognize 3D structures (the scan body does not need to be perfectly scanned but must
contain enough information to be used by the laboratory to detect the placement of the implant).
If the contact points were auto deleted, there is no need to re-scan them again.
Step 12: Remove the scan body and continue to antagonist and bite scans.
Note! The scanning process can also be completed in the opposite order if desired,
starting with the scan body.
3.4.4 How Do I Make Post and Core Scan
Dentist should perform the following operations when scanning Post and Core:
Step 1: Create an order and select "Post & Core" for the restoration type.
Step 2: An extra scan page is added automatically, giving you 2 pages for the jaw with the post
and core.
Step 3: Select first page of post and core scan, the one without the scan flag icon:
42
Step 4: Make first scan.
Step 5: Mark post and core locations using the Mark preparation tool.
Step 6: Attach a scan flag to post and core.
Step 7: Select the second page of the post and core scan with the scan flag icon:
Step 8: The area around the scan flag is automatically removed.
Step 9: Trim the areas, if the automatic removal was insufficient.
Step 10: Scan the scan flag starting from the surface 1-2 teeth away from the scan flag for the
system to recognize 3D structures.
(the scan flag does not need to be perfectly scanned but must contain enough information to be used
by the laboratory to detect the direction of the post).
If the contact points were auto deleted, there is no need to re-scan them again. Only the scan post is
important for later alignment.
When it is not possible to scan all posts at once, e.g., due to their close positioning, you can scan
posts separately by pressing the Add scan buttons at the bottom of the screen.
43
Confirm your intention in the appeared dialog window and scan another post after it has been placed
in the new location.
Additional scans add preview thumbnails on the right that show related scans in the main window
when pressed.
Should that be required, you can remove the additional post scans by pressing the delete button that
appear in the selected thumbnail.
Step 11: Continue to antagonist and bite scans (without scan flag).
Note! The scanning process is fixed – you have to scan without flags first and then go to
the scan flag page.
44
3.5 Tips to Obtaining a Good Scan
PREPARATION
1. Turn on the cart or PC in advance to allow the system to heat up. See section Heating and
Mounting the Scanner Tip, step 1. Allow the system to warm up for about 10 minutes prior to
use. If the cart has a heater, the final temperature is reached when the light goes out.
2. Retract the gingiva around the preparation by using retraction cord(s) for the margin line to
stand out clearly.
3. Make sure the scanner tip is warm to avoid condensation on the mirror. See section
Heating and Mounting the Scanner Tip, step 5.
SCANNING
1. Dry the teeth lightly using compressed air. Be sure to reach the narrow regions between teeth.
Consider using a saliva ejector and/or tampons.
2. Get a good start:
•
•
•
•
Start at preparation (or 1st molar if antagonist).
Wait for about 5 scanner "clicks" before proceeding (helps build up a good starting point).
Complete preparation including the margin line.
Scan neighboring teeth: Occlusion, lingual/palatinal side, buccal/labial side, mesial and distal
sides for contact points.
3. Keep scanner head at 0-5mm from the teeth, it is OK to touch the teeth occasionally.
4. Move the scanner slowly and smoothly, you should hear a more rapid clicking sound.
5. Keep lips, cheeks, and tongue out of the scanner’s view:
•
•
•
•
Use your finger or a dental mirror to create space between the teeth, lips and cheeks.
Use a lip-and-cheek-retractor to keep lips and cheeks away.
Be careful not to scan your own or assistant’s fingers.
If you get lips, cheeks or tongue in the scan, make sure to trim it all, especially where they
have contact with the teeth (no surfaces should stick out from the teeth).
6. Focus on:
•
•
Option 1 - Look at the teeth while scanning and listen to the "clicks". If it stops
clicking/capturing, carefully move back to the area marked on the screen.
Option 2 - Look at the 2D image at the lower right corner. What you see here is what you scan.
Avoid lips, cheeks and the tongue to get an easy scan.
7. When scanning is complete, inspect the result by rotating the scan.
The important areas are:
•
•
•
•
Margin line (avoid interference from gingiva, saliva, blood).
Contact points.
Occlusal surfaces.
If an important area is missing, simply start scanning the area until the scanner detects the
location and the clicking/capturing begins. You can optionally touch the area on the model to
get a new starting position if the scanner doesn’t automatically detect the area.
45
8. Bite Scan:
•
•
•
•
Place the scanner tip pressed against the cheek and ask the patient to bite down.
Start scanning from the second molar or canine if you make an anterior scan.
Scan 4 teeth in mesial direction for optimal alignment.
Scan e.g., mainly lower jaw first by covering gingiva and teeth. When the scan automatically
aligns into place, move the scanner up to upper jaw teeth and gingiva until it also aligns.
9. Important for good colors:
•
•
Avoid the light from the dentist chair lamp pointing directly into the patient's mouth.
Scan at several angles to even out any discoloration or shadows.
3.6 Scanning Strategies
BASIC PREPARATIONS FOR EASY SCANNING
Follow the steps from section Tips to Obtaining a Good Scan, Preparation to prepare for easy
scanning.
SCANNING APPROACH
The best scanning method is to start with a molar, since it has greater details for easier identification.
Change the scanning angle to 35-55 degrees during scanning to allow the surfaces to overlap, if the
overlap is small, the alignment may be lost.
SCANNING PATH
The recommended scanning path consisting of 3 sweeps: occlusal, lingual and buccal to ensure good
data coverage of all surfaces.
The occlusal sweep always comes first as it has most of the 3D structure, which makes scanning
easier. The first sweep should be started at the first molar (if antagonist) or the preparation (to scan
gingiva before it collapses from the retraction). Allow the scanner to get a good ‘starting point’ by
waiting for 3-5 clicks before moving the scanner steadily and slowly 0-5mm above the teeth.
While scanning, the biggest challenge is to control the soft tissue, such as the tongue, lips and cheeks
as they may confuse the scanner if getting into its view and potentially slow down or even stop the
scanning process. Therefore, the easiest second sweep depends on the jaw:
•
The upper jaw has only the soft tissue on one side (buccal) therefore, the second sweep should
be buccal as this pushes the soft tissue away and creates a clear view for the scanner.
•
The lower jaw is more challenging because of the tongue. The cheek can easily be retracted using
a finger or a mirror. Therefore, the second sweep is lingual, pushing the tongue away.
46
•
The third sweep covers the opposite side of the second sweep. Again, try to avoid soft tissue.
Because the scanner has already been on the other side of the teeth during the sweep two, the
system uses the obtained data to avoid adding soft tissue to the scanned teeth.
The recommended scan paths are summarized.
General Principles:
Upper jaw
Lower jaw
1. Occlusion
1. Occlusion
2. Buccal - There is no soft tissue in the way.
2. Lingual - the tongue is the most moving
soft tissue (compared to the cheek). The
cheek is easily retracted.
3. Palatal - As the scanner has already been on
the other side of the teeth during the step two,
the system uses the obtained data to avoid
adding soft tissue to the scanned teeth.
3. Buccal - As the scanner has already been
on the other side of the teeth during the step
two, the system uses the obtained data to
avoid adding soft tissue to the scanned teeth.
If a scanned jaw has a preparation - start with the preparation, then follow the steps described above.
Centrals
When scanning the first sweep of centrals, it is important to cover both, lingual and labial sides of the
teeth. The easiest method is to slowly wiggle the scanner tip between the labial and lingual sides.
The centrals require more attention than molars. Therefore, the scanner tip should move a little
slower in that region.
Posterior quadrant
The general principles are applied in the following 2 examples:
Example I: Lower quad, antagonist
Step 1: Antagonist: Start directly on the occlusion (the first
molar), then sweep along the occlusion.
Step 2: Lower jaw: Roll 45-90 degrees to the lingual side and
sweep to the second molar. Use the tip to keep the tongue away.
Step 3: Roll to the buccal side and complete the buccal sweep.
47
Example II: Upper quad, with preparation
Step 1: Start with the preparation:
•
•
•
•
•
Go to the occlusal side of the preparation.
Roll to the palatal side.
Roll to the buccal side.
Rotate almost 90 degrees to get the best angle for the distal
and mesial contact points.
Rotate back to the occlusal.
Step 2: Swipe along the occlusion.
Step 3: Upper jaw: Roll 45-90 degrees to the buccal side and
complete the buccal sweep on one side of the preparation.
Step 4: Roll to the palatal side and complete the sweep.
Step 5: Complete scanning on the other side of the preparation
by performing the occlusal sweep first.
Step 6: Perform the buccal sweep.
Step 7: Perform the palatal sweep.
Full arch
The general principles are applied in the following 2 examples:
Example I: Lower full arch, antagonist
Step 1: Antagonist: Start directly on the
occlusion (first molar), then sweep along the
occlusion. Slowly wiggle the scanner when
passing the centrals.
Step 2: Lower jaw: Roll 45-90 degrees to the
lingual side and sweep to the second molar. Use
the tip to keep the tongue away.
Step 3: Roll to the buccal side and complete
the buccal sweep.
48
Example II: Upper full arch, with
preparation
Start with the preparation:
Step 1: Go to the occlusal side of the
preparation.
•
•
•
•
Roll to the palatal side.
Roll to the buccal side.
Rotate almost 90 degrees to get the best
angle for the distal and mesial contact
points.
Rotate back to the occlusal.
Step 2: Swipe along the occlusion.
Step 3: Upper jaw: Roll 45-90 degrees to the
buccal side and complete the buccal sweep on
one side of the preparation.
Step 4: Roll to the palatal side and complete
sweep.
Step 5: Complete scanning on the other side
of the preparation by performing the occlusal
sweep first.
Step 6: Perform the buccal sweep.
Step 7: Perform the palatal sweep.
Especially important regions
In order for the lab to be able to make a good restoration it is especially important to have a good
scanning quality of the functional surfaces:
•
The margin line must stand out clearly. Observe that the gingiva is retracted, saliva and blood
are removed by using compressed air.
Adjust the margin line in the Analyze scan page if required.
•
Contact points. If there are non-scanned areas near the contact points, a warning will appear in
the upper left corner of the screen. Press the message for the model to display the areas in
question. Contact points on a molar may be difficult to reach, try going across the mouth/over
the tongue and tilt the scanner tip.
•
Occlusal surfaces.
49
Bite Scan
Step 1: Insert the scanner tip into the patient's mouth at the buccal side of the teeth and rotate it
to scan the side of the teeth. (Start from the second molar or canine if you make an anterior scan),
then close patient’s mouth.
Step 2: While centering 2D image on occlusion plane, slowly move the scanner tip in mesial
direction with equal coverage of upper and lower teeth.
Step 3: Scan 4 teeth for optimal alignment (no more/no less).
Below is an example of a good bite scan:
Situations with more preparations
In cases of multiple preparations focus must be put on scanning the preparations before the gingiva
collapses. If preparations are closely positioned, they may be scanned in one go. If preparations are
further apart, the retraction agent can be removed from 2-3 teeth at a time, having these areas
scanned before moving to the next region and repeating the procedure.
50
4 Options and Settings
This section provides an overview of the setting sections. Each section is explained in details in the
corresponding chapters.
Individual settings for operators are supported. For example, an operator can have his own preferred
settings for the Scan Sound, volume, Color System etc.
You must have configuration
parameters set before using
TRIOS.
Step 1: Press the Configure button in the
Service toolbar to open the Settings window
with configuration sections (see image).
Step 2: Follow the steps below to configure
the settings.
51
1. General
In the general settings, you can check for
upgrades, select the interface language,
read what's new, renew you subscription
online and get support online.
See the help topic General Options and
Settings for details.
2. System
System settings let you to view the system
log file, available hard disk space and define
the path to the support application. You can
also enable the auto show function of the
on-screen keyboard here.
3. Sound
Contains Mute on-screen keyboard switch
and scanning sound setting options:
•
Use sound effect switch.
•
Scanning sound volume.
•
Sound effect drop-down selection
menu.
52
4. Operator
Press Operator to add a new TRIOS operator
or change the existing name and password
(see Operator Options and Settings for
details).
Tip! Your account photo in *.png,
jpg, jpeg or bmp formats can be
added by pressing the Import
photo button.
5. Connection
Allows you to enable remote management,
client sharing, remote screen/tablet scanning
options and diagnose internet connection.
See Connection Settings chapter for details.
53
6. Lab Connections
The lab connection settings allow you to
create and configure the 3Shape
Communicate™ account of the operator and
view connected 3Shape Communicate™ and
direct connect labs.
See chapters Lab Connections, Create 3Shape
Communicate™ Account and Connect to the
Lab for details.
7. Order
Dentist address - Enter the address of your
dental clinic. This address is included on the
Order form (if supported by this order form).
Tooth numbering system - Lets you to
select the preferred tooth numbering system,
e.g.: UNN, FDI, Haderups, that changes the
way the teeth are numbered in the Order
form.
Shade system – Lets you to select one of the
available shade systems.
Remember last indication setting – Sets
the last used indication for the next selected
tooth.
Time interval between orders (in
minutes) – Specify the time interval between
new orders.
Work day start/ Work day end - Sets the
start and end time of your workday in the
calendar.
Patient names privacy - Has a selection
option to either always show, hide patient
names or show a toggle button for selection in
the Calendar list.
54
8. Scan
The Scan settings allow you to calibrate your
scanner and configure the scanning
preferences.
See Scan Options and Settings chapter for a
detailed description of all the parameters.
See Scanner Calibration chapter for detailed
instructions on scanner calibration.
9. Messages
Used to automatically discard old messages
from your Message page.
55
4.1 General Options and Settings
General settings contain the following buttons and options:
56
•
Check for upgrades - lets you keep
your TRIOS system up-to-date
•
User interface language - Select
the preferred TRIOS interface
language.
•
What's new - Open what's new
button lets you see the What's new
document.
•
Open web shop - Lets you renew
your subscription online. The dongle
information is displayed under About.
•
3Shape Support - Online support is
normally accessed by pressing Help
and then Online Support buttons.
This enables the remote support at
the choice of your distributor. Should
support be required directly from
3Shape, the 3Shape Support button
opens 3Shape QuickSupport dialog
window. Tell 3Shape the ID and
password displayed on the screen for
desktop sharing assistance.
4.2 Operator Options and Settings
Operator helps you add or modify TRIOS operators:
OPERATOR
•
•
Add new - Used to create a new
TRIOS operator (the name appears in
the list on the left).
When a newly created operator logs
in for the first time, it is presented
with a guided wizard to setup his
account. Alternatively, the settings
can be made via the Service toolbar:
Configure->Settings->Operator.
Modify - Lets you edit the selected
operator.
•
Delete - Removes the selected
operator from the list.
•
Name - Fill in your name.
•
Password - Create/modify your
password. If you do not want to have
a password, leave this field blank.
•
Is administrator - sets operator as
an administrator.
•
Automatically login - Logs the
operator in TRIOS automatically.
PHOTO
You can upload your personal photo in
*.png, jpg, jpeg or bmp formats by
pressing the Import photo button.
The Clear photo button removes added
photo.
User photos appear next to the operators
names on the Choose user login screen.
57
New TRIOS operator setup wizard
4.3 Connection Settings
Connection page contains configuration settings for:
•
Remote management - lets you enable or disable
remote management.
•
Client sharing - TRIOS cart data sharing setup.
•
Wi-Fi - Wireless network connection setup.
•
Proxy Settings - Internet access setup.
•
Diagnose Internet - Tests your internet
connection.
58
•
Remote screen/tablet scanning - Lets you
control TRIOS over a distance via iPad/tablet.
•
Bluetooth Devices - Bluetooth device connection
setup.
Note! The Wi-Fi and Bluetooth Devices buttons are enabled only in the cart installation of TRIOS
when a Wi-Fi and Bluetooth dongles are available in the cart.
REMOTE MANAGEMENT
Enable / Disable remote management toggle button.
CLIENT SHARING
•
Pressing the Share button makes your TRIOS cart
data (orders, updates etc.) available to the client
users.
•
The shared path is used by the clients to connect
to the TRIOS cart.
A client is an external version of the TRIOS
software, that can create and modify TRIOS orders
(typically placed at the receptionist of the clinic).
•
REMOTE SCREEN/TABLET SCANNING
Let's you download and install the Splashtop application
for remote connection between TRIOS and iPad/tablet.
See the supplied setup guide for instructions.
59
Wi-Fi
•
Selected Wireless Network drop-down menu
lets you choose a connection from the available
networks. A Network password is required for a
secure connection.
•
Connect to network / Disconnect from
network buttons - Establishes / closes connection
to the selected wireless network. If the connection
is established, a small globe icon is displayed next
to the Selected Wireless Network drop-down menu.
•
Refresh network list button - Updates the list of
available networks in the Selected Wireless
Networks drop-down menu.
•
Reset network adapter button - May help you
solve connection problems.
•
Enable Wi-Fi logging - Automatically connects
TRIOS to a predefined Wi-Fi network when
enabled.
Please read Wi-Fi Installation Considerations section for
guidelines on wireless network installation.
PROXY SETTINGS
If your network uses a proxy, fill in your proxy settings
here. They can be obtained from your network
administrator.
BLUETOOTH DEVICES
Opens up a page which allows you to connect to a
Bluetooth device, e.g. a keyboard.
60
4.4 Lab Connections
Lab Connections page contains configuration settings, a list of labs and their type
connections.
LAB CONNECTIONS
•
External Connection Method - lets
you select between 3Shape
Communicate and FTP type of
external connection.
•
Configure Communicate - Lets you
configure 3Shape Communicate
account.
•
Configure direct Connect Lab Lets you configure direct connection
(DC) to a lab.
•
Add new Direct Connect Lab Allows you to add a new direct
connection (DC) to a lab.
•
Refresh - Refreshes Lab Connections
list.
CONFIGURE COMMUNICATE
•
Login (email), password - Your
3Shape Communicate login details.
•
Add Account - Opens 3Shape
Communicate registration page.
•
Add Lab - Opens 3Shape
Communicate login page to add a lab.
•
Test settings - Tests 3Shape
Communicate connection settings.
ADD NEW DIRECT CONNECTION LAB /
CONFIGURE DIRECT CONNECTION LAB
Lab name - Name selected for the local
lab.
61
Folder path - Path to the local folder.
User name, Password - Network login
details if needed.
Delete - Deletes selected lab connection.
Test Settings - Tests configured direct
connection.
62
4.5 Scan Options and Settings
Scan settings frame contains parameters activated with the buttons on the right:
•
Use automatic tip heater - Allows
you to turn automatic heating on/off.
•
Show scan timer - The scan timer is
displayed during the scanning process
in the upper left corner of the
window.
•
Show 3D image count - Shows the
number of taken images during
scanning.
Bite alignment operation - Lets
you select the type of bite alignment:
Manual, Automatic - done after
scanning, or Live - done during
scanning.
•
•
Default scan zoom level - Allows
you to adjust the default zoom level
for scanning.
•
Non-preparation post processing Sets the precision level of the models
without preparation. Applies to
antagonist and study orders.
•
Use new post processing - Applies
new post processing algorithm when
enabled.
•
Hole close color - Select the color
shade to indicate closed holes on the
model.
•
Send scan videos to distributor Automatically sends scan videos to
distributor when enabled.
•
3D calibrate scanner - Used to
calibrate monochrome and color
TRIOS scanner. See Scanner
Calibration chapter for details.
Color scanner (these settings appear only when a color scanner is connected):
•
•
Shade measurement enabled - enables shade measurement option for the color scanner.
Color calibrate scanner - Opens color calibration guide. See Scanner Calibration chapter for
details.
63
•
•
Reset color calibration - Resets color scanner calibration to the factory default value. A New
color calibration is required after resetting.
Implant / P&C / Pre-preparation cut out diameter - Default values settings applied during
scanning.
Reset to defaults - Resets all settings to factory default values.
4.6 Help Options
The Help window displays information about the current system version and
provides the following options:
•
Online Support - Launches a screen sharing
session for online support.
•
Training Center - opens a dialog window
with training videos. Can be accessed from
the Help menu and Scanning Tools unfolding
menu at the bottom of the screen.
•
User Manual - Opens TRIOS online help.
•
Safety Guide - Opens TRIOS Safety and
Setup Guide.
•
Terms of Service - Opens the general
license terms and conditions.
•
Third Party License - Opens a list with third
party licenses.
•
Send feedback - Opens a form for reporting
a bug.
•
Close - Closes the Help window.
64
Tip! Pressing the 3Shape logo also opens the Help dialog window.
Training Center allows you to select and view various training material:
Training videos are listed in the left pane of the
page and can be filtered by categories.
The right page shows details for the selected
video.
Playback of the selected video is initiated by
clicking either the Open Video button or the
preview image in the Details pane on the right.
While some videos can be viewed locally, others
may require a working internet connection for
streaming.
65
The following page is opened for the selected video:
4.7 Closing Options
The Close button opens a dialog window with the information about the
current system version and provides the following closing options:
•
Logout - signs you out and displays the Choose
user list.
•
Restart system - reboots the TRIOS system
(available on cart systems).
•
Shutdown - turns OFF the TRIOS system. You
need to confirm your intention in the appearing
dialog.
Note! Please allow enough time for the system
to shut down properly before disconnecting the
power cable. The Standby button light
illuminates while the system is still processing
•
Cancel - closes the window and returns to the main
screen.
66
Note! After cleaning and disinfecting the scanner, put the protection tip on the scanning
tube to protect its optics from contamination when not in use.
Note! The Standby button on the cart also functions as a Reset one to restart the system
in case it becomes frozen and stops responding. Should that happen, push and hold the
Standby button pressed for about 5 seconds to restart the system.
4.8 TRIOS Client
3Shape TRIOS installer contains two installation options: Cart and Client.
The Cart version is installed directly on a TRIOS cart.
The Client version can be installed on regular PC's for an easy data-exchange between TRIOS cart
and client PC's within the clinic. The Client can be used for all TRIOS operations except scanning such
as, creating new orders and reviewing old ones.
Note! The Client cannot run if the Cart or Pod PC is turned off.
Software Requirements for installing 3Shape TRIOS Client:
•
•
Windows Vista or later.
Microsoft .Net 4. (version 4.5 is part of the installer)
Step 1: Enable Client sharing on the Cart
Before you can start using the Client, Client sharing must be enabled on the Cart.
1. In the Cart interface, select Configure from
the Service toolbar on the left to open
Settings.
2. Select Connection and press the Client
sharing button in the Connection page.
3. Press the Share button and confirm your
choice to enable Client sharing.
67
Copy the Installer address to use for Client installation (see Step 2) and the Cart address to connect
the Clients to (see Step 3).
Step 2: Run the Client installation
1. The TRIOS installer can be found via
the link from the Cart settings by
typing it in a file explorer or a web
browser. This opens a web page
with instructions and a link to the
Client Installation file.
2. When clicking the TRIOS Client
Application link you can either
choose to Run the installation after
the download, or save it for later
installation.
3. Select TRIOS Client option in
the appeared screen.
4. Press the Install button to
continue the installation process.
68
Step 3: Start the Client
On the first start-up of the TRIOS Client,
you need to enter the address or name of
your TRIOS Cart PC (see Step 1).
The TRIOS client restarts on saving the
address and connects to the TRIOS Cart.
Step 4: Using the Client
Except for the excluded scanning ability and limited Settings page, the TRIOS functionality described
for the Cart is also valid for the Client version.
Orders created with the Client are stored
on the Cart or Pod PC. The Client cannot
run if the Cart or Pod PC is not running.
Orders open with Cart or Client are
locked, the users are notified when they
try to open locked orders.
You can change the existing Client to Cart connection by opening the Connection page and filling in a
new Cart name.
The Test button allows you to confirm the established connection.
69
4.9 Wi-Fi Installation Considerations
Wireless router lets you access your network using a Wi-Fi connection from virtually anywhere within
the operating range of the wireless network. Keep in mind, however, that the number, thickness and
location of walls, ceilings, or other objects that the wireless signals must pass through, may limit the
range. Typical ranges vary depending on the types of materials and background RF (radio frequency)
noise in your home or business.
The key to maximizing wireless range is to follow these basic guidelines:
1. Keep the number of walls and ceilings between the router and other network devices to a minimum
- each wall or ceiling can reduce your adapter’s range from 3-90 feet (1-30 meters.) Position your
devices so that the number of walls or ceilings is minimized.
2. Be aware of the direct line between network devices. A wall that is 1.5 feet thick (0.5 meters), at a
45-degree angle appears to be almost 3 feet (1 meter) thick. At a 2-degree angle it looks over 42 feet
(14 meters) thick! Position devices so that the signal will travel straight through a wall or ceiling
(instead of at an angle) for better reception.
3. Building Materials make a difference. A solid metal door or aluminum studs may have a negative
effect on range. Try to position access points, wireless routers, and computers so that the signal
passes through drywall or open doorways. Materials and objects such as glass, steel, metal, walls with
insulation, water (fish tanks), mirrors, file cabinets, brick, and concrete will degrade your wireless
signal.
4. Keep your product away (at least 3-6 feet or 1-2 meters) from electrical devices or appliances that
generate RF noise.
5. If you are using 2.4GHz cordless phones or X-10 (wireless products such as ceiling fans, lights, and
home security systems), your wireless connection may degrade dramatically or drop completely. Make
sure your 2.4GHz phone base is as far away from your wireless devices as possible. The base
transmits a signal even if the phone in not in use.
6. There may be more than one wireless network active in your area. Each network uses one or more
channel numbers. If the channel numbers are close to the channels of your system, a degradation of
the communication may occur. Ask your IT department to verify this, and change the channel
numbers used by your network if required.
70
5 Communication With the Lab
With TRIOS system, it is possible to exchange orders and comments with the lab of your choice using
3Shape Communicate™ - an advanced tool, integrated in your TRIOS system.
3Shape Communicate™ allows you to:
•
•
•
•
•
Send 3D scans from your TRIOS system to the lab.
Receive designs from your lab for review.
Exchange comments with the lab.
Discuss virtual diagnostic wax-ups with your lab and patients.
Communicate with labs using TRIOS cart or any other PC.
Note! To be able to use 3Shape Communicate™, you have to register your Dental Clinic
with the 3Shape Communicate™ web site - www.3shapecommunicate.com and configure
your TRIOS Lab Connections settings.
71
5.1 Create 3Shape Communicate™ Account
To create a 3Shape Communicate account, please follow steps below (Access to the internet is
required):
Step 1: Open Configure Communicate
window
Press Configure->Lab Connections>Configure Communicate buttons to open the
window.
Step 2: Open 3Shape Communicate
registration
Press the Create Account button to open the
3Shape Communicate web page
(www.3shapecommunicate.com) and follow the
Register a Dental Clinic link.
72
Step 3: Register a Dental Clinic
Fill in the registration form and Press the
Register button to complete the
registration.
Step 4: Activate your account
Open the confirmation e-mail sent to your
e-mail address and press the activation
link.
Step 5: Start using 3Shape
Communicate™
Open Configure Communicate window,
enter your login and password and press
Test settings button. If the connection is
successful, you receive a confirmation
message.
Tip! You can use your credentials to access your 3Shape Communicate account from any
remote PC.
73
5.2 Connect to the Lab
Depending on your requirements, you can configure 3Shape Communicate and direct lab (local)
connections in TRIOS by following the steps described below.
Open Lab Connections page from the Settings menu.
3SHAPE COMMUNICATE LAB CONFIGURATION
Once your 3Shape Communicate account has been created, you need to set up a connection to the
Lab.
Step 1: Open 3Shape Communicate web site
Press Configure Communicate button on the Lab Connection page to open Configure
Communicate window.
74
Press the Add lab button to load 3Shape Communicate web site.
75
Step 2: Add Lab
Press the Connections menu item at the top to load Connected Sites page.
Press Add Connection button to open Connect to other Dental Clinics and Labs page. Fill in the
name of the lab (e-mail obtained from the lab) you want to connect to and press the Find button to
search.
Select the required Lab in the list of found items and press the Connect button to send your
connection request to the selected laboratory. A message is sent along with your request (text can be
customized). The lab you wish to connect is added to the Connected Sites list with the Waiting for
approval status.
76
Step 3: Start working with the lab
When the lab confirms the connection, its status is changed to Active and the laboratory appears in
the Lab Connection list of your TRIOS system. If you added a lab from a remote PC, press Refresh to
update the list.
When a lab has been added, the system automatically checks for order templates and downloads
them to your TRIOS system.
You can now select the lab from the list in the Order form to be able to exchange orders and
messages with the lab.
DIRECT CONNECT LAB CONFIGURATION
You can use a direct connection to your local Lab - the option must be enabled in dongle.
Step 1: Add new Direct Connect lab
Press Add new Direct Connect lab button on the Lab Connection page to open Configure Direct
Connect lab window. Fill in Lab name, Folder path and login details for the local network domain if
required.
77
Confirm connection details by pressing the Test settings button.
Press OK to save the newly created local lab. It will appear in the Lab Connections list with the DC
icon.
Step 2: Configure Direct Connect lab
Press Configure Direct Connect lab button on the Lab Connection page to open Configure Direct
Connect lab window. Modify Lab name, Folder path or the login details for the local network
domain if required. The existing direct connect lab can be also deleted by pressing the Delete button
here.
Confirm connection details by pressing the Test settings button.
Press OK to save connection setting changes for the local lab.
78
5.3 Send Order to the Lab
On the order page, choose the desired Lab
while creating order by clicking Change
Lab button and selecting the lab. You can
then perform scanning and send your order
to the Lab.
The list of labs can be modified using the
Lab Connections settings. Please see
chapter Connect to the Lab for details.
To send your order:
Step 1: Press the Send button (1)
A detailed order description with scan
images is visible in a preview.
Step 2: Press the Send order button
(2)
The View button lets you get a print
overview of the order and send it to print.
If you haven't performed post-processing at
the previous Analyze step, it is
automatically performed during order
sending and may take a minute to
complete.
Tip! It is recommended to do
post-processing at the Analyzing
step and inspect the result.
Tip! You can always return to the
order and send it later. You can
also re-send a changed order.
79
Tip! Order is sent in the
background, enabling you to
immediately start a new session
with another patient by pressing
the Go to calendar button.
Orders can be resent.
When you try to change an order
(e.g., modify the margin line, add
new annotations, images) that has
been already sent, a warning
message automatically appears
reminding you to re-send the order
if you proceed.
When you confirm you intention by
pressing the Yes button, the
Resend order button appears in
the Send order form. Press the
button to resend the modified order
to the lab.
80
5.4 Communicate with the Lab
MESSAGES
The Messages page shows notifications about the received comments, lab
designs and system messages. The important messages like a rejected case,
design approval is requested, or lab has not accepted the case for a while are
displayed with a red icon while others are indicated in green.
1. The laboratory can send you comments regarding the received orders, their statuses (see the
image below) and design updates to the restorations.
2. System messages are automatically generated by the TRIOS system to inform you about the
order status. For example, you are notified if the order has not been accepted by the lab within
18 hours. You also receive a message when the lab approves your order.
•
The number of new and unread messages appears in the Messages screen.
•
To view an order that received a comment or design and send a reply to the lab, tap the
message to open the 3Shape Communicate page of your TRIOS system.
•
Press on the green dot to mark a message as read.
•
Use the Show messages filter to view All / System / Order / Unread messages.
Orders and comments can also be accessed via the 3Shape Communicate web site www.3shapecommunicate.com.
81
Press the Open case button to view order details and scroll down to write a comment:
82
3SHAPE COMMUNICATE
If you have a notification in Messages, click on it to open the order in the
3Shape Communicate page and view the received message or design.
3Shape Communicate page lets you view the design, models and margin
lines in 3D, and discuss the case with a technician:
(1) Open the 3Shape Communicate page. View the scan model. If the lab uploaded a new design to
the 3Shape Communicate web site, it will be automatically downloaded to your TRIOS system and
visible on this page.
(2) Press the Comments button to show the message box on the left
(3) Press Write Comment to open the corresponding window (4)
(4) Type in your comment in the text field of the window.
(5) Press the Send button.
(6) Your comment is sent to the lab and you can view it in a dialog box.
(7) The newest message in the conversation is placed at the top.
(8) Press Refresh to update the page and see if new messages arrived.
Launch 3Shape Communicate - opens the 3Shape Communicate web page.
83
6 Maintenance
6.1 Scanner Calibration
The following types of calibrations can be done on the scanner:
•
3D calibration – Adjusts the optics of the scanner for generating 3D images.
•
Color calibration – Adjusts the color recognition for a particular scanning tip.
WHEN TO CALIBRATE
•
•
•
•
•
•
3D calibrate the scanner before using it for the first time and every eight days during regular
use.
3D calibrate the scanner when it has been moved, sustained hits or wide-range temperature
changes.
3D calibrate the scanner when the scan quality degrades. Calibration adjusts the scan quality
to the initial factory level and ensures optimum results.
Color calibrate the scanner before each scan for optimal color quality if you intend to use
Shade Measurement .
The mirror in the tip is almost never 100% clean, small variances could have an impact on the
Shade Measurement.
Color calibration has a weekly reminder. Shade Measurement will be disabled if the scanner
has not been color calibrated for 30 days.
HOW TO CALIBRATE 3D
Step 1: Prepare for calibration
Remove the scanner tip from the TRIOS
scanner and put on the supplied calibration
tip.
Step 2: Start calibration wizard
1. Go to the Configure page of your
TRIOS system.
2. Select Scan->3D calibrate scanner
for monochrome or Color calibrate
scanner for color scanner.
3. Follow the on-screen instructions.
84
Step 3: Wait for system to calibrate
the device
Step 4: Complete the process
A message will tell you once the calibration is
completed.
Step 5: Remove the calibration tip
While being guided by the wizard, remove the
calibration tip and put on the protection tip
when finished.
Note! Make sure the calibration tip is removed from the scanner after calibration as the tip
otherwise may become very warm.
HOW TO CALIBRATE COLOR
Step 1: Locate the supplied color
calibration kit
85
Step 2: Prepare for color calibration
1. Attach the scanner tip facing down,
make sure the tip is clean.
2. Mount the color calibration adapter
onto the scanner tip.
3. Remove the sleeve from the color
calibration target.
4. Insert the color calibration target into
the color calibration adapter with the
color side facing up.
Step 3: Start calibration wizard
1. Open TRIOS Scan settings page.
2. Press Color calibrate scanner
button to open the color calibration
guide.
3. Press Next and wait for the system to
calibrate the device.
Step 3: Prepare for validation
1. Detach the color calibration target,
turn it over for the gray side to face
upwards, then reattach it to the color
calibration adapter.
2. Press Next to perform validation.
Step 4: Complete the process
A message will tell you once the
calibration is completed.
86
Step 5: Remove the calibration kit
Remove the calibration target and adapter
from the scanner tip and put the
calibration target into its sleeve.
6.2 Cleaning, Disinfection and Sterilization
Please refer to the TRIOS Safety and Setup Guide for cleaning, disinfection and sterilization
instructions.
Note! TRIOS model TRIOS11A can be cleaned, disinfected, and sterilized similar to model
T12A.
Note! The scanner tips for TRIOS11A can be handled similar to the scanner tips for T12A
and T12P.
6.3 Disposal of the Scanner Tip
Please refer to the TRIOS Safety and Setup Guide for Disposal of the scanner tip instructions.
Note! The scanner tip for TRIOS model TRIOS11A can be disposed similar to T12A and
T12P
87
6.4 System Upgrades
When connected to a network, TRIOS automatically checks for:
•
New scanner firmware availability on startup. You are asked to upgrade it if a new firmware is
found.
•
Software upgrades and order form updates are checked at regular intervals.
AUTOMATIC
New software and order form versions are
automatically downloaded by the TRIOS
system when available.
You are asked for a confirmation to install
the software upgrade once it has been
downloaded, you can also opt to upgrade at
a later time. You are reminded of the
upgrade the next time you turn the system
on.
MANUAL
You can also check for order form updates and
software upgrades manually by pressing the Check
for upgrades button in Configure->Setting->General
page.
Caution! It is very important to follow on-screen instructions during the installation
process. Do NOT unplug the scanner while firmware is being updated.
88