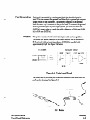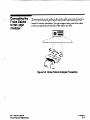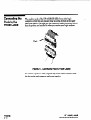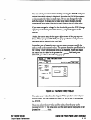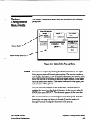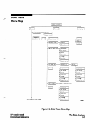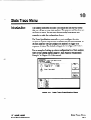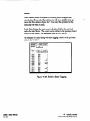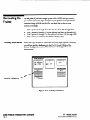
1
HP 1652B/HP 1653B
Logic Analyzers
Front-Panel Operation Reference
Volume 1 of 2
@!aHEWLETT
PACKARD
-
Front-Panel Operation Reference
Volume 1 of 2
HP 1652B/HP 1653B
Logic Analyzers
HEWLETT
PACKARD
-
@Copyright Hewlett-Packard Company 1989
Manual Set Part Number 0165240902
Printed in the U.S.A. November 1989
Printing History
New editions are complete revisions of the manual. Update packages,
which are issuedbetween editions, contain additional and replacement
pagesto be merged into the manual by the customer. The dates on the
title page changeonly when a new edition or a new update is published.
A software code may be printed before the date; this indicates the version
level of the software product at the time of the manual or update was
issued. Many product updates and fixes do not require manual changes
and, conversely,manual corrections may be done without accompanying
product changes. Therefore, do not expect a one to one correspondence
between product updates and manual updates.
Edition 1
November 1989
0165240902
List of Effective Pages
The List of Effective Pagesgivesthe date of the current edition and of any
pageschangedin updates to that edition. Within the manual, any page
changedsince the last edition is indicated by printing the date the changes
were made on the bottom of the page. If an update is incorporated when
a new edition of the manual is printed, the changedates are removed from
the bottom of the pagesand the new edition date is listed in Printing
History and on the title page.
Pages
All
Effective Date
November 1989
Product Warranty
This Hewlett-Packard product has a wamtnty against defects in
material and workmanship for a period of one year from date of
shipment. During warranty period, Hewlett-Packard Company will, at
its option, either repair or replace products that prove to be defective.
For warranty service or repair, this product must be returned to a
service facility designatedby Hewlett-Packard. However, warranty
service for products installed by Hewlett-Packard and certain other
products designatedby Hewlett-Packard will be performed at the
Buyer’s facility at no chargewithin the Hewlett-Packard service travel
area. Outside Hewlett-Packard servicetravel areas,warranty service
will be performed at the Buyer’s facility only upon Hewlett-Packard’s
prior agreementand the Buyer shall pay Hewlett-Packard’s round trip
travel expenses.
For products returned to Hewlett-Packard for warranty service,the
Buyer shall prepay shipping chargesto Hewlett-Packard and
Hewlett-Packard shall pay shipping chargesto return the product to
the Buyer. However, the Buyer shall pay all shipping charges,duties,
and taxesfor products returned to Hewlett-Packard from another
COUlltry.
Hewlett-Packard warrants that its software and firmware designatedby
Hewlett-Packard for usewith an instrument’will executeits
programming instructions when’properly installed on that instrument.
Hewlett-Packard does not warrant that the operation of the
instrument, software, or f-ware will be uninterrupted or error free.
Limitation
Of The foregoing warranty shall not apply to defects resulting from
Warranty
improper or inadequate maintenanceby the Buyer, Buyer-supplied
software, or interfacing, unauthorized modification or misuse,
operation outside of the environmental specifications for the product,
or improper site preparation or maintenance.
NO OTHER WARRANTY IS EXPRESSED OR IMPLIED.
HEWLETT-PACKARD SPECIFICALLY DISCLAIMS THE
IMPLIED WARRANTIES OR MERCHANTABILITY AND
FITNESS FOR A PARTICULAR PURPOSE.
Exclusive
Remedies
THE REMEDIES PROVIDED HEREIN ARE THE BUYER’S
SOLE AND EXCLUSIVE REMEDIES. HEWLETT-PACKARD
SHALL NOT BE LIABLE FOR ANY DIRECT, INDIRECT,
SPECIAL INCIDENTAL, OR CONSEQUENTIAL DAMAGES,
WHETHER BASED ON CONTRACT, TORT, OR ANY OTHER
LEGAL THEORY.
Product maintenanceagreementsand other customer assistance
agreementsare available for Hewlett-Packard products.
For any assistance,contact your nearestHewlett-Packard Salesand
ServiceOffice. Addressesare provided at the back of this manual.
Hewlett-Packard Company certifies that this product met its published
specificationsat the time of shipment from the factory.
Hewlett-Packard further certifies that its calibration measurementsare
traceable to the United StatesNational Bureau of Standards,to the
extent allowed by the Bureau’s calibration facility, and to the
calibration facilities of other International StandardsOrganization
members.
Safety
This product has been designedand tested according to International
SafetyRequirements. To ensuresafe operation and to keep the
product safe,the information, cautions,and warnings in this manual
must be heeded.
About this
manual...
Welcome to Hewlett-Packard logic analyzers.The HP 1652B/HP
1653BLogic Analpr is more than just a logic analyzer.It is an
analyzer and oscilloscopein one instrument. With this combination,
you have expanded measurementcapabilities.
This manual has been split into two volumes for better accessibility.
Volume one contains general instrument information and operating
reference information for the state analyzer. Also included is a state
analyzer measurementexample.
Volume two contains operating reference information and
measurementexamplesfor the timing analyzer and oscilloscope.To
help put the total functionality of the instrument together, a
measurementexample for mixed mode operation (timing/state/scope)
is included. Located in the back of volume two is the appendiceswhich
‘contain the seldom used information.
Information in both volumes is accessedeasilyby major tabs. All menu
and field definitions are arranged by major function within each
measurementtype. In addition, both volumes have a master index.
The user interface of the HP 1652B/1653Bwas designedfor the most
intuitive operation as possible. Pop-up windows help lead you through
setupsand measurementsso you won’t have to memorize a lot of steps.
As you read this manual and the other manualsabout this logic
analyzer,you will seejust how easythe HP 1652B/l653B is to use.
If you aren’t familiar with the HP 1652B/l653B Logic Analyzers, we
suggestyou read the HP 1652B/1653BGetting Started Guide. This
guide contains tutorial exampleson the basic functions of the logic
analyzer and digitizing oscilloscope.
If you are new to logic analyzersand digitizing oscilloscopes,or just
need a refresher, we think you’ll find Feeling Comfortablewith Logic
Ana&zets and Feeling Comfortable with Digitizing Oscilloscopesvaluable
reading. It will eliminate any misconceptionsor confusion you may
have about their application, and will show you how to get the most out
of the measurementfuntions.
Pleasetake time to fill out the “Your CommentsPlease”questionaire. If
it has already been used and you have any comments,addressthem to:
Hewlett-Packard
Atten: Publications Dept.
P.O. Box 2197
Colorado Springs, CO 80901-2197
Contents Volume 1
Chapter 1:
Chapter 2:
General Information
Logic Analyzer Description ...................................
User Interface ............................................
Configuration Capabilities ..................................
Key Features .............................................
AccessoriesSupplied ........................................
Available Accessories ........................................
Manuals Supplied ...........................................
Turning On the Logic Analyzer ................................
1-1
1-1
1-2
l-4
l-5
l-7
1-7
1-7
Probing
2-l
Introduction
21
.
Probing Options .............................................
The HP 1032OCUser-Definable Interface ...................
.2-l
The HP 10269CGeneral Purpose Probe Interface ............
.2-2
General Purpose Probing ..................................
23
The Termination Adapter ..................................
23
2-4
The HP1652B/53BProbing System ............................. .
2-4
Probe Pod Assemblies .....................................
Pod Grounding ...........................................
25
25
.
Probes ..................................................
2-6
Probe Grounding .........................................
2-6
Grabbers ................................................
26
Probe Cable ..............................................
217
OscihoscopeProbes .........................................
2-7
Probe Inputs .............................................
27
External Trigger Inputs ....................................
.
2-7
CompensationSignal Output ...............................
2-8
Signal Line Loading .........................................
Maximum Probe Input Voltage ................................
2-8
.. ... ....... ................................. 28
Pod Thresholds ..... ........
Connecting the Logic Analyzer to the Target System
.2-8
Connecting the Probe Cables to the Logic Analyzer .............
.2-9
2-10
Connecting the Pods to the Probe Cable .......................
................................................
-
HP 16528/1653B
Front-Panel Reference
Contents - 1
Disconnecting the Probes from the Pods .......................
Connecting the Grabbers to the Probes ........................
Connecting the Grabbers to the Test Points ....................
Labeling Pods, Probes, and Cables ............................
Chapter 3:
Chapter 4:
Using the Front-Panel User Interface
Introduction ................................................
Front-Panel Controls ........................................
Rear-Panel Controls and Connectors ...........................
The Cursor .................................................
How to Select Menus ........................................
How to Switch between the Analyzers and Oscilloscope ..........
Returning to the SystemConfiguration Menu ...................
How to Select Fields .........................................
Pop-up Menus ..............................................
How to Close Pop-up Menus ..................................
How to Select Options .......................................
Toggle Fields ..............................................
How to Enter Numeric Data .................................
How to Enter Alpha Data ...................................
ChangingAlpha Entries ....................................
How to Roll Data ...........................................
Assignment/SpecificationMenus .............................
Assigning Pod Bits to Labels ..............................
Specifying Patterns .......................................
SpecifyingEdges .........................................
System Configuration Menu
Introduction ................................................
SystemConfiguration Menu ...................................
Accessingthe SystemConfiguration Menu .....................
SystemConfiguration Menu Fields .............................
Name ...................................................
Type ....................................................
Scope On/Off ............................................
Autoscale ................................................
Pods ....................................................
Where to Go Next ...........................................
Contents - 2
2-11
2-12
2-12
2-13
-.
3-1
3-2
36
3-7
3-7
,308
.3-8
3-9
3-9
3-9
3-10
3-11
3-11
3-14
.3-15
3-16
3-17
.3-17
3-18
3-19
4-l
4-l
.4-2
4-3
4-3
4-4
4-5
4-5
4-6
4-7
HP 16528/1653B
Front-Panel Reference
--
Chapter 5:
I/O Menu
Introduction ..............................
......................................................
Accessingthe I/O Menu
PrintScreen ..............................................
Print AU ...................................................
Disk Operations ............................................
Load .... ................................................
Store ................................
....................
Autoload ................................................
COPY ..........................................
..........
Duplicate Disk ...........................................
PackDisk................................................5Rename .................................................
Purge ..................................................
FormatDisk.............................................5-11
I/O Port Configuration .....................................
Configuring the Interfaces ................
................
The HP-IB Interface ..................................
The RS-232CInterface ................................
External BNC Configuration ................................
Self Test ..................................................
Chapter 6:
HP 16528/1653B
Front-Panel Reference
. 51
,511
..5- 2
52
.5-3
55
55
56
5-7
58
9
59
5-10
.5-12
5-13
.5-13
.5-14
.5-17
5-18
Disk Drive Operations
.6-l
Introduction ...............................................
The Disk Operations Available ...............................
.6-l
Accessing the Disk Menu ....................................
.6-3
Selecting a Disk Operation ....................................
6-4
Disk Operation Parameters ..................................
.6-5
Installing a Blank Disk .......................................
66
Formatting a Disk ...........................................
617
.. 69
Storing to a Disk .................................................................................
The Load Operation
.6-11
6-12
Renaming a File ............................................
The Autoload Operation ...................................
.6-13
PurgingaFile.. ..........................................
..6.14
CopyingaFile ...........................................
..6.15
6-17
The Pack Disk Operation ....................................
Duplicating the Operating SystemDisk .......................
.6-18
Contents - 3
Chapter 7:
Making Hardcopy Prints
7-1
Introduction ................................................
7-1
Supported Printers ..........................................
7-2
Alternate Printers .........................................
7-2
Hooking Up Your Printer ....................................
7-3
HP-IB Printer Cables ........................................
7-3
RS-232CPrinter Cables ......................................
7-3
HP 132426 Cable .........................................
7-4
HP 92219H Cable .........................................
74
Setting HP-IB for HP Printers ...............................................................
.7:5
Setting RS-232Cfor HP Printers
7-S
Setting RS-232Cfor Your Non-HP Printer ......................
7-6
Setting Paper Width .........................................
7-6
RS-232CDefault Configuration ...............................
7-6
Recommended Protocol ......................................
7-7
Starting the Printout .........................................
7-7
Print Screen ..............................................
7-7
Print All .................................................
7-8
.............................
What Happens during a Printout?
7-9
Connecting to Other HP Printers ..............................
Chapter 8:
The State Analyzer
Introduction ................................................
The State Analyzer: An Overview ..............................
State Analyzer Menu Maps ...................................
State Format Menu Map .....................................
State Trace Menu Map .......................................
State Listing Menu Map ......................................
State Compare Menu Map ....................................
State Waveform Menu Map ...................................
State Chart Menu Map .......................................
Contents - 4
8-l
8-l
8-1
8-2
8-3
8-5
8-6
8-7
8-9
HP 16528/1653B
Front-Panel Reference
.........
.........
E
...
.......
T;‘vv?v7v?~
000000000
Flrl~r(l-i~l-4l-i’
.........
...
......
.........
...
......
.........
.........
........
.........
.........
.........
.........
.........
.........
.........
.........
.........
.........
.........
.........
.........
.........
......
.........
.........
.........
.........
.........
.........
;s:::::::
.a:::::::
.
.
.
...
.
.
.
.
Storage Macro ...........................................
Reading the SequenceLevel Display .........................
Acquisition Fields .........................................
Trace Mode ............................................
Armed By ..............................................
Branches ..............................................
Off .................................................
Restart ..............................................
Per Level ............................................
count .................................................
Off .................................................
Time ...............................................
States ...............................................
Prestore ...............................................
Qualifier and Pattern Fields .................................
Label ..................................................
Base ..................................................
Qualifier Field ..........................................
Patterns .............................................
Ranges..............................................
Pattern Fields ..........................................
Chapter 11:
Contents - 6
10-9
lo-11
10-13
10-13
l&l3
lo-14
10-14
10-14
lo-l!5
lo-18
lo-18
lo-18
10-20
10-21
10-22
10-22
10-22
10-23
10-23
lo-24
10-24
State Listing Menu
Introduction . . . . . . . . . . . . . . . . . . . . . . . . . . . . . . . . . . . . . . . . . . . . . . . 11-l
Accessingthe State Listing Menu . . . . . . . . . . . . . . . . . . . . . . . . . . . . . 11-2
State Listing Menu Fields . . . . . . . . . . . . . . . . . . . . . . . . . . . . . . . . . . . . 11-3
11-3
Markers ................................................
114
Markers: Off ............................................
11-4
Markers: Patterns ........................................
11-S
Stop Measurement ....................................
11-6
Markers: Time ...........................................
11-6
Markers: Statistics .......................................
11-7
........................................
Field
Pattern
HP 16528/1653B
Front-Panel Reference
Chapter 12:
/I-
Chapter 13:
/-
Chapter 14:
-
HP 16528/16538
Front-Panel Reference
State Compare Menu
Introduction ...............................................
Accessingthe Compare Menu ................................
The Compare and Difference Listing Displays ..................
The Compare Listing .....................................
The Difference Listing ....................................
Creating a Compare Image ..................................
Bit Editing of the Compare Image ............................
Masking Channels in the Compare Image ......................
Specifying a Compare Range .................................
Repetitive Comparisonswith a Stop Condition .................
Locating Mismatches in the Difference Listing ..................
SavingCompare Images .....................................
State Chart Menu
Introduction ...............................................
Accessing the State Chart Menu ..............................
Selecting the Axes for the Chart ..............................
Scaling the Axes ............................................
The Label Value vs. StatesChart .............................
The Label Value vs. Label Value Chart ......................
X & 0 Markers and Readouts for Chart .......................
Marker Options .........................................
State Waveforms Menu
Introduction ...............................................
Accessingthe State Waveforms Menu ........................
Selecting a Waveform .......................................
Replacing Waveforms .......................................
Deleting Waveforms ........................................
Selecting Statesper Division .................................
Delay from Trigger .........................................
State Waveform Display Features .............................
........................
XandOMarkersforStateWaveform
I.201
12-2
l2-2
l2-2
l2-2
12-3
l2-4
12-5
12-6
.12-7
l2-8
12-8
13-l
13-l
13-l
13-2
13-3
..l3- 4
l-3-5
13-6
14-l
.14-l
14-2
143
14-4
14-4
14-S
14-5
.14-5
Contents - 7
w
-__
-_
_--.-
--_--
Chapter 15:
------
State Analyzer Measurement Example
Introduction ...............................................
Problem Solving with the State Analyzer .......................
What Am I Going to Measure? ...............................
.....................
HowDoIConfiguretheLogicAnalyzer?
Connecting the Probes ......................................
Activity Indicators .......................................
Configuring the State Analyzer ...............................
Specifying the J Clock .......................................
Specifying a Triggel ConditioIl ..............................
Acquiring the Data ........................................
The State Listing . , ........................................
Finding the Answer ........................................
summary . . . . . . . . . ........................................
l5-1
l5-2
x5-2
.l5-4
U-6
U-6
l5-7
15-9
15-10
l!5-12
l5-13
514
35-16
Index
Contents - 8
HP 16528/1653B
*
_ _.----.
,-
General Information
Logic Analyzer
Description
The HP 1652B/1653Blogic analyzersare general purpose logic
analyzerswith oscilloscopemeasurementcapabilities. These analyzers
are designedas stand alone instruments for use by digital and
microprocessor designers.Both the HP 1652Band HP 1653Bhave
HP-IB and RS-232Cinterfaces for hardcopy printouts and control by a
host computer. With faster state analysis,oscilloscope measurement
capabilities and the improved features, the HP 1652B\53B analyzers
will accommodatenext generation design tasks.
The HP 1652B,is capable of 100MHz timing and 35 MHz state
analysison 80 channels.The HP 1653B,is capable of 100MHz timing
and 25 MHz state analysison 32 channels. You will use the same
manual set regardlessof whether you have an HP 1652Bor an HP
1653B.
-
Bothanalyzershavethe same2-channel,400.megasample/second,
100MHz single-shotand repetitive single-shotdigitizing oscilloscope
measurementcapabilities.
user IntW’faCe
First-time and casualusersas well as experienced logic analyzer users
will find the user interface easier to use than in previous generations.
The front panel is controlled by a front-panel keyboard, and the
addition of a “KNOB” allows you to move the cursor or change settings
more quickly than before. The timing analyzer (a close cousin of the
oscilloscope) now has oscilloscope-typecontrols which more closely
match the type of measurementsyou make with the timing analyzer.
Information is displayed on a nine-inch white phosphor CRT.
HP 16528/1653B
Front-Panel Reference
General Information
1-l
The HP 1652B/1653B can be con@ured either as two independent
COnfigUratiOn
machines(analyers) or as two interactive machines. No matter how
the analyzersare configured, up to two channelsof oscilloscope
measurementcan be added. The configurations for each analyzer
includes the following
Capabilities
HP 1652B:
Up to 80 channelsstate and up to two channelsoscilloscope.
Up to 80 channelstiming and up to two channelsoscilloscope.
Two state machineswith multiples of 16 channelsper machine,
with a combined maximum of 80 channelsand up to two channels
oscilloscope.
One state and one timing machine with multiples of 16 channels
per machine,with a combined maximum of 80 channelsand up to
two channelsoscilloscope.
Up to two channelsof oscilloscope.
.
....I.:,..1...1,,,.::,;,,,..1
OR
I
I
X’s;MJNEL
(80-X*
1 CHANNEL
STATE
‘-AND-]I
(80-X*
> CHANNEL
TIMING
‘-AND-,,,..,y:l
OR
I
/
X’
CHANNEL
STATE
016SOBO4
Figure l-l.
HP 16528 Configuration Capabilities
*multiples of 16 channels
General Information
1-2
HP 16528116538
Front-Panel Reference
^- .
HP 1653B:
Up to 32 channelsstate and up to two channelsoscilloscope.
Up to 32 channelstiming and up to two channelsoscilloscope.
Two state machineswith multiples of 16 channelsper machine,
with a combined maximum of 32 channelsand up to two channels
oscilloscope.
One state and one timing machine with multiples of 16 channels
per machine,with a combined maximum of 32 channelsand up to
two channelsoscilloscope.
Up to two channelsof oscilloscope.
OR
I
16
CHANNEL
STATE
16 CHANNEL
STATE
-AND-
]
16 CHANNEL
TIMING
-AND-
;r.,.c::
OR
I
16 CHANNEL
STATE
01650807
Figure l-2. HP 16538 Configuration Capabilities
HP 16528/1653B
Front-Panel Reference
General Information
l-3
Key Features
A 35inch disk drive is built into the instrument for storing logic
analyzerand oscilloscopeconfigurations and acquired data. The disk
drive also provides a way of loading inverse assemblyconfiguration
files into the logic analyzer for easyconfiguring. Some common
features of the logic analyzer and oscilloscopeinclude lightweight
passiveprobes for easyhook-up, mixed-mode display, HP-IB and
RS-232Cinterfaces for programming and printer output.
Logic analyzerkey features include:
Transitional timing for extendedtiming analyzer memory.
All channelscan be used for state or timing.
An external trigger BNC connector.
Transitional or glitch timing modes.
1 k deep memory on all channels.
Glitch detection.
Marker measurements.
Triggering and pattern qualification.
Overlapping of timing waveforms.
Eight sequencelevels.
Eight pattern recognizers.
One range recognizer.
Time and number-of-statestagging.
Pre-store.
Autoscale.
Programmability.
Cross-domaintriggering.
Interactive measurements.
Oscilloscope-typecontrols in the timing analyzer.
State Compare, Chart, and Waveform modes.
Oscilloscopekey features include:
l
l
l
l
General Information
l-4
400 Megasample/seconddigitizing rate.
100 MHz single-shot (real-time) bandwidth.
4 ksamplesper measurementper channel.
Automatic waveform scaling.
HP 16528/16538
Front-Panel Reference
ECL and TTL presets.
Automatic pulse parameter measurements.
Channel-to-channel time interval measurements.
Markers for time and voltage readouts.
6-bit resolution.
Probe attenuation from 1:l to 1OOO:l.
5OQdc or 1 MSZde input coupling.
Edge or immediate triggering.
Delayed trigger by eventsand/or time.
Trigger point marker displayed.
Normal, average,or cumulative acquisitions.
Connect-the-dots.
Chan + Chan, Chan-Chan,and waveform overlay.
Accessories
Supplied
HP 16528/l 653B
Front-Panel Reference
Table 1-1 lists the accessoriessupplied with your HP 1652B/53B.If any
of these accessorieswere missingwhen you received the logic analyzer
from the factory, contact your nearest Hewlett-Packard office.
General Information
l-5
Accessory
Quantity
1653B
HP Part No.
1652B
Probe assemblies
01650-61608
5
2
Probe cables
01650-61607
5
2
BNC Adapter 90’
1250-0076
2
2
BNC-to-mini probe adapter
1250-1454
1
1
Grabbers (Note 1)
5959-0288
100
40
Probe Leads (Note 2)
595999333
85
34
Ground leads (long) (Note 2)
595999335
5
2
Ground leads (short) (Note 2)
5959-9334
10
4
RS-232Cloop back adapter
01650-63202
1
1
Probe and probe cable
numbering label card
01650-94303
1
1
6.5
Mini-probes lO:l, 1 MS2,
pF, 1 m
HP 1043OA
2
2
AC power cable
SeeNote 3.
1
1
Operating systemdisk
Cdl
2
2
Operating and Programming
manual set
01652-90902
1
1
ServiceManual
01652-90905
1
1
Table l-1. Accessories Supplied
Notes:
1. Package of 20 per part number. The quantity in the table only indicates what is shipped with
the instrument.
2. Package of 5 per part number. These items are shipped assembled
as a 0165061608. The
part numbers are provided for replacement orders. The quantity in the above table only
indicates what is sent with the instrument.
3. The type of power cord you receive with your logic analyzer depends on your country.
Complete information about power cord options is in Appendix D of this manual.
General Information
1-6
HP 16528/16536
Front-Panel Reference
Available
Accessories
In addition to the accessoriessupplied, there are a number of
accessoriesavailable that will make your measurementtasks easier and
more accurate. You will find these listed in Accessories for HP Logic
Anal)t?zen.
Manuals
Supplied
.
The manuals supplied with your logic analyzerare as follows:
Feeling Comfortable with Logic Ana&ze~ - A primer on logic
analyzers.
Feeling Comfortable with Digitizing Oscilloscopes - A primer on
digitizing oscilloscopes.
Getting Started with the HP 16.52W1653BLq$c Analjzet - A tutorial
for new and casualusers.
HP 1652Bl1653B Front Panel Operation ReferenceMbnual - A
complete operating manual.
HP 1652Bf1653B Programming Reference - A complete reference
to progr ammingcommands.
ServiceManual - A guide to troubleshooting and module-level
repair.
Turning On the
Logic Analyzer
Note
I
d
4
Before you turn your logic analyzer on, refer to Appendix D for
information covering installation and set up of your logic analyzer.
Do not turn on the logic analyzerbefore you remove the yellow
shipping disk from the disk drive.
If you are unfamiliar with how to use the HP 1652B/l653B logic
analyzers,refer to chapter 1 of the Getting Started with the HP
1652Bl1653B Logic Ana@et.
HP 16528/l 6538
Front-Panel Reference
General Information
l-7
/-‘
2
Probing
Introduction
This chapter contains a description of the probing systemof the HP
1652B/l653B logic analyzers.It also contains the information you need
for connecting the probe systemcomponentsto each other, to the logic
analyzer and oscilloscope,and to the systemunder test.
Probing
Options
You can connect the HP 1652B/l653B logic analyzersto your system
under test in one of the following ways:
l
l
l
-
l
HP 1032OCUser-Definable Interface (optional).
HP 10269Cwith microprocessorspecific modules (optional).
The standard HP 1652B/53B prob&s (general purpose probing.)
Direct connection to a 200pin3M Seriestype header connector
using the optional termination adapter (HP part number
01650-63201).
The HP 1032OC The optional HP 1O32OCUser-Definable Interface module combined
User-Definable
Interface
with the optional HP 10269CGeneral Purpose Probe Interface allows
You to connect the HP 1652B/1653B logic analyzersto the
microprocessor in your target system.The HP 1032OCincludes a
breadboard (HP 64651B)which you custom wire for your system.
Another option for usewith the HP 1032OCis the HP 1032lA
Microprocessor Interface Kit. This kit includes sockets,bypass
capacitors and a fuse for power distribution. Also included are
wire-wrap headersto simplify wiring of your interface when you need
active devicesto support the connection requirements of your system.
You will find additional information about the HP 1032OCand HP
1032lA in the Accessories for HP Logic Anal’en data sheet.
. HP 16528/1653B
Front-Panel Reference
Probing
2-1
The HP 10269C
General Purpose
Probe Interface
Instead of connecting the analyzer probe tips directly to the signal
lines, you may use the optional HP 10269CGeneral Purpose Probe
Interface. The HP 10269Callows you to connect the probe cables,
without the probes, to connectors on the interface. When the
appropriate preprocessor is installed in the interface, you will have a
direct connection between the logic analyzerand the microprocessor
under test. Seefigure 2-l for a basic block diagram.
There are a number of microprocessor specific preprocessorsavailable
as optional accessorieswhich are listed in the Accessories for HP Logic
Analjzem data sheet.Appendix A of this manual also introduces you to
preprocessorsand inverse assemblers.
HP 16528
HP 1653B
Pod
HP10269C
1
PREPROCESSOR
Pod
2
Pod
3+
Pod
4*
Pod
5*
pPROCESSOR
L-
01650831
+ Not
available
on HP16538
Figure 2-1. HP 10269C with Preprocessor
Probing
2-2
HP 1652B/l653B
General Purpose
Probing
General purpose probing involvesconnecting the logic analyzer and
oscilloscopeprobes directly to your target systemwithout using any
interface. General purpose probing does not limit you to specific hook
up schemes,for an example,as the probe interface does.
The Termination
The optional termination adapter (HP part number 0165043201)
allows you to connect the logic analyzerprobe cables directly to test
ports on your target systemwithout the probes. However, since the
probes contain the proper termination for the logic analyzerinputs, a
termination must be provided.
Adapter
The termination adapter shownbelow, is designedto covet to a 20
(2x10) position, 4wall, low profile header connector, 3M Series3592
or equivalent.
To hook up the adapter, connect the termination adapter to the
analyzer probe cable. Connect the other end of the adapter directly to
your test port.
_-
Figure 2-2. Termination Adapter
HP 1652B/l653B
Probing
23m
The
HP1652B/1653B
Probing System
The standard HP 1652B/53Bprobing systemconsistsof logic analyzer
Probes and oscilloscopeprobes. Both have a passivedesignwhich
meansthere are no active circuits at the outer end of the cable. The
passivedesign also enablesthe pods and probes to be smaller and
lighter, there by making them easier to use.
-_
The logic analyzerprobing systemconsistsof flat ribbon probe cables,
a probe housing,probe leads,ground leads and grabbers. This passive
probing systemis similar to the probing systemused with high
frequency oscilloscopes.It consistsof a seriesR-C network (100 kSZin
parallel with 8 pF) at the probe tip, and a shielded resistive
transmissionline. The advantagesof this systeminclude the following:
l
l
l
l
Probe Pod
Assemblies
2 ns risetime with 25% perturbations
8 pF input capacitanceat the probe tip
Signal ground at the probe tip for higher speedtiming signals
Inexpensiveremovable probe tip assemblies
Probes and probe pod assembliesallow you to connect the logic
analyzerto your systemunder test without the HP 10269CProbe
Interface. This general purpose probing is useful for discrete digital
circuits. Each pod, as they will be referred to for consistency,contains,
16 probes (data channels),one clock channel, and a pod ground. See
the figure below.
GROUND LEAD (LONG)
(01650-82102)
n
PROBE HOUS
(01650452
GROUND LEAD (SHORT)
(01650-82103)
-PROBE
ASSEMBLY
(01658-61608)
0163X39
Figure 2-3. Probe Pod Assembly
Probing
24
HP 16528/16538
7
Pod Grounding
14
Probes
Each pod is grounded by a pod ground lead that should alwaysbe
used. You can connect the ground lead directly to a ground pm on your
target systemor use a grabber. The grabber connectsto the ground
lead the sameway it connectsto the probe lead. To connect the ground
lead to grounded pins on your target system,you must use 0.63 mm
(0.025in.) square pins or round pins with a diameter of 0.66 mm (0.026
in) to 0.84 mm (0.033in).
The probe consistsof a l2-inch twisted pair cable and one grabber.
The probe tip, which connectsto the target system,has an integrated
R-C network with an input impedance of 100kS):in parallel with
approximately 8 pF. Seefigure 24 below.
R-C
EQUIVALENT
NETWORK
I
I
I
PROBE
CIRCUIT
~CABLE~
I
I
LOGIC
ANALYZER
;
I
SIGNAL
GROUND
0166OBOQ
90: 9K
Figure 2-4. Probe Input Circuit
The other end of the probe has a two-pin connector that snapsinto the
.
pod’s probe housing. Seefigure 2-5.
R-C NETWORK
\
-
2-5. Probe
HP 16528/1653B
Fro&Panel
Reference
Probing
2-5
I
I
Probe Grounding
I
Note m
You can ground the probes in one of two ways.You can ground the
probes with the pod ground only however,the ground path won’t be
the samelength as the signal path through the probe. If your probe
ground path must be the sameas your signal path, use the short ground
lead (probe ground). The probe ground lead connectsto the molded
probe body via a pin and socket. You can then use a grabber or
grounded pins on your target systemthe sameway as the pod ground.
For improved signal fidelity, use a probe ground for every four probes
in addition to the pod ground.
If you need additional probe ground leads, order HP part number
5959-9334from your nearest Hewlett-Packard salesoffice.
Grabbers
The grabbers have a hook that fits around IC pins and component
leads and connectsto the probes and the ground leads. The grabbers
have been designedto fit on adjacent IC pins.
Probe Cable
The probe cable contains 17 signal lines, 17 chassisground lines and
two power lines (for preprocessor use) that are woven together into a
flat ribbon that is 4.5 feet long. The probe cable connectsthe logic
analyzerto the pods, termination adapter, or the HP 10269CGeneral
Purpose Probe Interface.
Both ends of the cable are alike, so you can connect either end to the
pods or logic analyzer.Each cable is capable of carrying 0.60 amps for
preprocessorpower.
DO NOT exceed this 0.60 amps per cable or the cable will be
damaged. Also, the maximum power available from the logic
analyzer (all cables) is 2 amps at 5 volts.
Note
Probing
2-6
Preprocessorpower is protected by a current limiting circuit. If current
exceeds2.3 amps,the circuit will open. The current limiting circuit will
try to reset itself every 20 ms until the shorted condition is fixed.
HP 1652Bj1653B
Front-Panel Reference
Oscilloscope
Probes
The two oscilloscopeprobes supplied with the HP 1652B/l653B Logic
Analyzer are the HP 10433AMiniature PassiveProbes.These small,
lightweight probes allow measurementsthat were previously very
difficult in denselypopulated circuits.
For complete information on the operation, maintenance,and
adjustmentsof the miniature passiveprobes, be sure to read the
operating note that is packagedwith the probes.
Probe InpUtS
Probe inputs are located on the front panel below the Knob. Input 1
(CH 1) is on the left. The probes may be connected directly to the BNC
input connectors. The signal is dc coupled to the oscilloscope.
BNC cablescan be connected directly to the BNC connectors.The HP
10503A 1.2 meter BNC-to-BNC cable is not provided with the
instrument, but, you can order it, separately.
External Trigger
BNCs
Inputs. The External Trigger Input allows the analyzer/scopetrigger
to be armed from an external TI’L compatible source. Arming occurs
when the normally active high status of the BNC is pulled low.
Outputs. The External Trigger Output provides the user accessto the
analyzer/scopetrigger output pulse. The output pulse is a TTL
compatible positive going pulse, that remains high from the time of
trigger until the acquisition cycle is complete.
BNC cablescan be connected directly to the BNC connectors.The
HP 10503A 1.2 meter BNC-to-BNC cable is not provided with the
instrument, but, you can order it, separately.
COmpenSatiOfl
Signal Output
HP 16528/16538
Front-Panel Reference
The CompensationSignal Output BNC is located on the rear panel.
The Compensation Signal 5OQoutput is - 1.2 kHz squarewave with
high amplitude near -200 mV and low amplitude near -400 mV when
connected to a 5052load. This square wave is used for probe
compensationadjustment (seeyour operating note for more
information about probing) and is used in examplesthroughout this
manual.
Probing
2-7
Signal Line
Loading
AIIY signal line you intend to probe with the logic analyzer probes, must
SUPPly
a minimum of 600 mV to the probe tip. The probes have an
input impedance of 100kst shunted by 8 pF. If the signal line is
incapable of this minimum voltage, you will not only have an incorrect
measurement,but the systemunder test may also malfunction.
Maximum
Probe Input
Voltage
The maximum input voltage of each logic analyzerprobe is 240 volts
Pod Thresholds
LOgic analyzerpods have two preset thresholds and a user-defmable
----.
The maximum input voltage of the oscilloscopeprobes is 2250 volts dc
at 1 MQ setting and 5 volts rms at 50 S2setting.
pod threshold. The two preset thresholds are ECL ( - 1.3V) and TTL
( + 1.6V). The user-definable threshold can be set anywherebetween
- 9.9 volts and + 9.9 volts in 0.1volt increments.
--
The pod thresholds of pods 1 and 2 in the HP 1653Band of pods 1,2,
and 3 in the HP 1652Bcan be set independently.The pod thresholds of
pods 4 and 5 in the HP 1652Bare slavedtogether. Therefore, when
you set the threshold on either pod 4 or 5, both thresholds will be the
same.
Connecting the
Logic Analyzer
to the Target
System
There are four waysyou can connect the logic analyzerto your target
system:the probes (general purpose probing); the HP lO32OC
User-definable Interface; the HP 10269Cwith microprocess specific
preprocessormodules; and direct connection to a 20 pin 3M R Series
type header connector using the optional termination adapter (HP part
number 01650-63201).
Since the probe interface hookups are microprocessor specific, they
will be explained in their respectivemicroprocessoroperating notes.
The rest of this chapter is dedicated to general purpose probing with
the logic analyzerprobes.
Probing
2-a
HP 16528/1653B
---.
-
Connecting the
Probe Cables
to the Logic
Analyzer
You connect the probe cablesto the probe cable connectors located on
the rear panel of the logic analyzer.The probe cable connectors are
keyed for proper orientation. You can connect either end of the cable
to the rear panel since both ends of the cablesare alike.
Figure 2-6. Probe Cable to Analyzer Connection
,-
HP 1652B/l653B
Probing
2-9
Connecting the
Pods to the
Probe Cable
The analyzerpods of the HP 1652B/53Bdiffer from other logic
analyzersin that they are passive(have no active circuits at the outer
end of the cable). The pods, are the connector bodies (as shown<below)
that the probes are installed in when you receive your logic analyzer.
Figure 2-7. Connecting Pods to Probe Cables
To connect a pod to a cable, align the key on the cable connector with
the slot on the pod connector and presstogether.
Probing
2-10
HP 16528/1653B
-
Disconnecting
the Probes
from the Pods
When you receive the logic analyzer,the probes are already installed in
the pods. To keep them out of your way, disconnect them from the pod.
To disconnect a probe, insert the tip of a ball-point pen into the latch
opening. Push on the latch while gently pulling the probe out of the
pod connector as shown below.
0166OEll
Figure 2-8. Disconnecting Probes From Pods
You connect the probes to the pods by inserting the double pin end of
the probe into the pod. The probes and pod connector body are both
keyed (beveled) so that they will fit together only one way.
HP 16528/1653B
Probing
2-11
---- -_I___--
-
Connecting the
Grabbers to the
Probes
Connect the grabbers to the probes by slipping the connector at the
end of the probe onto the recessedpin located in the side of the
grabber. If you need to use grabbers for either the pod or the probe
grounds, connect the grabbers to the ground leads in the samemanner.
Figure 2-Q. Connecting Grabbers to Probes
Connecting the
Grabbers t6 the
Test Points
The grabbers have a hook that fits around the IC pins and component
leads. Connect the grabber to the test point by pushing the rear of the
grabber to exposethe hook. Hook the lead and releaseyour thumb as
shownbelow.
Figure 2-10. Connecting Grabbers to Test Points
Probing
2-12
HP 1652B/16536
Front-Panel Reference
--
Labeling Pods,
Probes, and
Cables
Included with your logic analyzer are self-adhesivelabels for each pod,
cable and probe. Use these setsof labels for identification.
Each set has labels for each end of the cable, a label for the probe
housing, a label for the clock probe and l5 labels for each of the
channels. The figure below, showsthe correct placement of the labels.
Figure 2-l 1. Labeling Pods, Probes and Cables
*-
HP 1652B/1653B
Front-Panel Reference
Probing
243
,--
Using the Front-Panel User Interface
. Introduction
3
This chapter explains how to use the front-panel user interface. The
front and rear-panel controls and connectors are explained in the first
part of this chapter followed by “How to use...”explanations of the
front-panel user interface.
The front-panel user interface consistsof front-panel keys,the KNOB,
and display. The interface allows you to configure the logic analyzer,
oscilloscopeand each analyzer (machine) within the logic analyzer.It
also displaysacquired data and measurementresults.
Using the front-panel user interface involves the following processes:
l
l
l
l
l
Selectingthe desired menu with the menu keys.
Placing the cursor on the desired field within the menu by’
rotating the KNOB.
Displaying the field options or current data by pressing the
SELECT-key.
Selectingthe desired option by rotating the KNOB or entering
new data by using the KNOB or the keypad.
Starting and stopping data acquisition by using the RUN and
STOP keys.
-
HP 16526/1653B
Front-Panel Reference
Using the Front-Panel User Interface
3-l
Front-Panel
Controls
In order to apply the user interface quickly, you should know what the
front-panel controls do.
61652E62
@j(f)
Figure 3-l. HP 16528/53B Front Panel
01
Menu Keys. The menu keys allow you to select the main menusin the
logic analyzer.These keys are FORMAT/CHAN, TRACE/TRIG,
DISPLAY, and I/O. The Format/Channel, Trace/Trigger, and Display
keyswill display the menus of either analyzer (machine) 1 or 2
respectivelyor the oscilloscopedepending on what menu was last
displayed or what you did in the SystemConfiguration menu.
Format/Channel Menu Key. The FORMAT/CHAN menu key allows
you to accesseither the Timing Format Specification, State Format
Specification, or Oscilloscope Channel menus.You exit the
Format/Channel menu by pressinganother menu key or by returning to
the SystemConfiguration menu from this menu.
Trace/Trigger Menu Key. The TRACE/TRIG menu key allows you to
accesseither the Timing Trace, State Trace, or OscilloscopeTrigger
menus.You exit the Trace/Trigger menu by pressinganother menu key
or by returning to the SystemConfiguration menu from this menu.
Using the Front-Panel User Interface
3-2
HP 16528/16538
Front-Panel Reference
Display Menu Key. The DISPLAY menu key allows you to access
either the Timing Waveforms display, State Listing display, or the
Oscilloscope Waveforms display. You exit the Timing Waveforms,
State Listing, and OscilloscopeWaveforms menusby pressing another
menu key or by returning to the SystemConfiguration menu.
I/O Menu Key. The I/O menu key allows you to accessthe I/O menu.
You can accessthe I/O menu from any menu in either analyzer (timing .
or state) or oscilloscope,and at any time. Pressingthe I/O menu key
causesthe I/O menu to pop up over any current menu on the display.
02
Run Key. The RUN key allows you to initiate a data acquisition and
display cycle. The analyzer (state or timing) is automatically forced into
its display menu when a run is initiated. The oscilloscopewill stay in its
current menu when a run is initiated. The trace mode or run mode you
select (in the Trace/Trigger menu) determines whether a single or
multiple (repetitive) run occurs.
03
Stop key. The STOP key allows you to stop data acquisition or
printing. A single press alwaysstops the data acquisition. The data
displayed on screen dependson which acquisition mode (single or
repetitive) was used to acquire the data. In the repetitive mode, STOP
causesthe old display to remain unchangedas long as the old data is
not corrupt. In single mode, STOP causesany new data to be
displayed. If printing a hardcopy, the STOP key stops the print.
04
Don’t Care Key. The DON’T CARE key allows you to enter don’t
cares in binary octal, and hexadecimalpattern specification fields. In
Alpha Entry fields, this key enters a spaceand movesthe underscore
marker to the next space.
05
Clear Entry Key. The CLEAR ENTRY key allows you to perform the
following tasks:
Return decimal valuesto the previous value in the decimal menu
fields.
Return valuesto don’t cares in menu fields with number bases
other than decimal.
Clear Alpha Entry menus.
Move the underscore marker or cursor to its original position in
the menu fields.
HP 16528/1653B
Front-Panel Reference
Using the Front-Panel User Interface
3-3
.
06
Hex(adecimal) Keypad. The HEX keypad allows you to enter numeric
valuesin numeric entry fields. You enter valuesin the four number
basesbelow:
l
l
l
l
Binary
Octal
Decimal
Hexadecimal
The A through F keys are used for both hexadecimaland alpha
character entries.
07
08
09
CHS Key. The CHS (change sign) key allows you to changethe sign
( +) of numeric variables.
Roll Keys. When part of the data display is off screen,the ROLL keys
defme which way the KNOB will move the displayed data. These keys
and the KNOB roll displayed data up/down or left/right so you can
view off-screen data.
Knob. The KNOB has four major functions depending on what menu
or pop-up menu you are in. The KNOB allows you to do the following:
Move the cursor from field to field within the System
Configuration and main menus.
Roll the display left or right and up or down.
Position the cursor on options within pop-up menus.
Increment/decrement numeric valuesin numeric pop-up menus.
0IO
SelectKey. The SELECT key allows you to open pop-up menus,
chooseoptions in them, cancel selections,and close pop-up menus.
When the cursor is in a main menu (i.e. Format Specification) pressing
the SELECT key either opens a pop-up, or togglesoptions (when there
are only two options possible) in that field.
-
Using the Front-Panel User Interface
3-4
HP 16528/1653B
Front-Panel Reference
When a pop-up menu appears,the cursor will be on the current option.
You use the KNOB to move the cursor to your desired option. Pressing
the SELECT key tells the logic analyzerthis is the option you want.
This either automatically selectsthe option and closesthe pop-up,
opens another pop-up, or changesoptions. If the pop-up doesn’t
automatically close,it will contain the Done field. In this caseyou close
the pop-up by placing the cursor on Done and pressingSELECT.
Disk Drive. A 3.5 inch, double-sided, double density drive. Besides
011 loading
the operating system,it allows you to store and load logic
analyzer configurations and inverse assemblerfiles.
052
Disk Eject Button. Pressthis button to eject a flexible disk from the
disk drive.
.
0I3
Indicator Light. This light is illuminated when the disk drive is
operating. Wait until this light is out before removing or inserting disks.
014
Inputs 1 and 2. Two BNC connectors allow the connection of
oscilloscope probes and BNC cablesfor signal input to the oscilloscope.
HP 16528/1653B
Front-Panel Reference
Using the Front-Panel User Interface
3-5
-
-
Rear-Panel
Controls and
Connectors
t
.,
0
0
n
01652E03
Figure 3-2. HP 16528/53B Rear Panel
01
Line Power Module. Permitsselection of 110420 or 220-240Vat and
contains the fusesfor each of thesevoltage ranges. The On/Off switch
is also part of the module.
02
03
04
External Trigger BNCs. Provide arm out and arm in connections.
11
Note 3
05
Intensity Control. Allows you to set the display intensity to a
comfortable level.
Pod Cable Connectors. Keyed connectorsfor connecting the pod
cables.
The HP 1653Brear panel has connectorsfor pods 1 and 2 only.
RS-232CInterface Connector. Standard DB-25 type connector for
connecting an RS-232Cprinter or controller.
Using the Front-Panel User Interface
3-6
HP 1652B/1653B
._
,-
06 .
HP-IB Inte~ce Connector. Standard HP-II3 connector for connecting
an HP-IB printer or controller.
07
Fan. Provides cooling for the logic analyzer. Make sure air is not
restricted from the fan and rear-panel openings.
08
Probe Compensation Signal Output. Provides a signal for probe
compensation adjustment.
The Cursor
The cursor (inverse video) highlights interactive fields within the menus
that you want to use.Interactive fields are enclosedin boxesin each
menu. When you rotate the KNOB, the cursor movesfrom one field to
another.
How to Select
Menus
You select the main menusby pressingthe appropriate menu key. The
main menu keys are:
l
FORMATKHAN
TRACE/TRIG
DISPLAY
l
I/o
l
l
When the menu is displayed,you can accessfields within the menus.
The FORMAT/CHAN, TRACE/TRIG, and DISPLAY menu keys
provide accessto their respectivemenus.If more than one analyzer
(machine) is on, or the oscilloscopeis on, you seethe selectedmenu of
either analyzer 1, analyzer2 or the oscilloscope depending on what
type menu was last displayed (analyzer or scope), or what you did in
the SystemConfiguration menu. To switch from the machine 1 menu
set to machine 2 (sameanalyzer) menu set or the oscilloscopemenu
set, select the desired analyzeror scope from the pop-up that appears
when the field in the upper left comer of the main menu is selected.
This pop-up is available in all main menusexcept the I/O menu.
The I/O menu differs from the other three main menusin that it is a
pop-up menu that appears on top of the currently displayed menu
when you press the I/O key.
HP 1652B/1653B
Front-Panel Reference
Using the Front-Panel User Interface
3-7
How to Switch
between the
Analyzers and
Oscilloscope
You can switch between the analyzersand oscilloscope in any main
menu except the I/O menu. ,To switch between ahalyzersand scope,
place the cursor on the field in the upper left comer of the
FORMAT/CHAN, TRACE/TRIG, or DISPLAY (timing, state or
scope) menu and pressSELECT. A pop-up menu appears with the
following options:
0 System
0 MACHINE 1 (or your analyzername)
0 MACHINE 2 (or your analyzername)
l
Mixed Mode (if two or more are on)
0 Scope
Place the cursor on the opposite analyzer(machine), or scope and
pressSELECT. The logic analyzerwill display the samemenu type (i.e.
format, trace, etc.) in the other analyzer (machine) or the scope menu.
For example,if you were in the TRACE menu of machine 1, you will
now seethe TRIGGER menu of the scopeor the TRACE menu of
machine 2.
Returning to
the System
Configuration
Menu
You can return to the SystemConfiguration menu directly from the
FORMAT, TRACE, or DISPLAY menus.To return to the System
Configuration menu, place the cursor on the field in the upper left
comer of any of thesemenusand pressSELECT. The samepop-up
menu appearswith the following options:
0 System
1 (or your analyzername)
0 MACHINE 2 (or your analyzername)
l
Mixed Mode (if two or more are on)
0 Scope
0 MACHINE
Place the cursor on Systemand pressSELECT. The System
Configuration menu is displayed.
Using the Front-Panel User Interface
3-8
HP 16528/1653B
Front-Panel Reference
How to Select
Fields
You select fields within the main menusby placing the cursor on the
desired field and pressingSELECT. Depending on what type of field
you select,you will either seea pop-up menu or a new option in fields
that toggle.
Pop-up Menus
The pop-up menu is the most common type of menu you seewhen you
select a field. When a pop-up appears,you will seea list of two or more
options. Two pop-up menu types are described in “How to Select
Options” in this chapter. ’
How to Close
Pop-up Menus
Pop-up menuswithout the Done option automatically close when you
place the cursor on an option and press SELECT. After closing, the
logic analyzerplacesyour choice in the main menu field from which
you opened the pop-up.
Pop-up menusthat contain the Done option do not automatically close
when you make your selection.To close the pop-up, you place the
cursor on the Done option and pressSELECT.
These two pop-up menu types are described in “How to Select
Options” in this chapter.
HP 16528/1653B
Front-Panel Reference
Using the Front-Panel User Interface
3-S
How to Select
Options
How to select options depends on what type of pop-up menu appears
when you pressselect.When the pop-up appears,you will see a list of
options. You select the option you want by placing the cursor on it and
pressingSELECT. In most casesthe pop-up menu closesand your
desired option is now displayed in the field in the main menu.
-
There are also pop-up menuswhere each option within the pop-up
menu has more than one option available.In these cases,when you
place the cursor on one of the options and press SELECT, another
pop- up will appear.
An exampleof one of these is the clock field in the State Format
Specification menu. When you selectthe clock field in this menu it will
pop-up and show you all five clocks (J, K, L, M, and N) for an
HP 1652Bor both clocks (J and K) for an HP 1653B.
pTziiEq
-
Stoto
Formt
Spaelf lcrtion
Clock
Clock field
Label
1
Specify clock pop-up
Figure 3-3. State Clock Pop-up Menu
When you place the cursor on one of the clocks and press SELECT,
another pop-up appears,showingyou the choices of clock
specificationsavailable.
Using the Front-Panel User Interface
3-10
HP 16528/1653B
Front-Panel Reference
1
I
Clock
Clock specification pop-up
[60~
PWtOd
Pod 1
Pod 2
!ipuifu
Clnk
Figure 34. State Clock Pop-up with K Pop-up Open
When you chooseone of these specifications and press SELECT, this
pop-up will close, however,the original clock pop-up still remains
open. When finished specifying the choicesfor the clocks, you close
the original pop-up menu by selectingDone and pressingSELECT.
Toggle Fields
Some fields will toggle between two options “off” and “on”. When you
place the cursor on one of these fields and press SELECT, the
displayed option togglesto the other choice and no additional pop-up
appears.
How to Enter
Numeric Data
There are a number of pop-up menusin which you enter numeric data.
The two major types are as follows:
l
l
-
Numeric entry with fixed units (i.e. volts).
Numeric entry with variable units (i.e. ms,ps, etc.).
An example of a numeric entry menu in which you only enter the value
with fixed units is the pod threshold pop-up menu.
You can set the pod thresholds to either of the preset thresholds (TTL
or ECL) or to a specific voltage from - 9.9 V to + 9.9 V.
HP 16528/1653B
Front-Panel Reference
Using the Front-Panel User Interface
341
To set pod thresholds to a specific voltage, place the cursor in the
threshold portion of the pod field (‘ITL, ECL, or User-defined) of any
pod and press SELECT.
V]j-
Tlmtrg
Fomat
Sp8clf
lcatlon
---------------Lab.1
PO1
I5 ,I..
87
.*.*
0
Pod threshold
Figure 3-5. Pod Threshold
Select the User-defined option and another pop-up appears for you to
specify the pod threshold voltage.
Actlvlty
Lsbol
POD I
-oIfxl/f-err-offxlff-ot14rJff-offxlff-ilff4ff-aIf-
>
PO1
---------------15 ,I,.
87
.I..
0
Userdefined-pod
threshold entry pop-up
[-off-J
Figure 3-6. User-Defined Pop-up
Using the Front-Panel User Interface
3-12
HP 16528/16538
Front-Panel Reference
You can select your desired threshold by rotating the KNOB until your
desired threshold voltage is displayed. Rotating the KNOB increments
or decrementsthe value in small steps.Or you can changethe value
with the keypad. It allows you to make large value changesquickly.
Entering the new value from the keypad replaces the previous value.
If you want a negativevoltage for the threshold, press the CHS (change
sign) key on the front panel. The minus (0) sign will appear in the
POP-UP*
Notice, the cursor staysin the upper right comer of the pop-up over
Done. When you pressSELECT, the pop-up will close and your new
threshold will be placed in the Pod field.
In another type of numeric entry pop-up menu you must specify the
units as well as the numeric value. The pattern duration specification in
the Timing Trace Specification menu is an example.When you place
field and press
the cursor on the value in the present for
SELECT, you will see the following pop-up:
Tiring
frrce
Speclf lcstlon
Acqulsltlon
Lab.1
mode 1 Tmstttonal
]
>
Bate )
Find
Pat tern
-tic
Entry
(30)
0c
g
US
pf 080mt for
0nr
Than 1 Ind
Eclgo 1 ..*.
]
Figure 3-7. Numeric Entry Pop-up
You enter a new value from the keypad. When you have entered your
*-
desired value, you can changethe units (i.e., ns,/cs,ms, s) by rotating
the KNOB.
Once you select the new value and the units, close the pop-up by
pressingSELECT. The new value and the units will be displayed in the
field.
present for
HP 16528/1653B
Front-Panel Reference
Using the Front-Panel User Interface
3-13
In all numeric entry fields except the pod threshold field, you can open
the pop-up without pressingSELECT. To open the pop-up without
pressingSELECT, place the cursor on the field and press any number
that particular field accepts.The pop-up will appear with the new
number in the pop-up.
Note
How to Enter
Alpha Data
IlbI
Any time the cursor is on one of the numeric entry fields and you
unintentionally press a key that the field accepts,the pop-up will
appear and the number you pressedwill replace your current value. To
close the pop-up and return the original value, pressthe CLEAR
ENTRY key.
You can customizeyour analyzerconfiguration by giving namesto
severalitems:
l
l
l
l
l
The name of each analyzer.
Labels.
Symbols.
Filenames.
File descriptions.
For example,you can give each analyzera name that is representative
of your measurement.The default namesfor the analyzerswithin the
logic analyzer are MACHINE 1 and MACHINE 2. To rename an
analyzer,place the cursor on the name you wish to changein the
SystemConfiguration menu and pressSELECT. You will seethe
Alpha Entry pop-up menu:
Using the Froirt-Panel User Interface
3-14
HP 16528/1653B
Front-Panel Reference
Figure 3-8. Alpha Entry Pop-up
The top two lines enclosedin boxesin the pop-up contain the complete
alphanumeric set you use for namesin these types of fields. The bottom
line (enclosed in brackets) contains the name that existedwhen you
opened the Alpha Entry pop-up. To enter alpha charactersin the
brackets (where the default or old name appears) position the cursor
on the desired character and pressSELECT. The new character will be
placed in the brackets where the underscore marker is located. If you
want to place a new character in the brackets at a location not marked
by the underscore marker, move the underscore marker to where you
want the new character to be placed. Moving the underscore marker is
explained in “Changing Alpha Entries.”
Note
II3
Changing
Alpha Entries
You can also make direct keypad entries. Your selection will be placed
where the underscore marker is in the box.
To make changesor corrections in the Alpha Entry field, position the
underscore marker under the character you want to change.
,
To move the underscore marker to the left, place the cursor over the
left arrow and press SELECT once for each backspace.
HP 16528/1653B
Front-Panel Reference
Using the Front-Panel User Interface
3-15
To move the underscore marker to the right, you either place the
cursor on a desired character and pressSELECT, or place it on the
right arrow and pressSELECT.
You can also use the ROLL keysand the KNOB to move the
underscore marker. To use this alternate method press the left/right
ROLL key and rotate the KNOB until the underscore marker is under
the desired character. To return the KNOB to controlling the cursor’s
movement,press the left/right ROLL key again or press SELECT.
If you want to erasethe entire entry and place the underscore marker
at the beginning of the name box, press the CLEAR ENTRY key on
the front panel.
If you want to replace a character with a space,place the underscore
marker under that character and press the DON’T CARE key on the
front panel.
How to Roll
Data
To roll data, you presseither the left/right or up/down ROLL keys and
rotate the KNOB. The roll function is only available when there is more
data in the menu than can fit on screen.If there is off-screen data,
pressingthe ROLL keyscausesan indicator to appear in the upper left
corner of the display and activatesthe roll function of the KNOB. If
there is no off-screen data, the indicator will not appear.
Up/Down
Left/Right
016W
Figure 3-9. Roll Function Keys
One exampleof a menu with off-screen data is the STATE LISTING
menu. The state listing can contain up to 1024lines; however, the
display is only capable of showing you 16 lines at a time. To roll the
off-screen data, press the up/down ROLL key and then rotate the
KNOB to view the off-screen data.
Using the Front-Panel User Interface
3-16
HP 16528/1653B
Front-Panel Reference
VJtIerk@rr
Lab.1
60s.
-0007
-0006
QOOS
do04
6003
-0002
001
iel 000
+OOOl
+0002
+ooos
+a004
+OOOS
+0006
Moo7
+moe
1
[Stat0
Llstlnn
Of I
]
1
.
>
) pqzq
0066C4
1E7s
ooelx6
OOWFO
0004F2
oowc6
OOBBCA
OOWCC
6lE6
0000
WC8
BOX
OOFF
6730
000000
000002
E:
000004
000006
0000
8046
ooeo48
2E7c
00804cI
00604c
0000
04FC
OObOdE
008050
6lW
6100
Figure 3-10. Typical State Listing Menu
Assignment/
Specification
Menus
There are a number of pop-up menusin which you assignor specify
what you want the logic analyzer to do. The basic menus of this type are
as follows:
Assigning pod bits to labels
0 Specifying patterns
l
Specifying edges
l
Assigning Pod
Bits to Labels
The bit assignmentfields in both state and timing analyzerswork
identically. The convention for bit assignmentis as follows:
* (asterisk) indicates assignedbits
. (period) indicates un-assignedbits
HP 16528/1653B
Front-Panel Reference
Using the Front-Panel User Interface
3-17
Note
If you don’t seeany bit assignmentfields, it merely meansyou do not
have any pods assignedto this analyzer.Either switch analyzersor
assigna pod to the analyzeryou are working with.
To assignbits in these menus,place the cursor on one of the bit
assignmentfields and pressSELECT. You will seethe following popup menu:
87
15
,
,
,
*
‘
a
I
,
********
I
Figure 3-l 1. Bit Assignment Pop-up
Place the cursor on the left-most asterisk or period in the pop-up that
you want to changeand pressSELECT. The bit assignmenttogglesto
the opposite state of what it was when the pop-up first opened. Move
the cursor one bit to the right. Holding the SELECT key, repeats the
bit assignment.You close the pop-up by placing the cursor on Done
and pressingSELECT.
SpeCifying
Patterns
The Specify Patterns fields appear in severalmenusin both the timing
and state analyzers.Patterns can be specified in one of the available
number bases,except ASCII.
The convention for “don’t cares”in thesemenusis an “X” except in the
decimal base.If the baseis set to decimal after a “don’t care” is
specified, a $ character is displayed.
An exampleof a Specify Patterns field is the Find Pattern
the Timing Trace Specification menu.
Using the Front-Panel User Interface
3-18
field in
HP 16528/1653B
Front-Panel Reference
-
field and press
When you place the cursor on the Find Pattern
SELECT, you will seethe following pop-up menepar.
1
Specify
Pattern:
XXX%
I
Figure 342. Find Pattern
field Popup
When the pop-up is open, enter your desired pattern from the keypad
(including don’t cares).When you finish entering your pattern, close
the pop-up by pressingSELECT.
Specifying Edges
You canselect positive-going ( t ), negative-going( & ), or either edge
( f ) as part of your trigger specification. You specify edgesin the
Timing Trace Specification menu by placing the cursor on the Then
find Edge field under the desired label and pressingSELECT. You
will see the following menu.
Figure $13. Edge Pop-up
You will notice a number of periods in the pop-up menu. Each period
represents an unassignedbit for each bit assignedto the label. Don’t be
alarmed if you seea different number of unassignedbits, it merely
meansthe number of bits in your label is different than the number in
the label for this example.
To select a desired edge,place the cursor on your desired bit position
in the pop-up and pressSELECT until you seethe desired edge, or
unassign(.) the bit. PressingSELECT changesthe bit sequentially
from (.) to 4 to t to 1 and back to (.).
-
HP 16528/1653B
Front-Panel Reference
Using the Front-Panel User Interface
3-19
’
4
System Configuration Menu
Introduction
This chapter describesthe SystemConfiguration menu and pop-up
menuswithin the SystemConfiguration menu.
The purpose and functions of each field are e@ined in detail, and we
have included illustrations and examplesto make the explanations
clearer.
System
Configuration
Menu
The SystemConfiguration menu can be considered a systemlevel menu
in that it contains fields that you use to turn the scopeon or off and
start the configuration processfor both analyzer 1 and analyzer2. You
use this menu to do the following:
l
l
l
l
l
Turn analyzermachinesand scope on or off.
Specify analyzertype (timing and state).
Assign pods to the individual machineswithin the logic analyzer.
Initiate Autoscale in both the oscilloscope and timing analyzer.
Name each analyzer.
In this menu, you con&ure your logic analyzer in one of nine ways:
Timing analyzeronly.
State analyzeronly.
Up to two scope channels.
Two state analyzers.
One timing analyzerand one state analyzer.
Timing analyzerwith up to two scope channels.
State analyzerwith up to two scope channels.
Two state analyzerswith up to two scope channels.
One timing analyzer,one state analyzer and up to two scope
channels.
HP 16528/16538
Front-Panel Reference
System Configuation Menu
44
’
The SystemConfiguration menu for the HP 1652BLogic Analyzer is
shownbelow.
am1 ymr
2
Nom.1 1-1
Type 1 1-1
( Autoscsis
)
Figure 4-1. System Configuration Menu For HP 16528
Accessing the
System
Configuration
Menu
The SystemConfiguration menu is the default display when the logic
analyzeris turned on and the operating systemhas loaded. Once the
logic analyzer or scope is on and you are in a menu other than the
SystemConfiguration menu, you accessthe SystemConfiguration
menu by placing the cursor in the systema&s field in the upper left
corner and press SELECT. This field will be displaying either the
scope,Machine 1, Machine 2, or a user-defined name for the current
analyzermachine before you pressSELECT.
You then place the cursor on Systemin the pop-up menu and press
SELECK When the pop-up closesthe SystemConfiguration menu
will be displayed.
System Configuation Menu
4-2
HP 16528/1653B
Front-Panel Reference
System
Configuration
Menu Fields
The SystemConfiguration menu fields are described in the following
paragraphs*
Name field
Alpha Entry pop-up
Figure 4-2. Alpha Entry Popup Menu
Name
You name an analyzerby selectingthe Name field under it. An Alpha
Entry pop-up menu will open as shown above.The pop-up contains a
row of alpha characters,a row of numeric characters,two arrows, and a
box at the bottom of the menu in which the name appears.In the name
box is an underscore marker. This marker indicates in what spaceyour
next selection will be placed.
You can name the analyzerin one of two ways.The first way is to
position the cursor over the desired character in the pop-up using the
KNOB, then press SELECT. The character appearsin the name box
The secondmethod is to use the keypad on the front panel. With this
keypad you can enter the letters A through F and the numbers 0
through 9 instead of using the characters in the pop-up.
HP 16528/1653B
Front-Panel Reference
System Configuation Menu
4-3
The arrows in the pop-up move the underscore marker forward or
backward. To move the marker forward, position the cursor over the
right-pointing arrow and press SELECT. To backspacethe marker
position the cursor over the left-pointing arrow and press SELECT.
-
You can also move the underscore marker with the ROLL keys and the
KNOB. Pressingthe left/right ROLL key activatesthe marker.
Rotating the KNOB places the marker under the desired character.
You can replace a character with a spacein one of two ways.Position
the cursor over the spacein the pop-up and pressSELECT, or press
the DON’T CARE key on the front panel.
If you want to erasethe entire entry and place the underscore marker
at the beginning of the name box, press the CLEAR ENTRY key on
the front panel. When you have entered the correct name, position the
cursor over Done and press SELECT.
Type
The Type field defines the machine as either a state analyzer or a
timing analyzer.When this field is selected,a pop-up selector menu
appears.You choosethe machine type by using the KNOB to move the
cursor within the menu to the desired selection and pressingSELECT.
Systa
Conflgufrtion
Type PoPuP
---------------Pod
4
7
----------------
Figure d-3. Type Pop-up Menu
System Configuation Menu
4-4
HP 16526/16538
-
Scope On/Off
,-
The scope defaults to Off. To turn the scope on or off, simply move the
cursor over the On/Off field and press select. Scope measurementmay
be added to any analyzer co&guration.
Autoscale
Autoscale provides a starting point for setting up a measurement.The
*
Autoscale field appears for the timing analyzer in the System
Configuration menu only. When you select Autoscale, a pop-up
appearswith two options: Cancel and Continue. If you select Cancel,
the autoscaleis cancelled and control is returned to the System
Configuration menu.
Syr tr
Coal lQrr8 urn
I
aro1ytor
2
Nemo, I-1
Autoscale Popup
Figure 4-d. Autoscale Pop-up Menu
If you chooseContinue, autoscaleconfigures the Timing Format, Trace
Specification, and the Timing Waveforms menus.Autoscale searches
for channelswith activity on the assignedpods and displays them in the
Waveforms menu.
Autoscale for the scope is located in all main menus.When Continue is
selected,the Channel, Trigger, and Waveforms displays are
automatically configured. More information on scope autoscaleis
located in chapter 23, “Channel Menu.”
HP 16528/16538
Front-Panel Reference
System Configuation Menu
4-5
Id
Choosing Autoscale erasesah previous configurations in the timing
d yzer and scope,and turns the other analyzer (state) off ifit was on.
If you don’t want this to happen, selectCancel in the pop-up.
Pods
Each pod can be assignedto one of the analyzers.When the HP 1652B
Logic AnaIyzer is powered up, Pod 1 is assignedto AnaIyzer 1 and Pod
5 is assignedto Analyzer 2. When the HP 1653Bis powered up, Pod 1
is assignedto Analyzer 1 and Pod 2 is assignedto Analyzer 2.
Note d
To assigna pod, position the cursor on one of the pod fields and press
SELECT. With the pop-up that appears,you can ass& the pod to
Analyzer 1, Analyzer 2, or Unassignit. Pressingthe SELECT key
closesthe pop-up.
’
aMlyt@r
N8me:
2
(nACHINE]
TypvITIlnlng
(nuttmcole
)
Pod Assignment
Figure 4-5. Pod Assignment Pop-up Menu
System Configuation Menu
4-6
HP 16528/1653B
Front-Panel Reference
--
.-
Where to Go
Next
When you complete the systemlevel configuration for the logic
analyzer in this menu, you need to complete the individual analyzer
configurations for analyzer 1, analyzer2, or scope.To configure an
individual analyzeryou will normally configure the Format menu first
and then the Trace menu. For the scopeyou configure the Channel
menu first and then the Trigger menu.
Configuration menus for the timing analyzer start at chapter 16.For the
state analyzer,menus start at chapter 8 and for the scope,start at
chapter 22.
HP 16528/1653B
Front-Panel Reference
System Configuation Menu
4-7
5
I/O Menu
Introduction
This chapter describesthe I/O and pop-up menus that you will use on
your logic analyzer.The purpose and functions of each menu are
explained in detail, and we have included many illustrations and
examplesto make the explanationsclearer.
The I/O menu allows you to perform I/O taskswith your logic analyzer.
The tasksyou can do with this menu areasfollows:
0 Print screens.
l
Perform disk operations.
0 Configure the HP-II3 Interface.
l
Configure the RS-232CInterface.
l
Enable the analyzer to perform external triggering.
l
Run self tests on the analyzer.
Accessing the
I/O Menu
You can accessthe I/O menu from any other menu in the systemby
pressingthe I/O key on the front panel. Use the KNOB to roll the
cursor through the menu. When the cursor is positioned over the
option you desire, press SELECT. It lists the following options:
a Done
0 Print Screen
0 PrintAll
l
Disk Operations
0 I/O Port Configuration
l
External BNC Configuration
l
Self
Test
To exit the I/O menu, position the cursor over the Done option and
press SELECT. This returns you to the menu you were in before you
pressedthe I/O key.
-
HP 16528/1653B
Front-Panel Reference
I/O Menu
51
Print Screen
When you select the Print Screenoption, the information on the screen
is frozen and the message“PRINT in progress”appearsat the top of
the display. This messagewill not print. Only the STOP key is
operational while data is being transferred to the printer. If you wish to
stop a printout before it is completed, press the STOP key.
Print All
The Print All option prints not only what is displayed on screenbut
what is below, and, in the Format Specification, what is to the right of
the screenat the time you initiate the printout.
Note
Make sure the first line you wish to print is on screenwhen you select
Print All. Lines abovescreenwill not print.
Use this option when you want to print all the data in menuslike:
Timing Format Specification
State Format Specification
l
State Trace Specification
0 State Listing
l
Disk Directory
l
Symbols
l
l
If there is information below the screen,the information will be printed
on multiple pages.In Timing and State Format Specifications,the print
will be compressedwhen necessaryto print data that is off-screen to
the right.
When you select the Print All option, the information on the screen is
frozen, and the message“PRINT in progress’ appearsat the top of the
display. This messagewill not print. If you wish to stop the printout
before it is completed, press the STOP key on the front panel.
I/O Menu
5-2
HP 16528/1653B
-
Disk Operations
The Disk Operations option allows YOU to perform operations 011 YOUR
disk and with the files on your disk. For example,you can load a file
from your di& store a file to your disk, or format a disk. The following
pagesdescribe the disk operations. For additional information on the
disk operations, refer to Chapter 6, “Disk Drive Operations.”
When you select Disk Operations, a new menu pops up. This menu is
divided in two sectionsseparatedby a horizontal line. The top section
displays the disk operation that is to be performed and the file or files
that will be affected.
The bottom section displaysthe files on the disk in alphabetical order.
It also statesthe type of the file and a description, if one was specified
at storage.If no disk is in the disk drive or if the disk is not a supported
format, the appropriate messagewill be displayed.
Filp Field
Operations
FielY
Files on
Disc-
Disc DDrtmtlons
CHnRllA!!
CHARTll
CHARl2.6
CHART21
CHARTU
CHMTU
e cm1rr
tlULTIS IN A
IlULTISIN9
llULfISIN1
, HtJLlISINS1NAS.D
SIN-I 0-6
SIN,1 01
SYSTEL
[_DPnr)
021xonf Ig
16Wl-conftg
02lronflg
16Wl~onflg
02l-conflg
16SOLconf
tg
16Wl Acmf im
02lAonf
Ig
Oll-conftg
16S0/l~onflg
oooAionf I g
02lronftg
02l-.conftg
16SOlt~onf
Ig
16SOOCl,syt tan
#mlFllRo4~T,uPCaml
WlOlFORClWT,UPCOUNT
#HO2FORCHMT,lH'WNCOUNT
#t#I2FORO4ARf,UPMMJUWNT
#llosmRMART
#MBFoRM#zT
COWME W DUfEREMCES
sIswDsmE2x
4
SINE Am SINE 2x
SfE
m
SINE 2x
SINE m SmE 2m
SIWE WITH 5 DEGREEINCREIENTS
SIN
ICTH lODE6REE
SIE Nm
Wl6W
flYRElENTS
10 M6REE IRCREIERTS
Sgstom Softu#~
VO2.16
Halfway down the bottom display are arrows at each side of the screen.
These arrows tell you which file is to be operated on. To roll through
the list of files, press the up/down ROLL key and rotate the KNOB.
The file that is between the arrows in boldface type also appearsin the
FILE field in the top section of the display.
HP 16528/16538
Front-Panel Reference
l/O Menu
5-3
The top section of the menu contains different types of fields. Pressing
the Done field exits the Disk Operations menu and the I/O menu,
returning you to the menu you were in before you pressedthe I/O key.
The field on the left-most side of the display is the operations field. It
tells you which disk operation is to be performed. Next to that will
usually be one or two file fields that tell you which file or files are to be
acted upon. For severaloperations another field will appear in the top
section.
The Execute field executesthe disk operation appearing in the
operations field. For non-destructive operations, when Execute is
selectedthe operation is immediately performed. For destructive
operations a pop-up appearswith two options: Cancel and Continue.
Cancel lets you changeyour mind before the action is taken preventing
any data from being lost mistakenly.Continue executesthe operation.
If you select the operations field, you will seea pop-up menu with nine
options for disk operations, as shown.Each operation will now be
discussedin detail.
021,config
1650/l,COnf
021,conf
CHART31
l Cep@IfI
WLTISINwB
flULTISIND
tIULTfS1N-E
tlULlISINS 1NJX-B
SIN-IO3
SIN-101
SYS-rEtL
1650/l,conf
021,conf
16SO/l,conf
16S4ll~onffg
021,conf
011,conf
ig
ig
ig
DEMl
DEtlUl
DEMO2
DEt102
DEH03
DEfKB
ig
1g
SINE MD SINE
SINE MO SINE
lg
10
lbX)/l,conf
lg
000,conf
ig
021,conf
rg
021,conflg
1650/l,conf
ig
16!i00A,sys
tom
FOR
FOR
FOR
FOR
FOR
FOR
CHI)RT
CHCIRT
CHCIRT
CHART
CHART
CtMRT
_
_
UPCOUNT
UPCOUNT
UPDOHNCOUNT
UPDOHNCOUNT
COWIREW DIffEREWCES
SINE
ANO
SINE
SINE
SINE
SINE
WO
NITH
WITH
NIlH
W16500#3
4
2X
2X
SINE 2X
SINE 2X
S DEGREE INCRERENTS
10 OECREE INCREnENrS
10 DEGREE INCREtlENTS
Sgstom
Softusrr
VO2.M
Figure 5-2. Disk Operations Pop-up Menu
I/O Menu
5-4
HP 16528/1653B
Front-Panel Reference
Load
The Load operation allows you to load configuration files (including
symbol tables), and inverse assemblersfrom a disk. Executing a Load
operation loads the logic analyzerwith the file whose name appears in
the File field in the top section of the Disk Operations menu. Loading
symbol or inverse assemblerreplaces those that are linked to the
current configuration.
When a Load operation is executed,a message“Loading file from disk”
appears at the top of the display. After the file has been loaded, this
messageis replaced by “Load operation complete.”
Disc
I
Operations
Load
1 from
file
ICtlPDIFJ
1
Figure 5-3. Load Operation
Store
The Store operation allows you to store all the setup information, data
and inverse assemblerlinks for the analyzer in a configuration file. You
cannot store information for only one of the internal analyzers.The
information and data present in the logic analyzer at the time the Store
is initiated is stored on the disk.
When you select Store from the operations pop-up menu, the top
section of the Disk Operations menu looks similar to that shown in
figure 5-4. In addition to the operations and file fields, there is a File
description field. You can write an optional description of the file you
are storing in this field. A file description is not necessarybut may help
identify a file in the future.
When you name the file that you are storing, you must begin the file
name with a letter. The name can contain up to ten characters.It can
be any combination of letters and numbers, but it cannot contain any
spaces.
Entering a file description is similar to naming a file with three
exceptions:you can enter up to 32 characters,start the description with
a number, and enter spaces.
HP 16%!8/16538
Front-Panel Reference
I/O Menu
5-5
When you Execute the Store operation, the message“Storing
configuration to disk” appears at the top of the display. After the file
has been stored, the messageis replaced with “Store operation
complete” and the file name appears in the bottom section of the Disk
Operations menu with its file type and a description, if you gaveit one.
Birc ap8r8u888
1
Store
File
CDOM)
1 to file
dascrlptton
-1
[TIflING
STCITE nIXED OISPIAVS
1 (S)
Figure 5-4. Store Operation
Autoload
The Autoload operation allows a specified configuration file to be
loaded at power up. When you selectAutoload, the top section of the
Disk Operations menu looks similar to that shown below. A field
appearsnext to the operation field. When you select this field, a
pop-up menu appearswith the choicesEnable and Disable . Enable
causesthe specified file to be automatically loaded at power up.
Disable prevents any fde from being loaded at power up.
Figure 5-5. Autoload Operation
The file name in the file field can be changedwith one of two methods.
One method is to press the up/down ROLL key and rotate the KNOB
to scroll through the list of files until the name of the desired file
appearsin the file field. The other method is to select the file field and
use the Alpha Entry pop-up menu and the front-panel keypad to enter
the name.
Below the operations and file fields are two information lines. The first
line indicates the status of autoload ( Enable or Disable ), and the
secondline tells you which file, if any, is enabled for autoload. When
you select either Enable or Disable the autoload statusof a file will not
changeuntil you select Execute.
When you select Execute, after selectingEnable, the file whosename
appearsin the f2e field is selectedfor autoloading. The autoload status
line will sayEnable, and the autoload file line will state the name of the
file .
I/O Menu
5-6
-
Also, a file labeled AUTOLOAD is added to the bottom section of the
display. This file is not a configuration file. It contains information the
logic analyzer needsto load the chosenfile at power up. If you disable
autoloading, the file labeled AUTOLOAD does not disappear. You
must Purge it to eraseit from your disk. The Purge disk operation is
covered later in this chapter. If Autoload is disabled, the logic analyzer
will load the default configuration at power up.
COPY
The Copy operation allows you to copy a file to the samedisk or to
another disk. When you select Copy, the top section of the Disk
Operations menu will look similar to that below.
Dirt o~w~tlmr
(iiziir)
1
copy
] Ill.
[wEERzml
to
Isvsrrn,ost]
Figure 5-6. Copy Operation
Notice that there are two file fields. You can specify the file you are
copying from and the file you are copying to. When you select either
file field, you will get an Alpha Entry pop-up menu. You can use this
menu and the keypad on the front panel to enter the name of the file.
For the file that you are copying from, it is usually easier to use the
up/down ROLL key and the KNOB to select one of the files on the
disk rather than to use the Alpha Entry menu.
When you select Execute you will seea pop-up that tells you to insert
the disk onto which you want to copy the file. There are also two fields
in the pop-up. One is labeled Continue. You select Continue after you
have inserted the disk and are ready to copy the file. The other field is
labeled Stop. Selecting the Stop field halts the copy and returns you to
the Disk Operations menu.
If you insert the destination disk and select Continue, the file will be
copied. If the file is long, you might have to swap the source and
destination disks again. The logic analyzer tells you if you need to
reinsert the source disk to continue copying the file. You can also copy
to the samedisk, making the source and destination disk the same.
HP 16528/1653B
Front-Panel Reference
I/O Menu
s-7
.
Duplicate Disk
The Duplicate Disk operation allows you to duplicate all the files on
one disk to another. When you select this option, only the operations
field appearsin the top section of the Disk Operations menu. The disk
is automatically formatted in this operation.
Disc DDorotloar
-
aiia
Figure W. Duplicate Disk Operation
When you select Execute, you will seea pop-up with a messagetelling
you what occurs when a disk is duplicated. The pop-up also contains
two fields: Cancel and Continue. Cancel stops the duplicating process
and returns you to the Disk Operations menu. Continue executesthe
operation. If you select Continue, the display goesblank except for the
message“Insert source disk - hit selectwhen ready.” Insert the disk you
want to duplicate and pressSELECT. After the logic analyzer reads
the disk, it displaysthe message“Insert destination disk - hit select.
when ready.” Insert the disk to which you want to copy and press
SELECT. The analyzerwill tell you that it’s writing to the disk.
Figure 5-8. Duplicate Disk Pop-up Menu The processof duplicating a disk is an iterative one; i.e., more than one
swappingof disks may be necessarybefore all files are transferred. If
this is the casethe logic analyzerwill repeat the messagetelling you to
insert the source disk. Insert the source disk and pressSELECT. The
analyzerrememberswhere it stopped duplicating the first time and
starts reading from that location. When the analyzeris ready, insert the
destination disk and press SELECT. You will never have to swap disks
more than three times.
I/O Menu
S-8
HP 16528/16538
Front-Panel Reference
-\
After the duplication processis complete, the logic analyzer displaysa
messagetelling you what to do next. If you want to copy another disk,
press the FORMAT key on the front panel. The analyzerwill repeat its
messageto insert the source disk. If you do not want to copy any more
disks, insert the systemdisk and press the SELECT key. This reboots
the system
Note
Pack Disk
Duplicating a disk destroysany existing configurations and data on the
destination disk. Make sure that the disk to which you are duplicating is
the correct disk.
The Pack Disk operation reorganizesthe files on the disk making
room for more. When a file is purged, it is not removed from the disk
even though it doesn’t appear in the Disk Operations menu. Packing a
disk movesfiles up, creating spaceat the bottom of the disk memory.
When you select Pack Disk, the top section of the Disk Operations
menu looks similar to that shown below. Selecting Execute starts the
process.After the packing is completed, the message“Disk packing
complete” appears at the top of the screen.
,-
Dl*c oparatlmnr
t
Pack
Disc
CD-4
1
Figure 5-9. Pack Disk Operation
Rename
.
The Rename operation lets you rename a file. When you select this
option, the display will look similar to that shown in figure 5-10.
You will see a file field that tells you what the old name of the file is,
and a file field that tells you what the new name will be. If you select
either one of the file fields, an Alpha Entry pop-up menu appears.You
can use this menu and the keypad on the front panel to enter the name
of the file. For the field with the old file name, it is usually easier to use
the up/down ROLL key and the KNOB to select the desired file rather
than to use the Alpha Entry pop-up menu.
HP 16528/16538
Front-Panel Reference
I/O Menu
s-9
To start the rename operation, select Execute. The file will be renamed
and relocated alphabetically in the file list in the bottom section of the
Disk Operations menu.
If you try to rename a file with a name that already exists,a message
will tell you that a file already existswith that name, and the file will not
be renamed.
Figure HO. Rename Operation
Purge
The Purge operation allows you to delete a file from a disk. When you
select this option, the display will look similar to that shown below.
The file field contains the name of the file to be purged. You can
changethe file in this field either by positioning the cursor on the field
and selecting it to accessan Alpha Entry pop-up menu, or by using the
up/down ROLL key and the KNOB to move among the files.
When you select Execute you will seea pop-up with the choices
Cancel and Continue. Cancel lets you stop the Purge operation and
returns you to the Disk Operations menu. Continue purges the file
whosename appearsin the file field.
Note
ml
4
A purged file cannot be recovered.Make sure the file that is being
purged is the correct one.
Figure 5-l 1. Purge Operation
I/O Menu
5-10
HP 16528/16538
Front-Panel Reference
Format Disk
The Format Disk operation formats a disk, purging all previous files on
the disk. When you select this option, the display will look similar to
thatshowninfigure5-12.
Selecting Executegivesyou a pop-up with the choices Cancel and
Continue. Cancel stops the format operation and returns you to the
Disk Operation menu. If you select Continue, the disk will be
formatted. The message“Disk format in progress” will appear at the
top of the screen.When the formatting is complete, all the files will be
deleted.
Note
Formatting a disk purges all the files on the disk. Make sure the disk is
the correct one to be formatted becausepurged files cannot be
recovered.
Format
Disc
GEEa
Figure 5-12. Format Disk Operation
HP 1652B/l653B
Front-Panel Reference
I/O Menu
541
I/o Port
Configuration
The I/O Port Configuration option in the I/O menu enablesyou to
configure the logic analyzer for sendingconfiguration, waveforms and
listings to a printer or controller via HP-IB or RS-232C.
When you place the cursor on the External I/O Configuration option
and pressSELECT, you will seethe menu shown in figure 543.
Ewtsrnrl
Prlntor
US-2324
110 Put
Par 1ty
connoctod to I]
HPIb Conf igurr
Configuration
lion
HPIB bddrorr 1 [T]
*~I
stopbits ’ 1
1
J
1 INansJ
Baud rat.
’ r
Oats Bitt
*
Psinter
Controller
connoctod to -1
Protocol
Coon;-)
Cmnffgurmtior
2400
1
8
Inforrtlmn
Prtntar
lILesorJet]
Paper uiclth : vj
Figure 5-13. External I/O Port Configuration Menu
The HP 1652B/53Bis equipped with a standard RS-232Cinterface and
an HP-IB interface that allows you to connect to a printer or controller.
Connecting a controller givesyou remote accessfor running
measurements,up-loading and down-loading configurations and data,
and outputting to a printer. The controller interface is explained in
more detail in the HP 16.52B/l653BRogtwnming RqerenceManual.
Various HP-II3 and RS-232Cgraphics printers can be connected to the
logic analyzer.Configured menusas well aswaveformsand other data
can be printed for complete measurementdocumentation. The printer
interface is explained in more detail in Chapter 7.
I/O Menu
5-12
HP 16528/16536
Front-Panel Reference
COnfigUring the
Interfaces
You configure the HP-IBor RS-232Cinterfaces for a controller or a
printer by first selecting the I/O menu. Then you select the J/O Port
Configuration field to display the External I/O Port Configuration
menu. When the menu appears,select either field at the top of the
menu to switch the interfaces between a printer and a controller.
Whenever you changethe configuration for one interface, the other
interface automatically changesto the opposite configuration.
EHmrnal
Printer
I/O
Port
connected
Configuration
to 1-1
(iGX)
Controller
connected
to
1-1
Figure 5-14. Interface Configurations
The HP-IB printer must be set to Listen Ah~~ysfor the HP-IB
interface. In this mode, no HP-IB addressingis necessary.There are
two fields at the bottom of the menu that allow you to select the printer
type and paper width.
The Hewlett-Packard Interface Bus (HP-IB) is Hewlett-Packard’s
implementation of IEEE Standard 48%lW8, “Standard Digital
Interface for Programmable Instrumentation.” The HP-IB is a carefully
defined interface that simplifies the integration of various instruments
and computers into systems.It usesan addressingtechnique to ensure
that each device on the bus (interconnected by HP-IB cables) receives
only the data intended for it. To accomplish this, each device is set to a
different addressand this addressis used to communicate with other
deviceson the bus.
Selectingan Address. The HPIB addresscan be set to 32 different
HP-ES addresses,from 0 to 31. Simply choosean address that is
compatible with your device and/or software.The default is 7.
HP 16528/16538
Front-Panel Reference
I/O Menu
5-13
To select an address:
1. Selectthe External I/O Port Configuration menu and place the
cursor in the field directly to t&e right of HP-IB Address:. Press
SELECT and an Integer Entry pop-up appears.Seefigure 5-1.
Ertwnml
I
I
Printrr
I/O
Part
connectad
RE232-C
Configuration
to rRS-2321]
(Tzir)
Control
HfIb
Conllgurrtion
-
Iar
connoc tad to
[T]
Conf iaurstion
171
stopbits 8 1
1
17)
/
Integer Entry Pop-up
Data B;tt
I
Plirtw
’
e
fnforwthn
Prtnter
+zzziq
Paper uldth
: l-i!i?F]
Figure 5-15. Integer Entry Pop-up
2. When the pop-up appears,either rotate the knob or use’the
keypad to enter the address.If you enter an addressgreater than
31, the addresswill default to 31 when you select Done.
3. When you are finished entering the HP-IB address,select Done.
The pop-up closes,placing your selection in the appropriate field.
The RS-232C Interface
The RS-232Cinterface is Hewlett-Packard’s implementation of EIA
RecommendedStandard RS-232C,“Interface Between Data Terminal
Equipment and Data CommunicationsEquipment Employing Serial
Binary Data Interchange.” With this interface, data is sent one bit at a
time and charactersare not synchronizedwith preceding or subsequent
data characters.Each character is sent as a complete entity without
relationship to other events.
Protocol. Protocol governsthe flow of data between the instrument and
the external device. The protocol options are None and XON/xOFF. .
The default setting is XON/XOFF.
I/O Menu
5-14
HP 16528/1653B
Front-Panel Reference
-
Figure 5-W. Protocol Pop-up Menu
With lessthan a 5-wire interface, selecting None does not allow the
sending or receiving device to control how fast the data is being sent.
No control over the data flow increasesthe possibility of missing data
or transferring incomplete data. With a full 5-wire interface, selecting
None allows a hardware handshaketo occur. With a hardware
handshake,hardware signalscontrol data flow. The HP l3242G cable
allows the HP 1652B/l653BA to support hardware handshake.
With XON/XOFF, the receiver controls the data flow. By sending
XOFF (ASCII decemall9) over it’s transmit data line, the reciever
requeststhat the sender disablesdata transmission.A subsequent
XON (ASCII decimal 17) allows the sending device to resume data
transmission
Data Bits. Data bits are the number of bits sent and received per
character that represent the binary code of that character. The HP
1652B/53Bsupports S-bit only.
Stop Bits. Stop bits are used to identify the end of the character. The
number of stop bits must be the samefor both the controller and the
logic analyzer.The options are 1,15, or 2 stop bits per character. The
default setting is 1.
I
1
1 l/2
2
Figure 5-17. Stop Bits Pop-up Menu
Parity. The parity bit detects errors as incoming charactersare
received. If the parity bit does not match the expectedvalue, the
character is assumedto be incorrectly received. The action taken when
an error is detected dependson how the interface and the device
program are configured.
HP 1652B/l653B
Front-Panel Reference
I/O Menu
5-15
-
--- -- ____---_-._
*
--
Parityis determined by the requirements of the system.The parity bit
may be included or omitted from each character by enabling or
disabling the parity function. The options are None, Odd, or Even. The
default setting is None.
Figure 5-18. Parity Pop-up Menu
Baud Rate. The baud rate is the rate at which bits are transferred
between the interface and the peripheral. The baud rate must be set to
transmit and receive at the samerate as the peripheral, or data cannot
be successfullytransferred. The availablebaud rates are 110to 19.2k.
The default setting is 9600.
Figure 5-19. Baud Rate Popup Menu
Printer. You can specify which printer you are using by selecting the
Printer attribute field and choosingone of the options in the pop-up.
The options are ThinkJet, QuietJet, serJet, and Alternate.
Alternate allows you to use an Epson9 compatible printer. The default
printer option is ThinkJet.
I/O Menu
5-16
HP 16528/1653B
Front-Panel Reference
.
Figure 5-20. Printer Pop-up Menu
Paper Width. The logic analyzer offers two options for paper width: 8.5
and 13.5inches. Selecting the Paper Width attribute field givesyou a
pop-up with which you can make your choice.
El
8.513.5w
Figure S-21. Paper Width Pop-up Menu
c
The HP ThinkJet and HP LaserJet seriesprinters require a paper
width of 8.5 inches and the HP QuietJet seriesprinters require a paper
width of 13.5inches.If you have an HP ThinkJet or HP LaserJet
printer but have set the paper width to 13.5inches, the logic analyzer
tells the printer to compressthe print so it will fit on a page. The results
may not be satisfactory.If you have an Epson@ compatible printer,
check your printer manual to seewhich size is required.
-
External BNC
Configuration
On the rear panel of the logic analyzerare two BNC connectors. One
BNC is an input for an external trigger source. The other is used to
output a trigger source.The External BNC Configuration option in the
I/O menu identifies one of the two internal machinesor scope to be the
trigger source for an external instrument.
When you select this option you will seea field next to the words “BNC
output armed by.” Selecting this field givesyou a pop-up with either
two or three options. One option is Off. This indicates that the logic
analyzerwill not trigger an external instrument. The other options are
the internal analyzers,listed by name. You can select the analyzer for
triggering your external instrument by using the KNOB to position the
cursor on the appropriate name and pressingSELECT.
.-
HP 1652B/1653B
Front-Panel Reference
I/O Menu
5-17
If for some reasonboth of the internal analyzersare off, selecting the
External BNC Configuration option givesyou the message“BNC
output armed by : Off (note: both machinesare off).”
Self Test
The Self Test option in the I/O menu allows you to run a self test on the
logic analyzer.The self test is on the PV disk. Selecting this option
givesyou a pop-up telling you what effect the self test has on
the analyzer.The pop-up also contains two fields: Cancel and Start
Self Test. Cancel lets you changeyour mind about running the self test.
Selecting this field returns you to the I/O menu. Selecting the Start Self
Test field causesyour logic analyzerto load the self test from the disk
and run through it. Before selectingthis field you must insert the
master disk with the self test on it.
I
Note ‘@
Running the self test destroysall current configurations and data.
Make sure that you saveany important configurations on a disk before
running any of the self tests.
For a description of the individual self tests,refer to appendix E, in
volume 2 of this manual.
I/O Menu
S-18
HP 16528/1653B Front-Panel Reference
-
Disk Drive Operations
Introduction
This chapter describesthe disk operations of the HP 1652B/53Bin a
task format. The disk operations are described in detail in chapter 5.
The Disk
Operations
Available
Nine disk operations are available:
l
0 Load - Instrument configurations and data can be loaded from
the disk. Inverse assemblerscan be loaded.
Store - Instrument configurations and data can be stored on disk.
Systemfiles cannot be stored.
Autoload - Designatesa configuration file to be loaded
automatically the next time the HP 1652B/53Bis turned on.
Copy - Any file on the disk can be copied from one disk to
another or to the samedisk.
Duplicate Disk - All files from one disk are copied to another
disk. The directory and all files on the destination disk will be
destroyed with this operation. The copied files are packed on the
new disk as they are copied.
Pack Disk - This function packs files on a disk. Packing removes
all empty or unused sectorsbetween files on a disk so that more
spaceis available for files at the end of the disk.
Rename - Any filename on a disk can be changedto another
name.
Purge - Any file on a disk can be purged (deleted) from the disk.
-
Format Disk - Any two-sided 3.5inch floppy disk can be
formatted or initialized. The directory and all files on the disk will
be destroyedwith this operation.
HP 1652B/1653B
Front-Panel Reference
Disk Drive Operations
6-l
Although default valuesare provided for these disk operations, you
may have to specify additional information. This information is entered
by selectingthe appropriate fields displayed for each disk operation.
Disk operations are initiated by selectingthe Execute field If there is a
problem or additional information is needed to executean operation,
an advisoryappears near the top center of the screen displaying the
statusof the operation (an error messageprompts to swap disks, etc.).
If executinga disk operation could destroy or damagea file, another
pop-up appearswith the options Cancel and Continue when you select
Execute.If you don’t want to complete the operation, select Cancel to
cancel the operation. Otherwise, select Continue and the operation will
be executed.
Disk Drive Operations
6-2
HP 16528/1653B
Front-Panel Reference
--
-
Accessing the
Disk Menu
To display the Disk Operations menu, press the I/O menu key.
When the I/O pop-up menu appears,place the cursor on Disk
Operations and pressSELECT. You will see the Disk Operations
menu,
Olsc opsrslloar
(EiiT)
from 1110 [DR"nTEsrl
CEnscuts)
Fllenaare
l DRlltllES1
n IXEmEtm
-
DesllriDtlon
165./l smr 10
16SO/l,config
TInIw6 ml0
HIXED rWM DEnO
Figure &l.
HP 16528/1653B
Front-Panel Reference
4
Disk Operation Menu
Disk Drive Operations
63
Selecting a
Disk Operation
To select a disk operation, place the cursor on the field directly below
Disk Operations and pressSELECT. You will see the following
pop-up:
l ’
L
Load
Store
Auto1 oad
COPY
A
1
.
rDuplicate Disc
1
1 Pack Disc
,
Rename
Purge
Format Disc
Figure 6 - 2. Disk Operations Popup Menu
When the pop-up appears,place the cursor on the operation you want
and pressSELECT. After you select an option, the pop-up closesand
displaysthe fields required for your operation. For example,select
Store. The Disk Operations menu now looks like this:
ion
l DRDllTELl
llI%EDDEflo
1650/l zonf
16SO/l,conflg
10
lI?U)lE
l
DEIUI
MIXED IlDDE DEI’UJ
I
Figure &3. Store Operation
Disk Drive Operations
6-4
HP 16528/1653B
Front-Panel Reference
.Disk Operation
Parameters
The disk operation parametersconsist of the information that the disk
operation acts upon. They tell the logic analyzer the names,types,and
descriptions of files. To changethese parameters,select the
appropriate field and the field will either toggle to the opposite
function or a pop-up will appear. If a pop-up appears,select the
appropriate option or enter data with the keypad.
To initiate the disk operation function you have selected,place the
cursor on Execute. A pop-up appearswith Continue and Cancel. To
continue, place the cursor on Continue and press SELECT. To cancel
place the cursor on Cancel and pressSELECT. The Autoload, Pack
Disk, and Rename functions immediately executebecausethey are not
destructive to the files. These functions do not give you the Cancel and
Continue options.
DArc operaUrn8
[
copy
1 fllo
(3iiiq
IDR"rrsr]
lo
IoRRnrrsTJ
(TZZiT)
I
0 DRNITEST
flI%EODEW
1 MO/ I roar
16SD/l,conf
Aa
Ig
lINIw6
tlIXED
DEIID
fIDDE DEtlO
4
Figure 6-4. Disk Operation Parameters
HP 1652B/l653B
Front-Panel Reference
Disk Drive Operations
es
Installing a
Blank Disk
Note
Included with the HP 1652B/53Bis a blank 3.5.inch flexible disk for
your own use.To install the blank disk, hold the disk so that the
Hewlett-Packard label is on top and the metal auto-shutter is away
from you. Push the disk gently, but firmly, into the front disk drive until
it clicks into place.
I
IIC
d
The HP 1652Bl53Bdisk drives use the gray Hewlett-Packard
double-sided disks,which can be ordered in a packageof ten with the
Hewlett-Packard part number 92192A.DO NOT use single-sided disks
with the HP 1652Bl53B.
Figure 6-5. Installing a Disk
Disk Drive Operations
6-6
HP 16528/16538
Front-Panel Reference
-
Formatting a
Disk
Note
Before any information can be stored on a new disk, you must first
format it. Formatting marks off the sectors of the disk and createsthe
LIF (Logical Interchange Format) directory on the disk. If you initiate
a Duplicate Disk operation, the logic analyzerwill automatically format
the destination disk.
I
IIC
d
The HP 1652B/53Bdoes not support track sparing. If a bad track is
found, the disk is considered bad. If a disk has been formatted
elsewherewith track sparing, the HP 1652B/53Bwill only read up to
the fist spared track.
. Select the Format Disk operation.
Disc
Oeors tAam8
[ Format DISC
1
.-
ai
Fllrnarnr
-
e)rrctlPtlO”
m fllo*...
Figure 6-6. Format Disk Operation
After the Format Disk operation menu appears,the instrument reads
the disk and showsits condition. One of three conditions can exist:
l
l
HP 1652B/1653B
Front-Panel Reference
If this is a new disk, or a disk formatted by a disk drive not using
the LIF format, the menu will display UNSUPPORTED DISK
FORMAT on the lower portion of the menu.
If the disk is already formatted, but has no files, the menu will
display No Files.
Disk Drive Operations
6-7
l
If the disk already has files, a list of file namesappear on the
lower portion of the menu along with a file type and description.
If any of the listed files need to be saved,copy them to another disk
before initiating the Format Disk function. To initiate the Format Disk
function, select Execute.When the pop-up appears,select Continue
and the instrument will format the disk. Otherwise, select Cancel to
cancel the Format Disk operation.
Once you press Continue, the Format Disk operation starts and
permanently erasesall the existing information from the disk. After
that, there is no way to retrieve the original information.
Disk Drive Operations
6-a
HP 16528/1653B
Front-Panel Reference
Storing to a
Disk
The Store operation allows you to store your configurations and data to
a file with a description of its contents. You must assigna file name for
each file in which you wish to store data.
Select the Store operation.
store
Disc
Opnstlons
]
Flla
l DRRflfEST
ttIXEDDEflD
to
errcrlptton
film
CEED
-1
[[(@Kiiiq
16SD/l.COlIf
AD
TINXlc
lbSO/l,conf
Ig
HIXED MODEDEtlD
OfIS
0
Figure 6-7. The Store Operation
To name your ffie, place the cursor on the field to the right of “to file”
and press SELECT. The Alpha Entry pop-up appears.
Enter a filename that starts with a letter and contains up to ten
characters.It can be any combination of letters and numbers,but there
can be no blank spacesbetween any of the characters.
Entering a file description is the sameprocessas naming a file except
you can enter up to 32 characters,start the description with a number,
and enter spacesbetween characters.
Note
HP 1652B/l653B
Front-Panel Reference
The field for “file description” makesit easier to identify the type of
data in each file. This is for your conveniencebut you can leave this
field blank.
Disk Drive Operations
&9
When you have completed entering the file name and file description,
you initiate the store operation by placing the cursor on Execute and
pressingSELErTT. A pop-up appearswith Continue and Cancel. To
continue, place the cursor on Continue and pressSELECT. To cancel,
place the cursor on Cancel and pressSELECT.
Caution
Disk Drive Operations
6-10
If you store a new configuration and data to an existing file, they are
written over the original information “DESTROYING” the original
information in that file.
HP 16528116538
Front-Panel Reference
The Load
Operation
The Load operation allows you to load previously stored configuration
and data from a file on the disk.
Select the Load operation.
4 auwLDDo
wtolwLflIo
rtstw: OISamLED
DEF RULT
HP 16501TR
16SO/l,conflg
l6SO/l,conflg
invrr80,srraa
lnvers~,rrsea
lnvarrr,srru
LOhD THIS FILE TO DEFWLT THE LII
ACUJfRE HP1650 CHARACTERS
66000 Ih FOR INTERFhCE
1-O
66020 INVERSE CISSEnBLER
lWO
eo386 IA nml 80x87
1-O
200 ZFI FOR INTERFKE
1.0
STATE/lItlING FORtWiT
STNE SWlBOLS DEFINED
168000,1
168020,IP
18036bwO7
IZ80,I
lnvrrsr,osrn
sEnJP,l
SETUP2
16SO/l,conflg
lbSO/l,conflg
4
Figure &8. The Load Operation
Note
,tt
3
The Load operation is type dependent. This meansthat you cannot
load a systemfile. For example,if you try to load the file “SYSTEM,”
an advisory “warning: Invalid file type” appears in the top center of the
display.
To load the desired file, press the up/down ROLL key and rotate the
KNOB until the desired file appears in the field to the right of “from
file .n
Another way to enter the name of the file in the field to the right of
“from fde” is to select this field. When the Alpha Entry pop-up appears,
enter the correct filename.
-
HP 1652B/l6538
Front-Panel Reference
Disk Drive Operations
6-11
Renaming a File
The Rename operation LOWS YOU to changethe name of a file. The
only restriction is that you mot rename a file to an already existing
filename.
Select the Rename operation. When you have completed entering a
new file name and description, you initiate the Rename operation by
placing the cursor on Execute and pressingSELECT.
6 nuloLoaD
DEFAULT
HP16501TR
166000,1
I6eO20,IP
10036647
I2802
SETUP-1
SETUP2
rutoloadJ
il.
lbSO/l,conf
16SO/l,conf
invrr8a,o8aea
Invrrse,asrem
lnv~rro,ssrom
Ig
Ig
lnvmrsr,osraln
1650/l,conf
l65011,conf
lg
lg
stcltus:
DISlBLED
l
LOCI0 THIS FILE TO DEFWLT THE LA
ACQUIRE HP 1650 CHARACTERS
68000 I(I FOR INTERFACE
1-O
66020 INVERSE CISSEfWLER
1-O
1-O
80386 IA HITH bOXb7
260 ICI FOR INTERFKE
1-O
STATE/TItlING FORMAT
STATE SVRBOLS DEFINED
Figure 6-9. Renaming a File
Use either the KNOB or the Alpha Entry pop-up to enter the filename
you wish to changein the field to the right of “file.”
Move the cursor to the field to the right of “to” and press SELECT.
When the Alpha Entry pop-up appears,enter the new file name. When
you have completed entering the new file name,you initiate the rename
operation by placing the cursor on Execute and pressingSELECT’. The
rename operation immediately executesand when it is completed, an
advisory “Rename operation complete” is displayed.
Disk Drive Operations
642
HP 16528116538
Front-Panel Reference
-
The Autoload
Operation
Autoload allows you to designatea configuration file to be loaded
automatically the next time the HP 1652B/53Bis turned on. When the
Autoload operation is enabled, your designatedconfiguration file is
loaded instead of the default configuration file. This processallows you
to changethe default configuration of certain menus to a configuration
that better fits your needs.
Select the Autoload operation. To enable Autoload, select the Disable
field and when the pop-up appears,select Enable.
With the up/down ROLL key and KNOB or the Alpha Entry pop-up
enter the name of the configuration file you wish to load in the field to
the right of “File” and select Execute. The Autoload function is
Enabled as shown after “Current Autoload status:”on the display.
Note
When power is applied to the logic analyzer,Autoload On or Off is
determined by the presenceof an enabled autoload file on the disk. If
an enabled autoload file is present on the disk, the logic analyer will
load this configuration fde instead of the standard configuration fde.
(EK)
Dire Oeorotims
LEnral,]
,
Currmnl
Currant
outolood
butoload
file
ttrtur
I1 lo
rllrnsnrr-
l w1u0nD
DEFMJLT
HP 16SOlTR
fmoo0,I
168020,IP
IBOSB6J37
1280-X
.-
plm?L0~
]
1 Enabled
1 AUTDLOAD
(Wj
DlrcrtalfO”
outolooLf ilo
lbSO/l,conf Lg
16SD/l,conf 1g
invor80,08rn
inversr,rssom
1nvrrtm,stsn
invrrse,stsom
16SO/l,conf Ig
lbSD/l-conf Ig
Figure HO.
rtotro:
EmbLED
file:
DUIDlMD
l
LO&D THIS FILE TO DEFWLT THE LCI
ACOUIRE HP1650 CWACTERS
6BOOO
ICI FORINlERFhCE
de020 INVERSE ASSERBLER
8osB6 IA nxTH 00x07
280 ICI FOR INTERFACE
STfWE/TItlINCFORHAT
1-O
1-O
1-O
1-O
STATE SW’IBWS OEFINED
Autoload Operation Enabled
To disable the Autoload operation, select enable and when the pop-up
appears,select disable. When the pop-up closes,select Execute and
the Autoload function is disabled.
HP 1652B/16538
Front-Panel Reference
Disk Drive Operations
6-13
Purging a File
Caution
Select the Purge operation to Purge (delete) a file. With either the
up/down ROLL key and KNOB or the Alpha Entry pop-up enter the
file you wish to purge in the field to the right of “file.” Select Execute
and when the pop-up appears,select Continue and the file is purged
fromthedisk.
’
Once EXECUTED, the Purge operation permanently erasesthe file.
After that, there is no way to retrieve the orginal information.
Disc
opmrstlnt
Purge
J fila
piiKGq
filrnalnrI
l nuIoLonD
OEFWLT
HP16SOLTR
168000,I
16802OJP
100586-87
IZbOA
SETUP-1
SETUP2
rutolood~lilr
1650/l,conf
1650/l,conf
inver8o,a8rm
invars~,ascon
lnv~rso,as8rr
Invrrs~,assm
I650/l,conf
1650/l,conf
rtmtrs:OISnbLEb
Ig
tg
Disk Drive Operations
Loci0 THIS FILE TO DEFWLT
hCOUIRE HP1650 CHARfItTERS
60000 ICI FOR INTERFACE
68020 INVERSE ASSEMLER
00506 ICI HITH 00x07
fig
lg
Figure Ml.
6-14
on
ZOO ICI FOR INTERFKE
SlR?'E/tItlING FORIWV’
l
THE LFI
1-O
1-O
1-O
1-O
STATE SYtIbDLS DEFINED
Purging a File
HP 1652B/l653B
Front-Panel Reference
Copying a File
The Copy operation allows you to copy a file to the samedisk or
another disk. Select the Copy operation. With either the up/down
ROLL key and the KNOB or the Alpha Entry pop-up, enter the
filename you wish to copy in the field to the right of “file.” Select the
field to the right of “to” and when the Alpha Entry pop-up appears,
enter the name of the file you want to “copy to.n
You can also copy a file to the samefilename on another disk. To do
this, select the To” filename field, pressthe CLEAR ENTRY key
place the cursor on Done and press SELECT. This copies the original
filename in the “To” filename field.
Select Execute to start the copy operation. A pop-up appears with
instructions on what to do with the disks. Since you can copy a file to
the samedisk or another disk, simply follow the instructions as they
apply to your situation and select Continue to continue.
l
When “Insert the source disk” appears,remove the source disk
and insert the destination disk into the disk drive if you are
copying the file to another disk. The cursor is located on
“Continue,” so to continue, pressSELECT; otherwise, place the
cursor on “Stop” and pressSELECT. If you are copying to the
samedisk, press “Continue” without moving the disk.
If the fde cannot be copied in a single operation, the instruction “Insert
the source disk” will appear in the pop-up. Remove the destination
disk, re-insert the source disk and select Continue. The logic analyzer
reads another segmentof the source file. It will then tell you when to
re-insert the destination disk and continue.
Note
-
HP 16528/1653B
If the source file is large (ie. Systemfile) you should use the Duplicate
Disk operation. Duplicating large files using the Copy operation
requires changing disks many times. This invites the possibility of losing
track of the disk changes,which will destroy part or all of the files on
the source disk.
Disk Drive Operations
6-15
When the copy operation is complete, you will seethe new file name in
the directory. The new file name will be inserted in the directory in
alphabetical order.
I
I
I
I
__.-.
---..OEFFHJLT
HP 16501TR
I6woOJ
168020,IP
I8oftJ6~7
IZ8O.I
SETUP,1
sElw3
rtrtw:
16SCVl,conf Ig
lfSSD/l,conf la
invrr rr,srs&
invwse,rssem
inverss-asswn
lnvrrsr,ossn
16SO/l,conf lg
16SO/l,conf
Figure 642.
Disk Drive Operations
&16
Ig
DISauEB
LOCI0 THIS FILE TU DEFWLT THE LFI
ACOUIRE HP 1650 CHARACTERS
1-O
6WOO IA FOR INTERFACE
1-O
68020 IMVERSECISSEHBLER
1-O
eose6 IA nrlH etoxe7
1-O
ZOO ICI FOR INTERFKE
ST4iTE/fIHING
FORM1
STATE SVtibDLS DEFINED
Copy File Operation
HP 16528/16538
Front-Panel Reference
A
r
7
The Pack Disk
Operation
By deleting files from the disk and adding other files, you end up with
blank areason the disk (between files) that are too small for the new
files you are creating. The Pack Disk operation packs the current files
together, removing unused areasfrom between the files so that more
spaceis available for files at the end of the disk.
Select the Pack Disk operation. To pack the disk, select Execute.
1
Pack Disc
1
(Ewecute)
omtolorLfi1o
l AulOLOAD
DEFAULT
HPI65OITR
16I5ODO,I
168020,IP
180386-67
12~0-1
SETUP,1
SEW2
165O/l,conf
ig
165O/l,conf
tg
Inverse-ersan
1nvor se,esmm
invorso,essom
1nverse,es8em
165O/l,conf
ig
165O/l,conf
ig
rtcltmr:
BISfiOLED
4
LOhD THIS FILE TO DEFAULT THE LA
MXNJIRE HP1650 CHCIRACIERS
68000 ICI FOR INTERFACE
Ei
66020 INVERSE CISSEtlBLER
Ia
50386 IA HIlH 80X87
I-0
280 ICI FOR INTERFACE
STATE/TItlING FORtWiT
STRTE SVHBMS DEFINED
Figure 643. The Pack Disk Operation
HP 16528/1653B
Front-Panel Reference
Disk Drive Operations
&17
Duplicating the
Operating
System Disk
The Duplicate Disk operation allows you to duplicate all the files on
one disk to another disk. You use this operation to make a back-up
copy of your important disks so you won’t lose important data in the
event the disk wears out, is damaged,or a file is accidently deleted.
Select the Duplicate Disk operation and press Execute. When the
pop-up appears you will seethe following advisory:
I
Duplicate
Disc
Dupl icate
disc u8e8 al 1 Of 8y8tOI8
tan t0 help 8pOOd
up
the process of clupllcstlng
discs.
This will
DESTROY
the current
configuration
and data and will
require
e
reboot
of the system uhen duplication
is conploto.
Figure 6-14. Duplicate Disk Popup
Caution
The original directory and files on the destination disk are destroyed by
the DUPLICATE DISK operation.
To continue, select Continue. The instruction “Insert disk to be
copied-hit select when ready” will be displayed. Insert the source disk
and pressSELECT. The logic analyzerreads the source disk and
displays “Reading from source disk. Pleasewait...”
When the logic analyzerhas filled memory or has read the entire
source disk, it displays“Insert destination disk-hit selectwhen ready.”
Remove the source disk, insert the destination disk and press
SELECT. When the logic analyzerstarts writing to the destination disk,
you will see“Writing to destination disk. Pleasewait...”
Note
Disk Drive Operations
6-18
If the destination disk has not been formatted, the logic analyzerwill
automatically format the disk before it writes to it.
HP 16528/16538
Front-Panel Reference
If the amount of data on the source disk exceedsthe available memory
in the logic analyzer,the logic analyzerwill display “Insert the source
disk-hit selectwhen ready” again, and you will need to repeat the
processof inserting the source disk, then the destination disk. Follow
the directions on screenuntil the entire disk is duplicated.
When the entire disk is duplicated, you will see“Hit FORMAT key to
copy another disk or insert systemdisk and hit SELECT to reboot.” If
you are finished duplicating disks, insert the systemdisk and press
SELECT. The logic analyzerwill load the systemfile and return you to
the SystemConfiguration menu.
HP 16528/1653B
Front-Panel Reference
Disk Drive Operations
049
7
Making Hardcopy Prints
Introduction
The HP 1652B/l653B Logic Analyzers allow you to
print configurations, waveforms,and Iistings.Whenever your printer is
connected to the logic anaIyzerand you instruct it to do so, it will print
what is currently displayed on screenor all data in the menus having
off-screen data.
This chapter showsyou how to set up the logic analyzer’sHP-IB and
RS-232Cinterfaces for printers. If you have a Hewlett-Packard
ThinkIet, QuietJet, or LaserJet seriesprinter with the RS-232C
interface, the RS-232Cinterface is already set up for you with the
exception of the printer type and page width.
If you have another kind of printer, refer to your printer manual for
its interface requirements and changethe logic analyzer’sinterface
configuration as instructed.
Supported
Printers
The HP 1652B/1653Blogic analyzerswill support the fohowing printers
with HP-IB or R&23X capabilities. For the following RS-232C
printers, these configurations should be used:
HP ThinkJet (RS-232C switchesset for HP controllers)
HP QuietJet (factory settings)
l
HP LaserJet (factory settings)
0 Alternate
l
l
HP 16528/1653B
Front-Panel Reference
Making Hardcopy Prints
7-1
Alternate Printers
In addition to HP printers, the logic analyzerssupport Epson@
compatible RS-232Cprinters. These alternate printers must support
graphics.
When the logic analyzer’sRS-232Cconfiguration is s&tfor alternate
printers, it transmits data to the printer in the Epson format.
Printers incompatible with either HP or Epson data transfer formats
will not work with the HP 1652B/1653Blogic analyzers.
Hooking Up
Your Printer
If your printer is already connected to the logic analyzer,skip to
“Setting the RS-232Cfor HP Printers” or “Setting the HP-IB for HP
Printers” in this chapter. Otherwise hooking up your HP printer is just
a matter of having the correct HP-IB or RS-232Cinterface cable. Refer
to the figure below.
Figure 7-l.
Logic Analyzer to Printer Hook-up
The type of connector on the printer end of the interface cable is
determined by the kind of printer.
Ma king Hardcopy Prints
7-2
HP 16528/1653B
Front-Panel Reference
*
___------
HP-IB Printer
Cables
You can use any standard HP-IB cable to connect the logic analyzer to
the printer. The specific HP-ES cable only depends on the length you
need.
RS-232C
Printer Cables
You can use either an HP l3242G or HP 92219H cable to connect the
logic analyzer to the printer. However, the HP l3242G is the preferred
cable since it can be usedwith either no protocol (hardware
handshake)or XON/XOFF.
HP 132426 Cable
The HP 132426 cable has standard DB-25 connectors on each end and
is wired for hardware handshake.The cable schematicis shown below.
PRINTER
CHASSIS
SIGNAL
GROUND
1
TD
2
RD
3
GROUND
7
DTR
20
CTS
5
DSR
6
LOGIC
ANALYZER
1
,
CHASSIS
GROUND
TD
RD
1
7
7
A
SIGNAL
1 5
CTS
4 6
DSR
1 20
DTR
GROUND
165WBL82
Figure 7-2. HP 1342G Cable Schematic
Note
HP 16528/1653B
Front-Panel Reference
HP 132426 cable ends are the same,therefore it doesn’t matter which
end of the cable is connected to which piece of equipment.
Making Hardcopy Prints
7-3
HP 92219H Cable
The HP92219H cable has standard DB-25 connectors on each end and
is wired for XON/XOFF handshake.The cable schematicis shown
below.
CHASSIS
PRINTER
,
GROUND 1
LOGIC ANALYZER
,
?
- 1
CHASSIS
c
SIGNAL
GROUND
7
-
GROUND
,
7
SIGNAL
GROUND
‘
165WBL03
Figure 7-3. HP S22lSH Cable Schematic
Setting HP-IB
for HP Printers
The HP 1652BJ53Binterfaces directly with HP PCL printers
supporting the printer command language.These printers must also
support HP-IB and “Listen Always.” Printers currently available from
Hewlett-Packard with thesefeatures include:
l
l
l
Id
Note d
HP2225AThinkJet
HP 2227B QuietJet
HP 363OAoption 002 PaintJet
The printer must be in “Listen Always” when HP-IB is the printer
interface. The HP 1652B/53BHP-IB port does not respond to service
requests(SRQ) when controlling a printer. The SRQ enable setting for
the HP-IB printer has no effect on the HP 1652B/53Boperation.
For HP-IB printers, the Printer connected to field must be set to
HP-IB in the I/O Port Configuration menu. You accessthe I/O Port
Configuration menu by first accessingthe I/O menu, then the I/O Port
Configuration.
Making Hardcopy Prints
7-4
HP 16528/1653B
Front-Panel Reference
._ -_--
--
__
*---
Setting
RSm232Cfor
HP Printers
‘!
All three seriesof HP printers (HP ThinkJet, HP LaserJet, and
HP QuietJet) use the logic analyzer’sRS-232Cdefault configuration
with only one or two changesdepending on which printer you have.
Since the logic analyzer’sdefault RS-232Cconfiguration is set for the
HP ThinkJet printer, no changesare needed for the HP ThinkJet.
For RS232C printers, the Printer connected to field must be set to
RS-232Cin the I/O Port Configuration menu. You accessthe I/O Port
Configuration menu by fast accessingthe I/O menu, then the I/O Port
Configuration.
Listed below, are the changesyou need to make for other HP printers:
l
l
Printer type for the HP LaserJet and HP QuietJet.
Paper width for the HP QuietJet.
You accessthe printer type and page width fields by first accessingthe
I/O menu, then the I/O Port Configuration menu.
Setting
RSm232Cfor
Your Non-HP
Printer
The following attributes of the RS-232Cinterface must be set to
the correct configuration for your printer:
0 Protocol.
l
Number of data bits.
l
Number of stop bits.
0 Parity type.
l
Baud rate.
l
Paper width.
You accessthese fields by first accessingthe I/O menu then the I/O
Port Configuration menu.
HP 16528/16538
Front-Panel Reference
Making Hardcopy Prints
7-S
Setting Paper
Width
field in the I/O
Paper width is set by toggling the Paper width :
Port Configuration menu. It tells the printer tha=are
sendingup to
80 or 132characters per line (only when you Print All) and is totally
independent of the printer itself.
l
l
l
RS=232C
Default
Configuration
If you select 132charactersper line (13.5 inches) when using
other than an HP QuietJet selection, the listings are printed in a
compressedmode. Compressedmode usessmaller charactersto
allow the printer to print more characters in a given width.
If you select 132charactersper line (13.5 inches) on an
HP QuietJet, it will print a full 132characters per line.
If you select 80 charactersper line for any printer, a maximum of
80 characters are printed per line.
You can use the logic analyzer’sdefault configuration (except for
printer type and paper width) for all supported printers if you haven’t
changedthe printer’s RS-232Cconfiguration.
The logic analyzer’sdefault configuration is:
Protocol: XON/XOFF
Data Bits: 8
Stop Bits: 1
Parity: none
Baud rate: 9600
Printer: ThinkJet
Paper width: 8.5 inches
Recommended
Protocol
Making Hardcopy Prints
7-6
The recommended protocol is XON/XOFF. This allows you to use the
simpler three-wire hook-ups.
HP 16528/1653B
Front-Panel Reference
_
Starting the
Printout
When you are ready to print, you need to know whether there is more
data than is displayed on screen.In caseswhere data is off screen (i.e.,
format specifications with all pods assignedto a single analyzer),you
need to decide whether you want just the data that is on screenor all
the data.
If you want just what is on screen,start the printout with the Print
Screenoption. If you want all the data, use the Print All option. Both
options are in the I/O menu. Once you decide which option to use,start
the printout bv placinn the cursor on the print option (screen or all)
andbressing S&C+.
7
I/O MENU
l
Done
0 Print Screen
0 Print All
l
Disk Operations
0 I/O Port Configuration
l
External BNC Configuration
0 Self tests
Figure . 7 - 4. I/O Menu
The Print Screen option prints only what is displayed on screenat the
time you initiate the printout. In the Print Screenmode, the printer
usesits graphics capabilities and the printout will look just like the
logic analyzer screenwith only one exception: the cursor will not print.
Print All
Note
HP 16526/16538
Front-Panel Reference
The Print All option prints not only what is displayed on screen,
but also what is below, and, in the Format Specification, what is to the
right of the screen at the time you initiate the printout.
Make sure the first line you wish to print is at the top of the screen
when you select Print All. Lines abovethe screenwill not print.
Making Hardcopy Prints
7-7
Use this option when you want to print all the data in the following
menus:
l
l
l
l
l
l
What Happens
During
a Printout?
Timing Format Specifications.
State Format Specifications.
State Trace Specifications.
State Listing.
Symbols.:
Disk Directory.
When you press SELEa to start the printout, the I/O menu pop-up
disappearsand an advisory “PRINT in progress” appearsin the top
center of the display. While the data is transferred to the printer, the
only useablekey is the STOP key. When the logic analyzer has
completed the data transfer to the printer, the advisory “PRINT
complete” appears and the keyboard becomesuseableagain.
The PRINT in progressadvisorywon’t appear in your printout. If you
pressSTOP while the data is being transferred to the printer the
transfer stops and the data already sent will print out. This causesan
incomplete printout.
Making Hardcopy Prints
7-8
HP 16528/16538
Connecting to
Other HP
Printers
The HP 1652B/53Bcan also be used with Hewlett-Packard printers
that have RS-232Cinterface options. Simply connect the printer with
the HP 132426 cable. Refer to table 7-1 for the appropriate selection
for the RS-232Cconfiguration of the HP 1652B/53B.
Table 7-l. HP Printer Selection
I
For this HP Printer
Select this Printer in
I/O Port Configuration menu
HP 2631
QuietJet
HP 2671
ThinkJet
HP 2673
ThinkJet
I
The above printers should work with the HP 1652B/53Blogic
analyzers.However, no testshavebeen made to verify that they will
work completely. Therefore, proper operation is neither promised nor
supported by Hewlett-Packard.
HP 16528/1653B
Front-Panel Reference
Making Hardcopy Prints
7-9
The State Analyzer
Introduction
This chapter introduces the state analyzer. and contains the state
analyzermenu maps.
l
l
l
l
l
l
l
Chapter 9 explains the State Format menu
Chapter 10explains the State Trace menu
Chapter 11explains the State Listing menu
Chapter 12 explains the State Compare menu
Chapter 13 explains the State Chart menu
Chapter 14 explains the State Waveform menu
Chapter l!5 givesyou a basic State Analyzer Measurement
example
The State
Analyzer
(An Overview)
The state analyzer acquires data synchronouslyusing the
system-under-testto clock the acquired data. The acquired data is
displayed in a list form in the State Listing menu and in waveform form
in the State Waveform menu. The state analyzer differs from the timing
analyzerin that the acquisition clock is provided by the
system-under-testinstead of the internal acquisition clock used by the
timing analyzer.Therefore, the State Waveform menu displaysthe state
waveformsreferenced by statesper division and not secondsper
division as in the timing analyzer.
State Analyzer
Menu Maps
The State Ana.+er menu maps show you the fields and the available
options of each field within the six menus.The menu maps will help
you get an overview of each menu as well as provide you with a quick
reference of what each menu contains.
HP 16528/1653B
Front-Panel Reference
The State Analyzer
6-I
State Format
Menu Map
1 State
ynaiyzer
]
Listing
7 Clock
Per iod
*
>60ns
<60ns
A Off
Clock
-
Base
-Symbol
Width
-
1
-
t
-
z
-
Low
-
High
,
(
Pattern/Range
Pod
Norma I
Clock
r
-
TTL
fECL
1
Turn
Labels
-
Label
Modi
fy
-Turn
Bit
-
Field
Polarity
On
Label
Label
I
’ ttl
User
Off
-Assignment
,
’
+
(positive>
-
(negative)
016m32
Figure 6-I. State Format Menu Map
The State Analyzer
8-2
HP 16528/l 6538
Front-Panel Reference
State Trace
Menu Map
I
I
I
I
Formot
Trace
Sequence
- Levels
4
Insert
Listing
Level
Conce
H
I
Before
Delete
Level
Cance
I
After
Execute
While
storing
H
H
state
no
range
+ range
q
1
1
Combination
Enable
on
Store
I
Find
-
onystate
-
no
-
a-h
-
#a-fh
state
-
range
-
#range
-
f range
*
Combination
-
Combination
,nurneric
Keypod
Elntry
t
Continued
on
next
page
01650833
Figure 8-2. State Trace Menu Map
HP 16528/16538
Front-Panel Reference
The State Analyzer
6-3
Continued
from
Armed
previous
page
I
by
Run
-
BNC Input
Machine
Off
1 or
2
t
-
Restart
-
Per
anystate
Level
States
+
no
state
H
a
h
I
anystate
H
no
state
Combination
,
Off
On
1 Binary
-
Octal
,
Decimal
4
Combination
I
b
Hex
H
ASCII
Symbo I
data
entry
keypad
data
entry
keypad
016soe34
Figure 8-2. State Trace Menu Map (continued)
The State Analyzer
8-4
HP 16528/1653B
Front-Panel Reference
State Listing
Menu Map
State
Analyzer
I
I
I
Trace
Format
I
-
Pattern
-
Time
-
Statistics
X-pattern
O-pattern
nurner
i c en try
keypad
Tr i gger
Start
,
Stop
Specify
Stop
Measurement
measurement
when
X-O
I
I
. Pattern
H x-0
doto
>
entry
data
entry
keypad
data
entry
keypad
keypad
*
Binary
**
AaT
,
*
**
This
field
Depends
on
Time
States
Count
for
repositioning
is used
field
what
the Count
is
set
labels
to
in
or
v
Relative
Absou
i n the
State
lute
di Splay
Tr ace Spt cification
menu
Figure 8-3. State Listing Menu Map
HP 16528/1653B
Front-Panel Reference
The State Analyzer
8-5
State Compare
Menu Map
1 State
Analysis
I
I
Cornpar
I
e
State
Compare
1
1
,
WF
Chart
Cance
Listin’g
Difference
Continue
Listing
data
Ful
q-x+
Specify
Stop
Measurement
Mask
Base
11
I
Stop
4
entry
I
qz}l-Fk
1
I
measurement
when
data
entry
keypad
data
entry
keypad
I
x-o
I
Compare
I
I
1
Assignment
Binary
I
01650836
Figure 8-4. State Compare Menu Map
The State Analyzer
8-6
HP 16526/16538
Front-Panel Reference
--II-_
^_
-
-_
_
.-
---
State
Waveform
Menu Map
I
State
I
Chart
WF
data
data
entry
entry
Compare
keypad
keypad
-
Pattern
-
Statistics
1 X-pattern
L
-
4
Lobe
O-pattern
-
from
-
Specify
trigger
Patterns
I
-
Trigger
X marker
9
1 Start
,
01650837
-
Figure 6-5. State Waveform Menu Map
HP 16528/1653B
Front-Panel Reference
The State Analyzer
8-7
X marker
>
pattern
data
entry
keypad
0 marker
>
pattern
data
entry
keypad
,
Stop
measurement
when
X-0
q
’
d
-
x-o
-
Off
-
-
Less
-
Greater
Equa
I
Not
Equal
than
data
entry
keypad
data
entry
keypad
than
-
In
range
-
not
in
range
data
Insert
-
Waveform
-
Modify
-
Waveform
-
Delete
entry
keypad
waveform
on
waveform
off
waveform
01650838
Bit
select
XX
Figure 8-5. State Waveform Menu Map (continued)
The State Analyzer
8-8
HP 1652Bj1653B
Front-Panel Reference
State Chart
Menu Map
State
Analysis
I
State
Compare
Chart
To Marker
To Range
WF
Control
Control
-
Time
-
Statistics
1
from
[ Specify
entry
Tr.i gger
Patterns
*Only
set
1
data
keypad
Trigger
7
available
when
to 0 marker.
Find
Pattern
is
,
01650839
Figure 6-6. State Chart Menu Map
HP 16528/16536
Front-Panel Reference
The State Analyzer
6-S
tt
L
X marker
pattern
0 morker
pattern
Stop
-j
measurement
xxxx
when
j-
-
data
entry
keypad
data
entry
keypad
off
t
-
-
x-0
Less
-
Compare
Greater
dot 0 entry
k ewad
than
than
,
Not
in
range
dot a entry
k ewod
b
to
data
entry
keypad
tXY
I-
Chart
of-$-/TVS,
Ymax
---j
Ymin
--ha--
Xmax
+
Xmin
-lzEl-
FFFF
FFFF
t--
f
data
entry
keypad
doto
entry
keypad
data
entry
keypad
data
entry
keypad
Figure 6-6. State Chart Menu Map (continued)
The State Analyzer
8-10
HP 16528/1653B
Front-Panel Reference
State Format Specification
Menu
Introduction
This chapter describesthe State Format Specification menu and all
pop-up menus that you will use on your state analyzer.The purpose
and functions of each menu are explained in detail, and we have
included many illustrations and examplesto make the explanations
clearer.
Accessing the
State Format
Specification
Menu
The State Format Specification menu can be accessedby pressing the
FORMAT key on the front panel. If the Timing Format Specification
Menu is displayed when you press the FORMAT key, you will have to
switch analyzers.This is not a problem, it merely indicates that the last
action you performed in the SystemConfiguration Menu was on the
timing analyzer.
State Format
Specification
Menu
The State Format Specification menu lets you configure the logic
analyzer to group channelsfrom your microprocessor into labels you
assignfor your measurements.You can set the threshold levels of the
pods assignedto the state analyzer,assignlabels and channels,specify
symbols,and set clocks for triggering.
At power up, the logic analyzeris configured with a default setting.
You can use this default setting to make a test measurementon the
systemunder test. It can give you an idea of where to start your
measurement.For an exampleof setting up configurations for the state
analyzer,refer to your GettingSttied Guide or “State Analyzer
Measurement Example” in Chapter l5 of this manual.
HP 16528/1653B
Front-Panel Reference
State Format Specification Menu
0-l
At power up the State Format Specification menu looks Iike that shown
below:
L-2
- Sl8l8 rorrt
sp#lflcstl8n
’
Clock
Clock
l,60J
PoriOd
Actlvlty
Label
Pod
)
Pal
+
CII
5
----w----e-----IS....
87
. ..I
0
l +*ooloB*+*+**+L
Figure 9-I. State Format Specification Menu
The State Format Specification menu for the HP 1653Bis similar to
that for the HP 1652Bexcept that Pod 2 appears in the menu instead of
Pod 5.
This menu showsonly one pod assignedto each analyzer,which is the
caseat power up. Any number of pods can be assignedto one analyzer,
from none to ail five for the HP 1652B,and from none to two for the
HP 1653B.In the State Format Specification menu, only three pods
appear at a time in the display. To view any pods that are off screen,
pressthe left/right ROLL key and rotate the KNOB. The pods are
alwayspositioned so that the lowest numbered pod is on the right and
the highest numbered pod is on the left.
State Format Specification Menu
9-2
HP 16528/16538
Front-Panel Reference
State FoiLmat
Specification
Menu Fields
Seventypes of fields are present in the menus:
a Label
0 Polarity (Pol)
l
Bit assignments
l
Pod threshold
l
SpecifySymbols
l
Clock
l
Pod Clock
a Clock Period
A portion of the menu that is not a field is the Activity Indicators
display. The indicators appear under the active bits of each pod, next to
“Activity > .” When the logic analyzeris connected to your target
systemand the systemis running, you will see 1 in the Activity
Indicators display for each channel that has activity. These tell you that
the signalson the channelsare transitioning.
.-
The fields in the Format menusare described in the following sections.
Label
The label column contains 20 Label fields that you can define. Of the
20 labels, the state analyzerdisplaysonly 11 labels at one time. To view
the labels that are off screen,press the up/down ROLL key and rotate
the KNOB. The labels scroll up and down. To deactivate the scrolling,
pressthe ROLL key again.
To accessone of the Label fields, place the cursor on the field and
pressSELECT. You will seea pop-up menu like that shown below.
/Turn
label
on 1
Figure Q-2. Label Pop-Up Menu
HP 16528/1653B
Front-Panel Reference
State Format Specification Menu
S-3
Turn Label On
Selecting this option turns the label on and givesit a default letter
name. If you turned all the labels on they would be named A through T
from top to bottom. When a label is turned on, bit assignmentfields for
the label appear to the right of the label under the pods.
Modify Label
If you want to changethe name of a label, or want to turn a label on
and give it a specific name,you would select the Modify label option.
When you do, an Alpha Entry pop-up menu appears.You can use the
pop-up menu and the keypad on the front panel to name the label. A
label name can be a maximum of six characters.
Turn Label Off
Selecting this option turns the label off. When a label is turned off, the
bit assignmentsare savedby the logic analyzer.This givesyou the
option of turning the label back on and still having the bit assignments
if you need them. The waveformsand state listings are also saved.
You can give the samename to a label in the state analyzer as in the
timing analyzerwithout causingan error. The logic analyzer
distinguishesbetween them. An exampleof this appearsin the Getting
StartedGuide and in chapter l5 of this manual
POhrit)/
(POl)
Each label has a polarity assignedto it. The default for all the labels is
positive ( + ) polarity. You can changethe polarity of a label by
placing the cursor on the polarity field and pressingSELECT.. This
togglesthe polarity between positive ( + ) and negative ( - ).
In the state analyzer,negativepolarity inverts the data.
Bit Assignment
The bit assignmentfields allow you to assignbits (channels) to labels.
Above each column of bit assignmentfields is a line that tells you the
bit numbers from 0 to 15,with the left bit numbered 15 and the right bit
numbered 0. This line helps you know exactlywhich bits you are
assigning.
State Format Specification Menu
s-4
HP 16528116538
Front-Panel Reference
-
The convention for bit assignmentis as follows:
* (asterisk) indicates assignedbit
. (period) indicates unassignedbit
At power up the 16 bits of Pod 1 are assignedto the timing analyzer
and the 16 bits of Pod 5 are assignedto the state analyzer.
To change a bit assignmentconfiguration.,place the cursor on a bit
assignmentfield and pressSELECT. You will see the following pop-up
menu.
I.
87
, , I , . . I . ********
15
Figure 9-3. Bit Assignment Pop-Up Menu
Use the KNOB to move the cursor to an asterisk or a period and press
SELECT. The bit assignmenttogglesto the opposite state of what it
was before. When the bits (channels) are assignedas desired, place the
cursor on Done and pressSELECT. This closesthe pop-up and
displaysthe new bit assignment.
Assigning one channel per label may be handy in some applications.
This is illustrated in chapter 8 of the Getting Started Guide. Also, you
can assigna channel to more than one label, but this usually isn’t
desired.
Labels may have from 1 to 32 channelsassignedto them. If you try to
assignmore than 32 channelsto a label, the logic analyzer will beep,
indicating an error, and a messagewill appear at the top of the screen
telling you that 32 channelsper label is the maximum.
Channelsassignedto a label are numbered from right to left by the
logic analyzer.The least significant assignedbit (LSB) on the far right
is numbered 0, the next assignedbit is numbered 1, and so on. Since 32
channelscan be assignedto one label at most, the highest number that
can be given to a channel is 31.
HP 16528/1653B
Front-Panel Reference
State Format Specification Menu
9-S
Although labels can contain split fields, assignedchannelsare always
numbered consecutivelywithin a label. The numbering of channelsis
illustrated with the figure below.
piimcq-
Ststo
For#t
Specification
Clock
J&
Clock
Period
[>60]
clcttv1
Label
tg > ------------a--IS....
87
PoI
o...
0
Bii 31
---------------15....
87
.a..
Bk 19
0
---------------15 .,,,
87
a,,,
0
Bit 8 Bit 0
Figure 94. Numbering of Assigning Bits
Pod Threshold
Each pod has a threshold level assignedto it. For the HP 1653BLogic
Analyzer, threshold levels may be defined for Pods 1 and 2 individually.
For the HP 1652BLogic Analyzer, threshold levels may be defined for
Pods 1,2 and 3 individually, and one threshold for Pods 4 and 5. It does
not matter if Pods 4 and 5 are assignedto different analyzers.Changing
the threshold of one will changethe threshold of the other.
If you place the cursor on one of the pod threshold fields and press
SELECT, you will seethe following pop-up menu.
)r
TTL
.
ECL
.
User-defined c
Figure 9-5. Pod Threshold Pop-Up Menu
TIL sets the threshold at + 1.6volts, and ECL setsthe threshold at
- 1.3 volts.
State Format Specification Menu
Q-6
HP 16528/1653B
Front-Panel Reference
--
--_
The User-defined option lets you set the threshold to a specific voltage
between - 9.9 V and + 9.9 V. If you select this option you will seea
Numeric Entry pop-up menu as shown.
.-
[[““““I
Figure 9-6. User-defined Numeric Entry Pop-Up Menu
You can changethe value in the pop-up either with the keypad on the
front panel or with the KNOB, which you rotate until you get the
desired voltage. When the correct voltage is displayed, press SELECI’.
The pop-up will close and your new threshold will be placed in the pod
threshold field.
The threshold level you specify for the 16 data bits also applies to a
pod’s clock threshold.
*-
Specify Symbols
Clock
This field provides accessto the Specify Symbolsmenu. It differs from
the other fields in the State Format Specification menu in that it
displays a complete menu instead of a pop-up. The complete
description of the Specify SymbolsMenu follows the State Format
Specification Menu fields later in this chapter.
The Clock field in the Format Specification menu displays the clocks
for clocking your system.The display will be referred to as the
“clocking arrangement.”
The HP 1652BLogic Analyzer has five clock channels,each of which is
on a pod. The clocks are connectedthrough the pods simply for
convenience.The clock channelsare labeled J, K, L, M, and N and are
on pods 1 through 5, respectively.The clocking of the state analyzer is
synchronouswith your systembecauseyour analyzerusesthe signals
present in your system.The signal you use must clock the analyzer
when the data you want to acquire is valid.
The HP 1653BLogic Analyzer has two clock channels,each on one of
the pods. The J clock is on pod 1 and the K clock is on pod 2.
HP 16528/1653B
Front-Panel Reference
State Format Specification Menu
Q-7
When you select the Clock field, you will seethe following pop-up
menu with which you specify the clock.
Figure 9-7. Clock Pop-Up Menu
You can use one of the clocks alone or combine them to build one
clocking arrangement.If you select a field to the right of one of the
clocks in the pop-up you will seeanother pop-up menu:
Figure 9-8. Single Clock Pop-Up Menu
You can specify the negativeedge of the clock, the positive edge, either
edge, a high level, a low level, or the clock to be off.
The clocks are combined by ORing and ANDing them. Clock edges
are ORed to clock edges,clock levels are ORed to clock levels, and
clock edgesare ANDed to clock levels.
For example,if you select &for the J clock, t for the K clock, for the
M clock, and - for the N clock, the resulting clocking arrangiment
will appear in the display as:
I( JJ + Kt
Clock
> l ( tl,
+ N- 11
Figure 9-9. Example of a Clocking Arrangement
State Format Specification Menu
9-8
HP 16528/1653B
Front-Panel Reference
With this arrangement,the state analyzerwill clock the data when there
is a negativeedge of the J clock OR a positive edge of the K clock,
AND when there is a low level on the M clock OR a high level on the N
clock.
You must alwaysspecify at least one clock edge. If you try to use only
clock levels,the logic analyzerwill display a messagetelling you that at
least one edge is required.
Pod Clock
Your logic analyzerhas the capability of clocking data in three
different ways.The pod Clock fields in the State Format Specification
menu.allow you to specify which of the three waysyou want to clock the
data.
Each pod assignedto the state analyzer has a pod Clock field
associatedwith it. Selectingone of the pod Clock fields gives you the
following pop-up menu:
Figure 940. Pod clock Field Pop-Up Menu
Normal
This option specifiesthat clocking will be done in single phase.That is
the clocking arrangement located in the Clock field above the pods in
the State Format Specification menu will be used to clock all the pods
assignedto this machine.
For example,supposethat the Clock field looks like the following:
Clock
Figure 9-l 1. Example of a Clocking Arrangement
In Normal mode the state analyzerwill sample the data on any assigned
pods on a negative edge of the J clock OR on a positive edge of the K
clock.
HP 16528/l 6538
State Format Specification Menu
9-9
Demultiplex
With the HP 1652B/l653B Logic Analyzers, you can clock two different
types of data that occur on the samelines. For instance,lines that
transfer both addressand data information need to be clocked at
different times in order to get the right information at the right time.
When you select the Demultiplex option, the pod Clock field changes
to “Master 1Slave,”and two clock fields appear above the pods where
just one Clock field used to be. These fields are the Master Clock and
Slave Clock, as shown:
lnflCHINEJ-
I
S tote
Fomt
tlsslsr
[
Clock
I>-j
Parlod
Actlvlty )
Label
Pal
El
(Sprcify
Clock
JC
Pod
Speclf lcatlon
Syrbols
Slave
]
I
)
Clock
ut
1
5
1-1
---------w----w-
7 . . , . 07
***I***-****.**+
. .. . 0
Figure a-12. Master Clock and Slave Clock
Demultiplexing is done on the data lines of the specified pod to read
only the lower eight bits. This is two-phaseclocking, with the Master
Clock following the SlaveClock. The analyzerfirst looks for the
clocking arrangementthat you specify in the SlaveClock. When it sees
this arrangement,the analyzerclocks the data present on bits O-7of the
pod, then waits for the clocking arrangementthat you specify in the
Master Clock. When it seesthis arrangement,it again clocks the data
present on bits O-7of the pod. The upper eight bits of the pods are
ignored and don’t need to be connectedto your system.
Notice, the bit numbers that appear abovethe bit assignmentfield have
changed.The bits are now numbered 7....07....0 instead of l5 ....87....0 .
This helps you set up the analyzerto clock the right information at the
right time.
State Format Specification Menu
940
HP 1652B/l653B
Front-Panel Reference
The address/datalines ADO-AD7 on the 8085 microprocessor are an
example of Demultiplex. During part of the operating time the lines
have an addresson them, and during other times they have data on
them. Hook the lower eight bits of one of the pods to these eight lines
and set the Slaveand Master Clocks so that they clock the data and the
address at the proper time.
In this example,you may chooseto assignthe bits in the State Format
Specification menu similarly to that shown below. In this caseyou
would want to clock the addresswith the Slave Clock and the data with
the Master Clock.
InCICHfNE]
state
I
fomt
Hester
[
Clock
PW tad
Speclf lcstlon
Pod
6kttvtty
LOtJt!l
)
1
1
5
I’]
1 Hester
Slave
Clock
1
Kt
Clock
Jk
Speclf y Symeolr
I Slave
I
1
-----w----------
Pal
=J
.
Figure S-13. Master and Slave Clock Bit Assignments
The Master and SlaveClocks can have the sameclocking
arrangements.The clocking is still done the sameway, with the lower
eight bits being clocked first on the SlaveClock, then on the Master
Clock.
Mixed Clocks
The Mixed Clocks option allows you to clock the lower eight bits of a
pod separatelyfrom the upper eight bits. The state analyzer uses
Master and SlaveClocks to do this. If you select this option from the
pod Clock pop-up, the pod Clock field changesto “Master 1Slave,”
and two Clock fields, Master and Slave,appear above the pods.
-
HP 16526/1653B
Front-Panel Reference
State Format Specification Menu
9-11
As in Demultiplex, the Master Clock follows the SlaveClock. The state
analyzerlooks for the clocking arrangementgiven by the SlaveClock
and clocks the lower eight bits. Then it looks for the clock arrangement
given by the Master Clock and clocks the upper eight bits. Unlike
Demultiplex, all 16 bits of a pod are sampled.
The Master and SlaveClocks can have the sameclocking
arrangements.The clocking is still done the sameway, with the lower
eight bits clocked on the SlaveClock and the upper eight bits clocked
on the Master Clock.
Clock Period
This field provides greater measurementaccuracywhen your state
input clock period is greater than 60 ns. When you select > 60 ns, the
state analyzerprovides greater immunity againstnoise or ringing in the
state input clock signal; also, the logic analyzerprovides greater
accuracywhen triggering another state or timing analyzer or the BNC
trigger out.
If your State input clock period is lessthan 60 ns, you should select
< 60 ns. This disablesthe Count field in the State Trace Specification
menu becausethe maximum clock rate when counting is 16.67MHz (60
ns clock period). This also turns Prestore off.
Specify
Symbols Menu
The logic analyzer supplies Timing and State Symbol Tables in which
you can defme a mnemonic for a specific bit pattern of a label. When
measurementsare made by the state analyzer,the mnemonic is
displayedwhere the bit pattern occurs if the Symbol base is selected.
It is possiblefor you to specify up to 200 symbolsin the logic analyzer.
If you have only one of the internal analyzerson, all 200 symbolscan be
defined in it. If both analyzersare on, the 200 symbolsare split between
the two. For example,analyzer 1 may have l50, leaving 50 available for
analyzer2.
To accessthe Symbol Table in the State Format Specification menu,
place the cursor on the Specify Symbols field and press SELECT. You
will seea new menu as shown.This is the default setting for the Symbol
Table in both the timing and state analyzers.
State Format Specification Menu
s-12
HP 16528/1653B
Front-Panel Reference
Figure S-14. Symbol Table Menu
Specify Symbols II
Menu Fields
ere are four fields in the Symbol Table menu. They are:
l
l
l
l
Label
Label
Base
Symbol view size
Symbol name
The Label field identifies the label for which you are specifying
symbols.If you select this field, you will get a pop-up that lists all the
labels turned on for that analyzer.
RS
LDS
UDS
DTACK
~R/W
fbDDR
DATA
El
Figure 945. Lable Pop-Up Menu
HP 16528/16538
Front-Panel Reference
State Format Specification Menu
s-13
Each label has a separatesymbol table. This allows you to give the
samename to symbolsdefined under different labels. In the Label
pop-up select the label for which you wish to specify symbols.
Base
The Basefield tells you the numeric basein which the pattern will be
specified. The baseyou choosehere will affect the pattern field of the
State Trace Specification menu. This is covered later in this chapter.
To changethe base,place the cursor on the field and press SELECT.
You will seethe following pop-up menu.
Figure 9-16. Base Pop-Up Menu
If more than 20 channelsare assignedto a label, the Binary option is
not offered in the pop-up. The reason for this is that when a symbol is
specified as a range, there is only enough room for 20 bits to be
displayed on the screen.
Decide which baseyou want to work in and choosethat option from
the numeric Base pop-up menu.
If you choosethe ASCII option, you can seewhat ASCII characters the
patterns and rangesdefined by your symbolsrepresent. ASCII
charactersrepresentedby the decimal numbers 0 to 127 (hex 00 to 7F)
are offered on your logic analyzer.Specifying patterns and rangesfor
symbolsis discussedin the next section.
I
Note @
You cannot specify a pattern or range when the baseis ASCII. Fiist
defme the pattern or range in one of the other bases,then switch to
ASCII to seethe ASCII characters.
State Format Specification Menu
s-14
HP 16528/1653B
Front-Panel Reference
Symbol View Size
The Symbol view size field lets you specify how many characters of the
symbol name wiIl be displayed when the symbol is referenced in the
State Trace Specification menu and the State Listing menu. Selecting
this field givesyou the following pop-up.
Figure S-17. Symbol View Size Pop-Up Menu
You can have the logic analyzer display from 3 to all 16 of the
characters in the symbol name.For more information see “State Trace
Specification Menu” and “State Listing Menu” later in this chapter.
Symbol Name
When you first accessthe Symbol Table, there are no symbols
specified. The symbol name field reads “New Symbol.”If you select this
field, you will seean Alpha Entry pop-up menu on the display. Use the
pop-up menu and the keypad on the front panel to enter the name of
your symbol.A maximum of 16 characterscan be used in a symbol
name.
When you select the Done field in the Alpha Entry pop-up menu the
name that appearsin the symbol name field is assignedand two more
fields appear in the display.
tlMHIME
1 -
Slplbol
Base IHexadecimal ]
Label 1-1
IRERD
(TiK)
Table
Symbol
vieu size El
llPatternj100001
Figure B-18. Symbol Defined as a Pattern
HP 1652Bl1653B
Front-Panel Reference
State Format Specification Menu
9-15
The first of these fields defines the symbol as either a Pattern or a
Range.If you place the cursor on this field and press SELECT, it will
toggle between Pattern and Range.
When the symbol is defined as a pattern, one field appears to specify
what the pattern is. Selecting this field givesyou a pop-up with which
you can specify the pattern. Use the keypad and the DON’T CARE key
on the front panel to enter the pattern. Be sure to enter the pattern in
the numeric base that you specified in the Base field.
[yt;ify
Pattern:
]
Figure 949. Specify Pattern Pop-Up Menu
If the symbol is defined as a range,two fields appear in which you
specifythe upper and lower boundaries of the range.
tmCHIW
1 -
S@ml
( Dkne )
Table
SymboI
Label
-1
Base
[Hexadecimal
1
vteu
size
[T]
Figure 9-20. Symbol Defined as a Range
Selectingeither of these fields givesyou a pop-up with which you can
specifythe boundary of the range.
Figure 9-21. Specify Range Pop-Up Menu
You can specify rangesthat overlap or are nestedwithin each other.
Don’t caresare not allowed.
State Format Specification Menu
9-16
HP 16528/1653B
Front-Panel Reference
’
To add more symbolsto your symbol table, place the cursor on the last
symbol defined and press SELECT. A pop-up menu appears as shown.
Figure 9-22. Symbol Pop-Up Menu
The first option in the pop-up is Modify symbol. If you select this
option, you will seean Alpha Entry pop-up menu with which you can
changethe name of the symbol.
The second option in the pop-up is Insert new symbol. It allows you to
specify another symbol. When you select it, you will see an Alpha Entry
pop-up menu. Use the menu and the keypad on the front panel to enter
the name of your new symbol.When you select Done, your new symbol
will appear in the Symbol Table. The third option in the pop-up is
Delete symbol. If you select this option, the symbol will be deleted from
the Symbol Table.
Leaving the
Symbol Table
Menu
HP 16526/16538
Front-Panel Reference
When you have specified all your symbols,you can leave the Symbol
Table menu in one of two ways.One method is to place the cursor on
the Done field and press SELECT. This puts you back in the Format
Specification menu that you were in before entering the Symbol Table.
The other method is to pressthe FORMAT, TRACE, or DISPLAY
keyson the front panel to get you into the respective menu.
State Format Specification Menu
947
10
State Trace Menu
Introduction
This chapter describesthe State Trace menu and the pop-up menus
that you will use on your state analyzer.The purpose and functions are
described in detail, and we have included many illustrations and
examplesto make the explanations clearer.
The Trace Specification menu allows you to configure the state
analyzerto capture only the data of interest for your measurement.In
the state analyzeryou can configure the analyzerto trigger on a
sequenceof states.The default setting is shown in figure 10-l below.
For an example of setting up a trace configuration for a State analyzer,
refer to your GeftingStartedGuide or “StateAnalyzer Measuement
Example” in Chapter 15 of this manual.
s I8 I8 fr8co spoclf lc8tlon
WJJ,
Trace
mod@(-1
ssqumce
LOvalS
1
8
2
Aramd bg
1
Hhilo storing
e my ststo”
I tlrn.9
Trigger
on *‘a*
stow
- my
Run
Branches
1
Off
ttsto”
]
]
Count
[ Off 1
I
Prsrtoro
Figure 10-l. State Trace Specification Menu
HP 16528/1653B
Front-Panel Reference
State Trace Menu
lo-l
Accessing the
State Trace
Menu
The State Trace menu can be accessedby pressingthe TRACE key on
the front panel. If the Timing Trace Specification menu is displayed
when you press the TRACE key, you will have to switch analyzers.
This is not a problem, it merely indicates that the last action you
performed in the SystemConfiguration Menus was on the timing
analyzer.
State Trace
Menu Fields
The menu is divided into three sections:the SequenceLevels in the
large center box, the acquisition fields at the top and right of the
screen,and the qualifier and pattern fields at the bottom of the screen.
Before describing the fields in the menu, we need to define a few terms.
These terms will be used in the discussionsof the fields, so
understandingtheir meaningsis essential.
Pattern Recognizers:a pattern of bits (0, 1, or X) in each label. There
are eight recognizersavailable when one state analyzeris on. Four are
available to each analyzerwhen two state analyzersare on. The pattern
recognizersare given the namesa through h and are partitioned into
groups of four, a-d and e-h.
Range Recognizer: recognizesdata which is numerically between or on
two specified patterns. One range term is available and is assignedto
the first state analyzercreated by assigningpods to it or if only one
analyzeris on, then the range term is assignedto it.
Qualifier: user-specifiedterm that can be anystate,nostate, a single
pattern recognizer, a range recognizer, the complement of a pattern or
range recognizer, or a logical combination of pattern and range
recognizers.To specify a qualifier, you will use the pop-up shown in
figure 10-2. This pop-up appearswhen accessedthrough the five
different fields encounteredwhen setting qualifiers throughout the
State Trace menu.
State Trace Menu
lo-2
HP 1652B/16538
Front-Panel Reference
-
an 688
no s a 8
a
C
~
e
rrb
ZC
zd
ze
zf
zg
zh
range
7
#range
Embina tion
I
Figure W-2. Qualifier PopUp Menu
If you select the Combination option in the pop-up, you will seea
pop-up similar to that shownbelow.
Qua1 if
1
a
ier
Specification
-1
b
8
C
2
d
range
Figure 10-3. Full Qualifier Specification PopUp
HP 16526/16538
Front-Panel Reference
State Trace Menu
lo-3
Note 11
9
If two multi-pod state analyzersare on, the qualifier pop-up menu will
show that only four pattern recognizersare available to each analyzer.
Pattern recognizersa-d and the range recognizer are assignedto the
first analyzercreated, and pattern recognizerse-h go with the second
analyzer.In the Full Qualifier Specification pop-up there will be only
one OR gate and one set of pattern recognizers.
With this Full Qualifier Specification pop-up, you specify a logical
combination of patterns or rangesas the qualifier. The pattern
recognizersare alwayspartitioned into the groups of four shown. Only
one operator is allowed between the patterns in a group. Patterns in
uncomplimented form (a, b, etc.) can only be ORed.
The complementsof patterns ( # a, # b, etc.) can only be ANDed.
For example,if the first OR field (gate) is changedto AND, all the
patterns for that gate are complemented,as shown below.
A
Full
Qualifier
Specification
1
x
2
Figure 1O-4. Complemented Patterns
State Trace Menu
lo-4
HP 16528/1653B
Front-Panel Reference
To specify a pattern to be used in the combination, place the cursor on
the pattern recognizer field and press SELECT. The field toggles from
Off to On and a connection is drawn from the pattern field to the gate.
In figure 10-5,patterns b, c and d and the range are ORed together,
and e and g are ANDed together.
.-
Qua1if ier Specification
Full
a
b
c
d
range
Figure 10-5. Patterns Assigned for Logical Combinations
& shown in the previous figures, the range is included with the first
group of patterns (a-d). If you select the range field, you will seethe
following pop-up menu.
I
Full
1
Qualifier
Specification
(Done)\:
6
b
x
C
2
d
range
Figure 10-6. Range Specification Pop-Up Menu
HP 16526/16538
Front-Panel Reference
State Trace Menu
lo-5
Off disconnectsthe range from the qualifier specification. In indicates
that the contents of the range are to be in the qualifier specification,
and Out indicates that the complement of the range is to be in the
qualifier specification.
When you have specified your combination qualifier, select Done. The
Full Qualifier Specification pop-up closesand the Boolean expression
for your qualifier appearsin the field for which vou specified it.
While storing
\
Cb+c+d+rangel+(#e+gl
Figure W-7. Boolean Expression for Qualifier
Sequence
Levels
There are eight trigger sequencelevels available in the state analyzer.
You can add and delete levels so that you have from two to eight levels
at a time.
Only three levels appear in the SequenceLevels display at one time. To
display other levelsso that they can be accessed,press the up/down
ROLL key and rotate the KNOB.
If you selectlevel 1 shown in figure 10-1,you will seethe following
pop-up menu:
#
Sequence Level
Insert
ITrIgger
Level
1a
1
(TiK-jT
Delete
Level
8
1
b
11
I
L.
.
Figure 10-8. Sequence Level Pop-Up Menu
State Trace Menu
lo-6
HP 16528116538
Front-Panel Reference
Not all sequencelevel pop-up menus look like this one. This happens
to be the trigger sequencelevel in which you specify the state on which
the analyzeris to trigger. The trigger term can occur in any of the first
sevenlevels,and it is not necessarilya selectablefield The fields in the
menu of figure 10-8are described on the following pages.
InSeti Level
To insert a level, place the cursor on the field labeled Insert Level and
pressSELECT. You will seethe following pop-up menu.
Figure W-9. Insert Level Pop-Up Menu
Cancel returns you to the sequencelevel pop-up without inserting a
level. Before inserts a level before the present level. Aflter inserts a level
after the present level. If there are eight levels,the Insert Level field
doesn’t appear in the sequencelevel pop-ups.
Delete Level
Note d
HP 16528/16538
Front-Panel Reference
If you want to delete the present level, select the field labeled Delete
Level. You will seea pop-up menu with the choicesCancel and
Execute.Cancel returns you to the sequencelevel pop-up without
deleting the level. Executedeletes the present level and returns you to
the State Trace Specification menu.
If t here are only two levels,neither field can be deleted even though the
Delete Level field stilI appearsin the menu. There will alwaysbe’s
trigger term level and a store term level in SequenceLevels. Therefore,
if you try to delete either of these,all terms you have specified in these
levelswill be set to default terms, and, the trigger and store term levels
will remain.
State Trace Menu
lo-7
Storage
Qualifier
Each sequencelevel has a storage qualifier. The storage qualifier
specifiesthe statesthat are to be stored and displayed in the State
Listing. Selectingthis field givesyou the qualifier pop-up menu shown
in figure 10-2, with which you specify the qualifier.
As an example,supposeyou specify the storagequalifier in a sequence
level as shownbelow.
While storing
* a+d
Figure 10-10. Storage Qualifier Example
The only statesthat will be stored and displayed are the statesgiven by
pattern recognizersa and d.
Branching
Qualifier
Every sequencelevel except the last has a primary branching qualifier.
With the branching qualifier, you tell the analyzerto look for a specific
state or states.The primary branching qualifier advancesthe sequencer
to the next level if its qualifier is satisfied.
In the exampleof figure 10-8,the branching qualifier tells the analyzer
when to trigger. In other sequencelevels,the qualifier may simply
specify a state that the analyzeris to look for before continuing to the
next level.
Some sequencelevels also have a secondarybranching qualifier. The
secondarybranch will, if satisfied, route the sequencerto a level that
you define. This is covered in more detail in “Branches”later in this
chapter.
State Trace Menu
lo-8
HP 1652Bll653B
Front-Panel Reference
OCCUrrWlCe
Counter
The primaq branching qualifier has an occurrence counter. With the
occurrence counter field you specify the number of times the branching
qualifier is to occur before moving to the next level.
To changethe value of the occurrence counter, position the cursor on
the field and either pressSELECT or press a numeric key on the
front-panel keypad. You will seea pop-up similar to that shown below.
I
Integer
En try
(Done)
c
Figure 10-l 1. Occurrence Counter Pop-Up Menu
You can changethe value by either rotating the KNOB or pressingthe
appropriate numeric keys.The qualifier can be specified to occur from
oneto 65535times.
storage
Macro
Your logic analyzerhas the capability of post-trigger storage through a
storagemacro. The storagemacro is available only in the second to last
level, and it consumesboth that level and the last level. The field in
figure 10-8allows you to configure the state analyzer for post-trigger
storage.This field does not alwayssayTrigger on. If the sequencelevel
is not a trigger level, the field will sayThen find, as shown below.
-find
: any state
.
4
1 times
Figure 10-12. Then Find Branching Qualifier
HP 16528/1653B
Front-Panel Reference
State Trace Menu
lo-9
Selectingthe field givesyou a pop-up with two options. One option is
what the field said previously.The other option is Enable on. If you
select this option, the SequenceLevel pop-up changesto look similar
to that shownbelow.
Sequence Level 1
(Tiiiiii)
1
Insert
z
Delete
Leve 1
2
Level
I
fixirq
1a
)I
II
any state
Store
Dlsabl@ on
i
I
no state
I I
Figure 10-13. Storage Macro Sequence Level Example
Enable on can only be the next to last term, and when on, the last term
is combined with the Enable term.
You specify qualifiers for the stateson which you want the macro to
enable,the statesyou want to store, and the stateson which you want
the macro to disable. The storagemacro is a loop that keepsrepeating
itself until memory is full. The loop is repeated when the disable
qualifier is satisfied.As an example,supposeyou configure the
seauencelevel of figure 1043 to look like that shown below.
a
Sequence Level
1
(Donr)j:
1
Insert
Delete
Level
Level
i
)I
2
8
Store
e
Figure W-14. Sequence Level Pop-up with Storage Macro
State Trace Menu
lo-10
HP 16528/1653B
Front-Panel Reference
The logic analyzerwill store the state given by pattern recognizer d
until it comes acrossthe state given by a. When it seesstate a, the logic
analyzer starts to store the state given by pattern recognizer e. It stores
that state until it seesthe state given by f, at which time it disablesand
starts the processall over again.The analyzerrepeats this processuntil
its memory is full.
Reading the
Sequence
Level Display
Reading the display is fairly straightforward. For example,suppose
your display looks like that shown below.
Sequence Levels
Hhile storing
cI any state”
Find “a”
S times
Hhile storing
“b”
Trigger on “c”
Io
3
Store
1 times
" no state”
Figure 1045. Sequence Level Display Example
In level 1 anystateis stored while the logic analyzersearchesfor five
occurrencesof the pattern given by pattern recognizer a. When the five
occurrencesare found, the sequencermoveson to level 2. In level 2 the
state given by pattern recognizer b is stored until one occurrence of the
pattern given by pattern recognizer c is found and the logic analyzer
triggers. In level 3 nostate is stored, so the last state stored is the trigger
state.
HP 16528/16538
Front-Panel Reference
State Trace Menu
10-11
An example of a state listing for the previous State Trace configuration
is shown below. The state patterns specified are:
-
a = B03C
b=OOOO
C=8930
MACHINE 2
Label
Base
-0028
-0027
-0026
-0025
-0024
-0023
-0022
-0021
-0020
-0019
-0018
-0017
-0016
-0015
-0014
-0013
-0012
-0011
-0010
-0009
-0008
-0007
-0006
-0005
-0004
-0003
-0002
-0001
+oooo
>
>
-
STATE LISTXNC
A
Hex
4E35
61E6
0000
08C8
BO3C
OOPF
6730
4887
4E75
3000
0000
8930
B03C
OOPF
67F8
BO3C
61FA
BO3C
0000
8930
4EPA
FF9A
61E6
603C
0000
0000
0000
0000
8930
Figure 1046. State Listing Example
Anystate was stored while the analyzerlooked for five occurrencesof
the state B03C. After the fifth occurrence was found, only state 0000
was stored until state 8930was found, and the analyzer triggered. After
the trigger, no stateswere stored.
State Trace Menu
lo-12
HP 16528/l 6538
Front-Panel Reference
-
Acquisition
Fields
The acquisition fields are comprised of the Trace mode, Armed by
Branches, Count, and Prestore fields, as shown below.
IMCHINE 2 I- stdte
Trace moder Single
Trace
Specification
1
Sequence Levels
Hhile storing
’ any state”
1 times
Trigger
on ,a”
l
1
z
2
Store
” any state”
1
Wmed by
Run
Branches
I
Off
1
I
Count
[
Off
Pres tore
[
Off
I
I
Figure W-17. State Trace Acquisition Fields
Trace Mode
You specify the mode in which the state analyzerwill trace with the
Trace mode field. You have two choicesfor trace mode: Single and
Repetitive. If you place the cursor on the field and press SELECT the
field toggles from one mode to the other.
Single Trace mode acquires data once per trace. Repetitive Trace
mode repeats single acquisitions until the STOP key on the front panel
is pressed,or if Stop measurementis on, until conditions specified with
the X and 0 markers in the State Listing menu are met.
If both analyzersare on, only one trace mode can be
specified. Specifying one trace mode for one analyzer setsthe same
trace mode for the other analyzer.
Armed By The Armed by field lets you specify how your state analyzeris to be
armed. The analyzer can be armed by the RUN key, the other analyzer,
the scope or an external instrument through the BNC Input port. Any
of these can tell the analyzerwhen to start capturing data.
HP 1652B/1653B
Front-Panel Reference
State Trace Menu
lo-13
When you select the Armed by field, a pop-up menu appears like that
shown below. The first two options alwaysappear in the pop-up. The
third and fourth options will give the name of the other analyzer and
scope.If the other analyzeror scopeis off, or if the other machine or
scopeis being armed by this machine,these options will not be
available.
Armed by
Figure 1048. Armed By PopUp Menu
Branches
The Branches field allows you to configure the sequencerof the state
analyzerto branch from one sequencelevel to another with secondary
branching qualifiers, or to restart when a certain condition is met.
Selectingthis field givesyou the following pop-up menu.
Branches
Figure W-19. Branches Pop-Up Menu
If you select Off, all secondarybranching qualifiers are deleted from
the sequencelevels.Only the primary branchesremain.
The Restart option allows you to start over from sequencelevel 1 when
a specified condition is met. This can be handy if you have code that
branches off in severalpaths and you want the analyzerto follow one
certain path. If the analyzergoesoff on an undesired path, you would
want the analyzerto stop and go back to the beginning and take the
correct path.
State Trace Menu
10-14
HP 16528/16538
Front-Panel Reference
If you select the Restart option, you wilI seea qualifier pop-up menu
like that shown in figure 10-2.With the pop-up you select the qualifier
for the pattern on which you want your analyzerto start over.
When your state analyzeris reading data it proceeds through the
sequence.If a term doesn’t match the branching qualifier, it is then
checked against Restart. If the term matches,the state analyzerjumps
back the sequencelevel 1.
Per Level
Selecting the Per level option allows you to define a secondary
branching qualifier for each sequencelevel. A statementis added in
each level so that you can configure the analyzer to move to a different
level when a specified condition is met. An example of a sequencelevel
with a secondarybranching qualifier is shown in the figure below.
Sequence Level
Insert
Level
2
(Done)
Delete
Whll
Level
4
Then
find
c
JI
lltime
Else
on
f
) got0
level
I
S
cl 4
Figure 1O-20. Secondary Branching Qualifier
With this configuration, the state analyzerwill store b until it finds c. If
it finds f before it finds c, it will branch to sequencelevel 4. If you have
specified a storage macro in the next to last sequencelevel the Else on
statement will not appear in that level since a secondarybranching
qualifier already existsfor that level.
HP 16528/1653B
Front-Panel Reference
State Trace Menu
10-15
In the last sequencelevel, which only specifiesstatesthat are to be
stored, the secondarybranching qualifier statementlooks like that
shown below.
I
Sequence Level
Insert
On
(Done)
Delete
Leve 1
Store
I
Level
I mu state
I
] got0
level
ITT]
Figure 10-21. Secondary Branch Qualifier in Last Level
In this example, as the state analyzerstores anystate,it will branch to
sequencelevel 6 if it finds the state given by qualifier a.
The trigger sequencelevel is used as a boundary for branching between
levels.This level and the levels that occur before it cannot branch to
levels that occur after the trigger level, and vice versa.Therefore, if
there are eight sequencelevelsand level 5 is the trigger sequencelevel,
then levels 1 through 5 can branch to levels 1 through 5 only, and levels
6 through 8 can branch to levels 6 through 8 only.
You can tell if secondarybranch qualifiers havebeen specified by
looking at the SequenceLevels display. Figure lo-22 showshow the
display looks with the configuration that was given in figure 10-20.An
arrow is drawn out of level 2, indicating that branching originates from
that level, and an arrow is drawn to level 4 to indicate that a branch is
going to that level.
State Trace Menu
lo-16
HP 16528/1653B
Front-Panel Reference
Sequence Levels
“b”
1 times
Then find “c”
Else on “f” go to level 4
Hhile
storing
Hhile storing
Then find “c”
“d”
1 times
Hhile storing “8”
Then find “g”
1 times
Figure 1042. Branching Between Sequence Levels
Each sequencelevel can branch to only one level through a secondary
branching qualifier. However, the number of times to which a level can
be branched is limited only by the number of levels present. A level can
have only one arrow pointing awayfrom it, but it can have two pointing
to it if more than one other level is branching to it. An example of this
is shown in the figure below. The arrow with two tails indicates that a
level above and a level below branch to this level.
Sequence
Levels
Hhile storing
” any state”
1 times
Find ” any state”
Else on “b” go to level 2
Hhlle storing
” any state”
1 times
Then f lnd ‘Id”
Else
on “g”
go to
level
3
storing
” any state”
1 times
Trigger on “a”
go to level
Else on u any state”
Hhlle
2
Figure W-23. Multiple Branching Between Levels
-
HP 16528/16538
Front-Panel Reference
State Trace Menu
lo-17
-.-_
Count
Note d
-
The Count field allows you to place tags on statesso you can count
them. Counting cuts the acquisition memory in half from lk to 512 and
the maximum clock rate is reduced to 16.67MHZ.
Count (State Trace menu) is turned off when “Clock Period” is set to
< 60 ns in the State Format Specification menu since the clock rate is
greater than 16.67MHz. If you select Count, the clock period
automatically changesto > 60 ns.
Selectingthis field givesyou the following pop-up menu.
Count
Off
Time
States
Et
Figure 10-24. Count Pop-Up Menu
Off
If you select Off, the statesare not counted in the next measurement.
Time
If you selectTime counting, the time between stored statesis measured
and displayed (after the next run) in the State Listing under the label
Time. The time displayed can be either relative to the previous state or
to the trigger. The maximum time between statesis 48 hours.
An exampleof a state listing with time tagging relative to the previous
state is shown in figure 10-25.
State Trace Menu
lo-18
HP 16528/1653B
Front-Panel Reference
pi5z5Kq
nwkorr
1
-0007
4006
-0005
-0004
6003
[stat.
Off
L1rtlrg
1.24
1.28
1.24
1.72
1.m
1.24
1.24
1.24
1.24
1.28
1.24
1.72
r.2e
1.96
1.52
1.24
OOFF
6730
48E7
4E75
3000
-0002
0000
8930
80X
OOFF
+ooor
+0002
Moo3
+a04
+0005
MOO6
Moo7
+oooe
1
1
67F8
b03C
61Ffi
BOX
0000
8930
PEFCI
us
us
us
UI
us
us
us
us
us
us
us
us
us
us
us
us
Figure 10-25. Relative Time Tagging
An exampleof a state listing with time tagging relative to the trigger 1s
shownbelow.
/-
[ml
nerkors
- [State
[
Off
Listing
J
1
-0007
4006
4005
4004
6003
OOFF
6730
48E7
4E7S
3000
-9.24
-7.96
-6.72
-5.00
-3.72
-0002
0000
-2.48
8930
803C
-1.24
+OOOl
OOFF
woo2
+0003
+0004
+OOOS
+0006
Moo7
+oooe
67F8
b03C
61FA
80X
0000
8930
4EFFI
1.24
2.52
3.76
5.40
6.76
8.12
10.24
11.48
us
us
us
us
us
us
0
us
8
us
us
us
us
US
us
us
us
Figure W-26. Absolute Time Tagging
HP 16528/1653B
Front-Panel Reference
State Trace Menu
IO-19
States
State tagging counts the number of qualified statesbetween each
stored state. If you selectthis option, you will seea qualifier pop-up
menu like that shownin figure 10-2.You select the qualifier for the
state that you want to count.
In the State Listing, the state count is displayed (after the next run)
under the label States. The count can be relative to the previous stored
state or to the trigger. The maximum count is 4.4 X lOEl2. ;i V-An example of a state listing with state tagging relative to the previous
state is shownbelow.
Lab.1
60s.
+OOOO
+ooo 1
*002
+0003
+OOOd
+ooos
+0006
t+6oofJ
+0006
a009
+0010
+0011
+00!2
Ml013
#Old
+oOlS
>
)
056 1
0564
OS6E
0570
0576
0570
0566
0567
0564
056E
0570
0576
0578
0566
0567
OS64
2
11
I
30
29
56352
5644:
11
3;
29
56552
0
56446
Figure W-27. Relative State Tagging
State Trace Menu
lo-20
HP 16528/16538
Front-Panel Reference
-
An exampleof a state listing with state tagging relative to the trigger is
shownbelow.
Lsbal
)
es90 1
+QOOO
+QOOl
+0002
+ooos
a004
*005
056 I
OS64
056E
0570
0576
0570
0566
OS67
0564
056E
OS70
0576
0578
0566
0567
0564
0
2
13
14
z
56425
56423
112873
112884
1 12l!mi
112915
112944
169296
169296
225744
Figure W-28. Absolute State Tagging
PEStOre
Prestore allows you to store two qualified statesbefore each state that
is stored. There is only one qualifier that enablesprestore for each
sequencelevel. If you select this field, you will seea pop-up with the
options Off and On . SelectingOn givesyou a qualifier pop-up menu
like that in figure 10-2,from which you choosethe pattern range or
combination of patterns and rangesthat you want to prestore.
Prestore is only availablewhen clock period is > 60 11s.If you select
Prestore, the clock period automatically changesto > 601~if it was
previously set to < 60 ns.
During a measurement,the state analyzer stores in prestore memory
occurrencesof the statesyou specify for prestore. A maximum of two
occurrencescan be stored. If there are more than two occurrences
previous ones are pushed out. When the analyzer finds a state that has
been specified for storage,the prestore statesare pushed on top of the
stored state in memory and are displayed in the State Listing.
HP 16528/1653B
Front-Panel Reference
State Trace Menu
IO-21
Qualifier and
Pattern Fields
The qualifier and pattern fields appear at the bottom of the State Trace
Specification menu. They allow you to specify patterns for the
qualifiers that are used in the sequencelevels.
,
piizq
Figure W-29. Qualifier and Pattern Fields
The Label fields display the labels that you specified in the State
Format Specifkation menu. The labels appear in the order that you
specified them; however,you can changethe order. Select one of the
label fields and you will seea pop-up menu with all the labels. Decide
which label you want to appear in the label field and select that label.
The label that was there previously switchespositions with the label you
selectedfrom the pop-up.
The base fields allow you to specify the numeric basein which you want
to defke a pattern for a label. The basefields also let you use a symbol
that was specified in the State SymbolTable for the pattern. Each label
has its own basedefined separatelyfrom the other labels. If you select
one of the basefields, you will seethe following pop-up menu. Decide
which baseyou want to define your pattern in and select that option.
Binclr
Octal
Decimal
Hexadecimal
ASCII
S mbol
-B
Figure 10-30. Numeric Base Pop-Up Menu
State Trace Menu
lo-22
HP 16528/1653B
Front-Panel Reference
-.
One of the options in the Base pop-up is ASCII. It allows you to see
the ASCII charactersthat are represented by the pattern you specify in
the pattern fields.
Note d
You cannot define ASCII characters directly. You must first define the
pattern in one of the other numeric bases;then you can switch the base
to ASCII to seethe ASCII characters.
The Symbol option in the Base pop-up allows you to use a symbol that
has been specified in the State Symbol Tables as a pattern. In the
pattern fields you specify the symbolsyou want to use.
Qualifier Field
If you select the qualifier field, you will seethe following pop-up menu.
Label )
Base >
-
Figure W-31. Qualifier Field Pop-Up Menu
Patterns
The pattern recognizersare in two groups of four: a-d and e-h. If you
select one of these two options, the qualifier field will contain only
those pattern recognizers.For instance,the qualifier field in figure
IO-29 contains only the recognizers a-d.
HP 16528/1653B
Front-Panel Reference
State Trace Menu
lo-23
Ranges
If you select the range option, the qualifier and pattern fields look
similar to that shown below.
Label >
Base >
-Range
1ower
upper
[ Hex
1
IooooI
[ FFFF 1
Figure 10132. Range Qualifier and Pattern Fields
Only one range can be defined, and it can be defined over only one
label, hence over only 32 channels.The channelsdo not have to be
adjacent to each other. The logic analyzerselectsthe label over which
the range will be defmed by looking at the labels in order and choosing
the first one that has channelsassignedunder only two pods. A label
that contains channelsfrom more than two pods cannot be selectedfor
range definition. If all the labels have channelsassignedunder more
than two pods, the range option is not offered in the qualifier field
pop-up menu. However, in the HP 1653B,the range option will always
be offered since the analyzerhas only two pods.
Pattern Fields
The pattern fields allow you to specify the statesthat you want the state
analyzer to searchfor and store. Each label has its own pattern field
that you use to specify a pattern for that label (if you are defining a
pattern for a pattern recognizer).
During a run, the state analyzerlooks for a specified pattern in the
data. When it finds the pattern, it either stores the state or statesor it
triggers, depending on the step that the sequenceris on.
State Trace Menu
lo-24
HP 16528/16538
11
State Listing Menu
Introduction
This chapter describesthe State Listing menus and how to interpret it.
It also tells you how to use the fields to manipulate the displayed data
so you can find your measurementanswers.The State Listing menu is
the display menu of the state analyzer.
There are two different areasof the state listing display, the menu area
and the listing area. The menu area is in the top one-fourth of the
screen and the listing area is the bottom three-fourths of the screen.
The listing area displays the data that the state analyzer acquires.The
data is displayed in a listing format as shown below.
Time X to Tr lgger
Time 0 to Tr lgger
Tlmo x to 0
-0007
-0006
400s
-0004
6003
-0002
-000 1
0068CA
oomcc
OOMCE
OOMFE
008900
OOFF
6730
46E7
4EtS
3000
0004F4
0004F6
006930
0000
+0006
0004F4
6930
bO3C
OOFF
67F8
603c
6lFCI
BO3C
0000
+Ooo7
+0008
0004F6
00692R
8930
4EFCI
*002
a003
MOO4
+ooos
000932
008934
008936
00692E
006930
IO]
1-1
0
9
I .24 us
I .28 us
1.24 us
1 .72 us
1.28 us
1.24 us
1 .24
1 .24
I .24
I .28
I .24
us
us
1.96
us
1 .s2 us
1.24 us
us
us
us
I .72 us
I .28 us
Figure 1 l-l. State Listing Menu
This listing display showsyou 16 of the possible 1024lines of data at
one time. You can use the ROLL keys and the KNOB to roll the listing
to the lines of interest.
HP 16528/1653B
Front-Panel Reference
State Listing Menu
11-l
-.a
--
_
--..
----
----
---
--
The column of numbers at the far left representsthe location of the
acquired data in the state analyzer’smemory. The trigger state is
always0000.At the vertical center of this column you will seea box
containing a number. The box is used to quickly select another location
in the state listing. The rest of the columns (except the Time/States
column) represent the data acquired by the state analyzer.The data is
grouped by label and displayed in the number baseyou have selected
(hexadecimal is the default base).
When the Time or Statesoption is selectedin the Count field (State
Trace Specification Menu), the acquired data will be displayed with
time or state tags.
The Time column displayseither the Rel(ative) time (time from one
state to the next) or Abs(olute) time (time from each state to the
trigger).
The Statescolumn displaysthe number of qualified statesRel(ative) to
the previously stored state or the trigger (absolute).
Accessing the
State Listing
Menu
State Listing Menu
11-2
The State Listing Menu is accessedby pressing the DISPLAY key on
the front panel when the state analyzeris on. It will automatically be
displayed when you press RUN. If the Timing Waveforms is displayed
when you press the DISPLAY key, you will have to switch analyzers.
This is not a problem, it merely indicates that you were in the timing
analyzer or you had performed an action to the timing analyzerin the
SystemConfiguration Menu.
HP 16528/16538
7
State Listing
Menu Fields
The menu area contains fields that allow you to changethe display
parameters, place markers, and display listing measurement
parameters.
~~~~OOSTRTE] tlarkers
r
Istate
Time
Listing
I
1
Time X to Trigger
Tfme 0 to Trigger
Time X to 0
.
-2.48
3,76
6.24
us ]
us ]
us
Figure 1l-2. State Listing Menu Fields
Markers
The Markers field allows you to specify how the X and 0 markers will
be positioned on the state listing. The State Trace Specifications menu
options are:
If Count in the State Trace menu is Off, the marker options are:
0 off
-
0 Pattern
If Count in the State Trace menu is set to Time, the marker options are:
0 off
0 Pattern
l
Time
0 Statistics
If Count in the State Trace menu is set to State, the marker options are:
0 off
0 Pattern
0 State
-
HP 16528/1653B
Front-Panel Reference
State Listing Menu
11-3
Markers Off
Markers Patterns
When the markers are off they are not displayed,but are still placed at
the specified points in the data. If Stop measurementis on and the Stop
measurementcriteria are present in the data, the measurementwill
stop even though the markers are off.
When the markers are set to patterns,you can specify patterns on
which the logic analyzerwill place the markers. You can also specify
how many occurrencesof each marker pattern the logic analyzer looks
for. This use of the markers allows you to find a specific pattern for
each label in the acquired data.
l68OOOSTFITE
flark@r$
Pattern
] -
[
IS tote
Pattern
Listing
1
Find
1
1 o-pattern
j~]ft-om
1
Trigger
I
) 1-1
Figure 11-3. Markers Set to Patterns
Patterns for each marker (X and 0) can be specified. They can be
specified for both markers in each label. The logic analyzer searches
for the logical “and” of patterns in all labels.
In the Find X (O)-pattern 0 from Trigger field you specify how many
occurrencesof the marked pattern from a reference point you want the
logic analyzerto searchfor. The reference points are:
l
Trigger
0 Start (of a trace)
l
X Marker (only available in 0 marker pattern specification)
l68000STfiE
flarkers
Pattern
]r
1stote
Pattern
Listing
1
Find
1
[o-pattern
Specify
Stop
Heasurement
))7jfrom
> 1mjll
Figure t l-4. Search Reference Pop-Up Menu
State Listing Menu
11-4
HP 16526/1653B
Front-Panel Reference
Stop Measurement
Another feature of markers set to patterns is Stop Measurement. You
or Compare is
can specify either stop measurementwhen X-0 is
. The options for X-O are: Less than, Greater=
In range, Not
inrange. The options for Compare are: Equal and Not Equal (see
figure 11-5).
Parmeters
Stop measurement 1 Ix-01
Store exception
File desct~ption
to disk!
I1
@iiir)
is [ Less then
WI
1 I[
Fi 18 name 1 EXCEPTION 1
Figure 11-5. Markers Patterns Pop-Up Menu
With this feature you can use the logic analyzerto look for a specified
time or range of time between the marked patterns and to stop
acquiring data when it finds this time between markers. The X marker
must precede the 0 marker.
Also available is Store exception to disk which allows you to specify a
file on the disk that exceptionscan be stored in. The default filename is
EXCEPTION. When the trace mode is repetitive and Store exception
to disk is on, the following processtakes place: data is acquired until
the stop criteria is met, data acquisition will stop, data in the
acquisition memory will be stored on the disk, and data acquisition will
resumewhen the data is stored. This processcontinues until the disk is
full. The data is stored in the samefile name; however,the last three
characterswill automatically be replaced with a numerical serial
number. For example,EXCEPTION will changeto EXCEPT001 the
second time memory is stored.
The upper and lower range boundaries must not be the samevalue. For
example,if you want to stop a measurementwhen the X and 0 markers
are in range of 200 ns, you should set the range valuesto 19011sand
210 ns. This eliminates erroneous measurementtermination.
HP 16528/1653B
Front-Panel Reference
State Listing Menu
11-5
Markers Time
When the markers are set to Time, you can place the markers on states
in the listing of interest and the logic analyzerwill show the following:
l
l
l
Time X to Trig(ger).
Time 0 to Trig(ger).
TimeXtoO.
To position the markers, move the cursor to the field of the marker you
wish to position and press SELECT. A pop-up will appear showing the
current time for that marker. Either rotate the KNOB or enter a
numeric value from the keypad to changethe position of that marker.
PressingSELECT when you are finished positions the marker and
closesthe pop-up.
[S~~OOST~~TEIllarkers
r
Istate
Time
Listing
1
Time
Time
Time
I
X to Trigger
0 to Trigger
X to 0
6.76
3.76
-3.00
us]
us 1
us
.Figure 11-6. Markers Set to Time
The Time X to 0 field will changeaccording to the position of the X
and 0 markers. It displaysthe total time betweenthe statesmarked by
the X and 0 markers.
Markers Statistics
When statistics are specified for markers, the logic analyzerwill display
the followinz
Number of total runs.
Number of valid runs (runs where markers were able to be placed
on specified patterns).
Minimum time betweenthe X and 0 markers * Maximum time
between the X and 0 markers.
Average time between the X and 0 markers.
(68000STflTE]flarkers
[state
ptatistics
Listing
]
Valid
1 of
j
runs1
4
llinlmum
X-01
llax imum X-O 1
Werage
X-O:
0
0
0
s
s
s
Figure 1l-7. Markers Set to Statistics
State Listing Menu
11-6
HP 16528/1653B
Front-Panel Reference
How the statisticswill be updated depends on the state trace mode
(repetitive or single).
In repetitive, statisticswill be updated each time a valid run occurs
until you pressSTOP. When you press RUN after STOP, the statistics
will be cleared and will restart from zero.
In single, each time you press RUN an additional valid run will be
added to the data and the statistics will be updated. This will continue
unlessyou changethe placement of the X and 0 markers between runs.
Pattern
Fiz
field to specify the patterns for the X and 0
You use the Pattern
markers for each 1abel.r
.I $j+ooo
+oooo
1
+mO2
EEEI
+QoO4
+0005
+0006
+0007
Moo8
woo9
+oOlO
+oOll
8932
8930
8934
6936
892E
8930
04F4
04F6
892R
B92C
WC6
88138
OOFF
BOX
67F8
BO3c
61FA
BOX
0000
8930
4EFCI
FF9A
6lE6
80X
Figure 1 l-8. Pattern
1I .24
I .26
1 .24
1.72
I .28
1 .96
I .52
I .24
I .24
1.76
I .24
us
us
us
us
us
us
us
us
us
US
us
Field Pop-Up Menu
from
field, the pop-ups
When x-pattern is specified in the Find
field allow you to specify a paTem for the X
in the Pattern
marker in each label.
When the O-pattern is specified, the pop-ups in the Pattern
field allow you to specify the patterns for the 0 marker in each label.
HP 1652B/l653B
Front-Panel Reference
State Listing Menu
11-7
.
y
_
_
-..
-_
--.-
State Compare Menu
Introduction
-_--
__-_l_.---
.-
-
-
12
State compare is a software post-processingfeature that provides the
ability to do a bit by bit comparison between the acquired state data
listing and a compare data image. You can view the acquired data and
the compare image separately.In addition, there is a separate
difference listing that highhghts the bits in the acquired data that do
not match the corresponding bits in the compare image. Each state
machine has its own Compare and Difference listings.
You can use the editing capabilities to modify the compare image.
Masking capabilities are provided for you to specify the bits that you do
not want to compare. “Don’t compare” bits can be specified individually
for a given label and state row, or specified by channel acrossall state
rows. A range of statescan be selected for a comparison.When a range
is selected,only the bits in stateson or between the specified
boundaries are compared.
The comparison between the acquired state listing data and the
compare image data is done relative to the trigger points. This means
that the two data records are aligned at the trigger points and then
compared bit by bit. Any bits in the acquired data that do not match
the bits in the compare image are treated as unequal. The don’t
compare bits in the compare image are ignored for the comparison.
When a logic analyzer configuration is savedto or loaded from a disk,
any valid compare data including the data image, etc. is also savedor
loaded.
-
HP 16528/1653B
Front-Panel Reference
State Compare Menu
12-l
Accessing the
Compare Menu
The Compare menu is accessedfrom the State Listing menu. To
accessthe Compare menu place the cursor on the field State Listing
and press SELECT. A pop-up appearswith the following options:
0 State Listing
0 State Waveforms
l
State Chart
0 State Compare
Place the cursor on State Compare and pressSELECT. The pop-up
will close and display the State Compare menu.
The Compare
and Difference
Listing Displays
Two menus (or displays) in addition to the normal State Listing, are
available for making comparison measurements:the Compare Listing
and the Difference Listing.
The Compare
Listing
The Compare Listing contains the image (or template) that acquired
data is compared to during a comparison measurement.The
boundaries of the image (or size of the template) can be controlled by
using the channel masking and compare range functions described
below. Any bits inside the image displayed as “X” have been set to don’t
compare bits.
The Difference
Listing
The Difference Listing highhghts the entire row with inversevideo, if
any, in the acquired data that differs from those in the compare image.
In addition, when the base is hexadecimal,octal, or binary, the bit (or
digit containing the bit) that differs from the compare image is
underlined (see figures 12-2 and 12-3).If the baseis inverse assembled
symbols,the display does not change;however,the stop measurement
functions still function.
To display the Compare Listing or the Difference Listing, place the
cursor on the field directly to the right of Show in the upper left part of
the display and press SELECT. The field will toggle between Compare
Listing and Difference Listing.
State Compare Menu
12-2
HP 16528/1653B
Front-Panel Reference
The controls that roll the listing in all three menus,the normal State
Listing, the Compare Listing, and the Difference Listing are
synchronizedunlessthe number of pre-trigger statesdiffer between the
Compare listing and the acquired data. This meansthat when you
changethe current row position in the Difference Listing, the logic
analyzer automatically updates the current row in the acquired State
Listing, Compare Listing and vice-versa.
If the three listings are synchronizedand you re-acquire data, the
Compare Listing may have a different number of pre-trigger states
depending on the state trace trigger criteria. The Compare Listing can
be resynchronizedto the State and Difference Listings (if different) by
entering the desired state (acquisition memory) location from the
front-panel keypad.
This allows you to view corresponding areasof the two lists, to cross
check the alignment, and analyzethe bits that do not match.
Since time tags are not required to perform the compare, they do not
appear in either the compare image or difference displays.However,
correlation is possible since the displaysare locked together.
To move between the State Listing and Compare Listing in the
HP 1652B/53B,select the field directly to the right of your state
machine’slabel, in the upper left most part of the screen and press
SELECT. When this field is selected,a pop-up wiIl appear. Select the
State Listing field from this pop-up.
Creating a
Compare Image
HP 16528/1653B
Front-Panel Reference
An initial compare image can be generatedby copying acquired data
into the compare image buffer. When you place the cursor on the
Copy Trace to Compare field in the Compare Listing menu a pop-up
appearswith the options Cancel and Continue. If the Continue is
selected,the contents of the acquisition data structure for the current
machine are copied to the compare image buffer. The previous
compare image is lost if it has not been savedto a disk. If you select
Cancel the current compare image remains unchanged.
State Compare Menu
12-3
Bit Editing of
the Compare
Image
Bit editing allows you to mod@ the valuesof individual bits in the
compare image or specify them as don’t compare bits. The bit editing
fields are located in the center of the Compare Listing display to the
right of the listing number field (seefigure 12-l). A bit editing field
existsfor every label in the display unlessthe label’s baseis ASCII or
inverse assembledsymbols.You can accessany data in the Compare
Listing by rolling the desired row vertically until it is located in the bit
editing field for that label (column).
When you select one of the bit editing fields a pop-up appears in which
you enter your desired pattern or don’t compare for each bit.
Lab.1
Boss
+0065
+0066
+0067
MO68
+0069
+0070
+007 1
t+6072j
+Qo73
+Qo74
+0075
MO76
MO77
+0076
+0079
+ooeo
0404
0404
0404
0404
[a404
0404
0404
0404
0404
0404
02 z
03
3
02
2
03
3
82
02
Of
3’
02
2
3
2
03
3
0404
0404
02
03
2
0404
02
2
Figure 12-l. Bit Editing Fields
State Compare Menu
12-4
HP 16528/1653B
-
Masking
Channels in the
Compare Image
The channel Aasking function allows you to specify a bit, or bits in each
label that you do not want compared. This causesthe corresponding
bits in all statesto be ignored in the comparison. The compare data
image itself remains unchangedon the display. The Mask fields are
directly above the label and basefields at the top of both the Compare
and Difference listings (seefgurel2-2). When you select one of these
fields a pop-up appears in which you specify which channelsare to be
compared and which channelsare to be masked.A “.” (period)
indicates a don’t compare mask for that channel and an “*” (asterisk)
indicates that channel is to be compared.
Label
Ba¶o
+006S
+0066
+0067
+0066
MO69
+0070
+007 1
fz5q
+0073
+0074
ia
+QO76
da077
+0078
+0079
+ooeo
:
pFll%
04
IS
c2
36
8X
c2
ii
c2
;:
47
02
Fl
44
Figure 12-2. Bit Masking Fields
HP 16529/1653B
Front-Panel Reference
State Compare Menu
12-5
Specifying a
Compare Range
The Compare Range function.allows you to defme a subsetof the total
number of statesin the compare image to be used in the comparison.
The range is specified by setting start and stop boundaries. Only bits in
states(lines) on or between the boundaries are compared against the
acquired data.
The Compare mode is accessedby selectingthe Full Compare/Partial
Compare field in either the Compare or Difference listing menus.
When selected,a pop-up appears in which you select either the Full or
Partial option. When you select the Partial option, fields for setting the
start state and stop state values appear (seefigure 12-3).
MO69
I
MO70
ii
+0073
*074
+Qo75
MI076
+0077
MO76
+0079
+a080
c2
34
89
c2
34
Dl
47
02
Fl
44
h%h
Figure 12-3. Compare Full/Compare Partial Field
State Compare Menu
12-6
HP 16528/16538
Front-Panel Reference
--.
-
Repetitive
Comparisons
with a Stop
Condition
When you do a comparison in the repetitive trace mode, a stop
condition may be specified. The stop condition is either Stop
Measurement when Compare is Equal or Not Equal. In the caseof
Equal, bits in the compare image must match the corresponding bits in
the acquired data image for the stop condition to be a true. In the case
of Not Equal, a mismatch on a single bit will causethe stop condition
to be true. When stop conditions are specified in two analyzers,both
analyzersstop when the stop condition of either analyzer is satisfied. It
is an OR function.
You accessthe stop measurementfunction by selecting the Specify
Stop Measurement field in either the Compare or Difference Listing
menus.When you select this field, the Stop Measurement Parameters
pop-up appears (see figure 12-4).The first field in this pop-up, just to
the right of Stop measurementcontains either Off, X-O or Compare.
When this field is selected,a pop-up appears in which you select
Compare. When you select the Compare option, you can accessand
select either the Equal or Not Equal option in the next field to the right.
[-7!ZiSl
- [State
Show [Dlf foroncm
stop
Caqare
Listlnq
ner8urmnt
:
ore exception
le descr lptlon
t
fizGq
+0073
wo74
04m
0438
04x
043D
043F
0440
+0075
+0076
+0077
too7 1
Speclf y Stop
1
Find
Heasurement
Dtfforanc
Prrmtors
,op mosrurom~nt
+0069
+0070
]
(Doncr
I
3
3
c2
34
09
c2
i
3
044
0443 1
OBB6
34
01
3
47
2
+0079
+0078
0444
Obl37
Fl
02
5
+ooeo
0888
44
2
Figure 12-4. Specify Stop Measurement Field
Also available is Store exception to disk which allows you to specify a
file on the disk that exceptionscan be stored in. The default filename is
EXCEPTION.
HP 16528/16538
Front-Panel Reference
State Compare Menu
12-7
When the trace mode is repetitive and Store exception to disk is on, the
following processtakes place: data is acquired until the stop criteria is
met, data aquistion will stop, data in the acquisition memory will be
stored on the disk, and data acquisition will resumewhen the data is
stored. This processcontinues until the disk is full. The data is stored in
the samefile name; however, the last three characterswill
automatically be replaced with a numerical serial number. For
example,EXCEPTION will changeto EXCEPT001 the second time
memory is stored.
Note f#
You may also specify a stop measurementbasedon time between the X
and 0 markers in the Compare or Difference Listing menus.This is
available only when Count is set to Time in the State Trace menu. If the
Stop Measurement is set to run until Compare Equal or Compare Not
Equal in the Compare or Difference Listings, the Stop Measurement
on time X to 0 will changeto run until Compare Equal or Compare
Not Equal in the other state display menus (i.e. State Listing).
Locating
I
Mismatches
in
tne
m Yff
1 erence
Listing
The Find Difference feature dews you to easilylocate any patterns
that did not match in the last comparison. Occurrencesof differences
are found in numerical ascendingorder from the start of the listing.
The first occurrence of an error has the numerical value
of one.
.
Saving
Compare
Images
When you savea logic analyzer configuration to a disk, the compare
imagesfor both state analyzersare savedwith it. The compare data is
compacted to conservedisk space.Likewise, when you load a
configuration from disk, valid compare data will also be loaded.
State Compare Menu
12-8
field in the
This feature is controlled by the Find Difference
Difference Listing menu. When you selectthis fi=
Integer Entry
pop-up appearsin which you enter a number indicating which
difference you want to find. The listing is then scannedsequentially
until the specified occurrence is found and rolled into view.
HP 16528/1653B
Front-Panel Reference
-.
State Chart Menu
13
Introduction
The State Chart Menu allows you to build X-Y plots of label activity
using state data. The Y-axis alwaysrepresentsdata values for a
specified label. You can select whether the X-axis represents states(ie.
rows in the State List) or the data valuesfor another label. You can
scaleboth the axesto selectivelyview data of interest. An accumulate
mode is available that allows the chart display to build up over several
runs. When State is selectedfor the X-axis, X & 0 markers are
available which allows the current sample (state or time) relative to
trace point and the corresponding Y-axis data value to be displayed.
Marker placement is synchronizedwith the normal State Listing.
Accessing the
State Chart
Menu
The Chart menu is accessedfrom the State Listing menu. To accessthe
Chart menu place the cursor on the field State Listing and press
SELECT. A pop-up appearswith the following options:
l
State Listing.
0 State Waveforms.
l
State Chart.
0 State Compare.
Place the cursor on State Chart and pressSELECT. The pop-up will
close and display the State Chart menu.
Selecting the
Axes for the
Chart
HP 16528/l 6538
Front-Panel Reference
When using the State Chart display, you first select what data you want
plotted on each axis.To assignthe vertical axis label, position the
cursor on the Y-axis Label field in the menu. This is the field just to the
right of “XY Chart of Label”. When selected,a pop up appearsin which
you select one of the labels that were defined in the State Format
Specification Menu. The X-axis assignmentfield is just to the right of
“Versus”, and toggles between State and Label when selected.When
label is selected,a third field appearsto the right of Label that pops up
when selectedin which you select one of the defined state labels.
State Chart Menu
13-l
Scaling the
Axes
Either axis of the X - Y chart can be scaledby using the associated
vertical or horizontal min (minimum) or max (maximum) value fields.
When selected,a SpecifyNumber pop up appearsin which you specify
the actual minimum and maximumvaluesthat will be displayed on the
chart.
J-lXV
jstats Chsrt
Ctisrt
of
Label
Lpoopir1
1
vorrus
CTo ttorker
pzq
Control
)
~cclJmJlat~lorr
Figure 13-l. Axis Scaling Popup Menu
When State is selectedfor the X-axis, state acquisition memory
locations are plotted on the X-axis. The minimum and maximum values
can range from -1023to + 1023depending on the trace point location.
The minimum and maximumvaluesfor labels can range from
(0 to 232-‘)regardlessof axis,since labels
OOOOOOOOHtoW
are restricted to 32 bits.
State Chart Menu
13-2
HP 1652B/l653B
Front-Panel Reference
-
The Label
Value
vs
States Chart
The Label Value versusState chart is a plot of label activity versusthe
memory location in which the label data is stored. The label value is
plotted against successiveanalyzer memory locations. For example,in
the following figure, label activity of POD 1 is plotted on the Y axis and
the memory locations (State) are plotted on the X axis.
1-j
- lstste Chart
XV Chef t Of Lab.1
[‘I
1
Vor sus
1-1
Figure 13-2. Label vs. State Chart
-
HP 16528/1653B
Front-Panel Reference
State Chart Menu
13-3
The Label
Value
vs
Lake1 Value
Chart
When labels are assignedto both axis,the chart showshow one label
varies in relation to the other for a particular state trace record. Label
values are alwaysplotted in ascendingorder from the bottom to the top
of the chart and in ascendingorder from left to right acrossthe chart.
Plotting a label against itself will result in a diagonal line from the lower
left to upper right comer. X & 0 markers are disabled when operating
inthis mode.
lnFItHfNE1
XV Chart
Vert
-
[State
Chart
of Lab01 lpool
rlsx Ilc]
tlln(001
1
Versus
m
FETi-j
nax pJ
Horz”*”
pi!J
Figure 13-3. Label vs. Label Chart
State Chart Menu
13-4
HP 16528/16538
Front-Panel Reference
-.
_--
X & 0 Markers
and Readouts
for Chart
When State is specified for the X-axis, X & 0 markers are available
which can be moved horizontally. The markers are synchronizedwith
the X and 0 markers in the normal State Listing.
To select the marker mode for Chart (if it is not presently displayed),
place the cursor on the To Marker Control field and press SELECT.
This field wiil toggle to To RangeControl and the marker fields will be
displayed (see figure 13-4).
-Ixv
[stat.
cnert
Harkerr
of
CRart
Laba 1 lpoo]
1 Pattern
]
Find
( To eanae Contra1
]
VWSUS
[EzEq
(x-pa(ternvlfrm
)
Spmctf y Pattern
1
Tripper
]
Figure 13-4. Marker Fields
When a marker is positioned in the State Chart menu, it is also
positioned in the State Listing menu and vice-versa.The Chart marker
operation is identical to the markers in the State Listing menu (see
chapter 11).
HP 16528/1653B
Front-Panel Reference
State Chart Menu
13-5
Marker Options
The marker options in the State Chart menu depend on what Count
set to in the State Listing menu.
is
When Count is set to Off, the Chart markers can be set to:
0 off.
0 Pattern.
When Count is set to Time, the Chart markers can be set to:
0 off.
Pattern.
Time.
0 Statistics.
l
l
When Count is set to States, the Chart markers can be set to:
0 Pattern.
0 States.
0 off.
State Chart Menu
13-6
HP 16528/1653B
Front-Panel Reference
-
State Waveforms Menu
Introduction
14
The State Waveforms Menu allows you to view state data in the form of
waveformsidentified by label name and bit number. Up to 24
waveformscan be displayed simultaneously.Only state data from the
current state machine can be displayed as waveformsin the State
Waveforms menu.
The presentation and user interface is generally the sameas the Timing
Waveform menu, except the X-axis of the state waveform display
representsonly samples,or statesinstead of time (seconds).This is
true regardlessof whether Count (in the State Trace menu) is set to
Time or Off. As a result, the horizontal axis of the display is scaledby
States/Div and Delay in terms of samplesfrom trigger. Marker features
are the sameas for State List in that Time or Stateswill only be
available when Count is set to Time or States.The Sample Rate display
is not available in State Waveform evenwhen markers are off.
Accessing the
State Waveforms
Menu
The State Waveforms menu is accessedfrom the State Listing menu.
To accessthe State Waveforms menu place the cursor on the State
Listing field and press SELECT. A pop-up appearswith the following
options:
a State Listing.
a State Waveforms.
l
State Chart.
0 State Compare.
Place the cursor on State Waveforms and press SELECT. The pop-up
will close and display the State Waveforms menu.
HP 16528/1653B
Front-Panel Reference
State Waveforms Menu
14-l
Selecting a
Waveform
You can display up to 24 waveformson screenat one time. Each
waveform is a representation of a predefined label. To select a
waveform, place the cursor on a label name on the left side of the
disDlayand press SELECT. A pop-up appearsin which you:
Insert waveforms.
Turn on waveforms.
Modify waveforms (waveform labels).
Turn off waveforms.
Delete waveforms.
Just to the right of each label name is a two-digit number or the word
“all.” The number indicates which bit of the label the waveform
represents;or, all the bits of the label when “all” is displayed (see figure
14-1).
m]tlarkors
Mcumulato
Ststor/Div
[State
(1
lmvsforms
Find
1
[x-psttrrnlfrom
1
Trlggcr
1
[orrl
1
001s~ IT]
Figure 14-l. State Waveforms Menu
In the above figure, label A has “all” specified displaying all the bits
overlaid in a single waveform. Label B however,has sevenof its bits
displayed individually (bits 0 through 6).
State Waveforms Menu
14-2
HP 16528/1653B
Front-Panel Reference
A---
Replacing
Waveforms
You can replace a currently displayed waveform (label) with another
one of the predefined waveforms (labels). To replace one waveform
with another, place the cursor on the waveform you wish to replace and
pressSELECT.. A pop-up appears in which you select Modify
Waveform as shown in the following figure.
Figure 14-2. Waveform Selection Pop-up Menu
-
HP 16528/1653B
Front-Panel Reference
State Waveforms Menu
14-3
Another pop-up appearsin which you select the waveform (label) you
wish to display (see fwe 14-3). When you place the cursor on the new
waveform (label) and press SELECT the new waveform replacesthe
old waveform.
-J
-
IlW kef S
IState
J
[x-pa~]IIfon
IJ
Flccumulete
Stat66/Div
b41~sfofms
Flnd
1-1
1
1
Trlpqer
1
.
Delq
I]
Figure 14-3. Available Waveforms Pop-up Menu
Deleting
Waveforms
&kCth’lg
You can delete any of the currently displayed waveformsby placing the
cursor on the waveform you wish to delete and pressingSELECT.
When the pop-up appearsplace the cursor on Deletewaveform and
pressSELECT.
states
per Division
State Waveforms Menu
14-4
You can specify the statesper division by placing the cursor on the
field just to the right of States/Div, pressingSELECT, and either
entering the number of statesper division with the keypad or the knob.
The range is from 1 to 1024 per division.
HP 16528/1653B
Front-Panel Reference
Delay from
Trigger
You can specify the delay from trigger by specifying the number of
statesfrom the trigger. The delay will affect only the position of the
State Waveforms display. It does not affect data acquisition. The
minimum is - 1024and the maximum is 1024independent of trace
position in the record. Delay is not limited to the window containing
data.
State
The waveform display features of the State Waveform menu are the
s as the Timing Waveform menu with regard to:
Waveform
Display
Features
X and 0
Markers for
State Waveform
Low levels (below threshold) are represented by darker line.
Dotted lines representing the X and 0 markers.
Inverted triangle representing the trigger point.
Accumulate Mode.
Graticule frame with 10horizontal divisions.
Markers can be placed on the waveform display by specifying the
number of statesfrom trigger in the caseof the X marker or number of
statesfrom either the trigger or X marker in the caseof the 0 marker.
Markers can be automatically placed on the waveform by searchingfor
specific patterns assignedto each marker.
The X and 0 marker operation is identical to the marker operation in
the Timing Waveform Menu.
-
HP 16528/16538
Front-Panel Reference
State Waveforms Menu
14-5
State Analyzer Measurement Example
Introduction
15
In this chapter you learn how to use the state analyzer by setting up the
logic analyzerto simulate a simple state measurement. Since you may
not have the sametest circuit available,we will give you the
measurementresults as actually measuredby the logic analyzer,
The exercisein this chapter is organized in a task format. The tasksare
in the sameorder you will most likely use them once you become
experienced.The stepsin this format are both numbered and lettered.
The numbered stepsstate the step objective. The lettered stepsexplain
how to accomplish each step objective. There is also an example of
each menu after it has been properly set up.
How you use the stepsdependson how much you remember from
chapters 1 through 4 of the Gettingstarted Guide. If you can set up
each menu by just looking at the menu picture, go ahead and do so. If
you need a reminder of what stepsto perform, follow the numbered
steps.If you still need more information about “how,” use the lettered
steps.
To gain confidence using your logic analyzer,we recommend that you
configure the menus asyou follow the simulated measurementexample
up to the section “Acquiring the Data.” From that section to the end,
you will seethe measurementresults on the State Listing screen as if
you had the real test circuit connected,and as if you had selectedRUN.
.-
HP 16528/l 6538
State Analyzer Measurement Example
15-l
Problem sOh/hlg
with the State
Analyzer
In this exampleassumeyou have designeda microprocessor
controlled
.
circuit. You have completed the hardware, and the software designer
has completed the software and programmed the ROM (read-only
memory). When you turn your circuit on for the first time, your circuit
doesn’t work properly. You have checkedthe power supply voltages
and the systemclock and they are working properly.
Since the circuit has never worked before, you and the software
engineer aren’t sure if it is a hardware or software problem. You need
to do sometesting to find a solution.
What Am I
Going to
Measure?
You decide to start where the microprocessorstarts when power is
applied. We will describe a 68000microprocessor;however, every
processorhas similiar start-up routines.
When you power up a 68000microprocessor,it is held in reset for a
specific length of time before it starts doing anything to stabilize the
power supplies.The time the microprocessoris held in reset ensures
stable levels (states) on all the devicesand busesin your circuit. When
this reset period has ended, the 68000performs a specific routine
called “fetching the reset vector.”
The first thing you check is the time the microprocessor is held in reset.
You find the time is correct. The next thing to check is whether the
microprocessorfetches the reset vector properly.
State Analyzer Measurement Example
15-2
HP 16528/1653B
Front-Panel Reference
--.
The stepsof the 68000reset vector fetch are:
1. Set the stack pointer to a location you specify, which is in ROM at
addresslocations 0 and 2.
2. Find the fast addresslocation in memory where the
microprocessor fetchesits first instruction. This is also specified
by you and stored in ROM at addresslocations 4 and 6.
What you decide to find out is:
1. What ROM addressdoes the microprocessor look at for the
location of the stack pointer, and what is the stack pointer
location stored in ROM?
2. What ROM addressdoes the microprocessor look at for the
addresswhere its first instruction is stored in ROM, and is the
instruction correct?
3. Does the microprocessor then go to the addresswhere its frost
instruction is stored?
4. Is the executableinstruction stored in the first instruction location
correct?
Your measurement,then, requires verification of the sequential
addressesthe microprocessor looks at, and of the data in ROM at
these addresses.If the reset vector fetchis correct (in this example)
you will seethe following list of numbers in HEX (default base) when
your measurementresults are displayed.
+oooooooooooooo
+ 0001OOOOO204FC
+ooo2ooooO4oooo
+ 0003OOOOO68048
+ 00040080483E7C
This list of numbers will be explained in detail later in this chapter in
“The State Listing.”
HP 16528/1653B
Front-Panel Reference
State Analyzer Measurement Example
15-3
.
_-__.
How Do I
Configure the
Logic Analyzer?
._*.
-_
-
---_I-_
I..
I-
-I
I
^--I
._--
_-
--II_------
-
-
-_
-.
-.-.__
_
-
-.-I---
-
-----
--
-------_I_
In order to make this state measurement,you must configure the logic
analyzer as a state analyzer.By following these stepsyou will confisure
Analyzer 1 as the state analyzer.
If you are in the SystemConfiguration menu you are in the right place
to get started and you can start with step 2; otherwise, start with step 1.
1. Using the field in the upper left corner of the display, get the
SystemConfiguration menu on screen.
a. Place the cursor on the field in the upper left corner of the
display and press SELECT.
b. Place the cursor on Systemand pressSELECT.
2. In the SystemConfiguration menu, changethe Analyzer 1 type to
State. If Analyzer 1 is already a state analyzer,go on to step 3.
Eystn
Conftqurrtion
nnr1yr.r
n
ks
1
Nom811-1
Type1 1-1
Anolyzor
2
rl
Type: I]
Pa0 I
m---------------
Change to a State Analyzer
/
Pod 2
~~~~~-~~-~~-~-~Pod 3
l=l
Figure 15-l. System Configuration Menu
a. rlace the cursor on the Type:
and press SELECT.
b. Place the cursor on State and pressSELECT.
State Analyzer Measurement Example
15-4
HP 1652Bl1653B
Front-Panel Reference
-
3. Name Analyzer 168OOOSTATE(optional).
a. Place the cursor on the Name:
press SELECT.
,-
field of Analyzer 1 and
b. With the Alpha Entry pop-up, changethe name to
68000STATE.
4.
Assign pods 1,2, and 3 to the state analyzer.
a. Place the cursor on the Pod 1 field and pressSELECT.
b. In the Pod 1 pop-up, place the cursor on Analyzer 1 and press
SELECT.
c. Repeat stepsa and b for pods 2 and 3.
HP 16528/1653B
Front-Panel Reference
State Analyzer Measurement Example
15-5
Connecting
Probes
the
At this point, if you had a target systemwith a 68000microprocessor,
you would connect the logic analyzerto your system.Since you will be
assigninglabels ADDR and DATA, you hook the probes to your
systemaccordingly.
l
l
l
l
Activity Indicators
Pod 1 probes 0 through 15 to the data bus lines DO through DE
Pod 2 probes 0 through 15 to the addressbus lines A0 through Al5
Pod 3 probes 0 through 7 to the addressbus lines Al6 through A23.
Pod 1, CLK ( J clock) to the addressstrobe (LAS).
When the logicanalyzeris connected and your target systemis running,
you will see Activity Indicators in the Pod 1,2, and 3 fields of the
SystemConfiguration menu. This indicates which signal lines are
transitioning.
Egrla
Configuration
Analyzer 1
Analynr
2
Name1[EiEMiiFl
Qpe
cl
1-j
cl
Type: (71
Activity
Figure 15-2. Activity Indicators
State Analyzer Measurement Example
15-6
HP 16528/1653B
Front-Panel Reference
Configuring the
State Analyzer
Now that you have configured the system,you are ready to configure
the state analyzer.You will be:
l
0
l
0
l
Creating two names(labels) for the input signals
Assigning the channelsconnectedto the input signals
Specifying the State ( J ) clock
Specifying a trigger condition
1., Display the State Format Specification menu.
a. Pressthe FORMAT key on the front panel.
2., Name two labels, one ADDR and one DATA.
[~EIOOOSTAE I- st0 t0 ~0-1
Speclf lcs tlon
Clock
clock
Period
1>60nr]
Pod
3
Activr
Label
Pal
+
E+
Figure 15-3. State Format Specification Menu
a. Place the cursor on the top field in the label column and press
SELECT.
b. Place the cursor on Modify label and pressSELECT.
HP 16528/1653B
Front-Panel Reference
State Analyzer Measurement Example
15-7
c. With the Alpha Entry pop-up, changethe name of the label to
ADDR.
d. Name the secondlabel DATA by repeating steps a through c.
3. Assign Pod 1 bits 0 through I.5 to the label DATA.
a. Place the cursor on the bit assignmentfield below Pod 1 and to
the right of DATA and press SELECT.
b. Any combination of bits may already be assignedto this pod;
however,you will want all 16 bits assignedto the DATA label.
The easiestway to as&n is to pressthe CLEAR ENTRY key
to un-assignany assignedbits before you start.
c. Place the cursor on the period under the 15 in the bit
assignmentpop-up and press SELECT. This will place an
asterisk in the pop-up for bit 15, indicating Pod 1 bit l5 is now
assignedto the DATA label. Repeat this procedure until all 16
bits have an asterisk under eachbit number. Place the cursor
on Done and press SELECT to close the pop-up.
d. Repeat step c for Pod 2 and the ADDS label to assignall 16
bi ts.
e. Repeat step c except you will assignthe lower eight bits (0 - 7)
of Pod 3 to the ADDR label.
State Analyzer Measurement Example
15-8
HP 16528/l 6538
Front-Panel Reference
Specifying
J Clock
the
If you remember from “What’s a State Analyzer” in Feeling Comfortable
with Logic An-m,
the state analpr samplesthe data under the
control of an external clock, which is “synchronous”with your circuit
under test. Therefore, you must specify which clock probe you will use
for your measurement.In this exercise,you will use the J clock, which is
accessiblethrough pod 1.
1. Select the State Format Specification menu by pressing the
FORMAT key.
2. Set the J Clock to sample on a negative-goingedge.
speclf
Its tlon
Spectf y Spbol
s
Clock
Clock
Pod
Pariocl
tY ’
Pal
+
El+
2
J&
---a--
15 . . . .
’ J +lK~dIldXlN[Il
,...a.
.,,..I
Lt
7
Pod
1
--------------
++***o*-~+oL*C4
Figure 15-4. Specifying the J Clock
a. Place the cursor on the CLOCK field and press SELECT.
b. Place the cursor on the box just to the right of J in the pop-up
(labeled OFF) and pressSELECT.
c. Place the cursor on 4 and pressSELECT.
d. Place the cursor on Done and pressSELECT.
HP 1652B/l653B
Front-Panel Reference
State Analyzer Measurement Example
15-B
Specifying
Trigger
Condition
a
To capture the data and place the data of interest in the center of the
display of the State Listing menu, you need to tell the state analyzer
when to trigger. Since the first event of interest is address0000,you
need to tell the state analyzer to trigger when it detects address0000 on
the addressbus.
-
1. Select the State Trace Specification menu by pressing the TRACE
key.
2. Set the trigger so that the state analyzertriggers on address0000.
If the Trigger on option is not already a perform steps a through
d. If the option is a skip to step e.
a. Place the cursor on the 1 in the SequenceLevels field of the
menu and pressSELECT.
b . Place the cursor on the field to the right of the Trigger on field
piEzzEq=
State
mode ISinqlel
Trace
Trsce
Speciflcstlon
Sequence Levml
storing
nhlle
lfrlggerl
1
1
Delete
Inoer t Level
any state
[‘J
Level
I
times
b
oun
Off
t
I=!
store
Off
Label
Figure 15-5. State Trace Specification Menu
and pressSELECT. Another pop-up appears showingyou a
list of “trigger on” options. Options a through h are qualifiers.
You can assignthem a pattern for the trigger specification.
State Analyzer Measurement Example
15-10
HP 1652B/1653B
Front-Panel Reference
-
c. Place the cursor on the a option and press SELECT.
d. Place the cursor on Done in the SequenceLevels pop-up and
pressSELECI’.
e. Place the cursor on the field to the right of the a under the
label ADDR and pressSELECT.
f. With the keypad, press0 (zero) until there are all zeros in the
Specify Pattern: pop-up and then press SELECT.
[piii%mKITrace
stem
Trece
Spocif ic~tior
modr[~[
Armed
Sequence Level8
While storing
I 0
” eng ststo”
6 store
1
Trigger
on -en
ony state”
2
1
I t¶mos
by
Run
1 Off J
I
Count
[
Off
Pros tore
1
Off
Lob.1
>
1
Brsnchrs
]
1
pGTiirlADMZ1
ear. >
0
b
rl
C
Figure 15-6. State Trace Specification
Your trigger specification now states:While storing anystatetrigger on
“a” once and then store anystate.”
When the state analyzeris connectedto your circuit and is acquiring
data, it continuously stores until it sees0000on the addressbus, then it
will store anystateuntil the analyzermemory is filled.
-
HP 16528/1653B
Front-Panel Reference
State Analyzer Measurement Example
1541
Acquiring
Data
the
ml
Note 4
Since you want to capture the data when the microprocessor sends
address0000on the bus after power-up, you press the RUN key to arm
the state analyzer and then force a reset of your circuit. When the reset
cycle ends, the microprocessor should send address0000trigger the
state analyzer and switch the display to the State Listing menu.
I
From this point in the exerciseunto the end, we will give you the
measurementresults. This way, you will not have to obtain and use an
identical circuit.
-Itlarkoft
1
Lab.1
>
Bars
)
-0007
4006
QWS
4004
-0063
-0002
-000 1
r+ooool
+ooo 1
+0002
+ows
+OOO4
WOOS
+0006
+0007
+owe
IState
Listing
Off
1
0084C4
DOMC6
OOCMFO
0004f2
oomxl
WMCA
OOMCC
4E75
6lE6
0000
MC8
BOX
OOFF
6730
ooDOo2
Dow04
wwo6
DOD048
008046
DO604c
00804E
008050
04FC
woo -l8048
2E7C J
WOO
04fC
6lDO
6100
ooww
1
woo
Reset Vector Fetch Routine
Figure 15-7. Reset Vector Fetch Routine
State Analyzer Measurement Example
m-12
HP 16528/1653B
The State
Listing
The state listing displays three columns of numbers as shown:
I
[Z56ZKEJ
-
flsrkort
Lab.1
BS¶@
State Locations
-0007
-0006
-0005
-0004
-0003
-0002
-a001
Ei?Eq
MOO 1
+0002
+0003
a004
woo5
+0006
MOO7
+oooe
1
IState
Llstlng
Off
]
1
)
1
0088C4
4E75
OOb8C6
0004F0
0004F2
0088C8
ooem7
OoeBcc
000000
000002
000004
000006
008048
00804c1
00804C
00804E
008050
6lE6
0000
88C8
603C
OOFF
6730
woo
04FC
woo
6048
2E7C
WDO
04FC
61D8
6100
-
Figure 15-8. State Locations
The first column of numbers are the state line number locations as they
relate to the trigger point. The trigger state is on line + 0000 in the
vertical center of the list area. The negativenu&bers indicate states
occurring before the trigger and the positive numbers indicate states
occurring after the trigger.
The secondcolumn of numbers are the states(listed in HEX) the state
analyzerseeson the addressbus. This column is labeled ADDR.
The third column of numbers are the states(listed in HEX) the state
analyzerseeson the data bus. This column is labeled DATA.
HP 16528/1653B
Front-Panel Reference
State Analyzer Measurement Example
15-13
-
Finding the
Answer
--
-1~
._-_-
~-I-_
__
._----_
.._^_
----.___-.-____~_
--
---
Your answer is now found in the listing of states + 0000through
+ooo4.
The 68000alwaysreads addresslocations 0,2,4, and 6 to find the stack
pointer location and memory location for the instruction it fetches after
power-up. The 68000usestwo words for each of the locations that it is
looking for, a high word and a low word. When the software designer
programs the ROM, he must put the stack pointer location at address
locations 0 and 2.0 is the high word location and 2 is the low word
location. Similarly, the high word of the instruction fetch location must
be in addresslocation 4 and the low word in location 6.
Since the software design calls for the reset vector to set the stack
pointer to 04FC and read memory addresslocation 8048for its first
instruction fetch, you are interested in what is on both the addressbus
and the data bus in states0 through 3.
The state listing below lists the codesreset vector search,in states0
through 3 and the correct frostmicroprocessor instruction in state 4.
+ 0ooooooooOoooo
+ 000100000204FC
+ 00020000040ooo
+ooo30oooo68048
+ 00040080483E7C
You seethat states0 and 1 do contain addresslocations 0 and 2 under
the ADDR label, indicating the microprocessor did look at the correct
locations for the stack pointer data. You also seethat the data
contained in theseROM locations are 0000and 04FC, which are
correct.
You then look at states2 and 3. You seethat the next two address
locations are 4 and 6, which is correct, and the data found at these
locations is 0000 and 8048,which is also correct.
State Analyzer Measurement Example
15-14
HP 16528/1653B
Front-Panel Reference
So far you haveverified that the microprocessor has correctly
performed the reset vector search.The next thing you must verify is
whether the microprocessor addressesthe correct location in ROM
that it was instructed to addressin state 4 and whether the data is
correct in this ROM location. From the listing on your machine, you
seethat the addressin state 4 is 008048,which is correct, but the
instruction found in this location is 2E7C, which is not correct. You
have found your problem: incorrect data stored in ROM for the
microprocessor’sfirst instruction.
+
+
+
+
0000 OOOOO0000 (high word of stack pointer location)
0001 000002 04FC (low word of stack pointer location)
0002 oOOOO40000 (high word of instruction fetch location)
OOO3000006 8048 (low word of instuction fetch location)
+ 0004 008048 2E7C (first microprocessor instruction)
I
lbB000STATEJ-
[Stste
Llstlng
llsrlcors
Of1
1
1
1
-0007
QOO6
-0005
-0004
-0003
008OC4
OOb8C6
0004F0
0004F2
OObbCb
4E7S
6lE6
0000
mea
BOX
4002
ooeec(I
OOFF
000
I& 001
MOO 1
+0002
a003
000000
0088CC
0000
6730
ooDoo2
04FC
000006
008040
l!lO40
MOO6
00804C
04FC
+0007
+0008
00804E
DO8050
61D8
6100
+0004
2E7C -
woo5
Incorrect Data
Figure 15-S. Incorrect Data
-
HP 16526/1653B
Front-Panel Reference
State Analyzer Measurement Example
15-15
_
Summary
--
_,
.
_--.-
--~
--_--AL-..--
.^..
_l-_----.--I_--uL-l_-~-~
-
-ll---_.
-l_______l
You havejust learned how to make a simple state measurementwith
the HP 1652BLogic Analyzer. You have:
specified a state analyzer
learned which probes to connect
assignedpods 1,2, and 3
assignedlabels
assignedbits
speciEedthe J clock
specified a trigger condition
acquired the data
interpreted the state listing
You have seenhow easyit is to use the state analyzer to capture the
data on the addressand data buses.You can use this sametechnique to
capture and display related data on the microprocessor statuscontrol,
and various strobe lines. You are not limited to using this technique on
microprocessors.You can use this technique any time you need to
capture data on multiple lines and need to sample the data relative to a
systemclock.
Chapter 21 showsyou how to use the logic analyzer as an interactive
timing and state analyzer.You will seea simple measurementthat
showsyou both timing waveformsand state listings and how they are
correlated.
If you have an HP 1653B,you do not have enough channelsto
simultaneouslycapture all the data for a 68000.But, since you probably
aren’t working with 16.bit microprocessors,this exampleis still
valuable becauseit showsyou how to make the samekind of
measurementon an eight-bit microprocessor.
-
State Analyzer Measurement Example
15-16
HP 16528/1653B
Front-Panel Reference
_-
Index
A
absolute
AccessingSystemConfiguration
Menu
Accessories
available
manuals
supplied
Accessoriesfor HP 1652B/53B
accumulate
acquisition
fields (state trace)
acquisition modes
glitch
state
timing
transitional
activity indicators
alternate printers
armed by
BNC
Machine 1 or 2
Run
state
timing
Armed by Field
ASCII
Assignment/SpecificationMenus
Assigning Pod Bits to Labels
description
Specifying Edges
HP 16528/16538
Front-Panel Reference
18-9
4-2
l-7
l-7
l-5
l-5
19-6
10-13
18-5
10-13
18-3
18-4
20-5
7-2
24-4
24-4
24-4
lo-l3
18-3
24-3
17-9
3-17
3-17
3-19
Specifying Patterns
Auto-Measure
+ Width and -Width
Fall Time
Measurement Example
Period and Frequency
Preshoot and Overshoot
Rise Time
Top and Base Voltages
VP-P
Auto-Measure Field
Auto-Trig Field
Autoload
disable
enable
autoloading a file
Automatic Measurement
Algolithms
Autoscale
Autoscale Field
Axes (State Chart)
Scaling the
Selectingthe
3-18
25-9
25-6
25-4
25-8
25-10
25-5
25-3
25-7
25-l
24-6
5-6,6-l
5-6
56
6113
B-l
23-19
4-5
13-2
13-1
B
base
ASCII
State Trace
baud rate
bit assignment
branches
per level
1708,1806
17-9
10-22
5-16
g-4,17-4
10-14
10-15
Index-1
--
.._
_
-_
restart
branching
multiple levels
secondary
branching qualifier
--I--I.XLI_
.
.
._
10-14
10-17
10-15
10-8
C
cablesfor printer
Calibration
Cancelfield
ChangingAlpha Entries
ChannelMenu
ChannelMenu Fields
Impedance
Input
Offset
Preset
Probe
V/Div
CHS Key
Clear Entry Key
clock
demultiplex
master
mixed
normal
period (state)
slave
state
Closing Pop-up Menus
Compare Image
Bit Editing of the
Creating a
Masking Channelsin the
Saving
Compare Listing Display
Compare Range
Specifyinga
CompensationSignal
Index-2
7-3
24-1, D-l
5-4
3-15
23-l
23-5
23-l
23-3
23-5
23-4
23-2
3-4
3-3
9-10
9-10
9-11
9-9
9-12
9-10
97
319
l-2-3
12-4
12-3
12-5
12-8
12-2
12-6
12-6
2-7
Configuration Capabilities
HP 1652Bcapabilities
HP 1653Bcapabilities
Connect dots Field
Connecting
analyzerto target system
Grabbers to probes
Grabbers to test points
Labels to pods, probes, cables
Other HP Printers
Pods to probe cables
probe cablesto analyzer
Continue field
COPY
Copying a File
count
States
Time
Cursor
2-8
2-12
2-12
2-17
79
2110
2-9
54
5-7 6-1
6%
lo-18
10-20
lo-18
3-7
D
data
bits
time-correlating
Delay
from Trigger (State)
Delay (timing)
Deleting Waveforms (State)
Demultiplex (clock)
Difference Listing
Locating Mismatchesin
Difference Listing Display
disk
drive operations
format (LIF)
Installing a Blank Disk
operations
Disk Drive
Disk Eject Button
5-l-5
21911,27-12
23-17
14-5
19-.9
14-4
9-10
12-8
12-2
6-l
6-7
6-6
5-3
3-5
3-5
HP 16528/1653B
Front-Panel Reference
disk operation parameters
disk operations
Autoload
COPY
Copying a File
Duplicate Disk
Format Disk
Formatting a Disk
load
Pack Disk
Pack Disk Operation
Purge
Purging a File
Rename
Renaming a File
Selectinga
store
Storing to a Disk
Disk Operations menu
Accessingthe
display
mixed mode
resolution (Timing Waveforms)
Display Field
Accumulate Mode
Average Mode
Normal
display icons
The Inverted Triangle
Vertical Dotted Line
Don’t Care Key
Duplicate Disk
Duplicating Operating SystemDisk
-
E
ECL
Edge Trigger Mode
HP 1652B/l6538
Front-Panel Reference
6-s
5-6,6-l,
6-U
5-7,6-l
6-s
5-8,6-l
5-11,6-l
67
5-5 6- 19
6%
5-9,6-l
6-17
5-10,6-l
6-14
5-9,6-l
6-12
64
5-5
-9 6- 1
6-9
Auto-Trig Field
Level Field
Source Field
edges
Then Find
Entering Alpha Data
Entering Numeric Data
Error Messages
Execute field
External Trigger (arming)
for Scope
external trigger BNCs
configuration
24-6
24-5
244,246
18-11
3-14
3-11
C-l
5-4
2-7
5-17
F
Featuresof HP 1652B/l653B
file description
filename
Find Pattern
6-3
Format Disk
21912,270l3 Format/Channel Menu Key
Formatting a Disk
20-12
Front-Panel Controls
CHS Key
25-31
Clear Entry Key
25-30
Display
Menu Key
25-29
Don’t Care Key
Format/Channel Menu Key
20-11
Hex(adecimaI) Keypad
20-11
I/O Menu Key
33
Knob
5-8 6-l
Menu Keys
6118
Roil Keys
Run Key
SelectKey
Stop Key
Trace/Trigger Menu Key
Full Qualifier Specification
9-6
Fuse
l-4
5-5,6-g
505,609
18-7
5-11,6-l
32
617
3-4
3-3
3-3
3-3
3-2
3-4
33
314
3-2
3-4
3-3
3-4
3-3
3-2
10-4
D-8
Index-3
G
General Purpose Probe Interface
glitch triggering
Glitch Acquisition mode
Grabbers
2-2
18-13
18-5
2-6
Setting RS-232Cfor HP Printers
for Non-HP Printers
inverse assembleddata
How to Display
inverse assemblerfdes
loading
7-2
A-18
3-4
L
7-3
I
I/O menu
Accessingthe
I/O Menu Key
I/O Port Configuration menu
Immedediate Trigger Mode
Armed by
Impedance Field
Indicator Light
indicators
activity
Input Field
Input Voltage for Probes
Inputs 1 and 2
Installation
Installing a Blank Disk
Intensity Control
interface
Configuring
HP-IB
RS-232C
Setting HP-IB for HP Printers
A-19
K
Knob
Hooking Up Your Printer
HP-IB
printer cables
7-5
7-5
5-1
51
313
5-12
24-3
23-5
3-5
20-5
23-l
2-8
3-5
D-l
6-6
D-10
Label VaIue vs. Label Value
(State Chart)
Label Value vs. States
(State Chart)
labels
State Format menu
State Trace
symbols
Timing Format menu
Timing Trace menu
Level Field
Line Switch
Line Voltage Selection
Load
loading a file
Logic Analyzer
description
key features
turning it on
13-4
13-3
17-3
93
lb-22
17-8
17-3
18-6
24-5
D-10
D-7
5-5,6-l
6-11
l-l
l-4
l-7
M
5-13
5-13,7-l
5-14,7-l
7-4
Maintenance
Making Hardcopy Prints
D-l
7-l
HP 1652B/1653B
Front-Panel Reference
.-
Marker Measurements
markers
Pattern (state)
Pattern (timing)
Statistics(state)
Statistics(timing)
Time (state)
Time (timing)
Timing Waveforms menu
XandO
Markers Field for Scope
SamplePeriod Display
Search
SpecifySearchMarkers
Statistics
Time
X-O Pattern from start
master clock
measurementexample
state analyzer
timing analyzer
timing/state analyzer
measurements
microprocessor
memory
acquisition
menu fields
Specify Symbols(state)
Specify Symbols(timing)
st/Div (states-per-division)
State Format Specification
State Listing menu
State Trace menu
Timing Format Specification
Timing Trace Specification
Timing Waveforms menu
Menu Keys
menu maps
Channel Menu
Specify Markers
state analyzer
HP 16528/16538
Front-Panel Reference
2542
State Chart
State Compare
11-4
State Format
19-S
State Listing
11-6
State Trace
State Waveform
19-6
11-6
timing analyzer
Timing Format
19-4
Timing Trace
19-3
Timing Waveform
20-10
Trigger Menu
25-14
Waveform Selection
25-16
Waveforms Menu
25-16
menus
Disk Operations
25-23
25-14
VO
25-22
I/O Port Configuration
9-10
Specify Symbols(state)
Specify Symbols(timing)
State Chart
15-l
State Compare
20-l
21-1
State Format Specification
State Listing
A-l
State Trace
State Waveform
18-4- 18-5
State Waveforms
Timing Format Specification
Timing Trace Specification
943
Timing Waveforms
17-8
14-4
Microprocessor Specific
Measurements
93
Microprocessors Supported
1;.3
10-2
mixed clocks
Mixed Mode Displays
17-3
Arming the Scope
18-2
Displaying Timing Waveforms
19-3
State/State
3-2
State/Timing/ScopeMixed
22-2
Mode Display
Time-Correlated Displays
22-5
Timing/Scope
8-l
8-9 - 8-10
8-6
8-2
8-5
83
817- 8-8
16-l
16-2
16-3
16-4
22-3
22-5
22-4
5-3,6-l
51
5-12
9:7,9-12
17-7
l3-1
l2-1
91
i-1
10-l
14-l
14-l
17-l
18-l
19-1
A-l
A-3
9-11
26-1
26-4
26-5
26-3
26-8
26-9
26-4
Index-5
Timing/State
Mixed Mode Field
Mode Field
Edge
Immediate
26-2
26-l
24-2
24-4
24-3
N
name
label
symbol
Name Field
9-4,1704
17-10
4-3
0
0 to Trig(ger)
occurrencecounter
Offset Field
Operating Characteristics
Operating SystemDisk
Duplicating the
Operating System-loading
Overlapping Timing Waveforms
19-4
10-9
23-3
F-l
6-18
6-18
D-9
’
21-14
P
Pack Disk
Packing a Disk
paper width
Setting the
Parity
pattern
recognizers
Pattern Fields (state)
patterns
Duration (present for
fields
index-6
5-9,6-l
6-17
5-17
76
5115
)
10-2
lo-24
10-23
18-9
10-22
find
Pod Clock
Pod Fields
Pod Grounding
pod threshold
ECL
18-7
99
4-6
2-5
user-defined
Pod Thresholds
Pods
clock
threshold
Polarity (Pol)
Pop-up Menus
Power Cord Configurations
preprocessors
Preset Field
prestore
print
All
Screen
Starting the Printout
Print All
Print Screen
printer
printers
alternate
Hooking Up
Other HP Printers
supported
Probe Cables
Probe Connecting
Analyzer to Target System
Disconnecting Probes from Pods
Grabbers to Probes
Grabbers to Test Points
Labels to Pods,Probes, Cables
Pods to Probe Cables
Probe Cablesto Analyzer
Probe Field
Probe Grounding
17-6
17-6
17-6
2-8
99
916,1706
994,1704
39
d4
A-2
23-5
10-21
S-2,7-7
s-2,7-7
77
5:2,7 7
s-2,7:7
5-16
7-2
72
7-9
7-l
2-6
2-8
2-11
2-12
2-12
2-13
2-10
2-9
23-4
2-6
HP 16528/1653B
Front-Panel Reference
Probe Inputs for Scope
Probe Pod Assemblies
Probes
Probing Options
General Purpose Probing
HP 10269C General Purpose
Probe Interface
HP 1032OCUser-Definable
Interface
Termination Adapter
Probing Systemfor Analyzer
description
Grabbers
Maximum Probe Input Voltage
Pod Grounding
Probe Cable
Probe Grounding
Probe Pod Assemblies
Probes
Signal Line Loading
Probing Systemfor Scope
CompensationSignal Outputs
description
External Trigger#Inputs
Maximum Probe Input Voltage
Probe Inputs
protocol
Purge
Purging a File
2-7
2-4
2-5
2-3
2-2
2-1
2-3
2-4
2-6
2-8
2-S
2-6
2-6
2-4
2-5
2-8
2-7
2-7
2-7
28
217
S-14
5-10,6-l
6-14
Q
Qualifer Field (state)
qualifier
branching
fields
storage
HP 16528/l 6538
Front-Panel Reference
10-23
10-2
10-8
10-22
R
range
recognizers
10-2
ranges
lo-24
*Rear-PanelControls and Connectors
External Trigger BNCs
3-6
Fail
3-7
HP-IB Interface Connector
37
Intensity Control
3-6
Line Power Module
3-6
Pod Cable Connectors
3-6
Probe Compensation Signal
3-7
RS-232CInterface Connector
3-6
Recommended Protocol (RS-232C) 7-6
Rename
5-9,6-l
repetitive
trace mode (state)
1043
trace mode (timing)
18-3
Repetitive Run Mode
24-7
Replacing Waveforms (State)
14-3
Returning to systemconfiguration 3-8
Roll Data
3-16
Roll Kkys
3-4
RS-232C
default configuration
printer cables
recommended protocol
setting for HP printers
setting for non-HP printers
Run Key
Run Mode Field
Repetitive Mode Run
Single Mode Run
7-6
7-3
7-6
75
7-5
3-3
24-7
24-7
24-7
10-8
Index-7
S
sampleperiod
Scope
Introduction
ScopeField
ScopeMenus Overview
ScopeOn/Off Field
SelectKey
Selectinga Waveform (State)
Selectingan Address (HPIB)
SelectingFields
SelectingMenus
SelectingOptions
self test
Self Tests-powerup
sequencelevels
Delete Level
Insert Level
Reading the Display
SignalLine Loading
single
trace mode (state)
trace mode (timing)
SingleRun Mode
slaveclock
SlopeField
SourceField
Specifications
SpecifySearchMarkers
Greater than
In/Not IN Range
Lessthan
Type
X-O Marker set on
SpecifyingEdges
SpecifyingPatterns
st/Div (states-per-division)
stateanalyzer
Index-8
An Overview
menu maps
State Chart menu
Accessingthe s
state clock
19-3
State Compare menu
Accessingthe
22-l
State Format Specification menu
25-l
Accessingthe
22-6
fields
4-5
State Listing menu
34
Accessingthe
14-2
fields
543
state tagging
3-9
State Trace menu
37
Accessingthe
3-10
fields
5-18
(StateWaveforms menu
E-1
’ Accessingthe
10-6
State/StateMixed Mode Display
10-7
Statistics
10-7
Stop bits
10-11
Stop Key
2-8
Stop Measurement .
state
10-l-3
Stop Measurement (timing)
18-3
storage macro
24-7
storage qualifier
9-10
Store
246”, ’
Store exception to disk
24-4 .
state
F- 1 .1-1
A
State
Compare
_I
timing
25-20’~ .- Storing to a Disk
25-21.
supported printers
25-19
Switching BetweenAnalyzer
25-17
and Scope
25-17
symbols
3-19
base
3-18
label
141,144
name
8-l
m
81
81
l31
u-1
9-7
l2-2
9-l
9-l
9-3
11-l
11-2
11-3
10-20
10-l
10-2
10-2
14-l
14-1
26-3
25-23
5x5
3-3
11-5
19-5
10-9
10-8
5-5,6-l
11-5
12-7
19-6
6-9
7-l
38
17-7
g-14,17-8
g-13,17-8
9-15,17010
HP 16528/1653B
Front-Panel Reference
specify (state)
view size
SystemConfiguation Menu fields
Pods
r
Type
SystemConfiguration
Accessingsystemconfiguration
menu
description
SystemConfiguration Menu Fields
Autoscale
.
97
9k,
fields
17-10 Timing Trace Specification menu
4-6
4-4 .
4-2
4-l
4-s
Name
4-3
Scope On/Off
4-5
T
r
state
time
Termination Adapter
Then Find Edge
threshold
Pod
time tagging
time-correlated data
Time/Div (time per division)
timing
TimebaseFunctions
.
Delay
s/Div
scrolling
Zoom
timing
Trace mode
timing analyzer
An Overview
menu maps
Timing Format Specification menu
Accessingthe
base
HP 16528/16538
errAn+Dsnnl rnala*nnnn
, I ‘ +,
lo-18
10-20
10-19
2-3
Accessingthe
fields
;Timing
Wa%forms
1
Overlapping
.4Timing Waveforms menu
. Accessi@the
.I-r“Marker
At
field
3 Delay field
Timing Waveforms Menu fields
Timing/Scope Mixed Mode Display
Timing/State-Mixed Mode Display
Toggle Fields
Top and Bask Voltages defined
Trace/Trigger Menu Key
Transitional Acquisition mode
Trigger Marker
Trigger Menu
*
17-3
18-l
18-l
18-2
21-14
19-1
19-2
19-7
19-9
19-3
26-4
26-2
3-11
B-2
32
18-4
24-2
24-1
96
4-4
Type Field
18-11
U
9-6,174
10-19
21.11,27X User Interface
Changing Alpha Entries
19-8
Closing Pop-up
Menus
c
2343
23-17
23-14
23-17
2345
18-3
16-1
16-1
16-1
17-l
17-l
18-6
CurSOf :
3-l5
3-9
3-7
description
31
Entering Alpha Data
3-14
Entering Numeric Data
3111
Pop-up Menus
39
Returning to systemconfiguration 318
Roll Data
3-16
Selecting Fields
3-9
Selecting Menus
3-7
Selecting Options
3-10
Switching between analyzer
and scope
3-8
Index-9
Toggle Fields
User-Defmable Interface
341
2-l
-
V
V/Div Field
view size
symbol
23-2
1740
W
Waveform Selection
Insert/Delete
Math
Modify
Overlay
Turning them ON/OFF
WaveformsMenu
Auto-Measure Field
Connect dots Field
Description
Display Field
Marker Measurements
Markers Field
ScopeField
SearchMarker Measurement
Example
23-6
23-9
2342
23-10
23-11
23-8
25-l
2531
25-l
25-29
25-12
2543
25-l
25-24
X
X and 0 markers
State Chart
StateWaveform
Timing Waveforms
X to Trig(ger)
Index-l 0
-.
13-5
144
20-10
19-4
HP 16528/1653B
Evrrn+-Danal
Ddarnrrma
HP 1652B/HP 1653B
Your Comments Please
Your commentsassistus in meetingyour needsbetter. Please completethis questionnaireand return it to us. Feel free to add
any additional commentsthat you might have. All commentsand suggestionsbecomethe property of Hewlett-Packard. Omit
any questions that you feel would be proprietary.
Yes
No
1. Did you receiveyour product when expected?
[I
2. Were you satisfied with the operation of the instrument at turn-on?
[I
[I
[1
3. Were the proper accessoriessuppliedwith your product?
If not, what was missing?
Manual(s) [ ]
Probes[ ]
Other
4. What measurements will this instrument be used to make?
5. How will the instrument be controlled?
Front Panel [ ]
HP-IB [ ]
RS-232C [ ]
Controller Type
6. What do you like most about the instrument?
7. What would you like to see changed or improved?
8. Which manuals have you used?
[ ] Getting Started Guide
[ ] Front-Panel Reference
[ ] Programming Reference
[ ] Service Manual
9. Please rate the manuals on the following
4 = Excellent
3=Good
2 = Adequate
l=Poor
[ ] Breadth and depth of information
[ ] Ability to easily find information
[ ] Ability to understand and apply the information provided in the manual
10. What is your experience with logic analyzers?
[ ] No previous experience
[ ] LRss than 1 year experience
[ ] More than 1 year’s experience on one model
[ ] More than 1 year’s experience on several models
Name
Address
Phone
THANK YOU FOR YOUR HELP
Company
Zip Code
Instrument Serial #
NO POSTAGE NECESSARY IF MAILED
IN U.S.A.
Your cooperation in completingand returning this form
will be greatly appreciated.Thank you.
FOLD HERE
HEWLETT
PACKARD
III
NO POSTAGE
NECESSARY
IF MAILED
IN THE
UNITED STATES
III
BUSINESS REPLY CARD
FIRST CLASS
PERMIT NO. 1303
COLORADO SPRINGS, COLORADO
POSTAGE WILL BE PAID BY ADDRESSEE
HEWLETT-PACKARD
COLORADO SPRINGS DIVISION
ATN: PUBLICATIONS DEPT.
l?O. BOX 2197
COLORADO SPRINGS, COLORADO 80901-9959
-
_^_
HEWLETT
PACKARD
Printed in U.S.A.