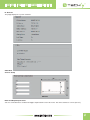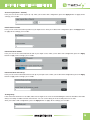
1
Trasmettitore
/ Ricevitore
HDMIARM
over
IP con
PoE
MULTIPLE DESKTOP
MONITOR
WITH
CLAMP
Trasmettitore / Ricevitore HDMI over IP con PoE
HDMI over IP with PoE Transmitter/Receiver
Manuale d'istruzione
User's manual
IDATA EXTIP-VW
IDATA EXTIP-VWR
www.techly.com
- [email protected]
www.techly.com
1
Trasmettitore
/ Ricevitore
HDMIARM
over
IP con
PoE
MULTIPLE DESKTOP
MONITOR
WITH
CLAMP
MANUALE D'ISTRUZIONE
INDICE
1.0 Introduzione............................................................................................................................................3
1.1 Contenuto della confezione......................................................................................................................3
1.2 Descrizione prodotto..............................................................................................................................3
1.3 Specifiche Tecniche................................................................................................................................4
1.4 Panoramica applicazioni..........................................................................................................................5
2.0 Impostazioni Guidata Video Wall............................................................................................................7
2.1 Installazione di Software Video Wall e Apple® Bonjour.........................................................................7
2.2. Installazione guidata Video Wall...........................................................................................................11
3.0. Impostazione tramite pagina di configurazione web............................................................................15
3.1. Preparativi per la connessione alla Configurazione Web.....................................................................15
3.2. Descrizione Configurazione Web.........................................................................................................15
Sicurezza del prodotto................................................................................................................................21
2
www.techly.com
Trasmettitore
/ Ricevitore
HDMIARM
over
IP con
PoE
MULTIPLE DESKTOP
MONITOR
WITH
CLAMP
trasmettitore/ricevitore HDMI OVER IP CON POE
Gentile Cliente
Grazie per aver acquistato questo prodotto. Per ottenere il massimo delle prestazioni nella salvaguardia della vostra
sicurezza, vi consigliamo di leggere con attenzione il presente manuale prima di collegare e mettere in funzione il prodotto.
Tenete sempre a disposizione il presente manuale per ulteriori esigenze future.
1.0 INTRODUZIONE
Questo manuale fornisce informazioni relative a tutti gli aspetti e le funzioni necessarie per installare, configurare, utilizzare
e mantenere il prodotto che hai acquistato.
Questo manuale è destinato a tecnici che hanno familiarità con i concetti di approfondimento di gestione di reti e con le
terminologie.
1.1 contenuto della confezione
Prima di iniziare l'installazione di questo prodotto, si prega di controllare e verificare il contenuto della confezione del
prodotto, che dovrebbe includere i seguenti elementi:
- 1x trasmettitore (IDATA EXTIP-VW)/ ricevitore (IDATA EXTIP-VWR) HDMI over IP con PoE
- 1x Adattatore
- 1x CD con manuale di installazione guidata e Video Wall per l'utente
Note: Nel caso qualsiasi elemento riportato in tabella qui sopra sia mancante o danneggiato, contattare il proprio distributore
o rivenditore al più presto.
1.2 descrizione del prodotto
Il trasmettitore / ricevitore HDMI over IP con PoE è una soluzione innovativa HDMI-over-PoE di segnaletica digitale.
Progettato come unità trasmittente (Trasmettitore HDMI over IP PoE) e unità ricevente (Ricevitore HDMI over IP PoE), è
eccezionalmente scalabile ed offre una combinazione di disposizioni Video Wall fino a 8 × 16.
Il trasmettitore / ricevitore HDMI over IP con PoE offre varie opzioni di connettività Video Wall per locali pubblici quali bar sport,
cinema, stazioni, ed è molto richiesto in luoghi come i centri di soccorso, enti per gestione della sicurezza o unità di monitoraggio
del traffico.
È possibile gestire / configurare il trasmettitore / ricevitore HDMI over IP con PoE in modo intuitivo con l’installazione
guidata Video Wall che viene fornita nella confezione o dalle pagine web di configurazione.
PoE Connettività, Centralizzazione e Raggruppamento
Il trasmettitore / ricevitore HDMI over IP con PoE supporta alimentazione da 802.3af PoE & DC5V, alimentazione remota ON
/ OFF da uno managed switch PoE e plug-and-play da DIP switch rotativo per regolare un gruppo diverso o un software
utility, un PC di controllo per impostare la matrice di visualizzazione via web.
Come funziona
Nel sistema, il segnale video viene distribuito collegando il trasmettitore HDMI-over-PoE (trasmettitore HDMI over IP con
PoE) alla sorgente video HDMI. A ciascun monitor visualizzato, è collegata un’unità ricevente (ricevitore HDMI over IP
con PoE) per completare il sistema. La soluzione è altamente flessibile e le tipologie Punto-Punto e Punto-Multipunto
potrebbero essere organizzate convenientemente.
Per soddisfare un'ampia gamma di requisiti di applicazione, anche il collegamento multipunto è facilmente realizzabile
e gestibile attraverso IGMP v1/2 con uno managed network switch, dove più sorgenti video possono essere distribuite
liberamente ai monitor richiesti.
Il layout di visualizzazione video è modificabile con l'utilità software in dotazione. Con l'avanzata tecnologia multicasting la
larghezza di banda non viene caricata pesantemente dal numero di unità mostrate.
www.techly.com
3
Trasmettitore
/ Ricevitore
HDMIARM
over
IP con
PoE
MULTIPLE DESKTOP
MONITOR
WITH
CLAMP
1.3 specifiche tecniche
4
Modalità Video Wall
Supporto matrice di visualizzazione M × N HDMI
Fino a 8 trasmettitori e 128 ricevitori in un unico sistema
Ha bisogno di un PC di controllo per impostare la configurazione Video Wall
Audio
Formati HDMI
Tipo connettore di rete
1000Mbps RJ-45, SFP
Tipo di segnale
HDMI 1.3 e HDCP 1.2 compatibile
Connettore HDMI
Tipo A 19 pin, femmina
Cavo di sistema
CAT5e / 6/7 UTP / FTP / Cavo STP, Fibra ottica
Risoluzione massima
HDTV 1080p (1920x1080 @ 60Hz)
Indicatore LED
PWR: Indicatore LED di alimentazione
LINK: Indicatore della connessione LAN
DATI: Indicatore di collegamento dati
Pulsanti
Premere Pulsante1:
Modificare Link / Unlink; Modalità Ingegneria
Premere Pulsante2 (solo ricevitore):
Cambiare modalità video / grafica; Anti-dithering; Aggiornamento EDID
Supporto multicast punto-punto, punto-multipunto e multipunto-multipunto
con configurazione di rete
Gruppo multi-fusione con switch Gigabit Ethernet (IGMP v1 / 2 Richiesto)
Consumo Di Energia
5V / 2.5A DC, 802.3af PoE
Potenza assorbita: max. 8W
Dimensioni
142 x 107 x 25 mm
Umidità di stoccaggio
5 ~ 95% (senza condensa)
Temperatura di stoccaggio
-10 ~ 80 ° C
Umidità di Utilizzo
10 ~ 85% RH (senza condensa)
Temperatura Di Utilizzo
0 ° C a 50 ° C
Peso
0.65kg
Approvazioni di regolamentazione
CE, FCC
www.techly.com
Trasmettitore
/ Ricevitore
HDMIARM
over
IP con
PoE
MULTIPLE DESKTOP
MONITOR
WITH
CLAMP
1.4
Panoramica applicazioni
Punto-Multipunto
Distribuzione multipla: 1 trasmettitore + 4 ricevitori
Applicazione 1 × 4 Video Wall: 1 trasmettitore + 4 ricevitori
www.techly.com
5
Trasmettitore
/ Ricevitore
HDMIARM
over
IP con
PoE
MULTIPLE DESKTOP
MONITOR
WITH
CLAMP
Punto-Multipunto
Applicazione 2 × 2 Video Wall: 2 trasmettitori + 4 ricevitori
Multipunto Multipunto
6
www.techly.com
Trasmettitore
/ Ricevitore
HDMIARM
over
IP con
PoE
MULTIPLE DESKTOP
MONITOR
WITH
CLAMP
2.0 Impostazione mediante installazione guidata Video Wall
Questa sezione vi guiderà correttamente nell’installazione del trasmettitore / ricevitore HDMI over IP con PoE e vi permetterà
di configurarlo con il software di configurazione. Questo capitolo contiene le seguenti sezioni:
- Installazione software Video Wall Setup e Apple® Bonjour
- Installazione guidata Video Wall
2.1 Installazione di Software Video Wall e Apple® Bonjour
Il trasmettitore / ricevitore HDMI over IP con PoE è dotato di un software di installazione guidata Video Wall facile ed intuitivo
che permette di trovare il trasmettitore / ricevitore HDMI over IP con PoE sulla rete locale ed effettuare le configurazioni della
gamma di TV .
Al fine di effettuare la configurazione guidata Video Wall correttamente, è necessario installare Apple® Bonjour sul PC,
scaricabile dal sito web Apple® (http://www.apple.com).
Si prega di seguire le istruzioni nella sezione seguente per installare sia l'installazione guidata Video Wall che Apple® Bonjour.
Installazione guidata Video Wall
1. Inserire il CD nel lettore CD-ROM del PC,
e fare doppio clic su Setup Wizard Video Wall.
2. Premere il pulsante "Next>" per avviare l'installazione
3. Selezionare il percorso del file dove si desidera installare
l'installazione guidata Video Wall premendo il pulsante
"Change...". Dopo aver deciso il percorso del file, premere
il pulsante "Next>" per continuare. È possibile premere il
pulsante "<Back" per tornare alla pagina di configurazione
precedente, oppure premere il pulsante "Cancel" per
annullare l'installazione.
www.techly.com
7
Trasmettitore
/ Ricevitore
HDMIARM
over
IP con
PoE
MULTIPLE DESKTOP
MONITOR
WITH
CLAMP
4. Premere il pulsante "Next>" per avviare l'installazione. È possibile
premere il pulsante "<Back" per tornare alla pagina di configurazione
precedente, oppure premere il pulsante "Cancel" per annullare
l'installazione.
5. Installazione completata. Si prega di premere il pulsante "Finish"
per completare l'installazione.
6. L'icona Setup della Guida Video Wall verrà visualizzata sul desktop
del PC. È possibile eseguire il software facendo doppio clic sull'icona
sul desktop.
8
www.techly.com
Trasmettitore
/ Ricevitore
HDMIARM
over
IP con
PoE
MULTIPLE DESKTOP
MONITOR
WITH
CLAMP
Installazione di Apple® Bonjour
1. Visitare il sito Apple® (http://www.apple.com) e scaricare Apple® Bonjour per il vostro PC.
Fare doppio clic su Apple® Bonjour.
2. Premere il pulsante "Next>" per avviare l'installazione.
È possibile premere il pulsante "Cancel"
per annullare l'installazione.
3. Cliccare su "I accept the terms in the license agreement",
quindi premere il pulsante "Next>". È possibile premere il
pulsante "<Back" per tornare alla pagina di configurazione
precedente, oppure premere il pulsante "Cancel" per
annullare l'installazione.
4. È possibile visualizzare le informazioni relative al Apple®
Bonjour qui. Premere il pulsante "Next>" per avviare
l'installazione. È possibile premere il pulsante "<Back"
per tornare alla pagina di configurazione precedente, oppure
premere il pulsante "Cancel" per annullare l'installazione.
www.techly.com
9
Trasmettitore
/ Ricevitore
HDMIARM
over
IP con
PoE
MULTIPLE DESKTOP
MONITOR
WITH
CLAMP
5. Selezionare il percorso del file dove si desidera installare
Apply® Bonjour premendo il pulsante "Change ...". Dopo
aver deciso il percorso del file, premere il pulsante "Install"
per continuare. È possibile premere il pulsante "<Back"
per tornare alla pagina di configurazione precedente, oppure
premere il pulsante "Cancel" per annullare l'installazione.
6. Il sistema avvierà l’installazione di Apple® Bonjour.
7. Installazione completata. Si prega di premere il pulsante
"Finish" per completare l'installazione.
10
www.techly.com
Trasmettitore
/ Ricevitore
HDMIARM
over
IP con
PoE
MULTIPLE DESKTOP
MONITOR
WITH
CLAMP
2.2 Installazione guidata Video Wall
Inizio
Prima di iniziare ad utilizzare la guida Video Wall del trasmettitore / ricevitore HDMI over IP con PoE, collegare tutti i vostri
trasmettitori / ricevitori HDMI over IP con PoE e il PC allo switch PoE, come mostrato nella figura seguente.
Accertarsi che il PC e il trasmettitore / ricevitore HDMI over IP con PoE siano nella stessa rete.
Per il PC non è necessario avere un IP per accedere al trasmettitore / ricevitore HDMI over IP con PoE. Di default, Il
trasmettitore / ricevitore HDMI over IP con PoE dovrebbe generare una serie di IP automaticamente.
Se stai usando Il trasmettitore / ricevitore HDMI over IP con PoE per la prima volta, è necessario eseguire prima l'installazione
guidata Video Wall, in modo da poter conoscere l'IP di questi dispositivi.
Si prega di consultare le sezioni in basso per informazioni più dettagliate in merito alla installazione guidata Video Wall.
Impostazioni di Installazione Guidata Video Wall
L'Installazione guidata Video Wall è un software che vi guiderà passo-passo e vi aiuterà nella configurazione.
Per avviare l'installazione guidata Video Wall, si prega di fare doppio clic sull'icona sul desktop.
1-Impostare i numeri del monitor verticale / orizzontale:
Qui è possibile impostare il numero di monitor che verranno utilizzati nel Video Wall verticale / orizzontale. Il numero dei
monitor impostato qui deve corrispondere al numero di ricetrasmettitori installati nella rete.
Il numero massimo di monitor che è possibile utilizzare verticalmente è 8, e il numero massimo di monitor che è possibile
utilizzare in senso orizzontale è di 16.
Al termine premere il pulsante "Next>"
www.techly.com
11
Trasmettitore
/ Ricevitore
HDMIARM
over
IP con
PoE
MULTIPLE DESKTOP
MONITOR
WITH
CLAMP
2-Scelta / Organizzazione dei Dispositivi in Uscita:
Qui si possono scegliere i dispositivi che si desiderano
utilizzare come fonti d'uscita e, di conseguenza,
organizzare le loro posizioni sul TV Wall.
È anche possibile visualizzare tutti i ricevitori HDMI over IP con PoE situati nella rete.
Le informazioni qui elencati includono i loro indirizzi IP e i nomi Host. Per eseguire
una ricerca in rete, premere il pulsante di ricerca del dispositivo (Search Device).
Se si desidera accedere ad altri ricevitori HDMI over IP con PoE, si dovrà utilizzare l'indirizzo IP qui in elenco.
Per aggiungere un dispositivo al TV Wall, si prega di trascinare il dispositivo desiderato dalla tabella dei dispositivi alla
tabella di destra del TV Wall Virtuale, come mostrato nella figura in basso.
Se si desidera rimuovere un dispositivo dal TV Wall, si prega di trascinarlo dalla tabella del TV Wall Virtuale al cestino, come
mostrato nella figura sotto.
È inoltre possibile attivare le funzioni Tearing Delay e
Show OSD qui.
• Tearing Delay: Se l'ambiente di rete non è stabile,
potrebbero verificarsi dei disturbi video sul Video Wall.
Abilitando questa funzione si riducono i ritardi video causati da reti instabili.
• Show OSD: Verranno visualizzate delle informazioni
aggiuntive sul monitor (numero seriale).
Premere il pulsante "Next>" al termine delle operazioni.
Per tornare alla precedente pagina di impostazioni,
premere il pulsante "Back".
12
www.techly.com
Trasmettitore
/ Ricevitore
HDMIARM
over
IP con
PoE
MULTIPLE DESKTOP
MONITOR
WITH
CLAMP
3-Scelta / Organizzazione dei dispositivi in uscita:
Qui si possono scegliere i dispositivi che si desiderano utilizzare come sorgenti di ingresso. Se si dispone di fonti multiple
di input, è possibile impostare quale ingresso si desidera utilizzare. Inoltre, è possibile impostare come visualizzare la
sorgente di ingresso, tra visualizzazione singola o su più monitor.
È anche possibile visualizzare tutti i ricetrasmettitori HDMI over IP con PoE in rete.
Le informazioni qui elencati includono i loro indirizzi IP e i nomi Host. Per eseguire una ricerca in rete, premere il pulsante
di ricerca del dispositivo.
Se si desidera accedere ad un differente ricetrasmettitore HDMI over IP con PoE, si dovrà utilizzare l'indirizzo IP qui in
elenco.
Per aggiungere una nuova sorgente di ingresso, si prega di scegliere la sorgente di ingresso che si desidera utilizzare,
scegliere il numero di monitor che si desidera utilizzare (verticale/orizzontale) e premere il pulsante "Add New View
Source" come mostrato nella figura sopra.
www.techly.com
13
Trasmettitore
/ Ricevitore
HDMIARM
over
IP con
PoE
MULTIPLE DESKTOP
MONITOR
WITH
CLAMP
L'impostazione che hai fatto sarà visualizzata sul Video Wall Virtuale. L'esempio mostrato in figura è una Video Wall che ha
due monitor verticalmente e un monitor orizzontalmente.
Se si dispone di fonti multiple di input, è possibile impostare colori diversi per queste diverse fonti.
Il colore impostato qui sarà visualizzato sul Video Wall Virtuale, che indica differenti fonti di ingresso.
Per eliminare una sorgente di input, si prega di scegliere la sorgente di ingresso che si desidera eliminare dal menu a
tendina, e premere il pulsante "Delete".
Se si desidera cambiare la posizione di visualizzazione di una fonte di ingresso sul Video Wall Virtuale, si prega di utilizzare i tasti direzionali (su, giù, sinistra e destra) per regolare la posizione.
Premere il pulsante "Apply" quando hai finito e applicare tutte le impostazioni eseguite. Per tornare alla pagina di
impostazione precedente, premere il pulsante "Back".
14
www.techly.com
Trasmettitore
/ Ricevitore
HDMIARM
over
IP con
PoE
MULTIPLE DESKTOP
MONITOR
WITH
CLAMP
3.0 impostazione tramite pagina di configurazione web
impostazione tramite pagina di configurazione web
Questa sezione vi guiderà nella configurazione web del trasmettitore / ricevitore. Questo capitolo contiene le seguenti
sezioni:
- I preparativi per la connessione alla Configurazione Web
- Descrizione della Configurazione Web
3.1 Preparativi per la connessione alla Configurazione Web
Impostazione dell'indirizzo IP del PC
Prima di collegarsi alla configurazione web del trasmettitore / ricevitore HDMI over IP con PoE, è necessario impostare
l'indirizzo IP del PC allo stesso segmento di rete del trasmettitore / ricevitore HDMI over IP con PoE che si desidera
collegare.
Ad esempio, se l'indirizzo IP del trasmettitore / ricevitore HDMI su IP con PoE è 169.254.4.20, è necessario impostare come
indirizzo IP del PC 169.254.4.X, dove X non deve essere 20, ma dovrebbe essere un qualsiasi altro numero da 1 a 254.
Ottenere l’IP del trasmettitore / ricevitore HDMI over IP con PoE
Come già detto nel capitolo 3, quando è collegato a una rete,
il trasmettitore / ricevitore HDMI over IP con PoE genera automaticamente
una serie di IP. È possibile visualizzare il proprio indirizzo IP tramite l’installazione
guidata del Video Wall, come mostrato nella figura qui a fianco.
3.2 Descrizione Configurazione Web
Per accedere alla pagina web di configurazione, si prega di aprire un browser web (come ad esempio
Chrome, Mozilla o Internet Explorer), e digitare l'indirizzo IP del trasmettitore / ricevitore HDMI over
IP con PoE che si desidera collegare.
La seguente sezione vi fornirà descrizioni dettagliate
relative alla configurazione web del trasmettitore / ricevitore
HDMI over IP con PoE.
www.techly.com
15
Trasmettitore
/ Ricevitore
HDMIARM
over
IP con
PoE
MULTIPLE DESKTOP
MONITOR
WITH
CLAMP
Sistema
A. Informazioni sulla versione
È possibile visualizzare le informazioni di sistema in questa pagina.
B. Aggiornamento Firmware
È possibile aggiornare il firmware qui in questa pagina. Notare che il processo di aggiornamento non deve essere interrotto
(scollegando il PC e il trasmettitore / ricevitore HDMI over IP con PoE) o il vostro Il trasmettitore / ricevitore HDMI over IP
con PoE potrebbe non funzionare correttamente.
- Choose File: Premere il pulsante per scegliere un file del firmware dal PC.
- Upload: Caricamento del firmware che avete scelto.
C. Utilities
Qui è possibile reimpostare / riavviare il trasmettitore / ricevitore HDMI over IP con PoE, oppure utilizzare il comando API
della console.
Comandi:
- Factory Default: Premere questo pulsante per ripristinare tutte le impostazioni al valore di default.
- Reboot: Premere questo pulsante per riavviare il trasmettitore / ricevitore HDMI over IP con PoE.
Comando API della console:
- Console API command: È possibile digitare i comandi API qui in questo campo.
- Apply: Premere questo pulsante per immettere il comando digitato nel campo di immissione comando.
- Output: Questo campo visualizza il sistema di uscita per il comando API inserito.
16
www.techly.com
Trasmettitore
/ Ricevitore
HDMIARM
over
IP con
PoE
MULTIPLE DESKTOP
MONITOR
WITH
CLAMP
D. Statistiche
In questa pagina sono riportate le statistiche di sistema.
Video Wall
A. Impostazioni di base
Smussatura e compensazione del gap
È possibile impostare le distanze per smussatura e compensazione del gap qui in questo menu. L'unità utilizzata qui è 0,1
millimetri (0,01 centimetri).
www.techly.com
17
Trasmettitore
/ Ricevitore
HDMIARM
over
IP con
PoE
MULTIPLE DESKTOP
MONITOR
WITH
CLAMP
Dimensioni Muro e Posizionamento
Qui è possibile impostare il numero di monitor che verrà utilizzato in modalità Video Wall in verticale / orizzontale. Inoltre, è
possibile impostare la modalità di ingresso in modalità host singolo.
Apply to:
Per applicare l'impostazione eseguita, premere il pulsante Apply qui. Inoltre, qui è possibile scegliere quale trasmettitore /
ricevitore HDMI over IP con PoE applicherà le impostazioni fatte. Se la funzione Show OSD è abilitata, sul monitor verranno
visualizzate informazioni aggiuntive (numero di serie).
B. Configurazione avanzata
Qui è possibile effettuare delle impostazioni avanzate come la regolazione della posizione del segnale di ingresso sul
monitor che avete. Prima di effettuare qualsiasi impostazione, si prega di scegliere il trasmettitore / ricevitore HDMI over IP
con PoE che si desidera configurare nel campo Choose Control Target.
Ripristinare Impostazioni di base
È possibile configurare tutte le impostazioni qui per le impostazioni di base. Si prega di premere il pulsante Reset per
ripristinare la configurazione di base.
18
www.techly.com
Trasmettitore
/ Ricevitore
HDMIARM
over
IP con
PoE
MULTIPLE DESKTOP
MONITOR
WITH
CLAMP
Layout dello schermo (Riga × Colonna)
Qui è possibile impostare il layout dello schermo (A × B). Dopo aver fatto la configurazione, premere il pulsante Apply per
applicare tutte le impostazioni eseguite.
Posizione Riga / Colonna
Qui è possibile impostare la posizione riga / colonna della sorgente in ingresso. Dopo aver fatto la configurazione, premere
il pulsante Apply per applicare tutte le impostazioni eseguite.
Spostamento Orizzontale / Verticale
Qui è possibile impostare lo spostamento orizzontale / verticale della vostra sorgente di ingresso. Dopo aver fatto la
configurazione, premere il pulsante Apply per applicare tutte le impostazioni eseguite.
Scalabilità Orizzontale / Verticale
Qui è possibile impostare la scala orizzontale / verticale della vostra sorgente di ingresso. Dopo aver fatto la configurazione,
premere il pulsante Apply per applicare tutte le impostazioni eseguite.
Tearing Delay
Se l'ambiente di rete non è stabile, potrebbero verificarsi dei disturbi video sul Video Wall. Abilitando questa funzione si
riducono i ritardi video causati da reti instabili. È possibile impostare il valore di ritardo (in microsecondi) anche qui.
Dopo aver effettuato le vostre impostazioni, premere il pulsante Apply per applicare tutte le impostazioni eseguite.
www.techly.com
19
Trasmettitore
/ Ricevitore
HDMIARM
over
IP con
PoE
MULTIPLE DESKTOP
MONITOR
WITH
CLAMP
Rete
A. Configurazione di Rete
È possibile effettuare la configurazione IP con le impostazioni di rete del trasmettitore / ricevitore PoE qui in questa pagina.
Modalità IP
Ci sono tre diverse modalità IP disponibili, che includono:
- IP automatico: Il trasmettitore / ricevitore HDMI over IP con PoE genera automaticamente una serie di indirizzi IP, maschera
di sottorete e gateway. Questa è l'impostazione predefinita.
- DHCP: Il trasmettitore / ricevitore HDMI over IP con PoE avrà una serie di indirizzi IP, maschera di sottorete e gateway
tramite il server DHCP.
- Statica: Impostazione manuale di indirizzo IP, maschera di sottorete e il gateway.
Per applicare le impostazioni eseguite, premere il pulsante Apply.
Modalità Casting
È possibile impostare la modalità di casting in questa pagina.
- Multicast: Impostare la modalità casting del trasmettitore / ricevitore HDMI over IP con PoE su multicast.
- Unicast: Impostare la modalità casting del trasmettitore / ricevitore HDMI over IP con PoE su unicast.
Per applicare le impostazioni eseguite, premere il pulsante Apply.
Funzioni
A. Configurazione seriale
In questa pagina si può fare la configurazione seriale. Per attivare
questa funzione, si prega di verificare la finestra Enable Serial over IP
e premere il pulsante Apply in basso. Le modalità operative includono
Tipo1, Tipo2, Tipo1 in modalità ospite e Tipo2 in modalità ospite.
Inoltre, è possibile modificare le impostazioni della velocità di
trasmissione (per la modalità operativa del tipo 2) qui in questa pagina.
Per applicare le impostazioni eseguite, premere il pulsante Apply.
20
www.techly.com
Trasmettitore
/ Ricevitore
HDMIARM
over
IP con
PoE
MULTIPLE DESKTOP
MONITOR
WITH
CLAMP
Questa appendice descrive i problemi di sicurezza relativi a questo prodotto. Per utilizzare il
prodotto in sicurezza, si consiglia vivamente di leggere questa appendice prima di installare
e utilizzare il prodotto La mancata osservanza di queste precauzioni e avvertenze potrebbe
causare malfunzionamenti, scosse elettriche o incendi. Se questo prodotto funziona in modo anomalo (ad esempio genera fumo),
si prega di terminare l’utilizzo e contattare il proprio distributore o rivenditore immediatamente.
AT T E N Z I O N E
RISCHIO DI SCOSSE ELETTRICHE
NON APRIRE
NON installare questo prodotto nelle condizioni di seguito elencate!
• NON installare il prodotto in un ambiente con condizioni diverse dal suo ambiente operativo specificato.
• NON installare il prodotto in un ambiente esposto a luce solare diretta o in prossimità di impianti di riscaldamento.
• NON installare il prodotto in un ambiente con forti escursioni termiche. Sbalzi di temperatura, anche all'interno della gamma di temperatura di
funzionamento del prodotto, possono causare malfunzionamenti.
• NON installare questo prodotto in prossimità di fonti d’acqua o liquido.
• Non sovrapporre questo prodotto con altri dispositivi di rete direttamente uno sopra l'altro. Impilare i dispositivi di rete direttamente, senza
l'applicazione di un telaio di montaggio, causerà il surriscaldamento di questo prodotto.
• NON installare questo prodotto su una superficie instabile. Può causarne la caduta o malfunzionamenti.
Guida alla manutenzione del prodotto:
• NON smontare il prodotto. Potrebbe provocare malfunzionamenti e invalidare la garanzia del prodotto.
• Si consiglia di mantenere il prodotto libero dalla polvere. Per rimuovere la polvere dal prodotto, si prega di utilizzare un pennello asciutto e
spazzolare delicatamente.
• Quando non si utilizza il prodotto, conservarlo in un luogo fresco con bassa umidità e privo di polvere. In caso contrario si potrebbe causarne il
malfunzionamento.
• Prima di accendere il prodotto, assicurarsi che la fonte di alimentazione elettrica soddisfi le esigenze di questo articolo. NON utilizzare altri
adattatori di corrente se il prodotto è dotato di un proprio alimentatore nella confezione.
Come ottenere il miglior risultato di visualizzazione HDMI:
Molti fattori possono influenzare la qualità e l'affidabilità dell’uscita HDMI. Le seguenti sezioni forniscono alcuni suggerimenti per garantire le migliori
prestazioni della vostra uscita HDMI.
Rete dedicata
Il trasmettitore / ricevitore HDMI over IP con PoE è progettato per funzionare su una rete Gigabit Ethernet dedicata, non cumulabile con altro traffico
di rete o con accesso ad internet.
Risoluzione di Monitoraggio
a. Impostare la sorgente di uscita sulla migliore risoluzione che tutti i televisori siano in grado di visualizzare.
b. Il trasmettitore / ricevitore HDMI over IP con PoE supporta 1080p. Se alcuni televisori in rete non sono in grado di accettare 1080p, l’impostazione
della risoluzione più alta può non essere visualizzata al meglio.
Risoluzione della Fonte e Qualità Audio / Video
Alcune fonti, come ricevitori satellitari o decoder, possono produrre a bassa risoluzione o consegnare materiale video estremamente compresso,
ottenendo scarsi risultati. Durante la pianificazione si considerino la fonte e la risoluzione dei problemi di sistema.
Dispositivi di visualizzazione
La qualità percepita dell'immagine video dipende fortemente dal tipo e dalla qualità dei televisori o proiettori utilizzati. Schermi di alta qualità
dovrebbero produrre un'immagine notevolmente migliore.
Distanza tra il trasmettitore e il ricevitore
E’ possibile raggiungere lunghe distanze, ma utilizzando cavi Cat. 5e / 6 di qualità superiore
Fonte e Cavi TV di Collegamento
Utilizzare cavi HDMI brevi e di qualità; i cavi di bassa qualità spesso sono inaffidabili. Usare sempre buoni metodi di rilievo tensione o cavi di
bloccaggio per impedire che i cavi si allentino nel corso del tempo.
Interferenza da apparecchi elettrici vicini
Può avere un effetto negativo sulla qualità del segnale. Ad esempio, i vecchi monitor dei computer spesso emettono campi elettromagnetici molto
forti che possono interferire con le prestazioni delle apparecchiature video nelle vicinanze.
In conformità alla normativa WEEE, le apparecchiature elettriche ed elettroniche non devono essere smaltite con i rifiuti domestici. Il presente prodotto deve essere
consegnato ai punti di raccolta preposti allo smaltimento e riciclo delle apparecchiature elettriche ed elettroniche. Contattate le autorità locali competenti per
ottenere informazioni in merito allo smaltimento corretto della presente apparecchiatura.
Si dichiara che questo prodotto è conforme alla Direttiva Europea EMC 2004/108/EC ed alla Direttiva Europea ROHS 2011/65/EU.
www.techly.com
21
HDMI over
IP with MONITOR
PoE Transmitter/Receiver
MULTIPLE
DESKTOP
ARM WITH CLAMP
user's manual
Table of Contents
1.0 Introduction����������������������������������������������������������������������������������������������������������������������������������������� 23
1.1 Package contenents���������������������������������������������������������������������������������������������������������������������������� 23
1.2 Product bried description������������������������������������������������������������������������������������������������������������������� 23
1.3 Technical Specification.........................................................................................................................24
1.4 Application Overview��������������������������������������������������������������������������������������������������������������������������� 25
2.0 Setting via Video Wall Setup Wizard��������������������������������������������������������������������������������������������������� 27
2.1 Installing Video Wall Setup Wizard And Apple® Bonjour.....................................................................27
2.2 Video Wall Setup Wizard��������������������������������������������������������������������������������������������������������������������� 31
3.0 Setting Via Configuration Webpage......................................................................................................35
3.1 Preparations For Connecting To Configuration Webpage....................................................................35
3.2 Configuration Webpage Description....................................................................................................35
Product safety............................................................................................................................................41
22
www.techly.com
HDMI over
IP with MONITOR
PoE Transmitter/Receiver
MULTIPLE
DESKTOP
ARM WITH CLAMP
trasmettitore/ricevitore HDMI OVER IP CON POE
Dear customer
Thank you for purchasing this product. For optimum performance and safety, please read these instructions carefully before
connecting, operating or adjusting this product. Please keep this manual for future reference.
1.0 introduction
This manual provides information regarding to all the aspects and functions needed to install, configure, use, and maintain
the product you’ve purchased.
This manual is intended for technicians who are familiar with in-depth concepts of networking management and terminologies.
1.1 Package Contents
Before starting install this product, please check and verify the contents of the product package, which should include the
following items:
- One HDMI over IP with PoE Transmitter (IDATA EXTIP-VW)/Receiver (IDATA EXTIP-VWR)
- One Adapter
- One CD contains User’s Manual and Video Wall Setup Wizard
Note: If any item listed in this table above is missing or damaged, please contact your distributor or retailer as soon as
possible.
1.2 Product Brief Description
The HDMI over IP with PoE Transmitter/Receiver is an innovative HDMI-over-PoE digital signage Solution. Designed with
transmitting units (HDMI over PoE IP with Transmitter) and receiving units (HDMI over IP with PoE Receiver), it is exceptionally
scalable, offering any combination up to 8 × 16 matrix video wall arrangement.
The HDMI over IP with PoE Transmitter/Receiver riches video wall connectivity options to public premises such as sports
bars, cinemas, transport stations, or highly demanded monitoring sites such as emergency response centers, security
organization, or traffic monitoring units.
You can manage/configure your HDMI over IP with PoE Transmitter/Receiver via intuitive Video Wall Setup Wizard that
comes with the package or configuration web pages.
PoE Connectivity, Centralization and Grouping
HDMI over IP with PoE Transmitter/Receiver supports powered by 802.3af PoE & DC5V, remote power ON/OFF by a PoE
managed switch and plug-and-play by rotary DIP switch to adjust different group or software utility, a controller PC to set
display array via web.
How it works
In the system, video signal is distributed by connecting HDMI-over-PoE digital signage Transmitter (HDMI over IP with PoE
Transmitter) to HDMI video source. At each of displaying monitors, one receiving unit (HDMI over IP with PoE Receiver) is
attached to complete the system. The solution is highly flexible that Point-to-Point or Point-to-Many topologies could be
conveniently arranged.
To meet wider range of application requirement, Many-to-Many connection is also easily achievable and manageable
through IGMP v1/2 with a managed network switch, where multiple video sources could be freely distributed to required
monitors.
The video gridding layout is modifiable with software utility provided. With advanced multicasting technology the bandwidth
is not heavily loaded to the number of displaying units.
www.techly.com
23
HDMI over
IP with MONITOR
PoE Transmitter/Receiver
MULTIPLE
DESKTOP
ARM WITH CLAMP
1.3 Technical Specifications
Video Wall mode
Support M × N HDMI display array
Up to 8 transmitters and 128 receivers possible in a single system
Need a controller PC to set the Video Wall configuration
Audio
HDMI formats
Network Connector Type
1000Mbps RJ-45, SFP
Signal type
HDMI 1.3 & HDCP 1.2 compliant
HDMI Connector
Type A 19 pin, female
System Cable
CAT5e/6/7 UTP/FTP/STP cable, Optical fiber
Maximum Resolution
HDTV 1080p (1920x1080 @ 60Hz)
LED Indicator
PWR: Power LED indicator
LINK: LAN connection indicator
DATI: LAN connection indicator
Push Button
Push Button1:
change Link / Unlink; Engineering Mode
Push Button2(for Receiver only):
change between Video Mode / Graphic Mode ; Anti-Dither ; Update EDID
Multicast Support Point-to-Point, Point-to-Many and Many-to-Many network
configuration
Multi-casting group with Gigabit Ethernet switch (IGMP v1/2 Required)
Power & Consumption
5V/2.5A DC , 802.3af PoE
Power consumption: Max. 8W
Dimensions
142 x 107 x 25 mm
Storage Humidity
5 ~ 95% (no condensation)
Storage Temperature
-10 ~ 80 ° C
Operating Humidity
10 ~ 85% RH (no condensation)
Operating Temperature
0 ° C to 50 ° C
Weight
0.65kg
Regulatory Approvals
CE, FCC
24
www.techly.com
HDMI over
IP with MONITOR
PoE Transmitter/Receiver
MULTIPLE
DESKTOP
ARM WITH CLAMP
1.4
Application Overview
Point-to-Multi
Multiple Distribution: 1 Transceiver + 4 Receivers
1 × 4 Video Wall Application: 1 Transceiver + 4 Receivers
www.techly.com
25
HDMI over
IP with MONITOR
PoE Transmitter/Receiver
MULTIPLE
DESKTOP
ARM WITH CLAMP
Point-to-Multi
2 × 2 Video Wall Application: 2 Transceiver + 4 Receivers
Multi-to-Multi
26
www.techly.com
HDMI over
IP with MONITOR
PoE Transmitter/Receiver
MULTIPLE
DESKTOP
ARM WITH CLAMP
2.0 Setting via Video Wall Setup Wizard
This section will guide you to install HDMI over IP with PoE Transmitter/Receiver’s Video Wall Setup Wizard properly and
making configurations with this configuration software. This chapter contains the following sections:
- Installing Video Wall Setup Wizard and Apple® Bonjour
- Video Wall Setup Wizard
2.1 Installing Video Wall Setup Wizard and Apple® Bonjour
The HDMI over PoE IP with Transmitter/Receiver comes with an intuitive and easy-to-use Video Wall Setup Wizard that
allows you to find your HDMI over IP with PoE Transmitter/Receiver on your local network and make TV array configurations.
In order to have the Video Wall Setup Wizard working properly, you have to install Apple® Bonjour on your PC as well.
Please visit Apple® website (http://www.apple.com) and download Apple® Bonjour to your PC.
Please follow the steps in the following section to install both the Video Wall Setup Wizard and Apple® Bonjour.
Installing Video Wall Setup Wizard
1. Insert the CD into your PC’s CD-ROM,
and double-click on the Video Wall Setup Wizard
2. Press the “Next>” button to start the installation
3. Select the file path you would like to install the Video Wall
Setup Wizard by pressing the “Change…” button. After
you’ve decided the file path, please press the “Next>”
button to continue. You can press the “<Back” button to go
back to the previous setup page, or press the “Cancel”
button to cancel the installation.
www.techly.com
27
HDMI over
IP with MONITOR
PoE Transmitter/Receiver
MULTIPLE
DESKTOP
ARM WITH CLAMP
4. Press the “Next>” button to start installation. You can press the
“<Back” button to go back to the previous setup page, or press
the “Cancel” button to cancel the installation.
5. Installation complete. Please press the “Finish” button to finish
the installation.
6. The Video Wall Setup Wizard’s icon will be displayed on your PC’s
desktop. You can run the software by double-click the icon on
the desktop.
28
www.techly.com
HDMI over
IP with MONITOR
PoE Transmitter/Receiver
MULTIPLE
DESKTOP
ARM WITH CLAMP
Installing Apple® Bonjour
1. Visit Apple® website (http://www.apple.com), and download Apple® Bonjour to your PC.
Double-click on Apple® Bonjour.
2. Press the “Next>” button to start the installation.
You can press the “Cancel” button to cancel the installation.
3. Click on “I accept the terms in the license agreement”,
then press the “Next>” button. You can press the “<Back”
button to go back to the previous setup page, or press the
“Cancel” button to cancel the installation.
4. You can view information regarding to Apple® Bonjour here.
Press the “Next>” button to start the installation. You can
press the “<Back” button to go back to the previous setup
page, or press the “Cancel” button to cancel the installation.
www.techly.com
29
HDMI over
IP with MONITOR
PoE Transmitter/Receiver
MULTIPLE
DESKTOP
ARM WITH CLAMP
5. Select the file path you would like to install Apply® Bonjour
by pressing the “Change…” button. After you’ve decided
the file path, please press the “Install” button to continue.
You can press the “<Back” button to go back to the previous
setup page, or press the “Cancel” button to cancel the
installation.
6. The system is installing Apple® Bonjour.
7. Installation complete. Please press the “Finish” button to
finish the installation.
30
www.techly.com
HDMI over
IP with MONITOR
PoE Transmitter/Receiver
MULTIPLE
DESKTOP
ARM WITH CLAMP
2.2 Video Wall Setup Wizard
Getting Started
Before starting to use HDMI over IP with PoE Transmitter/Receiver’s Video Wall Setup Wizard, please connect all your HDMI
over IP with PoE Transmitter/Receiver and your PC to the PoE switch as shown in the figure below.
Please be sure that your PC and your HDMI over IP with PoE Transmitter/Receiver are in the same network.
It is not necessary for your PC to have an IP to access HDMI over IP with PoE Transmitter/Receiver. By default, your HDMI
over IP with PoE Transmitter/Receiver should generate a set of IP automatically.
If you’re using HDMI over IP with PoE Transmitter/Receiver for the first time, you must run the Video Wall Setup Wizard first
so you can know the IP of these devices.
Please see the sections down below for more detailed information regarding to the Video Wall Setup Wizard.
Video Wall Setup Wizard Settings
The Video Wall Setup Wizard is a software that will guide you and help you to set up your TV wall in
a step-by-step manner.
To start the Video Wall Setup Wizard, please double-click the icon on your desktop.
1-Setting up the Vertical/Horizontal Monitor Numbers:
Here you can set the number of monitors that will be used in your TV wall vertically/horizontally. The number of the monitors
you set here must match the number of the Transceivers you’ve installed in your network.
The maximum number of monitor your can use vertically is 8, and the maximum number of monitor your can use horizontally
is 16.
Press the “Next>” button when you’re done.
www.techly.com
31
HDMI over
IP with MONITOR
PoE Transmitter/Receiver
MULTIPLE
DESKTOP
ARM WITH CLAMP
2-Choosing/Arranging the Output Devices:
Here you can choose the devices you would like to use as
output sources, and arranging their positions on the TV
wall accordingly.
You can also view all HDMI over IP with PoE Receivers located in the network here as
well. Information listed here includes their IP addresses and Host Name.
To perform a network search, please press the Search Device button.
If you would like to access to each different HDMI over IP with PoE Receiver, you will have to use the IP address listed here.
To add a device to the TV wall, please drag the device you want to from the device table to the right virtual TV wall as shown
in the figure down below.
If you would like to remove a device from the TV wall, please drag the device you want to from the virtual TV wall to the trash
can as shown in the below figure .
You can also enable the Tearing Delay and Show OSD
functions here.
• Tearing Delay: If the network environment is not stable,
video noises might occur on the TV wall.
Enabling this function will reduce the video delays
caused by unstable network environments.
• Show OSD: Addition information (serial number)
will be displayed on the monitor.
Press the “Next>” button when you’re done. To go back to
the previous setting page, press the “Back” button.
32
www.techly.com
HDMI over
IP with MONITOR
PoE Transmitter/Receiver
MULTIPLE
DESKTOP
ARM WITH CLAMP
3-Choosing/Arranging the Output Devices:
Here you can choose the devices you would like to use as input sources. If you have multiple input sources, you can set
which input sources you would like to use. Also, you can set how the input source will be display among single/multiple
monitors.
You can also view all HDMI over IP with PoE Transceivers located in the network here as well. Information listed here
includes their IP addresses and Host Name. To perform a network search, please press the Search Device button.
If you would like to access to each different HDMI over IP with PoE Transceiver, you will have to use the IP address
listed here.
To add a new input source, please choose the input source you would like to use, choose the number of monitors you
would like to use vertically/horizontally, and press the “Add New View Source” button as shown in the figure above.
www.techly.com
33
HDMI over
IP with MONITOR
PoE Transmitter/Receiver
MULTIPLE
DESKTOP
ARM WITH CLAMP
The setting you’ve made will be displayed on the virtual TV wall. The example shown in the figure above is a TV wall that
has two monitors vertically and one monitor horizontally.
If you have multiple input sources, you can set different colors to those different sources.
The color set here will be displayed on the virtual TV wall, indicating different input sources.
To delete an input source, please choose the input source you want to delete from the scroll-down menu, and press the
“Delete” button.
If you would like to change a input source’s display position on the virtual TV wall, please use the
direction buttons (Up, Down, Left, and Right) to adjust the position.
Press the “Apply” button when you’re done and apply all the settings you’ve made. To go back to the previous setting page,
press the “Back” button.
34
www.techly.com
HDMI over
IP with MONITOR
PoE Transmitter/Receiver
MULTIPLE
DESKTOP
ARM WITH CLAMP
3.0 Setting via Configuration Webpage
In Setting via Video Wall Setup Wizard
This section will guide you to make settings via Transmitter/Receiver’s Configuration Webpage. This chapter contains the
following sections:
- Preparations for Connecting to Configuration Webpage
- Configuration Webpage Description
3.1 Preparations for Connecting to Configuration Webpage
Setting PC’s IP Address
Before connecting to HDMI over IP with PoE Transmitter/Receiver’s configuration webpage, you have to set your PC’s IP
address to the same network segment of the HDMI over IP with PoE Transmitter/Receiver you would like to connect.
For example, if your HDMI over IP with PoE Transmitter/Receiver’s IP address is 169.254.4.20, you should set your PC’s IP
address to 169.254.4.X, where X mustn’t be 20, and should be any other number from 1 to 254.
Getting HDMI over IP with PoE Transmitter/Receiver IP
As mentioned in Chapter 3, when connected to a network, HDMI over IP
with PoE Transmitter /Receiver will automatically generate a set of IP.
You can view its IP address via Video Wall Setup Wizard as shown in
the figure down below.
3.2 Configuration Webpage Description
To access the configuration webpage, please open a web browser (such as Chrome, Mozilla,
or Internet Explorer), and type in the IP address of the HDMI over IP with PoE Transmitter/Receiver
you would like to connect.
The following section will provide you detailed descriptions
regarding to HDMI over IP with PoE Transmitter/Receiver’s
configuration webpage.
www.techly.com
35
HDMI over
IP with MONITOR
PoE Transmitter/Receiver
MULTIPLE
DESKTOP
ARM WITH CLAMP
System
A. Version Information
You can view system information here in this page.
B. Update Firmware
You can update firmware here in this page. Please note that the updating process cannot be disrupt (by disconnecting PC and
HDMI over IP with PoE Transmitter/Receiver), or your HDMI over IP with PoE Transmitter/Receiver might be malfunctioning.
- Choose File: Press this button to choose a firmware file from your PC.
- Upload: Uploading the firmware you’ve chosen.
C. Utilities
Here you can reset/reboot your HDMI over IP with PoE Transmitter/Receiver, or use the console API command.
Commands:
- Factory Default: Press this button to reset all settings to default value.
- Reboot: Press this button to reboot your HDMI over IP with PoE Transmitter/Receiver.
Console API Command:
- Command Inputting Field: You can type API commands here in this field.
- Apply: Press this button to input the command you typed in the Command Inputting Field.
- Output: This field displays system output for the API command you inputted.
36
www.techly.com
HDMI over
IP with MONITOR
PoE Transmitter/Receiver
MULTIPLE
DESKTOP
ARM WITH CLAMP
D. Statistics
This page displays the system statistics.
Video Wall
A. Basic Setup
Bezel and Gap Compensation
You can set the distances for bezel and gap compensation here in this menu. The unit used here is 0.1mm (0.01cm).
www.techly.com
37
HDMI over
IP with MONITOR
PoE Transmitter/Receiver
MULTIPLE
DESKTOP
ARM WITH CLAMP
Wall Size and Position Layout
Here you can set how many monitors your TV wall will be used vertically/horizontally. Also, you can set the input mode to
Single Host Mode as well.
Apply to:
To apply the setting you made, please press the Apply button here. Also, you can choose which HDMI over IP with PoE
Transmitter/Receiver will apply the settings you’ve made here.
If the Show OSD function is enabled, addition information (serial number) will be displayed on the monitor.
B. Advanced Setup
Here you can make advanced settings such adjusting the input signal position on the monitors you have. Before making any
settings, please choose the HDMI over IP with PoE Transmitter/Receiver you would like to configure in the Choose Control
Target field.
Reset to Basic Setup
You can set all the settings here to basic settings. Please press the Reset button to reset to basic setup.
38
www.techly.com
HDMI over
IP with MONITOR
PoE Transmitter/Receiver
MULTIPLE
DESKTOP
ARM WITH CLAMP
Screen Layout (Row × Column)
Here you can set the screen layout (A × B). After you’ve done with configuration, press the Apply button to apply all the
settings you’ve made.
Row/Column Position
Here you can set the row/column position of your input source. After you’ve done with configuration, press the Apply button
to apply all the settings you’ve made.
Horizontal/Vertical Shift
Here you can set the horizontal/vertical shift of your input source. After you’ve done with configuration, press the Apply
button to apply all the settings you’ve made.
Horizontal/Vertical Scale Up
Here you can set the horizontal/vertical scale up of your input source. After you’ve done with configuration, press the Apply
button to apply all the settings you’ve made.
Tearing Delay
If the network environment is not stable, video noises might occur on the TV wall. Enabling this function will reduce the video
delays caused by unstable network environments. You can set the delay (in microsecond) value here as well.
After you’ve done with configuration, press the Apply button to apply all the settings you’ve made.
www.techly.com
39
HDMI over
IP with MONITOR
PoE Transmitter/Receiver
MULTIPLE
DESKTOP
ARM WITH CLAMP
Network
A. Network Setup
You can make HDMI over IP with PoE Transmitter/Receiver’s network settings here in this page.
IP Mode
There are three different IP modes available, which include:
- Auto IP: HDMI over IP with PoE Transmitter/Receiver will automatically generate a set of IP address, subnet mask, and
gateway. This is the default setting.
- DHCP: HDMI over IP with PoE Transmitter/Receiver will get a set of IP address, subnet mask, and gateway via DHCP
server.
- Static: Setting IP address, subnet mask, and gateway manually.
To apply the settings you’ve made here, please press the Apply button.
Casting Mode
You can set the casting mode here in this page.
- Multicast: Set HDMI over IP with PoE Transmitter/Receiver’s casting mode to multicast.
- Unicast: Set HDMI over IP with PoE Transmitter/Receiver’s casting mode to multicast.
To apply the settings you’ve made here, please press the Apply button.
Functions
A. Serial Setup
You can make serial over IP here in this page. To enable this function,
please check on the Enable Serial over IP checkbox and press the
Apply button down below. The operation modes listed here include
Type 1, Type 2, Type 1 guest mode, and Type 2 guest mode.
Also, you can change the baud rate settings (for Type 2 operation mode)
here in this page.
To apply the settings you’ve made here, please press the Apply button.
40
www.techly.com
HDMI over
IP with MONITOR
PoE Transmitter/Receiver
MULTIPLE
DESKTOP
ARM WITH CLAMP
This appendix describes safety issues regarding to this product. To use this product safely, it is
highly recommended to read this appendix before installing and using this product.
Failure to follow these precautions and warnings might cause product malfunction, electrical
shock, or even fire. If this product is working abnormally (e.g. generating smoke), please stop using this product and contact your
distributor or retailer immediately.
AT T E N Z I O N E
RISCHIO DI SCOSSE ELETTRICHE
NON APRIRE
DO NOT install this product under conditions listed below:
• DO NOT install this product in an environment with conditions exceeding its specified operating environment.
• DO NOT install this product in an environment that is subjected to direct sunlight or near any heating equipment.
• DO NOT install this product in an environment with extreme temperature changes. Extreme temperature changes, even within the product’s
operating temperature range, may cause malfunctions.
• DO NOT install this product in a location near any sources of water or liquid.
• DO NOT stack this product with other network devices directly on top of one another. Stacking network devices directly without applying a
mounting rack will cause this product to overheat.
• DO NOT install this product on an unstable surface. Doing so might cause this product to fall, resulting malfunction.
Product Maintenance Guide:
• DO NOT disassemble this product. Doing so might cause malfunction and void your product’s warranty.
• It is recommended to keep your product clear of dust. To remove dust from your product, please use a dry brush and brush it off gently.
• When not using this product, please store it in an environment with low humidity, cool temperature, and free of dust. Failure to do so might cause
malfunction.
• Before powering up this product, please make sure that the electric power source meets this product’s requirement. DO NOT use other power
adapters if this product comes with its own power adapter in the package
Getting the Best HDMI Display Result:
Many factors might influence the quality and reliability of your HDMI output. The following sections will provide some tips for ensuring the best
performance of your HDMI output.
Dedicated Network
The HDMI over IP with PoE Transmitter/Receiver is designed to operate on a dedicated Gigabit Ethernet network, not to be combined with other
network traffic or with access to the internet.
Resolution Tracking
a. Set up the source to output the best resolution that all TVs are capable of displaying.
b. The HDMI over IP with PoE Transmitter/Receiver supports 1080p. If some TVs in the network are not capable of accepting 1080p, the higher
resolution sets may not be shown to their best advantage.
Source Resolution and Video/Sound Quality
Sources, such as satellite receivers or cable boxes, can output at low resolutions or deliver extremely compressed video material, yielding poor
results. Consider the source when planning and troubleshooting your system.
Display Devices
The perceived quality of the video image depends heavily upon the type and quality of the TVs or projectors used. High quality displays should be
expected to produce a noticeably better image
Distance between the Transmitter and the Receiver
Long distances are possible, but premium quality Cat 5e/6 cables are necessary for the longest runs.
Source and TV Connection Cables
Use short, premium HDMI cables; low quality cables are often unreliable. Always use good strain relief methods or locking cables to prevent cables
from becoming loose over time.
Interference from Nearby Electrical Devices
It can have an adverse effect on signal quality. For example, older computer monitors often emit very high electromagnetic fields that can interfere
with the performance of nearby video equipment.
This product is marked with this symbol. It means that used electrical and electronic products should not be mixed with general household waste. There is a
separate collections system for these products in compliance with EU Directive WEEE
The product is compliance with European Directive EMC 2004/108/EC and ROHS 2011/65/EU
www.techly.com
41
MULTIPLE DESKTOP MONITOR ARM WITH CLAMP
www.techly.com - [email protected]