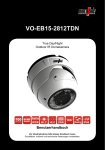
Download HRT0550TDN HRT0922TDN HRT2812TDN
Transcript
Telecamera Serie Y (TDN , DNR) Manuale d’Installazione/User Manual HRT0550TDN HRT0922TDN HRT2812TDN HR0802/ver.1.0 www.hrcctv.com Manuale di Installazione HRT0550-0922-2812TDN NORME GENERALI DI SICUREZZA General safety recommendations Sicurezza delle persone - Safety warnings Leggere e seguire le istruzioni - Tutte le istruzioni per la sicurezza e per l'operatività devono essere lette e seguite prima che il prodotto sia messo in funzione. Precauzioni particolari Rispettare tassativamente l'ordine delle istruzioni di installazione e collegamento descritte nel manuale. Verificare le indicazioni riportate sulla targa di identificazione: esse devono corrispondere alla vostra rete elettrica di alimentazione ed al consumo elettrico. Conservate le istruzioni per una consulta futura. Read and follow the instructions - Read the installation instructions before connecting the system to its power source. Follow these guidelines to ensure general safety. In order to prevent injury, burns or electrical shock to yourself and others, follow the connection instruction plan carefully. Sicurezza del prodotto - Product Safety Non posizionare in prossimità di liquidi oppure in un ambiente ad umidità eccessiva. Non lasciare penetrare del liquido o corpi estranei all'interno dell'apparecchiatura. Non ostruire le griglie di aerazione. Non sottoporre all'esposizione dei raggi solari oppure in prossimità di fonti di calore. Do not use the product in a wet location. Never push a foreign object through an opening inside the product. Slots and openings are provided for ventilation and should never be covered. Do not place under direct sunlight or heat sources. INFORMAZIONI SULL’AMBIENTE ENVIRONMENT INFORMATION Note per lo smaltimento del prodotto valide per la Comunità Europea Questo prodotto è stato progettato e assemblato con materiali e componenti di alta qualità che possono essere riciclati e riutilizzati. Non smaltire il prodotto come rifiuto solido urbano ma smaltirlo negli appositi centri di raccolta. E’ possibile smaltire il prodotto direttamente dal distributore dietro l’acquisto di uno nuovo, equivalente a quello da smaltire. Abbandonando il prodotto nell’ambiente si potrebbero creare gravi danni all’ambiente stesso. Nel caso il prodotto contenga delle batterie è necessario rimuoverle prima di procedere allo smaltimento. Queste ultime debbono essere smaltite separatamente in altri contenitori in quanto contenenti sostanze altamente tossiche. Il simbolo rappresentato in figura rappresenta il bidone dei rifiuti urbani ed è tassativamente vietato riporre l’apparecchio in questi contenitori. L’immissione sul mercato dopo il 1° luglio 2006 di prodotti non conformi al DLgs 151 del 25-07-05 (Direttiva RoHS RAEE) è amministrativamente sanzionato. pag.2 User Manual HRT0550-0922-2812TDN Disposal of waste products for European Union This products was designed to minimize their impact on the environment by reducing or eliminating hazardous materials and designing for recyclables. This product should be handed over to a designated collection point, e.g., on an authorized one -for-one basis when you buy a new similar product or to an authorized collection site for recycling waste electrical and electronic equipment. Improper handling of this kind of waste could have a possible negative impact on the environment and human health due to potentially hazardous substances. This symbol indicates that this product has not to be disposed of with your household waste, according to the WEEE Directive. For more information about where you can drop off your waste equipment for recycling, please contact your local city waste authority, or your household waste disposal service. GARANZIA - Warranty Questa garanzia ha validità di 2 anni a partire dalla data di acquisto assicurata solo dietro presentazione della fattura o scontrino rilasciati al cliente dal rivenditore. L’assistenza gratuita non è prevista per i guasti causati da: -Uso improprio del prodotto, immagazzinamento inadeguato, cadute o urti, usura, sporcizia, acqua, sabbia, manomissione da personale non autorizzato del prodotto rispetto a quanto previsto nei manuali d’uso inclusi. -Riparazioni, modifiche o pulizia effettuate da centri assistenza non autorizzati da HR EUROPE. -Danni o incidenti le cui cause non possono essere attribuite alla HR EUROPE, comprendenti e non limitati a fulmini, eventi naturali, alimentazione e ventilazione inadeguata. This warranty is valid for 2 years from the date of purchase obtained only against presentation of the original invoice/ cash ticket issued to the customer by the retailer. Warranty repair service is excluded if damage or defects have been caused by: -Improper use, incorrect storage, dropping or shocks, corrosion, dirt, water, handing or operation of the product as referred to in the users’ manuals. www.hrcctv.com User Manual Manuale di installazione HRT0550-0922-2812TDN HRT0550-0922-2812TDN 1.Specifiche tecniche-Technical features Modello-Model Sensore- Sensor Sistema TV- TV System Totale pixel- Total pixel Effettivo pixel- Effective pixel Sistema scansione -Scanning system Frequenza scansione-Scanning frequency Sincronizzazione-Synchronization O.S.D MENU Risoluzione-Resolution S/N Illuminazione minima-Minimum lux Portata Illuminatori a led-Night vision Bilanciamento bianco-White balance Shutter elettronico-Electronic shutter Uscita video- Video output Gamma caratteristica-Gamma characteristic BLC AGC DNR Sens up Privacy Messa a fuoco - focus TDN(Day &Night con filtro meccanico- Day & night mechanical filter) Grado di protezione- IP protection Alimentazione-Power Ottica regolabile – adjustable lens Temperatura/Umidità-Temperature/Humidity Peso- Weight HRT0550TDN-HRT0922TDN-HRT2812TDN 1/3” SONY super HAD CCD NTSC, PAL PAL=795(H)* 596(V) PAL=752(H)* 582(V) 2:1 Interlacciato-2:1 Interlaced PAL=15.625KHz(H)/50.00Hz(V) interna - Internal Disponibile-Available Colore 560TV Linee- Color 560TV Lines 50dB CDS OFF:0.1LUX F1.2 / CDS ON:0,0006LUX(sens up *128) Max 70 m – up to 70 m ATW/AWC/Manuale(1800°K-10500°K)- ATW/AWC Manual(1800°K-10500°K) PAL=1/50sec-1/120000sec CVBS:1.0Vp-p 75 ohm γ= 0,45 Selezionabile-Select LOW, MIDDLE, HIGH,OFF Selezionabile-Select LOW, MIDDLE, HIGH,OFF Selezionabile-Select LOW,HIGH,OFF,Middle Auto (selezionare *2-*128- select *2-*128) ON/OFF(4 zone- zone) ON/OFF(Livello regolabile-Level adjustable) Selezionabile (day & night/colore) - Select(day & night/color) IP 66 12 Vdc, 650 mA DC AUTO DC AUTO iris(9mmiris(5mm-50mm) 22mm) -10°~ +50° C/RH 95% Max. 1500g DC AUTO iris(2.8mm12mm) Materiale a Corredo - Contents of standard package 1 Base per facile installazione- 1 Base for easy installation 1 Telecamera- 1 Camera 4 Viti di fissaggio base- 4 Fixing screw for base 1 Brugola di fissaggio telecamera- 1 Fixing wrench for camera 1 Brugola per bloccaggio dello snodo- 1 Wrench to lock off 1 Brugola di bloccaggio del varifocale- 1 Wrench to lock off the varifocal 1 Cavo video test- 1 Video test cable www.hrcctv.com pag.3 Manuale di Installazione User Manual HRT0550-0922-2812TDN HRT0550-0922-2812TDN 2.Accesso al controllo OSD- Access to OSD control Controllo OSDOSD control Controllo OSDOSD control Per accedere al mini-joystick di controllo, svitare il coperchio di protezione. Unscrew the protection cover to access at mini-joystick. 2 1 3 1. controllo led IR :potenziometro per la regolazione dell’emissione di luce infrarossa.Regolare la potenza al fine di ottenere la visione desiderata. IR control: potentiometer for infrared light adjustment. Adjust the power to get right vision. 2. Mini-joystick: Utilizzare il joystick per muoversi nel menu e premere al centro per confermare. Mini-joystick: use joystick to move in the menu and press to confirm. 3. Connettore: video test per facile configurazione e messa a fuoco in loco. Uscita BNC Connector: video test to easy configuration and focus control. BNC Output. pag.4 www.hrcctv.com User Manual Manuale di installazione HRT0550-0922-2812TDN HRT0550-0922-2812TDN 3.Installazione - Installation MensolaBracket Base Tettuccio Sunshield Cavo-cable ScatolaCase Sensore IR IR Sensor Controllo OSDOSD control Ottica Lens IR led Focus control 4.Funzionamento-Functioning Per accedere al menù di impostazioni della telecamera premere il tasto SET-UP. Nel display verrà visualizzato il seguente menù: Press SET-UP button to access to the setup menu . The monitor will display: • SETUP ►Lens Shutter White Bal Backlight AGC DNR Sens-Up Special↵ Exit D C↵ −−− ATW OFF MIDDLE↵ LOW AUTO↵ • • • • • • • • • • • www.hrcctv.com muoversi nel menu con i tasti c e d . Si sposterà il cursore presente a sinistra dell'elenco. cambiare le impostazioni con i tasti W e X il simbolo a destra delle impostazioni indica la presenza di un sotto menù, accessibile premendo il tasto SET-UP . per uscire dai sotto menù premere il tasto SET-UP. per uscire dal menù principale spostarsi sulla voce EXIT e premere il tasto SET-UP con certe impostazioni altre voci non sono impostabili. Viene indicato con tre trattini “- - -“ to select items in the menu use the c and d buttons. The left cursor moves up and down. to change the settings use the W and X buttons. the symbol at the right of the settings shows the presence of submenu, accessible pressing the SET-UP button . to exit from submenus press the SET-UP button. to exit from menu move the cursor to EXIT and press the SET-UP button. selecting some settings, some other settings become disabled. These are indicated with “- - -“ pag.5 Manuale di Installazione User Manual HRT0550-0922-2812TDN HRT0550-0922-2812TDN LENS La telecamera è dotata di lente DC,e il parametro non è pertanto variabile.Con lenti DC DRIVE è possibile impostare la luminosità premendo il tasti W e X. There is a DC lens inside the camera,so it is no possible to modify the parameter.With DC DRIVE its enable the submenu to set the brightness by pressingW and Xkeys • • LENS ► Brightness−−−Ι−− 25 regola la luminosità dell'immagine con una scala da 1 a 70. set the brightness of the image with a range from 1 to 70. ATTENZIONE: la lente della telecamera è DC DRIVE. L'impostazione su MANUAL può causare malfunzionamenti PRESS SET TO RETURN ATTENTION: the lens of the camera is DC DRIVE. The MANUAL setup may cause malfunctions SHUTTER L'impostazione dell'otturatore elettronico si cambia con i tasti W e X . To change the settings of the electronic shutter use the W and X buttons. Premendo i tasti W e X si imposta la velocità dell'otturatore. Selezionando “A.FLK” l'impostazione di SENS-UP viene disabilitata. Pressing the W and X buttons you can set the shutter speed. Selected “A.FLK” the SENS-UP function is disabled. WHITE BAL Imposta la tonalità del colori. Ci sono tre impostazioni disponibili: ATW, AWC e MANUAL. Set the white balance. There are three settings: ATW, AWC and MANUAL. L'impostazione del bilanciamento del bianco si cambia con i tasti W e X . To change the settings of white balance use the W and X buttons. Selezionando MANUALE verrà visualizzato: Pressing the MANUAL button the monitor will display: WHITE BAL ► Red −−−Ι−− 32 Blue −−−Ι−− 39 PRESS SET TO RETURN pag.6 MANUAL: è possibile impostare il guadagno dei colori ROSSO e BLU fino ad ottenere la tonalità desiderata. ATW : il bilanciamento del bianco avviene automaticamente con temperature di colore da 1800°K a 10500°K, anche se cambia l'illuminazione. AWC: il bilanciamento del bianco è manuale: mettere davanti alla telecamera un foglio di carta bianca e premere SET-UP. MANUAL: set the gain of RED and BLUE colors while watching the color of the image. ATW:the white balance is automatic with color temperature range from 1800°K to 10500°K, also with changes in environment light source AWC: the white balance is manual: put a white paper in front of the camera and press the SET-UP button. www.hrcctv.com User Manual Manuale di installazione HRT0550-0922-2812TDN HRT0550-0922-2812TDN BACKLIGHT (BLC) Compensa l'illuminazione eccessiva dietro gli oggetti, variando il guadagno. Ci sono quattro impostazioni possibili. Compensate the severe backligth condition, by varing the gain. There are four settings. • • • • HIGH: il guadagno può incrementare da 6dB a 34dB - Gain could be increased from 6dB to 34dB. MIDDLE: il guadagno può incrementare da 6dB a 30dB - Gain could be increased from 6dB to 30dB LOW: il guadagno può incrementare da 6dB a 18dB - Gain could be increased from 6dB to 18dB OFF : backlight disattivato – Backlight does not operate. AGC: Imposta il guadagno massimo che può raggiungere il Controllo Automatico di Guadagno. Con un guadagno più alto le immagini saranno più luminose ma con maggior rumore.Ci sono quattro impostazioni possibili:HIGH, MIDDLE, LOW, OFF. Set the maximum gain of the Automatic Gain Control. With higher gain setting the image must be brigther but the noise level must be higher. There are four settings::HIGH, MIDDLE, LOW, OFF. HIGH: il guadagno può incrementare da 6dB a 34dB - Gain could be increased from 6dB to 34dB. MIDDLE: il guadagno può incrementare da 6dB a 30dB - Gain could be increased from 6dB to 30dB LOW: il guadagno può incrementare da 6dB a 18dB - Gain could be increased from 6dB to 18dB OFF: guadagno fisso a 6dB.(In posizione OFF verranno disabilitate le funzioni DNR e SENS UP - Gain fixed at 6dB.(at OFF DNR e SENS UP functions do not operate) Questa funzione permette anche la regolazione della luminosità(BRIGHTNESS) variando il guadagno This function allows the setup of brightness by varing the gain BRIGHTNESS ► Brightness−−−Ι−− 25 E’ possibile regolare la luminosità dell'immagine con una scala da 1 a 70. Set the brightness of the image with a range from 1 to 70. PRESS SET TO RETURN DNR Imposta il livello di riduzione di rumore dell'immagine. Con AGC impostato in OFF, questa funzione è disattivata. Ci sono quattro impostazioni possibili: Set the Digital Noise Reduction level. When AGC is OFF, DNR mode is not available. There are four settings: HIGH: Elevata riduzione del rumore, ma possono presentarsi delle immagini fantasma -High reduction of noise but ghost effect could appear.. MIDDLE: Riduzione media del rumore, con meno possibilità di immagini fantasma - Middle reduction of noise with less ghost effect. LOW: Bassa riduzione del rumore, senza immagini fantasma - Low reduction of noise without ghost effect. OFF: Riduzione del rumore disattivata - Noise reduction disabled. SENS-UP Imposta il fattore di amplificazione del segnale video premendo SET-UP Può essere disabilitato impostando su OFF. Set the amplification factor of the video signal by pressing SET-UP button. It can be disabled setting to OFF. LIMIT ► Auto x32 PRESS SET TO RETURN www.hrcctv.com pag.7 Manuale di Installazione User Manual HRT0550-0922-2812TDN • HRT0550-0922-2812TDN • Il fattore di amplificazione può essere impostato da x2 a x128. Più alto sarà il fattore, più alta sarà la luminosità dell'immagine con illuminazione insufficiente. Questa funzione agisce sul tempo di carica della luce del CCD, quindi maggiore sarà il fattore, più lenta sarà l'immagine, e più rumore presenterà l'immagine. Con AGC impostato a OFF, oppure con otturatore impostato su A.FLK questa funzione è disattivata. • The amplification factor can be set from x2 to x128. Higher will be the value, higher will be the brightness of the image even under low lighting level. This function increase the time of CCD charge, then higher will be the value, slower will be the refresh speed and higher will be the noise of the image. If AGC is set to OFF or if SHUTTER is set to A.FLK, this function is disabled. • MENU IMPOSTAZIONI SPECIALI – SPECIAL MENU SPECIALE – SPECIAL Si accede al menù di impostazioni speciali premendo il tasto SET-UP. Verrà visualizzato il seguente menù: You can enter to the special settings pressing the SET-UP button. The monitor will display: • SPECIAL ► Camera ID OFF Color AUTO Sync INT Motion DET OFF Privacy OFF Mirror OFF Sharpness ON↵ Reset Return↵ • • • • • • • • • muoversi nel menu con i tasti c e d Si sposterà il cursore presente a sinistra dell'elenco. cambiare le impostazioni con i tasti W e X. il simbolo a destra delle impostazioni indica la presenza di un sotto menù, accessibile premendo il tasto SET-UP . per uscire dai sotto menù premere il tasto SET-UP. per ritornare al menù principale spostarsi sulla voce RETURN e premere il tasto SET-UP. to select items in the menu use the c and d buttons. The left cursor moves up and down. to change the settings use the W and X buttons. the symbol at the right of the settings shows the presence of submenu, accessible pressing the SET-UP button . to exit from submenus press the SET-UP button. to return to previous menu, move the cursor to RETURN and press the SET-UP button. CAMERA ID In posizione ON è possibile impostare il nome della telecamera da impostare premendo SET-UP(Può essere disabilitato impostando su OFF) If set to ON the name of the camera will be displayed. It can be set pressing the SET-UP button( It can be disabled setting to OFF) • CAMERA ID ABCDEFGHIJ K L M NOPQRSTUVWXYZ Abcdefghijklm • • • nopqrstuvwx yz -. 0 1 2 3 4 5678 9 ← → CLR POS END TEST-1…………… • • • • • • pag.8 selezionare il carattere con i cursori W e X. e confermare con SETUP. ← → Premere SET-UP per scegliere la posizione del carattere CLR: Premere SET-UP per cancellare . Selezionando POS si visualizza il nome creato e si può variare la posizione con i cursori. END:Premere SET-UP per uscire da questo menu. select the character with the arrows W and X. and press SET-UP button. ← → Press SET-UP button to select character position. CLR: Press SET-UP button to clear the name field. POS displays created camera name on the screen, and you can modify the position with the arrows. END: Press SET-UP to exit www.hrcctv.com User Manual Manuale di installazione HRT0550-0922-2812TDN HRT0550-0922-2812TDN COLOR Imposta la selezione automatica o manuale del colore. Questa impostazione non è selezionabile se ACG è OFF. Set the automatic or manual color selection. Color mode is not available when AGC is OFF. AUTO : Passaggio automatico B/N o colore a seconda della quantità di luce (Day/Night) - Automatic B/W or ON : Immagine sempre a colori - Fixed color mode. color setting depend on ligth level (Day/Night) SYNC Il sincronismo per le telecamere alimentate a 12VDC è sempre impostato su intermo. The synchronization for 12VDC cameras is always set to internal. MOTION DET Se impostato su ON attiva la rilevazione di movimento su 4 aree, da impostare premendo W e X.In caso di rilevazione di movimento si visualizzerà nella parte bassa dell'immagine la scritta lampeggiante "Motion Detected" (Può essere disabilitato impostando su OFF) If it is set to ON the camera detects motion of objects in 4 areas; the areas can be set pressing the W and X..button. The screen will display "Motion Detected" when motion is detected( It can be disabled setting to OFF) MOTION DET ► Area Sel AREA 1 Area State ON Top ---Ι---10 Down ----Ι----25 Left------Ι----20 40 Right -----Ι---PRESS SET TO RETURN • • • • • • • • • • • • AREA SEL: selezionare l'area da impostare. AREA STATE: attiva o disattiva l' area selezionata. TOP: imposta il margine superiore dell’area selezionata. DOWN: imposta il margine inferiore. LEFT: imposta il margine sinistro. RIGHT: imposta il margine destro. AREA SEL: select the area to set. AREA STATE: turn on / off the selected area. TOP: set the upper border . DOWN: set the height of the area . LEFT: set the left border . RIGHT: set the lenght of the area . PRIVACY Se impostato su ON attiva il mascheramento visivo di alcune aree. Si possono impostare 4 aree premendo SETUP.Può essere disabilitato impostando su OFF). If it is set to ON the camera activates the mask of private areas; the areas can be set pressing the SET-UP button( It can be disabled setting to OFF) PRIVACY ► Area Sel AREA 1 Area State ON Area Tone ----Ι----23 Top ----Ι----14 Down ----Ι----- 29 Left------Ι----20 40 Right -----Ι---PRESS SET TO RETURN www.hrcctv.com • • • • • • • AREA SEL: selezionare l'area da impostare. AREA STATE: accende o spegne l' area selezionata. AREA TONE: tonalità delle aree, dal bianco (100) al nero (1). TOP: imposta il margine superiore dell’area selezionata. DOWN: imposta il margine inferiore. LEFT: imposta il margine sinistro. RIGHT: imposta il margine destro. • AREA SEL: select the area to set. AREA STATE: turn on / off the selected area. AREA TONE: set the greytone of areas, from white (100) to black (1) TOP: set the upper border . DOWN: set the height of the area . LEFT: set the left border . RIGHT: set the lenght of the area . • • • • • • pag.9 Manuale di Installazione HRT0550-0922-2812TDN User Manual HRT0550-0922-2812TDN MIRROR Imposta l'immagine speculare. Set the mirrored image. • • OFF : immagine normale - normal image. ON : immagine a specchio (orizzontale) –Horizontal mirror image SHARPNESS Aumenta il livello di dettaglio dell'immagine. Premere SET-UP per impostare il livello di contrasto (da 1 a 31). Può essere disattivato impostando su OFF. Maggiore è il livello di dettaglio impostato, maggiore sarà il rumore presente nell'immagine. It increases the detail level of the image. Press SET-UP button to set the detail level (from 1 to 31). This function can be disabled by setting OFF. Higher will be the detail level setting, higher will be the noise of the image. SHARPNESS ► Level −−−Ι−− 8 PRESS SET TO RETURN RESET Ripristina le impostazioni originali di fabbrica. Reset the device to the factory settings. pag.10 www.hrcctv.com User Manual HRT0550-0922-2812TDN Manuale di installazione HRT0550-0922-2812TDN Specifiche tecniche soggette a variazioni senza preavviso. Technical specifications can be modified without any preliminary notice www.hrcctv.com pag.11 Manuale di Installazione User Manual HRT0550-0922-2812TDN HRT0550-0922-2812TDN HR EUROPE s.r.l. ROMA: sede legale e amministrativa; Via Giulianello, 1-7 – 00178 Roma, ITALIA – Tel +39 06 7612912 Fax +39 06 7612601 TORINO: sede operativa; Via G.B.Feroggio, 10 – 10151 Torino, ITALIA – Tel +39 011 453 53 23 Fax +39 011 453 70 49 SHANGHAI: ufficio di rappresentanza; Minhang Residence, Room 506, N°50 Jinzhu Road 200336 Shanghai, CHINA Tel(Fax):+86 21 62086781 – e-mail: [email protected] e-mail: [email protected] web: www.hrcctv.com – Codice Fiscale e Partita IVA 06397551000 – Iscrizione R.E.A. 966880 pag.12 www.hrcctv.com


