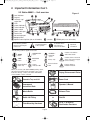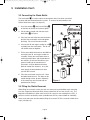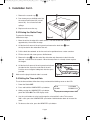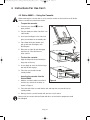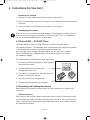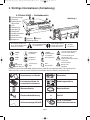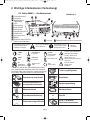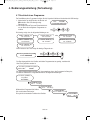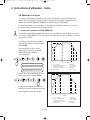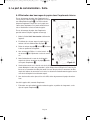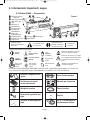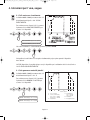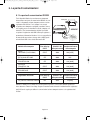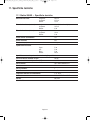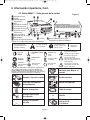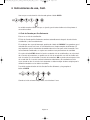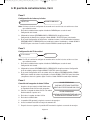
1
Statim_2KS_5KS_E_oct09_FIGS_Q7:Statim_2KS_5KS_E_oct09
1/20/10
1:05 PM
Page 1
STATIM 2000S/5000S
C A S S E T T E
A U T O C L A V E™
• Operator’s Manual
• Benutzerhandbuch
• Manuel de l’utilisateu
• Manuale per l’operatore
• Manual del Operador
STATIM 2000S/5000S Operator’s Manual 95-108430 Rev 7.0.
Copyright 2009 SciCan. All rights reserved.
Statim_2KS_5KS_E_oct09_FIGS_Q7:Statim_2KS_5KS_E_oct09
1/20/10
1:05 PM
Table of Contents
1. Introduction . . . . . . . . . . . . . . . . . . . . . . . 3
2. Important Information . . . . . . . . . . . . . . . 4
2.1 Disclaimers
2.2 Statim 2000S — Unit Overview
2.3 Statim 5000S — Unit Overview
3. Installation . . . . . . . . . . . . . . . . . . . . . . . . 7
3.1
3.2
3.3
3.4
3.5
3.6
3.7
3.8
3.9
Environmental Considerations
Unit Placement
Connecting the Waste Bottle
Filling the Reservoir
Priming the Statim Pump
Setting the Time and Date
Language Selection
Assigning Unit Identifier Number
Shipping the Unit
4.1
4.2
4.3
4.4
4.5
4.6
4.7
4.8
Statim 2000S — Cassette
Statim 5000S — Cassette
Statim 5000S — STAT-DRI Plates
Preparing and Loading Instruments
Instrument Weight Table
Selecting a Cycle
Running a Cycle
Stopping a Cycle
Page 2
5. Maintenance . . . . . . . . . . . . . . . . . . . . . 20
5.1 Cleaning the Cassette
5.2 Cleaning the Water Reservoir Filter
5.3 Cleaning the Reservoir
5.4 Cleaning the Exterior Surfaces
5.5 Changing the Statim 2000S Air Filter
5.6 Changing the Bacteria Retentive Air Filters
5.7 Replacing the Cassette Seal
5.8 Maintaining Fluid Levels
5.9 Reading Water Quality
5.10 Preventative Maintenance Schedule
6. The Communication Port . . . . . . . . . . . 25
4. Instructions for Use . . . . . . . . . . . . . . . 11
6.1
6.2
6.3
6.4
6.5
The RS232 Communication Port
Installing the Statim Data Logger
Installing Paper on the Internal Printer
Removing Internal Printer Paper Jams
Internal Printer Output Overview
7. Troubleshooting . . . . . . . . . . . . . . . . . . 35
8. Spare Parts List . . . . . . . . . . . . . . . . . . 39
9. Warranty . . . . . . . . . . . . . . . . . . . . . . . . 40
10. Test Protocol
10.1 Type Test
. . . . . . . . . . . . . . . . . . . 41
11. Specifications . . . . . . . . . . . . . . . . . . . 43
11.1 Statim 2000S — Specifications
11.2 Statim 5000S — Specifications
STATIM Cassette Autoclave and Statim are registered trademarks and
STAT-DRI and DriTec logos are trademarks of SciCan Ltd. All other trademarks
referred to in this manual are the property of their respective owners.
For all service
In Canada
United States:
Germany:
International:
Email:
and repair inquiries:
1-800-870-7777
1-800-572-1211
+49 (0) 821 56 74 56-0
(416) 446-4500
[email protected]
EU Representative
SciCan GmbH
Kurzes Geländ 10
D-86156 Augsburg
GERMANY
Phone: +49 (0) 821 56 74 56-0
Fax: +49 (0) 821 56 74 56-99
SciCan Inc.
701 Technology Drive
Canonsburg, PA 15317
USA
Phone: +1 724 820 1600
Fax: +1 724 820 1479
Toll free: 1-888-632-6031
Manufactured by:
SciCan
SciCan Medtech
Alpenstrasse
166300 Zug
SWITZERLAND
Phone: +41 (0) 41 727 7027
Fax: +41 (0) 41 727 702
1440 Don Mills Road,
Toronto ON M3B 3P9
CANADA
Phone:
(416) 445-1600
Fax:
(416) 445-2727
Toll free:
1-800-667-7733
Page 2
Statim_2KS_5KS_E_oct09_FIGS_Q7:Statim_2KS_5KS_E_oct09
1/20/10
1:05 PM
Page 7
1. Introduction
Statim 5000S
Statim 2000S
Congratulations on your selection of the STATIM ® Cassette Autoclave. We are confident that
you have purchased the finest equipment of its type. The Statim is a compact, counter-top
unit that features a number of sterilizing cycles designed to meet your needs and suitability
for steam sterilization. The Statim “S” Cassette Autoclaves are fully compliant with EN13060.
The details of installing, operating and servicing your Statim are all contained within this
operator’s manual. To ensure years of safe, trouble-free service please read these instructions before operating this unit and keep them for future reference. Operational, maintenance and replacement instructions should be followed for the product to perform as
designed. Contents of this manual are subject to change without notice to reflect changes
and improvements to the Statim product.
The Statim is suitable for the sterilization of dental and medical instruments designed
to withstand steam sterilization. The Statim has not been designed to sterilize liquids, cloth
loads, biomedical waste or materials not compatible with steam sterilization.
The processing of such loads may result in incomplete sterilization and / or damage to the
autoclave. For more information about instrument suitability for steam sterilization, consult
the manufacturers’ reprocessing instructions.
Page 3
Statim_2KS_5KS_E_oct09_FIGS_Q7:Statim_2KS_5KS_E_oct09
1/20/10
1:05 PM
Page 8
2. Important Information
2.1 Disclaimers
Use only steam-process distilled water in your Statim. Deionized, demineralized, or specially
filtered water should not be used. Never use tap water.
Do not permit any person other than certified personnel to supply parts for, service or maintain your Statim. SciCan shall not be liable for incidental, special or consequential damages
caused by any maintenance or services performed on the Statim by a third party, or for the
use of equipment or parts manufactured by a third party, including lost profits, any commercial loss, economic loss, or loss arising from personal injury.
Never remove the cover of the unit and never insert objects through holes or openings in the
cabinetry. Doing so may damage the unit and / or pose a hazard to the operator.
All elements of this book are common to both Statim 2000S and Statim 5000S except when
noted.
IMPORTANT:
Follow local guidelines governing verification of the sterilization procedure.
Drying Performance
The Statim 2000S and 5000S have been designed to provide a complete sterilization
solution for your unwrapped and wrapped instrument needs: rapid sterilization balanced
with rapid drying, by using the SciCan Dri-Tec Drying Technology.
The Statim 2000S uses convection heat to dry instruments by utilizing the remaining heat
in the system after the sterilization phase. Heat is captured and released in the cassette to
rapidly dry a properly loaded Statim cassette.
The Statim 5000S uses heat generated by the sterilization phase which is absorbed by
the drying plates. The heat is transferred from drying plates directly to the load resulting in
accelerated, rapid drying of a properly loaded Statim cassette.
Please refer to this operator’s manual for instructions on the proper arrangement of
instruments in the cassette and the use of Stat-Dri plates (Statim 5000S). By carefully
following these directions on how to properly load the cassette chamber, rapid drying
of the load will be achieved.
Page 4
Statim_2KS_5KS_E_oct09_FIGS_Q7:Statim_2KS_5KS_E_oct09
1/20/10
1:05 PM
Page 9
2. Important Information Con’t.
1
■
■2
3
■
4
■
5
■
6
■
7
■
8
■
■9
10
■
11
■
2.2 Statim 2000S — Unit overview
level indicator
keypad
reservoir cap/
water filter
LCD
power indicator
active indicator
power switch
power cable port
leveler feet
exhaust tube port
compressor
The following symbols
appear in the margins
of this book.
3
■
4
■
■2
Figure 1
■1
12
■
13
■
6
■
■5
12
■
14
■
9
■
13 biological filter
cassette ■
RS232 port
11
■
A situation which
may lead to a
mechanical failure.
A potential hazard
to the operator.
The following symbols appear on the unit:
10
■
START
button
UNWRAPPED
cycles
STOP
button
WRAPPED
cycles
Air dry only.
Steam distilled
water only
Power
Indicator LED
Active Indicator
LED
RUBBER /
PLASTIC
cycles
7
■
14 ■
8
■
Important
information
Caution: Hot Surface
and/or Hot Steam
Caution: Risk of electrical
shock. Disconnect supply
before servicing
Caution: Refer to
manual for details
When you receive your Statim 2000S packing carton, the items listed below will be included.
If any of the items are missing, contact your dealer immediately so the situation can be corrected.
Cassette Tray and Lid
Power Cord
Unwrapped Instrument
Rack
Operator’s Manual
Waste Bottle
Exhaust Tube
Bottle Lid Fitting
Stat-Dri
Tube Mounting Hardware
P.C.D. + 20 SciCan
Sterilization Emulators
Page 5
Statim_2KS_5KS_E_oct09_FIGS_Q7:Statim_2KS_5KS_E_oct09
1/20/10
1:05 PM
Page 10
2. Important Information Con’t.
■1
■2
■3
■4
■5
■6
■7
■8
■9
10
■
11
■
12
■
2.3 Statim 5000S — Unit overview
level indicator
3
■
4
■
keypad
reservoir cap/
water filter
LCD
power indicator
active indicator
power switch
power cable port
■6
leveler feet
12
5
■
■
exhaust tube port
biological filter
optional internal printer (not on all models)
The following symbols
appear in the margins
of this book.
■2
13
■
13
■
cassette
A potential hazard
to the operator.
UNWRAPPED
cycles
STOP
button
WRAPPED
cycles
Steam distilled
water only
Power
Indicator LED
1
■
9
■
The following symbols appear on the unit:
START
button
Figure 2
10
■
14
■
8
■
A situation which
may lead to a
mechanical failure.
Air dry only.
Active Indicator
LED
Important
information
Caution: Hot Surface
and/or Hot Steam
Caution: Risk of electrical
shock. Disconnect supply
before servicing
Caution: Refer to
manual for details
Drying Enhancement Plates
Cassette Tray and Lid
Power Cord
Unwrapped
Instrument Rack
Operator’s Manual
Waste Bottle
Exhaust Tube
Bottle Lid Fitting
Stat-Dri
Tube Mounting Hardware
P.C.D. + 20 SciCan
Sterilization Emulators
Page 6
7
■
RS232 port (not on all models)
RUBBER /
PLASTIC
cycles
When you receive your Statim 5000S packing carton,
the items listed below will be included. If any of the
items are missing, contact your dealer immediately
so the situation can be corrected.
11
■
14
■
Statim_2KS_5KS_E_oct09_FIGS_Q7:Statim_2KS_5KS_E_oct09
1/20/10
1:05 PM
Page 11
3. Installation
3.1 Environmental Considerations
There are several factors that may affect the performance of your Statim.
Please review these factors, and select a suitable location in which to install the unit.
•
Temperature and Humidity
•
Spacing
•
Venting
•
Work Surface
•
Electromagnetic Environment
•
Electrical Requirements
Avoid installing your Statim in direct sunlight or close to a heat source
(e.g. vents or radiators). The recommended operating temperatures are
15-25˚C with humidity of 25-70%.
The vents and openings on the Statim should remain uncovered and unobstructed. Leave a
minimum of 50 mm between the top, sides and back of the unit and any
wall or partition.
The Statim should be operated in a clean, dust free environment.
The Statim should be placed on a flat, level, water-resistant surface.
Never install and operate the unit on a sloped surface.
The Statim has been tested and meets applicable standards for electromagnetic emissions.
While the unit does not emit any radiation, it may itself be affected by other equipment which
does. We recommend that the unit be kept away from potential sources of interference.
Use properly grounded and fused power sources with the same voltage rating as indicated
on the label at the back of your Statim. Avoid multiple outlet receptacles. If using a surge
suppressor power bar, plug in one Statim only.
3.2 Unit Placement
When placing the unit on a counter top, ensure the following:
•
•
1 on the front panel should be
The level indicator bubble ■
balanced in the front right quadrant of the target. This will
ensure that the unit drains properly. Adjusting the three leveler feet will help you move the bubble if necessary.
The unit should be stable and all four feet should be securely in contact with the counter surface.
This will prevent the unit from moving freely.
■1
Figure 3
Page 7
Statim_2KS_5KS_E_oct09_FIGS_Q7:Statim_2KS_5KS_E_oct09
1/20/10
1:05 PM
Page 12
3. Installation Con’t.
3.3 Connecting the Waste Bottle
2 is used to collect the wastewater after it has been converted
The waste bottle ■
to steam and then drained from the cassette. To connect the waste bottle to the
Statim, follow these steps (see figure 4):
5000S
3 tube into the fitting ■
4
1. Insert the exhaust ■
on the back of the unit and connect tightly.
2. Cut the tube to length and slide the waste
5 into place.
bottle fitting ■
■3
3. Place the free end of the tube into the hole in
the lid of the waste bottle and hand-tighten
the fitting. Do not coil the exhaust tube.
6
4. Unscrew the lid and copper condenser coil ■
assembly from the waste bottle. The lid and
coil should come out together.
5. Fill the waste bottle with water to the MIN line
and replace the lid and copper condenser
assembly. Empty the waste bottle often to
avoid unpleasant odors and discoloration of
the contents. (A low-level disinfectant, prepared according to the manufacturer’s
instructions, may be added to the waste
bottle to remedy this situation). As a minimum, empty the waste bottle each time
you refill the reservoir.
6. Place the waste bottle near the unit. Store
the bottle below the unit. The tube can be
routed through a hole, (8 mm in diameter)
in the counter-top and secured with the
provided nylon clamps.
3.4 Filling the Statim Reservoir
4
■
6
■
■5
■2
2000S
■4
■3
■6
■2
Figure 4
When filling the reservoir, ensure you only use steam processed distilled water containing
less than 5 ppm total dissolved solids (having conductivity of less than 10 µS / cm). The
impurities and additives in other water sources will cause an error reading on the LCD. If
you have a water conductivity meter (available from SciCan, order number 01-103139S)
check each new water container before filling the reservoir. To fill the reservoir, follow these
steps (see figure 5):
Page 8
Statim_2KS_5KS_E_oct09_FIGS_Q7:Statim_2KS_5KS_E_oct09
1/20/10
1:05 PM
Page 13
3. Installation Con’t.
1. Remove the reservoir cap
■2
■2
2. Pour steam-process distilled water into
the reservoir until almost full (a maximum of 4L). Use a funnel to avoid
spillage.
3. Replace and secure the cap.
3.5 Priming the Statim Pump
To prime the Statim pump,
follow these steps:
Figure 5
1. Move the unit to the edge of the work surface. The front leveler feet should be
approximately 12 mm from the edge.
2. Lift the front left corner of the unit upward and remove the drain tube
the clip located on the underside of the unit.
■3
from
3. Pull the drain tube outward so the free end can be positioned over a water container.
4. Fill the reservoir with steam-process distilled water.
4 from the end of the drain tube and allow water to drain from the
5. Remove the plug ■
tube into a container for 30 seconds. When the water flows in a steady stream, replace
the stopper.
6. Lift the front left corner of the unit upward and reinsert
the tube into the clip on the underside of the unit.
Push the excess length of tubing back into the space
provided.
Make sure the plug in the drain tube is secured.
3.6 Setting the Time and Date
■4
■3
Figure 6
To set the time and date, follow these steps and watch the blinking cursor on the LCD:
1. Power the Statim OFF.
2. Press and hold the UNWRAPPED cycle button.
3. While pressing the UNWRAPPED cycle button,
power the Statim ON. The LCD display reads:
14:23
HH:MM
11/15/2006
DD/MM/YYYY
Display when setting the Date / Time
4. Use the cycle buttons to select and change the selected field’s value. To increase a
field’s value, press the UNWRAPPED cycle button. Hold the button down to increase the
value.
5. To decrease the value, press the WRAPPED cycle button.
Page 9
Statim_2KS_5KS_E_oct09_FIGS_Q7:Statim_2KS_5KS_E_oct09
1/20/10
1:05 PM
Page 14
3. Installation Con’t.
6. To select the next field, press the RUBBER AND PLASTICS cycle button.
7. To save changes and return to the regular operating mode, press the STOP button.
8. To quit without making changes, power the Statim OFF.
3.7 Language Selection
The messages displayed on the LCD can be changed to a number of different languages. To
change the current language selections, follow these steps:
1. Turn the power switch at the back of the unit OFF.
2. Press and hold the WRAPPED cycle button.
3. While depressing the WRAPPED
cycle button, turn the power switch at
the back of the unit to ON.
ENGLISH
Display when scrolling through languages
4. Press the UNWRAPPED cycle button to scroll to the next language selection.
5. Press the WRAPPED cycle button to scroll to the previous language.
6. When the desired language is displayed, press the STOP button to save the selection
and return to the regular operating mode.
3.8 Assigning Unit Identifier Number
1. Power the Statim OFF.
2. Press and hold the RUBBER / PLASTIC cycle button.
STATIM 2000 S2S2R601
#323
Display when assigning unit number
3. While pressing the RUBBER / PLASTIC cycle button, power the Statim ON.
4. Using the cycle buttons, select a maximum of 3 digits to be used as the unit’s identifier. The
UNWRAPPED button will increase the selected value and the WRAPPED cycle button will
decrease it. Use the RUBBER / PLASTIC to move to the next digit.
5. To save changes and return to the regular operating mode, press the STOP button.
3.9 Shipping the Unit
Before you move the unit, you will need to drain the reservoir. To do so, follow these steps:
1. Place a water container below the unit.
2. Using the drain tube (see section 3.5 Priming the Pump, Figure 6) empty the contents of
the reservoir into the water container.
3. Remove any remaining water from the reservoir with a non-linting, absorbant towel.
4. Screw-in the three leveler feet found underneath the unit.
5. Repack the unit in the original packing materials and include all accessories originally
included with the unit.
6. Specify heated and insured shipping.
Page 10
Statim_2KS_5KS_E_oct09_FIGS_Q7:Statim_2KS_5KS_E_oct09
1/20/10
1:05 PM
Page 15
4. Instructions For Use
4.1 Statim 2000S — Using the Cassette
When removing the cassette after a cycle, exercise caution as the metal areas will be hot
and the cassette may contain hot steam.
•
To open the cassette:
1. Hold the cassette handle with your thumbs facing inward on the cassette latch.
2. Push downward on the cassette latch.
3. Raise the cassette lid upwards and disengage the
hinge.
cassette latch
4. Rest the lid on its outer surface.
•
To close the cassette:
1. Align the hinge tab on the cassette lid with
the hinge slot on the rear of the bottom tray.
Figure 7
2. As you begin to close the lid, the hinge tab and slot will engage.
•
Inserting the cassette into the Statim 2000S:
1. Place the end of the cassette into the unit.
2. Gently push inward until you hear a “click” sound.
Never push the cassette into the Statim with force as the interior components could
be damaged.
•
Removing the cassette:
1. Grasp the handle with two hands and pull away from the unit.
2. Pull the cassette clear of the unit and set down on a firm surface.
•
Disengaging the cassette
•
STAT-DRI
When not in use, the cassette should be disengaged. To disengage the cassette, grasp the
handle and pull the cassette out until there is a 15 mm to 20 mm (1/ 2 to 3 / 4") gap between
the front of the Statim 2000S and the cassette handle.
Treatment of the interior surfaces of the cassette with the Stat-Dri drying agent, provided with
your unit, will enhance the drying process. (Replacement bottles are available from SciCan,
order number 2OZPLUS, 8OZPLUST, 32OZPLUS).
Page. 11
Statim_2KS_5KS_E_oct09_FIGS_Q7:Statim_2KS_5KS_E_oct09
1/20/10
1:05 PM
Page 16
4. Instructions For Use Con’t.
4.2 Statim 5000S — Using the Cassette
When removing the cassette after a cycle, exercise caution as the metal areas will be hot
and the cassette may contain hot steam.
•
To open the cassette:
1. Push the carry handle
open position.
■1
into the
■1
2. Put your hands on either side of the cassette handle.
3. Insert your forefingers in the slots and
place your thumbs on the thumb pads.
4. Press down with your thumbs and
pull up with your forefingers until
the lid opens.
■1
5. Raise the cassette lid and disengage
from the tray. Rest the lid on its
outer surface.
•
To close the cassette:
1. Align the hinge tab on the lid with the
hinge slot on the tray.
2. As you begin to close the lid, the hinge
tab and slot will engage.
3. Place the carry handle into the
closed position.
•
Inserting the cassette into the
Statim 5000S:
1. Hold the cassette handle in one hand
and the carry handle in the other as
shown in Figure 8.
Figure 8
2. Place the end of the cassette into the unit and drop the carry handle into its
closed position.
3. Gently push the cassette inward until you hear a click sound.
Never push the cassette into the Statim with force as the interior components could
be damaged.
Page 12
Statim_2KS_5KS_E_oct09_FIGS_Q7:Statim_2KS_5KS_E_oct09
1/20/10
1:05 PM
Page 17
4. Instructions For Use Con’t.
•
Removing the cassette:
1. Grasp the cassette handle with one hand and pull out from the unit.
2. As the cassette emerges from the unit, grasp the carry handle with your free hand and lift
it upwards.
3. Pull the cassette clear from the unit and set down on a firm surface.
•
Disengaging the cassette
When not in use, the cassette should be disengaged. To disengage the cassette, grasp the
handle and pull the cassette out until there is a 15 mm to 20 mm (1/ 2 to 3 / 4") gap between
the front of the Statim 5000S and the cassette handle.
4.3 Statim 5000S — STAT-DRI Plates
The Statim 5000S cassette uses STAT-DRI plates to enhance the drying process
for wrapped instruments. The adjustable plates are designed for the unwrapped instruments
rack and eliminate the need for a separate wrapped instrument rack.
Up to ten plates can be arranged along the length of the rack. Each unit is shipped
with five STAT-DRI plates. Additional plates may be ordered from SciCan (SciCan
part number 01-103935).
To install and adjust a STAT-DRI plate, follow these steps:
1. Hold a plate over the desired position, tilted slightly forward with the tabs down.
2. Insert the tabs between the mesh of the
unwrapped instrument rack.
3. Each tab has an elongated slot. Slide the plate until
the wire is at the end of each slot.
4. Release the plate to the resting position.
5. Prepare and load instruments for sterilization.
4.4 Preparing and Loading Instruments
Before loading any instruments into the Statim, consult the manufacturer’s reprocessing
instructions.
•
Clean Instruments
Clean and rinse all instruments before loading them into the cassette. Disinfectant residues
and solid debris may inhibit sterilization and damage the instruments, the cassette, and the
Statim. Lubricated instruments must be wiped thoroughly and any excess lubricant should
be removed before loading.
Page 13
Statim_2KS_5KS_E_oct09_FIGS_Q7:Statim_2KS_5KS_E_oct09
1/20/10
1:05 PM
Page 18
4. Instructions For Use Con’t.
•
Unwrapped Instruments
Arrange unwrapped instruments on the instrument rack in the tray so that they
do not touch one another. This ensures that steam reaches all surfaces and will promote
drying.
Instruments must not be stacked or piled in the cassettes, as this will impede the sterilization
process.
•
Wrapped Instruments (single wraps)
Place the instruments into single layer autoclave bags according to the manufacturer’s
instructions. Orient the instrument rack in the cassette to ensure that wrapped instruments
rest approximately 6 mm / 0.25" above the cassette base. Place the wrapped instruments
on the rack and arrange them to avoid overlap. Ensure that all wrapped loads are dry before
handling and /or storage to maintain sterility.
The use of cloth wraps in the Statim is not recommended.
SciCan recommends the use of paper / paper and plastic / paper autoclave bags
manufactured in accordance to EN 868. Loosely pack instruments in the bags to allow
steam penetration to all instrument surfaces.
The wrapped instrument rack for the Statim 5000S is designed to hold a maximum of
12 autoclave bags. Care must be taken to ensure that the combined weight of the loaded
bags does not exceed 1.5 kg (3.3 lbs).
The unwrapped instrument rack fitted with a maximum of 10 Stat-Dri plates will hold
10 autoclave bags.
•
Rubber and Plastic Instruments
The following materials can be sterilized in the Statim:
nylon, polycarbonate (Lexan™), polypropylene, PTFE (Teflon™), acetal (Delrin™),
polysulfone (Udel™), polyetherimide (Ultem™), silicone rubber, and polyester.
When loading rubber and plastic instruments in the tray, leave a space between the
instruments and the cassette walls. This ensures that steam reaches all surfaces, and
will promote drying.
The following materials cannot be sterilized in the Statim:
polyethylene, ABS, styrene, cellulosics, PVC, Acrylic (Plexiglas™), PPO (Noryl™), latex,
neoprene, and similar materials.
Use of these materials may lead to instrument or equipment damage. If you are unsure of
your instrument’s material or construction, do not load into your Statim until you have
checked with the instrument manufacturer.
Page 14
Statim_2KS_5KS_E_oct09_FIGS_Q7:Statim_2KS_5KS_E_oct09
1/20/10
1:05 PM
Page 19
4. Instructions For Use Con’t.
•
All Instruments
The Statim is NOT intended for sterilizing textiles, liquids or biomedical waste. Instruments
will remain sterile after a successful cycle until the cassette is disengaged from the unit.
Unwrapped instruments, once exposed to ambient or external conditions, cannot be maintained in a sterile state. If sterile storage is desired, wrap the instruments to be sterilized in
autoclave bags, according to the instrument manufacturer’s instructions. Then allow the
wrapped cycle to run until the air-dry phase is complete.
Best Practice: Allow instruments (wrapped or unwrapped) to dry completely prior to
handling. Wrapped or pouched instruments must not touch each other to promote drying
and enable effective sterilization.
SciCan recommends the final user carefully choose the most appropriate sterilization cycle
according to the recommendations of their leading infection control authorities and local
regulatory guidelines / recommendations.
•
Routine Monitoring
Chemical process indicators suitable for steam sterilizers should be included in or on each
package or load being sterilized. In addition, the weekly use of biological indicators, which
allow you to ascertain whether the instruments have been exposed
to sterilization conditions, is recommended.
4.5 Instrument Weight Guide
Instrument
Scissors
Dental scalers
Forceps
Dental handpiece
Wrapped instrument rack
Unwrapped instrument rack
Suction cannula
Plastic mouth mirror
Impression tray
Plastic x-ray positioning ring
Typical Instrument Weight
30 g / 0.96 oz
20 g / 0.64 oz
15 g / 0.48 oz
40 to 60 g / 1.29 to 1.92 oz
260 g / 8.35 oz
225 g / 7.23 oz
10 g / 0.32 oz
8 g / 0.25 oz
15 to 45 g / 0.48 to 1.45 oz
20 g / 0.64 oz
NOTE: The above weights are to be used as reference only. For exact weights of your
instruments, consult the manufacturer’s specifications.
Page 15
Statim_2KS_5KS_E_oct09_FIGS_Q7:Statim_2KS_5KS_E_oct09
1/20/10
1:05 PM
Page 20
4. Instructions For Use Con’t.
4.6 Selecting a Cycle
The Statim 2000S and 5000S have seven sterilization cycles, each designed to
sterilize using the parameters specified. Each cycle can be selected by pressing
the UNWRAPPED, WRAPPED or RUBBER / PLASTIC cycle buttons.
The types of instruments, sterilization requirements and a graph depicting each cycle characteristics are described over the following pages.
1. Unwrapped Cycles
The Statim 2000S and 5000S feature two 134˚C type S and one 134˚C type N
UNWRAPPED sterilization cycles. At the end of the cycle’s sterilization phase, air drying will
commence for one hour.
Air-drying can be interrupted at any
time by pressing the STOP button.
To select one of these cycles:
Press the UNWRAPPED
cycle button to scroll through the available
cycles.
HOLLOW UNWRAPPED (S) 134˚C / 3.5 min
A
HOLLOW UNWRAPPED (S) 134˚C / 18 min
A
B
SOLID UNWRAPPED (N) 134˚C / 3.5 min
C
C
B
D
3.5 min / 18 min
D
100˚C / 101 kPa
3 purges (Conditioning)
peak at 133˚C / 295 kPa
vent to 115˚C / 169 kPa
Pressurizing
Once the desired cycle has been
selected, press the START button.
E
F
F
E
Sterilizing
134˚C / 304 kPa 138˚C / 341 kPa
Venting
Air Drying
(Type S)
The unit memory remembers the last
cycle run and then displays this first when
the unit is powered on.
A
A
B
C
Page 16
B
C
D
3.5 min
100˚C / 101 kPa
1 purge (Conditioning)
peak at 133˚C / 295 kPa
vent to 115˚C / 169 kPa
Pressurizing
(Type N)
E
D
E
F
F
Sterilizing
134˚C / 304 kPa 138˚C / 341 kPa
Venting
Air Drying
Statim_2KS_5KS_E_oct09_FIGS_Q7:Statim_2KS_5KS_E_oct09
1/20/10
1:05 PM
Page 21
4. Instructions For Use Con’t.
2. Hollow Wrapped Cycles
The Statim 2000S and 5000S
feature two WRAPPED 134˚C type S
sterilization cycles.
To select one of these S Cycles:
Press the WRAPPED button to
scroll through the available cycles.
A
C
B
A
100˚C / 101 kPa
HOLLOW WRAPPED (S) 134˚C / 3.5 min
B
HOLLOW WRAPPED (S) 134˚C / 18 min
C
6 purges (Conditioning)
peak at 133˚C / 295 kPa
vent to 115˚C / 169 kPa
Pressurizing
D
3.5 min /
E
F
18 min
D Sterilizing
134˚C / 304 kPa 138˚C / 341 kPa
E Venting
F
Air Drying
Once the desired cycle has been selected, press the START button.
The unit remembers the last cycle run and then displays this first when the unit
is powered on.
A Process Challenge Device (PCD) is available for validation of HOLLOW WRAPPED (S)
134˚C/3.5 min cycle.
3. Rubber and Plastics Cycle
The Statim 2000S and 5000S feature two
121˚C type S sterilization cycles.
To select one of these S Cycles:
Press the RUBBER / PLASTIC button
to scroll through the available cycles.
A
A
B
RUBBER / PLASTIC (S) 121˚C / 15 min
C
RUBBER / PLASTIC (S) 121˚C / 30 min
Page 17
B
C
100˚C / 101 kPa
3 purges (Conditioning)
peak at 120˚C / 199 kPa
vent to 110˚C / 143 kPa
Pressurizing
D
15 min / 30 min
D
E
F
E
F
Sterilizing
121˚C / 205 kPa 124˚C / 225 kPa
Venting
Air Drying
Statim_2KS_5KS_E_oct09_FIGS_Q7:Statim_2KS_5KS_E_oct09
1/20/10
1:05 PM
Page 22
4. Instructions For Use Con’t.
Once the desired cycle has been selected, press the START button.
The unit remembers the last cycle run and then displays this first when the
unit is powered on.
4. Air Dry Only Cycle
This is not a sterilization cycle.
The Air Dry Only Cycle starts automatically after each sterilizing cycle and runs for
60 minutes.
Air drying may be interrupted by pressing the STOP button. To ensure that the contents of
the cassette are dry, the cycle should run for the full 60 minutes. Dryness is important for
unwrapped instruments for corrosion prevention. For wrapped instruments, a dry wrap is
required to maintain sterility.
If the STOP button is pressed during the air drying stage of the sterilization cycle, and the
cassette has not been removed from the autoclave, the Air Dry Only cycle may be used to
promote further drying. If the cassette has been removed from the autoclave, it may NOT
be reinserted for the Air Dry Only cycle. If the cassette contains wrapped instruments and
the wraps are not dry when the cassette is opened, the instruments must be handled in an
aseptic manner for immediate use or resterilized.
To start, press the Air Dry Only Cycle button, then press the START button.
When started independently, this cycle will run for 1 hour.
Page 18
Statim_2KS_5KS_E_oct09_FIGS_Q7:Statim_2KS_5KS_E_oct09
1/20/10
1:05 PM
Page 23
4. Instructions For Use Con’t.
4.7 Running a Cycle
To operate each cycle, follow these steps and watch the LCD .
1. Turn the power switch
14:23
11/15/2006
at the back of the unit to ON.
SELECT A CYCLE
The LCD display reads:
2. Press the appropriate cycle button on the
keypad to scroll through the available cycles
The display will read either:
HOLLOW UNWRAPPED
(S) 134˚C / 3.5 min
or
HOLLOW UNWRAPPED
(S) 134˚C / 18 min
SOLID UNWRAPPED (N)
134˚C / 3.5 min
HOLLOW WRAPPED (S)
134˚C / 3.5 min
HOLLOW WRAPPED (S)
134˚C / 18 min
or
RUBBER / PLASTIC (S)
121˚C / 15 min
RUBBER / PLASTIC (S)
121˚C / 30 min
As the button is released the display reads:
Cycle you selected
PRESS START
The unit’s cycle counter is displayed at the start, after the start button is depressed.
Cycle you selected
CYCLE NUMBER
000000
The amber indicator light comes on. To indicate that the cycle is in progress, the following messages are displayed as the cycle runs.
Cycle you selected
WARMING UP
CONDITIONING
110˚C
143 kPa
PRESSURIZING
125˚C
232 kPa
As the cycle is running,
various sounds will be heard.
This is the normal functioning of the unit.
Page 19
STERILIZING
136.8˚C 330 kPa 3:29
VENTING
108˚C
134 kPa
Statim_2KS_5KS_E_oct09_FIGS_Q7:Statim_2KS_5KS_E_oct09
1/20/10
1:05 PM
Page 24
4. Instructions For Use Con’t.
The buzzing noise during the air drying stage is the compressor operating. The air drying
phase of the cycle may be interrupted at any time by pressing the STOP button. The display will read:
PLEASE WAIT
CYCLE COMPLETE
When the automatic 60-minute air drying stage is finished the display reads:
REMOVE CASSETTE
CYCLE COMPLETE
If a sterilization cycle is successful the reminder tone sounds and the amber light flashes
until the STOP button is pressed or the cassette is removed from the unit.
4.8 Stopping a Cycle
To stop a cycle press the STOP button. If the STOP button is pushed, the cassette is
removed, or the unit detects a problem while operating, the cycle will stop and the
amber active light will flash. Once a cycle has been stopped, the STOP button must
be pressed before another cycle can be started. The display reads any of the
following messages:
CYCLE FAULT xxx
NOT STERILE
or
CASSETTE REMOVED
NOT STERILE
If the display shows the message, CYCLE FAULT or NOT STERILE, the cassette contents
are not sterile! See section 7. Troubleshooting for more information.
If the air drying stage of the cycle is interrupted, do not store wrapped instruments that were
in the cassette unless they are dry.
Page 20
Statim_2KS_5KS_E_oct09_FIGS_Q7:Statim_2KS_5KS_E_oct09
1/20/10
1:05 PM
Page 25
5. Maintenance
5.1 Cleaning the Cassette
Keeping the Statim cassette clean is good clinical practice and assists in the function of the
unit. SciCan recommends that the interior surface be cleaned at least once a week. Use
dishwashing soap or a mild detergent that does not contain chlorine. Scrub the inside of the
cassette with a cleaning pad designed for use with Teflon™ coated surfaces. After scouring,
rinse thoroughly with water to remove all traces of the detergent. Cleaning the inside of your
cassette is very important if you regularly sterilize lubricated instruments. Coating the entire
inside surface with STAT-DRI drying agent induces water to form an even coat on the inside
surface, without beading. The water in contact with the hot cassette surfaces also evaporates much more efficiently. Spotting is minimized and instruments dry much better. STATDRI should be applied every 10 cycles, and after every cassette cleaning.
5.2 Cleaning the Water Reservoir Filter
This water reservoir filter should be cleaned at least once a week or when required. The filter
can easily be removed and cleaned by placing the filter upside down under running water to
wash away the particles until clean, and then placed back into the reservoir opening. If a
replacement water reservoir filter is required, order part number 01-109300S.
5.3 Cleaning the Reservoir
Check the reservoir for dirt or particles. The reservoir may be cleaned by draining followed
by cleaning and rinsing with steam process distilled water ONLY. Use of chemicals or cleaning agents is not reccommended and could cause the unit damage.
5.4 Cleaning the Exterior Surfaces
Use a soft cloth moistened with soap and water to clean all exterior surfaces. Do not use
harsh cleaning chemicals or disinfectants.
5.5 Changing the Statim 2000S Air Filter
The filter should be replaced every six months in order to maintain an adequate supply of
clean air during the air drying cycle.
To change the filter, follow these steps:
2000S
1. Turn the power switch at the back of the unit OFF.
2. Remove and discard the old foam air filter
3. Install the new filter
■4 .
■4 (SciCan part no. 01-100207S).
2 to the back of the compressor
4. Secure the filter plate ■
1 retained during
using the screw ■
the disassembly procedure.
Page 21
■1
■4
■2
Figure 10
Statim_2KS_5KS_E_oct09_FIGS_Q7:Statim_2KS_5KS_E_oct09
1/20/10
1:05 PM
Page 26
5. Maintenance
5.6 Changing the Bacteria Retentive Air Filters
The filters should be replaced every six months or after 500 cycles to maintain
an adequate supply of clean air during the air drying cycle.
To change the bacteria retentive air filter on the Statim 2000S and 5000S,
follow these steps:
1. Power the Statim OFF.
1 from the bacteria
2. Disconnect tube A ■
2
retentive filter ■ and remove the filter from
3 . As you remove the filter
the filter bracket ■
from the bracket, note the orientation of the
arrow mark on the filter.
■2 ■3
■1
3. When the filter is free of the bracket, carefully discon4 from the filter.
nect tube B ■
■4
4. Before installing the replacement
2 (SciCan order
bacteria retentive filter ■
no. 01-102119S) check that the arrow mark
on the filter matches the direction
of the arrow on the bracket. Push the left
4 .
hand filter fitting into tube B ■
5. Gently press the replacement filter into
3 . The arrow mark of
the filter bracket ■
the filter should be facing out and pointing to
the left.
2000S
Figure 11
5000S
■2
■4
■1
■3
Figure 12
1 to the right hand filter fitting.
6. Re-connect tube A ■
5.7 Replacing the Cassette Seal
To ensure optimum performance of your Statim cassette autoclave, change the
cassette seal every 500 cycles or every six months, whichever comes first. Replacement
seals are available from SciCan (order number 01-100028S for Statim 2000S and 01101649S for Statim 5000S).
To change the cassette seal, follow these steps:
Place the cassette lid and the new seal on a clean work surface. Examine the position
of the old seal in the cassette lid and arrange the new seal in the same orientation,
next to the lid.
Page 22
Statim_2KS_5KS_E_oct09_FIGS_Q7:Statim_2KS_5KS_E_oct09
1/20/10
1:05 PM
Page 27
5. Maintenance con’t.
Remove the old seal and discard. Clean any residue out of the
seal channel and flush out the channel with distilled water.
Lubricate the new seal with the liquid seal lubricant provided.
Insert the rounded edge of the seal under the round lip of
the lid. Align the holes in the new seal with the holes in the lid.
NOTE: At every corner and at the holes in the lid, two square nibs
should be visible. The nibs should fit flush with the lid’s outer surface.
Ensure the seal is completely inserted. Feel around
the periphery to ensure the seal is securely in place.
NOTE: During a cycle, steam may appear between the lid
and the tray. If this persists, remove the cassette and check
that the seal is correctly installed.
Figure 13
Be careful. The metal parts will be hot, and the cassette may contain hot steam.
5.8 Maintaining Fluid Levels
Use only steam-process distilled water containing less than 5 ppm total dissolved
solids (having conductivity of less than 10 µS / cm) in the Statim. To fill the reservoir, remove
the cap from the top of the unit and fill the reservoir. We recommend using
a funnel to minimize spills. Each time you refill the reservoir, empty the waste bottle
and refill with water to the MIN line. Empty the waste bottle often to avoid unpleasant odors
and discoloration of the contents. (A low-level chlorine-free disinfectant,
prepared according to the manufacturer’s instructions, may be added to the waste
bottle to remedy this situation).
5.9 Reading Water Quality
1. Power up unit while pressing the STOP button to access the User Setup menu.
2. Using the UNWRAPPED and WRAPPED buttons, scroll to Water Quality and select it by
pressing the RUBBER AND PLASTIC button.
>Water Quality
CD=XXuS
l / yyy / z.z ppm
CD=conductivity
yyy= engineering value
Page 23
XX= micro S. value
z.z= parts per million value
Statim_2KS_5KS_E_oct09_FIGS_Q7:Statim_2KS_5KS_E_oct09
1/20/10
1:05 PM
Page 28
5. Maintenance con’t.
5.10 Preventative Maintenance Schedule
To ensure trouble-free performance, both the operator and the dealer must follow
a preventative maintenance schedule. NOTE: Please refer to your National, Regional, State
or Safety laws for any additional reoccurring user testing that may be required.
The schedules below describe the necessary actions.
Operator
Daily
Water Reservoir
Waste Bottle
Every
6 months
Weekly
Cassette
Biological and/or
Air Filter
• Replace water as needed.
• For opthalmic use, drain at the end of every workday, leave empty, and refill at the start
of the next workday.
• Empty the waste bottle every time you refill the water reservoir.
• Fill the bottle with water, up to the MIN line marking.
• Wash the interior of the cassette with dishwashing soap or a mild detergent that does not
contain chlorine.
• Scrub the inside with a cleaning pad designed for use with Teflon™-coated surfaces.
• After removing all traces of the detergent, treat interior surfaces of the cassette with
the STAT-DRI™ Plus drying agent to enhance the drying process. Order more STATDRI™ Plus from SciCan quoting 2OZPLUS, 8OZPLUST, or 32OZPLUS.
• Check the filter for dirt and moisture. Replace if dirty. Call for service if wet.
Water Filter
• Check the water reservoir filter every week and clean if necessary. Replace only if necessary.
Biological and/or
Air Filter
• Replace every 500 cycles or six months (whichever is first).
Cassette Seal
• Replace every 500 cycles or six months (whichever is first), or whenever necessary.
Once a year
Technician
Cassette
• Check the tray, lid and seal for damage. Replace if necessary.
Biological Filter
• Inspect the biological filter for moisture.
Solenoid Valve
• Inspect the valve and clean if dirty. Replace the plunger if defective.
Pump
• Clean the filters, replace if dirty.
Check Valve
• Remove the exhaust tube from the back of the unit during the air drying phase. Check for
air coming from the fitting.
• Remove the air compressor tube from the check valve inlet while running a cycle. Make
sure no steam is leaking from the valve. Replace if there are any leaks.
Water Reservoir
• Check the reservoir for dirt. Clean and rinse with steam process distilled water if necessary.
Calibration
• Calibrate the unit.
Page 24
Statim_2KS_5KS_E_oct09_FIGS_Q7:Statim_2KS_5KS_E_oct09
1/20/10
1:05 PM
Page 29
6. The Communication Port
6.1 The RS232 Communication Port
All Statim units that do not have an internal
printer will have an RS232 communication
port that will allow you to connect to an external
printer or to a SciCan Data Logger. For printing,
you will need to purchase a recommended printer
(see list below) from your local computer or electronics store. For data storage, you can
purchase SciCan’s USB Data Logger to record
and store cycle information onto a mass storage
device (MSD) such as a USB Flash Drive or SD
memory card.
Printer Model
Epson
TM-U220D (C31C515603)
Citizen
IDP-3110-40 RF 120B
Star Micro
SP212FD42-120
Star Micro
SP216FD41-120
Star Micro
SP512MD42-R
SciCan Data Logger
For Mass Storage Device*
Printer
OR
Data
Logger
End Of Line
CR/LF
Serial Port
Bitrate
Printer user °
character
CR/LF
9600
248 [0xF8]
CR
9600
N/A
CR
9600
210 [0xd2]
CR/LF
9600
210 [0xd2]
CR/LF
9600
210 [0xd2]
End Of Line
CR/LF
Serial Port
Bitrate
Printer user °
character
N/A
9600
32 [0xd2]
* Due to a variety of software programs/viewers that can be used to view the data files stored
on a mass storage device such as a USB memory stick, we recommend the above settings.
For your Statim to communicate to a specific device, you must enable this function through
the User Setup menu. Follow the instructions in section 6.2 Installing the
SciCan Data Logger below to enable communication to either an external printer or
the SciCan Data Logger.
Page 25
Statim_2KS_5KS_E_oct09_FIGS_Q7:Statim_2KS_5KS_E_oct09
1/20/10
1:05 PM
Page 30
6. The Communication Port con’t.
6.2 Installing the SciCan Data Logger
SciCan’s USB Data Logger can record and store cycle information onto a mass storage
device (MSD) such as a USB Flash Drive or SD memory card.
These instructions are for units with a 9-pin communication (RS232) port located at
the back of the unit.
Follow the steps below before connecting the Data Logger.
User Mode
Time/Date Setup
Language Setup
Unit ID Setup
Water Quality
Last Printout
RS232
End Of Line CR/LF
Serial Port Bitrate
Printer user ° char
Save and Exit
Exit
User Setup Menu
To install the SciCan Data logger, access
the user setup menu by powering up the
unit while pressing the STOP button.
Follow the instructions below to complete installation steps.
STEP 1
Selecting the USB Flash/MSD Option
RS232
USB/Flash MSD
1. Power up unit while pressing the STOP button to access the User Setup menu.
2. Using the UNWRAPPED and WRAPPED buttons, scroll to RS232 and select it by pressing the RUBBER AND PLASTIC button.
3. From the RS232 menu, use the UNWRAPPED and WRAPPED buttons to scroll down to
the USB/FLASH MSD option and press the RUBBER AND PLASTIC button to select and
return to the User Setup menu.
Page 26
Statim_2KS_5KS_E_oct09_FIGS_Q7:Statim_2KS_5KS_E_oct09
1/20/10
1:05 PM
Page 31
6. The Communication Port con’t.
Setting the Serial Port Bitrate to 9600
Serial Port Bitrate
9600
1. From the User Setup menu, use the UNWRAPPED and WRAPPED buttons to scroll to
the Serial Port Bitrate menu and select it using the RUBBER AND PLASTIC button.
2. From the Serial Port Bitrate menu, use the UNWRAPPED and WRAPPED buttons to
scroll down to 9600 and press the RUBBER AND PLASTIC button to select and return to
the User Setup menu.
Setting the Printer user Character; (example: 134°C)
Printer user ° char
32 [0x20]
1. From the User Setup menu, use the UNWRAPPED and WRAPPED buttons to scroll to
the Printer user ° char menu and select it using the RUBBER AND PLASTIC button.
2. From the Printer user ° char menu, using the UNWRAPPED button to increase the displayed value by one, and the WRAPPED button to increase that value by ten, enter the
value 32 [0x20] and press the RUBBER AND PLASTIC button to accept and return to the
User Setup menu.
Save and Exit
Save and Exit
A Save and Exit must be performed after the above settings are completed. If this is not
done, the information will revert to its prior settings.
1. From the User Setup menu, use the UNWRAPPED and WRAPPED buttons to scroll to
Save and Exit.
2. Select it by pressing the RUBBER AND PLASTIC button.
The LCD will display time and date
information and a sequence of
messages:
Page 27
HH:MM DD/MM/YYYY
“MSD NOT DETECTED”/”INSERT
MSD/FLASH”/”SELECT A CYCLE”
Statim_2KS_5KS_E_oct09_FIGS_Q7:Statim_2KS_5KS_E_oct09
1/20/10
1:05 PM
Page 32
6. The Communication Port con’t.
Step 2
Selecting the Time and Date
Time/Date
HH:MM DD/MM/YYYY
Note: If the time and date were set according to section 3.6, this does not have to be performed again.
1. Power up unit while pressing the STOP button to access the User Setup menu.
2. Using UNWRAPPED and WRAPPED buttons, scroll to Time/Date Setup and press the
RUBBER AND PLASTIC button to select it.
3. From the Time/Date Setup menu, set the time and date using the UNWRAPPED and
WRAPPED buttons to change the displayed values and the RUBBER AND PLASTIC button to select. Press the STOP button when completed.
Step 3
Setting Unit ID
001
Unit ID
Note: If the unit ID was set according to section 3.8, this does not have to be
performed again.
1. Power up unit while pressing the STOP button to access the User Setup menu.
2. Using the UNWRAPPED and WRAPPED buttons, scroll to the Unit ID Setup and press
the RUBBER AND PLASTIC button to select it.
3. From the Setup Unit ID menu, use the UNWRAPPED and WRAPPED buttons to change
the displayed values and the RUBBER AND PLASTIC button to select and move to the
next digit. Press the STOP button when completed.
Step 4
Connecting the SciCan Data Logger
1. Ensure that both the Statim unit and the SciCan Data Logger are off.
2. Connect the SciCan Data Logger to the Statim unit by using the serial cable.
3. Power up the SciCan Data Logger
4. Power up the Statim unit.
5. The LCD will display the following
sequence of messages:
6. Insert USB Flash Drive or SD memory card
7. After a few seconds the LCD will display
the following sequence of messages:
Page 28
HH:MM DD/MM/YYYY
“MSD NOT DETECTED”/”INSERT
MSD/FLASH”/”SELECT A CYCLE”
HH:MM DD/MM/YYYY
USB/FLASH DETECTED/SAFELY
REMOVE MSD/SELECT A CYCLE
Statim_2KS_5KS_E_oct09_FIGS_Q7:Statim_2KS_5KS_E_oct09
1/20/10
1:05 PM
Page 33
6. The Communication Port con’t.
6.3 Installing Paper on the Internal Printer
Use only paper approved for use with the optional internal printer on the Statim 5000S. The
use of any other paper will damage the printer and will void the warranty. Thermal paper is
available from SciCan (SciCan order no. 01-101657S).
Do not operate the printer without paper. If you run out of thermal paper, or if you do not wish
to use the printer, turn it OFF.
Never pull the paper backwards through the printer.
This will damage the printer mechanism.
To install the paper into the printer, follow these steps:
1. Power the Statim 5000S ON.
2. Open the printer door
3. Power the printer ON.
■1
by pushing on the top half of the door.
3 and trim the corners using the
4. Unroll some paper from the thermal paper roll ■
paper cutting template included with each box.
5. Move the paper roll arm ■4 into the loading position. Place the paper roll
so the paper strip feeds from the top of the roll and then carefully insert
it into the paper feed slot ■5 until it stops.
■3
on the arm
If the paper does not feed from the top, the heat sensitive side of the paper will not be in contact with the print head and the printer will not print.
6. With one hand, continue to gently feed the paper strip into the paper feed slot. With the
other hand, press the paper advance button until the paper feeds by itself.
Keep the paper straight when feeding it into the printer or it may jam. Do not force the paper
into the slot! If the paper will not feed into the slot, pre-cut the end of the roll again and reload
the paper.
Page 29
Statim_2KS_5KS_E_oct09_FIGS_Q7:Statim_2KS_5KS_E_oct09
1/20/10
1:05 PM
Page 34
6. The Communication Port con’t.
7. Continue to press the paper advance button ■6 until the paper feeds through the
paper exit slot on the front of the printer.
Then, move the paper roll ■3 and arm into
the operating position and close the printer
door ■1 . The printer is now ready to operate.
When you see a red line on one side of the
paper, it is time to replace the roll.
If a paper jam occurs, and the paper cannot be
removed by pressing the paper advance button
■6 , do not pull the paper backwards through
the printer.
Never put a utensil or tool into the paper exit
slot. For full instructions on how to remove
paper jams, see section 6.4 Removing Internal
Printer Paper Jams.
To replace the paper roll
steps:
■3 , follow these
1. With scissors, cut the paper between the
roll and the paper feed slot ■5 .
2. Remove the roll from the arm and discard
the unused portion.
3. Press the paper advance button ■6 to feed
the paper that remains in the printer out of the slot
at the front of the printer.
4. Install the new thermal paper roll by following the
instructions described in this section.
Page 30
■5
■2
■4
■3
■1
■4
■6
Figure 15.1
■5
■2
■6
■3
Figure 15.2
Statim_2KS_5KS_E_oct09_FIGS_Q7:Statim_2KS_5KS_E_oct09
1/20/10
1:05 PM
Page 35
6. The Communication Port con’t.
6.4 Removing Internal Printer Paper Jams
If paper jams in the printer and cannot be removed
6 , the printby pressing the paper advance button ■
er must be disassembled. Do not pull the paper
backwards through the printer and never put utensils or tools into the paper exit slot.
■7
■8
When paper is jammed in the printer, follow
these steps to remove the jam:
1. Power the Statim 5000S OFF and unplug the
unit.
■9
15
■
2. Using scissors, cut the paper between the
5 .
roll and the paper feed slot ■
14
■
3 from the paper
3. Remove the paper roll ■
4 and leave the arm in the
roll arm ■
loading position.
4. Using a #1 Phillips screwdriver, remove the
7 from the printer cover ■
8 and
three screws ■
remove the cover.
5. Note the orientation of the exposed printed
4 assemwiring board and the paper roll arm ■
1
bled on the printer door ■ .
13
■
11
■
10
■
■1
■4
10
■
12
■
Figure 16
6. Gently lift the printed wiring board upwards and away from the printer door. Exercise
care while handling the board. The printer is integral to the wiring board. Do not place
strain on the connections of the ribbon cable soldered to the board. Do not remove the
connector of the flexible cable from the connector header on the board. The paper drive
mechanism on the underside of the wiring board is now exposed.
7. Using a pair of tweezers or fine needle-nosed pliers, carefully remove the paper
from the mechanism.
When the paper is removed, reassemble the printer:
1. Carefully snap the paper roll holder, in the loading position, back into the clips on the
1 .
printer door ■
Page 31
Statim_2KS_5KS_E_oct09_FIGS_Q7:Statim_2KS_5KS_E_oct09
1/20/10
1:05 PM
Page 36
6. The Communication Port con’t.
2. Place the printed wiring board back into position on the printer door. Note the alignment
9 in the wiring board and the mounting bosses ■
13 on the printer
of the mounting holes ■
10 on the inside of
door. The black plastic printer body rests between the locating ribs ■
the printer door.
3. Ensure that the flexible cables
and the wiring board.
11 , ■
14
■
are not pinched between the printer door
4. Place the printer cover on the printer door. Ensure that the flexible cables are not
pinched between the cover and the door. The power button and the paper advance button must protrude through the openings in the cover and operate freely.
5. Using a #1 Phillips screwdriver, secure the printer cover to the printer door with
the three screws retained during the disassembly procedure. Do not over-tighten these
screws.
6. Plug your Statim 2000S / 5000S into the wall receptacle. Reconnect the printer if it was
previously disconnected. Turn the power switch to the ON position.
7. Press the printer power button to the ON position. Load paper into the printer following
the procedures in section 7.3 Installing Paper on the Internal Printer.
Page 32
Statim_2KS_5KS_E_oct09_FIGS_Q7:Statim_2KS_5KS_E_oct09
1/20/10
1:05 PM
6. The Communication Port con’t.
6.5 Cycle Printout Overview
1.
2.
3.
4.
5.
6.
7.
8.
9.
Model: STATIM 2000 software:
S2S2R410
Unit Identifier: autoclave has
been set up as number 323
Cycle counter: the number of
cycles having been run on the
unit = 9
Time / Date: 1:38 pm 14th
April, 2003
Cycle Name: SOLID
UNWRAPPED (N)
Cycle Name cont’d – parameters: 134˚C /
3.5 min – 1P
Cycle clock: starting at 0:00
Warm up complete: start of
the conditioning phase is 2:07
(see cycle graph – ‘A’ phase
complete, start of ‘B’ phase)
Peek Temp. / Press. & Time of
conditioning purge: for each
purge (number of lines based
on cycle selection – this is a
one purge cycle – activity
within ‘B’ phase )
10. Lowest Temp. / Press. & Time
of conditioning purge: for each
purge (number of lines based
on cycle selection – this is a
one purge cycle – activity
within ‘B’ phase )
1.
2.
3.
4.
5.
6.
7.
8.
9.
10.
11.
12.
13.
14.
15.
16.
17.
18.
19.
20.
21.
22.
23.
Page 33
Page 37
Statim_2KS_5KS_E_oct09_FIGS_Q7:Statim_2KS_5KS_E_oct09
1/20/10
1:05 PM
Page 38
6. The Communication Port con’t.
11.
Start Time of Pressurization: 3:21(start of ‘C’ phase)
12. Start Time of Sterilization: 4:12 (start of ‘D’ phase)
13. Temp. / Press. & Time at start of sterilization (‘D’ phase)
14. Min. Temp. / Press during the sterilization phase (lower limits of ‘D’ phase)
15. 135.1˚C 308 kPa
16. Max. Temp. / Press during the sterilization phase (upper limits of ‘D’ phase)
17. 136.7˚C 323 kPa
18. Temp. / Press. & Time of end of sterilization phase (end of ‘D’ phase)
19. Time Venting started: 7:43 (start of ‘E’ phase)
20. Sterilization was successfully completed
21. Time Air Drying started: 8:07 (start of ‘F’ phase)
22. Cycle was stopped by user
23. Drying cycle aborted prior to completion, load may not be dry
Page 34
Statim_2KS_5KS_E_oct09_FIGS_Q7:Statim_2KS_5KS_E_oct09
1/20/10
1:05 PM
Page 39
7. Troubleshooting
Problem
Unit does not power ON.
Solution
Check that the unit is plugged into a properly
grounded outlet and that the power cord is firmly
seated at the rear of the machine.
Try another circuit. Power unit OFF for 10 seconds
and then power ON again.
There is water under the machine.
Check the condition of the line circuit
breaker or fuse.
Check that water was not spilled when refilling the
reservoir. Make sure the plug in the exhaust tube is
secured. Remove and reinsert the cassette .
Attempt another cycle.
Be careful. The metal parts will be hot, and the cassette will contain hot steam.
The cassette is leaking. If water drips from the underside of the unit during operation, check the cassette
seal for misalignment or damage and replace the seal
if required.
Be careful. The metal parts will be hot, and the cassette will contain hot steam.
Attempt another cycle. If it still leaks attempt another
cycle using a different cassette if possible.
Instruments do not dry.
If the leak persists, turn the unit OFF, remove and
unload the cassette, unplug the unit, and call
your dealer.
Best drying occurs when the cycle continues to completion. Allow the cycle to finish. Make sure the instruments are loaded correctly in the cassette. Refer to
section 4.4 Preparing and Loading Instruments.
Check the unit leveling.
Clean the inside of the cassette and treat with Stat-Dri
drying agent. Refer to section 5.1 Cleaning the
Cassette. Examine the exhaust tube (tube to the
waste bottle) for kinks.
Page 35
Statim_2KS_5KS_E_oct09_FIGS_Q7:Statim_2KS_5KS_E_oct09
1/20/10
1:05 PM
Page 40
7. Troubleshooting con’t.
If kinked, straighten the tube. If the tube cannot be
straightened, remove it from the push-in fitting
attached to the Statim. Depress the collar on the fitting and with the other hand pull firmly on the tube.
Once the tube is free of the fitting, cut the damaged
section of tubing away using a sharp instrument. Be
sure that you leave enough tube to reach the unit
when you re-attach the tube to the exhaust fitting. If
the tube is too short to remove a section, contact your
SciCan dealer fora replacement.
Cycle interrupted — NOT STERILE,
Cycle aborted — NOT STERILE and
CYCLE FAULT messages.
Make sure the compressor is working. To check,
remove the exhaust tube from the waste bottle.
Start the Air Drying Only Cycle, and place the free
end into a glass of water. If there is not a strong,
steady flow of bubbles, the compressor is not
functioning properly. Contact your SciCan dealer.
Wait a few minutes and attempt another cycle before
proceeding to the next solution. Remove the cassette. Be careful. The metal parts will be hot and the
cassette will contain hot steam. Inspect the cassette
to ensure that the holes in the back of the seal are
perfectly aligned, and that the flexible lip of the seal is
completely free. Check the exhaust tube for kinks or
obstructions. If kinked, straighten the tube. If the
tube cannot be straightened, remove it from the pushin fitting attached to the Statim. Depress the collar on
the fitting and, with the other hand pull firmly on the
tube. Once the tube is free of the fitting, cut the damaged section of tubing away using a sharp instrument.
Be sure that you leave enough tube to reach the unit
when you re-attach the tube to the exhaust fitting. If
the tube is too short to remove a section, contact your
SciCan dealer for a replacement.
Check that the Statim has not inadvertently been
exposed to any electrical interference.
Refer to the Installation section dealing with
Environmental Considerations. (Section 3.1)
Try running another cycle. If the problem persists,
record the cycle fault message number and contact
your dealer.
Page 36
Statim_2KS_5KS_E_oct09_FIGS_Q7:Statim_2KS_5KS_E_oct09
1/20/10
1:05 PM
Page 41
7. Troubleshooting con’t.
Excessive steam issuing from the front
of the machine.
Remove and reinsert the cassette. Attempt another
cycle. Remove and check the cassette seal for misalignment or damage. Replace the seal if required.
Be careful as the metal parts will be hot and the cassette will contain hot steam.
If the leak persists, turn the unit OFF, remove and
unload the cassette and contact your SciCan dealer.
Message WATER QUALITY IS NOT ACCEPTABLE. Machine will not start.
You have used water which is not steam-process distilled or is improperly distilled.
Message REFILL RESERVOIR,
Machine will not start.
The level of the water in the reservoir is low. Refill the
reservoir. Refer to the steps described in section 3.4
Filling the Reservoir.
Message PRINTER FAULT displayed on
LCD Printer is not printing.
The printer does not work.
The printer appears to work, but nothing is
printed on the paper.
Time and date are incorrect.
Empty the reservoir and refill with steam-process distilled water containing less than 5 ppm total disolved
solids (having conductivity of less than 10 µS / cm).
If you have the water conductivity meter, check the
quality of the water before refilling the reservoir.
Refer to the steps described in section 3.9 Shipping
the Unit to empty the reservoir.
Check for a paper jam. If the paper is jammed, follow
the paper removal procedures outlined in section 6.4.
Power unit OFF for 10 seconds and then power
ON again. If the paper is still jammed, follow the disassembly procedures outlined in section 6.4
Removing Paper Jams.
Make sure that the printer cable is connected securely
with the connector on the back of the Statim
and the Statprinter. Make sure that the printer is powered ON. Power unit OFF for 10 seconds and
then power ON again.
Ensure that the paper is loaded properly (refer to section 6.3 Installing Paper on the Internal Printer). Check
to see that the paper leaves the paper roll from the top
of the roll. This means that the treated surface of the
coated thermal paper will be in contact with the thermal
print head.
The time and date have not been set. See section
3.6
Setting the Time and Date.
Page 37
Statim_2KS_5KS_E_oct09_FIGS_Q7:Statim_2KS_5KS_E_oct09
1/20/10
1:05 PM
Page 42
7. Troubleshooting con’t.
Message MSD NOT CONNECTED <>
INSERT MSD/FLASH
Check the serial cable connection.
Check the power connection.
Ensure the lower red LED is lit.
Check that the Mass Storage Device is properly
inserted.
Repeat the instructions for Installing the SciCan
Data Logger on your Statim.
Message MSD/FLASH FULL <>
REPLACE MSD
The MSD is full. Export the data.
Message Missing lines of
Data on MSD/FLASH
Refer to the STATIM screen to confirm successful
sterilization.
Reset the Data Logger by unplugging its power, disconnecting the MSD and waiting 10 seconds. Then
re-connect the power adapter and insert the MSD into
the Data Logger.
If the problem persists, contact the SciCan Service
Center.
Message: The file or directory in the
MSD is corrupted or unreadable.
Refer to the STATIM screen to confirm successful
sterilization.
The MSD may have been unplugged while data was
being written to it. The MSD should not be unplugged
until after “SAFELY REMOVE MSD <> MSD/FLASH
DETECTED” is displayed.
The corrupted files or directories may be lost.
Reformat the MSD on your computer.
Page 38
Statim_2KS_5KS_E_oct09_FIGS_Q7:Statim_2KS_5KS_E_oct09
1/20/10
1:05 PM
Page 43
8. Spare Parts List
01-100204S Exhaust Tube
01-100724S Condenser Bottle w / o
Condenser
01-100735S Waste Water Bottle Fitting
01-100780S Bumper
01-100782S Push-In Fitting (2000S)
01-100812S Condenser Bottle
01-100834S Cassette Lid (2000S)
01-101649S Cassette Seal (5000S)
01-101657S Thermal Paper (Box of 10 rolls)
01-101658S Cassette Handles
01-101709S Mesh Rack (5000S)
01-101755S Push-In Fitting (5000S)
01-101757S
01-101766S
01-101768S
01-101769S
Cassette Lid w / Box (5000S)
Power Cord UK
Power Cord Switzerland
Power Cord Italy
01-101779S Power Cord Europe
01-106030S Cassette Lid Handle (2000S)
01-100207S Compressor Filter (2000S)
01-104700S Adapter Cassette O-Ring Kit
01-104702S Adapter Cassette Lid (2000S)
01-104704S Adapter Cassette Lid (5000S)
01-104786S Instrument Holder - 4 mm
(5000S)
01-100028S Cassette Seal (2000S)
01-106438S Cassette Lid, Extended (2000S)
01-108340S Statim PCD – spare parts
01-109300S Water Reservoir Filter Kit
ACCESSORIES
01-100008A Kit Cassette Final (2000S)
01-100271A Kit Tray Cassette w / Mesh
(2000S)
01-101613S Cassette Complete (5000S)
01-101614S Tray Complete (5000S) with Box
01-103923
Condenser Additional Bottle
01-106071S Extended Cassette Lid
Handle (5000S)
01-103935
STATDRI Plates (5000S)
01-101783S Reservoir Cap and Filter
01-104499
Extended Cassette Instrument
Rack (5000S)
Adapter Cassette (2000S)
Adapter Cassette (5000S)
Handpiece Adapter Kit (2000S)
Handpiece Adapter Kit (5000S)
01-104093S Exhaust Tube 3 m long
01-101970S
01-102119S
01-103139S
01-103475S
01-103557S
01-103865S
01-103945S
Data Cable (5000S)
Filter Biological
Conductivity Meter
Tray (2000S)
Power Cord Repl. Denmark (det.)
Seal Lubricant
Rack-Tray Unwrapped
Instr. Kit (2000S)
01-104343S Plug - Drain Tubing (5000S)
01-104472S Extended Cassette Handles
(5000S)
01-104696S Handpiece Adapter
01-104697S Adapter Cassette Seal (2000S)
01-104698S Adapter Cassette Seal (5000S)
01-104699S Seal Insert
01-104104
01-104701
01-104703
01-106101
01-106102
01-106653
01-210000
01-106325
2OZPLUS
8OZPLUST
32OZPLUS
99-108332
01-108341
Page 39
Extended Length Cassette
(5000S)
Mesh Tray (2000S)
Kit Printer (5000S)
Container Endoscope
Complete (5000S)
STAT-dri 2 oz.
STAT-dri 8 oz.
STAT-dri 32 oz.
Chemical Emulator
134˚C/3.5 min
Statim PCD Final Assembly Kit
Statim_2KS_5KS_E_oct09_FIGS_Q7:Statim_2KS_5KS_E_oct09
1/20/10
1:05 PM
Page 44
9. Warranty
Limited Warranty
For a period of one year, SciCan guarantees that the Statim 2000S / 5000S, when manufactured by SciCan in new and unused condition, will not fail during normal service due to
defects in material and workmanship that are not due to apparent abuse, misuse, or accident.
The one year warranty will cover the performance of all components of the unit except consumables such as the cassette seal, the compressor filter and the microbiological filter, provided that the product is being used and maintained according to the description in the
user’s manual.
A two-year warranty will be applied specifically to the water pump, steam generator, and
printed circuit board (PCB) provided that the product is being used and maintained according
to the description in the user’s manual.
In the event of failure due to such defects during this period of time, the exclusive remedies
shall be repair or replacement, at SciCan’s option and without charge, of any defected
part(s) (except gasket), provided SciCan is notified in writing within thirty(30) days of the
date of such a failure and further provided that the defective part(s) are returned to SciCan
prepaid.
This warranty shall be considered to be validated, if the product is accompanied by the original purchase invoice from the authorized SciCan dealer, and such invoice identifies the item
by serial number and clearly states the date of purchase. No other validation is acceptable.
After one year, all SciCan’s warranties and other duties with respect to the quality of the
product shall be conclusively presumed to have been satisfied, all liability therefore shall terminate, and no action or breach of any such warranty or duty may thereafter be commenced
against SciCan.
Any express warranty not provided hereon and any implied warranty or representation as to
performance, and any remedy for breach of contract which, but for this provision, might arise
by implication, operation of law, custom of trade or course of dealing , including any implied
warranty of merchantability or of fitness for particular purpose with respect to all and any
products manufactured by SciCan is excluded and disclaimed by SciCan. If you would like
to learn more about SciCan products and features, visit our website at www.scican.com.
Page 40
—
—
*
UN
/
UN
/18
Dental instruments
KaVo GENTLE
force 7000C
HOLL
OW / UNWRAPPED
(S) 134
˚C /.53min
Kavo – Gentle
ux 25
Power
LPA L
H
O
LL
O
W
/
UNWRAPPED
(S
)
134
˚C /.53min
W&H-Trend LS, WD-56
HOLL
OW / UNWRAPPED
(S) 134
˚C /.53min
W&H-Trend
C-95RM
HS, T
HOLL
OW / UNWRAPPED
(S) 134
˚C /.53min
KaVo Super-T
orque LUX/640 B
HOLL
OW / UNWRAPPED
(S) 134
˚C /.53min
KaVo-INTRAmati
c LUX3,
LH20
HOLL
OW / UNWRAPPED
(S) 134
˚C /.53min
NSK-PANA
Air
HOLL
OW / UNWRAPPED
(S) 134
˚C /.53min
NSK-ATL1
18040
HOLL
OW / UNWRAPPED
(S) 134
˚C /.53min
HOLL
OW / UNWRAPPED
(S) 134
˚C /.53min
NSK – Ti-Max
H
O
LL
O
W
/
UNWRAPPED
(S
)
134
˚C /.53min
STAR-430
WL S
HOLL
OW / UNWRAPPED
(S) 134
˚C /.53min
Sirona-T1 Classic,
40 L
S
HOLL
OW / UNWRAPPED
(S) 134
˚C /.53min
Sirona-T1 Control, TC3
H
O
LL
O
W
/
UNWRAPPED
(S
)
134
˚C /.53min
Midwest-T
radition
HOLL
OW / UNWRAPPED
(S) 134
˚C /.53min
Bein – Air - Bora L
W&H – WS-75
HOLL
OW / WRAPPED
(S) 134
˚C /.53min
W&HA-99
– W LT
HOLL
OW / WRAPPED
(S) 134
˚C /.53min
W&H – TA-98 LC
HOLL
OW / WRAPPED
(S) 134
˚C /.53min
B & L Ophthalmology instruments
Gim
ble irri
gatin
gcannula
g E4894
30
HOLL
OW / UNWRAPPED
(S) 134
˚C /.53min
Lasi
k cannula
E4989
OLL
OW / UNWRAPPED
(S) 134
˚C /.53min
Gillis
rrigatin
i g-aspira
tin
gcannula E4932H
HOLL
OW / UNWRAPPED
(S) 134
˚C /.53min
Nic
hamin
hy
drossection
26
gcannula
E4421 HHOLL
OW / UNWRAPPED
(S) 134
˚C /.53min
HOLL
OW / UNWRAPPED
(S) 134
˚C /.53min
Irri
gatin
g-aspiratin
ghandpiece MVS 1063C
Endoscope acc
essories
RudolfMedizintechnikGmbH
OW / UNWRAPPED
(S) 134
˚C /.53min
Tro
car sleeve
, art
hroscop
y, 2 rotatin
gstopks,
coc HOLL
HOLL
OW / UNWRAPPED
(S) 134
˚C /.53min
1.7 mm dia
04 mm
xlen
g
1th #10-0008-0
0
HOLL
OW / UNWRAPPED
(S) 134
˚C /.53min
Tro
car sleeve
,hy
steroscop
y dia
gnostic
heat
hs, 1 fixed
HOLL
OW / UNWRAPPED
(S) 134
˚C /.53min
stopk,coc
.27 mm dia x g
302
th #10-0049-00
mm len
Alcon ophthalmichandpiece
H
O
LL
O
W
/
UNWRAPPED
(S
)
134
˚C
/.53min
NeoSonix
haco
handpiece
P
Miltexmedical instruments
Frazier edle
ne 26-778
HOLL
OW / UNWRAPPED
(S) 134
˚C /.53min
Yeoman
biops
y forceps
hrotatin
wit
gshaft 28-304
HOLL
OW / UNWRAPPED
(S) 134
˚C /.53min
Kerrison
geurron 18-199
4
HOLL
OW / UNWRAPPED
(S) 134
˚C /.53min
HOLL
OW / UNWRAPPED
(S) 134
˚C /.53min
FrazierFerguson
betu 19-570
HOLL
OW / UNWRAPPED
(S) 134
˚C /.53min
Yan
kauer suction
be 2-104SS
tu
Men
gh
inibiops
y needle 13-150
HOLL
OW / UNWRAPPED
(S) 134
˚C /.53min
Be c
ton D
ick
inson
Needle, 30G1
HOLL
OW / UNWRAPPED
(S) 134
˚C /.53min
ork
shop
Medical W
Hoc
keystic
kForceps,brane
mem
elin
pe
gmw-1925
HOLL
OW / UNWRAPPED
(S) 134
˚C /.53min
—
—
/
*
/
/
/
1. The PCD (Process Challenge Device) was designed
exclusively for use in the Statim 2000S and
Statim 5000S autoclaves.
2. The PCD is not for use with the Statim 2000,
Statim 5000 or Statim 5000S Extended Cassette.
3. PCD specification available upon request.
4. Hollow load A test not applicable – rationale available
upon request.
/
Statim_2KS_5KS_E_oct09_FIGS_Q7:Statim_2KS_5KS_E_oct09
1/20/10
1:05 PM
Page 41
Page 45
10. Test Protocol
10.1 Type test
Statim_2KS_5KS_E_oct09_FIGS_Q7:Statim_2KS_5KS_E_oct09
1/20/10
1:05 PM
Page 46
10. Test Protocol con’t.
Cycle
SOLID UNWRAPPED (N)
134˚C / 3.5 min
HOLLOW UNWRAPPED
(S) 134˚C / 3.5 min
HOLLOW UNWRAPPED (S)
134˚C / 18 min
HOLLOW WRAPPED (S)
134˚C / 3.5 min
HOLLOW WRAPPED (S)
134˚C / 18 min
RUBBER / PLASTIC (S)
121˚C / 15 min
RUBBER / PLASTIC (S)
121˚C / 30 min
STATIM 2000S
STATIM 5000S
Cold Unit With Max. Load +
Drying Phase
Warm Unit Without Load +
Drying Phase
Cold Unit With Max. Load +
Drying Phase
Warm Unit Without Load +
Drying Phase
6:45 + 60:00
8:45 + 60:00
9:15 + 60:00
13:15 + 60:00
11:45 + 60:00
17:30 + 60:00
26:15 + 60:00
32:00 + 60:00
8:05 + 60:00
22:35 + 60:00
15:35 + 60:00
10:40 + 60:00
30:05 + 60:00
25:10 + 60:00
20:15 + 60:00
18:40 + 60:00
35:15 + 60:00
33:40 + 60:00
Page 42
10:50 + 60:00
25:20 + 60:00
24:00 + 60:00
15:30 + 60:00
38:30 + 60:00
30:00 + 60:00
22:50 + 60:00
20:20 + 60:00
37:50 + 60:00
35:20 + 60:00
Statim_2KS_5KS_E_oct09_FIGS_Q7:Statim_2KS_5KS_E_oct09
1/20/10
1:05 PM
Page 47
11. Specifications
11.1 Statim 2000S — Specifications
Machine Dimensions:
Cassette Size (External):
Cassette Size (Internal):
Sterilization Chamber Volume:
Length:
Width:
Height:
48.5 cm
41.5 cm
15 cm
Length:
Width:
Height:
28 cm
18 cm
4 cm
Length:
Width:
Height:
Reservoir Volume:
1.8 L
4.0 L
Weight (Without water):
Clearance required:
41 cm (includes handles)
19.5 cm
4 cm
21 kg
Top:
Sides:
Back:
Front:
5 cm
5 cm
5 cm
48 cm
Clearance required for movement of the door(s):
48 cm
PRV value (pressure relief valve):
43.5 PSI
Minimum charge in the water reservoir:
Electrical Rating:
550 mL
220 - 240 V, 50/60 Hz, 6 A
Current:
AC
Protection Class:
I
Ambient Operating Temperature:
5˚C - 40˚C
Protection:
covered
Sound levels:
Mean - 56 dB, Peak - 65 dB
Max. Altitude:
2000 m
Humidity:
80% Max.
Page 43
Statim_2KS_5KS_E_oct09_FIGS_Q7:Statim_2KS_5KS_E_oct09
1/20/10
1:05 PM
Page 48
11. Specifications con’t.
11.2 Statim 5000S — Specifications
Machine Dimensions:
Cassette Size (External):
Cassette Size (Internal):
Sterilization Chamber Volume:
Length:
Width:
Height:
55 cm
41 cm
19 cm
Length:
Width:
Height:
38 cm
18 cm
8 cm
Length:
Width:
Height:
Reservoir Volume:
5.1 L
4.0 L
Weight (Without water):
Clearance required:
49.5 cm (includes handles)
19.5 cm
8 cm
33 kg
Top:
Sides:
Back:
Front:
5 cm
5 cm
5 cm
57 cm
Clearance required for movement of the door(s):
57 cm
PRV value (pressure relief valve):
43.5 PSI
Minimum charge in the water reservoir:
Electrical Rating:
550 mL
220 - 240 V, 50/60 Hz, 6 A
Current:
AC
Protection Class:
I
Ambient Operating Temperature:
5˚C - 40˚C
Protection:
covered
Sound levels:
Mean - 57 dB, Peak - 65 dB
Max. Altitude:
2000 m
Humidity:
80 % Max.
Optional Internal Printer Specifications:
Type:
Print:
Thermal Printer
20 characters per line
Print Speed:
1 line per second
Paper Roll Capacity: approx.
80 sterilization cycles per roll
Page 44
Statim_2KS_5KS_E_oct09_FIGS_Q7:Statim_2KS_5KS_E_oct09
1/20/10
1:05 PM
Inhaltsverzeichnis
5. Wartung . . . . . . . . . . . . . . . . . . . . . . . . . 20
1. Einführung . . . . . . . . . . . . . . . . . . . . . . . . 3
2. Wichtige Informationen . . . . . . . . . . . . . 4
2.1 Haftungsausschluss
2.2 Statim 2000S — Geräteübersicht
2.3 Statim 5000S — Geräteübersicht
3. Einrichtung . . . . . . . . . . . . . . . . . . . . . . . 7
3.1
3.2
3.3
3.4
3.5
3.6
3.7
3.8
3.9
Umgebungsbedingungen
Aufstellen des Gerätes
Anbringen der Abwasserflasche
Befüllen des Statim-Behälters
Vorbereiten der Statim-Pumpe
Einstellen von Uhrzeit und Datum
Sprachauswahl
Gerätekennung vergeben
Versand des Gerätes
4.1
4.2
4.3
4.4
4.5
4.6
4.7
4.8
Statim 2000S — Kassette
Statim 5000S — Kassette
Statim 5000S — STAT-DRI-Platten
Vorbereiten und Einstellen der Instrumente
Tabelle Instrumentengewicht
Auswahl eines Sterilisationsprogramms
Durchlauf eines Programms
Anhalten eines Programms
Page 49
5.1 Reinigen der Kassette
5.2 Reinigen des Wasserbehälter-Filters
5.3 Reinigen des Behälters
5.4 Reinigen der Außenflächen
5.5 Auswechseln des Statim 2000S-Luftfilters
5.6 Auswechseln des Bakterienrückhaltefilters
5.7 Austausch der Kassettendichtung
5.8 Aufrechterhalten der Flüssigkeitsniveaus
5.9 Ablesen der Wasserqualität
5.10 Zeitplan präventive Wartungsmaßnahmen
6. Kommunikationsanschluss . . . . . . . . . 25
6.1
6.2
6.3
6.4
6.5
4. Bedienungsanleitung . . . . . . . . . . . . . . 11
RS232-Kommunikationsanschluss
Einrichten des Statim Datenrekorders
Einlegen von Papier in den internen Drucker
Beseitigen von Papierstaus im internen Drucker
Übersicht Druckausgabe interner Drucker
7. Problembehandlung
. . . . . . . . . . . . . . 35
8. Ersatzteilliste . . . . . . . . . . . . . . . . . . . . 39
9. Garantie . . . . . . . . . . . . . . . . . . . . . . . . . 40
10. Testprotokoll . . . . . . . . . . . . . . . . . . . . 41
10.1 Typenprüfung
11. Technische Daten . . . . . . . . . . . . . . . . 43
11.1Statim 2000S — Technische Daten
11.2Statim 5000S — Technische Daten
Der STATIM Kassettenautoklav und Statim sind eingetragene Warenzeichen und die
STAT-DRI und DriTec Logos sind Warenzeichen von SciCan Ltd. Alle anderen in diesem
Handbuch erwähnten Warenzeichen sind Eigentum ihrer jeweiligen Besitzer.
Alle Service- und Reparaturanfragen richten Sie bitte an:
In Kanada:
1-800-870-7777
In den USA:
1-800-572-1211
Deutschland:
+49 (0) 821 56 74 56-0
International:
(416) 446-4500
E-Mail:
[email protected]
Hergestellt von:
SciCan
1440 Don Mills Road,
Toronto ON M3B 3P9
CANADA
Telefon:
(416) 445-1600
Fax:
(416) 445-2727
Gebührenfrei: 1-800-667-7733
Seite 2
Vertreter in der EU:
SciCan GmbH
Kurzes Geländ 10
D-86156 Augsburg
DEUTSCHLAND
Telefon: +49 (0) 821 56 74 56-0
Fax: +49 (0) 821 56 74 56-99
SciCan Inc.
701 Technology Drive
Canonsburg, PA 15317
USA
Telefon: +1 724 820 1600
Fax: +1 724 820 1479
Gebührenfrei (nur in den USA):
1-888-632-6031
SciCan Medtech
Alpenstrasse
166300 Zug
SCHWEIZ
Telefon: +41 (0) 41 727 7027
Fax: +41 (0) 41 727 702
Statim_2KS_5KS_E_oct09_FIGS_Q7:Statim_2KS_5KS_E_oct09
1/20/10
1:05 PM
Page 50
1. Einführung
Statim 5000S
Statim 2000S
Gratulation zum Kauf Ihres STATIM ® Kassettenautoklaven. Wir sind davon überzeugt, dass Sie
das beste Produkt seiner Art erworben haben. Der Statim ist ein kompaktes Tischgerät, das mit
seinen zahlreichen Sterilisationsprogrammen all Ihren Bedürfnissen und Erwartungen bei der
Dampfsterilisation gerecht wird. Die Statim “S” Kassettenautoklaven entsprechen vollständig der
EN13060.
Dieses Benutzerhandbuch enthält alle Einzelheiten zu Einrichtung, Betrieb und Wartung Ihres
Statim. Zur Gewährleistung eines langjährigen sicheren und problemfreien Betriebs sollten Sie die
Anweisungen vor Inbetriebnahme des Gerätes lesen und sie für künftige Verwendung aufbewahren. Die Anweisungen zu Betrieb, Wartung und Austausch von Ersatzteilen sollten befolgt
werden, damit das Gerät ordnungsgemäß arbeiten kann. Der Inhalt dieses Handbuchs kann ohne
Vorankündigung geändert werden, um Veränderungen und Verbesserungen am Statim
wiederzugeben.
Der Statim eignet sich zur Sterilisation zahnärztlicher und medizinischer Instrumente, die einer
Dampfsterilisation standhalten. Der Statim ist nicht geeignet für die Sterilisation von Flüssigkeiten,
Textilien und biomedizinischen Abfallstoffen oder Materialien, die einer Dampfsterilisation nicht
standhalten. Die Beschickung mit solchen Stoffen kann zu unvollständiger Sterilisation und/oder
Schäden am Autoklav führen. Für weitere Informationen über die Eignung bestimmter Instrumente
für die Dampfsterilisation ziehen Sie bitte die Herstelleranweisungen zur Aufbereitung zu Rate.
Seite 3
Statim_2KS_5KS_E_oct09_FIGS_Q7:Statim_2KS_5KS_E_oct09
1/20/10
1:05 PM
Page 51
2. Wichtige Informationen
2.1 Haftungsausschluss
Verwenden Sie für Ihren Statim ausschließlich dampfdestilliertes Wasser. Sie sollten kein deionisiertes, demineralisiertes oder speziell gefiltertes Wasser verwenden. Verwenden Sie auf keinen
Fall Leitungswasser.
Die Lieferung von Ersatzteilen, die Wartung und die Instandhaltung dürfen nur durch autorisiertes
Personal erfolgen. SciCan übernimmt keinerlei Haftung für zufällige, besondere oder
Folgeschäden, die durch Instandsetzung oder Wartung des Statim durch Dritte entstehen, oder
für die Verwendung von Ausrüstung oder Einzelteilen aus der Herstellung Dritter, einschließlich
Gewinneinbußen, jeglicher gewerblicher Verluste, wirtschaftlicher Verluste oder Verluste durch
Verletzungen von Personen.
Entfernen Sie niemals die Abdeckung des Gerätes und führen Sie auch keine Gegenstände durch
die Löcher oder Öffnungen am Gehäusekasten ein. Zuwiderhandlung kann zu Schäden am Gerät
und/oder zur Gefährdung des Bedieners führen.
Alle Teile dieses Buches beziehen sich sowohl auf den Statim 2000S als auch den Statim 5000S,
soweit nicht anders angegeben.
WICHTIG:
Befolgen Sie die örtlichen Vorschriften und Bestimmungen zur Verifizierung des
Sterilisationsverfahrens.
Trocknungsleistung
Die Modelle Statim 2000S und 5000S wurden entwickelt, um Ihnen eine umfassende
Sterilisierungslösung für unverpackte und verpackte Instrumente zu bieten: schnelle
Sterilisierung, ergänzt durch schnelle Trocknung mithilfe der SciCan Dri-TecTrocknungstechnologie.
Der Statim 2000S nutzt Konvektionswärme zum Trocknen von Instrumenten mithilfe der im
System nach der Sterilisationsphase vorhandenen Restwärme. Die Hitze wird erfasst und in
eine Kassette eingeleitet, um eine ordnungsgemäß geladene Statim-Kassette schnell zu
trocknen.
Der Statim 5000S verwendet in der Sterilisationsphase generierte Wärme, die von den
Trocknungsplatten absorbiert wird. Die Wärme wird von den Trocknungsplatten direkt auf die
Ladung übertragen. Dies beschleunigt die Trocknung einer ordnungsgemäß geladenen
Statim-Kassette.
Anweisungen zur ordnungsgemäßen Anordnung der Instrumente in der Kassette und zur
Verwendung von Stat-Dri-Platten (Statim 5000S) finden Sie in diesem Benutzerhandbuch.
Befolgen Sie die Anleitungen zum ordnungsgemäßen Laden der Kassettenkammer genau,
damit die Ladung schnell getrocknet wird.
Seite 4
Statim_2KS_5KS_E_oct09_FIGS_Q7:Statim_2KS_5KS_E_oct09
1/20/10
1:05 PM
Page 52
2. Wichtige Informationen (Fortsetzung)
1
■
■2
■3
■4
■5
■6
■7
■8
■9
10
■
11
■
2.2 Statim 2000S — Geräteübersicht
Füllstandsanzeige
Tastenfeld
Behälterdeckel
/Wasserfilter
LCD
Stromanzeige
Aktiv-Anzeige
Netzschalter
Netzkabelanschluss
Nivellierfüße
Auslassanschluss
Kompressor
■3
■4
■2
Abbildung 1
■1
12
■
13
■
■6 ■5
12
■
14
■
Die folgenden Symbole werden in der Randspalte dieses
Handbuchs verwendet.
■9
13 Biofilter
Kassette ■
RS232-Anschluss
Die folgenden Symbole finden sich am Gerät:
UNVERPACKT
STARTProgramme
Taste
11
■
Eine Situation, die zu
einem mechanischen
Defekt führen kann.
Eine potenzielle Gefahr
für den Bediener.
GUMMI/
KUNSTSTOFF
Programme
STOPTaste
VERPACKT
Programme
Nur Lufttrocknen
Nur
dampfdestilliertes Wasser
StromanzeigeLED
AktivAnzeige-LED
■7
14 ■
8
■
10
■
Wichtige
Information
Vorsicht: Heiße Oberfläche
und/oder heißer Dampf
Vorsicht: Gefahr eines
Stromschlags. Vor
Wartungsmaßnahmen Gerät
ausstecken
Vorsicht: Weitere
Details siehe
Handbuch
Der Karton, in dem Sie ihren Statim 2000S geliefert bekommen, enthält die unten aufgelisteten Artikel. Falls irgendeiner dieser
Artikel fehlen sollte, wenden Sie sich bitte umgehend an Ihren Händler, damit diese Situation bereinigt werden kann.
Kassettentray und Deckel
Stromkabel
Instrumentenständer für
unverpackte Instrumente
/5000S
STATIM 2000S
e t t e
C a s s
™
c l a v e
A u t o
Manual
• Operator’s
buch
• Benutzerhand
l’utilisateur
• Manuel de
Operador
• Manual del
operatori
• Manuale per
Bedienungsanleitung
1.0.
95-108430 Rev
Operator’s Manual
STATIM 2000S/5000S All rights reserved.
SciCan.
Copyright 2003
www.scican.com
Abwasserflasche
Ablassschlauch
Flaschendeckelhalterung
Stat-Dri
Schlauchmontage-Hilfsteile
P.C.D. + 20 SciCan
Sterilisationsemulatoren
Seite 5
Statim_2KS_5KS_E_oct09_FIGS_Q7:Statim_2KS_5KS_E_oct09
1/20/10
1:05 PM
Page 53
2. Wichtige Informationen (Fortsetzung)
1
■
■2
■3
■4
■5
■6
■7
■8
■9
10
■
11
■
12
■
2.3 Statim 5000S — Geräteübersicht
Füllstandsanzeige
Tastenfeld
Behälterdeckel
/Wasserfilter
LCD
Stromanzeige
Aktiv-Anzeige
Netzschalter
Netzkabelanschluss
Nivellierfüße
■6
Auslassanschluss
Biofilter
optionaler interner Drucker
(nicht bei allen Modellen)
Die folgenden Symbole werden
in der Randspalte dieses
Handbuchs verwendet.
■3
■4
■2
13
■
12
■
■5
13
■
STOPTaste
Kassette
10
■
14
■
GUMMI/
KUNSTSTOFF
Programme
VERPACKT
Programme
Der Karton, in dem Sie Ihren Statim 5000S geliefert bekommen, enthält die unten aufgelisteten Artikel. Falls irgendeiner
dieser Artikel fehlen sollte, wenden Sie sich bitte umgehend an
Ihren Händler, damit diese Situation bereinigt werden kann.
AktivAnzeige-LED
■7
RS232-Anschluss (nicht bei allen Modellen)
Nur Lufttrocknen
StromanzeigeLED
■8
11
■
14
■
Eine Situation, die zu
einem mechanischen
Defekt führen kann.
Eine potenzielle Gefahr
für den Bediener.
UNVERPACKT
Programme
Nur
dampfdestilliertes Wasser
■1
■9
Die folgenden Symbole finden sich am Gerät:
STARTTaste
Abbildung 2
Wichtige
Information
Vorsicht: Heiße Oberfläche
und/oder heißer Dampf
Vorsicht: Gefahr eines
Stromschlags. Vor
Wartungsmaßnahmen Gerät
ausstecken
Vorsicht: Weitere
Details siehe
Handbuch
Trocknungshilfsplatten
Stromkabel
Kassettentray und Deckel
Instrumentenständer für
unverpackte Instrumente
/5000S
STATIM 2000S
e t t e
C a s s
™
c l a v e
A u t o
Manual
• Operator’s
buch
• Benutzerhand
l’utilisateur
• Manuel de
Operador
• Manual del
operatori
• Manuale per
Bedienungsanleitung
1.0.
95-108430 Rev
Operator’s Manual
STATIM 2000S/5000S All rights reserved.
SciCan.
Copyright 2003
www.scican.com
Abwasserflasche
Ablassschlauch
Flaschendeckelhalterung
Stat-Dri
Schlauchmontage-Hilfsteile
P.C.D. + 20 SciCan
Sterilisationsemulatoren
Seite 6
Statim_2KS_5KS_E_oct09_FIGS_Q7:Statim_2KS_5KS_E_oct09
1/20/10
1:05 PM
Page 54
3. Einrichtung
3.1 Umgebungsbedingungen
Es gibt eine Reihe von Faktoren, die die Leistung Ihres Statim beeinflussen können. Schauen
Sie sich bitte diese Faktoren genau an und wählen Sie daraufhin einen passenden Ort zum
Aufstellen des Gerätes.
•
Temperatur und Luftfeuchtigkeit
•
Abstände
•
Belüftung
•
Arbeitsfläche
•
Elektromagnetisches Umfeld
•
Elektrische Anforderungen
Stellen Sie Ihren Statim nicht an einem Ort mit direkter Sonneneinstrahlung oder in der Nähe
einer Heizquelle (z.B. Entlüfter oder Heizkörper) auf. Die empfohlene Betriebstemperatur liegt
zwischen 15 und 25 °C bei einer Luftfeuchtigkeit zwischen 25 und 70 %.
Die Lüftungsschlitze und Öffnungen des Statim sollten stets unbedeckt und frei zugänglich sein.
Lassen Sie mindestens 50 mm zwischen der Oberseite, den Seiten sowie der Rückseite und
jeglichen Wänden oder Abtrennungen frei.
Der Statim sollte in einer sauberen, staubfreien Umgebung betrieben werden.
Der Statim sollte auf einer flachen, ebenen und wasserabweisenden Oberfläche aufgestellt werden. Installieren und betreiben Sie das Gerät nicht auf einer geneigten Fläche.
Der Statim ist auf elektromagnetische Emissionen getestet worden und erfüllt die maßgeblichen
Normen. Während das Gerät selbst keine Strahlung abgibt, kann es jedoch von anderen strahlenden Geräten beeinflusst werden. Wir empfehlen Ihnen deshalb, das Gerät von potenziellen
Interferenzquellen fernzuhalten.
Verwenden Sie ordnungsgemäß geerdete und abgesicherte Stromquellen mit derselben
Spannungsleistung, die auf dem Aufkleber an der Rückseite Ihres Statim ausgewiesen ist.
Vermeiden Sie die Verwendung von Mehrfachsteckdosen. Bei der Verwendung von Stromleisten
mit Überspannungsschutz stecken Sie immer nur einen Statim ein.
3.2 Aufstellen des Gerätes
Beim Aufstellen des Gerätes auf einer Arbeitsplatte stellen Sie Folgendes sicher:
•
•
1 an der Frontblende sollte in den
Die Niveauanzeigenblase ■
vorderen rechten Zielquadranten positioniert werden. Damit
stellen Sie sicher, dass die Flüssigkeit aus dem Gerät richtig
abfließen kann. Die Justierung der Nivellierfüße wird Ihnen bei
Bedarf helfen, die Blase richtig einzustellen.
Das Gerät sollte stabil und mit Kontakt aller vier Füße auf der
Arbeitsplatte aufgestellt sein. Dies verhindert ein Hin- und
Herbewegen des Gerätes.
■1
Abbildung 3
Seite 7
Statim_2KS_5KS_E_oct09_FIGS_Q7:Statim_2KS_5KS_E_oct09
1/20/10
1:05 PM
Page 55
3. Einrichtung (Fortsetzung)
3.3 Anbringen der Abwasserflasche
2 dient zum Auffangen des Abwassers, nachdem dieses zunächst zu
Die Abwasserflasche ■
Dampf umgewandelt wurde und dann aus der Kassette abgeflossen ist. Um die Abwasserflasche
am Statim anzubringen, gehen Sie wie folgt vor (siehe Abbildung 4):
3 in die
1. Führen Sie den Ablassschlauch ■
4 auf der Rückseite des Gerätes ein
Halterung ■
und stellen Sie eine dichte Verbindung her.
5000S
2. Schneiden Sie den Schlauch zu und schieben
5 in die
Sie die Abwasserflaschenhalterung ■
richtige Position.
3. Führen Sie das freie Ende des Schlauches in
die Deckelöffnung der Abwasserflasche ein und
drehen Sie die Halterung mit der Hand fest zu.
Wickeln Sie den Ablassschlauch nicht auf.
4. Drehen Sie den Deckel und die
6 von der
Kupferkondensatorspule ■
Abwasserflasche ab. Der Deckel und die Spule
sollten sich zusammen lösen.
5. Füllen Sie die Abwasserflasche bis zur MINMarkierung mit Wasser und drehen Sie den
Deckel samt Kupferkondensator wieder fest.
Leeren Sie zur Vermeidung unangenehmer
Gerüche und Verfärbung des Inhalts die
Abwasserflasche häufig aus. (Sie können
auch ein chlorfreies Desinfektionsmittel in
niedriger Konzentration, das gemäß den
Herstelleranweisungen zubereitet wurde, der
Abwasserflasche beimischen, um dieses
Problem zu lösen). Sie sollten die
Abwasserflasche zumindest immer dann
entleeren, wenn Sie den Behälter wieder auffüllen.
■3
■4
6
■
■5
■2
2000S
■4
■3
■6
■2
6. Stellen Sie die Abwasserflasche in der Nähe
des Gerätes auf. Bewahren Sie die Flasche
Abbildung 4
unterhalb des Gerätes auf. Der Schlauch
kann durch ein Loch (8 mm im Durchmesser) in
der Arbeitsplatte geführt und mit den mitgelieferten Nylonklemmen befestigt werden.
3.4 Befüllen des Statim-Behälters
Stellen Sie bei der Befüllung des Behälters sicher, dass Sie ausschließlich dampfdestilliertes
Wasser verwenden, das weniger als 5 Teile je Million (ppm) an echt gelösten Stoffen (mit einer
Leitfähigkeit von weniger als 10 µS/cm) enthält. Die Verunreinigungen und Additive in anderen
Wasserquellen führen zu einer Fehleranzeige auf der LCD-Anzeige. Wenn Sie im Besitz eines
Leitfähigkeitsmessers sind (erhältlich bei SciCan, Bestellnummer 01-103139S), überprüfen Sie
jeden neuen Wasserkanister, bevor Sie den Behälter befüllen. Um den Behälter zu füllen, gehen
Sie wie folgt vor (siehe Abbildung 5):
Seite 8
Statim_2KS_5KS_E_oct09_FIGS_Q7:Statim_2KS_5KS_E_oct09
1/20/10
1:05 PM
Page 56
3. Einrichtung (Fortsetzung)
1. Schrauben Sie den Behälterdeckel
■2
ab.
■2
2. Füllen Sie dampfdestilliertes Wasser bis kurz
vor Erreichen des Maximalvolumens von 4 l
in den Behälter ein. Verwenden Sie einen
Trichter, um ein Verschütten des Wassers zu
vermeiden.
3. Drehen Sie den Deckel wieder fest und sichern Sie ihn.
3.5 Vorbereiten der Statim-Pumpe
Um die Statim-Pumpe für den Betrieb vorzubereiten, gehen Sie wie folgt vor:
Abbildung 5
1. Bewegen Sie das Gerät an den Rand der
Arbeitsfläche. Der vordere Nivellierungsfuß sollte einen Abstand von ungefähr 12 mm vom
Rand haben.
2. Heben Sie die vordere linke Ecke des Gerätes an und entfernen Sie den Ablassschlauch
von der Klemme auf der Unterseite des Gerätes.
■3
3. Ziehen Sie den Ablassschlauch nach außen, so dass das freie Ende über einen
Wasserbehälter positioniert werden kann.
4. Befüllen Sie den Behälter mit dampfdestilliertem Wasser.
4 vom Ende des Ablassschlauches und lassen Sie das Wasser
5. Entfernen Sie den Stopfen ■
30 Sekunden lang in ein Behältnis abfließen. Wenn das
Wasser in einem stetigen Fluss fließt, stecken Sie den
■4
Stopfen wieder ein.
6. Heben Sie die vordere linke Ecke des Gerätes an und
führen Sie den Schlauch wieder in die Klemme an der
Unterseite des Gerätes ein. Drücken Sie das überstehende Ende des Schlauches in den dafür vorgesehenen
Bereich zurück.
Stellen Sie sicher, dass der Stopfen des Ablassschlauches
gesichert ist.
■3
Abbildung 6
3.6 Einstellen von Uhrzeit und Datum
Um Datum und Uhrzeit einzustellen, befolgen Sie die folgen- 14:23
den Schritte und beobachten dabei den
HH:MM
blinkenden Cursor auf der LCD-Anzeige:
11/15/2006
DD/MM/YYYY
Anzeige bei der Einstellung von Datum/Uhrzeit
1. Schalten Sie den Statim AUS.
2. Halten Sie die Taste des Programms UNVERPACKT gedrückt.
3. Schalten Sie den Statim bei gedrückter Taste UNVERPACKT EIN. Die LCD-Anzeige zeigt
Folgendes an:
4. Verwenden Sie die Programmtasten zur Auswahl und Änderung des Wertes für das ausgewählte Feld. Um den Wert einen Feldes zu erhöhen, drücken Sie auf die Taste UNVERPACKT. Halten Sie die Taste zur Erhöhung des Wertes gedrückt.
5. Um den Wert zu verringern, drücken Sie die Taste VERPACKT.
Seite 9
Statim_2KS_5KS_E_oct09_FIGS_Q7:Statim_2KS_5KS_E_oct09
1/20/10
1:05 PM
Page 57
3. Einrichtung (Fortsetzung)
6. Um das nächste Feld auszuwählen, drücken Sie die Taste des Programms
GUMMI UND KUNSTSTOFFE.
7. Um die Änderungen zu speichern und zum regulären Betriebsmodus
zurückzukehren, drücken Sie die STOP-Taste.
8. Um das Menü zu verlassen, ohne Änderungen vorgenommen zu haben, schalten
Sie den Statim AUS.
3.7 Sprachauswahl
Die Meldungen auf der LCD-Anzeige können in einer Reihe verschiedener Sprachen angezeigt
werden. Um die gegenwärtige Sprachauswahl zu ändern, gehen Sie wie folgt vor:
1. Schalten Sie den Netzschalter auf der Rückseite des
Gerätes AUS.
2. Halten Sie die Taste des Programms
VERPACKT gedrückt.
DEUTSCH
Anzeige beim Scrollen durch die Sprachen
3. Stellen Sie bei gedrückter Taste VERPACKT den Netzschalter auf der Rückseite des Gerätes
auf EIN.
4. Drücken Sie die Taste UNVERPACKT, um zur nächsten
Sprachauswahl weiter zu scrollen.
5. Drücken Sie die Taste VERPACKT, um zur vorherigen Sprache zu scrollen.
6. Wenn Ihre gewünschte Sprache angezeigt wird, drücken Sie die STOP-Taste, um Ihre
Auswahl zu speichern und zum regulären Betriebsmodus zurückzukehren.
3.8 Gerätekennung vergeben
1. Schalten Sie den Statim AUS.
2. Halten Sie die Taste des Programms
GUMMI/KUNSTSTOFF gedrückt.
STATIM 2000 S2S2R601 #323
Anzeige bei Zuweisung der Gerätenummer
3. Schalten Sie bei gedrückter Taste GUMMI/KUNSTSTOFF den Statim EIN.
4. Wählen Sie mit Hilfe der Tasten für die Programme eine maximal dreistellige Zahl aus, die als
Gerätekennung verwendet werden soll. Mit der Taste UNVERPACKT wird der ausgewählte
Wert erhöht und mit VERPACKT verringert. Mit der Taste GUMMI/KUNSTSTOFF gelangen
Sie zur nächsten Zahl.
5. Um die Änderungen zu speichern und zum regulären Betriebsmodus zurückzukehren,
drücken Sie die STOP-Taste.
3.9 Versand des Gerätes
Bevor Sie das Gerät bewegen, müssen Sie zunächst den Behälter entleeren. Dazu gehen Sie wie
folgt vor:
1. Stellen Sie einen Wasserbehälter unter das Gerät.
2. Entleeren Sie den Inhalt des Behälters mit Hilfe des Ablassschlauches (siehe Abschnitt 3.5
Vorbereiten der Pumpe, Abbildung 6) in ein Wasserbehältnis.
3. Entfernen Sie das restliche Wasser mit einem flusenfreien, absorbierenden Tuch aus dem
Behälter.
4. Schrauben Sie die drei Nivellierungsfüße unterhalb des Gerätes ein.
5. Verpacken Sie das Gerät in die Originalverpackung und legen Sie alle Zubehörteile bei, die
mit dem Gerät ausgeliefert wurden.
6. Geben Sie beheizten und versicherten Versand an.
Seite 10
Statim_2KS_5KS_E_oct09_FIGS_Q7:Statim_2KS_5KS_E_oct09
1/20/10
1:05 PM
Page 58
4. Bedienungsanleitung
4.1 Statim 2000S — Verwendung der Kassette
Gehen Sie vorsichtig vor, wenn Sie die Kassette nach Beendigung eines Sterilisationsgangs herausnehmen, da die Metallflächen heiß sind und die Kassette heißen Dampf enthalten kann.
•
Öffnen der Kassette:
1. Halten Sie den Kassettengriff so, dass Ihre Daumen auf dem Kassettenverschluss nach innen
zeigen.
2. Drücken Sie den Kassettenverschluss nach unten.
Kassettenverschluss
3. Heben Sie den Kassettendeckel hoch und lösen Sie
das Scharnier.
4. Legen Sie den Deckel auf seine Außenfläche.
•
Schließen der Kassette:
Abbildung 7
1. Bringen Sie die Scharnierkante am Kassettendeckel mit dem Scharnierschlitz am hinteren
Teil des unteren Trays zur Deckung.
2. Sobald Sie den Deckel schließen, rastet die Scharnierkante im Schlitz ein.
•
Einsetzen der Kassette in den Statim 2000S:
1. Stellen Sie das Ende der Kassette in das Gerät.
2. Schieben Sie die Kassette behutsam ein, bis Sie ein "Klick"-Geräusch hören.
Drücken Sie die Kassette niemals gewaltsam in den Statim, da die inneren Bestandteile sonst
Schaden nehmen können.
•
Herausnehmen der Kassette:
1. Greifen Sie den Griff mit beiden Händen und ziehen Sie die Kassette aus dem Gerät.
2. Ziehen Sie die Kassette vollständig aus dem Gerät heraus und setzen Sie sie auf einer festen
Oberfläche ab.
•
Ausklinken der Kassette
•
STAT-DRI
Wenn das Gerät nicht in Betrieb ist, sollte die Kassette ausgeklinkt werden. Dazu fassen Sie den
Griff und ziehen die Kassette heraus, bis eine 15 bis 20 mm große Lücke zwischen der
Vorderseite des Statim 2000S und dem Kassettengriff entstanden ist.
Die Behandlung der Innenflächen der Kassette mit dem Trocknungsmittel Stat-Dri, das mit Ihrem
Gerät geliefert wird, beschleunigt und verbessert den Trocknungsprozess. (Ersatzflaschen sind
bei SciCan erhältlich, Bestellnummer 2OZPLUS, 8OZPLUST, 32OZPLUS).
Seite 11
Statim_2KS_5KS_E_oct09_FIGS_Q7:Statim_2KS_5KS_E_oct09
1/20/10
1:05 PM
Page 59
4. Bedienungsanleitung (Fortsetzung)
4.2 Statim 5000S — Verwendung der Kassette
Gehen Sie vorsichtig vor, wenn Sie die Kassette nach Beendigung eines Sterilisationsgangs herausnehmen, da die Metallflächen heiß sind und die Kassette heißen Dampf enthalten kann.
•
Öffnen der Kassette:
1. Drücken Sie den Tragegriff
nen-Position.
■1
in die Öff-
■1
2. Greifen Sie mit den Händen jeweils an eine
Seite des Kassettengriffs.
3. Fahren Sie mit Ihren Zeigefingern in die
Schlitze und setzen Sie Ihre Daumen auf
die Daumenfelder.
4. Drücken Sie mit Ihren Daumen nach unten
und mit Ihren Zeigefingern nach oben, bis
sich der Deckel öffnet.
■1
5. Heben Sie den Kassettendeckel hoch und
nehmen Sie ihn vom Tray ab. Legen Sie
den Deckel auf seine Außenfläche.
•
Schließen der Kassette:
1. Bringen Sie die Scharnierkante am
Kassettendeckel mit dem Scharnierschlitz
des Trays zur Deckung.
2. Sobald Sie den Deckel schließen, rastet
die Scharnierkante im Schlitz ein.
3. Bringen Sie den Tragegriff in die
geschlossene Position.
•
Einsetzen der Kassette in den
Statim 5000S:
1. Halten Sie den Kassettengriff mit einer
Hand und den Tragegriff mit der anderen
fest, wie in Abbildung 8 dargestellt.
Abbildung 8
2. Setzen Sie das Ende der Kassette in das Gerät ein und bringen Sie den Tragegriff in die
geschlossene Position.
3. Schieben Sie die Kassette behutsam ein, bis Sie ein Klick-Geräusch hören.
Drücken Sie die Kassette niemals gewaltsam in den Statim, da die inneren Bestandteile sonst
Schaden nehmen können.
Seite 12
Statim_2KS_5KS_E_oct09_FIGS_Q7:Statim_2KS_5KS_E_oct09
1/20/10
1:05 PM
Page 60
4. Bedienungsanleitung (Fortsetzung)
•
Herausnehmen der Kassette:
1. Greifen Sie den Kassettengriff mit einer Hand und ziehen Sie die Kassette aus dem Gerät
heraus.
2. Sobald die Kassette aus dem Gerät hervortritt, fassen Sie den Tragegriff mit Ihrer freien Hand
und heben ihn hoch.
3. Ziehen Sie die Kassette vollständig aus dem Gerät heraus und setzen Sie sie auf einer festen
Oberfläche ab.
•
Ausklinken der Kassette
Wenn das Gerät nicht in Betrieb ist, sollte die Kassette ausgeklinkt werden. Dazu fassen Sie den
Griff und ziehen die Kassette heraus, bis eine 15 bis 20 mm große Lücke zwischen der
Vorderseite des Statim 5000S und dem Kassettengriff entstanden ist.
4.3 Statim 5000S — STAT-DRI-Platten
Die Statim 5000S-Kassette verwendet STAT-DRI-Platten zur Verbesserung des
Trocknungsprozesses verpackter Instrumente. Die justierbaren Platten sind für die
Instrumentenständer unverpackter Instrumente konstruiert worden und machen einen separaten
Ständer für verpackte Instrumente überflüssig. Bis zu zehn Platten können der Länge nach in
den Ständer eingestellt werden. Jedes Gerät wird mit fünf STAT-DRI-Platten ausgeliefert.
Zusätzliche Platten sind bei SciCan erhältlich (SciCan Artikelnummer
01-103935).
Zum Einsetzen und Justieren einer STAT-DRI-Platte gehen Sie wie folgt vor:
1. Halten Sie eine Platte mit den Befestigungslaschen nach
unten in gewünschter Richtung leicht nach vorne gelehnt.
2. Stecken Sie die Befestigungslaschen zwischen das Gitter
des Ständers für unverpackte Instrumente
3. Jede Befestigungslasche hat einen verlängerten Schlitz.
Schieben Sie die Platte soweit vor, bis der Draht am Ende
des Schlitzes angekommen ist.
4. Lassen Sie die Platte in der Halteposition los.
5. Bereiten Sie die Instrumente für die Sterilisation
vor und stellen Sie sie in den Statim.
4.4 Vorbereiten und Einstellen der Instrumente
Bevor Sie Instrumente in den Statim einstellen, sehen Sie sich die Herstelleranweisungen zur
Aufbereitung an.
•
Reinigen der Instrumente
Reinigen und spülen Sie alle Instrumente ab, bevor Sie sie in die Kassette einstellen.
Desinfektionsmittelrückstände und feste Verunreinigungen können die Sterilisation behindern und
die Instrumente, die Kassette und den Statim beschädigen. Geschmierte Instrumente müssen
gründlich abgewischt und jegliche überflüssigen Schmierstoffe vor dem Beladen beseitigt werden.
Seite 13
Statim_2KS_5KS_E_oct09_FIGS_Q7:Statim_2KS_5KS_E_oct09
1/20/10
1:05 PM
Page 61
4. Bedienungsanleitung (Fortsetzung)
•
Unverpackte Instrumente
Ordnen Sie unverpackte Instrumente auf dem Instrumentenständer so an, dass sie sich nicht
gegenseitig berühren. So stellen Sie sicher, dass der Dampf alle Flächen erreicht und der
Trocknungsprozess beschleunigt wird.
Die Instrumente dürfen in den Kassetten nicht gestapelt oder aufeinander gelegt werden, da dies
den Sterilisationsprozess behindert.
•
Verpackte Instrumente (einzeln verpackt)
Geben Sie die Instrumente gemäß Herstelleranweisung in einzelne Autoklavierbeutel. Richten Sie
den Instrumentenständer in der Kassette so aus, dass verpackte Instrumente etwa 6 mm über
dem Kassettenboden lagern. Verpackte Instrumente sind so im Ständer zu positionieren, dass sie
nicht übereinander liegen. Stellen Sie sicher, dass alle verpackten Ladungen trocken sind, bevor
Sie mit Ihnen hantieren und/oder sie lagern, um ihre Sterilität aufrechtzuerhalten.
Die Verwendung von textilen Verpackungen im Statim wird nicht empfohlen.
SciCan empfiehlt die Verwendung von Papier-/Papier- und Kunststoff-/Papier-Autoklavierbeuteln,
die entsprechend EN 868 hergestellt wurden. Packen Sie die Instrumente locker in die Taschen,
damit alle Instrumentenflächen vom Dampf erreicht werden können.
Das Gestell für verpackte Instrumente für den Statim 5000S ist für maximal 12 Autoklavierbeutel
vorgesehen. Es ist sicherzustellen, dass das Gesamtgewicht der beladenen Beutel 1,5 kg nicht
überschreitet.
Das Gestell für unverpackte Instrumente mit maximal 10 Stat-Dri-Platten fasst 10
Autoklavierbeutel.
•
Gummi- und Kunststoffinstrumente
Folgende Materialien können im Statim sterilisiert werden:
nylon, Polykarbonat (Lexan™), Polypropylen, PTFE (Teflon™), Acetal (Delrin™), Polysulfon
(Udel™), Polyetherimid (Ultem™), Silikongummi und Polyester.
Wenn Sie Gummi- oder Kunststoffinstrumente in das Trray geben, lassen Sie Platz zwischen den
Instrumenten und den Kassettenwänden. So stellen Sie sicher, dass der Dampf alle Flächen erreicht, und verbessern den Trocknungsprozess.
Folgende Materialien können nicht im Statim sterilisiert werden:
polyethylen, ABS, Styren, Zelluloseprodukte, PVC, Acrylat (Plexiglas™), PPO (Noryl™), Latex,
Neopren und ähnliche Materialien.
Die Verwendung dieser Materialien kann zu Schäden an den Instrumenten oder Geräten führen.
Wenn Sie sich über das Material oder den Aufbau ihrer Instrumente im Unklaren sind, stellen Sie
die Instrumente erst in den Statim ein, nachdem Sie beim Hersteller der Instrumente nachgefragt
haben.
Seite 14
Statim_2KS_5KS_E_oct09_FIGS_Q7:Statim_2KS_5KS_E_oct09
1/20/10
1:05 PM
Page 62
4. Bedienungsanleitung (Fortsetzung)
•
Alle Instrumente
Der Statim ist NICHT geeignet für die Sterilisation von Textilien, Flüssigkeiten oder biomedizinischem Abfall. Die Instrumente bleiben nach einem erfolgreichen Durchlauf steril, bis die Kassette
vom Gerät getrennt wird. Sobald unverpackte Instrumente der Raum- oder Außenumgebung ausgesetzt sind, verlieren Sie ihre Sterilität. Wünschen Sie sterile Lagerung, sollten Sie die zu sterilisierenden Instrumente in Autoklavierbeutel gemäß den Anweisungen des Instrumentenherstellers
verpacken. Dann lassen Sie den Sterilisationsgang für verpackte Instrumente laufen, bis die
Lufttrocknungsphase beendet ist.
Empfohlene Vorgehensweisen: Lassen Sie die Instrumente (verpackt und unverpackt) vor dem
weiteren Hantieren vollständig trocknen. Verpackte oder in Beutel eingelegte Instrumente dürfen
sich nicht berühren, damit die Trocknung beschleunigt und eine wirksame Sterilisation ermöglicht
wird.
SciCan empfiehlt eine sorgfältige Auswahl des Sterilisationszyklus durch den Endbenutzer, und
zwar gemäß den Empfehlungen der führenden Infektionskontrollbehörden und den
Richtlinien/Empfehlungen der lokalen Aufsichtsbehörden.
•
Routineüberwachung
Chemische Prozessindikatoren, die sich zur Dampfsterilisation eignen, sollten in oder auf jedem
Paket oder jeder zu sterilisierenden Ladung beigefügt sein. Darüber hinaus wird empfohlen, ein
Mal wöchentlich biologische Indikatoren zu verwenden, mit denen Sie sich vergewissern können,
ob die Instrumente Sterilisationsbedingungen ausgesetzt wurden.
4.5 Leitfaden für das Instrumentengewicht
Scheren
Instrument
Typisches Instrumentengewicht
30 g
Zahnärztliche Scaler
20 g
Pinzetten
Zahnärztliche Hand- und Winkelstücke
Ständer für verpackte Instrumente
Ständer für unverpackte Instrumente
Absaugkanüle
Kunststoff-Mundspiegel
15 g
40 bis 60 g
260 g
225 g
10 g
8g
Abdrucklöffel
Kunststoff-Röntgenpositionierungsring
15 bis 45 g
20 g
HINWEIS: Obige Gewichtsangaben stellen lediglich Richtwerte dar. Zur genauen
Gewichtsbestimmung Ihrer Instrumente konsultieren Sie bitte die Angaben des jeweiligen
Herstellers.
Seite 15
Statim_2KS_5KS_E_oct09_FIGS_Q7:Statim_2KS_5KS_E_oct09
1/20/10
1:05 PM
Page 63
4. Bedienungsanleitung (Fortsetzung)
4.6 Auswahl eines Sterilisationsprogrammes
Der Statim 2000S und der Statim 5000S verfügen über sieben Sterilisationsprogramme. Jedes
dieser Programme sterilisiert mit den eingestellten Parameternverwenden. Jedes Programm kann
durch einen Druck auf die Tasten UNVERPACKT, VERPACKT oder GUMMI/KUNSTSTOFF ausgewählt werden.
Auf den nächsten Seiten finden Sie Beschreibungen zum Instrumententyp, zu den
Sterilisationsanforderungen sowie Grafiken mit den Kennwerten jedes Programms.
1. Sterilisationsprogramme Unverpackt
Der Statim 2000S und 5000S verfügt über zwei Sterilisationsprogramme 134 °C Typ S sowie ein
Pprogramm 134 °C Typ N UNVERPACKT. Am Ende der Sterilisationsphase des Programms
beginnt eine einstündige
Lufttrocknungsphase.
Sie können die Lufttrocknung jederzeit
durch einen Druck auf die STOP-Taste
unterbrechen.
Um ein Programm auszuwählen, gehen Sie
wie folgt vor: Drücken Sie auf die Taste des
Programms UNVERPACKT, um durch die
verfügbaren Programme zu scrollen.
HOHLK. UNVERP. (S) 134 °C/3,5 min
A
B
D
C 3.5
E F
min / 18 min
A 00˚C
1 / 101 kPa D Sterilisation
/ 304 kPa B 3 Reinigungsgänge134˚C
(Aufbereitung)
138˚C
Höchstwert bei E
133˚C
/ 295/ 341
kPa kPa
Entlüften
5˚C auf
/ 169
11kPa
Druckabbau
C Druckaufbau
F Lufttrocknung
HOHLK. UNVERP. (S) 134 °C/18 min
FESTK. UNVERP. (N) 134 °C/3,5 min
Sobald Sie Ihr gewünschtes Programm ausgewählt haben, drücken Sie die STARTTaste.
Der Gerätespeicher merkt sich den letzten
Programmdurchlauf und zeigt diesen dann
als ersten an, wenn das Gerät eingeschaltet
wird.
Seite 16
A
B C
D
E F
3.5
min
A 00˚C
1 / 101 kPa D Sterilisation
/ 304 kPa B 1 Reinigungsgang 134˚C
(Aufbereitung) E 138˚C / 341 kPa
Höchstwert bei 133˚C
/ 295 kPa
Druckabbau
Entlüften
5˚C auf
/ 169
11F
kPa
Lufttrocknung
C Druckaufbau
Statim_2KS_5KS_E_oct09_FIGS_Q7:Statim_2KS_5KS_E_oct09
1/20/10
1:05 PM
Page 64
4. Bedienungsanleitung (Fortsetzung)
2. Sterilisationsprogramme
HOHLKÖRPER VERPACKT
Der Statim 2000S und 5000S verfügt über
zwei Sterilisationsprogramme VERPACKT
134 °C Typ S.
Um eines dieser S-Programme
auszuwählen, gehen Sie wie folgt vor:
Drücken Sie auf die Taste VERPACKT, um
durch die verfügbaren Programme zu
scrollen.
HOHLK. VERP. (S) 134 °C/3,5 min
A
B
D
C 3.5
EF
min /
18 min
A 00˚C
1 / 101 kPa D Sterilisation
/ 304 kPa B 6 Reinigungsgänge134˚C
(Aufbereitung)
138˚C
Höchstwert bei E
133˚C
/ 295/ 341
kPa kPa
Entlüften
5˚C auf
/ 169
11kPa
Druckabbau
C Druckaufbau
F Lufttrocknung
HOHLK. VERP. (S) 134 °C/18 min
Sobald Sie Ihr gewünschtes Programm ausgewählt haben, drücken Sie die START-Taste.
Der Gerätespeicher merkt sich den letzten Programmdurchlauf und zeigt diesen als erstes an,
wenn das Gerät eingeschaltet wird.
Ein Verarbeitungsprüfsystem (PCD – Process Challenge Device) zur Validierung des Programms
HOHLKÖRPER VERPACKT (S) 134 °C/3,5 min ist verfügbar.
3. Programm für Gummi- und
Kunststoffinstrumente
Der Statim 2000S und 5000S verfügt über
zwei Sterilisationsprogramme 121 °C Typ S.
Um eines dieser S-Programme auszuwählen,
gehen Sie wie folgt vor: Drücken Sie auf die
Taste des Programms GUMMI/KUNSTSTOFF,
um durch die verfügbaren Programme zu
scrollen.
A
B
D
C 15min
30/min E F
A 00˚C
1 / 101 kPa D Sterilisation
/ 205 kPa B 3 Reinigungsgänge121˚C
(Aufbereitung)
124˚C
Höchstwert bei E
120˚C
/ 199/ 225
kPa kPa
Entlüften
0˚C auf
/ 143
11kPa
Druckabbau
C Druckaufbau
F Lufttrocknung
GUMMI/KUNSTSTOFF (S) 121 °C/15 min
GUMMI/KUNSTSTOFF (S) 121 °C/30 min
Seite 17
Statim_2KS_5KS_E_oct09_FIGS_Q7:Statim_2KS_5KS_E_oct09
1/20/10
1:05 PM
Page 65
4. Bedienungsanleitung (Fortsetzung)
Sobald Sie Ihr gewünschtes Programm ausgewählt haben, drücken Sie die START-Taste.
Der Gerätespeicher merkt sich den letzten Programmdurchlauf und zeigt diesen als erstes an,
wenn das Gerät eingeschaltet wird.
4. Programm Nur Lufttrocknen
Dieses Programm ist kein Sterilisationsgang.
Das Programm Nur Lufttrocknen startet automatisch nach jedem Sterilisationsgang und läuft 60
Minuten lang.
Sie können die Lufttrocknung durch einen Druck auf die STOP-Taste jederzeit unterbrechen. Um
sicherzustellen, dass der Inhalt der Kassette trocken ist, sollte das Programm die vollen 60
Minuten durchlaufen. Die Trocknung der Instrumente ist wichtig zur Vermeidung von Korrosion an
unverpackten Instrumenten. Bei verpackten Instrumenten ist eine trockene Verpackung für die
Erhaltung der Sterilität erforderlich.
Wird während der Lufttrocknungsphase des Sterilisationszyklus die STOP-Taste gedrückt und die
Kassette wurde nicht aus dem Autoklaven genommen, kann das Programm „Nur Lufttrocknen“ für
die weitere Trocknung genutzt werden. Wurde die Kassette aus dem Autoklaven genommen, darf
sie für das Programm „Nur Lufttrocknen“ NICHT wieder eingeschoben werden. Enthält die
Kassette eingepackte Instrumente und sind die Verpackungen bei Öffnung der Kassette nicht
trocken, müssen die Instrumente für sofortigen Gebrauch aseptisch behandelt oder erneut sterilisiert werden.
Zum Start des Programms drücken Sie zunächst die Taste Nur Lufttrocknen und dann die
START-Taste.
Wenn das Programm eigenständig gestartet wird, dauert der Arbeitsgang 1 Stunde.
Seite 18
Statim_2KS_5KS_E_oct09_FIGS_Q7:Statim_2KS_5KS_E_oct09
1/20/10
1:05 PM
Page 66
4. Bedienungsanleitung (Fortsetzung)
4.7 Durchlauf eines Programms
Zur Durchführung eines Programms befolgen Sie die folgenden Schritte und beobachten die LCD-Anzeige.
1. Netzschalter an der Rückseite des Geräts auf
EIN schalten. Die LCD-Anzeige zeigt
Folgendes an:
2. Die entsprechende Taste am Tastenfeld drücken, um durch die verfügbaren Programme zu
scrollen
14:23
11/15/2006
PROGRAMM WAEHLEN
Die Anzeige zeigt eine der folgenden Meldungen an:
HOHLK. UNVERP. (S)
134 °C/3,5 min
oder
HOHLK. UNVERP. (S)
134 °C/18 min
FESTK. UNVERP. (N)
134 °C/3,5 min
oder GUMMI/KUNSTSTOFF (S)
HOHLK. VERP. (S)
134 °C/3,5 min
121 °C/15 min
GUMMI/KUNSTSTOFF (S)
121 °C/30 min
HOHLK. VERP. (S)
134 °C/18 min
Beim Loslassen der Taste zeigt die Anzeige Folgendes an:
Von Ihnen gewähltes Programm
START DRUECKEN
Der Durchgangszähler des Gerätes wird beim Programmstart angezeigt, nachdem die
Start-Taste gedrückt worden ist.
Von Ihnen gewähltes Programm
ZYKLUS NR.:
000000
Die gelbe Anzeigenlampe leuchtet auf. Um anzuzeigen, dass das Programm im Gange ist,
erscheinen während des Programmdurchlaufs die folgenden Meldungen.
Von Ihnen gewähltes
Programm
AUFHEIZEN
VORBEREITUNG
110 °C
143 kPa
DRUCKAUFBAU
125 °C 232 kPa
Während das Programm läuft, hören
Sie verschiedene Geräusche.
Dies gehört zur normalen Funktion des Gerätes.
Seite 19
STERILISIEREN
136,8 °C 330 kPa 3:29
DRUCKABBAU
108 °C 134 kPa
Statim_2KS_5KS_E_oct09_FIGS_Q7:Statim_2KS_5KS_E_oct09
1/20/10
1:05 PM
Page 67
4. Bedienungsanleitung (Fortsetzung)
Das Summen während der Lufttrocknungsphase stammt vom Arbeitsgeräusch des Kompressors.
Sie können die Lufttrocknungsphase des Sterilisationsgangs jederzeit durch Drücken der STOPTaste unterbrechen. Die Bildschirmanzeige lautet:
BITTE WARTEN
ZYKLUS BEENDET
Nach Ablauf der 60-minütigen Lufttrocknungsphase zeigt der Bildschirm Folgendes an:
KASSETTE ENTNEHMEN
ZYKLUS BEENDET
Nach erfolgreichemProgrammablauf ertönt ein Signal, und das gelbe Licht leuchtet auf, bis die
STOP-Taste gedrückt oder die Kassette aus dem Gerät entfernt wird.
4.8 Anhalten eines Programms
Um ein Programm anzuhalten, drücken Sie die STOP-Taste. Wenn die STOP-Taste gedrückt oder
die Kassette entfernt wird oder das Gerät ein Problem während des Programmablaufes entdeckt,
hält das Programm an, und die gelbe Lampe leuchtet auf. Sobald ein Programm gestoppt worden
ist, muss zunächst die STOP-Taste erneut gedrückt werden, bevor ein neues Programm gestartet
werden kann. Der Bildschirm zeigt eine der folgenden Meldungen an:
PROGRAMMFEHLER xxx
NICHT STERIL
oder
KASSETTE ENTFERNT
NICHT STERIL
Falls die Anzeige die Meldung PROGRAMMFEHLER oder NICHT STERIL anzeigt, ist der Inhalt
der Kassette nicht steril! Lesen Sie Abschnitt 7. Problembehandlung für weitere Informationen.
Falls die Lufttrocknungsphase des Programms unterbrochen wird, lassen Sie verpackte
Instrumente nicht in der Kassette, es sei denn, sie sind trocken.
Seite 20
Statim_2KS_5KS_E_oct09_FIGS_Q7:Statim_2KS_5KS_E_oct09
1/20/10
1:05 PM
Page 68
5. Wartung
5.1 Reinigen der Kassette
Das Sauberhalten der Statim-Kassette gehört zur anerkannten Verfahrensweise und erhält die
Funktionsfähigkeit des Gerätes. SciCan empfiehlt, die Innenflächen mindestens ein Mal pro
Woche zu reinigen. Verwenden Sie zur Reinigung Spülmittel oder ein mildes, chlorfreies
Reinigungsmittel. Wischen Sie das Innere der Kassette mit einem Reinigungsschwamm aus, der
für mit Teflon™ beschichtete Flächen geeignet ist. Spülen Sie die Kassette nach dem Reinigen
mit Wasser aus, um alle Reinigerspuren zu beseitigen. Die Reinigung des Kassetteninneren ist
bei regelmäßiger Sterilisation geschmierter Instrumente sehr wichtig. Die Beschichtung der
gesamten Oberfläche mit STAT-DRI-Trocknungsmittel führt dazu, dass Wasser eine gleichmäßige,
tropfenfreie Schicht auf der inneren Oberfläche bildet. Das Wasser, das in Kontakt mit den heißen
inneren Kassettenflächen kommt, verdampft außerdem schneller. Die Fleckenbildung wird auf ein
Minimum reduziert, und die Instrumente trocknen sehr viel besser. Sie sollten STAT-DRI nach
jedem zehnten Programmdurchlauf sowie nach jeder Säuberung der Kassette anwenden.
5.2 Reinigen des Wasserbehälter-Filters
Der Wasserbehälter-Filter sollte mindestens ein Mal pro Woche oder bei Bedarf häufiger gereinigt
werden. Der Filter lässt sich einfach entnehmen und reinigen, in dem er umgedreht und unter
fließendes Wasser gehalten wird, um die Schmutzpartikel abzuwaschen; anschließend wird er in die
Behälteröffnung zurückgesetzt. Benötigte Ersatzfilter für den Wasserbehälter können unter der
Artikelnummer 01-109300S nachbestellt werden.
5.3 Reinigen des Behälters
Überprüfen Sie den Behälter auf Schmutz und Partikel. Die Reinigung des Behälters erfolgt durch
Ablassen der Flüssigkeit und anschließendes Reinigen und Ausspülen AUSSCHLIESSLICH mit
dampfdestilliertem Wasser. Die Verwendung von Chemikalien oder Reinigungsmitteln wird nicht
empfohlen und kann Schäden am Gerät verursachen.
5.4 Reinigen der Außenflächen
Benutzen Sie für die Reinigung aller Außenflächen ein weiches, mit Seife und Wasser angefeuchtetes Tuch. Verwenden Sie keine scharfen Reiniger oder Desinfektionsmittel.
5.5 Auswechseln des Statim 2000S-Luftfilters
Sie sollten den Filter alle 6 Monate austauschen, um eine ausreichende Versorgung mit sauberer Luft
während der Lufttrocknungsphase zu gewährleisten.
2000S
Um den Filter auszutauschen, gehen Sie wie folgt vor:
1. Schalten Sie den Netzschalter auf der Rückseite des
Gerätes AUS.
4 .
2. Entfernen und entsorgen Sie den alten Schaum-Luftfilter■
4 (SciCan Artikelnummer
3. Installieren Sie den neuen Filter ■
01-100207S).
2 an der Rückseite des
4. Schrauben Sie die Filterplatte ■
1 fest, die Sie beim
Kompressors mit der Schraube ■
Auseinanderbauen gelöst haben.
Seite 21
■1
■4
■2
Abbildung 10
Statim_2KS_5KS_E_oct09_FIGS_Q7:Statim_2KS_5KS_E_oct09
1/20/10
1:05 PM
Page 69
5. Wartung
5.6 Auswechseln des Bakterienrückhaltefilters
Die Filter sollten alle sechs Monate oder nach 500 Sterilisierungsgängen ausgetauscht werden,
um eine ausreichende Versorgung mit sauberer Luft während der Trocknungsphase zu
gewährleisten.
Um den Bakterienrückhaltefilter beim Statim 2000S und 5000S auszuwechseln, gehen Sie wie
folgt vor:
1. Schalten Sie den Statim AUS.
1 vom Bakterienrückhaltefilter ■
2
2. Trennen Sie Schlauch A ■
3 herund ziehen Sie den Filter aus der Filterklammer ■
aus. Achten Sie beim Herausziehen des Filters aus der
Klammer auf die Richtung der Pfeilmarkierung auf dem
Filter.
3. Sobald Sie den Filter aus der Klammer gelöst haben, tren4 vom Filter.
nen Sie vorsichtig Schlauch B ■
4. Achten Sie vor dem Einsetzen des
2 (SciCan Artikelnummer
Austauschfilters ■
01-102119S) darauf, dass die Pfeilmarkierung
auf dem Filter mit der Richtung des Pfeils auf
der Klammer übereinstimmt. Drücken Sie die
4 hinein.
linke Filterhalterung in Schlauch B ■
5. Drücken Sie den Ersatzfilter sanft in die
3 . Die Pfeilmarkierung des
Filterklammer ■
Filters sollte außen sein und nach links zeigen.
■2 ■3
2000S
■1
■4
Abbildung 11
5000S
■2
■4
■1
■3
Abbildung 12
1 wieder mit der rechten Filterhalterung.
6. Verbinden Sie Schlauch A ■
5.7 Austausch der Kassettendichtung
Um die optimale Leistung Ihres Statim Kassettenautoklaven zu gewährleisten, wechseln Sie die
Kassettendichtung nach 500 Sterilisationsdurchgängen oder alle sechs Monate aus, je nachdem,
welcher Zeitpunkt eher erreicht wird. Ersatzdichtungen sind bei SciCan erhältlich (Artikelnummer
01-100028S für den Statim 2000S und 01-101649S für den Statim 5000S).
Um die Kassettendichtung zu wechseln, gehen Sie wie folgt vor:
Legen Sie den Kassettendeckel und die neue Dichtung auf eine saubere Arbeitsfläche. Prüfen Sie
die Position der alten Dichtung im Kassettendeckel und ordnen Sie die neue Dichtung in der gleichen Richtung neben dem Deckel an.
Seite 22
Statim_2KS_5KS_E_oct09_FIGS_Q7:Statim_2KS_5KS_E_oct09
1/20/10
1:05 PM
Page 70
5. Wartung (Fortsetzung)
Entfernen und entsorgen Sie die alte Dichtung. Beseitigen Sie jegliche
Rückstände aus der Dichtungsrille und spülen Sie die Rille mit destilliertem
Wasser aus.
Streichen Sie die neue Dichtung mit dem mitgelieferten flüssigen Dichtungsgel
ein.
Führen Sie den abgerundeten Rand der Dichtung unter der runden Lippe des
Deckels ein. Gleichen Sie die Löcher in der neuen Dichtung mit den Löchern im
Deckel ab.
HINWEIS: An jeder Ecke und an den Löchern im Deckel sollten zwei rechteckige
Stifte zu sehen sein. Die Stifte müssen bündig mit der Außenfläche des Deckels
sein.
Stellen Sie sicher, dass die Dichtung vollständig eingesetzt ist. Tasten Sie den
Rand ab, um sicher zu gehen, dass die Dichtung fest angebracht ist.
HINWEIS: Während eines Sterilisationsganges kann zwischen
dem Deckel und dem Tray Dampf austreten. Falls dies ständig
der Fall ist, entfernen Sie die Kassette und überprüfen Sie, ob die
Dichtung korrekt angebracht ist.
Abbildung 13
Seien Sie vorsichtig. Die Metallteile sind heiß, und die Kassette kann heißen Dampf enthalten.
5.8 Aufrechterhalten der Flüssigkeitsniveaus
Verwenden Sie ausschließlich dampfdestilliertes Wasser mit weniger als 5 ppm an echt gelösten
Stoffen (mit einer Leitfähigkeit von weniger als 10 µS / cm) in Ihrem Statim. Um den Behälter zu
befüllen, drehen Sie den Deckel oben auf dem Gerät ab. Wir empfehlen die Verwendung eines
Trichters, um ein Verschütten möglichst zu vermeiden. Jedes Mal, wenn Sie den Behälter wieder
befüllen, entleeren Sie die Abwasserflasche und füllen Wasser bis zur MIN-Markierung nach.
Leeren Sie zur Vermeidung unangenehmer Gerüche und Verfärbung des Inhalts die
Abwasserflasche häufig aus. (Sie können auch ein chlorfreies Desinfektionsmittel niedriger
Konzentration, das gemäß den Herstelleranweisungen zubereitet wurde, der Abwasserflasche
beimischen, um diesem Problem beizukommen).
5.9 Ablesen der Wasserqualität
1. Schalten Sie das Gerät bei gedrückter STOP-Taste ein, um zum Setup-Menü zu gelangen.
2. Scrollen Sie mit den Tasten UNVERPACKT und VERPACKT zu Wasserqualität und wählen Sie
diesen Punkt durch Drücken von GUMMI UND KUNSTSTOFF.
>Wasserqualität
CD = XXuS/yyy/z.z
ppm
l
CD = Leitfähigkeit
yyy = Maschinenwert
Seite 23
XX = Mikro-S-Wert
z.z = ppm-Wert
Statim_2KS_5KS_E_oct09_FIGS_Q7:Statim_2KS_5KS_E_oct09
1/20/10
1:05 PM
Page 71
5. Wartung (Fortsetzung)
5.10 Zeitplan präventive Wartungsmaßnahmen
Um einen einwandfreien Betrieb zu gewährleisten, müssen sowohl der Bediener als auch der
Hersteller einen Zeitplan für vorbeugende Wartungsmaßnahmen befolgen. HINWEIS: Bitte
beachten Sie die nationalen, regionalen, Landes- oder Sicherheitsgesetze, ob weitere wiederholte
Benutzerprobeläufe erforderlich sind.
Die unten aufgeführten Zeitpläne beschreiben die notwendigen Maßnahmen.
Bediener
Täglich
Wasserbehälter
.
Abwasserflasche
Wöchentlich
• Entleeren Sie die Abwasserflasche bei jedem Auffüllen des Behälters.
• Füllen Sie die Flasche bis zur MIN-Markierung mit Wasser.
• Waschen Sie das Innere der Kassette mit Spülmittel oder einem milden, chlorfreien Reinigungsmittel
aus.
• Wischen Sie das Innere der Kassette mit einem Reinigungsschwamm, der für mit Teflon™
beschichtete Flächen geeignet ist, aus.
• Nach Beseitigung aller Rückstände des Reinigungsmittels behandeln Sie die Innenflächen der
Kassette mit dem STAT-DRI™ Plus Trocknungsmittel, um den Trocknungsvorgang zu verbessern.
Sie können STAT-DRI™ Plus bei SciCan unter Angabe von 2OZPLUS, 8OZPLUST oder 32OZPLUS
nachbestellen.
Bio- und/oder
• Untersuchen Sie den Luftfilter auf Schmutz und Feuchtigkeit. Ersetzen Sie ihn bei
Verschmutzung. Luftfilter.
Beauftragen Sie den Service, falls der Filter feucht ist.
Kassette
Alle sechs
Monate
• Wasser nach Bedarf auffüllen.
• Für opthalmologische Anwendungen am Ende eines jeden Arbeitstages entleeren, leer
lassen und zu Beginn des nächsten Tages wieder auffüllen
Wasserfilter
Kassettendichtung
Bio- und/oder
Luftfilter
• Den Wasserbehälterfilter jede Woche überprüfen und bei Bedarf reinigen. Nur wenn nötig ersetzen.
• Nach jeweils 500 Sterilisationsgängen oder nach sechs Monaten
(je nachdem, was zuerst eintritt) oder bei Bedarf ersetzen.
• Ersetzen nach 500 Sterilisationsgängen oder nach sechs Monaten (je nachdem, welcher .
Zeitpunkt eher erreicht ist).
Techniker
Ein Mal pro Jahr
Kassette
• Überprüfen Sie das Tray, den Deckel und die Dichtung auf Schäden. Bei Bedarf ersetzen.
Biofilter
• Untersuchen Sie den Biofilter auf Feuchtigkeit.
Magnetventil
• Untersuchen Sie das Ventil und reinigen Sie es bei Verschmutzung. Tauschen Sie den
Kolben bei Defekt aus.
Pumpe
Regelventil
Wasserbehälter
Kalibrierung
• Reinigen Sie die Filter und tauschen Sie sie bei Verschmutzung aus.
• Den Ablassschlauch während der Trockungsphase von der Rückseite des Gerätes entfernen. Überprüfen, ob Luft aus dem Anschluss kommt.
• Entfernen Sie den Luftkompressorschlauch während des Durchlaufens eines
Sterilisationsgangs vom Regelventil. Stellen Sie sicher, dass kein Dampf aus dem Ventil
entweicht. Ersetzen Sie es, wenn Sie ein Leck feststellen.
• Untersuchen Sie den Behälter auf Verschmutzungen. Reinigen Sie den Behälter und
spülen Sie ihn bei Bedarf mit dampfdestilliertem Wasser aus.
• Kalibrieren Sie das Gerät.
Seite 24
Statim_2KS_5KS_E_oct09_FIGS_Q7:Statim_2KS_5KS_E_oct09
1/20/10
1:05 PM
Page 72
6. Kommunikationsanschluss
6.1 RS232-Kommunikationsanschluss
Alle Statim-Geräte ohne internen Drucker besitzen einen
RS232-Kommunikationsanschluss, an dem Sie einen externen Drucker oder einen SciCan Datenrekorder anschließen
können. Zum Ausdrucken müssen Sie einen der empfohlenen Drucker (siehe nachfolgende Liste) im Computer- oder
Elektronikfachhandel vor Ort kaufen. Für die
Datenspeicherung können Sie den USB Data Logger
(Datenrekorder) von SciCan kaufen, um Informationen über
den Programmdurchlauf auf einem Massenspeichergerät
wie etwa einem USB Flash Drive oder einer SDSpeicherkarte aufzuzeichnen und zu speichern.
Druckermodell
Epson
TM-U220D (C31C515603)
Citizen
IDP-3110-40 RF 120B
Star Micro
SP212FD42-120
Star Micro
SP216FD41-120
Star Micro
SP512MD42-R
SciCan Data Logger
Für Massenspeichergerät (MSD)*
Drucker
ODER
Data
Logger
Zeilenende
CR/LF
Serieller
Anschluss Bitrate
Druckeranwender °
Zeichen
CR/LF
9600
248 [0xF8]
CR
9600
N/A
CR
9600
210 [0xd2]
CR/LF
9600
210 [0xd2]
CR/LF
9600
210 [0xd2]
Zeilenende
CR/LF
Serieller
Anschluss Bitrate
Druckeranwender °
Zeichen
N/A
9600
32 [0xd2]
Damit Ihr Statim mit einem bestimmten Gerät kommunizieren kann, müssen Sie diese Funktion
im Anwender-Setup-Menü aktivieren. Befolgen Sie die Anweisungen im folgenden Abschnitt 6.2
Einrichten des SciCan Datenrekorders, um die Kommunikation entweder mit einem externen
Drucker oder dem SciCan Data Logger zu ermöglichen.
Seite 25
Statim_2KS_5KS_E_oct09_FIGS_Q7:Statim_2KS_5KS_E_oct09
1/20/10
1:05 PM
Page 73
6. Kommunikationsanschluss (Forts.)
6.2 Einrichten des SciCan Data Logger (Datenrekorder)
Der USB Data Logger (Datenrekorder) von SciCan kann Informationen über den
Programmdurchlauf auf einem Massenspeichergerät wie etwa einem USB Flash Drive oder einer
SD-Speicherkarte aufzeichnen und speichern.
Diese Anweisungen gelten für Geräte mit einem 9-Pin-Kommunikationsanschluss (RS232) auf der
Rückseite des Gerätes.
Befolgen Sie die unten angegebenen Schritte, bevor Sie den Data Logger anschließen.
Anwendermodus
Anwender-Setup-Menü
Uhrzeit/Datum einstellen
Sprache einstellen
Geräte-ID einstellen
Wasserqualität
Letzter Ausdruck
RS232
Zeilenende CR/LF
Serieller Anschluss Bitrate
Druckeranwender ° Zeichen
Speichern und beenden
Beenden
Zur Installation des SciCan Data Logger
gehen Sie zum Setup-Menü durch
Einschalten des Gerätes bei gedrückter
STOP-Taste. Befolgen Sie die nachfolgenden Anweisungen für die einzelnen
Installationsschritte.
SCHRITT 1
Auswahl der Option USB Flash/MSD
RS232
USB/Flash MSD
1. Schalten Sie das Gerät bei gedrückter STOP-Taste ein, um zum
Setup-Menü zu gelangen.
2. Scrollen Sie mit den Tasten UNVERPACKT und VERPACKT zu RS232 und wählen Sie diesen
Punkt durch Drücken von GUMMI UND KUNSTSTOFF.
3. Im RS232-Menü scrollen Sie mit den Tasten UNVERPACKT und VERPACKT nach unten zur
Option USB/FLASH MSD und drücken die Taste GUMMI UND KUNSTSTOFF, um diese
Option auszuwählen und zum Setup-Menü zurückzukehren.
Seite 26
Statim_2KS_5KS_E_oct09_FIGS_Q7:Statim_2KS_5KS_E_oct09
1/20/10
1:05 PM
Page 74
6. Kommunikationsanschluss (Forts.)
Einstellen der Bitrate Serieller Anschluss auf 9600
Serieller Anschluss Bitrate
9600
1. Im Setup-Menü scrollen Sie mit den Tasten UNVERPACKT und VERPACKT zum Menü
Serieller Anschluss Bitrate und wählen diese Option mit der Taste GUMMI UND KUNSTSTOFF.
2. Im Menü Serieller Anschluss Bitrate scrollen Sie mit den Tasten UNVERPACKT und VERPACKT nach unten zur Option 9600 und drücken die Taste GUMMI UND KUNSTSTOFF, um
diese Option auszuwählen und zum Setup-Menü zurückzukehren.
Einrichten des Druckeranwenderzeichens °; (Beispiel: 134 °C)
Druckeranwender ° Zeichen
32 [0xd2]
1. Im Setup-Menü scrollen Sie mit den Tasten UNVERPACKT und VERPACKT zum Menü
Druckeranwender ° Zeichen und wählen diese Option mit der Taste GUMMI UND KUNSTSTOFF.
2. Im Menü Druckeranwender ° Zeichen erhöhen Sie den angezeigten Wert mit der Taste
UNVERPACKT um 1 und mit der Taste VERPACKT um 10, geben den Wert 32 [0x20] ein und
drücken die Taste GUMMI UND KUNSTSTOFF, um die Änderung zu übernehmen und zum
Setup-Menü zurückzukehren.
Speichern und beenden
Speichern und beenden
Nach Abschluss der oben genannten Einstellungen muss ein "Speichern und beenden" durchgeführt werden. Andernfalls kehrt das Gerät zu den vorherigen Einstellungen zurück.
1. Im Setup-Menü scrollen Sie mit den Tasten UNVERPACKT und VERPACKT zu Speichern und
beenden.
2. Wählen Sie diese Option durch Drücken der Taste GUMMI UND KUNSTSTOFF.
Die LCD zeigt Uhrzeit- und
Datumsinformationen und eine
Reihe von Meldungen an:
HH:MM DD/MM/YYYY
“MSD NICHT GEFUNDEN”/”MSD/FLASH
EINSTECKEN”/”EIN PROGRAMM
WAEHLEN”
Seite 27
Statim_2KS_5KS_E_oct09_FIGS_Q7:Statim_2KS_5KS_E_oct09
1/20/10
1:05 PM
Page 75
6. Kommunikationsanschluss (Forts.)
Schritt 2
Einstellen von Uhrzeit und Datum
Uhrzeit/Datum
HH:MM DD/MM/YYYY
Hinweis: Wenn Uhrzeit und Datum wie in Abschnitt 3.6 angegeben eingestellt wurden,
muss dieser Schritt nicht nochmals durchgeführt werden.
1. Schalten Sie das Gerät bei gedrückter STOP-Taste ein, um zum Setup-Menü zu gelangen.
2. Scrollen Sie mit den Tasten UNVERPACKT und VERPACKT zu Uhrzeit/Datum einstellen und
drücken Sie zur Auswahl GUMMI UND KUNSTSTOFF.
3. Im Menü Uhrzeit/Datum einstellen ändern Sie die angezeigten Werte mit den Tasten UNVERPACKT und VERPACKT und bestätigen die eingestellten Werte mit GUMMI UND KUNSTSTOFF. Wenn Sie fertig sind, die STOP-Taste drücken.
Schritt 3
Geräte-ID einstellen
Geräte-ID
001
Hinweis: Wenn die Geräte-ID wie in Abschnitt 3.8 angegeben eingestellt wurden, muss dieser
Schritt nicht nochmals durchgeführt werden.
1. Schalten Sie das Gerät bei gedrückter STOP-Taste ein, um zum Setup-Menü zu gelangen.
2. Scrollen Sie mit den Tasten UNVERPACKT und VERPACKT zu Geräte-ID einstellen und
drücken Sie zur Auswahl GUMMI UND KUNSTSTOFF.
3. Im Menü Geräte-ID einstellen ändern Sie die angezeigten Werte mit UNVERPACKT und VERPACKT und drücken dann GUMMI UND KUNSTSTOFF, um die Auswahl zu bestätigen und
zur nächsten Ziffer zu gehen. Wenn Sie fertig sind, die STOP-Taste drücken.
Schritt 4
Anschluss des SciCan Data Logger
1. Überzeugen Sie sich davon, dass sowohl das Statim-Gerät als auch der SciCan
Data Logger ausgeschaltet sind.
2. Schließen Sie den SciCan Data Logger mit dem
seriellen Kabel am Statim-Gerät an.
3. Schalten Sie den SciCan Data Logger ein.
4. Schalten Sie den Statim ein.
5. Die LCD zeigt die folgenden Meldungen an:
6. USB Flash Drive oder
SD-Speicherkarte einstecken
7. Nach einigen Sekunden erscheinen folgende
Meldungen auf der LCD-Anzeige:
Seite 28
HH:MM DD/MM/YYYY
“MSD NICHT GEFUNDEN”/”MSD/FLASH
EINSTECKEN”/”EIN PROGRAMM
WAEHLEN”
HH:MM DD/MM/YYYY
USB/FLASH GEFUNDEN/MSD SICHER
ENTFERNEN/EIN PROGRAMM WAEHLEN
Statim_2KS_5KS_E_oct09_FIGS_Q7:Statim_2KS_5KS_E_oct09
1/20/10
1:05 PM
Page 76
6. Kommunikationsanschluss (Forts.)
6.3 Einlegen von Papier in den internen Drucker
Verwenden Sie nur Papier, das für den optionalen internen Drucker des Statim 5000S zugelassen
ist. Die Verwendung jeglichen anderen Papiers führt zu Schäden am Drucker und zum Verlust der
Garantie. Thermopapier ist bei SciCan erhältlich (SciCan Artikelnummer 01-101657S).
Betreiben Sie den Drucker niemals ohne Papier. Wenn Ihnen das Thermopapier ausgeht oder Sie
den Drucker nicht nutzen wollen, schalten Sie ihn AUS.
Ziehen Sie das Papier nie rückwärts durch den Drucker ein. Dies beschädigt den
Druckermechanismus.
Um Papier in den Drucker einzulegen, gehen Sie wie folgt vor:
1. Schalten Sie den Statim 5000S EIN.
2. Öffnen Sie die Druckertür
■1 , indem Sie auf die obere Hälfte der Tür drücken.
3. Schalten Sie den Drucker EIN.
3 ab und beschneiden Sie die Ecken mit
4. Rollen Sie etwas Papier von der Thermopapierrolle ■
der Papierschneideschablone, die in jeder Packung mitgeliefert wird.
5. Stellen Sie die Papierrollenhalterung ■4 in die Ladeposition. Setzen Sie die Papierrolle ■3 so
auf die Halterung, dass der Papierstreifen vom oberen Teil der Rolle abrollt, und führen Sie ihn
dann vorsichtig in den Papiereinzugsschlitz ■5 bis zum Anschlag ein.
Falls das Papier nicht von oben her abrollt, kommt die wärmeempfindliche Seite des Papiers nicht
mit dem Druckkopf in Kontakt, so dass der Drucker nicht drucken wird.
6. Schieben Sie mit einer Hand den Papierstreifen vorsichtig weiter in den Papiereinzugsschlitz ein.
Drücken Sie mit der anderen Hand auf die Taste für den Papiervorlauf, bis das Papier von selbst
eingezogen wird.
Achten Sie darauf, dass das Papier glatt ist, während es in den Drucker eingezogen wird, um einen
Papierstau zu vermeiden. Zwängen Sie das Papier nicht gewaltsam in den Schlitz! Wenn sich das
Papier nicht in den Drucker einziehen lässt, beschneiden Sie das Ende der Rolle nochmals und
ziehen das Papier erneut ein.
Seite 29
Statim_2KS_5KS_E_oct09_FIGS_Q7:Statim_2KS_5KS_E_oct09
1/20/10
1:05 PM
Page 77
6. Kommunikationsanschluss (Forts.)
7. Drücken Sie weiter auf die PapiervorlaufTaste ■6 , bis das Papier durch den
Papieraustrittsschlitz an der Vorderseite des
Druckers austritt. Stellen Sie danach die
Papierrolle ■3 und die Halterung in die
Betriebsposition und schließen Sie die
Druckertür ■1 . Der Drucker ist nun betriebsbereit.
Wenn Sie an einer Seite des Papiers eine rote
Linie sehen, muss die Papierrolle ersetzt werden.
Wenn im Falle eines Papierstaus das Papier
durch Drücken der Papiervorlauf-Taste ■6 nicht
entfernt werden kann, ziehen Sie das Papier nicht
rückwärts durch den Drucker.
Stecken Sie niemals einen Gegenstand oder ein
Werkzeug in den Papierausgangsschlitz. Die vollständigen Anweisungen zur Beseitigung von
Papierstau finden Sie im Abschnitt 6.4 Beseitigen
von Papierstaus im internen Drucker.
Um die Papierrolle
Sie wie folgt vor:
■3
auszutauschen, gehen
1. Schneiden Sie das Papier mit einer Schere
zwischen der Rolle und dem
Papiereinzugsschlitz ■5 ab.
2. Nehmen Sie die Rolle aus der Halterung und
entsorgen Sie das nicht verwendete Papier.
3. Drücken Sie auf die Papiervorlauf-Taste ■6 , um das
im Drucker verbliebene Papier aus dem Schlitz an der
Vorderseite des Druckers zu befördern.
4. Setzen Sie die neue Rolle Thermopapier gemäß den
in diesem Abschnitt beschriebenen Anweisungen ein.
Seite 30
■5
■2
■4
■3
■1
■4
■6
Abbildung 15.1
■5
■2
■6
■3 Abbildung 15.2
Statim_2KS_5KS_E_oct09_FIGS_Q7:Statim_2KS_5KS_E_oct09
1/20/10
1:05 PM
Page 78
6. Kommunikationsanschluss (Forts.)
6.4 Beseitigen von Papierstaus im internen Drucker
Wenn sich Papier im Drucker staut und nicht durch
6 beseitigt werden
Drücken der Papiervorlauf-Taste ■
kann, muss der Drucker auseinandergebaut werden.
Ziehen Sie das Papier nicht rückwärts durch den
Drucker und führen Sie keine Gegenstände oder
Werkzeuge in den Papieraustrittsschlitz ein.
■7
■8
Im Falle eines Papierstaus gehen Sie wie folgt vor:
1. Schalten Sie den Statim 5000S AUS und trennen
Sie das Gerät vom Netz.
■9
2. Schneiden Sie das Papier mit einer Schere zwis5
chen der Rolle und dem Papiereinzugsschlitz ■
ab.
14
■
3 aus der Halterung
3. Nehmen Sie die Papierrolle ■
4
■ und lassen Sie die Halterung in der
Ladeposition stehen.
4. Entfernen Sie mit Hilfe eines Phillips7 am
Schraubenziehers Nr. 1 die drei Schrauben ■
8
Druckergehäuse ■ und entfernen Sie das
Gehäuse.
5. Achten Sie auf die Ausrichtung der freigelegten
1 angeLeiterplatte sowie der auf der Druckertür ■
4
brachten Papierrollenhalterung ■ .
15
■
13
■
11
■
10
■
■1
■4
10
■
12
■
Abbildung 16
6. Heben Sie die Leiterplatte vorsichtig hoch und ziehen Sie sie von der Druckertür weg. Gehen
Sie behutsam mit der Platte um. Der Drucker ist mit der Leiterplatte fest verbunden. Üben Sie
keinen Druck auf die Anschlüsse des auf die Platte gelöteten Flachbandkabels aus. Ziehen
Sie das Anschlussstück des Flachbandkabels nicht aus dem Anschlusskopf auf der Platte.
Der Papiereinzugsmechanismus auf der Unterseite der Leiterplatte liegt nun frei.
7. Entfernen Sie mit einer Pinzette oder einer feinen Spitzzange das Papier vom Mechanismus.
Wenn Sie das Papier entfernt haben, bauen Sie den Drucker wieder zusammen:
1. Lassen Sie den Papierrollenhalter in der Ladeposition vorsichtig zurück in die Klappen an der
1 zurückschnappen.
Druckertür ■
Seite 31
Statim_2KS_5KS_E_oct09_FIGS_Q7:Statim_2KS_5KS_E_oct09
1/20/10
1:05 PM
Page 79
6. Kommunikationsanschluss (Forts.)
2. Setzen Sie die Leiterplatte wieder in die Position an der Druckertür. Achten Sie auf die
9 auf der Leiterplatte und der Befestigungsnocken
Anordnung der Befestigungslöcher ■
an der Druckertür. Das schwarze Plastikdruckergehäuse liegt zwischen den
10 auf der Innenseite der Druckertür.
Arretierungsrippen ■
3. Stellen Sie sicher, dass die Flachbandkabel
Leiterplatte eingeklemmt sind.
11 , ■
14
■
13
■
nicht zwischen der Druckertür und der
4. Setzen Sie das Druckergehäuse auf die Druckertür. Stellen Sie sicher, dass das
Flachbandkabel nicht zwischen Gehäuse und Tür eingeklemmt ist. Die Einschalttaste und die
Papiervorlauf-Taste müssen durch die Öffnungen im Gehäuse hervorschauen und sich frei
bedienen lassen.
5. Schrauben Sie mit Hilfe eines Phillips-Schraubenziehers Nr. 1 und den drei Schrauben, die
sie während des Auseinanderbauens bereitgehalten haben, das Druckergehäuse wieder an
die Druckertür. Ziehen Sie die Schrauben nicht zu fest.
6. Stecken Sie das Netzkabel Ihres Statim 2000S/5000S in die Steckdose ein. Wenn Sie den
Netzstecker des Druckers vorher gezogen haben, stecken Sie ihn nun wieder ein. Schalten
Sie den Netzschalter EIN.
7. Drücken Sie die Einschalttaste am Drucker in die Position EIN. Ziehen Sie gemäß der
Vorgehensweise im Abschnitt 6.3 Einlegen von Papier in den internen Drucker Papier in den
Drucker ein.
Seite 32
Statim_2KS_5KS_E_oct09_FIGS_Q7:Statim_2KS_5KS_E_oct09
1/20/10
1:06 PM
Page 80
6. Kommunikationsanschluss (Forts.)
6.5 Übersicht Ausdruck Sterilisationsgang
1.
2.
3.
4.
5.
6.
7.
8.
9.
Modell: STATIM 2000 Software:
S2S2R410
Gerätekennung: Für den
Autoklav ist die Zahl 323
vergeben worden
Durchgangszähler: Die Zahl der
Sterilisationsgänge, die das
Gerät durchlaufen hat, beträgt 9
Uhrzeit/Datum:
13.38 Uhr, 14. April 2003
Name des Sterilisationsgangs:
FESTK. UNVERP. (N)
Name des Sterilisationsgangs
(Fortsetzung) – Parameter:
134 °C/3,5 min – 1P
Beginn Reinigungsgang:
Beginnt um 0.00
Aufheizphase beendet: Beginn
der Aufbereitungsphase ist 2.07
Uhr (siehe Schaubild zum
Arbeitsgang – Phase A beendet,
Start von Phase B)
Spitzentemp. /Druck & Uhrzeit
für Vorbereitung Reinigung: pro
Reinigungsphase (Anzahl der
Zeilen gemäß des ausgewählten
Sterilisationsprogramms – dies
ist ein Programm mit einem
Durchgang – Aktivität in Phase
B)
1.
2.
3.
4.
5.
6.
7.
8.
9.
10.
11.
12.
13.
14.
15.
16.
17.
18.
19.
20.
21.
22.
23.
10. Niedrigste Temp. /Druck & Uhrzeit für Vorbereitung Reinigung: pro Reinigungsphase (Anzahl
der Zeilen gemäß des ausgewählten Sterilisationsprogramms – dies ist ein Programm mit
einem Durchgang – Aktivität in
Phase B)
Seite 33
Statim_2KS_5KS_E_oct09_FIGS_Q7:Statim_2KS_5KS_E_oct09
1/20/10
1:06 PM
Page 81
6. Kommunikationsanschluss (Forts.)
11.
Beginn des Druckaufbaus: 3.21 Uhr (Start von Phase C)
13.
Temp. /Druck & Uhrzeit zu Beginn der Sterilisation (Phase D)
12.
Beginn der Sterilisation: 4.12 Uhr (Start von Phase D)
14.
Mindesttemperatur/-druck während der Sterilisationsphase (untere Grenzen von Phase D)
16.
Maximaltemperatur/-druck während der Sterilisationsphase (obere Grenzen der Phase D)
18.
Temp. /Druck & Uhrzeit am Ende der Sterilisationsphase (Ende der Phase D)
15.
17.
19.
20.
21.
22.
23.
135,1 °C 308 kPa
136,7 °C 323 kPa
Startzeitpunkt der Entlüftungsphase: 7.43 Uhr (Start von Phase E)
Sterilisation wurde erfolgreich abgeschlossen
Beginn der Lufttrocknungsphase: 8.07 Uhr (Start von Phase F)
Sterilisationsgang wurde vom Bediener angehalten
Trocknungsgang vor Beendigung abgebrochen, Ladung unter Umständen nicht trocken
Seite 34
Statim_2KS_5KS_E_oct09_FIGS_Q7:Statim_2KS_5KS_E_oct09
1/20/10
1:06 PM
Page 82
7. Problembehandlung
Problem
Das Gerät schaltet sich nicht EIN.
Lösung
Stellen Sie sicher, dass der Netzstecker in einer ordnungsgemäß geerdeten Steckdose steckt und das Stromkabel fest
auf der Rückseite des Gerätes angeschlossen ist.
Starten Sie einen weiteren Versuch. Schalten Sie das Gerät
für 10 Sekunden AUS und schalten Sie es danach wieder
EIN.
Unter dem Gerät befindet sich Wasser.
Überprüfen Sie den Zustand des Stromkreisunterbrechers
oder der Sicherung.
Überprüfen Sie, ob beim Auffüllen des Behälters Wasser verschüttet wurde. Stellen Sie sicher, dass der Stopfen des
Ablassschlauches gesichert ist. Ziehen Sie die Kassette heraus
und schieben Sie sie wieder ein.
Starten Sie einen weiteren Sterilisationsgang.
Seien Sie vorsichtig. Die Metallteile sind heiß, und die Kassette
enthält heißen Dampf.
Die Kassette leckt. Wenn während des Betriebs Wasser von der
Unterseite des Gerätes tropft, untersuchen Sie die
Kassettendichtung auf korrekten Sitz oder Beschädigungen und
ersetzen Sie die Dichtung, falls erforderlich.
Seien Sie vorsichtig. Die Metallteile sind heiß, und die Kassette
enthält heißen Dampf.
Versuchen Sie, einen weiteren Durchlauf zu starten. Falls das
Gerät immer noch leckt, starten Sie einen weiteren Durchgang
mit einer anderen Kassette, wenn möglich.
Falls das Leck fortbesteht, schalten Sie das Gerät AUS, entfernen und entleeren die Kassette, trennen das Gerät vom Netz
und rufen Ihren Händler an.
Die Instrumente trocknen nicht.
Die besten Trocknungsergebnisse erzielen Sie, wenn Sie das
Sterilisationsprogramm vollständig durchlaufen lassen. Lassen
Sie den Gang vollständig durchlaufen. Stellen Sie sicher, dass
die Instrumente korrekt in der Kassette angeordnet sind. Lesen
Sie Abschnitt 4.4 Vorbereiten und Einstellen der Instrumente.
Überprüfen Sie die Nivellierung des Gerätes.
Reinigen Sie das Innere der Kassette und verwenden Sie das
Stat-Dri-Trocknungsmittel. Lesen Sie Abschnitt 5.1 Reinigen der
Kassette. Untersuchen Sie den Ablassschlauch (Schlauch zur
Abwasserflasche) auf Knicke.
Seite 35
Statim_2KS_5KS_E_oct09_FIGS_Q7:Statim_2KS_5KS_E_oct09
1/20/10
1:06 PM
Page 83
7. Problembehandlung (Fortsetzung)
Falls der Schlauch Knicke aufweist, ziehen Sie ihn glatt. Falls
dies nicht möglich ist, lösen Sie die am Statim angebrachte
Eindrückhalterung. Drücken Sie die Halterungsrosette herunter
und ziehen Sie mit der anderen Hand kräftig am Schlauch.
Sobald der Schlauch aus der Halterung gelöst ist, schneiden
Sie den beschädigten Abschnitt des Schlauches mit einem
scharfen Instrument ab. Vergewissern Sie sich, dass das
verbleibende Schlauchstück lang genug ist, wenn Sie den
Schlauch wieder an der Ablasshalterung anschließen. Wenn der
Schlauch zu kurz ist, um einen Abschnitt zu entfernen, wenden
Sie sich an Ihren SciCan-Händler, um einen Ersatzschlauch zu
erhalten.
Durchgang unterbrochen— NICHT STERIL,
Durchgang abgebrochen — NICHT STERIL
und PROGRAMMFEHLER-Meldungen.
Stellen Sie sicher, dass der Kompressor funktioniert. Entfernen
Sie zur Überprüfung den Ablassschlauch von der
Abwasserflasche. Starten Sie einen Nur Lufttrocknen-Gang und
stecken Sie das freie Ende in ein Glas Wasser. Wenn kein
starker, gleichmäßiger Strom von Luftblasen besteht, funktioniert der Kompressor nicht richtig. Wenden Sie sich an Ihren
SciCan-Händler.
Warten Sie ein paar Minuten und starten Sie einen neuen
Durchlauf, bevor Sie zur nächsten Lösung übergehen.
Entfernen Sie die Kassette. Seien Sie vorsichtig. Die Metallteile
sind heiß, und die Kassette enthält heißen Dampf. Untersuchen
Sie die Kassette, um sicherzustellen, dass die Öffnungen auf
der Rückseite der Dichtung vollkommen deckungsgleich sind
und dass die biegsame Lippe der Dichtung vollständig frei ist.
Überprüfen Sie den Ablassschlauch auf Knicke oder
Verstopfungen. Ziehen Sie den Schlauch bei Knicken wieder
glatt. Falls dies nicht möglich ist, lösen Sie die am Statim angebrachte Eindrückhalterung. Drücken Sie die Halterungsrosette
herunter und ziehen Sie mit der anderen Hand kräftig am
Schlauch. Sobald der Schlauch aus der Halterung gelöst ist,
schneiden Sie den beschädigten Abschnitt des Schlauches mit
einem scharfen Instrument ab. Vergewissern Sie sich, dass das
verbleibende Schlauchstück lang genug ist, wenn Sie den
Schlauch wieder an der Ablasshalterung anschließen. Wenn der
Schlauch zu kurz ist, um einen Abschnitt zu entfernen, wenden
Sie sich an Ihren SciCan-Händler, um einen Ersatzschlauch zu
erhalten.
Stellen Sie sicher, dass der Statim nicht versehentlich einer
elektrischen Interferenz ausgesetzt wurde. Lesen Sie den
Abschnitt über die Einrichtung des Gerätes, der sich mit den
Umgebungsbedingungen beschäftigt. (Abschnitt 3.1)
Versuchen Sie, einen neuen Durchgang zu starten. Falls das
Problem weiterhin besteht, notieren Sie die
Programmfehlernummer und wenden sich an Ihren Händler.
Seite 36
Statim_2KS_5KS_E_oct09_FIGS_Q7:Statim_2KS_5KS_E_oct09
1/20/10
1:06 PM
Page 84
7. Problembehandlung (Fortsetzung)
Übermäßiger Dampfaustritt an der
Vorderseite des Gerätes.
Ziehen Sie die Kassette heraus und setzen Sie sie wieder ein.
Versuchen Sie, einen weiteren Durchlauf zu starten. Entfernen Sie die
Kassettendichtung und untersuchen Sie sie auf falsche Ausrichtung
und Beschädigungen. Ersetzen Sie die Dichtung bei Bedarf. Seien
Sie vorsichtig, da die Metallteile heiß sind und die Kassette heißen
Dampf enthält.
Falls die Lecks fortbestehen, schalten Sie das Gerät AUS, entfernen
und entladen die Kassette und wenden sich an ihren SciCan-Händler.
Meldung WASSERQUALITÄT IST NICHT
AKZEPTABEL. Das Gerät startet nicht.
Sie verwenden nicht ausreichend destilliertes oder kein
dampfdestilliertes Wasser.
Meldung BEHÄLTER WIEDER AUFFÜLLEN.
Das Gerät startet nicht.
Der Wasserstand im Behälter ist zu niedrig. Füllen Sie den
Behälter wieder auf. Gehen Sie gemäß den Schritten vor, die im
Abschnitt 3.4 Auffüllen des Behälters beschrieben werden.
Meldung DRUCKERFEHLER auf der LCDAnzeige. Der Drucker druckt nicht.
Sehen Sie nach, ob ein Papierstau vorliegt. Falls dies der Fall
ist, befolgen Sie die nötigen Schritte zur Beseitigung von
Papierstau, die im Abschnitt 6.4 beschrieben werden. Schalten
Sie das Gerät für 10 Sekunden AUS und schalten Sie es
danach wieder EIN. Wenn sich das Papier immer noch staut,
befolgen Sie die nötigen Schritte zum Auseinanderbauen, die im
Abschnitt 6.4 Beseitigen von Papierstau beschrieben werden.
Der Drucker funktioniert nicht.
Stellen Sie sicher, dass das Druckerkabel fest mit dem
Anschluss auf der Rückseite des Statim und dem Statprinter
angebracht ist. Vergewissern Sie sich, dass der Drucker AN
ist. Schalten Sie das Gerät für 10 Sekunden AUS und schalten Sie es danach wieder EIN.
Der Drucker scheint zu funktionieren, aber auf
dem Papier wird nichts ausgedruckt.
Stellen Sie sicher, dass das Papier ordnungsgemäß eingezogen ist (lesen Sie Abschnitt 6.3 Einlegen von Papier in den
internen Drucker). Überprüfen Sie, ob das Papier die
Papierrolle von oben her verlässt. Dies bedeutet, dass die
behandelte Oberfläche des beschichteten Papiers mit dem thermischen Druckkopf in Kontakt steht.
Datum und Uhrzeit sind nicht korrekt.
Datum und Uhrzeit sind nicht eingestellt worden. Siehe
Abschnitt 3.6 Einstellen von Uhrzeit und Datum.
Leeren Sie den Behälter und füllen Sie dampfdestilliertes
Wasser mit einem Anteil an echt gelösten Stoffen von weniger
als 5 ppm (mit einer Leitfähigkeit von weniger als 10 µS / cm)
ein. Falls Sie den Wasserleitfähigskeitmesser besitzen, überprüfen Sie die Wasserqualität, bevor Sie den Behälter wieder
befüllen. Gehen Sie gemäß den Schritten vor, die im Abschnitt
3.9 Versand des Gerätes zur Wasserentleerung des Behälters
beschrieben sind.
Seite 37
Statim_2KS_5KS_E_oct09_FIGS_Q7:Statim_2KS_5KS_E_oct09
1/20/10
1:06 PM
Page 85
7. Problembehandlung (Fortsetzung)
Meldung
MSD NICHT ANGSCHLOSSEN <>
MSD/FLASH EINSTECKEN
Überprüfen Sie den Anschluss des seriellen Kabels.
Überprüfen Sie den Stromanschluss.
Stellen Sie sicher, dass die untere rote LED leuchtet.
Überprüfen Sie, ob das Massenspeichergerät korrekt
eingesetzt ist.
Wiederholen Sie die Schritte für Einrichten des SciCan Data
Logger an Ihrem Statim.
Meldung
MSD/FLASH VOLL <> MSD ERSETZEN
Das MSD ist voll. Exportieren Sie die Daten.
Meldung Fehlende Datenzeilen auf dem
MSD/FLASH
Beachten Sie den STATIM-Bildschirm, um die erfolgreiche
Sterilisation zu bestätigen.
Setzen Sie den Data Logger zurück, in dem Sie ihn vom
Stromnetz trennen, das MSD ausstecken und 10 Sekunden
warten. Dann schließen Sie den Netzadapter wieder an und
schieben das MSD in den Data Logger.
Wenn das Problem weiterhin besteht, wenden Sie sich an das
SciCan Service-Center.
Meldung: Die Datei oder das
Verzeichnis im MSD ist beschädigt oder
nicht lesbar.
Beachten Sie den STATIM-Bildschirm, um die erfolgreiche
Sterilisation zu bestätigen.
Das MSD wurde möglicherweise ausgesteckt, während Daten
daruf geschrieben wurden. Das MSD darf nicht ausgesteckt
werden, nachdem “MSD SICHER ENTFERNEN <>
MSD/FLASH ENTDECKT” angezeigt wird.
Die beschädigten Datein oder Verzeichnisse können verloren
sein. Formatieren Sie das MSD auf Ihrem Computer neu.
Seite 38
Statim_2KS_5KS_E_oct09_FIGS_Q7:Statim_2KS_5KS_E_oct09
1/20/10
1:06 PM
Page 86
8. Ersatzteilliste
01-100204S
01-100724S
01-100735S
01-100780S
01-100782S
01-100812S
01-100834S
01-101649S
01-101657S
01-101658S
01-101709S
01-101755S
01-101757S
01-101766S
01-101768S
01-101769S
01-101779S
01-106030S
01-106071S
01-104093S
01-101783S
01-101970S
01-102119S
01-103139S
01-103475S
01-103557S
01-103865S
01-103945S
01-104343S
01-104472S
Ablassschlauch
Kondensatorflasche mit/ohne
Kondensator
Abwasserflaschenhalterung
Puffer
Eindrückhalterung (2000S)
Kondensatorflasche
Kassettendeckel (2000S)
Kassettendichtung (5000S)
Thermopapier (Schachtel mit 10 Rollen)
Kassettengriffe
Gitterständer (5000S)
Eindrückhalterung (5000S)
Kassettendeckel mit Box (5000S)
Netzstromkabel UK
Netzstromkabel Schweiz
Netzstromkabel Italien
Netzstromkabel Europa
Kassettendeckelgriff (2000S)
Griff verlängerter Kassettendeckel
(5000S)
Ablassschlauch 3 m lang
Behälterdeckel und Filter
Datenkabel (5000S)
Biofilter
Leitfähigkeitsmesser
Tray (2000S)
Ersatz-Stromkabel Dänemark
Dichtungsgel
Ständer - Tray unverpackte Instr.
Set (2000S)
Stopfen – Ablassschlauch (5000S)
Verlängerte Kassettengriffe
(5000S)
01-104696S
01-104697S
Handstückadapter
Adapterkassettendichtung (2000S)
01-104699S
Dichtungseinsatz
01-104698S
Adapterkassettendichtung (5000S)
01-100207S
Kompressorfilter (2000S)
01-104700S
01-104702S
01-104704S
Adapterkassetten-O-Ring-Set
Adapter Kassettendeckel (2000S)
Adapter Kassettendeckel (5000S)
01-100028S
Kassettendichtung (2000S)
01-104786S
Instrumentenhalter - 4 mm
(5000S)
01-106438S
Kassettendeckel, verlängert (2000S)
01-109300S
Wasserbehälterfilter-Set
01-108340S
01-100008A
Statim PCD – Ersatzteile
ZUBEHÖR
Kassettenendstück-Set (2000S)
01-101613S
Traykassetten-Set mit Gitter
(2000S)
Kassette komplett (5000S)
01-103923
Zusätzliche Kondensatorflasche
01-100271A
01-101614S
Tray komplett (5000S) mit Box
01-103935
STATDRI-Platten (5000S)
01-104499
Instrumentenständer verlängerte
Kassetten (5000S)
Adapterkassette (2000S)
Adapterkassette (5000S)
Handstück-Adapter-Set (2000S)
Handstück-Adapter-Set (5000S)
01-104104
01-104701
01-104703
01-106101
01-106102
01-106653
01-210000
01-106325
2OZPLUS
8OZPLUST
32OZPLUS
99-108332
01-108341
Seite 39
Verlängerte Kassette (5000S)
Gittertray (2000S)
Druckerset (5000S)
Behälter Endoskop komplett
(5000S)
STAT-dri 57 g
STAT-dri 227 g
STAT-dri 907 g
Chemischer Emulator 134 °C/3,5
min
Statim PCD Endmontage-Set
Statim_2KS_5KS_E_oct09_FIGS_Q7:Statim_2KS_5KS_E_oct09
1/20/10
1:06 PM
Page 87
9. Garantie
Eingeschränkte Garantie
SciCan garantiert für einen Zeitraum von einem Jahr, dass der Statim 2000S / 5000S ab dem
Tag der Herstellung durch SciCan und im Neu- und nicht gebrauchten Zustand bei normalem
Gebrauch nicht auf Grund von Material- oder Verarbeitungsfehlern, die nicht auf offensichtlichen
Missbrauch, falsche Anwendung oder Unglücksfälle zurückzuführen sind, ausfallen wird.
Die einjährige Garantie gilt für die Funktionsfähigkeit aller Teile des Geräts (ausgenommen
Verschleißteile wie Dichtung, Kompressorfilter und mikrobiologischer Filter), vorausgesetzt, das
Gerät wird gemäß der im Benutzerhandbuch enthaltenen Beschreibung genutzt und gewartet.
Eine zweijährige Garantie gilt speziell für Wasserpumpe, Dampfgenerator und Steuerplatine,
vorausgesetzt, das Gerät wird gemäß der im Benutzerhandbuch enthaltenen Beschreibung
genutzt und gewartet.
Im Falle einer Ausfalles, der während der Garantiezeit auf solche Defekte zurückzuführen ist,
besteht die einzige Verpflichtung von SciCan nach eigenem Ermessen in der kostenlosen
Reparatur oder im unentgeltlichen Ersatz jeglicher defekter Teile (mit Ausnahme des
Dichtungsrings), vorausgesetzt, dass SciCan innerhalb von 30 Tagen nach Auftreten einer
solchen Störung schriftlich benachrichtigt wird und dass die defekten Teile außerdem frachtfrei an
SciCan zurückgesendet werden.
Diese Garantie gilt als vereinbart, wenn dem Produkt die Originalrechnung des autorisierten
SciCan-Händlers beiliegt und diese Rechnung den Artikel durch seine Artikelnummer kennzeichnet und sowie einen eindeutigen Beleg des Kaufdatums aufweist. Keine andere Art von Beleg ist
akzeptabel. Nach Ablauf eines Jahres gelten alle von SciCan gegebenen Garantien und anderen
Verpflichtungen bezüglich der Qualität des Produktes als endgültig erfüllt. Somit endet jegliche
Haftung, und gerichtliche Schritte wegen Verstoßes gegen eine solche Garantie oder
Verpflichtung dürfen hiernach nicht mehr gegen SciCan eingeleitet werden.
Jegliche ausdrückliche Garantie, die hier nicht gegeben wird, und jegliche implizierte Garantie
oder Darstellung hinsichtlich der Leistungsfähigkeit sowie jegliche Rechtsmittel bei Vertragsbruch,
die abgesehen von dieser Bestimmung durch Andeutung, Gesetzesauslegung, Handelsbrauch
oder -sitte, einschließlich jeglicher implizierter Garantie hinsichtlich Verkaufsfähigkeit oder
Eignung für einen bestimmten Zweck in Bezug auf eines oder alle von SciCan hergestellten
Produkte entstehen könnten, werden von SciCan ausgeschlossen und abgelehnt. Falls Sie mehr
über unsere Produkte und Fähigkeiten erfahren wollen, besuchen Sie die SciCan-Webseite unter
www.scican.com.
Seite 40
*
1kg
1,5kg
Dental instruments
KaVoGENTLEforce7000C
Kavo–GentlePowerLux25LPA
W&H-TrendLS,WD-56
W&H-TrendHS,TC-95RM
KaVoSuper-TorqueLUX/640B
KaVo-INTRAmaticLUX3,20LH
NSK-PANAAir
NSK-ATL118040
NSK–Ti-Max
STAR-430SWL
Sirona-T1Classic,S40L
Sirona-T1Control,TC3
Midwest-Tradition
Bein–Air-BoraL
W&H–WS-75
W&H–WA-99LT
W&H–TA-98LC
B & L Ophthalmology instruments
Gimbleirrigatingcannula30g E4894
Lasikcannula E4989
Gillisirrigating-aspiratingcannulaE4932
Nichaminhydrossectioncannula26g E4421H
Irrigating-aspiratinghandpiece MVS1063C
Rudolf Medizintechnik GmbH Endoscope accessories
Trocarsleeve,arthroscopy,2rotatingstopcocks,
1.7mmdiax104mmlength #10-0008-00
Trocarsleeve,hysteroscopydiagnosticsheath,1fixed
stopcock,2.7mmdiax302mmlength #10-0049-00
Alcon ophthalmic handpiece
NeoSonixPhacohandpiece
Miltex medical instruments
Frazierneedle 26-778
Yeomanbiopsyforcepswithrotatingshaft28-304
Kerrisonrongeur 18-1994
Frazier-Fergusontube 19-570
Yankauersuctiontube 2-104SS
Menghinibiopsyneedle 13-150
Becton Dickinson
Needle,30G1
Medical Workshop
HockeystickForceps,membranepeelingmw-1925
Maximale Ladung
2000S
5000S
Für b estimmte medizinische Geräte –
VERGLEICHEN SIE D IE UNTEN
ANGEFÜHRTE LISTE.
Mikrobiologische Tests
Zusätzliche Tests
STATIM 2000S/5000S PCD *
(01- 108341)
Verb leib ende Luft
Trocknung, Festkörperladung einfach verpackt
Schw ingende Kammer
Leere Kammer
Festkörperladung — unverpackt
Festkörperladung — einfach verpackt
Hohlkörperladung B
Trocknung, Festkörperladung — unverpackt
Typenprüfung
1kg
1,5kg
HOHLK. UNVERP. (S)
134˚C / 3,5 min
1kg
1,5kg
Seite 41
°C/3,5
°C/3,5
°C/3,5
°C/3,5
Min.
Min.
Min.
Min.
Min.
Min.
Min.
Min.
Min.
134
134
134
134
134
134
°C/3,5
°C/3,5
°C/3,5
°C/3,5
°C/3,5
°C/3,5
Min.
Min.
Min.
Min.
Min.
Min.
HOHLKÖRPER/UNVERPACKT (S) 134 °C/3,5 Min.
HOHLKÖRPER/UNVERPACKT (S) 134 °C/3,5 Min.
HOHLKÖRPER/UNVERPACKT (S)
HOHLKÖRPER/UNVERPACKT (S)
HOHLKÖRPER/UNVERPACKT (S)
HOHLKÖRPER/UNVERPACKT (S)
HOHLKÖRPER/UNVERPACKT (S)
HOHLKÖRPER/UNVERPACKT (S)
HOHLKÖRPER/UNVERPACKT (S) 134 °C/3,5 Min.
134
134
134
134
HOHLKÖRPER/UNVERPACKT (S)
HOHLKÖRPER/UNVERPACKT (S)
HOHLKÖRPER/UNVERPACKT (S)
HOHLKÖRPER/UNVERPACKT (S)
°C/3,5
°C/3,5
°C/3,5
°C/3,5
°C/3,5
0,4kg
0,4kg
GUMMI/KUNSTSTOFF (S)
121˚C / 15 min
0,4kg
0,4kg
GUMMI/KUNSTSTOFF (S)
121˚C / 30 min
1:06 PM
134
134
134
134
134
1kg
1,5kg
HOHLK. VERPACKT (S)
134˚C / 18 min
1/20/10
HOHLKÖRPER/UNVERPACKT (S)
HOHLKÖRPER/UNVERPACKT (S)
HOHLKÖRPER/UNVERPACKT (S)
HOHLKÖRPER/UNVERPACKT (S)
HOHLKÖRPER/UNVERPACKT (S)
*
1. Das PCD (Process Challenge Device) wurde ausschließlich für den Gebrauch in den Statim 2000S und
Statim 5000S Autoklaven entwickelt.
2. Der PCD ist nicht für den Einsatz mit der erweiterten
Kassette des Statim 2000, Statim 5000 oder Statim
5000S geeignet.
3. Technische Daten des PCD auf Anfrage erhältlich.
4. Prüfung Hohlkörperladung A nicht anwendbar – Näheres
auf Anfrage.
1kg
1,5kg
HOHLK. VERPACKT (S)
134˚C / 3,5 min
STERILISATIONSGÄNGE
HOHLK. UNVERP. (S)
134˚C / 18 min
HOHLKÖRPER/UNVERPACKT (S) 134 °C/3,5 Min.
HOHLKÖRPER/UNVERPACKT (S) 134 °C/3,5 Min.
HOHLKÖRPER/UNVERPACKT (S) 134 °C/3,5 Min.
HOHLKÖRPER/UNVERPACKT (S) 134 °C/3,5 Min.
HOHLKÖRPER/UNVERPACKT (S) 134 °C/3,5 Min.
HOHLKÖRPER/UNVERPACKT (S) 134 °C/3,5 Min.
HOHLKÖRPER/UNVERPACKT (S) 134 °C/3,5 Min.
HOHLKÖRPER/UNVERPACKT (S) 134 °C/3,5 Min.
HOHLKÖRPER/UNVERPACKT (S) 134 °C/3,5 Min.
HOHLKÖRPER/UNVERPACKT (S) 134 °C/3,5 Min.
HOHLKÖRPER/UNVERPACKT (S) 134 °C/3,5 Min.
HOHLKÖRPER/UNVERPACKT (S) 134 °C/3,5 Min.
HOHLKÖRPER/UNVERPACKT (S) 134 °C/3,5 Min.
HOHLKÖRPER/UNVERPACKT (S) 134 °C/3,5 Min.
HOHLKÖRPER/VERPACKT (S) 134 °C/3,5 Min.
HOHLKÖRPER/VERPACKT (S) 134 °C/3,5 Min.
HOHLKÖRPER/VERPACKT (S) 134 °C/3,5 Min.
Zyklus
FESTK. UNVERP. (N)
134˚C / 3,5 min
Statim_2KS_5KS_E_oct09_FIGS_Q7:Statim_2KS_5KS_E_oct09
Page 88
10. Testprotokoll
10.1 Typenprüfung
Statim_2KS_5KS_E_oct09_FIGS_Q7:Statim_2KS_5KS_E_oct09
1/20/10
1:06 PM
Page 89
10. Testprotokoll (Fortsetzung)
Sterilisationsgang
FESTK. UNVERP. (N)
134 °C/3,5 min
HOHLK. UNVERP. (S)
134 °C/3,5 min
HOHLK. UNVERP. (S)
134 °C/18 min
HOHLK. VERPACKT (S)
134 °C/3,5 min
HOHLK. VERPACKT (S)
134 °C/18 min
GUMMI/KUNSTSTOFF (S)
121 °C/15 min
GUMMI/KUNSTSTOFF (S)
121 °C/30 min
STATIM 2000S
STATIM 5000S
Kaltes Gerät mit maximaler Ladung +
Trockungsphase
Warmes Gerät ohne Ladung +
Trockungsphase
Kaltes Gerät mit maximaler Ladung +
Trockungsphase
Warmes Gerät ohne Ladung +
Trockungsphase
6:45 + 60:00
8:45 + 60:00
9:15 + 60:00
13:15 + 60:00
11:45 + 60:00
17:30 + 60:00
26:15 + 60:00
32:00 + 60:00
8:05 + 60:00
22:35 + 60:00
15:35 + 60:00
10:40 + 60:00
30:05 + 60:00
25:10 + 60:00
20:15 + 60:00
18:40 + 60:00
35:15 + 60:00
33:40 + 60:00
Seite 42
10:50 + 60:00
25:20 + 60:00
24:00 + 60:00
15:30 + 60:00
38:30 + 60:00
30:00 + 60:00
22:50 + 60:00
20:20 + 60:00
37:50 + 60:00
35:20 + 60:00
Statim_2KS_5KS_E_oct09_FIGS_Q7:Statim_2KS_5KS_E_oct09
1/20/10
1:06 PM
Page 90
11. Technische Daten
11.1 Statim 2000S — Technische Daten
Geräteabmessungen:
Kassettengröße (außen):
Kassettengröße (innen):
Volumen Sterilisationskammer:
Länge:
Breite:
Höhe:
48,5 cm
41,5 cm
15 cm
Länge:
Breite:
Höhe:
28 cm
18 cm
4 cm
Länge:
Breite:
Höhe:
Behältervolumen:
1,8 l
4,0 l
Gewicht (ohne Wasser):
Erforderliche Abstände:
41 cm (mit Handgriffen)
19,5 cm
4 cm
21 kg
Oben:
Seiten:
Rückseite:
Vorderseite:
Erforderlicher Abstand zum Bewegen der Tür(en):
Mindestfüllmenge des Wasserbehälters:
PRV-Wert (Überdruckventil):
Elektrischer Nennwert:
5 cm
5 cm
5 cm
48 cm
48 cm
550 ml
43,5 PSI
220 - 240 V, 50/60 Hz, 6 A
Stromart:
AC (Wechselstrom)
Schutzklasse:
I
Schutz:
gedeckt
Umgebungstemperatur:
5 - 40 °C
Schallpegel:
Durchschnittlich – 56 dB, Höchstwert – 65 dB
Relative Luftfeuchtigkeit:
80% Max.
Maximale Betriebshöhe über NN:
2000 m
Seite 43
Statim_2KS_5KS_E_oct09_FIGS_Q7:Statim_2KS_5KS_E_oct09
1/20/10
1:06 PM
Page 91
11. Technische Daten (Fortsetzung)
11.2 Statim 5000S — Technische Daten
Geräteabmessungen:
Kassettengröße (außen):
Kassettengröße (innen):
Volumen Sterilisationskammer:
Länge:
Breite:
Höhe:
55 cm
41 cm
19 cm
Länge:
Breite:
Höhe:
38 cm
18 cm
8 cm
Länge:
Breite:
Höhe:
Behältervolumen:
5,1 l
4,0 l
Gewicht (ohne Wasser):
Erforderliche Abstände:
49,5 cm (mit Handgriffen)
19,5 cm
8 cm
33 kg
Oben:
Seiten:
Rückseite:
Vorderseite:
Erforderlicher Abstand zum Bewegen der Tür(en):
Mindestfüllmenge des Wasserbehälters:
PRV-Wert (Überdruckventil):
Elektrischer Nennwert:
5 cm
5 cm
5 cm
57 cm
57 cm
550 ml
43,5 PSI
220 - 240 V, 50/60 Hz, 6 A
Stromart:
AC (Wechselstrom)
Schutzklasse:
I
Schutz:
gedeckt
Umgebungstemperatur:
5 - 40 °C
Schallpegel:
Durchschnittlich – 57 dB, Höchstwert – 65 dB
Maximale Betriebshöhe über NN:
Technische Daten optionaler interner Drucker:
2000 m
Relative Luftfeuchtigkeit:
80 % Max.
Typ:
Thermodrucker
Druckgeschwindigkeit:
1 Zeile pro Sekunde
Druckmuster:
20 Zeichen pro Zeile
Papierrollenleistung: ungefähr
80 Sterilisationsgänge pro Rolle
Seite 44
Statim_2KS_5KS_E_oct09_FIGS_Q7:Statim_2KS_5KS_E_oct09
1/20/10
1:06 PM
Table des matières
5. Entretien . . . . . . . . . . . . . . . . . . . . . . . . 20
1. Introduction . . . . . . . . . . . . . . . . . . . . . . . 3
2. Informations importantes . . . . . . . . . . . . 4
2.1 Avertissements
2.2 Statim 2000S — Vue d’ensemble de l’appareil
2.3 Statim 5000S — Vue d’ensemble de l’appareil
3. Installation . . . . . . . . . . . . . . . . . . . . . . . . 7
3.1
3.2
3.3
3.4
3.5
3.6
3.7
3.8
Considérations environnementales
Mise en place de l’appareil
Branchement de la bouteille à eau résiduaire
Remplissage du réservoir
Amorçage de la pompe Statim
Réglage de la date et de l’heure
Sélection de la langue
Attribution du numéro d’identification de
l’appareil
3.9 Expédition de l’appareil
4. Instructions d’utilisation . . . . . . . . . . . 11
4.1
4.2
4.3
4.4
4.5
4.6
4.7
4.8
Page 92
Statim 2000S — Cassette
Statim 5000S — Cassette
Statim 5000S — Plaques STAT-DRI
Préparation et chargement des instruments
Guide des poids des instruments
Sélection d’un cycle
Exécution d’un cycle
Interruption d’un cycle
5.1
5.2
5.3
5.4
5.5
5.6
Nettoyage de la cassette
Nettoyage du filtre du réservoir d’eau
Nettoyage du réservoir
Nettoyage des surfaces extérieures
Changement des filtres à air Statim 2000S
Changement des filtres à air retenant
les bactéries
5.7 Remplacement du joint de cassette
5.8 Maintien des niveaux des liquides
5.9 Mesure de la qualité de l’eau
5.10 Calendrier d’entretien préventif
6. Le port de communication . . . . . . . . . . 25
6.1 Le port de communication RS232
6.2 Installation de l’enregistreur de données
du Statim
6.3 Installation du papier dans l’imprimante interne
6.4 Élimination des bourrages du papier
de l’imprimante interne
6.5 Aperçu de la sortie de l’imprimante interne
7. Dépannage . . . . . . . . . . . . . . . . . . . . . . 35
8 Liste des pièces de rechange . . . . . . . 39
9. Garantie . . . . . . . . . . . . . . . . . . . . . . . . . 40
10. Protocole d’essai . . . . . . . . . . . . . . . . 41
10.1 Test de type
11. Spécifications . . . . . . . . . . . . . . . . . . . 43
11.1 Statim 2000S — Spécifications
11.2 Statim 5000S — Spécifications
StatIM Cassette Autoclave et Statim sont des marques de commerce déposées et les logos
STAT-DRI et DriTec sont des marques de commerce de SciCan Ltd. Toute autre marque dont
il est fait mention dans le présent manuel appartient à son propriétaire respectif.
Pour toute demande de renseignements relatifs à l’entretien et
aux réparations, contacter :
Au Canada :
1-800-870-7777
Aux États-Unis :
1-800-572-1211
Allemagne:
+49 (0) 821 56 74 56-0
International :
(416) 446-4500
Courrier électronique :
[email protected]
Fabriqué par :
SciCan
Représentant UE
SciCan GmbH
Kurzes Geland 10
D-86156 Augsburg
ALLEMAGNE
Tél : +49 (0) 821 56 74 56-0
Fax : +49 (0) 821 56 74 56-99
SciCan Inc.
701 Technology Drive
Canonsburg, PA 15317
États-Unis
Tél : +1 724 820 1600
Fax : +1 724 820 1479
Numéro vert : 1-888-632-6031
SciCan Medtech
Alpenstrasse
166300 Zug
SUISSE
Tél : +41 (0) 41 727 7027
Fax : +41 (0) 41 727 702
1440 Don Mills Road,
Toronto ON M3B 3P9
CANADA
Tél. :
(416) 445-1600
Télécop. :
(416) 445-2727
Sans frais :
1-800-667-7733
Page 2
Statim_2KS_5KS_E_oct09_FIGS_Q7:Statim_2KS_5KS_E_oct09
1/20/10
1:06 PM
Page 93
1. Introduction
Statim 5000S
Statim 2000S
Félicitations d’avoir choisi le STATIM ® Cassette Autoclave. Nous sommes certains que cet achat
correspond à ce qui se fait de mieux dans ce type d’équipement. Le Statim est un appareil de
comptoir compact qui offre un certain nombre de cycles de stérilisation conçus pour répondre aux
nombreux besoins des utilisateurs. Les autoclaves à cassette « S » sont parfaitement conformes à
la norme EN13060.
Tous les détails sur l’installation, l’utilisation et l’entretien du Statim figurent dans le présent manuel
de l’utilisateur. Pour assurer des années d’utilisation sécuritaire et sans problème, lire attentivement
les présentes instructions avant d’utiliser l’appareil et les conserver pour s’y référer ultérieurement.
Les instructions d’utilisation, de maintenance et de remplacement doivent suivies scrupuleusement
pour que ce produit fonctionne tel que prévu. Le contenu du présent manuel peut être modifié sans
préavis afin de refléter les modifications et améliorations apportées au produit Statim.
Le Statim convient à la stérilisation de tous les types d’instruments dentaires et médicaux pouvant
résister à la stérilisation par la chaleur humide. Le Statim n’a pas été conçu pour stériliser les liquides, les vêtements, les déchets ou matériels biomédicaux non compatibles avec la stérilisation par
la chaleur humide. Le traitement de telles charges peut résulter en une stérilisation incomplète et /
ou endommager l’autoclave. Pour plus de renseignements sur la compatibilité des instruments, consulter les instructions de retraitement des fabricants.
Page 3
Statim_2KS_5KS_E_oct09_FIGS_Q7:Statim_2KS_5KS_E_oct09
1/20/10
1:06 PM
Page 94
2. Informations importantes
2.1 Avertissements
Utiliser uniquement de l’eau distillée obtenue à partir de vapeur dans le Statim. Ne pas utiliser d’eau
dé ionisée, déminéralisée ou spécialement filtrée. Ne jamais utiliser d’eau du robinet.
N’utiliser que du personnel qualifié pour fournir les pièces, entretenir ou réparer le Statim. SciCan ne
pourra être tenue pour responsable des dommages accessoires, spéciaux ou indirects causés par
des travaux de maintenance ou de réparation effectués sur le Statim par un tiers ou par l’utilisation
d’équipement ou de pièces fabriqués par un tiers, y compris le manque à gagner, le préjudice commercial, la perte économique ou toute perte causée par des blessures.
Ne jamais retirer le couvercle de l’appareil et ne jamais insérer d’objets dans les trous ou ouvertures
du boîtier. Cela pourrait endommager l’appareil et / ou présenter un risque pour l’utilisateur.
Tous les éléments de ce manuel sont communs aux appareils Statim 2000S et Statim 5000S sauf
indication contraire.
IMPORTANT :
Respecter les directives locales régissant la vérification de la procédure de stérilisation
Performances de séchage
Les appareils Statim 2000S et 5000S ont été conçus pour offrir une solution de stérilisation
complète de vos instruments non enveloppés et enveloppés : une stérilisation rapide suivie
par un séchage rapide grâce à la technologie de séchage SciCan Dri-Tec.
Le Statim 2000S utilise la chaleur par convection pour le séchage des instruments en
récupérant la chaleur résiduelle présente dans le système après la phase de stérilisation.
Afin d’assurer un séchage rapide, il est important de charger correctement la cassette Statim
pour que la chaleur puisse être capturée dans le système et libérée dans la cassette.
Le Statim 5000S utilise la chaleur générée par la phase de stérilisation et absorbée par les
plaques de séchage. Il est important de charger correctement la cassette Statim pour que la
chaleur puisse être transférée directement des plaques de séchage sur la charge, ce qui
entraîne un séchage rapide et accéléré de la cassette.
Consulter ce manuel de l’utilisateur pour apprendre comment disposer correctement les
instruments dans la cassette et pour en savoir plus sur l’utilisation des plaques Stat-Dri
(Statim 5000S). En exécutant soigneusement ces instructions pour charger correctement la
cassette dans l’autoclave, on obtient un séchage rapide de la charge.
Page 4
Statim_2KS_5KS_E_oct09_FIGS_Q7:Statim_2KS_5KS_E_oct09
1/20/10
1:06 PM
Page 95
2. Informations importantes - Suite.
1
■
■2
3
■
4
■
5
■
6
■
7
■
8
■
■9
10
■
11
■
2.2 Statim 2000S — Vue d’ensemble de l’appareil
■3 ■4
indicateur de niveau
■2
clavier
■1
bouchon du réservoir/
filtre à eau
écran à crista
ux liquides
indicateur
d’alimentation
13
indicateur d’activité
■
interrupteur d’alimentation ■
6
■5
prise de câble
pied de mise de niveau
12
13
orifice de tube d’évacuation ■ cassette ■ filtre biologique ■
9
14
■ port RS232
compresseur
Les symboles suivants
apparaissent dans les
marges de ce manuel.
Bouton
d’arrêt
Eau distillée
obtenue à partir
de vapeur
uniquement
EMBALLE
cycles
DÉL d’alimentation.
12
■
10
■
11
■
Situation pouvant
causer une panne
mécanique.
Risque potentiel pour
l’utilisateur.
Les symboles suivants apparaissent sur l’appareil :
NON EMBALLE
Bouton de
cycles
départ
Figure 1
CAOUTCHOUC
/ PLASTIQUE
cycles
Séchage à
l’air seul.
DÉL d’activité.
■7
14 ■
8
■
Information
importante
Avertissement : Surface
chaude et/ou vapeur
chaude
Avertissement : Risque de
choc électrique. Débrancher
l’alimentation avant l’entretien
Avertissement : Se reporter
au manuel pour de plus
amples détails
Les articles ci-dessous se trouvent dans le carton d’emballage du Statim 2000S. Si un ou plusieurs articles
manquent, contacter immédiatement le revendeur pour corriger la situation.
Tiroir de cassette et couvercle
Cordon d’alimentation
Grille à instruments nonenveloppés
/5000S
STATIM 2000S
e t t e
C a s s
™
c l a v e
A u t o
Manual
• Operator’s
buch
• Benutzerhand
l’utilisateur
• Manuel de
Operador
• Manual del
operatori
• Manuale per
Manuel de l’opérateur
1.0.
95-108430 Rev
Operator’s Manual
STATIM 2000S/5000S All rights reserved.
SciCan.
Copyright 2003
www.scican.com
Bouteille à eau résiduaire
Tube d’évacuation
Raccord de couvercle
de bouteille
Stat-Dri
Émulateurs de stérilisation
SciCan P.C.D. + 20
Quincaillerie de montage
des tubes
Page 5
Statim_2KS_5KS_E_oct09_FIGS_Q7:Statim_2KS_5KS_E_oct09
1/20/10
1:06 PM
Page 96
2. Informations importantes - Suite.
■1
■2
■3
■4
■5
■6
■7
■8
■9
10
■
11
■
12
■
2.3 Statim 5000S — Vue d’ensemble de l’appareil
indicateur de niveau
■3 ■4
clavier
bouchon du réservoir/
filtre à eau
écran à cristaux
liquides
indicateur
d’alimentation
indicateur d’activité
interrupteur
d’alimentation
■6
13
■
prise de câble
12
■
■5
pied de mise de niveau
orifice de tube d’évacuation
filtre biologique
imprimante interne en option (pas sur tous les modèles)
Les symboles suivants
apparaissent dans les
marges de ce manuel.
Bouton
d’arrêt
Eau distillée
obtenue à partir
de vapeur
uniquement
■1
■9
13
■
NON EMBALLE
cycles
10
■
cassette
14
■
CAOUTCHOUC
/ PLASTIQUE
cycles
EMBALLE
cycles
Séchage à
l’air seul.
DÉL d’activité.
DÉL d’alimentation.
11
■
14
■
Les articles ci-dessous se trouvent dans le carton d’emballage du Statim 5000S. Si un ou plusieurs articles
manquent, contacter immédiatement le revendeur pour
corriger la situation.
■8
Information
importante
Avertissement : Surface
chaude et/ou vapeur chaude
Avertissement : Risque de
choc électrique. Débrancher
l’alimentation avant l’entretien
Avertissement : Se reporter
au manuel pour de plus
amples détails
Plaques d’amélioration du
séchage
Tiroir de cassette et couvercle
Cordon d’alimentation
Grille à instruments nonenveloppés
/5000S
STATIM 2000S
e t t e
C a s s
™
c l a v e
A u t o
Manual
• Operator’s
buch
• Benutzerhand
l’utilisateur
• Manuel de
Operador
• Manual del
operatori
• Manuale per
Manuel de l’opérateur
1.0.
95-108430 Rev
Operator’s Manual
STATIM 2000S/5000S All rights reserved.
SciCan.
Copyright 2003
www.scican.com
Bouteille à eau résiduaire
Tube d’évacuation
Raccord de couvercle de
bouteille
Stat-Dri
Émulateurs de
stérilisation
SciCan P.C.D. + 20
Quincaillerie de montage
des tubes
Page 6
■7
port RS232 (pas sur tous les modèles)
Situation pouvant
causer une panne
mécanique.
Risque potentiel pour
l’utilisateur.
Les symboles suivants apparaissent sur l’appareil :
Bouton de
départ
■2
Figure 2
Statim_2KS_5KS_E_oct09_FIGS_Q7:Statim_2KS_5KS_E_oct09
1/20/10
1:06 PM
Page 97
3. Installation
3.1 Considérations environnementales
Il existe plusieurs facteurs pouvant affecter les performances du Statim. Étudier ces facteurs
et choisir un emplacement convenable où installer l’appareil.
•
Température et humidité
•
Espacement
•
Expulsion de vapeur
•
Surface de travail
•
Environnement électromagnétique
•
Exigences électriques
Éviter d’installer le Statim dans un endroit exposé au rayonnement direct du soleil ou près d’une
source de chaleur (p. ex. bouches de chauffage ou radiateurs). Les températures d’utilisation
recommandées sont comprises entre 15 et 25 °C avec une humidité de 25 à 70 %.
Les évents et ouvertures du Statim ne doivent pas être couverts ni obstrués. Laisser au moins 50
mm entre le dessus, les côtés et l’arrière de l’appareil et un mur ou une cloison.
Le Statim devra être utilisé dans un environnement propre, sans poussière.
Le Statim devra être placé sur une surface plate, de niveau et résistant à l’eau. Ne jamais installer et
utiliser l’appareil sur une surface en pente.
Le Statim a fait l’objet de tests et correspond aux normes applicables en matière d’émissions électromagnétiques. Même si l’appareil n’émet aucune radiation, il peut être affecté par d’autres
équipements qui en émettent. Nous recommandons d’installer l’appareil à l’écart de toute source
potentielle de perturbations.
Utiliser des sources d’alimentation avec prise de terre et fusibles corrects, de même tension nominale que celle indiquée sur l’étiquette à l’arrière de l’appareil. Éviter d’utiliser des prises multiples. En
cas d’utilisation d’une barre multiprises avec protection contre les surtensions, ne brancher qu’un
seul appareil Statim.
3.2 Mise en place de l’appareil
Lors de la mise en place de l’appareil sur un dessus de comptoir, vérifier ce qui suit
•
•
1 sur le panneau avant devra
La bulle de l’indicateur à niveau ■
être située dans le quart avant droit de la cible. De cette façon,
l’appareil se videra correctement. On peut utiliser les trois pieds
réglables pour déplacer la bulle si nécessaire.
L’appareil doit être stable et les quatre pieds doivent être en contact avec la surface du comptoir. Cela empêchera l’appareil de se
déplacer librement.
■1
Figure 3
Page 7
Statim_2KS_5KS_E_oct09_FIGS_Q7:Statim_2KS_5KS_E_oct09
1/20/10
1:06 PM
Page 98
3. Installation - Suite.
3.3 Branchement de la bouteille à eau résiduaire
2 est utilisée pour collecter l’eau résiduaire après qu’elle ait été transLa bouteille à eau résiduaire ■
formée en vapeur et qu’elle soit sortie de la cassette. Pour brancher la bouteille à eau résiduaire au
Statim, procéder comme suit (voir Figure 4) :
5000S
3 dans le raccord
1. Insérer le tube d’évacuation ■
■4 à l’arrière de l’appareil et bien le brancher.
2. Couper le tube à longueur et mettre en place le
5.
raccord de bouteille à eau résiduaire ■
■3
3. Placer l’extrémité libre du tube dans le trou du
couvercle de la bouteille à eau résiduaire et serrer le raccord à la main. Ne pas lover le tube d’évacuation
4. Dévisser l’ensemble de couvercle et de serpentin
6 de la bouteille à eau
réfrigérant en cuivre ■
résiduaire. Le couvercle et le serpentin devraient
sortir ensemble.
5. Remplir d’eau la bouteille à eau résiduaire
jusqu’à la ligne MIN et remettre en place l’ensemble de couvercle et de condenseur en cuivre.
Vider souvent la bouteille à eau résiduaire pour
éviter des odeurs désagréables et la décoloration
du contenu. (Il est possible d’ajouter une
solution faiblement désinfectante, préparée
selon les instructions du fabricant, dans la
bouteille à eau résiduaire pour résoudre ce
problème). Au minimum, vider la bouteille à
eau résiduaire chaque fois que l’on remplit le
réservoir.
■4
6
■
■5
■2
2000S
■4
■3
■6
■2
6. Placer la bouteille à eau résiduaire près de
l’appareil. Ranger la bouteille sous l’appareil.
Figure 4
On peut faire passer le tube dans un trou
(d’un diamètre de 8 mm / 0,3 pouce) dans le
comptoir et le fixer avec les colliers en nylon fournis.
3.4 Remplissage du réservoir
Pour remplir le réservoir, utiliser uniquement de l’eau distillée obtenue à partir de vapeur et contenant moins de 5 ppm de matières solides dissoutes (ayant une conductivité inférieure à 10 µS /
cm). Les impuretés et additifs contenus dans les autres types d’eau causeront l’affichage d’un message d’erreur sur l’écran à cristaux liquides. Si l’on dispose d’un appareil de mesure de la conductivité de l’eau (disponible auprès de SciCan, numéro de commande 01-103139S), vérifier chaque nouveau contenant d’eau avant de remplir le réservoir. Pour remplir le réservoir, procéder comme suit
(voir figure 5) :
Page 8
Statim_2KS_5KS_E_oct09_FIGS_Q7:Statim_2KS_5KS_E_oct09
1/20/10
1:06 PM
Page 99
3. Installation - Suite.
2
1. Retirer le bouchon du réservoir ■
■2
2. Verser de l’eau distillée obtenue à partir de
vapeur dans le réservoir jusqu’à ce qu’il soit
presque plein (maximum de 4 L). Utiliser un
entonnoir pour éviter tout déversement.
3. Remplacer et fixer le bouchon.
3.5 Amorçage de la pompe Statim
Pour amorcer la pompe Statim, procéder
comme suit :
Figure 5
1. Placer l’appareil sur le bord de la surface de
travail. Le pied avant réglable devrait être à environ 12 mm.
3 de la pince située
2. Soulever le coin avant gauche et retirer le tube d’évacuation ■
sous l’appareil.
3. Tirer le tube d’évacuation vers l’extérieur de façon à pouvoir placer l’extrémité libre sur
un contenant d’eau.
4. Remplir le réservoir avec de l’eau distillée obtenue à partir de vapeur.
4 de l’extrémité du tube d’évacuation et laisser l’eau se vider du tube dans
5. Retirer le bouchon ■
un contenant pendant 30 secondes. Quand le débit d’eau devient régulier, remettre le bouchon
en place.
6. Soulever le coin avant gauche de l’appareil et réinsérer le
tube dans la pince sous l’appareil. Pousser la longueur
excédentaire de tube dans l’espace prévu.
S’assurer que le bouchon sur le tube d’évacuation est bien fixé.
3.6 Réglage de la date et de l’heure
Pour régler l’heure et la date, procéder comme suit et observer le curseur clignotant sur l’écran à cristaux liquides :
■4
■3
Figure 6
1. Mettre le Statim hors tension.
2. Maintenir enfoncé le bouton de cycle pour instruments NON ENVELOPÉS.
3. En maintenant enfoncé le bouton de cycle pour instruments NON ENVELOPÉS, mettre le
Statim sous tension. L’écran à cristaux liquides affiche le message suivant :
4. Utiliser les boutons de cycle pour sélectionner et
changer la valeur des champs sélectionnés. Pour
augmenter la valeur d’un champ, appuyer sur le
bouton du cycle NON ENVELOPÉS. Maintenir le
bouton enfoncé pour augmenter la valeur.
14:23
HH:MM
S’affiche lors du réglage de la date et de l’heure
5. Pour diminuer la valeur, appuyer sur le bouton du cycle ENVELOPÉ.
Page 9
11/15/2006
JJ/MM/AAAA
Statim_2KS_5KS_E_oct09_FIGS_Q7:Statim_2KS_5KS_E_oct09
1/20/10
1:06 PM
Page 100
3. Installation - Suite.
6. Pour sélectionner le champ suivant, appuyer sur le bouton du cycle
CAOUTCHOUC ET PLASTIQUE.
7. Pour sauvegarder les changements et revenir au mode d’utilisation normal,
appuyer sur le bouton STOP.
8. Pour quitter sans faire de changements, mettre le Statim OFF.
3.7 Sélection de la langue
Les messages affichés sur l’écran à cristaux liquides peuvent être changés dans un certain nombre de
langues différentes. Pour changer de langue, suivre les étapes ci-dessous :
1. Tourner l’interrupteur d’alimentation à l’arrière d e l’appareil sur OFF.
2. Maintenir enfoncé le bouton du cycle ENVELOPÉ.
FRANCAIS
3. Tout en appuyant sur le bouton de cycle pour instruments
ENVELOPÉS, tourner l’interrupteur d’alimentation à l’arAffichage pendant le défilement des langues
rière de l’appareil sur ON.
4. Utiliser les boutons de cycle NON ENVELOPÉ pour faire défiler les sélection de langue.
5. Appuyer sur le bouton de cycle ENVELOPÉ pour passer à la langue précédente.
6. Quand la langue souhaitée est affichée, appuyer sur le bouton STOP pour sauvegarder la sélection et
revenir en mode de fonctionnement normal.
3.8 Attribution du numéro d’identification
de l’appareil
1. Mettre le Statim hors tension.
STATIM 2000 S2S2R601 #323
S’affiche lorsqu’un numéro est affecté à l’appareil
2. Maintenir enfoncé le bouton de cycle CAOUTCHOUC / PLASTIQUE.
3. En maintenant enfoncé le bouton de cycle CAOUTCHOUC / PLASTIQUE, mettre le
Statim ON.
4. Avec les boutons de cycle, sélectionner un maximum de 3 chiffres à utiliser comme numéro d’identification de l’appareil. Le bouton de cycle NON ENVELOPÉ augmentera la valeur sélectionnée et le bouton
de cycle ENVELOPÉ la réduira. Utiliser le bouton CAOUTCHOUC / PLASTIQUE pour passer au chiffre
suivant.
5. Pour sauvegarder les changements et revenir au mode d’utilisation normal, appuyer
sur le bouton STOP.
3.9 Expédition de l’appareil
Avant de déplacer l’appareil, il faut vider le réservoir. Pour cela, procéder comme suit :
1. Placer un contenant à eau sous l’appareil.
2. Avec le tube d’évacuation, (voir la section 3.5 Amorçage de la pompe, figure 6) vider le contenu
du réservoir dans le contenant à eau.
3. Éliminer l’eau restant dans le réservoir avec une serviette absorbante non pelucheuse.
4. Visser les trois pieds réglables sous l’appareil.
5. Remballer l’appareil avec les matériaux d’emballage d’origine et joindre tous les accessoires livrés avec
l’appareil.
6. Indiquer le mode d’expédition (chauffé et assuré).
Page 10
Statim_2KS_5KS_E_oct09_FIGS_Q7:Statim_2KS_5KS_E_oct09
1/20/10
1:06 PM
Page 101
4. Instructions d’utilisation
4.1 Statim 2000S — Utilisation de la cassette
Pour retirer la cassette après un cycle, faire attention car les surfaces métalliques sont très chaudes
et la cassette peut contenir de la vapeur brûlante.
•
Pour ouvrir la cassette :
1. Tenir la poignée de la cassette avec les pouces orientés vers l’intérieur sur le verrou de la cassette.
2. Pousser vers le bas sur le verrou de la cassette.
Verrou de cassette
3. Soulever le couvercle de la cassette vers le haut et
dégager la charnière.
4. Poser le couvercle sur sa surface extérieure.
•
Pour fermer la cassette :
1. Aligner la languette de charnière du couvercle
de la cassette avec la fente de charnière à l’arrière du fond.
Figure 7
2. En fermant le couvercle, la languette et la fente de charnière s’engagent.
•
Insertion de la cassette dans le Statim 2000S :
1. Placer l’extrémité de la cassette dans l’appareil.
2. Poussez doucement vers l’intérieur jusqu’à ce qu’on entende un « clic ».
Ne jamais forcer pour pousser la cassette dans le Statim car cela pourrait endommager les composants intérieurs.
•
Retrait de la cassette :
1. Saisir la poignée de la cassette avec les deux mains et tirer pour la sortir de l’appareil.
2. Dégager la cassette de l’appareil et la poser sur une surface ferme.
•
Dégagement de la cassette :
•
STAT-DRI
Quand elle n’est pas utilisée, la cassette devrait être dégagée. Pour dégager la cassette, saisir la
poignée et tirer sur la cassette jusqu’à ce qu’il y ait un espace de 15 mm à 20 mm (1/ 2 à 3 / 4 po)
entre l’avant de l’appareil Statim 2000S et la poignée de la cassette.
Un traitement des surfaces intérieures de la cassette avec l’agent dessiccatif Stat-Dri, livré avec
l’appareil, améliorera le processus de séchage. (Des bouteilles de rechange sont disponibles auprès
de SciCan, numéro de commande 2OZPLUS, 8OZPLUST, 32OZPLUS).
Page 11
Statim_2KS_5KS_E_oct09_FIGS_Q7:Statim_2KS_5KS_E_oct09
1/20/10
1:06 PM
Page 102
4. Instructions d’utilisation - Suite.
4.2 Statim 5000S — Utilisation de la cassette
Pour retirer la cassette après un cycle, faire attention car les surfaces métalliques sont très chaudes
et la cassette peut contenir de la vapeur brûlante.
•
Pour ouvrir la cassette :
1 en posi1. Pousser la poignée de transport ■
tion ouverte.
■1
2. Placer les mains de chaque côté de la
poignée de la cassette.
3. Insérer les index dans les fentes et placer
les pouces aux endroits prévus.
4. Appuyer avec les pouces et tirer vers le haut
avec les index jusqu’à ce que le couvercle
s’ouvre.
5. Soulever le couvercle de la cassette et le
dégager du plateau. Poser le couvercle sur
sa surface extérieure.
•
■1
Pour fermer la cassette :
1. Aligner la languette de charnière sur le couvercle avec la fente de charnière sur le
plateau.
2. En fermant le couvercle, la languette et la
fente de charnière s’engagent.
3. Placer la poignée de transport en position
fermée.
•
Insertion de la cassette dans le
Statim 5000S :
1. Tenir la poignée de la cassette dans une
main et la poignée de transport dans l’autre
comme illustré à la Figure 8.
Figure 8
2. Placer l’extrémité de la cassette dans l’appareil et laisser tomber la poignée de transport en
position fermée.
3. Poussez doucement vers l’intérieur jusqu’à ce qu’on entende un « clic ».
Ne jamais forcer pour pousser la cassette dans le Statim car cela pourrait endommager les composants intérieurs.
Page 12
Statim_2KS_5KS_E_oct09_FIGS_Q7:Statim_2KS_5KS_E_oct09
1/20/10
1:06 PM
Page 103
4. Instructions d’utilisation - Suite.
•
Retrait de la cassette :
1. Saisir la poignée de la cassette dans une main et la sortir de l’appareil.
2. Lorsque la cassette sort de l’appareil, saisir la poignée de transport avec la main libre et la
soulever vers le haut.
3. Dégager la cassette de l’appareil et la poser sur une surface ferme.
•
Dégagement de la cassette :
Quand elle n’est pas utilisée, la cassette devrait être dégagée. Pour dégager la cassette, saisir la
poignée et tirer sur la cassette jusqu’à ce qu’il y ait un espace de 15 mm à 20 mm (1/ 2 à 3 / 4 po)
entre l’avant de l’appareil Statim 5000S et la poignée de la cassette.
4.3 Statim 5000S — Plaques STAT-DRI
La cassette Statim 5000 utilise des plaques STAT-DRI pour améliorer le processus de séchage des
instruments enveloppés. Les plaques réglables sont conçues pour la grille à instruments nonenveloppés et évitent d’avoir un grille séparée pour les instruments enveloppés. Il est possible de
placer jusqu’à dix plaques dans la longueur de la grille. Chaque appareil est livré avec cinq plaques
STAT-DRI. Il est possible de commander des plaques supplémentaires auprès de SciCan (numéro
de pièce SciCan 01-103935).
Pour mettre en place et ajuster une plaque STAT-DRI, suivre les étapes ci-dessous :
1. Maintenir une plaque dans la position souhaitée, légèrement inclinée vers l’avant, avec les languettes vers le bas.
2. Insérez les languettes dans les trous dans la grille à instruments non-enveloppés.
3. Chaque languette est dotée d’une fente allongée. Faites
glisser la plaque jusqu’à ce que le fil de fer soit calé au
fond de chaque fente.
4. Relâcher la plaque en position de repos.
5. Préparer et charger les instruments à stériliser.
4.4 Préparation et chargement des instruments
Avant de charger les instruments dans le Statim, consulter les instructions de retraitement
des fabricants.
•
Nettoyer les instruments
Nettoyer et rincer les instruments avant de les charger dans la cassette. Les résidus de désinfectant
et les débris solides peuvent empêcher la stérilisation et endommager les instruments, la cassette et
l’appareil Statim. Les instruments lubrifiés doivent être parfaitement essuyés pour éliminer l’excès de
lubrifiant avant le chargement.
Page 13
Statim_2KS_5KS_E_oct09_FIGS_Q7:Statim_2KS_5KS_E_oct09
1/20/10
1:06 PM
Page 104
4. Instructions d’utilisation - Suite.
•
Instruments non enveloppés
Placer les instruments non-enveloppés sur la grille à instruments, dans le plateau, de façon à ce
qu’ils ne se touchent pas entre eux. De cette façon, la vapeur atteint toutes les surfaces et le
séchage est facilité.
Les instruments ne doivent pas être empilés dans les cassettes car cela compromettra le processus
de stérilisation.
•
Instruments enveloppés (enveloppes uniques)
Placer les instruments dans les sacs à autoclave à enveloppe unique selon les instructions du
fabricant. Orienter la grille à instruments enveloppés dans la cassette de façon à ce que les
instruments enveloppés soient à environ 6 mm / 0,25 po au-dessus de la base de la cassette.
Placer les instruments enveloppés sur la grilles et les arranger pour éviter qu’ils ne se chevauchent.
S’assurer que toutes les charges enveloppées sont sèches avant de les manipuler ou de les ranger
afin de maintenir la stérilité.
Il n’est pas recommandé d’utiliser des enveloppes en tissu dans l’appareil Statim.
SciCan recommande l’utilisation de sacs pour autoclave en papier / papier et plastique / papier
fabriqués conformément à la norme EN 868. Ne pas tasser les instruments dans les sacs pour
permettre à la vapeur de pénétrer toutes les surfaces des instruments.
La grille à instruments enveloppés du Statim 5000S est conçue pour contenir au maximum 12 sacs
à autoclave. Il convient de veiller à ce que le poids total des sacs chargés ne dépasse pas 1,5 kg
(3,3 lb).
La grille à instruments non enveloppés dotée de 10 plaques Stat-Dri au maximum peut contenir
10 sacs à autoclave.
•
Instruments en caoutchouc et en plastique
Les matériaux suivants peuvent être stérilisés dans le Statim :
Nylon, polycarbonate (Lexan™), polypropylène, PTFE (Téflon™), acétal (Delrin™), polysulfone
(Udel™), polyéthérimide (Ultem™), silicone, caoutchouc et polyester.
Lors du chargement d’instruments en caoutchouc et en plastique dans le tiroir, laisser un espace
entre les instruments et les parois de la cassette. Cela permettra à la vapeur d’atteindre toutes les
surfaces et accélérera le séchage.
Les matériaux suivant ne peuvent pas être stérilisés dans le Statim :
Polyéthylène, ABS, styrène, dérivés cellulosiques, PVC, Acrylique (Plexiglas™), PPO (Noryl™),
latex, Néoprène et matériaux similaires.
L’utilisation de ces matériaux risque d’endommager les instruments et l’appareil. En cas d’incertitude
sur le matériau dans lequel est fabriqué un instrument, ne pas le charger dans le Statim avant
d’avoir vérifié auprès du fabricant.
Page 14
Statim_2KS_5KS_E_oct09_FIGS_Q7:Statim_2KS_5KS_E_oct09
1/20/10
1:06 PM
Page 105
4. Instructions d’utilisation - Suite.
•
Tous les instruments
Le Statim n’est PAS conçu pour la stérilisation des textiles, liquides ou déchets biomédicaux. Les
instruments resteront stériles après un cycle terminé avec succès jusqu’à ce que la cassette soit
sortie de l’appareil. Les instrument non enveloppés, une fois exposés aux conditions ambiantes ou
extérieures, ne peuvent pas être maintenus dans un état stérile. Si l’on souhaite obtenir un stockage
stérile, envelopper les instruments à stériliser dans des sacs pour autoclave, conformément aux
instructions du fabricant des instruments. Ensuite, utiliser le cycle pour instruments enveloppés
jusqu’à ce que la phase de séchage à l’air soit terminée.
Conseil : Laisser les instruments (enveloppés ou non) sécher complètement avant de les manipuler. Les instruments enveloppés ou en sacs ne doivent pas se toucher pour faciliter le séchage et
assurer une stérilisation efficace.
SciCan conseille à l’utilisateur final de choisir soigneusement le cycle de stérilisation le mieux adapté conformément aux recommandations des principales autorités de contrôle des infections et aux
recommandations/régulations locales.
•
Surveillance de routine
Des indicateurs chimiques pour stérilisateur à vapeur devraient être utilisés dans ou sur chaque
ensemble ou charge stérilisé. De plus, il est recommandé d’utiliser chaque semaine des indicateurs
biologiques qui permettent de s’assurer que les instruments ont été exposés aux conditions de
stérilisation.
4.5 Guide des poids des instruments
Ciseaux
Instrument
Poids type des instruments
30 g / 0,96 oz
Détartreur dentaire
20 g / 0,64 oz
Forceps
15 g / 0,48 oz
Pièce à main dentaire
40 à 60 g / 1,29 à 1,92 oz
Grille à instruments enveloppés
260 g / 8,35 oz
Grille à instruments non-enveloppés
225 g / 7,23 oz
Canule d’aspiration
10 g / 0,32 oz
Miroir à bouche en plastique
8 g / 0,25 oz
Coque d’empreinte
Anneau de positionnement en plasqiue pour radiographie
15 à 45 g / 0,48 à 1,45 oz
20 g / 0,64 oz
NOTA : Les poids ci-dessus doivent être utilisés pour référence seulement. Pour les poids exacts
des instruments, consulter les spécifications du fabricant.
Page 15
Statim_2KS_5KS_E_oct09_FIGS_Q7:Statim_2KS_5KS_E_oct09
1/20/10
1:06 PM
Page 106
4. Instructions d’utilisation - Suite.
4.6 Sélection d’un cycle
Les appareils Statim 2000S et 5000S ont sept cycles de stérilisation, chacun étant conçu pour
stériliser avec les paramètres spécifiés. Chaque cycle peut être sélectionné en appuyant sur les
boutons de cycle NON EMBALLÉ, EMBALLÉ ou CAOUTCHOUC / PLASTIQUE.
Les types d’instruments, les spécifications de stérilisation et un graphique décrivant les caractéristiques de chaque cycle figurent dans les pages suivantes.
1. Cycles pour instruments NON EMBALLÉ
Les appareils Statim 2000S et 5000S offrent deux cycles de stérilisation 134 °C type S et un cycle
134 °C type N, NON EMBALLÉ. À la fin de la phase de stérilisation du cycle, le séchage à l’air commence pour une heure.
Le séchage à l’air peut être interrompu à
n’importe quel moment en appuyant sur le
bouton STOP.
Pour sélectionner un de ces cycles :
Appuyer sur le bouton de cycle NON
EMBALLÉ pour faire défiler les
cycles disponibles.
A
INSTR CREUX N EMB (S) 134 °C / 3,5 min
A
B
INSTR CREUX N EMB (S) 134 °C / 18 min
INSTR SOL N EMB (S) 134 °C / 3,5 min
C
C
B
D
3.5 min / 18 min
100˚C / 101 kPa
3 purges (Conditionnement)
max. à 133˚C / 295 kPa
ventilation à 115˚C / 169 kPa
Pressurisation
D
E
F
F
E
Stérilisation
134˚C / 304 kPa 138˚C / 341 kPa
Ventilation
Séchage à l’air
Une fois que le cycle souhaité a été sélectionné, appuyer sur le bouton START.
La mémoire de l’appareil se souvient du
dernier cycle exécuté et l’affiche en premier
quand l’appareil est mis sous tension.
A
A
B
B
C
D
3.5 min
100˚C / 101 kPa
1 purge (Conditionnement)
max. à 133˚C / 295 kPa
ventilation à 115˚C / 169 kPa
C Pressurisation
Page 16
E
D
E
F
F
Stérilisation
134˚C / 304 kPa 138˚C / 341 kPa
Ventilation
Séchage à l’air
Statim_2KS_5KS_E_oct09_FIGS_Q7:Statim_2KS_5KS_E_oct09
1/20/10
1:06 PM
Page 107
4. Instructions d’utilisation - Suite.
2. Cycles pour instruments CREUX
ENVELOPPÉS
Les appareils Statim 2000S et 5000S offrent
deux cycles de stérilisation pour instruments
EMBALLÉ à 134 °de type S.
Pour sélectionner un de ces cycles S :
Appuyer sur le bouton des cycles EMBALLÉ
pour faire défiler
les cycles disponibles.
A
INSTR CREUX EMB (S) 134 °C / 3,5 min
A
100˚C / 101 kPa
B
6 purges (Conditionnement)
max. à 133˚C / 295 kPa
ventilation à 115˚C / 169 kPa
Pressurisation
C
D
3.5 min /
C
B
E
F
18 min
D Stérilisation
134˚C / 304 kPa 138˚C / 341 kPa
E Ventilation
F
Séchage à l’air
INSTR CREUX EMB (S) 134 °C / 18 min
Une fois que le cycle souhaité a été sélectionné, appuyer sur le bouton START.
La mémoire de l’appareil se souvient du dernier cycle exécuté et l’affiche en premier quand l’appareil est mis sous tension.
Un dispositif de vérification de traitement (PCD) est disponible pour vérifier le cycle pour INSTR. CREUX
EMBALLÉS (S) 134 °C, 3,5 min.
3. Cycle pour instruments en
caoutchouc et plastique
Les appareils Statim 2000S et 5000S offrent
deux cycles de stérilisation à
121 °C de type S.
Pour sélectionner un de ces cycles S :
Appuyer sur le bouton CAOUTCHOUC /
PLASTIQUE pour faire défiler les cycles
disponibles.
A
A
B
C
CAOUTCH. / PLAST. (S) 121 °C / 15 min
CAOUTCH. / PLAST. (S) 121 °C / 30 min
Page 17
B
C
D
15 min / 30 min
100˚C / 101 kPa
3 purges (Conditionnement)
max. à 120˚C / 199 kPa
ventilation à 110˚C / 143 kPa
Pressurisation
D
E
F
E
F
Stérilisation
121˚C / 205 kPa 124˚C / 225 kPa
Ventilation
Séchage à l’air
Statim_2KS_5KS_E_oct09_FIGS_Q7:Statim_2KS_5KS_E_oct09
1/20/10
1:06 PM
Page 108
4. Instructions d’utilisation - Suite.
Une fois que le cycle souhaité a été sélectionné, appuyer sur le bouton START.
La mémoire de l’appareil se souvient du dernier cycle exécuté et l’affiche en premier quand l’appareil est mis sous tension.
4. Cycle de séchage à l’air seul
Ceci n’est pas un cycle de stérilisation.
Le cycle de séchage à l’air seul démarre automatiquement après chaque cycle de stérilisation et
dure 60 minutes.
Le séchage à l’air peut être interrompu en appuyant sur le bouton STOP. Pour que le contenu de la
cassette soit sec, on devra laisser le cycle fonctionner pendant 60 minutes. Le séchage est important pour les instruments non enveloppés afin d’éviter la corrosion. Pour les instruments enveloppés, une enveloppe sèche est indispensable pour maintenir la stérilité
Si l’on a appuyé sur le bouton STOP pendant l’étape de séchage à l’air du cycle de stérilisation et si
la cassette n’a pas été retirée de l’autoclave, le cycle Séchage à l’air seul peut être utilisé pour
obtenir un séchage supplémentaire. Si la cassette a été retirée de l’autoclave, elle ne peut PAS être
réinsérée pour le cycle de séchage à l’air seul. Si la cassette contient des instruments enveloppés et
si les enveloppes ne sont pas sèches quand la cassette est ouverte, les instruments doivent être
manipulés de façon aseptique pour une utilisation immédiate ou être stérilisés de nouveau.
Pour démarrer, appuyer sur le bouton de cycle de séchage à l’air seul, puis appuyer sur le bouton
de démarrage.
Lorsqu’il est utilisé seul, ce cycle dure une heure.
Page 18
Statim_2KS_5KS_E_oct09_FIGS_Q7:Statim_2KS_5KS_E_oct09
1/20/10
1:06 PM
Page 109
4. Instructions d’utilisation - Suite.
4.7 Exécution d’un cycle
Pour exécuter chaque cycle, procéder comme suit et observer l’écran à cristaux liquides.
1. Tourner l’interrupteur d’alimentation à l’arrière de l’appareil sur ON. L’écran à cristaux
liquides affiche le message suivant :
14:23
15/11/2006
CHOISIR UN CYCLE
2. Appuyer sur le bouton de cycle approprié sur
le clavier pour faire défiler les cycles disponibles.
L’affichage indiquera :
INSTR CREUX N EMB (S) 134
ou
°C / 3,5 min
INSTR CREUX N EMB (S)
134 °C / 18 min
INSTR SOL N EMB (S) 134
°C / 3,5 min
INSTR CREUX EMB (S) 134
°C / 3,5 min
INSTR CREUX EMB (S) 134
°C / 18 min
ou
CAOUTCH. / PLAST. (S)
121 °C / 15 min
CAOUTCH. / PLAST. (S)
121 °C / 30 min
Quand on relâche le bouton, l’affichage indique :
Cycle sélectionné
APPUYER SUR START
Le compteur de cycles de l’appareil est affiché au démarrage, après qu’on ait appuyé sur le bouton Start.
Cycle sélectionné
CYCLE NUMÉRO
000000
Le témoin ambre s’allume. Pour indiquer que le cycle est en cours, les messages suivants s’affiche pendant le cycle.
Cycle sélectionné
RECHAUFFEMENT
PREPARATION
110˚C
143 kPa
PRESSURISATION
125˚C
232 kPa
Pendant le déroulement du cycle,
Çon entendra divers bruits. Ce sont des
bruits de fonctionnement normaux de l’appareil.
Page 19
STERILISATION
136,8˚C 330 kPa 3:29
EXPULSION DE VAPEUR
108˚C
134 kPa
Statim_2KS_5KS_E_oct09_FIGS_Q7:Statim_2KS_5KS_E_oct09
1/20/10
1:06 PM
Page 110
4. Instructions d’utilisation - Suite.
Le bruit de bourdonnement que l’on entend durant l’étape de séchage à l’air est causé par le fonctionnement du compresseur. La phase de séchage à l’air du cycle peut être interrompue à tout
moment en appuyant sur le bouton STOP. L’affichage indiquera :
ATTENDRE S.V.P.
CYCLE COMPLET
Quand l’étape de séchage à l’air automatique de 60 minutes est terminé, l’affichage indique :
SORTIR LA CASSETTE
CYCLE COMPLET
Si un cycle de stérilisation a réussi, la tonalité de rappel se fait entendre et le témoin ambre clignote
jusqu’à ce qu’on appuie sur le bouton STOP ou que l’on sorte la cassette de l’appareil.
4.8 Interruption d’un cycle
Pour arrêter un cycle, appuyer sur le bouton STOP. Si l’on appuie sur le bouton STOP, si la cassette est sortie ou si l’appareil détecte un problème de fonctionnement, le cycle est interrompu et le
témoin ambre clignote. Quand un cycle a été interrompu, on doit appuyer sur le bouton STOP avant
de pouvoir commencer un autre cycle. L’écran affiche un des messages suivants :
DEFAUT DE CYCLE # #
NON STERILISE
ou
CASSETTE RETIRÉE
NON STERILISE
Si l’écran affiche le message DÉFAUT DE CYCLE ou NON STÉRILE, le contenu de la cassette
n’est pas stérile! Voir la section 7 Dépannage pour plus d’informations.
Si l’étape de séchage à l’air du cycle est interrompue, ne pas stocker les instruments enveloppés
qui étaient dans la cassette à moins qu’ils ne soient secs.
Page 20
Statim_2KS_5KS_E_oct09_FIGS_Q7:Statim_2KS_5KS_E_oct09
1/20/10
1:06 PM
Page 111
5. Entretien
5.1 Nettoyage de la cassette
Le fait de maintenir la cassette Statim propre constitue un bonne habitude clinique et améliore le
fonctionnement de l’appareil. SciCan recommande de nettoyer la surface intérieure au moins une
fois par semaine. Utiliser du savon à vaisselle ou un détergent doux ne contenant pas de chlore.
Frotter l’intérieur de la cassette avec un tampon à récurer conçu pour les surfaces revêtues de
Téflon™. Après le nettoyage, rincer soigneusement avec de l’eau pour éliminer toute trace de détergent. Il est très important de nettoyer l’intérieur de la cassette si l’on stérilise régulièrement des
instruments lubrifiés. En revêtant toute la surface intérieure avec l’agent dessiccatif Stat-dri, l’eau
forme une couche régulière sur la surface intérieure, sans former de gouttes. L’eau en contact avec
les surfaces chaudes de la cassette s’évapore également beaucoup plus efficacement. Les taches
d’eau sont réduites au minimum et les instruments sèchent beaucoup mieux. On devra appliquer du
Stat-dri tous les 10 cycles et après chaque nettoyage de la cassette.
5.2 Nettoyage du filtre du réservoir d’eau
Ce filtre du réservoir d’eau doit être nettoyé au moins une fois par semaine ou lorsque cela est
nécessaire. Il est possible de retirer et de nettoyer le filtre simplement, en le plaçant la face
supérieure sous un flux d’eau pour retirer les particules jusqu’à ce qu’il soit propre, puis en le
replaçant dans l’ouverture du réservoir. S’il est nécessaire de remplacer le filtre du réservoir d’eau,
commander la pièce 01-109300S.
5.3 Nettoyage du réservoir
Vérifier la présence de saleté ou de particules dans le réservoir. Pour nettoyer le réservoir, le vidanger puis le laver et le rincer avec de l’eau distillée obtenue à partir de vapeur SEULEMENT.
L’utilisation de produits chimiques ou d’agents de nettoyage n’est pas recommandée et pourrait
endommager l’appareil.
5.4 Nettoyage des surfaces extérieures
Utiliser un chiffon doux humidifié avec de l’eau et du savon pour nettoyer toutes les surfaces
extérieures. Ne pas utiliser de produits de nettoyage chimiques agressifs ni de désinfectants.
5.5 Changement des filtres à air Statim 2000S
Les filtres devraient être remplacés tous les six mois afin d’alimenter correctement l’appareil en air
propre durant le cycle de séchage à l’air.
Pour changer le filtre, respecter les étapes suivantes :
2000S
1. Tourner l’interrupteur d’alimentation à l’arrière de l’appareil
sur OFF.
4 .
2. Retirer et jeter l’ancien filtre à air en mousse ■
4
3. Mettre en place le filtre neuf ■
(Pièce SciCan n° 01-100207S).
2 à l’arrière du compresseur
4. Immobiliser la plaque de filtre ■
1 conservée lors de la procédure de démonavec la vis ■
tage.
Page 21
■1
■4
■2
Figure 10
Statim_2KS_5KS_E_oct09_FIGS_Q7:Statim_2KS_5KS_E_oct09
1/20/10
1:06 PM
Page 112
5. Entretien
5.6 Changement des filtres à air retenant les bactéries
Les filtres devraient être remplacés tous les six mois ou après 500 cycles afin d’alimenter correctement l’appareil en air propre durant le cycle de séchage à l’air.
Pour changer le filtre à air retenant les bactéries sur les appareils Statim 2000S et 5000S, suivre les
étapes ci-dessous :
1. Mettre le Statim hors tension.
1 du filtre retenant les bactéries ■
2
2. Débrancher le tube A ■
3
et retirer le filtre du support de filtre ■ . En retirant le filtre
du support, noter l’orientation de la flèche sur le filtre.
■2 ■3
3. Une fois le filtre libéré du support, débrancher avec précau4 du filtre.
tion le tube B ■
4. Avant de mettre en place le filtre de rechange retenant les
2 (numéro de commande SciCan >01bactéries ■
102119S), vérifier que la flèche sur le filtre correspond à la
direction de la flèche sur le support. Pousser le
4 .
raccord de filtre de gauche dans le tube B ■
5. Enfoncer doucement le filtre de rechange dans
3 . La flèche sur le filtre
le support de filtre ■
devrait être face à l’extérieur et être dirigée vers
la gauche.
1 sur le raccord de filtre
6. Rebrancher le tube A ■
de droite.
2000S
■1
■4
Figure 11
5000S
■2
■4
■1
■3
Figure 12
5.7 Remplacement du joint de cassette
Pour assurer un fonctionnement optimal de l’autoclave à cassette Statim, changer le joint de cassette tous les 500 cycles ou tous les six mois. On peut commander des joints de rechange auprès
de SciCan (numéro de commande 01-100028S pour le Statim 2000S et 01-106049S pour le Statim
5000S).
Pour changer le joint de cassette, procéder comme suit :
Placer le couvercle de la cassette et le joint neuf sur une surface de travail propre. Examiner la position de l’ancien joint dans le couvercle de la cassette et installer le joint neuf dans le même sens,
près du couvercle.
Page 22
Statim_2KS_5KS_E_oct09_FIGS_Q7:Statim_2KS_5KS_E_oct09
1/20/10
1:06 PM
Page 113
5. Entretien - Suite.
Retirer l’ancien joint et le jeter. Nettoyer les résidus dans la gorge du joint et rincer
la gorge avec de l’eau distillée.
Lubrifier le nouveau joint avec le lubrifiant liquide pour joint fourni.
Insérer le bord arrondi du joint sous la lèvre ronde du couvercle. Aligner les trous du
nouveau joint et les trous du couvercle.
NOTA : Dans chaque coin et au niveau des trous du couvercle, deux ergots carrés
devraient être visibles. Les ergots doivent affleurer avec la surface extérieure du
couvercle.
S’assurer que le joint est complètement inséré. Passer la main tout autour du joint
pour vérifier qu’il est bien en place.
NOTA : Durant un cycle, de la vapeur peut apparaître entre le couvercle et le
plateau. Si cela persiste, retirer la cassette et vérifier que le joint est bien installé.
Faire attention. Les pièces métalliques seront très chaudes et la cassette peut contenir de la vapeur chaude.
5.8 Maintien des niveaux des liquides
Figure 13
Utiliser uniquement de l’eau distillée obtenue à partir de vapeur et contenant moins de 5 ppm de
matières solides dissoutes (ayant une conductivité inférieure à 10 µS / cm) dans le Statim. Pour
remplir le réservoir, retirer le bouchon du dessus de l’appareil et remplir le réservoir. Nous recommandons d’utiliser un entonnoir pour éviter les déversements. À chaque remplissage du réservoir,
vider la bouteille à eau résiduaire et la remplir d’eau jusqu’à la ligne MIN. Vider souvent la bouteille
à eau résiduaire pour éviter des odeurs désagréables et la décoloration du contenu. (Il est possible
d’ajouter une solution faiblement désinfectante, préparée selon les instructions du fabricant, dans la
bouteille à eau résiduaire pour résoudre ce problème.)
5.9 Mesure de la qualité de l’eau
1. Mettre l’appareil sous tension en appuyant sur le bouton STOP pour accéder au menu
Configuration utilisateur.
2. En utilisant les boutons NON EMBALLÉ et EMBALLÉ, faire défiler jusqu’à Qualité de l’eau et
sélectionner cette option en appuyant sur le bouton CAOUTCHOUC ET PLASTIQUE.
>Qualité de l’eau CD=
XXuS
l / yyy / z,z ppm
CD=conductivité
yyy= valeur mécanique
Page 23
XX= valeur S. micro
z,z= valeur pièces par million
Statim_2KS_5KS_E_oct09_FIGS_Q7:Statim_2KS_5KS_E_oct09
1/20/10
1:06 PM
Page 114
5. Entretien - Suite.
5.10 Calendrier d’entretien préventif
Pour assurer un fonctionnement sans problème, l’opérateur et le concessionnaire doivent suivre un calendrier d’entretien préventif. NOTA : Consulter la législation nationale, régionale, provinciale ou de sécurité pour
tout essai périodique supplémentaire effectué par l’utilisateur et pouvant être nécessaire.
Les calendriers ci-dessous décrivent les actions nécessaires.
Chaque jour
Opérateur
Réservoir d’eau
Bouteille à eau
résiduaire
Chaque semaine
Cassette
Biologique et/ou
Filtre à airº
Tous les 6
mois
Filtre à eau
Joint pour cassette
Biologique et/ou
Filtre à air
• Remplacer l’eau au besoin.
Pour l’utilisation en ophtalmologie, vider à la fin de chaque journée de travail, laisser vide,
puis remplir à nouveau au début de la journée de travail suivante.
• Vider la bouteille à eau résiduaire chaque fois que l’on remplit le réservoir d’eau.
• Remplir la bouteille d’eau, jusqu’à la marque de la ligne MIN.
• Laver l’intérieur de la cassette avec du savon de vaisselle ou un détergent doux ne contenant pas
de chlore.
• Frotter l’intérieur avec un tampon à récurer conçu pour les surfaces revêtues de Téflon™.
• Après avoir retiré toutes les traces de détergent, traiter les surfaces intérieures de la cassette avec
l’agent déssicatif STAT-DRI™ pour améliorer le processus de séchage. Commander davantage de
STAT-DRI™ Plus auprès de SciCan, extraits 2OZPLUS, 8OZPLUST ou 32OZPLUS.
• Vérifier la présence de saleté et de moisissure dans le filtre. Les remplacer s’ils sont sales.
Appeler le réparateur s’il est humide.
• Vérifier le filtre du réservoir d’eau chaque semaine et le nettoyer si nécessaire.
Remplacer si nécessaire uniquement.
• Remplacer tous les 500 cycles ou tous les six mois (selon la première éventualité)
ou lorsque cela est nécessaire.
• Remplacer tous les 500 cycles ou tous les six mois (selon la première éventualité).
Technicien
Cassette
Une fois par an
Filtre biologique
• Vérifier si le plateau, le couvercle et le joint sont endommagés. Remplacer si nécessaire.
• Vérifier la présence de moisissure dans le filtre biologique.
Électrovalve
• Inspecter l’électrovalve et la nettoyer si elle est sale. Remplace le plongeur s’il est défectueux.
Clapet antiretour
• Retirer le tube d’évacuation de l’arrière de l’appareil au cours de la phase de séchage à
l’air. Vérifier si de l’air provient du raccord.
• Retirer le tube du compresseur d’air de l’entrée du clapet antiretour pendant l’exécution
d’un cycle. S’assurer qu’aucune vapeur ne fuit du clapet. Le remplacer en cas de fuites.
Pompe
Réservoir d’eau
Étalonnage
• Nettoyer les filtres et les remplacer s’ils sont sales.
• Vérifier la présence de saletés dans le réservoir. Nettoyer et rincer si nécessaire avec de
l’eau distillée obtenue à partir de vapeur.
• Étalonner l’appareil.
Page 24
Statim_2KS_5KS_E_oct09_FIGS_Q7:Statim_2KS_5KS_E_oct09
1/20/10
1:06 PM
Page 115
6. Le port de communication
6.1 Le port de communication RS232
Tous les appareils Statim ne disposant pas d’imprimante
interne seront dotés d’un port de communication RS232 permettant de se connecter à une imprimante externe ou à un
enregistreur de données SciCan. Pour imprimer, acheter une
imprimante recommandée (voir liste ci-dessous) auprès de
votre magasin d’informatique ou d’électronique local. Pour le
stockage des données, il est possible d’acheter un enregistreur de données USB SciCan pour enregistrer et conserver les informations de cycle sur un périphérique de stockage
de masse (MSD), comme un lecteur flash USB ou une carte
mémoire SD.
Modèle d’imprimante
Imprimante
OU
Enregistreur
de données
Fin de ligne
CR/LF
Port série
Caractère
Utilisateur de
l’imprimante°
bitrate
CR/LF
9600
248 [0xF8]
CR
9600
N/A
CR
9600
210 [0xd2]
CR/LF
9600
210 [0xd2]
CR/LF
9600
210 [0xd2]
Enregistreur de
données SciCan
Fin de ligne
CR/LF
Port série
Caractère
Pour périphérique de
stockage de masse*
Utilisateur de
l’imprimante°
bitrate
N/A
9600
32 [0xd2]
Epson
TM-U220D (C31C515603)
Citizen
IDP-3110-40 RF 120B
Star Micro
SP212FD42-120
Star Micro
SP216FD41-120
Star Micro
SP512MD42-R
* En raison de la diversité de programmes/visionneurs de logiciels pouvant être utilisés pour visualiser les fichiers de données stockés sur un périphérique de stockage de masse, comme une
carte mémoire USB, nous recommandons les réglages ci-dessus.
Pour que le Statim communique avec un périphérique spécifique, activer cette fonction dans le
menu Configuration utilisateur. Suivre les instructions de la section 6.2 Installation de l’enregistreur
de donneés SciCan ci-dessous pour activer la communication vers une imprimante externe ou l’enregistreur de données SciCan.
Page 25
Statim_2KS_5KS_E_oct09_FIGS_Q7:Statim_2KS_5KS_E_oct09
1/20/10
1:06 PM
Page 116
6. Le port de communication - Suite.
6.2 Installation de l’enregistreur de données SciCan
L’enregistreur de données USB SciCan peut enregistrer et conserver les informations de cycle sur
un périphérique de stockage de masse (MSD), comme un lecteur flash USB ou une carte mémoire
SD.
Ces instructions s’appliquent aux appareils disposant d’un port de communication (RS232) à 9
broches à l’arrière.
Suivre les étapes ci-dessous avant de connecter l’enregistreur de données.
Mode utilisateur
Heure / Date de configuration
Configuration de la langue
Configuration de l’ID de l’appareil
Qualité de l’eau
Dernière impression
RS232
Fin de ligne CR/LF
Port série bitrate
Utilisateur de l’imprimante ° char
Enregistrer et Quitter
Quitter
Menu Configuration utilisateur
Pour installer l’enregistreur de données
SciCan, accéder au menu Configuration utilisateur en mettant l’appareil sous tension
tout en appuyant sur le bouton STOP.
Suivre les instructions ci-dessous pour
réaliser les étapes d’installation.
Étape 1
Sélection de l’option USB Flash/MSD
RS232
USB/Flash MSD
1. Mettre l’appareil sous tension en appuyant sur le bouton STOP pour accéder
au menu Configuration utilisateur.
2. En utilisant les boutons NON EMBALLÉ et EMBALLÉ, faire défiler jusqu’à RS232 et le sélectionner en appuyant sur le bouton CAOUTCHOUC ET PLASTIQUE.
3. Dans le menu RS232, utiliser les boutons NON EMBALLÉ et EMBALLÉ pour faire défiler
jusqu’à l’option USB/FLASH MSD et appuyer sur le bouton CAOUTCHOUC ET PLASTIQUE
pour sélectionner et revenir au menu Configuration utilisateur.
Page 26
Statim_2KS_5KS_E_oct09_FIGS_Q7:Statim_2KS_5KS_E_oct09
1/20/10
1:06 PM
Page 117
6. Le port de communication - Suite.
Réglage du port série bitrate sur 9600
Port série bitrate
9600
1. Dans le menu Configuration utilisateur, utiliser les bouton NON EMBALLÉ et EMBALLÉ pour
faire défiler jusqu’au menu Port série bitrate et le sélectionner à l’aide du bouton
CAOUTCHOUC ET PLASTIQUE.
2. Dans le menu Port série bitrate, utiliser les boutons NON EMBALLÉ et EMBALLÉ pour faire
défiler jusqu’à 9 600 et appuyer sur le bouton CAOUTCHOUC ET PLASTIQUE pour sélectionner et revenir au menu Configuration utilisateur.
Configuration du caractère utilisateur de l’imprimante (exemple : 134 °C)
Utilisateur de l’imprimante ° char
32 [0x20]
1. Dans le menu Configuration utilisateur, utiliser les bouton NON EMBALLÉ et EMBALLÉ pour
faire défiler jusqu’au menu Utilisateur de l’imprimante ° char et le sélectionner à l’aide du bouton
CAOUTCHOUC ET PLASTIQUE.
2. Dans le menu Utilisateur de l’imprimante ° char, en utilisant le bouton NON EMBALLÉ pour
accroître la valeur affichée d’une unité et le bouton EMBALLÉ accroître cette valeur de dix
unités, saisir la valeur 32 [0x20], puis appuyer sur le bouton CAOUTCHOUC ET PLASTIQUE
pour accepter et revenir au menu Configuration utilisateur.
Enregistrer et Quitter
Enregistrer et Quitter
Il est nécessaire d’Enregistrer et de Quitter une fois les réglages ci-dessus réalisés. Sinon, les informations reviendront à leurs réglages antérieurs.
1. Dans le menu Configuration utilisateur, utiliser les boutons NON EMBALLÉ et EMBALLÉ pour
faire défiler jusqu’à Enregistrer et Quitter.
2. Le sélectionner en appuyant sur le bouton CAOUTCHOUC ET PLASTIQUE.
L’écran à cristaux liquide affichera
les données d’heure et de date,
ainsi qu’une séquence de messages :
HH:MM JJ/MM/AAAA
« MSD NON DETECTÉ »/« INSÉRER
MSD/FLASH »/« SÉLÉCTIONNER UN CYCLE »
Page 27
Statim_2KS_5KS_E_oct09_FIGS_Q7:Statim_2KS_5KS_E_oct09
1/20/10
1:06 PM
Page 118
6. Le port de communication - Suite.
Étape 2
Sélection de la date et de l’heure
Heure / Date
HH:MM JJ/MM/AAAA
Nota : Si l’heure et la date ont été configurées conformément à la section 3.6, il n’est pas nécessaire de les reconfigurer.
1. Mettre l’appareil sous tension en appuyant sur le bouton STOP pour accéder
au menu Configuration utilisateur.
2. En utilisant les boutons NON EMBALLÉ et EMBALLÉ, faire défiler jusqu’à Configuration
heure/date et appuyer sur CAOUTCHOUC ET PLASTIQUE pour la sélectionner.
3. Dans le menu Configuration heure/date, régler l’heure et la date en utilisant les boutons NON
EMBALLÉ et EMBALLÉ pour changer les valeurs affichées, puis le bouton CAOUTCHOUC ET
PLASTIQUE pour sélectionner. Appuyer sur le bouton STOP une fois la procédure terminée.
Étape 3
Configuration de l’ID de l’appareil
ID de l’appareil
001
Nota : Si l’ID de l’appareil été configuré conformément à la section 3.8, vous n’avez pas besoin de
la reconfigurer.
1. Mettre l’appareil sous tension en appuyant sur le bouton STOP pour accéder
au menu Configuration utilisateur.
2. En utilisant les boutons NON EMBALLÉ et EMBALLÉ, faire défiler jusqu’à Configuration ID d’appareil et appuyer sur CAOUTCHOUC ET PLASTIQUE pour la sélectionner.
3. Dans le menu Configuration ID d’appareil, utiliser les boutons NON EMBALLÉ et EMBALLÉ
pour changer les valeurs affichées et le bouton CAOUTCHOUC ET PLASTIQUE pour sélectionner et passer au chiffre suivant. Appuyer sur le bouton STOP une fois la procédure terminée.
Étape 4
Branchement de l’enregistreur de données SciCan
1.
2.
3.
4.
5.
S’assurer que l’appareil Statim et l’enregistreur de données SciCan sont tous deux éteints.
Connecter l’enregistreur de données SciCan à l’appareil Statim en utilisant le câble série.
Mettre l’enregistreur de données SciCan sous tension.
Mettre l’appareil Statim sous tension.
L’écran à cristaux liquides affichera la séquence
HH:MM JJ/MM/AAAA
de messages suivante :
« MSD NON DETECTÉ »/« INSÉRER
6. Insérer le lecteur flash USB ou la carte mémoire SD
MSD/FLASH »/« SÉLÉCTIONNER UN CYCLE »
7. Après quelques secondes, l’écran à cristaux liquide
affichera la séquence de messages suivante :
HH:MM JJ/MM/AAAA
USB/FLSAH DÉTECTÉ/RETIRER MSD
SÛREMENT/SÉLÉCTIONNER UN CYCLE
Page 28
Statim_2KS_5KS_E_oct09_FIGS_Q7:Statim_2KS_5KS_E_oct09
1/20/10
1:06 PM
Page 119
6. Le port de communication - Suite.
6.3 Installation du papier dans l’imprimante interne
Utiliser uniquement du papier homologué pour l’utilisation avec une imprimante interne en option sur
le Statim 5000S. L’utilisation d’un autre papier endommagera l’imprimante et annulera la garantie. Le
papier thermique peut être obtenu auprès de SciCan (n° de commande SciCan 01-101657S).
Ne pas utiliser l’imprimante sans papier. Si l’imprimante ne contient plus de papier thermique ou si l’on
ne souhaite pas l’utiliser, la mettre hors tension.
Ne jamais tirer le papier en arrière dans l’imprimante. Cela endommagera le mécanisme d’impression.
Pour installer le papier dans l’imprimante, procéder comme suit :
1. Mettre le Statim 5000 hors tension.
2. Ouvrir la porte de l’imprimante ■1 en poussant sur la demi-moitié supérieure de la porte.
3. Mettre l’impression sous tension.
3 et couper les coins en utilisant le gabarit de découpe du
4. Dérouler un peu de papier thermique ■
papier joint à chaque boîte.
5. Placer le bras de rouleau de papier ■4 en position de chargement. Placer le rouleau de papier
■3 sur le bras de façon à ce que la bande de papier se déroule depuis le dessus du rouleau,
puis l’insérer soigneusement dans la fente d’alimentation du papier ■5 jusqu’à ce qu’elle s’arrête.
Si le papier ne se déroule pas depuis le dessus, le côté sensible à la chaleur ne sera pas en contact
avec la tête d’impression et l’imprimante n’imprimera pas.
6. Avec une main, continuer de faire avancer doucement la bande de papier dans la fente d’alimentation du papier. Avec l’autre main, appuyer sur le bouton d’avance du papier jusqu’à ce que le
papier avance seul.
Maintenir le papier droit lorsqu’il entre dans l’imprimante, sinon il risque de bourrer. Ne pas forcer le
papier à entrer dans la fente. Si le papier n’entre pas dans la fente, découper de nouveau l’extrémité
du rouleau et recharger le papier.
Page 29
Statim_2KS_5KS_E_oct09_FIGS_Q7:Statim_2KS_5KS_E_oct09
1/20/10
1:06 PM
Page 120
6. Le port de communication - Suite.
7. Continuer d’appuyer sur le bouton d’avance du
papier ■6 jusqu’à ce que le papier sorte par la
fente de sortie du papier à l’avant de l’imprimante. Ensuite, mettre le rouleau de papier
■3 et le bras en position de fonctionnement et
fermer la porte de l’imprimante ■1 .
L’imprimante est maintenant prête à fonctionner.
Quand on voit une ligne rouge sur un côté du papier, il est temps de remplacer le rouleau.
En cas de bourrage du papier et si le papier ne
peut pas être retiré en appuyant sur le bouton d’avance du papier ■6 , ne pas tirer le papier en
arrière dans l’imprimante.
Ne jamais placer d’ustensile ou d’outil dans la
fente de sortie du papier. Pour des instructions
complètes sur la façon de supprimer les bourrages
du papier, se référer à la section 6.4. Élimination
des bourrages du papier de l’imprimante interne.
Pour remplacer le rouleau de papier ■3 , procéder
comme suit :
1. Avec des ciseaux, couper le papier entre le
rouleau et la fente d’alimentation
du papier ■5 .
2. Retirer le rouleau du bras et jeter la partie
inutilisée.
3. Appuyer sur le bouton d’alimentation du papier ■6 pour
faire sortir le papier restant dans l’imprimante de la
fente à l’avant de l’imprimante.
4. Mettre en place le nouveau rouleau de papier thermique en suivant les instructions décrites dans la
présente section.
Page 30
■5
■2
■4
■3
■1
■4
■6
Figure 15.1
■5
■2
■6
■3
Figure 15.2
Statim_2KS_5KS_E_oct09_FIGS_Q7:Statim_2KS_5KS_E_oct09
1/20/10
1:06 PM
Page 121
6. Le port de communication - Suite.
6.4 Élimination des bourrages du papier dans l’imprimante interne
En cas de bourrage du papier dans l’imprimante et si
l’on ne peut pas retirer le papier en appuyant sur le bou6 , il est nécessaire de
ton d’alimentation du papier ■
démonter l’imprimante. Ne pas tirer sur le papier vers
l’arrière dans l’imprimante et ne jamais mettre d’ustensiles ni d’outils dans la fente de sortie du papier.
■7
■8
En cas de bourrage du papier dans l’imprimante,
procéder comme suit pour supprimer le bourrage :
1. Mettre le Statim 5000S hors tension et débrancher
l’appareil.
■9
2. En utilisant des ciseaux, couper le papier entre le
5 .
rouleau et la fente d’alimentation du papier ■
14
■
3 du bras ■
4 et laisser
3. Retirer le rouleau de papier ■
le bras en position de chargement.
7
4. Avec un tournevis Phillips n°1, retirer les trois vis ■
8
du couvercle ■ de l’imprimante et retirer le couvercle.
5. Noter l’orientation de la carte de circuit imprimé
4 montés
exposée et du bras du rouleau de papier ■
1
sur la porte d’imprimante ■ .
15
■
13
■
11
■
10
■
■1
■4
10
■
12
■
Figure 16
6. Soulever doucement vers le haut la carte de circuit imprimé en l’éloignant de la porte de l’imprimante. Manipuler la carte avec précaution. La tête d’impression est intégrée à la carte. Ne pas
forcer sur les connexions du câble plat soudé à la carte. Ne pas retirer le connecteur du câble
souple de l’embase de connecteur sur la carte. Le mécanisme d’entraînement du papier sous la
carte de circuit imprimé est maintenant exposé.
7. Avec des brucelles ou des pinces à bec très effilé, retirer soigneusement le papier du mécanisme.
Une fois le papier retiré, remonter l’imprimante :
1. Enclencher avec précaution le bras de rouleau de papier, en position de chargement, sur les
1 .
clips de la porte d’imprimante ■
Page 31
Statim_2KS_5KS_E_oct09_FIGS_Q7:Statim_2KS_5KS_E_oct09
1/20/10
1:06 PM
Page 122
6. Le port de communication - Suite.
2. Remettre en place la carte de circuit imprimé sur la porte de l’imprimante. Noter l’alignement des
9 dans la carte de circuit et les bossages de montage ■
13 sur la porte de
trous de montage ■
l’imprimante. Le corps d’imprimante en plastique noir est placé entre les nervures de centrage
10 sur l’intérieur de la porte d’imprimante.
■
11 et ■
14 ne sont pas pincés entre la porte de l’imprimante et la
3. Vérifier que les câbles souples ■
carte de circuit de circuit.
4. Placer le couvercle d’imprimante sur la porte d’imprimante. Vérifier que les câbles souples ne
sont pas pincés entre le couvercle et la porte. Le bouton de mise sous tension et le bouton d’avance du papier doivent sortir par les ouvertures du couvercle et fonctionner librement.
5. Avec un tournevis Phillips #1, fixer le couvercle d’imprimante à la porte d’imprimante avec les
trois vis conservées durant la procédure de démontage. Ne pas trop serrer ces vis.
6. Brancher le Statim 2000S /5000S sur la prise murale. Rebrancher l’imprimante si elle a été
débranchée précédemment. Mettre l’interrupteur d’alimentation en position ON.
7. Mettre le bouton d’alimentation de l’imprimante en position ON. Charger le papier dans l’imprimante en suivant les procédures figurant dans la section 7.3, Installation du papier dans l’imprimante interne.
Page 32
Statim_2KS_5KS_E_oct09_FIGS_Q7:Statim_2KS_5KS_E_oct09
1/20/10
1:06 PM
Page 123
6. Le port de communication - Suite.
6.5 Vue d’ensemble du cycle d’impression
1.
2.
3.
4.
5.
6.
7.
8.
9.
10.
Modèle : logiciel STATIM 2000:
S2S2R410
Identifiant de l’unité : l’autoclave
a été configuré sous le numéro
323
Compteur de cycles : le nombre
de cycles exécutés par l’appareil
est de 9
Heure / Date :
13 h 38 14 Avril 2003
Nom du cycle : INSTR SOL N
EMB (N)
Nom du cycle - Suite paramètres : 134 ˚C / 3,5 min –
1P
Horloge du cycle :
démarrage à 0:00
Chauffage terminé : début de la
phase de conditionnement à
2:07 (voir le graphique du cycle phase «A» terminée, début de la
phase «B»)
Temp. max. /Pression et heure
de purge de conditionnement :
pour chaque purge (nombre de
lignes basé sur le choix du cycle
- ceci est un cycle à une purge activité durant la
phase «B»)
1.
2.
3.
4.
5.
6.
7.
8.
9.
10.
11.
12.
13.
14.
15.
16.
17.
18.
19.
20.
21.
22.
23.
Temp. min. /Pression et heure de
purge de conditionnement : pour
chaque purge (nombre de lignes
basé sur le choix du cycle - ceci
est un cycle à une purge - activité durant la phase «B»)
Page 33
Statim_2KS_5KS_E_oct09_FIGS_Q7:Statim_2KS_5KS_E_oct09
1/20/10
1:06 PM
Page 124
6. Le port de communication - Suite.
11.
Heure de début de la pressurisation : 3:21 (début de la phase «C»)
13.
Temp. /Pression et heure au début de la stérilisation (phase «D»)
12.
14.
15.
16.
17.
18.
19.
20.
21.
22.
23.
Heure de début de la stérilisation : 4:12 (début de la phase «C»)
Temp. min. / pression pendant la phase de stérilisation
(limites inférieures de la phase «D»)
135,1 ˚C 308 kPa
Temp. max. / pression pendant la phase de stérilisation
(limites supérieures de la phase «D»)
136,7 ˚C 323 kPa
Temp. /Pression et heure de fin de la phase de stérilisation (fin de la phase «D»)
Heure de début de la ventilation : 7:43 (début de la phase «E»)
La stérilisation s’est terminée avec succès
Heure de début du séchage à l’air : 08:07 (début de la phase «F»)
Le cycle a été interrompu par l’utilisateur
Cycle de séchage interrompu avant la fin; la charge n’est peut-être pas sèche
Page 34
Statim_2KS_5KS_E_oct09_FIGS_Q7:Statim_2KS_5KS_E_oct09
1/20/10
1:06 PM
Page 125
7. Dépannage
Problème
L’appareil ne se met pas sous tension.
Solution
Vérifier que l’appareil est branché dans une prise avec
mise à la terre et que le cordon d’alimentation est bien
fixé à l’arrière de l’appareil.
Essayer un autre circuit. Mettre l’imprimante hors tension
pendant 10 secondes et la remettre ensuite sous tension.
Vérifier l’état du disjoncteur ou du fusible
de la ligne.
Il y a de l’eau sous la machine.
Vérifier que l’eau n’a pas été renversée lors du remplissage
du réservoir. S’assurer que le bouchon dans le tube de
vidange est bien en place. Retirer la cassette et la remettre
en place.
Essayer un autre cycle.
Faire attention. Les pièces métalliques seront très chaudes
et la cassette contiendra de la vapeur chaude.
La cassette fuit. Si de l’eau goutte de la partie inférieure de
l’appareil pendant le fonctionnement, vérifier si le joint de la
cassette est bien en place ou s’il est endommagé et le remplacer si nécessaire.
Faire attention. Les pièces métalliques seront très chaudes
et la cassette contiendra de la vapeur chaude.
Essayer un autre cycle. Si la cassette fuit toujours essayer
d’effectuer un cycle en utilisant une autre cassette, si possible.
Si la fuite persiste, couper l’alimentation de l’appareil, retirer et décharger la cassette, débrancher l’appareil et appeler
le concessionnaire.
Les instruments ne sèchent pas.
On obtient le meilleur séchage quand le cycle est exécuté
jusqu’à la fin. Laisser l’appareil fonctionner jusqu’à la fin du
cycle. S’assurer que les instruments sont chargés correctement dans la cassette. Se reporter à la section 4.4,
Préparation et chargement des instruments.
Vérifier les filtres à air et les remplacer s’ils sont sales.
Nettoyer l’intérieur de la cassette et traiter avec l’agent dessiccatif Stat-Dri. Voir la section 5.1, Nettoyage de la cassette.
Vérifiez sur le tube d’évacuation (tube allant dans la bouteille
à eau résiduaire) n’est pas plié.
Page 35
Statim_2KS_5KS_E_oct09_FIGS_Q7:Statim_2KS_5KS_E_oct09
1/20/10
1:06 PM
Page 126
7. Dépannage - Suite.
En cas de pliures, redresser le tube. Si le tube ne peut pas
être redressé, le retirer du raccord à pousser fixé au
Statim. Appuyer sur le collier du raccord et, avec l’autre
main, tirer fermement sur le tube. Une fois le tube libéré du
raccord, couper la section endommagée avec un instrument bien affûté. Laisser une longueur suffisante de tube
pour atteindre l’appareil lorsqu’on refixe le tube sur le raccord d’évacuation. Si le tube est trop court pour en couper
un morceau, contacter le concessionnaire SciCan pour
obtenir un tube de rechange.
Vérifier que le compresseur fonctionne. Pour cela, retirer le
tube d’évacuation de la bouteille à eau résiduaire.
Démarrer le cycle de séchage à l’air seul et placer l’extrémité libre dans un verre d’eau. S’il ne se produit pas une
circulation forte et régulière de bulles d’air, le compresseur
ne fonctionne pas correctement. Contacter le concessionnaire SciCan.
Messages Cycle interrompu — NON
STÉRILE. Cycle interrompu — NON
STÉRILE et DÉFAUT DE CYCLE.
Attendre quelques minutes et essayer un autre cycle avant
de passer à la solution suivante. Retirer la cassette.
Faire attention. Les surfaces métalliques sont très chaudes
et la cassette peut contenir de la vapeur brûlante. Inspecter
la cassette pour s’assurer que les trous à l’arrière du joint
sont parfaitement alignés et que la lèvre souple du joint est
parfaitement libre. Vérifier si le tube d’évacuation est plié
ou obstrué. En cas de pliures, redresser le tube. Si le tube
ne peut pas être redressé, le retirer du raccord à pousser
fixé au Statim. Appuyer sur le collier du raccord et, avec
l’autre main, tirer fermement sur le tube. Une fois le tube
libéré du raccord, couper la section endommagée avec un
instrument bien affûté. Laisser une longueur suffisante de
tube pour atteindre l’appareil lorsqu’on refixe le tube sur le
raccord d’évacuation. Si le tube est trop court pour en
couper un morceau, contacter le concessionnaire SciCan
pour obtenir un tube de rechange.
Vérifier si le Statim n’a été exposé par inadvertance à des
interférences électriques. Se reporter à la section
Installation traitant des considérations environnementales.
(Section 3.1)
Essayer d’effectuer un autre cycle. Si le problème persiste,
noter le numéro du message de défaut et contacter le concessionnaire.
Page 36
Statim_2KS_5KS_E_oct09_FIGS_Q7:Statim_2KS_5KS_E_oct09
1/20/10
1:06 PM
Page 127
7. Dépannage - Suite.
Excès de vapeur sortant de l’avant de
la machine.
Retirer la cassette et la remettre en place. Essayer un
autre cycle. Retirer et vérifier si le joint de la cassette n’est
pas mal aligné ou endommagé. Remplacer le joint si
nécessaire. Faire attention car les parties métalliques sont
très chaudes et la cassette contient de la vapeur brûlante.
Si la fuite persiste, mettre l’appareil hors tension, retirer et
décharger la cassette et contacter le concessionnaire
SciCan.
Affichage du message
QUALITÉ DE L 146>EAU NON CONFORME.
La machine ne démarrera pas.
Utilisation d’eau qui n’est pas distillée à partir de vapeur ou
qui est mal distillée.
Affichage du message REMPLIR LE
RÉSERVOIR, La machine ne démarrera pas.
Le niveau d’eau dans le réservoir est bas. Remplir le
réservoir. Se reporter aux étapes décrites dans la
section 3.4, Remplissage du réservoir.
Vider le réservoir et le remplir d’eau distillée obtenue à partir de vapeur contenant moins de 5 ppm de matières
solides dissoutes (ayant une conductivité inférieure à 10 µS
/ cm). Si l’on dispose d’un appareil de mesure de la conductivité de l’eau, vérifier la qualité de l’eau avant de remplir le réservoir. Se reporter aux étapes décrites dans la
section 3.9, Expédition de l’appareil, pour vider le réservoir.
Affichage du message DÉFAUT IMPRIMANTE
sur l’écran à cristaux liquides, l’imprimante
n’imprime pas.
L’imprimante ne fonctionne pas.
L’imprimante semble fonctionner,
mais rien n’est imprimé sur le papier.
La date et l’heure sont incorrectes
Vérifier s’il y a un bourrage du papier. Dans ce cas, suivre
les procédures de retrait du papier décrites dans la section
6.4. Mettre l’imprimante hors tension pendant 10 secondes et la remettre ensuite sous tension. Si le bourrage du
papier persiste, suivre les procédures de démontage
décrites dans la section 6.4, Élimination des bourrages du
papier.
S’assurer que le câble d’imprimante est bien branché avec
le connecteur à l’arrière du Statim et au Statprinter.
S’assurer que l’imprimante est sous tension. Mettre l’imprimante hors tension pendant 10 secondes et la remettre
ensuite
sous tension.
Vérifier si le papier est correctement chargé (se reporter à la
section 6.3, Installation du papier dans l’imprimante interne).
Vérifier si le papier quitte le rouleau de papier (50) depuis le
dessus du rouleau. Cela signifie que la surface traitée du
papier thermique sera en contact avec la tête
d’impression thermique.
La date et l’heure n’ont pas été réglées. Voir section 3.6
Réglage de la date et de l’heure
Page 37
Statim_2KS_5KS_E_oct09_FIGS_Q7:Statim_2KS_5KS_E_oct09
1/20/10
1:06 PM
Page 128
7. Dépannage - Suite.
Message MSD NON CONNECTÉ <>
INSÉRER MSD/FLASH
Vérifier la connexion du câble série.
Vérifier la connexion d’alimentation.
S’assurer que la DÉL rouge inférieure est allumée.
Vérifier que le périphérique de stockage de masse est correctement inséré.
Répéter les instructions d’Installation de l’enregistreur de
données SciCan sur le Statim.
Message MSD/FLASH PLEIN
<> REMPLACER MSD
Le MSD est plein. Exporter les données.
Message Lignes de données
manquantes sur MSD/FLASH
Se reporter à l’écran STATIM pour confirmer que la stérilisation a réussi.
Réinitialiser l’enregistreur de données en débranchant son
alimentation, en déconnectant le MSD et en attendant 10
secondes. Ensuite, reconnecter l’adaptateur d’alimentation
et insérer le MSD dans l’enregistreur de données.
Si le problème persiste, contacter le centre d’entretien
SciCan.
Message : Le fichier ou répertoire du
MSD est corrompu ou illisible.
Se reporter à l’écran STATIM pour confirmer que la stérilisation a réussi.
Le MSD a peut avoir été débranché alors que des données
étaient en cours d’inscription. Le MSD doit être débranché
jusqu’à ce que « RETIRER MSD SÛREMENT
<>MSD/FLASH DÉTECTÉ » s’affiche.
Les fichiers ou répertoires corrompus risquent d’être perdus. Reformater le MSD sur votre ordinateur.
Page 38
Statim_2KS_5KS_E_oct09_FIGS_Q7:Statim_2KS_5KS_E_oct09
1/20/10
1:06 PM
Page 129
8 Liste des pièces de rechange
01-100204S
01-100724S
01-100735S
01-100780S
01-100782S
01-100812S
01-100834S
01-101649S
01-101657S
01-101658S
01-101709S
01-101755S
01-101757S
01-101766S
01-101768S
01-101769S
01-101779S
01-106030S
01-106071S
01-104093S
01-101783S
01-101970S
01-102119S
01-103139S
01-103475S
01-103557S
01-103865S
01-103945S
01-104343S
01-104472S
Tube d’évacuation
Bouteille du condenseur sans condenseur
Raccord de bouteille pour eaux usées
Butoir
Raccord à pousser (2000S)
Bouteille de condenseur
Couvercle de cassette (2000S)
Joint de cassette (5000S)
Papier thermique (Boîte de 10 rouleaux)
Poignées de cassette
Grille (5000S)
Raccord à pousser (5000S)
Couvercle de cassette avec boîte (5000S)
Cordon d’alimentation - R.-U.
Cordon d’alimentation - Suisse
Cordon d’alimentation - Italie
Filtre de compresseur (2000S)
01-104700S
01-104702S
01-104704S
Kit de joints toriques pour cassette adaptateur
Couvercle de cassette adaptateur (2000S)
Couvercle de cassette adaptateur (5000S)
01-100028S
Joint de cassette (2000S)
01-104786S
Porte instruments - 4 mm (5000S)
01-106438S
Couvercle de cassette, étendue (2000S)
01-109300S
Kit de filtre du réservoir d’eau
01-108340S
01-100008A
01-100271A
01-101613S
Statim PCD - pièces de rechange
ACCESSOIRES
Kit Cassette Final (2000S)
Kit Cassette de plateau avec grillage (2000S)
Cassette Complète (5000S)
01-101614S
Plateau complet (5000S) avec boîtier
Poignée de couvercle de cassette
allongée (5000S)
01-103935
Plaques STAT-DRI (5000S)
Bouchon et filtre de réservoir
01-104499
Grille à instruments de cassette
allongée (5000S)
Cassette adaptateur (2000S)
Cassette adaptateur (5000S)
Kit adaptateur pour pièces à main (2000S)
Kit adaptateur pour pièces à main (5000S)
Cordon d’alimentation - Europe
Poignée de couvercle de cassette (2000S)
Tube d’évacuation - 3 m de long
Câble de données (5000S)
Filtre biologique
Conductivimètre
Plateau (2000S)
Cordon d’alimentation Danemark (det.)
Lubrifiant pour joint
Kit pour instruments non enveloppés
pour grill - plateau (2000S)
Bouchon - Tube de vidange (5000S)
Poignées de couvercle de cassette
allongée (5000S)
01-104696S
01-104697S
Adaptateur pour pièces à main
Joint de cassette adaptateur (2000S)
01-104699S
Insert de joint
01-104698S
01-100207S
Joint de cassette adaptateur (5000S)
01-103923
01-104104
01-104701
01-104703
01-106101
01-106102
01-106653
01-210000
01-106325
2OZPLUS
8OZPLUST
32OZPLUS
99-108332
01-108341
Page 39
Bouteille supplémentaire pour condenseur
Cassette allongée (5000S)
Plateau grillagé (2000S)
Kit imprimante (5000S)
Contenant pour endoscopes complet (5000S)
STAT-dri 2 oz.
STAT-dri 8 oz.
STAT-dri 32 oz.
Émulateur chimique 134 °C
3,5 min
Kit d’assemblage final du
Statim PCD
Statim_2KS_5KS_E_oct09_FIGS_Q7:Statim_2KS_5KS_E_oct09
1/20/10
1:06 PM
Page 130
9. Garantie
Garantie limitée
Pendant une période d’un an, SciCan garantit que le Statim 2000S / 5000S, fabriqué par
SciCan à l’état neuf et non utilisé, ne tombera pas en panne en service normal à cause de
défauts de matières premières et de main-d’oeuvre qui ne soient pas dus à un abus, une mauvaise utilisation ou un accident apparents.
La garantie d’un an couvre les performances de tous les composants de l’appareil, à l’exception
des produits consommables, comme le joint de la cassette, le filtre du compresseur et le filtre
microbiologique, attendu que le produit est utilisé et entretenu conformément à la description
présentée dans le manuel de l’utilisateur.
Une garantie de deux ans s’appliquera spécifiquement à la pompe à eau, au générateur de vapeur
et à la carte de circuit imprimé (PCB), dans la mesure où le produit est utilisé et entretenu conformément à la description présentée dans le manuel de l’utilisateur.
En cas de panne due à de tels défauts durant cette période de temps, les mesures correctives
exclusives seront la réparation ou le remplacement, au choix de SciCan et gratuitement, des pièces
défectueuses (à l’exception du joint et des filtres), à condition que SciCan soit informée par écrit
dans un délai de trente (30) jours de la date de la panne et à condition que les pièces défectueuses
soient renvoyées à SciCan en port payé.
Cette garantie sera considérée comme validée si le produit est accompagné de l’original de la facture d’achat établie par le concessionnaire SciCan autorisé et que cette facture identifie l’article par
son numéro de série et indique clairement la date d’achat. Aucune autre validation n’est acceptable.
Après la période d’un an, toutes les garanties et autres obligations de SciCan en ce qui concerne la
qualité du produit seront décisivement réputées satisfaites, toute obligation sera par conséquent
éteinte et aucune action pour inobservation de garantie ou d’obligation ne pourra être intentée contre SciCan.
Toute garantie expresse non indiquée dans le présent document et toute garantie implicite ou toute
assertion relative aux performances et tout recours pour rupture de contrat qui, sauf pour cette disposition, pourrait survenir par implication, par effet d’une loi, par pratique commerciale courante ou
par rapports d’affaire, y compris toute garantie implicite de qualité marchande ou de conformité à
une utilisation particulière en ce qui concerne tous ou n’importe lequel des produits fabriqués par
SciCan est exclue et déclinée par SciCan. Pour en savoir plus sur les produits SciCan et leurs caractéristiques, visiter le site Web à l’adresse www.scican.com.
Page 40
Chambredynamique
Chambrevide
Chargepleine–nonenveloppé
Chargepleine–enveloppeunique
ChargeCreuxB
Sécheresse,chargepleine–nonenveloppé
Sécheresse,chargepleine–enveloppeunique
Airrésiduel
*
/
/
/
/
/
/
/
/
/
INST CREUX
INST CREUX
INST CREUX
INST CREUX
INST CREUX
Page 41
INST CREUX
INST CREUX
INST CREUX
INST CREUX
N
N
N
N
EMB
EMB
EMB
EMB
EMB
EMB
EMB
EMB
EMB
(S)
(S)
(S)
(S)
(S)
(S)
(S)
(S)
(S)
134
134
134
134
134
134
134
134
134
°C
°C
°C
°C
°C
°C
°C
°C
°C
/
/
/
/
/
/
/
/
/
3,5
3,5
3,5
3,5
3,5
3,5
3,5
3,5
3,5
min
min
min
min
min
min
min
min
min
/
/
/
/
/
/
N
N
N
N
N
N
EMB
EMB
EMB
EMB
EMB
EMB
(S)
(S)
(S)
(S)
(S)
(S)
134
134
134
134
134
134
°C
°C
°C
°C
°C
°C
/
/
/
/
/
/
3,5
3,5
3,5
3,5
3,5
3,5
min
min
min
min
min
min
INST CREUX / N EMB (S) 134 °C / 3,5 min
INST CREUX / N EMB (S) 134 °C / 3,5 min
INST CREUX
INST CREUX
INST CREUX
INST CREUX
INST CREUX
INST CREUX
CAOUTCH./PLAST.(S)
121˚C/15min
1. Un dispositif de vérification de traitement (PCD) a été
conçu exclusivement pour l’utilisation dans les autoclaves
Statim 2000S et Statim 000S.
2. Le dispositif de traitement (PCD) ne doit pas être utilisé
avec la cassette élargie du Statim 2000, Statim 5000 ou
Statim 5000S.
3. Spécifications du PCD fournies sur demande.
4. Test Charge creux A non réalisable - justifications fournies
sur demande.
CAOUTCH./PLAST.(S)
121˚C/15min
1:06 PM
N
N
N
N
N
N EMB (S) 134 °C / 3,5 min
N EMB (S) 134 °C / 3,5 min
N EMB (S) 134 °C / 3,5 min
N EMB (S) 134 °C / 3,5 min
N EMB (S) 134 °C / 3,5 min
N EMB (S) 134 °C / 3,5 min
N EMB (S) 134 °C / 3,5 min
N EMB (S) 134 °C / 3,5 min
N EMB (S) 134 °C / 3,5 min
N EMB (S) 134 °C / 3,5 min
N EMB (S) 134 °C / 3,5 min
N EMB (S) 134 °C / 3,5 min
N EMB (S) 134 °C / 3,5 min
N EMB (S) 134 °C / 3,5 min
EMB (S) 134 °C / 3,5 min
EMB (S) 134 °C / 3,5 min
EMB (S) 134 °C / 3,5 min
INSTRCREUXEMB(S)
134˚C/18min
1/20/10
INST CREUX / N EMB (S) 134 °C / 3,5 min
/
/
/
/
/
/
/
/
/
/
/
/
/
/
/
/
/
CYCLES
INSTRCREUXNEMB(S) INSTRCREUXNEMB(S) INSTRCREUXEMB(S)
134˚C/3.5min
134˚C/18min
134˚C/3.5min
INST CREUX
INST CREUX
INST CREUX
INST CREUX
INST CREUX
INST CREUX
INST CREUX
INST CREUX
INST CREUX
INST CREUX
INST CREUX
INST CREUX
INST CREUX
INST CREUX
INST CREUX
INST CREUX
INST CREUX
INSTRSOLNEMB(N)
134˚C/3.5min
Dental instruments
KaVo GENTLEforce 7000C
Kavo – Gentle Pow er Lux 25 LPA
W&H- Trend LS, WD - 56
W&H- Trend HS, TC- 95RM
KaVo Super- Torq ue LUX/640 B
KaVo- INTRAmatic LUX3, 20 LH
NSK- PANA Air
NSK- ATL118040
NSK – Ti- Max
STAR- 430 SWL
Sirona- T1 Classic, S 40 L
Sirona- T1 Control, TC3
Midw est- Tradition
Bein – Air - Bora L
W&H – WS- 75
W&H – WA- 99 LT
W&H – TA- 98 LC
B & L Ophthalmology instruments
Gimb le irrigating cannula 30g E4894
Lasik cannula
E4989
Gillis irrigating- aspirating cannula E4932
Nichamin hy drossection cannula 26g E4421 H
Irrigating- aspirating handpiece MVS 1063C
Rudolf Medizintechnik GmbH Endoscope accessories
Trocar sleeve, arthroscopy , 2 rotating stop cocks,
1.7 mm dia x 104 mm length #10- 0008- 00
Trocar sleeve, hy steroscopy diagnostic sheath, 1 fix ed
stop cock, 2.7 mm dia x 302 mm length #10- 0049- 00
Alcon ophthalmic handpiece
NeoSonix Phaco handpiece
Miltex medical instruments
Frazier needle
26- 778
Yeoman b iopsy forceps w ith rotating shaft 28- 304
Kerrison rongeur
18- 1994
Frazier- Ferguson tub e 19- 570
Yankauer suction tub e 2- 104SS
Menghini b iopsy needle 13- 150
Becton Dickinson
Needle, 30G1
Medical Workshop
Hockey stick Forceps, memb rane peeling mw - 1925
Charge maximale
Essais microbiologiques
Pourinstrumentsmédicaux
particuliersVOIRLISTE
CI-DESSOUSLesmisesàjour
serontsurlesitewww.scican.com
Essais supplémentaires
STATIM2000S/5000SPCD
(01-108341)
Test de type
Statim_2KS_5KS_E_oct09_FIGS_Q7:Statim_2KS_5KS_E_oct09
Page 131
10. Protocole d’essai
10.1 Test de type
*
Statim_2KS_5KS_E_oct09_FIGS_Q7:Statim_2KS_5KS_E_oct09
1/20/10
1:06 PM
Page 132
10. Protocole d’essai Suite.
Cycle
INSTR SOL N EMB (N)
134 ˚C / 3,5 min
INSTR CREUX N EMB (S)
134 °C / 3,5 min
INSTR CREUX N EMB (S)
134 °C / 18 min
INSTR CREUX EMB (S)
134 ˚C / 3,5 min
INSTR CREUX EMB (S)
134 ˚C / 18 min
CAOUTCH./PLAST. (S)
121 ˚C / 15 min
CAOUTCH./PLAST. (S)
121 ˚C / 30 min
STATIM 2000S
STATIM 5000S
Appareil froid avec charge max.+
phase de séchage
Appareil chaud sans charge +
phase de séchage
Appareil froid avec charge max.+
phase de séchage
Appareil chaud sans charge +
phase de séchage
6:45 + 60:00
8:45 + 60:00
9:15 + 60:00
13:15 + 60:00
11:45 + 60:00
17:30 + 60:00
26:15 + 60:00
32:00 + 60:00
8:05 + 60:00
22:35 + 60:00
15:35 + 60:00
10:40 + 60:00
30:05 + 60:00
25:10 + 60:00
20:15 + 60:00
18:40 + 60:00
35:15 + 60:00
33:40 + 60:00
Page 42
10:50 + 60:00
25:20 + 60:00
24:00 + 60:00
15:30 + 60:00
38:30 + 60:00
30:00 + 60:00
22:50 + 60:00
20:20 + 60:00
37:50 + 60:00
35:20 + 60:00
Statim_2KS_5KS_E_oct09_FIGS_Q7:Statim_2KS_5KS_E_oct09
1/20/10
1:06 PM
Page 133
11. Spécifications
11. Statim 2000S — Spécifications
Dimensions de l’appareil :
Dimensions (extérieures) :
Dimensions (intérieures) :
Longueur :
Largeur :
Hauteur :
48.5 cm
41,5 cm
15 cm
Longueur :
Largeur :
Hauteur :
28 cm
18 cm
4 cm
Longueur :
Largeur :
Hauteur :
Volume de la chambre de stérilisation :
Volume du réservoir :
Poids (sans eau) :
Dégagement nécessaire :
41 cm (avec les poignées)
19,5 cm
4 cm
1,8 L
4,0 L
21 kg
Dessus :
Côtés :
Arrière :
Avant :
5 cm
5 cm
5 cm
48 cm
Dégagement nécessaire pour l’ouverture des portes : 48 cm
Charge minimale dans le réservoir d’eau :
550 mL
Caractéristiques électriques :
220 - 240 V, 50/60 Hz, 6 A
Valeur de la soupape de sécurité :
Courant :
43,5 PSI
Alternatif
Classe de protection :
I
Protection:
Températures ambiantes d’utilisation :
Niveaux sonores :
Humidité :
couvert
5 ˚C - 40 ˚C
Moyen -56 dB, Maximum - 65 dB
80% max.
Altitude max. :
2 000 m
Page 43
Statim_2KS_5KS_E_oct09_FIGS_Q7:Statim_2KS_5KS_E_oct09
1/20/10
1:06 PM
Page 134
11. Spécifications - Suite.
11.2
Statim 5000S — Spécifications
Dimensions de l’appareil :
Dimensions (extérieures) :
Dimensions (intérieures) :
Longueur :
Largeur :
Hauteur :
55 cm
41 cm
19 cm
Longueur :
Largeur :
Hauteur :
38 cm
18 cm
8 cm
Longueur :
Largeur :
Hauteur :
Volume de la chambre de stérilisation :
Volume du réservoir :
Poids (sans eau) :
Dégagement nécessaire :
49,5 cm (avec les poignées)
19,5 cm
8 cm
5,1 L
4,0 L
33 kg
Dessus :
Côtés :
Arrière :
Avant :
5 cm
5 cm
5 cm
57 cm
Dégagement nécessaire pour l’ouverture des portes : 57 cm
Charge minimale dans le réservoir d’eau :
550 mL
Caractéristiques électriques :
220 - 240 V, 50/60 Hz, 6 A
Valeur de la soupape de sécurité :
Courant :
43,5 PSI
Alternatif
Classe de protection :
I
Protection:
Températures ambiantes d’utilisation :
Niveaux sonores :
Humidité :
couvert
5 ˚C - 40 ˚C
Moyen -57 dB, Maximum - 65 dB
80 % max.
Altitude max. :
2 000 m
Spécifications relatives à l’imprimante interne en option :
Type:
Imprimante thermique
Vitesse d’impression :
1 ligne par seconde
Impression:
20 caractères par ligne
Capacité du rouleau de papier : environ
Page 44
80 cycles de stérilisation par rouleau
Statim_2KS_5KS_E_oct09_FIGS_Q7:Statim_2KS_5KS_E_oct09
1/20/10
1:06 PM
Indice
Page 135
5. Manutenzione . . . . . . . . . . . . . . . . . . . . 20
1. Introduzione . . . . . . . . . . . . . . . . . . . . . . . 3
2. Informazioni importanti . . . . . . . . . . . . . 4
2.1 Esonero da responsabilità
2.2 Statim 2000S — Panoramica
2.3 Statim 5000S — Panoramica
3. Installazione . . . . . . . . . . . . . . . . . . . . . . . 7
3.1
3.2
3.3
3.4
3.5
3.6
3.7
3.8
3.9
Considerazioni ambientali
Collocazione del dispositivo
Collegamento della bottiglia di scarico
Riempimento del serbatoio
Priming della pompa Statim
Impostazione di data e ora
Selezione della lingua
Assegnazione di identificativo del dispositivo
Trasporto del dispositivo
4.1
4.2
4.3
4.4
4.5
4.6
4.7
4.8
Statim 2000S — Caricatore
Statim 5000S — Caricatore
Statim 5000S — Piastre STAT-DRI
Preparazione e caricamento degli strumenti
Tabella del peso dello strumento
Selezione di un ciclo
Esecuzione di un ciclo
Arresto di un ciclo
4. Istruzioni per l’uso . . . . . . . . . . . . . . . . 11
5.1 Pulizia del caricatore
5.2 Pulizia del filtro del serbatoio dell’acqua
5.3 Pulizia del serbatoio
5.4 Pulizia delle superfici esterne
5.5 Modifica del filtro dell’aria Statim 2000S
5.6 Cambio dei filtri dell’aria antibatterici
5.7 Sostituzione della tenuta del caricatore
5.8 Manutenzione dei livelli di fluidi
5.9 Lettura della qualità dell’acqua
5.10 Piano di manutenzione preventiva
6. La porta di comunicazioni . . . . . . . . . . .25
6.1
6.2
6.3
na
6.4
La porta di comunicazioni RS232
Installazione del registratore dati Statim
Installazione della carta nella stampante inter-
Eliminazione degli inceppamenti della
carta nella stampante interna
6.5 Panoramica dell’uscita della stampante interna
7. Risoluzione dei problemi
. . . . . . . . . . 35
8. Elenco delle parti di ricambio . . . . . . . 39
9. Garanzia . . . . . . . . . . . . . . . . . . . . . . . . 40
10. Protocollo di collaudo . . . . . . . . . . . . 41
10.1 Tipo di test
11. Specifiche tecniche . . . . . . . . . . . . . . 43
11.1 Statim 2000S — Specifiche tecniche
11.2 Statim 5000S — Specifiche tecniche
L' autoclave a caricatore STATIM e Statim nonché STAT-DRI e i loghi di DriTec sono marchi di
fabbrica di SciCan Ltd. Tutti gli altri marchi di fabbrica indicati nel presente manuale sono di
proprietà dei rispettivi possessori.
Per tutte le richieste di servizi e riparazioni:
Canada:
1-800-870-7777
Stati Uniti:
1-800-572-1211
Germania:
+49 (0) 821 56 74 56-0
Altri Paesi:
1 (416) 446-4500
Posta elettronica:
[email protected]
SciCan Inc.
701 Technology Drive
Canonsburg, PA 15317
USA
Telefono: +1 724 820 1600
Fax: +1 724 820 1479
Numero verde: 1-888-632-6031
Prodotto da:
SciCan
1440 Don Mills Road,
Toronto ON M3B 3P9
CANADA
Telefono:
Fax:
Numero verde:
RAPPRESENTANTE UE:
SciCan GmbH
Kurzes Geländ 10
D-86156 Augsburg
GERMANY
Telefono: +49 (0) 821 56 74 56-0
Fax: +49 (0) 821 56 74 56-99
SciCan Medtech
Alpenstrasse
166300 Zug
SWITZERLAND
Telefono: +41 (0) 41 727 7027
Fax: +41 (0) 41 727 702
1 (416) 445-1600
1 (416) 445-2727
1-800-667-7733
Pagina 2
Statim_2KS_5KS_E_oct09_FIGS_Q7:Statim_2KS_5KS_E_oct09
1/20/10
1:06 PM
Page 136
1. Introduzione
Statim 5000S
Statim 2000S
Congratulazioni per aver scelto le autoclave a caricatore STATIM ® . Siamo certi del fatto che, con
questo acquisto, ora disponga della migliore apparecchiatura nella propria categoria. Lo Statim è un
dispositivo compatto da banco che presenta una serie di cicli di sterilizzazione progettati per soddisfare
le esigenze e l’idoneità alla sterilizzazione a vapore. Le autoclave a caricatore “S” dello Statim sono
completamente conformi allo standard EN13060.
I dettagli relativi all’installazione, al funzionamento e alla manutenzione dello Statim sono tutti inclusi
all’interno del presente manuale per l’operatore. Invitiamo a leggere le istruzioni prima di mettere in funzione il dispositivo e a conservarle per eventuali future consultazioni al fine di assicurarsi un periodo di
servizio duraturo negli anni, sicuro e privo di problemi. Si consiglia di attenersi alle istruzioni per il funzionamento, la manutenzione e la sostituzione affinché il prodotto funzioni come previsto. I contenuti
del presente manuale sono soggetti ad eventuali cambiamenti senza preavviso al fine di adattarsi alle
modifiche e alle migliorie apportate allo Statim.
Lo Statim è idoneo alla sterilizzazione degli strumenti medici e odontoiatrici progettati per resistere alla
sterilizzazione a vapore. Lo Statim non è stato progettato per la sterilizzazione di liquidi, carichi di tessuti, rifiuti biomedici o materiali non compatibili con la sterilizzazione a vapore. Il trattamento di questi
carichi può portare ad una sterilizzazione incompleta e / o causare danni all’autoclave. Per maggiori
informazioni in merito all’idoneità degli strumenti alla sterilizzazione a vapore, si consiglia di consultare
le istruzioni di trattamento dei produttori.
Pagina 3
Statim_2KS_5KS_E_oct09_FIGS_Q7:Statim_2KS_5KS_E_oct09
1/20/10
1:06 PM
Page 137
2. Informazioni importanti
2.1 Esonero da responsabilità
Utilizzare solo acqua distillata a vapore nello Statim. Non è consigliabile impiegare acqua deionizzata,
demineralizzata o filtrata con metodi speciali. Non utilizzare mai acqua di rubinetto.
Si consiglia di non consentire ad eventuali persone, non facenti parte del personale autorizzato, di
provvedere alla fornitura di componenti e al servizio di riparazione o manutenzione dello Statim. La
SciCan non sarà ritenuta responsabile di eventuali danni accidentali, straordinari o indiretti causati da
operazioni di manutenzione e riparazione eseguite sullo Statim da parti terze o per l’impiego di attrezzature o componenti prodotti da parti terze, fra cui la perdita di profitti, eventuali perdite commerciali,
economiche o derivanti da lesioni alle persone.
Non rimuovere mai il coperchio dal dispositivo e non inserire oggetti nei fori o nelle aperture presenti
nel cabinet. La mancata osservanza di queste indicazioni potrebbe causare danni al dispositivo o
costituire un pericolo per l’operatore.
Tutte le sezioni del presente manuale sono comuni sia allo Statim 2000S sia allo Statim 5000S salvo
diverse indicazioni.
IMPORTANTE:
Seguire le indicazioni locali che governano la verifica della procedura di sterilizzazione.
Asciugatura
I modelli Statim 2000S e 5000S sono stati concepiti per fornire una soluzione di sterilizzazione
completa per strumenti con rivestimento e senza rivestimento e consentono di eseguire una rapida
sterilizzazione e un’asciugatura veloce grazie alla tecnologia di asciugatura SciCan Dri-Tec.
Il modello Statim 2000S utilizza per l’asciugatura degli strumenti il riscaldamento per convezione,
sfruttando il calore che resta nel sistema al termine della fase di sterilizzazione. Il calore viene catturato
e rilasciato nel caricatore per asciugare rapidamente il carico corretto della Statim nel caricatore.
Il modello Statim 5000S sfrutta il calore generato dalla fase di sterilizzazione che viene assorbito dalle
piastre di asciugatura. Il calore viene trasferito dalle piastre di asciugatura direttamente nel carico, al
fine di velocizzare l’asciugatura rapida del carico corretto della Statim nel caricatore.
Per istruzioni sulla disposizione corretta degli strumenti nel caricatore e sull’uso delle piastre
Stat-Dri (Statim 5000S) si rimanda al presente manuale dell’operatore. Seguendo con attenzione le
istruzioni qui riportate relative al carico corretto della camera del caricatore sarà possibile completare
rapidamente l’asciugatura del carico.
Pagina 4
Statim_2KS_5KS_E_oct09_FIGS_Q7:Statim_2KS_5KS_E_oct09
1/20/10
1:06 PM
Page 138
2. Informazioni importanti, segue
1
2
3
■
■
■
■4
■5
■6
■7
■8
■9
10
■
■11
2.2 Statim 2000S — Panoramica
indicatore di livello
tastierino
tappo del serbatoio
/ filtro dell’acqua
LCD
indicatore di
alimentazione
indicatore attivo
interruttore di
alimentazione
porta cavo
di alimentazione
piedini livellatori
porta tubo di scarico
compressore
I seguenti simboli
appaiono nei margini di
questo libro.
■3
■4
Solo acqua
distillata a
vapore
■1
13
■
■6 ■5
■9
■12 caricatore ■13 filtro biologico
■14 porta RS232
Cicli CON RIVESTIMENTO
LED di indicatore di alimentazione
11
■
Cicli
GOMMA /
PLASTICA
Asciugare solo
all’aria.
LED di indicatore
attivo
■7
14 ■
8
■
10
■
Una situazione che
potrebbe condurre ad
un guasto meccanico.
Un potenziale rischio
per l’operatore.
Cicli
SENZA RIVESTIMENTO
Pulsante
ARRESTO
Figura 1
12
■
I seguenti simboli appaiono sul dispositivo:
Pulsante
AVVIO
■2
Informazioni
importanti
Attenzione: Superficie rovente e/o
vapore a temperature elevate
Attenzione: Rischio di scossa elettrica. Scollegare l’alimentazione prima
di eseguire interventi di manutenzione
Attenzione: Fare riferimento al
manuale per dettagli
Ricevendo la scatola d’imballaggio Statim 2000S saranno presenti i componenti riportati di seguito. Nel caso non fossero presenti alcuni componenti, rivolgersi immediatamente al rivenditore per far fronte alla situazione.
Cassetto e coperchio caricatore
Cavo di alimentazione
Cestello per strumenti
senza rivestimento
/5000S
STATIM 2000S
e t t e
C a s s
™
c l a v e
A u t o
Manual
• Operator’s
buch
• Benutzerhand
l’utilisateur
• Manuel de
Operador
• Manual del
operatori
• Manuale per
Manuale per l’operatore
1.0.
95-108430 Rev
Operator’s Manual
STATIM 2000S/5000S All rights reserved.
SciCan.
Copyright 2003
www.scican.com
Bottiglia di scarico
Tubo di scarico
Accessorio coperchio bottiglia
Stat-Dri
Struttura di montaggio del
tubo
P.C.D. + 20 simulatori di
sterilizzazione SciCan
Pagina 5
Statim_2KS_5KS_E_oct09_FIGS_Q7:Statim_2KS_5KS_E_oct09
1/20/10
1:06 PM
Page 139
2. Informazioni importanti, segue
1
2
3
■
■
■
■4
■5
■6
■7
■8
■9
10
■
11
■
12
■
2.3 Statim 5000S — Panoramica
indicatore di livello
■3
tastierino
tappo del serbatoio /
filtro dell’acqua
LCD
indicatore di
alimentazione
indicatore attivo
interruttore di
alimentazione
porta cavo di
alimentazione
■6
piedini livellatori
■5
porta tubo di scarico
filtro biologico
stampante interna opzionale
(non presente su tutti i modelli)
I seguenti simboli
appaiono nei margini di
questo libro.
■4
■2
13
■
12
■
13
■
Pulsante
ARRESTO
Solo acqua
distillata a
vapore
■1
■9
caricatore
10
■
Cicli
SENZA RIVESTIMENTO
Una situazione che
potrebbe condurre ad
un guasto meccanico.
Cicli
GOMMA /
PLASTICA
Cicli
CON RIVESTIMENTO
Asciugare solo
all’aria.
LED di indicatore di alimentazione
Ricevendo la scatola d’imballaggio Statim 5000S saranno
presenti i componenti riportati di seguito. Nel caso non
fossero presenti alcuni componenti, rivolgersi immediatamente al rivenditore per far fronte alla situazione.
11
■
14
■
■8
■7
■14 porta RS232 (non presente su tutti i modelli)
Un potenziale rischio
per l’operatore.
I seguenti simboli appaiono sul dispositivo:
Pulsante
AVVIO
Figura 2
LED di indicatore
attivo
Informazioni
importanti
Attenzione: Superficie rovente
e/o vapore a temperature
elevate
Attenzione: Rischio di scossa
elettrica. Scollegare l’alimentazione prima di eseguire
interventi di manutenzione
Attenzione: Fare riferimento al
manuale per dettagli
Piastre per una migliore
asciugatura
Cassetto e coperchio
caricatore
Cavo di alimentazione
Cestello per strumenti
senza rivestimento
/5000S
STATIM 2000S
e t t e
C a s s
™
c l a v e
A u t o
Manual
• Operator’s
buch
• Benutzerhand
l’utilisateur
• Manuel de
Operador
• Manual del
operatori
• Manuale per
Manuale per l’operatore
1.0.
95-108430 Rev
Operator’s Manual
STATIM 2000S/5000S All rights reserved.
SciCan.
Copyright 2003
www.scican.com
Bottiglia di scarico
Tubo di scarico
Accessorio coperchio
bottiglia
Stat-Dri
Struttura di montaggio del
tubo
Pagina 6
P.C.D. + 20 simulatori di
sterilizzazione SciCan
Statim_2KS_5KS_E_oct09_FIGS_Q7:Statim_2KS_5KS_E_oct09
1/20/10
1:06 PM
Page 140
3. Installazione
3.1 Considerazioni ambientali
Esistono diversi fattori che potrebbero influenzare le prestazioni dello Statim. Si prega di esaminare
questi fattori e scegliere una posizione adeguata in cui installare questo dispositivo.
•
Temperatura e umidità
•
Distanze
•
Ventilazione
•
Superficie operativa
•
Ambiente elettromagnetico
•
Requisiti elettrici
Evitare d’installare lo Statim esponendolo alla luce diretta del sole o in prossimità di una fonte di calore
(come ad esempio prese d’aria o radiatori). Le temperature operative raccomandate oscillano tra i 15 e i
25 °C con un tasso d’umidità del 25-70%.
Si consiglia di mantenere le prese d’aria e le aperture presenti sullo Statim scoperte e libere da ostacoli. Lasciare un minimo di 50 mm tra la parte superiore, quelle laterali e il retro del dispositivo e le
eventuali pareti o divisori.
Si consiglia di azionare lo Statim in un ambiente pulito e privo di polvere.
Si consiglia di posizionare lo Statim su una superficie uniforme, piana e resistente all’acqua. Non
installare e azionare mai il dispositivo su superfici inclinate.
Lo Statim è stato collaudato soddisfacendo gli standard appropriati per le emissioni elettromagnetiche.
Se da una parte il dispositivo non emette alcun tipo di radiazione, dall’altra potrebbe essere interessato
da eventuali emissioni di altre attrezzature. Consigliamo di tenere il dispositivo lontano da potenziali
fonti d’interferenza.
Utilizzare alimentatori elettrici correttamente muniti di valvole e collegati a terra con la stessa tensione
nominale indicata sull’etichetta presente sul retro dello Statim. Evitare di utilizzare prese di corrente
multiple. Nel caso si utilizzi una piastra d’alimentazione con soppressore di transienti, collegare
solamente uno Statim.
3.2 Collocazione del dispositivo
Collocando il dispositivo sopra un banco, assicurarsi di quanto riportato di seguito:
•
•
1 nel pannello anteriore dovrebbe
La bolla dell’indicatore di livello ■
essere in una posizione d’equilibrio nel quadrante destro frontale
del riferimento. In questo modo ci si assicura che il dispositivo sia
in grado di scaricarsi correttamente. Regolando i tre piedini
regolabili è possibile spostare la bolla qualora fosse necessario.
Si consiglia di stabilizzare il dispositivo tenendo tutti i quattro
i piedini saldamente a contatto con la superficie del banco. In
questo modo si impedisce al dispositivo di muoversi.
Pagina 7
■1
Figura 3
Statim_2KS_5KS_E_oct09_FIGS_Q7:Statim_2KS_5KS_E_oct09
1/20/10
1:06 PM
Page 141
3. Installazione, segue
3.3 Collegamento della bottiglia di scarico
2 viene impiegata per la raccolta delle acque di scarico dopo la conversione di
La bottiglia di scarico ■
queste ultime in vapore, successivamente espulse dal caricatore. Per collegare la bottiglia di scarico
allo Statim, seguire i passaggi indicati (vedere la figura 4):
3 nel raccordo ■
4
1. Inserire il tubo di scarico ■
presente sul retro del dispositivo fissandolo
saldamente.
5000S
2. Tagliare il tubo alla lunghezza desiderata e far
5
scorrere il raccordo della bottiglia di scarico ■
nella corretta posizione.
3. Disporre l’estremità libera del tubo nel foro nel coperchio della bottiglia di scarico e stringere a mano il
raccordo. Non avvolgere il tubo di scarico.
4. Svitare il coperchio e il gruppo della serpentina di
6 dalla bottiglia di scarico. Il copraffreddamento ■
erchio e la serpentina dovrebbero
uscire insieme.
5. Riempire la bottiglia di scarico con acqua fino alla
linea MIN, rimettere a posto il coperchio e il gruppo
della serpentina di raffreddamento. Svuotare la
bottiglia di scarico spesso per evitare odori sgradevoli e lo scolorimento dei contenuti (è possibile
aggiungere un blando disinfettante preparato
secondo le istruzioni del produttore alla bottiglia
di scarico per porre rimedio a questa situazione). Come minimo, svuotare la bottiglia di
scarico ogni volta che si riempie il serbatoio.
6. Disporre la bottiglia di scarico vicino al dispositivo. Collocare la bottiglia sotto il dispositivo. Il
tubo può essere fatto passare per un foro (8
mm di diametro), praticato sulla superficie del
banco e fissato con i morsetti in nylon forniti.
3.4 Riempimento del serbatoio
■3
■4
6
■
■5
■2
2000S
■4
■3
■6
■2
Figura 4
Quando si procede al riempimento del serbatoio, assicurarsi di utilizzare solamente acqua distillata a
vapore con un tenore complessivo di sostanze solide in sospensione inferiore a 5 ppm (con una conduttività inferiore a 10 µS / cm). Le impurità e gli additivi presenti nelle altre fonti d’acqua genereranno un
errore nella lettura del display LCD. Se si dispone di un rilevatore della conduttività dell’acqua (disponibile presso la SciCan, numero ordinativo 01-103139S), controllare tutti i nuovi contenitori d’acqua prima
di riempire il serbatoio. Per riempire il serbatoio, seguire i passaggi indicati (vedere la figura 5):
Pagina 8
Statim_2KS_5KS_E_oct09_FIGS_Q7:Statim_2KS_5KS_E_oct09
1/20/10
1:06 PM
Page 142
3. Installazione, segue
2
1. Rimuovere il tappo del serbatoio ■
■2
2. Versare l’acqua distillata a vapore nel serbatoio fino a riempirlo quasi completamente (al
massimo 4 litri). Utilizzare un imbuto per
evitare il gocciolamento.
3. Rimettere a posto e fissare il tappo.
3.5 Priming della pompa Statim
Per eseguire il priming della pompa Statim,
seguire i passaggi indicati:
Figura 5
1. Spostare il dispositivo a lato della superficie
di lavoro. Si consiglia di regolare i piedini livellatori frontali a 12 mm circa dall’estremità.
3
2. Sollevare l’angolo sinistro anteriore del dispositivo e rimuovere il tubo di drenaggio ■
dal morsetto ubicato sulla parte inferiore del dispositivo.
3. Tirare il tubo di drenaggio verso l’esterno in modo che l’estremità disimpegnata possa essere disposta sopra un contenitore per acqua.
4. Riempire il serbatoio con acqua distillata a vapore.
4 dall’estremità del tubo di drenaggio per consentire all’acqua di defluire dal
5. Rimuovere il tappo ■
tubo nel contenitore per 30 secondi. Quando l’acqua scorre con un flusso continuo, rimettere il
tappo al proprio posto.
6. Sollevare l’angolo sinistro anteriore del dispositivo e inserire
nuovamente il tubo nella graffa presente sulla parte inferiore
del dispositivo. Sospingere la parte in eccesso della tubatura nello spazio disponibile.
Assicurarsi d’aver connesso correttamente il tubo di drenaggio.
3.6 Impostazione di data e ora
■4
■3
Figura 6
Per impostare l’ora e la data, seguire i passaggi indicati e controllare il cursore intermittente
sul display LCD:
14:23
11/15/2006
1. Disattivare lo Statim.
HH:MM
DD/MM/YYYY
2. Tenere premuto il pulsante CICLO SENZA
Display quando si impostano la data e l’ora
RIVESTIMENTO.
3. Mentre si preme il pulsante Ciclo SENZA RIVESTIMENTO, accendere lo Statim. Il display LCD
riporta:
4. Utilizzare i pulsanti di ciclo per selezionare e modificare il valore del campo selezionato. Per
aumentare il valore del ciclo, premere il pulsante Ciclo senza rivestimento. Tenere premuto il
pulsante per aumentarne il valore.
5. Per ridurne il valore, premere il pulsante Ciclo CON RIVESTIMENTO.
Pagina 9
Statim_2KS_5KS_E_oct09_FIGS_Q7:Statim_2KS_5KS_E_oct09
1/20/10
1:06 PM
Page 143
3. Installazione, segue
6. Per selezionare il campo successivo premere il pulsante Ciclo GOMMA E PLASTICA.
7. Per salvare le modifiche e tornare alla modalità operativa normale, premere il pulsante ARRESTO.
8. Per uscire senza operare eventuali modifiche, spegnere lo Statim.
3.7 Selezione della lingua
È possibile modificare i messaggi visualizzati sul display LCD in una serie di lingue diverse.
Per modificare le impostazioni correnti relative alla lingua, seguire i passaggi indicati:
1. Impostare l’interruttore dell’alimentazione posto sul retro del dispositivo su SPENTO.
2. Tenere premuto il pulsante Ciclo CON RIVESTIMENTO.
ITALIANO
3. Una volta rilasciato il pulsante Ciclo CON RIVESTIMENTO,
accendere l’alimentazione sul retro del dispositivo.
Display quando si scorrono le lingue
4. Premere il pulsante Ciclo SENZA RIVESTIMENTO per visualizzare l’impostazione successiva
relativa alla lingua.
5. Premere il pulsante Ciclo con RIVESTIMENTO per visualizzare l’impostazione precedente relativa
alla lingua.
6. Quando viene visualizzata la lingua desiderata, premere il pulsante ARRESTO per salvare
l’impostazione e tornare alla modalità operativa normale.
3.8 Assegnazione di identificativo del dispositivo
1. Disattivare lo Statim.
2. Tenere premuto il pulsante per il ciclo GOMMA / PLASTICA.
3. Mentre si preme il pulsante Ciclo GOMMA / PLASTICA,
accendere lo Statim.
STATIM 2000 S2S2R601 #323
Display quando si assegna un
numero al dispositivo
4. Con i pulsanti di ciclo selezionare fino ad un massimo di 3 cifre da utilizzare come identificativo
del dispositivo. Il pulsante SENZA RIVESTIMENTO aumenta il valore selezionato, mentre il
pulsante del ciclo CON RIVESTIMENTO lo diminuisce. Utilizzare il ciclo GOMMA / PLASTICA per
passare alla cifra successiva.
5. Per salvare le modifiche e tornare alla modalità operativa normale, premere il pulsante ARRESTO.
3.9 Trasporto del dispositivo
Prima di movimentare il dispositivo è necessario svuotare il serbatoio. A tal fine, seguire i passaggi indicati:
1. Disporre un contenitore per acqua sotto il dispositivo.
2. Con il tubo di drenaggio (consultare la sezione 3.5, Priming della pompa, figura 6) svuotare il
contenuto del serbatoio nel contenitore per acqua.
3. Rimuovere l’eventuale acqua rimanente dal serbatoio con uno straccio assorbente antisfilacciature.
4. Avvitare i tre piedini livellatori posti sotto il dispositivo.
5. Reimballare il dispositivo con i materiali d’imballaggio originali includendo tutti gli accessori forniti di
serie con il dispositivo.
6. Specificare un tipo di trasporto riscaldato e assicurato.
Pagina 10
Statim_2KS_5KS_E_oct09_FIGS_Q7:Statim_2KS_5KS_E_oct09
1/20/10
1:06 PM
Page 144
4. Istruzioni per l’uso
4.1 Statim 2000S — Uso del caricatore
Una volta rimosso il caricatore dopo un ciclo, prestare attenzione poiché le parti in metallo saranno
calde e il caricatore potrebbe contenere vapore ad elevate temperature.
•
Come aprire il caricatore:
1. Tenere la maniglia del caricatore con i pollici rivolti verso l’interno della sicura del caricatore.
2. Premere verso il basso, sulla sicura del caricatore.
3. Sollevare il coperchio del caricatore e disimpegnare
la cerniera.
sicura del caricatore
4. Appoggiare il coperchio sulla sua superficie esterna.
•
Come chiudere il caricatore:
1. Allineare la linguetta della cerniera presente sul coperchio del caricatore con la scanalatura della
cerniera presente sul retro del cassetto inferiore.
Figura 7
2. Cominciando a chiudere il coperchio, la linguetta e la scanalatura andranno a combaciare.
•
Inserire il caricatore nello Statim 2000S:
1. Posizionare l’estremità del caricatore nel dispositivo.
2. Spingere delicatamente verso l’interno fino ad udire un suono di “scatto”.
Non premere mai il caricatore nello Statim con forza rischiando di danneggiare i componenti interni.
•
Rimozione del caricatore:
1. Afferrare la maniglia con due mani ed estrarla dal dispositivo.
2. Estrarre completamente il caricatore dal dispositivo e posare su una superficie stabile.
•
Disimpegnare il caricatore
•
STAT-DRI
Quando non viene impiegato è consigliabile disimpegnare il caricatore. Per disimpegnare il caricatore,
afferrare la maniglia ed estrarre il caricatore fino a quando tra la parte frontale dello Statim 5000S e la
maniglia del caricatore non vi saranno dai 15 ai 20 mm.
Il trattamento delle superfici interne del caricatore con il composto siccativo Stat-Dri, fornito insieme al
dispositivo, migliorerà il processo d’asciugatura (le bottiglie sostitutive sono disponibili presso la
SciCan, numero ordinativo 2OZPLUS, 8OZPLUST, 32OZPLUS).
Pagina 11
Statim_2KS_5KS_E_oct09_FIGS_Q7:Statim_2KS_5KS_E_oct09
1/20/10
1:06 PM
Page 145
4. Istruzioni per l’uso, segue
4.2 Statim 5000S — Uso del caricatore
Una volta rimosso il caricatore dopo un ciclo, prestare attenzione poiché le parti in metallo saranno
calde e il caricatore potrebbe contenere vapore ad elevate temperature.
•
Come aprire il caricatore:
1 portan1. Premere la maniglia del supporto ■
dola in posizione d’apertura.
■1
2. Mettere le mani su entrambi i lati della
maniglia del caricatore.
3. Inserire gli indici nelle scanalature e mettere i
pollici sulle piastre per i pollici.
4. Premere verso il basso con i pollici e tirare
verso l’alto con gli indici fino ad aprire il
coperchio.
■1
5. Sollevare il coperchio del caricatore e disimpegnarlo dal cassetto. Appoggiare il coperchio
sulla sua superficie esterna.
•
Come chiudere il caricatore:
1. Allineare la linguetta della cerniera presente
sul coperchio con la scanalatura della
cerniera presente sul cassetto.
2. Cominciando a chiudere il coperchio,
la linguetta e la scanalatura andranno
a combaciare.
3. Disporre la maniglia del supporto nella
posizione di chiusura.
•
Inserire il caricatore nello Statim
5000S:
Figura 8
1. Afferrare la maniglia del caricatore con una mano e la maniglia del supporto dell’altra come
mostrato nella Figura 8.
2. Posizionare l’estremità del caricatore nel dispositivo e portare la maniglia del supporto nella
posizione di chiusura.
3. Spingere delicatamente verso l’interno fino ad udire un suono di scatto.
Non premere mai il caricatore nello Statim con forza rischiando di danneggiare i componenti interni.
Pagina 12
Statim_2KS_5KS_E_oct09_FIGS_Q7:Statim_2KS_5KS_E_oct09
1/20/10
1:06 PM
Page 146
4. Istruzioni per l’uso, segue
•
Rimozione del caricatore:
1. Afferrare la maniglia con una mano ed estrarre dal dispositivo.
2. Mentre il caricatore fuoriesce dal dispositivo, afferrare la maniglia con la mano libera e
tirarla verso l’alto.
3. Estrarre completamente il caricatore dal dispositivo e posare su una superficie stabile.
•
Disimpegnare il caricatore
Quando non viene impiegato è consigliabile disimpegnare il caricatore. Per disimpegnare il caricatore,
afferrare la maniglia ed estrarre il caricatore fino a quando tra la parte frontale dello
Statim 5000S e la maniglia del caricatore non vi saranno dai 15 ai 20 mm.
4.3 Statim 5000S — Piastre STAT-DRI
Il caricatore dello Statim 5000S utilizza piastre STAT -DRI per migliorare il processo d’asciugatura
per gli strumenti muniti di rivestimento. Le piastre regolabili sono state concepite per il cestello per
strumenti senza rivestimento e rendono superfluo il fatto di disporre del cestello per strumenti con
rivestimento separato. È possibile disporre fino ad un massimo di 10 piastre nel senso della lunghezza
del supporto. Ogni dispositivo è munito di serie di cinque piastre STAT-DRI. È possibile ordinare
ulteriori piastre presso la SciCan (numero articolo SciCan 01-103935).
Per installare e regolare una piastra STAT-DRI, seguire i passaggi indicati:
1. Disporre una piastra sulla posizione desiderata, leggermente
inclinata in avanti con le linguette rivolte verso il basso.
2. Inserire le linguette nelle maglie del cestello per strumenti
senza rivestimento.
3. Ogni linguetta ha una scanalatura allungata. Far scorrere la
piastra fino a quando il filo non raggiunge l’estremità di ogni
scanalatura.
4. Rilasciare la piastra nella posizione di riposo.
5. Preparare e caricare gli strumenti per la sterilizzazione.
4.4 Preparazione e caricamento degli strumenti
Prima di caricare qualsiasi strumento nello Statim, consultare le istruzioni del produttore.
•
Pulire gli strumenti
Pulire e sciacquare tutti gli strumenti prima di caricarli nel caricatore. I residui di agenti disinfettanti e i
depositi solidi possono impedire la sterilizzazione e danneggiare gli strumenti, il caricatore e lo Statim.
Gli strumenti lubrificati devono essere accuratamente strofinati e si consiglia di rimuovere le sostanze
lubrificanti in eccesso prima di effettuare il carico.
Pagina 13
Statim_2KS_5KS_E_oct09_FIGS_Q7:Statim_2KS_5KS_E_oct09
1/20/10
1:06 PM
Page 147
4. Istruzioni per l’uso, segue
•
Strumenti senza rivestimento
Disporre gli strumenti senza rivestimento sul cestello per strumenti nel cassetto in modo che non si
tocchino gli uni con gli altri. In questo modo si garantisce che il vapore raggiunga tutte le superfici
favorendone l’asciugatura.
Gli strumenti non devono essere accatasti o impilati nei caricatori dato che questa disposizione ostacola il processo di sterilizzazione.
•
Strumenti con rivestimento (singoli rivestimenti)
Collocare gli strumenti in sacche per autoclave a uno strato, in conformità alle istruzioni del produttore.
Orientare il cestello per strumenti nel caricatore per garantire che gli strumenti con rivestimento si
trovino circa 6 mm al di sopra della base del caricatore. Porre gli strumenti con rivestimento sul cestello
per strumenti disponendoli in modo da evitare eventuali sovrapposizioni. Assicurarsi che tutti i carichi
con rivestimento siano asciutti prima del trattamento e/o dello stoccaggio per conservarne la sterilità.
Si sconsiglia l’impiego di rivestimenti in tessuto nello Statim.
La SciCan consiglia l’impiego di sacche per autoclave in carta / carta e plastica / carta prodotte secondo lo standard EN 868. Disporre comodamente gli strumenti nelle sacche per consentire al vapore di
raggiungere le superfici degli strumenti.
La rastrelliera per strumenti con rivestimento del modello Statim 5000S può contenere un massimo di
12 sacche per autoclave. Accertarsi che il peso totale delle sacche per autoclave non superi 1,5 kg.
La rastrelliera per strumenti senza rivestimento contiene un massimo di 10 piastre Stat-Dri per un totale
di 10 sacche per autoclave.
•
Strumenti di gomma e plastica
I seguenti materiali possono essere sterilizzati nello Statim:
nylon, policarbonato (Lexan™), polipropilene, PTFE (Teflon™), acetale (Delrin™), polisolfone (Udel™),
polieterimide (Ultem™), gomma siliconica e poliestere.
Caricando strumenti di gomma e plastica nel cassetto, lasciare uno spazio tra gli strumenti e le pareti
del caricatore. In questo modo si garantisce che il vapore raggiunga tutte le superfici favorendone l’asciugatura.
I seguenti materiali non possono essere sterilizzati nello Statim:
polietilene, ABS, stirene, sostanze cellulosiche, PVC, acrilico (Plexiglas™), PPO (Noryl™), lattice, neoprene e materiali simili.
È possibile che l’impiego di questi materiali provochi danni agli strumenti o all’attrezzatura. Se non si è
certi dei materiali o della struttura dei materiali, non caricarli nello Statim fino a quando non siano stati
effettuati gli accertamenti del caso presso il produttore.
Pagina 14
Statim_2KS_5KS_E_oct09_FIGS_Q7:Statim_2KS_5KS_E_oct09
1/20/10
1:06 PM
Page 148
4. Istruzioni per l’uso, segue
•
Tutti gli strumenti
Lo Statim NON è stato progettato per la sterilizzazione di materiali tessili, liquidi o rifiuti biomedici. Gli
strumenti resteranno sterili dopo il completamento di un ciclo fino quando il caricatore non sarà disimpegnato dal dispositivo. Gli strumenti senza rivestimento, una volta esposti all’ambiente o alle condizioni esterne, non possono essere conservati in uno stato sterile. Se si desidera effettuare uno
stoccaggio sterile, disporre gli strumenti da sterilizzare in sacche da autoclave secondo le istruzioni del
produttore di strumenti. Successivamente consentire al ciclo con rivestimento di completare la fase di
asciugatura ad aria.
Pratica consigliata: consentire agli strumenti (con o senza rivestimento) di asciugarsi completamente
prima del loro impiego. Gli strumenti con rivestimento o sacche non devono toccarsi gli uni con gli altri
per favorirne l’asciugatura e consentire un’efficace sterilizzazione.
SciCan raccomanda all’utente finale di scegliere con cura il ciclo di sterilizzazione più idoneo in base
alle raccomandazioni delle autorità sanitarie per il controllo delle infezioni e le linee guida/raccomandazioni locali in materia.
•
Controllo di routine
È consigliabile aggiungere gli indicatori chimici di processo, idonei agli sterilizzatori a vapore, in ogni
involucro o carico che si sterilizzi. Inoltre si consiglia l’impiego su base settimanale di indicatori biologici, che consente di accertarsi del fatto che gli strumenti siano stati esposti alle condizioni necessarie
alla sterilizzazione.
4.5 Schema dei pesi degli strumenti
Strumento
Forbici
Scrostatore dentale
Pinze
Dispositivo dentario
Cestello per strumenti con rivestimento
Cestello per strumenti senza rivestimento
Cannula aspiratrice
Specchio per bocca di plastica
Supporto per impronta
Anello di posizionamento raggi x di plastica
Peso tipico degli strumenti
30 g / 0,96 oz
20 g / 0,64 oz
15 g / 0,48 oz
Da 40 a 60 g / da 1,29 a 1,92 oz
260 g / 8,35 oz
225 g / 7,23 oz
10 g / 0,32 oz
8 g / 0,25 oz
Da 15 a 45 g / da 0,48 a 1,45 oz
20 g / 0,64 oz
NOTA: I pesi indicati precedentemente sono solamente a scopo di riferimento. Per i pesi esatti degli
strumenti impiegati, si consiglia di consultare le specifiche del produttore.
Pagina 15
Statim_2KS_5KS_E_oct09_FIGS_Q7:Statim_2KS_5KS_E_oct09
1/20/10
1:06 PM
Page 149
4. Istruzioni per l’uso, segue
4.6 Selezione di un ciclo
Lo Statim 2000S e 5000S dispone di sette cicli di sterilizzazione, ognuno dei quali è stato progettato
con i parametri indicati. È possibile selezionare ogni ciclo premendo i pulsanti di ciclo SENZA RIVESTIMENTO, CON RIVESTIMENTO o GOMMA / PLASTICA.
Una descrizione dei tipi di strumenti, requisiti di sterilizzazione e un grafico che rappresenta le caratteristiche di ogni ciclo è fornita nelle pagine successive.
1. Cicli senza rivestimento
Lo Statim 2000S e 5000S presenta due cicli di sterilizzazione di tipo S a 134 °C e uno a 134 °C di tipo
N SENZA RIVESTIMENTO. Al termine della fase di sterilizzazione del ciclo ha inizio un’asciugatura ad
aria della durata di un’ora.
È possibile interrompere l’asciugatura ad aria
in qualsiasi momento premendo il pulsante
ARRESTO.
Per selezionare uno di questi cicli: Premere il
pulsante di ciclo SENZA RIVESTIMENTO per
scorrere i cicli disponibili.
A
COR. CAVI NON IMB (S) 134 °C / 3,5 min
COR. CAVI NON IMB (S) 134 °C / 18 min
SOLIDI NON IMB. (N) 134 °C / 3,5 min
Una volta selezionato il ciclo desiderato, premere il pulsante AVVIO.
La memoria del dispositivo ricorda l’ultimo
ciclo eseguito visualizzandolo poi per primo
quando il dispositivo viene attivato.
B
D
C 3.5
E F
min / 18 min
A 00˚C
1 / 101 kPa D Sterilizzazione
134˚C / 304 kPa B 3 canc. (condizionam.)
138˚C
picco a 133˚C / E
295
kPa / 341 kPa
tilazione
ventil.
5˚Ca/ 11
169 kPa Ven
C Pressurizzaz.
F Asciugatura ad aria
A
B C
D
E F
3.5
min
A 00˚C
1 / 101 kPa D Sterilizzazione
134˚C / 304 kPa B 1 canc. (condizionam.)
138˚C
picco a 133˚C / E
295
kPa / 341 kPa
tilazione
ventil.
5˚Ca/ 11
169 kPa Ven
C Pressurizzaz.
F Asciugatura ad aria
Pagina 16
Statim_2KS_5KS_E_oct09_FIGS_Q7:Statim_2KS_5KS_E_oct09
1/20/10
1:06 PM
Page 150
4. Istruzioni per l’uso, segue
2. Cicli vuoto con rivestimento
Lo Statim 2000S e 5000S presentano due cicli
di sterilizzazione di tipo S a 134 °C CON
RIVESTIMENTO.
Per selezionare uno di questi cicli S: premere
il pulsante di ciclo CON RIVESTIMENTO per
scorrere i cicli disponibili.
A
D
C 3.5
EF
min
/
B
18min
D Sterilizzazione
A ˚C
100
/ 101
a kP
134˚C / 304 kPa B anc.
6 con
d(cizi
onam.)
138˚C / 341 kPa
ccopia ˚C
133
/ 295
a kP E Ven
tilazione
ent
il.
v a ˚C
115
/ 169
a kP
C Pressur
izza
z.
F As
ciugaturaiaad ar
COR. CAVI IMBALL (S) 134 °C / 3,5 min
COR. CAVI IMBALL (S) 134 °C / 18 min
Una volta selezionato il ciclo desiderato, premere il pulsante AVVIO.
Il dispositivo ricorda l’ultimo ciclo eseguito visualizzandolo poi per primo quando il dispositivo
viene attivato.
Un PCD (dispositivo di convalida del processo) è disponibile per la validazione del ciclo da 3,5 min a
134 °C CAVO CON RIVESTIMENTO.
3. Ciclo gomma e materiali plastici
Lo Statim 2000S e 5000S presentano due cicli
di sterilizzazione di tipo S a 121 °C.
Per selezionare uno di questi cicli S: premere
il pulsante di ciclo GOMMA / PLASTICA per
scorrere i cicli disponibili.
A
A
B
GOMMA / PLASTICA (S) 121 °C / 15 min
C
GOMMA / PLASTICA (S) 121 °C / 30 min
Pagina 17
B
C
100˚C / 101 kPa
3 canc. (condizionam.)
picco a 120˚C / 199 kPa
ventil. a 110˚C / 143 kPa
Pressurizzaz.
D
15 min / 30 min
D
E
F
E
F
Sterilizzazione
121˚C / 205 kPa 124˚C / 225 kPa
Ventilazione
Asciugatura ad aria
Statim_2KS_5KS_E_oct09_FIGS_Q7:Statim_2KS_5KS_E_oct09
1/20/10
1:06 PM
Page 151
4. Istruzioni per l’uso, segue
Una volta selezionato il ciclo desiderato, premere il pulsante AVVIO.
Il dispositivo ricorda l’ultimo ciclo eseguito visualizzandolo poi per primo quando il dispositivo
viene attivato.
4. Ciclo di sola asciugatura ad aria
Questo non è un ciclo di sterilizzazione.
Il ciclo di sola asciugatura si avvia automaticamente dopo ciascun ciclo di sterilizzazione e
funziona per 60 minuti.
L’asciugatura ad aria può essere interrotta premendo il pulsante ARRESTO. Per assicurarsi che i materiali contenuti nel caricatore siano asciutti, è consigliabile lasciare il ciclo completi la propria esecuzione
di 60 minuti. L’asciuttezza è un fattore importante per gli strumenti senza rivestimento al fine di prevenire gli effetti della corrosione. Per gli strumenti con rivestimento, è necessario un involucro asciutto
per conservare la sterilità.
Se durante la fase di asciugatura ad aria del ciclo di sterilizzazione viene premuto il pulsante STOP e il
caricatore non è stato rimosso dall’autoclave, è possibile portare a termine il ciclo di sterilizzazione
usando il ciclo di sola asciugatura ad aria. Se il caricatore è stato rimosso dall’autoclave, NON potrà
essere reinserito per il ciclo di sola asciugatura ad aria. Se il caricatore contiene degli strumenti con
rivestimento e gli involucri non sono asciutti all’apertura del caricatore, gli strumenti devono essere
maneggiati in maniera asettica per un eventuale impiego immediato o essere nuovamente sterilizzati.
Per avviare il processo, premere il pulsante Ciclo di sola asciugatura ad aria e successivamente premere il pulsante AVVIO.
Quando viene avviato in maniera indipendente, il ciclo ha una durata di 1 ora.
Pagina 18
Statim_2KS_5KS_E_oct09_FIGS_Q7:Statim_2KS_5KS_E_oct09
1/20/10
1:06 PM
Page 152
4. Istruzioni per l’uso, segue
4.7 Esecuzione di un ciclo
Per eseguire ogni ciclo, seguire i passaggi indicati e controllare il display LCD.
1. Accendere l’interruttore di alimentazioneposto
14:23 11/15/2006
sul retro del dispositivo. Il display LCD riporta:
SELEZIONE DEL CICLO
2. Premere il pulsante di ciclo appropriato sul
tastierino per scorrere i cicli disponibili
Il display visualizza:
COR. CAVI NON IMB
134°C / 3.5 min
oppure
COR. CAVI NON IMB
134°C / 18 min
SOLIDI NON IMB.
134°C / 3.5 min
COR. CAVI IMBALL
134°C / 3.5 min
COR. CAVI IMBALL
134°C / 18 min
oppure
GOMMA/ PLASTICA.
121°C / 15 min
GOMMA/ PLASTICA.
121°C / 30 min
Mentre viene rilasciato il pulsante il display visualizza:
Il ciclo selezionato
PREMERE INIZIO
Il contatore del ciclo del dispositivo viene visualizzato all’avvio una volta rilasciato il pulsante AVVIO.
Il ciclo selezionato
CICLO NUMERO 000000
La spia gialla si attiva. Per indicare che il ciclo è in stato d’avanzamento, i seguenti messaggi vengono visualizzati mentre il ciclo è in esecuzione.
Il ciclo selezionato
RISCALDAMENTO
CONDIZIONARE
110 °C
143 kPa
Mentre viene eseguito il ciclo, si sentono
diversi suoni. Si tratta del normale
funzionamento del dispositivo.
PRESSURIZZARE
125 °C
232 kPa
Pagina 19
STERILIZZA
136,8 °C 330 kPa 3:29
VENTILAZIONE
108 °C
134 kPa
Statim_2KS_5KS_E_oct09_FIGS_Q7:Statim_2KS_5KS_E_oct09
1/20/10
1:06 PM
Page 153
4. Istruzioni per l’uso, segue
Il ronzio che si può sentire durante la fase di asciugatura ad aria è dato dal funzionamento del compressore. È possibile interrompere la fase di asciugatura ad aria di questo ciclo in qualsiasi momento
premendo il pulsante ARRESTO. Il display visualizza:
ATTENDERE
CICLO COMPLETO
Una volta conclusa la fase di asciugatura ad aria da 60 minuti, il display visualizza:
RIMUOVERE CASSETTA
CICLO COMPLETO
Se il ciclo di sterilizzazione è stato completato con successo, viene prodotto un suono di avviso e lampeggia la spia gialla fino a quando non viene premuto il pulsante ARRESTO o non viene estratto il caricatore dal dispositivo.
4.8 Arresto di un ciclo
Per arrestare un ciclo premere il pulsante ARRESTO. Se viene premuto il pulsante ARRESTO, viene
estratto il caricatore, o il dispositivo rileva un problema in fase operativa, il ciclo viene arrestato e la
spia d’attività gialla emette una luce intermittente. Una volta arrestato il ciclo, è necessario premere il
pulsante ARRESTO prima di poter avviare un qualsiasi altro ciclo. Il display visualizza uno dei seguenti
messaggi:
AVARIACICLO xxx
NON STERILE
o
CASSETTA RIMOSSA
NON STERILE
Se il display mostra il messaggio CYCLE FAULT o NOT STERILE (AVARIA CICLO o NON STERILE), i
materiali contenuti nel caricatore non sono sterili! Consultare la sezione 7 Risoluzione dei problemi per
maggiori informazioni.
Se viene interrotta la fase di asciugatura ad aria del ciclo, non riporre gli strumenti muniti di rivestimento che sono stati all’interno del caricatore a meno che non siano asciutti.
Pagina 20
Statim_2KS_5KS_E_oct09_FIGS_Q7:Statim_2KS_5KS_E_oct09
1/20/10
1:06 PM
Page 154
5. Manutenzione
5.1 Pulizia del caricatore
Mantenere il caricatore Statim pulito rappresenta una buona pratica clinica e facilita il funzionamento
del dispositivo. La SciCan consiglia di pulire le superfici interne almeno una volta alla settimana.
Utilizzare detersivo per piatti o un detergente delicato che non contenga cloro. Pulire strofinando le
parti interne del caricatore con un tamponcino specifico per l’impiego su superfici rivestite di Teflon™.
Una volta pulito, risciacquare accuratamente con acqua per rimuovere tutte le tracce del detergente. La
pulizia delle parti interne del caricatore è molto importante se si sterilizzano strumenti lubrificati regolarmente. La protezione di tutta la superficie interiore con il composto siccativo STAT-DRI spinge l’acqua a
formare un rivestimento uniforme sulle superfici interne senza la formazione di schiuma. L’acqua
venendo a contatto con le superfici calde del caricatore evapora anche in maniera più efficiente. La formazione di macchie viene ridotta al minimo mentre gli strumenti asciugano in maniera molto migliore. È
consigliabile applicare lo STAT-DRI ogni 10 cicli e dopo ogni pulizia del caricatore.
5.2 Pulizia del filtro del serbatoio dell’acqua
Questo filtro del serbatoio dell’acqua va pulito almeno una volta alla settimana o quando è richiesto. Il filtro può essere facilmente rimosso e pulito capovolgendo il filtro sotto acqua corrente per rimuovere le particelle di sporco lavandole fino a quando non sia pulito, quindi può essere ricollocato nell’apertura del serbatoio. Se è richiesto un filtro del serbatoio dell’acqua di ricambio, ordinare il numero articolo 01-109300S.
5.3 Pulizia del serbatoio
Verificare la presenza di eventuale sporco o particelle nel serbatoio. È possibile pulire il serbatoio
svuotandolo per poi pulirlo e risciacquarlo SOLO con acqua distillata a vapore. Si sconsiglia l’impiego
di prodotti chimici o agenti chimici che potrebbero causare danni al dispositivo.
5.4 Pulizia delle superfici esterne
Utilizzare un panno morbido inumidito con sapone e acqua per la pulizia di tutte le superfici esterne.
Non utilizzare prodotti chimici o disinfettanti per la pulizia aggressivi.
5.5 Modifica del filtro dell’aria Statim 2000S
Si consiglia di sostituire il filtro ogni sei mesi per mantenere un’adeguata erogazione d’aria pulita nel
corso del ciclo d’asciugatura ad aria.
Per la sostituzione del filtro, seguire i passaggi indicati:
2000S
1. Impostare l’interruttore dell’alimentazione posto sul retro del
dispositivo su SPENTO.
4.
2. Rimuovere o eliminare il vecchio filtro dell’aria multicellulare ■
4 (SciCan art. n. 01-100207S).
3. Installare il nuovo filtro ■
2 alla parte posteriore del com4. Fissare la piastra del filtro ■
1 conservata durante la procedura di
pressore con la vite ■
smontaggio.
Pagina 21
■1
■4
■2
Figura 10
Statim_2KS_5KS_E_oct09_FIGS_Q7:Statim_2KS_5KS_E_oct09
1/20/10
1:06 PM
Page 155
5. Manutenzione
5.6 Cambio dei filtri dell’aria antibatterici
Si consiglia di sostituire i filtri ogni sei mesi o dopo 500 cicli per mantenere un’adeguata erogazione
d’aria pulita nel corso del ciclo d’asciugatura ad aria.
Per la sostituzione del filtro dell’aria antibatterico sullo Statim 2000S e 5000S, seguire i
passaggi indicati:
1. Disattivare lo Statim.
1 dal filtro antibatterico ■
2 e rimuovere
2. Scollegare il tubo A ■
3
il filtro dalla staffa del filtro ■ . Rimuovendo il filtro dalla staffa,
fare attenzione all’orientamento della freccia presente
sul filtro.
■2
5. Spingere delicatamente il filtro sostitutivo all’inter3 . La freccia del filtro
no della staffa del filtro ■
dovrebbe essere trovarsi in corrispondenza ed
essere rivolta a sinistra.
1 al raccordo del filtro
6. Ricollegare il tubo A ■
a destra.
2000S
■1
3. Quando il filtro è disconnesso dalla staffa, disconnettere il
4 con cura.
tubo B dal filtro ■
4. Prima di installare il filtro antibatterico sostitutivo
■2 (SciCan art. n. 01-102119S) verificare che la freccia
presente sul filtro corrisponda alla direzione della
freccia presente sulla staffa. Spingere il raccordo
4 .
del filtro a sinistra nel tubo B ■
■3
■4
Figura 11
5000S
■2
■4
■1
■3
Figura 12
5.7 Sostituzione della tenuta del caricatore
Per garantire le prestazioni ottimali dell’autoclave del caricatore Statim, sostituire la tenuta del caricatore ogni 500 cicli o ogni sei mesi, a seconda di quale di queste due scadenze si verifichi per prima. Le
tenute sostitutive sono disponibili presso la SciCan (numero ordinativo 01-100028S per Statim 2000S e
01-101649S per Statim 5000S).
Per la sostituzione della tenuta del filtro, seguire i passaggi indicati:
posizionare il coperchio del caricatore e la nuova tenuta su una superficie di lavoro pulita. Esaminare la
posizione della vecchia tenuta nel coperchio del caricatore e disporre la nuova tenuta con lo stesso orientamento in corrispondenza del coperchio.
Pagina 22
Statim_2KS_5KS_E_oct09_FIGS_Q7:Statim_2KS_5KS_E_oct09
1/20/10
1:06 PM
Page 156
5. Manutenzione, segue
Rimuovere la vecchia tenuta ed eliminarla. Pulire per eliminare gli eventuali
residui presenti nel canale della tenuta e pulire il canale con acqua distillata.
Lubrificare la nuova tenuta col lubrificante liquido per tenute fornito.
Inserire l’estremità arrotondata della tenuta sotto il bordo arrotondato
del coperchio. Allineare i fori presenti nella nuova tenuta con i fori presenti
nel coperchio.
NOTA: In ogni angolo e sui fori nel coperchio dovrebbero essere visibili due sporgenze quadrate. Le sporgenze dovrebbero essere a livello con la superficie esterna del
coperchio.
Assicurasi che la tenuta sia completamente inserita. Controllando la superficie esterna assicurarsi che la tenuta sia disposta in maniera corretta.
NOTA: Nel corso di un ciclo, si può formare vapore tra il coperchio e il
cassetto. Se questa condizione continua a verificarsi, estrarre il caricatore
e verificare che la tenuta sia installata correttamente.
Figura 13
Agire con cautela. Le parti metalliche saranno calde e il caricatore potrebbe contenere vapore a temperature elevate.
5.8 Manutenzione dei livelli di fluidi
Utilizzare solamente acqua distillata a vapore con un tenore complessivo di sostanze solide in sospensione inferiore a 5 ppm (con una conduttività inferiore a 10 µS / cm) nello Statim. Per riempire il serbatoio, rimuovere il tappo dalla parte superiore del dispositivo e riempire il serbatoio. Consigliamo di utilizzare un imbuto per ridurre al minimo le eventuali perdite. Ogni volta che si riempie il serbatoio,
svuotare la bottiglia di scarico e riempirla con acqua fino raggiungere la linea MIN. Svuotare la bottiglia
di scarico spesso per evitare odori sgradevoli e lo scolorimento dei contenuti (è possibile aggiungere
un blando disinfettante privo di cloro preparato secondo le istruzioni del produttore alla bottiglia di scarico per porre rimedio a questa situazione).
5.9 Lettura della qualità dell’acqua
1. Accendere il dispositivo premendo nel contempo il pulsante ARRESTO per accedere al menu User
Setup (Impostazione dell’utente).
2. Utilizzando i pulsanti SENZA RIVESTIMENTO e CON RIVESTIMENTO, scorrere fino alla qualità
dell’acqua e selezionarla premendo il pulsante GOMMA E PLASTICA.
>Qualità dell’acqua
CD=XXuS
l / yyy / z.z ppm
CD = conduttività
yyy = valore ingegneristico
Pagina 23
XX = valore micro S.
z.z = valore di parti per milione
Statim_2KS_5KS_E_oct09_FIGS_Q7:Statim_2KS_5KS_E_oct09
1/20/10
1:06 PM
Page 157
5. Manutenzione, segue
5.10 Piano di manutenzione preventiva
Per garantire prestazioni prive di eventuali problemi, sia l’operatore sia il rivenditore sono tenuti a seguire il piano di
manutenzione preventiva. NOTA: Si prega di fare riferimento al corpo giuridico-normativo della provincia, regione o stato
d’appartenenza in materia di sicurezza per eventuali ed ulteriori operazioni di collaudo che, riproponendosi, potrebbero
risultare necessarie.
I piani riportati di seguito offrono una descrizione delle misure necessarie.
Quotidiana
Operatore
Serbatoio dell’acqua
Bottiglia di scarico
Settimanale
Caricatore
Filtro biologico e/o
dell’aria
Ogni 6
mesi
Filtro per acqua
Tenuta del caricatore
Filtro biologico e/o
dell’aria
Caricatore
Una volta all’anno
Filtro biologico
Valvola a solenoide
Pompa
Controllare la valvola
Serbatoio dell’acqua
Calibrazione
• Se necessario, procedere alla sostituzione dell’acqua.
• Per utilizzo oftalmico, drenare alla fine di ogni giornata lavorativa, lasciare vuoto e riempire nuovamente all’inizio della successiva giornata lavorativa.
• Svuotare la bottiglia di scarico ogni volta che si riempie il serbatoio.
• Riempire la bottiglia con acqua fino al contrassegno della riga MIN.
• Lavare la parte interna del caricatore con un detersivo per piatti o un detergente delicato che non
contenga cloro.
• Pulire strofinando le parti interne con un tamponcino specifico per essere impiegato su superfici
rivestite di Teflon™.
• Dopo aver rimosso tutte le tracce del detersivo, trattare le superfici interne del caricatore con il composto siccativo STAT-DRI™ Plus per migliorare il processo d’asciugatura. Ordinare altro STAT-DRI™
Plus dalla SciCan citando 2OZPLUS, 8OZPLUST o 32OZPLUS.
• Controllare il filtro per verificare la presenza di eventuale sporco e umidità. Sostituire se
sporco. Rivolgersi all’assistenza se umido.
• Controllare il filtro del serbatoio dell’acqua ogni settimana e pulirlo se necessario. Sostituirlo
solo se necessario.
• Sostituire ogni 500 cicli o sei mesi (a seconda di quale di queste condizioni si verifichi per prima) o
quando sia necessario.
• Sostituire ogni 500 cicli o sei mesi (a seconda di quale di queste condizioni si verifichi per prima).
Tecnico
• Verificare la presenza di eventuali danni nel cassetto, nel coperchio e nella tenuta. Sostituirli se
necessario.
• Ispezionare il filtro biologico per verificare l’eventuale presenza di umidità.
• Ispezionare la valvola e pulirla se sporca. Sostituire lo stantuffo tuffante se difettoso.
• Pulire i filtri, sostituirli se sporchi.
• Rimuovere il tubo di scarico dal retro del dispositivo durante la fase d’asciugatura dell’aria.
Controllare l’aria proveniente dall’accessorio.
• Rimuovere il tubo del compressore dell’aria dall’ingresso della valvola di ritenuta mentre si esegue
un ciclo. Assicurarsi che non vi siano perdite di vapore dalla valvola. Sostituire se sono presenti
eventuali perdite.
• Verificare la presenza di eventuale sporco nel serbatoio. Pulire e risciacquare con acqua distillata a
vapore se necessario.
• Calibrare il dispositivo.
Pagina 24
Statim_2KS_5KS_E_oct09_FIGS_Q7:Statim_2KS_5KS_E_oct09
1/20/10
1:06 PM
Page 158
6. La porta di comunicazioni
6.1 La porta di comunicazioni RS232
Tutti i dispositivi Statim che non hanno una stampante
interna hanno una porta di comunicazioni RS232 che consente il collegamento ad una stampante esterna o ad un
registratore dati SciCan. Per la stampa è necessario
acquistare una stampante consigliata (consultare l’elenco
nel seguito) presso un rivenditore locale di computer o di
elettronica. Per la memorizzazione dei dati è possibile
acquistare il registratore dati USB SciCan per registrare e
memorizzare informazioni relative al ciclo su una periferica
di memoria di massa (mass storage device, MSD) quale
un’unità flash USB o una scheda di memoria SD.
Modello della stampante
Epson
TM-U220D (C31C515603)
Citizen
IDP-3110-40 RF 120B
Star Micro
SP212FD42-120
Star Micro
SP216FD41-120
Star Micro
SP512MD42-R
Registratore dati SciCan
Per periferica di memoria di massa*
Fine della riga
CR/LF
Stampante
OPPURE
Registrat
ore dati
Velocità in bit
Carattere dell’utente°
della porta seriale
della stampante
CR/LF
9600
248 [0xF8]
CR
9600
N/A
CR
9600
210 [0xd2]
CR/LF
9600
210 [0xd2]
CR/LF
9600
210 [0xd2]
Fine della riga
CR/LF
N/V
Velocità in bit
Carattere dell’utente°
della porta seriale
della stampante
9600
32 [0xd2]
Affinché lo Statim possa comunicare con una periferica specifica, è necessario abilitare questa funzione attraverso il menu User Setup. Seguire le istruzioni nella sezione 6.2 Installazione del registratore
dati SciCan nel seguito per abilitare le comunicazioni ad una stampante esterna o al registratore dati
SciCan.
Pagina 25
Statim_2KS_5KS_E_oct09_FIGS_Q7:Statim_2KS_5KS_E_oct09
1/20/10
1:06 PM
Page 159
6. La porta di comunicazioni, segue
6.2 Installazione del registratore dati SciCan
Il registratore dati USB SciCan può registrare e memorizzare informazioni relative al ciclo su una periferica di memoria di massa (mass storage device, MSD) quale un’unità flash USB o una scheda di
memoria SD.
Queste istruzioni sono per dispositivi con una porta di comunicazione a 9 pin (RS232) ubicata sul retro
dell’unità.
Seguire questa procedura prima di collegare il registratore dati.
User Mode
Ora/ IMP data
Messa a punto di lingua
Impostazione dell’ID del dispositivo
Qualità dell’acqua
Ultimo tabulato
RS232
Fine della riga CR/LF
Velocità in bit della porta seriale
Carattere dell’utente° della stampante
Risparmi e rimuova
Rimuova
Dell’utente del menu
Per installare il registratore dati SciCan,
accedere al menu user setup alimentando
l’unità e premendo nel contempo il pulsante
ARRESTO. Seguire queste istruzioni per
completare la procedura di installazione.
Fase 1
Selezione dell’opzione USB/Flash MSD
RS232
USB/Flash MSD
1. Accendere il dispositivo premendo nel contempo il pulsante ARRESTO per accedere al
menu User Setup (Impostazione dell’utente).
2. Utilizzando i pulsanti SENZA RIVESTIMENTO e CON RIVESTIMENTO, scorrere fino a RS232 e
selezionarla premendo il pulsante GOMMA E PLASTICA.
3. Dal menu RS232, utilizzare i pulsanti SENZA RIVESTIMENTO e CON RIVESTIMENTO per scorrere fino all’opzione USB/FLASH MSD e premere il pulsante GOMMA E PLASTICA per
selezionarla e ritornare al menu User Setup.
Pagina 26
Statim_2KS_5KS_E_oct09_FIGS_Q7:Statim_2KS_5KS_E_oct09
1/20/10
1:06 PM
Page 160
6. La porta di comunicazioni, segue
Impostazione della velocità in bit della porta seriale a 9600
Serial Port Bitrate
9600
1. Dal menu User Setup, utilizzare i pulsanti SENZA RIVESTIMENTO E CON RIVESTIMENTO per
scorrere fino al menu Serial Port Bitrate e selezionarlo utilizzando il pulsante GOMMA E PLASTICA.
2. Dal menu Serial Port Bitrate, utilizzare i pulsanti SENZA RIVESTIMENTO e CON AVVOLGIMENTO
per scorrere fino a 9600 e premere il pulsante GOMMA E PLASTICA per selezionarlo e ritornare al
menu User Setup.
Impostazione del carattere dell’utente della stampante (esempio: 134 °C)
Printer user ° char
32 [0x20]
1. Dal menu User Setup, utilizzare i pulsanti SENZA RIVESTIMENTO E CON RIVESTIMENTO per
scorrere fino al menu Printer user ° char e selezionarlo utilizzando il pulsante GOMMA E PLASTICA.
2. Dal menu Printer user ° char, utilizzando il pulsante SENZA RIVESTIMENTO per aumentare il valore visualizzato di uno e il pulsante CON AVVOLGIMENTO per aumentare tale valore di dieci,
immettere il valore 32 [0x20] e premere il pulsante GOMMA E PLASTICA per accettarlo e ritornare
al menu User Setup.
Risparmi e rimuova
Risparmi e rimuova
Risparmi e rimuova deve essere eseguito dopo il completamento delle impostazioni precedenti. Se
questa operazione non è eseguita, le informazioni tornano alle impostazioni precedenti.
1. Dal menu User Setup, utilizzare i pulsanti SENZA RIVESTIMENTO e CON RIVESTIMENTO per
scorrere fino a Risparmi e rimuova.
2. Selezionarlo premendo il pulsante GOMMA E PLASTICA.
Il display LCD visualizza informazioni
sulla data e sull’ora e una sequenza
di messaggi:
GG/MM/AA--DD/MM/YYY
“MSD NOT DETECTED”/”INSERT
MSD/FLASH”/”SELEZIONE DEL CICLO”
Pagina 27
Statim_2KS_5KS_E_oct09_FIGS_Q7:Statim_2KS_5KS_E_oct09
1/20/10
1:06 PM
Page 161
6. La porta di comunicazioni, segue
Fase 2
Selezione di data e ora
GG/MM/AA--DD/MM/YYY
Ora/Data
Nota: Se l’ora e la data sono state impostate secondo la sezione 3.6, questa operazione non deve
essere eseguita nuovamente.
1. Accendere il dispositivo premendo nel contempo il pulsante ARRESTO per accedere al menu User
Setup (Impostazione dell’utente).
2. Utilizzando i pulsanti SENZA RIVESTIMENTO e CON RIVESTIMENTO, scorrere fino a Time/Date
Setup e premere il pulsante GOMMA E PLASTICA per selezionarlo.
3. Dal menu Time/Date Setup, impostare la data e l’ora utilizzando i pulsanti SENZA RIVESTIMENTO
e CON RIVESTIMENTO per modificare i valori visualizzati e il pulsante GOMMA E PLASTICA per
selezionarli. Premere il pulsante ARRESTO al termine.
Fase 3
Impostazione dell’ID del dispositivo
001
Unit ID
Nota: Se l’ID del dispositivo è stato impostato secondo la sezione 3.8, questa operazione non deve
essere eseguita nuovamente.
1. Accendere il dispositivo premendo nel contempo il pulsante ARRESTO per accedere al menu User
Setup (Impostazione dell’utente).
2. Utilizzando i pulsanti SENZA RIVESTIMENTO e CON RIVESTIMENTO, scorrere fino a Unit ID
Setup (Impostazione dell’ID del dispositivo) e premere il pulsante GOMMA E PLASTICA per
selezionarlo.
3. Dal menu Setup Unit ID, utilizzare i pulsanti SENZA RIVESTIMENTO e CON RIVESTIMENTO per
modificare i valori visualizzati e il pulsante GOMMA E PLASTICA per selezionarli e passare alla
cifra successiva. Premere il pulsante ARRESTO al termine.
Fase 4
Connessione del registratore dati SciCan
GG/MM/AA--DD/MM/YYY
1. Accertarsi che sia il dispositivo Statim sia il
registratore dati SciCan siano spenti.
2. Collegare il registratore dati SciCan al dispositivo
Statim utilizzando il cavo seriale.
3. Accendere il registratore dati SciCan
4. Accendere il dispositivo Statim.
“MSD NOT DETECTED”/”INSERT
MSD/FLASH”/”SELEZIONE DEL CICLO”
GG/MM/AA--DD/MM/YYY
USB/FLASH DETECTED/SAFELY REMOVE
MSD/SELEZIONE DEL CICLO
5. Il display LCD visualizza questa sequenza di messaggi:
6. Inserire l’unità Flash USB o la scheda di memoria SD
7. Dopo pochi secondi il display LCD visualizza questa sequenza di messaggi:
Pagina 28
Statim_2KS_5KS_E_oct09_FIGS_Q7:Statim_2KS_5KS_E_oct09
1/20/10
1:06 PM
Page 162
6. La porta di comunicazioni, segue
6.3 Installazione della carta nella stampante interna
Utilizzare solo carta approvata per essere impiegata con la stampante interna sullo Statim 5000S.
L’impiego di qualsiasi altro tipo di carta potrebbe danneggiare la stampante e annullare la validità della
garanzia. La carta termica è disponibile presso SciCan (numero ordinativo SciCan 01-101657S).
Non attivare la stampante senza carta. Se si esaurisce la carta termina o se non si desidera utilizzare la
stampante, spegnerla.
Non tirare mai la carta all’indietro nella stampante. In questo modo si possono causare danni al
meccanismo della stampante.
Per installare la carta nella stampante, seguire i passaggi indicati:
1. Accendere lo Statim 5000S.
2. Aprire lo sportello della stampante ■1 premendo sulla metà superiore dello sportello.
3. Accendere la stampante.
3 orientando gli angoli con il cuscinetto
4. Svolgere un po’ di carta dal rullo della carta termica ■
tagliacarte fornito con ogni scatola.
5. Spostare il braccio del rullo carta ■4 nella posizione di carico. Posizionare il rullo carta ■3 sul braccio in modo che la striscia di carta sia alimentata dalla parte superiore del rullo e successivamente
inserirla con cautela all’interno della scanalatura d’alimentazione carta ■5 fino al suo arresto.
Se la carta non viene alimentata dall’alto, il lato sensibile al calore della carta non viene a contatto con la
testina di stampa impedendo alla stampante di stampare.
6. Con una mano, continuare ad inserire con cura la striscia di carta nella scanalatura d’alimentazione
carta. Con l’altra mano, premere il pulsante d’avanzamento carta fino a quando la carta non sarà
alimentata in maniera autonoma.
Mantenere la carta diritta mentre la si inserisce nella stampante per evitare eventuali inceppamenti.
Non spingere con forza la carta nella scanalatura! Se la carta non si inserisce nella scanalatura, tagliare
nuovamente l’estremità del rullo e ricaricare la carta.
Pagina 29
Statim_2KS_5KS_E_oct09_FIGS_Q7:Statim_2KS_5KS_E_oct09
1/20/10
1:06 PM
Page 163
6. La porta di comunicazioni, segue
7. Continuare a premere il pulsante d’avanzamento
carta ■6 fino a quando la carta non sarà alimentata dalla scanalatura d’uscita carta presente sulla parte anteriore della stampante.
Successivamente spostare il braccio ■3 del
rullo carta nella posizione di funzionamento e
chiudere lo sportello della stampante ■1 . A
questo punto la stampante è pronta per un
corretto funzionamento.
Quando compare una linea rossa su un lato della
carta, significa che è giunto il momento di effettuare
la sostituzione del rullo.
Se si verifica un inceppamento della carta, e non è
possibile rimuovere la carta premendo il pulsante
d’avanzamento carta ■6 , non tirare la carta
all’indietro nella stampante.
Non inserire mai utensili o strumenti nella scanalatura d’uscita carta. Per le istruzioni dettagliate sulle
modalità di eliminazione della carta inceppata,
consultare la sezione 6.4 Eliminazione degli
inceppamenti della carta nella stampante interna.
Per sostituire il rullo carta ■3 , seguire i passaggi
indicati:
1. Con le forbici tagliare la carta tra il rullo e la
scanalatura d’alimentazione carta ■5 .
2. Estrarre il rullo dal braccio ed eliminare la
parte inutilizzata.
3. Premere il pulsante d’avanzamento carta ■6 per far
uscire la carta rimanente all’interno della stampante
dalla scanalatura presente sulla parte anteriore della
stampante.
4. Installare il nuovo rullo di carta termica seguendo le
istruzioni riportate in questa sezione.
Pagina 30
■5
■2
■4
■3
■1
■4
■6
Figura 15.1
■5
■2
■6
■3
Figura 15.2
Statim_2KS_5KS_E_oct09_FIGS_Q7:Statim_2KS_5KS_E_oct09
1/20/10
1:06 PM
Page 164
6. La porta di comunicazioni, segue
6.4 Eliminazione degli inceppamenti della carta
nella stampante interna
Se non è possibile rimuovere la carta inceppata nella
stampante premendo il pulsante d’avanzamento carta ■6 ,
è necessario smontare la stampante. Non tirare la carta
all’indietro nella stampante e non inserire mai utensili e
strumenti nella scanalatura d’uscita carta.
■7
■8
Quando la carta rimane inceppata nella stampante,
seguire i passaggi indicati:
■9
1. Spegnere lo Statim 5000S e scollegare il dispositivo.
15
■
2. Con le forbici tagliare la carta tra il rullo e la
scanalatura d’alimentazione carta ■5 .
14
■
3 dal braccio del rullo carta ■
4
3. Estrarre il rullo carta ■
e lasciare il braccio nella posizione di carico.
7 dal
4. Con un cacciavite Phillips 1, svitare le tre viti ■
8 e rimuovere il
coperchio della stampante ■
coperchio.
5. Prestare attenzione all’orientamento della pannello di
4
controllo stampato e al braccio del rullo carta ■
1 .
montati sullo sportello della stampante ■
13
■
■11
10
■
■1
■4
10
■
12
■
Figura 16
6. Sollevare con attenzione il pannello di controllo stampato allontanandolo dallo sportello della
stampante. Prestare attenzione quando si maneggia il pannello. Il pannello è indispensabile per il
funzionamento della stampante. Non sottoporre ad alcuna tensione i collegamenti del cavo piatto
saldato al pannello. Non rimuovere il connettore del cavo flessibile dalla basetta del connettore
presente sul pannello. A questo punto è visibile il meccanismo di guida della carta presente sulla
parte inferiore del pannello di controllo.
7. Con un paio di pinzette o di tenaglie fini a punta ricurva, rimuovere con attenzione la carta
dal meccanismo.
Una volta rimossa la carta, procedere al riassemblaggio della stampante:
1. Far scattare con attenzione il portarullo, in posizione di carico, facendolo tornare nelle graffe
1.
presenti sullo sportello della stampante ■
Pagina 31
Statim_2KS_5KS_E_oct09_FIGS_Q7:Statim_2KS_5KS_E_oct09
1/20/10
1:06 PM
Page 165
6. La porta di comunicazioni, segue
2. Riposizionare il pannello di controllo stampato nella corretta posizione sullo sportello della
9 presenti sul pannello
stampante. Prestare attenzione all’allineamento dei fori di montaggio ■
13 presenti sullo sportello della stampante. Il corpo della
di controllo e sui mozzi di montaggio ■
10 presenti sulla parte interna dello
stampante in plastica nera rimane tra le alette di riferimento ■
sportello della stampante.
11 , ■
14 non rimangano intrappolati tra lo sportello della stampante e
3. Assicurarsi che i cavi flessibili ■
il pannello di controllo.
4. Posizionare il coperchio della stampante sullo sportello della stampante. Assicurarsi che i cavi
flessibili non restino intrappolati tra il coperchio e lo sportello. Il pulsante d’alimentazione e il
pulsante d’avanzamento carta devono essere sporgenti rispetto alle aperture presenti sul coperchio
ed essere pienamente funzionanti.
5. Con un cacciavite Phillips 1 fissare il coperchio della stampante sullo sportello della stampante con
le tre viti raccolte durante la procedura di smontaggio. Non stringere eccessivamente le viti.
6. Collegare lo Statim 2000S / 5000S alla presa di corrente nella parete. Ricollegare la stampante se
era stata precedentemente scollegata. Portare l’interruttore di alimentazione in posizione ON
(acceso).
7. Impostare l’interruttore dell’alimentazione della stampante su ON. Caricare la carta nella stampante
seguendo le procedure indicate nella sezione 7.3 Installazione della carta nella stampante interna.
Pagina 32
Statim_2KS_5KS_E_oct09_FIGS_Q7:Statim_2KS_5KS_E_oct09
1/20/10
1:06 PM
Page 166
6. La porta di comunicazioni, segue
6.5 Panoramica della stampa del ciclo
1.
2.
3.
4.
5.
6.
7.
8.
9.
10.
Modello: Software STATIM 2000:
S2S2R410
1.
2.
Identificazione dispositivo:
autoclave installata con
numero 323
3.
4.
5.
Contatore cicli: numero di cicli
eseguiti sul dispositivo = 9
6.
7.
Ora / Data: 13.38 14 aprile 2003
8.
Nome cicli: SOLIDI NON
IMB. (N)
9.
10.
Nome cicli continui / parametri:
134 ˚C / 3,5 min – 1P
11.
12.
Clock di ciclo: inizio a 0:00
Riscaldamento completo: l’avvio
della fase di condizionamento è
2.07 (consultare il grafico del ciclo
– ‘A’ fase completa, avvio della
fase ‘B’)
Temperatura di picco / Press. e
durata dell’eliminazione del condizionamento: per ogni eliminazione (numero di linee a seconda del ciclo selezionato – si tratta
di un ciclo da un’eliminazione –
attività presente nella fase ‘B’)
Temperatura minima / Press. e
durata dell’eliminazione del condizionamento: per ogni eliminazione (numero di linee a seconda del ciclo selezionato – si tratta
di un ciclo da un’ eliminazione –
attività presente nella fase ‘B’)
13.
14.
15.
16.
17.
18.
19.
20.
21.
22.
23.
Pagina 33
Statim_2KS_5KS_E_oct09_FIGS_Q7:Statim_2KS_5KS_E_oct09
1/20/10
1:06 PM
Page 167
6. La porta di comunicazioni, segue
11.
Ora avvio della pressurizzazione: 3.21 (avvio della fase ‘C’)
13.
Temp. / Press. e durata all’avvio della sterilizzazione (fase ‘D’)
12.
14.
15.
16.
17.
18.
19.
20.
21.
22.
23.
Ora avvio della sterilizzazione: 4.12 (avvio della fase ‘D’)
Temp. min. / Press. durante la fase di sterilizzazione (livelli minimi della fase ‘D’)
135,1 °C 308 kPa
Temp. max. / Press. durante la fase di sterilizzazione (livelli massimi della fase ‘D’)
136,7 °C 323 kPa
Temp. / Press. e durata alla fine della fase di sterilizzazione (fine della fase ‘D’)
Ora d’avvio della ventilazione: 7.43 (avvio della fase ‘E’)
La sterilizzazione è stata completata con successo
Ora d’avvio dell’asciugatura ad aria: 8.07 (avvio della fase ‘F’)
Il ciclo è stato arrestato dall’utente
Il ciclo d’asciugatura è stato interrotto prima del completamento, il carico potrebbe non
essere asciutto.
Pagina 34
Statim_2KS_5KS_E_oct09_FIGS_Q7:Statim_2KS_5KS_E_oct09
1/20/10
1:06 PM
Page 168
7. Risoluzione dei problemi
Problema
Il dispositivo non si accende.
Soluzione
Controllare che il dispositivo sia inserito in una presa correttamente collegata a massa e che il cavo di alimentazione
sia saldamente alloggiato sul retro della macchina.
Provare un altro circuito. Spegnere il dispositivo per 10 secondi e quindi riaccenderlo.
Controllare la condizione dell’interruttore del circuito di linea
o del fusibile.
È presente dell’acqua sotto la macchina.
Controllare che l’acqua non sia stata versata quando si è
riempito nuovamente il serbatoio. Assicurarsi d’aver connesso correttamente il tubo di scarico. Estrarre e reinserire il
caricatore.
Cercare di eseguire un altro ciclo.
Agire con cautela. Le parti metalliche saranno calde e il
caricatore potrebbe contenere vapore a temperature elevate.
Il caricatore perde. Se l’acqua sgocciola dalla parte inferiore
del dispositivo durante il funzionamento, verificare la presenta di eventuali allineamenti errati o danni nella tenuta del
caricatore e sostituire la tenuta se necessario.
Agire con cautela. Le parti metalliche saranno calde e il
caricatore potrebbe contenere vapore a temperature elevate.
Cercare di eseguire un altro ciclo. Se sono ancora presenti
delle perdite, cercare di eseguire un altro ciclo con un
caricatore diverso se possibile.
Se le perdite continuano a verificarsi, spegnere il dispositivo,
estrarre e scaricare il caricatore, scollegare il dispositivo e
rivolgersi al proprio rivenditore.
Gli strumenti non si asciugano.
I migliori risultati in termini di asciugatura si ottengono quando il ciclo giunge a completamento. Consentire al ciclo di
giungere al termine. Assicurarsi di aver caricato tutti gli
strumenti nel caricatore in maniera corretta. Consultare la
sezione 4.4 Preparazione e caricamento degli strumenti.
Verificare il livellamento del dispositivo.
Pulire le parti interne del caricatore e trattate con il composto
siccativo Stat-Dri. Consultare la sezione 5.1 Pulizia del caricatore. Controllare con attenzione il tubo di scarico (il tubo
della bottiglia di scarico) cercando eventuali pieghe.
Pagina 35
Statim_2KS_5KS_E_oct09_FIGS_Q7:Statim_2KS_5KS_E_oct09
1/20/10
1:06 PM
Page 169
7. Risoluzione dei problemi, segue
Se piegato, raddrizzare il tubo. Se il tubo non può essere
raddrizzato, rimuoverlo dal raccordo a pressione collegato
allo Statim. Premere la fascetta presente sul raccordo e con
l’altra mano tirare con risolutezza il tubo. Una volta liberato
il tubo dal raccordo, tagliare la sezione danneggiata con uno
strumento affilato. Assicurarsi di aver lasciato una quantità
di tubo sufficiente a raggiungere il dispositivo quando si
ricollega il tubo al raccordo di scarico. Se il tubo risulta troppo corto per eliminarne una sezione, rivolgersi al rivenditore
SciCan per effettuare una sostituzione.
Assicurarsi che il compressore sia operativo. Per effettuare
una verifica, rimuovere il tubo di scarico dalla bottiglia
di scarico.
Avviare il ciclo di sola asciugatura ad aria e disporre
l’estremità libera in un bicchiere d’acqua. Se non si riscontra
un flusso intenso e costante di bollicine, il compressore non
funziona correttamente. Contattare il proprio
rivenditore SciCan.
Messaggi di ciclo interrotto — NON STERILE
e ciclo bloccato — NON STERILE
e AVARIA CICLO.
Attendere alcuni minuti e cercare di eseguire un altro ciclo
prima di passare alla soluzione successiva.
Rimuovere il caricatore. Agire con cautela. Le parti metalliche saranno calde e il caricatore potrebbe contenere
vapore a temperature elevate. Controllare il caricatore per
assicurarsi che i fori presenti sul retro della tenuta siano
perfettamente allineati e che il bordo flessibile della tenuta
non incontri alcun ostacolo. Verificare l’eventuale presenza
di pieghe o impedimenti nel tubo di scarico. Se piegato, raddrizzare il tubo. Se il tubo non può essere raddrizzato,
rimuoverlo dal raccordo a pressione collegato allo Statim.
Premere la fascetta presente sul raccordo e con l’altra
mano tirare con risolutezza il tubo. Una volta liberato il tubo
dal raccordo, tagliare la sezione danneggiata con uno strumento affilato. Assicurarsi di aver lasciato una quantità di
tubo sufficiente a raggiungere il dispositivo quando si ricollega il tubo al raccordo di scarico. Se il tubo risulta troppo
corto per eliminarne una sezione, rivolgersi al rivenditore
SciCan per effettuare una sostituzione.
Verificare che lo Statim non sia stato inavvertitamente
esposto ad eventuali interferenze elettriche. Consultare la
sezione Installazione relativa alle Considerazioni ambientali
(Sezione 3.1).
Cercare di eseguire un altro ciclo. Se il problema persiste,
registrare il numero del messaggio dell’avaria di ciclo e contattare il proprio rivenditore.
Pagina 36
Statim_2KS_5KS_E_oct09_FIGS_Q7:Statim_2KS_5KS_E_oct09
1/20/10
1:06 PM
Page 170
7. Risoluzione dei problemi, segue
Vapore in eccesso fuoriesce dalla
parte frontale della macchina.
Estrarre e reinserire il caricatore. Cercare di eseguire un altro
ciclo. Estrarre e verificare la presenza di eventuali allineamenti
errati o danni nella tenuta del caricatore. Sostituire la tenuta se
necessario. Agire con cautela poiché le parti metalliche saranno
calde e il caricatore potrebbe contenere vapore a temperature
elevate.
Se le perdite continuano a verificarsi, spegnere il dispositivo,
scaricare il caricatore e rivolgersi al proprio rivenditore SciCan.
Messaggio WATER QUALITY IS NOT
ACCEPTABLE - qualità dell’acqua non
accettabile. La macchina non si attiva.
È stata utilizzata dell’acqua che non è stata distillata a
vapore o non è stata distillata correttamente.
Messaggio REFILL RESERVOIR - riempire
serbatoio -, la macchina non si attiva.
Il livello dell’acqua nel serbatoio è basso. Riempire nuovamente il serbatoio. Consultare i passaggi descritti nella
sezione 3.4 Riempimento del serbatoio.
Messaggio PRINTER FAULT - avaria stampante - visualizzato sul DISPLAY LCD.
La stampante non stampa.
La stampante non funziona.
Svuotare il serbatoio e riempire con acqua distillata a
vapore con un tenore complessivo di sostanze solide in
sospensione inferiore a 5 ppm (con una conduttività inferiore a 10 µS / cm). Se si dispone di un rilevatore della conduttività dell’acqua, controllare la qualità dell’acqua prima di
riempire il serbatoio. Consultare i passaggi descritti nella
sezione 3.9 Trasporto del dispositivo prima di svuotare il
serbatoio.
Verificare che la carta non sia inceppata. Se la carta è
inceppata, seguire le procedure per la rimozione della carta
presentate nella sezione 6.4. Spegnere il dispositivo per
10 secondi e quindi riaccenderlo. Se la carta è ancora
inceppata, seguire le procedure di smontaggio presentate
nella sezione 6.4 Eliminazione degli inceppamenti della
carta.
Assicurarsi che il cavo della stampante sia collegato correttamente al connettore presente sul retro dello Statim e della
stampante Stat. Accertarsi che la stampante sia accesa.
Spegnere il dispositivo per 10 secondi e quindi riaccenderlo.
La stampante sembra essere operativa, ma
non viene stampato nulla sulla carta.
Assicurarsi che la carta sia correttamente caricata nella
stampante (consultare la sezione 6.3 Installazione della carta
nella stampante interna). Verificare che la carta esca dal rullo
di carta dalla parte superiore del rullo. In questo modo la
superficie trattata della carta con rivestimento termico verrà a
contatto con la testina di stampa termica.
L’ora e la data non sono corrette.
L’ora e la data non sono state impostate. Consultare la
sezione 3.6 Impostazione di data e ora.
Pagina 37
Statim_2KS_5KS_E_oct09_FIGS_Q7:Statim_2KS_5KS_E_oct09
1/20/10
1:06 PM
Page 171
7. Risoluzione dei problemi, segue
Messaggio MSD NOT CONNECTED <>
INSERT MSD/FLASH (Periferica di memoria di massa non connessa, inserire periferica/Flash)
Verificare il collegamento del cavo seriale.
Verificare il collegamento dell’alimentazione.
Accertarsi che il LED rosso inferiore sia illuminato.
Controllare che la periferica di memoria di massa sia correttamente inserita.
Ripetere le istruzioni per Installazione del registratore dati
SciCan sullo Statim.
Messaggio MSD/FLASH FULL <> REPLACE
MSD (Periferica di memoria di massa/Flash
piena, sostituirla)
La periferica di memoria di massa è piena. Esportare i dati.
Messaggio Missing lines of Data on
MSD/FLASH (Righe di dati mancanti su periferica di memoria di massa/Flash)
Fare riferimento alla schermata STATIM per confermare la
riuscita della sterilizzazione.
Ripristinare il registratore dati scollegandone l’alimentazione, scollegando la periferica di memoria di massa e
attendendo 10 secondi. Quindi ricollegare l’adattatore di alimentazione e inserire la periferica di memoria di massa nel
registratore dati.
Se il problema persiste, rivolgersi al Centro assistenza
SciCan.
Messaggio: The file or directory in the
MSD is corrupted or unreadable (Il file
o la directory nella periferica di memoria di massa sono danneggiati o illeggibili).
Fare riferimento alla schermata STATIM per confermare la
riuscita della sterilizzazione.
La periferica di memoria di massa potrebbe essere stata
scollegata durante la scrittura dei dati sulla stessa. La periferica di memoria di massa non va scollegata fino alla visualizzazione del messaggio “SAFELY REMOVE MSD <>
MSD/FLASH DETECTED” (Rimuovere in sicurezza la periferica di memoria di massa, periferica o Flash rilevate).
È possibile che i file o le directory danneggiati siano stati
persi. Riformattare la periferica sul computer.
Pagina 38
Statim_2KS_5KS_E_oct09_FIGS_Q7:Statim_2KS_5KS_E_oct09
1/20/10
1:07 PM
Page 172
8. Elenco delle parti di ricambio
01-100204S
01-100724S
01-100735S
01-100780S
01-100782S
01-100812S
01-100834S
01-101649S
01-101657S
01-101658S
01-101709S
01-101755S
01-101757S
01-101766S
01-101768S
01-101769S
01-101779S
01-106030S
01-106071S
01-104093S
01-101783S
01-101970S
01-102119S
01-103139S
01-103475S
01-103557S
01-103865S
01-103945S
01-104343S
01-104472S
Tubo di scarico
Bottiglia del condensatore senza
condensatore
Raccordo della bottiglia dell’acqua di scarico
Paraurti
Raccordo a pressione (2000S)
Bottiglia del condensatore
Coperchio del caricatore (2000S)
Tenuta del caricatore (5000S)
Carta termica (scatola da 10 rulli)
Maniglie del caricatore
Supporto a rete (5000S)
Raccordo a pressione (5000S)
Coperchio del caricatore con scatola (5000S)
Cavo d’alimentazione GB
Cavo d’alimentazione Svizzera
Cavo d’alimentazione Italia
Cavo d’alimentazione Europa
Maniglia del coperchio del caricatore (2000S)
Filtro del compressore (2000S)
01-104700S
01-104702S
01-104704S
Kit o-ring del caricatore dell’adattatore
Coperchio del caricatore dell’adattatore (2000S)
Coperchio del caricatore dell’adattatore (5000S)
01-100028S
Tenuta del caricatore (2000S)
01-104786S
Cestello per strumenti - 4 mm
(5000S)
01-106438S
Coperchio del caricatore, grande (2000S)
01-109300S
Kit con filtro del serbatoio dell’acqua
01-108340S
01-100008A
Statim PCD – parti di ricambio
ACCESSORI
Caricatore Kit Final (2000S)
01-101613S
Caricatore cassetto Kit con rete
(2000S)
Caricatore completo (5000S)
01-103923
Bottiglia supplementare del condensatore
01-100271A
01-101614S
Cassetto completo (5000S) con scatola
Maniglia del coperchio del caricatore, grande (5000S)
01-103935
Piastre STATDRI (5000S)
Filtro e tappo del serbatoio
Cavo dati (5000S)
01-104499
Cestello per strumenti del caricatore
grande (5000S)
Caricatore dell’adattatore (2000S)
Caricatore dell’adattatore (5000S)
Kit adattatore dispositivo (2000S)
Kit adattatore dispositivo (5000S)
Tubo di scarico da 3 m
Filtro biologico
Rilevatore di conduttività
Cassetto (2000S)
Cavo di alimentazione di ricambio Danimarca (det.)
Lubrificante di tenuta
Kit strumenti senza rivestimento del
cassetto del cestello (2000S)
Tubazione di drenaggio della spina (5000S)
Maniglie del caricatore, grandi
(5000S)
01-104696S
01-104697S
Adattatore dispositivo
Tenuta del caricatore dell’adattatore (2000S)
01-104699S
Inserto della tenuta
01-104698S
01-100207S
Tenuta del caricatore dell’adattatore (5000S)
01-104104
01-104701
01-104703
01-106101
01-106102
01-106653
01-210000
01-106325
2OZPLUS
8OZPLUST
32OZPLUS
99-108332
01-108341
Pagina 39
Caricatore grande
(5000S)
Cassetto a rete (2000S)
Kit stampante (5000S)
Contenitore endoscopio completo
(5000S)
STAT-dri 2 oz.
STAT-dri 8 oz.
STAT-dri 32 oz.
Simulatore chimico
134 °C/3,5 min
Kit di montaggio finale Statim PCD
Statim_2KS_5KS_E_oct09_FIGS_Q7:Statim_2KS_5KS_E_oct09
1/20/10
1:07 PM
Page 173
9. Garanzia
Garanzia limitata
Per un periodo di un anno, la SciCan garantisce che lo Statim 2000S / 5000S, laddove prodotto dalla
SciCan e in condizioni di prodotto nuovo non utilizzato, non subirà guasti, nell’ambito di un funzionamento normale, dovuti a vizi di materiali e fabbricazione non generati da cattivo uso, uso scorretto o
incidenti manifesti.
La garanzia di un anno è valida per il funzionamento corretto di tutte le parti dell’apparecchio (esclusi i
pezzi soggetti a usura come guarnizione, filtro del compressore e filtro microbiologico), a condizione
che l’apparecchio sia utilizzato e manutenzionato conformemente alla descrizione contenuta nel manuale per l’uso.
Nel caso si verifichi un guasto dovuto ai suddetti vizi nell’arco di tempo specificato, gli unici rimedi previsti saranno la riparazione o la sostituzione, a discrezione della SciCan e senza costi aggiuntivi, delle
parti difettate, a condizione che il tutto sia notificato alla SciCan per iscritto entro trenta (30) giorni dalla
data in cui si è verificato il suddetto guasto e a condizione che le parti difettate siano restituite alla
SciCan con versamento anticipato.
La presente garanzia sarà considerata come valida, se il prodotto sarà corredato della fattura d’acquisto originale emessa dal rivenditore SciCan autorizzato e la suddetta fattura individui l’articolo con il
rispettivo numero di serie indicando in maniera inconfutabile la data d’acquisto. Nessuna altra forma di
convalida sarà ritenuta accettabile. A distanza di un anno tutte le garanzie concesse dalla SciCan e
tutti gli altri eventuali obblighi in merito alla qualità del prodotto saranno definitivamente considerati
come soddisfatti, ponendo quindi termine a tutte le eventuali responsabilità in modo tale che nessun
tipo di misura o violazione di tali garanzie o impegni possa eventualmente essere avviato nei confronti
della SciCan.
Da parte della SciCan sono escluse e declinate le eventuali garanzie esplicite non fornite in materia e
le eventuali dichiarazioni o garanzie implicite per quanto concerne le prestazioni, e gli eventuali rimedi
alla violazione del contratto che, se non per via della presente disposizione, potrebbero verificarsi tacitamente, azione legale, uso commerciale, procedura di negoziazione, fra cui eventuali garanzie
implicite di commerciabilità o di idoneità a particolari scopi nei confronti di tutti gli eventuali prodotti
realizzati dalla SciCan. Per maggiori informazioni in merito ai prodotti e alle caratteristiche della
SciCan, consigliamo di visitare il nostro sito internet www.scican.com.
Pagina 40
Cameradinamica
Cameravuota
Caricopienosenzarivestimento
Caricopienorivestimentosingolo
CaricovuotoB
Secco,caricopienosenzarivestimento
Secco,caricopienorivestimentosingolo
Ariaresidua
*
Dental instruments
Pagina 41
IMBUSTATI
IMBUSTATI
IMBUSTATI
IMBUSTATI
CAVI/NON
CAVI/NON
CAVI/NON
CAVI/NON
134
134
134
134
°C/3,5
°C/3,5
°C/3,5
°C/3,5
IMBUSTATI
IMBUSTATI
IMBUSTATI
IMBUSTATI
IMBUSTATI
IMBUSTATI
(S)
(S)
(S)
(S)
(S)
(S)
134
134
134
134
134
134
°C/3,5
°C/3,5
°C/3,5
°C/3,5
°C/3,5
°C/3,5
min
min
min
min
min
min
CAVI/NON IMBUSTATI (S) 134 °C/3,5 min
CAVI/NON IMBUSTATI (S) 134 °C/3,5 min
CAVI/NON
CAVI/NON
CAVI/NON
CAVI/NON
CAVI/NON
CAVI/NON
CAVI/NON IMBUSTATI (S) 134 °C/3,5 min
(S)
(S)
(S)
(S)
min
min
min
min
min
min
min
min
min
°C/3,5
°C/3,5
°C/3,5
°C/3,5
°C/3,5
GOMMA/PLASTICA(S)
121˚C/15min
GOMMA/PLASTICA(S)
121˚C/30min
1:07 PM
134
134
134
134
134
COR.CAVIIMBALL(S)
134˚C/18min
1. Il PCD (Process Challenge Device) è stato concepito per
essere utilizzato esclusivamente negli apparecchi di autoclave Statim 2000S e Statim 5000S.
2. Il PCD non è adatto per l’uso del caricatore grande dello
Statim 2000, Statim 5000 o Statim 5000S.
3. Specifiche tecniche del PCD su richiesta.
4. Il controllo del carico di strumenti cavi A non è applicabile –
Informazioni più dettagliate su richiesta.
CICLI
COR.CAVIIMBALL(S)
134˚C/3.5min
1/20/10
(S)
(S)
(S)
(S)
(S)
IMBUSTATI
IMBUSTATI
IMBUSTATI
IMBUSTATI
IMBUSTATI
CAVI/NON
CAVI/NON
CAVI/NON
CAVI/NON
CAVI/NON
COR.CAVINONIMB(S)
(S)134˚C/18min
min
min
min
min
min
min
min
min
min
min
min
min
min
min
COR.CAVINONIMB(S)
134˚C/3.5min
CAVI/NON IMBUSTATI (S) 134 °C/3,5
CAVI/NON IMBUSTATI (S) 134 °C/3,5
CAVI/NON IMBUSTATI (S) 134 °C/3,5
CAVI/NON IMBUSTATI (S) 134 °C/3,5
CAVI/NON IMBUSTATI (S) 134 °C/3,5
CAVI/NON IMBUSTATI (S) 134 °C/3,5
CAVI/NON IMBUSTATI (S) 134 °C/3,5
CAVI/NON IMBUSTATI (S) 134 °C/3,5
CAVI/NON IMBUSTATI (S) 134 °C/3,5
CAVI/NON IMBUSTATI (S) 134 °C/3,5
CAVI/NON IMBUSTATI (S) 134 °C/3,5
CAVI/NON IMBUSTATI (S) 134 °C/3,5
CAVI/NON IMBUSTATI (S) 134 °C/3,5
CAVI/NON IMBUSTATI (S) 134 °C/3,5
CAVI/IMBUSTATI (S) 134 °C/3,5 min
CAVI/IMBUSTATI (S) 134 °C/3,5 min
CAVI/IMBUSTATI (S) 134 °C/3,5 min
Ciclo
SOLIDINONIMB(N)
134˚C/3.5min
KaVoGENTLEforce7000C
Kavo–GentlePowerLux25LPA
W&H-TrendLS,WD-56
W&H-TrendHS,TC-95RM
KaVoSuper-TorqueLUX/640B
KaVo-INTRAmaticLUX3,20LH
NSK-PANAAir
NSK-ATL118040
NSK–Ti-Max
STAR-430SWL
Sirona-T1Classic,S40L
Sirona-T1Control,TC3
Midwest-Tradition
Bein–Air-BoraL
W&H–WS-75
W&H–WA-99LT
W&H–TA-98LC
B & L Ophthalmology instruments
Gimbleirrigatingcannula30g E4894
Lasikcannula E4989
Gillisirrigating-aspiratingcannulaE4932
Nichaminhydrossectioncannula26g E4421H
Irrigating-aspiratinghandpiece MVS1063C
Rudolf Medizintechnik GmbH Endoscope accessories
Trocarsleeve,arthroscopy,2rotatingstopcocks,
1.7mmdiax104mmlength #10-0008-00
Trocarsleeve,hysteroscopydiagnosticsheath,1fixed
stopcock,2.7mmdiax302mmlength #10-0049-00
Alcon ophthalmic handpiece
NeoSonixPhacohandpiece
Miltex medical instruments
Frazierneedle 26-778
Yeomanbiopsyforcepswithrotatingshaft28-304
Kerrisonrongeur 18-1994
Frazier-Fergusontube 19-570
Yankauersuctiontube 2-104SS
Menghinibiopsyneedle 13-150
Becton Dickinson
Needle,30G1
Medical Workshop
HockeystickForceps,membranepeelingmw-1925
Carico Massimo
Test microbiologici
Perdispositivimedicispecifici
Vedereelencoriportatodiseguito
Glieventuali aggiornamenti
saranno www.scican.com
Test supplementari
STATIM2000S/5000SPCD
(01-108341)
Tipo di test
Statim_2KS_5KS_E_oct09_FIGS_Q7:Statim_2KS_5KS_E_oct09
Page 174
10. Protocollo di collaudo
10.1 Tipo di test
*
Statim_2KS_5KS_E_oct09_FIGS_Q7:Statim_2KS_5KS_E_oct09
1/20/10
1:07 PM
Page 175
10. Protocollo di collaudo, segue
Ciclo
SOLIDI NON IMB. (N)
134 °C / 3,5 min
COR. CAVI NON IMB (S)
134 °C / 3,5 min
COR. CAVI NON IMB (S)
134 °C / 18 min
COR. CAVI IMBALL. (S)
134 °C / 3,5 min
COR. CAVI IMBALL. (S)
134 °C / 18 min
GOMMA / PLASTICA (S)
121 °C / 15 min
GOMMA / PLASTICA (S)
121 °C / 30 min
STATIM 2000S
STATIM 5000S
Disp. a freddo con carico Max. +
fase asciug.
Disp. a caldo senza carico +
fase asciug.
Disp. a freddo con carico Max. +
fase asciug.
Disp. a caldo senza carico +
fase asciug.
6.45 + 60.00
8.45 + 60.00
9.15 + 60.00
13.15 + 60.00
11:45 + 60.00
17.30 + 60.00
26.15 + 60.00
32.00 + 60.00
8.05 + 60.00
22.35 + 60.00
15.35 + 60.00
10.40 + 60.00
30.05 + 60.00
25.10 + 60.00
20.15 + 60.00
18.40 + 60.00
35.15 + 60.00
33.40 + 60.00
Pagina 42
10.50 + 60.00
25.20 + 60.00
24.00 + 60.00
15.30 + 60.00
38.30 + 60.00
30.00 + 60.00
22.50 + 60.00
20.20 + 60.00
37.50 + 60.00
35.20 + 60.00
Statim_2KS_5KS_E_oct09_FIGS_Q7:Statim_2KS_5KS_E_oct09
1/20/10
1:07 PM
Page 176
11. Specifiche tecniche
11.1 Statim 2000S — Specifiche tecniche
Dimensioni macchina:
Dimensioni caricatore (esterne):
Dimensioni caricatore (interne):
Volume camera sterilizzazione:
Lunghezza:
Larghezza:
Altezza:
Lunghezza:
Larghezza:
Altezza:
Lunghezza:
Larghezza:
Altezza:
Volume serbatoio:
41 cm (incluse le maniglie)
19,5 cm
4 cm
28 cm
18 cm
4 cm
1,8 l
4,0 l
Peso (senz’acqua):
Spazio libero necessario:
48,5 cm
41,5 cm
15 cm
21 kg
Sopra:
Lati:
Dietro:
Davanti:
5 cm
5 cm
5 cm
48 cm
Spazio libero necessario per la movimentazione degli sportelli: 48 cm
Carico minimo del serbatoio d’acqua:
550 ml
Classe elettrica:
220 - 240 V, 50/60 Hz, 6 A
Valore valvola limitatrice di pressione (VLP):
Corrente:
43,5 PSI
CA
Classe protezione:
I
Protezione:
rivestito
Temperatura ambiente di funzionamento:
5 °C - 40 °C
Livello sonoro:
Medio - 56 dB, Max - 65 dB
Umidità:
80% max.
Altitudine Max:
2000 m
Pagina 43
Statim_2KS_5KS_E_oct09_FIGS_Q7:Statim_2KS_5KS_E_oct09
1/20/10
1:07 PM
Page 177
11. Specifiche tecniche, segue
11.2 Statim 5000S — Specifiche tecniche
Dimensioni macchina:
Dimensioni caricatore (esterne):
Dimensioni caricatore (interne):
Volume camera sterilizzazione:
Lunghezza:
Larghezza:
Altezza:
Lunghezza:
Larghezza:
Altezza:
Lunghezza:
Larghezza:
Altezza:
Volume serbatoio:
49,5 cm (incluse le maniglie)
19,5 cm
8 cm
38 cm
18 cm
8 cm
5,1 l
4,0 l
Peso (senz’acqua):
Spazio libero necessario:
55 cm
41 cm
19 cm
33 kg
Sopra:
Lati:
Dietro:
Davanti:
5 cm
5 cm
5 cm
57 cm
Spazio libero necessario per la movimentazione degli sportelli: 57 cm
Carico minimo del serbatoio d’acqua:
550 ml
Classe elettrica:
220 - 240 V, 50/60 Hz, 6 A
Valore valvola limitatrice di pressione (VLP):
Corrente:
43,5 PSI
CA
Classe protezione:
I
Protezione:
rivestito
Temperatura ambiente di funzionamento:
5 °C - 40 °C
Livello sonoro:
Medio - 57 dB, Max - 65 dB
Umidità:
80% max.
Altitudine Max:
Specifiche tecniche della stampante interna opzionale:
2000 m
Tipo:
Stampante termica
Velocità di stampa:
1 linea al secondo
Stampa:
20 caratteri per linea
Capacità approssimativa del rullo carta:
80 cicli di sterilizzazione per rullo
Pagina 44
Statim_2KS_5KS_E_oct09_FIGS_Q7:Statim_2KS_5KS_E_oct09
1/20/10
1:07 PM
Índice
5. Mantenimiento . . . . . . . . . . . . . . . . . . . 20
1.Introducción . . . . . . . . . . . . . . . . . . . . . . . 3
2. Información importante . . . . . . . . . . . . . 4
2.1 Descargos de responsabilidad
2.2 Statim 2000S — Vista general de la unidad
2.3 Statim 5000S — Vista general de la unidad
3. Instalación . . . . . . . . . . . . . . . . . . . . . . . . 7
3.1
3.2
3.3
3.4
3.5
3.6
3.7
3.8
3.9
Consideraciones ambientales
Ubicación de la unidad
Conexión de la botella de desechos
Relleno del depósito
Preparación de la bomba Statim
Configuración de la hora y la fecha
Selección del idioma
Preparación de la unidad para el uso
Despacho de la unidad
4.1
4.2
4.3
4.4
4.5
4.6
4.7
4.8
Statim 2000S — El uso del cassette
Statim 5000S — El uso del cassette
Statim 5000S — Bandejas STAT-DRI
Preparación y carga de los instrumentos
Tabla de pesos de los instrumentos
Selección de un ciclo
Ejecución de un ciclo
Detención del ciclo
Page 178
5.1
5.2
5.3
5.4
5.5
5.6
La limpieza del cassette
Limpieza del filtro del depósito de agua
Limpieza del depósito
Limpieza de las superficies exteriores
Cambio de los filtros de aire Statim 2000S
Cambio de los filtros de aire para retención
de bacterias
5.7 Reemplazo de la junta del cassette
5.8 Cómo mantener los niveles del líquido
5.9 Lecturas de la calidad del agua
5.10 Programa de mantenimiento preventivo
6. El puerto de comunicaciones . . . . . . . 25
4. Instrucciones de uso . . . . . . . . . . . . . . 11
6.1. El puerto de comunicaciones RS232
6.2 Instalación del cargador de datos Statim
6.3 Instalación del papel en la impresora interna
6.4 Eliminación de atascos de papel en la
impresora interna
6.5 Vista general de la producción de la
impresora interna
7. Localización de fallos . . . . . . . . . . . . . 35
8 Lista de Repuestos . . . . . . . . . . . . . . . . 39
9. Garantía . . . . . . . . . . . . . . . . . . . . . . . . . 40
10. Protocolo de Pruebas . . . . . . . . . . . . 41
10.1 Tipos de Prueba
11. Especificaciones
. . . . . . . . . . . . . . . . 43
11.1 Statim 2000S — Especificaciones
11.2 Statim 5000S — Especificaciones
STATIM Cassette Autoclave y Statim son marcas registradas y los logos de STAT-DRI y
DriTec son marcas registradas de SciCan Ltd. Las restantes marcas citadas en el presente
manual pertenecen a sus respectivos propietarios.
Para toda averiguación sobre servicio y reparaciones, llame:
En Canadá
1-800-870-7777
United States:
1-800-572-1211
Alemania:
+49 (0) 821 56 74 56-0
Internacional:
(416) 446-4500
E-mail:
[email protected]
Fabricado por:
SciCan
Representante en la UE
SciCan GmbH
Kurzes Geland 10
D-86156 Augsburg
ALEMANIA
Teléfono: +49 (0) 821 56 74 56-0
Fax: +49 (0) 821 56 74 56-99
SciCan Inc.
701 Technology Drive
Canonsburg, PA 15317
EE.UU.
Teléfono: +1 724 820 1600
Fax: +1 724 820 1479
Tel. gratuito: 1-888-632-6031
SciCan Medtech
Alpenstrasse
166300 Zug
Suiza
Teléfono: +41 (0) 41 727 7027
Fax: +41 (0) 41 727 702
1440 Don Mills Road,
Toronto ON M3B 3P9
CANADA
Teléfono:
(416) 445-1600
Fax:
(416) 445-2727
Llamada gratis: 1-800-667-7733
Página 2
Statim_2KS_5KS_E_oct09_FIGS_Q7:Statim_2KS_5KS_E_oct09
1/20/10
1:07 PM
Page 179
1.Introducción
Statim 5000S
Statim 2000S
Felicitaciones por haber seleccionado el STAT® Cassette Autoclave. Estamos seguros de que
usted ha comprado el mejor equipo en su clase. El Statim es una unidad compacta, de mesa,
que presenta un número de ciclos de esterilización diseñados para ajustarse a sus muchas
necesidades. Las Autoclaves de cassette Statim “S” cumplen con la normativa EN13060.
Este manual del operador contiene todos los detalles de instalación, operación y mantenimiento
de su Statim. Para garantizar años de servicio seguro y sin problemas, lea estas instrucciones
antes de operar esta unidad y guárdelas para referencia futura. Es importante seguir las
instrucciones de operación, mantenimiento y reemplazo para que el producto se desempeñe
según su diseño. El contenido de este manual está sujeto a cambios sin aviso previo para reflejar
los cambios y las mejoras introducidas en el producto Statim.
El Statim es adecuado para la esterilización de todo tipo de instrumentos dentales y médicos,
diseñados para resistir la esterilización al vapor. El Statim no ha sido diseñado para esterilizar
líquidos, cargas de paños, desechos biomédicos o materiales que no sean compatibles con
esterilización al vapor. El procesamiento de cargas de ese tipo puede resultar en una esterilización incompleta y/o dañar el autoclave. Para obtener más información sobre la adaptabilidad
del instrumento, consulte las instrucciones de reprocesamiento del fabricante.
Página 3
Statim_2KS_5KS_E_oct09_FIGS_Q7:Statim_2KS_5KS_E_oct09
1/20/10
1:07 PM
Page 180
2. Información importante
2.1 Descargos de responsabilidad
Use solamente agua destilada para el proceso de vapor en su Statim. No se debe usar agua
desionizada, desmineralizada o filtrada especialmente. Nunca use agua de grifo.
No permita que ninguna persona que no sea el personal calificado, suministre repuesto para el
servicio o realice labores de mantenimiento en su Statim. SciCan no se hará responsable de
ningún perjuicio incidental, especial o consecuente ocasionado por el mantenimiento o el servicio
realizado por terceros en el Statim, o como resultado del uso de maquinaria o piezas fabricadas
por terceros, incluyendo pérdida de ganancias, pérdida comercial de cualquier índole, pérdida
económica o pérdida resultante de lesiones personales.
Nunca extraiga la tapa de la unidad y nunca inserte objetos a través de los agujeros o aberturas
de los armarios. Hacerlo puede dañar la unidad y/o causar peligro para el operador.
Todos los elementos de este libro pertenecen tanto a Statim 2000S como a Statim 5000S, a
menos que se indique lo contrario.
IMPORTANTE:
Siga las directrices locales que regulan la verificación del procedimiento de esterilización.
Secado
Los modelos Statim 2000S y 5000S han sido diseñados con el fin de proporcionar una
solución de esterilización completa para las necesidades del instrumental embolsado y no
embolsado: esterilización rápida equilibrada con secado también rápido, mediante el uso de
la tecnología de secado Dri-Tec de SciCan.
En el modelo Statim 2000S se utiliza calor por convección para secar instrumentos con el
calor remanente en el sistema tras la fase de esterilización. El calor capturado se libera en
el cassette para secar con rapidez un cassette Statim correctamente cargado.
En el modelo Statim 5000S se utiliza el calor generado en la fase de esterilización, que es
absorbido por las placas de secado. Dicho calor se transfiere directamente hasta la carga
desde las placas de secado, lo que resulta en un secado rápido y acelerado del cassette
Statim correctamente cargado.
Consulte el presente manual del operador para conocer las instrucciones sobre la
colocación correcta de los instrumentos en el cassette, así como el uso de las placas
Stat-Dri (Statim 5000S). Si se siguen con cuidado estas orientaciones acerca de cómo
cargar correctamente la cámara de cassettes, se logrará un secado rápido de la carga.
Página 4
Statim_2KS_5KS_E_oct09_FIGS_Q7:Statim_2KS_5KS_E_oct09
1/20/10
1:07 PM
Page 181
2. Información importante, Cont.
■1
■2
■3
■4
■5
■6
■7
■8
■9
10
■
11
■
2.2 Statim 2000S — Vista general de la unidad
indicador de nivel
teclado
tapa del depósito/
filtro de agua
LCD
indicador de energía
indicador de activo
interruptor de energía
puerto del cable
■6
de alimentación
patas niveladoras
puerto del tubo de escape
compresor
En los márgenes de
este libro aparecen los
siguientes símbolos.
■3
■4
■2
Figura 1
■1
12
■
13
■
■5
■9
12 cassette ■
13 filtro biológico
■
14
■ puerto RS232
Una situación que
puede conducir a un
fallo mecánico.
Un peligro potencial
para el operador.
Aparecen los siguientes símbolos en la unidad:
DESEMBOLSADOS
Botón de
Ciclos
INICIO
11
■
GOMA/PLÁS
TICO
Ciclos
Botón de
PARADA
EMBOLSADO
Ciclos
Solamente
agua destilada
al vapor
Secado por Aire
solamente.
LED Indicador
de energía
LED Indicador
de activo
10
■
■7
14 ■
8
■
Información
importante
Precaución: Superficie
caliente y/o vapor caliente
Precaución: Riesgo de descarga eléctrica. Desconecte la alimentación antes de realizar
servicio de mantenimiento
Precaución: Consulte el
manual para obtener
información específica
Los artículos indicados a continuación estarán incluidos cuando usted reciba su caja de embalaje de Statim 2000S. Si observa la
falta de uno de estos artículos, comuníquese inmediatamente con su representante de ventas para corregir esa situación.
Bandeja y tapa del cassette
Cordón eléctrico
Rejilla de instrumentos
desembolsados
/5000S
STATIM 2000S
e t t e
C a s s
™
c l a v e
A u t o
Manual
• Operator’s
buch
• Benutzerhand
l’utilisateur
• Manuel de
Operador
• Manual del
operatori
• Manuale per
Manual del operador
1.0.
95-108430 Rev
Operator’s Manual
STATIM 2000S/5000S All rights reserved.
SciCan.
Copyright 2003
www.scican.com
Botella de desechos
Tubo de escape
Accesorio de la tapa de la
Botella
Stat-Dri
Emuladores de esterilización P.C.D.
+ 20 SciCan
Herrajes de montaje
del tubo
Página 5
Statim_2KS_5KS_E_oct09_FIGS_Q7:Statim_2KS_5KS_E_oct09
1/20/10
1:07 PM
Page 182
2. Información importante, Cont.
2.3 Statim 5000S — Vista general de la unidad
■1 indicador de nivel
■2 teclado
■3 tapa del depósito/
■3
■4
filtro de agua
■4 LCD
■5 indicador de energía
■6 indicador de activo
■7 interruptor de energía
■8 puerto del cable de
alimentación
■6
■9 patas niveladoras
13
■
12
■5 ■
10 puerto del tubo de escape
■
11 filtro biológico
■
13 cassette
■
12 puerto de impresora opcional
■
(puede no estar disponible para todos los modelos)
En los márgenes de
este libro aparecen los
siguientes símbolos.
■2
Botón de
PARADA
Solamente
agua destilada
al vapor
■1
■9
10
■
11
■
14
■
■8
14 puerto RS232 (puede no estar
■
DESEMBOLSADOS
Ciclos
Una situación que
puede conducir a un
fallo mecánico.
GOMA/PLÁS
TICO
Ciclos
EMBOLSADO
Ciclos
Secado por Aire
solamente.
LED Indicador
de energía
LED Indicador
de activo
Los artículos indicados a continuación estarán incluidos cuando usted reciba su caja de embalaje de
Statim 5000S. Si observa la falta de uno de estos
artículos, comuníquese inmediatamente con su representante de ventas para corregir esa situación.
Información
importante
Precaución: Superficie
caliente y/o vapor caliente
Precaución: Riesgo de
descarga eléctrica.
Desconecte la alimentación
antes de realizar servicio de
mantenimiento.
Precaución: Consulte el
manual para obtener información específica
Bandejas para Mejorar el
secado
Cordón eléctrico
Bandeja y tapa del cassette
Rejilla de instrumentos
desembolsados
/5000S
STATIM 2000S
e t t e
C a s s
™
c l a v e
A u t o
Manual
• Operator’s
buch
• Benutzerhand
l’utilisateur
• Manuel de
Operador
• Manual del
operatori
• Manuale per
Manual del operador
1.0.
95-108430 Rev
Operator’s Manual
STATIM 2000S/5000S All rights reserved.
SciCan.
Copyright 2003
www.scican.com
Botella de desechos
Tubo de escape
Accesorio de la tapa
de la Botella
Stat-Dri
Emuladores de esterilización P.C.D.
+ 20 SciCan
Herrajes de montaje
del tubo
Página 6
■7
disponible para todos los modelos)
Un peligro potencial
para el operador.
Aparecen los siguientes símbolos en la unidad:
Botón de
INICIO
Figura 2
Statim_2KS_5KS_E_oct09_FIGS_Q7:Statim_2KS_5KS_E_oct09
1/20/10
1:07 PM
Page 183
3. Instalación
3.1 Consideraciones ambientales
Existen varios factores que pueden afectar el desempeño de su Statim. Es importante que
examine estos factores y seleccione una ubicación adecuada en la que instalará la unidad.
•
Temperatura y Humedad
•
Espaciamiento
•
Ventilación
•
Superficie de trabajo
•
Entorno electromagnético
•
Requerimientos eléctricos
Evite instalar su Statim bajo la luz directa del sol o cerca de una fuente de calor (por ej., rejillas
de ventilación o radiadores). Las temperaturas de operación que se recomiendan son 15-25˚C
con humedad de 25-70%.
Las rejillas y aberturas de ventilación en el Statim deben permanecer descubiertas y sin obstrucciones. Deje un mínimo de 50 mm entre la parte superior, los costados y la parte posterior de la
unidad y todo muro o división.
El Statim se debe operar en un entorno limpio y sin polvo.
El Statim se debe colocar sobre una superficie plana, nivelada y resistente al agua. Nunca
instale ni opere la unidad sobre una superficie en pendiente.
El Statim ha pasado pruebas y cumple con las normas correspondientes de emisiones electromagnéticas. Aunque la unidad no emite ninguna radiación, puede ser afectada por otro tipo de
equipo que la emita. Recomendamos mantener la unidad lejos de toda posible fuente de interferencia.
Use fuentes de corriente con fusible y debidamente conectadas a tierra, con la misma clasificación de tensión que se indica en la etiqueta en la parte posterior de su unidad. Evite tomas de
corriente múltiples. Si usa una barra de corriente con supresor de sobretensiones, enchufe el
Statim solamente.
3.2 Ubicación de la unidad
Cuando coloque la unidad sobre una mesa, asegúrese de lo siguiente:
•
•
1 en el tablero delantero debe
La burbuja indicadora de nivel ■
estar equilibrada en el cuadrante delantero derecho del objetivo. Esto garantizará que la unidad se drene debidamente. Si
ajusta las tres patas niveladoras podrá mover la burbuja según
se requiera.
La unidad debe estar estable y las cuatro patas deben estar en
contacto seguro con la superficie de la mesa. Así se evitará
que la unidad se mueva sin control.
Página 7
■1
Figura 3
Statim_2KS_5KS_E_oct09_FIGS_Q7:Statim_2KS_5KS_E_oct09
1/20/10
1:07 PM
Page 184
3. Instalación, Cont.
3.3 Conexión de la botella de desechos
2 se usa para recoger las aguas residuales después de haberse converLa botella de desechos ■
tido en vapor y de haberse drenado del cassette. Para conectar la botella de desechos al Statim,
siga los siguientes pasos (ver Figura 4):
5000S
3 en el accesorio
1. Introduzca el tubo de escape ■
■4 en la parte posterior de la unidad y conéctelo
firmemente.
2. Corte el tubo hasta obtener el largo deseado y
coloque suavemente el accesorio de la botella
5 en su lugar.
de desechos ■
3. Coloque el extremo libre del tubo en el orificio
de la tapa de la botella de desechos y apriete el
accesorio con la mano. No enrolle el tubo de
escape.
4. Destornille la tapa y la unidad del serpentín del
6 de la botella de desecondensador de cobre ■
chos. La tapa y el serpentín deberán salir juntos.
5. Llene la botella de desechos con agua hasta la
línea de MIN. y coloque nuevamente el montaje
de tapa y condensador de cobre. Vacíe la
botella de desechos a menudo para evitar
olores desagradables y la decoloración del
contenido. (Se puede agregar un desinfectante de bajo nivel, preparado según las
instrucciones del fabricante, a la botella de
desechos para remediar esta situación.)
Como mínimo, vacíe la botella de desechos
cada vez que vuelva a rellenar el depósito.
■3
■4
6
■
■5
■2
2000S
■4
■3
■6
■2
6. Coloque la botella de desechos cerca de la
Figura 4
unidad. Guarde la botella debajo de la unidad.
Se puede dirigir el tubo a través de un orificio,
(8 mm de diámetro) en la mesa y asegurarlo con las abrazaderas de nylon suministradas.
3.4 Relleno del depósito
Cuando rellene el depósito, asegúrese de estar utilizando solamente agua destilada procesada
con vapor que contenga menos de 5ppm de sólidos disueltos en total (con una conductividad
menor a 10 µS / cm). Las impurezas y los aditivos en otras fuentes de agua harán que se lea
error en la pantalla LCD. Si tiene un medidor de conductividad de agua (disponible en SciCan,
artículo número 01-103139S) verifique cada contenedor de agua nuevo antes de rellenar el
depósito. Para rellenar el depósito, sigua los pasos siguientes (consulte la figura 5):
Página 8
Statim_2KS_5KS_E_oct09_FIGS_Q7:Statim_2KS_5KS_E_oct09
1/20/10
1:07 PM
Page 185
3. Instalación, Cont.
1. Saque el sombrerete del depósito
■2
■2
2. Derrame agua destilada para proceso de
vapor en el depósito hasta que esté casi
lleno (un máximo de 4 Litros). Utilice un
embudo para evitar los derrames.
3. Reemplace y ajuste la tapa.
3.5 Primación de la bomba Statim
Para aplicar una primación a la bomba Statim,
siga los siguientes pasos:
Figura 5
1. Mueva la unidad hasta el borde de la
superficie de trabajo. Las patas niveladoras frontales deben estar aproximadamente a 12 mm
del borde.
3 del sujetador
2. Levante la esquina frontal izquierda de la unidad y retire el tubo de desagüe ■
ubicado en la parte inferior de la unidad.
3. Tire el tubo de desagüe hacia fuera para que el extremo libre pueda ubicarse sobre el
contenedor de agua.
4. Rellene el depósito con agua destilada procesada con vapor.
4 del extremo del tubo de desagüe y deje que el agua drene del tubo al contenedor
5. Retire el tapón ■
durante 30 segundos. Cuando el agua fluya de modo consistente, coloque el tapón nuevamente.
6. Levante la esquina frontal izquierda de la unidad y
coloque nuevamente el tubo en el sujetador ubicado en
la parte inferior de la unidad. Ubique nuevamente el
excedente del tubo en el espacio provisto.
Asegúrese de que el tapón en el tubo de desagüe esté
firmemente colocado.
3.6 Configuración de la hora y la fecha
■4
■3
Figura 6
Para configurar la hora y la fecha, siga estos pasos y observe el centelleo del cursor en la pantalla LCD:
1. Apague el Statim.
2. Oprima y mantenga presionado el botón
del ciclo de DESEMBOLSADO.
14:23
HH:MM
11/15/2006
DD/MM/AAAA
Mostrar al configurar Fecha / Hora
3. Mientras pulsa el botón del ciclo de DESEMBOLSADO,
encienda la Statim. La lectura de la pantalla LCD es la siguiente:
4. Use los botones de ciclo para seleccionar y cambiar el valor del campo seleccionado. Para
aumentar un valor de campo, oprima el botón de Ciclo DESEMBOLSADO. Sostenga el botón
oprimido para aumentar el valor.
5. Para disminuir el valor, oprima el botón de Ciclo EMBOLSADO.
Página 9
Statim_2KS_5KS_E_oct09_FIGS_Q7:Statim_2KS_5KS_E_oct09
1/20/10
1:07 PM
Page 186
3. Instalación, Cont.
6. Para seleccionar el campo siguiente, oprima el botón de ciclo de GOMA y PLÁSTICO.
7. Para guardar los cambios y regresar al modo de operación normal, oprima el botón PARADA.
8. Para finalizar sin realizar cambios, apague la Statim.
3.7 Selección del Idioma
Se pueden cambiar los mensajes que se visualizan en la pantalla LCD a varios idiomas
diferentes. Para cambiar las selecciones actuales de idioma, siga los siguientes pasos:
1. Apague el interruptor de electricidad en la parte posterior de la unidad.
2. Oprima y mantenga oprimido el botón de
Ciclo EMBOLSADO.
ESPANOL
3. Mientras suelta el botón de Ciclo EMBOLSADO,
Visualizar cuando se desplaza a través de
encienda el interruptor de electricidad en la
los idiomas.
parte trasera de la unidad.
4. Oprima el boton de ciclo DESEMBOLSADO para desplazarse a la siguiente seleccion de idioma.
5. Oprima el boton de ciclo EMBOLSADO para desplazarse a la anterior seleccion de idioma.
6. Cuando visualice el idioma deseado, oprima el botón de PARADA para guardar la selección y
para regresar al modo de operación regular.
3.8 Preparación de la unidad para el uso
1. Apague la Statim.
2. Oprima y mantenga presionado el botón del ciclo
de GOMA/PLÁSTICO.
STATIM 2000 S2S2R601 #323
Visualizar al asignar un número de
unidad
3. Mientras oprime el botón del ciclo GOMA/PLÁSTICO, encienda el Statim.
4. Al utilizar los botones de los ciclos, seleccione un máximo de 3 dígitos para que sean utilizados
como identificadores de la unidad. El botón DESEMBOLSADO incrementará el valor seleccionado y el botón de ciclo EMBOLSADO lo reducirá. Utilice el botón GOMA/PLÁSTICO para
desplazarse al siguiente dígito.
5. Para guardar los cambios y regresar al modo de operación normal, oprima el botón PARADA.
3.9 Despacho de la unidad
Antes de mover la unidad, usted deberá drenar el depósito. Para hacerlo, siga los pasos siguientes:
1. Coloque un envase de agua debajo de la unidad.
2. Con un tubo de desagüe (ver sección 3.5 Preparación de la bomba, Figura 6), vacíe el contenido del depósito en el contenedor de agua.
3. Elimine el agua que quede en el depósito con una toalla absorbente que no tenga pelusa.
4. Atornille las tres patas niveladoras que se encuentran debajo de la unidad.
5. Vuelva a embalar la unidad en los materiales de embalaje originales junto con todos los accesorios incluidos originariamente con la unidad.
6. Especifique un envío asegurado y con temperatura acondicionada.
Página 10
Statim_2KS_5KS_E_oct09_FIGS_Q7:Statim_2KS_5KS_E_oct09
1/20/10
1:07 PM
Page 187
4. Instrucciones de uso
4.1 Statim 2000S — El uso del cassette
Tenga cuidado al retirar el cassette después de un ciclo porque las áreas de metal estarán
calientes y el cassette puede contener vapor caliente.
•
Para abrir el cassette:
1. Sostenga el mango del cassette con sus dedos pulgares hacia adentro en el pasador del
cassette.
2. Empuje el pasador del cassette hacia abajo.
pasador del cassette
3. Levante la tapa del cassette y desenganche
la bisagra.
4. Asiente la tapa sobre la superficie externa.
•
Para cerrar el cassette:
Figura 7
1. Alinee la lengüeta de la bisagra en la tapa del cassette con la ranura de la bisagra en la parte
trasera de la bandeja inferior.
2. A medida que comience a cerrar la tapa, la lengüeta de la bisagra y la ranura se engancharán.
•
Introducción del cassette en el Statim 2000S:
1. Coloque el extremo del cassette en la unidad.
2. Empuje suavemente hacia adentro hasta que escuche un "clic".
Nunca inserte el cassette con fuerza en la unidad Statim porque los componentes internos se
pueden dañar.
•
Extracción del cassette:
1. Sujete el mango del cassette con las dos manos y empuje hacia fuera.
2. Saque el cassette completamente de la unidad y colóquelo sobre una superficie firme.
•
Desenganche del cassette
•
STAT-DRI
Es necesario desengachar el cassette cuando éste no está en uso. Para desenganchar el cassette, sostenga el mango y tire el cassette hacia fuera hasta que quede un espacio de entre 15
mm y 20 mm (1/ 2 a 3 / 4"pulgadas) entre el frente del Statim 2000S y el mango del cassette.
El proceso de secado será mejor si se trata el interior de las superficies del cassette con el agente
de secado Stat-Dri incluido con su unidad. (SciCan tiene disponible botellas de repuesto, artículos
número 2OZPLUS, 8OZPLUST, 32OZPLUS).
Página 11
Statim_2KS_5KS_E_oct09_FIGS_Q7:Statim_2KS_5KS_E_oct09
1/20/10
1:07 PM
Page 188
4. Instrucciones de uso, Cont.
4.2 Statim 5000S — El uso del cassette
Tenga cuidado al retirar el cassette después de un ciclo porque las áreas de metal estarán
calientes y el cassette puede contener vapor caliente.
•
Para abrir el cassette:
1. Coloque el mango para traslado
posición de abierto.
■1
en la
■1
2. Pongas sus manos en ambos lados del
mango del cassette.
3. Inserte sus dedos índices en las ranuras y
ponga sus dedos pulgares en las superficies para los pulgares.
4. Presione con los pulgares y tire con los
dedos índices hasta que se abra la tapa.
5. Levante la tapa del cassette y desengánchela de la bandeja. Asiente la tapa
sobre la superficie externa.
•
■1
Para cerrar el cassette:
1. Alinee la lengüeta de la bisagra en la tapa
del cassette con la ranura de la bisagra en
la parte trasera de la bandeja inferior.
2. A medida que comience a cerrar la tapa, la
lengüeta de la bisagra y la ranura se
engancharán.
3. Coloque el mango de traslado en la
posición de cerrado.
•
Introducción del cassette en el
Statim 5000S:
1. Sostenga el mango del cassette en una
mano y el mango de traslado en la otra, tal
como se observa en la figura 8.
Figura 8
2. Coloque el extremo del cassette en la unidad y coloque el mango de traslado en la posición
de cerrado.
3. Empuje suavemente hacia adentro hasta que escuche un clic.
Nunca inserte el cassette con fuerza en la unidad Statim porque los componentes internos se
pueden dañar.
Página 12
Statim_2KS_5KS_E_oct09_FIGS_Q7:Statim_2KS_5KS_E_oct09
1/20/10
1:07 PM
Page 189
4. Instrucciones de uso, Cont.
•
Extracción del cassette:
1. Sujete el mango del cassette con una mano y sáquelo de la unidad.
2. A medida que el cassette sale de la unidad, tome el mango de traslado con la mano libre y levántelo.
3. Saque el cassette completamente de la unidad y colóquelo sobre una superficie firme.
•
Desenganche del cassette
Es necesario desengachar el cassette cuando éste no está en uso. Para desenganchar el cassette,
sostenga el mango y tire el cassette hacia fuera hasta que haya un espacio de entre 15 mm y 20 mm
(1/ 2 a 3 / 4" pulgadas) entre el frente del Statim 5000S y el mango del cassette.
4.3 Statim 5000S — Bandejas STAT-DRI
El cassette Statim 5000S utiliza bandejas STAT-DRI para mejorar el proceso de secado para
instrumentos embolsados. Las bandejas regulables están diseñadas para la rejilla de instrumentos desembolsados , evitando el uso de una rejilla de instrumentos embolsados separada. Se
pueden colocar hasta diez bandejas a lo largo de la rejilla. Cada unidad se despacha con cinco
bandejas STAT-DRI. Se pueden pedir bandejas adicionales a SciCan (Número de pieza SciCan
01-103935).
Para instalar y regular una bandeja STAT-DRI, siga las siguientes instrucciones:
1. Sostenga una bandeja en la posición deseada, inclinada levemente hacia adelante con las
lengüetas hacia abajo.
2. Inserte las lengüetas entre la malla de la rejilla de
instrumentos desembolsados.
3. Cada lengüeta tiene una ranura alargada. Deslice la
bandeja hasta que el cable esté al final de cada ranura.
4. Suelte la bandeja en la posición de descanso.
5. Prepare y cargue los instrumentos para
la esterilización.
4.4 Preparación y carga de los instrumentos
Antes de cargar un instrumento en el Statim, consulte las instrucciones de reprocesamiento
del fabricante.
•
Limpieza de los instrumentos
Limpie y enjuague todos los instrumentos antes de cargarlos en el cassette. Los residuos de
desinfectantes y partículas sólidas pueden inhibir la esterilización y perjudicar los instrumentos,
el cassette y el Statim. Los instrumentos lubricados se deben limpiar bien para eliminar todo el
exceso de lubricante antes de cargarlos.
Página 13
Statim_2KS_5KS_E_oct09_FIGS_Q7:Statim_2KS_5KS_E_oct09
1/20/10
1:07 PM
Page 190
4. Instrucciones de uso, Cont.
•
Instrumentos desembolsados
Disponga los instrumentos desembolsados sobre la rejilla de instrumentos en la bandeja, de
manera tal que no se toquen unos con otros. Esto asegura que el vapor llegue a todas las superficies y estimulará el secado.
Los instrumentos no deben estar ni amontonados ni apilados en el cassette, ya que esto impedirá
el proceso de esterilización.
•
Instrumentos embolsados (envoltorios únicos)
Coloque los instrumentos en las bolsas de una capa para autoclave según las instrucciones del
fabricante. Dirija la rejilla de instrumentos embolsados hacia dentro del cassette para asegurarse
de que los instrumentos embolsados queden a unos 6 mm/0.25 pulgadas por encima de la base
del cassette. Coloque los instrumentos embolsados en la rejilla y arréglelos para evitar que
queden superpuestos. Asegúrese de que todas las cargas embolsadas estén secas antes de
manipularlas y / o almacenarlas para mantenerlas esterilizadas.
No se recomiendan envoltorios de paño en el Statim.
SciCan recomienda utilizar bolsas de autoclave de papel/papel y plástico/papel fabricadas de
acuerdo con la normativa EN 868. Coloque los instrumentos en las bolsas sin apretarlos para
permitir la penetración del vapor en todas las superficies de los instrumentos.
La rejilla para instrumentos embolsados del modelo Statim 5000S ha sido diseñada para dar
cabida a un máximo de 12 bolsas de autoclave. Deberán tomarse las medidas necesarias para
garantizar que el peso combinado de las bolsas cargadas no supere 1,5 kg (3,3 lbs).
La rejilla para instrumentos no embolsados dotada de 10 placas Stat-Dri como máximo dará
cabida a 10 bolsas para autoclave.
•
Instrumentos de goma y de plástico
Los siguientes materiales se pueden esterilizar en el Statim:
nylon, policarbonato (Lexan™), polipropileno, PTFE (Teflon™), acetal (Delrin™), polisulfona
(Udel™), polieterimida (Ultem™), silicona, caucho y poliéster.
Cuando cargue instrumentos de caucho y de plástico en la bandeja, deje un espacio entre los
instrumentos y las paredes del cassette. Esto garantizará que el vapor llegue a todas las
superficies y acelerará el secado.
Los siguientes materiales no se pueden esterilizar en el Statim:
polietileno, ABS, estireno, celulósico, PVC, acrílico (Plexiglas™), PPO (Noryl™), látex, neopreno,
y materiales similares.
El uso de estos materiales puede resultar en daños a los instrumentos o al equipo. Si no está
seguro acerca del material o la estructura del instrumento, no lo cargue en el Statim hasta
consultarlo con el fabricante del instrumento.
Página 14
Statim_2KS_5KS_E_oct09_FIGS_Q7:Statim_2KS_5KS_E_oct09
1/20/10
1:07 PM
Page 191
4. Instrucciones de uso, Cont.
•
Todos los instrumentos
El Statim NO está diseñado para esterilizar textiles, líquidos o desechos biomédicos. Los instrumentos se mantendrán estériles después de un ciclo exitoso hasta que se retire el cassette de la
caja del autoclave. Los instrumentos desembolsados no pueden mantenerse en estado estéril
una vez expuestos a condiciones ambientales o externas. Si desea guardarlos estériles, envuelva
los instrumentos para esterilizarlos en bolsas de autoclave, de acuerdo con las instrucciones del
fabricante del instrumento. Luego, deje que se ejecute el ciclo embolsado hasta que la fase de
secado por aire esté completa.
Mejor Uso: Deje que los instrumentos (embolsados o desembolsados) se sequen por completo
antes de manipularlos. Los instrumentos embolsados no deben tocarse unos con otros para así
facilitar el secado y permitir una esterilización eficaz.
SciCan recomienda al usuario final que elija cuidadosamente el ciclo de esterilización más
apropiado según las recomendaciones de las autoridades de control de infecciones competentes
y según las recomendaciones y directrices normativas locales.
•
Monitorización de Rutina
Se deben incluir en cada paquete o carga a esterilizar los indicadores de procesos químicos adecuados para los esterilizadores a vapor. Además, se recomienda el uso semanal de indicadores
biológicos, para poder verificar si los instrumentos fueron expuestos a las condiciones de esterilización o no.
4.5 Tabla de pesos de los instrumentos
Tijeras
Instrumento
Peso típico del instrumento
30 g / 0,96 oz
Raspador dental
20 g / 0,64 oz
Fórceps
15 g / 0,48 oz
Pieza dental de mano
Rejilla de instrumentos embolsados
Rejilla de instrumentos desembolsados
Cánula de succión
Espejo bucal plástico
40 a 60 g / 1,29 a 1,92 oz
260 g / 8,35 oz
225 g / 7,23 oz
10 g / 0,32 oz
8 g / 0,25 oz
Bandeja de impresión
Anillo plástico de posicionamiento de rayos x
15 a 45 g / 0,48 a 1,45 oz
20 g / 0,64 oz
NOTA: Los pesos mencionados anteriormente sólo se utilizarán como referencia. Para los pesos
exactos de sus instrumentos, consulte las especificaciones del fabricante.
Página 15
Statim_2KS_5KS_E_oct09_FIGS_Q7:Statim_2KS_5KS_E_oct09
1/20/10
1:07 PM
Page 192
4. Instrucciones de uso, Cont.
4.6 Selección de un Ciclo
Las Statim 2000S y 5000S tienen siete ciclos de esterilización, cada uno de los cuales está diseñado para esterilizar utilizando los parámetros especificados. Se puede seleccionar cada ciclo
oprimiendo los botones de los ciclos DESEMBOLSADO, EMBOLSADO o GOMA/PLÁSTICO.
En las páginas siguientes, se describen los tipos de instrumentos, los requisitos de esterilización
y se muestra un gráfico con las características de cada ciclo.
1. Ciclos Desembolsados
Statim 2000S y 5000S presentan dos ciclos de esterilización tipo 134˚C S y uno tipo 134˚C N
DESEMBOLSADOS. El proceso de secado por aire de una hora comenzará al finalizar la fase de
esterilización del ciclo.
El secado por aire se puede interrumpir en
cualquier momento al oprimir el botón
PARADA.
Para seleccionar uno de estos ciclos:
Oprima el botón de ciclo DESEMBOLSADO
para desplazarse a través de los ciclos
disponibles.
A
B
D
C 3.5
E F
min / 18 min
A 00˚C
1 / 101 kPa D Esterilización
134˚C / 304 kPa B 3 depuraciones (Acondicionamiento)
138˚C
máximo a 133˚CE/ Ven
295
kPa / 341 kPa
ventilar
5˚C a
/ 169
11 kPa tilación
C Presurización
F Secado por aire
INST HUEC NO EMP (S) 134˚C / 3,5 min
INST HUEC NO EMP (S) 134˚C / 18 min
INST SOL NO EMP (S) 134˚C / 3,5 min
Una vez que se seleccionó el ciclo deseado,
oprima el botón INICIO.
La memoria de la unidad recuerda el último
ciclo que se ejecutó y por lo tanto visualiza
este ciclo primero al encender la unidad.
A
B C
D
3.5
min
E F
A 00˚C
1 / 101 kPa D Esterilización
134˚C / 304 kPa B 1 depuración (Acondicionamiento)
138˚C
máximo a 133˚C
/
295
kPa/ 341 kPa
E Ven
tilación
ventilar
5˚C a
/ 169
11 kPa
C Presurización F Secado por aire
Página 16
Statim_2KS_5KS_E_oct09_FIGS_Q7:Statim_2KS_5KS_E_oct09
1/20/10
1:07 PM
Page 193
4. Instrucciones de uso, Cont.
2. Ciclos Huecos Embolsados
Las Statim 2000S y 5000S presentan dos
ciclos de esterilización EMBOLSADOS a
134˚C de tipo S.
Para seleccionar uno de estos Ciclos S:
Oprima el botón EMBOLSADOS para
desplazarse a través de los ciclos
disponibles.
A
D
3.5
min
B C
E F
A 00˚C
1 / 101 kPa D Esterilización
134˚C / 304 kPa B 1 depuración (Acondicionamiento)
138˚C
máximo a 133˚C
/
295
kPa/ 341 kPa
E Ven
tilación
ventilar
5˚C a
/ 169
11 kPa
C Presurización F Secado por aire
INST HUEC EMP (S) 134˚C / 3,5 min
INST HUEC EMP (S) 134˚C / 18 min
Una vez que se seleccionó el ciclo deseado, oprima el botón INICIO.
La unidad recuerda el último ciclo que se ejecutó y por lo tanto visualiza este ciclo primero al
encender la unidad.
Se encuentra disponible un Dispositivo para el control del proceso (PCD por su sigla en inglés)
para validar el ciclo HUECOS EMBOLSADOS (S) a 134˚C/3,5 min.
3. Ciclo Goma y Plásticos
Las Statim 2000S y 5000S presentan dos
ciclos de esterilización a 121˚C de tipo S.
Para seleccionar uno de estos Ciclos S:
Oprima el botón GOMA/PLÁSTICO para
desplazarse a través de los ciclos
disponibles.
A
A
B
GOMA / PLASTICO (S) 121˚C / 15 min
C
GOMA / PLASTICO (S) 121˚C / 30 min
Página 17
B
C
D
15 min / 30 min
D
100˚C / 101 kPa
3 depuraciones (Acondicionamiento)
máximo a 120˚C / 199 kPa
E
ventilar a 110˚C / 143 kPa
Presurización
F
E
F
Esterilización
121˚C / 205 kPa 124˚C / 225 kPa
Ventilación
Secado por aire
Statim_2KS_5KS_E_oct09_FIGS_Q7:Statim_2KS_5KS_E_oct09
1/20/10
1:07 PM
Page 194
4. Instrucciones de uso, Cont.
Una vez que se seleccionó el ciclo deseado, oprima el botón INICIO.
La unidad recuerda el último ciclo que se ejecutó y por lo tanto visualiza este ciclo primero al
encender la unidad.
4. Ciclo de Secado por Aire Solamente
Este no es un ciclo de esterilización.
El Ciclo de Secado por Aire Solamente comienza automáticamente después de cada ciclo de
esterilización, y dura unos 60 minutos.
El secado por aire se puede interrumpir, oprimiendo el botón de PARADA. Para garantizar que el
contenido del cassette esté seco, el ciclo deberá durar su tiempo completo de 60 minutos. Es
muy importante que los instrumentos desembolsados estén secos para evitar la corrosión. Para
los instrumentos embolsados, se requiere una envoltura seca para mantener la esterilidad.
Si se pulsa el botón STOP durante la fase de secado del ciclo de esterilización y no se ha extraído el cassette de la autoclave, es posible usar el ciclo de secado sólo, con el fin de facilitar aún
más el secado. Si se ha extraído el cassette de la autoclave, NO se puede reinsertar para el ciclo
de secado sólo. Si el cassette contiene instrumentos embolsados y los envoltorios no están
secos cuando se abre el cassette, los instrumentos se deben manejar de forma aséptica para la
utilización inmediata o se los deben reesterilizar.
Para iniciar, oprima el botón del ciclo Secado Por Aire Solamente, y luego oprima el
botón de INICIO.
Cuando se inicia en forma independiente, este ciclo dura 1 hora.
Página 18
Statim_2KS_5KS_E_oct09_FIGS_Q7:Statim_2KS_5KS_E_oct09
1/20/10
1:07 PM
Page 195
4. Instrucciones de uso, Cont.
4.7 Ejecución de un ciclo
Siga estos pasos para operar cada ciclo, y observe la pantalla LCD.
1. Coloque el interruptor de energía que está en la parte
posterior de la unidad en la posición ON (ENCENDIDO).
La lectura de la pantalla LCD es la siguiente:
14:23 11/15/2006
SELECCIONE UN CICLO
2. Oprima el botón de ciclo apropiado en el teclado
para desplazarse por los ciclos disponibles
La imagen mostrará lo siguiente:
INST HUEC NO EMP (S)
134˚C / 3,5 min
INST HUEC NO EMP (S)
134˚C / 18 min
INST SOL NO EMP (S)
134˚C / 3,5 min
ó
INST HUEC EMP (S) 134˚C
/ 3,5 min
INST HUEC EMP (S) 134˚C
/ 18 min
ó
GOMA / PLASTICO (S)
121˚C / 15 min
GOMA / PLASTICO (S)
121˚C / 30 min
Cuando se suelte el botón, la pantalla indicará:
Ciclo seleccionado
PULSE INICIO
El contador de ciclo de la unidad se visualiza al comienzo, después de oprimir el botón de inicio.
Ciclo seleccionado
CICLO NUMERO 000000
La luz indicadora ámbar se enciende. Para indicar que los ciclos están en progreso, se visualizan los siguientes mensajes a medida que el ciclo se ejecuta.
Ciclo seleccionado
CALENTAMIENTO
ACONDICIONANDO
110˚C
143 kPa
PRESURIZANDO
125˚C
232 kPa
Durante el funcionamiento del ciclo
se escucharán diferentes sonidos.
Éste es el funcionamiento normal de la unidad.
Página 19
ESTERILIZANDO
136,8˚C 330 kPa 3:29
VENTILACIÓN
108˚C
134 kPa
Statim_2KS_5KS_E_oct09_FIGS_Q7:Statim_2KS_5KS_E_oct09
1/20/10
1:07 PM
Page 196
4. Instrucciones de uso, Cont.
El murmullo durante la etapa de secado por aire proviene del funcionamiento del compresor. La
fase del ciclo de secado por aire puede interrumpirse en cualquier momento con el botón de
PARADA. La imagen mostrará lo siguiente:
ESPERE POR FAVOR
CICLO COMPLETO
Cuando la etapa de secado por aire automática de 60 minutos finalice, la imagen mostrará lo
siguiente:
EXTRAER CASSETTE
CICLO COMPLETO
Si el ciclo de esterilización es satisfactorio, sonará el tono de recordatorio y destellará la luz de
color ámbar hasta que se presione el botón de PARADA o se extraiga el cassette de la unidad.
4.8 Detención del ciclo
Para detener un ciclo, oprima el botón de PARADA. Si se presiona el botón de PARADA, si se
retira el cassette, o si la unidad detecta un problema mientras opera, el ciclo se detendrá y la luz
de activo color ámbar estará intermitente. Una vez que finalizó un ciclo, se debe oprimir el botón
PARADA antes de que se pueda iniciar otro ciclo. Se visualizará cualquiera de los siguientes
mensajes:
FALLO DE CICLO xxx
CONTENIDO NO ESTERIL
o
CASSETTE EXTRAIDO
CONTENIDO NO ESTERIL
Si la pantalla indica el mensaje, FALLO DE CICLO o NO ESTÉRIL, ¡el contenido del cassette no
es estéril! Consulte la sección 7. Localización de fallos para obtener más información.
Si se interrumpe la etapa de secado por aire del ciclo, no guarde los instrumentos embolsados
que estaban en el cassette a menos que estén secos.
Página 20
Statim_2KS_5KS_E_oct09_FIGS_Q7:Statim_2KS_5KS_E_oct09
1/20/10
1:07 PM
Page 197
5. Mantenimiento
5.1 La limpieza del cassette
Se debe mantener el cassette Statim limpio como buena práctica clínica, ya que ayuda al funcionamiento de la unidad. SciCan recomienda limpiar la superficie interior por lo menos una vez
por semana. Use jabón para lavar vajilla o un detergente suave que no contenga cloro. Friegue
el interior del cassette con una esponja diseñada para superficies revestidas de Teflón™.
Después de restregar, enjuague bien con agua para eliminar todo vestigio de detergente. La
limpieza del interior de su cassette es muy importante si usted esteriliza instrumentos lubricados
con frecuencia. El revestimiento de toda la superficie interior con el agente de secado Stat-Dri
induce a que el agua forme una capa uniforme en la superficie interior sin producir gotas. El agua
en contacto con las superficies calientes del cassette también se evapora con mucha más eficacia. Así se reducen las manchas y los instrumentos se secan mucho mejor. Es importante aplicar
STAT-DRI cada 10 ciclos y después de cada limpieza del cassette.
5.2 Limpieza del filtro del depósito de agua
Este filtro del depósito de agua se debe limpiar al menos una vez por semana o cuando sea necesario. El filtro se puede extraer y limpiar con facilidad, colocándolo boca abajo y bajo un chorro de
agua para lavar las partículas, y luego colocándolo de nuevo en la abertura del depósito. Si se
necesita un respuesto del filtro de depósito de agua, pida la pieza número 01-109300s.
5.3 Limpieza del depósito
Verifique que el depósito no tenga polvo ni partículas. Se debe limpiar el depósito drenándolo,
limpiándolo y enjuagándolo ÚNICAMENTE con agua destilada procesada con vapor. No se
recomienda el uso de agentes químicos o de limpieza, ya que pueden dañar la unidad.
5.4 La limpieza de las superficies exteriores
Use un paño suave humedecido con agua y jabón para limpiar todas las superficies exteriores.
No use sustancias de limpieza fuertes ni desinfectantes.
5.5 Cambio de los filtros de aire Statim 2000S
Para mantener el suministro correcto de aire limpio durante el ciclo de secado por aire, se deben
reemplazar los filtros cada seis meses.
Para cambiar el filtro siga estos pasos:
2000S
1. Apague el interruptor de electricidad en la parte posterior
de la unidad.
2. Quite el viejo filtro de aire de espuma y deséchelo
■4 .
4 (SciCan pieza n° 01-100207S).
3. Instale el filtro nuevo ■
2 en la parte posterior del com4. Ajuste la bandeja del filtro ■
1 que se guardó durante el
presor utilizando el tornillo ■
proceso de desmontaje.
Página 21
■1
■4
■2
Figura 10
Statim_2KS_5KS_E_oct09_FIGS_Q7:Statim_2KS_5KS_E_oct09
1/20/10
1:07 PM
Page 198
5. Mantenimiento
5.6 Cambio de los filtros de aire para retención de bacterias
Para mantener el suministro correcto de aire limpio durante el ciclo de secado por aire, se deben
reemplazar los filtros cada seis meses o después de 500 ciclos.
Para cambiar el filtro de aire para retención de bacterias en el Statim 2000S y 5000S siga los
siguientes pasos:
1. Apague el Statim.
1 del filtro de retención de bacte2. Desconecte el tubo A ■
2
3 . A medida que
rias ■ y retire el filtro de su soporte ■
retira el filtro del soporte, fíjese en la orientación de la
flecha en el filtro.
■2 ■3
■1
3. Cuando el filtro esté fuera del soporte, desconecte cuida4 del filtro.
dosamente el tubo B ■
2 de
4. Antes de instalar el filtro para retención de bacterias ■
repuesto (SciCan artículo número 01-102119S) verifique
que la dirección de la flecha en el filtro sea la
misma que la de la flecha del soporte.
Presione el conector izquierdo del filtro en el
4 .
tubo B ■
5. Suavemente presione el filtro de repuesto en
3 . La flecha del filtro
el soporte del filtro ■
debería estar hacia el frente y apuntando
hacia la izquierda.
2000S
■4
■4
Figura 11
5000S
■2
■1
■3
Figura 12
1 al conector derecho del filtro.
6. Vuelva a conectar el tubo A ■
5.7 Reemplazo de la junta del cassette
Para asegurar un rendimiento óptimo del autoclave de cassette Statim, cambie la junta del cassette cada 500 ciclos o cada seis meses, lo que ocurra primero. SciCan tiene disponibles juntas
de repuesto (artículo número 01-100028S para Statim 2000S y 01-106049S para Statim 5000S).
Para cambiar la junta del cassette, siga los pasos siguientes:
Coloque la tapa del cassette y la nueva junta sobre una superficie de trabajo limpia. Examine la
posición de la junta usada en la tapa del cassette y coloque la nueva junta en la misma dirección,
cerca de la tapa.
Página 22
Statim_2KS_5KS_E_oct09_FIGS_Q7:Statim_2KS_5KS_E_oct09
1/20/10
1:07 PM
Page 199
5. Mantenimiento, Cont.
Retire la junta vieja y deséchela. Retire cualquier residuo del canal de la junta y
purgue el canal con agua destilada.
Lubrique la junta nueva con el líquido lubricante para juntas incluido.
Inserte el borde redondeado de la junta debajo del borde redondo de la tapa.
Alinee los orificios de la junta nueva con los orificios de la tapa.
NOTA: En cada esquina y en los orificios de la tapa debe haber dos puntas
cuadradas visibles. Las puntas deben encajar a nivel con la superficie exterior de
la tapa.
Asegúrese de que la junta esté completamente insertada. Palpe alrededor de la
periferia para asegurase de que la junta está correctamente colocada.
NOTA: Durante un ciclo, puede aparecer vapor entre la tapa y la bandeja. Si
esto continúa, retire el cassette y verifique que la junta esté correctamente colocada.
Tenga cuidado. Las partes metálicas estarán calientes y el cassette
puede contener vapor caliente.
Figura 13
5.8 Cómo mantener los niveles del líquido
Use solamente agua destilada que contenga menos de 5 ppm de sólidos disueltos en total (con
conductividad menor a 10µS / cm) en el Statim para el proceso de vapor. Para rellenar el depósito, retire el sombrerete de la parte superior de la unidad y llene el depósito. Recomendamos el
uso de un embudo para reducir los derrames. Cada vez que rellene el depósito, vacíe la botella
de desechos y vuelva a llenarla con agua hasta la línea MIN. Vacíe la botella de desechos a
menudo para evitar olores desagradables y la decoloración del contenido. (Se puede agregar un
desinfectante de bajo nivel, preparado según las instrucciones del fabricante, en la botella de
desechos para remediar esta situación).
5.9 Lecturas de la calidad del agua
1. Encienda la unidad mientras oprime el botón de PARADA para acceder al menú Configuración
del Usuario.
2. Utilizando los botones DESEMBOLSADO y EMBOLSADO, desplácese hasta Calidad del Agua
y selecciónela presionando el botón GOMA Y PLÁSTICO.
>Calidad del agua
CD=XXuS
l / yyy / z.z ppm
CD=conductividad
yyy= valor de ingeniería
Página 23
XX= valor en micras S.
z.z= valor en partes por millón
Statim_2KS_5KS_E_oct09_FIGS_Q7:Statim_2KS_5KS_E_oct09
1/20/10
1:07 PM
Page 200
5. Mantenimiento, Cont.
5.10 Programa de mantenimiento preventivo
Para asegurar un rendimiento sin problemas, tanto el operador como el distribuidor deben seguir
un programa de mantenimiento preventivo. NOTA: Consulte las leyes de seguridad correspondientes de su país, región o estado, para cualquier otra prueba del usuario que pueda ser necesaria.
Los siguientes programas describen las acciones necesarias.
Diariamente
Operador
Depósito de agua
Botella de desechos
Semanalmente
Cassette
Biológico y/o
Filtro de aire
Cada seis
meses
Filtro de agua
Junta del cassette
Biologica y/o
Filtro de aire
Cassette
Una vez al año
Filtro biológico
• Sustituya el agua según sea necesario.
• Para el uso oftalmológico, drene al final de cada día de trabajo, déjelo vacío, y rellenar en
empezar siguiente día.
• Vacíe la botella de desechos cada vez que rellene el depósito.
• Rellen la botella con agua, hasta la línea de la marca MIN.
• Lave el interior del cassette con jabón lavavajillas o un detergente suave que no contenga cloro.
• Friegue el interior del cassette con una esponja diseñada para superficies revestidas de
Teflón™.
• Después de eliminar todo vestigio de detergente, trate las superficies interiores del cassette con agente de secado STAT-DRI™ Plus para mejorar el proceso de secado. Haga
más pedidos Plus a SciCan, mencionando los productos 2OZPLUS, 8OZPLUST.
• Verifique que el filtro de aire no contenga polvo ni humedad. Reemplácelos si contienen
polvo.Llame al servicio técnico si está húmedo.
• Compruebe el filtro del depósito de agua cada semana y límpielo si es necesario.
Reemplácelo si fuera necesario.
• Sustitúyala cada 500 ciclos o cada seis meses (lo que ocurra primero), o cuando sea necesario.
•Reemplácela cada 500 ciclos o cada seis meses (lo que ocurra primero).
Técnico
• Controle que la bandeja, la tapa y la junta no estén dañadas. Reemplácelas si fuera necesario.
• Inspeccione el filtro biológico para asegurarse de que no tenga humedad.
Válvula de solenoide
• Inspeccione la válvula y límpiela si está sucia. Reemplace el solenoide si tiene defectos.
Válvula de contención
• Extraiga el tubo de escape de la parte posterior de la unidad durante la fase de secado por
aire. Verifique si hay aire proveniente del conector.
Bomba
Depósito de agua
Calibración
• Limpie los filtros; reemplácelos si tienen polvo.
• Retire el tubo compresor de aire de la entrada de la válvula de contención cuando se está ejecutando un ciclo. Asegúrese de que no se filtre nada de vapor de la válvula. Reemplácela en
caso de que hubiera filtraciones.
• Verifique que el depósito no tenga polvo. Si fuera necesario, limpie y enjuague con agua destilada procesada con vapor.
• Calibre la unidad.
Página 24
Statim_2KS_5KS_E_oct09_FIGS_Q7:Statim_2KS_5KS_E_oct09
1/20/10
1:07 PM
Page 201
6. El puerto de comunicaciones
6.1. El puerto de comunicaciones RS232
Todas las unidades Statim que no tienen una impresora
interna tendrán un puerto de comunicaciones RS232 que le
permita conectar una impresora externa o un cargador de
datos SciCan. Para imprimir, tendrá que comprar una
impresora recomendada (vea la lista que aparece más
adelante) en su tienda de informática o electrónica más
cercana. Para el almacenamiento de datos, puede comprar
un Cargador de datos SciCan con conexión USB y almacenar la información de ciclos en un dispositivo de almacenamiento masivo (MSD), por ejemplo una unidad Flash con
USB o una tarjeta de memoria SD.
Modelo de impresora
Epson
TM-U220D (C31C515603)
Citizen
IDP-3110-40 RF 120B
Star Micro
SP212FD42-120
Star Micro
SP216FD41-120
Star Micro
SP512MD42-R
Cargador de datos SciCan
Para dispositivo de
almacenamienot masivo*
Impresora
o
Cargador
de datos
Fin de la línea
CR/LF
Puerto Serie
Velocidad en bits
Usuario de
impresora ° carácter
CR/LF
9600
248 [0xF8]
CR
9600
N/A
CR
9600
210 [0xd2]
CR/LF
9600
210 [0xd2]
CR/LF
9600
210 [0xd2]
Fin de la línea
CR/LF
N/A
Puerto Serie
Usuario de
Velocidad en bits impresora ° carácter
9600
32 [0xd2]
Para que la unidad Statim se comunique con un dispositivo específico, deberá activar esta función en el menú de Configuración del usuario. Siga las instrucciones de la sección 6.2 Instalación
del cargador de datos SciCan, que aparece a continuación, para activar la comunicación con una
impresora externa o con el cargador de datos SciCan.
Página 25
Statim_2KS_5KS_E_oct09_FIGS_Q7:Statim_2KS_5KS_E_oct09
1/20/10
1:07 PM
Page 202
6. El puerto de comunicaciones, Cont.
6.2 Instalación del cargador de datos SciCan
El cargador de datos SciCan con conexión USB puede grabar y almacenar la información de ciclos en un dispositivo de almacenamiento masivo (MSD), por ejemplo una unidad Flash con USB
o una tarjeta de memoria SD.
Estas instrucciones son para unidades con un puerto de comunicaciones de 9 patillas (RS232)
ubicado en la parte posterior de la unidad.
Siga los pasos que se describen a continuación antes de conectar al cargador de datos.
Modo de Usuario
Configuración de Hora/Fecha
Configuración de idioma
Calidad del agua en Configuración
de ID de la unidad
Última impresión
RS232
Fin de la línea CR/LF
Velocidad en bits del puerto serie
Carácter de usuario de impresora °
Guardar y salir
Salir
Menú Configuración del
usuario
Para instalar el cargador de datos SciCan,
acceda al menú Configuración del usuario,
encendiendo la unidad mientra oprime el
boton de PARADA. Siga las instrucciones
que aparecen a continuación para completar los pasos de instalación.
Paso 1
Selección de la opción USB Flash/MSD
RS232
USB/Flash MSD
1. Encienda la unidad mientras oprime el botón de PARADA para acceder al menú
Configuración del Usuario.
2. Utilizando los botones DESEMBOLSADO y EMBOLSADO, desplácese hasta RS232 y selecciónelo presionando el botón GOMA Y PLÁSTICO.
3. Desde el menú RS232, use los botones DESEMBOLSADO Y EMBOLSADO para
desplazarse hasta la opción USB/FLASH MSD y presione el botón GOMA Y PLÁSTICO para
seleccionar y regresar al menú Configuración del usuario.
Página 26
Statim_2KS_5KS_E_oct09_FIGS_Q7:Statim_2KS_5KS_E_oct09
1/20/10
1:07 PM
Page 203
6. El puerto de comunicaciones, Cont.
Configuración de la velocidad en bits del puerto serie a 9600
Velocidad en bits del
puerto serie
9600
1. En el menú Configuración del usuario, utilice los botones DESEMBOLSADO y EMBOLSADO
para desplazarse hasta el menú Velocidad en bits del puerto serie y selecciónelo utilizando el
botón GOMA Y PLÁSTICO.
2. Desde el menú Velocidad en bits del Puerto Serie, use los botones DESEMBOLSADO Y
EMBOLSADO para desplazarse hasta 9600 y presione el botón GOMA Y PLÁSTICO para
seleccionar y regresar al menú Configuración del usuario.
Configuración de los caracteres del usuario de impresora
(ejemplo: 134°C)
Carácter de usuario de
impresora °
32 [0x20]
1. En el menú Configuración del usuario, utilice los botones DESEMBOLSADO y EMBOLSADO
para desplazarse hasta el menú Caracteres del Usuario de Impresora ° y selecciónelo utilizando el botón GOMA Y PLÁSTICO.
2. En el menú Caracteres del Usuario de impresora °, utilizando el botón DESEMBOLSADO
para incrementar en uno el valor visualizado y el botón EMBOLSADO para incrementar ese
valor en diez, introduzca el valor 32 [0x20] y oprima el botón GOMA Y PLÁSTICO para aceptar y regresar al menú Configuración del usuario.
Guardar y salir
Guardar y salir
Se debe realizar la acción de Guardar y Salir una vez que se haya completado la configuración
anterior. Si no se hace, la información se revertirá a su configuración anterior.
1. En el menú Configuración del usuario, utilice los botones DESEMBOLSADO y EMBOLSADO
para desplazarse hasta la función Guardar y Salir.
2. Selecciónela oprimiendo el botón GOMA Y PLÁSTICO.
La pantalla LCD mostrará la información
de hora y fecha y una secuencia
de mensajes:
HH:MM DD/MM/AAAA
“MSD NO DETECTADO”/”INSERTAR
MSD/FLASH”/”SELECCIONAR UN CICLO”
Página 27
Statim_2KS_5KS_E_oct09_FIGS_Q7:Statim_2KS_5KS_E_oct09
1/20/10
1:07 PM
Page 204
6. El puerto de comunicaciones, Cont.
Paso 2
Configuración de la hora y la fecha
Hora/Fecha
HH:MM DD/MM/AAAA
Nota: Si la hora y fecha se configuraron de acuerdo con la sección 3.6, esta acción no se tiene
que realizar de nuevo.
1. Encienda la unidad mientras oprime el botón de PARADA para acceder al menú
Configuración del Usuario.
2. Utilizando los botones DESEMBOLSADO y EMBOLSADO, desplácese hasta
Configuración de Hora/Fecha y oprima el botón GOMA Y PLÁSTICO para seleccionarlo.
3. En el menú Configuración de Hora/Fecha, establezca la hora y la fecha utilizando los botones
DESEMBOLSADO Y EMBOLSADO para cambiar los valores visualizados y el botón GOMA Y
PLÁSTICO para seleccionar. Presione el botón PARADA cuando haya finalizado.
Paso 3
Configuración del ID de unidad
ID de unidad
001
Nota: Si el ID de la unidad se configuró de acuerdo con la sección 3.8, esta acción no se tiene
que realizar de nuevo.
1. Encienda la unidad mientras oprime el botón de PARADA para acceder al menú
Configuración del Usuario.
2. Utilizando los botones DESEMBOLSADO y EMBOLSADO, desplácese hasta Configuración
de ID de unidad y oprima el botón GOMA Y PLÁSTICO para seleccionarlo.
3. En el menú Configuración del ID de unidad, utilice los botones DESEMBOLSADO y EMBOLSADO para cambiar los valores visualizados y el botón GOMA Y PLÁSTICO para seleccionar
y desplazarse hasta el siguiente dígito. Presione el botón PARADA cuando haya finalizado.
Paso 4
Conexión del cargador de datos SciCan
1. Asegúrese de que tanto la unidad Statim como
el cargador de datos SciCan están apagados.
2. Conecte el cargador de datos SciCan a la unidad
Statim mediante el puerto serie.
3. Encienda el cargador de datos SciCan
4. Encienda la unidad Statim.
HH:MM DD/MM/AAAA
“MSD NO DETECTADO”/”INSERTAR
MSD/FLASH”/”SELECCIONAR UN CICLO”
HH:MM DD/MM/AAAA
USB/FLASH DETECTADO/EXTRAER MSD CON
SEGURIDAD/SELECCIONAR UN CICLO
5. La pantalla LCD mostrará la siguiente secuencia de mensajes:
6. Inserte la unidad Flash USB o la tarjeta de memoria SD
7. Después de unos segundos, la pantalla LCD mostrará la siguiente secuencia de mensajes:
Página 28
Statim_2KS_5KS_E_oct09_FIGS_Q7:Statim_2KS_5KS_E_oct09
1/20/10
1:07 PM
Page 205
6. El puerto de comunicaciones, Cont.
6.3 Instalación del papel en la impresora interna
En la unidad Statim 5000S, utilice solamente papel aprobado para el uso con la impresora interna
opcional. El uso de cualquier otro tipo de papel perjudicará la impresora y anulará la garantía. El
papel térmico se puede obtener a través de SciCan (SciCan artículo número 01-101657S).
No opere la impresora sin papel. Si se le agota el papel térmico o si no desea usar la impresora,
apáguela.
Nunca tire del papel hacia atrás a través de la impresora. Esto perjudicará el mecanismo de la
impresora.
Para instalar el papel en la impresora, siga los pasos siguientes:
1. Encienda la unidad Statim 5000S .
2. Abra la puerta de la impresora
3. Encienda la impresora.
■1
empujando la mitad superior de la puerta.
3 Use la plantilla de corte de papel que
4. Desenrolle un poco de papel del rollo de papel térmico ■
viene incluida con cada caja de papel utilizando la plantilla para cortar papel que se incluye con
cada caja.
5. Mueva el brazo del rollo de papel■4 hacia la posición de carga. Coloque el rollo de papel ■3
en el brazo de manera que la tira de papel se alimente desde la parte superior del rollo y luego
introdúzcala cuidadosamente en la ranura de alimentación del papel ■5 hasta que se detenga.
Si el papel no se alimenta desde la parte superior, el lado del papel que es sensible al calor no
quedará en contacto con el cabezal de impresión, y la impresora no imprimirá.
6. Con una mano continúe alimentando delicadamente la tira de papel en la ranura de alimentación
del papel. Con la otra mano, oprima el botón de avance del papel hasta que el papel se alimente
automáticamente.
Mantenga el papel recto cuando lo alimente en la impresora o podrá quedar atascado. No fuerce el
papel en la ranura. Si el papel no entra en la ranura, corte el extremo del rollo nuevamente y vuelva a cargar el papel.
Página 29
Statim_2KS_5KS_E_oct09_FIGS_Q7:Statim_2KS_5KS_E_oct09
1/20/10
1:07 PM
Page 206
6. El puerto de comunicaciones, Cont.
7. Continúe oprimiendo el botón de avance del
papel ■6 hasta que el papel se alimente a
través de la ranura de salida del papel en la
parte delantera de la impresora. Luego
mueva el rollo de papel ■3 y el brazo a la
posición de operación y cierre la puerta de la
impresora ■1 . La impresora ahora se
encuentra lista para funcionar.
■5
■2
Cuando vea una línea roja en una cara del papel,
es hora de reemplazar el rollo.
■4
Nunca coloque un utensilio ni una herramienta en
la ranura de salida del papel. Para obtener
instrucciones completas, consulte la sección 6.4
Cómo Despejar el Papel Atascado.
■6
Si el papel se atasca y no lo puede sacar oprimiendo el botón de avance del papel ■6 , no jale
del papel hacia atrás por la impresora.
Para cambiar el rollo de papel
siguientes:
■3 , siga los pasos
1. Con tijeras, corte el papel entre el rollo y la
ranura de alimentación del papel ■5 .
2. Saque el rollo del brazo y tire la porción sin
usar a la basura.
3. Oprima el botón de avance del papel ■6 para
alimentar el papel que permanece en la
impresora y sacarlo por la ranura en la parte
delantera de la impresora.
4. Instale el nuevo rollo de papel térmico siguiendo las
instrucciones descritas en esta sección.
Página 30
■3
■1
■4
Figura 15,1
■5
■2
■6
■3
Figura 15,2
Statim_2KS_5KS_E_oct09_FIGS_Q7:Statim_2KS_5KS_E_oct09
1/20/10
1:07 PM
Page 207
6. El puerto de comunicaciones, Cont.
6.4 Eliminación de atascos de papel en la impresora interna
Si el papel se atasca en la impresora y no se puede
6
sacar oprimiendo el botón de avance del papel ■
,será necesario desensamblar la impresora. No tire del
papel hacia atrás por la impresora y nunca coloque
utensilios ni herramientas dentro de la ranura de salida
del papel.
■7
■8
Cuando el papel se haya atascado en la impresora,
siga los siguientes pasos para despejarlo:
1. Apague el Statim 5000S y desenchufe la unidad.
■9
2. Usando tijeras, corte el papel entre el rollo y la
5 .
ranura de alimentación del papel ■
14
■
3. Retire el rollo de papel ■ del brazo del rollo de
4 y deje el brazo en la posición de cargapapel ■
do.
3
4. Utilizando un destornillador Phillips N° 1, retire los
7 de la cubierta de la impresora ■
8 y
tres tornillos ■
retire la cubierta.
5. Observe la dirección del tablero impreso de cables
que ha quedado expuesto y el brazo del rollo de
4 ensamblado en la puerta de la impresora
papel ■
■1 .
15
■
13
■
11
■
10
■
■1
■4
10
■
12
■
Figura 16
6. Levante suavemente el tablero impreso de cables y sáquelo de la puerta de la impresora.
Tenga cuidado cuando trabaje con el tablero. La impresora y el tablero de cables son integrales. No ponga presión sobre las conexiones del cable de cinta soldado al tablero. No
saque el conector del cable flexible del cabezal del conector en el tablero. El mecanismo de
impulsión del papel debajo del tablero de cables ahora quedará expuesto.
7. Usando pinzas para cejas o tenacillas de punta de aguja finas, saque el papel cuidadosamente del mecanismo.
Cuando haya terminado de sacar el papel, vuelva a ensamblar la impresora:
1. Cuidadosamente vuelva a colocar el brazo del rollo de papel en la posición de cargado, en
1 .
los sujetapapeles en la puerta de la impresora ■
Página 31
Statim_2KS_5KS_E_oct09_FIGS_Q7:Statim_2KS_5KS_E_oct09
1/20/10
1:07 PM
Page 208
6. El puerto de comunicaciones, Cont.
2. Coloque el tablero de impresión de cables nuevamente en posición en la puerta de la impre9 en el tablero de cables y las
sora. Observe la alineación de los orificios de montaje ■
13
salientes de montaje ■ en la puerta de la impresora. El cuerpo negro de plástico de la
10 en el interior de la puerta de
impresora queda apoyado entre las nervaduras de posición ■
la impresora.
3. Asegúrese de que los cables flexibles
sora y el tablero de cables.
11 , ■
14
■
no estén apretados entre la puerta de la impre-
4. Ubique la cubierta de la impresora sobre la puerta de la impresora. Asegúrese de que los
cables flexibles no estén apretados entre la cubierta y la puerta. El botón de encendido y el
botón para avanzar el papel deben sobresalir a través de las salidas en la cubierta y deben
operar libremente.
5. Con un destornillador Phillips N° 1, ajuste la cubierta de la impresora a la puerta de la impresora con los tres tornillos guardados durante el procedimiento de desarmado. No ajuste de
más estos tornillos.
6. Enchufe la Statim 2000S / 5000S en el receptáculo de pared. Vuelva a conectar la impresora
si se la desconectó antes. Coloque el interruptor de energía en la posición
de encendido.
7. Oprima el botón de encendido de la impresora para encenderla. Cargue el papel en la impresora siguiendo el procedimiento de la sección 7.3 Instalación del papel en la impresora interna.
Página 32
Statim_2KS_5KS_E_oct09_FIGS_Q7:Statim_2KS_5KS_E_oct09
1/20/10
1:07 PM
Page 209
6. El puerto de comunicaciones, Cont.
6.5 Vista general de la impresión del ciclo
1.
2.
3.
4.
5.
6.
7.
8.
9.
Modelo: software STATIM 2000:
S2S2R410
Identificador de la unidad: el
autoclave se configuró con el
número 323
4.
5.
6.
7.
Hora/Fecha: 1:38 p.m. 14 de
abril de 2003
Nombre del ciclo: INST SOL NO
EMP (N)
Nombre del Ciclo (continuación)
– parámetros: 134 ˚C / 3,5 min
– 1P
Ciclo del reloj: inicio a las 12:00
a.m.
8.
9.
10.
11.
12.
13.
14.
15.
16.
17.
Pico de temperatura / Press. &
hora de la depuración de
acondicionamiento: para cada
depuración (cantidad de renglones según la selección del
ciclo - éste es un ciclo de una
depuración– actividad dentro de
la fase “B”)
10. Temperatura mínima / Press. &
hora de la depuración de
acondicionamiento: para cada
depuración (cantidad de renglones según la selección del
ciclo - éste es un ciclo de una
depuración– actividad dentro
de la fase “B”)
2.
3.
Contador de ciclos: el número
de ciclos que se ejecutaron en
la unidad = 9
Calentamiento completo: el inicio de la fase de acondicionamiento es a las 2:07 (ver
el gráfico del ciclo – Fase “A”
completa, inicio de la fase “B”)
1.
18.
19.
20.
21.
22.
23.
Página 33
Statim_2KS_5KS_E_oct09_FIGS_Q7:Statim_2KS_5KS_E_oct09
1/20/10
1:07 PM
Page 210
6. El puerto de comunicaciones, Cont.
11.
Hora de Inicio de la Presurización: 3:31 (inicio de la fase “C”)
13.
Temp. / Press. y Hora al inicio de la esterilización (fase “D”)
12.
14.
15.
16.
17.
18.
19.
20.
21.
22.
23.
Hora de Inicio de la Esterilización: 4:12 (inicio de la fase “D”)
Temperatura Mínima/Presión durante la fase de esterilización
(los límites más bajos de la fase “D”)
135,1˚C 308 kPa
Temperatura Máxima/Presión durante la fase de esterilización
(los límites más altos de la fase “D”)
136,7˚C 323 kPa
Temp. / Press. y Hora de finalización de la fase de esterilización (fin de la fase “D”)
Hora de inicio de la Ventilación: 7:43 (inicio de la fase “E”)
La esterilización finalizó exitosamente
Hora de inicio del Secado por Aire: 8:07 (inicio de la fase “F”)
El usuario detuvo el ciclo
Se abortó el ciclo de Secado antes de finalizar, la carga puede no estar seca
Página 34
Statim_2KS_5KS_E_oct09_FIGS_Q7:Statim_2KS_5KS_E_oct09
1/20/10
1:07 PM
Page 211
7. Localización de fallos
Problema
La unidad no se enciende.
Solución
Verifique que la unidad esté enchufada en un
tomacorriente debidamente puesto a tierra y que el
cordón eléctrico esté firmemente asentado en la
parte posterior de la máquina.
Pruebe con otro circuito. Apague la unidad por 10
segundos y luego vuelva a encenderla.
Hay agua debajo de la máquina.
Compruebe la condición del círcuito de conductos
interruptor o fusible.
Verifique que no se haya derramado agua cuando se
rellenó el depósito. Asegúrese de que el tapón en el
tubo de desagüe esté firmemente colocado. Saque y
vuelva a introducir el cassette.
Pruebe otro ciclo.
Tenga cuidado. Las partes metálicas estarán
calientes y el cassette contendrá vapor caliente.
Hay fugas desde el cassette. Si gotea agua desde la
parte inferior de la unidad durante el funcionamiento,
verifique que la junta del cassette no esté mal alineada o averiada y cámbiela si es necesario.
Tenga cuidado. Las partes metálicas estarán
calientes y el cassette contendrá vapor caliente.
Pruebe otro ciclo. Si aún hay fugas,pruebe otro ciclo
usando otro cassette, si dispone de uno.
Si las fugas persisten, apague la unidad, retire y
descargue el cassette, desenchufe la unidad y llame
a su representante.
Los instrumentos no se secan.
El mejor secado ocurre cuando el ciclo continúa hasta su terminación. Permita que el ciclo termine. Asegúrese de que los
instrumentos se hayan cargado debidamente en el cassette.
Consulte la sección 4.4 Preparación y
Carga de los Instrumentos.
Verifique el nivelado de la unidad.
Limpie el interior del cassette y trátelo con agentes de secado Stat-Dri. Consulte la sección 5.1 Limpieza del cassette.
Asegúrese de que el tubo de escape (tubo hacia la botella
de desechos) no esté torcido.
Página 35
Statim_2KS_5KS_E_oct09_FIGS_Q7:Statim_2KS_5KS_E_oct09
1/20/10
1:07 PM
Page 212
7. Localización de fallos, Cont
Si el tubo está torcido, enderécelo. Si no se puede
enderezar el tubo, retírelo del conector unido al
Statim. Presione el cuello del conector y con la otra
mano tire firmemente del tubo. Una vez que el tubo
esté libre del conector, corte la sección dañada del
tubo utilizando un instrumento cortante. Asegúrese
de dejar suficiente tubo como para alcanzar la
unidad cuando vuelva a conectar el tubo al conector
de escape. Si el tubo es demasiado corto como para
cortar una sección, póngase en contacto con su distribuidor SciCan para reemplazarlo.
Asegúrese de que el compresor esté funcionando.
Para verificarlo, retire el tubo de escape de la botella
de desechos. Inicie el Ciclo único de secado por aire
y ubique el extremo libre en un vaso de agua. Si no
hay un flujo fuerte y consistente de burbujas, el
compresor no está funcionando correctamente.
Póngase en contacto con su distribuidor de SciCan.
Ciclo interrumpido —NO ESTÉRIL., Ciclo cancelado — NO ESTÉRIL y
FALLO DE CICLO, mensajes.
Espere unos minutos e intente otro ciclo antes de
pasar a la siguiente solución. Retire el cassette.
Tenga cuidado. Las partes de metal estarán
calientes y el cassette contendrá vapor caliente.
Inspeccione el cassette para asegurase de que los
orificios de la parte trasera de la junta estén perfectamente alineados y de que el borde flexible de la
junta está completamente libre. Verifique que el tubo
de escape no esté ni torcido ni obstruido. Si el tubo
está torcido, enderécelo. Si no se puede enderezar
el tubo, retírelo del conector unido al Statim.
Presione el cuello en el conector y con la otra mano
tire firmemente del tubo. Una vez que el tubo esté
libre del conector, corte la sección dañada del tubo
utilizando un instrumento cortante. Asegúrese de
dejar suficiente tubo como para alcanzar la unidad
cuando vuelva a conectar el tubo al conector de
escape. Si el tubo es demasiado corto como para
cortar una sección, póngase en contacto con su distribuidor SciCan para reemplazarlo.
Verifique que no se haya expuesto al Statim a
cualquier interferencia eléctrica en un descuido.
Consulte la sección de Instalación referida a
Consideraciones Ambientales. (Sección 3.1)
Pruebe a ejecutar otro ciclo. Si el problema continúa, registre el número del mensaje de falla de
ciclo y comuníquese con su representante.
Página 36
Statim_2KS_5KS_E_oct09_FIGS_Q7:Statim_2KS_5KS_E_oct09
1/20/10
1:07 PM
Page 213
7. Localización de fallos, Cont
Calor excesivo emanando del frente
de la máquina.
Saque y vuelva a introducir el cassette. Pruebe otro
ciclo. Retire y verifique que la junta del cassette no esté
mal alineada o dañada. Si fuera necesario, reemplace
la junta. Tenga cuidado, ya que las partes de metal
estarán calientes y el cassette contendrá vapor caliente.
Si la filtración continúa, apague la unidad, retire y
descargue el cassette y póngase en contacto con su
distribuidor SciCan.
Mensaje de CALIDAD DEL AGUA NO ACEPTABLE. La máquina no
comienza a funcionar.
Usted ha usado agua que no es destilada para el
proceso de vapor o no se ha destilado debidamente.
Mensaje de RELLENAR DEPÓSITO. La
máquina no comienza a funcionar.
El nivel del agua en el depósito es bajo. Rellene el
depósito. Consulte los pasos descritos en la sección
3.4 Relleno del depósito.
Mensaje de FALLO DE LA IMPRESORA en la
pantalla.
La impresora de LCD no imprime.
La impresora no funciona.
La impresora parece funcionar, pero no
imprime nada en el papel.
Hora y fecha incorrectos.
Vacíe el depósito y rellénelo con agua destilada
procesada con vapor que contenga menos de 5ppm
de sólidos disueltos en total (con una conductividad
menor a 10 µS / cm). Si tiene un medidor de conductividad de agua, verifique la calidad del agua
antes de rellenar el depósito. Consulte los pasos
descritos en la sección 3.9 Despacho de la Unidad
para vaciar el depósito.
Verifique que no haya papel atascado. Si el papel se
ha atascado, siga los procedimientos para retirar el
papel indicados en la sección 6.4. Apague la unidad
por 10 segundos y luego vuelva a encenderla. Si el
papel aún está atascado, siga los procedimientos de
desensamblaje indicados en la sección 6.4 Cómo
Despejar el Papel Atascado.
Asegúrese de que el cable de la impresora esté
conectado firmemente al conector en la parte posterior del Statim y a la impresora Statprinter.
Asegúrese de que la impresora esté encendida.
Apague la unidad por 10 segundos y luego vuelva a
encenderla.
Asegúrese de que el papel está cargado adecuadamente (consulte la sección 6.3 Instalación del papel
en la impresora interna). Verifique que el papel salga
del rollo de papel desde la parte superior del rollo.
Esto significa que la superficie tratada del papel térmico revestido estará en contacto con el cabezal de
impresión térmica.
No se ha configurado la hora y la fecha. Consulte la
sección 3.6 Configuración de la hora y la fecha.
Página 37
Statim_2KS_5KS_E_oct09_FIGS_Q7:Statim_2KS_5KS_E_oct09
1/20/10
1:07 PM
Page 214
7. Localización de fallos, Cont
Mensaje MSD NO CONECTADO <>
INSERTAR MSD/FLASH
Compruebe la conexión del cable serie.
Compruebe la conexión de alimentación.
Asgúrese de que el indicador LED rojo inferior esté
encendido.
Compruebe que el dispositivo de almacenamiento
masivo esté corrrectamente insertado.
Repita las instrucciones para Instalación del cargador de datos SciCan en la unidad Statim.
Mensaje MSD/FLASH LLENA <> SUSTITUIR
MSD
El MSD está lleno. Exporte los datos.
Mensaje Faltan líneas de datos en
MSD/FLASH
Consulte la pantalla del STATIM para confirmar que
la esterilización es satisfactoria.
Restaure el cargador de datos desenchufando su
cable de alimentación, desconectando el MSD y
esperando 10 segundos. Luego vuelva a conectar el
adaptador de alimentación e inserte el MSD en el
cargador de datos.
Si el problema continúa, póngase en contacto con el
Centro de Servicio al Cliente de SciCan.
Mensaje: El archivo o directorio en el
MSD está dañado o es ilegible.
Consulte la pantalla del STATIM para confirmar que
la esterilización es satisfactoria.
El MSD puede que se haya desconectado mientras
se estaba escribiendo información en él. El MSD no
se debería desenchufar hasta que se muestre el
mensaje "SAFELY REMOVE MSD <> MSD/FLASH
DETECTED".
Los archivos o directorios dañados puede que se
hayan perdido. Vuelva a formatear el MSD en su
ordenador.
Página 38
Statim_2KS_5KS_E_oct09_FIGS_Q7:Statim_2KS_5KS_E_oct09
1/20/10
1:07 PM
Page 215
8 Lista de Repuestos
01-100204S
01-100724S
01-104702S
01-104704S
01-100782S
01-100812S
01-100834S
01-101649S
01-101657S
01-101658S
01-101709S
01-101755S
01-101757S
01-101766S
01-101768S
01-101769S
01-101779S
01-106030S
01-106071S
01-104093S
01-101783S
01-101970S
01-102119S
01-103139S
01-103475S
01-103557S
01-103865S
01-103945S
01-104343S
01-104472S
Tubo de escape
Botella del condensador sin condensador
Accesorio de la botella de
agua de desperdicios
Vástago
Accesorio incrustado (2000S)
Botella del condensador
Tapa del cassette (2000S)
Junta del cassette (5000S)
Papel termal (Caja de 10 rollos)
Mangos del cassette
Rejilla de la malla (5000S)
Accesorio incrustado (5000S)
Tapa del cassette con caja (5000S)
Cordón eléctrico, Reino Unido
Cordón eléctrico, Suiza
Cordón eléctrico, Italia
01-104700S
01-100735S
01-100780S
01-104786S
01-100028S
Filtro del compresor (2000S)
Equipo de la junta tórica del
adaptador del cassette
Tapa del adaptador del cassette (2000S)
Tapa del adaptador del cassette (5000S)
Porta instrumentos - 4 mm.
(5000S)
Junta del cassette (2000S)
01-106438S
Tapa del cassette, Ampliada (2000S)
01-104093S
Equipo de filtros del depósito de agua
01-108340S
01-100008A
01-100271A
01-101613S
Statim PCD – repuestos
ACCESORIOS
Equipo de cassette final (2000S)
Equipo de bandeja de cassette
con malla (2000S)
Cassette completo (5000S)
01-101614S
Bandeja completa (5000S) con caja
Mango extendido de la tapa del
cassette (5000S)
01-103935
Bandejas STATDRI (5000S)
Tapa y filtro del depósito
01-104499
Rejilla de instrumentos de cassette extendido (5000S)
Adaptador del cassette (2000S)
Adaptador del cassette (5000S)
Equipo de adaptador manual (2000S)
Equipo de adaptador manual (5000S)
Cordón eléctrico, Europa
Mango de la tapa del cassette (2000S)
Tubo de escape de 3 m de longitud
Cable de información (5000S)
Filtro biológico
Medidor de conductividad
Bandeja (2000S)
Cordón eléctrico de repuesto Dinamarca (det.)
Lubricante para juntas
Instrumentos desembolsados de
rejilla y bandeja Equipo (2000S)
Tubos de enchufe – desagüe (5000S)
Mangos extendidos del cassette
(5000S)
01-104696S
01-104697S
Adaptador manual
Junta del adaptador del cassette (2000S)
01-104699S
Inserción de junta
01-104698S
01-100207S
Junta del adaptador del cassette (5000S)
01-103923
01-104104
01-104701
01-104703
01-106101
01-106102
01-106653
01-210000
01-106325
2OZPLUS
8OZPLUST
32OZPLUS
99-108332
01-108341
Página 39
Botella adicional del condensador
Cassette de longitud extendida
(5000S)
Bandeja de malla (2000S)
Equipo de impresora (5000S)
Contenedor de endoscopio completo (5000S)
STAT-dri 2 oz
STAT-dri 8 oz
STAT-dri 907,18 g
Emulador químico 134˚C/3,5 min
Equipo de ensamblaje final de
Statim PCD
Statim_2KS_5KS_E_oct09_FIGS_Q7:Statim_2KS_5KS_E_oct09
1/20/10
1:07 PM
Page 216
9. Garantía
Garantía Limitada
SciCan garantiza por un período de un año que Statim 2000 / 5000, cuando haya sido
fabricado por SciCan en estado nuevo y sin uso, no fallará durante el servicio normal debido
a defectos en materiales y en mano de obra que no sean debidos a un abuso, mal uso o
accidente aparentes.
La garantía de una año cubrirá el rendimiento de todos los componentes de la unidad, excepto
artículos consumibles tales como la junta del cassette, el fitro del compresor y el filtro mibrobiológico, siempre que el producto esté siendo utilizado y mantenido de acuerdo con la descripción del manual del usuario.
Se aplicará una garantía de dos años específicamente a la bomba de agua, al generador de
vapor y a la placa de circuito impreso (PCB), siempre que el producto esté siendo utilizado y
mantenido de acuerdo con la descripción del manual del usuario.
En el caso de un fallo debido a tales defectos durante este período de tiempo, el recurso exclusivo será la reparación o el reemplazo, a discreción de SciCan y sin cargo alguno, de toda pieza
defectuosa (a excepción de la empaquetadura), siempre que SciCan reciba un aviso por escrito
dentro de los treinta (30) días de la fecha de dicho fallo y, asimismo, siempre que la pieza o las
piezas defectuosa(s) sean devueltas a SciCan con porte pagado.
Esta garantía se considerará validada si el producto viene acompañado por la factura original de
compra de un representante autorizado de SciCan y tal factura identifica el artículo por medio
de su número de serie e indica claramente la fecha de compra. No se aceptará ninguna otra
validación. Después de un año, todas las garantías y otros deberes de SciCan’s con respecto
a la calidad del producto, serán considerados de manera concluyente, y por lo tanto toda
responsabilidad al respecto quedará terminada, de modo que no se podrá iniciar ninguna acción
contra SciCan por violación a tal garantía o deber.
SciCan excluye y niega toda garantía explícita que no se haya suministrado en la presente y
cualquier otra garantía implícita, declaración con respecto al desempeño, o recurso por violación
de contrato que, a excepción de esta disposición, pueda surgir por implicación, operación de la
ley, costumbres de la industria o curso de negocios, incluyendo toda garantía implícita de comerciabilidad o de idoneidad para un fin en particular con respecto a todos y a cualquiera de los
productos fabricados SciCan. Si desea obtener más información sobre los productos y las
propiedades de SciCan, visite nuestro sitio Web www.scican.com.
Página 40
Cámaradinámica
Cámaravacía
Cargasólida—desembolsada
Cargasólida—embolsadasimple
CargahuecaB
Sequedad,cargasólida—desembolsada
Sequedad,cargasólida—embolsadasimple
AireResidual
*
Cykluser
Dental instruments
134˚C/3.5min
INSTHUECNOEMP(S)
134˚C/18min
INSTHUECNOEMP(S)
HUECO/DESCUBIERTO(S)134°C/3,5min.
HUECO/DESCUBIERTO(S)134°C/3,5min.
HUECO/DESCUBIERTO(S)134°C/3,5min.
HUECO/DESCUBIERTO(S)134°C/3,5min.
HUECO/DESCUBIERTO(S)134°C/3,5min.
HUECO/DESCUBIERTO(S)134°C/3,5min.
HUECO/DESCUBIERTO(S)134°C/3,5min.
HUECO/DESCUBIERTO(S)134°C/3,5min.
HUECO/DESCUBIERTO(S)134°C/3,5min.
HUECO/DESCUBIERTO(S)134°C/3,5min.
HUECO/DESCUBIERTO(S)134°C/3,5min.
HUECO/DESCUBIERTO(S)134°C/3,5min.
HUECO/DESCUBIERTO(S)134°C/3,5min.
HUECO/DESCUBIERTO(S)134°C/3,5min.
HUECO/CUBIERTO(S)134°C/3,5min.
HUECO/CUBIERTO(S)134°C/3,5min.
HUECO/CUBIERTO(S)134°C/3,5min.
HUECO/DESCUBIERTO(S)134°C/3,5min.
HUECO/DESCUBIERTO(S)134°C/3,5min.
HUECO/DESCUBIERTO(S)134°C/3,5min.
HUECO/DESCUBIERTO(S)134°C/3,5min.
HUECO/DESCUBIERTO(S)134°C/3,5min.
HUECO/DESCUBIERTO(S)134°C/3,5min.
HUECO/DESCUBIERTO(S)134°C/3,5min.
HUECO/DESCUBIERTO(S)134°C/3,5min.
HUECO/DESCUBIERTO(S)134°C/3,5min.
HUECO/DESCUBIERTO(S)134°C/3,5min.
HUECO/DESCUBIERTO(S)134°C/3,5min.
HUECO/DESCUBIERTO(S)134°C/3,5min.
HUECO/DESCUBIERTO(S)134°C/3,5min.
HUECO/DESCUBIERTO(S)134°C/3,5min.
HUECO/DESCUBIERTO(S)134°C/3,5min.
HUECO/DESCUBIERTO(S)134°C/3,5min.
HUECO/DESCUBIERTO(S)134°C/3,5min.
HUECO/DESCUBIERTO(S)134°C/3,5min.
Ciclo
INSTSOLNOEMP(N)
134˚C/3.5min
KaVoGENTLEforce7000C
Kavo–GentlePowerLux25LPA
W&H-TrendLS,WD-56
W&H-TrendHS,TC-95RM
KaVoSuper-TorqueLUX/640B
KaVo-INTRAmaticLUX3,20LH
NSK-PANAAir
NSK-ATL118040
NSK–Ti-Max
STAR-430SWL
Sirona-T1Classic,S40L
Sirona-T1Control,TC3
Midwest-Tradition
Bein–Air-BoraL
W&H–WS-75
W&H–WA-99LT
W&H–TA-98LC
B & L Ophthalmology instruments
Gimbleirrigatingcannula30g E4894
Lasikcannula E4989
Gillisirrigating-aspiratingcannulaE4932
Nichaminhydrossectioncannula26g E4421H
Irrigating-aspiratinghandpiece MVS1063C
Rudolf Medizintechnik GmbH Endoscope accessories
Trocarsleeve,arthroscopy,2rotatingstopcocks,
1.7mmdiax104mmlength #10-0008-00
Trocarsleeve,hysteroscopydiagnosticsheath,1fixed
stopcock,2.7mmdiax302mmlength #10-0049-00
Alcon ophthalmic handpiece
NeoSonixPhacohandpiece
Miltex medical instruments
Frazierneedle 26-778
Yeomanbiopsyforcepswithrotatingshaft28-304
Kerrisonrongeur 18-1994
Frazier-Fergusontube 19-570
Yankauersuctiontube 2-104SS
Menghinibiopsyneedle 13-150
Becton Dickinson
Needle,30G1
Medical Workshop
HockeystickForceps,membranepeelingmw-1925
carga maxima
Pruebas Microbiológicas
ParaDispositivosmédicosespecíficos
Opdateringernoterespå
VERLASIGUIENTELISTA
Lasactualizacionesfiguraránen
www.scican.com
Otras Pruebas
STATIM2000S/5000SPCD
(01-108341)
Tipo de Prueba
INSTHUECEMP(S)
134˚C/18min
GOMA/PLASTICO(S)
121˚C/15min
GOMA/PLASTICO(S)
121˚C/15min
1. El PCD (Process Challenge Device) está diseñado
para usarse exclusivamente en los autoclaves Statim
2000S y Statim 5000S .
2. El PCD no se utiliza con Statim 2000, Statim 5000 ni
Statim 5000S Extended Cassette.
3. La especificación técnica del PCD se suministra sobre
pedido.
4. Test carga hueca A no aplicable:más detalles sobre
pedido.
INSTHUECEMP(S)
134˚C/3.5min
Statim_2KS_5KS_E_oct09_FIGS_Q7:Statim_2KS_5KS_E_oct09
1/20/10
1:07 PM
Página 41
Page 217
10. Protocolo de Pruebas
10.1 Prueba de tipos
*
Statim_2KS_5KS_E_oct09_FIGS_Q7:Statim_2KS_5KS_E_oct09
1/20/10
1:07 PM
Page 218
10. Protocolo de Pruebas, Cont.
Ciclo
INST SOL NO EMP (N)
134 ˚C / 3,5 min
INST HUEC NO EMP (S)
134˚C / 3,5 min
INST HUEC NO EMP (S)
134˚C / 18 min
INST HUEC EMP (S)
134 ˚C / 3,5 min
INST HUEC EMP (S)
134 ˚C / 18 min
GOMA/PLASTICO (S)
121 ˚C / 15 min
GOMA/PLASTICO (S)
121 ˚C / 30 min
STATIM 2000S
STATIM 5000S
Unidad de Frío con Carga Máx.+
Fase de Secado
Unidad de Calor sin Carga +
Fase de Secado
Unidad de Frío con Carga Máx.+
Fase de Secado
Unidad de Calor sin Carga +
Fase de Secado
6:45 + 60:00
8:45 + 60:00
9:15 + 60:00
13:15 + 60:00
11:45 + 60:00
17:30 + 60:00
26:15 + 60:00
32:00 + 60:00
8:05 + 60:00
22:35 + 60:00
15:35 + 60:00
10:40 + 60:00
30:05 + 60:00
25:10 + 60:00
20:15 + 60:00
18:40 + 60:00
35:15 + 60:00
33:40 + 60:00
Página 42
10:50 + 60:00
25:20 + 60:00
24:00 + 60:00
15:30 + 60:00
38:30 + 60:00
30:00 + 60:00
22:50 + 60:00
20:20 + 60:00
37:50 + 60:00
35:20 + 60:00
Statim_2KS_5KS_E_oct09_FIGS_Q7:Statim_2KS_5KS_E_oct09
1/20/10
1:07 PM
Page 219
11. Especificaciones
11.1 Statim 2000S — Especificaciones
Dimensiones de la máquina:
Longitud:
Ancho:
Altura:
48,5 cm
41,5 cm
15 cm
Longitud:
Anchura:
Altura:
28 cm
18 cm
4 cm
Tamaño del Cassette (Externo): Longitud:
Anchura:
Altura:
Tamaño del Cassette (Interno):
Volumen de la cámara de esterilización:
Volumen del depósito:
Peso (sin agua):
Distancia necesaria:
41 cm (incluye los mangos)
19,5 cm
4 cm
1,8 L
4,0 L
21 kg
Parte superior:
Lados:
Parte posterior:
Parte frontal:
Distancia necesaria para el movimiento de la/s puerta/s:
Carga mínima en el depósito de agua:
Valor de PRV (Válvula de seguridad):
Clasificación eléctrica:
Corriente:
5 cm
5 cm
5 cm
48 cm
48 cm
550 mL
43,5 PSI
220 - 240 V, 50/60 Hz, 6 A
CA
Clase de protección:
I
Protección:
Temperaturas del ambiente de operación:
Niveles de sonido:
Humedad:
cubierta
5˚C - 40˚C
Medio – 56 dB, Máximo – 65 dB
80% máx
Altura máxima:
2000 m
Página 43
Statim_2KS_5KS_E_oct09_FIGS_Q7:Statim_2KS_5KS_E_oct09
1/20/10
1:07 PM
Page 220
11. Especificaciones, Cont.
11.2 Statim 5000S — Especificaciones
Dimensiones de la máquina:
Longitud:
Ancho:
Altura:
55 cm
41 cm
19 cm
Longitud:
Anchura:
Altura:
38 cm
18 cm
8 cm
Tamaño del Cassette (Externo): Longitud:
Anchura:
Altura:
Tamaño del Cassette (Interno):
Volumen de la cámara de esterilización:
Volumen del depósito:
Peso (sin agua):
Distancia necesaria:
49,5 cm (incluye los mangos)
19,5 cm
8 cm
5,1 L
4,0 L
33 kg
Parte superior:
Lados:
Parte posterior:
Parte frontal:
Distancia necesaria para el movimiento de la/s puerta/s:
Carga mínima en el depósito de agua:
Valor de PRV (Válvula de seguridad):
Clasificación eléctrica:
Corriente:
5 cm
5 cm
5 cm
57 cm
57 cm
550 mL
43,5 PSI
220 - 240 V, 50/60 Hz, 6 A
CA
Clase de protección:
I
Protección:
Temperaturas del ambiente de operación:
Niveles de sonido:
Humedad:
cubierta
5˚C - 40˚C
Medio – 57 dB, Máximo – 65 dB
80 % máx
Altura máxima:
Especificaciones de la impresora interna opcional:
2000 m
Tipo:
Impresora termal
Velocidad de impresión:
1 línea por segundo
Impresión:
20 caracteres por línea
Capacidad del rollo de papel: aprox.
80 ciclos de esterilización por rollo
Página 220