1
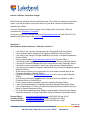
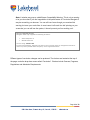
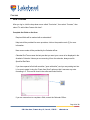
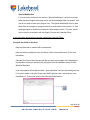
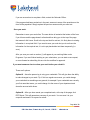
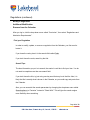
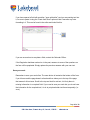
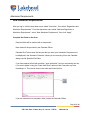
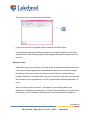
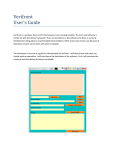
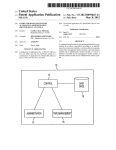
Lakehead University
Curriculum Navigator
User Guide
Last updated January 2015
Contents
Links to Curriculum Navigator .................................................................................................... 3
Frequently Asked Questions ...................................................................................................... 3
General Information About User Accounts ................................................................................. 6
Quality Assurance (Program Proposal Briefs) ............................................................................ 9
Preparation Templates ..............................................................................................................10
How to Change Curriculum in the Academic Calendar ..............................................................11
Courses .........................................................................................................................13
Programs.......................................................................................................................20
Regulations ...................................................................................................................29
Admission Requirements ...............................................................................................37
Bundling Instructions .................................................................................................................44
The Envelope (Title Guidelines) ................................................................................................46
Tracking / Searching for Requests ............................................................................................48
Troubleshooting: Cancelling, Relegating ...................................................................................48
Workflows .................................................................................................................................52
Senate and Committee Information ...........................................................................................52
Prepare a Meeting Agenda Using Curriculum Navigator ................................................52
After a meeting ..............................................................................................................53
Reporting .......................................................................................................................53
Page 2 of 53
User Guide for Curriculum Navigator Users
This User Guide is helpful for those that regularly use Curriculum Navigator. Questions about
Curriculum Navigator can be directed to:
Calendar Officer at [email protected] or 807-343-8163 (or ext. 8163).
Why you should not print this document:
This document is posted online so that we may continue to update the information as needed,
therefore, a printed document may become outdated.
Links to Curriculum Navigator
Curriculum Navigator has two sites: a live site (Production), and a test site (Development). The
test site is a copy of the live site. It allows us to test the effects of any changes we want to
implement.
If you are new to Curriculum Navigator and wish to work on the test site where you can try
actions without implementing a change, please use the Test Site:
Test: http://navigator-dev.lakeheadu.ca
Otherwise, to access the live site, visit: http://navigator.lakeheadu.ca
Frequently Asked Questions
What is Curriculum Navigator?
Curriculum Navigator is a web-based solution designed by a company, Decision Academic.
This solution has moved us away from the paper-based curriculum approval process to an
electronic one. Proposals move through the system from one approval stage to the next, as
each stage completes and approves the component they are responsible for reviewing. The
final product is displayed in the Lakehead University Academic Calendar.
Page 3 of 53
Why do we use Curriculum Navigator?
Curriculum Navigator is used to makes changes to our Academic Calendar in a systematic
way. Since the Academic Calendar is an official University document there is a formal
process for approving and implementing changes to it; that process, also known as the
workflow, begins with an initiator. The initiator proposes a change, then the change follows
a sequence of reviews and approvals, (e.g. for example the Dean, Faculty Council, Senate,
and Senate Committees). In the past, changes were proposed using a paper document
which proved difficult to manage and track. Curriculum Navigator provides a streamlined,
organized, and efficient way of managing and archiving changes electronically.
What is the Academic Calendar?
The Academic Calendar is our guide to academics at Lakehead University. It is an official
University document and comprehensive guide that contains information such as
regulations, important dates, admission requirements, program requirements, and courses,
specific to Lakehead.
How does this relate to the Course Timetable?
The Academic Calendar provides descriptions of all university courses existing at
Lakehead University. Since not all courses are offered every year, students are advised to
consult the Course Timetables for availability of offerings. Course Timetables provide
specific details such as course dates, times, locations, and instructor name(s). Just
because a course exists in the Academic Calendar does not mean it will be offered that
year.
How do I access Curriculum Navigator?
Every member of Lakehead University can access Curriculum Navigator. Using the
credentials below, a member of the university may track and review any curriculum change
in process.
Website: http://navigator.lakeheadu.ca
Username (case sensitive): lakeheadmember
Password (case sensitive): password
Click on “Curriculum” at the top of the screen, and then click on “Search Requests”. If you have
the request number you can enter the specific request number, then press “Search”. Otherwise,
you may search for requests by keyword or faculty.
Page 4 of 53
How do I initiate a curriculum change?
Each faculty has assigned initiators within their areas. The number of initiators in each faculty
varies. If you are unsure as to who the initiator is in your area, contact the Administrative
Assistant to the Dean.
If you are developing a curriculum change for an initiator within your faculty, follow the
instructions for “Preparation Templates”.
For training, contact the Calendar Officer at [email protected] or 807-343-8163. For
additional assistance refer to the User Guide.
Questions?
See below for contact resources: “Who do I contact if…”
•
•
•
•
•
•
•
•
•
•
•
•
•
•
•
I am unsure if my curriculum change requires a Proposal Brief (Provost Office)
I have questions about developing a Program Proposal Brief (Provost Office)
I am unsure if my change is a major modification, not major, or a special modification
(Provost Office)
I have questions about Quality Assurance and the IQAP (Provost Office)
I am having trouble logging into my Curriculum Navigator Account (Calendar Officer)
I am new to Curriculum Navigator and I don't know where to start (Calendar Officer)
I would like to track a request but I don’t have a user account (Calendar Officer)
I am unsure how to attach a Program Proposal Brief to my Curriculum Navigator request
(Calendar Officer)
There are many pieces of my request and I’m not sure how to submit them all into
Curriculum Navigator (Calendar Officer)
I received an email from [email protected] and I’m not sure why (Calendar
Officer)
A curriculum request was relegated back to me and I’m not sure what to do with it
(Calendar Officer or Provost Office)
I have questions about associated curriculum changes (Calendar Officer)
I want to know the deadline for submitting curriculum requests (Secretariat Office)
I am an Administrator or Chair on a Senate Committee and have questions about my
Report to Senate (Secretariat Office)
For all questions regarding Senate Reports, meeting dates, Senate minutes, Senate
Committee members, or Senate Committee Terms of Reference (Secretariat Office)
Provost Office:
Calendar Officer:
Secretariat Office:
[email protected] or 807-343-8132 (ext. 8132)
[email protected] or 807-343-8163 (ext. 8163)
[email protected] or 807-346-7929 (ext. 7929)
Page 5 of 53
General Information About User Accounts
The following is a list of the different types of user accounts currently existing in Curriculum
Navigator:
Lakehead Member Account
This is a generic account that anyone in the University can use to log in and track any
curriculum request in the workflow. Using this account, you cannot make changes but you can
download material for review.
Initiator Accounts
Each Faculty unit has designated initiators. These are people that have a special type of access
that allows them to input changes into Curriculum Navigator. Some Faculties have only one
initiator, some have many. Each initiator is pre-approved by the Dean’s office. The
Administrative Assistant in each Faculty can identify who the initiators are within that particular
Faculty.
Submission Reviewer Account – Managed by the Calendar Officer and Deputy Provost
This user account was implemented to ensure all curriculum changes are starting off on the
right track. This role is the second stage in all curriculum request submissions.
Dean and Faculty Council
Each Dean and their Administrative Assistant has a user account. This account will give them
access to review each request coming out of their Faculty before it goes to Senate for referral. It
also allows for input from the Faculty Council.
Additional Dean
Each Dean and their Administrative Assistant has access to this user account type. If a
curriculum request from one Faculty requires approval by another Faculty, there is an option in
Curriculum Navigator to send it to the other Dean.
Page 6 of 53
Senate
The Secretariat Office has an account for the Senate stage. Using this account they can see
items that are ready for Senate referral, or approval.
Committee Member Accounts
Each committee has a member account that they can use to log in and review the requests that
are at their committee’s stage. They can also use this account to track any other curriculum
requests in the workflow.
Senate Academic Committee
The Chair and the Assistant of this committee both have accounts for Curriculum Navigator.
Using this account they are able to see items that are ready for this committee’s review. They
are able to comment, make editorial changes, add or delete attachments, send it backwards
(i.e. relegate), or send it forward (i.e. approve) to the next stage. This committee reviews items
that fall under the scope of their Terms of Reference and delegates items accordingly to their 2
sub-committees listed below.
Senate Academic – Regulations Sub-Committee
Using this account, the Sub-Committee members are able to see items that are ready for
review. They are able to comment, make editorial changes, add or delete attachments, send it
backwards (i.e. relegate), or send it forward (i.e. approve) to the next stage. This committee
reviews items that fall under the scope of their Terms of Reference, which normally includes
regulation and admission requirement proposals.
Senate Academic – Quality Assurance Sub-Committee
The Chair and the Assistant of this committee both have accounts for Curriculum Navigator.
Using this account, they are able to see items that are ready for review by this sub-committee.
They are able to comment, make editorial changes, add or delete attachments, send it
backwards (i.e. relegate), or send it forward (i.e. approve) to the next stage.
Senate has delegated responsibility to the Senate Academic-Quality Assurance Sub-Committee
to verify that Academic Units have taken the appropriate steps to ensure that programs are
robust, viable and deliverable, are in the interest of the University, and meet the provincial
requirements outlined in the Quality Assurance Framework.
Page 7 of 53
Senate Continuing Education and Distributed Learning Committee
The Chair and the Assistant of this committee both have accounts for Curriculum Navigator.
Using this account, they are able to see items that are ready for review by the committee. They
are able to comment, make editorial changes, add or delete attachments, send it backwards
(i.e. relegate), or send it forward (i.e. approve) to the next stage. This committee reviews items
that fall under the scope of their Terms of Reference, which normally includes certificate
proposals.
Senate Undergraduate Studies Committee
The Chair and the Assistant of this committee both have accounts for Curriculum Navigator.
Using this account, they are able to see items that are ready for review by the committee. They
are able to comment, make editorial changes, add or delete attachments, send it backwards
(i.e. relegate), or send it forward (i.e. approve) to the next stage. This committee reviews items
that fall under the scope of their Terms of Reference, normally undergraduate courses and
programs submitted into Curriculum Navigator.
Faculty of Graduate Studies Committee
The Chair and the Assistant of this committee both have accounts for Curriculum Navigator.
Using this account, they are able to see items that are ready for review by the committee. They
are able to comment, make editorial changes, add or delete attachments, send it backwards
(i.e. relegate), or send it forward (i.e. approve) to the next stage. This committee reviews items
that fall under the scope of their Terms of Reference, normally graduate courses and programs
submitted into Curriculum Navigator.
Senate Budget Committee
The Chair and the Assistant of this committee both have accounts for Curriculum Navigator.
Using this account, they are able to see items that are ready for review by the committee. They
are able to comment, make editorial changes, add or delete attachments, send it backwards
(i.e. relegate), or send it forward (i.e. approve) to the next stage. This committee reviews items
that fall under the scope of their Terms of Reference, that is, all submissions that have a
budgetary impact, entered into Curriculum Navigator.
Calendar Officer
This stage is the last stage in the workflow. This stage provides an opportunity for the Calendar
Officer to make final editorial changes (i.e. housekeeping) to the request before it is displayed in
the calendar.
Page 8 of 53
Quality Assurance (Program Proposal Briefs)
Quality Assurance at Lakehead University:
The Policy for the Review and Approval of Academic Programs (the Policy) governs the review
and approval of proposed new programs and the review of existing programs at Lakehead
University. The Policy applies to the approval of new academic undergraduate and graduate
programs, major modifications to existing undergraduate and graduate programs, new minors,
specializations and concentrations.
Therefore, any curriculum changes including new programs, and major modifications to
programs will have further requirements based on the quality assurance specifications.
For more information visit:
-
The Program Proposals webpage for New Programs
-
The Information webpage for Major Modifications of Programs
-
The homepage for Quality Assurance
Or contact directly:
-
Dr. Nancy Luckai, Acting Deputy Provost at 807-343-8132 or
[email protected]
Page 9 of 53
Preparation Templates
If you are developing a curriculum change for an initiator in your Academic Unit and you do not
have your own account set up in Curriculum Navigator (i.e. someone else will be putting your
request into Curriculum Navigator for you), please use these templates.
Only use one template per change (i.e. don’t include multiple changes on one template as this
makes it more difficult for the initiator to input).
Note: InfoPath documents should no longer be used.
__________________________________________________________________________
Step 1: Select a Template from the link below and save it to your computer.
For each type of curriculum change, there is a corresponding template. The reason there
are different templates is because each change type requires different information,
and/or will be sent through a different workflow (committees).
A note about associated changes. Your curriculum change may result in an associated
change. This will require an additional template submission. For example, if you change
a course title, this would result in a change to all program requirements that contain that
course title. Therefore, you would need to submit the following templates: Modify a
Course and Modify a Program.
How to find associated changes? Open up the Academic Calendar, type in a keyword
or phrase in the bar called “Search Calendar”. This feature will search for your item from
the various categories: Courses, Programs, Regulations and Admission Requirements.
Questions? Contact the Calendar Officer for assistance with associated changes.
Link to templates: https://www.lakeheadu.ca/faculty-and-staff/facultyresources/cn/instructions
Page 10 of 53
Step 2: Complete the template(s)
If you have any questions about the template fields, contact [email protected] or
call the Calendar Officer at 807-343-8163 (or ext. 8163).
Step 3: Submit the template(s)
Submit your template(s) via email to the initiator within your faculty so that they may
enter the information into Curriculum Navigator. If you are unsure who the initiator is
contact the Administrative Assistant to the Dean for information.
The initiator will input this request into Curriculum Navigator to start the approval
process. A unique request number will then be assigned to your request. You may use
this number to track the progress of your request.
For Curriculum Navigator Initiators:
How to Change Curriculum in the Academic Calendar
If you are a designated initiator, if you already have an account set up, and if you have already
received training, follow these instructions. If you don’t have an account or would like to receive
training, contact the Calendar Officer at [email protected] or 807-343-8163 (or ext.
8163):
Go to: http://navigator.lakeheadu.ca and log in.
Page 11 of 53
Note: A window may pop up called Brower Compatibility Warning. This is only a warning
to let you know that if you see irregularities in the performance of Curriculum Navigator it
may be caused by your browser. You can still use it even though your received this
warning, but save your work often. In most cases it will result in a ball spinning on your
screen but you can still use the system, it doesn’t prevent you from working on it.
Browser Compatibility Warning
Navigator Suite only supports the following browsers:
•
•
Internet Explorer 9
Mozilla Firefox 24
You are using: Chrome 38.
In some circumstances, data may not load or save correctly when an unsupported browser is
used. To prevent possible data corruption, use a supported browser.
Different types of curriculum changes can be produced. The choices are located at the top of
the page, under the drop-down menu called “Curriculum”. Choices include Courses, Programs,
Regulations and Admission Requirements.
Page 12 of 53
Courses
- New Courses
After you log in, click the drop-down menu called “Curriculum”, then select “Courses”, then
select “To add a New Course click here”.
Complete the fields on the form
Required fields will be marked with a red asterisk*.
Help text will be provided for some questions, click on the question mark [?] for more
information.
New course codes will be provided by the Calendar officer.
Calendar End Term means the last year that you want your course to be displayed in the
Academic Calendar. Unless you are removing it from the calendar, always use No
Specified End Date.
If you have opened a field with an editor (“open with editor”) and you are pasting text into
it, be sure to paste it using the “Paste from Word” option so that it removes any extra
formatting in it. This can be found in the editor and looks like this:
If you are unsure how to complete a field, contact the Calendar Officer.
Page 13 of 53
Save your work
Remember to save your work often. The save button is located at the bottom of the form.
If you hit save and the page doesn’t refresh and then takes you directly to the top of the
page that means it did not save. Scroll to the top and look for red text, it is likely there is
information missing in a required field. If you need to save your work but you do not have
the information for the required text, it is ok to put placeholder text there temporarily (i.e.
xxxxx).
After you save your work, a number (1) will appear in your Working Folder under
Courses. If you are finished working on your submission, you can start a new request, or
move forward on submitting this one into the workflow for approval.
If you want someone else to review your work before you submit it
There are 2 options:
Option #1 – Have the person log in using your credentials. This will give them the ability
to make changes to your work.
Tip: If this is a regular occurrence, you could change your credentials to something more
general, or you could change it to the name of your department and share the account
with others.
Option #2 – After you have saved your completed work, at the top of the page, click
PDF Report. This will generate a summary of your work. You can save it to your
computer and email it to anyone for review.
“Bundling” will allow you to group together multiple requests; however there are rules to
watch for. See bundling instructions if appropriate.
If you are ready to move forward with submitting your requests, see The Envelope for further
instructions.
Page 14 of 53
Courses (continued):
- Modify a Course
- Additional Modification [Update]
- Reinstate into Calendar [No changes]
- Reinstate into Calendar [With revisions]
- Remove from the Calendar
After you log in, click the drop-down menu called “Curriculum”, then “Courses”.
Find your course
In order to modify, reinstate, or remove a course, you first need to locate it:
If you know the course code, enter it in the search field called “Course Code” (e.g.
Anthropology 1032); as you can see from the example, the course code should contain
the full word followed by 4 digits.
If you don’t know the code, search by the title.
Search Tips:
The less information you put into search, the easier it could be to find your item. You do
not need to complete more than one search field.
If you don’t know the title, try just using one key word that may be in the title. It is likely
the title is exactly what is shown in the Calendar, so you could copy and paste from the
Calendar.
Page 15 of 53
Finally, you can un-restrict the search parameters by changing the drop-down menu
called Search options: to “Contains” instead of “Starts With”. This will give the search
engine more flexibility when searching.
How to avoid two changes to the same course, at the same time
Once you have located your course, consider if anyone else could be making a change
to it during the same timeframe. For example, last month someone put through a change
for entry into the 2017 calendar; you wonder if it is still in the workflow because you want
to make another change to the same one for the same calendar year. If that is a
possibility, follow the instructions below.
If it is not possible, skip to the next step.
To check that someone else hasn't already submitted a curriculum change to the same
course:
o
After locating your course click "Show Advanced Fields"
o
Deselect the check box called "Latest Only"
o
In the drop-down box called "Course Status" select "choose".
o
Then click search. All versions will be displayed. If one of your versions say "In
working folder", or "In change request", contact the Calendar Officer before
proceeding because that means someone else is working on it.
o
The Calendar Officer will verify that there is another request in the system for the
same item and calendar year. Options will be to relegate the request back and add
your changes to it, or wait until it is approved by Senate and moved into the
Calendar.
o
Otherwise, if all the versions are “approved”, that means no one else is working on it
so choose the version with the “No specified end date” and proceed with making
your changes.
Page 16 of 53
Apply an Action
After you have selected your item and opened it up you will see at the top of the page
the Actions you can apply to the course.
Action Choices include:
•
Modify this Course
This form will allow you to modify an existing course. Use this form if there hasn’t
already been a change made to the course for the same year.
•
Additional Modification [Update]
This form will allow you to make a modification to a course if someone has already
made a change for that year. Without this form, the system will only allow one
change per year.
•
Reinstate into Calendar (no changes)
This form will allow you to reinstate a course that was removed from the Calendar. If
you have no changes to make to the course, this is the correct form. See policy.
•
Reinstate into Calendar (with changes)
This form will allow you to reinstate a course that was removed from the Calendar. If
you have any changes to make to the course, this is the correct form.
•
Remove from Calendar
This form will allow you to remove a course from the Calendar.
If you are unsure which Action is appropriate, contact the Calendar Officer.
Page 17 of 53
Complete the fields on the form.
Required fields will be marked with a red asterisk *.
Help text will be provided for some questions, click on the question mark [?] for more
information.
You will not be able to change the code because a new code equals a new course; there
is a different form for that.
Calendar End Term means the last year that you want your course to be displayed in the
calendar. Unless you are removing it from the calendar, always use No Specified End
Date.
If you have opened a field with an editor (“open with editor”) and you are pasting text into
it, be sure to paste it using the “Paste from Word” option so that it removes any extra
formatting in it. This can be found in the editor and looks like this:
If you are unsure how to complete a field, contact the Calendar Officer.
If the course had been worked on in the past, answers to some of the questions on the
form will be populated. Simply replace the previous answers with your own text.
Page 18 of 53
Save your work.
The save button is located at the bottom of the form. If you hit save and the page doesn’t
refresh and then takes you to the top of the page that means it did not save. Scroll to the
top and look for red text, it is likely a required field is missing information. If you need to
save your work but you do not have the information for the required text, it is ok to put
placeholder text there temporarily (i.e. xxxxx).
After you save your work, a number (1) will appear in your Working Folder under
Courses. If you are finished working on your new course, you can start a new request, or
move forward on submitting this one into the workflow for approval.
If you want someone else to review your work before you submit it:
There are 2 options:
Option #1 – Have the person log in using your credentials. This will give them the ability
to make changes to your work.
Tip: If this is a regular occurrence, you could change your credentials to something more
general, for example if your credentials are currently your first name/last name, you
could change it to the name of your department and share the account with others.
Option #2 – After you have saved your completed work, at the top of the page, click
PDF Report. This will generate a summary of your work. You can save it to your
computer and email it to anyone for review.
“Bundling” will allow you to group together multiple requests; however there are rules to
watch for. See bundling instructions if appropriate.
If you are ready to move forward with submitting your requests, see The Envelope for further
instructions.
Page 19 of 53
Programs
- New Programs
After you log in, click the drop-down menu called “Curriculum”, then “Programs”.
At the top, use the drop-down menu to select your new program type.
Select your New Program Type:
Choices include:
•
New Degree/Major
•
New Minor
•
New Major Concentration/Specialization
•
New Field, Graduate Diploma, or Collaborative Program
•
New Certificate
Note: For each of the choices above, a Program Proposal Brief is required for Quality
Assurance. When completing your request, use the “Supporting Documents” tab to
upload the Proposal Brief and any other relevant documentation.
Complete the fields on the form.
Required fields will be marked with a red asterisk *.
Help text will be provided for some questions, click on the question mark [?] for more
information.
New program codes will be provided by the Calendar officer.
Calendar End Term means which year will be the last year that you want your program
displayed in the calendar. Unless you are removing a program from the Calendar,
always use No Specified End Date.
Page 20 of 53
If you have opened a field with an editor (“open with editor”) and you are pasting text into
it, be sure to paste it using the “Paste from Word” option so that it removes any extra
formatting in it. This can be found in the editor and looks like this:
If you are unsure how to complete a field, contact the Calendar Officer.
Save your work.
Remember to save your work often. The save button is located at the bottom of the form.
If you hit save and the page doesn’t refresh and then takes you to the top of the page
that means it did not save. Scroll to the top and look for red text, it is likely there is
missing information in a required field. If you need to save your work but you do not have
the information for the required text, it is ok to put placeholder text there temporarily (i.e.
xxxxx).
After you save your work, a number (1) will appear in your working folder under
Programs. If you are finished working on your new program, you can start a new
request, or move forward on submitting this one into the workflow for approval.
Page 21 of 53
If you want someone else to review your work before you submit it:
There are 2 options:
Option #1 – Have the person log in using your credentials. This will give them the ability
to make changes to your work.
Tip: If this is a regular occurrence, you could change your credentials to something more
general, for example if your credentials are currently your first name/last name, you
could change it to the name of your department and share the account with others.
Option #2 – After you have saved your completed work, at the top of the page, click
PDF Report. This will generate a summary of your work. You can save it to your
computer and email it to anyone for review.
“Bundling” will allow you to group together multiple requests; however there are rules to
watch for. See bundling instructions if appropriate.
If you are ready to move forward with submitting your requests, see The Envelope for further
instructions.
Page 22 of 53
Programs (continued):
- Modify a Program (major and less significant changes)
- Additional Modification [Update]
- Special Modification
- Reinstate back into the Calendar
- Remove from the Calendar
After you log in, click the drop-down menu called “Curriculum”, then “Programs”.
Find your Program
In order to modify, reinstate, or remove a program, you first need to locate it:
If you know the code, place it in the search field called Search by program code (e.g.
BA.GENE). As you can see from the example, the program code should contain a short
form code.
If you don’t know the code, search by the program title.
Search Tips:
The less information you put in to search, the easier it could be to find your item. You do
not need to complete more than one search field.
If you don’t know the title, try just using one key word that may be in the title. It is likely
the title is exactly what is shown in the Calendar, so you could copy and paste from the
Calendar.
Page 23 of 53
You can un-restrict the search parameters by changing the drop down menu called
Search options: to “Contains” instead of “Starts With”. This will give the search engine
more flexibility when searching.
How to avoid two changes to the same program, at the same time
Once you have located your program, consider if anyone else could be making a change
to it during the same time frame. For example, last month someone put through a
program change for entry into the 2017 calendar; you wonder if it is still in the workflow
because you want to make another change to the same one for the same calendar year.
If that is a possibility, follow the instructions below.
If it is not possible, skip to the next step.
To check that someone else hasn't already submitted a curriculum change to the same
program:
o
After locating your program click "Show Advanced Fields"
o
Deselect the check box called "Latest Only"
o
In the drop-down box called "Program Status" select "choose".
o
Then click search. All versions will be displayed. If one of your versions say "In
working folder", or "In change request", contact the Calendar Officer before
proceeding because that means someone else is working on it.
o
The Calendar Officer will verify that there is another request in the system for the
same item and calendar year. Options will be to relegate the request back and add
your changes to it, or wait until it is approved by Senate and moved into the
calendar.
o
Otherwise, if all the versions are “approved”, that means no one else is working on it
so choose the version with the “No specified end date” and proceed with making
your changes.
Page 24 of 53
Apply an Action
After you have selected your item, you will see at the top of the page Actions that you
can apply to the program.
Action Choices include:
-
Certificate: Modify
This form will allow you to modify a currently existing certificate. Use this form if there
hasn’t already been a change made to the certificate for the same year.
-
Certificate: Additional Modification [Update]
This form will allow you to make a modification to a certificate if someone has
already made a change for that year. Without this form, the system will only allow
one change per year.
-
Certificate: Reinstate back into Calendar
This form will allow you to reinstate a certificate that was removed from the Calendar.
-
Certificate: Remove from Calendar
This form will allow you to remove a certificate from the Calendar.
-
Programs: Major Modification
This form will allow you to make a major modification to a currently existing program.
It is considered a major modification if 20% or more of the program has changed. If
you are unsure if your change is major or minor, contact the Provost and VicePresident (Academic) Office at [email protected] or 807-343-8574 (or
ext. 8574). Use this form if there hasn’t already been a change made to the program
for the same year.
Page 25 of 53
-
Programs: Additional Modification (Major Modification) [Update]
This form will allow you to make a major modification to a program if someone has
already made a change to that program for that year. Without this form, the system
will only allow one change per year.
-
Programs: Less significant changes
This form will allow you to make a modification to a currently existing program. If you
are unsure if your change is major or minor, contact the Provost and Vice-President
(Academic) Office at [email protected] or 807-343-8574 (or ext. 8574).
Use this form if there hasn’t already been a change made to the program for the
same year.
-
Programs: Additional Modification (Less significant changes) [Update]
This form will allow you to make a modification to a program if someone has already
made a change for that year. Without this form, the system will only allow one
change per year.
-
Programs: Reinstate back into Calendar
This form will allow you to reinstate a program that was removed from the Calendar.
-
Programs: Remove from Calendar
This form will allow you to remove a program from the Calendar.
-
Minors: Remove from Calendar
This form will allow you to remove a minor from the Calendar.
Page 26 of 53
-
Special Modification
If you have been advised to use the form “Special Modification”, the form is located
under the New Program drop-down menu (on the homepage under Curriculum), and
you do not need to locate your program first. The Special Modification form is used
when there is a change to a program that will co-exist with the first version, i.e. if an
existing program is modified to include an Orillia campus version. This form should
only be used in consultation with the Deputy Provost and Calendar Officer.
If you are unsure which Action to choose, contact the Calendar Officer.
Complete the fields on the form.
Required fields will be marked with a red asterisk *.
Help text will be provided for some questions, click on the question mark [?] for more
information.
Calendar End Term means the last year that you want your program to be displayed in
the calendar. Unless you are removing a program from the Calendar, always use No
Specified End Date.
If you have opened a field with an editor (“open with editor”) and you are pasting text into
it, be sure to paste it using the “Paste from Word” option so that it removes any extra
formatting in it. This can be found in the editor and looks like this:
Page 27 of 53
If you are unsure how to complete a field, contact the Calendar Officer.
If the program had been worked on in the past, answers to some of the questions on the
form will be populated. Simply replace the previous answers with your own text.
Save your work.
Remember to save your work often. The save button is located at the bottom of the form.
If you hit save and the page doesn’t refresh and then bring you to the top of the page
that means it didn’t save. Scroll to the top and look for red text, it is likely there is missing
information in a required field. If you need to save your work but you do not have the
information for the required text, it is ok to put placeholder text there temporarily (i.e.
xxxx).
After you save your work a number (1) will appear in your working folder under
Programs. If you are finished working on your submission, you can start a new request,
or move forward on submitting this one into the workflow for approval.
If you want someone else to review your work before you submit it:
There are 2 options:
Option #1 – Have the person log in using your credentials. This will give them the ability
to make changes to your work. Tip: If this is a regular occurrence, you could change
your credentials to something more general, for example if your credentials are currently
your first name/last name, you could change it to the name of your department and
share the account with others.
Option #2 – After you have saved your completed work, at the top of the page, click
PDF Report. This will generate a summary of your work. You can save it to your
computer and email it to anyone for review.
Page 28 of 53
“Bundling” will allow you to group together multiple requests; however there are rules to
watch for. See bundling instructions if appropriate. If you are ready to move forward with
submitting your requests, see The Envelope for further instructions.
Regulations
- New Regulations
After you log in, click the drop-down menu called “Curriculum”, then select “Regulations and
Admission Requirements”. From the drop-down menu called “Add New Regulation or
Admission Requirement”, select “New Regulation”, then click “Apply”.
Complete the fields on the form.
Required fields will be marked with a red asterisk *.
New regulation codes will be provided by the Calendar Officer.
Calendar End Term means which year will be the last year that you want your regulation
to be displayed in the calendar. Unless you are removing a regulation from the Calendar,
always use No Specified End Date.
If you have opened a field with an editor (“open with editor”) and you are pasting text into
it, be sure to paste it using the “Paste from Word” option so that it removes any extra
formatting in it.
Page 29 of 53
This can be found in the editor and looks like this:
If you are unsure how to complete a field, contact the Calendar Officer.
Save your work.
Remember to save your work often. The save button is located at the bottom of the form.
If you hit save and the page doesn’t refresh and then takes you to the top of the page
that means it did not save. Scroll to the top and look for red text, it is likely there is
missing information in a required field. If you need to save your work but you do not have
the information for the required text, it is ok to put placeholder text there temporarily (i.e.
xxxxx).
After you save your work a number (1) will appear in your working folder under
Regulations or Admission Requirements. If you are finished working on it, you can start
a new request, or move forward on submitting this one into the workflow for approval.
Page 30 of 53
If you want someone else to review your work before you submit it:
There are 2 options:
Option #1 – Have the person log in using your credentials. This will give them the ability
to make changes to your work.
Tip: If this is a regular occurrence, you could change your credentials to something more
general, for you could change it to the name of your department and share the account
with others.
Option #2 – After you have saved your completed work, at the top of the page, click
PDF Report. This will generate a summary of your work. You can save it to your
computer and email it to anyone for review.
“Bundling” will allow you to group together multiple requests; however there are rules to
watch for. See bundling instructions if appropriate.
If you are ready to move forward with submitting your requests, see The Envelope for further
instructions.
Page 31 of 53
Regulations (continued)
-
Modify a Regulation
-
Additional Modification
-
Remove from the Calendar
After you log in, click the drop-down menu called “Curriculum”, then select “Regulations and
Admission Requirements”.
Find your Regulation
In order to modify, update, or remove a regulation from the Calendar, you first need to
locate it:
If you know the code, place it in the search field called Code.
If you don’t know the code, search by the title.
Search Tips:
The less information you put in to search, the easier it could be to find your item. You do
not need to complete more than one search field.
If you don’t know the title, try just using one key word that may be in the title. Also, it is
likely the title is exactly what is shown in the Calendar, so you could copy and paste from
the Calendar.
Also, you can unrestrict the search parameters by changing the drop down menu called
Search options: to “Contains” instead of “Starts With”. This will give the search engine
more flexibility when searching.
Page 32 of 53
How to avoid two changes to the same regulation, at the same time
Once you have located your Regulation, consider if anyone else could be making a
change to it during the same time frame. For example, last month someone put through
a change for entry into the 2017 Calendar; you wonder if it is still in the workflow
because you want to make another change to the same regulation for the same calendar
year. If that is a possibility, follow the instructions below.
If it is not possible, skip to the next step.
Check that someone else hasn't already submitted a curriculum change to the same
regulation you are searching for, here is how:
o
After locating your regulation click "Show Advanced Fields"
o
Deselect the check box called "Latest Only"
o
In the drop-down box called " Regulation and Admission Requirement Status:" select
"choose".
o
Then click search. All versions of the regulation will display. If one of your versions
say "In working folder", or "In change request", contact the Calendar Officer before
proceeding because that means someone else is working on it.
o
The Calendar Officer will verify that there is another request in the system for the
same regulation and calendar year. Options will be to relegate the request back and
add your changes to it, or wait until it is approved by Senate and moved into the
Calendar.
o
Otherwise, if all the versions are “approved”, that means no one else is working on it
so choose the version with the “No specified end date” and proceed with making
your changes.
Page 33 of 53
Apply an Action
After you have selected your Regulation, you will see at the top of the page Actions that
you can apply to the regulation.
Action Choices include:
-
Regulation – Modify
This form will allow you to modify a currently existing regulation. Use this form if
there hasn’t already been a change made to the reguation for the same year.
-
Regulation – Additional Modification [Update]
This form will allow you to make a modification to a regulation if someone has
already made a change for that year. Without this form, the system will only allow
one change per year.
-
Remove from Calendar
This form will allow you to remove a regulation from the Calendar.
If you are unsure which Action to choose, contact the Calendar Officer.
Complete the fields on the form.
Required fields will be marked with a red asterisk *.
Calendar End Term means the last year that you want your regulation to be displayed in
the calendar. Unless you are removing it from the Calendar, always use No Specified
End Date.
Page 34 of 53
If you have opened a field with an editor (“open with editor”) and you are pasting text into
it, be sure to paste it using the “Paste from Word” option so that it removes any extra
formatting in it. This can be found in the editor and looks like this:
If you are unsure how to complete a field, contact the Calendar Officer.
If the Regulation had been worked on in the past, answers to some of the questions on
the form will be populated. Simply replace the previous answers with your own text.
Save your work.
Remember to save your work often. The save button is located at the bottom of the form.
If you hit save and the page doesn’t refresh and then takes you to the top of the page
that means it did not save. Scroll to the top and look for red text, it is likely there is
missing information in a required field. If you need to save your work but you do not have
the information for the required text, it is ok to put placeholder text there temporarily (i.e.
xxxx).
Page 35 of 53
After you save your work a number (1) will appear in your working folder under
Regulations or Admission Requirements. If you are finished working on your regulation
you can start a new request, or move forward on submitting this one into the workflow for
approval.
If you want someone else to review your work before you submit it.
There are 2 options:
Option #1 – Have the person log in using your credentials. This will give them the ability
to make changes to your work.
Tip: If this is a regular occurrence, you could change your credentials to something more
general, for example if your credentials are currently your first name/last name, you
could change it to the name of your department and share the account with others.
Option #2 – After you have saved your completed work, at the top of the page, click
PDF Report. This will generate a summary of your work. You can save it to your
computer and email it to anyone for review.
“Bundling” will allow you to group together multiple requests; however there are rules to
watch for. See bundling instructions if appropriate.
If you are ready to move forward with submitting your requests, see The Envelope for further
instructions.
Page 36 of 53
Admission Requirements
- New Admission Requirements
After you log in, click the drop-down menu called “Curriculum”, then select “Regulations and
Admission Requirements”. From the drop-down menu called “Add New Regulation or
Admission Requirement”, select “New Admission Requirement”, then click “Apply”.
Complete the fields on the form.
Required fields will be marked with a red asterisk *.
New codes will be provided by the Calendar Officer.
Calendar End Term means the last year that you want your Admission Requirement to
be displayed in the Academic Calendar. Unless you are removing it from the Calendar,
always use No Specified End Date.
If you have opened a field with an editor (“open with editor”) and you are pasting text into
it, be sure to paste it using the “Paste from Word” option so that it removes any extra
formatting in it. This can be found in the editor and looks like this:
If you are unsure how to complete a field, contact the Calendar Officer.
Page 37 of 53
Save your work.
Remember to save your work often. The save button is located at the bottom of the form.
If you hit save and the page doesn’t refresh and then bring you to the top of the page
that means it didn’t save. Scroll to the top and look for red text, it is likely there is missing
information in a required field. If you need to save your work but you do not have the
information for the required text, it is ok to put placeholder text there temporarily (i.e.
xxxxx).
After you save your work a number (1) will appear in your working folder under
Regulations or Admission Requirements. If you are finished working it you can start a
new request, or move forward on submitting this one into the workflow for approval.
If you want someone else to review your work before you submit it:
There are 2 options:
Option #1 – Have the person log in using your credentials. This will give them the ability
to make changes to your work.
Tip: If this is a regular occurrence, you could change your credentials to something more
general, for you could change it to the name of your department and share the account
with others.
Option #2 – After you have saved your completed work, at the top of the page, click
PDF Report. This will generate a summary of your work. You can save it to your
computer and email it to anyone for review.
“Bundling” will allow you to group together multiple requests; however there are rules to
watch for. See bundling instructions if appropriate.
If you are ready to move forward with submitting your requests, see The Envelope for further
instructions.
Page 38 of 53
Admission Requirements (continued)
-
Modify an Admission Requirements
-
Additional Modification [Update]
-
Remove from the Calendar
After you log in, click the drop-down menu called “Curriculum”, then select “Regulations and
Admission Requirements”.
Find your Admission Requirement
In order to modify, update, or remove an Admission Requirement from the
Calendar, you first need to locate it:
If you know the code, place it in the search field called Code.
If you don’t know the code, search by the title.
Search Tips:
The less information you put in to search, the easier it could be to find your item. You do
not need to complete more than one search field.
If you don’t know the title, try just using one key word that may be in the title. Also, it is
likely the title is exactly what is shown in the calendar, so you could copy and paste from
the Calendar.
Also, you can unrestrict the search parameters by changing the drop down menu called
Search options: to “Contains” instead of “Starts With”. This will give the search engine
more flexibility when searching.
Page 39 of 53
How to avoid two changes to the same Admission Requirement, at the same time
Once you have located your admission requirement, consider if anyone else could be
making a change to it during the same time frame. For example, last month someone
put through change for entry into the 2017 Calendar; you wonder if it is still in the
workflow because you want to make another change to the same one for the same
calendar year. If that is a possibility, follow the instructions below.
If it is not possible, skip to the next step.
Check that someone else hasn't already submitted a curriculum change to the same
Admission Requirement, here is how:
o
After locating your admission requirement click "Show Advanced Fields"
o
Deselect the check box called "Latest Only"
o
In the drop-down box called "Regulation and Admission Requirement Status" select
"choose".
o
Then click search. All versions will be displayed. If one of your versions say "In
working folder", or "In change request", contact the Calendar Officer before
proceeding because that means someone else is working on it.
o
The Calendar Officer will verify that there is another request in the system for the
same item and calendar year. Options will be to relegate the request back and add
your changes to it, or wait until it is approved by Senate and moved into the
Calendar.
o
Otherwise, if all the versions are “approved”, that means no one else is working on it
so choose the version with the “No specified end date” and proceed with making
your changes.
Apply an Action
After you have selected your item you will see at the top of the page Actions that you
can apply to the admission requirement.
Page 40 of 53
Action Choices include:
-
Admission Requirement – Modify
This form will allow you to modify a currently existing admission requirement. Use
this form if there hasn’t already been a change made to the admission requirement
for the same year.
-
Admission Requirement – Additional Modification [Update]
This form will allow you to make a modification to an admission requirement if
someone has already made a change for that year. Without this form, the system will
only allow one change per year.
-
Admission Requirement – Remove from Calendar
This form will allow you to remove an admission requirement from the calendar.
If you are unsure which Action to choose, contact the Calendar Officer.
Complete the fields on the form.
Required fields will be marked with a red asterisk *.
Calendar End Term means the last year that you want your admission requirement to be
displayed in the Calendar. Unless you are removing it from the Calendar, always use No
Specified End Date.
if you have opened a field with an editor (“open with editor”) and you are pasting text into
it, be sure to paste it using the “Paste from Word” option so that it removes any extra
formatting in it.
Page 41 of 53
This can be found in the editor and looks like this:
If you are unsure how to complete a field, contact the Calendar Officer.
If the admission requirement had been worked on in the past, answers to some of the
questions on the form will be populated. Simply replace the previous answers with your
own text.
Save your work.
Remember to save your work often. The save button is located at the bottom of the form.
If you hit save and the page doesn’t refresh and then takes you to the top of the page
that means it did not save. Scroll to the top and look for red text, it is likely there is
missing information in a required field. If you need to save your work but you do not have
the information for the required text, it is ok to put placeholder text there temporarily (i.e.
xxxx).
After you save your work a number (1) will appear in your working folder under
Regulations or Admission Requirements. If you are finished working on it you can start a
new request, or move forward on submitting this one into the workflow for approval.
Page 42 of 53
If you want someone else to review your work before you submit it.
There are 2 options:
Option #1 – Have the person log in using your credentials. This will give them the ability
to make changes to your work.
Tip: If this is a regular occurrence, you could change your credentials to something more
general, for example if your credentials are currently your first name/last name, you
could change it to the name of your department and share the account with others.
Option #2 – After you have saved your completed work, at the top of the page, click
PDF Report. This will generate a summary of your work. You can save it to your
computer and email it to anyone for review.
“Bundling” will allow you to group together multiple requests; however there are rules to
watch for. See bundling instructions if appropriate.
If you are ready to move forward with submitting your requests, see The Envelope for further
instructions.
Page 43 of 53
Bundling Instructions
Depending on the number and type of changes, it may make sense to “bundle” some or all of
the changes together. If you have created several requests, click “view” on your working folder
and you will see that your items are listed separately under the Curriculum tab. From this point,
you can decide if you want to “bundle them together”, or submit them separately into the
workflow.
You may want to bundle if the requests are very similar in nature or if they are directly
associated with each other. However, if you do chose to bundle, there are some rules:
Courses:
•
Only bundle courses with other courses (not with programs, regulations or admission
requirements).
•
Don’t bundle undergraduate with graduate level courses.
•
Change types such as “New”, “Modify”, and/or “Remove from calendar” can be bundled
together.
•
If the course is being sent to another Faculty for review, don’t bundle it with items that do not
require that other Faculty’s review.
Programs:
•
Program changes can only be bundled with other program changes (not with courses,
regulations or admission requirements). Even if you have a course and a program change
that are associated with each other, they cannot be bundled together. However, you can
reference the associated request number in the documentation.
•
Don’t bundle undergraduate with graduate level programs.
•
Change types such as “New”, “Modify”, and/or “Remove from calendar” cannot be bundled
together. For example, only major modifications can be bundled with major modifications.
•
If the program is being sent to another Faculty for review, don’t bundle it with another one
that does not require that other Faculty’s review.
Page 44 of 53
Regulations:
•
Only bundle regulations with other regulations (not with programs, courses or admission
requirements).
•
Don’t bundle undergraduate with graduate level regulations.
•
Change types such as “New”, “Modify”, and/or “Remove from calendar” can be bundled
together.
•
If the regulation is being sent to another Faculty for review, don’t bundle it with items that do
not require that other Faculty’s review.
Admission Requirements:
•
Only bundle admission requirements with other admission requirements (not with programs,
regulations or courses).
•
Don’t bundle undergraduate with graduate level items.
•
Change types such as “New”, “Modify”, and/or “Remove from calendar” can be bundled
together.
•
If the admission requirement is being sent to another Faculty for review, don’t bundle it with
items that do not require that other Faculty’s review.
If you are ready to move forward, select the boxes of the items you wish to bundle together and
then click “Submit Selected”. This will bring you to the “Envelope” page.
Remember: The title you create on the Envelope should summarize all of the items in your
bundle. Create it so that it makes sense to a Senate member as they will read it on an agenda.
See below for more information.
Page 45 of 53
The Envelope (Title Guidelines)
Whether or not you have bundled your items together, you will need to complete the “Envelope”
in order to submit a request. After you have clicked on “Submit Selected”, you will then be
brought to the page called the Envelope. The Envelope contains general information about your
curriculum request(s).
Here are some tips to use when filling out the fields in the Envelope.
•
Your Unique Request Number: This will be generated for you. This will be your unique
number that helps you (and others) track your request.
•
Title of this Request: The title should contain general information about your request. It
should help the reader understand the type of request without having to open it up. It should
make sense for all the items bundled in it (if applicable). The title is what will be posted on
the Senate agenda.
Here are some guidelines to follow:
o
Start with the change type - is it a Course, Program, Regulation, or Admission
Requirement?
o
Next add the action type - is it New, a Modification, a Major modification, or are you
Reinstating or Discontinuing?
o
Then add GR for graduate level, or UG for undergraduate level (remember these two
should not be combined).
o
Then add a Department or Unit.
o
Then feel free to add any other specifics you think may help.
Example: Courses-Modifications-UG-Mathematics-Changes to 4th year titles.
•
Faculty or Institution Unit: Select the Faculty or Unit that the request belongs to. This will
tell the system which Dean to send it to.
Page 46 of 53
•
Submission Date: Enter today’s date.
•
Person to be contacted for specific questions: Who developed this request? This will tell
the Committees who to contact if they have specific questions. This is often not the initiator.
•
Additional Dean Stage: If you would like another Faculty Dean to review this request,
select all that apply. Do not select your own Faculty.
•
Workflow: Select from the drop-down box. It will ask you for the type of request: course,
program, regulation or admission requirement.
•
Note: This is an opportunity to add a general note about your request. For example, you
could add a request number from another submission if you want to reference it. Or you
could add a list of department chairs that have approved it.
•
Justifications: You do not need to add anything here.
•
Supporting Documents: If you click on the “Supporting Documents” tab at the top, you can
add attachments (e.g. Word, PDF, Excel, JPG) such as Proposal Briefs or other documents
supporting the curriculum change.
Click “Create Request” when you’re done.
The page will refresh. If it did not refresh, scroll to the top and look for red text. It is possible that
a required field is missing information. You should now see your request item(s) listed at the
bottom of the Envelope when it refreshes.
After this you can save it for later, you can create a PDF report of all your items, or you can
scroll to the bottom and click “Submit Request for Approval”. This will send it off to the workflow.
Once submitted, you will notice that a request number was generated. Also a new tab will
appear called “Workflow”. These two items will help you track your request.
Congratulations on submitting your request!
Page 47 of 53
Tracking / Searching for Requests
If you are the initiator of the request:
Simply log in, click “View” on your “Submitted curriculum requests” folder to find your requests.
After the item(s) has been approved at the final stage of Senate, and after the Calendar Officer
completes the editorial changes and moves it over to the Calendar, the initiator will receive an
email notification and it will be removed from their “Submitted Curriculum Requests” folder. You
can still look it up using the “Search Requests” feature.
If you did not initiate the request:
Log in, click “Curriculum” at the top of the page, then select “Search Requests”. You can search
by request number, or other criteria such as Faculty name. Remember the less information you
enter, the wider the search parameters will be, and the easier it will be to search. You can sort
the search results by clicking on the header, such as date submitted.
After you open the request, click on the Workflow tab at the top of the document to see the
current stage. You can also click on History, located in the middle of the page under Programs
to see changes that were performed at certain stages. You can also scroll to the bottom under
Curriculum Request History to see the approval tracking and comments made by each stage.
Troubleshooting: Cancelling, Relegating
After an initiator submits a request, it moves through the workflow. After that, the request can
only be changed by the person with responsibility for the current stage. If the change is small
and editorial in nature, that person can make the necessary changes. But if the change impacts
the content in any way, it should be relegated back to the initiator, and the workflow should be
restarted so that every stage can see the change. If a request is restarted in the workflow, but
Page 48 of 53
has already been approved for referral at a Senate meeting, and are “small and editorial” in
nature, it can skip forward to the last stage in the list. However, if the change impacts the
“content” in any way, it should start over in the workflow so that every stage can see the
change. Be sure to let the Secretariat Office know if it will not need to be re-referred at Senate.
Each stage has the ability to “Approve”, “Relegate”, “Deny”, or “Cancel” requests:
Approve: This action will send the request on to the next workflow. When approving a request,
your comment notes should include the meeting date of the approval, or any changes
made/requested. Providing as much detail as possible in the comments section is best.
Relegate: This action will send the request backwards in the workflow. Once you chose
“relegate” it will ask you to choose to go back 1 step, 2 steps, etc., or all the way back to the
initiator. Be sure to select the appropriate stage. If you chose relegate to the initiator they will
receive an email notification, and the request will go to their “Assigned curriculum requests”
folder.
Note: Even though the initiator will receive a notification, you may want to contact them to
explain why it was relegated back. Be sure to include your notes in the comment box when you
apply the relegate action.
From here the initiator can click “view” on their “Assigned curriculum requests” folder, open up
the request, make changes to it, save it, and then send it back into the workflow. Under the
section “Workflow Management”, the initiator can add their comments (which should reflect a
summary of the changes made), then if they select “Approve Request” from the drop down
menu it will prompt them to select the next stage. As mentioned earlier, if the changes are small
and editorial in nature, it can skip forward to the last stage in the list. But if the change impacts
the content in any way, it should start over in the workflow so that every stage can see the
change. Be sure to let the Secretariat Office know if it will not need to be re-referred at Senate.
The same request number will be assigned to this request and a full audit history will be kept.
Page 49 of 53
Alternatively, if you need to start the request over (e.g. to redo on a new form), the initiator can
choose to “Deny” or “Cancel” the request once it’s been relegated to them:
Deny Request / Cancel Request: This action will send the request directly back to the
initiator’s Working Folder.
From here the initiator can open up the request, and make changes. If the initiator clicks save, it
will remain in their Working Folder for further edits.
Add a new item to an existing request:
If the initiator submitted a request, and would like to add another item to it the original request, it
first needs to be “Cancelled” so that it ends up in the initiator’s Working Folder.
After the initiator creates the new item (course, or program, etc.), it will be stored under the
“Curriculum” tab in their Working Folder. Check the box for that item. Then select from the dropdown menu “Add selected to request:”, and click “Add”, to add/bundle that item to the existing
request.
Remove an item from an existing request: “Splitting a Request”
After a bundled request has been submitted, items can be removed from the bundle at any
stage (except the initiator’s stage). To split a request, open the request and click on “Split
Curriculum Request”, then choose the items you want separated. It will keep the same request
number once you save it, but it will add a letter to the end of each of the request numbers.
When ready, the initiator can click “Submit Request for Approval”. The workflow will not start
over, it will continue as is from the stage it was split unless relegated back.
The same request number will be assigned to this request and a full audit history will be kept.
Page 50 of 53
Deleting a request:
If you wish to delete a request altogether, the initiator can click “view” in their Working Folder,
select the check box of the request, and then click “Delete Selected”.
This will delete the envelope, delete the request number, and separate all the individual items
(courses, or programs, etc.) and place them under the “Curriculum” tab in the Working Folder.
From the “Curriculum” tab the initiator can check the box of each of the items, and then click
“Delete Selected” to delete the items. This does not delete the record itself (i.e. it will not be
removed from the calendar); this just deletes the work the initiator did on it.
Once a request is deleted, there is no record of it anymore so be sure to document it elsewhere
if you feel that is necessary.
Page 51 of 53
Workflows
Where will your request go?
Workflows are predetermined paths designated to each change type. For example, a
modification to an undergraduate course will not follow the same workflow as a new graduate
program. The workflows were set based on the needs of Senate Committees and the order that
they need to be viewed. For example, it wouldn’t make sense for a Dean to review the items
after a Senate committee has worked on it.
When you select the action (or change type) in Curriculum Navigator, you are essentially
selecting the workflow.
Here is a link to the chart of all change types and their associated workflows.
Senate and Committee Information
Prepare a Meeting Agenda Using Curriculum Navigator
Each Administrative Assistant and Chair of a Committee involved with Curriculum Navigator will
have an account. This account will allow you to view all items at your committee’s stage. Once
you log in, click “view” on the “Assigned curriculum requests” folder. From there you can use the
listed items to create your agenda (use both the title and request number).
Also, if you open up the request, and click on the “Supporting Documents” tab at the top, you
can also add attachments so that your committee material is located in one place.
Note: This does not pertain to meeting agendas or minutes, but rather proposal briefs or other
documents supporting the curriculum change.
Page 52 of 53
After a meeting
When your meeting is done, you can implement the decisions your committee has made about
the request. Choices include: make editorial changes, relegate it backwards in the workflow,
cancel the request, or approve it and move it forward into the workflow.
Before you make a selection of the action to take on a request (approve, cancel, or relegate),
you must enter a comment into the Comment box. At minimum, you should be entering the date
of the meeting and the action (e.g. Approved at the January 27th, 2014 meeting of SAC). If
anything extra occurred those comments should be added as well, for example: Attached a
missing piece of the proposal brief.
Reporting
Whenever referencing a curriculum change, in your minutes or in a report, be sure to include
both the title and the request number.
For more information about what should be included in your committee’s Report to Senate,
contact the Secretariat Office at [email protected] or 807-346-7929 (or ext. 7929).
This User Guide is helpful for those that regularly use Curriculum Navigator.
Questions about Curriculum Navigator can be directed to:
Calendar Officer
Email:
[email protected]
Phone:
807-343-8163 (or ext. 8163).
Page 53 of 53