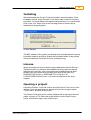
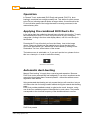
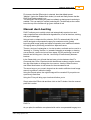
1
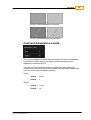
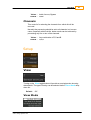
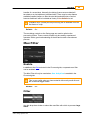
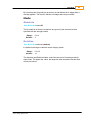
PTQS-2011.1_0
Phoenix Touch
Quickstart Manual
2011.1
Image Systems 2011 User Manual
© 2011 Image Systems AB
This publication, or parts thereof, may not be reproduced in any form, by any method, for any
purpose.
The software described in this document is furnished under a license agreement. This license is
available in the docs/licenses folder once the software is installed. See the appendix for license
and legal notification.
IMAGE SYSTEMS AB MAKES NO WARRANTY, EITHER EXPRESSED OR IMPLIED,
INCLUDING BUT NOT LIMITED TO ANY IMPLIED WARRANTIES, OF MERCHANTABILITY OR
FITNESS FOR A PARTICULAR PURPOSE, REGARDING THESE MATERIALS AND MAKES
SUCH MATERIALS AVAILABLE SOLELY ON AN “AS-IS” BASIS. IN NO EVENT SHALL IMAGE
SYSTEMS AB BE LIABLE TO ANYONE FOR SPECIAL, COLLATERAL, INCIDENTAL, OR
CONSEQUENTIAL DAMAGES IN CONNECTION WITH OR ARISING OUT OF PURCHASE OR
USE OF THESE MATERIALS. THE SOLE AND EXCLUSIVE LIABILITY TO IMAGE SYSTEMS
AB, REGARDLESS OF THE FORM OF ACTION, SHALL NOT EXCEED THE PURCHASE PRICE
OF THE MATERIALS DESCRIBED HEREIN.
IMAGE SYSTEMS AB reserves the right to revise and improve its products as it sees fit. This
publication describes the state of this product at the time of its publication, and may not reflect
the product at all times in the future.
The following are trademarks of IMAGE SYSTEMS AB :
Nucoda Film Master, Nucoda HD, Nucoda Fuse, Nucoda Compose, Phoenix Finish, Phoenix
Refine, Phoenix Touch, DVO, Turbine, Twister and Valhall.
All other brand names, product names, or trademarks belong to their respective holders.
Title :
Document Revision :
Software Revision :
Date :
Image Systems 2011 User Manual
PTQS-2011.1_0
2011.1
15/09/2011
Contents
1
Table of Contents
Welcome
.......................................................... 3
Overview
.......................................................... 6
Product Support
........................................................ 6
Links and Social
........................................................ 6
Contacts
........................................................ 7
Phoenix Touch Trial
..........................................................
Phoenix Touch Trial
10
. . . . . . . . . . . . . . . . . . . . . . . . . . . . . . . . . . . . . . . . . . . . . . . . . . . . . . . . 10
The User Interface. . . . . . . . . . . . . . . . . . . . . . . . . . . . . . . . . . . . . . . . . . . . . . . . . . . . . . . . . .
16
Interface Conventions . . . . . . . . . . . . . . . . . . . . . . . . . . . . . . . . . . . . . . . . . . . . . . . . . . . . . . . . 16
Main Screens
. . . . . . . . . . . . . . . . . . . . . . . . . . . . . . . . . . . . . . . . . . . . . . . . . . . . . . . . 18
Project Screen
Project Desktop
Project Library
Viewer Tools
. . . . . . . . . . . . . . . . . . . . . . . . . . . . . . . . . . . . . . . . . . . . . . . . . . . . . . . . 18
. . . . . . . . . . . . . . . . . . . . . . . . . . . . . . . . . . . . . . . . . . . . . . . . . . . . . . . . 19
. . . . . . . . . . . . . . . . . . . . . . . . . . . . . . . . . . . . . . . . . . . . . . . . . . . . . . . . 20
. . . . . . . . . . . . . . . . . . . . . . . . . . . . . . . . . . . . . . . . . . . . . . . . . . . . . . . . . . 22
Comparison Mode. . . . . . . . . . . . . . . . . . . . . . . . . . . . . . . . . . . . . . . . . . . . . . . . . . . . . . . . . .
DVO Tools
DVO Dust
25
. . . . . . . . . . . . . . . . . . . . . . . . . . . . . . . . . . . . . . . . . . . . . . . . . . . . . . . . . . 30
. . . . . . . . . . . . . . . . . . . . . . . . . . . . . . . . . . . . . . . . . . . . . . . . . . . . . . . . 31
Basic Settings and Presets
. . . . . . . . . . . . . . . . . . . . . . . . . . . . . . . . . . . . . . . . . . . . . . . . . . . . . . . . 31
Processing Filters
. . . . . . . . . . . . . . . . . . . . . . . . . . . . . . . . . . . . . . . . . . . . . . . . . . . . . . . . 33
Setup
. . . . . . . . . . . . . . . . . . . . . . . . . . . . . . . . . . . . . . . . . . . . . . . . . . . . . . . . 41
DVO Fix
. . . . . . . . . . . . . . . . . . . . . . . . . . . . . . . . . . . . . . . . . . . . . . . . . . . . . . . . 48
Restoration Tool
. . . . . . . . . . . . . . . . . . . . . . . . . . . . . . . . . . . . . . . . . . . . . . . . . . . . . . . . 52
Appendices
Legal Notices
Index
. . . . . . . . . . . . . . . . . . . . . . . . . . . . . . . . . . . . . . . . . . . . . . . . . . . . . . . . . . 55
. . . . . . . . . . . . . . . . . . . . . . . . . . . . . . . . . . . . . . . . . . . . . . . . . . . . . . . . 56
0
PTQS-2011.1_0
Welcome
1
3
Image Systems 2011 User Manual
Phoenix Touch
Welcome to the Phoenix Restoration Environment from Image Systems!
The Phoenix platform is the perfect solution for film archives and content
owners who require the best in content restoration, re-mastering and
repurposing. This manual will help you get the most out the system.
Product :
Phoenix Touch
Version :
2011.1
Document Revision : PTQS-2011.1_0
Date :
© 2011 Image Systems AB
15/09/2011
PTQS-2011.1_0
4
Welcome
© 2011 Image Systems AB
PTQS-2011.1_0
Overview
2
6
Overview
Phoenix Touch Trial version – Getting started
This guide will help to get you started with Phoenix Touch using the trial
version. Detailed operation is provided in the User Manual that is installed
together with the Phoenix Touch software.
Phoenix Touch
Product Support
Product Support is available to all clients with a valid maintenance contract.
To contact support, see the Contacts section.
User Forum
Image Systems runs a web-based user forum at the following address :
http://forum.digitalvision.se/
Please consider joining the forum and taking part in wide-ranging discussions
with our growing community of users.
Links and Social
Facebook
http://www.facebook.com/groups.php?ref=sb#/group.php?gid=2439525958
YouTube
http://uk.youtube.com/user/151Wardour
Twitter
https://twitter.com/dv_alerts
Web Site
http://www.imagesystems.tv
© 2011 Image Systems AB
PTQS-2011.1_0
Links and Social
7
Contacts
Stockholm
Linköping
Image Systems AB
Solna Strandväg 98
SE-171 54 Solna
Sweden
Ågatan 40
582 22 Linköping
Sweden
t: +46 (0)8 546 18200
f: +46 (0)8 546 182 09
t: +46 13 200 100
f: +46 13 200 150
London
Los Angeles
Image Systems (UK)
151 Wardour Street
London
W1F 8WE
Image Systems (US)
4605 Lankershim Blvd
Suite 700,
North Hollywood
CA 91602
USA
t: +44 (0)207 734 8282
f: +44 (0)207 292 6969
t: +1 818 769 8111
f: +1 818 769 1888
China (Hong Kong)
Image Systems (China)
C/O Swedish Trade Council
804 Hong Kong Club Building
3A Chater Road
Hong Kong
t: +852 2525 5445
t: +852 9440 0736
f: +852 2810 5600
Email Contacts
[email protected]
[email protected]
© 2011 Image Systems AB
PTQS-2011.1_0
8
Overview
© 2011 Image Systems AB
PTQS-2011.1_0
Phoenix Touch Trial
3
10
Phoenix Touch Trial
Phoenix Touch Trial
Getting started
This guide will help to get you started with Phoenix Touch using the trial
version. Detailed operation is provided in the User Manual that is installed
together with the Phoenix Touch software.
About Phoenix Touch
Phoenix Touch from Image Systems is restoration software for automatic
and/or manual removal of dust, dirt and blemishes. Phoenix Touch is part of a
product line including:
Phoenix Finish, the complete restoration, re purposing and re-mastering
production solution, focused on getting the best from your archive.
Phoenix Refine, offers the best in image restoration and enhancement tools
to transform media ready for mastering.
DVO (Digital Vision Options) is the core technology behind Phoenix. With over
20 years of research and development the DVO software tools have become
one of the most revered tool sets in the post production industry. Known for
presenting the best image manipulation tools for restoration, enhancement
and format conversion, they are only available on the Nucoda and Phoenix
platforms.
About Phoenix Touch Trial
The Phoenix Touch trial version is a special installer, including pre-built project
and associated media. A 30 day trial license is provided, with full functionality.
When the trial license expires a full license can be acquired through Image
Systems’ sales channels.
System requirements
Operating System: Windows 7 Pro, 64 bit
Memory: Min. 4 GB of RAM
Free disk space: Min. 1.5 GB
Disk speed: Min. 200 MB/s for real-time HD playback
Graphics card: NVIDIA with 512 MB RAM (Quadro 4000 or better
recommended)
Internet connection
Web browser
© 2011 Image Systems AB
PTQS-2011.1_0
Phoenix Touch Trial
11
Installing
After downloading the Phoenix Touch trial installer, start the installer. When
installation is done, launch Phoenix Touch trial in order to start the licensing
procedure. A license dialogue will appear stating that there is no valid license.
Click on the “Yes” button to go to the web page where a license can be
obtained from Image Systems.
License dialogue
The MAC address of the system has already been provided and the company
information needs to be filled in. Submit the information and a 30 day license
will be provided by e-mail within 24 hours (weekdays only).
License
When receiving the license by email copy the attached license.flic file into c:
\Phoenix\License\ (or wherever the installation directory has been placed)
replacing the current file. If for some reason the file attachment has been
blocked, copy the license string included in the body of the email (e.g
PHOENIX TOUCH 2011.01 0324D6A8FFF8 13-Aug-2011 30
D145FAC5DEE337281972) into c:\Phoenix\License\license.flic using
notepad.
Opening a project
Launch the Phoenix Touch trial version using the Phoenix Touch icon on the
desktop. Once the application has started you will notice a project called
“Touch Demo” at the top of the screen.
The Phoenix Touch trial version comes prepared with a trial project and test
media, courtesy of ITV. Select the project and click on the Open Project
button, in the bottom right corner of the screen.
© 2011 Image Systems AB
PTQS-2011.1_0
12
Phoenix Touch Trial
Operation
In Phoenix Touch, automated (DVO Dust) and manual (DVO Fix) dustbusting is combined into a single powerful tool. This allows for quick access
to the Fix tool, allowing manual repairs of larger stains. A reveal mode in the
Fix tool will allow parts of the image that was incorrectly processed, to be
restored at any time.
Applying the combined DVO Dust+Fix
In the trial project, the media has already been spliced to the timeline. To apply
the combined DVO Dust + Fix tool. use your mouse or pen, to drag the
orange bar (clicking in the time code display ribbon, until it is over the clip in
the timeline.
Pressing the F1 key will switch you from the Library view to the image
viewer, where you should see the material as you move the play head.
Once over the material, you add the tool to the material by clicking on the
Restoration Tool icon, at the bottom of the screen.
The bottom menu is switchable, so, if you can’t see the icon, please click on
this icon <insert pic> in order to switch the views]
Restora tion tool button
Automatic dust-busting
Manual “Dust busting” is hugely time consuming and expensive. Because
DVO Dust works automatically and intelligently, it can turn in excellent results
around ten times faster than a manual operator - without the artifacts some
algorithms leave behind.
Using automated dust-busting not only means that you will save time, but you
will reduce the risk of missing smaller artifacts during the manual dust-busting
pass.
DVO Dust provides detailed controls to optimize the result, however, using
one of the four available presets will be effective in most cases. The presets
corresponds to the size and frequency of the dust/blemishes to remove.
DVO Dust presets
© 2011 Image Systems AB
PTQS-2011.1_0
Phoenix Touch Trial
13
First ensure that the Effects tab is selected, then that default preset
"Medium" (below the Enable Basic button) is used and finally ensure that the
DVO Dust Enable control is on.
The automatic dust-busting will start immediately as background rendering is
enabled. This can easily be verified (selecting the Timeline tab) as the render
bar at the top of the timeline will go green instead of red.
Manual dust-busting
DVO Fix allows you to quickly select and automatically repairs minor and
major imperfections associated with degraded film, such as blotches, staining
and physical damage.
Using a brush or shape tool for selection, DVO Fix automatically fills in with
motion and grain-compensated imagery for seamless results, greatly
improving both image quality and speed of operation over traditional methods
of copying and re-positioning content from adjacent frames.
There s a choice of rectangular or circular brushes, and both can be used in a
“drawing” or “Clicking” fashion, ie, instead of dragging a rectangle or drawing
over a blemish, use the tool more like a stamp, by just positioning it over the
blemish and clicking once. Use the 1 and 2 keys to switch easily between
brushes.
In the General tab, you will note that we have a choice between Auto Fix,
Clone and Auto Clone. Experiment with the different modes to see the results.
Use the offset button to change the clone source. Use the Offset Previous
and Offset Next feature to set frames for the automated fix tool.
The arrow keys on you numeric keypad can be used to shift the cloned image
around, to position it within the image.
Using the Reveal option, the original image will be revealed if if you paint over
a previously fixed area.
Using the F6 key will bring up a view that will allow you to
Simply select the Effects tab and then click on the Fix button. Now the manual
paint tool is active.
DVO Fix
As you paint, the artifacts are replaced with motion compensated imagery true
© 2011 Image Systems AB
PTQS-2011.1_0
14
Phoenix Touch Trial
to the original content.
To move frame by frame, use the left and right arrow keys on your keyboard.
© 2011 Image Systems AB
PTQS-2011.1_0
The User Interface
4
16
The User Interface
This chapter will give you an overview of the user interface and some basic
components of the application.
Interface Conventions
The following interface conventions are used for various elements.
Functional
A function button performs a single action only.
Active and available
function button.
Inactive function button.
If a button is not available for selection, it is
greyed out.
Secondary Windows
The two dots preceding the button name indicate that a new window or
dialog will open when pressed.
Drop-down Menus
The three vertical dots preceding the button name indicate that this button is
a drop-down selection list.
Numeric Sliders / Data Entry
Click, hold and drag the mouse left and right in the data field to increment
and decrement the data value. You can also click the mouse once in the
data field to select, then type in a data value.
© 2011 Image Systems AB
PTQS-2011.1_0
Interface Conventions
17
Toggle Buttons
Toggle button off.
Toggle button on.
A group of three toggle buttons, with one enabled.
Radio Buttons
A group of two radio buttons. In a group, only one option can be selected at
one time.
Option Buttons
Option button off.
Option button on.
Information Dialogs
Informational
Informational
messages, no user
interaction required.
© 2011 Image Systems AB
Query
Request for user
input.
Warning/Error
Warning or error alert.
Sometimes including a
request for user intervention.
PTQS-2011.1_0
18
The User Interface
Main Screens
The application environment is composed of a number of components within
which you do the majority of your work. These include the main Project
Screen, the Project Desktop and the Project Library.
Project Screen
The Project Screen is the first screen visible when we launch the application.
This is where we create and manage our projects and access our global
preferences.
Main Project Screen
The active component screen will be high-lighted orange.
To access the component, press the corresponding button on the main
screen :
© 2011 Image Systems AB
PTQS-2011.1_0
Main Screens
19
Project Desktop
The Project Desktop is the main working environment inside your project.
The Project Desktop show ing the view er area and the com position tim eline below .
The desktop is composed of three main views :
The Monitor - in dual monitor mode, this will be displayed on your
second monitor
The Composition Timeline and GUI controls
The Memories view - for notes, memories and grouped shots
In single-screen mode, the Monitor panel can display the Monitor,
the Library or the Memories panel.
Project Desktop show ing M emories view
© 2011 Image Systems AB
PTQS-2011.1_0
20
The User Interface
Project Library
The Project Library is where we import and export media, create
compositions and manage our project assets.
© 2011 Image Systems AB
PTQS-2011.1_0
Viewer Tools
5
22
Viewer Tools
The viewer tools menu is opened from the project desktop by :
Pressing the F12 hot key or
Clicking the up-arrow button on the bottom-right of the viewer panel as
shown below.
view er toolbox m enu
The viewer tools pop-up menu contains setup for the following functions:
compare mode
head-up display (HUD)
grids
masks
graphs
histogram
colour management system (cms)
These functions can be turned on/off from within the menu pop-up window, or
from the corresponding icons on the desktop once the settings for each
function have been selected via the pop-up menu.
© 2011 Image Systems AB
PTQS-2011.1_0
23
Tool Configuration
The available options are user configurable for the following tools :
HUD
Grids
Masks
Graphs
© 2011 Image Systems AB
PTQS-2011.1_0
Comparison Mode
6
25
Hot key : F6
The compare function allows you to compare the frame you are viewing
against other instances in your timeline, against a reference frame, or against
different versions of the frame itself.
Compare Modes
The Compare options are selected via the drop-down list on the right-hand
menu. Show this menu using the F12 hot key. The options listed inside a
project may be a subset of the total available because you may want to limit
those you can cycle through. The options available in this list is configured in
the Control Panel preference section.
© 2011 Image Systems AB
PTQS-2011.1_0
26
Comparison Mode
Split m ode. You can interactively change the Dual m ode. Com parison side-by-side.
split using the m ouse or panel.
Split
Selecting split mode will allow you to wipe between the currently active frame
in the viewer and your comparison image.
An overlay control will appear in the viewer, separating the two frames. This
control can then be manipulated interactively by dragging it in any arbitrary
direction, to make comparisons between the two images. It is also possible
adjust the overlay during playback.
Dual
Selecting dual mode will display two images in the viewer. The currently
active frame will appear on the left, and next to it on the right will be your
choice of comparison image.
Cut
Selecting the cut mode will allow you to toggle between the current frame and
your comparison image in full size. Only one image will be displayed at a time,
determined by pressing the compare button on/off. When the compare button
is off you will see the current frame, as normal, and when the compare button
is on you will see the comparison image.
A full screen compare can be achieved by taking a snapshot of the
current image and moving to a new frame for comparison. Press
CTRL + 5 to grab the current image. Holding down the 5 key at any
future time will display the snapshot frame in place of the current
image in the monitor.
© 2011 Image Systems AB
PTQS-2011.1_0
27
Difference Modes
There are 3 difference modes:
Diff red
Diff luma
Diff monochrome
Each one will show you the difference between the current frame and the
comparison frame in the specified colour.
Comparison Image
Once you have selected your compare mode, you can close the viewer tools
menu (F12) and bring up the Memories screen to select what we will
compare against.
Select the ..M e m orie s button :
Select the S hot button :
Choose a Comparison Target from the drop-down list below Shot :
© 2011 Image Systems AB
PTQS-2011.1_0
28
Comparison Mode
You can compare against targets :
Track - the track below
Head - the secondary play-head
Event - a selected event
Revert - the previous grade on the shot
Source - the segment source
Groups - a selected group member
© 2011 Image Systems AB
PTQS-2011.1_0
DVO Tools
7
30
DVO Tools
DVO stands for Digital Vision O ptics, our collection of image
processing tools running in software on generic computer
platforms. DVO effects are optimised to make use of the latest
multithreading, CPU and GPU computer technology.
With the DVO toolset Image Systems brings twenty years of experience in
developing high performance image processing algorithms to the world of
data-centric restoration, digital intermediate and commercial work.
DVO Effects can be added to a segment on the timeline in the same way as
any other effect. They are automatically activated once applied.
This section describes each effect and its parameters.
DVO Dust
DVO Fix
Restoration Tool
Every DVO tool processes its input according to the specified colour
format and it is essential to set the colour format of the input
material correctly (the default will be taken from the project setting).
This can be changed independently inside each DVO effect. If the
input colour format is set incorrectly the material may not be
processed properly.
For a discussion of colour scaling modes, see the Setup Manual.
© 2011 Image Systems AB
PTQS-2011.1_0
31
DVO Dust
DVO Dust is a fully automatic and highly accurate film dirt, dust and random
scratch concealment and video drop-out removal system. It can remove
around 90% of visible imperfections without introducing unwelcome artifacts.
DVO Dust utilises a pioneering set of processing algorithms and new filters
with the Image Systems Emmy award-winning PHAME motion compensation
technology. With manual "dust busting" being very time consuming and
expensive, the automation in DVO Dust can typically reduce the amount of
operator time required by an order of magnitude. This saves enormous
amounts of time and money without any compromise in terms of picture
quality.
This effect has three groups of parameters:
The Enable toggle button allows the complete effect
to be turned on or off.
Presets - preset selections for quick dirt
removal
Processing - specific processing options
Setup - additional settings for various
processing selections
Basic Settings and Presets
The DVO Dust effect provides a number of presets, ranging from Extra Light
to Extra Heavy removal. These work as a very good starting point before
moving on to the more advanced controls in the Processing and Setup tabs.
You may not need to use any of the advanced parameters.
© 2011 Image Systems AB
PTQS-2011.1_0
32
DVO Tools
Enable Basic
The Enable Basic toggle button allows you to enable/disable basic mode.
This mode uses presets to automate and hide much of the effect complexity.
When you edit any of the settings in the processing or setup tabs the
basic mode becomes automatically disabled. Similarly, when you
select a mode from the basic modes, all settings will be
automatically adjusted to fit the selected mode and basic mode will
be automatically enabled.
Presets
This is a collection of preset settings (e.g. Extra Light, Heavy etc.) that setup
the effect for a predefined level of dust/dirt.
Values :
Default :
Extra Light, Light, Medium, Heavy, Extra Heavy
Medium
Strength
This slider allows the adjustment of the strength of dust reduction processing
to use. It is only available in basic mode.
Range :
Default :
-5 to +5
0
Enable White / Enable Black
White/black dirt removal is enabled via the corresponding Enable White/
Enable Black toggle buttons.
© 2011 Image Systems AB
PTQS-2011.1_0
DVO Dust
33
Enable Black - for black/dark spots
Enable White - for white/light spots
Both can also be enabled at the same time.
Default :
On
These options also appear in the Processing tab and they are linked
(changing one location affects the other).
Note that if neither button is enabled then DVO Dust will not filter
at all!
Processing Filters
The filters used by the process are very important in determining the final
processed quality. DVO Dust includes a variety of filter algorithms that can
effectively process a wide range of input footage.
Drop-down Filter list
© 2011 Image Systems AB
PTQS-2011.1_0
34
DVO Tools
Spatial / Temporal / Mixed Filters
Values :
Default :
Spatial, Mixed 1, Mixed 2, Mixed 3, Mixed 4, Temporal 1,
Temporal 2, Copy Prev, Copy Next, Bypass
Mixed 3
The following generic filter groups are defined.
Spatial
All filters named Spatial are filters that work only within the current
frame (or field if the material is interlaced), i.e. it has taps only in the
current frame. These filters are intended for very small spots.
Mixed
All filters named Mixed have taps in both the current frame and the
frame previous to and following the current frame. That is, it has both
spatial and temporal taps. All these filters however have more taps in
the current frame than in the previous and following frames together
(more spatial taps than temporal). These filters are intended for
normal spots.
The different Mixed types (Mixed 1,2,3 etc.) change the ratio between
spatial and temporal. The larger the number, the more temporal
filtering.
© 2011 Image Systems AB
PTQS-2011.1_0
DVO Dust
35
Temporal
Filters named Temporal have both spatial and temporal taps but with
more temporal than spatial. This will enable the DVO Dust to remove
any size of spots. These filters may need more careful use, to not
give unwanted artefacts.
The filter called 'Temporal 2' is a special temporal filter that
uses minimum amount of information from the current frame.
This means that the processed signal will not vary as much as
the normal temporal filter in terms of luminance/intensity.
Copy
Copy Next
Copy Prev
The 'Copy Next' and 'Copy Prev' filters should be used for one frame
in combination with a key area and Global mode to replace a big
chunk of dirt, a big hole, or a flash frame with information from the
next or previous frame.
Bypass
Setting the filter to Bypass will leave dirt unprocessed.
Use Adaptive Size
When the U se A daptiv e S ize button is enabled, the filter size
automatically adjusts during processing according to the size of the dirt found.
Default :
© 2011 Image Systems AB
On
PTQS-2011.1_0
36
DVO Tools
Filter Size
This sets the size of the filter on the current frame, so it is only required for
spatial and temporal filters.
Use the numeric slider to define the filter size when adaptive filter sizing is not
enabled. The larger the size of the dirt the larger this value should be.
Range :
Default :
0 to 15
7
Adaptation
The A daptation toggle button allows you to turn the adaptation processing
on/off.
When this button is off, DVO Dust works in global mode, filtering the whole
image with the same fixed filter selected in the Filter menu.
Note that if the A daptation button is off then none of the
adaptation controls above will have an effect.
Motion
This numeric slider configures the degree of motion sensitivity.
Initially you can set it to 0 (most safety), for maximum motion sensitivity, and
then increase it in steps if there isn't enough filtering in moving parts of the
picture.
A value of 256 corresponds to no motion adaptation at all, which means that
temporal filtering can be applied fully to moving parts of the image.
Range :
Default :
0 to 256
30
MDC
The M DC (Motion Detection Current) toggle button determines whether to
look at just the previous and next field/frame, or to look at all of the previous,
© 2011 Image Systems AB
PTQS-2011.1_0
DVO Dust
37
current, and next field/frame.
Default :
On
Having this option on ensures higher sensitivity and reduces artefacts down to
a minimum.
For maximum filtering, the control may be set to off.
MDC filter configuration is done inside the Setup section.
Edge
This controls material edge protection.
Edge protection acts as a safety measure and reduces the possibility of false
scratch detection. Some material may require this protection e.g. houses at a
distance, a forest or material with a slight weave. By turning edge protection
on, the built in edge detector will affect were DVO Dust filters and it will reduce
filtering where it finds edges.
Default :
On
Edge protection should normally be left on.
Further controls for defining thresholds for edges are available in the setup
tab.
Edge parameter configuration is done inside the Setup section.
Temporal Adaptation
Temporal Adaptation acts to exclude falsely detected dust/dirt from being
processed. It does this by comparing dirt detected on the current frame with
dirt detected on the previous frame (within a sizable window).
This toggle button turns temporal adaptation on/off.
Default :
Off
The temporal adaptation settings can be found in the Setup tab.
Black / White
There are two separate and independent parameter groups controlling the
processing for Black (dark) and White (light) areas of dust/dirt.
© 2011 Image Systems AB
PTQS-2011.1_0
38
DVO Tools
Enable Black / Enable White
White/black dirt removal can be enabled via the corresponding toggle
button.
Enable Black - to remove black/dark spots
Enable White - to remove white/light spots
Both can also be enabled at the same time.
Default :
On
Note that if neither button is enabled then DVO Dust will not
filter at all!
Use Adaptive
If on, sets white/black contrast to be adaptive.
Default :
On
This will result in the algorithm determining which contrast setting is
needed on a pixel-by-pixel basis.
When enabled the contrast controls change to give more, or less, effect
of the adaptive contrast.
Adptv Threshold
Only applicable if U se A daptiv e is on.
Range :
Default :
-32 to 31
0
Fixed Threshold
Only applicable if U se A daptiv e is off.
Range :
Default :
0 to 63
30
You should lower the thresholds if you have very low contrast white
spots on light background, or black spots on dark background, and
increase the thresholds if the luminance difference between the spots
and the background is less:
© 2011 Image Systems AB
PTQS-2011.1_0
DVO Dust
39
or
set the contrast threshold to a low value
or
set the contrast threshold to a high value
Contrast Adaptation Limits
The contrast adaptation low and high limit controls only work in the adaptive
mode and are used to specify the range of contrast settings that the
adaptation is allowed to work in.
The upper limit is normally set to the non-adaptive contrast setting you
normally use. If both limits are set to the same value the result is exactly the
same as when using non-adaptive contrast.
Low
Range :
Default :
0 to 63
5
Range :
Default :
0 to 63
30
High
© 2011 Image Systems AB
PTQS-2011.1_0
40
DVO Tools
Other Settings
Signal
This selects the signal (channel) within which scratches/dirt will be
detected.
Values :
Default :
Y,U,V,R,G,B,Y+U+V
Y
The adaptation works on one channel only, normally 'Y'. By setting the
signal to 'R', for example, when only red scratches are visible, the DVO
Dust will more precisely detect the dirt, minimizing the risk of affecting
actual picture content.
Motion Estimation
This drop-down button allows you to choose the motion estimation.
Values :
Default :
off, normal, best
normal
When enabled, the motion estimation module gives a performance
boost, both in dirt detection and concealment. This means that much
more aggressive settings can be used without introducing smearing.
Scene Change
This drop-down button gives options for how to process the frames
surrounding an edit/cut point:
Inside - processes the frame before a cut using only the current and
previous frame, and processes the frame after a cut using only the
current and next frame. Stays inside the shot.
Across - ignores cuts, use the previous, current, and next frame.
Goes across shots.
Bypass - doesn't process the frames before or after a cut.
© 2011 Image Systems AB
PTQS-2011.1_0
DVO Dust
Values :
Default :
41
Inside, Across, Bypass
inside
Channels
This control is for selecting the channels from which dirt will be
removed.
Normally the processing should be set to all channels, but in some
cases, especially with small dirt, better results can be achieved by
processing only one or two of the channels.
Values :
Default :
Any combination of R,G and B.
R,G,B
Setup
View
Turning on the Vie w toggle button will provide an overlay/preview showing
detected dirt. The type of overlay can be selected via the Vie w M ode dropdown list:
Default :
Off
View Mode
© 2011 Image Systems AB
PTQS-2011.1_0
42
DVO Tools
Values :
Default :
Dirt On Luma, Dirt On Red Input, Dirt On Red Output,
Difference
Dirt On Luma
Where :
Dirt On Luma - The detected scratches/dirt are high-lighted on a
monochrome input picture with lowered luminance.
Dirt On Red Input - The detected scratches/dirt are shown with red
on the unprocessed input signal.
Dirt On Red Output - The detected scratches/dirt are shown with
red on the processed output signal.
Difference - The difference between the unprocessed input and the
processed output is displayed.
Colour
The drop-down list will default to the project setting for the input format. You
need to set this control according to the material that you are working with. If
the footage was shot with a video camera, select a linear format. If this
control is not set correctly the material may not be processed properly.
Default :
From Project
History Required
The DVO Dust effect is recursive.
Recursive means the result for any given frame depends on the
result of the previous frame(s).
For best results a certain amount of frame history needs to be built up, and
this numeric slider is used to specify how many frames of history to use.
Range :
Default :
0 to 15
5 frames
Use Handles
The Use Handles button controls whether the history includes available
© 2011 Image Systems AB
PTQS-2011.1_0
DVO Dust
43
handles of a scene/shot. Normally, the history frames accumulated will
terminate on a shot edit/event (start/end edit). There may be extra frames
available (handles) before or after the start and end edit points of a shot
however and these will be included as history if Use Handles is set.
If handles exist, full and precise processing will be available from the
first frame of a clip.
Default :
On
The remaining controls on the Setup page are used to optimize the
processing further. These controls should only be used by experienced
operators with a good understanding of the dirt and scratch concealment
process.
Max Filter
Enable
In addition to the filter selected in the Processing tab, a separate max filter
can be enabled.
The Max Filter will only be used when U se A daptiv e is enabled in the
Processing tab.
This is very useful when you have material with mostly small dirt and
the occasional bigger stains.
Default :
Off
Filter
Use this drop-down button to select the max filter with which to process large
stains.
© 2011 Image Systems AB
PTQS-2011.1_0
44
DVO Tools
Values :
Default :
Spatial, Mixed 1, Mixed 2, Mixed 3, Mixed 4, Temporal 1,
Temporal 2, Copy Prev, Copy Next, Bypass
Temporal 1
When the Max Filter is enabled, the normal filter used for the adaptive filter
sizing will take care of the small dirt. When the upper size limit is reached it
will automatically switch over to the filter selected here.
The filter used here would typically be a larger temporal filter.
The Max Filter can also be set to Bypass, which will leave big stains
unprocessed. These can be processed later by a de-blotcher or 3rd party
software.
Size
This specifies the size of the spatial part of the filter (for spatial and mixed
filter types).
Use a large value when processing large bits of dirt.
Range :
Default :
0 to 15
3
Motion
Width
Motion W idth is used in combination with the Motion control in the
processing section and defines the motion adaptation behaviour. When
motion width is set to 0, the motion setting will be used as a threshold
discriminating between moving and non-moving parts. When motion width is
set to a non-zero value, the classification will change gradually from “no
motion” to “full motion”. Motion width then specifies the size of the transition
region.
Range :
Default :
© 2011 Image Systems AB
0 to 255
30
PTQS-2011.1_0
DVO Dust
45
MDC Scale
The M DC (Motion Detection Current) toggle button in the Processing section
determines whether to look at just the previous and next field/frame, or to look
at all of the previous, current, and next field/frame.
Only used if MDC (Motion Detection Current) control enabled in the
Processing section.
The higher the scale setting, the more filtering (less impact of the MDC
algorithm).
Range :
Default :
0 to 15
8
Edge
The Edge settings apply only if Edge protection has been enabled in
the Processing tab.
Offset
The edge offset acts like a threshold, determining how well-defined edges
have to be before the edge control has any effect. The smaller the offset value
the sooner the edge control will have an effect.
Range :
Default :
0 to 255
45
Scale
Edge scale sets the sensitivity of the edge control. The higher the setting the
more pronounced the effect of the edge control.
Range :
Default :
© 2011 Image Systems AB
0 to 255
192
PTQS-2011.1_0
46
DVO Tools
Temporal
The temporal settings apply only if Temporal Adaptation has been
enabled in the Processing tab.
The purpose of temporal adaptation is to exclude falsely detected dirt from
processing by comparing it with the previous frame's detected dirt within a
sizable window.
Strength
The strength level determines the amount of influence that the previous
frame's detected dirt will have on exclusion of dirt detection in the current
frame. A higher value will result in more dirt being excluded and less
processing carried out.
Range :
Default :
0 to 255
80
Trim Size
The trim size corresponds to a "window" in the previous frame which is
searched for dirt to compare against the current frame. The smaller the
window (trim size) the more filtering that will be achieved.
Range :
Default :
0 to 7
5
Hit Growth
The Hit Growth control is useful when the dirt in the image does not have very
well-defined edges.
© 2011 Image Systems AB
PTQS-2011.1_0
DVO Dust
47
By increasing the hit growth the processor is told that the dirt is bigger than it
actually appears. The result is that the soft edges also are processed.
Mode
Absolute
U se R e lativ e button off.
The hit mask for all sizes of scratches are grown by the same amount as
specified with the strength control
Range :
Default :
0 to 4
4
Relative
U se R e lativ e button on (default)
In relative mode large scratches cause a larger growth.
Range :
Default :
0 to 15
10
The Absolute and Relative sliders control the amount of hit mask growth for
each mode. The higher the value, the larger the area around the scratch that
will be processed.
© 2011 Image Systems AB
PTQS-2011.1_0
48
DVO Tools
DVO Fix
DVO Fix facilitates the repair of specific areas and imperfections in a single
frame, such as scratches, hairs and blotches.
Using a brush or shape tool to select the damage, DVO Fix automatically
repairs the selected area by comparing it to adjacent frames and applying
motion compensation to recreate missing detail plus grain compensation to
blend-in the recreated information.
DVO Fix is not enabled by default. It is only enabled once an area to fix has
been selected via the Brush or the Rectangle tool.
Brush Menu
The brush tool appears in the viewer as an oval shape. Use this tool to fix an
area by either clicking or clicking and dragging the brush.
Size
The size tool allows you to resize the brush in order to fix smaller/larger
areas.
You can also resize the brush by holding down the SHIFT key (on either the
keyboard or control panel), the left mouse button and dragging. The brush
size will
Range :
Default :
© 2011 Image Systems AB
0.1 to 5000
20 pixels
PTQS-2011.1_0
DVO Fix
49
Rate
The rate tool applies to when you drag the brush, affecting how many brush
'stamps' are performed during the dragging motion.
Range :
Default :
2 to 1000
10
Rect Menu
The rectangle tool displays a cross-hair in the viewer, allowing you to draw a
rectangle around the area that you want to fix. As soon as the rectangle has
been drawn the DVO Fix effect will start processing.
Softness
The softness setting applies to the border outside of the rectangle and allows
you to adjust how the outline blends into the surrounding area. This numeric
slider takes values between 0-1.
Range :
Default :
0 to 1
0.2
Common Menu
The U se H andle s button controls whether the tool uses source handles
when rebuilding the frame. This is important at scene boundaries (edits)
because the tool rebuilds using frames before and after the current frame.
Default :
On
If this button is on, and we are at a scene boundary (start or end of shot), if we
have handles we will use them as part of the rebuilding process.
If there are no handles, or this button is off, no before (or after) frames will (or
can) be used at the scene start (or end), and this impacts the DVO Fix result.
Note that a scene detected timeline can have no shot handles, so
U se H andle s should be turned off.
© 2011 Image Systems AB
PTQS-2011.1_0
50
DVO Tools
Erase
The Erase button becomes enabled as soon as a fix is made to the current
layer.
Default :
Off
Turning on the Erase button will turn the brush into an eraser and applying
this to the fixed area of your image will 'undo' previous fixes.
You cannot erase changes to a mixed-down layer.
Mixdown
The Mix Down button becomes enabled as soon as a fix is made to the
current layer.
Pressing Mix Down will make the changes to the current layer permanent,
"burning" them into the image.
This tool allows you to apply fixes with different settings to the same
area.
Enable Grain
© 2011 Image Systems AB
PTQS-2011.1_0
DVO Fix
51
Enable Grain will turn on the grain compensation. This adds grain to the 'fixed'
area as appropriate, blending the changes into the scene.
Default :
Off
The parameters are the same as for the DVO Regrain effect.
Colour
The drop-down list will default to the project setting for the input format. You
need to set this control according to the material that you are working with. If
the footage was shot with a video camera, select a linear format. If this
control is not set correctly the material may not be processed properly.`
Default :
© 2011 Image Systems AB
From Project
PTQS-2011.1_0
52
DVO Tools
Restoration Tool
The Restoration Tool is a combined effect, placing both a DVO Dust and a
DVO Fix effect on a shot simultaneously. These two effects are often used
together.
Used in this mode, an extra function Reveal is available inside DVO Fix.
Adding a Restoration Effect
Add a Restoration effect by clicking the restoration icon on the effects toolbar
at the bottom of the main screen.
Added as a single effect in the Effects layer, both DVO Dust and DVO Fix are
available in the same effect.
The Reveal Function
In restoration mode, the DVO Fix tool has the added function Reveal which is
not available in the standalone DVO Fix effect.
The Reveal function enables you to see the results of the DVO Fix before the
DVO Dust effect takes place.
© 2011 Image Systems AB
PTQS-2011.1_0
Restoration Tool
53
Size / Rate
The Size and Rate parameters are for the Reveal brush, as described in the
DVO Fix Brush section.
Blend
The Blend parameter controls the mix between before and after the
application of the Dust effect. The larger the value, the less mix.
This facilitates the correction of any 'false positives' (incorrect fixes)
carried out by the Dust tool.
Range :
Default :
© 2011 Image Systems AB
0.0 to 1.0
1.0 (no mix)
PTQS-2011.1_0
Appendices
8
55
© 2011 Image Systems AB
PTQS-2011.1_0
56
Appendices
Legal Notices
The software described in this document is furnished under a license
agreement.
This license is available in the docs/licenses folder once the software is
installed.
The software may not be reverse assembled and may be used or copied only
in accordance with the terms of the license agreement. It is against the law to
copy the software on any medium except as specifically allowed in the license
agreement.
This product includes software that is copyright 2009, Avid Technology, Inc.,
its licensors and its licensees. All rights reserved.
This product is manufactured by Image Systems AB under license to patent
pending applications and issued (U.S. and other) patents :
U.S. Patent Application 10/817,209, published as U.S. patent publication
2004/0196903
U.S. Patent Application 10/817,217, published as U.S. patent publication
2004/0196911
Canadian Patent Application 2521467
European Patent Application 04749684.0, published as European patent
publication 1629675.
This product includes software that is copyright 2008 RED Digital Cinema.
Image Systems applications incorporate and are based in part on the work
of :
Name
URL
Notes
FLTK
http://www.fltk.org
[1] [2]
FFmpeg
http://www.ffmpeg.org
[1]
Freetype
http://www.freetype.org
[17]
FTGL
http://ftgl.wiki.sourceforge.net
[3]
libtiff
http://www.libtiff.org
[4]
libjpeg
http://www.ijg.org/files/README
[5]
winpcap
http://www.winpcap.org/
[6]
GLEW
http://glew.sourceforge.net/
[7] [8] [9]
OpenFX
http://openfx.sourceforge.net/
[10]
© 2011 Image Systems AB
PTQS-2011.1_0
Legal Notices
mxflib
http://sourceforge.net/projects/mxflib/
[11]
AAF
http://aaf.sourceforge.net/
[12]
OpenEXR
http://www.openexr.com/
[13]
libsigc
http://libsigc.sourceforge.net/
[1]
libsndfile
http://www.mega-nerd.com/libsndfile/
[1]
libpng
http://www.libpng.org/pub/png/libpng.
html
[14]
zlib
http://www.zlib.net/
[15]
Boost
http://www.boost.org/
[16]
57
Notes
[1] http://www.gnu.org/licenses/old-licenses/lgpl-2.1.html.
Included with product distribution in folder docs/licenses/.
[2] http://www.fltk.org/COPYING.php - FLTK exceptions to [1]
[3] The MIT License
Copyright (c) <year> <copyright holders>
Permission is hereby granted, free of charge, to any person obtaining a copy of this software
and associated documentation files (the "Software"), to deal in the Software without
restriction, including without limitation the rights to use, copy, modify, merge, publish,
distribute, sublicense, and/or sell copies of the Software, and to permit persons to whom the
Software is furnished to do so, subject to the following conditions:
The above copyright notice and this permission notice shall be included in
all copies or substantial portions of the Software.
THE SOFTWARE IS PROVIDED "AS IS", WITHOUT WARRANTY OF ANY KIND, EXPRESS OR
IMPLIED, INCLUDING BUT NOT LIMITED TO THE WARRANTIES OF MERCHANTABILITY,
FITNESS FOR A PARTICULAR PURPOSE AND NONINFRINGEMENT. IN NO EVENT SHALL
THE AUTHORS OR COPYRIGHT HOLDERS BE LIABLE FOR ANY CLAIM, DAMAGES OR
OTHER LIABILITY, WHETHER IN AN ACTION OF CONTRACT, TORT OR OTHERWISE,
ARISING FROM, OUT OF OR IN CONNECTION WITH THE SOFTWARE OR THE USE OR
OTHER DEALINGS IN THE SOFTWARE.
[4] Libtiff license
Copyright (c) 1988-1997 Sam Leffler
Copyright (c) 1991-1997 Silicon Graphics, Inc.
Permission to use, copy, modify, distribute, and sell this software and its documentation for
any purpose is hereby granted without fee, provided that (i) the above copyright notices and
this permission notice appear in all copies of the software and related documentation, and
(ii) the names of Sam Leffler and Silicon Graphics may not be used in any advertising or
publicity relating to the software without the specific, prior written permission of Sam Leffler
and Silicon Graphics.
THE SOFTWARE IS PROVIDED "AS-IS" AND WITHOUT WARRANTY OF ANY KIND,
EXPRESS, IMPLIED OR OTHERWISE, INCLUDING WITHOUT LIMITATION, ANY WARRANTY
© 2011 Image Systems AB
PTQS-2011.1_0
58
Appendices
OF MERCHANTABILITY OR FITNESS FOR A PARTICULAR PURPOSE.
IN NO EVENT SHALL SAM LEFFLER OR SILICON GRAPHICS BE LIABLE FOR ANY
SPECIAL, INCIDENTAL, INDIRECT OR CONSEQUENTIAL DAMAGES OF ANY KIND, OR ANY
DAMAGES WHATSOEVER RESULTING FROM LOSS OF USE, DATA OR PROFITS,
WHETHER OR NOT ADVISED OF THE POSSIBILITY OF DAMAGE, AND ON ANY THEORY OF
LIABILITY, ARISING OUT OF OR IN CONNECTION WITH THE USE OR PERFORMANCE OF
THIS SOFTWARE.
[5] libjpeg
See : http://www.ijg.org/files/README
We are releasing this software for both noncommercial and commercial use. Companies
are welcome to use it as the basis for JPEG-related products. We do not ask a royalty,
although we do ask for an acknowledgement in product literature (see the README file in
the distribution for details). We hope to make this software industrial-quality --- although, as
with anything that's free, we offer no warranty and accept no liability.
[6] winpcap
See : http://www.winpcap.org/misc/copyright.htm
Copyright (c) 1999 - 2005 NetGroup, Politecnico di Torino (Italy).
Copyright (c) 2005 - 2009 CACE Technologies, Davis (California).
All rights reserved.
Portions Copyright (c) 1990, 1991, 1992, 1993, 1994, 1995, 1996, 1997 The Regents of the
University of California. All rights reserved.
Portions Copyright (c) 1995, 1996, 1997 Kungliga Tekniska Högskolan (Royal Institute of
Technology, Stockholm, Sweden). All rights reserved.
Portions Copyright (c) 1997 Yen Yen Lim and North Dakota State University. All rights
reserved.
Portions Copyright (c) 1993 by Digital Equipment Corporation.
Portions Copyright (C) 1995, 1996, 1997, 1998, and 1999 WIDE Project. All rights reserved.
Portions Copyright (c) 1996 Juniper Networks, Inc. All rights reserved.
Portions Copyright (c) 2001 Daniel Hartmeier All rights reserved.
Portions Copyright 1989 by Carnegie Mellon.
License included with product distribution in folder docs/licenses/.
[7] GLEW
The OpenGL Extension Wrangler Library
Copyright (C) 2002-2008, Milan Ikits <milan ikits[]ieee org>
Copyright (C) 2002-2008, Marcelo E. Magallon <mmagallo[]debian org>
Copyright (C) 2002, Lev Povalahev
All rights reserved.
Redistribution and use in source and binary forms, with or without
modification, are permitted provided that the following conditions are met:
* Redistributions of source code must retain the above copyright notice, this list of
conditions and the following disclaimer.
* Redistributions in binary form must reproduce the above copyright notice, this list of
conditions and the following disclaimer in the documentation and/or other materials
provided with the distribution.
* The name of the author may be used to endorse or promote products derived from this
software without specific prior written permission.
THIS SOFTWARE IS PROVIDED BY THE COPYRIGHT HOLDERS AND CONTRIBUTORS "AS
© 2011 Image Systems AB
PTQS-2011.1_0
Legal Notices
59
IS" AND ANY EXPRESS OR IMPLIED WARRANTIES, INCLUDING, BUT NOT LIMITED TO,
THE IMPLIED WARRANTIES OF MERCHANTABILITY AND FITNESS FOR A PARTICULAR
PURPOSE ARE DISCLAIMED. IN NO EVENT SHALL THE COPYRIGHT OWNER OR
CONTRIBUTORS BE LIABLE FOR ANY DIRECT, INDIRECT, INCIDENTAL, SPECIAL,
EXEMPLARY, OR CONSEQUENTIAL DAMAGES (INCLUDING, BUT NOT LIMITED TO,
PROCUREMENT OF SUBSTITUTE GOODS OR SERVICES; LOSS OF USE, DATA, OR
PROFITS; OR BUSINESS INTERRUPTION) HOWEVER CAUSED AND ON ANY THEORY OF
LIABILITY, WHETHER IN CONTRACT, STRICT LIABILITY, OR TORT (INCLUDING
NEGLIGENCE OR OTHERWISE) ARISING IN ANY WAY OUT OF THE USE OF THIS
SOFTWARE, EVEN IF ADVISED OF THE POSSIBILITY OF SUCH DAMAGE.
[8] Mesa
Mesa 3-D graphics library
Version: 7.0
Copyright (C) 1999-2007 Brian Paul All Rights Reserved.
Permission is hereby granted, free of charge, to any person obtaining a copy of this software
and associated documentation files (the "Software"), to deal in the Software without
restriction, including without limitation the rights to use, copy, modify, merge, publish,
distribute, sublicense, and/or sell copies of the Software, and to permit persons to whom the
Software is furnished to do so, subject to the following conditions:
The above copyright notice and this permission notice shall be included in all copies or
substantial portions of the Software.
THE SOFTWARE IS PROVIDED "AS IS", WITHOUT WARRANTY OF ANY KIND, EXPRESS OR
IMPLIED, INCLUDING BUT NOT LIMITED TO THE WARRANTIES OF MERCHANTABILITY,
FITNESS FOR A PARTICULAR PURPOSE AND NON INFRINGEMENT. IN NO EVENT SHALL
BRIAN PAUL BE LIABLE FOR ANY CLAIM, DAMAGES OR OTHER LIABILITY, WHETHER IN
AN ACTION OF CONTRACT, TORT OR OTHERWISE, ARISING FROM, OUT OF OR IN
CONNECTION WITH THE SOFTWARE OR THE US
[9] Khronos
Copyright (c) 2007 The Khronos Group Inc.
Permission is hereby granted, free of charge, to any person obtaining a copy of this software
and/or associated documentation files (the "Materials"), to deal in the Materials without
restriction, including without limitation the rights to use, copy, modify, merge, publish,
distribute, sublicense, and/or sell copies of the Materials, and to permit persons to whom
the Materials are furnished to do so, subject to the following conditions:
The above copyright notice and this permission notice shall be included in all copies or
substantial portions of the Materials.
THE MATERIALS ARE PROVIDED "AS IS", WITHOUT WARRANTY OF ANY KIND, EXPRESS
OR IMPLIED, INCLUDING BUT NOT LIMITED TO THE WARRANTIES OF
MERCHANTABILITY, FITNESS FOR A PARTICULAR PURPOSE AND NONINFRINGEMENT.
IN NO EVENT SHALL THE AUTHORS OR COPYRIGHT HOLDERS BE LIABLE FOR ANY
CLAIM, DAMAGES OR OTHER LIABILITY, WHETHER IN AN ACTION OF CONTRACT, TORT
OR OTHERWISE, ARISING FROM, OUT OF OR IN CONNECTION WITH THE MATERIALS OR
THE USE OR OTHER DEALINGS IN THE MATERIALS.
[10] OFX
From : http://openfx.sourceforge.net/Documentation/Doxygen/ofxCore_8h-source.html
Copyright (c) 2003-2004, The Foundry Visionmongers Ltd. All rights reserved.
© 2011 Image Systems AB
PTQS-2011.1_0
60
Appendices
Redistribution and use in source and binary forms, with or without modification, are
permitted provided that the following conditions are met:
* Redistributions of source code must retain the above copyright notice, this list of conditions
and the following disclaimer.
* Redistributions in binary form must reproduce the above copyright notice, this list of
conditions and the following disclaimer in the documentation and/or other materials
provided with the distribution.
* Neither the name The Foundry Visionmongers Ltd, nor the names of its contributors may
be used to endorse or promote products derived from this software without specific prior
written permission.
THIS SOFTWARE IS PROVIDED BY THE COPYRIGHT HOLDERS AND CONTRIBUTORS "AS
IS" AND ANY EXPRESS OR IMPLIED WARRANTIES, INCLUDING, BUT NOT LIMITED TO,
THE IMPLIED WARRANTIES OF MERCHANTABILITY AND FITNESS FOR A PARTICULAR
PURPOSE ARE DISCLAIMED. IN NO EVENT SHALL THE COPYRIGHT OWNER OR
CONTRIBUTORS BE LIABLE FOR ANY DIRECT, INDIRECT, INCIDENTAL, SPECIAL,
EXEMPLARY, OR CONSEQUENTIAL DAMAGES (INCLUDING, BUT NOT LIMITED TO,
PROCUREMENT OF SUBSTITUTE GOODS OR SERVICES; LOSS OF USE, DATA, OR
PROFITS; OR BUSINESS INTERRUPTION) HOWEVER CAUSED AND ON ANY THEORY OF
LIABILITY, WHETHER IN CONTRACT, STRICT LIABILITY, OR TORT (INCLUDING
NEGLIGENCE OR OTHERWISE) ARISING IN ANY WAY OUT OF THE USE OF THIS
SOFTWARE, EVEN IF ADVISED OF THE POSSIBILITY OF SUCH DAMAGE.
[11] mxflib
Copyright (c) 2002-2007, Matt Beard, BBC R&D and Metaglue Corporation
See : http://mxflib.cvs.sourceforge.net/viewvc/mxflib/mxflib/COPYING?
revision=1.5&view=markup
[12] AAF Public Source License
See : http://aaf.cvs.sourceforge.net/aaf/AAF/LEGAL/AAFSDKPSL.TXT?view=markup
Included with product distribution in folder docs/licenses/.
[13] OpenEXR
See : http://www.ilm.com/opensource/ilm-bsd-lic.html
Copyright (c) 2002, Industrial Light & Magic, a division of Lucas Digital Ltd. LLC All rights
reserved.
Redistribution and use in source and binary forms, with or without modification, are
permitted provided that the following conditions are met:
* Redistributions of source code must retain the above copyright notice, this list of conditions
and the following disclaimer.
* Redistributions in binary form must reproduce the above copyright notice, this list of
conditions and the following disclaimer in the documentation and/or other materials
provided with the distribution.
* Neither the name of Industrial Light & Magic nor the names of its contributors may be used
to endorse or promote products derived from this software without specific prior written
permission.
THIS SOFTWARE IS PROVIDED BY THE COPYRIGHT HOLDERS AND CONTRIBUTORS "AS
IS" AND ANY EXPRESS OR IMPLIED WARRANTIES, INCLUDING, BUT NOT LIMITED TO,
THE IMPLIED WARRANTIES OF MERCHANTABILITY AND FITNESS FOR A PARTICULAR
PURPOSE ARE DISCLAIMED. IN NO EVENT SHALL THE COPYRIGHT OWNER OR
CONTRIBUTORS BE LIABLE FOR ANY DIRECT, INDIRECT, INCIDENTAL, SPECIAL,
© 2011 Image Systems AB
PTQS-2011.1_0
Legal Notices
61
EXEMPLARY, OR CONSEQUENTIAL DAMAGES (INCLUDING, BUT NOT LIMITED TO,
PROCUREMENT OF SUBSTITUTE GOODS OR SERVICES; LOSS OF USE, DATA, OR
PROFITS; OR BUSINESS INTERRUPTION) HOWEVER CAUSED AND ON ANY THEORY OF
LIABILITY, WHETHER IN CONTRACT, STRICT LIABILITY, OR TORT (INCLUDING
NEGLIGENCE OR OTHERWISE) ARISING IN ANY WAY OUT OF THE USE OF THIS
SOFTWARE, EVEN IF ADVISED OF THE POSSIBILITY OF SUCH DAMAGE.
[14] libpng
See : http://www.libpng.org/pub/png/src/libpng-LICENSE.txt
[15] zlib
See : http://www.zlib.net/zlib_license.html
[16] Boost Software License
See : http://www.boost.org/LICENSE_1_0.txt
Boost Software License - Version 1.0 - August 17th, 2003
Permission is hereby granted, free of charge, to any person or organization obtaining a copy
of the software and accompanying documentation covered by this license (the "Software") to
use, reproduce, display, distribute, execute, and transmit the Software, and to prepare
derivative works of the Software, and to permit third-parties to whom the Software is
furnished to do so, all subject to the following:
The copyright notices in the Software and this entire statement, including the above license
grant, this restriction and the following disclaimer, must be included in all copies of the
Software, in whole or in part, and all derivative works of the Software, unless such copies or
derivative works are solely in the form of machine-executable object code generated by a
source language processor.
THE SOFTWARE IS PROVIDED "AS IS", WITHOUT WARRANTY OF ANY KIND, EXPRESS OR
IMPLIED, INCLUDING BUT NOT LIMITED TO THE WARRANTIES OF MERCHANTABILITY,
FITNESS FOR A PARTICULAR PURPOSE, TITLE AND NON-INFRINGEMENT. IN NO EVENT
SHALL THE COPYRIGHT HOLDERS OR ANYONE DISTRIBUTING THE SOFTWARE BE
LIABLE FOR ANY DAMAGES OR OTHER LIABILITY, WHETHER IN CONTRACT, TORT OR
OTHERWISE, ARISING FROM, OUT OF OR IN CONNECTION WITH THE SOFTWARE OR
THE USE OR OTHER DEALINGS IN THE SOFTWARE.
[17] Freetype
See : http://www.freetype.org/FTL.TXT
Portions of this software are copyright copyright (c) 2006 The FreeType Project (www.
freetype.org). All rights reserved.
© 2011 Image Systems AB
PTQS-2011.1_0
62
Appendices
© 2011 Image Systems AB
PTQS-2011.1_0