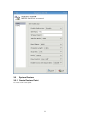
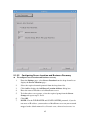
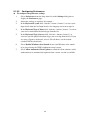
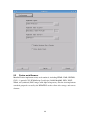
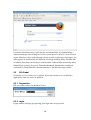
1
Linux-Based Terminal
Termtek Linux V3.0
User’s Manual
Version No. LX30-20090223
TABLE OF CONTENTS
1
2
Software Overview ................................................................................................5
1.1
LBTs ..............................................................................................................5
1.2
1.3
1.4
1.5
Scope..............................................................................................................5
Feature List ....................................................................................................5
Minimum Requirement..................................................................................7
Note................................................................................................................7
1.6
Reference .......................................................................................................7
Initial Terminal Setup ............................................................................................8
2.1
3
Hot-keys Functions ........................................................................................8
Accessories ............................................................................................................9
3.1
Network Disk .................................................................................................9
3.1.1
Samba setting .........................................................................................9
3.1.2
Disk Mount ............................................................................................9
3.1.3
Disk Share............................................................................................10
3.2
Serial to TCP/IP ...........................................................................................10
3.3
System Restore.............................................................................................11
3.3.1
Create Restore Point ............................................................................11
3.3.1.1 Input Description .............................................................................12
3.3.2
Restore System.....................................................................................12
3.3.2.1 Select Restore Point .........................................................................13
3.4
Thunar File Manager....................................................................................14
4
Environment.........................................................................................................15
4.1
Desktop Setting............................................................................................15
4.2
4.3
4.4
4.5
4.6
Menu Editor .................................................................................................16
Panel Manager .............................................................................................17
Preferred Applications .................................................................................18
Screensaver ..................................................................................................19
Splash Screen settings..................................................................................20
4.7
User Interface Preferences ...........................................................................22
4.7.1
Theme tab.............................................................................................22
4.7.2
Icon tab.................................................................................................22
4.7.3
Font ......................................................................................................22
4.7.4
4.7.5
Toolbar Style........................................................................................23
Font rendering......................................................................................23
1
4.8
Window Manager.........................................................................................23
4.8.1
Style .....................................................................................................24
4.8.1.1 Title font...........................................................................................24
4.8.1.2 Title alignment .................................................................................25
4.8.1.3 Button layout....................................................................................25
4.8.2
Keyboard Shortcuts..............................................................................25
4.8.3
Focus ....................................................................................................26
4.8.3.1 Focus model .....................................................................................26
4.8.3.2 New window focus ..........................................................................26
4.8.3.3 Raise on focus ..................................................................................27
4.8.3.4 Raise on click ...................................................................................27
4.8.4
Advance ...............................................................................................27
4.8.4.1
4.8.4.2
4.8.4.3
Windows snapping...........................................................................28
Wrap workspaces .............................................................................28
Opaque move and resize ..................................................................28
4.8.4.4 Double click action ..........................................................................28
4.8.5
Window Manager Tweaks ...................................................................28
4.8.6
Workspaces and Margins .....................................................................29
4.8.6.1 Workspaces ......................................................................................30
4.8.6.1.1 Workspace names ......................................................................30
4.8.6.2 Margins ............................................................................................30
5
Network................................................................................................................32
5.1
Citrix Presentation Server Client .................................................................32
5.1.1
Creating a New ICA Connection Entry ...............................................33
5.1.1.1 Connecting to a Citrix Server ..........................................................34
5.1.2
Changing a Connection Entry..............................................................34
5.1.2.1 Configuring Network Properties......................................................34
5.1.2.2 Improving Performance over a Low-Bandwidth Connection..........35
5.1.2.3 Specifying an Application to Run at Connection ............................38
5.1.2.4 Changing the Window Properties ....................................................40
5.1.2.5 Configuring Login Properties ..........................................................41
5.1.3
Changing Default Settings ...................................................................42
5.1.3.1
5.1.3.2
5.1.3.3
5.1.3.4
5.1.3.5
Changing Settings for the Disk Cache .............................................42
Configuring Auto Client Reconnect ................................................44
Configuring Server Location and Business Recovery .....................45
Configuring Hotkeys........................................................................46
Configuring Preferences ..................................................................48
2
5.2
Firefox web Browser....................................................................................49
5.3
GO-Global....................................................................................................50
5.3.1
Connection ...........................................................................................50
5.3.2
Login ....................................................................................................50
5.4
NX client ......................................................................................................51
5.4.1
NX connection wizard .........................................................................51
5.4.2
Login ....................................................................................................53
5.5
Remote Desktop Protocol ............................................................................54
5.5.1
General .................................................................................................54
5.5.2
Display .................................................................................................55
5.5.3
Local Resources ...................................................................................56
5.5.3.1 Programs ..........................................................................................57
5.5.3.2 Performance .....................................................................................58
5.6
VNC Viewer ................................................................................................59
5.7
X11 Client....................................................................................................60
5.8
5.9
5.10
5.11
Terminal Emulation .....................................................................................61
Shell Script Editor........................................................................................61
SSH Client ...................................................................................................62
Telnet ...........................................................................................................63
5.12 Connection manager ....................................................................................64
5.12.1
Connections..........................................................................................64
5.12.2
Configure .............................................................................................64
5.12.2.1
ADD New connection..................................................................65
5.12.2.2
5.12.2.3
6
Choosing a Connection Protocol .................................................66
Startup ..........................................................................................67
System..................................................................................................................68
6.1
Autostarted Applications .............................................................................68
6.2
Date & Time ................................................................................................69
6.2.1
Date/Time ............................................................................................70
6.2.2
Time Zone............................................................................................70
6.2.3
Time Server..........................................................................................70
6.3
Display Setting.............................................................................................71
6.4
Enhanced Write Filter ..................................................................................71
6.5
FTP Update ..................................................................................................72
6.6
General Information.....................................................................................72
6.6.1
General .................................................................................................73
6.6.1.1 Modify Terminal and Group name ..................................................73
3
6.6.1.2
Reset to Factory Default Setting ......................................................73
6.6.2
Network info ........................................................................................73
6.7
Keyboard Preferences ..................................................................................75
6.7.1
Settings.................................................................................................75
6.7.1.1 Keys .................................................................................................75
6.7.1.2 Cursor...............................................................................................75
6.7.2
Shortcuts ..............................................................................................75
6.7.3
Accessibility.........................................................................................76
6.7.4
Layouts.................................................................................................77
6.8
Manage Printer jobs .....................................................................................78
6.9
Mixer Settings..............................................................................................78
6.10 Mouse Settings.............................................................................................79
6.10.1
Button settings .....................................................................................80
6.10.1.1
Motion settings.............................................................................80
6.10.1.2
Drag and drop ..............................................................................80
6.10.1.3
Double click .................................................................................80
6.10.2
Coursor.................................................................................................81
6.10.3
Accessibility.........................................................................................82
6.11 Network Managerment ................................................................................82
6.11.1
Connection ...........................................................................................83
6.11.1.1
Eth0 ..............................................................................................83
6.11.1.2
PPPoE ..........................................................................................84
6.11.1.3
PPTP ............................................................................................85
6.11.2
DNS Setting .........................................................................................86
6.11.3
Network info ........................................................................................87
6.12 Printing.........................................................................................................87
6.12.1
Server Settings .....................................................................................88
6.12.2
Printer Properties .................................................................................88
6.12.3
Add New Printer ..................................................................................89
6.12.3.1
6.12.3.2
Local Printers ...............................................................................89
Remote Printers............................................................................89
4
Software Overview
1
1.1
LBTs
LBTs (Linux -based Terminals) are designed to connect to WTS (Windows Terminal
Server) servers via RDP (Remote Desktop Protocol), or Windows NT applications
server via ICA (Independent Computing Architecture). RDP is the Windows CE-based
protocol for connecting to Windows terminal servers. ICA is a distributed presentation
services protocol for Windows NT server, allowing an application's user interface to
execute on a Linux -based terminal while the application's logic executes on the
server.
1.2
Scope.
Hardware: TK-3550, TK-3750, TK-3752, TK-3756, TK-3770, TK-3772, TK-3778,
TK-3800, TK-3880
Software: 300b1 or newer
1.3
Feature List
Group
Main
component
Kernel
2.6.22
Core
Ubuntu 7.10
Window Manager
Connections
Version
XFCE 4.2
ICA
10.6
RDP (rdesktop)
1.6
Termtek Emulation
2.37
VNC
4.1.1
SSH
4.6
Telnet
4.2
Go-Global Windows Server Client
●
NX client
●
X11
●
RSH
●
Firefox plugins Firefox
3.0
Adobe Reader
8.0
Java Runtime Environment
1.6
Adobe Flash Player
9.0
5
Control Panel General Page
●
Display Page
●
Date/Time
●
Network Configure (LAN)
●
Network Configure (Wireless LAN)
●
Network Configure (PPPoE)
●
Network Configure (VPN)
●
Startup
●
Keyboard
●
Volumn & Sound
●
Network Disk Mount(SAMBA)
Network Disk Mount(NFS)
●
File Sharing(SAMBA)
System
tools
Driver
Serial To Network
●
FTP Update
●
User Interface Language
●
Screen Saver
●
Remove Local Storage
●
Desktop Manager
●
EWF
●
System restore
●
Printer job manager
●
Quickly resolution setting
●
Add/remove
●
Wi-FI: VT6656
●
Wi-FI: Qcom wireless(up to n)
●
RTL8110
●
Smart Card Driver
●
Wide Screen
●
Dual Screen
●
Extend Screen
●
CUPS
●
LPD
●
6
1.4
Minimum Requirement
CF: 512MB
RAM: 512MB
1.5
Note
Version No.
LX30-20090223
1.6
Description
Date
Draft
2009-02-25
Reference
1. ubuntu 7.10 help Documentation
https://help.ubuntu.com/xubuntu/desktopguide/C/index.html
2. Xfce 4.2 Documentation
http://www.xfce.org/documentation/4.2/
7
Released
Jeff
2
2.1
Initial Terminal Setup
Hot-keys Functions
Press “ESC” in system starting up
1. Termtek Linux :
normal startup
2. Reset to Factory Default Setting
Reset system to factory default when removed CF to another H/W
platform or system crashed.
3. Reset to Xorg Factory Display Setting
Reset display resolution setting.
Press “Ctrl + Alt + ‘+’ “ in desktop environment
Increase desktop size( TK-3800 and TK-3880 are invalid)
Press “Ctrl + Alt + ‘-’ “ in desktop environment
Decrease desktop size( TK-3800 and TK-3880 are invalid)
8
3
Accessories
3.1 Network Disk
3.1.1 Samba setting
To start /stop samba daemon.
3.1.2 Disk Mount
To mount remote shared file system by samba or NFS.
9
3.1.3 Disk Share
Share local file system.
3.2
Serial to TCP/IP
To Enable/Disable serial port to TCP port.
10
3.3 System Restore
3.3.1 Create Restore Point
To create a new restore point.
11
3.3.1.1
Input Description
You can input some description for this restore point.
3.3.2 Restore System
To restore system from restore point.
12
3.3.2.1
Select Restore Point
In this page, you can select a restore point that was created (if any), and press "OK"
button to restore system to previous state.
WARNING: Once you perform this operation, all data later than the restore point will be lost.
13
3.4
Thunar File Manager
Thunar is a new modern file manager for the Xfce Desktop Environment. It has been
designed from the ground up to be fast and easy-to-use. Its user interface is clean and
intuitive, and does not include any confusing or useless options. Thunar is fast and
responsive with a good start up time and directory load time.
14
4
4.1
Environment
Desktop Setting
The desktop manager sets the background image, provides a right-click menu to
launch applications and can optionally show files (including application launchers) or
iconified windows. It includes gradient support for background color, saturation
support for background image, real multiscreen and xinerama support, and it provides
a desktop menu editor.
15
4.2
Menu Editor
Edits the xfce menu or optional other FILE instead.
16
4.3
Panel Manager
The Panel Manager can be set to a vertical orientation as well as the standard
horizontal layout..
17
4.4
Preferred Applications
The preferred applications framework, which was previously only available in
Terminal, was imported into Xfce, so users no longer need to edit shell profiles to
specify which browser and terminal emulator should be used by Xfce applications.
The goal was to make it as easy as possible to change an application for a certain
category.
18
4.5
Screensaver
The screensaver package contains a screen saver and locker designed to have simple,
sane, secure defaults and be well integrated with the desktop.
19
4.6
Splash Screen settings
On the left, the dialog shows a list of all installed engines. Select an engine, and you
will see, if available, a preview and information about it. You can click on the Test
button to see a demonstration of the selected splash screen engine.
20
21
4.7
User Interface Preferences
4.7.1 Theme tab
Select in this list the GTK theme you want to see applied to the entire environment.
4.7.2 Icon tab
Select in this list the icon theme you want to see applied to the entire environment.
4.7.3 Font
The "font select" button shows the font family currently in use in your environment.
Click this button if you want to change it, and a "font selection" dialog will appear.
22
This dialog allows you to choose a font family, its style and its size, with the help of a
preview box at the bottom of the window. Just click the "OK" button to apply the new
setting and close the dialog.
4.7.4 Toolbar Style
There are four toolbar styles available to change the layout of toolbars used by
compatible applications : Icons (icons only), Text (text only), Both (icons and text)
and Both horizontal.
4.7.5 Font rendering
In this section you can configure the font rendering. The first checkbox allows you to
enable anti-aliasing, an effect that is applied to the edges of characters to make them
look smoother. If you enable anti-aliasing, you can choose to use hinting, a
font-rendering that improves the quality of fonts at small sizes and at low resolutions.
You can select full, medium and slight hinting. Moreover, you can choose the
sub-pixel color order for your fonts, using the "Use sub-pixel hinting" option and one
of the four available hinting technics in the chooser, especially if you have a LCD or a
flat-screen display.
4.8
Window Manager
The window manager is responsible for the placement of windows on the screen,
provides the window decorations and allows you for instance to move, resize or close
23
them.
The dialog shows four tabs : Style, Keyboard, Focus, Advanced. All modifications
will have an immediate effect on the behaviour of the selected module.
4.8.1 Style
The list on the left side of the dialog shows all avaible window decorations. The xfwm
4 module offers the choice between 4 different themes, but there are more than 60
supplementary themes avaible in xfwm4-themes extra package.
4.8.1.1
Title font
The "Font select" button shows the family font currently in use for the window title
appearance. Click this button if you want to change it, and a "Font selection" dialog
will appear.
24
4.8.1.2
Title alignment
Whatever the buttons layout is, you can choose the alignment of the title inside the
title bar, selecting one of those simple options : align it to the left, center or right.
4.8.1.3
Button layout
The button layout configuration uses an easy drag and drop tool. Click and drag the
buttons to change the layout. Drop a button in the "Hidden" area to remove a button
from the titlebar. All modifications will have an immediate effect on the title bar
buttons position.
4.8.2 Keyboard Shortcuts
The list on the left side of the dialog shows all avaible shortcuts themes, using the
name of directories that contain a keythemerc file.
25
4.8.3 Focus
4.8.3.1
Focus model
A focused window receives the keyboard and mouse input. You have the choice
between two focus models :
Click to focus : select this option if you want a window to receive the focus only
when you click anywhere on its frame.
Focus follow mouse : select this option if you want a window to receive the
focus as soon as the mouse pointer is over its frame.
4.8.3.2
New window focus
Selecting this option will automatically give the focus to newly created windows,
26
without the need to click or move the mouse pointer.
4.8.3.3
Raise on focus
If this option is selected, the frame of a newly focused window will automatically
appear over all other frames, after an amount of time that you can adjust with the
"delay" slider.
4.8.3.4
Raise on click
Choose this option if you want a window to pass over the others when you click
anywhere on its frame. If this option is not selected, you will have to click somewhere
on its decorations (title bar, borders or corners) to raise it.
4.8.4 Advance
27
4.8.4.1
Windows snapping
You can choose the windows borders to be attracted by the borders of other windows,
or by the screen edges, when they are moved. The distance from which this effect will
be applied can be specified with the "Distance" slider.
4.8.4.2
Wrap workspaces
Select the first option if you want to switch to the next workspace when the mouse
pointer reaches the screen edges. Select the second one if you want the same
behaviour while dragging a window. You can specify the screen edges resistance
using the corresponding slider.
4.8.4.3
Opaque move and resize
Two options allow you to choose if the content of a window will appear or not, when
you move or resize it (not displaying the content will save some system resources).
4.8.4.4
Double click action
Select what must be the behaviour of the window manager when you double-click on
the title bar of a window : shade window, hide window, maximize window or none.
4.8.5 Window Manager Tweaks
This applet allows users to enable Compositing effects that are built in Xfce 4.4.
Furthermore, you can easily control the opacity of windows, inactive windows,
windows during moves, during resize and even popup windows. This allows
applications to have a translucent effect that looks neat.
28
4.8.6 Workspaces and Margins
There is a special settings dialog to change the workspace properties.
29
4.8.6.1
Workspaces
This option allows you too choose the number of workspaces you want to use
(between 1 and 32).
4.8.6.1.1
Workspace names
This field shows the list of avaible workspaces. If you want to edit the name of one of
them, click its number and a fill the entry of the dialog that will then appear. When it's
done, click the "Apply" button, or just press the Enter key, to return to the list.
4.8.6.2
Margins
Margins are areas on the edges of the screen that maximized windows won't cover.
You can adjust the size, in pixels, of all margins (left, right, top and bottom). Use this
feature, for example, if you do not want maximized windows to overlap panel or
iconbox frames.
30
31
5
5.1
Network
Citrix Presentation Server Client
Use this application to create a Citrix ICA connection.
32
5.1.1 Creating a New ICA Connection Entry
1.
Start the ICA Client. From the Entry menu, click New, or click the New icon on
the toolbar.The Properties dialog box appears with the Network page displayed.
2.
Click Server or Published Application.
For a server connection, type the name or IP address of the MetaFrame server or
select the name from the pop-up menu to the right of the Server field.
—or—
For a published application, type the name of the published application or select
the name from the pop-up menu to the right of the Server field.
3.
If you have typed the name of the MetaFrame server or published application, in
the Description field, type a unique description for the entry. The description is
used to identify the connection in the Citrix ICA Client window. If you have
33
selected a server or published application from the pop-up menu, a default
description is automatically added.
4.
Click OK to save the entry or Cancel to exit the Properties dialog box without
saving the entry.
5.1.1.1
Connecting to a Citrix Server
Click the “Connect” icon that you will open the Citrix ICA Client window. Fill the
User name and password to login.
5.1.2 Changing a Connection Entry
This section describes how to change properties for an existing connection entry.
5.1.2.1
Configuring Network Properties
Use the Network page in the Properties dialog box to specify a connection with a
MetaFrame server and the network protocol to use.
To change the network properties for a connection entry
1.
From the main ICA Client window, select the connection entry that you
want to change.
34
2.
3.
From the Entry menu, click Properties.
From the Properties dialog box, select Network from the drop-down list to
4.
display the Network page:
Adjust the properties as required:
Enter a description forthe connection in the Description field.
Click Server to configure a connection to a MetaFrame server. Click
Published Application to configure a connection to a published
application. You can specify a server either by its name or its IP
address. Click the…button (“browse”) to get a list of Servers or
Published Applications.
5.1.2.2
Improving Performance over a Low-Bandwidth Connection
If you are using ICA over a low-bandwidth connection, such as a modem or cellular
telephone, there are a number of changes that you can make to your client
configuration and the way you use the client to improve performance.
Change your ICA Client configuration
Changing your client configuration, as described below, can reduce the
bandwidth that ICA requires and improve performance
Change the way you use the client
Changing the way you use the client can also reduce the bandwidth required for a
high-performance connection
Use the latest MetaFrame server and ICA Clients
Citrix is continually enhancing and improving ICA performance with each
release, and many performance features require the latest client and server
software in order to function.
35
Changing your ICA Client Configuration
On devices with limited processing power, or where limited bandwidth is
available, there is a trade-off between performance and functionality. The ICA
Client provides both user and administrator with the ability to choose an
acceptable mixture of rich functionality and interactive performance. Making one
or more of these changes can reduce the bandwidth that your connection requires
and improve performance.
Enable the Bitmap Cache
Bitmap caching stores commonly-used bitmaps (images) locally on your client
so that they do not have to be transferred over the ICA connection every time
they are needed.
36
To enable bitmap caching
1.
From the ICA Client window, select the connection entry that you
want to change.
2.
3.
Data Compression
Data compression reduces the amount of data transferring across the ICA session.
This requires additional processor resources to compress and decompress the
data, but it can increase performance over bandwidth-limited connections.
To enable data compression
1.
From the ICA Client window, select the connection entry that you
want to change.
2.
3.
From the Properties page, select Connection from the drop-down list
to display the Connection page.
Select Use Disk Cache for Bitmaps. Click OK.
From the Properties page, select Connection from the drop-down list
to display the Connection page.
Select Use Data Compression to reduce the amount of data
transferring across the ICA session.
SpeedScreen Latency Reduction
SpeedScreen Latency Reduction improves performance over high latency
connections by providing instant feedback to the user in response to typed data or
mouse clicks. (NOTE: SpeedScreen Latency Reduction will work only when it
is available on the MetaFrame server you are connecting to and has been enabled.
See your MetaFrame server documentation for more details.)
To change SpeedScreen settings
1.
From the ICA Client window, select the connection entry that you
want to change.
2.
3.
From the Properties page, select Connection from the drop-down list
to display the Connection page.
In the SpeedScreen section there are two list boxes, Local Text Echo
and Mouse Click Feedback. Local Text Echo accelerates display of
the input text, effectively shielding you from experiencing latency on
the network. Mouse Click Feedback provides visual feedback of a
mouse click, in that the mouse pointer is immediately changed to an
hourglass indicator. Select a mode from the drop-down list: (NOTE:
Local text echo does not support input using IME.)
a、 For slower connections (for example if you are connecting over a
37
WAN or a dial-in connection), set mode to On to decrease the
delay between user input and screen display.
b、 For faster connections (for example, if you are connecting over a
LAN), set mode to Off.
c、 If you are not certain of the connection speed, set the mode to
Auto to turn SpeedScreen on or off depending on the latency of
the connection. You can override Auto mode using the Toggle
SpeedScreen hotkey.
Reduce the Window Size
Change the window size to the minimum you can comfortably use.
Reduce the Number of Colors
Reduce the number of colors to 256.
Reduce Sound Quality
If you are using sound, reduce the sound quality to the minimum setting or
disable client audio mapping.
Changing the Way You Use the Client
ICA technology is highly optimized and typically does not have high CPU and
bandwidth requirements. However, if you are using a very low-bandwidth
connection, you should consider the following to preserve performance:
1.
Avoid accessing large files using client drive mapping. When you access
alarge file with client drive mapping, the file is transferred over the ICA
connection. On slow connections, this may take a long time.
2.
Avoid printing large documents on local client printers. When you print
a document on a local client printer, the print file is transferred over the ICA
connection. On slow connections, this may take a long time.
3.
5.1.2.3
Avoid playing multimedia content. Playing multimedia content uses a lot
of bandwidth and can cause reduced performance.
Specifying an Application to Run at Connection
Use the Application page in the Properties dialog box to specify an application
to run when you connect using the connection entry. If you specify an
application, you will not see the MetaFrame server desktop when you connect
and the connection is closed when you quit the application.
38
To specify an application to run at connection
1.
From the ICA Client window, select the connection entry that you
want to change.
2.
From the Properties page, select Application from the drop-down list
to display the Application page.
3.
In the Application field, you can specify the pathname of an
application to be run after connecting to a MetaFrame server.
4.
In the Working Directory field, you can specify the pathname of a
directory to be used with the application.
If the entry you are configuring is a connection to a published
5.
application, the Application dialog box will not be available.
39
5.1.2.4
Changing the Window Properties
Use the Window page to change the window size and number of colors used for
a particular connection.
To configure the window properties
1.
Select the connection entry you want to change.
2.
From the Properties page, select Window from the drop-down list to
display the Window page.
Window Size allows you to select from Fixed Size, Percentage of Screen Size,
or Full Screen. Selecting Fixed Size or Percentage and type the size (in pixels)
or percentage in the Window Size boxes. If you are connecting to a published
application you can also select Seamless. Seamless integrates local and remote
windows on the desktop.
Window Colors allows you to set the number of window colors to 16, 256, 32
40
Thousand, or 16Million. Your display must be capable of displaying the
resolution and color depth you select. You can only specify a color depth greater
than 256 colors on Version 6.0 and later clients.
256 Color Mapping allows you to set up 256 color sessions to use approximate
or exact colors. Use Shared - Approximate Colors to eliminate color flashing
when switching context. Note that if other applications have allocated all 256
colors, the client will use a private color map.
In each case, select Use Default to use the default window size or window colors
setting.
5.1.2.5
Configuring Login Properties
The Login page allows you to enter login details of your ICA connection so that
you do not need to type them in each time you connect.
To configure login properties
1.
From the Citrix ICA Client window, select the connection entry that
you want to change.
2.
From the Properties page, select Login from the drop-down list to
3.
display the Login page.
Type your Username, Domain (optional), and Password for the
connection. To enable smart card login, select Allow Smart Card
Logon.
41
5.1.3 Changing Default Settings
This section describes how to change settings that apply for all connection entries on
the workstation. It also describes how to change the default settings that are used
when you create a new connection entry. You may want to do this if you prefer to use
a particular setting; for example, a window size that is different from the suggested
setting.
5.1.3.1
Changing Settings for the Disk Cache
Use the Disk Cache page in the Settings dialog box to control the location, size,
and contents of the disk cache. (NOTE: The disk cache is used only if it is
enabled for a particular connection.)
To adjust the settings for the disk cache
42
1.
2.
From the Option menu, click Settings.
From the Settings dialog box, select Disk Cache from the drop-down
list. This displays the Disk Cache page:
3.
To set the maximum size of the cache, adjust the Amount of disk
space to use slider to show a percentage of the disk, or type in the
maximum size you want to allow.
4.
To change the location of the cache, set the Disk Cache Directory as
appropriate by clicking the Change button and browsing to your
desired location. If you change the location of a cache on a workstation,
make sure that you clear the old cache first.
5.
To set the minimum size of bitmaps to cache, adjust The minimum
size bitmap that will be cached is slider. The size setting is displayed
next to the slider.
6.
To clear the cache, click the Clear Cache Now button. Citrix does not
43
recommend that you clear the cache if any ICA connections are open.
Before clearing the cache, verify that all ICA connections are closed.
7.
5.1.3.2
NOTE: An administrator can view information about the bitmap cache
settings for an ICA connection using the Cache tab in Citrix Server
Administration. See your server documentation for more details.
Configuring Auto Client Reconnect
To change the auto client reconnection settings for a connection entry
1.
From the main ICA Client window, select the connection entry that you
want to change.
2.
From the Entry menu, click Properties.
3.
From the drop-down list, click Auto Reconnect.
4.
5.
6.
Select Enable Auto Reconnect and, if required, enter values for Maximum
Retries and Seconds Delay Before Retrying Reconnect.
Click OK.
NOTE: Auto client reconnect works in the same way regardless of whether
a user has logged on conventionally or with a smart card. Users who log in
to a MetaFrame session using a smart card will be automatically
reconnected should their session fail and will not have to reenter their PIN
number, provided that their smart card remains in the smart card reader.
44
5.1.3.3
Configuring Server Location and Business Recovery
To configure server location and business recovery
1.
From the Settings page, select Server Location from the drop-down list to
display the Server Location page:
2.
Select the required network protocol from the drop-down list.
3.
4.
Click Add to display the Add Server Location Address dialog box.
Enter the name or IP address of a MetaFrame server.
5.
To define other server groups, select the required group from the Server
Group and repeat steps 3 and 4.
Click OK.
NOTE : For the TCP/IP+HTTP and SSL/TLS+HTTPS protocols, if you do
not enter an IP address, you must have a MetaFrame server on your network
mapped to the default name of ica. Domain name, where domain name is a
6.
7.
45
TCP/ IP domain name. TCP/IP+HTTP and SSL/TLS+HTTPS server
location do not support the (Auto-Locate) function.
5.1.3.4
Configuring Hotkeys
Hotkeys are used to control the behavior of the client and as substitutes for the
standard Windows hotkeys for a published application. For example, if you
wanted to close the current window on a Windows PC, you would press ALT+F4.
This key combination closes the session in X Windows. Hotkey functionality
allows you to map common key combinations like ALT+F4 to a key
combination such as ALT+CTRL+F4 that will be ignored by your local
operating system. When you press this new combination, the ICA UNIX Client
will send ALT+F4 to the MetaFrame server, closing the current window.
To display the hotkey settings
1.
From the Settings page, select Hotkeys from the drop-down list:
46
3.
On the Hotkeys pages, you can define alternative key combinations for
the hotkeys <Alt> <F1> to <Alt> <F12>, ALT+TAB,
ALT+SHIFT+TAB, and Toggle Speed screen, -which are reserved for
use by X Windows.
By default, these key combinations are generated by <Alt> <Ctrl>
4.
<F1> to <Alt> <Ctrl> <F12>, but you can change the definitions by
selecting alternative keys from the pop-up menus.
Any <Alt> key combinations not used by your X Window manager
2.
5.
can be used as normal within the ICA session.
If you want to use the PC key combination <Ctrl> <Alt> <Delete>
during the connection session, use the key combination <Ctrl> <Alt>
<Enter> or <Ctrl> <Alt> <Return>.
47
5.1.3.5
Configuring Preferences
To configure the preference settings
1.
Select Preferences from the drop-down list in the Settings dialog box to
display the Preferences page:
2.
Adjust the settings as required, for example:
3.
In the Keyboard Layout field, click the…button (“browse”) to select your
input locale from the list. Input locale is the language you want to type in.
4.
In the Keyboard Type (Client) field, click the…button (“browse”) to select
your correct workstation keyboard type from the list.
5.
In the Keyboard Type (Server) field, click the…button (“browse”) to
select the specific physical keyboard type you are using from the list. If you
are using a Japanese keyboard, select it. For all others, use the default
(standard 105 key keyboard).
6.
Select Enable Windows Alert Sounds if you want Windows alert sounds
to be played using the UNIX workstation sound system.
7.
Select Allow Automatic Client Updates to allow the client software at this
workstation to be automatically updated when a newer version is available.
48
5.2
Firefox web Browser
Mozilla Firefox implements many web standards, including HTML, XML, XHTML,
SVG 1.1 (partial),CSS, ECMAScript (JavaScript), DOM, MathML, DTD, XSLT,
XPath, and (animated) PNG images with alpha transparency. Firefox also implements
standards proposals created by the WHATWG such as client-side storage, and canvas
element.
49
It includes tabbed browsing, a spell checker, incremental find, live bookmarking, a
download manager, and an integrated search system that uses the user's desired search
engine. Functions can be added through add-ons created by third-party developers, the
most popular of which include the NoScript JavaScript disabling utility, Tab Mix Plus
customizer, FoxyTunes media player control toolbar, Adblock Plus ad blocking utility,
StumbleUpon (website discovery), Foxmarks Bookmark Synchronizer (bookmark
synchronizer), DownThemAll! download enhancer, and Web Developer toolbar.
5.3
GO-Global
Go-Global is a fast remote access solution. It provides instant access to Windows
applications from any device or platform.
5.3.1 Connection
Fill server IP to connect for Windows Server.
5.3.2 Login
Logon window will pop up requesting your login name and password
50
After entering your login details, the client will attempt to establish connection with
the server.
A screenshot of a GO-Global connection as following
5.4
NX client
NX Client is a fast remote access solution; it’s a lightweight mean to carry with you
the power of your office workstations installed with NX Server.
5.4.1 NX connection wizard
It will guide you through the steps needed to setup your login.
51
Insert name of session. Your configuration setting will be saved with this name.
Select type of the terminal server and desktop size.
52
Create shortcut on desktop.
5.4.2 Login
Fill user name and password.
53
Then login.
5.5
Remote Desktop Protocol
You can easily connect to terminal servers or to connect to the implementation of another
Windows computer. All you need is Internet access and connect to another computer
permissions. You can also choose to connect to your designated special settings, then
save these settings for use the next time you connect.
5.5.1 General
You can type the Computer name, User name, Password, and Domain on this page.
54
You can click “Save As” to save your connections.
5.5.2 Display
You can choose the size of your remote desktop and set the color quality under this
tab.
55
5.5.3 Local Resources
You can set the sound on this page. Choosing “On the local computer”. It will bring
the sounds from the server to the client device.
56
5.5.3.1
Programs
If you want to start a program while connection, you can click Start the following
program on connection . You can also specify path and file name when you specify a
program.
57
5.5.3.2
Performance
The Performance properties sheet lets you optimize the performance of the
connections.
58
5.6
VNC Viewer
Virtual network computing (VNC) is a great tool for remote desktop viewing and
manipulation. Its core function is to allow the user to use the VNC client to connect to
a host running the VNC server and remotely uses the server's desktop. VNC software
makes it possible to view and fully-interact with one computer from any other
computer or mobile device anywhere on the Internet. Keyboard and mouse updates
are sent to the server, and snapshots of the server's desktop are compressed and sent
back to the client via the VNC protocol.
59
The figure is shown below.
5.7
X11 Client
The X Display Manager Control Protocol (XDMCP) is used by X terminals (and X
servers in general) to set up an X session with a remote system over the network.
After filling out the Server IP, click OK button to connect.
60
5.8
Terminal Emulation
It provides terminal emulation for most standard UNIX terminal types, including
Wyse 60/120/50+/325, VT52/100/220/320/420, TVI 910+/925, ADDS A2,
Console_ANSI and IBM AIXTerm.
5.9
Shell Script Editor
The following figure shall now appear. Type the script name and script command,
click on OK to complete this script. This Shell Script will now show on the Terminal
Connection Manager.
Press Import Scirpt, user can edit existing Script Files.
61
5.10 SSH Client
SSH (Secure Shell) is a secure way to log into another computer over a network, you
can execute commands in remote machine as well as transfer files to and from the
remote machine. However unlike telnet, all data between the client and server is
encrypted.
62
The window below will then pop up. You can select “Password” or “Public Key” that
you want to authenticate for login server. Enter the Connection name, SSH server and
Username you would like to log in the server with.
The “X11 Forwarding” is how to log into a remote computer over a network, and get
a graphical user interface while lessening the chances of other people eavesdropping
in on your personal data.
Login Method
Password : Enter the password for SSH. When you open this connection which you
can login to server directly.
Public Key : To connect in first time. In first time to connect, you must type twice of
password for login server. In order to set the public key to server. In next time to
connect, you will login directly
5.11 Telnet
Telnet is a network protocol used on the Internet or local area network LAN
connections. You can execute commands through the Telnet and they will be executed
as if you were entering them directly on the server console.
The window below will then pop up. Enter the Connection name, Telnet server and
Username you would like to log in the server with.
63
5.12 Connection manager
5.12.1 Connections
Select a session on list and press "Connect" button to activate it
Press “End” to terminate the connction.
5.12.2 Configure
The Configure properties sheet allows the user to Add, Edit, Delete, and Startup the
connections.
64
5.12.2.1 ADD New connection
The New Connection dialog box is used to create new network connections. This
dialog box is invoked by: Clicking on the Configure tab in the Terminal Connection
Manager dialog box. Clicking on Add command button on the Configure properties
sheet. The following figure shows the New Connection dialog box.
65
5.12.2.2 Choosing a Connection Protocol
Use the scroll list shown in the dialog box above to select the type of connection
protocol you want. When you choose from the list above, you are deciding which
connection protocol you want to use to connect to a server. They are as follow:
Citrix ICA Client
ICA (Independent Computing Architecture) protocol, through which connects to
an ICA (Winframe/Metaframe) server. Refer to chapter 5.1 for ICA Connections.
Microsoft Remote Desktop Client
RDP (Remote Desktop Protocol) protocol, through which connects to a WBT
(Linux -Based Terminal) server. Refer to chapter 5.5 for RDP Connections.
X11
The X Display Manager Control Protocol (XDMCP) is used by X terminals (and
X servers in general) to set up an X session with a remote system over the
network. Please refer to section 5.7 for further detail
Web Browser
Connects to the Internet directly via Mozilla. There are different versions of
Mozilla in Linux LBTs. It depends on the capacity of the RAM of your WBT.
Refer to chapter 5.2 for the Internet applications.
66
Termtek Emulation
Termtek Emulation is powerful tool to setup emulation of ANSI&ASCII and
IBM emulation.
Please refer to section 5.8 for further detail.
Shell Script Editor
a powerful tool to setup Linux shell script in connection manager. You can write
the script in the connection, and run the connection to execute the script. Refer to
section 5.9 for more detail.
VNC Viewer
VNC (Virtual Network Computing) protocol, through which connects to a VNC
(WinVNC) server. Refer to chapter 5.6 for all details.
NX Client
NX Client is a fast remote access solution; it’s a lightweight mean to carry with
you the power of your office workstations installed with NX Server.
refer to section 5.4 for further detail.
Please
SSH Client
SSH (Secure Shell) is a secure way to log into another computer over a network,
you can execute commands in remote machine as well as transfer files to and
from the remote machine. Please refer to section 5.10 for further detail.
Go-Global Windows Server Client
Go-Global is a fast remote access solution. It provides instant access to
Windows applications from any device or platform. Please refer to
section 5.3 for further detail.
Telnet
Telnet is a network protocol used on the Internet or local area network LAN
connections. You can execute commands through the Telnet and they will be
executed as if you were entering them directly on the server console.
refer to section 5.11 for further detail.
5.12.2.3 Startup
Add/Remove startup connection session.
67
Please
6
6.1
System
Autostarted Applications
Add/Remove Autostart Applications.
68
6.2
Date & Time
Set up your local time and time zone for this device
69
6.2.1 Date/Time
Set local date and time
6.2.2 Time Zone
Select Time Zone
6.2.3 Time Server
Enable/Disable automatically synchronize and set time server.
70
6.3
Display Setting
Set screen mode, extended Primary, Second screen position and resolution.
Dual mode and Extend mode are Invalid in TK-3550 and TK-3750.
6.4
Enhanced Write Filter
Enable/Disable EWF for protect volume.
71
Enable : Write into RAM disk.
Disable : Write into volume.
6.5
FTP Update
The FTP Update lets you update to new firmware. Please fill Server name, User name,
Password and Firmware name then click “OK”.
6.6
General Information
Display General information
72
6.6.1 General
Display general hardware and firmware information
6.6.1.1
Modify Terminal and Group name
Replace Terminal name and Group name then click “OK”.
6.6.1.2
Reset to Factory Default Setting
Reset system to factory default to clean all configuration.
6.6.2 Network info
Display network information
73
74
6.7
Keyboard Preferences
6.7.1 Settings
6.7.1.1 Keys
When you press and hold a keyboard key, the corresponding action will be repeated if
the "Repeat" option is selected.
Delay — Use this slider to specify the delay between the first action of the pressed
key, and the moment this action will begin to repeat itself.
Speed — This slider determines at which speed an action will be repeated.
6.7.1.2
Cursor
Select the "Show blinking" option if you want the cursor to blink in text boxes.
Speed — Use this slider to specify at which interval the cursor will blink.
6.7.2 Shortcuts
The list on the left side of the dialog shows all avaible shortcuts themes, using the
name of directories that contain a keythemerc file.
75
6.7.3 Accessibility
Set Sticky keys, show keys and Bounce.
76
6.7.4 Layouts
Enable or disable X configuration
After disable X configuration you can add new keyboard layout.
77
6.8
Manage Printer jobs
You can right click the mouse to “Cancel”, “Hold”, “Release” and “Reprint” the job.
6.9
Mixer Settings
A standalone mixer application
78
6.10 Mouse Settings
Change settings for mouse behaviour
79
6.10.1 Button settings
Choose your mouse buttons setting, depending on whether you are left- or
righthanded. This action swaps the left and the right button actions.
6.10.1.1 Motion settings
Acceleration — this slider allows easy control of the speed of the mouse pointer when
you move it.
Threshold — Controls the threshold (in terms of distance) from which acceleration is
applied to the mouse pointer.
6.10.1.2 Drag and drop
Use this slider to fix the threshold (in term of distance) from which the environment
considers that you are dragging an item while you are moving it with the mouse.
6.10.1.3 Double click
Use this slider to choose the speed of the double-click action. "Slow" will increase the
delay that can pass between mouse clicks when you double-click. "Fast" will decrease
this delay.
80
6.10.2 Coursor
Change cursor style and size.
81
6.10.3 Accessibility
You can Enable/Disable mouse emulation.
Enable: emulation mouse behaviour by Number key(without Num Lock)
6.11 Network Managerment
Network connection manager
82
6.11.1 Connection
Select target device, and press "Properties" button to open configure window
6.11.1.1 Eth0
Set DHCP or static IP for ethernet
83
6.11.1.2 PPPoE
Fill Connection name, User name and password to add new PPPoE connection.
Choose Auto startup section; you can auto connect when system start up.
84
6.11.1.3 PPTP
To add new VPN connection.
85
6.11.2 DNS Setting
To modify Domain Name System server
86
6.11.3 Network info
To show network information.
6.12 Printing
87
6.12.1 Server Settings
To adjust by selecting “server Settings” in the list.
6.12.2 Printer Properties
The tabs at the top of pane show the different properties of queue that can modified,
including whether it is shared, who may print to it, the PPD options, and default job
options.
88
6.12.3 Add New Printer
6.12.3.1 Local Printers
Normally, you can simply connect your USB printer and let the system recognize and
install it. There are also some printers cannot be properly recognized and therefore
require manual setup, and even some of those are totally unsupported by Linux
printing service. You can check its list of printer to find out if the model you have is in
fact supported.
6.12.3.2 Remote Printers
For adding printers that are not locally connected, there is no much difference from
installing local printers. You also start from selecting "New Printer". The next step,
you have to decide which protocol is used to share that printer, the IP address(host
name), and the name of sharing. Nevertheless, only recognizable printer models can
be installed and configured as remote printers.
89