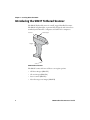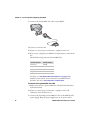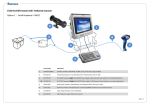
1
SR61T
User’s
Guide
Tethered Scanner
Intermec Technologies Corporation
Worldwide Headquarters
6001 36th Ave.W.
Everett, WA 98203
U.S.A.
www.intermec.com
The information contained herein is provided solely for the purpose of allowing customers to
operate and service Intermec-manufactured equipment and is not to be released, reproduced, or
used for any other purpose without written permission of Intermec Technologies Corporation.
Information and specifications contained in this document are subject to change without prior
notice and do not represent a commitment on the part of Intermec Technologies Corporation.
© 2009 by Intermec Technologies Corporation. All rights reserved.
The word Intermec, the Intermec logo, Norand, ArciTech, Beverage Routebook, CrossBar,
dcBrowser, Duratherm, EasyADC, EasyCoder, EasySet, Fingerprint, i-gistics, INCA (under license),
Intellitag, Intellitag Gen2, JANUS, LabelShop, MobileLAN, Picolink, Ready-to-Work, RoutePower,
Sabre, ScanPlus, ShopScan, Smart Mobile Computing, SmartSystems, TE 2000, Trakker Antares,
and Vista Powered are either trademarks or registered trademarks of Intermec Technologies
Corporation.
There are U.S. and foreign patents as well as U.S. and foreign patents pending.
ii
SR61T Tethered Scanner User’s Guide
Document Change Record
This page records changes to this document. The document was
originally released as Revision 001.
Version
Number Date
002
3/2009
SR61T Tethered Scanner User’s Guide
Description of Change
Revised to support hardware and software for
release 2. Updates included new cables and data
transmission settings.
iii
iv
SR61T Tethered Scanner User’s Guide
Contents
Contents
Before You Begin. . . . . . . . . . . . . . . . . . . . . . . . . . . . . . . . . . . . . . . . . . . . . . . . . . . . . . . . . . . . . . . . . . x
Safety Information . . . . . . . . . . . . . . . . . . . . . . . . . . . . . . . . . . . . . . . . . . . . . . . . . . . . . . . . x
Global Services and Support . . . . . . . . . . . . . . . . . . . . . . . . . . . . . . . . . . . . . . . . . . . . . . . x
Warranty Information. . . . . . . . . . . . . . . . . . . . . . . . . . . . . . . . . . . . . . . . . . . . . x
Web Support . . . . . . . . . . . . . . . . . . . . . . . . . . . . . . . . . . . . . . . . . . . . . . . . . . . . xi
Telephone Support . . . . . . . . . . . . . . . . . . . . . . . . . . . . . . . . . . . . . . . . . . . . . . xi
Service Location Support . . . . . . . . . . . . . . . . . . . . . . . . . . . . . . . . . . . . . . . . . xi
Who Should Read This Manual . . . . . . . . . . . . . . . . . . . . . . . . . . . . . . . . . . . . . . . . . . . xii
Related Documents . . . . . . . . . . . . . . . . . . . . . . . . . . . . . . . . . . . . . . . . . . . . . . . . . . . . . . xii
Patent Information . . . . . . . . . . . . . . . . . . . . . . . . . . . . . . . . . . . . . . . . . . . . . . . . . . . . . . xii
1 Learning About the SR61T
.............................................. 1
Introducing the SR61T Tethered Scanner . . . . . . . . . . . . . . . . . . . . . . . . . . . . . . . . . . . . . . . . . . . 2
What’s New . . . . . . . . . . . . . . . . . . . . . . . . . . . . . . . . . . . . . . . . . . . . . . . . . . . . . . . . . . . . . . . . . . . . . . 3
Understanding the SR61T Behavior . . . . . . . . . . . . . . . . . . . . . . . . . . . . . . . . . . . . . . . . . . . . . . . . 3
Understanding the Status Light . . . . . . . . . . . . . . . . . . . . . . . . . . . . . . . . . . . . . . . . . . . . 4
Understanding the Beeps . . . . . . . . . . . . . . . . . . . . . . . . . . . . . . . . . . . . . . . . . . . . . . . . . . 4
Using Vibrate Alert. . . . . . . . . . . . . . . . . . . . . . . . . . . . . . . . . . . . . . . . . . . . . . . . . . . . . . . . 5
Scanning Bar Codes . . . . . . . . . . . . . . . . . . . . . . . . . . . . . . . . . . . . . . . . . . . . . . . . . . . . . . . . . . . . . . . 6
2 Connecting and Configuring the SR61T
............................... 9
Connecting Your SR61T to a Host Computer. . . . . . . . . . . . . . . . . . . . . . . . . . . . . . . . . . . . . . . 10
Creating a USB Connection . . . . . . . . . . . . . . . . . . . . . . . . . . . . . . . . . . . . . . . . . . . . . . . 10
Creating an RS-232 Connection . . . . . . . . . . . . . . . . . . . . . . . . . . . . . . . . . . . . . . . . . . . 11
Creating a Keyboard Wedge Connection . . . . . . . . . . . . . . . . . . . . . . . . . . . . . . . . . . . 14
Creating a Wand Emulation Connection . . . . . . . . . . . . . . . . . . . . . . . . . . . . . . . . . . . 16
Setting Parameters in the SR61T . . . . . . . . . . . . . . . . . . . . . . . . . . . . . . . . . . . . . . . . . . . . . . . . . . 17
International Keyboard Parameters . . . . . . . . . . . . . . . . . . . . . . . . . . . . . . . . . . . . . . . . 17
Serial Parameter Parameters . . . . . . . . . . . . . . . . . . . . . . . . . . . . . . . . . . . . . . . . . . . . . . 20
Enabling the Configurable RS-232 Protocol . . . . . . . . . . . . . . . . . . . . . . . . 22
Understanding Features of Configurable RS-232 Protocol . . . . . . . . . . . 23
3 Troubleshooting and Maintaining the SR61T
. . . . . . . . . . . . . . . . . . . . . . . 27
Troubleshooting the SR61T. . . . . . . . . . . . . . . . . . . . . . . . . . . . . . . . . . . . . . . . . . . . . . . . . . . . . . . 28
SR61T Tethered Scanner User’s Guide
v
Contents
Calling Product Support . . . . . . . . . . . . . . . . . . . . . . . . . . . . . . . . . . . . . . . . . . . . . . . . . 28
Problems and Possible Solutions . . . . . . . . . . . . . . . . . . . . . . . . . . . . . . . . . . . . . . . . . . 29
Resetting the SR61T . . . . . . . . . . . . . . . . . . . . . . . . . . . . . . . . . . . . . . . . . . . . . . . . . . . . . 30
Maintaining the SR61T. . . . . . . . . . . . . . . . . . . . . . . . . . . . . . . . . . . . . . . . . . . . . . . . . . . . . . . . . . . 30
Upgrading the SR61T . . . . . . . . . . . . . . . . . . . . . . . . . . . . . . . . . . . . . . . . . . . . . . . . . . . . 31
Cleaning the SR61T . . . . . . . . . . . . . . . . . . . . . . . . . . . . . . . . . . . . . . . . . . . . . . . . . . . . . . 34
4 Configuration Command Reference
. . . . . . . . . . . . . . . . . . . . . . . . . . . . . . . . . 35
Using Configuration Commands. . . . . . . . . . . . . . . . . . . . . . . . . . . . . . . . . . . . . . . . . . . . . . . . . . 36
Configuration Commands By Function. . . . . . . . . . . . . . . . . . . . . . . . . . . . . . . . . . . . . . . . . . . . 36
SR61T Configuration Commands . . . . . . . . . . . . . . . . . . . . . . . . . . . . . . . . . . . . . . . . . . . . . . . . . 40
ACK . . . . . . . . . . . . . . . . . . . . . . . . . . . . . . . . . . . . . . . . . . . . . . . . . . . . . . . . . . . . . . . . . . . . 40
Administrator Reset Factory Defaults. . . . . . . . . . . . . . . . . . . . . . . . . . . . . . . . . . . . . . 40
Alt Mode . . . . . . . . . . . . . . . . . . . . . . . . . . . . . . . . . . . . . . . . . . . . . . . . . . . . . . . . . . . . . . . . 41
Australian Post . . . . . . . . . . . . . . . . . . . . . . . . . . . . . . . . . . . . . . . . . . . . . . . . . . . . . . . . . . 41
Aztec. . . . . . . . . . . . . . . . . . . . . . . . . . . . . . . . . . . . . . . . . . . . . . . . . . . . . . . . . . . . . . . . . . . . 41
Baud Rate . . . . . . . . . . . . . . . . . . . . . . . . . . . . . . . . . . . . . . . . . . . . . . . . . . . . . . . . . . . . . . . 41
Beep and LED Mode . . . . . . . . . . . . . . . . . . . . . . . . . . . . . . . . . . . . . . . . . . . . . . . . . . . . . 41
Beep Duration . . . . . . . . . . . . . . . . . . . . . . . . . . . . . . . . . . . . . . . . . . . . . . . . . . . . . . . . . . . 41
Beep Frequency . . . . . . . . . . . . . . . . . . . . . . . . . . . . . . . . . . . . . . . . . . . . . . . . . . . . . . . . . . 42
Beep Volume . . . . . . . . . . . . . . . . . . . . . . . . . . . . . . . . . . . . . . . . . . . . . . . . . . . . . . . . . . . . 42
BPO . . . . . . . . . . . . . . . . . . . . . . . . . . . . . . . . . . . . . . . . . . . . . . . . . . . . . . . . . . . . . . . . . . . . 42
Canada Post . . . . . . . . . . . . . . . . . . . . . . . . . . . . . . . . . . . . . . . . . . . . . . . . . . . . . . . . . . . . . 42
Center Decoding Activation. . . . . . . . . . . . . . . . . . . . . . . . . . . . . . . . . . . . . . . . . . . . . . . 43
Center Decoding Tolerance . . . . . . . . . . . . . . . . . . . . . . . . . . . . . . . . . . . . . . . . . . . . . . . 43
Codabar. . . . . . . . . . . . . . . . . . . . . . . . . . . . . . . . . . . . . . . . . . . . . . . . . . . . . . . . . . . . . . . . . 43
Codablock A. . . . . . . . . . . . . . . . . . . . . . . . . . . . . . . . . . . . . . . . . . . . . . . . . . . . . . . . . . . . . 43
Codablock F . . . . . . . . . . . . . . . . . . . . . . . . . . . . . . . . . . . . . . . . . . . . . . . . . . . . . . . . . . . . . 43
Code 11 . . . . . . . . . . . . . . . . . . . . . . . . . . . . . . . . . . . . . . . . . . . . . . . . . . . . . . . . . . . . . . . . . 44
Code 39 . . . . . . . . . . . . . . . . . . . . . . . . . . . . . . . . . . . . . . . . . . . . . . . . . . . . . . . . . . . . . . . . . 44
Code 93/93i . . . . . . . . . . . . . . . . . . . . . . . . . . . . . . . . . . . . . . . . . . . . . . . . . . . . . . . . . . . . . 44
Code 128 / GS1-128 . . . . . . . . . . . . . . . . . . . . . . . . . . . . . . . . . . . . . . . . . . . . . . . . . . . . . . 44
ISBT 128 . . . . . . . . . . . . . . . . . . . . . . . . . . . . . . . . . . . . . . . . . . . . . . . . . . . . . . . . 45
GTIN Processing for GS1-128. . . . . . . . . . . . . . . . . . . . . . . . . . . . . . . . . . . . . 45
Consecutive Same Read Data Validation . . . . . . . . . . . . . . . . . . . . . . . . . . . . . . . . . . . 45
Configurable RS-232 Protocol . . . . . . . . . . . . . . . . . . . . . . . . . . . . . . . . . . . . . . . . . . . . 45
Control Character Conversion . . . . . . . . . . . . . . . . . . . . . . . . . . . . . . . . . . . . . . . . . . . . 45
Data Bits . . . . . . . . . . . . . . . . . . . . . . . . . . . . . . . . . . . . . . . . . . . . . . . . . . . . . . . . . . . . . . . . 46
Data Editing. . . . . . . . . . . . . . . . . . . . . . . . . . . . . . . . . . . . . . . . . . . . . . . . . . . . . . . . . . . . . 46
Data Format. . . . . . . . . . . . . . . . . . . . . . . . . . . . . . . . . . . . . . . . . . . . . . . . . . . . . . . . . . . . . 46
DataMatrix. . . . . . . . . . . . . . . . . . . . . . . . . . . . . . . . . . . . . . . . . . . . . . . . . . . . . . . . . . . . . . 46
vi
SR61T Tethered Scanner User’s Guide
Contents
Disable All Symbologies . . . . . . . . . . . . . . . . . . . . . . . . . . . . . . . . . . . . . . . . . . . . . . . . . . 46
Dutch Post . . . . . . . . . . . . . . . . . . . . . . . . . . . . . . . . . . . . . . . . . . . . . . . . . . . . . . . . . . . . . . 46
EAN/UPC . . . . . . . . . . . . . . . . . . . . . . . . . . . . . . . . . . . . . . . . . . . . . . . . . . . . . . . . . . . . . . . 47
ISBN. . . . . . . . . . . . . . . . . . . . . . . . . . . . . . . . . . . . . . . . . . . . . . . . . . . . . . . . . . . . 47
GTIN Processing. . . . . . . . . . . . . . . . . . . . . . . . . . . . . . . . . . . . . . . . . . . . . . . . . 47
ENQ . . . . . . . . . . . . . . . . . . . . . . . . . . . . . . . . . . . . . . . . . . . . . . . . . . . . . . . . . . . . . . . . . . . . 47
Error Beep. . . . . . . . . . . . . . . . . . . . . . . . . . . . . . . . . . . . . . . . . . . . . . . . . . . . . . . . . . . . . . . 47
Event Notification . . . . . . . . . . . . . . . . . . . . . . . . . . . . . . . . . . . . . . . . . . . . . . . . . . . . . . . 47
Good Read Beep Duration . . . . . . . . . . . . . . . . . . . . . . . . . . . . . . . . . . . . . . . . . . . . . . . . 48
Good Read Beep Number . . . . . . . . . . . . . . . . . . . . . . . . . . . . . . . . . . . . . . . . . . . . . . . . . 48
Good Read Beep Timing. . . . . . . . . . . . . . . . . . . . . . . . . . . . . . . . . . . . . . . . . . . . . . . . . . 48
Good Read LED Duration . . . . . . . . . . . . . . . . . . . . . . . . . . . . . . . . . . . . . . . . . . . . . . . . 48
GS1 Composite . . . . . . . . . . . . . . . . . . . . . . . . . . . . . . . . . . . . . . . . . . . . . . . . . . . . . . . . . . 48
GS1 DataBar Expanded . . . . . . . . . . . . . . . . . . . . . . . . . . . . . . . . . . . . . . . . . . . . . . . . . . 49
GS1 DataBar Limited . . . . . . . . . . . . . . . . . . . . . . . . . . . . . . . . . . . . . . . . . . . . . . . . . . . . 49
GS1 DataBar Omni-Directional . . . . . . . . . . . . . . . . . . . . . . . . . . . . . . . . . . . . . . . . . . . 49
Hardware/Software Protocol Timeout . . . . . . . . . . . . . . . . . . . . . . . . . . . . . . . . . . . . . 49
Inter-Character Delay . . . . . . . . . . . . . . . . . . . . . . . . . . . . . . . . . . . . . . . . . . . . . . . . . . . . 49
Interleaved 2 of 5 . . . . . . . . . . . . . . . . . . . . . . . . . . . . . . . . . . . . . . . . . . . . . . . . . . . . . . . . 50
Inter-Message Delay . . . . . . . . . . . . . . . . . . . . . . . . . . . . . . . . . . . . . . . . . . . . . . . . . . . . . . 50
ISCP Activation . . . . . . . . . . . . . . . . . . . . . . . . . . . . . . . . . . . . . . . . . . . . . . . . . . . . . . . . . . 50
Japan Post . . . . . . . . . . . . . . . . . . . . . . . . . . . . . . . . . . . . . . . . . . . . . . . . . . . . . . . . . . . . . . . 50
Keyboard Selection. . . . . . . . . . . . . . . . . . . . . . . . . . . . . . . . . . . . . . . . . . . . . . . . . . . . . . . 50
LRC . . . . . . . . . . . . . . . . . . . . . . . . . . . . . . . . . . . . . . . . . . . . . . . . . . . . . . . . . . . . . . . . . . . . 50
Matrix 2 of 5. . . . . . . . . . . . . . . . . . . . . . . . . . . . . . . . . . . . . . . . . . . . . . . . . . . . . . . . . . . . . 51
Maxicode. . . . . . . . . . . . . . . . . . . . . . . . . . . . . . . . . . . . . . . . . . . . . . . . . . . . . . . . . . . . . . . . 51
Micro PDF417 . . . . . . . . . . . . . . . . . . . . . . . . . . . . . . . . . . . . . . . . . . . . . . . . . . . . . . . . . . . 51
MSI. . . . . . . . . . . . . . . . . . . . . . . . . . . . . . . . . . . . . . . . . . . . . . . . . . . . . . . . . . . . . . . . . . . . . 51
NAK . . . . . . . . . . . . . . . . . . . . . . . . . . . . . . . . . . . . . . . . . . . . . . . . . . . . . . . . . . . . . . . . . . . . 51
Override Caps Lock Key . . . . . . . . . . . . . . . . . . . . . . . . . . . . . . . . . . . . . . . . . . . . . . . . . . 51
Parity . . . . . . . . . . . . . . . . . . . . . . . . . . . . . . . . . . . . . . . . . . . . . . . . . . . . . . . . . . . . . . . . . . . 52
PDF417 . . . . . . . . . . . . . . . . . . . . . . . . . . . . . . . . . . . . . . . . . . . . . . . . . . . . . . . . . . . . . . . . . 52
Planet . . . . . . . . . . . . . . . . . . . . . . . . . . . . . . . . . . . . . . . . . . . . . . . . . . . . . . . . . . . . . . . . . . . 52
Plessey . . . . . . . . . . . . . . . . . . . . . . . . . . . . . . . . . . . . . . . . . . . . . . . . . . . . . . . . . . . . . . . . . . 52
Postamble . . . . . . . . . . . . . . . . . . . . . . . . . . . . . . . . . . . . . . . . . . . . . . . . . . . . . . . . . . . . . . . 52
Postnet. . . . . . . . . . . . . . . . . . . . . . . . . . . . . . . . . . . . . . . . . . . . . . . . . . . . . . . . . . . . . . . . . . 53
Preamble . . . . . . . . . . . . . . . . . . . . . . . . . . . . . . . . . . . . . . . . . . . . . . . . . . . . . . . . . . . . . . . . 53
Predefined Security Levels . . . . . . . . . . . . . . . . . . . . . . . . . . . . . . . . . . . . . . . . . . . . . . . . 53
QR Code . . . . . . . . . . . . . . . . . . . . . . . . . . . . . . . . . . . . . . . . . . . . . . . . . . . . . . . . . . . . . . . . 53
Sensor Optimization . . . . . . . . . . . . . . . . . . . . . . . . . . . . . . . . . . . . . . . . . . . . . . . . . . . . . 53
Setup Beep . . . . . . . . . . . . . . . . . . . . . . . . . . . . . . . . . . . . . . . . . . . . . . . . . . . . . . . . . . . . . . 54
Special Keys Interpretation . . . . . . . . . . . . . . . . . . . . . . . . . . . . . . . . . . . . . . . . . . . . . . . 54
Stacked Code Crackle . . . . . . . . . . . . . . . . . . . . . . . . . . . . . . . . . . . . . . . . . . . . . . . . . . . . 54
Standard 2 of 5 . . . . . . . . . . . . . . . . . . . . . . . . . . . . . . . . . . . . . . . . . . . . . . . . . . . . . . . . . . 54
Stop Bits . . . . . . . . . . . . . . . . . . . . . . . . . . . . . . . . . . . . . . . . . . . . . . . . . . . . . . . . . . . . . . . . 54
Symbology Identifier . . . . . . . . . . . . . . . . . . . . . . . . . . . . . . . . . . . . . . . . . . . . . . . . . . . . . 55
Telepen . . . . . . . . . . . . . . . . . . . . . . . . . . . . . . . . . . . . . . . . . . . . . . . . . . . . . . . . . . . . . . . . . 55
SR61T Tethered Scanner User’s Guide
vii
Contents
Timeout Between Different Consecutive Codes . . . . . . . . . . . . . . . . . . . . . . . . . . . . . 55
Timeout Between Identical Consecutive Codes . . . . . . . . . . . . . . . . . . . . . . . . . . . . . 56
TLC 39. . . . . . . . . . . . . . . . . . . . . . . . . . . . . . . . . . . . . . . . . . . . . . . . . . . . . . . . . . . . . . . . . . 56
Transmission Frame Size . . . . . . . . . . . . . . . . . . . . . . . . . . . . . . . . . . . . . . . . . . . . . . . . . 56
Trigger Mode . . . . . . . . . . . . . . . . . . . . . . . . . . . . . . . . . . . . . . . . . . . . . . . . . . . . . . . . . . . . 57
Trigger Timeout . . . . . . . . . . . . . . . . . . . . . . . . . . . . . . . . . . . . . . . . . . . . . . . . . . . . . . . . . 57
Turn Off After Good Read . . . . . . . . . . . . . . . . . . . . . . . . . . . . . . . . . . . . . . . . . . . . . . . . 58
Vibrate Alert. . . . . . . . . . . . . . . . . . . . . . . . . . . . . . . . . . . . . . . . . . . . . . . . . . . . . . . . . . . . . 58
Vibrate Alert Duration . . . . . . . . . . . . . . . . . . . . . . . . . . . . . . . . . . . . . . . . . . . . . . . . . . . 58
A Specifications and Accessories
. . . . . . . . . . . . . . . . . . . . . . . . . . . . . . . . . . . . . . 59
Specifications. . . . . . . . . . . . . . . . . . . . . . . . . . . . . . . . . . . . . . . . . . . . . . . . . . . . . . . . . . . . . . . . . . . . 60
Physical Dimensions . . . . . . . . . . . . . . . . . . . . . . . . . . . . . . . . . . . . . . . . . . . . . 60
Power and Electrical Specifications . . . . . . . . . . . . . . . . . . . . . . . . . . . . . . . . 60
Temperature and Environmental Specifications . . . . . . . . . . . . . . . . . . . . 60
Bar Code Symbologies. . . . . . . . . . . . . . . . . . . . . . . . . . . . . . . . . . . . . . . . . . . . 61
EV10 1D Linear Imager (SR61TV) . . . . . . . . . . . . . . . . . . . . . . . . . . . . . . . . . 62
EL20 Laser Scanner (SR61TL). . . . . . . . . . . . . . . . . . . . . . . . . . . . . . . . . . . . . 64
EA11 2D Area Imager (SR61TA). . . . . . . . . . . . . . . . . . . . . . . . . . . . . . . . . . . 66
EX25 Near-Far Range Area Imager (SR61TE) . . . . . . . . . . . . . . . . . . . . . . . 68
Accessories for the SR61T. . . . . . . . . . . . . . . . . . . . . . . . . . . . . . . . . . . . . . . . . . . . . . . . . . . . . . . . . 70
Stand Accessories . . . . . . . . . . . . . . . . . . . . . . . . . . . . . . . . . . . . . . . . . . . . . . . . . . . . . . . . 70
Cable Accessories . . . . . . . . . . . . . . . . . . . . . . . . . . . . . . . . . . . . . . . . . . . . . . . . . . . . . . . . 71
Operating Settings . . . . . . . . . . . . . . . . . . . . . . . . . . . . . . . . . . . . . . . . . . . . . . . . . . . . . . . . . . . . . . . 74
Scanner behavior . . . . . . . . . . . . . . . . . . . . . . . . . . . . . . . . . . . . . . . . . . . . . . . . . . . . . . . . 74
Wand Emulation Configuration . . . . . . . . . . . . . . . . . . . . . . . . . . . . . . . . . . . . . . . . . . 76
Data Transmission Settings . . . . . . . . . . . . . . . . . . . . . . . . . . . . . . . . . . . . . . . . . . . . . . . . . . . . . . . 77
Enabling Control Character Conversion Parameters . . . . . . . . . . . . . . . . . . . . . . . . 77
Enabling Alt Mode Parameters . . . . . . . . . . . . . . . . . . . . . . . . . . . . . . . . . . . . . . . . . . . . 78
Enabling Special Keys Interpretation Parameters . . . . . . . . . . . . . . . . . . . . . . . . . . . 79
viii
SR61T Tethered Scanner User’s Guide
Before You Begin
Before You Begin
This section provides you with safety information, technical support
information, and sources for additional product information.
Safety Information
Your safety is extremely important. Read and follow all warnings and
cautions in this document before handling and operating Intermec
equipment. You can be seriously injured, and equipment and data can
be damaged if you do not follow the safety warnings and cautions.
This section explains how to identify and understand warnings,
cautions, and notes that are in this document.
A warning alerts you of an operating procedure, practice,
condition, or statement that must be strictly observed to avoid
death or serious injury to the persons working on the equipment.
A caution alerts you to an operating procedure, practice,
condition, or statement that must be strictly observed to prevent
equipment damage or destruction, or corruption or loss of data.
Note: Notes either provide extra information about a topic or contain
special instructions for handling a particular condition or set of
circumstances.
Global Services and Support
Warranty Information
To understand the warranty for your Intermec product, visit the
Intermec web site at www.intermec.com and click Support >
Returns and Repairs > Warranty.
SR61T Tethered Scanner User’s Guide
ix
Before You Begin
Disclaimer of warranties: The sample code included in this document
is presented for reference only. The code does not necessarily
represent complete, tested programs. The code is provided “as is with
all faults.” All warranties are expressly disclaimed, including the
implied warranties of merchantability and fitness for a particular
purpose.
Web Support
Visit the Intermec web site at www.intermec.com to download our
current manuals (in PDF). To order printed versions of the Intermec
manuals, contact your local Intermec representative or distributor.
Visit the Intermec technical knowledge base (Knowledge Central) at
www.intermec.com and click Support > Knowledge Central to
review technical information or to request technical support for your
Intermec product.
Telephone Support
In the U.S.A. and Canada, call 1-800-755-5505.
Outside the U.S.A. and Canada, contact your local Intermec
representative. To search for your local representative, from the
Intermec web site, click About Us > Contact Us.
Service Location Support
For the most current listing of service locations, go to
www.intermec.com and click Support >Returns and Repairs >
Repair Locations.
For technical support in South Korea, use the after service locations
listed below:
AWOO Systems
102-1304 SK Ventium
522 Dangjung-dong
Gunpo-si, Gyeonggi-do Korea, South 435-776
Contact: Mr. Sinbum Kang
Telephone: +82-31-436-1191
Email: [email protected]
x
SR61T Tethered Scanner User’s Guide
Before You Begin
IN Information System PTD LTD
6th Floor
Daegu Venture Center Bldg 95
Shinchun 3 Dong
Donggu, Daegu City, Korea
E-mail: [email protected] or [email protected]
Who Should Read This Manual
This guide is for the person who is responsible for installing,
configuring, and maintaining the SR61T.
This guide provides you with information about the features of the
SR61T, and how to install, configure, operate, maintain, and
troubleshoot it.
Related Documents
The Intermec web site at www.intermec.com contains our documents
(as PDF files) that you can download for free.
To download documents
1 Visit the Intermec web site at www.intermec.com.
2 Click Support > Manuals.
3 Use the Product Category field, the Product Family field, and
the Product field to help you locate the product whose
documentation you want to download.
Patent Information
Product is covered by one or more of the following patents:
4,882,476; 4,894,523; 4,953,113; 4,970,379; 4,988,852; 5,019,699;
5,021,642; 5,038,024; 5,081,343; 5,095,197; 5,144,119; 5,144,121;
5,182,441; 5,187,355; 5,187,356; 5,216,233; 5,216,550; 5,218,191;
5,233,172; 5,241,488; 5,243,602; 5,258,606; 5,288,985; 5,308,966;
5,342,210; 5,359,185; 5,389,770; 5,397,885; 5,414,251; 5,416,463;
5,442,167; 5,464,972; 5,468,947; 5,468,950; 5,477,044; 5,486,689;
5,500,516; 5,502,297; 5,504,367; 5,514,858; 5,534,684; 5,536,924;
5,539,191; 5,541,419; 5,548,108; 5,550,362; 5,550,364; 5,565,669;
5,572,007; 5,576,529; 5,594,230; 5,598,007; 5,608,578; 5,616,909;
5,619,027; 5,640,001; 5,659,431; 5,672,860; 5,684,290; 5,719,678;
SR61T Tethered Scanner User’s Guide
xi
Before You Begin
5,729,003; 5,742,041; 5,761,219; 5,764,798; 5,777,308; 5,777,309;
5,777,310; 5,786,583; 5,798,509; 5,798,513; 5,804,805; 5,811,776;
5,811,777; 5,818,027; 5,821,523; 5,834,749; 5,837,987; 5,841,121;
5,842,070; 5,854,478; 5,862,267; 5,869,840; 5,873,070; 5,877,486;
5,878,395; 5,886,338; 5,895,906; 5,902,987; 5,902,988; 5,912,452;
5,923,022; 5,936,224; 5,949,056; 5,969,321; 5,969,326; 5,979,768;
5,987,192; 5,992,750; 6,003,775; 6,012,640; 6,016,960; 6,018,597;
6,024,289; 6,034,379; 6,036,093; 6,039,252; 6,064,763; 6,095,422;
6,097,839; 6,102,289; 6,102,295; 6,119,941; 6,128,414; 6,138,915;
6,149,061; 6,149,063; 6,152,370; 6,155,490; 6,158,661; 6,164,542;
6,164,545; 6,173,893; 6,195,053; 6,234,393; 6,234,395; 6,249,008;
6,328,214; 6,330,975; 6,345,765; 6,356,949; 6,367,699; 6,375,075;
6,375,076; 6,435,411; 6,484,944; 6,641,046; 6,669,087; 6,681,994;
6,688,523; 6,732,930; 6,879,428; 6,889,903; 6,974,085.
There may be other U.S. and foreign patents pending.
xii
SR61T Tethered Scanner User’s Guide
1
Learning About the SR61T
Use this chapter to familiarize yourself with the SR61T
Tethered Scanner. This chapter covers these topics:
•
Introducing the SR61T Tethered Scanner
•
What’s New
•
Scanning Bar Codes
1
Chapter 1 — Learning About the SR61T
Introducing the SR61T Tethered Scanner
The SR61T Tethered Scanner is a small, rugged handheld scanner.
The SR61T is lightweight, ergonomically designed, and it interfaces
seamlessly with Intermec computers and other host computers.
Scanner
Status light
Trigger
SR61T Tethered Scanner
The SR61T comes with one of these scan engine options:
2
•
1D linear imager (SR61TV)
•
2D area imager (SR61TA)
•
Laser scanner (SR61TL)
•
Near-far range area imager (SR61TE)
SR61T Tethered Scanner User’s Guide
Chapter 1 — Learning About the SR61T
Intermec Technologies Corp.
Everett, WA 98203
Interm
ec
Evere
Tec
tt, WA hnolo
98203gies Co
MFD:
CN: SR YYYYMM
SN: XX61TVXX DD
XXXX XX
XX XXXXX
rp.
MODE
xxxx
MODEL: SR61T
MFD: YYYYMMDD
L: SR
XXX
Xxx
61T
5V 1,7A
xxxx Patent
XX
CN: SR61TVXXXX
SN: XXXXXXXXXXX
5V 1,7A
Patent
XXXXXXxxxxxxxxxxXX
SR61TVXXXX
SR61T Scan Engine Option: The scan engine option of your SR61T is the sixth
character of the configuration number. In this illustration, the scan engine
option is V or 1D linear imager.
For more information about the scanner options, see “Scanning Bar
Codes” on page 6.
The SR61T is powered through the accessory cable that connects it to
the host computer. Depending on your connection, power for the
SR61T comes from either the host computer or the external power
supply. For more information about each cable, see “Cable
Accessories” on page 71.
What’s New
This revision of the user’s manual includes information on
•
New cables for connecting the SR61T
•
Updates on Data Transmission and Operating Settings on the
SR61T
Understanding the SR61T Behavior
The SR61T uses lights, beeps and vibrations to indicate if a bar code
has been successfully decoded. You can also configure your SR61T to
behave differently than it does out of the box. To learn how to do this,
see “Scanner behavior” on page 74.
SR61T Tethered Scanner User’s Guide
3
Chapter 1 — Learning About the SR61T
Understanding the Status Light
The status light on the SR61T indicates a successful decode of a bar
code or an error or warning condition.
Default Status Light Description
Light State
What it Means
Blinks green once
The SR61T successfully decoded a bar code and
sent the data to the host computer.
The SR61T successfully scanned a configuration
bar code.
Turns on and stays
red for 2 seconds
You scanned a bar code, but the data was not sent to
the host computer.
You scanned a configuration bar code and the
SR61T did not accept it.
Understanding the Beeps
The SR61T beeps to give you audio feedback when performing some
functions. For example, you hear a beep each time you scan a valid bar
code.
Default SR61T Beep Descriptions
Beep Sequence
What it Means
Single beep
The SR61T successfully decoded a bar code or scanned
a configuration bar code. You can configure the
number of good read beeps to be one, two, none, or a
number of your choice. For help, see
www.intermec.com/EasySet.
Three beeps
Data was not successfully sent to the host computer.
A configuration bar code was not successfully scanned.
One beep and the You just scanned the Administrator Reset Factory
LED flashes green Defaults bar code and the non-volatile memory is being
written.
once
4
SR61T Tethered Scanner User’s Guide
Chapter 1 — Learning About the SR61T
Note: The SR61TV (linear imager) and SR61TL (laser scanner) may
also produce a crackle sound when you scan a stacked (2D) bar code.
For more information, see “Stacked Code Crackle” on page 54.
You can change the beep volume for your needs and environment.
You can set the beep volume to Low (quiet), Medium (loud), or High
(very loud - default).
To turn off the beeper
•
Scan this bar code:
Beep Duration - 0
\60\03\11\21\00\00\00
You can also change the beeper duration and beeper frequency. For
more information about the beeper commands, see Chapter 4,
“Configuration Command Reference.”
Using Vibrate Alert
In the default scanner mode, you can configure the SR61T to vibrate
when it successfully decodes a bar code. This feature can be useful in
these situations:
•
You are in a noisy environment, such as a busy warehouse, where it
can be difficult to hear the beep.
•
You are working in a quiet environment, such as a library, where
you do not want to make a lot of noise.
SR61T Tethered Scanner User’s Guide
5
Chapter 1 — Learning About the SR61T
To turn on vibrate alert
•
Scan this bar code:
Turn On Vibrate Alert
\60\03\10\48\00\02\40
To turn off vibrate alert
•
Scan this bar code:
Turn Off Vibrate Alert
\60\03\10\48\00\00\00
Note: You cannot configure the SR61T to vibrate when it is
configured to behave in the Legacy scanner mode.
Scanning Bar Codes
For the SR61TL and SR61TE, do not look directly into the
window area or at a reflection of the laser beam or laser aiming
beam while the laser is scanning. Long-term exposure to the laser
beam can damage your vision.
The SR61T contains either a 1D linear imager (SR61TV), 2D area
imager (SR61TA), laser scan engine (SR61TL), or near-far range area
imager (SR61TE) to scan bar code data. The type of scan engine you
are using and the type of bar code you are decoding determines the
way you scan the bar code.
When you unpack the SR61T, these bar code symbologies are enabled:
6
•
Code 39
•
Code 128 / GS1-128
SR61T Tethered Scanner User’s Guide
Chapter 1 — Learning About the SR61T
•
EAN/UPC
•
PDF417
•
DataMatrix (SR61TA and SR61TE only)
If you are using bar code labels that are encoded in a different
symbology, you need to enable the symbology on your SR61T. Use
EasySet version 5.6.0.1 or later to enable and disable symbologies for
your scanner. EasySet is available at no charge from the Intermec web
site at www.intermec.com/EasySet.
To scan a bar code label with a laser scanner or 1D linear imager
1 Point the SR61T at the bar code label and hold the SR61T at a
slight angle 15 to 25 cm (6 to 10 in) from the label.
2 Pull the trigger, and direct the red beam so that it falls across all
bars in the bar code label.
Use this test bar code:
Code 39 Test Bar Code
*123456*
*123456*
Tip: Depending on your screen resolution, you may be able to scan
bar codes displayed on your computer screen with either the 1D
linear imager or the near-far range area imager.
When the SR61T successfully reads a bar code label, the SR61T
creates a single high beep, the status light briefly turns green, and
the scanner beam turns off. If Vibrate Alert is enabled, the SR61T
briefly vibrates.
3 Release the trigger.
SR61T Tethered Scanner User’s Guide
7
Chapter 1 — Learning About the SR61T
ABCD
Status light
Scanning Bar Codes: The aiming and scanner beams that you see depend
on whether you have a laser scanner (SR61TL), 1D linear imager (SR61TV),
2D area imager (SR61TA), or near-far range area imager (SR61TE).
To scan omni-directionally with the 2D or near-far range area imager
1 Point the scanner window at the bar code label and hold the
SR61T steady a few inches from the label.
2 Pull the trigger.
•
If you are scanning with a 2D imager, center the red aiming
beam over the bar code label.
•
If you are scanning with a near-far range area imager, position
the red aiming beam just to the right of the center of the bar
code label.
3 The imager may flash repeatedly while it is trying to read a bar
code. The aiming beam is smaller when the imager is closer to the
bar code and larger when it is further away.
4 When the SR61T successfully reads a bar code label, the SR61T
creates a single high beep and the status light briefly turns green.
If Vibrate Alert is enabled, the SR61T briefly vibrates.
5 Release the trigger.
8
SR61T Tethered Scanner User’s Guide
2
Connecting and Configuring the
SR61T
Use this chapter to understand how to connect the SR61T
to a host and configure the SR61T. This chapter covers
these topics:
•
Connecting Your SR61T to a Host Computer
•
Setting Parameters in the SR61T
9
Chapter 2 — Connecting and Configuring the SR61T
Connecting Your SR61T to a Host Computer
To connect your SR61T to a host computer, you need the appropriate
accessory cable. For a list and description of each cable, see “Cable
Accessories” on page 71.
Creating a USB Connection
The USB cable you choose depends on whether your host PC provides
power through the USB port. If your host PC provides power through
the USB port, connect using a standard USB cable. If your host PC
does not provide power through the USB port, connect using a
powered USB cable.
To connect with a standard USB cable
1 Make sure you have the standard USB cable (PN 236-182-xxx).
2 Connect the standard USB cable to your SR61T.
3 Connect the USB cable to the host PC.
4 If necessary, configure your SR61T for an International keyboard.
The default keyboard is North America. For help, see
“International Keyboard Parameters” on page 17.
To connect with a powered USB cable
1 Make sure you have the powered USB cable (PN 236-183-xxx).
2 Connect the powered USB cable to the SR61T and a power supply
(P/N 851-089-105). Plug the power supply to an AC power outlet.
10
SR61T Tethered Scanner User’s Guide
Chapter 2 — Connecting and Configuring the SR61T
3 Connect the USB cable to the host PC.
4 If necessary, configure your SR61T for an International keyboard.
The default keyboard is North America. For help, see
“International Keyboard Parameters” on page 17.
Creating an RS-232 Connection
The RS-232 cable you choose depends on whether your host PC
provides power through the RS-232 port. If your host PC provides
power through the RS-232 port, connect using the standard RS-232
cable. If your host PC does not provide power through the RS-232
port, connect using the powered RS-232 cable.
To connect with a standard RS-232 cable
1 Make sure you have the standard RS-232 cable (P/N 236-184-xxx).
2 If you are connecting to an Intermec computer, turn it off.
Otherwise, leave the host PC on.
SR61T Tethered Scanner User’s Guide
11
Chapter 2 — Connecting and Configuring the SR61T
3 Connect the standard RS-232 cable to your SR61T.
4 Connect to the host PC.
5 If you are connecting to an Intermec computer, turn it on.
6 If necessary, configure your SR61T serial parameters to match the
PC.
The default serial parameters for the SR61T are:
Serial Parameter
Default Setting
Baud rate
57600
Data bits
8
Parity
None
Stop bits
1
For help, see “Serial Parameter Parameters” on page 20 or
EasySet version 5.6.0.1 or later. EasySet is available from the
Intermec web site at www.intermec.com/EasySet.
To connect with a powered RS-232 cable
1 Make sure you have a powered RS-232 cable (P/N 236-185-xxx or
P/N 236-198-xxx).
2 If you are connecting to an Intermec computer, turn it off.
Otherwise, leave the host PC on.
3 Connect the externally powered RS-232 cable to the SR61T and a
power supply. Plug the power supply into an AC power outlet.
12
SR61T Tethered Scanner User’s Guide
Chapter 2 — Connecting and Configuring the SR61T
4 Connect to the host PC.
5 If you are connecting to an Intermec computer, turn it on.
Note: While the green light on the Intermec computer is flashing,
do not disconnect the scanner from the Intermec computer.
6 If necessary, configure your SR61T serial parameters to match the
PC.
The default serial parameters for the SR61T are:
Serial Parameter
Default Setting
Baud rate
57600
Data bits
8
Parity
None
Stop bits
1
For help, see “Serial Parameter Parameters” on page 20 or
EasySet version 5.6.0.1 or later. EasySet is available from the
Intermec web site at www.intermec.com/EasySet.
SR61T Tethered Scanner User’s Guide
13
Chapter 2 — Connecting and Configuring the SR61T
Creating a Keyboard Wedge Connection
There are several different keyboard wedge cables available for your
connection to a host PC. You can choose from a standard or an
externally powered cable.
To connect with a standard keyboard wedge cable
1 Turn off your host PC.
2 Make sure you have the appropriate cable. If you host PC does
provide power, use a standard keyboard wedge cable (P/N 236186-xxx).
3 Connect the standard keyboard wedge cable to your SR61T and
the host PC.
o
4 Turn on your host PC.
5 If necessary, configure your SR61T for an International keyboard
by scanning bar codes. The default keyboard is North America. For
help, see “International Keyboard Parameters” on page 17.
To connect with a powered keyboard wedge cable
1 Turn off your host PC.
2 Make sure you have the appropriate cable. If your host PC does not
provide power, use the powered keyboard wedge cable (P/N 236187-xxx).
3 Connect the powered keyboard wedge cable to your SR61T and a
host a power supply (P/N 851-089-105). Plug the power supply
into an AC power outlet.
14
SR61T Tethered Scanner User’s Guide
Chapter 2 — Connecting and Configuring the SR61T
4 Connect the keyboard wedge cable to the host PC.
5 Turn on your host PC.
6 If necessary, configure your SR61T for an International keyboard
by scanning bar codes. The default keyboard is North America. For
help, see “International Keyboard Parameters” on page 17.
To connect the SR61T using a Y-cable
1 Turn off your host PC.
2 Connect the Y-cable (P/N 236-214-001) to your SR61T.
SR61T Tethered Scanner User’s Guide
15
Chapter 2 — Connecting and Configuring the SR61T
3 Connect one end of the Y-cable to your host PC and the other end
to a PS2 keyboard.If your host PC does not provide enough power,
connect the Y-cable to a power supply (P/N 851-089-005). Then
plug the power supply to an AC power outlet.
4 Turn on your host computer.
5 If necessary, configure your SR61T for an International keyboard.
The default keyboard is North America. For help, see
“International Keyboard Parameters” on page 17.
Creating a Wand Emulation Connection
You can create a wand emulation connection to an Intermec
computer by connecting a wand emulation cable to the computer.
There are several types of cables available for use. The type of cable
you choose will depend on the Intermec computer you have. For a list
of cables to choose from, see “Cable Accessories” on page 71.
Note: You can connect the following Intermec computers using a
wand emulation cable: 2420, 2425, 2435, 2455, 2475, 2480, 2481,
2485, 2486
To create a wand emulation connection
1 Make sure that you have the appropriate wand emulation cable.
(P/N 236-188-xxx, P/N 236-189-xxx, or 236-190-xxx).
2 Connect the wand emulation cable to your SR61T and the
Intermec computer.
3 (Optional) You can also configure the wand emulation cable to
enable it to communicate differently with an Intermec computer.
For help, see “Creating a Wand Emulation Connection” on
page 16.
Note: When you use a wand emulation connection, post processing
features like postamble, preamble and data editing are not available.
You must change these settings using your Intermec computer.
16
SR61T Tethered Scanner User’s Guide
Chapter 2 — Connecting and Configuring the SR61T
Note: If you get a good beep read from the SR61T but receive no data
on your host computer, this means that the bar code you scanned is
too large for your Intermec computer to process.
Setting Parameters in the SR61T
After you connect your SR61T to a host, you may need to configure it
to communicate properly with the host. Use this section to change the
way that the SR61T transmits encoded data. This section contains the
following bar codes:
•
“International Keyboard Parameters” on page 17.
•
“Serial Parameter Parameters” on page 20.
To configure additional SR61T settings, see “Operating Settings”
on page 74 or EasySet version 5.6.0.1 or later. EasySet is available
from the Intermec web site at www.intermec.com/EasySet.
International Keyboard Parameters
If your SR61T is connected to a host with a keyboard wedge cable, you
may need to configure your SR61T to behave like an International
keyboard. Scan the following bar codes to make your keyboard behave
like the following keyboards.
* = default
North America*
\60\02\53\20\00\00\00
Belgian French
Windows
\60\02\53\20\00\3A\40
Danish Windows
\60\02\53\20\00\2D\20
SR61T Tethered Scanner User’s Guide
17
Chapter 2 — Connecting and Configuring the SR61T
Dutch Windows
\60\02\53\20\00\35\20
French Canadian Windows 95/98
\60\02\53\20\00\08\00
French Canadian
Windows XP/2000
\60\02\53\20\00\0A\40
French Windows
\60\02\53\20\00\02\40
German Windows
\60\02\53\20\00\05\20
Hungarian Windows
\60\02\53\20\00\25\20
Italian Windows
\60\02\53\20\00\10\00
Norwegian Windows
\60\02\53\20\00\30\00
18
SR61T Tethered Scanner User’s Guide
Chapter 2 — Connecting and Configuring the SR61T
Portuguese Windows
\60\02\53\20\00\38\00
Swedish Windows
\60\02\53\20\00\12\40
Swiss French Windows
\60\02\53\20\00\2A\40
Swiss German
Windows
\60\02\53\20\00\28\00
Spanish Windows
\60\02\53\20\00\0D\20
UK English Windows
\60\02\53\20\00\15\20
Brazilian Portuguese Windows
\60\02\53\20\00\38\00
Japanese Windows
\60\02\53\20\00\18\00
SR61T Tethered Scanner User’s Guide
19
Chapter 2 — Connecting and Configuring the SR61T
IBM/NCR Terminals
\60\02\53\20\00\1D\20
Serial Parameter Parameters
If your SR61T is connected to a host with an RS-232 cable, configure
your SR61T serial parameters to match the host. This section
contains bar codes for basic serial parameters. To configure additional
serial parameters, use EasySet.
Note: By default, RTS/CTS hardware protocol is disabled. To enable
this parameter, use EasySet version 5.6.0.1 or later. RTS/CTS hardware
protocol operates only in one direction. The SR61T requests
permission from the host to transmit and monitors host
transmissions.
* = default
Baud Rate
1200
\60\02\48\40\00\0A\40
2400
\60\02\48\40\00\0A\40
4800
\60\02\48\40\00\10\00
9600
\60\02\48\40\00\12\40
20
SR61T Tethered Scanner User’s Guide
Chapter 2 — Connecting and Configuring the SR61T
19200*
\60\02\48\40\00\15\20
38400
\60\02\48\40\00\18\00
57600
\60\02\48\40\00\1A\40
115200
\60\02\48\40\00\1D\20
Data Bits
7
\60\02\48\42\00\00\00
8*
\60\02\48\42\00\02\40
Parity
None*
\60\02\48\43\00\00\00
Even
\60\02\48\43\00\02\40
SR61T Tethered Scanner User’s Guide
21
Chapter 2 — Connecting and Configuring the SR61T
Odd
\60\02\48\43\00\05\20
Stop Bits
1*
\60\02\48\44\00\00\00
2
\60\02\48\44\00\02\40
Enabling the Configurable RS-232 Protocol
By default, the SR61T uses ISCP to communicate with a host
computer. If you are connecting the SR61T to a host computer, for
example an Intermec Terminal that speaks ISCP, you will not need to
do anything.
If you are connecting your host computer that does not use ISCP, you
must disable the ISCP protocol, that is, enable the Configurable RS232 protocol.
You may also want to configure the ENQ, ACK, NAK, and LRC
parameters. For more details about the Configurable RS-232
Protocol, see “Understanding Features of Configurable RS-232
Protocol” on page 23.
If you are connecting to a Intermec Terminal using ISCP or EasySet,
keep the default settings for Data bits, Parity and Stop bits so ISCP
can work properly.
22
SR61T Tethered Scanner User’s Guide
Chapter 2 — Connecting and Configuring the SR61T
To disable the ISCP Protocol (enable the Configurable RS-232
Protocol)
•
Scan the following bar code
\60\02\43\20\00\00\00
To enable ISCP Protocol
•
Scan the following bar code
\60\02\43\20\00\02\40
Understanding Features of Configurable RS-232
Protocol
The Configurable RS-232 protocol is comprised of four features. Each
of these features can be turned on or off independently of one other.
Use the table and procedures below to understand the Configurable
RS-232 protocol. To specify a specific value for any of the individual
parameters, go to EasySet.
Configurable RS-232 Protocol Features
Parameter
Description (When Enabled)
ENQ
The scanner waits until it receives ENQ from the
host before sending data to the host. If the hw/sw
timeout period expires before the host send ENQ,
the then the scanner does not send the data to the
host
ACK
The scanner waits for the length of the hw/sw
timeout period of time to receive an ACK message
from the host and then time out. If the scanner
times out then the scanner issues error beeps.
SR61T Tethered Scanner User’s Guide
23
Chapter 2 — Connecting and Configuring the SR61T
Configurable RS-232 Protocol Features (continued)
Parameter
Description (When Enabled)
NAK
The scanner sends data to the host. If the host does
not like the data then the host must send a NAK
before the hw/sw timeout period expires. If the
scanner receives a NAK from the host then the
scanner resends the data. The scanner resends the
data three times.
LRC
The scanner appends the Longitudinal Redundancy
Check , which is two characters, to the end of the
data. The LRC characters are calculated by XOR’ing
the hex values of the first two ASCII characters, and
then XOR’ing the results with the next character.
This pattern is repeated for all data characters.
To configure the ENQ parameter
•
To enable ENQ, scan the following bar codes
\60\02\48\45\00\02\40
•
To disable ENQ, scan the following bar code
To configure the ACK parameter
•
To enable ACK, scan the following bar code:
\60\02\48\47\00\02\40
•
24
To disable ACK, scan the following bar code
SR61T Tethered Scanner User’s Guide
Chapter 2 — Connecting and Configuring the SR61T
\60\02\48\47\00\00\00
To configure the NAK parameter
•
To enable NAK, scan the following bar code and enter an NAK
number
\60\02\48\49\00\02\40
•
To disable NAK, scan the following bar code
\60\02\48\49\00\00\00
To configure the LRC parameter
•
To enable LRC, scan the following bar code and enter a LRC
number
\60\02\48\4C\00\02\40
•
To disable LRC, scan the following bar code
\60\02\48\4C\00\00\00
SR61T Tethered Scanner User’s Guide
25
Chapter 2 — Connecting and Configuring the SR61T
26
SR61T Tethered Scanner User’s Guide
3
Troubleshooting and
Maintaining the SR61T
Use this chapter to solve problems you may have while
using the SR61T. This chapter contains these topics:
•
Troubleshooting the SR61T
•
Maintaining the SR61T
27
Chapter 3 — Troubleshooting and Maintaining the SR61T
Troubleshooting the SR61T
If you have problems using the SR61T, use this chapter to find a
possible solution.
Calling Product Support
To talk to an Intermec Product Support representative:
•
In the U.S.A. and Canada, call 1-800-755-5505
•
Outside the U.S.A. and Canada, contact your local Intermec
representative. For help, go to www.intermec.com > About Us >
Contact Us.
Before you call Intermec Product Support, make sure you have the
following information:
•
SR61T firmware version
•
SR61T decode version
•
SR61T sub-system version
To get the firmware version, decode version, and sub-system version
1 Run an application that can accept bar code information from the
SR61T:
•
If you are using a USB or keyboard wedge cable, use
Microsoft® Notepad.
•
If you are using an RS-232 cable, use the EasySet ISCP
Terminal window. For help, see the EasySet software.
2 Scan one of these bar codes:
Get firmware version
Get decode version
Get sub-system version
28
SR61T Tethered Scanner User’s Guide
Chapter 3 — Troubleshooting and Maintaining the SR61T
Problems and Possible Solutions
Use this section to find possible solutions to problems you may have.
Problems and Possible Solutions
Problem
Possible Solution
You pull the trigger, but The SR61T receives power from either a host
nothing happens.
computer or external power supply through an
accessory cable. Make sure:
• you are using the appropriate cable. For more
information, see “Cable Accessories” on
page 71.
• the cable is connected to the appropriate port
on the host computer.
• the universal power supply (if necessary) is
properly plugged in.
You pull the trigger, the Try these possible solutions:
red scanning beam
• Make sure that the SR61T is configured for the
turns on, but you
symbology you are scanning.
cannot successfully scan • Make sure that the SR61T is at the appropriate
a bar code.
scanning distance from the bar code. Move the
SR61T closer and farther to find the
appropriate distance.
• Make sure that the SR61T is configured for the
type of bar code you are scanning.
• The bar code you are trying to scan may be
poorly printed or too small. Scan a known
good bar code to make sure that the SR61T is
working properly.
For more information, see “Scanning Bar
Codes” on page 6.
You scan a bar code and The beep duration, volume, frequency, and
number may be configured so the SR61T does not
the status light turns
on, but the SR61T does beep. To reset the SR61T, scan this bar code:
not beep.
Reset factory defaults
SR61T Tethered Scanner User’s Guide
29
Chapter 3 — Troubleshooting and Maintaining the SR61T
Problems and Possible Solutions (continued)
Problem
Possible Solution
The SR61T does not recognize or support the
You scan a
configuration bar code configuration bar code you scanned.
and the SR61T beeps
three times.
You scan a bar code, the Try these possible solutions:
SR61T beeps once, and • Make sure that your data collection
the status light blinks
application is set up to receive data from the
green once, but the data
SR61T.
is not transmitted to the
• If you are using an RS-232 cable, make sure
host computer.
that the serial parameters on the SR61T match
the serial parameters of the host computer. The
default serial parameters for the SR61T are:
57600 baud, 8 data bits, no parity, and 1 stop
bit.
You scan a data bar code Try disconnecting and then reconnecting the
and the scanner beeps scanner to the host and then reestablish
once, pauses for half a communications with the host.
second, and then beeps
three times.
Resetting the SR61T
If your SR61T does not respond when you pull the trigger, you can
reset your SR61T. When you send the Administrator Reset Factory
Defaults command, the configuration command parameters are
returned to their original factory defaults and the scanner restarts.
To reset your SR61T
1 Establish a connection with EasySet.
2 Send the Administrator Reset Factory Defaults command to the
SR61T.
Maintaining the SR61T
To keep your SR61T in good working order, you may need to upgrade
the SR61T and clean the scanner window.
30
SR61T Tethered Scanner User’s Guide
Chapter 3 — Troubleshooting and Maintaining the SR61T
Upgrading the SR61T
You may need to upgrade the SR61T firmware if there is an update
that incorporates changes to a feature or adds functionality to the
scanner. The process of upgrading the SR61T takes about 10 minutes
to complete.
To upgrade the SR61T, you need:
•
an RS-232 accessory cable with external power (P/N 236-185-001
or 236-198-001). For more information, see “Cable Accessories”
on page 71.
•
power supply (P/N 851-089-105).
•
country-specific AC power cord. See the table below for the correct
power cord to purchase:
Country
Part number
China
071918
Europe
1-974027-025
United States
1-974028-025
United Kingdom 1-974029-020
Australia
1-974030-025
Italy
321-471-002
Denmark
321-501-002
India/Africa
321-502-002
•
a PC running Microsoft® Windows® XP with SP2 or Microsoft
Windows 2000 with SP4.
•
the Intermec Scanner Upgrade Utility. You can download this
utility from the SR61T downloads page at www.intermec.com.
•
the firmware update (.ldr) file.
Note: Before you start the upgrade process, make sure that you are
not using the selected COM port for any other application or you
receive an error and cannot use the COM port.
SR61T Tethered Scanner User’s Guide
31
Chapter 3 — Troubleshooting and Maintaining the SR61T
To upgrade the SR61T firmware
1 Download the latest SR61T firmware update package from the
Intermec web site at www.intermec.com.
a Go to Support > Downloads.
b From the Product Category drop-down list, choose Bar Code
Scanners.
c
From the Product Family drop-down list, choose Rugged.
d From the Product drop-down list, choose SR61T Hand Held
Scanner and click Submit.
e Click the link to download the firmware upgrade package and
save it to your PC.
f
Unzip the .zip file.
2 Connect your SR61T to a host PC with the RS-232 cable.
3 Scan the Reset Factory Defaults bar code:
Reset factory defaults
32
SR61T Tethered Scanner User’s Guide
Chapter 3 — Troubleshooting and Maintaining the SR61T
4 Start the Intermec Scanner Upgrade Utility:
5 Select a COM port and a baud rate.
6 Click Browse and navigate to the location of the firmware
upgrade (.ldr) file and then click Open.
7 Click Upgrade. A message appears asking if you want to upgrade.
8 Click Yes. A dialog box appears and provides you with the progress
of the update.
9 Click OK when the Update Completed message appears. You have
successfully upgraded your SR61T firmware.
10 Disconnect and reconnect the RS-232 cable to reboot the SR61T.
SR61T Tethered Scanner User’s Guide
33
Chapter 3 — Troubleshooting and Maintaining the SR61T
Cleaning the SR61T
Clean the scanner window as often as needed for the environment in
which you are using the SR61T. To clean the scanner window, you can
use soapy water, a solution of ammonia and water, or isopropyl
alcohol.
Opening the SR61T voids the warranty and may cause damage to
the internal components.
To clean the scanner window
1 Dip a clean towel or rag in soapy water, ammonia and water
solution, or isopropyl alcohol and wring out the excess. Wipe the
scanner window. Do not allow any abrasive material to touch the
window.
2 Wipe dry with a lint-free cloth.
34
SR61T Tethered Scanner User’s Guide
4
Configuration Command
Reference
Use this chapter to learn about the configuration
commands supported on the SR61T. This chapter contains
these topics:
•
Using Configuration Commands
•
Configuration Commands By Function
•
SR61T Configuration Commands
35
Chapter 4 — Configuration Command Reference
Using Configuration Commands
A configuration command changes the way the SR61T operates. For
example, you can change the Beep Volume and make the SR61T
beeper very quietly.
You can configure the SR61T:
•
by sending commands to your SR61T from your PC using EasySet.
•
by sending commands to a bar code setup sheet. Then, scan the
bar codes onscreen with your SR61T (SR61TE or SR61TA only), or
print the setup sheet and scan the bar codes.
•
by sending commands to your SR61T from your Intermec
computer using Intermec Settings.
Note: When you first connect to an Intermec computer, only
SR61T settings common to the Intermec computer’s internal
scanner settings are changed to the internal scanner’s default
settings.
For a list of all the commands and their default values as they are
organized in EasySet, see the next section, “Configuration
Commands By Function.”
For descriptions of each command organized alphabetically, see
“SR61T Configuration Commands” on page 40.
Configuration Commands By Function
The configuration commands are grouped by function and reflect the
organization of the Commands window in EasySet.
Reset All Parameters
36
Command
Default Value
See Page
Administrator reset factory defaults
N/A
40
SR61T Tethered Scanner User’s Guide
Chapter 4 — Configuration Command Reference
Interface Settings
RS-232 Parameter
Default Value
See Page
Baud rate
57600
41
Data bits
8
46
Parity
None
52
Stop bits
1
54
Hardware/software protocol timeout
1000 ms
49
Configurable RS-232 Protocol
Not active
45
ENQ
Not active
47
ACK
Not active
40
NAK
Not active
51
LRC
Not active
50
Inter-character delay
None
49
Inter-message delay
None
50
PS/2 Keyboard Wedge
Default Value
See Page
Keyboard selection
North America
50
Override caps lock key
Not active
51
Data Transmission Settings
Data Transmission Command
Default Value
See Page
ISCP activation
Active
50
Data format
Raw
46
Transmission frame size (TFS)
4096
56
ISCP
Not active
47
Symbology identifier
Event notification
Not transmitting
55
Preamble
None
53
Postamble
<CR><LF>
52
Data editing
N/A
46
Alt Mode
Not active
41
Control character conversion
Active
45
SR61T Tethered Scanner User’s Guide
37
Chapter 4 — Configuration Command Reference
Symbology Settings
Symbology
Default Value
See Page
Disable all symbologies
N/A
46
Australian Post
Not active
41
Aztec
Not active
41
BPO
Not active
42
Canada Post
Not active
42
Codabar
Not active
43
Codablock
Codablock A
Not active
43
Codablock F
Not active
43
Code 11
Not active
44
Code 39
Active
44
Not active
54
Code 93/93i
Special keys interpretation
Not active
44
Code 128/GS1-128
Active
44
ISBT 128
Not active
45
GTIN processing
Not active
45
DataMatrix
Active
46
Dutch Post
Not active
46
EAN/UPC
Active
47
ISBN
Not active
47
GTIN processing
Not active
47
Not active
48
GS1 DataBar Omni-directional
Not active
49
GS1 Expanded
Not active
49
GS1 Limited
Not active
49
Interleaved 2 of 5
Not active
50
Japan Post
Not active
50
Matrix 2 of 5
Not active
50
Maxicode
Not active
51
Micro PDF417
Not active
51
MSI
Not active
51
GS1 Composite
GS1 DataBar
38
SR61T Tethered Scanner User’s Guide
Chapter 4 — Configuration Command Reference
Symbology Settings (continued)
Symbology
Default Value
See Page
PDF417
active
52
Planet
Not active
52
Postnet
Not active
53
QR Code
Not active
53
Standard 2 of 5
Not active
54
Telepen
Not active
55
TLC 39
Not active
56
Operating Settings
Trigger Activation Command
Default Value
See Page
Trigger mode
Level
57
Trigger timeout
2 seconds
57
Turn off after good read
Active
58
Data Decoding Security Command
Default Value
See Page
Predefined security levels
Normal
53
Consecutive same read data
validation
Auto read count
before transmission
45
Timeout between identical
consecutive codes
300 ms
56
Timeout between different
consecutive codes
None
55
Center Decoding Command
Default Value
See Page
Center decoding activation
Not active
43
Center decoding tolerance
No tolerance
43
Beeps/LED Command
Default Value
See Page
Beep and LED Mode
SR61T default mode
41
Beep volume
High
42
SR61T Tethered Scanner User’s Guide
39
Chapter 4 — Configuration Command Reference
Beeps/LED Command
Default Value
See Page
Beep frequency
2610 Hz
42
Good read beeps
Number
Duration
Timing
1
80 ms
Before transmission
48
48
48
Good read LED duration
2000 ms
48
Error beep
On
47
Setup beep
On
54
Beeps/LED Command
Default Value
See Page
2D symbologies
Stacked code crackle
On
54
Vibrate alert
Vibrate alert
Duration
Off
300 ms
58
58
Sensor optimization
Automatic
53
Operating Settings (continued)
SR61T Configuration Commands
This section lists the configuration commands in alphabetical order
and provides a description of each command. To configure your
SR61T using these commands, see www.intermec.com/EasySet.
ACK
A feature of the Configurable RS-232 Protocol. The scanner waits for
the length of the hw/sw timeout period of time to receive an ACK
message from the host and then time out. If the scanner times out
then the scanner issues error beeps.
Administrator Reset Factory Defaults
Causes the SR61T to perform a restart and restores all configuration
commands to their default settings.
40
SR61T Tethered Scanner User’s Guide
Chapter 4 — Configuration Command Reference
Alt Mode
A data transmission settings that allow the SR61T to transmit special
characters to a host computer. For example, if Alt mode is enabled,
the character “Alt+ 0196” is interpreted as “Ä.” When Alt mode is
disabled, “Alt+0196” is transmitted as is.
Australian Post
SR61TA (area imager) and SR61TE (near-far range area imager) only.
Enables or disables decoding of Australian Post symbology.
Australian Post is a 4-state bar code that allows Australian Post to sort
incoming mail using a bar code. There are three types of bar codes
corresponding to FCC values 11, 59, and 62. BarDIMM only needs the
DPID and Customer information, and automatically generates all the
other information like the FCC or Reed-Solomon checksum.
Aztec
SR61TA (area imager) and SR61TE (near-far range area imager) only.
Enables or disables decoding of Aztec symbology. Aztec is a 2D matrix
symbology made up of square modules on a square grid, with a square
bulls eye pattern at their center. Aztec Code symbols can encode large
amounts of data with user-defined error-correction level.
Baud Rate
Sets the baud rate for the communications. The baud rate must
match the baud rate of the host. You can set Baud Rate to a value of
1200, 2400, 9600, 19200, 38400, 57600, or 115200.
Beep and LED Mode
Sets the way in which the beeps and LED lights will behave on the
SR61T. By default, the scanner is set to behave in one way, but it can
be configured to operate differently.
Beep Duration
Sets the length of the beeps. You can set Beep Duration to a value
from 0 to 2550 ms. When Beep Duration is set to 0 ms, the beeper is
off.
SR61T Tethered Scanner User’s Guide
41
Chapter 4 — Configuration Command Reference
Use Beep Duration in combination with Beep Frequency and Beep
Volume to define beeps according to operator preference and work
environment.
Beep Frequency
Sets the frequency, or pitch, of the beeps. You can set Beep Frequency
to a value from 1000 to 5110 Hz.
Use Beep Frequency in combination with Beep Volume and Good
Read Beep Duration to define beeps according to operator preference
and work environment.
Beep Volume
Adjusts the volume of the beeps. You can set Beep Volume to Low,
Medium, or High.
Note: To turn off the beeper, set the Beep Duration to 0.
Use Beep Volume in combination with Beep Frequency and Good
Read Beep Duration to define beeps according to operator preference
and work environment.
BPO
SR61TA (area imager) and SR61TE (near-far range area imager) only.
Enables or disables decoding of BPO (British Post Office) 4-state bar
code symbology. BPO was developed by the British Post office for
encoding European postcode data similar to the way the U.S. Postnet
symbology is used for encoding Zip Code data. BPO provides
European countries with a simple and efficient postal bar coding
scheme.
Canada Post
SR61TA (area imager) and SR61TE (near-far range area imager) only.
Enables or disables decoding of Canada Post 4-state bar code
symbology. Canada Post contains addressing as well as customerspecific information. Canada Post sends mail pieces through Canada
Post’s integrated distribution system in the most cost-efficient way.
42
SR61T Tethered Scanner User’s Guide
Chapter 4 — Configuration Command Reference
Center Decoding Activation
Enables or disabled the Center Decoding of bar codes. When enabled,
the SR61T reads only the bar code that the laser aimer is centered on.
This parameter is useful for reading bar codes that are positioned
close together.
Center Decoding Tolerance
Allows you to aim the laser beam close to the bar code label you want
to read instead of positioning the aimer right on the bar code. Values
for Center Decoding Tolerance can range from 0 (laser beam must be
positioned on the bar code to be read) to 100 (laser beam can be
positioned beside the bar code to be read).
Codabar
Enables or disables decoding of Codabar symbology. Codabar
is a self-checking, discrete symbology. The American Blood
Commission (ABC) Codabar requires that you retain and transmit the
start/stop code digits when processing a Codabar symbol. As a result,
configuration CD10 is an illegal configuration.
Codablock A
Enables or disables decoding of Codablock A symbology. Codablock
A is a 2D bar code that is an extension of Code 39.
If Code 39 is enabled with check digit, you cannot enable Codablock
A. For best results, disable Code 39 before you enable Codablock A. If
Code 39 is enabled with check digit, Codablock A is not be decoded
properly.
Codablock F
Enables or disables decoding of Codablock F symbology. Codablock F
is a 2D bar code that is an extension of Code 128. If Code 128 is
enabled with check digit, you cannot enable Codablock F. For best
results, disable Code 128 before you enable Codablock F.
SR61T Tethered Scanner User’s Guide
43
Chapter 4 — Configuration Command Reference
Code 11
Enables or disables decoding of Code 11 symbology. Code 11 is a very
high-density, discrete numeric bar code used extensively in labeling
telecommunications components and equipment.
Code 39
Enables or disables decoding of Code 39 symbology. Code 39 is
discrete, variable length, and self-checking. The character set is
uppercase A to Z, 0 to 9, dollar sign ($), period (.), slash (/), percent
(%), space ( ), plus (+), and minus (-).
Code 93/93i
Enables or disables decoding of Code 93/93i symbology. Code 93/93i
is a variable length, continuous symbology that uses four element
widths.
Code 128 / GS1-128
Enables or disables decoding of Code 128 / GS1-128 symbology. Code
128 is a very high-density alphanumeric symbology that supports the
extended ASCII character set. It is a variable length, continuous code
that uses multiple element widths.
Code 128 supports the following function codes.
Code 128 Function Codes
44
Function Codes
Description
FNC1
FNC1 is used as a separator when multiple identifiers
and their fields are concatenated. For example, FNC1 can
be useful in keyboard wedge mode when the GS
character cannot be transmitted.
FNC2
When the FNC2 character occurs in a bar code, the
SR61T temporarily stores the data from the bar code and
transmits it as a prefix to the next symbol. In this way,
FNC2 can be used to concatenate several symbols before
the data is transmitted.
SR61T Tethered Scanner User’s Guide
Chapter 4 — Configuration Command Reference
ISBT 128
Enables and configures decoding of ISBT Code 128 symbology. ISBT
Code 128 is the global bar code labeling standard for the blood
banking industry and is used to support the worldwide distribution,
tracking, and handling of blood bags and blood components.
GTIN Processing for GS1-128
With Global Trade Item Number (GTIN) processing enabled, a GTINcompliant GS1-128 label strips the first two digits output 14 digits.
GTIN-compliant GS1-128 labels:
•
are 16 digits long.
•
have “01” as the first two digits of the label.
Consecutive Same Read Data Validation
To ensure you have a valid read before transmitting data, you can set
the SR61T to scan a bar code multiple times.
You can set Consecutive Same Read Data Validation from 0 to 10. The
default value of 0 sets the scanner to automatically adapt to the
consecutive same read based on the bar code quality and the trust
level of the bar code. For example, labels with a check digit require
fewer reads than labels without a check digit.
Configurable RS-232 Protocol
If you are connecting your host computer that does not use ISCP, you
must disable the ISCP protocol, that is, enable the Configurable RS232 protocol. The Configurable RS-232 protocol is comprised of four
features, ACK, NAK, ENQ and LRC.
Control Character Conversion
A data transmission setting allows the SR61T to transmit special
characters to a host computer. For example, when control character
mode is enabled, the character “8” is transmitted as “Backspace.”
Otherwise, the character “8” is transmitted as “Ctrl + H”.
SR61T Tethered Scanner User’s Guide
45
Chapter 4 — Configuration Command Reference
Data Bits
Sets the number of data bits the scanner uses when communicating.
You can set Data Bits to 7 or 8.
Data Editing
Data editing allows you to edit data scanned by the SR61T before it is
transmitted to the host. You can define up to seven input scenarios to
filter the data you want to edit. For more information, see the EasySet
software.
Data Format
Determines how information is sent to the host when you use
Intermec Scanner Control Protocol (ISCP). If you select a value of raw,
bar code data is sent to the host exactly as is appears in the bar code,
no frame or acknowledgement are necessary. If you select a value of
packet, the bar code data is encapsulated within ISCP protocol.
DataMatrix
SR61TA (area imager) and SR61TE (near-far range area imager) only.
Enables or disables decoding of DataMatrix symbology, a high density
2D matrix code that can store a large amount of information.
DataMatrix has excellent error correction abilities and is mostly used
for marking and tracking parts.
Disable All Symbologies
This command disables all symbologies. However, disabling all
symbologies does not reset symbology parameters to their default
values. To reset all symbology parameters to their default factory
settings, use the Administrator Reset Factory Defaults command. For
more information, see “ACK” on page 40.
Dutch Post
SR61TA (area imager) and SR61TE (near-far range area imager) only.
Enables or disables decoding of Dutch Post symbology. Dutch Post is
a 4-state bar code that contains addressing, as well as customerspecific information.
46
SR61T Tethered Scanner User’s Guide
Chapter 4 — Configuration Command Reference
EAN/UPC
Enables or disables decoding of European Article Numbering (EAN)/
Universal Product Code (UPC) symbology. EAN/UPC are fixedlength, numeric, continuous symbologies that use four element
widths. A scanner that is configured to decode EAN bar codes can
decode UPC, but the reverse is not true. UPC code is a subset of EAN
code.
ISBN
International Standard Book Number (ISBN) is a 10-digit symbology
that uniquely identifies books for tracking and ordering.
With ISBN enabled, the first three characters (978) are ignored, and
the checksum is calculated on the remaining characters.
GTIN Processing
With Global Trade Item Number (GTIN) processing enabled, two
zeros are padded to the beginning of UPC-A, and one zero is padded
to the beginning of EAN-13 to expand the numbers to 14 digits. To
use GTIN processing you also need to enable the corresponding EAN/
UPC symbology.
ENQ
A feature of the Configurable RS-232 Protocol. The scanner waits
until it receives ENQ from the host before sending data to the host. If
the hw/sw timeout period expires before the host send ENQ, the then
the scanner does not send the data to the host.
Error Beep
Enables or disables the error beep. Your SR61T emits an error beep
without affecting the configuration of your SR61T, when you scan a
configuration bar code that is damaged or unknown.
Event Notification
Sends information to the host when a selected action occurs. You can
activate Event Notifications such as start of session read or trigger
released.
SR61T Tethered Scanner User’s Guide
47
Chapter 4 — Configuration Command Reference
Good Read Beep Duration
Sets the length of the SR61T good read beeps. You can set Good Read
Beep Duration to a value from 0 (off) to 2550 ms.
Use Good Read Beep Duration in combination with Beep Volume and
Beep Frequency to define beeps according to operator preference and
work environment.
Good Read Beep Number
Establishes the number of beeps used for the good read beep: one,
two, or none.
Good Read Beep Timing
Sets the good read beep to occur either before or after successfully
transmitting data.
Good Read LED Duration
Sets the amount of time the green Status light stays on after a good
read. You can set Good Read LED Duration to a value from 0 (off) to
5110 ms. When the Status light is on due to a long duration setting,
the SR61T can still read new bar codes and receive commands.
GS1 Composite
Enables or disables GS1 Composite symbology. A GS1 Composite
symbol consists of a linear component (encoding the item’s primary
identification) associated with an adjacent 2D Composite
Component (encoding supplementary data, such as a batch number
or expiration date). The Composite symbol always includes a linear
component to ensure that the primary identification is readable by all
scanning technologies, and so that 2D imagers can use the linear
component as a finder pattern for the adjacent 2D Composite
Component.
48
SR61T Tethered Scanner User’s Guide
Chapter 4 — Configuration Command Reference
GS1 DataBar Expanded
Enables or disables decoding of GS1 DataBar Expanded. GS1 DataBar
Expanded is an alphanumeric symbology that can read GS1 DataBar
limited and stacked bar code labels. It is a member of the GS1
DataBar symbology family.
GS1 DataBar Limited
Enables or disables decoding of GS1 DataBar Limited. GS1 DataBar
Limited is a numeric symbology that does not read stacked bar code
labels. It is a member of the GS1 DataBar symbology family.
GS1 DataBar Omni-Directional
Enables or disables decoding of GS1 DataBar omni-directional 1D or
stacked 2D codes. GS1 Databar omni-directional is a numeric
symbology that can read stacked omni-directional bar code labels. It is
a member of the GS1 DataBar symbology family.
Note: To read GS1 DataBar omni-directional stacked 2D codes, GS1
DataBar Expanded or GS1 DataBar Limited must also be enabled.
Hardware/Software Protocol Timeout
Sets the Hardware/Software Protocol Timeout for all supported RS232 protocols. The hardware/software protocol is the maximum
length of time that the SR61T waits for a response from a host before
attempting to resent data. You can set the Hardware/Software
Protocol Timeout to a value from 0 to 2550 ms.
Inter-Character Delay
Adds a delay between each character transmitted to the host so that
information transmission is not too fast for the host. You can set
Inter-Character Delay to a value from 0 to 999 ms.
SR61T Tethered Scanner User’s Guide
49
Chapter 4 — Configuration Command Reference
Interleaved 2 of 5
Enables or disables decoding of Interleaved 2 of 5 symbology.
Interleaved 2 of 5 is a high-density, self-checking, continuous numeric
symbology mainly used in inventory distribution and the automobile
industry.
Inter-Message Delay
Adds a delay between each bar code transmitted to the host to avoid
losing information. You can set Inter-Message Delay to value from 0
to 999 ms.
ISCP Activation
The Intermec Scanner Control Protocol (ISCP) is a secure structured
protocol using a frame format to send and receive messages via an RS232 port between an Intermec scanner and a host system. ISCP allows
you to easily configure, retrieve information from or control your
scanner directly from the host system.
Japan Post
SR61TA (area imager) and SR61TE (near-far range area imager) only.
Enables or disables decoding of Japan Post 4-state code symbology.
Japan Post is a simple and efficient postal bar coding scheme.
Keyboard Selection
Selects the keyboard you are using with your terminal or cash register.
For help, see “International Keyboard Parameters” on page 17.
LRC
A feature of the Configurable RS-232 Protocol. The scanner appends
the Longitudinal Redundancy Check , which is two characters, to the
end of the data. The LRC characters are calculated by XOR’ing the hex
values of the first two ASCII characters, and then XOR’ing the results
with the next character. This pattern is repeated for all data
characters.
50
SR61T Tethered Scanner User’s Guide
Chapter 4 — Configuration Command Reference
Matrix 2 of 5
Enables or disables decoding of Matrix 2 of 5 symbology. Matrix 2 of 5
is a discrete bar code derived from Code 11.
China Post is available as part of the Matrix 2 of 5 symbology start/
stop code. China Post encodes 11 digits with no check digit and has
unique start and stop patterns.
Maxicode
SR61TA (area imager) and SR61TE (near-far range area imager) only.
Enables or disables decoding of Maxicode symbology. Maxicode is a
fixed 2D symbology that contains an array of hexagons arranged
around a circular pattern. Maxicode is mostly used in package sorting
and tracking applications.
Micro PDF417
Enables or disables decoding of Micro PDF417 symbology. Micro
PDF417 is a multi-row symbology based on PDF417, designed to
maximize area efficiency for applications that do not need the
maximum data capacity of PDF417. Micro PDF417 contains a limited
set of symbol sizes that each includes a fixed level of error correction.
MSI
Enables or disables decoding of MSI symbology. MSI code is similar
to Plessey code in that it includes a start pattern, data characters, one
or two check digits, and a stop pattern.
NAK
A feature of the Configurable RS-232 Protocol. The scanner sends
data to the host. If the host does not like the data then the host must
send a NAK before the hw/sw timeout period expires. If the scanner
receives a NAK from the host then the scanner resends the data. The
scanner resends the data three times.
Override Caps Lock Key
Enables or disables the Override Caps Lock Key. When enabled, the
uppercase or lowercase state of the data is preserved.
SR61T Tethered Scanner User’s Guide
51
Chapter 4 — Configuration Command Reference
Parity
Sets the parity for communications. You can set Parity to none, even,
or odd.
PDF417
Enables or disables decoding of PDF417 symbology. The PDF417
symbology is a stacked 2D symbology that allows you to scan across
rows of code. Each row consists of start/stop characters, row
identifiers, and symbol characters (which consist of four bars and
four spaces each and contain the actual data). This symbology uses
error-correction symbol characters appended at the end to recover
loss of data.
Macro PDF417, a feature of PDF417, extends the capability of
PDF417 by allowing up to 99,999 PDF417 symbols to be used to store
data. The symbols are concatenated as they are scanned and can be
scanned in any order.
Planet
SR61TA (area imager) and SR61TE (near-far range area imager) only.
Enables or disables decoding of Planet symbology. The United States
Postal Service (USPS) uses a combination of two tracking numbers
(the Postnet code and Planet code) to track a customer’s piece of mail.
A Planet symbol has 12 or 14 digits.
Plessey
Enables or disables decoding of Plessey symbology. Plessey code is
pulse-width modulated like most other bar codes and includes a start
character, data characters, an eight-bit cyclic check digit, a
termination bar, and usually a reverse start character. The code is
continuous and not self-checking. You need to configure two
parameters for Plessey code: Start Code and Check Digit.
Postamble
Sets the postamble that is appended to any data you scan. Common
postambles include cursor controls such as a tab or a carriage return
line feed. You can set up to 20 ASCII characters for Postamble.
52
SR61T Tethered Scanner User’s Guide
Chapter 4 — Configuration Command Reference
Postnet
SR61TA (area imager) and SR61TE (near-far range area imager) only.
Enables or disables decoding of Postal Numeric Encoding Technique
(Postnet) symbology. The Postnet bar code was invented by the United
States Postal Service (USPS) to encode ZIP information. Enabling
your letter printing system as Postnet-capable allows you to receive a
discount on postage. The U.S.A. delivery address coding can be of
three forms (1) 5-digit ZIP; (2) 5-digit ZIP + 4 code (3) 11-digit delivery
point code. So a valid Postnet bar code contains either 32 bars, 52 bars
or 62 bars. Postnet is a numeric symbology. Different from most other
symbologies, Postnet has requirements to the actual bar height and
width. The information is encoded in the height and has nothing to
do with the spaces.
Preamble
Sets the preamble that precedes any data you scan. Common
preambles include a data location number or an operator number.
You can set Preamble to up to 20 ASCII characters.
Predefined Security Levels
Defines the security level to use when decoding bar codes. When you
select a lower decode security level, the SR61T can decode bar codes
with poorer print quality.
QR Code
SR61TA (area imager) and SR61TE (near-far range area imager) only.
Enables or disables decoding of QR Code symbology. QR Code is a 2D
matrix symbology containing dark and light square data modules.
Sensor Optimization
SR61TV (linear imager) only. Sets the linear imager configuration for
the type of bar code being scanned. If you are going to scan only
standard 1D bar codes or only stacked 2D bar codes, you can set
Sensor Optimization to 1D or 2D for optimal imager performance.
SR61T Tethered Scanner User’s Guide
53
Chapter 4 — Configuration Command Reference
Setup Beep
Enables or disables the setup beep. When you successfully scan
a configuration bar code, you hear the setup beep, and the
configuration of the SR61T is changed.
Special Keys Interpretation
A data transmission setting that allows the SR61T to transmit special
characters that have been encoded in a bar code. For example, if
special keys interpretation is enabled, the character, “.A” is
transmitted as “Delete” to the host computer.
Stacked Code Crackle
SR61TV (linear imager) and SR61TL (laser scanner) only. Enables or
disables the crackle sound when you scan a stacked (2D) bar code.
Standard 2 of 5
Enables or disables decoding of Standard 2 of 5 symbology. Standard
2 of 5 is a low-density numeric symbology that encodes all
information in the bars separated by fixed-width spaces. Standard 2
of 5 is used in warehouse sorting, photofinishing, and airline
ticketing.
Stop Bits
Sets the number of stop bits for communications. You can set Stop
Bits to 1 or 2.
54
SR61T Tethered Scanner User’s Guide
Chapter 4 — Configuration Command Reference
Symbology Identifier
Symbology identifiers allow you to indicate the type of data being
sent by prepending an identifier. You can prepend one of the
following types of character strings to identify which symbology the
data is using.
Symbology Identifier Options
Character String
Descriptions
AIM identifier
The AIM Standard for symbology identifiers consists
of a three-character structure indicating the symbology
and the optional features of the symbology. For more
information about the AIM Standard for symbology
identifiers, refer to the AIM ISO/IEC Standard.
User-defined
symbology
identifier (UDSI)
The user-defined symbology identifier (UDSI) is one to
four ASCII characters in length. You can configure
user-defined symbology identifiers to assign custom
identifier strings to the bar code symbologies.
Code mark
Enables the code mark symbology identifier for all
symbologies.
Telepen
Enables or disables decoding of Telepen symbology. Telepen is the
only symbology to directly represent the full ASCII character set
without shift characters. Considered extremely secure, Telepen has
negligible risk of misreads and a double-density numeric only mode.
Timeout Between Different Consecutive Codes
This command prevents the scanner from decoding unwanted bar
codes on the same label. The scanner invalidates a second bar code
read if it occurs before the timeout expires. Use this command when
consecutively scanning bar codes that contain different data, as
opposed to the Timeout Between Identical Consecutive Codes
command.
You can set Timeout Between Different Consecutive Codes to a value
from 0 to 2550 ms.
SR61T Tethered Scanner User’s Guide
55
Chapter 4 — Configuration Command Reference
Timeout Between Identical Consecutive Codes
This command prevents the same bar code from being decoded more
than once. If you want to decode the same bar code twice, you must
wait until the end of the timeout before scanning it again. Use this
command when consecutively scanning bar codes with identical data,
as opposed to the Timeout Between Different Consecutive Codes
command.
You can set Timeout Between Identical Consecutive Codes to a value
from 0 to 2550 ms.
TLC 39
TLC 39 is a composite symbology designed for the
Telecommunications Industry. TLC 39 combines a Code 39 symbol
that encodes a part number (for items such as plug-in boards at
central switching stations) with a linked MicroPDF417 symbol that
encodes a serial number and other optional information.
The first six characters must be numeric and include the ECI number.
The seventh character is a delimiter between the linear data portion
and the composite data portion, typically a comma, although other
delimiters are allowed. The next piece of data is a mandatory unique
Serial Number.
There can be other data fields after the Serial Number, usually either
AppIDs or DataIDs, which are governed by whether or not there are
alpha characters in the serial number. Country Of Origin is another
typical data field included in this symbology.
Transmission Frame Size
Controls the amount of data sent to the computer by setting the
length of the longest frame the host can receive. You can set the
transmission frame size to a value from 32 to 5120.
56
SR61T Tethered Scanner User’s Guide
Chapter 4 — Configuration Command Reference
Trigger Mode
Trigger mode allows you to set different types of triggering options
for the scan engine. For more information, see the next table.
Trigger Mode Options
Mode
Description
Continuous
When you pull the trigger, the red scanner beam turns
and stays on. When you pull the trigger a second time, the
scanner beam turns off. Simply releasing the trigger does
not turn off the scanner.
Level
When you pull the trigger, the red scanner beam turns on
and stays on until you release the trigger or until the
SR61T successfully decodes a bar code.
Pulse
When you pull the trigger, the red scanner beam turns on.
The scanner remains on until the scanner successfully
decodes a bar code or the Trigger Timeout period is
reached.
Flashing
When you pull the trigger, the red scanner beam turns on
and the SR61T checks for a bar code to read. The scanner
starts flashing when the Trigger Timeout period is
reached. When the SR61T finds and reads a bar code, it
resets the Trigger Timeout period. If you pull the trigger a
second time, the scanner beam turns off.
Autostand
Autostand mode allows you to switch between level mode
and flashing mode. The first time you pull the trigger, the
scanner beam turns on and the scanner is in flashing
mode. Switch to level mode by pulling the trigger again.
When you release the trigger, the scanning beam goes off
and stays off until the trigger timeout expires and it
resumes flashing.
Aim
Aim triggering allows you to turn on the scanner and aim
the red scanner beam without causing a decode. When
you release the trigger, the aiming beam stays on until the
scanner successfully decodes a bar code.
Trigger Timeout
Sets the trigger timeout for the Trigger Mode command. You can set
trigger timeout from 1 to 4095 seconds.
SR61T Tethered Scanner User’s Guide
57
Chapter 4 — Configuration Command Reference
Turn Off After Good Read
Sets how the SR61T operates in level and pulse trigger modes.
Turn Off After Good Read Options
Trigger Mode
Turn Off After
Good Read
Level
Enabled
The SR61T scanner beam turns off after
it successfully reads a bar code.
Level
Disabled
The SR61T scanner beam stays on until
you release the Scan button.
Pulse
Enabled
The SR61T scanner beam turns off after
it successfully reads a bar code.
Pulse
Disabled
The SR61T scanner beam stays on until
the Trigger Timeout period is reached.
SR61T Behavior
Vibrate Alert
Enables or disables the vibrate alert. When Vibrate Alert is enabled,
the scanner vibrates when you scan a valid bar code.
Vibrate Alert Duration
Sets the amount of time that the vibrate alert remains on. You can set
Vibrate Alert Duration to a value from 0 to 2550 ms.
58
SR61T Tethered Scanner User’s Guide
A
Specifications and Accessories
59
Appendix — Specifications and Accessories
Specifications
Use this section to find technical information about the SR61T.
Physical Dimensions
Length:
19.4 cm (7.6 in)
Height:
13.1 cm (5.2 in)
Width:
7.2 cm (2.8 in)
Weight:
320 g (11.2 oz)
Power and Electrical Specifications
Electrical rating:
x 5V, 1.7A
Temperature and Environmental Specifications
EV10
Operating:
-30°C to 50°C (-22°F to 122°F)
Storage:
-40°C to 70°C (-40°F to 158°F)
EA11
Operating:
-20°C to 60°C (-4°F to 140°F)
Storage:
-30°C to 70°C (-22°F to 158°F)
EL20
Operating:
-20°C to 55°C (-4°F to 131°F)
Storage:
-40°C to 60°C (-40°F to 140°F)
EX25
Operating:
-20°C to 60°C (-4°F to 140°F)
Storage:
-40°F to 60°C (-40°F to 158°F)
All Scan Engines
Relative humidity:
5 to 95% non-condensing
Environmental rating: IP54
60
SR61T Tethered Scanner User’s Guide
Appendix — Specifications and Accessories
Bar Code Symbologies
•
•
•
•
•
•
•
•
•
•
•
•
•
•
•
•
•
Australian Post*
Aztec*
BPO*
Canada Post*
Codabar
Codablock A
Codablock F
Code 11
Code 39
Code 93/93i
Code 128 / GS1-128
DataMatrix*
Dutch Post*
EAN/UPC
GS1 Composite
GS1 DataBar Expanded
•
•
•
•
•
•
•
•
•
•
•
•
•
•
•
•
GS1 DataBar Omni-Directional
GS1 DataBar Stacked
Interleaved 2 of 5
Japan Post*
Matrix 2 of 5
Maxicode*
Micro PDF417
MSI
PDF417
Planet*
Plessey
Postnet*
QR Code*
Standard 2 of 5
Telepen
TLC 39
GS1 DataBar Limited
* = These symbologies are only available on the SR61TA (2D area
imager) and SR61TE (near-far range area imager).
SR61T Tethered Scanner User’s Guide
61
Appendix — Specifications and Accessories
EV10 1D Linear Imager (SR61TV)
Scan range:
up to 50 cm (19.7 in)
Scan angle:
40°
Minimum X dimension: 4 mils (0.1 mm)
Minimum Reading Distances With 0.255 cm (0.100 in) Setback
Bar Code
Symbology Contents
Density
Minimum
Distance*
Maximum
Distance
0.1 mm (4 mils)
0.125 mm (5 mils)
0.25 mm (10 mils)
0.5 mm (20 mils)
1 mm (40 mils)
11.255 cm (4.40 in)
10.255 cm (4.00 in)
6.255 cm (2.50 in)
4.255 cm (1.70 in)
7.755 cm (3.10 in)
13.745 cm (5.40 in)
16.745 cm (6.60 in)
23.745 cm (9.30 in)
30.745 cm (12.10 in)
39.745 cm (15.60 in)
EAN/UPC 120010010100
0.33 mm (13 mils)
5.455 cm (2.10 in)
25.745 cm (10.10 in)
PDF417
0.254 mm (10 mils) 10.255 cm (4.00 in)
0.381 mm (15 mils) 8.255 cm (3.20 in)
Code 39
RESO 0.100 MM
R 0.125 MM
0.25
0.5
RIMM
10 mils
15 mils
16.745 cm (6.60 in)
18.745 cm (7.40 in)
*Minimum reading distances are measured in the dark (0 lux).
62
SR61T Tethered Scanner User’s Guide
Appendix — Specifications and Accessories
0"
2"
4"
6"
8"
10"
12"
14"
16"
18"
20"
in
10"
25
8"
20
100% contrast UPC/
EAN
6"
15
4"
10
2"
5
0"
0
2"
5
4"
10
0.125 mm/
5 mil
0.25 mm/10 mil
6"
15
0.5 mm/20 mil
20
8"
1 mm/40 mil
25
10"
0
5
10
15
20
25
30
35
40
45
50
cm
Linear Imager Minimum Reading Distances: This graphic does not include the
0.255 cm (0.100 in) setback for the SR61T.
SR61T Tethered Scanner User’s Guide
63
Appendix — Specifications and Accessories
EL20 Laser Scanner (SR61TL)
Scan angle:
38 degrees
Minimum X dimension: 4 mils (0.1 mm)
Minimum Reading Distances With 0.260 cm (0.102 in) Setback
Symbology
Density
Minimum Distance*
Maximum Distance
Code 39
0.125 mm (5 mils)
0.25 mm (10 mils)
0.5 mm (20 mils)
1 mm (40 mils)
1.3 mm (51 mils)
9.760 cm (3.802 in)
7.260 cm (2.802 in)
9.260 cm (3.602 in)
10.260 cm (4.002 in)
41.260** cm (16.202 in)
18.740 cm (7.398 in)
38.740 cm (15.198 in)
79.740 cm (31.398 in)
131.740 cm (51.898 in)
149.740 cm (58.898 in)
EAN/UPC
0.33 mm (13 mils)
6.760 cm (2.702 in)
47.740 cm (18.798 in)
*Minimum reading distances are measured in the dark (0 lux).
**Depends on symbology length and scan angle.
64
SR61T Tethered Scanner User’s Guide
Appendix — Specifications and Accessories
0"
8"
16"
24"
32"
48"
40"
56"
64"
in
64"
80
56"
70
48"
60
UPC / EAN
40"
50
32"
40
24"
30
16"
20
0.125 mm
8"
10
0
0
8"
10
16"
20
30
24"
0.25 mm / 10 mils
32"
40"
40
50
0.5 mm / 20 mils
48"
60
1 mm / 40 mils
70
56"
1.3 mm / 51 mils
64"
80
cm
0
20
40
60
80
100
120
140
160
Standard Range Laser Scanner Minimum Reading Distances: This graphic
does not include the 0.260 cm (0.102 in) setback for the SR61T.
SR61T Tethered Scanner User’s Guide
65
Appendix — Specifications and Accessories
EA11 2D Area Imager (SR61TA)
Scan angles:
38.9° horizontal
25.4° vertical
45.5° diagonal
Minimum Reading Distances With 0.180 cm (0.071 in) Setback
Symbology
Density
Minimum Distance
Maximum Distance
Code 39
0.125 mm (5 mils)
0.20 mm (8 mils)
0.25 mm (10 mils)
0.5 mm (20 mils)
7.580 cm (2.971 in)
4.380 cm (1.671 in)
3.680 cm (1.471 in)
5.280 cm (2.071 in)
12.220 cm (4.729 in)
EAN/UPC
0.33 mm (13 mils)
5.180 cm (2.071 in)
29.820 cm (11.629 in)
DataMatrix
0.191 mm (7.5 mils)
0.254 mm (10 mils)
0.381 mm (15 mils)
6.680 cm (2.571 in)
5.180 cm (2.071 in)
**
16.420 cm (6.429 in)
20.80 cm (8.129 in)
27.820 cm (10.229 in)
PDF417
0.160 mm (6.6 mils)
0.254 mm (10 mils)
0.381 mm (15 mils)
6.480 cm (2.571 in)
4.880 cm (1.871 in)
5.280 cm (2.071 in)
14.020 cm (5.429 in)
21.820 cm (8.529 in)
33.620 cm (13.129 in)
*Minimum reading distances are measured in the dark (0 lux).
**Depends on symbology length and scan angle.
66
SR61T Tethered Scanner User’s Guide
Appendix — Specifications and Accessories
0"
4"
8"
12"
16"
in
10"
8"
Data Matrix 7.5 mils
6"
4"
PDF417 6.6 mils
2"
0"
2"
4"
0.125mm / 5mils
6"
0.25 mm / 10 mils
8"
100% contrast UPC EAN
10"
0.5 mm / 20 mils
cm
0
10
20
30
40
50
2D Area Imager Minimum Reading Distances: This graphic does not include
the 0.180 cm (0.071 in) setback for the SR61T.
SR61T Tethered Scanner User’s Guide
67
Appendix — Specifications and Accessories
EX25 Near-Far Range Area Imager (SR61TE)
Scan angles:
12.2° horizontal
7.8° vertical
14.4° diagonal
Light source angles:
13° horizontal
11° vertical
17° diagonal
Light source:
650 nm laser (aiming beam and auto focus)
617 nm highly visible LED (lighting system)
1D Symbologies Minimum Reading Distances With 0.325 cm (0.128) Setback
Symbology
Density
Minimum Distance
Maximum Distance
Code 39
0.1 mm (3.8 mils)
0.25 mm (10 mils)
0.5 mm (20 mils)
1 mm (40 mils)
1.3 mm (51 mils)
2.5 mm (100 mils)
18 cm (7.09 in)
18 cm (7.09 in)
19 cm (7.48 in)
40 cm (15.75 in)
100 cm (39.37 in)
130 cm (51.18 in)
32 cm (12.60 in)
69 cm (27.16 in)
110 cm (43.31 in)
220 cm (86.61 in)
310 cm (122.05 in)
430 cm (169.29 in)
EAN 100%
0.33 mm
22 cm (7.87 in)
100 cm (39.37 in)
*Minimum reading distances are measured in the dark (0 lux).
68
SR61T Tethered Scanner User’s Guide
Appendix — Specifications and Accessories
0"
16"
32"
48"
64"
80"
96 "
112"
128"
144"
160"
174"
in
80 "
200
64"
160
48"
120
100% EAN
contrast UPC
32"
100 cm
39.4"
80
16"
40
0"
0
16 "
40
0.25 mm
10 mils
32 "
48"
80
69 cm
27.2"
0.5 mm / 20 mils
110 cm
43.3"
120
220 cm
86.6"
1 mm / 40 mils
64"
160
430 cm
169.3"
2.54 mm / 100 mils
80 "
200
cm
0
40
80
120
160
200
240
280
320
360
400
440
EX25 Near-Far Range Area Imager Minimum Reading Distances: This graphic
does not include the 0.25 cm (0.098 in) setback for the SR61T.
SR61T Tethered Scanner User’s Guide
69
Appendix — Specifications and Accessories
Accessories for the SR61T
You can use these accessories (sold and ordered separately) with the
SR61T. To order accessories, contact your local Intermec sales
representative.
Stand Accessories
SR61T Desktop Stand (P/N 203-878-xxx): The desktop stand provides you with
a convenient way to store the SR61T when you are not using it.
SR61T Hands-Free Stand (P/N 203-877-xxx): The hands-free stand provides
you with a convenient way to store the SR61T when you are not using it or scan
items without having to hold your scanner.
70
SR61T Tethered Scanner User’s Guide
Appendix — Specifications and Accessories
SR61T Wall or Vehicle Mount Holder (P/N 203-876-xxx): The wall or vehicle
mount holder provides you with a convenient way to store the SR61T when you
are not using it. You can either attach the holder to a wall with screws or attach
the holder to a vehicle with tie-wraps.
Cable Accessories
USB Cable (P/N 236-182-xxx)
SR61T Tethered Scanner User’s Guide
71
Appendix — Specifications and Accessories
USB Cable With Power Jack (P/N 236-xxx-xxx (6.5 feet) or
P/N 236-xxx-xxx (12 feet) ): This cable requires an external power supply
(P/N 851-089-105) and a country-specific power cord.
RS-232 Cable (P/N 236-184-xxx (6.5 feet) or P/N 236-197-xxx (12 feet))
RS-232 Cable With Power Jack (P/N 236-185-xxx (6.5 feet) or
P/N 236-198-xxx (12 feet) ): This cable requires an external power supply
(P/N 851-089-105) and a country-specific power cord.
72
SR61T Tethered Scanner User’s Guide
Appendix — Specifications and Accessories
Keyboard Wedge Cable (P/N 236-186-xxx)
Keyboard Wedge Cable (P/N 236-187-xxx): This cable requires an external
power supply (P/N 851-089-105) and a country-specific power cord.
Y-cable (P/N 236-214-xxx)
Wand Emulation Cable (P/N 236-189-001)
SR61T Tethered Scanner User’s Guide
73
Appendix — Specifications and Accessories
Wand Emulation Cable (P/N 236-190-001)
Wand Emulation Cable (P/N 236-188-001)
Operating Settings
Scanner behavior
If you prefer the SR61T to behave similar to an older Intermec
product, you can configure the SR61T to run in the legacy scanner
mode. This changes how the lights and beeps behave.
To configure the SR61T to behave as a Legacy scanner
•
Scan the following bar code
\60\03\10\4C\00\02\40
74
SR61T Tethered Scanner User’s Guide
Appendix — Specifications and Accessories
To return the SR61T to its default behavior
•
Scan the following bar code
\60\03\10\4C\00\00\00
The following table describes the lights when SR61T is in Legacy
mode.
Legacy Scanner SR61T Light Descriptions
Light State
What it Means
Blinks green once
The SR61T successfully decoded a bar code and
sent the data to the host computer.
The SR61T successfully scanned a configuration
bar code.
Turns on and stays
red for 2 seconds
You scanned a bar code, but the data was not sent to
the host computer.
You scanned a configuration bar code and the
SR61T did not accept it.
The following table describes the beeps when SR61T is in Legacy
scanner mode.
Legacy Scanner SR61T Beep Descriptions
Beep Sequence
What it Means
Single beep
The SR61T successfully decoded a bar code or
scanned a configuration bar code.
Six beeps
Data was not successfully sent to the host
computer. A configuration bar code was not
successfully scanned.
Two beeps
The SR61T is starting up.
SR61T Tethered Scanner User’s Guide
75
Appendix — Specifications and Accessories
Wand Emulation Configuration
To configure a wand emulation cable
1 Scan one of the following bar codes:
•
To set DBP output to original code, scan
\60\02\48\43\00\00\00
•
To set DBP output to Code 39, scan
\60\02\48\43\00\02\40
•
To set DBP output to Code 128, scan
\60\02\48\43\00\05\20
2 Scan one of the following bar codes:
•
To set Logic Level During Transmission to bar=0, space=1
\60\02\4B\22\00\00\00
•
To set the Logic Level During Transmission to bar=1, space=0
\60\02\4B\22\00\02\40
76
SR61T Tethered Scanner User’s Guide
Appendix — Specifications and Accessories
•
To set Logical Signal State Outside of Transmission to quiet
zone=1
\60\02\4B\23\00\00\00
•
To set Logical Signal State Outside of Transmission to quiet
zone=0
\60\02\4B\23\00\02\40
Data Transmission Settings
The following section lists a few data transmission settings and
describes how to use them. For a full set of data transmission settings,
see www.intermec.com/EasySet.
Enabling Control Character Conversion Parameters
The following data transmission settings allows the SR61T to
transmit special characters to a host computer. For example, when
control character mode is enabled, the character “8” is transmitted as
“Backspace.” Otherwise, the character “8” is transmitted as “Ctrl + H”.
To use character control conversion you must have a keyboards
wedge.
To enable character control conversion:
•
Scan the following bar code
\60\02\53\24\00\02\40
To disable control character conversion:
•
Scan the following bar code
SR61T Tethered Scanner User’s Guide
77
Appendix — Specifications and Accessories
\60\02\53\24\00\00\00
The table below displays a list of characters you can transmit when
you have character control conversion enabled.
Control Character Conversion Table
ASCII character
Transmitted as
8
Backspace
9
Tab
13
Enter
27
Escape
Enabling Alt Mode Parameters
The following data transmission settings allow the SR61T to transmit
special characters to a host computer. For example, if Alt mode is
enabled, the character “Alt+ 0196” is interpreted as “Ä.” When Alt
mode is disabled, “Alt+0196” is transmitted as is.
To use the Alt mode, you must have a PS2/keyboard wedge.
To enable Alt mode:
•
Scan the following bar code
\60\02\53\23\00\02\40
To disable Alt mode:
•
Scan the following bar code
\60\02\53\23\00\00\00
78
SR61T Tethered Scanner User’s Guide
Appendix — Specifications and Accessories
The ASCII character table below displays a few values you may
transmit to a host computer when Alt mode is enabled. To see a full
list, see the industry standard Alt mode table.
Alt Mode Conversion Table (selected characters only)
ASCII character
Transmitted as
Alt + 042
*
Alt + 0224
à
Alt + 0196
Ä
Alt + 0231
ç
Enabling Special Keys Interpretation Parameters
The following data transmission settings allows the SR61T to
transmit special characters that have been encoded in a bar code. For
example, if special keys interpretation is enabled, the character, “.A” is
transmitted as “Delete” to the host computer.
To use special keys interpretation you must have a PS2/keyboard
wedge interfaces.
To enable special keys interpretation
•
Scan the following bar code
\60\01\50\5F\00\02\40
To disable special keys interpretation
•
Scan the following bar code
\60\01\50\5F\00\00\00
The table below displays a list of values you may transmit to a host
computer when you have special keys interpretation enabled.
SR61T Tethered Scanner User’s Guide
79
Appendix — Specifications and Accessories
Special Characters Table
80
Character
Transmitted as
.A
DEL
.B
ENTER
.C
RETURN
.D
SEND
.E
FIELD
.F
FIELD EXIT
.G
HOME
.H
END
.I
TAB
.J
ALT
.K
BACK TAB
.L
BACKSPACE
.M
Right arrow
.N
Left arrow
.O
Up arrow
.P
Down arrow
.Q
CLEAR
.R
FIELD
.S
DUP
.T
ESC
.U
LINE FEED
.V
RESET
.W
CTRL
.X
SHIFT
0A
PF1
0B
PF2
0C
PF3
0D
PF4
0E
PF5
0F
PF6
0G
PF7
SR61T Tethered Scanner User’s Guide
Appendix — Specifications and Accessories
Special Characters Table (continued)
Character
Transmitted as
0H
PF8
0I
PF9
0J
PF10
0K
PF11
0L
PF12
0M
PF13
0N
PF14
0O
PF15
0P
PF16
0Q
PF17
0R
PF18
0S
PF19
0T
PF 20
0U
PF21
0V
PF22
0W
PF23
0X
PF24
.0
PgUp
.1
PgDN
.2
Right CTRL
.3
Right Shift
.4
Alt GR
SR61T Tethered Scanner User’s Guide
81
Appendix — Specifications and Accessories
82
SR61T Tethered Scanner User’s Guide
Worldwide Headquarters
6001 36th Avenue West
Everett, Washington 98203
U.S.A.
tel 425.348.2600
fax 425.355.9551
www.intermec.com
© 2009 Intermec Technologies
Corporation. All rights reserved.
SR61T Tethered Scanner User’s Guide
*934-024-002*
P/N 934-024-002