1
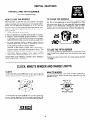
GAS
RANGES
kR
crrigcrrtor-Free2ers,
Ice
Makers.
Dishwashers
guilt-In
Ovens
and
Surface
Unit%
Ranges,
Microwave
Ovens, Compactors, Room Air Conditioners, Dehumidifiers, Automatic Washers, Clothes Dryers, Freezen, I
Your respons3bWes.. .
Proper installation
and safe use of your appliance
are your personal
“Use and Care Guide” carefully for important
use and safety information.
responsibilities.
Read this
Installation
You must be sure your appliance
is...
l
installed
and leveled
by a qualified
installer or service
technician:
l installed
in a well-ventilated
area protected
from weather;
l
properly
connected
to the correct
electric
supply and
ground. (See page 20 of this booklet
or the “Installation
Instructions”.)
l
properly
connected
to the correct gas supply. (See “lnstallation
Instructions”.)
Proper Use
You must be sure your appliance
is...
l
used only for jobs expected
of home ranges;
l
used only by people who can operate it properly;
l properly
maintained.
Contents
Safety Precautions
Basic Range ........................................
Child Safety ........................................
SurfaceCooking
...................................
Oven Cooking
......................................
Utensils ..............................................
Constant Standing Pilots ............................
Solid State Ignition (Manual Lighting)
Tri-Temp” Burner Adjustment
Basic Information
on Surface Cooking
How Surface Burners Work ...........................
Surface
Burners with Solid State Ignition
.............
Surface Burners with Pilots ...........................
Selecting Correct Flame Size
Care Information
...................................
Special
Your Model
If you have
mation ready:
Complete
5
5
5
.5-6
6
Features
8
8-9
Griddle and Fifth Burner .............................
Clock, Minute Minder, Range Lights
Basic Information
on Oven Cooking/Broiling
How Oven Works ...................................
Preheating
......................................
Copy
1
1
1
2
2
2
4
4
and Serial Numbers
a question,
or need
service,
have
10
..I 0
this infor-
10
11
12-13
14
15-17
Special Features
Continuous Cleaning
Oven ........................
Eye Level Range ...................................
Fan Noise Information
..............................
.......................
Programmed
Oven Cooking
Delay Cook and Hold ..............................
Installation
and Service information
Installation
.......................................
Nameplate
.......................................
Disconnecting
Electrical Power ...................
Pressure Regulators
...............................
If You Need Service or Assistance
1. Before Calling for Assistance
....................
2. If You Need Assistance
..........................
3. If You Need Service .............................
4. If You Have a Problem ...........................
Here
Model and Serial Numbers from the nameplate. (See page 20 for location.)
2. Purchase or installation
date from your sales slip.
Copy this information
in these spaces. Keep this book,
your warranty, and the sales slip together
in a handy place,
1.
...........................
Low Temp Oven Setting
Roasting
Hints ....................................
Baking
Hints
..................................
Broiling
Hints .....................................
Care Information
..............................
MODEL NUMBER
SERIAL NUMBER
PURCHASE/INSTALLATION
SERVICE COMPANY
DATE
AND PHONE NUMBER
18
18
18
19
19
20
20
20
20
21
21
21
21
SAFETY PRECAUTIONS
Read all instructions
BASIC
l
l
l
RANGE
before using this appliance
SAFETY
CAUTION:
Do not store
items of interest to children
in cabinets above a range, on
the backguard,
or backsplash of a range. Children
climbing
on the range to
reach items could be seriously injured.
Do not store combustible
materials, gasoline or other
flammable vapors and liquids near a range.
If a range is installed neara window, properprecautions
should be taken to prevent curtains from blowing over
burners creating a FIRE HAZARD.
The range should not be
used as a space heater to
heat or warm a room. This
instruction is based on safety
considerations,
to prevent
potential hazards and to prevent damage to range.
l
l
l
l
l
The back of the range and the oven vent area become
TOO HOT TO TOUCH when the oven is in use.
BE SURE ALL RANGE PARTS ARE COOL BEFORE
TOUCHING
OR CLEANING.
CAUTION:
(For built-in wall oven only) Be careful, in
opening
oven door to avoid touching
knuckles or fingers on hot oven vent trim,
just above door handle; grasp door handle
from underneath rather than from top.
Keep range clean. If grease or spillovers are allowed to
accumulate,
they MAY IGNITE
CHILD
l
l
l
l
SAFETY
Children MUST BE TAUGHT safe range practices to
prevent possible injury. Listed below are some basic
practices we recommend you read and follow for safe
use of this gas appliance when children are present.
Do not leave children alone or unsupervised
near the
range when range is in use or is still hot.
Children
should be taught
that the range is not a toy.
They should not be allowed
to play with range controls
or other parts of the range.
Children MUST be taught that the range and utensils
on the range can be hot.
The range should not be used as a step stool to cabinets above.
Children should not be allowed to sit or stand on any
part of the range.
Let hot utensils cool in a safe place, out of reach of
small children.
GAS ODORS
l
A faint gas odor may indicate a pilot light is out. To relight pilots, follow instructions
on page 2. If a gas odor
is detected when the pilot is burning, cut off the gas
supply to the range. Call your installeror local gascompany to have the possible leak checked. NEVER USE A
MATCHOROTHERFLAMETOLOCATEAGASLEAK.
SURFACE
COOKING
SAFETY
To eliminate the hazard of reaching over hot surface
burners, cabinet storage space should not be provided
over a range. TEMPERATURES
IN STORAGE AREAS
ABOVE THE RANGE MAY BE UNSAFE FOR STORAGE OF SOME TYPES OF MATERIALS
SUCH AS
VOLATILE LIQUIDS OR AEROSOL SPRAYS.
l
A cooking utensil should be in place whenever a surface burner is turned on. The utensil will absorb heat
and prevent possible damage to the grate and surface
burner. The utensil will also serve as a shield from the
burner in case any combustible
materials are nearby.
0 AVOID
REACHING
OVER
A BURNER FLAME WHILE
WEARING LOOSE FITTING
CLOTHING.
Clothes
may
ignite or may catch utensil
handles.
l
SAFETY PRECAUTIONS
If you must reach over a surface burner, turn
Use DRY sturdy pot holders. DAMP POT
MAY CAUSE BURNS FROM STEAM. Dish
other substitutes
are not recommended
for
trail across hot surface burners and ignite or
on range parts.
burner off.
HOLDERS
towels or
they may
get caught
GREASE
HOT GREASE IS FLAMMABLE.
Avoid letting grease
deposits collect around range, range hood or in vent
fan. Do not leave can of drippings around range. Let
quantitres of hot fat, used for deep fat frying, cool before
attempting to move or handle.
In the event of a grease fire, do not attempt to move pan.
Turn surface burner off and cover pan to extinguish
flame. DO NOT DOUSE FLAME WITH WATER. Use a dry
chemical type fire extinguisher,
if available, or sprinkle
heavily with baking soda.
OVEN COOKING
AND HINTS
SAFETY
PRECAUTIONS
Never reach directly into a hot oven to add or remove
cooking utensils. Rather, use DRY sturdy’ pot holders
and pull oven rack out before adding or removing utensils. Do not use DAMP pot holders because they will
cause steam burns. Dish towels or other substitutes are
not recommended as they may get caught on range parts
or ignite.
Do not use the oven as a storage area.
DO NOT HEAT AN UNOPENED
GLASS OR METAL
CONTAINER
IN THE OVEN. Pressure buildup in the
container may cause it to burst and result in serious personal harm or damage to the range.
OVEN AIR FLOW AND OVEN BURNER
FLAME APPEARANCE
Unrestricted
air flow through
the oven is necessary
for safe and proper operation of the oven burner. Do
not obstruct air intake located below broiler drawer.
The flame size and appearance of a properly adjusted
oven burner should look like this illustration.
GENERAL SAFETY PRECAUTIONS
HINTS FOR COOKING UTENSILS
AND
Choose pans that are easily grasped with handles that
stay cool. Avoid using pans that are unstable, warped,
or easily tipped. If pan handles twist and cannot be
tightened, discard them. Pans that are too heavy to move
easily when filled with food may also be a hazard.
Be sure utensil is large enough to properly contain food
and avoid boilovers. Pan size is especially important in
deep fat frying. Be certain pan is large enough to accommodate volume of food that is to be added and for the
bubble action of fat. NEVER LEAVE A DEEP FAT FRYING OPERATION UNATTENDED.
Always turn pan handles to the side or back of the range,
not out into the room where they are easily hit or reached
by small children.
Never leave a pan unattended when using a high flame
setting. Only use a high setting to bring liquids to a boil
or begin cooking, then REDUCE to a lower flame setting
to continue the cooking operation.
Never use a high
flame setting for extended cooking. REMEMBER: Food
will not cook any faster when more than the amount of
heat needed to maintain a gentle boil is used.
PLASTICS
Many plastics are vulnerable to heat. Keep plastics away
from parts of the range that may become warm or hot.
Follow manufacturer’s
directions for oven cooking bags
or browning bags.
ALUMINUM
FOIL
Use aluminum foil ONLY as instructed on page 12 in this
booklet. Improper use may cause damage to the range
and may affect cooking results.
AEROSOL
SPRAYS
Many aerosol-type
spray cans are EXPLOSIVE when
exposed to heat and may be highly flammable. Avoid
their use or storage near a hot range. Do not use aerosol
products other than spray-type oven cleaners in or near
a gas range. If used frequently
over a period of time,
ingredients
in some aerosols may cause metal parts of
the range to rust and corrode.
HOW TO LIGHT CONSTANT
STANDING
PILOTS
BROILER
PAN
Always remove soiled broiler pan from the broiler compartment after cooking for GREASE LEFT IN THE PAN
MAY BECOME HOT ENOUGH TO IGNITE. Using the
broiler compartment
for storage is not recommended.
The broiler oan should be in place when oven is in use.
EYE LEVEL OVEN
Do not use the Eye L.evel oven for cooking items that
are too heavy or bulky to handle easily, especially if considerable amounts of hot fat are involved. Removing
this type of food from the upper oven may be hazardous.
The upper Eye Level oven will either be a conventional
baking oven or a microwave oven. Please refer to the
.Use and Care Of Your New Microwave Oven Booklet
for instructions
on the microwave oven.
(This information
is NOT for ranges equipped with Solid
State Ignition.)
Be sure Oven Temperature Control and Surface Burner
Controls are OFF before lighting pilots.
Surface Burners and Griddle Pllots: Raise and support
cooktop on the metal rod. Hold a lighted match near
the pilot ports.
Lower Oven Pllot: Remove oven racks and oven bottom.
Hold a lighted match to the pilot located at the far end
of the oven burner. When pilot is lighted, replace oven
bottom and oven racks. Be sure to secure the two screws
located at the front of the oven bottom.
n
Eye Level Oven Pilot: Remove oven racks and oven bottom. Hold a lighted match to the pilot located along the
left end of the burner. The pilot flame is partially hidden
by a metal shield so it may be difficult to actually see the
flame.
Replace oven bottom and oven racks. To check oven
ignition, turn Oven Temperature Control to a low setting.
After a 45 to 60 second delay, the oven burner will ignite
if the pilot is lighted.
n
(1) If range is NOT equipped
with the Programmed Oven feature, the two screws are
located to the LEFT of the oven control on
either side of the griddle valve on the MANIFOLD PIPE.
>
HOW TO ADJUST CONSTANT
STANDING
PILOTS FOR SURFACE BURNERS ONLY
(This information
State Ignition.)
is NOT for ranges equipped
with Solid
1. Remove cooktop and Oven Temperature Control knob.
Locate top burner and pilot adjusting screw.
(a) Adjusting screw is to the LEFT of the oven control
on the MANIFOLD PIPE for all freestanding ranges
without the Programmed Oven Cooking featureor
the Griddle/Fifth
Burner feature and in the CENTER of the MANIFOLD PIPE for the Built-In Surface Unit.
(2) If a range is equipped with the Programmed
Oven feature, the griddle pilot adjusting screw
(A) is located to the LEFT of the griddle valve
on the MANIFOLD PIPE and the surface burner pilot adjusting screw (B) is located on the
UPPER RIGHT SIDE of the oven control.
(b) Adjusting screw is on the UPPER RIGHT SIDE
of the oven control for all freestanding ranges with
the Programmed Oven Cooking feature but without
the Griddle/Fifth
Burner feature.
(c) There
ranges
feature.
pilots
Burner
Insert a small screwdriver into the adjusting screw and
turn the screw to the right or left until the flame on the
pilot is %-inch in height.
are two (2) adjusting screws on 36-inch
equipped with the Griddle/Fifth
Burner
One screw adjusts the surface burner
and the other adjusts the Griddle/Fifth
pilot.
I
/
CAUTION: DO NOT TURN THE SCREW LOCATED
IN THE CENTER OF THE OVEN CONTROL STEM.
Replace cooktopand Oven Temperature Control knob.
3
HOW TO OPERATE APPLIANCE
EQUIPPED
WITH SOLID STATE IGNITION IN THE EVENT
OF A PROLONGED
POWER FAILURE
TRI-TEMP@
BURNER
ADJUSTMENT
The Tri-Tempo
burner valve has “click”
sounds to
identify the HIGH, MEDIUM and WARM settings.
To adjust the flame size:
1. Push in and turn surface burner knob to HIGH. For
ranges equipped with Solid State Ignition, turn knob
past HIGH to (START) or the light position.
If a powerfailureshould
occur, manually light the surface
burners by holding a lighted match near the surface
burner and turn the surface burner on.
Due to safety considerations,
manual lighting of the
upper Eye Level oven is NOT recommended.
To manually light oven pllot: CAUTION-OVEN
MUST
BE COOL WHEN MANUALLY LIGHTING OVEN PILOT.
If oven is warm, wait until oven cools before lighting pilot,
Open broiler compartment drawer to the stop position.
Place broiler tray and pan in lowest rack position.
Oven pilot is located on the right side of the oven
burner at the back of the oven.
Hold a lighted match and reach through the broiler
compartment to the oven pilot.
(START)
2. When burner
While holding the match near the tip of the pilot, turn
the Oven Temperature Control to the desired temperature. Immediately remove hand from broiler compartment. Burner will light after a 20 to 60 second delay.
lights, turn knob to WARM.
3. Remove knob being careful not to change the position
of the stem Grasp stem firmly and insert small blade
screwdriver into the center of the gas valve stem.
Turn the screwdriver in either direction until the flame
height is %-inch or lower in size.
Flame must be of sufficient size to maintain a STABLE
FLAME OI all burner ports.
5. Close broiler
drawer.
When cooking is finished, turn the Oven Temperature
Control to OFF. This will shut off all gas to the oven.
Whenever electrical power is off, you will have to light
the pilot manually each time you wish to use the oven.
NEVER ADJUST
SETTING.
CAUTION: IF THE OVEN BURNER DOES NOT LIGHT
WITHIN 20 TO 60 SECONDS AFTER THE PILOT IS
LIGHTED,
TURN THE OVEN TEMPERATURE
CONTROL TO OFF AND WAIT FOR POWER TO BE RESTORED. DO NOT ATTEMPT TO RELIGHT THE PILOT
AGAIN. If oven does not function
properly when the
power is restored, call a serviceman to determine the
problem.
THE FLAME
MEDIUM
4
SIZE
AT THE MEDIUM
SURFACE
HOW A SURFACE
BURNER
COOKING
WORKS
INFORMATION
HOW TO OPERATE
WITH PILOTS
When the surface burner valve (A) is turned on, gas enters
the mixer tube or venturi (B) and comes in contact with
air. This air/gas mixture flows to the burner head (C) and
is lighted by either the flame from the pilot or a spark from
the solid state iqnitor (D).
SURFACE
BURNERS
Your range or built-in surface unit is equipped with one
of two types of surface burner valves. They can be identified by the markings on the control. One type of burner
has HIGH (START) and OFF printed on the control. This
is called an EFFLEX@ burner. The other type of burner
has HIGH (START), MEDIUM and WARM printed on
the control with “click” sounds to identify these 3 settings. This is called a Tri-Temp@ burner.
To operate elther type of burner: Push in and turn control to the left to HIGH (START). When the burner lights,
turn control back to the desired flame size.
If the flame should go out during a cooking operation,
turn the burner off.lF GAS HAS ACCUMULATED
AND
A STRONG GAS ODOR IS DETECTED, WAIT 5 MINUTES FOR THE GAS ODOR TO DISAPPEAR BEFORE
RELIGHTING
BURNER. To relight burner, push in and
turn knob to HIGH.
SELECTING
CORRECT
FLAME SIZE
Use the HIGH flame setting to quickly bring foods to a
boil or to begin a cooking operation. Then reduce to a
lower setting to continue cooking. Never leave food unattended over a high flame setting.
A properly adjusted burner with clean ports will light
within a few seconds The cone-shaped
flame will be
clear blue in color with a clearly defined inner cone.
There should be no trace of yellow in the flame. A yellow
flame indicates an improper mixture of air and gas. This
wastes fuel so have a serviceman adjust the air/gas mixture if a yellow flame ever occurs.
HIGH
HOW TO OPERATE SURFACE
WITH SOLID STATE IGNITION
(START)
BURNERS
Solid State Ignition eliminates the pilots. Rangesor builtin surface units equipped with solid state ignition operate
the same as conventional
ranges.
To operate this type burner:
Push in and turn control to the left past HIGH to the
(START) position. This is the light position. The clicking sound indicates that the ignitor is producing
sparks to light the surface burner. Sometimes you
may notice some static interference with your radio,
television or stereo system when the ignitor is producing sparks.
When the burner lights, turn the control back to the
desired setting. If selecting a high flame setting, adjust the knob until there is no clicking sound. The
clicking sound will stop and the ignitor will turn off.
Do not leave the control in the (START) position once
the burner lights.
If the flame should go out during a cooking operation,
turn the burner off. IF GAS HAS ACCUMULATED
AND A STRONG GAS ODOR IS DETECTED, WAIT
5 MINUTES FOR THE GAS ODOR TO DISAPPEAR
BEFORE RELIGHTING
BURNER.
See page 4 for instructions
on manually lighting the surface burners in the event of a power failure.
MEDIUM is used to continue a cooking operation. Food
will not cook any faster when a higher flame setting is
used than that needed to maintain a gentle boil. Remember, water boils at the same temperature whether boiling
gently or vigorously.
Use WARM to keep food at serving temperatures without
further cooking. You may find that some cooking may
take place if the cooking utensil is covered.
I
5
FACTORS TO CONSIDER WHEN
SELECTING
CORRECT FLAME SIZE
SIZE OF COOKING UTENSIL: FLAME SIZE SHOULD
BE ADJUSTED SO IT DOES NOT EXTEND BEYOND
THE EDGE OF THE COOKING UTENSIL FOR YOUR
PERSONAL
SAFETY AND TO PREVENT POSSIBLE
DAMAGE TO CABINETS ABOVE RANGE.
Adjusting the size of the flame to fit the size of the cooking utensil also helps to save fuel.
UTENSIL
MATERIALS:
Stainless
steel, porcelain,
enamelware,
glass, glass ceramic and Teflon@-coated
utensils designed for surface cooking usually heat slowly
and conduct heat poorly when a large flame size is used.
Adjust the flame size to extend only halfway between
center and edge of the utensil bottom for better cooking results.
Aluminum utensils conduct heat more evenly; therefore,
a slightly larger flame size can be used. The flame can
be adjusted so it comes to the edge of the utensil, The
flame should NEVER be adjusted so that it extends
beyond the bottom of the utensil.
COVERED UTENSILS: If the utensil is covered less fuel
will be needed; therefore, a lower flame size can be used.
REMEMBER: Food will not cook any faster when more
than the amount of heat needed to maintain a gentle
boil is used. See page 2 for additional information
on
the safe use of utensils.
CARE INFORMATION
Be sure the range or built-in surface unit is cool before
removing any parts or cleaning the unit. Any parts removed in the cleaning should be replaced correctly.
COOKTOP
AND GRATES
To remove cooktop: First remove
pans. Then grasp front two burner
can be completely removed or can
located across the center of the
units do not have a metal support
completely removed.)
To clean burner box: 1) Remove cooktop or support
cooktop on metal rod. 2) The burner box, located under
the cooktop should be cleaned frequently with soap and
water to remove spillovers. If soil is not removed and is
allowed to accumulate, it may damage the finish. 3) If desired, an application
of appliance wax can be used to
protect the finish of the burner box.
grates and reflector
wells and lift up.Top
rest on the metal rod
burner box. (Built-in
rod nor can they be
To replace cooktop If completely
removed: Insert two
tabs on the back of the cooktop into the slots on the
back of the range. Lower into place applying pressure
at the front edges to secure top to the range.
To clean porclain-enamel
cooktop: 1) When surface is
cool, clean with warm soapy water. TO PREVENT POSSIBLE CRACKING AND CHIPPING, NEVER WIPE OFF
A WARM OR HOT ENAMEL SURFACE WITH A DAMP
CLOTH. 2) Porcelain-enamel
is a glass fused on metal
and will crack or chip with misuse. All spillovers, especially acid spillovers, should be wiped up immediately with
a dry cloth. 3) Do not use abrasive or caustic cleaning
agents on exterior finish of range.
To clean grates: Grates are made of porcelain-coated
steel and can be cleaned with warm soapy water or in
the dishwasher. Use a soap-filled scouring pad for stubborn soil.
To clean control knobs: 1) Remove knobs by gently pullling off. 2) Clean with warm soapy water. 2) Do not use
abrasive cleaning agents for they will scratch the finish
and remove markings. 4) Replace knobs.
6
SURFACE
BURNERS
DISCOLORATION
WILL ALSO OCCUR
THE SURFACE BURNER WHEN:
Shipping screws are used to secure each surface burner
to the range during transportation.
Once range is installed, the screws should be removed.
1. The burner is turned on without a pan In place to
absorb heat. This is especially critical when the flame
is adjusted to the MEDIUM flame setting.
2. Incorrect cleaning agents are used. Some cleaning
agents can scratch or dull the aluminum finish of the
burner head.
3. Cleaned in the dishwasher.
Dishwasher
detergents
are harsh and caustic and will permanently
dull the
aluminum finish.
4. Boilovers occur when the flame is adjusted to a HIGH
flame setting.
5. Cleaning is infrequent
or soil is allowed to burn on
before cleaning.
To clean surface burners: Clean burners in warm soapy
water after each use or as they become soiled. Remove
stubborn soil by scouring with a nonabrasive
plastic
scouring pad such as Tuffy@ and a paste of baking soda
and water.
Clean ports with a straight pin. Do not use a wooden
toothpick or other objects that might enlargen or break
off and clog a port. Both burner ignition and cooking
results will be affected if a port is enlargened or clogged.
The following
cleaning
agents ARE NOT RECOMMENDED FOR CLEANING
SURFACE BURNERS for
they will permanently
damage the finish:
Caustic
cleaners such as oven cleaners, steel wool, abrasive
cleaning or scouring agents, dishwasher
detergent or
metal polishes.
After cleaning, burners can be dried in the oven set at
140°F. (SO’C.). CAUTION:
BURNERS AND BURNER
TUBES MUST BE DRY BEFORE USE.
To remove burner: 1) Remove or support cooktop with
metal rod. 2) Grasp burner head and tilt to release tab
from slot near pilot. 3) Lift burner up and toward rear of
range until burner is released.
To replace burner: 1) Insert the air shutter end of the
burner over the hood and lower burner into place. 2) Insert tab on burner into slot in burner support located in
burner box. If burner is not replaced correctly, cooking
results will be affected, burner will not operate properly
and a safety hazard could occur. 3) Replace cooktop.
Screws are for shipping only.
Remove before using burner.
A
A natural dulling of the surface burner’s aluminum finish
should be expected. This is a permanent dulling and will
occur over a period of time and with continued usage.
Cleaning
practices may improve the appearance
but
will not completely restore the finish to its original luster.
MAINTENANCE
TO
AND SERVICE
1. Always keep appliance area clear and free from combustible materials, gasoline and other flammable vapors and liquids.
2. Do not obstruct or restrict the flow of combustion and
ventilation
air.
4. Cleaning procedures for various appliance parts are
given along with the description and use instructions
for those parts in this book (see particularly
pages 6,
7 above, 8, 15, 16, the general cleaning chart on page
17, and page 18.) The frequency of cleaning will vary
depending on use.
5. Lubrication
of moving parts should not normally be
requiredwiththeoneexceptionoftheovendoorhinges
which may occasionally
require a tiny drop of household oil at the pivot point. Lubricate these pointssparingly only when and if the normal sounds of opening
or closing of door changes significantly.
6. Replacement
parts may be obtained through your
local dealer (see inside back cover.)
3. The visual check and adjustment of pilot flames made
per the printed installation
instruction
sheets should
be repeated whenever service has been interrupted or
upon relighting
pilots. Normally the pilot flame and
surface and oven burner flames should not require
adjustment
beyond those made at installation.
It is
good preventive maintenance,
however, to occasionally check pilot’s flame size and burner flame patterns.
Should you detect significant variation, service may be
needed. (See inside back cover for specific checks you
can make.)
7
SPECIAL
GRIDDLE
AND FIFTH
(%-inch
models
BURNER
only)
TO CLEAN
HOW TO USE THE GRIDDLE
Before griddle is used the first time, season it by lightly
rubbing surface with a small amount of unsalted shortening. Do not use butter, margarine or oil for they will
discolor finish Do not usesharp metal instruments, overheat or suddenly change temperatures
for these will
damage finish.
1. Remove porcelain griddle cover.
2. Be sure grease cup, located under griddle, is in place.
griddle correctly.
A mirror
3. Position Teflon@-coated
is provided just under the thumb hole on the griddle.
Use the mirror to view flame for flame size adjustment.
4 For even cooking results, preheat griddle using a
medium flame size for about 5 minutes or until the
entire cooking surface is evenly heated.
Sprinkle a few drops of water over the surface; if
properly heated, the water will bead and “dance.” The
water will sizzle and steam If griddle is not hot enough.
5. CAUTION:
Remove griddle
cover before igniting
burner when using the griddle or fifth burner.
NEVER REPLACE GRIDDLE COVER UNTIL GRIDDLE
HAS COMPLETELY
COOLED.
CLOCK,
FEATURES
MINUTE
MINDER
CLOCK
To set dial-type clock, push in and turn Minute Minder
knob to the left to the correct time-of-day. Besure Minute
Minder hand is on OFF after setting clock.
THE GRIDDLE
Allow griddle to cool. Wash in hot soapy water, rinse and
dry. Do not use abrasives or scouring powders for they
will scratch the finish. Do not clean the Teflon@-coated
griddle in the dishwasher.
Detergents
used for dishwashers are too strong and will remove the seasoning.
TO USE THE FIFTH BURNER
To convert griddle into the Fifth Burner, remove the cover
and griddle and replace with the porcelain insert and
grate.
Follow the same instructions
for using surface burners
on page 5.
AND RANGE
MINUTE
LIGHTS
MINDER
To set Minute Minder, turn knob in either direction to
the desired time. When the bell rings, manually turn the
Minder to OFF.
30
MINUTE
To set digrtal-type clock, push In and turn Minute Minder
knob in either direction to the correct time-of-day.
Be
sure Minute Minder hand is on OFF after setting clock.
MINOER
RANGE
EYE LEVEL RANGE WITH LIGHTED
BACKSPLASH
LIGHTS
Surface Lights: Your range or built-in unit may be
equipped with one of the following
two types of light
switches: either a push in switch marked TOP which
you hold until the light comes on or a flip switch marked
SURFACE LIGHT
Oven Lights: Your range or built-in oven may be equipped
with one of the following two types of oven light switches:
either a push in switch marked OVEN, or a flip switch
marked OVEN LIGHT.
To Replace Oven Light: NEVER REPLACE BULB UNTIL
BOTH THE OVEN AND BULB ARE COOL.
DISCONNECT
POWER TO RANGE. (Raise cooktop
and disconnect
DIUQ located under cooktop behind
right rear surface birner.)
Remove three screws in chrome strip at top of backsplash
glass. When removing chrome strip, use care so glass
does not fall out. Remove glass by tilting forward. Replace fluorescent tube taking care not to touch the metal
at the ends of the tube. Reverse procedure to replace
glass. Reconnect power to range.
EYE LEVEL RANGE
BACKSPLASH
WITH PORCELAIN
Fluorescent
tube is behind a metal trim strip located
across the top of the backsplash.
Replace fluorescent
tube taking care not to touch the metal at the ends of
the tube. Reconnect power to range.
Remove bulb with a dry pot holder IO prevent possible
harm to hands. If bulb should break, use a pot holder
to protect hands and very carefully remove bulb. If
bulb breaks at base, hzve a serviceman remove bulb.
Replace with a 40-watt A?PLIANCE bulb. Reconnect
power to range and replace cooktop.
REPLACING
RANGE
LIGHTS
Be sure range parts and bulb are cool. DISCONNECT
POWER TO RANGE (see above or page 20) before replacing any light bulb or fluorescent
tube.
SURFACE
LIGHTS
BUILT-IN
Grasp top trim at each end with thumbs under edge. Lift
trim up and back. Replace fluorescent tube taking care
not to touch the metal at the ends of the tube. Snap top
trim back into place. Reconnect power to range.
OVEN
Remove two phillips screws located near top of each
side trim strip. Lift top trim strip up and remove. Remove
all knobs. Remove metal rings around light switches by
unscrewing
counter clockwise.
Remove washers. Tilt
top of glass slightly forward, lift straight up and off control panel. Replace fluorescent
tube taking care not to
touch the metal at the ends of the tube. Reverse procedure to reinstall panel. Reconnect power to range.
t--
9
--
4
BASIC
INFORMATION
ON OVEN COOKING
AND BROILING
HOW THE OVEN WORKS
PREHEATING
Wh’en the Oven Temperature Control is turned to a desired setting, there will be a 45 to 60 second delay before the oven burner lights. This delay is for safety considerations. When the oven reaches the temperature set
on the Oven Temperature
Control, the oven burner will
automatically
cycle on and off to maintain the preset
temperature.
If the Oven Temperature Control is turned
to BROIL, the oven burner will remain on for most normal
broiling operations. The burner will cycle on and off for
extended broiling operations.
Preheating is necessary only for baking operations;
it
is not necessary to preheat the oven for broiling or roasting. To preheat, turn the Oven Temperature Control to
the desired temperature setting. Do not select a higher
setting, for the oven will not preheat any faster. Allow
about 10 minutes for the oven to heat before placing
food in the oven.
LOW TEMP OVEN SETTING
The Low Temp Setting (140 to 200°F.) can be used to
keep foods at serving temperatures without further cooking, for thawing frozen foods, refreshing baked goods
or for warming plates or serving dishes. Be sure utensils
are ovenproof. Do not warm silver. silverplate or plastics
in the oven. Food is more palatable and nutritious if kept
warm no ionger than 1% to 2 hours.
HOW OVEN EQUIPPED WITH SOLID
STATE IGNITION WORKS
Ovens equipped with Solid state Ignition operate the
same as a conventional
gas oven. When the Oven Temperature Control is turned to a desired setting, you can
hear clicking sounds for the first 5 to 10 seconds until
the ignitor lights the oven pilot. The pilot, in turn, lights
the oven burner. When the Oven Temperature Control is
turned off, both the oven pilot and burner go out. On
some models, you can hear a click sound from the igniter
when the Oven Temperature Control !s turned off. Occasional!:., you may notice borne statrc interference
with
your radio, televislorr or stereo system when the ignitor
is producing spar hs.
See page 4 for instrutions on manually lighting the oven
in the event of a prolonged power failure.
~-
If the oven was not in use and is cool, preheat to a Low
Temp setting for about 5 to 8 minutes.
If the oven has been set at a higher temperature or is sti;i
warm: Either reduce to a L.ow Temp setting 15 rninu7(‘+
before the end of cooking and let the oven cool with the
door closed, or reduce oven temperature after cooking
and leave the door opened for five minutes. Use caution if
small children are around the hot oven door when it is
open.
OVEN CHARACTERISTICS
Every oven has its own personal characteristics.
You
may find that the cooking times and temperatures you
were accli?romed to with your old range may alter slightly
with ync~r’ I!CW ranr!e!. Please expect some differences
with this nlsw range
OVEN TEMPERATURE
DESCRIPTION
_--.---
CONVERSION
DEGREES
FAHRENHEIT
10
(“F)
CHART
DEGREES
CENTRIGRADE
(“C)
HINTS
FOR SUCCESSFUL
ROASTNG
Roasting is the cooking of tender cuts of meat with dry
heat. No water is added nor is the cooking utensil
covered. Searing is unnecessary.
If desired, season
meat with salt and pepper.
Check weight of meat and place fat-side-up
on a rack
in a shallow roasting pan.
Arrange oven rack in one of the two bottom rack positions betore oven is turned on. Preheating is unnecessary
for roasting meats.
Meats are roasted at 325°F. except tenderloin (425” F.)
and smaller poultry (375 to 400°F.). Turn the Oven
Temperature
Control to the desired temperature.
Cooking time is determined by the weight of the meat and
the desired doneness. Use the chart given below as a
guide in determining
cooking times. The most accurate
way is with a meat thermometer.
Insert thermometer
so the tip is in the center of the thickest part of the meat
and is not touching bone or fat.
ROASTING
After cooking, remove meat from oven and let stand 15
to 20 minutes for easier carving. Rare or medium rare
meats should be removed from the oven when the internal temperature is 5 to 10” less than the final desired
temperature for meat will continue to cook slightly while
standing.
Frozen meat may be cooked in the same way as fresh
meat if the meat is thawed first. It is also possible, however, to cook meat from the frozen state. Follow the
same roasting instructions
but increase cooking time
approximately
10 to 25 minutes per pound. When using
frozen packaged meat, follow package directions. Frozen
poultry should always be thawed before cooking except
when package directions
recommend
cooking
from
the frozen state such as for frozen turkey rolls. DO NOT
REFREEZE MEATS THAT HAVE NOT BEEN COOKED
FIRST.
GUIDE
- _-.. -._-BEEF
Staririir>q
Rib
160” F. (medium)
170°F. (well done)
Rolled
23 to 25 min/lb.
27 to 30 min/lb.
Rib
20 to 22 min/lb.
Tenderloin,
Whole
140 - 170°F.
PORK LOIN
Center
Half
LAMB.
30 to 35 min/lb.
35 tn 40 min/lb.
LEG
170 - 180” F.
20 to 25 min/lb.
25 to 30 min/lb.
30 to 35 min/lb.
HINTS
FOR SUCCESSFUL
BAKING
OVEN RACKS: Arrange oven racks in the correct positions BEFORE the oven is turned on. If using only one
rack, position rack so the food is near the center of the
oven. If using both racks, allow 3 to 4 inches between
racks. The racks should be arranged so they divide the
oven in thirds,
PAN PLACEMENT: Allow 2 inches between utensils and
the oven walls. Utensils should not touch each other,
the oven walls or the oven window, on models so equipped. When using both racks for cooking, stagger
the utensils so one is neither directly over another nor
touching each other or the oven walls.
Cooking results will be affected by the use of utensils
that are too large for the oven rack, misplacement
of
utensils in the oven or placing too many utensils on an
oven rack. Incorrect placement of cooking utensils in
the oven will prevent proper oven air circulation
which
affects cooking results and oven operation.
Never place pans directly on the oven bottom.
TIMINGS:
Check the food after the minimum
time
recommended
in the recipe and continue checking at
intervals until the food is done.
Leave the oven door closed until the minimum baking
time given has elapsed, then check food. Do not be a
“peeping
Tom”. Opening the door frequently
during
cooking allows excessive heat to escape which wastes
fuel and affects baking results.
UTENSILS: To obtain good baking results, use bright
or light colored aluminum pans for cookies or biscuits
and dull or anodized aluminum pans for pies and breads.
Dark pans absorb heat and cause overbrowning.
Bake biscuits and cookies on a flat sheet or very shallow
pan. The bottom of an inverted pan may be used. If sheet
or utensil has sides, pale or light browning will occur.
For a crisp crust, use glass or dull, anodized aluminum
pie plates and bread pans.
When baking cakes in glass utensils, lower recommended temperature by 25” F. and use the recommended
cooking time in the recipe. It is not necessary to lower
temperatures
for baking pies or cooking casseroles in
glass utensils.
Use level pans. Warped ones result in uneven browning
and poorly shaped products.
Use the size pan recommended
in the recipe. As a general guide, cake pans should be filled only about twothirds full.
CORRECT USE OF ALUMINUM
FOIL: Do not place
aluminum foil directly on the oven bottom. A piece of
foil that is slightly larger than the cooking utensil can
be placed on the rack directly below the one holding
the cooking utensil.
Do not completely
cover an oven rack with foil. This
blocks air flow, affects cooking results and could be
a safety hazard.
Do not use aluminum foil directly under a cooking utensil. Foil will reflect heat away from the utensil and will
cause pie crusts to be soggy on the bottom crust or have
pale browning on the top crust.
12
COMMON
BAKING
PROBLEMS
AND WHY THEY
HAPPEN
FOOD NOT DONE AT END OF
COOKING TIME.
-Temperature
too low.
--incorrect
use of aluminum foil.
-Too
many pans on a rack.
-Oven door opened frequently.
PIE BURNS AROUND EDGE OF CRUST.
-Temperature
too high.
-Pans touching each other or the oven walls.
-Edge
of pie crust too tall.
CAKE NOT DONE IN CENTER.
-Temperature
too high.
-Pan too small.
-Pan not in center of oven.
PIE HAS SOAKED CRUST.
-Temperature
too low at start of baking.
-Filling
too juicy.
-Used shiny pans not dark or anodized pan.
CAKE UNDERSIZED.
-Too little leavening.
-Batter
overbeaten.
-Pan too large.
-Temperature
too high.
BROWNING PATTERN IS UNEVEN.
-Utensi,ls
too large.
-Utensils
are of different materials.
-Oven
racks too close to oven bottom.
-Incorrect
use of aluminum foil.
-Oven
vent may be blocked.
CAKE FALLS
-Too
much shortening,
liquid or sugar.
-Too
much leavening.
-Temperature
too low.
-Pan too small.
-Stale
baking powder.
-Oven door opened frequently.
CAKE HAS TUNNELS.
-Not enough shortening.
-0vermixing
after adding
-Used all-purpose
flour.
flour.
CAKE HIGH IN MIDDLE.
-Too much flour.
-Temperature
too high.
CAKE IS UNEVEN.
-Pans not staggered in oven, are touching
each other or the oven walls.
-Batter
uneven in pans.
-Warped
pans.
-Range
not level.
CAKE CRACKS ON TOP.
-Temperature
too high.
-Batter
overmixed.
-Too
much leavening.
BISCUITS, CAKES OR COOKIES ARE DARK ON THE
BOTTOM AND/OR ARE PALE ON TOP.
-Oven
not preheated.
-Too
many pans on one rack.
-Used
dark or heavy pans rather than shiny
pans.
-Pan too deep or too large.
-Used
incorrect rack position.
-Pan too close to oven bottom.
-Cookie
sheet too large for oven rack.
-Uneven
heat distribution
in oven-pans
blocking air circulation
or oven vent
blocked.
-Incorrect
use of aluminum foil.
-Oven
door not closed tightly or opened too
frequently.
-Oven
temperature
too low.
13
,
HINTS
FOR SUCCESSFUL
BROILING
Before broiling, trim excess fat to prevent excessive
spattering
and cut slashes around the outer edges of
the meat to prevent the meat from curling during cooking.
Food must be placed on the broiler tray in the broiler
pan to allow fat to drip to the pan below. Fat may become
hot enough to ignite if directly exposed to the flame.
Place food on a cold, ungreased broiler tray.
ings to allow fat to drip to pan below. The broiler tray
is designed to keep fat from being directly exposed to
the oven burner to eliminate possible fire hazards.
Place food in the rack position as suggested in the guide
below. If food is placed too close to the flame, overbrowning and smoking may occur. Broiling is always done with
the door closed.
Never leave a soiled broiler tray and pan in the oven after
broiling. Drippings might become hot enough to ignite
if exposed directly to the flame.
The broiler pan can be lined with aluminum foil for ease
of cleaning. If the broiler tray is lined with foil, cut open-
BROIL
FOOD
GUIDE
RACK POSITION*
DONENESS
TOTAL
COOKING
TIME
4- 7 min.
BACON
1
BEEF PATTIES
%-inch thick
2
2
3
Rare
Medium
Well Done
12-14 min.
14-16 min.
17-20 min.
STEAKS
l-inch thick
1
1
2
Rare
Medium
Well Done
12-14 min.
15-16 min.
20-24 min.
STEAKS
1%inch thick
2
2
3
Rare
Medium
Well Done
20-24 min.
25-30 min.
32-38 min.
3
(Broil at 425” F.)
Well Done
35-45 min.
CHICKEN
2%lbs.
HALVES
FISH FILLETS
l-inch thick
1
lo-13 min.
HAM SLICES
l-inch Fully Cooked
Cook-Before-Eating
1
1
lo-12 min.
20-24 min.
PORK CHOPS
l-inch thick
3
(Broil at 425” F.)
Well Done
25-30 min.
LAMB CHOPS
1%thick
2
2
Medium
Well Done
18-20 min.
20-22 min.
*Rack position
1 is the position
closest to the top of the broiler
14
compartment.
CARE INFORMATION
Be sure the range or built-in oven is cool before removing
parts for cleaning. After removing any part, be sure it
is correctly replaced.
OVEN DOOR
OVEN
There are two types of oven doors-lift
off and nonlift
off. The lift off door is identified by the two hinge slots
located behind the hinge arms on the door.
To remove lift off door: Open door to the “stop” position
(opened about 4-inches) and grasp doorwith both hands
at sides of the door. Lift up evenly, at the same angle,
until the door clears the hinges.
The oven(s) will have one of two types of finishes-either
porcelain-enamel
or the Continuous
Cleaning
Oven
finish. The porcelain-lined
oven is dark gray in color with
a smooth glass-like textured surface. The Continuous
Cleaning finish is a dark charcoal gray colorwith a rough
textured surface.
See page 18 for additional information on the Continuous
Cleaning Oven finish.
To clean a porcelain-lined
oven: Wipe acid stains immediately with a dry clbth. Clean oven walls, bottom
and door with hot soapy water. Stubborn soil can be
removed with cleansing powders, plastic pads or a paste
of baking soda and water. Do not use steel wool or other
abrasive scouring pads for they will scratch the surface.
Commercial
oven cleaners can be used but follow the
manufacturer’s
directions.
COMMERCIAL
OVEN CLEANERS
When using oven cleaners,
carefully
follow manufacturer’s directions. Wear rubber gloves to protect your
hands for oven cleaners are caustic.
Use oven cleaners on the porcelain-lined
oven only.
Never use cleaners on the oven burner, surface burners,
end panels, exterior finishes, trim parts or on the Continuous Cleaning Oven finish. These parts will be permanently damaged by the cleaner.
After using the oven cleaner, rinse oven interior and
thermostat sensing device, located at the top of the oven,
with a mild solution of vinegar and water.
To replace door: Hold door in the same position and
insert hinge openings on hinge arms. (Hinge arms are
spring mounted and will slam shut against the range if
accidentally
hit with the dool.) Lower door evenly, at
the same angle as hinge, until door is seated in the.
original position.
CAUTION: Do not attempt to open or close door from the
“stop” position until tlie door is completely
seated on
the hinges.
OVEN RACKS
All ovens are equipped with two oven racks with a safe:,
“lock-stop”
position to keep racks from coming co!r
pletely out of the oven when adding or removing foe:,
To remove rack: Be sure rack is cool. Pull rack out tI
the “lock-stop”
position, tilt up and continue pulling I! 11’
the rack is released.
To replace rack: Place rack on rack supports, tilt up 27
push to rear of oven. Pull rack out to “lock-stop”
PO:?
tion to be sure rack has been properly replaced.
To clean racks: Wash with soapy water. Remove stubborn soil with cleansing powder or a soap-filled scouring
pad. Rinse, dry and correctly replace rack in the oven.
OVEN DOOR WINDOW
Occasionally,
you may find that the window in the oven
door may fog due to moisture condensing
in the oven.
This is especially common in humid weather or when
cooking foods high in moisture. Opening the oven door
a few inches during the first few minutes of preheating
or cooking will allow moist air to escape and prevent
the window from fogging.
15
OVEN BOTTOM
LOWER BROILER
COMPARTMENT
The oven bottom is insulated to eliminate hot spots
directly above the oven burner. Eliminating the hot spots
greatly increases the baking efficiency
as well as the
cooking capacity of the oven.
To remove oven bottom: Be sure oven bottom is cool.
First remove oven racks, then loosen the two screws
located along the front of the oven bottom. Slide the
screws back to release the front of the oven bottom.
Grasp oven bottom, lift up and pull forward until rear
tabs release. Then, remove oven bottom from oven.
Store broiler tray and pan in the broiler compartment
when not in use to prevent possible scorching of the
floor under the range when the oven is in use.
To remove drawer on 30- or 364nch ranges: Be sure
broiler is cool. Firmly grasp drawer and slide out to the
first stop. Lift up and pull to the second stop. Lower
drawer to the floor, grasp rear of broiler drawer and lift up.
To remove drawer on 204nch ranges: Remove broiler
tray and pan. Pull metal clip, located in center of drawer
floor, up about 2-inches, then pull drawer out.
To clean broller compartment:
The broiler compartment
is lined with porcelain-enamel.
Follow cleaning information for porcelain-lined
ovens.
To clean broiler tray and pan: Remove pan and tray from
broiler after use. Cool, pour off grease and place a soapy
cloth over the tray and pan. Let soak to loosen soil, then
wash in hot soapy water. Use a soap-filled scouring pad
to remove stubborn soil. If desired, tray and pan can be
cleaned in the dishwasher.
To replace oven bottom: Insert tabs into slots on the
back oven wall. Lower into place, slide two screws forward and tighten. Be sure bottom is fitted into slots and
screws are tight. If not correctly replaced, even bottom
may become warped and cooking results will be affected.
To clean oven bottom: Oven bottom will have the same
finish as the oven. Follow cleaning instructionsforcleaning oven. When cleaning oven bottom, do not allow insulation, located under the oven bottom, to become wet.
LEVELING
LEGS
The range can be leveled on uneven floors by adjusting
the leveling leg screws in the bottom of the range. Leveling legs are located in the four corners of the range.
Remove broiler compartment
drawer and adjust as
necessary with a screwdriver.
r
GENERAL
PARTS
CLEANING
Soap
CLEANING
AGENTS
DIRECTIONS
f3emove
from broiler
after use Allow to cool, then pour off
!Irease. Place soapy cloth over tray and pan, let soak to loosen
soil. Wash in soapy
water.
Use soap filled scouring
pad to
remove stubborn
soil. Clean in dishwasher
if desired.
& Water
Plastic scouring
Soap
fllled
CHART
pad
scourlnq
pad
burner
quently
allowed
remove
and dry.
Soap 8 Water
Appliance
wax
16
I
box, located
under cooktop.
should
to remove
spillovers.
If soil is not
to accumulate,
it may damage
the
surface
burners
and clean with soap
If desired,
an application
of wax can
be cleaned
freremoved
and is
finish.
To clean,
and water, rinse
be used.
GENERAL
Control
Knobs
CLEANING
Mrid detergent
Soap 8 ‘Waler
Paste of baking soda
& water
Window
cleaning
fluid
or ammonia
End panels,
Soap
polyester
Grates
Wash with cloth wrung out in soapy water.
soil with paste of baking soda an water. To
ing of oven door glass, do not oversaturate
abrasive
materials
such as scouring
pads,
dered
cleaning
agents.
They will damage
clear water and dry.
Wash with soap
materials,
They
& water
Detergent
8 water
Soap filled scouring
Metal finishesAluminum-backguard
base. control
panel
Chrome
8 stainless
steel-trim
parts
Soap & water
Paste of baking
8 water
Oven
Soap 8 water
Cleansing
powders
plastic pads
Soap filled scouring
Rack
(Cont’d.)
To remove
knobs for cleaning.
gently
pull forward
mrld detergent
and water
Do not use abrasive
cleaning
They will scratch
finish and remove markings
Rinse,
replace
8 water
Glass-backguard
Oven Window
CHART
Wash In
agents.
dry and
Remove stubborn
avoid inside staincloth. Do not use
steel wool or powglass.
Rinse with
and warm water. Do not use abrasive
cleaning
will scratch
finish. Never use oven cleaners.
S:ates are made of porcelain
coated steel. They can becleaned
at the sink with detergent
and waler or in thedishwasher
Clean
stubborn
soil with soap filled scouring
pad.
Wash with soap and water. Remove stubborn
soil with paste of
baking soda and water
Do not use abrasive
or caustic
agents.
They will damage the finish. Restore luster on brushed
chrome
only, apply small amount of mineral oil and let stand 5 minutes.
Remove
excess oil with a clean cloth.
pad
soda
Clean with soapy water
Remove stubborn
powder
or soap filled scouring
pad. Rinse
8
so11 wrth cleansrng
and dry
pad
Mild soap 8 water
Paste of baking soda
8 water
Porcelain
enamel IS glass fused on metal. It may crack or chrp
wrth misuse.
Clean with soap and water when parts are cool
All spillovers,
especially
acid spillovers,
should
be wiped up
immediately
with a dry cloth. When surface
is cool, clean with
warm
soapy
water.
NEVER
WIPE OFF A WARM
OR HOT
ENAMEL
SURFACE
WITH
A DAMP
CLOTH.
THIS
MAY
CAUSE
CRACKING
AND CHIPPING.
Never use abrasive
or
caustic
cleaning
agents on exterior
finish of range.
Porcelain-enamel
Oven
and Lower Broiler
Compartment
(See page 18 for cleaning
instructions
of
Continuous
Cleaning
Oven.)
Soap a water
Cleansing
powders
8
plastic pads
Commercial
oven cleaner
Wipe acid stains immediately
with a dry cloth. Clean oven walls
and bottom with soap and water. Stubborn
soil IS removed
with
cleansing
powders
or plastic pad. Do not use metallic
cleaning
pads. They will scratch
the surface.
Commercial
oven cleaners
can be used but follow
manufacturer’s
directions.
Reflector
(Chrome
Soap 8 water
Paste of baking
8 water
Plastic scouring
Porcelain
Exterior
Surface
Enamelfinishes
Pans
plated
burners
Vinyl Finishes
Door handle
Manifold
panel
steel)
Soap 8. water
Paste of baking
8 water
Plastic scouring
as Tuffy@
Soap
soda
pad
soda
pad such
Clean pans after each use wrth soap and water. Remove stubborn stains with baking
soda paste and plastic scouring
pad.
To prevent
scratching
the finish, do not use abrasive
cleaning
agents.
Rinse, dry and replace.
NOTE: Pans will permanently
discolor
if exposed
to excessive
heat or if soil is allowed
to
bake on
Clean as necessary
with warm soapy water. Remove
stubborn
soil by scouring
with a non-abrasive
plastic scouring
pad and
a paste of baking soda and water. Clean ports with a straight
pin. Do not enlargen
or distort the ports. Do not use a wooden
toothpick.
It may break off and clog port. DO NOT CLEAN
BURNERS
WITH THE FOLLOWING:
Caustic
cleaners,
steel
wool, abrasive
cleaning
agents, dishwasher
detergent,
or metal
polishes.
These will damage
finish.
Do not clean burners
111
dishwasher.
Burners
can be dried in the oven set at 140” i
(60 ’ C.). CAUTION:
Burner and burner tube must be dry before
use.
Never
8 water
17
use abrasive
or caustic
cleaning
agents
on vinyl
finishes
SPECIAL
CONTINUOUS
CLEANING
WHAT IS THE CONTINUOUS
OVEN
FEATURES
OVEN
Brittle crusts or varnish-type
stains can be loosened by
GENTLY tapping stain with a wooden or plastic utensil.
Brush away any loose soil that flakes off.
Remaining
soil will gradually
reduce with continued
oven use at normal baking temperatures.
DO NOT USE ANY TYPE OF OVEN CLEANER, POWDERED CLEANSERS, SOAP, DETERGENT OR PASTE
ON ANY CONTINUOUS
CLEANING SURFACE. ALSO,
DO NOT USE ANY ABRASIVE
MATERIALS,
STEEL
WOOL, SHARP INSTRUMENTS
OR SCRAPERS FOR
THEY WILL DAMAGE THE FINISH.
Avoid spillovers by using utensils that are large enough
to hold food. A cookie sheet or piece of aluminum foil,
just a little larger than the pan, can be placed on the rack
directly below the rack holding the utensil to catch spills.
Over a period of time, wear marks may appear on the
embossed rack supports. This is normal and results from
sliding the racks in and out of the oven. Wear marks will
not affect the cleaning action of the oven.
NOTE: The lower broiler compartment
is lined with
porcelain-enamel
and NOT with the Continuous
Cleaning finish. Follow cleaning instructions
on page 15.
CLEANING
The special ceramic finish of the Continuous
Cleaning
Oven is identified
by its dark gray color and rough,
porous texture. The rough texture acts to prevent grease
spatters from forming beads which run down the walls
leaving unsightly
streaks. Rather, the rough texture
absorbs spatters and allows them to spread, thus exposing a larger area to the hot oven air for faster more
effective cleaning action.
Cleaning action automatically
begins whenever the oven
is turned on for baking or roasting. The oven MUST be
on for cleaning to take place-no
cleaning will occur
when the oven is off. The special finish must be exposed
to hot oven air before soil will begin to gradually reduce
in size.
FACTORS
CLEANING
AFFECTING
TIME
LENGTH
OF
The higher the oven temperature, the faster the cleaning
action. The length of cleaning time will depend on these
factors: Type of soil, amount or size of soil, oven temperature and length of time oven is in use. Time may vary
from a few minutes to several hours. Soil deposited at
the end of cooking may still be visible. This will usually
fade with continued
oven use until the soil gradually
disappears or can be wiped up manually. The oven will
appear presentably
clean, even though some spatters
may be present.
MANUALLY
CLEANING
EYE LEVEL
RANGE
The smaller upper oven on the Eye Level Range will be
equipped with either a conventional
gas oven or a microwave oven.
Eye Level Range wlth Conventlonal
Upper Oven: The
Eye Level conventional
oven operates the same as the
larger lower oven. Because of the size and location of
the upper oven, it is a handy place to cook small quantities of foods.
The smaller oven, which is very efficient for most purposes, does have some size limitations. Do not use cookie
sheets or other cooking utensils that are larger than
lbinches.
Large cookie sheets will block the air flow
which in turn affects baking results. When baking more
than one cake layer at a time, use two different rack positions for the two layers and stagger the pans so one is
not directly over the other.
Eye Level Range with Microwave Oven: Refer to the Use
and Care Microwave Oven Booklet for operating instructions on the microwave oven.
This range is equipped with a special, automatic fan to
help keep the microwave oven cool during somecooking
operations.
Do not be concerned if you hear the auxiliary fan come on
during, or sometimes after, some conventional
cooking
operations. The fan is activated by the thermal sensor and
will turn on and remain on until the air temperatures in the
upper section of range are reduced to a safe level. The fan
may remain on for a time after the conventional
oven or
surface units have been turned off.
CAUTION: To prevent permanent damage to the range
parts, the range MUST be installed according
to the
Installation
Instructions.
Refer to the instructions
for
correct clearances.
OPERATION
OF ANY SURFACE BURNER WITHOUT
A UTENSIL
IN PLACE WILL CAUSE PERMANENT
DAMAGE TO THE RANGE PARTS.
HEAVY SPILLOVERS
The special finish will clean most spatters during normal
oven use unless there is a heavy buildup of soil. Heavy
spillovers
such as pie or casserole boilovers will not
clean effectively without some manual help, The crusty
or varnish-like
stains that form from these spillovers
clog the pores and prevent the special finish from being
exposed to the hot oven air. This greatly reduces the
cleaning effectiveness
of the finish.
These crusty or varnish-like
stains must either be removed or broken up before cleaning can effectively
take place.
To manually clean heavy splllovers: Brush off heavy soil
with a nylon brush or plastic pad. DO NOT USE paper
towels, cloths or sponges for the oven walls are porous
and particles of these materials will rub off on the walls.
Rinse area with clear water only. Do not allow insulation
under oven bottom to become wet,
18
.
PROGRAMMED
OVEN COOKING
DELAY
COOK AND HOLD
This feature offers you the ability to program the oven,
at your convenience
for up to 7 hours of cooking. At the
preselected
time-of-day,
the oven will automatically
turn on, cook the food for the preselected length of time
and then reduce to a keep-warm temperature. The oven
will hold this setting until you manually turn the oven off.
Before using this feature, be sure the clock is operating
snd is at the correct time-of-day
When this feature is used, cooking will begin as soon as
you set the oven temperature and will continue for the
length of time you set on the COOKING
HOURS or
HOURS TO COOK knob. At the end of the preset time,
the oven automatically
lowers to a keep-warm temperature and will hold this temperature until you turn theoven
off.
r
HOURS
TO COOK
START
TIME
MINUTE
MINDER
r
To operate this feature:
1. Select foods that cook for the same length of time and
at the same temperature.
Place food in the oven.
2. Turn the COOKING HOURS or HOURS TO COOK
knob to the desired cooking time. The oven can be
set for up to 6 (or 10 hours, depending on your model)
of cooking.
For Eye Level Conventional
Gas Ovens: Flip OVEN
SELECTOR switch, located on the control panel, to the
oven you wish to use for programmed cooking. UPPER
for the ~II-‘I er oven and LOWER for the lower oven. Only
ONE oven can be programmed at a time, the other oven
can be operated manually
OVEN
LIGHT
ON
OVEN
SELECTOR
UPPER
To operate thls feature:
1. Select foods that cook for the same length of time
and at the same temperature. Place food in the oven
Highly perishable foods such as dairy, pork, poultry,
seafoods or stuffings are not recommended
for delayed cooking.
2. Turn the HOURS TO COOK knob to the d--sired cooking time. The oven can be set for up to 7 hours of
cooking.
3. Push in and turn START TIME knob to the time-ofday you wish food to begin cooking.
4. Turn the Oven Temperature
Control to the desired
temperature setting.
SURFACE
LIGHT
ON
When the range clock is at the time set on the START
TIME knob, the oven will automatically
turn on. About
20 minutes before time lapses on the HOURS TO COOK
knob, the oven will automatically
reduce to a keep-warm
setting. The oven will maintain this temperature
until
you manually turn the oven off.
5. When the food is removed from the oven:
-Turn
the Oven Temperature
Control to off.
-Turn
the HOURS TO COOK knob to MANUAL.
-Check
to be sure START TIME knob is in the “out”
position.
3. Turn the Oven Temperature
Control to the desired
setting and cooking begins. (For the Eye Level Gas
Range: Turn the Oven Temperature
Control for the
oven selected to the desired setting.)
4. About 20 minutes before time lapses on the COOKING HOURS knob, the oven temperature
will automatically reduce to a keep-warm setting. The oven
will maintain
this temperature
until you turn the
oven off.
Foods will safely hold at a keep-warm temperature
for
up to 4 or 5 hours, but quality, appearance and nutritional value is better if food is served within 1% hours
after cooking.
5. When food is removed from the oven, turn the Oven
Temperature
Control to off.
BUILT-IN
COOKING
If the HOURS TO COOK knob and START TIME knob
are not in the position as described in #5 above, the oven
will not turn on the next time you use the oven.
OVENS ONLY: It is necessary to turn the
HOURS Knob from HOLD to MANUAL or
19
INSTALLATION
AND SERVICE
INSTALLATION
DO NOT REMOVE THE THIRD GROUNDING
FROM THE POWER CORD PLUG.
THE INSTALLATION,
ADJUSTMENT
AND SERVICE OF
THIS APPLIANCE
MUST ONLY BE PERFORMED BY
A QUALIFIED
INSTALLER
OR SERVICEMAN.
This is
to insure correct adjustments for safety and for proper
performance.
CLEARANCE-Observe
all instructions
for minimum
clearances to any combustible surfaces. These should
be in accordance with information
on the nameplate
and with national fire laws.
DISCONNECTING
ELECTRICAL
ON A GAS APPLIANCE
POWER
On built-in ovens, the disconnect
plug is located under
the bottom plate in the broiler compartment
on the right
side of the compartment.
OF NAMEPLATE
PRESSURE
The model and serial numbers for this appliance are
found on the nameplate. These numbers must be used
when requesting service from your dealer, serviceman
or from us. Please record these numbers in the space
provided on the inside front cover.
The nameplate is located under the cooktop on the left
side wall of the burner box or near the center rear of the
burner box. On built-in ovens, the nameplate is located
on the main front oven frame.
ELECTRICAL
CONNECTIONS
GAS APPLIANCE
PRONG
There are two ways to disconnect
electrical power to
a gas appliance.
Either unplug the three-prong
plug
at the wall receptacle or unplug the range power disconnect plug, located under the cooktop behind the
right rear burner, by pulling up.
VENTING-Never
block vents (air openings) on the
range. Vents provide air which is needed for proper
operation.
CARPETING--Range
should NOT be installed directly over kitchen carpeting unless an insulating
pad
or ‘h-inch thick plywood is placed between the range
and carpet.
TYPE OF GAS-There
are two major types of gasNatural and LP (Bottled). Ranges adjusted for one
type of gas CANNOT be used with the other type of
gas until ADJUSTMENTS
ARE FIRST MADE BY A
QUALIFIED SERVICEMAN.
LOCATION
INFORMATION
REGULATORS
Regulators maintain the pressure of the gas coming into
the range unless the pressure in the line drops below
normal. By controlling
this pressure, thesizeand
appearance of the burner flame will remain constant. If you
should move to a new location or change fuels, contact
your serviceman to adjust the range or built-in unit to the
new fuel.
ON A
ALWAYS DISCONNECT
POWER TO RANGE BEFORE
SERVICING.
Ranges equipped with electrical
power have a threeprong grounding
plug. FOR PERSONAL SAFETY THIS
RANGE
MUST BE PROPERLY
GROUNDED.
THE
THREE-PRONG
PLUG MUST BE PLUGGED DIRECTLY
INTO A PROPERLY
GROUNDED
THREE-PRONGTYPE WALL RECEPTACLE.
IF A TWO-PRONG-TYPE
WALL RECEPTACLE
IS ENCOUNTERED, IT IS THE PERSONAL RESPONSIBILITY
OF THE OWNER TO HAVE IT REPLACED WITH A
PROPERLY GROUNDED THREE-PRONG-TYPE
WALL
RECEPTACLE.
THE THREE-PRONG
GROUNDING
PLUG IS FOR YOUR PROTECTION
AGAINST SHOCK
HAZARDS.
20
If you need service or assistance, we suggest you
follow these four steps:
3 If you need service * . . .
1 Before calling for assistance.. .
l
l
Performance
problems
often result from little things you
can find and fix yourself without tools of any kind.
If a surface burner fails to light:
l Is the pilot lit?
l Is the
unit connected
to electrical
power (Solid State
Ignition)?
l Did you
check the fuse or circuit breaker
(Solid State
Ignition)?
l Are burner
ports clogged?
(See page 7.)
l Is the burner
correctly
rated? (Call for service.]
If burner flames are uneven:
l Are burner
ports clogged?
(See page 7.)
If surface burner flames lift off ports, are yellow, or are
noisy when turned off:
l The air/gas
mixture may be incorrect. (Call for service.)
If a pilot will not stay lit:
l The burner
and/or
pilot may be out of adjustment.
(Call
for service.]
If an oven burner does not light:
l Is the pilot lit?
l Is the temperature
control turned to a setting?
l Is unit connected
to electrical
power (Solid State Ignition)?
l Did you
check the fuse or circuit breaker
(Solid State
Ignition)?
If the oven temperature
seems to be inaccurate:
l Did you read
pages 12 and 13’?
l Has the oven thermostat
sensing device slipped out of the
holding clips?
l Is the oven
calibration
or burner out of adjustment?
(Call
for service.)
If the clock or lights do not work:
l Is the unit connected
to electrical
power?
l Did you check
the fuse or circuit breaker?
l Are bulbs
burned out? (See page 9.)
If soil is visible on continuous-cleaning
oven finish:
l The special
finish is designed
to reduce oven soil gradually during normal baking or roasting. It is not designed
to
keep your oven spotless...only
presentably
clean.
l The door is coolerihan
oven walls. Soil will be more visible
on the door than on other areas of the oven.
If cooking
results aren’t what you expect:
l Is the oven level?
l Are you using utensils recommended
on page 12?
l Have you preheated
the oven as the recipe calls fot?
l Are the pans the size called
for in the recipe?
l Are you following
a tested recipe from a reliable source?
See Pages 12 and 13 for more information
on cooking
problems and how to solve them.
2
l
Whirlpool
has a nationwide
network
of franchised
TECH-CARE” Service Companies.
TECH-CARE service technicians are trained to fulfill the product warranty
and provide after-warranty
service, anywhere
in the United States.
To locate TECH-CARE service in your area, call our COOL-LINE
service assistance telephone
number (see Step 2) or look in
your telephone
directory
Yellow Pages under:
OR
WHIRLPOOL APPLIANCES
FRANCHISEDTECH-CARESERVICE
SERVICE COMPANIES
XYZ SERVICECO
999-9999
123 Maple
and talk with one of our trained Consultants.
can instruct you in how to obtain satisfactory
your appliance
or, if service is necessary,
qualified
service company
in your area.
assistance
WHIRLPOOL APPLIANCES
FRANCHISEDTECH-CARESERVICE
SERVICE COMPANIES
XYZ SERVICECO.
999-9999
123 Maple
OR
WASHING MACHINES, DRYERS
L IRONERS-SERVICING
WHIRLPOOL APPLIANCES
FRANCHISEDTECH-CARESERVICE
SERVICE COMPANIES
XYZSERVICECO
123Mople
999-9999
4
l
Ifyouhaveaproblem*...
Call our COOL-LINE service assistance
telephone
(see Step 2), and talk with one of our Consultants,
prefer, write to:
Mr. Guy Turner, Vice President
Whirlpool Corporation
Administrative
Center
2000 US-33 North
Benton Harbor, Ml 49022
*If you must call or write, please provide:
model
serial number, date of purchase,
and a complete
tion of the problem.
This information
is needed
in
better respond to your request for assistance.
If you need assistance*. . .
Call the Whirlpool
COOL-LINE’5 service
phone number. Dial tree from:
Contlnental
U.S. . . . . . . . . . . . . . . . . . . . . . . .
.............................
Mlchlgan
Alaska 81 Hawaii
......................
ELECTRICAL APPLIANCESMAJOR-REPAIRING & PARTS
APPLIANCES-HOlJSEHOLOMAJOR-SERVICE & REPAIR
tele-
(800) 253-l 301
(800) 632-2243
(800) 253-l 121
0
The Consultant
operation
from
recommend
a
FSP
21
8
number
or if you
number,
descrip
order to
FSP is a registered
trademark
of Whirlpool
Corporation
for
quality parts. Look for this symbol of quality whenever
you
need a replacement
part for your Whirlpool
appliance.
FSP
replacement
parts will fit right and work right. because
they
are made to the same exacting
specifications
used to build
every new Whirlpool
appliance
Making your world a little easier.
Part No. 878072/OB-039-018-99
0. Refrifentor-Freeze6
ICC
Maken. Dishwashers, Built-In Ovens and Surface Units, Ranges, Microwave Ovens,
Printed
in U.S.A.
Compactor,
Room
AirConditioners,
Dehumidifiers,
Automatic
Washen,
Clothes
Dryen,
Freezer