1
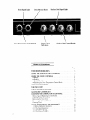
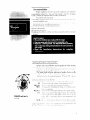
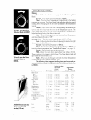
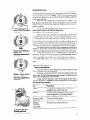
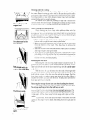
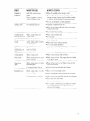
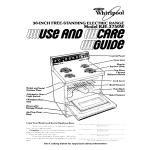
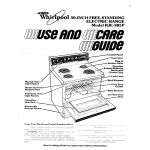
Copy
Your
Model
and
Serial
Number
Here
If you hdve questlox
or need to call for service.
the service
company
~111 ask for your Model
and Serial
Numbers
Your
new range
has these
numbers
on a
plate above
the oven
lust behlnd
the top of the over]
door
Copy the numbers
111these spaces while you are
thlnklng
about It
Keep this book III a handy place
Your warranty
and sales slop should
be kept with It
See Cooking
Guide
for important
Model
Number
Send
Number
F’llrctlase
Service
Company
Dar&x
and Phone
safety information.
Number
Oven Signal Light
Oven Temperature
Control
Oven Selector
Knob
Knob
Surface Unit Signal Light
Surface Unit Control
Surface Unit
Indicators
Knobs
Table of Contents
Page
YOUR RESPONSIBILITIES
USING THE SURFACE UNIT CONTROLS
USING THE OVEN CONTROLS
l
l
l
l
Baking
Broiling
Variable Broil Feature
Resetting the Oven Temperature
&%oi
&I’&
OVEN RACK POSITIONS
THE OVEN VENT
THE OPTIONAL ROTISSERIE
ACCESSORY CANNING KIT
CLEANING AND CARING FOR YOUR RANGE
Removing and Replacing Control
Cleaning Under the Cooktop
Removing the Oven Door
Remoting the Storage Drawer
Cleaning Chart
Knobs
IF YOU NEED SERVICE OR ASSISTANCE
1.
2.
3.
4.
Before
If You
If You
If YOU
Calling for Assistance
Need Assistance
Need Serwce
Have a Probkin
::
Your responsibilities
Proper installation and safe use of the range are your personal
responsibilities
Read this “Use alld Care Guide” and the “Cooking
Guide” carefully for important use and safety informahorl.
You must be sure your range
l is properly
installed and leveled 011a floor that will hold the useIght. and
in a well-ventilated
room
l is connected
only to the right kind of outlet, with the right electric supply
and grounding (see “Installation Irlstructions“ 1
l is used only for jobs expected
of home ranges
l IS out of the weather
l is properly
malntalwd
l is not used by childrrrl
or others who may not urrdersralld hoLv ITshould
be used
Using
the oven controls
Baking:
First-Follow
the directions
on page
5 for “Positioning
Oven
Racks.”
To bake, turn the Oven
Selector Knob to BAKE.
To broil,
turn the Oven
Selector Knob to
BROIL.
Second-Turn
the Oven Selector Knob to “BAKE”.
Third--Turn
the Oven Temperature
Control Knob to the baking
temperature you want The Oven Signal Light will glow while the oven is
heating. When this light goes off, the oven has heated to the temperature
you set.
Fourth---Plx.’
food !II the oven During baking. the elements will
turn on and off to heir; keep the oven at the temperature
you set. The
Oven Signal Lqht will turrlo11 and off with the elements. The top element
helps heat during bokrng, but does not turn red.
Fifth-When
the baking is done. turn both the Oven Temperature
and Oven Selector Knobs to “OFF.”
Broiling:
(Note-The
door must be partly open while broiling.)
First-Follow
the directions below for placing the meat at the right
distance from the Broil Element.
Second-Turn
the Oven Selector to “BROIL.”
Third-Turn
the Oven Temperature Control Knob to “BROIL”
or
turn It to a lower temperature (see “Variable Broil Feature.” on page 5 ).
Fourth-Put
the broiler pan on the oven rack.
Fifth-Keep
the oven door open about four inches (10 cm).
There is a stop in the hinges to hold it there. The Oven Signal Light will
glow while the broil element IS on.
Sixth-When
vou are through. turn both the Oven Temperature
Control and the Over1 Selector Knobs to “OFF.”
The following
chart suggests broiling times and oven-rack positions for different kinds of meats when the Oven Selector Knob is set
to BROIL.
Food
Beef Steak<
Rare
Medium
Well dorW
Beef Steak.5
Rare
Medium
Well donkx
Hamburgers
Lamb Chops
Medium
Ham slice. precookc,;i
or tendered
Canadian Bacon
Pork Rib or Loln Char:
Well done
Chicken
ALWAYS broil with the
door open about 4
inches (10 cm).
FlSh
Inches (cm) from
top of food
IO broil
Element
Approximate
Minutes
2nd side
1st side
1 (2 5 cm)
i 12 icm)
1 (25cm)
3’ (8 cm)
3” (8 cm)
3 18cmJ
7-9
9-11
11-13
1; 2 I.4 cm)
1’2” 1-I cm)
Il.1 ilcm)
._- li’:mi
4”
4”
4”
3”
-5” (lo-13 cm) 13-15
-5” (lo-13 cm) 17-19
-5” (10-13 cm) 19-21
(8 cm)
6-8
3-5
4-7
5-7
6-8
B-10
14-16
4-5
3 (8 cm)
6-8
4-5
3” (8 cm)
3” (8 cm)
6-8
6
4-5
4
4”-5” (lo-13 cm) 15
10
7” -9” (18-23 cm) 25-30
11-16
3” (8 cm)
3” (8 cm)
7-8
10-E
9-14
5-7
Liver
FrankfurtiJls
3” (8 cm)
4” -5” (lo-13
cm)
3
6-7
3
4-5
/
Loosen the locking
screw; NOTICE position
of notches.
Lower: move black part
toward “LO.”
One notch equals about
10°F (5%).
Variable Broil Feature:
You might want to broil some foods slower than others. Broiling
can be slowed down by setting a lower temperature on the Oven Temperature Control Knob instead of “BROIL.” Using a lower temperature will
cause the broil element to turn on and off during the broiling SO that the
food broils more slowly.
When the Oven Temperature Control Knob is on “BROIL,” the
Broil Element heats all the time. Set the temperature lower and it heats
some of the time. The lower the temperature setting, the shorter are the
periods of heating.
NOTE: The Oven Selector must be on BROIL and the door
must be partly open for ail broilirig temperatures.
Resetting the Oven Temperature Control:
Does your new oven seem hotter or colder than your old oven?
The temperatures in older ovens often shift very gradually, getting hotter
or colder without the user really noticing the change. Your new oven is
properly adjusted to provide accurate temperatures, but when compared
to your old range, the new design may give you different baking results. If
you think that the temperature setting on your range needs to be hotter or
colder, you can adjust the Oven Temperature Control Knob by yourself.
To adjust the setting, first pull the Oven Temperature Control Knob
straight off. On the back, just across from the locking screw, are a row of
notches on the black part of the knob and one tooth on the chrome part.
To set your oven about lO”F(5”C) cooler, loosen the locking screw
about two full turns and move the row of notches one notch closer to
“LO.” To set your oven about lO”F(5”C) warmer, move the row of
notches one notch closer to “HI.” Each notch equals about lO”F(5”C).
Tighten the locking screw and put the knob back on the control
panel.
Oven rack positions
Higher:
move black
part toward “HI.”
One notch equals about
10°F (5°C).
Your oven has two racks. Always put the racks where you want
them to be before you turn on the oven.
To remove a rack, take hold of it on the front edge and pull it out
until it stops. Then lift up the front edge and pull again. It will slide past the
stops, out of the guides and out of the oven.
To put it back, fit the back corners into the guides at each side of
the oven and slide it in, keeping the front tilted up until the rack passes
the stops in the rack guides.
For:
Baking
Broiling
Roasting LARGE
cuts of meat
Roasting
SMALLER
cuts of meat
Place Rack:
On the second rack guide from the bottom or
so food is in the center of the oven.
So food is about the distance from the broil
element suggested in the broiling timetable
under “Using the Oven Controls.”
On the bottom rack guides.
So food is in the center of the oven.
To remove rack, pull
forward until rack
stops, lift front and pull.
5
When baking, always leave at least 1% to 2 inches (4-5 cm) of
air space between the sides of a pan and other pans and the oven wail
for air circulation.
For best results, get additional information on placing pans, cookie
sheets and other utensils from the “Cooking Guide.”
The oven vent
There is an oven vent under the right rear surface element. When
the oven is on, heated air will escape through it. A vent is needed for air
circulation in the oven during baking. You can cook on this surface unit
while the oven is on. A warm pan of food will stay warm on this unit while
the oven is on. It may be warm enough to melt butter, too.
Do not try to save heat or energy by blocking the vent. Poor
baking can result. Plastic utensils may melt if they are oyer the vent
while the oven is on.
The optional
rotisserie
If you would like a rotisserie with your oven, you can order a kit
(Part No. 261880) from your dealer. Easy installation instructions come
with the kit.
Accessory
canning
kit (Part No. 242905)
The large diameter of most water-bath or pressure canners combined with high heat settings for long periods of time can shorten the life
of regular surface units and cause damage to the cooktop.
If you plan to use the cooktop for canning, we recommend the
installation of a Canning Kit. Order the kit from your Whirlpool Dealer or
Tech-Care Service Company.
SEE THE “COOKING
INFORMATION.
Cleaning
Pull knob and trim ring
straight out. Remember
how the spring goes.
GUIDE”
FOR IMPORTANT
CANNING
and caring for your range
Your range is designed to be easy to clean. You will usually wipe off
spills and spatters when they happen, but you will sometimes want to
clean under and behind the control knobs and surface units. This section
will tell you how to remove those, and what to use when cleaning.
Removing and replacing control knobs:
1. Be sure the control knobs are set to “OFF’.
2. Pull the black knobs straight off.
3. If the control has a chrome trim ring, pull it straight off.
4. Wash the knobs (and trim rings) in warm, sudsy water.
5. Replace the trim rings first. If the control spring was removed, put
it back exactly as shown on the left.. .smail end first.
6. Hold the black knob so it points to “OFF.” Push it straight back on.
Removing and Replacing Oven Control Knobs:
1. Be sure the knobs are set to “OFF.”
2. Pull each knob straight off.
3. Wash the knobs in warm, sudsy water.
4. The knobs are not interchangeable. Make sure you put the adjustable Oven Temperature Control Knob on the right place, and the
nonadjustable Oven Selector Knob on the other.
6
Receutacie
Removing surface units and reflector bowls:
1. First. be sure the Surface Untt Controls are all “OFF” and that the
surface units are cool.
2. Lift each surface unit about an inch (2.5 cm) at the edge away frown the
plug-in (receptacle). Pull the unit straight away from the plug-irl. Do
not wash surjace units: they will burn themselves clean during normal
use.
3. Lift out the re!lector bowls,
To remove surface
unit, lift and pull
straight out.
Hold surface unit level
when replacing.
Replacins
reflector bowls and surface units:
1. Be s&e the surface unit controls are on “OFF.”
2. Put the reflector bowls back into their places. Make sure you can see
the plug-ins (receptacles) for the surface units through the square
hole in the side of each bowl.
3. Hold the surface unit level with the prongs (termlnals) pointing at
the plug-in
4. With the prongs started in the plug-in. start pushing in on the surface
unit. At the same time. lift a little on the side of the surface unit that’s
by the plug-in
5. Make sure the surface-unit prongs are pushed Into the plug-In as far as
they will go The surface unit should fit into the reflector bowl and be
level
Prop up the top with
support rod.
Cleaning under the cooktop:
To clean the area under the cooktop, ltft the front of the cooktop at
the center. Raise the swing-up rod to hold It. (Be sure the tip of the rod is
in the notch in the cooktop.) Use warm soapy water and a sponge or cloth.
Scouring powders or any other abrasive cleaner may harm porcelainenamel finishes and can scratch chrome.
Be careful not to raise the cooktop so high that it touches the
control console. And don’t drop it. Dropping the cooktop can chip or crack
a hard porcelain finish. or damage side panels and surface units.
Easier
cleaning with aluminum
foil:
Oven cleaning can be a chore when spillovers bake onto the
bottom of the oven. Use aluminum foil so you can just throw it away with
the spillovers. You can use the heavy-duty
18.inch (45 cm) aluminum foil
found in most grocery stores. Or you can order an aluminum foil kit (Part
Number 241430) from your Whirlpool Dealer.
Use aluminum
easy cleaning.
foil for
Pull straight with t’he
angle of Dart-oDen door.
Push down evenlv.
Pull to stop. Lift; pull
again.
When cutting thr foil. make sure it IS long enough to cover the
bottom with enough left over to start up both sides.
Make sure the bake element IS cool Lift it far enough to raise its feet
from the bottom of the oven. (You may have to remove the
oven rack.)
Slide the foil sheet under the bake element. Make sure it is centered
and long enough to start up the sides.
When you put the bake element back down. make sure all the feet
rest solidly on the foil and that the foil is smoothed out across the
bottom of the oven. If the feet on the element are not solidly on the
foil. the oven mai’ not bake properly.
Removing the oven door:
Removtng the ()ven door may make it easier to clean the oven. To
remove the door. ftrst open it to the first stop (about 4 inches or 10 cm).
Take hold of both sides of the door near the top: then lift it at the same
angle it is in.
With the door off. you will notice how the ends of the hinges slide
into slots at the bottom corners of the door. To put the door back on. fit
both bottom corners of the door over the ends of the hinges. Push the
door down evenly. so neither corner gets ahead of the other. When it
reaches the bottom. you can close the door. A safety latch will hold the
door open until it is on correctly.
Removing the storage drawer (use care when handling the drawer):
The drawer below your oven is meant to store pots and pans
Never keep anything in there that will burn or melt.
You may want to remove the drawer for cleaning under the range.
Pull it straight out until in stops Use care when handling the drawer. Lift
the front and pull some more to get it over the stop. Now slide it out until
it stops agaln Lift the (irawer away from the range until it slips out of the
guides.
To put II back. frt the side rails at the back of the drawer into both
guides on the range. Push it closed while lifting the front to get past the
stops.
HOW
PART
Outside of
appliance
Soft cloth. warm soapy
water
Nylon or plastic scouring
pad for stubborn spots
l
TO CLEAN
Wipe off regularly
.-~
when range is cool.
0 Do not allow food containrng acids (such as
vrnegar. tomato, lemon juice or milk) to remain
on surface Acids will remove the glossy finish.
* Do not use abrasive
Surface units
No cleaning requrred
Control knobs
and chrome rims
Warm, sudsy water and
bristle brush
Chrome
bowls
Automatic dishwasher or
warm. soapy water or plastic
scrubbing pad
reflector
or harsh cleansers.
l
Spatters
or spills will burn off.
l
Wipe off excessrve spills with damp cloth when
surface unit is cold
l
Do not immerse in water.
0 Waste. rinse and dry well.
* Do not soak
l
Clean frequently
l
Wash with other cooking
l
Do not use harsh abrasives.
utensils
Alummum
broiler pan and
grid
Warm soapy water or soap:’
steel wool pads
l
Wash with other cooking
Control
Warm, soapy water
l
Wash. rinse and dry with soft cloth.
Oven racks
Warm, soapy water or soap\
steel wool pads
0 Wash. rinse and dry Use soapy steel wool pads
for stubborn areas.
Oven door
glass
Warm, soapy water or plastrc
scrubbing pad
* Make certarn oven is cool. Wash. rinse and dry
well !vith soft cloth
Commercial
l
Standard
panel
oven
glass cleaner
Warm, soapy water or 5oapL
steel wool pads
CorrlnlerCii~l
(i’v(‘r1 ! leantri
utensils
Follow directrons provided
with cleaner
0 Rem, !i’t! do< lr for easier access
l
PIact riewalIaper0r-i
l
FI JI,LC directIons
floor to protect floor sur-face
provrded
with the oven cleaner
m R:n\c well LC.rthclear water
* I ,\e~ !:I well vrntrlated
l
room
II0 110tdllou~ commercial oven cleaner to contact
tlrr heatrng elements. oven seal. or exterior
surfaces of the range
IF YOU NEED SERVICE OR ASSISTANCE,
FOLLOW THESE FOUR STEPS:
1. Before calling
WE SUGGEST
YOU
for assistance..
Performance
problems often result from little things you can find
and fix yourself without tools of any kind.
If nothing operates:
* IS thr ranye plugged 1nt0 an operating outlet or wired into a live
circuit with the> propel voltage? (See Installation
Instructions.)
l
Have you chcxcke:i the main fuse or circuit-breaker
box’?
If the oven will not operate:
l
Is the Oven St>lector Krlob turned to a setting (BAKE or BROIL)’
l
Is the Oven Tenjper,lture
Control Knob turned to a temperature
settiny”
If surface units will nor operate:
l
Have you check4 the main fuse or circuit-breaker
0 Art, >.urface units :)luyyed in all the way?
l
Dc. [he c‘c;ntrol knf lbs turrl)
If surface-unit
Control Knob or Knobs will not turn:
0 Is the> spnng put i:i correctly. as shown on page
anti Canny for yo-:r Ranye” SectIon’?
l
Did LOII Flush jr1 t-~i~fort~tryiny tc, turn3
box?
6 in the “Cleaning
If cooking results aren’t what you expect:
l
Is tr-ie range level
l
Art> LOLI uslny pa! :i rt-‘: ommended in the Cooking Guide?
a~ If taklny. hale’ ~‘1,I.! allo\ked l’.’ to 2 inches (4-5 cm) on all sides of
the pans ICY air CP ulatic’n)
l
Does the (oberl temperature seem too low or too high? See page 5.
“ResettIny Your ( jven Temperature Control Knob.”
l
Havtj you preheatG,d the oven as the recipe calls for!
l
Are :he pcins tt,el if,. e called for 11~the recipe’
0 Are> ~rju folIowiny (1 tested recipe! from a reliable source?
l
Do the co< )klny ut,jnslls lhdve smooth. flat bottoms?
l
DC, ttit> cclokllly utc,nsIIs fit the surface unit being used?
C;ec, that Cooking Guide for more information
on cooking problems anti tIt)w :k) solvt’ “ierr:
2. If you need assistance*
Call the Whirlpool
COOL-LINE’
phone number. Dial free from:
Continental
U.S.
Michigan
Alaska & Hawaii
service
.
.
.
assistance
tele-
(800) 253-1301
(800) 632-2243
(800) 253-1121
and talk with one of our trained
Consultants.
The Consultant
can
instruct you in how to obtain satisfactory
operation from your appliance
or, if service is necessary, recommend
a qualified service company
in
your area
3. If you need service*
TECH-Cm?E
FRANCHISED
SERVICE
Whirlpool has a nationwide network of franchised TECH-CARE’
service companies.
TECH-CARE
service technicians
are trained to
fulfill the product warranty
and provide after-warranty
service, anywhere in the United States. To locate TECH-CARE
service in your area,
call our COOL-LINE
service assistance telephone number (see Step 2)
or look in your telephone directory Yellow Pages under:
WHIRLPOOLAPPLIANCES
FRANCHISEDTECH-CARE
.SER\'i(‘E
XYISERVICECO
'23Maple
OR WHIRLPOOLAPPLIANCES
SERVIC'
(‘O.M1'4
WASHING MACHINES,
A IRONERS-SERVICING
ELECTRICAL
APPLIANCESMAJOR-REPAIRING
6 PARTS
APPLIANCES-HOUSEHOLDMAJOR-SERVICE
6 REPAIR
Vf‘S
999 tiLi49
OR WHIRLPOOLAPPLIANCES
FRANCHISEDTECH-CARESERVICE
FRANCHISEDTECH-CARESERVICE
SEH I’/(‘E
XVZSERVICECO
123 Maple
DRYERS
COMPA
.VIES
999 9999
SER \‘I(‘E
XYZSERVICE CO
123 Maple
(‘0MPA.V16.‘i
.999~9999
4. If you have a problem*.
Call our COOL-LINE
service assistance telephone
number (see
Step 2) and talk with one of our Consultants,
or if you prefer, write to:
Mr. Guy Turner, Vice President
Whirlpool
Corporation
Administrative
Center
2000 US-33 North
Benton Harbor. Ml 49022
*If you must call or write, please provide: model numbers, serial number, date of purchase, and a complete description
of the problem. This
information
is needed in order to better respond to your request for
assistance.
FSP is o registered trademark
of Whirlpool Carporotion
for
qualrty parts Look for this
symbol of quality whenever
FSP
yw need 0 replacement
part
@ for your Whirlpool appliance.
FSP replacement
parts
will fit right and work right, becausetheyore
mode lo the some exacilng specifications
used lo build every new Whirtpook appliance.
0
Benton itarbor. Michigan. Automatic Washers. Clathes Dryers,
Freezers. Aelrigarator-Freazers. Ice Malrsrs. Dlshwashar8.
Built-In Ovens and Surtate Unlb, Ranges. Mlcrawara Ovens,
Compaclors, Rwm Air CaadillOaar% Dehumitltfiers. Caetral
Heating and Air Caaditimrlng Syalems.
Part No. 310594
Rev. A
Printed in U.S.A.