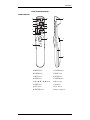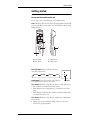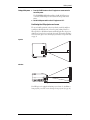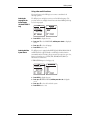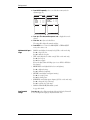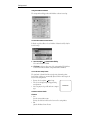
1
215E
Polaview
LCD Projector User’s Guide
Table of contents
General information
Declaration of Conformity ____________________________________________6
Important safeguards _________________________________________________7
Introduction
LCD projector features ______________________________________________10
Contents of the LCD projector box____________________________________12
Parts list and accessories _____________________________________________13
Remote control unit _____________________________________________13
Before using the remote control _______________________________14
Battery replacement caution___________________________________14
LCD projector _________________________________________________15
LCD projector back/bottom _____________________________________16
Getting started
How to use the remote control unit____________________________________17
Setting up the LCD projector ________________________________________18
Positioning the LCD projector ________________________________18
Adjusting the lens ___________________________________________19
Rear screen mode projection __________________________________19
Connecting the LCD projector _______________________________________20
Connecting to a computer (RGB signal) ____________________________20
Connecting to audio/video output equipment
(S-VIDEO/VIDEO signal) _______________________________________21
Computer cables & adapters__________________________________________22
Pin assignments ____________________________________________________23
Setting the DIP Switches_________________________________________24
Factory preset timing _______________________________________________26
Turning the power on and off ________________________________________30
Turning on the power ___________________________________________30
Turning off the power ___________________________________________31
Positioning the LCD projector and screen ______________________________31
Basic LCD projector operation _______________________________________33
Special effects while projecting ________________________________34
English
1
Using other useful functions__________________________________________35
Selecting the Language for On-Screen Displays
(for Model PV215E-C only) ______________________________________35
Selecting the Video System Format ________________________________35
Turning off the input signal display ________________________________36
Disabling the POWER button on the remote control unit _____________36
Canceling the enlarging (scanning line conversion) function____________37
Changing to 16:9 (wide) screen format _____________________________37
Blue Screen with no input signal___________________________________38
Adjusting the projected image ________________________________________39
Input image adjustment __________________________________________39
Adjustments for input image ______________________________________40
Recall standard settings __________________________________________40
RGB sync adjustment _______________________________________________41
Adjustments for RGB input _______________________________________42
Adjusting the white balance __________________________________________44
Selecting the picture memory _____________________________________45
Projecting PC-Card (ATA Flash Card) data _____________________________46
When using the Repeat Play ______________________________________47
JPEG Viewer features _______________________________________________48
System requirements_________________________________________48
JPEG Viewer installation ____________________________________________48
How to make JPEG files______________________________________48
Capture feature _____________________________________________48
Starting up the JPEG Viewer__________________________________49
Functions of each menu item __________________________________50
When using the Capture feature _______________________________51
Size of the projected screen ___________________________________52
How to edit using the Album Display feature ____________________52
Changing the image display order in Folder _____________________52
Moving the images between Folders ____________________________53
Displaying full-screen images for confirmation ___________________53
Deleting images _____________________________________________53
When using the BMP to JPEG Converter feature ________________53
2
Polview 215E LCD Projector User’s Guide
ProMouse Control Feature___________________________________________54
Windows 95 / Windows 98 _______________________________________54
System requirements_________________________________________54
ProMouse installation ________________________________________55
To open the ProMouse Software_______________________________55
Using the ProMouse Software _________________________________56
To start the ProMouse Control feature _________________________56
To Use the Auto Setup feature ________________________________56
ProMouse Software details ____________________________________56
Macintosh _____________________________________________________58
System requirements_________________________________________58
ProMouse installation ________________________________________58
To open the ProMouse Software_______________________________59
Using ProMouse Software ____________________________________59
To start the ProMouse Control feature _________________________59
To Use the Auto Setup feature ________________________________60
ProMouse Software details ____________________________________60
Appendix
Maintenance _______________________________________________________62
Warning Indications_____________________________________________62
Status Code Display Indications _______________________________62
Cleaning the Air Filter ___________________________________________63
Cleaning procedure__________________________________________63
Lamp Replacement______________________________________________65
Lamp replacement period_____________________________________65
Lamp replacement procedure _________________________________66
Before Requesting Service ___________________________________________69
Where to get help ___________________________________________69
Specifications ______________________________________________________70
Polaroid Three Year Limited Warranty ________________________________72
U.S.A. and Canada ______________________________________________72
Outside the U.S.A. and Canada____________________________________72
Polaroid Offices and Service Centers __________________________________73
English
3
4
Polview 215E LCD Projector User’s Guide
General information
General information
Caution: This equipment has been tested and found to comply with the limits for a
Class B digital device, pursuant to Part 15 of the FCC Rules. These limits are
designed to provide reasonable protection against harmful interference in a
residential installation. This equipment generates, uses, and can radiate radio
frequency energy and, if not installed and used in accordance with the instructions,
may cause harmful interference to radio communications. However, there is no
guarantee that interference will not occur in a particular installation. If this
equipment does cause harmful interference to radio or television reception, which
can be determined by turning the equipment off and on, the user is encouraged to
try to correct the interference by one or more of the following measures:
• Reorient or relocate the receiving antenna.
• Increase the separation between the equipment and receiver.
• Connect the equipment into an outlet on a circuit different from that to which
the receiver is connected.
• Consult the dealer or an experienced radio/TV technician for help.
FCC Warning: To assure continued FCC compliance, use only the provided power
supply cord and prevent undesirable interference, use only the provided shielded
VGA cable with 2 ferrite cores while connecting LCD to computer and all other
connecting cables should be shielded. Any changes or modifications not expressly
approved by the party responsible for compliance could void the user’s authority to
operate the equipment.
This device complies with Part 15 of the FCC Rules. Operation is subject to
the following two conditions: (1) This device may not cause harmful interference,
and (2) this device must accept any interference received, including interference
that may cause undesired operation.
English
5
General information
Declaration of Conformity
Model Number:
PV215E
Trade Name:
Polaroid
Responsible Party:
Polaroid (Europa) BV
Address:
Hoge Botofstraat 45 7511 ZA, Enschede,
The Netherlands
Telephone Number:
31-53-486-5050
This device complies with the following directives and standards:
89/336/EEC: EN55022, EN50082-1, IEC801-2, IEC801-3, IEC801-4,
EN61000-3-2, EN61000-3-3
73/23/EEC: EN 60950: A1, A2, A3
Thank you
for purchasing the Polaroid Polaview PV215E LCD Projector, one of the most
sophisticated and reliable products on the market today. Used properly, it will bring
you years of service. Please take time to fill in the information below. The serial
number is on the tag located on the back of your LCD projector. You’ll want to
keep this information handy as your convenient LCD projector information source.
For your own protection and prolonged operation of your LCD projector, please
be sure to read the “Important safeguards” carefully before use.
Date of Purchase
Dealer Purchased From
Dealer Address
Dealer Phone No.
Model No.
PV215E
Serial No.
“Polaroid” and Polaview” are trademarks of Polaroid Corporation,
Cambridge, MA, U.S.A. Other product/brand names may be trademarks
of the respective owners.
6
Polaview 215E LCD Projector User’s Guide
General information
Important safeguards
!
Caution: Please read all of these instructions before you operate your LCD
projector. Keep these instructions in a safe place for future reference.
Machine Noise Information Ordinance 3. GSGV, January 18, 1991: The sound
pressure level at the operator position is equal or less than 44dB (A) according to
ISO7779. (However, this is when the ambient temperature is less than 30°C.)
Electrical energy can perform many useful functions. This LCD projector has been
engineered and manufactured to meet applicable safety standards. But improper use
can result in potential electrical shock or fire hazards. In order not to defeat the
safeguards incorporated into this LCD projector, observe the following basic rules
for its installation, use, and servicing.
Unplug the LCD projector from the power point before cleaning.
2. Do not use liquid cleaners or aerosol cleaners. Use a soft dry cloth to clean the
LCD projector unit. If the unit is very dirty, wet a cloth with neutral detergent,
squeeze it tight, wipe the unit with it, and finish by wiping with a dry cloth. Do
not use a chemical duster or polisher-cleaner because it can adversely affect the
unit and peel the paint coat.
3. Do not use attachments not recommended by Polaroid, as they may cause
hazards.
1.
4. Do not use the LCD projector near water; for example, near a bathtub,
5.
6.
7.
8.
9.
washbowl, kitchen sink, laundry tub, in a wet basement or near a swimming
pool. Never spill liquid into the LCD projector.
Do not place the LCD projector on an unstable cart, stand, or table. The LCD
projector may fall, which may cause serious injury to a child or an adult and/or
serious damage to the unit. Use only with a cart or stand recommended by its
manufacturer as being suitable for use with an LCD projector.
Ceiling, wall, or shelf mounting for installation should use a mounting kit
approved by the manufacturer for use with an LCD projector and should
follow the manufacturer’s instructions.
LCD projector equipment and cart combinations should be moved with care.
Quick stops, excessive force, and uneven surfaces may cause the equipment and
cart combination to overturn.
Slots and openings in the cabinet back and bottom are provided for ventilation.
To ensure reliable operation of the LCD projector and to protect it from
overheating, these openings must not be blocked or covered. These openings
should never be covered with cloth or other materials. The bottom opening
should not be blocked by placing the LCD projector on a bed, sofa, rug, or
other similar surface. The LCD projector should not be placed near or over a
radiator or heating vent. The LCD projector should not be placed in a built-in
installation such as a bookcase unless proper ventilation is provided.
The LCD projector should be operated only from the type of power source
indicated on the back of the LCD projector or in the specifications. If you are
not sure of the type of power supplied to your home, consult your LCD
projector dealer or local power company.
English
7
General information
10. Do not allow anything to rest on the power cord. Do not place the LCD
projector where the cord will be walked on.
11. Follow all warnings and instructions marked on the LCD projector.
12. As a safety feature, this LCD projector is equipped with a 3-prong earthed
plug. The 3-prong earthed plug will fit only into a earthing-type power outlet.
If the plug does not fit, use an adapter that is properly earthed or have an
electrician install an earthing-type outlet. Do not attempt to modify this AC
plug.
13. For added protection for the LCD projector during a lightning storm, or when
it is left unattended or not in use for long periods of time, unplug it from the
power point and disconnect any cable systems. This will prevent damage to the
projector due to lightning and power-line surges.
14. Do not overload power points and extension cords with too many products,
because this can result in fire or electric shock.
15. Never push objects of any kind into the LCD projector through cabinet slots,
as they may touch dangerous voltage points or short out parts, which could
result in a fire or electric shock.
16. Do not attempt to service the LCD projector yourself. Opening or removing
covers may expose you to dangerous voltages or other hazards. Refer all
servicing to qualified service personnel.
17. Unplug the LCD projector equipment from the power point and refer
servicing to qualified service personnel under the following conditions:
a.
When the power cord or plug is damaged or frayed.
b. If liquid has been spilled into the LCD projector.
c.
If the LCD projector has been exposed to rain or water.
d.
If the LCD projector does not operate normally when you follow the
operating instructions. Adjust only those controls that are covered by
the operating instructions; improper adjustment of other controls may
cause damage and will often require extensive work by a qualified
technician to restore the LCD projector to normal operation.
e.
If the LCD projector has been dropped or the cabinet has been
damaged.
f.
When the LCD projector exhibits a distinct change in performance—
this indicates a need for service.
18. Upon completion of any service or repairs to the LCD projector ask the service
technician to perform a routine safety check to determine that the LCD
projector is in safe operating condition.
8
Polaview 215E LCD Projector User’s Guide
General information
19. When replacement parts are required, be sure the service technician has used
replacement parts specified by the manufacturer that have the same
characteristics as the original parts. Unauthorized substitutions may result in
fire, electric shock or other hazards.
20. The air filter should be cleaned every 100 hours of lamp use. The LCD
projector may become too hot if the filter is not cleaned when required.
21. If the lens becomes dirty or smudged, clean with a clean, dampened cloth.
Never touch the lens with your fingers.
22. Do not look directly into the aperture and lens while operating the LCD
projector, as this may result in damage to your eyes.
23. We make an effort to keep your environment clean. Please bring the not
reparable unit to your dealer or a recycling company.
English
9
Introduction
Introduction
LCD projector features
High brightness and resolution
1,440 K-pixel, 600-lumen (ANSI) offers clear images even when ambient light level
is high.
Compact and lightweight
Because it is completely portable, you can give attractive presentations at any
location by connecting the LCD projector to an external device such as a notebook
computer.
20 to 300 inch screen capability
20'' (0.97 m) to 300'' (15.8) diagonal screen size. (See table on page 32.)
Compatible with most personal computers
The RGB input accepts signals from VGA, SVGA, XGA (Compression), and MAC
compatible computers with no additional hardware. Other computers require a
separate cable.
On-screen display
This LCD projector’s language is set to English at the factory. In addition, you can
select Spanish, French, German or Italian.
Information screens and menus make setting up and operating the LCD projector
extremely easy.
IR remote control
Front and rear sensors allow you to control the projector from almost anywhere in
the room.
Stereo audio output
For external audio equipment connection.
ProMouse control feature
This feature lets you use the LCD Projector remote control unit as a mouse to
control your personal computer. There is also an Auto Setup feature which
identifies the signal mode and automatically adjusts the Vertical position,
Horizontal position, Horizontal size and Phase. (See page 46)
Projected PC-Card (ATA Flash Card) data
Using this software, “JPEG Viewer”, you can save the image displayed on the PC
screen as a JPEG file, to a PC-Card (ATA Flash Card). And if you insert the PCCard into this LCD projector, you can project the image using the JPEG Image
playback feature. (See page 48.)
Automatic Universal Power Supply with automatic power down
This unit has an operating voltage range of 100-240 V AC. The lamp power is
automatically turned off if there is no input signal for 15 minutes.
10
Polaview 215E LCD Projector User’s Guide
Introduction
Video board
This LCD projector accepts input signals in all major video formats, including
PAL, SECAM, NTSC, PAL-M, PAL-N and NTSC4.43, as well as the higher
quality S-VIDEO signals.
Equipped with a variety of convenient functions
A variety of functions such as the following have been provided.
• A blue screen is projected when no signal is being input.
• Mute or freeze functions for video and audio signals can be toggled on and off.
• The input signal display function can be toggled on and off.
• Cancellation of the enlarging function is provided.
• 16:9 (wide) screen projection is provided.
• The function of the POWER button on the remote control unit can be
disabled.
• Rear screen projection is provided.
English
11
Introduction
Contents of the LCD projector box
Please confirm that the following items are packed in the LCD projector box. They
are provided to help you use or set up your LCD projector.
• LCD projector
• Remote control unit
• 2 “AA” batteries
• 9.8 ft. UL/CSA power cord or 2.44m power cord
• VGA cable
• VGA MAC adapter
• PC audio cable
• RS-232C cable
• RS-232C 9-pin adapter
• RS-232C 25-pin adapter
• 3.5'' floppy disk containing ProMouse Software for Windows 95 & 98
• 3.5'' floppy disk containing ProMouse Software for Macintosh
• 3.5'' floppy disk containing JPEG Viewer for Windows 95 & 98
• User’s Guide (please read completely before operating)
• Registration card
12
Polaview 215E LCD Projector User’s Guide
Introduction
Parts list and accessories
Remote control unit
a
b
c
POWER FREEZE SHUTTER
MUTE
MODE
VOLUME
MENU
n
i
INPUT
d
STANDARD
e
h
j
k
LIGHT POINTER
l
f
m
o
g
p
a FREEZE button
i VOLUME buttons
b POWER button
j INPUT button
c MUTE button
k MENU button
d MODE button
l POINTER button
e Adjust Z / X / C / V buttons
m Mouse button
f LIGHT button
n Transmitter
g Click 2 button
o Click 1 button
h SHUTTER button
p Battery compartment
English
13
Introduction
Before using the remote control
Load the 2 “AA” batteries into the remote control
unit.
1. Slide the lid in the direction of the arrow.
2. Install 2 “AA” batteries as indicated inside the
battery compartment.
3. Replace the lid and snap it into place.
Battery replacement caution
!
Do not mix old and new batteries. (Also never mix
alkaline with manganese batteries)
Note: Do not place the remote control
unit upside down, otherwise the mouse
button may be pressed down, which
will cause the battery power to be
consumed.
Remote control unit operating range
When using the remote control unit, point it at the front or rear of the LCD
projector or at the projection screen. The range for optimum operation is within 30
degrees of the receiver at a maximum distance of about 23 feet (7m).
Remote control unit light up
Press the LIGHT button to illuminate the function buttons on the remote control
unit for 10 seconds. The light goes out while any button is pressed, and then turns
back on for an additional 10 seconds when the button is released.
14
Polaview 215E LCD Projector User’s Guide
Introduction
LCD projector
v
u
t
STATUS
CODE
VOLUME
MODE
INPUT
w
MENU
s
r
ST
ANDARD
q
a
VO
LU
M
E
ST
M
N
OD
E
A
DA
b
RD
M
EN
U
PU
T
IN
p
o
ST
A
CO TU
DE S
n
MAIN
OFF
ON
m
S-VIDE
O VID
EO
IN L-A
UD
IO-R
RS232
C
RGB IN
AUDIO
IN
RGB OU
T
c
d
e
f g
h
i
l
AUDIO
OUT
MAIN
k
j
a PC Card release button
m MAIN power switch
b PC Card slot
n FOCUS ring
c S-VIDEO input connector
o ZOOM ring
d VIDEO input connector
p Remote control sensor
e AUDIO (l/r) input connectors
q POWER button/ STANDBY(R)
f RS-232C connector
g RGB input connector
h Audio input connector
i RGB output connector
j Audio output connector
k Lens cap
l AC socket (100-240V)
ON(G) indicator
r Adjust Z/X/C/V buttons
s STATUS CODE
t INPUT button
u MENU button
v MODE button
w VOLUME button
English
15
Introduction
LCD projector back/
bottom
a
b
c
AUDIO OUT
OFF
MAIN
AC IN
ON
d
RGB OIUT
e
RS232C
RGB IN
AUDIO IN
f
S-VIDEO VIDEO IN
L-AUDIO IN-R
g
16
h
a Remote control sensor
e Lens cap holder
b Air outlet port
f Air filter
c Carrying handle
g Lamp cover screws
d Adjusters
h Lamp cover
Polaview 215E LCD Projector User’s Guide
Getting started
Getting started
How to use the remote control unit
You can use the remote control unit in place of the computer’s mouse.
Note: If PC-Card or Video mode is selected as the input signal mode for the LCD
projector, the ProMouse feature cannot be used. (This includes the Pointer, Stamp
and Line functions.)
POWER FREEZE SHUTTER
MUTE
MODE
VOLUME
MENU
INPUT
STANDARD
LIGHT POINTER
c
b
d
a
a Click 2 button
c Pointer button
b Mouse button
d Click 1 button
POINTER button: Each press will change the mouse
cursor mode as shown below.
Mouse
Pointer
Stamp
Line
Mouse button: This can be used in place of the computer’s
mouse pointing device to move the screen cursor.
cursor button
Click 1 button: This button corresponds to the button on a single-button mouse,
or to the left button on a standard mouse with two buttons.
• When this button is pressed in Stamp mode, you can mark the screen with a
stamp.
• When this button is held down and used with the mouse button in Line mode,
you can paint a line on the screen.
Click 2 button: This button corresponds to the right button on a standard mouse
with two buttons.
• When in mouse cursor mode (Pointer, Stamp, or Line), you can return to
mouse mode by pressing this button.
English
17
Getting started
Setting up the LCD projector
Place the LCD projector on a stable, flat surface according to the LCD projector/
screen relative position chart on page 32.
Positioning the LCD projector
Caution: Depending on the relative position of the LCD projector and the screen,
improper adjustments may cause picture distortion. To prevent the LCD from
wobbling, make sure both adjusters (see below) are in firm contact with the support
surface.
Side view
projected image
center
S-VIDEO VIDEO IN
L-AUDIO IN-R
RS232C
RGB IN
AUDIO IN
RGB OIUT
AUDIO OUT
center
screen
center the projected image on the screen
Original picture position
Picture position after adjustment
Front view
adjusters
To raise the projector, turn the adjusters to the right.
To lower the projector, turn the adjusters to the left.
Note: For a distortion-free picture, it is very important that the LCD projector be
positioned so that it is perfectly horizontal. If necessary, turn the adjusters in either
direction to make fine adjustments.
18
Polaview 215E LCD Projector User’s Guide
Getting started
Adjusting the lens
If the LCD projector is not set up so that it is horizontal, it will not be possible to
obtain a distortion-free picture. Turn the adjusters in either direction to make fine
adjustments to the level of the projector so that the projector is perfectly horizontal.
VO
LU
ME
ST
M
OD
E
A
N
DA
RD
M
EN
U
IN
PU
T
ST
AT
CO US
DE
a
b
MAIN
OFF
S-VIDEO
VIDEO
ON
IN L-AU
DIO-R
RS232C
RGB IN
AUDIO
IN
RGB OUT
AUDIO
OUT
MAIN
a. Use the ZOOM ring to adjust the size of the picture.
For a larger picture, turn the ring to the right. For a smaller picture, turn the
ring to the left.
b. Use the FOCUS ring to adjust the focus of the picture.
Turn the ring to the right or left until the picture is at the optimum focus.
Rear screen mode projection
The image can be flipped to a mirror image of the input video signal for rear screen
projection.
The procedure and on-screen displays shown below assume that an RGB signal is
being used to input the signal.
MENU
RGB ADJUST
RGB SYNC MENU
>SET UP PROJECTOR
LANGUAGE
/SPRACHE /LANGUE
/IDIOMA
/LINGUA
SELECT : PUSH ZorX
SET
: PUSH CorV
END
: PUSH MENU
Front mounting
(factory setting)
S-VIDEO VIDEO IN
L-AUDIO IN-R
RS232C
RGB IN
AUDIO IN
RGB OIUT
AUDIO OUT
Rear mounting
SET UP PROJECTOR
>FRONT REAR
INPUT DISP
REMOTE POWER
EXPANSION (VGA)
LAMP TIME RESET
FRONT
ON
ON
ON
OFF
SELECT : PUSH ZorX
SET
: PUSH CorV
END
: PUSH MENU
Press MENU to display the menu.
2. Press Z or X to select SET UP PROJECTOR, and then press C or V to
display the screen.
1.
3. Press Z or X to select FRONT REAR and then press C or V select
FRONT or REAR.
Select FRONT to return to the standard projection format.
Select REAR to flip to a mirror image of the input signal.
4. Press MENU twice to exit.
English
19
Getting started
Connecting the LCD projector
Before you begin
• Turn off the power supply of each system component before connecting any of
the components.
• If necessary cables for connecting any of the system components are not
supplied with the component or available as an optional accessory, you may
need to obtain them yourself.
Connecting to a
Diagram numbers correspond to the numbers in the computer cables & adapters
computer (RGB signal) chart. (see page 22).
Audio system
Computer
Computer monitor cable
Audio cable
(not included)
(not included)
e
S-VIDEO VIDEO IN
f
RS232C
RGB IN
AUDIO IN
RGB OIUT
AUDIO OUT
Connector
jacks on
left side of
computer
a
b
L-AUDIO IN-R
c
d
a RS-232C 25-pin adapter (6)
d PC audio cable (3)
b RS-232C cable (4)
e RS-232C 9-pin adapter (5)
c VGA cable (1)
f VGA Mac adapter (2)
Note:
• The RGB input accepts signals from VGA, SVGA, XGA (Compression), and
MAC compatible computers without the need for any additional hardware.
• Plug the VGA signal cable (supplied) correctly into the RGB IN terminal on the
LCD projector and the RGB signal output terminal on your computer. Secure
the plugs by tightening the thumb screws.
When connecting the LCD projector to a Macintosh series computer, first
connect the VGA/MAC adapter (supplied) to the RGB signal input terminal on
your computer. Then, firmly plug the VGA signal cable into both the RGB IN
terminal on the LCD projector and the VGA/MAC adapter on the computer.
Secure the plugs by tightening the thumb screws.
• To view images simultaneously on the monitor and projection screen, connect
your computer monitor to the LCD projector’s RGB OUT terminal.
• When the LCD projector is connected to external devices (for example, a
personal computer) you can use the remote control unit in place of the
computer’s mouse by attaching the RS-232C connector cable.
20
Polaview 215E LCD Projector User’s Guide
Getting started
• Plug the RS-232C cable (supplied) correctly into both the RS-232C terminal on
the LCD projector and the RS-232C output terminal on the computer. Secure
the plugs by tightening the thumb screws.
When connecting to a Macintosh series computer, use the RS-232C 9-pin
adapter (supplied). Or, when connecting to an IBM-PC series computer, use the
RS-232C 25-pin adapter (supplied). Connect one of these RS-232C adapters to
the RS-232C input terminal on your computer. Then, firmly plug the RS-232C
cable into both the RS-232C terminal on the LCD projector and the RS-232C
adapter on the computer. Secure the plugs by tightening the thumb screws.
• When connecting the LCD projector to a computer other than a VGA, SVGA,
XGA (Compression), or Macintosh series, a separate cable is needed.
• If you wish to use the plug & play function, turn on the MAIN POWER switch
on the LCD projector before turning on the computer.
Connecting to audio/
video output
equipment
(S-VIDEO/VIDEO
signal)
Laser disc player
Audio system
S-Video cable
(not included)
Audio cable
(not included)
S-VIDEO VIDEO IN
L-AUDIO IN-R
RS232C
RGB IN
AUDIO IN
RGB OIUT
AUDIO OUT
Connector jacks on
left side of computer
VCR
Audio/Video cable
(not included)
Note:
If the S-VIDEO IN and VIDEO IN terminals are both connected, the S-VIDEO
IN signal input will have priority. To view the signal being input to the VIDEO IN
terminal, disconnect the plug from the S-VIDEO IN terminal.
If the video signal source is connected using a cable with a BNC junction plug, use
the BNC/RCA adapter (not included) to convert the pin jack.
English
21
Getting started
Computer cables & adapters
These accessories are supplied in order to connect the LCD projector to computer
equipment. The numbers in the left column correspond to the numbers in the
connection diagram on page 20.
Port
22
No.
Cable/adapter
1
VGA cable
2
Macintosh – VGA
adapter
3
PC audio cable
4
RS-232C cable
5
6
Projector
Computer/AV product
D-Sub HD 15-pin (male)
D-Sub HD 15-pin (male)
D-Sub HD 15-pin (female)
Macintosh D-Sub 15-pin (male)
Length
6.56 ft
(2.0 m)
—
M3 stereo mini-pin
M3 stereo mini-pin
Mini DIN 8-pin (male)
D-Sub 9-pin (female)
RS-232C 9-pin
adapter
D-Sub 9-pin (male)
Mini DIN 8-pin (female)
RS-232C 25-pin
adapter
D-Sub 9-pin (male)
6.56 ft
(2.0 m)
6.56 ft
(2.0 m)
—
Polaview 215E LCD Projector User’s Guide
D-Sub 25-pin (female)
—
Getting started
Pin assignments
Follow the instructions below when connecting to a computer. Refer to page 22 for
a list of cables and adapters.
a. Signal connector: D-Sub HD 15-pin (PC/AT compatible model)
Connect the signal cable to the D-Sub HD 15-pin connector on the LCD
project unit.
b. Signal connector: D-Sub 15-pin (MAC) to convert a MAC D-Sub 15-pin
connector to a D-Sub HD 15-pin connector, connect a VGA-MAC adapter
(included) to the D-Sub 15-pin connector and then to the D-Sub HD 15-pin
connector on the LCD projector. Be sure to set the DIP switches on the VGAMAC adapter to your display type. (See “Setting the DIP Switches” on page 24)
Macintosh
8
VGA
1
15
9
Pin
No.
Earth for red video signal
2
1
15
11
6
Pin
No.
Signal
1
5
10
Signal
1
Earth for red video signal
Red video signal
2
Green video signal
3
Composite sync
3
Blue video signal
4
ID1
4
Unused
5
Green video signal
5
Unused (Through out)
6
Earth for green video signal
6
Earth for red video signal
7
ID2
7
Earth for green video signal
8
Unused
8
Earth for blue video signal
9
Blue video signal
9
Unused
10 ID3
1
2
3
4
5
6
10 Earth
11 Earth
11 Unused
12 Vertical synchronising signal
12 Unused
13 Earth for blue video signal
13 Horizontal synchronising signal
14 Earth
14 Vertical synchronising signal
15 Horizontal synchronising signal
15 Unused
Note: When using a Composite Sync Output type Macintosh, please use a
Composite Sync type VGA MAC adapter (pin 3 and pin 13 are connected).
English
23
Getting started
Setting the DIP
Switches
Find the resolution of your display type on the table shown at left (also on the
adapter). Then, set each DIP switch that is indicated by a “ ” mark to ON.
RESOLUTION
DIP SWITCHES
1 2 3 4 5 6
*21" MULTIMODE
*17" MULTIMODE
*13" MULTIMODE
VGA/SVGA MODE
21" 1152X870
19" 1024X768
16" 832X624
13" 640X480
••
••
••
••
••••
••
• •
••
•
••
••
LEGEND:
= SUPPORTS APPLE MULTIPLE SCAN
SOFTWARE
= ON
*
•
Example: If your display type is 16'', set DIP switches 2 and 4 on the VGA-MAC
adapter to ON. By doing so, the signal will travel through switches 2 and 4 and pin
numbers 4 to 10 as shown in the signal chart above.
ON
ON
DIP
DIP
1 2 3 4 5 6
1 2 3 4 5 6
24
Polaview 215E LCD Projector User’s Guide
Getting started
c. RS-232C connector: D-Sub 9 pin Connect the RS-232C cable to the Mini
DIN 8-pin connector on the LCD projector unit.
d. RS-232C connector: Mini DIN 8-pin
To convert a D-Sub 9-pin connector to a Mini DIN 8-pin connector, use a
RS-232C 9-pin adapter (included). Connect the D-Sub 9-pin adapter and
RS-232C cable. Then, connect it to the Mini DIN 8-pin connector on the LCD
projector unit.
5
1
9
6
Pin
No.
6
8
3
5
1
2
Pin
No.
Signal
Signal
1
Unused
1
Unused (Request to send)
2
Received data
2
Unused (Clear to send)
3
Transmitted data
3
Transmitted data
4
Unused
4
Earth
5
Earth
5
Received data
6
Unused
6
Unused
7
Unused (Request to send)
7
Unused
8
Unused (Clear to send)
8
Unused
9
Unused
e. RS-232C connector: D-Sub 25-pin
To convert a D-Sub 25-pin connector to a D-Sub 9-pin connector, use a
RS-232C 25-pin adapter (included). Connect the D-Sub 25-pin adapter and
RS-232C cable. And then connect it to the D-Sub 9-pin connector on the
LCD projector unit.
13
1
25
14
Pin
No.
Signal
1
5
6
9
Pin
No.
Signal
1
Unused
1
Unused
2
Transmitted data
2
Received data
3
Received data
3
Transmitted data
4
Unused (Request to send)
4
Unused
5
Unused (Cleared to send)
5
Earth
6
Unused
6
Unused
7
Earth
7
Unused (Request to send)
8-25 Open
8
Unused (Clear to send)
9
Unused
English
25
Getting started
Factory preset timing
Preset timing
IBM 640x350 at 70 Hz
IBM 640x400 at 70 HZ
IBM 640x480 at 60 Hz
Dot Clock
25.1745 Mhz
25.1745 Mhz
25.1745 Mhz
Horizontal frequency
31.4681 Khz
31.4681 Khz
31.4681 Khz
A-Period
31.778 µs (800 dots)
31.778 µs (800 dots)
31.778 µs (800 dots)
B-Blanking
6.356 µs (160 dots)
6.356 µs (160 dots)
6.356 µs (160 dots)
C-Sync Width
3.815 µs (96 dots)
3.815 µs (96 dots)
3.815 µs (96 dots)
D-Back Porch
1.907 µs (48 dots)
1.907 µs (48 dots)
1.907 µs (48 dots)
E-Active Time
25.423 µs (640 dots)
25.423 µs (640 dots)
25.423 µs (640 dots)
F-Front Porch
0.636 µs (16 dots)
0.636 µs (16 dots)
0.636 µs (16 dots)
Vertical frequency
70.0849 Hz
70.0849 Hz
A-Period
14.268 ms (449 lines)
14.268 ms (449 lines)
16.684 ms (525 lines)
B-Blanking
3.146 ms (99 lines)
1.5557 ms (49 lines)
1.430 ms (45 lines)
C-Sync Width
0.064 ms (2 lines)
0.064 ms (2 lines)
0.064 ms (2 lines)
D-Back Porch
1.907 ms (60 lines)
1.113 ms (35 lines)
1.049 ms (33 lines)
E-Active Time
11.122 ms (350 lines)
12.711 ms (400 lines)
15.254 ms (480 lines)
F-Front Porch
1.176 ms (37 lines)
0.381 ms (12 lines)
0.318 ms (10 lines)
Sync Polarity (H/V)
Positive/Negative
Negative/Positive
Negative/Negative
Reservation timing
Dot Clock
Horizontal frequency
59.939 Hz
Preset timing
MAC LC 640x480
MAC II 640x480
VESA 640x350 at 85 Hz
31.334 MHz
30.2410 MHz
31.5 MHz
34.97 KHz
35.0012 KHz
37.861 KHz
A-Period
28.598 µs (896 dots)
28.570 µs (894 dots)
26.413 µs (832 dots)
B-Blanking
8.171 µs (256 dots)
7.407 µs (224 dots)
6.095 µs (192 dots)
C-Sync Width
2.043 µs (64 dots)
2.803 µs (63 dots)
2.032 µs (64 dots)
D-Back Porch
2.426 µs (76 dots)
3.241 µs (98 dots)
3.048 µs (96 dots)
E-Active Time
20.425 µs (640 dots)
21.163 µs (640 dots)
20.317 µs (640 dots)
F-Front Porch
3.702 µs (116 dots)
2.083 µs (63 dots)
1.016 µs (32 dots)
Vertical frequency
66.61 Hz
66.6689 Hz
85.080 Hz
A-Period
15.013 ms (525 lines)
15.000 ms (525 lines)
11.754 ms (445 lines)
B-Blanking
1.287 ms (45 lines)
1.286 ms (45 lines)
2.509 ms (95 lines)
C-Sync Width
0.086 ms (3 lines)
0.086 ms (3 lines)
0.079 ms (2 lines)
D-Back Porch
1.115 ms (39 lines)
1.114 ms (39 lines)
1.585 ms (60 lines)
E-Active Time
13.726 ms (480 lines)
13.714 ms (480 lines)
9.244 ms (350 lines)
F-Front Porch
0.886 ms (3 lines)
0.086 ms (3 lines)
0.845 ms (32 lines)
Sync Polarity (H/V)
Negative/Negative
Sync on Green or Composite Positive/Negative
26
Polaview 215E LCD Projector User’s Guide
Getting started
Preset timing
Dot Clock
Horizontal frequency
VESA 640x480 at 85Hz
VESA 640x480 at 72Hz
VESA 640x480 at 75 Hz
31.5 MHz
31.5 MHz
31.5 Mhz
37.861 KHz
37.861 KHz
37.500 KHz
A-Period
26.413 µs (832 dots)
26.413 µs (832 dots)
26.667 µs (840 dots)
B-Blanking
6.095 µs (192 dots)
6.095 µs (192 dots)
6.349 µs (200 dots)
C-Sync Width
2.032 µs (64 dots)
1.270 µs (40 dots)
2.032 µs (64 dots)
D-Back Porch
3.048 µs (96 dots)
4.063 µs (128 dots)
3.810 µs (120 dots)
E-Active Time
20.317 µs (640 dots)
20.317 µs (640 dots)
20.317 µs (640 dots)
F-Front Porch
1.016 µs (32 dots)
0.762 µs (24 dots)
0.508 µs (16 dots)
Vertical frequency
85.080 Hz
72.8088 Hz
75.0000 Hz
A-Period
11.754 ms (445 lines)
13.735 ms (520 lines)
13.333 ms (500 lines)
B-Blanking
1.189 ms (45 lines)
1.057 ms (40 lines)
0.533 ms (20 lines)
C-Sync Width
0.079 ms (3 lines)
0.079 ms (3 lines)
0.080 ms (3 lines)
D-Back Porch
1.083 ms (41 lines)
0.740 ms (28 lines)
0.427 ms (16 lines)
E-Active Time
10.566 ms (400 lines)
12.678 ms (480 lines)
12.800 ms (480 lines)
F-Front Porch
0.026 ms (1 line)
0.238 ms (9 lines)
0.027 ms (1 line)
Sync Polarity (H/V)
Negative/Positive
Negative/Negative
Negative/Negative
Preset timing
VESA 640x480 at 85Hz
VESA 800x600 at 56Hz
VESA 800x600 at 60Hz
Dot Clock
36.000 Mhz
36.000 Mhz
40.000 Mhz
Horizontal frequency
43.269 Khz
35.156 Khz
37.879 Khz
A-Period
23.111 µs (832 dots)
28.444 µs (1024 dots)
26.400 µs (1056 dots)
B-Blanking
5.333 µs (192 dots)
6.222 µs (224 dots)
6.400 µs (256 dots)
C-Sync Width
1.333 µs (48 dots)
2.000 µs (72 dots)
3.200 µs (128 dots)
D-Back Porch
3.111 µs (112 dots)
3.556 µs (128 dots)
2.200 µs (88 dots)
E-Active Time
17.778 µs (640 dots)
22.222 µs (800 dots)
20.000 µs (800 dots)
F-Front Porch
0.889 µs (32 dots)
0.667 µs (24 dots)
1.000 µs (40 dots)
Vertical frequency
85.008 Hz
56.250 Hz
60.317 Hz
A-Period
11.764 ms (509 lines)
17.778 ms (625 lines)
16.579 ms (628 lines)
B-Blanking
0.670 ms (29 lines)
0.711 ms (25 lines)
0.739 ms (28 lines)
C-Sync Width
0.069 ms (3 lines)
0.057 ms (2 lines)
0.106 ms (4 lines)
D-Back Porch
0.578 ms (25 lines)
0.626 ms (22 lines)
0.607 ms (23 lines)
E-Active Time
11.093 ms (480 lines)
17.067 ms (600 lines)
15.840 ms (600 lines)
F-Front Porch
0.023 ms (1 line)
0.028 ms (1 line)
0.026 ms (1 line)
Sync Polarity (H/V)
Negative/Negative
Positive/Positive
Positive/Positive
English
27
Getting started
Preset timing
VESA 800x600 at 72Hz
VESA 800x600 at 75Hz
VESA 800x600 at 85Hz
Dot Clock
50.000 Mhz
49.500 Mhz
56.250 Mhz
Horizontal frequency
48.077 Khz
46.875 Khz
53.674 Khz
A-Period
20.800 µs (1040 dots)
21.333 µs (1056 dots)
18.631 µs (1048 dots)
B-Blanking
4.800 µs (240 dots)
5.172 µs (256 dots)
4.409 µs (248 dots)
C-Sync Width
2.400 µs (120 dots)
1.616 µs (80 dots)
1.138 µs (64 dots)
D-Back Porch
1.280 µs (64 dots)
3.232 µs (160 dots)
2.720 µs (152 dots)
E-Active Time
16.000 µs (800 dots)
16.162 µs (800 dots)
14.222 µs (800 dots)
F-Front Porch
1.120 µs (56 dots)
0.323 µs (16 dots)
0.569 µs (32 dots)
Vertical frequency
72.188 Hz
75.000 Hz
85.061 Hz
A-Period
13.853 ms (666 lines)
13.333 ms (625 lines)
11.756 ms (631 lines)
B-Blanking
1.373 ms (66 lines)
0.533 ms (25 lines)
0.578 ms (28 lines)
C-Sync Width
0.125 ms (6 lines)
0.064 ms (3 lines)
0.056 ms (3 lines)
D-Back Porch
0.478 ms (23 lines)
0.448 ms (21 lines)
0.503 ms (27 lines)
E-Active Time
12.480 ms (600 lines)
12.800 ms (600 lines)
11.179 ms (600 lines)
F-Front Porch
0.770 ms (37 lines)
0.021 ms (1 line)
0.019 ms (1 line)
Sync Polarity (H/V)
Positive/Positive
Positive/Positive
Positive/Positive
Preset timing (*Compression)
VESA 1024x768 at 60Hz
VESA 1024x768 at 70Hz
VESA 1024x768 at 75 Hz
Dot Clock
65.000 MHz
75.000 MHz
78.7500 Mhz
Horizontal frequency
48.363 KHz
56.476 KHz
60.0229 KHz
A-Period
20.677 µs (1344 dots)
17.707 µs (1328 dots)
16.660 µs (1312 dots)
B-Blanking
4.923 µs (320 dots)
4.054 µs (304 dots)
3.657 µs (288 dots)
C-Sync Width
2.092 µs (136 dots)
1.813 µs (136 dots)
1.219 µs (96 dots)
D-Back Porch
2.462 µs (160 dots)
1.920 µs (144 dots)
2.235 µs (176 dots)
E-Active Time
15.754 µs (1024 dots)
13.653 µs (1024 dots)
13.003 µs (1024 dots)
F-Front Porch
0.369 µs (24 dots)
0.320 µs (24 dots)
0.203 µs (16 dots)
Vertical frequency
60.004 Hz
70.069 Hz
75.0286 Hz
A-Period
16.666 ms (806 lines)
14.272 ms (806 lines)
13.328 ms (800 lines)
B-Blanking
0.786 ms (38 lines)
0.673 ms (38 lines)
0.533 ms (32 lines)
C-Sync Width
0.124 ms (6 lines)
0.106 ms (6 lines)
0.050 ms (3 lines)
D-Back Porch
0.600 ms (29 lines)
0.513 ms (29 lines)
0.466 ms (28 lines)
E-Active Time
15.880 ms (768 lines)
13.599 ms (768 lines)
12.795 ms (768 lines)
F-Front Porch
0.062 ms (3 lines)
0.053 ms (3 lines)
0.017 ms (1 line)
Sync Polarity (H/V)
Positive/Positive
Positive/Positive
Positive/Positive
*Note: Because some lines are omitted, picture degradation may occur.
28
Polaview 215E LCD Projector User’s Guide
Getting started
Preset timing (*Compression)
Horizontal frequency
MAC 16” 832x624
MAC 19” 1024x768
49.725 KHz
60.2410 KHz
A-Period
20.111 µs (1152 dots)
16.600 µs (1328 dots)
B-Blanking
5.587 µs (320 dots)
3.800 µs (304 dots)
C-Sync Width
1.117 µs (64 dots)
1.200 µs (96 dots))
D-Back Porch
3.910 µs (244 dots)
2.200 µs (176 dots)
E-Active Time
14.524 µs (832 dots)
12.800 µs (1024 dots)
F-Front Porch
0.559 µs (32 dots)
0.400 µs (4 dots)
Vertical frequency
74.550 Hz
74.9266 Hz
A-Period
13.414 ms (667 lines)
13.346 ms (804 lines)
B-Blanking
0.865 ms (43 lines)
0.597 ms (36 lines)
C-Sync Width
0.060 ms (3 lines)
0.050 ms (3 lines)
D-Back Porch
0.784 ms (39 lines)
0.498 (30 lines)
E-Active Time
12.549 ms (624 lines)
12.749 ms (768 lines)
F-Front Porch
0.020 ms (1 line)
0.050 ms (3 lines)
Sync Polarity (H/V)
Negative/Negative
—
*Note: Because some lines are omitted, picture degradation may occur.
English
29
Getting started
Turning the power on and off
If the MAIN power switch on the LCD projector is pressed while the cooling fan is
still operating, the operating life of the projector lamp will be shortened. Be sure to
follow the procedure outlined below when turning the LCD projector power
supply on and off.
d
POWER FREEZE SHUTTER
MUTE
MODE
VO
LU
M
E
a
VOLUME
MENU
INPUT
STANDARD
LIGHT POINTER
ST
M
N
OD
A
E
DA
RD
EN
U
M
IN
PU
T
STA
CO TU
DE S
MAIN
OFF
ON
S-VIDE
O VID
EO
b
IN L-A
UDI
O-R
RS232C
RGB IN
AUDIO
IN
RGB OUT
AUDIO
OUT
MAIN
a POWER button/STANDBY(R)
ON(G) indicator
b MAIN power switch
Turning on the power
c
c AC socket
d POWER button
(remote control)
Insert the power cord into the LCD projector AC socket and connect it
to a properly grounded wall outlet.
2. Set the MAIN power switch on the LCD projector to ON.
The STANDBY(R) ON(G) indicator lights red.
The first time you turn on the power, or whenever the STANDBY(R) ON(G)
indicator is not lit, press the MAIN power switch (ON/OFF) to turn on the
power.
3. Press the POWER button on the LCD projector or remote control to
turn on the power.
The STANDBY(R) ON(G) indicator flashes green while the LCD projector is
warming up, and then changes to solid green when the picture is projected on
the screen after approximately 45 seconds.
When the power is on, the STANDBY(R) ON(G)
POWER
indicator indicates the operating condition of the lamp.
1.
STANDBY (R)
ON (G)
Red
MAIN power on (lamp off)
Green
Lamp is ready
Flashing green
Warming up
Flashing red
Cooling fan operating
Note: When POWER is first pressed, and while the LCD projector is
warming up, the “Polaroid” letter will be projected on the screen for
approximately 30 seconds. During the warm-up period, no other picture can be
projected on the screen.
30
Polaview 215E LCD Projector User’s Guide
Getting started
Turning off the power
Press the POWER button on the LCD projector or remote control to
turn off the power.
The STANDBY(R) ON(G) indicator flashes red while the LCD projector
cools down, and then changes to solid red when the fan stops after about a
minute.
2. Set the MAIN power switch on the LCD projector to OFF.
1.
Positioning the LCD projector and screen
The screen should be positioned so that it is not directly touched by sunlight or
room light, as this will wash out the colors of the picture, making it hard to see.
When possible, close all blinds and curtains and dim the lights. Also, the projector
should be at a 90° angle to the screen for the best results. To determine the distance
for the desired size, please refer to the LCD projector/relative screen position chart
on page 32.
Top view
VOLUME
MODE
ST
AN D A R D
a
MENU
INPUT
STATUS
CODE
Side view
c b
d
S-VIDEO VIDEO IN
L-AUDIO IN-R
RS232C
RGB IN
AUDIO IN
RGB OIUT
AUDIO OUT
e
Your LCD projector is equipped with an image reverse feature. So, in addition to
front projection, you can also reverse the image for rear projection. (See page 19)
English
31
Getting started
LCD projector/screen relative position
The picture can be adjusted to the desired size within the range of the zoom lens.
(This chart is based on SVGA input signals. Screen sizes will be smaller when VGA
signals are used.)
Screen size
Throw distance (e)
Distance (a)
Distance (b)
Distance (c)
Distance (d)
20 inches
3.18 ft (0.97mm)
1.35 ft (0.41m) 0.98 ft. (0.30m) 0.89 ft (0.27m) 1.18 ft (3cm)
40 inches
4.92-6.56 ft (1.5–2.0m)
2.66 ft (0.81m) 2.00 ft. (0.61m) 1.80 ft (0.55m) 2.36 ft (6cm)
60 inches
7.87-10.17 ft (2.4–3.1m)
3.94 ft (1.2m)
2.99 ft. (0.91m) 2.69 ft (0.82m) 3.54 ft (9cm)
72 inches
9.51-12.14 ft (2.9–3.7m)
4.92 ft (1.5m)
3.61 ft. (1.1m)
3.25 ft (0.99m) 4.33 ft (11cm)
80 inches
10.50-13.45 ft (3.2–4.1m)
5.25 ft (1.6m)
3.94 ft. (1.2m)
3.54 ft (1.08m) 4.72 ft (12cm)
100 inches
13.12-17.06 ft (4.0–5.2m)
6.56 ft (2.0m)
4.92 ft. (1.5m)
4.43 ft (1.35m) 5.91 ft (15cm)
120 inches
15.75-20.67 ft (4.8–6.3m)
7.87 ft (2.4m)
5.91 ft. (1.8m)
5.31 ft (1.62m) 7.09 ft (18cm)
150 inches
20.01-25.92 ft (6.1–7.9m)
9.84 ft (3.0m)
7.55 ft. (2.3m)
6.79 ft (2.07m) 9.06 ft (23cm)
200 inches
26.57-34.78 ft (8.1–10.6m)
13.45 ft (4.1m) 9.84 ft. (3.0m)
250 inches
33.46-43.31 ft (10.2–13.2m) 16.73 ft (5.1m) 12.47 ft. (3.8m) 11.22 ft (3.42m) 14.96 ft (38cm)
300 inches
40.03-51.84 ft1(12.2–15.8m) 20.01 ft (6.1m) 15.09 ft. (4.6m) 13.58 ft (4.14m) 18.11 ft (46cm)
8.86 ft (2.7m)
11.81 ft (30cm)
If the LCD projector and the screen are not properly placed,
the picture will be distorted producing a keystoned image as
shown at right.
Caution: When setting up the LCD projector
Do not place it in humid or dusty places, or places where the
air is sooty or full of cigarette smoke. If the lens, mirror or
other optical component becomes dirty, the picture will blur
or darken, making viewing difficult.
Do not expose the projector to extreme heat or cold.
Operating temperature: 41°-104°F (5°-40°C).
32
Polaview 215E LCD Projector User’s Guide
keystoned
image
Getting started
Basic LCD projector operation
Before you begin, make sure…
•
•
•
•
•
You have read Important safeguards. (See page 7)
All connections are made. (See page 20)
The LCD projector is positioned properly. (See page 31)
The LCD projector is plugged in.
The lens cap is removed.
g
c
POWER FREEZE SHUTTER
a
d
MUTE
MODE
VOLUME
MENU
INPUT
f
e
STANDARD
VOLUME
LIGHT POINTER
MODE
ST
ANDARD
MENU
INPUT
STATUS
CODE
b
a VOLUME +/- buttons
e INPUT button (remote control)
b INPUT button
f VOLUME +/- button
c FREEZE button (remote control)
d MUTE button (remote control)
(remote control)
g SHUTTER button
(remote control)
Turn on the power.
(See “Turning the power on and off” on page 30)
2. Press INPUT on the LCD projector or remote control unit to select the
desired input signal.
1.
RGB
PC-CARD
S-VIDEO OR VIDEO
Continue to press INPUT to set the desired input signal. Each press will
change the display as shown above.
You can turn the input signal display off. (See “Turning off the input signal
display” on page 36.)
3. Turn on your computer (RGB) or start video playback (S-VIDEO or
VIDEO).
Adjust FOCUS and ZOOM rings if necessary. (See “Adjusting the lens” on
page 19)
English
33
Getting started
4. Press VOLUME +/- on the LCD projector or remote control unit to
adjust the volume level of the built-in speaker.
The number of segments (0-63) increases or decreases as the volume is
adjusted.
24
When you select an S-VIDEO or VIDEO input signal
VIDEO
AUTO
NTSC
a
b
a Input signal
b Input signal format
Note: When an S-VIDEO or VIDEO input signal is selected, the name of the
signal format will be displayed directly below the input signal in the on-screen
display.
Special effects while projecting
• Turning off the sound
Press the MUTE button to instantly mute the sound.
Press again to restore the previous sound level.
• Manual shutter function
Press the SHUTTER button to blank out the video and mute the sound.
Press again to return to the normal screen and sound.
• Freezing the picture
Press the FREEZE button to freeze the picture and mute the sound.
Press again to return to the normal screen and sound.
34
Polaview 215E LCD Projector User’s Guide
Getting started
Using other useful functions
You may use buttons on the LCD projector or remote control unit for the
following operations.
Selecting the
Language for OnScreen Displays
(for Model PV215E-C
only)
The LCD projector can display screens in one of five different languages. The
procedure and on-screen displays shown below assume that an RGB signal is being
used as the input signal.
MENU
RGB ADJUST
RGB SYNC MENU
SET UP PROJECTOR
>LANGUAGE
/SPRACHE /LANGUE
/IDIOMA
/LINGUA
SELECT : PUSH ZorX
SET
: PUSH CorV
END
: PUSH MENU
LANGUAGE
>ENGLISHINPUT DISP
DEUTSCH
FRANCAIS
ESPANOL
ITALIANO
ON
SELECT : PUSH ZorX
END
: PUSH MENU
Press MENU to display the menu.
2. Press Z or X to select LANGUAGE, and then press C or V to display the
screen.
1.
3. Press Z or X to select the language.
4. Press MENU twice to exit.
Selecting the Video
System Format
The LCD projector is equipped with full NTSC, PAL, SECAM, PAL-M, PAL-N
and NTSC4.43 video support. Usually set to AUTO, the broadcast format is
automatically switched according to the tape inserted. If you experience poor color,
however, you may have to set to NTSC, PAL, SECAM, PAL-M, PAL-N, or
NTSC4.43 as described below.
S-VIDEO/VIDEO input is selected (page 34).
MENU
VIDEO ADJUST
SET UP PROJECTOR
>VIDEO SYSTEM
LANGUAGE
/SPRACHE /LANGUE
/IDIOMA
/LINGUA
SELECT : PUSH ZorX
SET
: PUSH CorV
END
: PUSH MENU
VIDEO SYSTEM
>AUTO
PAL
SECAM
NTSC
PAL-M
PAL-N
NTSC4.43
SELECT : PUSH ZorX
END
: PUSH MENU
Press MENU to display the menu.
2. Press Z or X VIDEO SYSTEM, and then press C or V to display the
screen.
3. Press Z or X to select the desired video system.
4. Press MENU twice to exit.
1.
English
35
Getting started
Turning off the input
signal display
The function which displays the currently selected input signal on the screen can be
turned off by the following procedure. The procedure and on-screen displays
shown below assume that an RGB signal is being used as the input signal.
MENU
RGB ADJUST
RGB SYNC MENU
>SET UP PROJECTOR
LANGUAGE
/SPRACHE /LANGUE
/IDIOMA
/LINGUA
SELECT : PUSH ZorX
SET
: PUSH CorV
END
: PUSH MENU
SET UP PROJECTOR
FRONT/REAR
>INPUT DISP
REMOTE POWER
EXPANSION (VGA)
LAMP TIME RESET
FRONT
ON
ON
ON
NO
SELECT : PUSH ZorX
SET
: PUSH CorV
END
: PUSH MENU
Press MENU to display the menu.
2. Press Z or X to select SET UP PROJECTOR, and then press C or V to
display the screen.
3. Press Z or X to select INPUT DISP, and then press C or V to select ON
or OFF.
Select OFF to turn off the input signal display function.
Select ON to turn on the input signal display function. The input signal will be
displayed each time it is changed. (This is the factory setting.)
4. Press MENU twice to exit.
1.
Disabling the POWER
button on the remote
control unit
In order to prevent the power from being turned off by mistake, the POWER
button on the remote control unit can be disabled by the following procedure. The
procedure and on-screen displays shown below assume that an RGB signal is being
used as the input signal.
MENU
RGB ADJUST
RGB SYNC MENU
>SET UP PROJECTOR
LANGUAGE
/SPRACHE /LANGUE
/IDIOMA
/LINGUA
SELECT : PUSH ZorX
SET
: PUSH CorV
END
: PUSH MENU
1.
SET UP PROJECTOR
FRONT/REAR
INPUT DISP
>REMOTE POWER
EXPANSION (VGA)
LAMP TIME RESET
FRONT
ON
ON
ON
NO
SELECT : PUSH ZorX
SET
: PUSH CorV
END
: PUSH MENU
Press MENU to display the menu.
2. Press Z or X to select SET UP PROJECTOR, and then press C or V to
display the screen.
3. Press Z or X to select REMOTE POWER, and then press C or V to
select ON or OFF.
Select OFF to disable the POWER button on the remote control unit.
Select ON to use the POWER button on the remote control unit normally.
(This is the factory setting.)
4. Press MENU twice to exit.
36
Polaview 215E LCD Projector User’s Guide
Getting started
Canceling the
enlarging (scanning
line conversion)
function
When a VIDEO/S-VIDEO signal in NTSC format or a signal with less than
800 x 600 dots (for example, 640x480 dots) is input, the LCD projector
automatically enlarges the image to 800 x 600 dots. This may cause picture quality
degradation. For a better image, select EXPANSION (VGA) or (NTSC):OFF by
the following procedure.
The procedure and on-screen displays shown below assume that an RGB signal is
being used as the input signal.
MENU
RGB ADJUST
RGB SYNC MENU
>SET UP PROJECTOR
LANGUAGE
/SPRACHE /LANGUE
/IDIOMA
/LINGUA
SELECT : PUSH ZorX
SET
: PUSH CorV
END
: PUSH MENU
SET UP PROJECTOR
FRONT/REAR
INPUT DISP
REMOTE POWER
>EXPANSION (VGA)
LAMP TIME RESET
FRONT
ON
ON
ON
NO
SELECT : PUSH ZorX
SET
: PUSH CorV
END
: PUSH MENU
Press MENU to display the menu.
2. Press Z or X to select SET UP PROJECTOR, and then press C or V to
display the screen.
3. Press Z or X to select EXPANSION (VGA) OR (NTSC), and then press
C or V to select ON or OFF.
Select OFF to cancel the enlarging (scanning line conversion) function.
Select ON to use the enlarging (scanning line conversion) function. (This is the
factory setting.)
4. Press MENU twice to exit.
1.
Changing to 16:9
(wide) screen format
When a VIDEO or S-VIDEO signal in NTSC format is input, the image can be
displayed in 16:9 (wide) screen format by the following procedure.
S-VIDEO/VIDEO input is selected (page 34).
MENU
RGB ADJUST
RGB SYNC MENU
>SET UP PROJECTOR
LANGUAGE
/SPRACHE /LANGUE
/IDIOMA
/LINGUA
SELECT : PUSH ZorX
SET
: PUSH CorV
END
: PUSH MENU
1.
SET UP PROJECTOR
FRONT/REAR
FRONT
INPUT DISP
ON
REMOTE POWER
ON
>16:9 (NTSC)
OFF
EXPANSION (NTSC)
NO
LAMP TIME RESET
NO
SELECT : PUSH ZorX
SET
: PUSH CorV
END
: PUSH MENU
Press MENU to display the menu.
2. Press Z or X to select SET UP PROJECTOR, and then press C or V to
display the screen.
3. Press Z or X to select 16:9 (NTSC), and then press C or V to select ON
or OFF.
Select OFF to return the normal screen. (This is the factory setting.)
Select ON to display in 16:9 (wide) screen format.
4. Press MENU twice to exit.
Note: Even if the 16:9 (wide) screen feature is set to OFF, when an “S1” signal is
input, the image is automatically displayed in 16:9 (wide) screen mode.
English
37
Getting started
Blue Screen with no
input signal
The LCD projector is equipped with an internal blue screen function which turns
the screen blue when the video or computer equipment connected to the input jack
is turned off, or when there is nothing connected to the input jack.
(5 minutes before
power is shut off)
++
++
++
++
++
++
SIGNAL
Power is
shut off
++++++++++
FOCUS
++++++++++
++
OFF 5min
remaining time
• If the power is turned on when no input signal is input to the LCD projector,
the screen will turn blue.
The “FOCUS” overlay appears only until the video or computer equipment is
connected to the input jack and turned on. If no input signal is received (the
screen is blue) for 15 minutes, the lamp will turn off automatically.
• The display on the right in the above diagram will appear when the RGB input
is within the LCD projector’s frequency range but is not one of the LCD
projector’s programmed formats. (as on page 26 through page 29)
• Should an RGB signal be input which is out of the LCD projector’s frequency
range, no indication will appear.
38
Polaview 215E LCD Projector User’s Guide
Getting started
Adjusting the projected image
This LCD projector’s picture is set to standard specifications at the factory.
However, you can adjust the image to suit your own preferences by using the RGB
or VIDEO ADJUST feature. Three memory modes allow you to adjust and save up
to three sets of settings for each input signal (RGB and S-VIDEO/VIDEO).
For RGB signal input, three items can be adjusted: “BRIGHTNESS,”
“PICTURE,” and “COLOR (White Balance)”.
For VIDEO signal input, six items can be adjusted; “COLOR”, “TINT”,
“BRIGHTNESS”, “PICTURE”, “SHARPNESS”, and “SUB COLOR” (white
balance).
Note: When a PC-Card is inserted, the RGB “BRIGHTNESS” memory is used.
Only “BRIGHTNESS” can be adjusted.
Input image
adjustment
RGB or S-VIDEO/VIDEO input is selected (page 33). Use the buttons on the
LCD projector or remote control.
POWER FREEZE SHUTTER
MUTE
d
MODE
VOLUME
MENU
INPUT
f
STANDARD
VOLUME
e
LIGHT POINTER
MODE
a
ST
ANDARD
MENU
b
INPUT
STATUS
CODE
c
e Adjust Z/X/C/Vbuttons
a MODE button
(remote control)
b MENU button
c Adjust Z/X/C/Vbuttons
f MENU button (remote control)
d MODE button (remote control)
1.
Press MENU to display the menu.
RGB
S-VIDEO/VIDEO
MENU
>RGB ADJUST
RGB SYNC MENU
SET UP PROJECTOR
LANGUAGE
/SPRACHE /LANGUE
/IDIOMA
/LINGUA
SELECT : PUSH ZorX
SET
: PUSH CorV
END
: PUSH MENU
MENU
>VIDEO ADJUST
SET UP PROJECTOR
VIDEO SYSTEM
LANGUAGE
/SPRACHE /LANGUE
/IDIOMA
/LINGUA
SELECT : PUSH ZorX
SET
: PUSH CorV
END
: PUSH MENU
2. Press Z or X to select RGB ADJUST or VIDEO ADJUST, and then press
C or V to display the screen.
Three different sets of control adjustments can be memorized for different
projection situations.
English
39
Getting started
3. Press MODE repeatedly to choose one of the three memory modes for
adjustment (page 45).
RGB ADJUST
>BRIGHTNESS
PICTURE
COLOR
R LEVEL
G LEVEL
B LEVEL
MODE 1
0
0
-----I---------I-----
0
0
0
-----I---------I---------I-----
RGB ADJUST
>BRIGHTNESS
MODE 1
+5
+
-----I-----
VIDEO ADJUST
(1/2)
>COLOR
TINT
BRIGHTNESS
PICTURE
SHARPNESS
MODE 1
0
0
0
0
0
VIDEO ADJUST
>COLOR
-----I---------I---------I---------I---------I-----
MODE 1
+5
+
-----I-----
4. Press Z or X to select, and then press C or V to display the item to be
adjusted.
5. Press C or V to adjust as described below.
The setting will be displayed by numerals and a bar.
6. Press MENU once to return to the RGB ADJUST or VIDEO ADJUST
menu, or three times to exit.
Adjustments for input
image
• COLOR control (Adjust color intensity level.) (S-Video or video mode only)
Press V to deepen the color.
Press C to make the color paler.
• TINT control (Adjust hue for realistic tones.)(S-Video or video mode only)
Press V for more green.
Press C for more purple.
(Tint can be adjusted when the LCD projector is set to NTSC or NTSC4.43
video formats.)
• BRIGHTNESS control (Adjust black level to room brightness.)
Press V to brighten the image.
Press C to darken the background.
• PICTURE control (Adjust overall picture intensity.)
Press V for a stronger picture.
Press C for a fainter picture.
• SHARPNESS control (Adjust picture sharpness.) (S-Video or video mode only)
Press V to sharpen the edges of the image.
Press C to soften the edges of the image.
• COLOR or SUB COLOR (White Balance) control
See page 44 for details.
Recall standard
settings
Press C or V together. If the menu showing all items is displayed, all items will
be reset. If a single item is displayed, only that item will be reset.
40
Polaview 215E LCD Projector User’s Guide
Getting started
RGB sync adjustment
For V POSI, H POSI, H SIZE and PHASE adjustments, see the PC Output
Timing Relative Value Chart on page 43. These adjustments are carried out
automatically when the Auto Setup feature of the ProMouse software is used. See
“ProMouse Control Feature” on page 54.
RGB input is selected (See page 33). Use the buttons on the LCD projector or
remote control unit.
POWER FREEZE SHUTTER
MUTE
MODE
VOLUME
MENU
INPUT
d
STANDARD
VOLUME
c
LIGHT POINTER
MODE
ST
ANDARD
MENU
a
INPUT
STATUS
CODE
b
a MENU button
c MENU Button (remote control)
b Adjust Z/X/C/Vbuttons
d Adjust Z/X/C/Vbuttons
(remote control)
1.
Press MENU to display the menu.
MENU
RGB ADJUST
>RGB SYNC MENU
SET UP PROJECTOR
LANGUAGE
/SPRACHE /LANGUE
/IDIOMA
/LINGUA
SELECT : PUSH ZorX
SET
: PUSH CorV
END
: PUSH MENU
2. Press Z or X to select RGB SYNC MENU, and then press C or V to
display the screen.
RGB SYNC MENU
VGA60
H=31, 5KHz
V=60
Hz
>V POST
0 -----I----H POST
0 -----I----H SIZE
0 -----I----PHASE
0 -----I----SELECT : PUSH ZorX
SET
: PUSH CorV
END
: PUSH MENU
RGB SYNC MENU
VGA60
H=31, 5KHz
V=60
Hz
>V POST
+5
+
-----I-----
3. Press Z or X to select, and then press C or V to display the item to be
adjusted.
English
41
Getting started
4. Press Z or X to adjust as described below.
The setting will be displayed by numerals and a bar.
5. Press MENU once to return to the RGB SYNC MENU menu, or three times
to exit.
Adjustments for RGB
input
• V POSI (Vertical Position) Control
(Adjust the vertical position within the projection screen.)
Press C to move down or V to move up.
IMAGE
IMAGE
projection
screen
• H POSI (Horizontal Position) Control
(Adjust the horizontal position within the projection screen.)
Press C to move left or V to move right.
IMAGE
IMAGE
• H (Horizontal) SIZE Control
(Adjust the data display, timing, and attain the correct horizontal image size.)
Press C or V to eliminate the vertical stripes that appear on the computer
screen.
• PHASE Control
(Adjust the vertical line strength so that text is readable.)
Press C or V to eliminate the flicker (localized noise) that appears on the
computer screen.
42
Polaview 215E LCD Projector User’s Guide
Getting started
PC Output Timing Relative Value Chart
Vertical
position
Horizontal
position
Horizontal
size
IBM 640 x 350 at 70 Hz/
IBM 640 x 350 at 70 Hz
-30-+30
-50-+50
-50-+90
IBM 640 x 480 at 60 Hz
-30-+30
-50-+50
-50-+90
MAC II 640 x 480
-30-+30
-50-+50
-50-+90
MAC 16” 832 x 624
-30-+30
-50-+50
-50-+90
VESA 640 x 350 at 85 Hz/
VESA 640 x 400 at 85 Hz
-30-+30
-50-+50
-50-+90
VESA 640 x 480 at 72 Hz
-26-+30
-50-+50
-50-+90
VESA 640 x 480 at 75 Hz
-14-+30
-50-+50
-50-+90
VESA 640 x 480 at 85 Hz
-23-+30
-50-+50
-50-+90
VESA 800 x 600 at 56 Hz
-19-+30
-50-+50
-50-+90
VESA 800 x 600 at 60 Hz
-22-+30
-50-+50
-50-+90
VESA 800 x 600 at 72 Hz
-24-+30
-50-+50
-50-+90
VESA 800 x 600 at 75 Hz
-19-+30
-50-+50
-50-+90
VESA 800 x 600 at 85 Hz
-25-+30
-50-+50
-50-+90
VESA 1024 x 768 at 60 Hz
-30-+30
-50-+50
-50-+90
VESA 1024 x 768 at 70 Hz
-30-+30
-50-+50
-50-+90
VESA 1024 x 768 at 75 Hz
-29-+30
-50-+50
-50-+90
MAC 19” 1024 x 768
-27-+30
-50-+50
-50-+90
Model
English
43
Getting started
Adjusting the white balance
The picture may become over-saturated with red or blue color. Also, the white
shade may not be the desired degree of whiteness. In such cases, you can adjust the
white balance by the following procedure.
RGB input is selected (See page 33). Use the buttons on the LCD projector or
remote control unit.
POWER FREEZE SHUTTER
MUTE
d
MODE
VOLUME
MENU
INPUT
f
STANDARD
VOLUME
e
LIGHT POINTER
MODE
ST
ANDARD
a
b
MENU
c
INPUT
STATUS
CODE
a MODE button
d MODE button (remote control)
b Adjust Z/X/C/VButtons
e Adjust Z/X/C/Vbuttons
(remote control)
c MENU button
f MENU button (remote control)
Press MENU to display the menu.
2. Press Z or X to select RGB ADJUST or VIDEO ADJUST, and then press
C or V to display the screen.
3 different sets of control adjustments can be memorized for different
projection situations.
1.
RGB
S-VIDEO/VIDEO
MENU
>RGB ADJUST
RGB SYNC MENU
SET UP PROJECTOR
LANGUAGE
/SPRACHE /LANGUE
/IDIOMA
/LINGUA
SELECT : PUSH ZorX
SET
: PUSH CorV
END
: PUSH MENU
MENU
>VIDEO ADJUST
SET UP PROJECTOR
VIDEO SYSTEM
LANGUAGE
/SPRACHE /LANGUE
/IDIOMA
/LINGUA
SELECT : PUSH ZorX
SET
: PUSH CorV
END
: PUSH MENU
3. Press MODE repeatedly to choose one of the three memory modes for
adjustment (page 45).
44
Polaview 215E LCD Projector User’s Guide
Getting started
4. Press Z or X to select R LEVEL, G LEVEL OR B LEVEL for the
COLOR (for RGB input) or SUB COLOR (for S-VIDEO/VIDEO input).
RGB ADJUST
BRIGHTNESS
PICTURE
COLOR
>R LEVEL
G LEVEL
B LEVEL
0
0
MODE
+
-----I---------I-----
0
0
0
-----I---------I---------I-----
VIDEO ADJUST
(1/2)
>COLOR
TINT
BRIGHTNESS
PICTURE
SHARPNESS
MODE
-----I---------I---------I---------I---------I-----
0
0
0
0
0
VIDEO ADJUST
(2/2)
SUBCOLOR
>R LEVEL
G LEVEL
B LEVEL
MODE
0
0
0
-----I---------I---------I-----
5. Press C or V to display the R, G or B LEVEL ADJUST screen.
RGB ADJUST
>R LEVEL
MODE
+5
+
-----I-----
VIDEO ADJUST
R LEVEL
MODE
+5
+
-----I-----
6. Press C or V to adjust the R, G or B Level.
The setting will be displayed by numerals and a bar.
Example of adjustment: R LEVEL
Press V to strengthen the red component.
Press C to weaken the red component.
7. Press MENU once to return to the RGB ADJUST or VIDEO ADJUST
menu, or three times to exit.
Selecting the picture
memory
Press MODE on the LCD projector or remote control unit to select the desired
picture mode.
• When MODE is pressed, the preset setting will first be displayed on the screen
for about 5 seconds.
• Each time you press MODE, the display will change as shown below:
MODE1
MODE2
MODE3
English
45
Getting started
Projecting PC-Card (ATA Flash Card) data
Using this software, “JPEG Viewer”, you can save the image displayed on the PC
screen as a JPEG file to a PC-Card (ATA Flash Card). If you insert the PC-Card in
this LCD projector, you can project using the JPEG Image Playback feature.
Follow the instructions below to use this feature.
Caution: It is possible that this feature will not operate correctly with all PC Cards.
Operating performance of the following PC Card makers is verified. (ATA Flash
Card). Panasonic; Hitachi; TDK; SanDisk
After purchasing a PC Card, perform (Normal) format with Windows 95 before
using it.
VO
LU
M
Follow the instructions below when projecting image data saved on the PC-Card.
(See “JPEG Viewer features” on page 48)
1. Turn on the LCD projector to start projecting. (See “Turning on the
power” on page 30 )
2. Insert the PC-Card (2a)
2b
into the PC-Card slot (2b)
on the LCD projector.
Then, press INPUT on the
2a
LCD projector or remote
control and select “PCCARD”.
The INDEX and first image
in each FOLDER are shown.
E
ST
M
N
ODE
A
DA
RD
U
EN
M
T
PU
IN
ST
AT
CO US
DE
MAIN
OFF
S-VIDEO
VIDEO
ON
IN L-AU
DIO-
R
RS232C
RGB IN
AUDIO
IN
RGB OUT
AUDIO
OUT
MAIN
Note:
It takes a few seconds for the list of images to be displayed. (WAIT...appears) If
you made JPEG files with something other than JPEG Viewer, it may take a
much longer time to display the list of images.
See “When using BMP or JPEG
JPEG Converter feature”, and convert to
JPEG files ideally suited to this LCD projector.
If you made a FOLDER with something other than JPEG Viewer, FOLDERA, FOLDER-B,...will be displayed.
“ROOT” is displayed if images corresponding to this LCD projector are found
in root directly.
The screen turns blue if images corresponding to this LCD projector are not
found in the PC-Card.
When you want to eject the PC-Card, slide the PC-Card RELEASE button in
the direction of the arrow mark on the LCD projector, and “NO CARD screen
is displayed.
3. Press C or V to select FOLDER.
INDEX
Press V select the next FOLDER.
FOLDER 1
7
FOLDER 2
12
PressC to select the previous FOLDER.
V FOLDER 3
24
FOLDER 4
5
FOLDER 5
13
The selected FOLDER is indicated by a red arrow.
FOLDER 6
11
SELECT FOLDER : CorV
The selected image in FOLDER is encircled by a
TO SLIDE SHOW : VOLUMETO MULTI
: VOLUME+
bold, blue frame.
Note: Press VOLUME to play back the first image
of the selected FOLDER.
46
Polaview 215E LCD Projector User’s Guide
Getting started
4. Press VOLUME
+ to decide FOLDER.
A list of images will be displayed.
5. Press C or V to select an image.
The selected image is encircled by a bold, blue
frame, and the FOLDER name and number is
displayed.
Note: PressZorX to change the selected
FOLDER, and press VOLUME - to display the
INDEX.
6. Press VOLUME + to project the selected image.
Press C orV select the images one by one.
Press V to project the next image.
Press C to project the previous image.
Note:
MULTI DISP
FOLDER 3
SELECT SLIDE
SELECT FOLDER
TO INDEX
TO SLIDE SHOW
:
:
:
:
1 / 24
1 / 24
CorV
ZorX
VOLUMEVOLUME+
800 x 600
ON-SCREEN ON / OFF : ZorX
NEXT SLIDE
: CorV
TO MULTI
: VOLUMETO INDEX
: VOLUME+
Press Volume - when playing back to return the
screen to the list of images.
Press Volume + during playback to display the INDEX.
Press Z orX during playback to display the file size and the operating
instructions.
Press Z orX again to turn off the display.
When using the
Repeat Play
The LCD projector can automatically play back images one by one in the
selected FOLDER, and you can select the length of time each image is played
back.
1. Press MENU to display the menu.
MENU
2. PressZorXto select “REPEAT PLAY”.
RGB ADJUST
>REPEAT PLAY
OFF
SET UP PROJECTOR
3. PressCorVrepeatedly to select the length of
LANGUAGE
/SPRACHE /LANGUE
time each image is played back.
/IDIOMA
/LINGUA
SELECT : PUSH ZorX
Playback length of 5 seconds, 10 seconds, 30
SET
: PUSH CorV
END
: PUSH MENU
seconds, 60 seconds, or 120 seconds can be selected.
Note:
Repeat Play can only be used in the selected
FOLDER.
You cannot select images while Repeat Play is in
progress. Follow the above instructions to select
REPEAT PLAY OFF, and then select an image.
MENU
RGB ADJUST
>REPEAT PLAY
5sec.
SET UP PROJECTOR
LANGUAGE
/SPRACHE /LANGUE
/IDIOMA
/LINGUA
SELECT : PUSH ZorX
SET
: PUSH CorV
END
: PUSH MENU
English
47
Getting started
JPEG Viewer features
System requirements
•
•
•
•
•
•
IBM PC/AT or compatible
Microsoft Windows 95, Windows 98
16MB RAM or more recommended
2MB available hard disk space
3.5 inch 1.44MB floppy disk drive (for installation)
PCMCIA Type II slot
JPEG Viewer installation
1.
Turn on the PC and start up Windows 95 or 98.
2. Insert the floppy disk (JPEG Viewer software) into the floppy disk drive.
3. Select [Run…] from the Windows Start menu.
4. Type in [A:\SETUP.EXE] and click [OK].
It is assumed that your 3.5 inch 1.44MB floppy disk
drive is assigned as drive “A”. If not, replace “A” with
the appropriate letter.
5. Follow the instructions as they appear on
your PC screen.
How to make JPEG files
You can make JPEG files using the installed
JPEG Viewer software.
Capture feature
You can save captured images of your PC screen as JPEG files. (See page 51)
Note: Existing BMP or JPEG files must be converted and saved as JPEG files
ideally suited to this LCD projector when projecting with this LCD projector. (See
page 53)
48
Polaview 215E LCD Projector User’s Guide
Getting started
Starting up the JPEG Viewer
VO
M
E
LU
ST
M
ODE
A
N
DA
RD
M
EN
U
IN
PU
T
ST
AT
CO US
DE
Examples below assume the use of Windows 95.
1. Turn on the PC and start up
2b
Windows.
2. Insert the PC-Card (ATA
2a
Flash Card not supplied) into
the PC-Card (a) Slot on your
PC.
When you purchase a PCCard, format it as you normally
with Windows 95 or 98 before
use.
3. Select [Start]
[Programs]
[JPEG Viewer]
[JPEG
Viewer] to open the JPEG
application.
MAIN
OFF
S-VIDEO
VIDEO
ON
IN L-AU
DIO-
R
RS232C
RGB IN
AUDIO
IN
RGB OUT
AUDIO
OUT
MAIN
English
49
Getting started
Functions of each menu item
menu bar
tool bar
Following are the software’s menu items and their functions:
File
Add Graphic file to Folder
Converts an original BMP or JPEG file to a JPEG file
and saves it to Folder
Delete Graphic file from Folder
Deletes selected images from Folder
Exit
Exits the JPEG Viewer
Folder
New
Makes new Folder
Open
Opens saved Folder
Delete Folder
Deletes edited Folder
Tool
Capture
Changes to the Capture mode
Remake Thumbnail
Remakes Thumbnail files of images contained in the
edited folder
Option
Sets the JPEG Viewer
Window
Cascade
Arranges windows in an overlapping pattern
Tile Horizontal
Arranges windows in a top to bottom pattern
Tile Vertical
Arranges windows in a left to right pattern
Arrange Icons
Arranges minimized windows
Help
50
JPEG Viewer Help
Displays JPEG Viewer help
Version Information
Displays the version information
Polaview 215E LCD Projector User’s Guide
Getting started
When using the Capture feature
1.
Select [Option] from the [Tool]
menu, and then set the drive and
JPEG quality for saving captured
images.
PC-Card drive
Select the PC-Card drive for saving
images.
Wait time to start Capture
Set the waiting time from when the
Capture is clicked until capturing the
actual image starts. Select from 1 to 10
seconds.
JPEG quality
Set the picture quality of JPEG files to one of five levels. (Refer to Help for
more details)
Note: The setting changes back to the default setting when the RESET button
is clicked.
2. Select [New] or [Open] from the
[folder] menu, and then open Folder
for saving images.
Note:
The Folder is also opened if you click
[New] or [Open] shortcut button on the
Toolbar.
When creating a new Folder, a
consecutive number is automatically
assigned to the Folder name.
Folder1, Folder2...
Do not change the Folder name.
3. Select [Capture] from the [Tool] menu to
display the Capture dialogue box.
The dialogue box will also be displayed if you click
[Capture] shortcut button on the Toolbar.
The Capture dialogue box is always displayed before other application screens,
and the main window is minimized.
The file name (set in the Preference menu) followed by -1.jpg will be saved.
Subsequent file names will be automatically assigned numbers up to 999 as long
as the file name is not changed.
4. Start up the PC application software
and display the image you want to
capture on the screen
5. Click [Capture] button in the Capture
dialogue box. The displayed image will
be saved to the selected Folder in
JPEG format.
Note:
The images in the capture dialogue box
are not saved.
English
51
Getting started
File names will automatically assigned consecutive numbers whenever saved,
and thumbnail files will be made. Thumbnail files are used when displaying a
list of images in this LCD projector or in this software.
JPEG file: Aut_0001.jpg, Aut_0002.jpg,...
Thumbnail file: Thm_0001.jpg, Thm_0002.jpg,....
Do not change these file names.
Pressing [Return] button in the Capture dialogue box will close this dialogue
box. The main window will be displayed. The saved image will be displayed in
the Folder.
Size of the projected screen
Because the projection image from this projector is SVGA (800x600 dots), an XGA
image will be compressed.
If the picture file is less than VGA (640x480 dots) and the expanded projection
feature is on, the picture will expand as follows: 640
800, 480
600.
For the best picture quality, it is recommended that JPEG files be 800x600 dots in
size.
The larger the file size, the longer it will take (from whenC or V is pressed) to
project the picture.
How to edit using the Album Display feature
While confirming images displayed in an album, you can change the image display
order and move images to another Folder using simple mouse operations.
Changing the image display order in Folder
Select the image you want to move.
2. Drag the selected image and drop it into an image in the desired location.
The selected image is inserted in front of the image it was dropped into.
The file name numbers are renewed automatically.
1.
select “D”
drop into
“B”
52
Polaview 215E LCD Projector User’s Guide
Getting started
Moving the images between Folders
Open the Folder containing the image to be moved and the destination
Folder.
2. Select the image that you want to move.
1.
select “B”
drop into
“F”
3. Drag the selected image and drop it into the destination Folder.
The selected image is inserted in front of the image that it was dropped into.
The file numbers are renewed automatically.
Displaying full-screen images for confirmation
1.
Double-click the image that you want to confirm.
The image fills the entire screen.
Note: Click the mouse or press any button on the keyboard to return the
screen to the Album display.
Deleting images
1.
Select the image that you want to delete.
2. Select [Delete Graphic file from Folder] from [File] menu.
The image will be deleted from Folder.
Note: You can also delete the selected image if you press the [Delete Graphic
file from Folder] shortcut button on the Toolbar.
When using the BMP to JPEG Converter feature
Note:
It is possible that the supplied software will not operate correctly, depending on the
hardware configuration of the PC and the sharing of resources by other
applications’ software.
Specifications of these software are subject to change without notice.
1. Select [Option] from the [Tool]
menu, and set the drive and JPEG
quality for saving converted images.
PC-Card drive
Select the PC-Card drive for saving
images.
JPEG quality
Set the picture quality of JPEG files to
one of five levels. (Refer to Help for
more details)
Note:
The setting changes back to the default setting when the RESET button is
clicked.
English
53
Getting started
2. Select [New] or [Open] from the
[Folder] menu, and then open Folder
for saving images.
The Folder is also opened if you click
[New] or [Open] shortcut button on the
Toolbar.
When creating a new Folder, a
consecutive number is automatically
assigned to the Folder name.
Folder1, Folder2...
Do not change the Folder name.
3. Select [Add Graphic file to Folder]
from the [File] menu, and designate
the BMP (or JPEG) file that you want
to convert.
The JPEG Convert Status screen will
appear and conversion will begin
automatically.
The converted JPEG file is saved to the
selected Folder.
Note:
File names will automatically assigned consecutive numbers whenever saved,
and thumbnail files will be made. Thumbnail files are used when displaying a
list of images in this LCD projector or in this software.
JPEG file: Aut_0001.jpg, Aut_0002.jpg,...
Thumbnail file: Thm_0001.jpg, Thm_0002.jpg,....
Do not change these file names.
ProMouse Control Feature
This feature lets you use the LCD projector remote control unit as a mouse to
control your personal computer. There is also an Auto Setup feature which
identifies the signal mode and automatically adjusts the vertical position, horizontal
position, horizontal size, and phase.
Windows 95 /
Windows 98
System requirements
•
•
•
•
•
•
IBM PC/AT or compatible
Windows 95 or Windows 98
386SX CPU or higher
8MB RAM on-board memory
2MB available hard disk space
3.5 inch 1.44 MB floppy disk drive (for installation)
Note:
It is possible that the supplied software will not operate correctly, depending on the
hardware configuration of the PC and the sharing of resources by other
applications’ software.
Specifications of these software are subject to change without notice.
54
Polaview 215E LCD Projector User’s Guide
Getting started
ProMouse installation
1.
Turn on the PC and start up Windows.
2. Insert the floppy disk (ProMouse software) into the floppy disk drive.
3. Select [Run…] from the Windows Start menu
4. Type in [A:\SETUP:EXE] and click [OK].
It is assumed that your 3.5 inch 1.44MB floppy disk drive is assigned as drive “A”.
If not, replace “A” with the appropriate letter.
5. Follow the instructions as they appear on your PC screen.
Click (OK)
To open the ProMouse Software
Select [Programs]
Start Menu.
[ProMouse]
[ProMouse] from the Windows
• The ProMouse Menu screen will appear.
English
55
Getting started
Using the ProMouse Software
The setting window will appear when the ProMouse software is started up.
To start the ProMouse Control feature
Follow the steps below. Please refer to “ProMouse Software details” (below) for
detailed settings.
Select the Option
Communication Setting.
Select and set COM1 or COM2.
2. Click Start in the lower right corner of the setting window. The ProMouse
Control feature will start and the setting window will be minimized.
1.
To Use the Auto Setup feature
The signal mode is identified and the vertical position, horizontal position,
horizontal size, and phase are automatically adjusted. Click on Auto Setup at the
bottom of the setting window.
• You may also select Option
Auto Setup.
• The on-screen display at right will appear during
auto adjustment.
AUTO SETUP
• Auto Setup may not be possible with some computer
types.
ProMouse Software details
File Menu
• Save
Saves the current window status.
You may also click Save in the lower left corner of the setting window.
• Exit
Quits the ProMouse Control feature.
56
Polaview 215E LCD Projector User’s Guide
Getting started
Option Menu
• Clear Screen
Deletes all the lines or stamp marks written on the screen.
• Mouse Setting
The dialog shown below will appear. Sets the movement speed of the mouse
using the remote control unit.
Help Menu
• Contents
Displays help information for the software.
• Version Information
Displays a dialogue box indicating the version of the software.
Window Setting
• Pointer Shape
Selects the indicating pointer mark on the screen.
The currently selected pointer mark appears at the left end of this row.
• Stamp
Selects the indicator stamp mark on the screen.
The currently selected stamp mark appears at the left end of this row.
• Remote Key Action
You can program the Z, X, C, and V keys as personal computer shortcut keys.
How to program
1. Click on the remote key you
want to be programmed in
the setting window.
The screen shown at right
will appear.
2. Operate the desired
shortcut command on the
PC and click OK.
The key selected in step 1
will be programmed with the shortcut command operated in step 2.
Programmed shortcut keys are indicated in the setting window.
Because the Clear Screen command is necessary to delete lines or stamp marks
from the screen, theX key is programmed as Clear Screen at the factory. If you
wish to change this command to a different key, follow steps (1) and (2).
• Line Style
Selects the indicating line thickness and colors on the screen.
Note: To return all items in the setting window to their original factory setting,
click on Reset.
English
57
Getting started
Macintosh
System requirements
•
•
•
•
•
•
System 7.1 or later
68030 CPU or higher, or Power Macintosh
2 MB RAM on-board memory
2MB available hard disk space
3.5'' 1.44MB floppy disk drive (for installation)
Serial port (Mini DIN 8 pin)
Note:
It is possible that the supplied software will not operate correctly, depending on the
hardware configuration of the personal computer and the sharing of resources by
other applications’ software.
Specifications of these software are subject to change without notice.
ProMouse installation
1.
Turn on the Macintosh.
2. Insert the floppy disk (ProMouse software) into the floppy disk drive.
3. Double click the floppy disk ProMouse(E) icon.
4. Double click on the ProMouse(E) Installer icon.
5. Select the installation method, “Easy Install,” “Custom Install” or
•
•
•
6.
58
“Remove”.
Easy Install
Lets ProMouse designed fat
binary items run on the
Macintosh hard disk.
Custom Install
Lets you select the type of
Macintosh.
Remove
Removes installed
ProMouse(E) software from
the Macintosh hard disk.
Click on “Install” to start the ProMouse software installation.
Polaview 215E LCD Projector User’s Guide
Getting started
7.
Click on “Restart” to finish the installation and restart the Macintosh.
To open the ProMouse Software
Double click the ProMouse icon in the ProMouse Folder.
The ProMouse software will open.
Using ProMouse Software
The setting window will appear when the ProMouse software is started up.
To start the ProMouse Control feature
Follow the steps below. Please refer to “ProMouse Software Details” (below) for
detailed settings.
1. Select the Option
Connection
Setting.
The dialogue box shown at right will
appear.
2. Select the Printer port or Modem port.
Then click OK.
Refer to the Macintosh Operation Manual
for details on the communication ports.
3. Click on Start in the lower right corner of the setting window.
The ProMouse Control feature will start and the setting window will be closed.
English
59
Getting started
To Use the Auto Setup feature
The signal mode is identified and the vertical position, horizontal position,
horizontal size, and phase are automatically adjusted. Click on Auto Setup at the
bottom of the setting window.
• You may also select Option
Auto Setup.
• The on-screen display at right will appear during
auto adjustment.
AUTO SETUP
• Auto Setup may not be possible with some
computer types.
ProMouse Software details
File Menu
• Save
Saves the current window status.
You may also click Save in the lower left corner of the setting window.
• Quit
Quits the ProMouse Control feature.
Option Menu
• Clear Screen
Deletes all the lines or stamp marks written on the screen.
• Mouse Setting
The dialog box shown at right
will appear. Sets the movement
speed of the mouse using the
remote control unit.
Apple Menu
• Version
Displays a dialogue box indicating the version of the software.
Window Setting
• Pointer Shape
Selects the indicating pointer mark on the screen.
The currently selected pointer mark appears at the left of this row.
• Stamp
Selects the indicator stamp mark on the screen.
The currently selected stamp mark appears at the left end of this row.
• Remote Key Action
You can program the Z, X, C, and V keys as personal computer shortcut
keys.
60
Polaview 215E LCD Projector User’s Guide
Getting started
How to program
1. Click on the remote key you
want to be programmed in the
setting window.
The screen shown at right will
appear.
2. Operate the desired shortcut
command on the PC.
The key selected in step 1 will be programmed with the shortcut command
operated in step 2.
Programmed shortcut keys are indicated in the setting window.
Because the Clear Screen command is necessary to delete lines or stamp
marks from the screen, the X key is programmed as Clear Screen at the
factory. If you wish to change this command to a different key, follow steps
(1) and (2).
• Line Style
Selects the indicating line thickness and colors on the screen.
Note: To return all items in the setting window to their original factory setting,
click on Reset.
English
61
Appendix
Appendix
Maintenance
Warning Indications
Status Code Display Indications
This LCD projector has a STATUS CODE display that calls your attention to
problem conditions existing inside the LCD projector. The LCD projector displays
a status code indication each time an internal problem is detected. If any of the
following indications appear in the STATUS CODE display, immediately turn off
the MAIN power. Then, see the chart below.
VO
LU
M
E
ST
M
N
OD
A
E
DA
RD
EN
U
M
IN
PU
T
STA
CO TU
DE S
MAIN
OFF
STATUS CODE display
ON
S-VIDE
O VID
EO IN
L-AUDI
O-R
RS232C
RGB IN
AUDIO
IN
RGB OUT
AUDIO
OUT
MAIN
Status Code
Symptom
Problem
Possible Solution
F-L
Lamp unit automatically
turns off due to abnormally
high internal temperature.
(Standby-by condition)
Cooling fan malfunction
Take the LCD projector
to your nearest Service
Center.
F-O
Misinstalled air filter unit.
Properly install the air filter
unit.
A-n
Temperature sensor
malfunction.
Take the LCD projector
to your nearest Service
Center.
A-0
Clogged air filter.
A-1
Blocked air intake.
Clean the filter
(See page 63).
L-n
Lamp does not light up.
P-2
P-3
P-4
62
The surrounding temperature of the place of use may
be too high.
Place the projector so that
the surrounding temperature is between 5˚C(41˚C
(104˚F) and the humidity is
between 10% and 80%
(with no condensation).
Lamp is burned out.
Take the LCD projector
to your nearest Service
Center.
Lamp voltage is not correct.
Abnormally high internal
temperature.
Polaview 215E LCD Projector User’s Guide
Relocate the projector to a
proper location.
Abnormal temperature rise.
Other cause.
Appendix
Status Code
Symptom
Problem
Possible Solution
L-1
Lamp operation time is
over 1000 hours.
It is nearly time to replace
the lamp unit.
Replace the lamp unit.
(See page 66).
L-0
Lamp operation time is
over 1100 hours.
The lamp unit must be
replaced.
C-d
Forced cooling fan operating to expedite lamp
replacement (See page 65).
—
—
Note: Please wait one minute before turning the power back on, to allow the lamp
to cool. A much longer time may be required if the LCD projector has reached an
abnormally high internal temperature.
The air filter should be cleaned about every 100 hours. Also, clean the air filter if
“A-0” appears in the STATUS CODE display.
Replace the filter when it is clogged or dirty even after cleaning.
Cleaning procedure
Tools required: Vacuum cleaner.
Wait until the cooling fan stops and the STANDBY(R) ON(G) indicator turns
solid red.
1. Set the MAIN power switch to OFF and unplug the power cord.
E
M
LU
VO
N
OD
A
M
ST
Cleaning the Air Filter
E
DA
RD
U
EN
M
T
PU
IN
ST
AT
CO U
DE S
MAIN
OFF
S-VIDEO
VIDEO
ON
IN L-AU
DIO
-R
RS232C
RGB IN
AUDIO
IN
RGB OUT
AUDIO
OUT
MAIN
MAIN power switch
2. Place the LCD projector up on its side as illustrated.
indent
air filter unit
English
63
Appendix
3. Remove the air filter unit
Hold the indent on the air filter unit with your hands and pull the air filter unit
out of the LCD projector.
4. Clean the filter.
Gently remove any accumulated dust from the air filter unit with your vacuum
cleaner.
crevice attachment
Caution: Operating the LCD projector with a torn or damaged air filter
may cause damage to the LCD projector.
5. Replace the air filter unit.
Slide the air filter unit into the LCD projector until the hollows in the air filter
unit are aligned with the hollows in the LCD projector.
Note: The LCD projector power cannot be turned on unless the air filter unit is
correctly installed.
64
Polaview 215E LCD Projector User’s Guide
Appendix
Lamp Replacement
Warning: If Status Code “L-n” (see page 62) is displayed on the Status
Code Display when lamp is not turned on, take the LCD Projector to your
nearest Service Center for repair as there is danger of injury due to lamp
fragments.
Lamp replacement period
The LCD projector lamp has a limited operating life of approximately 1100 hours.
“LAMP TIME REMAINING 10h” will be displayed on screen when the operation
time reaches 1090 hours. Then, each time the power is turned on, the lamp life
remaining will be displayed.
A 10-second warning display (15 seconds when the LCD projector power is turned
on) will appear every hour after 1090 hours of operation time, and the warning will
flash during the last 5 minutes of lamp life.
LAMP TIME REMAINING
10h
LAMP TIME REMAINING
9h
LAMP TIME REMAINING
5min
LAMP TIME REMAINING
0min
If lamp use reaches 1100 hours
The LCD projector will shut itself off and the STATUS
CODE indication will become “L-0”. (See STATUS
CODE on page 62.)
1. Replace the lamp.
2. Press POWER ON, the “Lamp Time Reset” display
will appear to reset the lamp time.
Lamp Time Reset
Unless you change to a
new lamp. POWER will be
off 10 minutes later.
Have you finished yet?
NO
YES
SELECT : PUSH C or V
• Only this screen will be displayed when POWER is pressed until the lamp
time is reset. (The LCD projector cannot display a normal picture at this
time.)
• If the lamp time is not reset, this screen will disappear and the LCD
projector will shut itself off after about 10 minutes.
3. Press C or V to select YES.
4. Turn the power off to reset the lamp time.
English
65
Appendix
Lamp replacement procedure
Caution: Because of possibility of injury, strictly follow the lamp replacement
procedure outlined below.
Order Lamp: 630146 Tools required: A coin.
1. After the cooling fan has stopped and the STANDBY(R) ON(G) indicator
turns solid red, set the MAIN power switch to OFF and unplug the power
cord.
VO
LU
M
E
ST
M
OD
A
N
E
DA
RD
U
M
EN
T
PU
IN
ST
AT
CO U
DE S
MAIN
OFF
S-VIDEO
VIDEO
ON
IN L-AU
DIO-R
RS232C
RGB IN
AUDIO
IN
RGB OUT
AUDIO
OUT
MAIN
MAIN power switch
Note: Please wait more than one hour before replacing the lamp.
If you need to replace the lamp more urgently
The LCD Projector has a forced cooling feature. After the POWER switch is
turned OFF, and sometime during the first minute of the cooling fan operation,
press C and V at the same time. The cooling fan will change to high speed for
about 10 minutes. (The “C-d” STATUS CODE will be displayed.)
2. Grabbing the handle, place the LCD projector up on its side as
illustrated.
3. Remove the lamp cover screws.
First read the caution and warning labels on the lamp cover. Then, remove the
lamp cover screws (2) by using a coin, and take off the lamp cover.
1.
lamp cover
screws
66
Polaview 215E LCD Projector User’s Guide
coin
Appendix
4. Remove the lamp unit screw.
Remove the lamp unit screws (2), then grasp the lamp unit handle and carefully
pull it from the LCD projector. Keep the lamp housing opening to your right.
Do not touch the lamp or point the lamp opening at anyone.
lamp unit screws
coin
Warning: The lamp may be hot. Be careful when handling.
Caution: High-pressure lamps may explode if improperly handled.
lamp unit
S-VIDEO VIDEO IN
L-AUDIO IN-R
RS232C
RGB IN
AUDIO IN
RGB OIUT
AUDIO
Danger of injury due to lamp fragments.
5. Install the new lamp unit.
Remove the 630146 lamp from the LCD projector and install a new lamp unit.
(630146)
Do not drop. The impact of dropping may cause the lamp to explode.
6. Replace the lamp unit screws.
Replace the lamp unit screw and the lamp cover screws using a coin to tighten.
Properly dispose of the old lamp.
7. Plug the LCD projector back in by inserting the power cord into the
LCD projector AC socket, and set the MAIN power switch to ON.
8. Press POWER to turn the LCD projector ON.
9. Press MENU to display the menu.
MENU
RGB ADJUST
RGB SYNC MENU
>SET UP PROJECTOR
LANGUAGE
/SPRACHE /LANGUE
/IDIOMA
/LINGUA
SELECT : PUSH ZorX
SET
: PUSH CorV
END
: PUSH MENU
SET UP PROJECTOR
FRONT/REAR
INPUT DISP
REMOTE POWER
EXPANSION (VGA)
>LAMP TIME RESET
FRONT
ON
ON
ON
NO
SELECT : PUSH ZorX
SET
: PUSH CorV
END
: PUSH MENU
English
67
Appendix
10. Press Z orX to select SET UP PROJECTOR, and then press C or V to
display the screen.
11. Press Z orX to select LAMP TIME RESET, and then press C or V to
display the screen.
Lamp Time Reset
When you change to a new
lamp reset lamp time.
Have you finished yet?
NO
YES
SELECT : PUSH C or V
END
: PUSH MENU
12. Press C or V to select YES. “Push POWER button to reset” will appear.
13. Press POWER to reset the lamp time to “0”.
68
Polaview 215E LCD Projector User’s Guide
Appendix
Before Requesting Service
If the LCD projector unit fails, check the following before calling your dealer for
service.
Problem
Possible Cause
The power does not turn on.
• The power cord may not be connected.
• The MAIN power switch on the projector may be turned off.
• The main power supply may not be supplied to the power point.
• The Status Codes are indicated on the STATUS CODE Display.
• The lamp unit or lamp unit cover may not have been correctly installed .
• The air filter unit may not have been correctly installed.
No picture appears
• The lens cap may still be attached to the lens.
• The signal input source may not be connected properly.
• The input selection setting may not be correct.
• The BRIGHTNESS adjustment may be at the lowest setting.
• The LCD projector may be set to SHUTTER mode.
The picture is fuzzy
• The lens focus may not have been set correctly, or the projector may not be at the correct
distance from the screen.
• The lens may be dirty.
• The LCD projector may not be set up so that it is perpendicular to the screen.
• The VIDEO or R, G, B adjustments may not have been set correctly.
“FOCUS” or “NO SYNC”
appears on the screen.
• The signal input source may not be connected properly.
• The input selection setting may not be correct.
• The connected signal source may be turned off.
The color is too light or the tint • COLOR or TINT adjustments may not have been set correctly.
is poor
• The video formats may not match.
• The signal connection pin assignments may not have been set correctly.
No sound can be heard
• The audio signal source may not be connected properly.
• The volume adjustment may be at the lowest possible setting.
• The MUTE function or Audio/Video SHUTTER function may be active.
The remote control unit does not • The batteries may be spent, or they may not be inserted correctly.
operate
• There may be an object blocking the infrared signals between the remote control unit and
the projector.
• The remote control unit may be out of the operating range.
“CARD NG” appears on screen • A PC-Card that is not compatible with this LCD projector is inserted
Where to get help
If at any time you need help:
• Check “Before Requesting Service” above.
• Call your dealer’s technical support line and explain your problem.
• Call Polaroid Corporation. Refer to listing of Polaroid offices and service
centers.
English
69
Appendix
Specifications
LCD panels
0.9” Polysilicon LCD panel X3,
RGB shutter method, using translucent TN crystal panels
Drive method
Active Matrix 4:3 aspect ratio panels, TFT (Thin Film Transistor)
No. of pixels
480,000 (800 x 600) stripe pixels x 3 panels
Lens
1-1.3 zoom lens, F2.5-2.7, f37-48mm manual focus
Projector lamp
150 W High Pressure Mercury Lamp
Contrast ratio
150:1
Brightness
600 lumens
Number of colors
16,777,216
Screen size
20”-300” (measured diagonally)
Projection (throw) distance
0.97 m-15.8 m (3.18’-51.84’)
Lens axis shift
1:9 Low position
Color systems
PAL/SECAM/NTSC/PAL-M/PAL-N/NTSC4.43
*VIDEO input signal
1Vp-p, sync negative, 75Ω terminated
*S-VIDEO input signal
Y (luminance signal): 1 Vp-p, sync negative, 75Ω terminated C (chrominance signal):
burst 0.286 Vp-p, 75Ω terminated
RGB input signal
Video signal
RGB analogue (0.7 Vp-p, 1.0 Vp-p with sync on green, 75Ω)
Unlimited number of colors
Sync signal
H/V separate, H/V composite, or sync on green.
H-Frequency
24.83-60.24 kHz (TTL Level) Refer to page 26.
V-Frequency
56.25-85.1 Hz (TTL Level) Refer to page 26.
RGB
RGB analogue (0.7 VP-p, 1.0 Vp-p with sync on green, 75Ω).
HD/SYNC
Same polarity as HD/SYNC terminal of RGB IN connector
(TTL Level)
VD
Same polarity as VD terminal of RGB IN connector
(TTL Level)
RGB output signal
Connectors
S-Video input: Mini DIN 4-pin X 1
Video input: RCA pin X 1
Video Audio input: RCA pin X 2 (L+R)
Serial port (RS-232C): Mini DIN 8-pin X 1
RGB display input: D-sub HD 15-pin X 1
RGB audio input: M3 stereo mini pin X 1
RGB display output: D-sub HD 15-pin X 1
Audio output: M3 stereo mini pin X 1
PC card slot: PCMCIA Type II X 1
Controls
Cabinet buttons/Switches
MAIN POWER ON/OFF, VOLUME +/-, MODE,
MENU, INPUT, Z,X,C,V, Release
Remote control unit buttons
Power ON/OFF, Freeze, Shutter, Mute, Volume +/-, Mode,
Menu, Input, Z,X,C,V, Light, Pointer, Mouse, Click1,
Click2
70
Polaview 215E LCD Projector User’s Guide
Appendix
Audio output
1.5 W (10% THD)
Speaker
70 mm X 40 mm X 1 (2.76” X 1.58” X 1
Operating temperature
5˚C to 40˚C (41˚F to 104˚F)
Operating humidity
10% - 80% (non-condensation)
Storage temperature/
Storage humidity
-13°F to 104°F (-25°C to 40°C) / 5%-85% (non-condensing)
-13°F to 140°F (-25°C to 60°C) / Normal humidity
Power supply
100-240 V AC (50 or 60 Hz) Automatic
Power consumption
260 W
Dimensions (W x H x D)
240 mm x 153 mm x 325 mm (9-7/16" x 6" x 12-13/16")
Amps
2.6A-1.2A
Weight
12.6 lbs. (5.8 kg)
Approvals
FCC, UL, C-UL, CE, VDE
Note:
Specifications and design are subject to change without notice.
English
71
Appendix
Polaroid Three Year Limited Warranty
Polaroid warrants your Polaview projector equipment against defects in
manufacture for a period of three years from the date of purchase. To verify the
warranty period, you should keep the sales slip or other proof of the purchase date.
Should this product, or any component or accessory included with it, become
defective at any time during the warranty period, Polaroid Corporation will, at its
discretion, either replace or repair this item, without charge, provided the product
is returned to a designated servicing location (prepaid and insured). To ship the
unit, pack the carrying case in the original carton or equivalent, with plenty of
padding.
This Limited Warranty does not apply to product damage resulting from accident,
incorrect installation, unauthorized modification, misuse or abuse.
U.S.A. and Canada
Before you return your equipment for repair, please call Polaroid Electronic
Imaging Technical Support from within the U.S.A. at 1-800-432-5355, Monday
through Friday, 8 a.m. to 8 p.m., Eastern Time. In Canada, call 1-800-268-6970.
We can help you determine what is at fault, and advise you on how and where to get
service in the quickest and most convenient way.
THIS WARRANTY EXCLUDES ALL INCIDENTAL AND
CONSEQUENTIAL DAMAGES. ALL EXPRESSED OR IMPLIED
LIABILITY FOR THIS EQUIPMENT INCLUDING BUT NOT LIMITED
TO THE IMPLIED WARRANTY OF MERCHANTABILITY AND FITNESS
FOR A PARTICULAR PURPOSE ARE LIMITED IN DURATION TO THE
THREE YEAR WARRANTY PERIOD.
SOME STATES DO NOT ALLOW THE EXCLUSION OR LIMITATION
OF INCIDENTAL OR CONSEQUENTIAL DAMAGES OR THE
DURATION OF IMPLIED WARRANTIES SO THE ABOVE LIMITATIONS
MAY NOT APPLY TO YOU. THIS WARRANTY GIVES YOU SPECIFIC
LEGAL RIGHTS, AND YOU MAY ALSO HAVE OTHER RIGHTS WHICH
MAY VARY FROM STATE TO STATE.
Outside the U.S.A. and
Canada
THIS WARRANTY EXCLUDES ALL INCIDENTAL AND
CONSEQUENTIAL DAMAGES AND DOES NOT AFFECT YOUR
STATUTORY RIGHTS.
Note: No user-serviceable parts inside, with the exception of the lamp and air filter
which can be replaced as described in this manual. Attempts to modify mechanical
or electronic parts inside will void your warranty, and may be hazardous.
72
Polaview 215E LCD Projector User’s Guide
Polaroid Offices and Service Centers
Australia
Polaroid Australia Pty. Ltd.
13–15 Lyonpark Road
P.O. Box 163
North Ryde, N.S.W. 2113
Tel.: (02) 9 950 7000
Fax: (02) 887 2209
France
Polaroid (France) S.A.
12 Bis Ave. Gay Lussac
La Clef de Saint-Pierre, B.P. 7
78996 Elancourt Cédex
Tel.: (33-1) 30 68 38 38
Fax: (33-1) 30 68 38 39
Belgique/België
Polaroid (Belgium) N.V.–S.A.
Rue Colonel Bourg 111
Kolonel Bourgstraat 111
1140 Bruxelles–1140 Brussel
Tel.: 32 2 702 86 20
Fax: 32 2 726 92 99
Toll free: 32 78 155 905
Hong Kong
Polaroid (Far East) Ltd.
32/F Windsor House
311 Gloucester Road
Causeway Bay
Tel.: (852) 2894 0333
Fax: (852) 2895 1382
Brasil
Polaroid do Brasil Ltda.
Av. Paulista, 1776–11º andar
Cerqueira Cesar
São Paulo–Capital
01310-921
Tel.: 55.11.285.6411
Fax: 55.11.283.2625
288.6521
287.5393
Canada
Polaroid Canada Inc.
350 Carlingview Drive
Etobicoke, Ontario M9W 5G6
Toll free: 1-800-268-6970
Danmark
Polaroid a.s.
Blokken 75
3460 Birkerød
Tlf.: 42 81 75 00
Fax: 42 81 70 26
Deutschland
Polaroid GMBH
Sprendlinger Landstrasse 109
63069 Offenbach
Tel.: (49-69) 840 4100
Fax: (49-69) 840 4 204
España
Polaroid (España), S.A
Calle Orense, 16
2a planta
28020 Madrid
Tno: 34-1-597.02.52
Fax: 34-1-597.27.82
Italia
Polaroid (Italia) S.p.A.
Via Piave 11
21051 Arcisate (Varese)
Tel.: (39-332) 470031
Fax: (39-332) 478249
Japan
Nippon Polaroid
Kabushiki Kaisha
Mori Building No. 30
Toranomon 3-2-2
Minato-ku
Tokyo 105
Tel.: (81-3) 3438 8811
Fax: (81-3) 3433 3537
México
Polaroid de México S.A. de C.V.
Paseo de la Reforma 195
Piso 17
C.P. 06500 México, D.F.
Tel.: (52-5) 703-1111
Fax: (52-5) 566-0505
Del interior al 91 (800) 70-727
Ventas 91 (800) 70-747
Nederland
Polaroid Nederland B.V.
Zonnebaan 45
3606 CH Maarssen
PO Box 1219
3600 BE Maarssen
Tel.: (31-30) 241 0420
Fax: (31-30) 241 1969
Reparaties:
Polaroid (Europe) B.V.
Hoge Bothofstraat 45
7511 ZA Enschede
Tel.: (31-53) 486 5050
Tel.: (32-53) 486 9905
73
New Zealand
Polaroid New Zealand Ltd.
24-26 Anzac Avenue
Auckland
Tel.: (64-9) 377 3773
Norge
Polaroid (Norge) A/S
Industriveien 8B,
1473 Skårer, Norway
Tlf: (47-67) 90 47 10
Fax: (47-67) 90 51 73
Österreich
Polaroid Ges.m.b.H.
Eitnergasse 5A
1231 Wien, Austria
Tel.: (43-1) 869 86 27
Fax: (43-1) 869 81 00
Portugal
Polaroid (España) S.A.
Sucursal em Portugal
Edificio Monumental
Avenida Praia da Vitória, 71-A 4º B
1050 Lisboa
Tel.: (351-1) 316.10. 49
Fax: (351-1) 316.10. 56
Puerto Rico
Polaroid Caribbean Corporation
Centro de Seguros
Ave. Ponce de León 701
Miramar, Santurce 00907
Tel.: (1-809) 725-6240
Fax: (1-809) 725-5462
74
Schweiz/Suisse/Svizzera
Polaroid AG
Hardturmstrasse 133
8037 Zürich, Switzerland
Tel.: (41-1) 277.72.72
Fax: (41-1) 271.38.84
Suomi
Polaroid Oy
Sinikalliontie 10
02630 Espoo
Tel.: (358-0) 502 35 33
Fax: (358-0) 502 35 50
Sverige
Polaroid AB
Ekholmsvägen 34
Box 204
127 24 Skärholmen
Tel.: (46-8) 710 08 50
Fax: (46-8) 740 73 68
U.K.
Polaroid (U.K.) Ltd. &
Polaroid Export Operations
Wheathampstead House
Codicote Road
Wheathampstead
Hertfordshire AL4 8SF U.K.
Tel: (44) 1582 63 2000
Freefone: (800) 010119
U.S.A.
Polaroid Corporation
Technical Assistance
Tel.: Toll free 1-800-432-5355
Call for the nearest Polaroid location