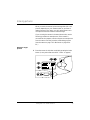
1
Polaroid Digital Camera PDC-2000 User Guide for Macintosh or Windows applications Capture high-quality color images Table of Contents Quick startup 1 Introduction vii 1 Typical PDC-2000 workflow 2 System requirements 2 Macintosh systems PC systems 3 3 Technical assistance 3 Using this manual 4 2 Setting up 7 Unpacking 7 Optional accessories 9 Setting up the PDC-2000 camera Attaching the camera straps Setting the SCSI ID Installing and charging the batteries Connecting the camera to your Macintosh If the PDC-2000 is the only SCSI device If your Macintosh has other SCSI devices Connecting to an Apple PowerBook 10 10 11 14 17 18 19 20 i Setting up your Macintosh for the PDC-2000 Installing the plug-in software Installing PDC-2000 Direct 21 22 Verifying camera internal settings from your Macintosh 22 Connecting the camera to your PC 23 If the PDC-2000 is the only SCSI device If your PC has other SCSI devices Setting up your PC for the PDC-2000 Choosing the software to install Installing the TWAIN driver Installing the plug-in software Installing PDC-2000 Direct 24 25 26 26 27 27 28 Verifying camera internal settings from your PC 28 Disconnecting the camera from your computer 29 3 Using the PDC-2000 camera Getting acquainted LCD panel Viewfinder indicators Sound indicators Capture and Index modes Automatic shutoff ii 21 33 34 37 39 40 40 41 Taking pictures Turning on the camera Setting to stand-alone mode Selecting Capture mode Setting the camera for current lighting conditions Holding the camera Framing and taking the picture If you see a viewfinder warning Using flash Using Auto Focus Using Focus Lock Compensating for backlighting Labeling pictures Editing the default picture label Editing a single picture’s label Erasing pictures Erasing a single picture Erasing all pictures Unerasing pictures 4 Using the PDC-2000 with your Macintosh 41 41 42 43 43 44 44 45 46 48 48 49 50 51 53 55 55 57 58 61 The PDC-2000 windows 62 Working with pictures in the camera 65 Viewing pictures in the camera Selecting thumbnails Previewing pictures with PDC-2000 Direct Viewing picture information 65 66 67 67 iii Rotating pictures Editing a picture label Transferring pictures from the camera to the computer Deleting pictures from the camera 69 71 Operating the camera from the Macintosh 72 Changing operating preferences 75 Available options Changing the preferences Releasing the camera from computer control Releasing the camera Restoring computer control 5 Using the PDC-2000 with your PC 68 75 77 80 80 81 83 The PDC-2000 windows 84 Working with pictures in the camera 87 Viewing pictures in the camera Selecting thumbnails Previewing pictures with PDC-2000 Direct Viewing picture information Rotating pictures Editing a picture label Transferring pictures from the camera to the computer Deleting pictures from the camera iv 68 87 89 89 89 90 90 91 93 Operating the camera from the PC 94 Changing operating preferences 97 Available options Changing the preferences Releasing the camera from computer control Releasing the camera Restoring computer control 6 Maintenance and troubleshooting Caring for the camera batteries Recommended battery types Charging the batteries in the camera Charging the batteries outside the camera Replacing the camera batteries 97 99 102 102 103 105 105 106 106 108 110 Troubleshooting error messages 111 PDC-2000 full one-year warranty 114 Service 115 Polaroid Offices and Service Centers 116 Radio and television interference 118 PDC-2000 camera specifications 121 Software license agreements 123 Index 129 v Quick startup For more information, see the page indicated. Setting up Page (Macintosh) Page (PC/Windows) 7 7 1 Unpack the PDC-2000 camera. 11 11 2 Set the camera’s SCSI ID. 14 14 3 Install and charge the camera batteries. 17 23 4 Connect the camera to your computer. 21 27 5 Install the PDC-2000 plug-in, TWAIN driver or PDC-2000 Direct on your computer. 75 97 6 Set the camera internal settings (date, time, user name, etc.). Steps Quick startup vii Taking pictures Page (Macintosh) Page (PC/Windows) 29 29 1 Disconnect the PDC-2000 camera from the computer. 41 41 2 Turn on the camera. 43 43 3 Set the camera for the current lighting conditions (daylight, incandescent or fluorescent). 44 44 4 Frame and take a picture. 50 50 5 Label your pictures (optional). Steps Viewing and transferring the pictures in the camera viii Page (Macintosh) Page (PC/Windows) 17 23 1 Connect the camera to the computer. 65 87 2 View thumbnails (small representations) of the pictures stored in the camera. 69 91 3 Select and transfer the pictures to the computer. 71 93 4 Delete the pictures from the camera. Steps 1 Introduction The Polaroid PDC-2000 Digital Camera captures high-quality color pictures electronically. PDC-2000 pictures contain up to 16.7 million colors and can be saved as high resolution (600x800 pixels) or super-high resolution (1200x1600 pixels) pictures. The PDC-2000 has all the features of an automatic compact 35mm camera, including automatic exposure, electronic flash and automatic focus. These features produce correct exposure, accurate colors and sharp focus under a great variety of picture-taking conditions. Manual overrides are also provided for unusual conditions. Using the Macintosh or Microsoft Windows software provided with the camera, you can view the pictures taken with the PDC-2000 camera and transfer them to the computer. You can then use an image-processing application to manipulate, enhance, save and print the pictures. When the camera is connected to your computer, you can control the camera and take pictures via the computer keyboard or mouse. This is useful when the camera is used in a stationary setup. Introduction 1 Typical PDC-2000 workflow To help you understand the full capabilities of the PDC-2000 camera, a typical workflow sequence is presented below. After you become familiar with PDC-2000 features, you can use the camera in other ways to best suit your imaging needs. 1 Take pictures with the camera (Chapter 3). 2 Connect the camera to your computer (Chapter 2). 3 Use your computer to view the pictures stored in the camera (Chapter 4 for Macintosh, Chapter 5 for PCs). 4 Select the pictures you want to keep and transfer them to the computer (Chapter 4 or 5). 5 Edit or enhance any of the pictures using an image-processing application such as Adobe Photoshop. (See instructions with the application.) 6 Print the picture or use it in another application, such as a desktop publishing application. (See instructions with the application.) As an alternative sequence for studio or other stationary setups, you can leave the PDC-2000 camera permanently attached to the computer. With the camera connected to the computer, you can operate the camera controls and take pictures using the computer’s display, keyboard or mouse. System requirements Using the PDC-2000 software to view and manipulate pictures taken with the PDC-2000 camera requires the following hardware and software. If you do not have the required configuration, contact your Polaroid dealer. 2 Macintosh systems • A Macintosh family computer with at least a 68020 processor and 8 megabytes (MB) of RAM. (16 MB is recommended.) • Apple system software version 7.1 or later. • An image-processing application, such as Adobe Photoshop, compatible with Adobe Photoshop plug-in modules, is recommended for working with PDC-2000 pictures. If you do not have such an application, you can use PDC-2000 Direct (packaged with the PDC-2000 camera) to transfer pictures from the camera and to control the camera from the computer. PC systems • An IBM PC or compatible, with at least a 33 MHz 486SX microprocessor and 8 MB of RAM. (A Pentium processor and 16 MB of RAM is recommended.) • An ASPI-compliant SCSI adapter. • A video adapter and monitor capable of displaying 24-bit color (16.7 million colors) is recommended for optimal display of PDC-2000 pictures. • MS-DOS 5.0 or higher. • Microsoft Windows 3.1 or later. • An image-processing application, such as Adobe Photoshop, that is either TWAIN-compliant or compatible with Adobe Photoshop plug-in modules, is recommended for working with PDC-2000 pictures. If you do not have such an application, you can use PDC-2000 Direct (packaged with the PDC-2000 camera) to transfer pictures from the camera and to control the camera from the computer. Technical assistance Call toll-free from within the U.S.A.: 1-800-432-5355, Monday through Friday, 8 a.m. to 8 p.m.(Eastern time), or fax to: 781-386-9688. You can also contact Polaroid Introduction 3 Technical Support on CompuServe (“GO Polaroid”) or write to Polaroid Electronic Imaging Technical Support, 565-3B Technology Sq., Cambridge, MA 02139. In Canada, call toll-free: 1-800-268-6970. Outside the U.S.A. and Canada, please contact the Polaroid office nearest you. See Polaroid Offices and Service Centers on page 116. For the latest PDC-2000 product information, updates and bulletins, access the Polaroid World Wide Web site at http://www.polaroid.com. Using this manual This book explains how to set up and use your Polaroid PDC-2000 camera. It also includes the procedures for installing the PDC-2000 software on your Macintosh computer or PC, and for taking, viewing and saving pictures taken with the PDC-2000 camera. These instructions assume that you are familiar with the operation of your Macintosh computer or PC with Microsoft Windows. Here’s what you’ll find inside: Quick startup: Summarizes instructions for setting up the PDC-2000 camera and software, and for taking pictures and transferring them to the computer. 1 Introduction: Briefly describes the PDC-2000 camera, lists system requirements and explains how to obtain technical assistance. 2 Setting up: Explains how to install the camera batteries, install the PDC-2000 software on your Macintosh computer or PC, and connect the PDC-2000 camera to your computer. 3 Using the PDC-2000 camera: Explains the PDC-2000 camera controls, and provides instructions for taking and labeling pictures. 4 4 Using the PDC-2000 with your Macintosh: Tells you how to use your Macintosh computer to view pictures taken with the PDC-2000 camera, how to transfer them from the camera to your Macintosh, and how to operate the camera from your Macintosh. 5 Using the PDC-2000 with your PC: Tells you how to use your IBM-compatible computer and Windows to view pictures taken with the PDC-2000 camera, how to transfer them from the camera to your PC, and how to operate the camera from your PC. 6 Maintenance and troubleshooting: Contains battery-replacement instructions, solutions to problems that might occur, and warranty and service information. Introduction 5 2 Setting up Unpacking Listed below are the components in the PDC-2000 camera package. If any is missing, contact your dealer immediately. a PDC-2000 camera with 38mm-equivalent lens b Hand strap c Shoulder strap d Power adapter/trickle charger: Recharges the NiCad batteries in the camera and provides power for the camera while the batteries are charging. e Camera batteries: Four “AA” NiCad rechargeable batteries. f SCSI cable (1 meter) and DB25/50 pin Centronics adapter: Connect the PDC-2000 camera to a Macintosh computer or PC SCSI port. g Software diskettes: PDC-2000 plug-in software for Macintosh and Windows, TWAIN driver (for Windows only) and Polaroid PDC-2000 Direct camera utility software for Macintosh and Windows. Setting up 7 Note: Please be sure to fill out and return the registration card packed with the PDC-2000 camera. As a registered owner, you will be among the first to receive information about PDC-2000 software updates and the availability of new PDC-2000 products. WARNING: NOTHING INSIDE THE PDC-2000 CAMERA EXCEPT THE BATTERIES IS USER-SERVICEABLE. TO AVOID THE POSSIBILITY OF DAMAGING THE CAMERA OR VOIDING THE WARRANTY, DO NOT DISASSEMBLE THE CAMERA. 8 Optional accessories You may have also purchased one or more of the following optional accessories for the PDC-2000 camera. (Any necessary instructions are packaged with each accessory.) 60mm-equivalent lens: Interchangeable lens for enlarging more distant subjects. SCSI host adapter: Adapter board for adding a SCSI port to IBM-compatible computers (PCs) for communicating with the PDC-2000 camera and other SCSI devices. SlimSCSI adapter kit: Adapter, 1-meter cable and software for connecting the PDC-2000 camera to the PCMCIA slot of a PC notebook computer. 110-volt 5-hour battery charger: Fully charges the PDC-2000 NiCad batteries in 5 hours from AC power. 12-volt auto adapter and recharger: Recharges the batteries in the camera and provides power for the camera from an automotive lighter socket. 2-meter SCSI system cable: Provides extra length for convenience while taking pictures with the camera connected to the computer (not for use with Apple PowerBook computers). Carrying case: Soft case with shoulder strap for the PDC-2000 camera and accessories. Setting up 9 Setting up the PDC-2000 camera Attaching the camera straps A hand strap and a shoulder strap are provided with the PDC-2000 camera. To help prevent damage to the camera and to make camera handling easier, attach one or the other. (You cannot attach both at the same time.) To attach the hand strap, connect the ends of the strap to the eyelets on the front and the back of the camera. Slide the plastic sleeve on each hook toward the eyelet until it snaps to lock the strap. 10 To attach the shoulder strap, connect the ends of the strap to the eyelets on the back of the camera as shown. Be sure to slide the plastic sleeve on each hook toward the eyelet until it snaps, locking the strap securely. Setting the SCSI ID The PDC-2000 camera is a Small Computer Systems Interface (SCSI) device. You can connect up to seven SCSI devices to your computer, one to another in a SCSI chain. Note: If you are connecting the PDC-2000 camera to an IBM PC or compatible computer, the computer must have an ASPI-compliant SCSI adapter. (See System requirements on page 2.) The PDC-2000 camera’s SCSI ID is preset to 4 at the factory. You do not need to change this number unless another SCSI device in the chain is already using it. To determine whether 4 is already being used, check the user guides of the other devices or run a SCSI utility program. Setting up 11 WARNING: EACH SCSI DEVICE CONNECTED TO YOUR COMPUTER MUST HAVE ITS OWN UNIQUE ID NUMBER SO YOUR COMPUTER CAN DISTINGUISH IT FROM OTHER ATTACHED SCSI DEVICES. USING TWO OR MORE DEVICES WITH THE SAME ID NUMBER CAN CAUSE THEM TO MALFUNCTION. YOU CAN LOSE DATA AS A RESULT. If the PDC-2000 is your only external SCSI device or no other device in the chain is using ID 4, skip the rest of this section and go on to Installing and charging the batteries on page 14. If you must change the camera’s SCSI ID, use the following steps: 1 Make sure the camera power is off and the camera is disconnected from the computer. If the camera is on, turn it off by pressing the power button (a). 12 2 Open the connector cover and locate the SCSI ID selector. 3 Insert a small screwdriver into the slot and rotate the selector until the arrow points to the desired SCSI ID. Note: Do not use 7 or 0, which are customarily used for the computer and for Macintosh hard drives. In addition, 3 is often used for internal CD-ROM drives. 4 Close the connector cover. Setting up 13 Installing and charging the batteries The four NiCad “AA” rechargeable batteries packaged with the PDC-2000 camera are shipped uncharged. To use the camera, you must install the batteries and charge them as described below. 1 Unlatch and remove the PDC-2000 battery holder from the camera. 14 2 Unwrap and install the four “AA” NiCad batteries provided, observing the battery orientation label in the battery holder. (Install the two outside batteries first, then install the two inside batteries.) WARNING: USE ONLY THE BATTERIES PROVIDED OR THE “AA” NICAD RECHARGEABLE BATTERY TYPES RECOMMENDED ON PAGE 106. OTHER TYPES, SUCH AS ALKALINE OR LITHIUM “AA” BATTERIES, WILL NOT OPERATE THE CAMERA, AND MAY CAUSE INJURY OR DAMAGE THE CAMERA IF YOU ATTEMPT TO CHARGE THEM AS DESCRIBED BELOW. Setting up 15 3 Engage the battery holder and close it, making sure it latches. 4 Connect the power adapter/trickle charger to the camera and to AC power. Do not operate the camera until the batteries have charged for about 6 hours. After this 6-hour period, you can use the camera while the batteries continue to charge. 16 Note: The camera is not operable without the batteries, even if the power adapter/trickle charger is connected. Charge the new batteries completely by leaving the charger connected to the camera for about 12 hours. (After this initial charging, the batteries will recharge completely in about 6 hours.) WARNING: USE ONLY THE POWER ADAPTER/ TRICKLE CHARGER PROVIDED FOR CHARGING THE BATTERIES WHILE THEY ARE IN THE CAMERA. OTHER ADAPTERS AND CHARGERS SIMILAR IN APPEARANCE ARE AVAILABLE, BUT THEY CAN OVERHEAT THE BATTERIES AND CAUSE INJURY OR CAMERA DAMAGE. You can also charge the batteries outside the camera with optional 110-volt 5-hour battery charger (see Optional accessories on page 9) or another charger compatible with your local AC voltage and designed for NiCad “AA” batteries. Carefully follow the instructions provided with the charger you are using. Connecting the camera to your Macintosh The PDC-2000 camera is an internally terminated SCSI device designed to connect to the SCSI port of your Macintosh computer. How you connect the PDC-2000 depends on whether you have other SCSI devices connected to your computer. Note: Be sure to set the camera’s SCSI ID as described on page 11 before connecting the camera. Setting up 17 WARNING: DO NOT CONNECT OR DISCONNECT THE PDC-2000 CAMERA OR ANY OTHER SCSI DEVICE WHILE THE DEVICE OR YOUR COMPUTER IS TURNED ON. DOING SO COULD DAMAGE THE DEVICE, YOUR COMPUTER, OR BOTH. (TURN OFF THE CAMERA BY PRESSING POWER BUTTON a.) If the PDC-2000 is the only SCSI device If the PDC-2000 camera is the only external SCSI device being used with your computer, turn off the computer and the camera. Then connect the SCSI system cable provided to the computer’s SCSI port (a). The port is marked with a SCSI symbol for easy identification. Connect the other end of the system cable (b) to the camera’s SCSI connector. Use only the SCSI cable provided with the camera. Other cables may appear similar, but could damage the camera or your computer. 18 After connecting the SCSI cable, connect the camera to AC power using the power adapter/trickle charger (c). IMPORTANT: ALWAYS CONNECT THE CAMERA TO AC POWER WHEN IT IS CONNECTED TO THE COMPUTER. IF THE CAMERA OR ANY OTHER SCSI DEVICE TURNS OFF WHILE CONNECTED, IT COULD CORRUPT DATA ON YOUR HARD DISK. If your Macintosh has other SCSI devices Because the PDC-2000 camera is internally terminated, you must install it as the last device in your SCSI chain as follows: 1 Turn off the computer, all SCSI devices, and the camera. 2 Remove the terminator (a) from the last SCSI device in your SCSI chain. Note: Keep the terminator. You must reconnect it if you use the computer while the camera is not attached. 3 Attach the DB25/50 pin Centronics adapter (b) to the end of the SCSI system cable (c). Use only the cable provided with the camera. Other cables may appear similar, but could damage the camera or your computer. 4 Connect the DB25/50 pin Centronics adapter (b) to the connector from which you removed the terminator. Setting up 19 5 Connect the other end of the SCSI system cable (d) to the SCSI connector on the PDC-2000 camera. 6 Connect the camera to AC power with the power adapter/trickle charger (e). IMPORTANT: ALWAYS CONNECT THE CAMERA TO AC POWER WHEN IT IS CONNECTED TO THE COMPUTER. IF THE CAMERA OR ANY OTHER SCSI DEVICE TURNS OFF WHILE CONNECTED, IT COULD CORRUPT DATA ON YOUR HARD DISK. Connecting to an Apple PowerBook In addition to the cables and adapters described in the previous sections, Apple PowerBook computers require an HDI-30/DB25 adapter (available from Macintosh dealers) to connect the PDC-2000 SCSI system cable to the PowerBook SCSI port. (Do not use a SCSI dock adapter or a cable-type adapter. These adapters may not work and could corrupt data on your PowerBook hard disk.) Other than the exceptions above, follow the instructions for connecting to Macintosh computers (starting on page 17) when connecting the PDC-2000 camera to an Apple PowerBook computer. WARNING: WITH POWERBOOK COMPUTERS, USE ONLY THE 1-METER SCSI SYSTEM CABLE (PROVIDED WITH THE PDC-2000) TO CONNECT THE CAMERA TO THE COMPUTER OR TO THE LAST DEVICE IN THE SCSI CHAIN. LONGER CABLES MAY CORRUPT DATA OR DAMAGE THE COMPUTER’S HARD DRIVE. 20 Setting up your Macintosh for the PDC-2000 To view PDC-2000 pictures stored in the camera, transfer pictures from the camera to your computer, operate the camera through the computer, or change camera setup options, you must install one of the following programs on your Macintosh. Both are provided with the PDC-2000 camera. • PDC-2000 plug-in software Using the plug-in after it is installed requires an image-processing application (not provided) compatible with Adobe Photoshop plug-in modules. • PDC-2000 Direct software If you do not have an image processing application compatible with Photoshop plug-in modules, you must install PDC-2000 Direct to use the PDC-2000 with your computer. (If you install PDC-2000 Direct, you do not need the plug-in software described above to use it.) Installing the plug-in software To install the PDC-2000 plug-in software on your Macintosh: 1 Insert the PDC-2000 plug-in installation disk into an internal or external drive. 2 If the disk contents are not already visible, open the disk. 3 Be sure to read any Read Me file included on the disk. The Read Me file contains important late-breaking product information that may affect installation or use. 4 Double-click the Installer icon to open the Installer program. 5 Click the Install button and follow instructions on the screen to choose and Acquire/Export folder. 6 When an on-screen message indicates that installation has been completed, click OK. 7 Restart your computer. Setting up 21 Installing PDC-2000 Direct Use the following steps to install PDC-2000 Direct: 1 Insert the PDC-2000 Direct for Macintosh installation disk into an internal or external drive. 2 If the disk contents are not already visible, open the disk. 3 Be sure to read any Read Me file included on the disk. The Read Me file contains important late-breaking product information that may affect installation or use. 4 Double-click the Installer icon to open the Installer program. 5 Click the Install button and follow instructions on the screen. 6 When an on-screen message indicates that installation has been completed, click OK. 7 Restart your computer. Verifying camera internal settings from your Macintosh The PDC-2000 camera stores the following settings in its internal memory: • User name • Default picture label • Current date • Current time • Automatic shutoff timeout values • Camera sound indicator status Before using the PDC-2000 camera for the first time, verify (and change, if necessary) these settings by following instructions in Changing operating preferences on page 75. 22 After verifying the camera’s internal settings, proceed as follows: If you intend to take pictures with the camera disconnected from the computer, close your image-processing application or PDC-2000 Direct by choosing Quit from the File menu. Then turn off the computer and the camera, and disconnect the camera as described on page 29. Refer to Using the PDC-2000 camera on page 33 for picture-taking instructions. If you will take pictures while using the computer to control the camera, leave the camera connected to the computer. Refer to Using the PDC-2000 with your Macintosh on page 61. Connecting the camera to your PC The PDC-2000 camera is an internally terminated SCSI device designed to connect to a SCSI adapter on your IBM-compatible computer. How you connect the PDC-2000 depends on whether you have other SCSI devices connected to your computer. Note: Be sure to set the camera’s SCSI ID as described on page 11 before connecting the camera. Also, your IBM-compatible computer must have an ASPI-compliant SCSI adapter for attaching the camera. See System requirements on page 2 for more information. Setting up 23 WARNING: DO NOT CONNECT OR DISCONNECT THE PDC-2000 CAMERA OR ANY OTHER SCSI DEVICE WHILE THE DEVICE OR YOUR COMPUTER IS TURNED ON. DOING SO COULD DAMAGE THE DEVICE, YOUR COMPUTER, OR BOTH. (TURN OFF THE CAMERA BY PRESSING POWER BUTTON a.) If the PDC-2000 is the only SCSI device If the PDC-2000 camera is the only external SCSI device being used with your computer, turn off the computer and the camera. Then connect the SCSI system cable provided to the computer’s SCSI port (a). Connect the other end of the system cable (b) to the camera’s SCSI connector. Use only the cable provided with the camera. Other cables may appear similar, but could damage the camera or your computer. 24 After connecting the SCSI cable, connect the camera to AC power using the power adapter/trickle charger (c). IMPORTANT: ALWAYS CONNECT THE CAMERA TO AC POWER WHEN IT IS CONNECTED TO THE COMPUTER. IF THE CAMERA OR ANY OTHER SCSI DEVICE TURNS OFF WHILE CONNECTED, IT COULD CORRUPT DATA ON YOUR HARD DISK. If your PC has other SCSI devices Follow the steps below if your computer has other external SCSI devices in addition to the PDC-2000 camera. Because the PDC-2000 camera is internally terminated, you must install it as the last device in your SCSI chain as follows: 1 Turn off the computer, all SCSI devices, and the camera. 2 Remove the terminator (a) from the last device in your SCSI chain. Note: Keep the terminator. You will need to reconnect it if you wish to use the computer while the camera is disconnected from it. 3 Attach the DB25/50 pin Centronics adapter (b) to the end of the SCSI system cable (c). Use only the cable provided with the camera. Other cables may appear similar, but could damage the camera or your computer. 4 Connect the DB25/50 pin Centronics adapter (b) to the connector from which you removed the terminator. Setting up 25 5 Connect the other end of the SCSI system cable (d) to the SCSI connector on the PDC-2000 camera. 6 Connect the camera to AC power using the power adapter/trickle charger (e). IMPORTANT: ALWAYS CONNECT THE CAMERA TO AC POWER WHEN IT IS CONNECTED TO THE COMPUTER. IF THE CAMERA OR ANY OTHER SCSI DEVICE TURNS OFF WHILE CONNECTED, IT COULD CORRUPT DATA ON YOUR HARD DISK. Setting up your PC for the PDC-2000 To view PDC-2000 pictures stored in the camera, transfer pictures from the camera to your computer, operate the camera through the computer, or change camera setup options, you must install one of the following programs on your PC. All are provided with the PDC-2000 camera. • PDC-2000 TWAIN driver Using the TWAIN driver requires an image-processing application (not provided) compatible with the TWAIN specification. • PDC-2000 plug-in software Using the plug-in requires an image-processing application (not provided) compatible with Adobe Photoshop plug-in modules. • PDC-2000 Direct software If you do not have an image processing application compatible with TWAIN or Photoshop plug-in modules, you must install PDC-2000 Direct to use the PDC-2000 camera with your computer. Choosing the software to install 26 The TWAIN driver is recommended for use with the PDC-2000, since it is compatible with most Microsoft Windows image processing applications capable of acquiring images. (This includes Adobe Photoshop for Windows.) If you are using an application not compatible with TWAIN but compatible with Photoshop plug-in modules, install the plug-in instead. Note: To avoid possible conflicts between the TWAIN driver and the plug-in module, do not install both. If you do not have an application compatible with either TWAIN or Photoshop plug-ins, install PDC-2000 Direct. You do not need the TWAIN driver or the plug-in to use PDC-2000 Direct. Installing the TWAIN driver To install the TWAIN driver: 1 Turn on the computer and start Windows. 2 Insert the TWAIN driver diskette into the floppy drive. 3 From the Program Manager menu, choose Run. 4 Type a:\setup (or b:\setup if the diskette is in drive B) and click OK. 5 Follow instructions on the screen to complete the installation. 6 Remove the diskette from the floppy drive. Installing the plug-in software To install the plug-in module: 1 Turn on the computer and start Windows. 2 Insert the plug-in module diskette into the floppy drive. 3 From the Program Manager menu, choose Run. 4 Type a:\setup (or b:\setup if the diskette is in drive B) and click OK. An initial dialog message box appears, followed by a PDC-2000 Setup dialog box indicating a drive and directory for the PDC-2000 plug-in files. Setting up 27 5 To use the drive and directory displayed in the dialog box, click Continue. To change the drive or directory, enter the new location before clicking Continue. 6 Follow instructions on the screen to complete the installation. 7 Remove the diskette from the floppy drive. Installing PDC-2000 Direct To install PDC-2000 Direct: 1 Turn on the computer and start Windows. 2 Insert the PDC-2000 Direct for Windows diskette into the floppy drive. 3 From the Program Manager menu, choose Run. 4 Type a:\setup (or b:\setup if the diskette is in drive B) and click OK. 5 To use the drive and directory displayed in the dialog box, click Continue. To change the drive or directory, enter the new location before clicking Continue. 6 Follow instructions on the screen to complete the installation. 7 Remove the diskette from the floppy drive. Verifying camera internal settings from your PC The PDC-2000 camera stores the following settings in its internal memory: • User name • Default picture label • Current date 28 • Current time • Automatic shutoff timeout values • Camera sound indicator status Before using the PDC-2000 camera for the first time, verify (and change, if necessary) these settings by following instructions in Changing operating preferences on page 97. After verifying the camera’s internal settings, proceed as follows: If you intend to take pictures with the camera disconnected from the computer, close your image-processing application by choosing Exit from the File menu. Then turn off the computer and the camera, and disconnect the camera as described below. Refer to Using the PDC-2000 camera on page 33 for picture-taking instructions. If you wish to take pictures while using the computer to control the camera, leave the camera connected to the computer. Refer to Using the PDC-2000 with your PC on page 83. Disconnecting the camera from your computer If you want to take pictures with the PDC-2000 camera away from the computer, use the following steps to disconnect it. Note: The procedure below disconnects the camera cable from the computer. To use the camera controls for taking pictures without disconnecting the camera from the computer, see Releasing the camera from computer control on page 80 (Macintosh) or page 102 (PC) instead. 1 Turn off the computer. Setting up 29 2 Turn off the camera by pressing the Power button (a). WARNING: DO NOT CONNECT OR DISCONNECT THE PDC-2000 CAMERA OR ANY OTHER SCSI DEVICE WHILE THE DEVICE OR YOUR COMPUTER IS TURNED ON. DOING SO COULD DAMAGE THE DEVICE, YOUR COMPUTER, OR BOTH. 3 Disconnect the camera cable from the computer or from the SCSI device to which it is connected. 4 Disconnect the camera cable from the camera by pressing the latching levers and pulling straight out. 30 5 If other SCSI devices are connected to your computer and you wish to use the computer while the camera is disconnected, install a terminator on the SCSI device connector to which the camera was attached. Setting up 31 3 Using the PDC-2000 camera Using the Polaroid PDC-2000 camera is similar to using a conventional 35mm point-and-shoot camera. But instead of storing pictures on photographic film, the PDC-2000 camera stores electronic images internally or on a computer connected to the camera. Used in the stand-alone mode, the camera stores up to 40 pictures (model PDC-2000/40) or 60 pictures (model PDC-2000/60) internally. The camera controls allow you to control the use of flash, automatic focus, white balance and other features just as you would operate any other camera. You can also attach a label to each picture and erase pictures you don’t want to keep. When connected by a cable (tethered mode) to a computer running PDC-2000 software, the camera can be controlled with the computer keyboard and mouse, and its viewfinder image appears on the computer screen. In this mode, it transfers each picture as it is taken directly to the computer for viewing, printing, editing or storing. In the tethered mode, the camera can also send all its stored pictures to the computer at once. Using the PDC-2000 camera 33 This chapter explains how to use the camera in the stand-alone mode. To use your computer for controlling the camera during picture-taking and to transfer pictures from the camera to your computer, see Using the PDC-2000 with your Macintosh (page 61) or Using the PDC-2000 with your PC (page 83). Note: The model PDC-2000/T has no internal picture storage and is intended only for use while connected to a computer (tethered mode). Getting acquainted a Flash: Provides controlled subject lighting for correctly exposed and color-balanced pictures. b Lens: Directs and focuses light into camera for capturing pictures. c LCD panel: Displays picture numbers and labels, along with symbols (icons) indicating camera conditions and errors. See LCD panel on page 37. 34 d SCSI address selector: Sets the camera’s SCSI address (required for communication with your computer). e SCSI cable connector: Provides a connection to your computer via the SCSI cable provided. f Battery charger connector: Connection for the battery charger. g Viewfinder: Used for framing pictures. Also displays signals informing the operator about camera conditions. See Viewfinder indicators on page 39. h Power button: Turns the camera power on and off. i Erase button: Used in the Index mode to erase pictures from the camera. (See Erasing pictures on page 55.) Also used in the Index or Capture mode to erase or edit picture labels. (See Labeling pictures on page 50.) j Label button: Activates or deactivates the Label field in the LCD panel for creating or editing picture labels. See Labeling pictures on page 50. k Scroll buttons: When the camera is in the Index mode, scrolls through the numbers and labels of the pictures stored in the camera. If the Label field is active, scrolls through the list of Using the PDC-2000 camera 35 alphanumeric characters for insertion in a label. (See Labeling pictures on page 50.) l Enter button: If the Label field is active, enters the currently displayed character in the space above the cursor and moves the cursor to the right. (See Labeling pictures on page 50.) m Shutter button: Pressing half-way down focuses the camera and measures available light for automatically setting exposure. Pressing fully takes a picture. Also used with other buttons to delete pictures from the camera. n Backlight Compensation button: Increases exposure for correct subject lighting in backlighted scenes. See Compensating for back lighting on page 49. o Battery compartment: Holds the four rechargeable NiCad “AA” batteries powering the camera. p Index button: Changes the camera to Index mode for scrolling through picture numbers and labels and deleting pictures. Pressing a second time returns the camera to Capture mode for taking pictures. (See Capture and Index modes on page 40 for more information.) q White Balance button: Sets the camera for accurate color rendition in daylight, incandescent light or fluorescent light. See Setting the camera for current lighting conditions on page 43. r Auto Focus button: Disables automatic focus and sets focus distance at infinity. See Using Auto Focus on page 48. s Flash button: Sets flash for automatic, on or off. See Using flash on page 46. 36 LCD panel The LCD panel on the PDC-2000 camera displays text and symbols indicating various camera settings and error conditions. a Time and date. When the camera is in Capture mode, displays the current time and date. To set, see Changing the preferences on page 77 (Macintosh) or page 99 (PC). When the camera is in Index mode, displays the time and date the currently displayed picture was taken. b White balance indicator. Displays current lighting conditions setting: (blank) daylight, ( ) incandescent light, ( ) fluorescent light. To change the white balance setting, see Setting the camera for current lighting conditions on page 43. c Flash setting indicator. Displays current flash setting: ( automatic flash, ( ) flash on, (blank) flash off. ) To change the setting, see Using flash on page 46. Using the PDC-2000 camera 37 d Auto Focus indicator. Displays current auto focus setting: ( ) Auto Focus on, ( ) Auto Focus off. To change the setting, see Using Auto Focus on page 48. e Picture counter. When the camera is in the Capture mode, displays the number of pictures stored in the camera. In the Index mode, displays the number of the picture being reviewed. f Battery level indicator. Displays current battery level: ( fully charged, ( ) discharged, and other levels. ) Discharged batteries should be recharged (see Caring for the camera batteries on page 105) or replaced with charged batteries. g Sound indicator. Displays status of camera sound: (blank) sound on, ( ) sound off. To change the setting, see Changing operating preferences on page 75 (Macintosh) or page 97 (PC). h Mode indicator. Displays the current mode setting: (blank) Capture mode, (“Index”) Index mode. To change the setting, press the Index button described on page 36. i Backlight compensation indicator. Displays backlight compensation setting: ( ) on, (blank) off. To change the setting, see Compensating for back lighting on page 49. j 38 Label area. Displays a 10-character label for the current picture. (Also used for displaying messages, as described in item l.) k Error indicator. Displays “Error” when an error condition exists (low light, low battery, flash not ready, disk full or internal hardware error). See page 111 for error message troubleshooting information. l Viewfinder indicators Message area. Displays error messages (low light, low battery, flash not ready, disk full or internal hardware error), and confirmation messages for erasing pictures and connecting the camera to the computer. (Also used for displaying labels, as described in item j.) For convenience while taking pictures, the PDC-2000 provides a yellow LED and a red LED at the bottom of the viewfinder. If an error condition occurs, these indicators light to alert you. Indicator Meaning Yellow Flash has not completely charged or picture being stored Blinking red (when Shutter button partially depressed) Insufficient light, storage disk full, low battery or internal hardware error Using the PDC-2000 camera 39 When a blinking red LED appears in the viewfinder, the LCD panel also displays an explanatory error message. (See LCD panel on page 37.) Sound indicators The PDC-2000 provides audible tones to help alert you to the following operating or error conditions: Sound Meaning One high-pitched tone when camera power turned on Camera is ready to take pictures Two high-pitched tones followed by a low-pitched tone when Shutter button pressed half way Low battery Two high-pitched tones Insufficient light, flash not when Shutter button pressed ready, storage disk full or half way internal hardware error One or two low-pitched tones when camera turned on Internal hardware error or special condition One or more low-pitched tones followed by camera powering off Battery power insufficient for camera operation When two high-pitched tones or a low-pitched tone indicate an error condition, the LCD panel also displays an explanatory message. (See LCD panel on page 37.) If you wish, you can turn camera sound off for the error condition signals. See Changing the preferences on page 77 (Macintosh) or page 99 (PC). Capture and Index modes The PDC-2000 has two modes of operation: Capture and Index. You select the mode by pressing the Index button. The Capture mode is used for picture-taking. You can also edit the default picture label while you are in the Capture mode. (See Labeling pictures on page 50 for more information.) 40 The Index mode allows you to use the Scroll buttons to scroll through the numbers, times, dates and labels of the pictures stored in the camera. In the Index mode, you can also delete pictures and edit individual labels. Automatic shutoff To help conserve battery power, the PDC-2000 has an automatic shutoff feature that turns off the camera after a preset period of inactivity (2 minutes, unless you change it as described below). The camera also turns off the viewfinder image, which can be displayed on the computer screen when taking pictures with the camera connected to the computer, if the camera remains inactive for a preset period. The automatic shutoff timeout periods can be adjusted through the camera’s internal settings. See Changing the preferences on page 77 (Macintosh) or page 99 (PC). Note: Automatic shutoff is disabled while the camera is connected to AC power and is under computer control (displaying “connected” on the LCD panel). Taking pictures Turning on the camera To turn on the PDC-2000 camera, press the Power button (a). Using the PDC-2000 camera 41 When you press the Power button, the camera performs a brief self-test, then displays a normal LCD panel. If the sound indicators are enabled, the camera also emits a short, high-pitched tone to indicate that it passed the self-test and is ready to take pictures. If the camera detects any problems or errors during its self-test, it displays an error message on the LCD and emits one or two short, low-pitched tones. (For more information about error messages, see Troubleshooting error messages on page 111.) Setting to stand-alone mode If your PDC-2000 camera is connected to a computer, you must release it from computer control to operate in the stand-alone mode. Use either of these two methods to release it: • Use the computer to release the camera. (See Releasing the camera from computer control, page 80 for Macintosh or page 102 for PC.) • Disconnect the camera from the computer. (See Disconnecting the camera from your computer on page 29.) WARNING: DO NOT DISCONNECT OR CONNECT ANY DEVICE WHILE THE DEVICE OR YOUR COMPUTER IS TURNED ON. DOING SO COULD DAMAGE THE DEVICE, YOUR COMPUTER, OR BOTH. 42 Selecting Capture mode Before taking pictures, make sure the camera is in the Capture mode. If the camera is in the Index mode instead, the word “Index” (a) appears in the LCD panel. Set the mode to Capture by pressing the Index button. Setting the camera for To achieve accurate colors, you must choose the white current lighting conditions balance setting that matches lighting conditions in the scene. Using an incorrect setting can give your pictures an unnatural yellow, blue or green tint. Use the daylight setting for taking pictures outdoors, or when taking pictures with the flash set to Automatic or On (see Using flash on page 46). When taking pictures indoors without flash under incandescent or fluorescent lighting, change the camera to the appropriate setting by pressing the White Balance button (WB). Using the PDC-2000 camera 43 When either incandescent ( ) or fluorescent ( ) lighting is selected, the appropriate symbol appears on the LCD panel (a). When daylight is selected, no symbol is visible. Holding the camera The PDC-2000 camera is designed so you can easily hold it steady during picture-taking. When you hold the camera as shown, you can comfortably reach the shutter button while viewing the scene through the viewfinder. If you hold the camera vertically (for portraits, for example), be sure the flash is at the top as shown. Framing and taking the picture 44 After setting the mode and lighting setting, hold the camera correctly and view the scene to be captured through the viewfinder. If necessary, move closer or farther away from the subject while looking through the viewfinder to get the framing you want. (If you wear eyeglasses, fold back the rubber eyecup on the viewfinder for easier viewing.) With the normal 38mm-equivalent lens, the PDC-2000 camera can focus on subjects as close as 10 inches (26cm) from the lens. When framing subjects less than 2 feet (61cm) from the lens, leave some extra space between your subject and the left and right edges of the viewfinder. At close distances, some of the area near the edges of the viewfinder may not be captured in the picture. Note: When the normal 38mm-equivalent lens is installed on the camera, use the full viewfinder for framing your picture. The frame visible in the viewfinder is for framing with the optional 60mm-equivalent lens. When the subject is framed, press the shutter button slightly while watching for a yellow or red warning indicator at the bottom of the viewfinder. If no warning indicator is visible, take the picture by pressing the shutter button completely. (If a red or yellow warning indicator is visible in the viewfinder, release the button and refer to If you see a viewfinder warning below before taking the picture.) Before or after taking the picture, you can label it as described on page 50 for easy identification. If you see a viewfinder warning If a yellow or red warning indicator is visible in the viewfinder when you are about to take a picture, release the shutter button and take the steps indicated below before continuing: Indicator Yellow Meaning and corrective action Flash has not completely charged or previous picture still being stored; wait until the LED goes out before taking the picture Using the PDC-2000 camera 45 Indicator Blinking red Meaning and corrective action Insufficient light; use flash (page 46) or Camera storage disk is full; erase one or more pictures (page 55) or transfer the stored pictures to the computer (page 69 for Macintosh, page 91 for PC) or Low battery power; recharge batteries (page 106) or Hardware error; see Troubleshooting error messages (page 111) Note: When you see the blinking red LED in the viewfinder, look at the LCD panel for more information about the problem. Using flash The PDC-2000 camera provides three flash modes for optimum picture quality under a great variety of lighting conditions: Automatic ( ) Camera automatically determines whether or not to use flash On ( Flash fires with every picture ) Off (blank) Flash never fires Automatic ( ) is the recommended setting, and should produce correctly lighted pictures under most conditions. The flash is effective up to 15 feet (4.6m) from the subject. Use the flash On ( ) setting when conditions might cause the automatic flash system to mistakenly determine that flash is not needed. Outdoors, for example, overall scene lighting may be adequate but the main subject may be in shadow. In this case, the automatic flash would not fire and the subject would be too dark. In this case, using the flash On setting would expose the subject correctly. 46 When flash is set to Automatic or On, make sure the white balance is set for Daylight. (See Setting the camera for current lighting conditions on page 43.) Use the flash Off (no symbol) setting when sufficient light is available and you do not wish to fire the flash. To change the flash setting, press the Flash button ( ) until , or no symbol, as appropriate, appears in the LCD panel (a). Using the PDC-2000 camera 47 Using Auto Focus The PDC-2000 camera features automatic focus that produces sharp pictures under most conditions. To disable automatic focus and set focus to infinity (for taking pictures through a window, for example), press the Auto Focus button ( ) to display the Auto Focus Off symbol ( ) on the LCD panel (a). You can reset to Auto Focus On ( ) by pressing the Auto Focus button again. The camera automatically resets to Auto Focus On when the camera is turned on. Using Focus Lock The Focus Lock feature lets you achieve sharp focus when the main subject is not centered in the picture. To use Focus Lock, center the subject in the viewfinder and press the Shutter button half-way down to lock the focus distance. While continuing to hold the Shutter button, reframe the picture as desired. Then press the Shutter button all the way to take the picture. 48 Compensating for back lighting The PDC-2000 camera’s exposure system automatically adjusts to most lighting conditions. But when the background is much brighter than your subject or “back-lighted,” the subject may turn out too dark (a). Using the Backlight Compensation feature increases the brightness of the entire picture to produce a correctly exposed subject (b). Turn on Backlight Compensation by pressing the Backlight Compensation button ( ). A symbol ( ) in the LCD panel (a) indicates that Backlight Compensation is on. The camera automatically turns Backlight Compensation off after you take a picture or when the camera is turned on. Using the PDC-2000 camera 49 Labeling pictures To help identify your pictures, you can use the camera controls to assign a 10-character label to each one. This label appears on the camera’s LCD panel (a) whenever the picture number is displayed, and it remains with the picture when it is transferred to the computer. With the procedures in this section, you can edit the default picture label applied to all pictures taken after the default label is entered. (Your PDC-2000 camera was shipped with “POLAROID” as the default picture label.) You can also edit this default label to create unique labels for individual pictures any time after the pictures are taken. 50 Note: You can also use your computer to edit the default picture label or change individual picture labels for pictures being transferred to the computer. For more information, see Chapter 4 (Macintosh) or Chapter 5 (PC). Editing the default picture label Use the following steps to edit the default picture label stored in the camera. This label will appear on all pictures taken after the label is edited. 1 If the camera is in the index mode (indicated by “Index” on the LCD panel), press the Index button to remove “Index” and change the mode to Capture. The current default picture label (a) is visible. Using the PDC-2000 camera 51 2 Press the Label button to display a blinking cursor (b) under the first empty character space in the LCD panel label field. If no default label exists, the cursor appears in the first character space of the label field. 3 Press the Erase button once to erase the last character of the label, twice to erase the last two characters, etc. To erase the entire label, hold the Erase button for 3 seconds or longer. If no picture label exists, it is not necessary to press the Erase button. 4 To insert a new character at the cursor location, press the Scroll button until the desired character appears in the space. Press the Enter button to store the character and move the cursor to the next space. Note: Only upper case (capital) letters, numerals, hyphen (-) and space are available for labels. To leave a blank space, press the Enter button without entering a character. 5 Repeat step 4 until you have completed the label (up to 10 characters and spaces). 52 6 Exit from the Label mode by pressing the Label button. To individualize the default label for a single picture, use the procedure in the following section. Editing a single picture’s label Use the following steps to edit an individual picture label: 1 If the camera is not in the Index mode (indicated by “Index” (a) on the LCD panel), press the Index button to change to the Index mode. (It may take a few seconds for “Index” to appear.) 2 If the number (b) of the picture receiving the new label is not displayed in the LCD panel, press the Scroll button until the desired picture number and label (c) appear. Using the PDC-2000 camera 53 3 Press the Label button to display a blinking cursor (c) under the first empty space in the LCD panel label field. 4 Press the Erase button once to erase the last character of the label, twice to erase the last two characters, etc. To erase the entire label, hold the Erase button for 3 seconds or longer. If no picture label exists, it is not necessary to press the Erase button. 5 To insert a new character at the cursor location, press the Scroll button until the desired character appears in the label space. Press the Enter button to store the character and move the cursor to the next space. To leave a blank space, press the Enter button without entering a character. 6 Repeat step 5 until you have completed the new label (up to 10 characters and spaces). 7 Exit from the Label mode by pressing the Label button. 54 Erasing pictures When you reach the camera’s picture-storage limit (40 or 60 pictures, depending on your camera model) or you want to retake pictures for any reason, you will need to erase one or more pictures from the camera’s internal storage. If you are using the camera in the stand-alone mode, use the following procedure to erase pictures. (If the camera is connected to the computer, use the computer to erase pictures from the camera. For that procedure, see Deleting pictures from the camera on page 71 for Macintosh or page 93 for PC.) Erasing a single picture 1 Place the camera in the Index mode (a) by pressing the Index button. (It may take a few seconds for “Index” to appear.) Using the PDC-2000 camera 55 2 Press the Scroll button until the number (b), label (c), if used, and date and time (d) of the desired picture appears in the LCD panel. 3 Simultaneously press and release the Erase button and the Shutter button to display a confirmation message (e) on the LCD panel. (Be sure to press the Shutter button all the way.) 4 To erase the picture, press the Erase button a second time. (If you decide not to erase the picture, do not press the Erase button. Instead, wait for the confirmation message to disappear or press the Enter button.) 56 5 Repeat steps 2, 3 and 4 as needed to erase additional pictures. Important: When you erase a picture, the picture numbers change to produce a continuous sequence starting at 1 for all remaining pictures. When erasing multiple pictures, you should erase the highest-numbered picture first to avoid accidentally erasing pictures you want to keep. 6 To change to Capture mode for taking more pictures, press the Index button. Erasing all pictures WARNING: THIS PROCEDURE ERASES ALL PICTURES STORED IN THE CAMERA. IF YOU WANT TO KEEP ANY PICTURES, BE SURE TO TRANSFER THEM TO THE COMPUTER (SEE PAGE 69 FOR MACINTOSH OR PAGE 91 FOR PC) BEFORE USING THE STEPS BELOW. 1 Place the camera in the Index mode (a) by pressing the Index button. (It may take a few seconds for “Index” to appear.) Using the PDC-2000 camera 57 2 Simultaneously press and hold the Erase button and the Shutter button for 5 seconds to display “erase all?” (b) on the LCD panel. (Be sure to press the Shutter button completely.) Release the buttons when the message appears. 3 To erase all the pictures, press the Erase button a second time. (If you decide not to erase the pictures, do not press the Erase button. Instead, wait for the confirmation message to disappear or press the Enter button.) 4 To change to Capture mode for taking more pictures, press the Index button. Unerasing pictures If you accidentally erase one or more pictures from the camera, you may be able to recover (“unerase”) them with the following procedure. Note: These steps restore only the most recently taken pictures. If you erase pictures and then take more before you attempt recovery, the new pictures may overwrite the ones you want to recover. 1 Turn the camera off by pressing the Power button. 58 2 Simultaneously press and hold the Power button and the Auto Focus button until “restored” appears on the LCD panel (about 2 seconds), then release the buttons. 3 Transfer the pictures you want to keep to your computer (see page 69 for Macintosh or page 91 for PC). Note: Restoring pictures is likely to change the picture numbers. Use care in choosing the pictures to be transferred. 4 Erase all the pictures from the camera. (See Erasing all pictures on page 57, or see Chapter 4 or 5 to use your computer for erasing the pictures.) Note: Because this procedure restores all pictures on the camera’s storage disk, the LCD displays “disk full” if you attempt to take additional pictures without performing steps 3 and 4. Using the PDC-2000 camera 59 4 Using the PDC-2000 with your Macintosh To transfer and work with pictures from the PDC-2000 camera on your Macintosh, you use the PDC-2000 plug-in module with an image-processing application, such as Adobe Photoshop. If you do not have an application compatible with plug-in modules, you can still work with the camera through your Macintosh by installing PDC-2000 Direct. (See Chapter 2 for software installation information.) With the PDC-2000 camera connected to your computer and either the PDC-2000 plug-in or PDC-2000 Direct software installed, you can perform the following operations: View the pictures stored in the camera You can quickly view all the pictures in the camera by displaying miniature representations of them (called thumbnails) in a single window. Transfer multiple pictures You can use the thumbnail view to choose and transfer pictures from the camera to your computer. Using the PDC-2000 with your Macintosh 61 Operate the camera through the computer You can take pictures by using your computer keyboard or mouse, while using the computer screen as a viewfinder. This is particularly convenient for studios and other stationary setups. Change camera setup You must use the PDC-2000 software to change the PDC-2000 camera’s internal date, time, user name and other settings stored in the camera. The PDC-2000 windows When you use the PDC-2000 plug-in software from within an image-processing application or when you launch PDC-2000 Direct, three different windows are available: Transfer Pictures window The Transfer Pictures window displays thumbnail representations of pictures in the camera. From the Transfer Pictures window, you can: • Transfer selected pictures from the camera to the computer. • Rotate selected pictures in 90-degree increments. • Edit picture labels. 62 • View picture information, including date, time, user name, and camera settings in effect when the picture was taken. • Delete selected pictures from the camera. Take Pictures window The Take Pictures window lets you control the camera through the computer. With the Take Pictures window you can: • Display a viewfinder image on your computer screen for framing pictures. • Change the viewfinder orientation from landscape to portrait or vice versa. • Change the camera settings for flash, lighting conditions, automatic focus and backlight compensation just as you would with the controls on the camera. • Take a picture and immediately transfer it to the computer. Using the PDC-2000 with your Macintosh 63 Set Preferences window The Set Preferences window lets you change the internally stored camera settings and the way pictures are transferred from the camera to the computer. It also allows you to release the camera from computer control without disconnecting the camera cable. From the Set Preferences window you can: • Change the user name (recorded with each picture). • Change the default picture label. • Change the camera’s internal clock settings to match the computer’s time and date settings. • Change the camera’s automatic shutoff settings. • Select the resolution of pictures transferred from the camera to the computer. • Turn the camera sound indicators off and on. • Release the camera from computer control (for taking pictures using the camera’s controls while the camera is connected to the computer). 64 • Set “Expert Preferences” for transferring pictures to an image processing application or directly to a file on your computer’s disk, for keeping the PDC-2000 plug-in active or closing it after each transfer operation, and for enabling or disabling the display of thumbnail images from the camera. Working with pictures in the camera Using either the PDC-2000 plug-in software with your image-processing application or PDC-2000 Direct, you can look at thumbnails (small representations) of pictures stored in the camera without transferring them to the computer. While viewing the thumbnails on your computer screen, you can rotate pictures, transfer pictures to the computer, or delete pictures from the camera. Viewing pictures in the camera To display thumbnails of the pictures stored in the camera: 1 Connect the camera to your computer. If necessary, see Connecting the camera to your Macintosh on page 17. 2 Turn on the camera by pressing the Power button (a). 3 Turn on your computer. Using the PDC-2000 with your Macintosh 65 4 Start an image-processing application compatible with Photoshop plug-ins, or start PDC-2000 Direct. 5 If you are using PDC-2000 Direct, skip to step 6. If you are using a plug-in compatible image processing application, choose Acquire from the File menu, then choose PDC-2000. 6 If the Transfer Pictures window is not visible, click on the Transfer Pictures button to display it. If all the thumbnails cannot fit in the window, click on the vertical scroll bar to view additional thumbnails. Selecting thumbnails Before you can perform operations (rotate, delete, etc.) on the pictures represented by the thumbnails in the Transfer Pictures window, you must select one or more of the thumbnails. To select a single thumbnail, click it once or press the arrow keys to move to the thumbnail you want to select. A red border appears around the thumbnail. If all the thumbnails do not fit in the window, the rows of thumbnails automatically scroll as you use the arrow keys. 66 To select several thumbnails, press and hold the Shift key and then click the thumbnails or use the arrow keys. To select all the thumbnails, click the Select All button or hold down the z (Command) key and press the A key. To deselect one thumbnail, press and hold the Shift key and click the selected thumbnail. To deselect all thumbnails, click the Select All button (or hold down the z key and press the A key) a second time. Previewing pictures with PDC-2000 Direct If you are using PDC-2000 Direct, you can enlarge any thumbnail to a 400x300-pixel preview image for closer viewing. To view a preview image, click on the thumbnail to select it. Choose Preview from the File menu, or hold down the z (Command) key and press the O key. While viewing the preview image, you can save the picture to your computer’s hard disk by choosing Save As from the File menu. To close the preview image, click on the Close box in the upper left corner of the Preview window. Viewing picture information When the Transfer Pictures window is open, you can display the following information about any picture represented in the window: • Picture label • User name • Date and time picture was taken • Focus distance • Camera settings when picture was taken (light source, flash, autofocus, backlight compensation) Using the PDC-2000 with your Macintosh 67 To view this information for any picture, select the desired thumbnail as described on page 66. Then choose the Get Info button or hold down the z (Command) key and press the I key. To view abbreviated picture information, hold down the Option key while clicking on a thumbnail. Rotating pictures You can rotate a picture in 90-degree increments to change its orientation from landscape to portrait or vice versa. The rotation will not be saved unless you transfer the picture to the computer. To rotate one or more pictures: 1 View the pictures in the camera as described on page 65. 2 Select one or more pictures to be rotated. (See Selecting thumbnails on page 66.) 3 Rotate the selected pictures 90 degrees by clicking the Rotate button or hold down the z (Command) key and press the R key. 4 To rotate the pictures further, continue to click the Rotate button again or hold down z and press R. Note: To rotate the selected thumbnails back to their original orientation, hold down z and Shift, and press R. Editing a picture label If necessary, you can edit individual picture labels in the Transfer Pictures window. To edit the label text, click on the label and use the keyboard. You can move among labels by either clicking with the mouse or pressing the Tab key. Note: Unlike individual labels created with the camera controls as described in Editing a single picture’s label on page 53, labels edited with the computer are not saved in the camera. They remain visible only while you are viewing the Transfer Pictures window. 68 Transferring pictures from the camera to the computer While viewing pictures stored in the camera, you can choose those you want to keep and then transfer them to the computer. If you are using Adobe Photoshop or another application compatible with Photoshop plug-ins, you can transfer them to the image-processing application or directly to an image file on your computer’s hard disk. (You choose the method of transfer through the Expert Preferences button in the Set Preferences window. See Changing the preferences on page 77.) If you are using PDC-2000 Direct, you can only transfer the pictures directly to your computer’s hard disk. When you transfer the pictures from the camera to an image processing application, you save each one by using the Save As command in the application. Most image-processing applications allow you to choose a file format for the pictures you are saving. (A file format is a way of organizing the image data so the computer can display and work with it.) See instructions with your image-processing application for a description of formats available to you. If you prefer to save the pictures directly to your computer’s hard disk or if you are using PDC-2000 Direct, your pictures are saved as TIFF files in the folder of your choice. Transferring pictures to an application Use the following steps to transfer one or more pictures to the computer through your image-processing application. (These instructions do not apply to PDC-2000 Direct because it only saves pictures directly to disk.) Note: If necessary, disable the option that transfers pictures directly to disk or change the resolution (800x600 or 1600x1200) of the pictures being transferred before starting this procedure. (See Changing the preferences on page 77.) Using the PDC-2000 with your Macintosh 69 Tip: If the Transfer button displays a diskette, the Expert Preferences are set to transfer directly to disk and must be changed before starting. 1 View the pictures in the camera as described on page 65. 2 Select one or more pictures to be transferred. (See Selecting thumbnails on page 66.) 3 Click the Transfer button or hold down the z (Command) key and press the T key. Each selected picture appears in your image-processing application. Note: When you transfer several pictures, your imageprocessing application may display them on top of one another. To view the different image windows, drag each one slightly to tile them. 4 If the Transfer Pictures window is still visible, close it. 5 Save a picture as follows: a. In the image-processing application, click on a picture to make its window active. b. Choose Save As from the application’s File menu. c. Follow the instructions with your image-processing application to save the picture in the desired format and in the desired folder on your hard disk. 6 Repeat step 5 as needed to save all the transferred pictures. Note: Some applications may not allow you to transfer all the pictures at once with this method. If some of the pictures do not transfer from the camera to the application, repeat steps 2 through 7 as needed to transfer additional pictures. 70 Transferring pictures directly to disk Use the following steps to transfer one or more pictures directly from the camera to the computer’s hard disk without passing through your image-processing application. (If you are using PDC-2000 Direct, you must use this procedure to transfer pictures from the camera to your computer.) Note: If necessary, enable the option that transfers pictures directly to disk or change the resolution (800x600 or 1600x1200) of the pictures being transferred before starting this procedure. (See Changing the preferences on page 77.) Tip: If the Transfer button displays a diskette, the Expert Preferences are set to transfer directly to disk and does not need to be changed before starting. 1 View the pictures in the camera as described on page 65. 2 Select one or more pictures to be transferred. (See Selecting thumbnails on page 66.) 3 Click the Transfer button or hold down the z (Command) key and press the T key. 4 Select a folder to receive the pictures. (You can also create a new folder for the pictures by clicking on the New Folder button.) 5 Click OK to transfer the pictures. Deleting pictures from the camera Use the following procedure to delete pictures from the camera. If you want to keep any of the pictures you are about to delete, be sure to transfer them to the computer before deleting them from the camera. See Transferring pictures from the camera to the computer on page 69. To delete pictures from the camera: 1 View the pictures in the camera as described on page 65. Using the PDC-2000 with your Macintosh 71 2 Select one or more pictures to be deleted. (See Selecting thumbnails on page 66.) 3 Use one of these methods to display a confirmation dialog box: • Click the Delete button. • Press the Delete key. • Hold down the z (Command) key and press the D key. 4 To delete the selected pictures from the camera, click OK in the confirmation dialog box. Note: If you are not deleting all the pictures from the camera, those remaining will be renumbered. For example, you may decide to delete all pictures except 4 and 23. In this case, picture 4 becomes picture 1, and picture 23 becomes picture 2. Operating the camera from the Macintosh If the camera is connected to the computer, you can control the camera with the mouse and the keyboard, and you can display a “live” viewfinder image on your computer screen. This is useful if you use the camera in a stationary setting. To take pictures using the computer: 1 Connect the camera to your computer. If necessary, see Connecting the camera to your Macintosh on page 17. 72 2 Turn on the camera by pressing the Power button (a). 3 Turn on the computer. 4 Start an image-processing application compatible with Photoshop plug-in modules or start Polaroid PDC-2000 Direct. 5 If you are using PDC-2000 Direct, skip to step 6. If you are using an image-processing application, choose Acquire from the File menu, then choose PDC-2000. 6 If necessary, change the resolution (800x600 or 1600x1200) of the pictures transferred to the computer. (See Changing the preferences on page 77.) Using the PDC-2000 with your Macintosh 73 7 If the Take Pictures window is not visible, display it by clicking on the Take Pictures button. 8 Click the View Finder button (or hold down the z key and press the V key) to display a viewfinder image in the Take Pictures window. 9 To change the orientation of the image in the viewfinder, choose Landscape or Portrait as appropriate. (You can also hold down the z key and press the R key to change between Landscape and Portrait.) 10 Select the Flash setting you want to use from the drop-down list. See Using flash on page 46 for more information. 11 Choose a Light setting that matches the lighting conditions in the current scene. See Setting the camera for current lighting conditions on page 43. 12 Select or deselect the Auto Focus option. See Using Auto Focus on page 48. 13 If necessary, select Backlight Compensation. See Compensating for back lighting on page 49. 74 14 When the picture is framed as desired, click the Snap button (or hold down the z key and press the S key) to capture the picture and transfer it to your image processing application or to a Preview window in PDC-2000 Direct. Note: To snap the picture after a preset delay, click on the timer button (next to the Snap button) instead of the Snap button. Enter the desired time delay, then click Start Timer to begin the specified interval. 15 If you are using an image processing application, close the Take Pictures window (if it is still open) and follow instructions with your application to view, edit or save the picture. If you are using PDC-2000 Direct, choose Save from the File menu. Changing operating preferences Available options Using the PDC-2000 plug-in, you can set the following preferences. These preferences remain unchanged until you set them again. User name The user name stored in the camera is attached to each picture. After a picture is taken, you can view the user name to help identify the photographer or the camera by using the Get Info button in the Transfer Pictures window. (See Viewing picture information on page 67.) Changing the user name affects only pictures taken after the changes are made. Pictures taken earlier and stored in the camera retain the user name in effect when they were taken. Using the PDC-2000 with your Macintosh 75 Default picture label The default picture label is attached to each picture when it is taken. This label appears below each thumbnail image in the Transfer Pictures window to help identification. It is also visible in the camera’s LCD panel. After taking a picture, you can change its label from the default to an individualized description by using the camera controls (see Labeling pictures on page 50) or by using the PDC-2000 plug-in software (see Editing a picture label on page 68). Changing the default picture label affects only pictures taken after the changes are made. Pictures taken earlier and stored in the camera retain the label in effect when they were taken. (The default picture label can also be changed with the camera controls as described in Chapter 3.) Current date and time The camera’s internal clock settings are attached to each picture to indicate the date and time the picture was taken. You can view the camera’s current date and time settings in the camera LCD panel (see page 37). Changing the date or time affects only pictures taken after the changes are made. Pictures taken earlier and stored in the camera retain the settings in effect when they were taken. Automatic shutoff timeouts The timeout settings determine how long the camera remains inactive before the viewfinder image on the computer and the main camera power automatically turn off to conserve battery power. The automatic shutoff for camera power does not operate when the camera is under computer control (displaying “connected” in the LCD panel) and connected to AC power. Picture resolution The PDC-2000 can be set to transfer its internally stored pictures as either high resolution (800x600) or super-high resolution (1600x1200) images. The selected picture resolution option is applied to the pictures during transfer from the camera to the computer. It does not affect the way the pictures are taken or stored in the camera. Camera sound indicators You can disable the camera’s audible error signals. (See Sound indicators on page 40 for a description of these indicators.) 76 Expert preferences You can choose to transfer pictures from the camera to an image processing application or directly to a file on disk, to keep the PDC-2000 plug-in active or close it after each transfer operation, and to disable display of thumbnail images from the camera for faster plug-in launch. Changing the preferences To change any of the preference settings described above: 1 Connect the PDC-2000 camera to the computer as described on page 17. WARNING: DO NOT CONNECT OR DISCONNECT THE PDC-2000 CAMERA OR ANY OTHER SCSI DEVICE WHILE THE DEVICE OR YOUR COMPUTER IS TURNED ON. DOING SO COULD DAMAGE THE DEVICE, YOUR COMPUTER, OR BOTH. 2 Turn on the camera by pressing the Power button (a). 3 Turn on the computer. 4 Start an image-processing application compatible with Photoshop plug-in modules or start Polaroid PDC-2000 Direct. 5 If you are using PDC-2000 Direct, skip to step 6. If you are using an image-processing application, choose Acquire from the File menu, then choose PDC-2000. Using the PDC-2000 with your Macintosh 77 6 If the Set Preferences window is not visible, click the Set Preferences button to display it. 7 Change one or more of the settings as needed: Name or default picture label Click the Set button and type new entries. (Only upper case letters, numerals, hyphens and spaces can be used in the default picture label.) Camera internal clock Click the Synchronize button to set the camera to the computer’s date and time settings. Automatic shutoff timeouts Click the appropriate scroll buttons to change the viewfinder timeout (range: 1-100 seconds) or the camera power-off timeout (range: 1-60 minutes). Picture resolution Click on the desired resolution button (800x600 or 1600x1200). Camera sound indicators Turn on or off by clicking on the Sound check box. 78 Expert preferences Set the following options: Picture transfer method Transfer pictures either to disk or to your image-processing application. Note: An icon on the Transfer button in the Transfer Pictures window indicates the current setting. A disk icon indicates transfer to disk, and an application window indicates transfer to your image-processing application. Plug-in behavior after transfer Choose to close the plug-in and return to the image processing application after picture transfer or to leave the plug-in active. Thumbnail display Disable the option for loading thumbnail images from the camera to the Transfer Pictures window, allowing the plug-in to launch faster. 8 Return to the image-processing application or close PDC-2000 Direct by clicking the Close box in the upper left corner of the Set Preferences window. Using the PDC-2000 with your Macintosh 79 Releasing the camera from computer control You may wish to release the PDC-2000 camera from computer control so you can operate it via the controls on the camera and store pictures in the camera without disconnecting the camera from the computer. Releasing the camera To release the camera from computer control, use these steps: 1 Start an image-processing application compatible with Photoshop plug-in modules or start Polaroid PDC-2000 Direct. 2 If you are using PDC-2000 Direct, skip to step 3. If you are using an image-processing application, choose Acquire from the File menu, then choose PDC-2000. 3 If the Set Preferences window is not visible, click the Set Preferences button to display it. 4 To release the camera from computer control, click the Release Camera button (or hold down the z key and press the R key). A Release Camera dialog box appears. 5 If you expect to restore the camera to computer control soon, leave the dialog box open. To return to the image-processing application or exit from PDC-2000 Direct, click on the Quit button. 6 After releasing the camera, refer to Chapter 3 for camera operating instructions. WARNING: DO NOT TURN OFF THE CAMERA OR DISCONNECT IT FROM THE COMPUTER AFTER IT HAS BEEN RELEASED FROM COMPUTER CONTROL. DOING SO COULD DAMAGE YOUR COMPUTER OR CORRUPT DATA ON YOUR HARD DISK. 80 If you want to turn off the camera while its cable is connected to the computer, use the procedure recommended for any SCSI device: (1) turn off the computer, and (2) turn off the camera. To disconnect the camera from the computer, see Disconnecting the camera from your computer on page 29. Restoring computer control After releasing the camera from computer control as described above, you can place the camera back under computer control with these steps: If the Release Camera dialog box is still visible If you left the Release Camera window visible as described in the previous section, click on the Reconnect button to restore camera control to the computer. If the Release Camera dialog box is not visible If you returned to the image-processing application or closed PDC-2000 Direct after releasing the camera from computer control, use the following steps to restore camera control to the computer: 1 Start your image-processing application or PDC-2000 Direct. 2 If you are using PDC-2000 Direct, skip to step 3. If you are using an image processing application, choose Acquire from the File menu, then choose PDC-2000. 3 If the Take Pictures window is not visible, click the Take Pictures button to display it and restore camera control to the computer. Using the PDC-2000 with your Macintosh 81 5 Using the PDC-2000 with your PC To transfer and work with pictures from the PDC-2000 camera on your PC, you use the PDC-2000 TWAIN driver or plug-in module with an image-processing application, such as Adobe Photoshop. If you do not have an application compatible with TWAIN or plug-in modules, you can still work with the camera via your PC by installing PDC-2000 Direct. (See Chapter 2 for software installation information.) With the PDC-2000 camera connected to your computer and the PDC-2000 TWAIN driver, the plug-in or PDC-2000 Direct software installed, you can perform the following: View the pictures stored in the camera You can quickly view all the pictures in the camera by displaying miniature representations of them (called thumbnails) in a single window. Transfer multiple pictures You can use the thumbnail views to choose and transfer pictures from the camera to your computer. Using the PDC-2000 with your PC 83 Operate the camera through the computer You can take pictures by using your computer keyboard or mouse, while using the computer screen as a viewfinder. This is particularly convenient for studios and other stationary setups. Change camera setup You must use the PDC-2000 software to change the PDC-2000 camera’s internal date, time, user name and other settings. The PDC-2000 windows When you start PDC-2000 software (TWAIN driver, plug-in or PDC-2000 Direct), three different windows are available: Transfer Pictures window The Transfer Pictures window displays thumbnail representations of the pictures in the camera. From the Transfer Pictures window, you can: • Transfer selected pictures from the camera to the computer. 84 • Rotate pictures in 90-degree increments. • Edit picture labels. • View picture information, including date, time, user name, and camera settings in effect when the picture was taken. • Delete selected pictures from the camera. Take Pictures window The Take Pictures window lets you control the camera through the computer while taking pictures. With the Take Pictures window you can: • Display a viewfinder image on your computer screen for framing pictures. • Change the viewfinder orientation from landscape to portrait or vice versa. • Change the camera settings for flash, lighting conditions, automatic focus and backlight compensation just as you would with the controls on the camera. • Take a picture and immediately transfer it to the computer. Using the PDC-2000 with your PC 85 Set Preferences window The Set Preferences window lets you change the camera’s internally stored settings and the way pictures are transferred to the computer. From the Set Preferences window, you can: • Change the user name recorded with each picture. • Change the default picture label. • Change the camera’s internal clock settings to match the computer’s time and date settings. • Change the camera’s automatic shutoff settings. • Select the resolution of pictures transferred from the camera to the computer. • Turn the camera sound indicators off and on. • Release the camera from computer control (for taking pictures using the camera’s controls while the camera is connected to the computer). • Set “Expert” preferences for transferring pictures to an image processing application or directly to files on you computer’s hard disk. 86 Working with pictures in the camera Using the PDC-2000 software (TWAIN driver, plug-in or PDC-2000 Direct), you can look at thumbnails (small representations) of pictures stored in the camera without transferring them to the computer. While viewing the thumbnails on your computer screen, you can rotate pictures, transfer pictures to the computer, or delete pictures from the camera. Viewing pictures in the camera To display thumbnail images of the pictures stored in the camera: 1 Connect the camera to your computer. If necessary, see Connecting the camera to your PC on page 23. 2 Turn on the camera by pressing the Power button (a). 3 Turn on your computer. 4 Start your TWAIN compliant or plug-in compatible application, or start PDC-2000 Direct. Using the PDC-2000 with your PC 87 5 If you are using PDC-2000 Direct, wait for the Transfer Pictures window to appear. If you are not using PDC-2000 Direct, use one of the methods below to display the Transfer Pictures window: • If you are using Adobe Photoshop and the TWAIN driver, pull down the File menu and choose Select TWAIN and PDC-2000. Click on OK. Pull down the File menu again and choose Acquire TWAIN. • If you are using a TWAIN compliant application other than Adobe Photoshop, refer to the application’s instructions for acquiring images. • If you are using a plug-in compatible application, pull down the File menu, choose Acquire, and choose PDC-2000. Note: If no pictures are stored in the camera, the Take Pictures window appears instead of the Transfer Pictures window. If all the thumbnails do not fit in the window, use the vertical scroll bar to view additional thumbnails. 88 Selecting thumbnails Before you can perform operations (rotate, delete, etc.) on the pictures represented by the thumbnails in the Transfer Pictures window, you must select one or more of the thumbnails. To select a single thumbnail, click on it once or press the arrow keys to move to the thumbnail you want to select. A color border appears around the thumbnail. (If all thumbnails are displayed in the window, click on the vertical scroll bar to see more.) To select several thumbnails, press and hold the Control key and then click the thumbnails. To select all the thumbnails, click the Select All button. To deselect a thumbnail, press and hold the Control key and click the thumbnail. To deselect all thumbnails, hold the Control key and click the Select All button. Previewing pictures with PDC-2000 Direct If you are using PDC-2000 Direct, you can enlarge any thumbnail to a 400x300-pixel preview image for closer viewing. To view a preview image, click on the desired thumbnail with the right mouse button to display a pop-up menu. Then choose Preview from the menu. While viewing the preview image, you can save the picture to your computer’s hard disk by choosing Save As from the File menu. To close the preview image, double click on the Command box in the upper left corner of the Preview window or choose Close from the File menu. Viewing picture information When the Transfer Pictures window is open, you can display the following information about any picture represented in the window: • Picture label • User name Using the PDC-2000 with your PC 89 • Date and time picture was taken • Focus distance • Camera settings when picture was taken (light source, flash, auto focus, backlight compensation) To view this information for any picture, click on the desired thumbnail with the right mouse button to display a pop-up menu. Then choose Get Info from the menu. Rotating pictures You can rotate pictures in 90-degree increments to change their orientation from landscape to portrait or vice versa. The rotation will not be saved unless you transfer the pictures to the computer. To rotate one or more pictures: 1 View the pictures in the camera as described on page 87. 2 Select one or more pictures to be rotated. (See Selecting thumbnails on page 89.) 3 Rotate the selected pictures 90 degrees by clicking the Rotate button. (To rotate the pictures further, continue to click the Rotate button.) Editing a picture label If you wish, you can edit a picture label in the Transfer Pictures window. To edit a label, click on the desired thumbnail with the right mouse button to display a pop-up menu. Then choose Edit Label to display an Edit Label dialog box. Type a new label for the picture and choose OK. Note: Unlike individual labels created with the camera controls as described in Editing a single picture’s label on page 53, labels edited with the computer are not saved in the camera. They remain visible only while you are viewing the Transfer Pictures window. 90 Transferring pictures from the camera to the computer While viewing pictures stored in the camera, you can choose those you want to keep and then transfer them to the computer. If you are using Adobe Photoshop or another TWAIN or plug-in compatible image processing application, you can transfer them either to the application or directly to your computer’s hard disk. (You choose the method of transfer through the Set Preferences window. See Changing the preferences on page 99.) If you are using PDC-2000 Direct, you can only transfer the pictures directly to your hard disk. When you transfer the pictures from the camera to an image-processing application, you must save each one using the Save As command in the application. Most image-processing applications allow you to choose a file format for the pictures you are saving. (A file format is a way of organizing the image data so the computer can display and work with it.) See instructions with your image-processing application for a description of formats available to you. If you prefer to transfer the pictures from the camera directly to your computer’s hard disk, they are saved as TIFF files in the directory of your choice. Transferring pictures to an application Use the following steps to transfer one or more pictures to the computer through your image-processing application. (If you are using PDC-2000 Direct, you must transfer your pictures directly to disk as described above.) Note: If necessary, disable the option that transfers pictures directly to disk or change the resolution (800x600 or 1600x1200) of the pictures being transferred before starting this procedure. (See Changing the preferences on page 99.) Tip: If the Transfer button displays a diskette, the Expert Preferences are set to transfer directly to disk and must be changed before starting. Using the PDC-2000 with your PC 91 1 View the pictures in the camera as described on page 87. 2 Select one or more pictures to be transferred. (See Selecting thumbnails on page 89.) 3 Click the Transfer button. Each selected picture appears in your image-processing application. Note: When you transfer several pictures, your image-processing application may display them on top of one another. To view the different image windows, drag each one slightly to tile them. 4 Save a picture as follows: a. In the image-processing application, click on a picture to make its window active. b. Choose Save As from the application’s File menu. c. Follow the instructions with your image-processing application to save the picture in the desired format and in the desired directory on your hard disk. 5 Repeat step 4 as needed to save all the transferred pictures. Note: Some applications may not allow you to transfer all the pictures at once with this method. If some of the pictures do not transfer from the camera to the application, repeat steps 1 through 6 as needed to transfer additional pictures. Transferring pictures directly to disk Use the steps below to transfer one or more pictures directly from the camera to the computer’s hard disk without passing through your image-processing application. Note: If necessary, enable the option that transfers pictures directly to disk or change the resolution (800x600 or 1600x1200) of the pictures being transferred before starting this procedure. (See Changing the preferences on page 99.) 92 Tip: If the Transfer button displays a diskette, the Expert Preferences are set to transfer directly to disk and do not need to be changed before starting. 1 View the pictures in the camera as described on page 87. 2 Select one or more pictures to be transferred. (See Selecting thumbnails on page 89.) 3 Click the Transfer button. 4 Select a directory to receive the pictures. 5 If you want, change the first six characters of the file names given to the stored pictures. (If you do not change the characters, the file names will contain the first six characters of the label on the first picture being transferred. A two-digit numeral will be appended to the six characters, producing a unique, eight-character name for each file.) 6 Click OK to transfer the pictures. Deleting pictures from the camera Use the following procedure to delete one or more pictures from the camera. If you want to keep any of the pictures you are about to delete, be sure transfer them to the computer as described in the previous section before you delete them from the camera. 1 View the pictures in the camera as described on page 87. 2 Select one or more pictures to be deleted. (See Selecting thumbnails on page 89.) 3 Click the Delete button to display a confirmation message. 4 To delete the pictures from the camera, click OK. Note: If you are not deleting all the pictures from the camera, those remaining will be renumbered. For example, you may decide to delete all pictures except 4 and 23. In this case, picture 4 becomes picture 1, and picture 23 becomes picture 2. Using the PDC-2000 with your PC 93 Operating the camera from the PC If the camera is connected to the computer, you can use the PDC-2000 software to control the camera with the mouse and the keyboard, and you can display a “live” viewfinder image on your computer screen. This is useful if you use the camera in a studio or other stationary setting. To take pictures using the computer: 1 Connect the camera to your computer. If necessary, see Connecting the camera to your PC on page 23. 2 Turn on the camera by pressing the Power button (a). 3 Turn on your computer. 4 Start your TWAIN compliant or plug-in compatible application, or start PDC-2000 Direct. 94 5 If you are using PDC-2000 Direct, wait for the Transfer Pictures window to appear. If you are not using PDC-2000 Direct, use one of the methods below to display the Transfer Pictures window: • If you are using Adobe Photoshop and the TWAIN driver, pull down the File menu and choose Select TWAIN and PDC-2000. Click on OK. Pull down the File menu again and choose Acquire TWAIN. • If you are using a TWAIN compliant application other than Adobe Photoshop, refer to the application’s instructions for acquiring images. • If you are using a plug-in compatible application, pull down the File menu, choose Acquire, and choose PDC-2000. Note: If no pictures are stored in the camera, the Take Pictures window appears instead of the Transfer Pictures window. 6 If necessary, change the resolution at which the pictures will be transferred (600x800 or 1200x1600) through the Set Preferences window. (See Changing the preferences on page 99.) Using the PDC-2000 with your PC 95 7 Click the Take Pictures button to display the Take Pictures window. 8 Click the View Finder button to display a viewfinder image in the Take Pictures window. 9 To change the orientation of the image in the viewfinder, choose Landscape or Portrait as appropriate. 10 Select the Flash setting you want to use from the drop-down list. See Using flash on page 46 for more information. 11 Choose a Light setting that matches the lighting conditions in the current scene. See Setting the camera for current lighting conditions on page 43. 12 Select or deselect the Auto Focus option. See Using Auto Focus on page 48. 13 If necessary, select Backlight Compensation. See Compensating for back lighting on page 49. 96 14 When the picture is framed as desired, click the Snap button to capture the picture and transfer it to your image processing application or to a Preview window in PDC-2000 Direct. Note: To snap the picture after a preset delay, click on the timer button (next to the Snap button) instead of the Snap button. Enter the desired time delay, then click Start Timer to begin the specified interval. 15 If you are using an image-processing application, follow instructions with your application to view, edit or save the picture. If you are using PDC-2000 Direct, choose Save As from the File menu. Changing operating preferences Available options Using the PDC-2000 software (TWAIN driver, plug-in or PDC-2000 Direct) on your computer, you can set the following camera preferences. These preferences remain unchanged until you set them again. User name The user name stored in the camera is attached to each picture. After a picture is taken, you can view the user name to help identify the camera or photographer by using the Get Info selection on the pop-up menu. (See Viewing picture information on page 89.) Changing the user name affects only pictures taken after the changes are made. Pictures taken earlier and stored in the camera retain the user name in effect when they were taken. Using the PDC-2000 with your PC 97 Default picture label The default picture label is attached to each picture when it is taken. This label appears below each thumbnail image in the Transfer Pictures window to help identification. It is also visible in the camera’s LCD panel. After taking a picture, you can change its label from the default to an individualized description by using the camera controls (see Labeling pictures on page 50) or by using the PDC-2000 software (see Editing a picture label on page 90). Changing the default picture label affects only pictures taken after the changes are made. Pictures taken earlier and stored in the camera retain the label in effect when they were taken. (The default picture label can also be changed with the camera controls as described in Chapter 3.) Current date and time The camera’s internal clock settings are attached to each picture to indicate the date and time the picture was taken. you can view the camera’s date and time setting on the camera LCD panel (see page 37). Changing the date or time affects only pictures taken after the changes are made. Pictures taken earlier and stored in the camera retain the settings in effect when they were taken. Automatic shutoff timeouts The timeout settings determine how long the camera remains inactive before the viewfinder image on the computer and the main camera power automatically turn off to conserve battery power. The automatic shutoff for camera power does not operate when the camera is under computer control (displaying “connected” in the LCD panel) and connected to AC power. Picture resolution The PDC-2000 can be set to transfer its internally stored pictures as either high resolution (800x600) or super-high resolution (1600x1200) pictures. The selected picture resolution option is applied to the pictures during transfer from the camera to the computer. It does not affect the way the pictures are taken or stored in the camera. 98 Camera sound indicators You can disable the camera’s audible error signals. (See Sound indicators on page 40 for a description of these indicators.) Expert preferences You can choose to transfer pictures from the camera to an image processing application or directly to a file on disk. Changing the preferences To change any of the preference settings described above: 1 Connect the PDC-2000 camera to the computer as described on page 23. WARNING: DO NOT CONNECT OR DISCONNECT THE PDC-2000 CAMERA OR ANY OTHER SCSI DEVICE WHILE THE DEVICE OR YOUR COMPUTER IS TURNED ON. DOING SO COULD DAMAGE THE DEVICE, YOUR COMPUTER, OR BOTH. 2 Turn on the camera by pressing the Power button (a). Using the PDC-2000 with your PC 99 3 Turn on your computer. 4 Start your TWAIN compliant or plug-in compatible application, or start PDC-2000 Direct. 5 If you are using PDC-2000 Direct, wait for the Transfer Pictures window to appear. If you are not using PDC-2000 Direct, use one of the methods below to display the Transfer Pictures window: • If you are using Adobe Photoshop and the TWAIN driver, pull down the File menu and choose Select TWAIN and PDC-2000. Click on OK. Pull down the File menu again and choose Acquire TWAIN. • If you are using a TWAIN compliant application other than Adobe Photoshop, refer to the application’s instructions for acquiring images. • If you are using a plug-in compatible application, pull down the File menu, choose Acquire, and choose PDC-2000. Note: If no pictures are stored in the camera, the Take Pictures window appears instead of the Transfer Pictures window. 100 6 Click the Set Preferences button to display the Set Preferences window. 7 Change one or more of the settings as needed: Name or default picture label Click the Set button and type new entries. (Only upper case letters, numerals, hyphens and spaces can be used in the default picture label.) Camera internal clock Click the Synchronize button to set the camera to the computer’s date and time settings. Automatic shutoff timeouts Click the appropriate scroll buttons to change the viewfinder timeout (range: 1-100 seconds) or the camera power-off timeout (range: 1-60 minutes). Picture resolution Click on the desired resolution button (800x600 or 1600x1200). Camera sound indicators Turn on or off by clicking on the Sound check box. Using the PDC-2000 with your PC 101 Expert preferences Choose the Expert Preferences button and choose to transfer pictures to your image processing application or directly to disk. (An icon on the Transfer button in the Transfer Pictures window indicates the current Expert preferences setting. A disk icon indicates transfer to disk, and an application window indicates transfer to your image-processing application.) 8 Return to the image-processing application by double-clicking on the Control menu box in the upper left corner of the window. Releasing the camera from computer control You may wish to release the PDC-2000 camera from computer control so you can operate it via the controls on the camera and store pictures in the camera without disconnecting the camera from the computer. Releasing the camera You can release the camera from computer control as follows: 1 Start your TWAIN compliant or plug-in compatible application, or start PDC-2000 Direct. 2 If you are using PDC-2000 Direct, wait for the Transfer Pictures window to appear. If you are not using PDC-2000 Direct, use one of the methods below to display the Transfer Pictures window: • If you are using Adobe Photoshop and the TWAIN driver, pull down the File menu and choose Select TWAIN and PDC-2000. Click on OK. Pull down the File menu again and choose Acquire TWAIN. • If you are using a TWAIN compliant application other than Adobe Photoshop, refer to the application’s instructions for acquiring images. 102 • If you are using a plug-in compatible application, pull down the File menu, choose Acquire, and choose PDC-2000. Note: If no pictures are stored in the camera, the Take Pictures window appears instead of the Transfer Pictures window. 3 Click the Set Preferences button to display the Set Preferences window. 4 Click the Release Camera button, then click Yes to release the camera and return to the image-processing application or exit from PDC-2000 Direct. After releasing the camera, refer to Chapter 3 for camera operating instructions. WARNING: DO NOT TURN OFF THE CAMERA OR DISCONNECT IT FROM THE COMPUTER AFTER IT HAS BEEN RELEASED FROM COMPUTER CONTROL. DOING SO COULD DAMAGE YOUR COMPUTER OR CORRUPT DATA ON YOUR HARD DISK. If you want to turn off the camera while its cable is connected to the computer, use the procedure recommended for any SCSI device: (1) turn off the computer, and (2) turn off the camera. To disconnect the camera from the computer, see Disconnecting the camera from your computer on page 29. Restoring computer control After releasing the camera from computer control as described above, you can place the camera back under computer control at any time with these steps: 1 Start your TWAIN compliant or plug-in compatible application, or start PDC-2000 Direct. 2 If you are using PDC-2000 Direct, wait for the Transfer Pictures window to appear. Using the PDC-2000 with your PC 103 If you are not using PDC-2000 Direct, use one of the methods below to display the Transfer Pictures window: • If you are using Adobe Photoshop and the TWAIN driver, pull down the File menu and choose Select TWAIN and PDC-2000. Click on OK. Pull down the File menu again and choose Acquire TWAIN. • If you are using a TWAIN compliant application other than Adobe Photoshop, refer to the application’s instructions for acquiring images. • If you are using a plug-in compatible application, pull down the File menu, choose Acquire, and choose PDC-2000. Note: If no pictures are stored in the camera, the Take Pictures window appears instead of the Transfer Pictures window. 3 Click the Take Pictures button to display the Take Pictures window. 104 6 Maintenance and troubleshooting Caring for the camera batteries The four NiCad “AA” rechargeable batteries provided with the PDC-2000 camera have enough power for taking 40 pictures under normal conditions. The battery level indicator on the PDC-2000 camera’s LCD panel indicates full ( ), low ( ) and other levels between them. Recharge the batteries whenever the indicator shows low battery level. Note: Conserve battery power by turning the camera off when it is not in use. WARNING: DO NOT TURN OFF THE CAMERA OR ANY OTHER SCSI DEVICE WHILE IT IS CONNECTED TO YOUR COMPUTER IF THE COMPUTER IS ON. DOING SO COULD DAMAGE THE COMPUTER OR CORRUPT DATA ON YOUR HARD DISK. The batteries can be recharged at any time, but NiCad batteries perform best when you allow them to discharge almost completely before recharging. Repeatedly recharging partially charged batteries causes them to lose their capacity. Maintenance and troubleshooting 105 (Use of a battery conditioner/charger, available at many electronics and video equipment stores, is recommended because it discharges the batteries completely before starting the charge cycle. The power adapter/trickle charger provided with the PDC-2000 does not discharge the batteries before charging them.) You may wish to purchase additional “AA” NiCad batteries for use with the PDC-2000 camera. With extra batteries, you can use one set while charging another. (See Charging the batteries outside the camera on page 108.) NiCad “AA” batteries of the types recommended in the following section are usually available at electronics and department stores. Recommended battery types Polaroid recommends the following battery types for use with the PDC-2000: Eveready type CH15 AA 1.2v, 650mAh Panasonic type KR-15/51 AA 1.2v 500mAh Sanyo type N-600AA 1.2v 600mAh WARNING: USE ONLY THE BATTERIES PROVIDED OR THE “AA” NICAD RECHARGEABLE BATTERY TYPES LISTED ABOVE. OTHER TYPES, SUCH AS ALKALINE OR LITHIUM “AA” BATTERIES, WILL NOT OPERATE THE CAMERA, AND MAY CAUSE INJURY OR DAMAGE THE CAMERA IF YOU ATTEMPT TO CHARGE THEM AS DESCRIBED BELOW. Charging the batteries in the camera 106 To charge the batteries while they are in the camera, connect the power adapter/trickle charger to the camera and to AC power. Charge the batteries completely by leaving the charger connected to the camera for about 6 hours (12 hours for new batteries). You can use the camera while the batteries are charging. WARNING: USE ONLY THE POWER ADAPTER/ TRICKLE CHARGER PROVIDED FOR CHARGING THE BATTERIES WHILE THEY ARE IN THE CAMERA. OTHER AC ADAPTERS AND CHARGERS SIMILAR IN APPEARANCE ARE AVAILABLE, BUT THEY CAN OVERHEAT THE BATTERIES AND CAUSE INJURY OR CAMERA DAMAGE. Maintenance and troubleshooting 107 Charging the batteries outside the camera If you wish to charge the batteries outside the camera, use the optional 110-volt 5-hour battery charger or another charger designed for NiCad “AA” batteries. Recharge the batteries as follows: 1 Turn off the camera by pressing the power button (a). 2 Unlatch and remove the PDC-2000 battery holder from the camera. 3 Remove the four batteries from the holder. 4 Charge the batteries according to the instructions for the charger you are using. 108 Note: The camera is not operable while the batteries are removed, even if the power adapter/trickle charger is connected. Furthermore, you may need to reset the camera’s date, time, default picture label and automatic shutoff settings if the batteries are removed from the camera for more than 30 minutes. For these reasons, you may want to purchase additional “AA” NiCad batteries for use while others are charging. (See Recommended battery types on page 106.) 5 After the batteries have been charged, reinsert them into the battery holder. Be sure to observe the battery orientation label. (Install the two outside batteries first, then install the two inside batteries.) Maintenance and troubleshooting 109 6 Insert the battery holder in the camera and close it, making sure it latches. 7 Turn on the camera to verify that the batteries have been installed correctly. Replacing the camera batteries The NiCad batteries provided with the PDC-2000 are capable of being recharged hundreds of times, but they may eventually wear out. Replace the batteries when they require abnormally frequent recharging. NiCad “AA” batteries of the types recommended on page 106 are usually available at electronics and department stores. WARNING: USE ONLY THE BATTERIES RECOMMENDED ON PAGE 106. OTHER TYPES, SUCH AS ALKALINE OR LITHIUM “AA” BATTERIES, WILL NOT OPERATE THE CAMERA, AND MAY CAUSE INJURY OR DAMAGE THE CAMERA IF YOU ATTEMPT TO CHARGE THEM AS DESCRIBED ABOVE. 110 Troubleshooting error messages When necessary, the PDC-2000 camera displays error messages on the LCD panel to inform you about operating or hardware problems. The list below recommends specific action for each error message. Error messages not listed below may also appear on the LCD panel. If an unlisted message appears, turn the camera off briefly, then turn it back on. If the message reappears, contact Polaroid Technical Assistance (see page 115). WARNING: WHEN THE INSTRUCTIONS BELOW DIRECT YOU TO TURN THE CAMERA OFF AND BACK ON, TURN OFF THE COMPUTER BEFORE DOING SO (IF THE CAMERA IS CONNECTED TO YOUR COMPUTER). FAILURE TO TURN OFF THE COMPUTER COULD CORRUPT DATA ON YOUR HARD DISK, DAMAGE THE CAMERA, OR DAMAGE THE COMPUTER. charging The camera is not ready to take flash pictures because the electronic flash is still charging. Wait until the yellow indicator in the viewfinder goes out before trying again. disk full The camera has reached its storage capacity. Transfer the pictures to your computer (page 69 for Macintosh and page 91 for PC), and erase the pictures from the camera (page 71 for Macintosh and page 93 for PC). error 01h The camera detected a problem with its picture storage hardware. Turn the camera off briefly, then turn it back on. If the message reappears, contact Polaroid Technical Assistance (see page 115). When this condition exists, you can still take pictures by operating the camera under computer control (page 72 for Macintosh and page 94 for PC) but you will not be able to store additional pictures in the camera or transfer pictures previously stored in the camera. Maintenance and troubleshooting 111 error 02h The camera detected a problem with the LCD panel. Turn the camera off briefly, then turn it back on. If the message reappears, contact Polaroid Technical Assistance (see page 115). When this condition exists, the camera will continue to operate normally except for the LCD panel. error 04h The camera detected a problem with the hardware storing the current date and time and other data. Turn the camera off briefly, then turn it back on. If the message reappears, contact Polaroid Technical Assistance (see page 115). Under this condition, the camera will continue to operate normally, but the time and date displayed and stored with pictures may be incorrect. In addition, time-related features (automatic shutoff, for example) may not operate normally. error 08h Stored data for optimizing image quality may have become corrupted. Turn the camera off briefly, then turn it back on. If the message reappears, contact Polaroid Technical Assistance (see page 115). Under this condition, the camera will continue to operate normally. Picture quality, however, may be reduced and the stored user name and camera serial number may become corrupted. error 10h Stored data for the camera’s light sensor may have become corrupted. Turn the camera off briefly, then turn it back on. If the message reappears, contact Polaroid Technical Assistance (see page 115). Under this condition, the camera will continue to operate normally, but the pictures may contain small dots or lines. error 20h Stored data for optimizing picture exposure may have become corrupted. Turn the camera off briefly, then turn it back on. If the message reappears, contact Polaroid Technical Assistance (see page 115). Under this condition, the camera will continue to operate normally, but picture quality may be reduced. error 40h The camera detected an internal communication error. Turn the camera off briefly, then turn it back on. If the message reappears, contact Polaroid Technical Assistance (see 112 page 115). Under this condition, you will still be able to transfer pictures stored in the camera to your computer, but you will not be able to take additional pictures. error 80h The camera detected an image processing error. Turn the camera off briefly, then turn it back on. If the message reappears, contact Polaroid Technical Assistance (see page 115). Under this condition, you will still be able to transfer pictures stored in the camera to your computer, but you will not be able to take additional pictures. low batt The camera batteries require charging. See Caring for the camera batteries on page 105. low light The camera senses insufficient light for taking pictures without flash. Set the electronic flash to On or to Auto (see Using flash on page 46) before taking the picture. no term Invalid buttons have been held down during camera power-up. Press the Erase button to clear the message. stuck btn One of the camera control buttons is being held down. Make sure all buttons are released and continue. If the problem persists, turn the camera off briefly, then turn it back on. If this does not solve the problem, contact Polaroid Technical Assistance (see page 115). term Invalid buttons have been held down during camera power-up. Press the Erase button to clear the message. Maintenance and troubleshooting 113 PDC-2000 full one-year warranty Polaroid Corporation warrants the PDC-2000 camera, excluding the batteries, against defects in manufacture or workmanship for a period of one year from the date of purchase. To verify the warranty period, you should keep the invoice, sales receipt, or other proof of the purchase date. Should this product or any component or accessory included with it, except software or batteries, prove to be defective at any time during the warranty period, Polaroid Corporation will, at its discretion, either replace or repair this item, without charge. Please refer to the Software Warranties under Software License Agreements (page 123) for the PDC-2000 software warranty. This warranty does not cover damage caused by accident, incorrect installation, unauthorized modification, and misuse of abuse. A charge will be made for repair of such damage. This warranty excludes all consequential damages. Some states do not allow the exclusion or limitation of consequential damages, so the foregoing exclusion may not apply to you. 114 Service U.S.A. and Canada If your PDC-2000 camera requires service, call Polaroid Technical Assistance toll-free from within the U.S.A. at 1-800-432-5355, Monday through Friday, 8 a.m. to 8 p.m., (Eastern Time). From Canada, call toll-free at 1-800-268-6970. To return the camera for service, pack it carefully in its original shipping carton or other sturdy container, with plenty of padding. Shipping instructions are available from Polaroid Technical Assistance specialists at the telephone numbers above. Outside U.S.A. and Canada Please contact your nearest Polaroid office or service center (see pages 116-18). Maintenance and troubleshooting 115 Polaroid Offices and Service Centers Australia Polaroid Australia Pty. Ltd. 13-15 Lyonpark Road P.O. Box 163 North Ryde, N.S.W. 2113 Tel: (02) 950 7000 Fax: (02) 887-2209 Belgique/België Polaroid (Belgium) S.A.-N.V. Rue Colonel Bourg 111 Kolonel Bourgstraat 111 1140 Bruxelles-1140 Brussel Tel: +32 2 726 97 00 Fax: +32 2 726 92 99 Toll free line: 32 2 78 155 905 Brasil Polaroid do Brasil Ltda. Av. Paulista, 1776-11º andar Cerqueira Cesar São Paulo-Capital Brasil, 01310-921 Tel: 55.11.285.6411 Fax: 55.11.283.2625 288.6521 287.5393 Canada Polaroid Canada, Inc. 350 Carlingview Drive Rexdale, Ontario M9W 5G6 Toll free: 1-800-268-6970 Danmark Polaroid a.s. Blokken 75 Postboks 9 3460 Birkerød Tlf: 42 81 75 00 FAX: 42 81 70 26 116 Deutschland Polaroid GmbH Sprendlinger Landstrasse 109 63069 Offenbach Tel: 069 8404 444 069 8404 999 España Polaroid (España) S.A. Paseo de la Castellana, 130-Plta. 28046-Madrid Tno: 34-1-411.38.36 Fax: 34-1-411.40.73 France Polaroid (France) S.A. 4, rue J.P. Timbaud, B.P. 47 78391 Bois d’Arcy Cédex Tel: (1) 30 85 61 66 Great Britain Polaroid (U.K.) Ltd. Ashley Road, St. Albans Hertfordshire AL1 5PR Tel: 0800 010119 Hong Kong Polaroid (Far East) Ltd. 32/F Windsor House 311 Gloucester Road Causeway Bay Tel: (852) 2894-0333 Fax: (852) 2895 1382 Italia Polaroid (Italia) S.p.A. Via Piave 11 21051-Arcisate (Varese) Tel: 0332-470031 Fax: 0332-478249 Polaroid Offices and Service Centers (continued) Japan Nippon Polaroid Kabushiki Kaisha Mori Building, No. 30 2-2 Toranomon 3-chome Minato-ku Tokyo (105) Tel: 81-3-3438-8811 Toll free: 0120-248716 Korea Poloroid Far East Ltd., Korea Branch Suite 2001, Korea World Trade Center 159, Samsung-Dong, kangnam-ku Seoul 135-729 Tel: (822) 551-8633 Fax: (822) 551-6763 México Polaroid de México S.A. de CV Paseo de la Reforma 195-Piso 14 C.P. 06500 México, D.F. Tel: 703-1111 Fax: 566-0505 Del interior al 91 (800) 70-727 Ventas 91 (800) 70-747 Nederland Polaroid Nederland BV Zonnebaan 45 3606 CH Maarssen PO Box 1219 3600 BE Maarssen Tel: 31-30-410-420 Fax: 31-30-411-969 Reparaties: Polaroid (Europa) BV Hoge Bothofstraat 45 7511 ZA Enschede New Zealand Polaroid New Zealand Ltd. Camera Services 24-26 Anzac Avenue Auckland Tel: (09) 377 3773 Norge Polaroid (Norge) A/S Industriveien 8B Postboks 80 1471 Skårer Tlf: 67 90 47 10 Fax: 67 90 51 73 Österreich Polaroid Ges.m.b.H. Eitnergasse 5A 1231 Wien Tel: 869 86 27 Fax: 869 81 00 Portugal Polaroid (España) S.A. Sucursal em Portugal Avda. Helen Keller, 19-A 1400 Lisboa Tel: (01) 363.85.46 Puerto Rico Polaroid Caribbean Corporation Centro de Seguros Ave. Ponce de León 701 Miramar, Santurce 00907 Tel: (809) 725-6240 Fax: (809) 725-5462 Schweiz/Suisse/Svizzera Polaroid A.G. Hardturmstrasse 133 8037 Zürich Tel: (01) 277.72.72 Maintenance and troubleshooting 117 Polaroid Offices and Service Centers (continued) Suomi Polaroid Oy Sinikalliontie 10 02630 Espoo Puh: 90-502 35 33 Fax: 90-502 35 50 Sverige Polaroid AB Ekholmsvägen 34 Box 204 127 24 Skärholmen Tel: 08-710 08 50 Fax: 08-740 73 68 Taiwan Polaroid F.E. Ltd.- Taiwan Branch 3/F, 82 Kuang Fu N. Rd. Taipei, Taiwan Tel: 886-2-578-2216 Fax: 886-2-579-2771 U.S.A. Polaroid Corporation Technical Assistance Toll Free: 1-800-432-5355 Radio and television interference FCC Notice (U.S.A.) Warning: Changes or modifications to this unit not expressly approved by the party responsible for compliance could void the user’s authority to operate the equipment. This equipment has been tested and found to comply with the limits for a Class B digital device, pursuant to Part 15 of the FCC rules. These limits are designed to provide reasonable protection against harmful interference in a residential installation. This equipment generates, uses and can radiate radio frequency energy and, if not installed and used in accordance with the instructions, may cause harmful interference to radio communications. However, there is no guarantee that interference will not occur in a particular installation. If this equipment does cause harmful interference to radio or television reception, which can be determined by turning the equipment off and on, the user is encouraged to try to correct the interference by one or more of the following measures: • Reorient or relocate the receiving antenna. • Increase the separation between the equipment and receiver. 118 • Connect the equipment to an outlet on a circuit different from the one to which the receiver is connected. • Consult the dealer or an experienced radio/television technician for help. EMI Notice (Canada) This digital apparatus does not exceed the Class B limits for radio noise emissions from digital apparatus set out in the Radio Interference Regulations of the Canadian Department of Communications. LE PRESENT APPAREIL NUMERIQUE N’EMET PAS DE BRUITS RADIOELECTRIQUES DEPASSANT LES LIMITES APPLICABLES AUX APPAREILS NUMERIQUES DE CLASS B PRESCRITES DANS LE REGLEMENT SUR LE BROUILLAGE RADIOELECTRIQUE EDICTE PAR LE MINISTERE DES COMMUNICATIONS DU CANADA. EMC Statement (Europe) Polaroid Corporation certifies that this product conforms to the following standards: Safety Low Voltage Directive 73/23/EEC IEC 950/EN60950 EMC: 89/336/EEC EMC Directive EN 55022, Class B EN 50082-1 IEC 801-2 IEC 801-3 IEC 801-4 Use only a harmonized detachable cordset that has conductors with a cross sectional area equal to or greater than 1.0mm. This cord shall be rated for 220-240VAC, 10 Amperes. It should be approved by a European agency such as VDE, SEMKO, ASTA or VTE. Maintenance and troubleshooting 119 PDC-2000 camera specifications Camera type Models Handheld point-and-shoot digital camera • PDC-2000/40 • PDC-2000/60 • PDC-2000/T Sensor resolution Polaroid 1 million pixel CCD Output resolution High resolution: 800x600 pixels, 24-bit color (16.7 million colors), 1.4MB file Super high resolution: 1600x1200 pixels, 24-bit color (16.7 million colors), 5.6MB file Picture storage capacity PDC-2000/40: PDC-2000/60: PDC-2000/T: 40 pictures 60 pictures No internal picture storage Computer interface SCSI-2 Standard lens 11mm (38mm equivalent) f/2.8 glass Optional lens 17mm (60mm equivalent) f/2.8 glass Focus range Standard lens: Optional lens: 10 inches (26cm) to infinity 24 inches (61cm) to infinity PDC-2000 camera specifications 121 ISO rating 100 (film speed equivalent) Shutter Scanning aperture, microprocessor-controlled Shutter speed 1/25 to 1/500 second Aperture f/2.8 to f/11 Electronic flash Internal, 15-foot (4.6m) maximum range Recycle time (minimum time between shots) 12 seconds with flash 7 seconds without flash Power supply Four rechargeable “AA” NiCad batteries IEC universal power adapter/trickle charger Power adapter/ trickle charger Input: 100-240VAC, 380mA, 50-60 Hz (surge protected) Output: +6.0VDC, 500mA Dimensions Length: Width: Height: Weight with batteries 2.0 pounds (0.9kg) Operating environment Temperature: Relative humidity: 122 7.9 inches (20.1cm) 6.3 inches (16.0cm) 2.2 inches (5.6cm) 32° to 120°F (0° to 48°C) 5% to 90%, no condensation Software license agreements Polaroid License Agreement U.S.A. and Canada IMPORTANT: By opening the sealed disk package accompanying this manual, you indicated your acceptance of the following Polaroid License Agreement. Polaroid License Agreement (SINGLE-USER PRODUCTS) This is a legal agreement between you, the end user, and Polaroid Corporation. By opening the sealed disk package, you are agreeing to be bound by the terms of this agreement. If you do not agree to the terms of this agreement, promptly return the unopened disk package and the accompanying items (including written materials and binders or other containers) to the place you obtained them for a full refund. POLAROID SOFTWARE LICENSE 1 GRANT OF LICENSE. Polaroid grants to you the right to use one copy of the enclosed Polaroid software program (the “SOFTWARE”) on a single terminal connected to a single computer (i.e., with a single CPU). You may not network the Software license agreements 123 SOFTWARE or otherwise use it on more than one computer or computer terminal at the same time. 2 COPYRIGHT. The SOFTWARE is owned by Polaroid or its suppliers and is protected by United States copyright laws and international treaty provisions. Therefore you must treat the SOFTWARE like any other copyrighted material (e.g., a book or musical recording) except that you may either (a) make one copy of the SOFTWARE solely for backup or archival purposes, or (b) transfer the SOFTWARE to a single hard disk provided you keep the original solely for backup or archival purposes. You may not copy the written materials accompanying the software. 3 OTHER RESTRICTIONS. You may not rent or lease the SOFTWARE, but you may transfer the SOFTWARE and accompanying written materials on a permanent basis provided you retain no copies and the recipient agrees to the terms of this AGREEMENT. You may not reverse engineer, decompile, or disassemble the SOFTWARE. If SOFTWARE is an update, any transfer must include the update and all prior versions. 4 DUAL MEDIA SOFTWARE. You may receive the SOFTWARE in more than one medium. Regardless of the type or size of media you receive, you may only use one medium that is appropriate for your single computer. You may not use or install the other medium on another computer. You may not loan, rent, lease or otherwise transfer the other medium to another user, except as part of a permanent transfer (as provided above) of all SOFTWARE and written materials. 90-DAY SOFTWARE WARRANTY Polaroid warrants that the SOFTWARE media will be free of defects in materials and workmanship for a period of 90 days from the date of purchase. CUSTOMER REMEDIES. Polaroid’s entire liability and your exclusive remedy shall be, at Polaroid’s option either (a) return of the price paid or (b) repair or replacement of the 124 SOFTWARE that does not meet Polaroid’s Limited Warranty and which is returned to Polaroid with a copy of your receipt. This limited Warranty is void if failure of the SOFTWARE has resulted from accident, abuse, or misapplication. Any replacement SOFTWARE will be warranted for the remainder of the original warranty period or 30 days, whichever is longer. NO OTHER WARRANTIES. POLAROID DISCLAIMS ALL OTHER WARRANTIES, EITHER EXPRESS OR IMPLIED, INCLUDING BUT NOT LIMITED TO IMPLIED WARRANTIES OF MERCHANTABILITY AND FITNESS FOR A PARTICULAR PURPOSE, WITH RESPECT TO THE SOFTWARE, AND THE ACCOMPANYING WRITTEN MATERIALS. NO LIABILITY FOR CONSEQUENTIAL DAMAGES. IN NO EVENT SHALL POLAROID OR ITS SUPPLIERS BE LIABLE FOR ANY CONSEQUENTIAL OR INCIDENTAL DAMAGES (INCLUDING, WITHOUT LIMITATION, DAMAGES FOR LOSS OF BUSINESS PROFITS, BUSINESS INTERRUPTION, LOSS OF BUSINESS INFORMATION, OR OTHER PECUNIARY LOSS), ARISING OUT OF THE USE OR INABILITY TO USE THIS POLAROID PRODUCT, EVEN IF POLAROID HAS BEEN ADVISED OF THE POSSIBILITY OF SUCH DAMAGES. BECAUSE SOME STATES DO NOT ALLOW THE EXCLUSION OR LIMITATION OF LIABILITY FOR CONSEQUENTIAL OR INCIDENTAL DAMAGES, THE ABOVE LIMITATION MAY NOT APPLY TO YOU. U.S. GOVERNMENT RESTRICTED RIGHTS The SOFTWARE and documentation are provided with RESTRICTED RIGHTS. Use, duplication, or disclosure by the Government is subject to restrictions as set forth in subparagraph (c)(1)(ii) of the rights in Technical Data and Computer Software clause at 52.227-7013. Contractor/Manufacturer is Polaroid Corporation, 549 Technology Square, Cambridge, Massachusetts 02139. Software license agreements 125 This Agreement is governed by the laws of the Commonwealth of Massachusetts, U.S.A. Should you have any questions concerning this Agreement, or if you wish to contact Polaroid for any reason, please write: Polaroid Electronic Imaging Technical Support, 565-3B Technology Sq., Cambridge, MA 02139. Polaroid License Agreement Outside U.S.A. and Canada IMPORTANT: By opening the sealed disk package accompanying this manual, you indicated your acceptance of the following Polaroid License Agreement. Polaroid License Agreement (SINGLE-USER PRODUCTS) This is a legal agreement between you, the end user, and Polaroid Corporation. By opening the sealed disk package, you are agreeing to be bound by the terms of this agreement. If you do not agree to the terms of this agreement, promptly return the unopened disk package and the accompanying items (including written materials and binders or other containers) to the place you obtained them for a full refund. POLAROID SOFTWARE LICENSE 1 GRANT OF LICENSE. Polaroid grants to you the right to use one copy of the enclosed Polaroid software program (the “SOFTWARE”) on a single terminal connected to a single computer (i.e., with a single CPU). You may not network the SOFTWARE or otherwise use it on more than one computer or computer terminal at the same time. 2 COPYRIGHT. The SOFTWARE is owned by Polaroid or its suppliers and is protected by United States copyright laws and international treaty provisions. Therefore you must treat the SOFTWARE like any other copyrighted material (e.g., a book or musical recording) except that you may either (a) make one copy of the SOFTWARE solely for backup or archival purposes, or (b) transfer the SOFTWARE to a single hard disk provided you keep the original solely for backup or 126 archival purposes. You may not copy the written materials accompanying the software. 3 OTHER RESTRICTIONS. You may not rent or lease the SOFTWARE, but you may transfer the SOFTWARE and accompanying written materials on a permanent basis provided you retain no copies and the recipient agrees to the terms of this AGREEMENT. You may not reverse engineer, decompile, or disassemble the SOFTWARE. If SOFTWARE is an update, any transfer must include the update and all prior versions. 4 DUAL MEDIA SOFTWARE. You may receive the SOFTWARE in more than one medium. Regardless of the type or size of media you receive, you may only use one medium that is appropriate for your single computer. You may not use or install the other medium on another computer. You may not loan, rent, lease or otherwise transfer the other medium to another user, except as part of a permanent transfer (as provided above) of all SOFTWARE and written materials. 90-DAY SOFTWARE WARRANTY Polaroid warrants that the SOFTWARE media will be free of defects in materials and workmanship for a period of 90 days from the date of purchase. CUSTOMER REMEDIES. Polaroid’s entire liability and your exclusive remedy shall be, at Polaroid’s option either (a) return of the price paid or (b) repair or replacement of the SOFTWARE that does not meet Polaroid’s Limited Warranty and which is returned to Polaroid with a copy of your receipt. This limited Warranty is void if failure of the SOFTWARE has resulted from accident, abuse, or misapplication. Any replacement SOFTWARE will be warranted for the remainder of the original warranty period or 30 days, whichever is longer. THIS WARRANTY EXCLUDES ALL INCIDENTAL AND CONSEQUENTIAL DAMAGES AND DOES NOT AFFECT YOUR STATUTORY RIGHTS. Software license agreements 127 This Agreement is governed by the laws of the Commonwealth of Massachusetts, U.S.A. Should you have any questions concerning this Agreement, or if you wish to contact Polaroid for any reason, please write: Polaroid Electronic Imaging Technical Support, 565-3B Technology Sq., Cambridge, MA 02139. 128 Index A C accessories, optional 9 attaching the camera straps 10 Auto Focus, using 48 automatic shutoff 41 automatic shutoff, setting camera, Macintosh 76 automatic shutoff, setting camera, PC 98 camera service 115 camera specifications 121 camera straps, attaching 10 Capture and Index modes 40 Capture mode, selecting 42 changing operating preferences, Macintosh 75 changing operating preferences, PC 97 charging the batteries in the camera 106 charging the batteries outside the camera 108 computer control, restoring, Macintosh 81 computer control, restoring, PC 103 connecting the camera to your Macintosh 17 connecting the camera to your PC 23 controls, camera 34 B back lighting, compensating for 49 batteries, caring for 105 batteries, charging in camera 106 batteries, charging outside the camera 108 batteries, installing and charging 14 batteries, recommended types 106 batteries, replacing 110 129 D I date, changing camera, Macintosh 76 date, changing camera, PC 98 deleting pictures 55 deleting pictures from the camera, Macintosh 71 deleting pictures from the camera, PC 93 disconnecting the camera 29 Index and Capture modes 40 information, viewing picture, Macintosh 67 information, viewing picture, PC 89 Installing PDC-2000 Direct, Macintosh 22 Installing PDC-2000 Direct, PC 28 introduction 1 L E editing a picture label, Macintosh 68 editing a picture label, PC 90 EMC statement 119 EMI notice 119 erasing pictures 55 error messages on LCD display, troubleshooting 111 F FCC notice 118 flash range 46, 122 flash, using 46 focus distance 45, 121 Focus Lock, using 48 framing and taking the picture 44 G getting acquainted 34 H holding the camera 44 130 label, default picture, editing with camera 51 label, editing, Macintosh 68 label, editing, PC 90 label, individual, editing with camera 53 labeling pictures using camera controls 50 LCD panel 37 license agreements, software 123 lighting conditions, setting the camera for current 43 M Macintosh system requirements 3 Macintosh, connecting camera to 17 Macintosh, setting up 21 maintenance and troubleshooting 105 modes, Index and Capture 40 O P (continued) operating the camera from the Macintosh 72 operating the camera from the PC 94 optional accessories 9 preferences, changing operating, PC 97 Previewing pictures with PDC-2000 Direct, Macintosh 67 Previewing pictures with PDC-2000 Direct, PC 89 P Q PC system requirements 3 PC, connecting camera to 23 PC, setting up 26 PDC-2000 Direct, installing Macintosh 22 PDC-2000 Direct, installing, PC 28 PDC-2000 windows, Macintosh 62 PDC-2000 windows, PC 84 picture information, abbreviated, Macintosh 68 picture information, viewing, Macintosh 67 picture information, viewing, PC 89 picture label, changing default, Macintosh 76 picture label, changing default, PC 98 picture label, editing, Macintosh 68 picture label, editing, PC 90 picture resolution options, changing, PC 98 plug-in software, installing, Macintosh 21 plug-in software, installing, PC 27 PowerBook computers, connecting to 20 preferences, changing operating, Macintosh 75 quick startup vii R radio and television interference 118 recommended battery types 106 releasing camera from computer control, Macintosh 80 releasing camera from computer control, PC 102 replacing camera batteries 110 requirements, system 2 resolution, changing picture option, Macintosh 76 resolution, changing picture option, PC 98 restoring (“unerasing”) pictures in the camera 58 rotating pictures, Macintosh 68 rotating pictures, PC 90 S SCSI ID, setting 11 selecting thumbnails, Macintosh 66 selecting thumbnails, PC 89 service, camera 115 setting up 7 131 S (continued) T (continued) setting up the Macintosh 21 setting up the PC 26 setting up the PDC-2000 camera 10 shutoff, automatic 41 shutoff, setting automatic camera, Macintosh 76 shutoff, setting automatic camera, PC 98 software license agreements 123 sound indicators, description 40 sound, turning camera on and off, Macintosh 76 sound, turning camera on and off, PC 99 specifications, camera 121 straps, camera, attaching 10 system requirements 2 timer, for Snap button, PC 97 transferring pictures from the camera to the computer, Macintosh 69 transferring pictures from the camera to the computer, PC 91 troubleshooting error messages 111 turning on the camera 41 TWAIN driver, installing 27 typical PDC-2000 workflow 2 T taking pictures 41 technical assistance, obtaining 3 television interference, radio and 118 thumbnails, selecting, Macintosh 66 thumbnails, selecting, PC 89 time, changing camera, Macintosh 76 time, changing camera, PC 98 timeouts for automatic shutoff 41 timeouts, setting camera shutoff, Macintosh 76 timeouts, setting camera shutoff, PC 98 timer, for Snap button, Macintosh 75 132 U unerasing pictures in the camera 58 unpacking 7 user name, changing, Macintosh 75 user name, changing, PC 97 using the PDC-2000 camera 33 using the PDC-2000 with a Macintosh 61 using the PDC-2000 with a PC 83 using this manual 4 V viewfinder indicators 39 viewfinder warnings, dealing with 45 viewing picture information, Macintosh 67 viewing picture information, PC 89 viewing pictures stored in the camera, Macintosh 65 viewing pictures stored in the camera, PC 87 W warranty, camera 114 warranty, software, outside U.S.A. and Canada 126 warranty, software, U.S.A. and Canada 123 white balance, setting 43 workflow, typical PDC-2000 2 133 Copyright Polaroid Corporation 1996. All rights reserved. “Polaroid” and “PDC” are trademarks of Polaroid Corporation, Cambridge, MA, U.S.A. All other product names may be the property of their respective owners.