1
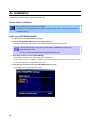
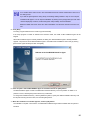
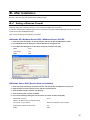
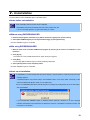
NEC ESMPRO Agent Ver.4.5
Installation Guide (Windows)
Chapter1
Introduction
Chapter2
NEC ESMPRO Agent
Chapter3
System Requirements
Chapter4
Before Installation
Chapter5
Installation
Chapter6
After Installation
Chapter7
Uninstallation
Chapter8
Notes
Appendix
AG45_E-IG-W-003-01-001
© NEC Corporation 2011
Contents
Contents..........................................................................................................................................................................2
Abbreviations of Operating Systems...............................................................................................................................3
Trademarks.....................................................................................................................................................................4
Warnings and Additions to This Document .....................................................................................................................5
1. Introduction ................................................................................................................................................................6
2. NEC ESMPRO Agent .................................................................................................................................................7
3. System Requirements ................................................................................................................................................8
4. Before Starting Installation .........................................................................................................................................9
4.1 Installation method...............................................................................................................................................9
4.2 Settings before installation...................................................................................................................................9
4.2.1 Installing the Starter Pack ..............................................................................................................................9
4.2.2 TCP/IP Setting ...............................................................................................................................................9
4.2.3 Installing the SNMP Service.........................................................................................................................10
4.2.4 Settings of the SNMP Service...................................................................................................................... 11
4.2.5 Installing the RAID System Management Utility...........................................................................................13
5. Installation ................................................................................................................................................................14
6. After Installation........................................................................................................................................................17
6.1 Setting a Windows Firewall................................................................................................................................17
6.2 Setting of operation of NEC ESMPRO Agent ....................................................................................................18
7. Uninstallation............................................................................................................................................................19
8. Notes........................................................................................................................................................................20
8.1 Event log............................................................................................................................................................20
8.2 Hard disk drive / RAID / File ..............................................................................................................................21
8.3 I/O device ..........................................................................................................................................................24
8.4 Hardware ...........................................................................................................................................................25
8.5 SNMP ................................................................................................................................................................26
8.6 System...............................................................................................................................................................26
8.7 System environment ..........................................................................................................................................27
8.8 Coexistence with another product .....................................................................................................................28
8.9 Report................................................................................................................................................................29
8.10 OS dependence ..............................................................................................................................................29
8.11 Others .............................................................................................................................................................32
Appendix .......................................................................................................................................................................35
2
Abbreviations of Operating Systems
Windows Operating Systems are referred to as follows.
Notations in this document
Windows Server 2008 R2
Official names of Windows
Windows Server 2008 R2 Standard
Windows Server 2008 R2 Enterprise
Windows Server 2008 R2 Datacenter
Windows Server 2008 R2 Foundation
Windows Server 2008
Windows Server 2008 Standard
Windows Server 2008 Enterprise
Windows Server 2008 Datacenter
Windows Server 2008 Standard 32-bit
Windows Server 2008 Enterprise 32-bit
Windows Server 2008 Datacenter 32-bit
Windows Server 2003 R2
Windows Server 2003 R2 Standard x64 Edition
Windows Server 2003 R2 Enterprise x64 Edition
Windows Server 2003 R2 Standard Edition
Windows Server 2003 R2 Enterprise Edition
Windows Server 2003
Windows Server 2003 Standard x64 Edition
Windows Server 2003 Enterprise x64 Edition
Windows Server 2003 Standard Edition
Windows Server 2003 Enterprise Edition
Windows 7
Windows 7 Professional 64-bit Edition
Windows 7 Professional 32-bit Edition
Windows Vista
Windows Vista Business 64-bit Edition
Windows Vista Business 32-bit Edition
Windows XP
Windows XP Professional x64 Edition
Windows XP Professional
3
Trademarks
NEC ESMPRO and EXPRESSCLUSTER are registered trademarks of NEC Corporation.
Microsoft, Windows, Windows Vista, and Windows Server are registered trademarks or trademarks of Microsoft
Corporation in the United States and other countries.
MegaRAID is a registered trademark of LSI Corporation.
All other product, brand, or trade names used in this publication are the trademarks or registered trademarks of their
respective trademark owners.
4
Warnings and Additions to This Document
1.
Unauthorized reproduction of the contents of this document, in part or in its entirety, is prohibited.
2.
The contents of this document may change without prior notice.
3.
Do not make copies or alter the document content without permission from NEC Corporation.
4.
Every effort has been made to ensure the completeness of this document. However, if you have any
concerns, or discover errors or omissions, please contact your retailer.
5.
Regardless of these 4 items, NEC Corporation assumes no responsibility for effects resulting from
operations.
6.
The sample values used in this document are not the actual values.
5
1. Introduction
This document describes a server management utility NEC ESMPRO Agent.
Before attempting to operate the server management utility NEC ESMPRO Afent, read this document so as to gain an
adequate understanding of the contents.
The contents in this document are intended for users who fully understand features and operations of operating
systems related to this utility.
If you want to know operations of the operating systems, or if there is any unclear point, see the online help of each
operating system.
♦About symbols in this document
This document uses the following symbols:
Represents a caution or a thing that must be kept when using this utility or devices.
Represents a tip or useful information.
Represents a point that must be checked before using this utility or devices.
6
2. NEC ESMPRO Agent
NEC ESMPRO lets a system administrator manage remote servers across a network. NEC ESMPRO monitors
server hardware and software configurations, failures, and performance. With log data collected by NEC ESM
PRO, a system administrator can track long-term and short-term performance, monitor server usage, create gr
aphs to record trends, and check server failure rates. The administrator can use the information collected to c
reate more efficient data routing procedures and optimize server usage.
NEC ESMPRO consists of NEC ESMPRO Manager that runs on a management computer and NEC ESMPRO
Agent that runs on a monitored server.
About NEC ESMPRO Manager, refer to the NEC ESMPRO Manager Installation guide.
7
3. System Requirements
NEC ESMPRO Agent requires the following hardware and software:
- Hardware
- Machine
NEC Express5800 series
- Memory
Memory required for running the operating system plus
30MB or more
- Free hard disk drive space
50MB or more
- Software
- Operating system
Windows Server 2008 R2
Windows Server 2008
Windows Server 2003 R2
Windows Server 2003
Windows 7
Windows Vista
Windows XP
- OS component
TCP/IP
SNMP(Simple network management protocol)
8
4. Before Starting Installation
Be sure to read this page before installing NEC ESMPRO Agent.
4.1 Installation method
NEC ESMPRO Agent has the following installation method.
♦Installation simultaneously with OS Installation
NEC ESMPRO Agent is automatically installed when a Windows OS is installed by using EXPRESSBUILDER.
To use installed NEC ESMPRO Agent, according to the following (4.2.4 Settings of the SNMP Service) steps.
♦Individual installation
You can execute NEC ESMPRO Agent setup program from EXPRESSBUILDER.
To install NEC ESMPRO Agent (for Windows) separately, according to the following (4.2 Settings before installation)
steps.
4.2 Settings before installation
You should be setting the some components before installing NEC ESMPRO Agent.
4.2.1 Installing the Starter Pack
On Windows systems, the NEC ESMPRO Agent needs the necras.sys driver. To install the necras.sys, install the
Starter Pack from EXPRESSBUILDER.
For details regarding the Starter Pack, refer to the Installation Guide on the product.
When you install NEC ESMPRO Agent without installing "necras.sys", The following messages are displayed and the
installation of NEC ESMPRO Agent is discontinued.
Install the Starter Pack to update the system.
4.2.2 TCP/IP Setting
Set a static IP address for the server.
See the Help started from the Windows Start menu for how to set TCP/IP.
9
4.2.3 Installing the SNMP Service
The installing of the SNMP Service is described below.
♦Notes installing the SNMP Service:
- During OS installation, if the SNMP service is added to the system after applying the service package,
apply it again. If not, the SNMP service may not operate properly, and this can cause the improper
operation of NEC ESMPRO Agent.
♦Windows Server 2008 / Windows Server 2008 R2
1
Double-click [Programs and Features] in [Control Panel].
2
Click [Turn Windows features on or off].
"Server Manager" window appears.
3
Click [Features].
4
Click [Add Features].
"Add Features Wizard" appears.
5
Check the [SNMP Services] check box.
6
Click [Next].
7
Click [OK].
♦Windows Server 2008 Server Core / Windows Server 2008 R2 Server Core
1
Execute the following commands by the command prompt.
"Start /w ocsetup SNMP-SC"
SNMPService is installed.
2
Execute the following commands by the command prompt.
"netsh firewall add portopening protocol = UDP port = 161 name = snmp mode = ENABLE scope = ALL"The port
used on SNMP appears.
♦Windows 7、Windows Vista
1
Double-click [Programs and Features] in [Control Panel].
2
Click [Turn Windows features on or off].
3
Click the [SNMP feature] check box.
4
Click [OK].
♦Another versions of Windows OS
1
Double-click [Add/Remove Programs] in [Control Panel].
2
Click [Add/Remove Windows Components].
3
Click Select [Management and Monitoring Tools] in the Windows component wizard.
4
Click [Details...].
5
Click Check the check box of [Simple Network Management Protocol].
10
6
Click [OK].
7
Click the [Next] button.
The file copy operation is started.
8
Insert the Windows OS installation media into the opticak disk drivce, and click [OK].
4.2.4 Settings of the SNMP Service
The settings of the SNMP Service is described below.
♦Starting property of SNMP service
Excluding Windows Server 2008 Server Core / Windows Server 2008 R2 Server
Core
1
Double-click [Administrative Tools] in [Control Panel].
2
Double-click [Services].
3
Double-click [SNMP Service].
Windows Server 2008 Server Core / Windows Server 2008 R2 Server Core
The setting change of the SNMP service of the server that executes, the Server Core installation is done from the PC
for management by way of the network.
1
Connected preparation is done on the server side.
Execute the following commands by the command prompt on the server side.
"netsh firewall set service FILEANDPRINT enable SUBNET"
"netsh firewall set service REMOTEADMIN enable SUBNET"
2
Install the SNMP service onto the management PC.
*After this item you operate it with the management PC.
About the method of installing the SNMP service, see "Installing the SNMP Service".
3
The session from the computer for management to the server is established.
Execute the following commands by the command prompt on PC for management side.
"Net use * ¥¥ <ServerName> ¥c$ /u: <UserName> "
ServerName is a name of the server that executes the Server Core installation.
UserName is a name of the Administrative account.
4
Click the"Control Panel", and double click "Administrative Tools" icon.
5
Right-click on the "Computer Management" from the tree on the left pane.
Click the "Connect to another PC…"
6
The computer name of the server that executes the Server Core installation is input to "Select Computer"
box, and click the "OK" button.
It is connected with "Computer Management" of the server that executes the Server Core installation.
11
♦To change the settings of the SNMP Service
1
Click [SNMP Service] from the service list and then [Properties] in the [Action] menu.
The "SNMP Properties" dialog box appears.
2
Enter "public" or an arbitrary name in the [Community name] box of the [Traps] property sheet and click
[Add to list].
To change the community name of traps to be received from the default "*" in NEC ESMPRO Manager site,
enter the same name as the community name newly set in NEC ESMPRO Manager site.
To receive trap from NEC ESMPRO Agent at NEC ESMPRO Manager machine, both community names should
be the same.
3
Click [Add].
4
Click the [Add...] button in [Trap destinations]. After entering the IP address of the NEC ESMPRO
Manager machine of the send destination in the [Host name, IP or IPX address] box, click the [Add]
button.
If you specify the same IP address (or host name) specified on the trap destination also for the Manager Alert
(TCP/IO) setting, a warning message appears to indicate redundancy. With this configuration, the alert is
redundantly sent to NEC ESMPRO Manager of a specified IP address (or host name).
5
Open the [Security] property sheet and click the [Add] button [Accepted community names].
6
Set its authority to [READ CREATE] or [READ WRITE].
If you do not set the authority of [Accepted community names] as "READ CREATE" or "READ WRITE", you
cannot perform configuration or monitoring from NEC ESMPRO Manager.
7
Click Select [Accept SNMP packets from any host].
- Setup of receiving SNMP packets from specific communities only.
Change the name of the community receiving SNMP packets from the default "public" to any name.If
the community name is changed, the community of NEC ESMPRO Agent is changed and registered by
starting from [Control Panel]. To change the community to another and register it, use the [SNMP
Community] list box in the [General] tab.
To allow NEC ESMPRO Agent to receive SNMP packets sent from NEC ESMPRO Manager, set the
send community name in NEC ESMPRO Manager to be the same as that accepted by the SNMP
Service in NEC ESMPRO Agent.
- Setup of receiving SNMP packets from specific hosts only.
Select [Accept SNMP packets from these hosts], specify IP addresses of the hosts, IP addresses of the
servers to install NEC ESMPRO Agent, and the loop-back address (127.0.0.1).
8
12
Click [OK] Terminate the network setup.
♦Notes after SNMP service setting:
- Some software products provided by other vendors may change the SNMP Service configuration. If you
install NEC ESMPRO Agent on the system under the condition where these types of software are already
installed, NEC ESMPRO Agent service may not work properly.
In such a case, delete the SNMP Service once and then install the service again. Afterward, reinstall NEC
ESMPRO Agent and the software products provided by other vendors.
- If you change SNMP Service setting while NEC ESMPRO Agent is running, NEC ESMPRO Agent may not
monitor the RAID System.
In such a case, restart the ESMDiskArray Service.
4.2.5 Installing the RAID System Management Utility
RAID System Management Utility is required to monitor the RAID System with NEC ESMPRO Agent.
Before installing NEC ESMPRO Agent make sure that RAID System Management Utility has been installed.
If RAID System Management Utility is not installed, please install it according to the manual.
13
5. Installation
The installation of NEC ESMPRO Agent is described below.
♦Notes before installation:
- Start installing after the system starts completely.
- If installation is conducted right after the system startup, it may fail. Wait for a while and retry if the error
message appears.
♦With using EXPRESSBUILDER
1
Logon as a user with Administrators privilege.
2
Insert the EXPRESSBUILDER DVD into the Optical disk drive.
The EXPRESSBUILDER Autorun Menu is automatically displayed by the Autorun function.
If Windows Autorun Menu does not launch, start the NEC ESMPRO Setup directly from
EXPRESSBUILDER DVD.
"<revision number>¥WIN¥ESMPRO¥EN¥ESMMENU¥SETUP.EXE"
3
Click [Setup software] and then [NEC ESMPRO].
NEC ESMPRO Setup launches and the Main Menu is displayed.
If User Account Control is enabled on Windows Vista or Windows Server 2008 and later, the User Account
Control window appears. Click [Continue] to proceed.
4
Click [Agent] on the main menu of the NEC ESMPRO Setup window.
The available menus vary depending on Model.
14
- If you double-click to select a menu, two same dialog boxes may appear. Click [Exit] to close one of
the dialog boxes.
- If you click the [Cancel] button during setup, the message asking whether to stop or not to stop the
installation will appear. You can stop the installation by clicking on the [Stop] button (the main menu
remains displayed). However, the file having been setup halfway will not be deleted.
- Windows installer may rarely cause error during installation, and the setup program execution may
fail.
5
Click [Next].
The setup program determines the machine type automatically.
If the setup program is unable to determine the machine model, the install of NEC ESMPRO Agent will be
stopped.
When NEC ESMPRO Agent is already installed, the dialog box "NEC ESMPRO Agent is already installed"
appears. The previous version NEC ESMPRO Agent is uninstalled and reinstallation starts newly by clicking
[Remove the Agent software] and then click [Next].
6
Enter the path in which NEC ESMPRO Agent is installed and click the [Next] button.
The NEC ESMPRO Agent module is installed below the ESM directory of the root partition in default. If no
problem is found, click the [Next] button without any modification.
To change the installation directory, click the [Reference] button, specify the desired installation directory with
the full path including the drive name, and click the [Next] button.
7
When the installation end window appears, click the [OK] button.
The installed is complete. The functions of installed NEC ESMPRO Agent will be enabled after the system is
restarted.
15
♦Notes on installation:
- After the installation of NEC ESMPRO Agent, SNMP Service is stopped. The SNMP Services will be
started when the OS is restarted.
- Even if the installation of NEC ESMPRO is completed, the main menu for the NEC ESMPRO setup
remains displayed. Note that the main menu may be hidden by another dialog box. To terminate the NEC
ESMPRO setup, click [End] in the main menu.
- Windows Server 2008 R2 / Windows 7 installing NEC ESMPRO Agent the message that "Windows
Explorer has stopped working" might be displayed.
However, installation was normally completed. The system doesn't have the influence.
16
6. After Installation
Be sure to read this page after installing NEC ESMPRO Agent.
6.1 Setting a Windows Firewall
When the setting of the firewall is effective, port (161/UDP) that SNMP uses is blocked.
In this case, because NEC ESMPRO Agent cannot communicate with NEC ESMPRO Manager, the server cannot be
monitored from NEC ESMPRO Manager.
Open the port according to the following procedures.
♦Windows XP / Windows Server 2003 / Windows Server 2003 R2
1
Click Start, point to Settings, click Control Panel, and then double-click Windows Firewall.
2
In the Windows Firewall dialog box, click the Add Port on Exceptions tab.
3
In the Add a Port dialog box, set the values as follows, and then click [OK].
Name
4
:
snmp
Port number :
161
Select
UDP
:
Close the Windows Firewall dialog box.
♦Windows Server 2003 (Service Pack not installed)
1
Click Start, point to Settings, click Control Panel, and then double-click Network Connections.
2
Right-click the connection that you want, and then click Properties.
3
Click the Advanced tab, and then click Settings.
4
Click the Service tab, and then click Add.
5
In the Service Settings dialog box, set the values as follows, and then click [OK].
Description of service
:
snmp
this service on your network
:
Name or IP address of the computer
External Port number for this service
:
161
Select
:
UDP
Name or IP address of the computer hosting
17
6
Close the Network Connections window.
6.2 Setting of operation of NEC ESMPRO Agent
To change settings of NEC ESMPRO Agent, use Property of NEC NESMPRO Agent from Control Panel.
The setting items on Property of NEC ESMPRO Agent are different by the model.
18
7. Uninstallation
The uninstallation of NEC ESMPRO Agent is described below.
♦Notes before uninstallation:
- Start uninstalling after the system starts completely.
- Uninstallation performed immediately after the system restarts may fail.
If an error message appears, try again after waiting for a while.
♦Without using EXPRESSBUILDER
1
Double-click [Programs and Features] or [Add or Remove Programs] from [Control Panel].
2
Select [NEC ESMPRO Agent] and click [Uninstall/Change] (or [Change/Remove]).
Now NEC ESMPRO Agent is uninstalled.
♦With using EXPRESSBUILDER
1
Make the main menu of the NEC ESMPRO setup appear by referring to the section "5. Installation" in this
document.
2
Click [Agent].
The "Welcome to the InstallShield Wizard for Agent" dialog box appears.
3
Click [Next].
The message [NEC ESMPRO Agent is already installed] is displayed.
4
Select [Delete] and then click the [Next] button.
Now NEC ESMPRO Agent is uninstalled.
♦Notes on uninstallation:
- If uninstallation is conducted right after the system startup, it may fail. Wait for a while and retry if the error
message appears.
A [AMIRTUpt.dll] file may remain solely in the installation folder. In this case, delete it manually. If files
other than [AMIRTUpt.dll] also remain, do not delete them.
- Due to an InstallShield 2008 failure, the following error message may be displayed only at the first startup
after uninstallation.
- If you uninstall NEC ESMPRO Agent on Windows Server 2008 R2 / Windows 7, an error message
indicating that Explorer has stopped may be displayed. However, uninstallation completes normally, and
the system is not affected.
19
8. Notes
8.1 Event log
♦LAN Monitoring Report
The LAN monitoring function defines the line status depending on the number of transmission packets and the number
of packet errors within a certain period. Thus, the LAN monitoring function may report a line fault or high line load only
in a temporary high line impedance state. If a normal state recovery is reported immediately, temporal high line
impedance may have occurred thus there is not any problem.
♦The monitoring event is not alerted
- The alert function is based on the event information registered in the event log of the system.
Thus, set the event log process on the event viewer to [Overwrite events as needed]. The monitoring event is not
alerted in the setting other than that.
- The event registered in the monitoring event tree on the setting tool of alert function (Alert Manager) is not alerted to
the manager if Alert Manager Main Service does not operate. Even when the service is operating, if the
enabled/disabled flag of each alerting ways is disabled, the event is not alerted.
The alert enabled/disabled flag is set by selecting [Base Setting] - [Report] Properties from [Setting] of Alert Manager.
Also the event occurred before Eventlog Service started at the time of system startup cannot be alerted.
- You can set the time to the shutdown by selecting [Base Setting] - [Other] on the setting tool of the alert function (Alert
Manager). The initial value is 20 seconds.
When you set smaller value than this, the alert may not be performed at the time of shutdown.
- When an alert failure occurs at the time of alerting of monitoring target event, an error message is logged in the event
log. If you newly log the error message which occurs at the time of alerting as a monitoring target event, the error at
the time of alerting will be alerted again.
As a result, large number of alerts will be sent when recovering the failure. This leads to the increase of system load
and the degradation of the performance. Do not register the events especially which are produced by the following
alert function services as the monitoring target.
Alert Manager ALIVE(S) Service
Alert Manager Main Service
Alert Manager Socket(S) Service
20
♦Event log which warn CPU load monitoring is registered
If NEC ESMPRO Agent cannot acquire performance information from the OS due to a temporary resource shortage or
high load ratio on the system, it will record the following event log. However, there is no real problem on operation (In
the description, Y and X represent alphanumeric characters).
Source
:
ESMCpuPerf
Type
:
Information
Event ID
:
9005
Description
:
Cannot get system performance information now (YYYY Code=xxxx).
If NEC ESMPRO Agent cannot get information, it will treat the load ratio as 0%.
Therefore, if NEC ESMPRO Agent cannot get information continuously, the CPU load ratio may appear lower than the
actual value.
♦Application log registered when system starting
* About the event of "Source: Perflib".
When system is starting, Perflib log may be registered to the application log.
The detailed information about an event log is described on Microsoft Product Support Services.
Please check the contents.
- Events for Performance Monitor Extensions
http://support.microsoft.com/default.aspx?scid=kb;en-us;226494
- Application Log Events Generated When You Start Performance Counter Query
http://support.microsoft.com/default.aspx?scid=kb;en-us;296187
- Event ID 2003 Warning Message Logged When Loading Performance Counters
http://support.microsoft.com/default.aspx?scid=kb;en-us;267831
Visit the Microsoft Help and Support on regular basis where you can find other information than the above at
http://support.microsoft.com/default.aspx?LN=en-us.
♦Event log monitoring
Events displayed on Alert Manager can be monitored.
Events that are not displayed on Alert Manager cannot be monitored.
Example)
You cannot monitor the following new events since Windows Vista (Windows Eventing 6.0).
Events that a channel is not defined in metadata.
8.2 Hard disk drive / RAID / File
♦Connection with Hard Disk Drive
The preventive hard disk drive maintenance function may not work properly when a hard disk drive which was used in a
machine where NEC ESMPRO Agent is installed is connected to other machine.
Make sure not to connect such hard disk drives.
21
♦Using IDE Mirroring Controller (Promise Fasttrak100/100LP)
NEC ESMPRO manages IDE Mirroring Controller (Promise Fasttrak100/100LP) in a similar way as it manages SCSI
and IDE devices except for the following points:
- [Information of server state/constitution] of NEC ESMPRO Manager
All hard disk drives connected with disk mirroring controller are displayed on [Information of server
state/constitution] of NEC ESMPRO Manager as one logical disk drive instead of displaying each hard disk drive.
Also, disk mirroring controller is not displayed on [Information of server state/constitution] of NEC ESMPRO
Manager as "Disk Array". It is displayed as "SCSI Controller".
- Pre-Failure function of hard disk drive
The pre-failure function doesn't make any check on hard disk drives connected with disk mirroring controller.
♦"NEC ESMPRO Agent ESMDiskArray"
"NEC ESMPRO Agent ESMDiskArray" is installed also in the system in which a RAID controller does not exist, and
adds [NEC ESMPRO Agent ESMDiskArray] to the [Start] menu.
(Monitoring is not performed while the status of service "ESMDiskArray" is "Started".) In this case, do not use the "NEC
ESMPRO Agent ESMDiskArray Console" which performs of monitoring interval and maintenance of "NEC ESMPRO
Agent ESMDiskArray".
(When click a [Start] menu, [NEC ESMPRO Agent ESMDiskArray], and a [Console], the console displays the message
which shows that the RAID controller for a monitor does not exist.)
♦Disk Maintenance while NEC ESMPRO Agent is Running
The following works to disks (hard disk drive or magneto optical) are not allowed while NEC ESMPRO Agent is running;
To format or delete a partition by Disk Administrator or by other means.
To request programmatically to remove media from removable disks such as MO, Zip and PD.
1
Double-click [Administrative Tools]-[Services] in [Control Panel].
2
Right-click [ESMCommonSerivce] and click [Stop].
3
Verify that "ESMCommonService" stopped, and close the [Services].
4
Do the disk-related works.
5
Double-click [Administrative Tools]-[Services] in [Control Panel].
6
Right-click [ESMCommonSerivce] and click [Start].
7
Verify that "ESMCommonService" is active and close the [Services].
8
Close the [Control Panel].
♦Monitoring the failures of the tape device is desired
NEC ESMPRO Agent does not monitor the failures of the tape device. If you want to conduct monitoring, use backup
software or tape monitoring application. Using the event monitoring function of NEC ESMPRO Agent allows you to
monitor the event log of backup software or applications.
22
♦Changing setting of storage monitoring
The following setting will not take effect until one (old) monitoring interval cycle of each monitoring service passes after
changes are made to setting.
sampling interval (Polling Frequency tab of storage setting) reset (Reset tab of storage setting and Reset button on
Hard Disk General view in [Information of server state/constitution] of NEC ESMPRO Manager) hard disk pre-failure
prediction mode (HD Pre-failure tab of storage setting) thresholds of free block monitoring (Free Space tab of storage
setting and threshold button on File System General view in [Information of server state/constitution] of NEC ESMPRO
Manager).
♦Changing mode of hard disk pre-failure prediction
Turning on/off the mode of hard disk pre-failure prediction, all hard disks work in the same mode in either case. You can
not set the mode of each hard disk individually.
♦Storage Devices other than SCSI/IDE Device
NEC ESMPRO Agent does not monitor storage devices other than SCSI/IDE devices (e.g., an USB device).
♦Display of the [Information of server state/constitution] of NEC ESMPRO Manager
when a Hard Disk Drive is connected
In the case of using the LSI RAID system, even if you connect a Hard Disk Drive to the RAID Contoller, the connected
Hard Disk Drive may not be displayed of the [Information of server state/constitution] of NEC ESMPRO Manager.
In such a case, recognize the Hard Disk Drive by the RAID system configuration.
♦Network drive is not displayed of the [Information of server state/constitution] of
NEC ESMPRO Manager
On Windows XP or the OS released after it, the drive connected to network is not displayed under the file system tree
in the [Information of server state/constitution] of NEC ESMPRO Manager.
♦Information displayed in "Resource" of SCSI controller
In the following cases, check the information of resource using "Device Manager" and "System Information
(winmsd.exe)" of OS.
- x64 Edition OSs
Incorrect information may appear in the [Resource] window displayed from [SCSI Controller] of [Information of
server state/constitution] of NEC ESMPRO Manager.
- Windows Vista or later
I/O port information does not appear in the [Resource] window displayed from [SCSI Controller] of [Information of
server state/constitution] of NEC ESMPRO Manager.
23
♦Display of the [Information of server state/constitution] of NEC ESMPRO Manager
when the RAID System is changed
When a Physical Device and a Logical Device are added or are deleted when immediately after the installation of NEC
ESMPRO Agent and the RAID System are maintaining it, it takes time of a few minutes until information is displayed of
the [Information of server state/constitution] of NEC ESMPRO Manager.
♦SATA Optical disk drive
In the case of using the LSI Embedded MegaRAID, infomation of SATA Optical disk drive does not displayed of the
[Information of server state/constitution] of NEC ESMPRO Manager.
8.3 I/O device
♦Floppy Disk Drive Information
If you add or delete floppy disk drive connected with USB while the OS is running, the drive information under the [I/O
Device] of the [Information of server state/constitution] of NEC ESMPRO Manager will be updated at the next system
startup.
♦Serial Port
For the models supporting serial ports, note the following.
NEC ESMPRO Agent has multiple features that use serial ports.
When using these features, the ports may become insufficient.
The serial ports available for each feature are as follows.
UPS
:
COM1-10
APCU
:
COM1-2
ALIVE Maintenance*
:
COM1-9
*Alive Maintenance uses Remote Access Service.
The available serial ports when using Remote Access Service for Manager Report (TCP/IP Out-of-Band) are as
follows.
Manager Report: COM1-10
Among those above, only the following combination can share the serial ports.
- Alive Maintenance + Remote Access Service used by a user
When one of the features uses the line, the other feature cannot be used.
Manager Report (TCP /IP Out-of-Band), which uses Remote Access Service, may be unable to
notify failure information when sharing other serial port. Ensure not to share serial ports.
24
♦Printer Information’s Available Time
When you add a new printer, install its driver and make its settings, if you do not make settings for the available time
from Add Printer Wizard, the printer’s available time (From and To) in [Printers and Faxes] are [00:00], on the other
hand, Manager’s time are [9:00]. To display them properly, make the settings of printer from [Printers and Faxes]. The
procedures are as follows;
1
Right-click the printer you want to make settings for and click [Properties].
2
Click the [advanced]tab and enter values in the available time.
3
Click [OK].
Now, you can see the correct information from Manager, too.
♦Information of the keyboard/mouse connected with USB
When the keyboard or mouse is connected with USB, the keyboard or mouse information under the [I/O Device] of the
[Information of server state/constitution] of NEC ESMPRO Manager is listed as "Unknown".
♦I/O device information on the Multi monitor system
If you use the multi monitor system with the additional graphic accelerator board, the information of the only monitor 1
is displayed on the I/O device view of the [Information of server state/constitution] of NEC ESMPRO Manager.
♦Refresh rate of display adaptor
If you selected [use default setting of hardware], the value of the refresh rate is '1Hz' under the [I/O Device] - [display
adapter name] on [Information of server state/constitution] of NEC ESMPRO Manager.
* The setting of the screen refresh rate can be confirmed by of property on the screen.
([setting] tab - [Advanced] - [monitor] tab - [screen refresh rate])
* It is set to the use of a default setting of hardware by the refresh rate of the screen when the monitor name is
displayed as 'Generic PNP Monitor'.
♦Display information
If the OS of Agent conputer is Windows 7, following items may be "Unknown" in display information on NEC ESMPRO
Manager.
- Refresh rate
- Vertical/horizontal resolution
- Pixel
8.4 Hardware
♦Display of the [Information of server state/constitution] of NEC ESMPRO Manager
when an odd number of DIMMs are installed
When an odd number of DIMMs are installed, the indication of memory bank is displayed in gray (Not Installed) of
[Information of server state/constitution] of NEC ESMPRO Manager. However, it is not the problem if the locations of
actually installed DIMMs are correct. If any warning/error occurred on DIMM, the indication of memory bank becomes
yellow (Warning) or red (Error) to allow you to detect a memory failure.
25
8.5 SNMP
♦CPU Load Ratio of SNMP Service (snmp.exe)
While monitoring the server from NEC ESMPRO Manager, the CPU load ratio of SNMP Service on the NEC ESMPRO
Agent side may increase at every monitoring interval (default: 1 minute).
NEC ESMPRO Manager and NEC ESMPRO Agent exchange information through SNMP Service.
If the server status monitoring by NEC ESMPRO Manager is on (default: ON), NEC ESMPRO Manager regularly
issues a request to NEC ESMPRO Agent to get the current status of the server. In response, NEC ESMPRO Agent
checks the status of the server. As a result, the CPU load ratio of SNMP Service increases temporarily.
If you have trouble of terminating a movie player application, turn off the server status monitoring by NEC ESMPRO
Manager or extend the monitoring interval.
♦Hang of SNMP Service
SNMP Service has a module called "SNMP Extended Agent" This module may be registered when you install some
software that uses SNMP Service.
If you start SNMP Service, SNMP Extended Agent is also loaded at the initialization. However, if the initialization is not
completed within a specified period, SNMP Service will hang.
It may take time to complete the initialization due to temporary high load on the system. In this case, wait for the system
load become low enough before restarting SNMP Service.
♦Community Authority
Depending on your OS type or its version, settings for community, SNMP service’s security function, are not made, or
default settings of authority are different.
To enable the remote shutdown and threshold change functions via NEC ESMPRO Manager, make settings of
community and set its authority to "READ CREATE" or "READ WRITE".
♦Change of SNMP Community
If the security setting of the SNMP Service of a system, where the NEC ESMPRO Agent is installed, is changed from
the default "public" to a community name, change the community settings of the NEC ESMPRO Agent, too.
1
Double-click the [NEC ESMPRO Agent] icon in [Control Panel].
2
Click Select a desired community name from the [SNMP Community] list box in [SNMP Setting] of the
[General] sheet.
The community names to receive SNMP packets from are listed in the [SNMP Community] list box.
3
Click [OK].
8.6 System
♦CPU Information
In [CPU Information] of DataViewer’s system tree, the external clock is listed as "Unknown".
26
8.7 System environment
♦Threshold for Temperature / Power Voltage / Fan Monitoring
The threshold for temperature/power voltage/fan cannot be displayed or changed. However, some models can only
display the threshold of the [Information of server state/constitution] of NEC ESMPRO Manager.
NEC ESMPRO Agent performs monitoring with the optimal threshold set on each model.
♦Display for Temperature / Power Voltage / Fan Sensors
On some models, temperature/power voltage/fan sensors do not have information on the status, current values,
revolutions, thresholds, etc. Note that the following may be displayed when referring to the applicable sensor on NEC
ESMPRO Manager.
- Display of the [Information of server state/constitution] of NEC ESMPRO Manager, the status is shown as
"Unknown" (grayed out).
- Display of the [Information of server state/constitution] of NEC ESMPRO Manager, the current value and
revolutions are not displayed, or they are shown as "Unknown".
Even if the above are displayed, there is no problem as the monitoring is being performed.
♦Case cover monitoring
The alert according to the opening and shutting of the case cover is not alerted of by the model that supports the case
cover monitoring in initialization either.
The alert of the opening and shutting of the case cover comes to be informed of by changing the setting with a set tool
of the alert report function (Alert manager).
The state of the server state color and the case cover is reflected by [Information of server state/constitution] of NEC
ESMPRO Manager regardless of the record setting.
♦Display of power supply
Tedium is correctly displayed though information on the power source module mounted with NEC ESMPRO Manager is
not displayed even if the power source module is mounted while starting when the device of the redundant power
supply composition is started by non-redundant power supply composition.
Restart OS to reflect the mounted state of the power supply module.
♦Display of the [Information of server state/constitution] of NEC ESMPRO Manager
when the redundant fan is removed/inserted
If the redundant fan is removed/inserted in hot-swap mode, the latest configuration information may not be displayed of
the [Information of server state/constitution] of NEC ESMPRO Manager.
The following event is logged when the redundant fan is removed/inserted. If the latest configuration information is not
displayed, restart the SNMP service.
Source
:
ESMCommonService
ID
:
1602
Description
:
A new device is connected to the slot or the connector.
27
8.8 Coexistence with another product
♦CPU Load when Using Microsoft SQL Server 6.5 Simultaneously
For use under the following conditions, the CPU load of the NEC ESMPRO Agent service may increase (+10% or
more).
(Conditions)
- Microsoft SQL Server 6.5 and NEC ESMPRO Agent are installed on the same machine and the services are running.
- The [Integrate Performance Monitor] option of the Microsoft SQL Server 6.5 is checked.
(Verification procedure)
Using the Performance Monitor, compare the values when the [Integrate Performance Monitor] option of the Microsoft
SQL Server 6.5 is checked and unchecked.
Object : Process, Counter: % Processor Time, Instance: ESMCMN
Ensure to restart the machine after checking/unchecking the option. If the machine is not restarted, the
correct load factor cannot be acquired with the Performance Monitor.
(Countermeasure)
If the CPU load factor acquired by the "verification procedure" above greatly differs when the option of the SQL Server
is on and off, it is believed that the CPU load factor increases when the option is set to on.
The above phenomenon occurs because the amount of performance data collected from the OS increases when this
SQL Server option is set to on; thereby, the service to collect the performance data from the OS requires time to
analyze the performance data.
If you do not need to monitor the performance data of SQL Server, set the SQL Server option to off in order to prevent
the CPU load from increasing due to the collection of unnecessary performance data.
♦File system monitoring cannot be inherited on the system using
EXPRESSCLUSTER
When using NEC ESMPRO Agent in the cluster environment configured by EXPRESSCLUSTER, there is a following
limitation:
- If a failover occurs, the settings of the threshold for the empty space monitoring function and the enable/disable of
monitoring of the operating sever are not inherited to the standby server. Make sure to reset the threshold and the
enable/disable of monitoring on the standby server.
♦Using with Oracle Products
When an Oracle product is installed, the startup of SNMP Service may be changed to "Manual". In such a case, restore
it to "Automatic" and configure the appropriate settings according to the instructions of the Oracle product. For any
concerns, contact "NEC Oracle Response Center".
28
♦Microsoft Cluster Service (MSCS)*
When MSCS is used, the following event may be registered and reported to NEC ESMPRO Manager.
Source
:
AlertManagerMainService
ID
:
802
Description
:
The past event was detected during the System log monitoring.
The possible causes are as follows:
- The system time has been changed.
- Shutdown was not performed properly.
- The event log file is corrupted.
Although MSCS has a feature that all the events of clustered computers are visible, the events may not be stored to the
event log in the order of date (such as when either of the computers was shut down or started).
NEC ESMPRO Agent checks whether the events are stored in the order of date. Therefore, when an event not in the
order of date is found, it registers such an event assuming that "the past event is detected".
Even when the event is registered due to this feature of MSCS, the event log monitoring feature
continues and it operates properly for those events in the order of date.
* On Windows Server 2008, the name of MSCS was changed to Microsoft Failover Cluster (MSFC).
8.9 Report
♦The detail information of alert is displayed as "Unknown"
Detail information of some alert displayed on the alert viewer may be shown as "Unknown".
♦Deleted Reporting Method
From the NEC ESMPRO Agent Ver. 4.3, the following reporting methods will not be supported.
- Pager
- ALIVE
♦General client report
"General client report" cannot be used.
Though no error appears even if you enable this method, it just does not work.
8.10 OS dependence
♦Using [Hardware Management] on Windows Server 2003 R2
If you use "Hardware Management" provided by Windows Server 2003 R2, remove the NEC ESMPRO Agent and the
NEC Server Management Controller Driver.
29
♦Security Setting for Installation/Uninstallation
On the Windows Server 2003 system, if the "Administrators" group is removed from the "Impersonate a client after
authentication" item of the [User Rights Assignment] in the [Local Security Policy], perform the installation (including
the update installation) and uninstallation by following the procedure below.
1
Double-click [Administrative Tools]-[Local Security Policy] in [Control Panel].
2
Use [Local Policies] to add an "Administrators" group to the "Impersonate a client after authentication"
item.
3
Restart the OS.
4
Perform installation (uninstallation).
5
Restore the local security policy setting to the original setting.
6
Restart the OS.
♦Notes on Server Core
- Help dialog box of Alert Manager setting tool does not appear.
- "Manager (TCP/IP Out-of-Band)" method cannot be used.
♦User Account Control
On Windows Vista / Windows Server 2008 or later system that the User Account Control is turned on, if you start the
NEC ESMPRO Agent Control Panel or collect.exe program, the [User Account Control] dialog box will appear. Click
[Continue] button to start the program.
♦The number of mouse buttons
On Windows Vista / Windows Server 2008 or later system, the value of "Buttons" item of Mouse Information of the
[Information of server state/constitution] of NEC ESMPRO Manager is 'Unknown'.
30
♦Monitoring CPU Load Factor
On Windows Vista / Windows Server 2008 or later, a memory leak may occur when you acquire the CPU load
factor due to problems with the OS.
If you do not monitor the CPU load factor, remove the module to monitor the CPU load factor by following the
procedure below.
1
From Control Panel, Double-click [Administrative Tools] - [Service].
2
Right-click [ESMCommonSerivce] and click [Stop].
3
Change the file name "%SystemRoot%¥system32¥cpuperf.esr" as follows.
"cpuperf.esr" -> "cpuperf.bak"
* For x64 Edition, change the following file name.
"%SystemDrive%¥Windows¥SysWOW64¥cpuperf.esr"
4
Right-click [ESMCommonSerivce] and click [Start].
♦System eventlog during installing NEC ESMPRO Agent
When you install the NEC ESMPRO Agent, following event may be reported on Windows Eventlog (system).
Source
:
Windows Defender
Event ID
:
3004
Type
:
Warning
Description
:
Windows Defender Real-Time Protection agent has detected changes.
Microsoft recommends you analyze the software that made these changes for potential
risks. You can use information about how these programs operate to choose whether
to allow them to run or remove them from your computer. Allow changes only if you
trust the program or the software publisher. Windows Defender can't undo changes
that you allow.These events are reported by installing service. These are not problem.
These events are reported by installing service.These are not problem.
♦Notes on host OS of Virtualization environment
When NEC ESMPRO Agent detects dangerous trouble information continuous to operate, OS is shutdown in the
setting of default.
The shutdown not anticipated from Guest OS was generated because the service console shutdown without shutting
down Guest OS in the environment to operate Guest OS in the virtualization environment.
Invalidate the shutdown function by the report from NEC ESMPRO Agent, and shutdown from Guest OS by manual at
the failure when the normal termination of Guest OS is valued.
[Setup steps of shutdown function by report]
1
Logon as a user with administrative privilege.
2
Double-click [NEC ESMPRO Agent] in [Control Panel].
3
Click [NEC ESMPRO Agent]-[Report Setting...].
Displays Alert Manager.
4
Click [Setting]-[Base Setting].
5
It is confirmed that "Shutdown Delay" item of [Other] is invalid (red).
Change to invalid (red) clicking the icon when it is valid (green).
6
Click [OK] Setting Terminate.
31
8.11 Others
♦Pop-up message of esmcmn.exe is displayed when starting the OS
The following pop-up message may be displayed when you restart the system which NEC ESMPRO Agent is installed
to and removal drives such as MO and DVD-RAM are mounted on, without closing Windows Explorer, after displaying
the contents of media and removing the media by the software eject (by right-clicking the DVD drive on Windows
Explorer and selecting [Eject]).
The message (the drive name) displayed varies depending on the OS.
If the pop-up message "There is no disk in the drive. insert a disk into drive A:. " is displayed, click [Cancel] or
[Continue] to close the dialog box. If you do not close the dialog box, you cannot start the Workstation service and
related services, causing unstable operation of the OS. Also, if you restart the system, execute it after terminating the
program such as Windows Explorer which displays a media.
Example:
♦PCI hot plug
Select the server for the watch with NEC ESMPRO Manager again and renew the [Information of server
state/constitution] tree when you dynamically change the composition of a server concerned with PCI hot plug when
server information is being referred by [Information of server state/constitution] of NEC ESMPRO Manager.
When the [Information of server state/constitution] tree is not renewed, it might be different from information on present
HW because the configuration change of HW with PCI hot plug is not reflected.
Moreover, it can be confirmed that the composition of the device that installs NEC ESMPRO Agent was changed
because the device of NEC ESMPRO Manager has registered in the trap destination of NEC ESMPRO Agent, and the
trap concerning "State of Slot" is transmitted to the manager according to the timing of the configuration change on the
NEC ESMPRO Manager side.
♦Monitoring under Sleep Mode
When NEC ESMPRO Agent is in sleep mode (system standby or system hibernation), NEC ESMPRO Agent in sleep
mode cannot be monitored from NEC ESMPRO Manager.
When server failure monitoring is performed from NEC ESMPRO Manager and the applicable NEC ESMPRO Agent is
put into sleep mode, the "No response from the server." message is reported, the status color of the server icon turns
gray, and NEC ESMPRO Manager fails to judge whether NEC ESMPRO Agent fails or is put into sleep mode. Keep
this in mind if you operate the monitoring target system with the setting that allows the system to enter sleep mode.
32
♦When Performing Duplex System Management
To perform duplex system management, install NEC ESMPRO Agent on a local disk on both the operating and standby
servers. The installation procedure for NEC ESMPRO Agent is same as a normal installation, except that it should be
installed on two servers.
♦Restart after HW trouble occurs
When abnormality of HW is detected, OS is shutdown.
When the morrow is started, it is likely to shutdown when OS is restart without action/recovering trouble after it
shutdown. Restart OS after action/recovering trouble.
♦Shutdown monitoring
When performing shutdown monitoring, all shutdown processes are to be monitored. If there is an application that
performs shutdown without rebooting OS or turning off the power, set the timeout value longer or disable the monitoring
function.
♦Monitoring LAN via IEEE1394 interface
If you connect an IEEE1394 network adapter and an IEEE1394 network adapter on another equipment, NEC ESMPRO
Agent could not monitor LAN activity.
IEEE1394 connection
Server
Server
♦Memory leak
Memory leak occurs intermittently irregularly on Windows Vista RTM, Windows Vista SP1, or Windows Server 2008.
The detailed information is described on Microsoft Product Support Services.
Check the contents.
[Article ID: 955515]
http://support.microsoft.com/kb/955515/en-us
Execute the above hotfix or the Service Pack 2.
NEC recommends the Service Pack 2.
As for this phenomenon, [About Alert Manager] occurs in the case of 4.10 or later.
The confirmation procedure of [About Alert Manager] is as follows.
1
Go to [Start]-[Control Panel] and select [NEC ESMPRO Agent].
2
Click [General]-[Report Setting...].
Displays Alert Manager.
3
Click the "Help" - "About Alert Manager" menu on Alert Manager.
4
Confirm version of "Alert Manager".
Example) Alert Manager Ver. 4.10
33
♦Monitoring by NEC ESMPRO Manager
If the version of NEC ESMPRO Manager is older than that of the target NEC ESMPRO Agent, its operation is not
guaranteed. Some items cannot be monitored. Use the same or newer version of NEC ESMPRO Manager than that of
NEC ESMPRO Agent for monitoring.
♦Display of the [Information of server state/constitution] of NEC ESMPRO Manager
It might be displayed, the display of some items is "Unknown" by the model and the environment in the display of the
[information of server stare/constitution] of NEC ESMPRO Manager.
34
Appendix
♦Port number list
NEC ESMPRO Agent uses the following port numbers.
To use NEC ESMPRO Agent with the Windows Firewall enabled, open the required ports.
[NEC ESMPRO Manager <-> NEC ESMPRO Agent]
Function
NEC ESMPRO Manager
Auto Registration
Unknow
Direction
->
Server Monitoring (SNMP)
NEC ESMPRO Agent
Remarks
161/udp
snmp
snmp-trap
<-
SNMP report to Manager
162/udp
<-
Unknow
TCP/IP report to Manager
31134/tcp
<-
Unknow
->
* In case of two-way protocol, upper arrow shows that connection starts, and lower arrow shows that connection
turns.
* The port number used by TCP/IP report to Manager can be changed in set screen of report.
* In case of port No. unknown, unused port is used to start connection.
♦Services list
NEC ESMPRO Agent uses the following services.
Services
Process name
Start-up
Function
Alert Manager Main Service
AMVMain.exe
Automatic
Manage Various trouble
Remarks
reports.
Alert Manager Socket(S)
amvscks.exe
Manual
Service
Report to Manager by
When either of "
using TCP/IP.
Manager(TCP/IP
In-Band) and
Manager(TCP/IP
Out-of-Band)" is set to
valid (green) at Base
Setting Window, the
service is started.
When both settings are
set to invalid (red), it is
stopped.
ESMDiskArray
esmda.exe
Automatic
Monitors state and
configuration of "Promise
Technology, Inc. RAID
System" and "LSI
Corporation RAID
System".
35
ESM Storage Service
esmstrg.exe
Automatic
Monitors Storage Device
state and configuration.
ESMFSService
esmfs.exe
Automatic
Monitors File System
configuration and free
space.
ESMLANService
esmlan.exe
Disable
Monitors load of network
line and trouble.
ESMCommonService
esmcmn.exe
Automatic
Monitors temperature,
voltage, fan, power
supply, and dump setting.
ESM System Management
esmsmsrv.exe
Automatic
Service
Monitors temperature,
Only the IPMI
voltage, fan, power
corresponding model.
supply, and door, etc.
ESRAS Utility Service
nvramsrv.exe
Automatic
Information displayed by
the ESRAS utility is
taken.
♦The order of starting or stopping services
To start or stop services, perform the following procedure.
On some model of server, some service may not exist.
[order]
[Stopping services]
[Starting services]
1
ESM Storage Service
ESMCommonService
2
ESMDiskArray
ESM System Management Service
3
ESMFSService
SNMP Service
4
ESMLANService
Alert Manager ALIVE(S) Service
5
ESMCommonService
Alert Manager Main Service
6
ESM System Management Service
Alert Manager Socket(S) Service
7
ESRAS Utility Service
ESM Storage Service
8
Alert Manager ALIVE(S) Service
ESMDiskArray
9
Alert Manager Main Service
ESMFSService
10
Alert Manager Socket(S) Service
ESMLANService
11
SNMP Service
ESRAS Utility Service
36