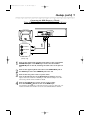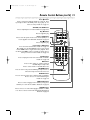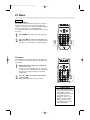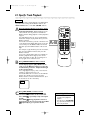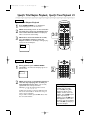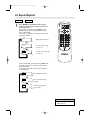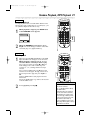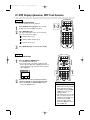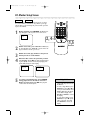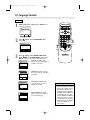
1
MDV410/430 2/7/02 11:18 AM Page 1
OWNER’S MANUAL
MDV410/MDV430 DVD PLAYER
READ THIS
MANUAL FIRST!
ON PURCHASING THIS PRODUCT.WE’VE INCLUDED
EVERYTHING YOU NEED TO GET STARTED. IF YOU HAVE ANY PROBLEMS,
OUR REPRESENTATIVES CAN HELP YOU GET THE MOST FROM YOUR
NEW PRODUCT BY EXPLAINING:
• HOOKUPS • FIRST TIME SETUP • FEATURE OPERATION
DO NOT ATTEMPT TO RETURN THIS PRODUCT TO THE STORE.
FOR FAST HELP, CALL US FIRST!
CONGRATULATIONS
1-800-705-2000
THANK YOU
FOR MAKING US A PART OF YOUR HOME!
IMPORTANT!
RETURN YOUR WARRANTY REGISTRATION C ARD WITHIN 10
SEE WHY INSIDE.
DAYS.
MDV410/430 2/7/02 11:18 AM Page 2
Return your Warranty Registration card today to
ensure you receive all the benefits you’re entitled to.
Once your MAGNAVOX purchase is registered, you’re eligible to receive all the privileges of owning a MAGNAVOX product. So complete and return the Warranty Registration Card enclosed
with your purchase at once. And take advantage of these important benefits.
Owner
Confirmation
Model
Registration
Registering your product within
10 days confirms your right to
maximum protection under the
terms and conditions of your
MAGNAVOX warranty.
Your completed Warranty
Registration Card serves as
verification of ownership in the
event of product theft or loss.
Returning your Warranty
Registration Card right away
guarantees you’ll receive all
the information and special
offers which you qualify for as
the owner of your model.
IS
Know these
TRATION
NE
!
Hurry
W
D
EDED
IT
HIN 1
0
Congratulations on your purchase,
and welcome to the “family!”
AYS REG
Warranty
Verification
safetysymbols
CAUTION
RISK OF ELECTRIC SHOCK
DO NOT OPEN
CAUTION: TO REDUCE THE RISK OF ELECTRIC SHOCK, DO NOT
REMOVE COVER (OR BACK). NO USER-SERVICEABLE PARTS
INSIDE. REFER SERVICING TO QUALIFIED SERVICE PERSONNEL.
Dear MAGNAVOX product owner:
Thank you for your confidence in MAGNAVOX. You’ve selected
one of the best-built, best-backed products available today. And
we’ll do everything in our power to keep you happy with your
purchase for many years to come.
As a member of the MAGNAVOX “family,” you’re entitled to
protection by one of the most comprehensive warranties and
outstanding service networks in the industry.
What’s more, your purchase guarantees you’ll receive all the
information and special offers for which you qualify, plus easy
access to accessories from our convenient home shopping
network.
And most importantly you can count on our uncompromising
commitment to your total satisfaction.
All of this is our way of saying welcome-and thanks for investing
in a MAGNAVOX product.
P.S. Remember, to get the most from your
MAGNAVOX product, you must return your
Warranty Registration Card within 10 days. So
please mail it to us right now!
This “bolt of lightning” indicates uninsulated material
within your unit may cause an
electrical shock. For the safety
of everyone in your household,
please do not remove product
covering.
The “exclamation point”
calls attention to features
for which you should read the
enclosed literature closely to
prevent operating and maintenance problems.
WARNING: TO PREVENT
FIRE OR SHOCK HAZARD,
DO NOT EXPOSE THIS
EQUIPMENT TO RAIN OR
MOISTURE.
CAUTION: To prevent electric shock, match wide blade of
plug to wide slot, fully insert.
ATTENTION: Pour éviter les
choc électriques, introduire la
lame la plus large de la fiche
dans la borne correspondante
de la prise et pousser jusqu’au
fond.
For Customer Use
Enter below the Serial No.
which is located on the rear of
the cabinet. Retain this information for future reference.
Model No.________________
Serial No. ________________
Visit our World Wide Web Site at http://www.magnavox.com
MDV410/430 2/7/02 11:18 AM Page 3
Table of Contents 3
General Information
Table of Contents
Safety Information
Introduction . . . . .
Playable Discs . . .
.
.
.
.
.
.
.
.
.
.
.
.
.
.
.
.
.
.
.
.
.
.
.
.
.
.
.
.
.
.
.
.
.
.
.
.
.
.
.
.
.
.
.
.
.
.
.
.
.
.
.
.
.
.
.
.
.
.
.
.
.
.
.
.
.
.
.
.
.
.
.
.
.
.
.
.
.
.
.
.
.
.
.
.
.
.
.
.
.
.
.
.
.
.
.
.
.
.
.
.
.
.
.
.
.
.
.
.
.
.
.
.
.
.
.
.
.
.
.
.
.
.
.
.
.
.
.
.
.
.
.
.
.
.
.
.
.
.
.
.
.
.
.
.
.
.
.
.
.
.
.
.
.
.
.
.
.
.
.
.
.
.
.
.
.
.
.
.
.
.
.
.
.
.
.
.
.
.
.
.
.
.
.
.
.
.
.
.
.
.
.
.
.
.
.
.
.
.
.
.
.
.
.
.
.
.
.
.
...
...
...
...
.
.
.
.
.
.
.
.
.
.
.
.
.
.
.
.
.
.
.
.
.
.
.
.
.
.
.
.
.
.
.
.
.
.
.
.
.
.
.
.
.
.
.
.
.
.
.
.
.3
.4
.5
.6
Getting Started
Remote Control Setup . . . . . . . . . . . . . . . . . . . . . . . . . . . . . . . . . . . . . . . . . . . . . . . . . . . . . . . . . . . . . . . .7
Hookups . . . . . . . . . . . . . . . . . . . . . . . . . . . . . . . . . . . . . . . . . . . . . . . . . . . . . . . . . . . . . . . . . . . . . . . . .8-13
Remote Control Buttons . . . . . . . . . . . . . . . . . . . . . . . . . . . . . . . . . . . . . . . . . . . . . . . . . . . . . . . . . . .14-15
Front Panel . . . . . . . . . . . . . . . . . . . . . . . . . . . . . . . . . . . . . . . . . . . . . . . . . . . . . . . . . . . . . . . . . . . . . . . .16
Display Panel . . . . . . . . . . . . . . . . . . . . . . . . . . . . . . . . . . . . . . . . . . . . . . . . . . . . . . . . . . . . . . . . . . . . . . .17
Rear Panel . . . . . . . . . . . . . . . . . . . . . . . . . . . . . . . . . . . . . . . . . . . . . . . . . . . . . . . . . . . . . . . . . . . . . . . . .18
Disc Playback and Features
Playing a Disc . . . . . . . . . . . . . . . . . . . . . . . . . . . . . . . . . . . . . . . . . . . . . . . . . . . . . . . .
Menus . . . . . . . . . . . . . . . . . . . . . . . . . . . . . . . . . . . . . . . . . . . . . . . . . . . . . . . . . . . . .
Paused and Step-by-Step Playback, Resume On . . . . . . . . . . . . . . . . . . . . . . . . . . . . . .
Fast Forward/Reverse Search . . . . . . . . . . . . . . . . . . . . . . . . . . . . . . . . . . . . . . . . . . . .
Slow Motion, Zoom . . . . . . . . . . . . . . . . . . . . . . . . . . . . . . . . . . . . . . . . . . . . . . . . . . .
Specific Track Playback . . . . . . . . . . . . . . . . . . . . . . . . . . . . . . . . . . . . . . . . . . . . . . . .
Specific Title/Chapter Playback, Specific Time Playback . . . . . . . . . . . . . . . . . . . . . . . .
Repeat Playback . . . . . . . . . . . . . . . . . . . . . . . . . . . . . . . . . . . . . . . . . . . . . . . . . . . . . .
A-B Repeat Playback . . . . . . . . . . . . . . . . . . . . . . . . . . . . . . . . . . . . . . . . . . . . . . . . . .
Programmed Playback . . . . . . . . . . . . . . . . . . . . . . . . . . . . . . . . . . . . . . . . . . . . . . . . .
Random Playback, MP3 Playback . . . . . . . . . . . . . . . . . . . . . . . . . . . . . . . . . . . . . . . . .
MP3 Display Information, MP3 Track Selection . . . . . . . . . . . . . . . . . . . . . . . . . . . . . .
Random MP3 Playback, Programmed MP3 Playback . . . . . . . . . . . . . . . . . . . . . . . . . . .
Audio Language, Stereo Sound Mode . . . . . . . . . . . . . . . . . . . . . . . . . . . . . . . . . . . . . .
Subtitle Language . . . . . . . . . . . . . . . . . . . . . . . . . . . . . . . . . . . . . . . . . . . . . . . . . . . . .
Camera Angles . . . . . . . . . . . . . . . . . . . . . . . . . . . . . . . . . . . . . . . . . . . . . . . . . . . . . . .
.....
.....
.....
.....
.....
.....
.....
.....
.....
.....
.....
.....
.....
.....
.....
.....
.
.
.
.
.
.
.
.
.
.
.
.
.
.
.
.
.
.
.
.
.
.
.
.
.
.
.
.
.
.
.
.
.
.
.
.
.
.
.
.
.
.
.
.
.
.
.
.
.
.
.
.
.
.
.
.
.
.
.
.
.
.
.
.
.
.
.
.
.
.
.
.
.
.
.
.
.
.
.
.
.
.
.
.
.
.
.
.
.
.
.
.
.
.
.
.
.
.
.
.
.
.
.
.
.
.
.
.
.
.
.
.
.
.
.
.
.
.
.
.
.
.
.
.
.
.
.
.
.
.
.
.
.
.
.
.
.
.
.
.
.
.
.
.
.19
.20
.21
.22
.23
.24
.25
.26
.27
.28
.29
.30
.31
.32
.33
.34
DVD Player Setup and Features
On-Screen Display . . . . . . . . . . . . . . . . . . . . . . . . . . . . . . . . . . . . . . . . . . . . . . . . . . . . . . . . . . . . . . . . . . .35
Parental Controls Password . . . . . . . . . . . . . . . . . . . . . . . . . . . . . . . . . . . . . . . . . . . . . . . . . . . . . . . . . . . .36
Parental Controls Levels . . . . . . . . . . . . . . . . . . . . . . . . . . . . . . . . . . . . . . . . . . . . . . . . . . . . . . . . . . . . . .37
Marker Setup Screen . . . . . . . . . . . . . . . . . . . . . . . . . . . . . . . . . . . . . . . . . . . . . . . . . . . . . . . . . . . . . . . . .38
Audio Controls . . . . . . . . . . . . . . . . . . . . . . . . . . . . . . . . . . . . . . . . . . . . . . . . . . . . . . . . . . . . . . . . . . . . .39
Display Controls . . . . . . . . . . . . . . . . . . . . . . . . . . . . . . . . . . . . . . . . . . . . . . . . . . . . . . . . . . . . . . . . . .40-41
Language Controls . . . . . . . . . . . . . . . . . . . . . . . . . . . . . . . . . . . . . . . . . . . . . . . . . . . . . . . . . . . . . . . .42-43
Black Level Settings, TruSurround Setting . . . . . . . . . . . . . . . . . . . . . . . . . . . . . . . . . . . . . . . . . . . . . . . . .44
Information You May Need
Care and Maintenance, Glossary . . . . . . . . . . . . . . . . . . . . . . . . . . . . . . . . . . . . . . . . . . . . . . . . . . . . . . . .45
Helpful Hints . . . . . . . . . . . . . . . . . . . . . . . . . . . . . . . . . . . . . . . . . . . . . . . . . . . . . . . . . . . . . . . . . . . . .46-47
Limited Warranty . . . . . . . . . . . . . . . . . . . . . . . . . . . . . . . . . . . . . . . . . . . . . . . . . . . . . . . . . . . . . . . . . 48
Specifications . . . . . . . . . . . . . . . . . . . . . . . . . . . . . . . . . . . . . . . . . . . . . . . . . . . . . . . . . . . . . . . . . . . . . . .49
Index . . . . . . . . . . . . . . . . . . . . . . . . . . . . . . . . . . . . . . . . . . . . . . . . . . . . . . . . . . . . . . . . . . . . . . . . . . . . .50
Supplied Accessories . . . . . . . . . . . . . . . . . . . . . . . . . . . . . . . . . . . . . . . . . . . . . . . . . . . . . . . . . . . . . . . . .51
MDV410/430 2/7/02 11:18 AM Page 4
4 Safety Information
Safety Precautions
Warning: To prevent fire or shock hazard, do not expose this equipment to rain or
moisture.
Federal Communications Commission (FCC) Warning: Any unauthorized
changes or modifications to this equipment void the user’s authority to operate it.
Laser Safety
This unit employs a laser. Only a qualified service person should remove the cover or
attempt to service this device, due to possible eye injury.
CAUTION: USE OF CONTROLS OR ADJUSTMENTS OR PERFORMANCE OF
PROCEDURES OTHER THAN THOSE SPECIFIED HEREIN MAY RESULT IN
HAZARDOUS RADIATION EXPOSURE.
CAUTION: VISIBLE AND INVISIBLE LASER RADIATION WHEN OPEN AND
INTERLOCK DEFEATED. DO NOT STARE INTO BEAM. THE BEAM IS LOCATED
INSIDE, NEAR THE DECK MECHANISM.
Special Information for Canadian Users
This Class B digital apparatus complies with Canadian ICES-003.
Cet appareil numérique de la classe B est conforme à la norme NMB-003 du Canada.
Radio/TV Interference
This equipment has been tested and found to comply with the limits for a Class B digital
device, pursuant to Part 15 of the FCC Rules. These limits are designed to provide
reasonable protection against harmful interference in a residential installation. This equipment generates, uses, and can radiate radio frequency energy and, if not installed and used
in accordance with the instructions, may cause harmful interference to radio communications. However, there is no guarantee that interference will not occur in a particular
installation. If this equipment does cause harmful interference to radio or television reception, which can be determined by turning the equipment off and on, the user is encouraged to try to correct the interference by one or more of the following measures:
1) Reorient or relocate the receiving antenna.
2) Increase the separation between the equipment and the receiver.
3) Connect the equipment into an outlet on a circuit different from that to which the
receiver is connected.
4) Consult the dealer or an experienced radio/TV technician for help.
Copyright Protection
Unauthorized copying, broadcasting, public performance and lending of Discs are
prohibited.
This product incorporates copyright protection technology that is protected by method
claims of certain U.S. patents and other intellectual property rights owned by Macrovision
Corporation and other rights owners. Use of this copyright protection technology must
be authorized by Macrovision Corporation and is intended for home and other limited
viewing uses only unless otherwise authorized by Macrovision Corporation. Reverse engineering or disassembly is prohibited.
Declaration of Conformity
Model Number:
Trade Name:
Responsible Party:
MDV410, MDV430
Magnavox
Philips Consumer Electronics
P.O. Box 14810
Knoxville, TN 37914-1810
(865) 521-4316
Manufactured under license from Dolby Laboratories. "Dolby" and the double-D symbol are trademarks of
Dolby Laboratories.
Copyright 2002 Magnavox. All rights reserved.
MDV410/430 2/7/02 11:18 AM Page 5
Introduction 5
Welcome!
This owner’s manual describes two models: the MDV410 and the MDV430. The display panels of these two Players have a different appearance. Also, the MDV430 has
COMPONENT VIDEO OUT jacks, but the MDV410 does not. Otherwise, the two
models operate identically. Unless noted otherwise, the MDV430 is shown in this manual.
These Digital Video Disc Players provide high picture quality, clear sound, and endless
playback features available on Digital Video Discs (DVDs). Add options to your DVD
viewing - watch a director’s cut of a movie, listen to the producer’s comments, or play
your favorite scene over and over again. The possibilities are limited only by your
choices and the materials available on the DVD.
You can listen to Audio Compact Discs and MP3 files on this DVD Player as well.
To get the most enjoyment from the DVD Player, read this owner’s manual carefully.
It describes how to access the features listed below.
Features
• Audio Language choices *
• Camera Angles *
• DVD Menus in a desired
language *
• Markers
• MP3 Playback
• Parental Controls*
• Paused/Fast/Slow/Stepby-Step Playback
• Program Playback
• Random Playback
• Repeat, A-B Repeat
• Specific Time/Title/
Chapter/Track Playback
• Subtitles *
• Zoom
* If available on the Disc
When referring to this manual, remember...
DVD
Indicates the feature described is available on some Digital Video Discs.
AUDIO CD Indicates the feature described is available on some Audio Compact Discs.
MP3
Indicates the feature described is available with MP3 files.
Disc Menus...
Some explanations in this manual describe the DVD Disc Menus. These menus are set by
the movie producers and will vary among Discs. Not all Discs have menus. However, if the
Disc has a menu, you can access the Disc Menu by pressing the MENU button on the
remote control. Details are on page 20.
DVD Player Setup Menus...
Some instructions explain how to use the DVD Player’s Setup menu to set features of the
DVD Player or the Disc. Access the DVD Player’s Setup menu by pressing SETUP on the
remote control when Disc playback is stopped. Even if a feature is set up in the DVD
Player’s menu, it may not be available if the current Disc does not include that feature.
Available Disc Features...
All the features described in this manual may not be available on every Disc.
If the feature is not available on the Disc, you cannot use the DVD Player to
make the feature available. An “X” will appear in the top right corner of the
TV screen if you try to access a feature that is not available on the current
Disc or not available at the current time.
This unit employs TruSurround system
of SRS Labs, Inc. as virtual technology.
TruSurround and the
symbol are trademarks of SRS Labs, Inc.
TruSurround technology is incorporated under license from SRS Labs, Inc.
MDV410/430 2/7/02 11:18 AM Page 6
6 Playable Discs
Playable Discs
This DVD Player will play Digital Video Discs (DVDs) and Audio Compact Discs
(CDs), and has limited playability of finalized Digital Video Discs Rewritable
(DVD+RW) and Compact Discs Rewritable (CD-RW).
To play a DVD on this DVD Player, make sure the Disc meets the requirements for
Region Codes and Color Systems as described below.
Discs that have the following logos will play on this DVD Player.
ReWritable
DVD
DVD
Audio CD
CD-RW
(limited)
DVD+RW
(limited)
Region Codes
DVDs must be labeled for ALL regions or for Region 1 in order to play on this DVD
Player. You can not play DVDs that are labeled for other regions.
Look for the symbols below on your DVDs. If these region symbols do not appear on
your DVD, you cannot play the DVD in this DVD Player.
The number inside the globe refers to a region of the world. Region 1 represents the
United States, Canada, upper regions of North America, Bermuda, the U.S. Virgin
Islands, and small regions near Australia.
A Disc encoded in a specific region format can only play on DVD Players with the
same region code. For example, if a Disc is labeled for Region 2, you can not play the
DVD on this DVD Player.
Color Systems
Different color systems are available throughout the world. The most common color
systems are NTSC, which is used primarily in the United States and North America,
PAL, and SECAM.
This DVD Player uses the NTSC color system. Therefore, the Discs that you play
must be recorded in the NTSC system. You cannot play Discs recorded in other formats. The color system of the DVD may be listed on the DVD or on the Disc case.
Unacceptable Discs
If you insert an unacceptable type of disc, “Please insert a playable disc” will appear on
the TV screen. (Also, “- - - - - “ will appear on the display panel of the MDV430. There
is no indication on the front of the MDV410 if an unacceptable Disc is in the disc tray.)
The following Discs will not play on this DVD Player.
• CD-ROM
• Photo CD
• Compact Disc-Interactive (CD-I)
• Video CD
• DVD-RAM
• Video Single Disc (VSD)
• DVD-ROM
• Super Audio CD (SACD) (The Audio
CD layer of a hybrid SACD may play.)
Audio of the following discs might play, but video will not be accessible.
• Compact Disc-Graphic (CD-G)
• Compact Disc-Video (CD-V)
MDV410/430 2/7/02 11:18 AM Page 7
Remote Control Setup 7
Putting Batteries in the Remote Control
1
Remove the battery compartment lid on the
bottom of the remote control by sliding the lid down
and off, following the direction of the arrow on the
lid.
2
3
Place two AA batteries inside the battery
compartment with their + and – ends aligned as
indicated.
1
Replace the battery compartment lid.
2
3
Using the Remote Control
Point the remote control at the DVD Player’s remote sensor
(see page 16) when using the remote control to operate the
DVD Player.
Do not put objects between the remote control and the
DVD Player.
Recycling Guidelines/Battery Safety
●
●
Your new product and its packaging contain materials
that can be recycled and reused. Specialized companies can recycle your product to increase the amount
that needs to be properly disposed. Your product
uses batteries that should not be thrown away when
depleted but should be disposed of as small chemical
waste. Please find out about the local regulations on
disposal of your old product, batteries, and packaging
whenever you replace existing equipment.
Battery Usage CAUTION - To prevent battery leakage that may result in bodily injury or damage to the
unit:
• Install ALL batteries correctly, with the + and markings on the battery aligned as indicated on the
unit;
• Do not mix batteries, for example, old with new or
carbon with alkaline; and
• Remove batteries when the unit will not be used
for a long time.
MDV410/430 2/7/02 11:18 AM Page 8
8 Hookups
Depending on your TV and other equipment you wish to connect, there are various
ways you could connect the DVD Player. Use only one of the connections described
in the following pages.
Before you begin...
●
Refer to the manuals of your TV, Stereo or other devices as necessary. Note the
style of jacks and connectors on the other equipment. Determine how to
choose different Audio and Video In channels on your other equipment so you
can see and hear the DVD Player on the TV, Stereo, etc.
●
Disconnect all equipment from the power outlets. Connect the equipment
to the power outlets only after you have finished hooking up everything.
Never make or change connections with equipment connected to the
power outlet.
Determining the best possible connection...
Your hookup will be determined primarily by feature availability of your existing
equipment. However, the following guidelines describe which options have the best
picture and sound quality.
COMPONENT VIDEO OUT jacks provide the best picture quality.
These are available on the MDV430 only.
Use the S-VIDEO OUT jack for excellent picture quality.
Use the yellow VIDEO OUT jack for good picture quality.
If your TV only has an RF-style jack, usually labelled Antenna In or
75 ohm, you will need an RF adapter in order to connect the DVD
Player to the TV. Ask your electronics retailer for details. The DVD picture still will exceed the quality of videotapes and other analog recordings.
Digital audio connections provide the clearest sound. Connect the DVD
Player’s DIGITAL AUDIO OUT COAXIAL jack to your Stereo for the best
sound quality.
If digital connections are not possible, connect the DVD Player’s red and white
AUDIO OUT jacks to the Audio In jacks of your Stereo or TV.
Remember...
●
Connect the DVD Player directly to the TV. For example, do not connect the
DVD Player to a VCR, then connect the VCR to a TV. This type of connection may distort the picture and sound. Also, your VCR might have the copy
protection system, which could further distort the DVD image.
●
Set the TV to the correct Video In channel. Such channels may be called
AUX or AUXILIARY IN, AUDIO/VIDEO or A/V IN, EXT1 or EXT2 or
External In, etc. These channels often are located near channel 00. See your
TV owner’s manual for details. Or, keep changing channels at the TV until
you see the DVD logo or DVD playback on the TV screen. (The DVD
Player power must be on.)
●
Set the Stereo to the correct channel or “source” mode.
●
Do not connect the DVD Player’s AUDIO OUT jacks to the PHONO IN
jack of your Stereo.
●
Depending on your connection, you may need to purchase additional cables.
●
You only need one audio connection and one video connection.
●
If you do not connect the DVD Player to a Dolby Digital-compatible Stereo, set
DOLBY DIGITAL to OFF on the DVD Player. Details are on pages 11 and 39.
Playing a Disc when the settings are wrong could distort the sound or damage
the speakers.
Once you determine the best option, find your choice on pages 9-13.
Follow the specific steps for the hookup you chose.
MDV410/430 2/7/02 11:18 AM Page 9
Hookups (cont’d) 9
Connecting the DVD Player to a TV only
TV has AUDIO (red and white) and VIDEO (yellow) IN jacks
Y
Cr
VIDEO
OUT
Cb
DIGITAL AUDIO OUT
PCM/MULTICHANNEL
COAXIAL
R
COMPONENT
VIDEO OUT
L
AUDIO OUT
S-VIDEO
OUT
1
L/MONO
AUDIO
R
VIDEO
in
LEFT AUDIO IN
1 2
RIGHT AUDIO IN
VIDEO IN
Back of TV
(example only)
1
Connect the supplied red and white audio cables to the red and white
AUDIO OUT jacks on the DVD Player and to the red and white
AUDIO IN jacks on the TV, matching the cable colors to the jack colors.
2
3
Connect the supplied yellow video cable to the VIDEO OUT jack on
the DVD Player and to the VIDEO IN jack on the TV.
4
Connect the DVD Player’s power cord to a power outlet.
Press the POWER y button to turn on the DVD Player.
You should see the DVD logo on the TV screen. If you do not, check your connections and make sure the TV is set to the correct Audio/Video In channel.
Connect the TV’s power cord to a power outlet.
Turn on the TV and set it to the Audio/Video In channel, which also
may be referred to as A/V In or Auxiliary In. This channel usually is near channel 00. See your TV owner’s manual for details.
MDV410/430 2/7/02 11:18 AM Page 10
10 Hookups (cont’d)
Connecting the DVD Player to a TV only
TV has AUDIO (red and white) and S-VIDEO IN jacks
Y
Cr
VIDEO
OUT
Cb
DIGITAL AUDIO OUT
PCM/MULTICHANNEL
COAXIAL
1
L/MONO
AUDIO
R
VIDEO
in
1
R
COMPONENT
VIDEO OUT
L
AUDIO OUT
S-VIDEO
OUT
2
LEFT AUDIO IN
RIGHT AUDIO IN
S-VIDEO IN
Back of TV
(example only)
1
Connect the supplied red and white audio cables to the red and white
AUDIO OUT jacks on the DVD Player and to the red and white
AUDIO IN jacks on the TV, matching the cable colors to the jack
colors.
2
3
4
Connect an S-Video cable (not supplied) to the S-VIDEO OUT jack
on the DVD Player and to the S-VIDEO IN jack on the TV.
Connect the TV’s power cord to a power outlet.
Turn on the TV and set it to the S-VIDEO IN channel. This channel may
be near channel 00. See your TV owner’s manual for details.
Connect the DVD Player’s power cord to a power outlet.
Press the POWER y button to turn on the DVD Player.
You should see the DVD logo on the TV screen. If you do not, check your connections and make sure the TV is on the correct S-Video In channel.
MDV410/430 2/7/02 11:18 AM Page 11
Hookups (cont’d) 11
Connecting to a TV and a Stereo that is Dolby Digital or MPEG compatible
Some Discs are recorded in a 5.1 channel Dolby Digital Surround format. These Discs will sound best if
you connect the DVD Player to a Stereo that has Dolby Digital.
●
Set DOLBY DIGITAL to ON if you connect the Player to a Dolby Digital-compatible Stereo. Details
are on page 39.
●
If you play an MPEG audio disc and connect the Player to an MPEG-compatible Stereo, set MPEG to
ON. Details are on page 39.
●
Select 5.1 channel Dolby Digital Surround sound if available in the DVD’s menu.
●
This DVD Player does not support the Digital Theater System (DTS).
DVD Player
Y
Cr
VIDEO
OUT
Cb
DIGITAL AUDIO OUT
PCM/MULTICHANNEL
R
COMPONENT
VIDEO OUT
L
Back of TV
(example only)
VIDEO
1
L/MONO
Back of Stereo
(example only)
COAXIAL DIGITAL
AUDIO IN
1
COAXIAL
AUDIO OUT
S-VIDEO
OUT
2
AUDIO
R
VIDEO IN
1
2
Connect a coaxial digital audio cable (not supplied) to the COAXIAL
jack on the DVD Player and to the COAXIAL DIGITAL AUDIO IN
jack on the Stereo.
3
4
Plug in the Stereo’s power cord. Turn on the Stereo and select the
Auxiliary IN station. During Disc playback, you will adjust the volume at the
Stereo. See your Stereo owner’s manual for details.
5
Connect the supplied yellow video cable to the yellow VIDEO OUT
jack on the DVD Player and to the VIDEO IN jack on the TV.
You may use S-Video or Component Video (MDV430 only) if S-Video or
Component Video is available on your TV. See pages 10 and 12 for these optional
video connections. Remember, you only need one video connection between the
TV and the DVD Player.
Plug in the TV’s power cord. Turn on the TV and set it to the correct
Video In channel. During Audio CD playback, you may check the Disc status
on your TV screen. During DVD playback, you will watch the program on the
TV. See your TV owner’s manual for details.
Connect the DVD Player’s power cord to a power outlet. Press the
POWER y button to turn on the DVD Player.
You should see the DVD logo on the TV screen. If you do not, check your connections and make sure the TV is on the correct channel.
MDV410/430 2/7/02 11:18 AM Page 12
12 Hookups (cont’d)
Connecting to a TV and a Stereo
TV has Component Video In Jacks
(possible only with MVD430)
Back of TV
(example only)
Y
Cr
VIDEO
OUT
Cb
DIGITAL AUDIO OUT
PCM/MULTICHANNEL
R
COMPONENT
VIDEO OUT
L
VIDEO
1
L/MONO
AUDIO
R
in
COAXIAL
1
AUDIO OUT
S-VIDEO
OUT
2
COMPONENT
VIDEO IN
Y
AUDIO (RIGHT) IN
Cb/B-Y
AUDIO (LEFT) IN
Back of Stereo
(example only)
1
Connect the supplied red and white audio cables to the red and white
AUDIO OUT jacks on the DVD Player and to the red and white
AUDIO IN jacks on the Stereo, matching the cable colors to the jack
colors.
You can use the Digital Audio Out Coaxial connection instead if your Stereo
has a Coaxial In jack. Details are on pages 11 and 13. Remember, you only need
one audio connection.
2
3
4
Connect component video cables (not supplied) to the COMPONENT VIDEO OUT jacks on the DVD Player and to the COMPONENT VIDEO IN jacks on the TV.
5
Plug in the Stereo’s power cord. Turn on the Stereo and select the
Stereo’s Auxiliary IN station. During Disc playback, you will adjust the volume at your Stereo. See your Stereo owner’s manual for details.
Plug in the TV’s power cord. Turn on the TV and set it to the
Component Video In channel, which may be near channel 00. During
Audio CD playback, you may check the status of Audio CDs on your TV
screen. During DVD playback, you will watch the program on the TV. See your
TV owner’s manual for details.
Connect the DVD Player’s power cord to a power outlet.
Press the POWER y button to turn on the DVD Player.
You should see the DVD logo on the TV screen. If you do not, check your connections and make sure the TV is on the correct Component Video In channel.
Cr/R-Y
MDV410/430 2/7/02 11:18 AM Page 13
Hookups (cont’d) 13
Connecting to a TV and a Stereo
with Digital Input jacks, Mini-Disc Deck or Digital Audio Tape Deck
●
If the Disc is recorded in 5.1 channel Dolby Digital Surround, you cannot copy the Disc in digital sound
using a Mini-Disc or Digital Audio Tape Deck.
VIDEO
1
L/MONO
AUDIO
Y
Cr
VIDEO
OUT
Cb
DIGITAL AUDIO OUT
PCM/MULTICHANNEL
1
COAXIAL DIGITAL
AUDIO IN
Back of Stereo
(example only)
COAXIAL
R
COMPONENT
VIDEO OUT
L
AUDIO OUT
S-VIDEO
OUT
R
in
Back of TV
(example only)
VIDEO IN
2
1
2
Connect a coaxial digital audio cable (not supplied) to the COAXIAL
jack on the DVD Player and to the COAXIAL DIGITAL AUDIO IN
jack on the Stereo.
3
4
Plug in the Stereo’s power cord. Turn on the Stereo and select the
Auxiliary IN station. During Disc playback, you will adjust the volume at the
Stereo. See your Stereo owner’s manual for details.
5
Connect the supplied yellow video cable to the yellow VIDEO OUT
jack on the DVD Player and to the VIDEO IN jack on the TV.
You may use S-Video or Component Video (MDV430 only) if S-Video or
Component Video is available on your TV. See pages 10 and 12 for these optional
video connections. Remember, you only need one video connection between the
TV and the DVD Player.
Plug in the TV’s power cord. Turn on the TV and set it to the correct
Video In channel. During Audio CD playback, you may check the status of
the Disc on your TV screen. During DVD playback, you will watch the program
on the TV. See your TV owner’s manual for details.
Plug in the DVD Player’s power cord. Press the POWER y button to
turn on the DVD Player. You should see the DVD logo on the TV screen .
If you do not, check your connections and make sure the TV is on the correct
channel.
MDV410/430 2/7/02 11:18 AM Page 14
14 Remote Control Buttons
OPEN/CLOSE A Button
Press to open or close the Disc tray.
A-B REPEAT Button
Press to set up A-B Repeat Play, which repeatedly plays a specific
segment of a Disc. Details are on page 27.
REPEAT Button
Press to repeat playback of the current Disc or Track (Audio
CD) or a Title or Chapter (DVD). Details are on page 26.
POWER y Button
Press to turn the power on and off. P-ON or P-OFF appears
briefly on the display panel of the MDV430. The red POWER
light appears on the front of the MDV410 when the power is on.
POWER
REPEAT
A-B
SKIP
DISPLAY
OPEN/
CLOSE
PAUSE
DISPLAY Button
Press to see the current status of the Disc on the TV screen
during playback. Press repeatedly to remove the status display.
Details are on page 35.
Number Buttons
Press to directly select a Track (Audio CD) for playback.
Details are on page 24.
Use the Number buttons to program Tracks (Audio CD)
for playback. Details are on page 28.
CLEAR Button
Press to erase incorrect information when setting up features.
MENU Button
Press to display the Disc menu. Details are on pages 5 and 20.
SETUP Button
When Disc playback is stopped, press to access or remove the
DVD Player’s Setup menu.
Arrow Buttons
Press to select an item in the DVD Player’s Setup
menu or in the Disc menu.
MARKER Button
Press to set a Marker, which will give you quick access to points
on a Disc that you select. Details are on page 38.
ZOOM Button
Press to enlarge the DVD picture. Details are on page 23.
MODE Button
When playback is stopped, press to set up programmed or random playback for an Audio CD or MP3 files.
Details are on pages 28-29.
During DVD playback, press to set up the black level setting or
TruSurround setting. Details are on page 44.
SEARCH MODE Button
Press to access or remove the Search display, which allows you
to go directly to a specific Title/Chapter/Track/Time.
Details are on pages 24-25.
AUDIO
1
2
3
4
5
6
7
8
9
SUBTITLE
ANGLE
SEARCH
MODE
CLEAR
0
+10
TITLE
MENU
MODE
ZOOM
OK
SETUP
RETURN
MARKER
MDV410/430 2/7/02 11:18 AM Page 15
Remote Control Buttons (cont’d) 15
Pause F Button
Press to pause Disc playback. Details are on page 21. Press
repeatedly to advance the DVD picture step by step (or one
frame at a time). Details are on page 21.
SKIP G and H Buttons
Press to skip Chapters or Tracks. Details are on page 24-25.
Play B Button
Press to begin Disc play.
Reverse h Button
Press to view the picture in fast reverse motion (DVD) or to
reverse playback of an Audio CD. Details are on page 22.
POWER
REPEAT
A-B
SKIP
DISPLAY
OPEN/
CLOSE
PAUSE
Stop C Button
Press to stop Disc play.
Fast Forward g Button
Press to fast forward the Disc. Details are on page 22.
On a DVD, press the Pause F button, then press the Fast
Forward g button to begin slow motion playback. Press
the Fast Forward g button repeatedly to change the forward speed of slow motion. Details are on page 23.
AUDIO
1
2
SUBTITLE
4
5
6
7
8
9
ANGLE
SEARCH
MODE
CLEAR
0
OK Button
Press to select, change, or confirm a setting in
the DVD Player’s Setup menu.
Press to select a feature in the DVD Disc menu.
RETURN Button
Press to return to the previous DVD Player Setup menu or to
remove the Setup menu from the TV screen.
ANGLE Button
Press to view the picture from a different angle (if available).
Press to choose one of the available angles.
Details are on page 34.
SUBTITLE Button
Press to select a language for the subtitles (among those
available) or to turn off the subtitles. Details are on page 33.
AUDIO Button
Press to choose one of the audio languages available on a DVD
or to choose a Stereo sound mode during Audio CD playback.
Details are on page 32.
+10
TITLE
MENU
TITLE Button
Press to display the Title menu of the DVD, if available.
Details are on page 20.
3
MODE
ZOOM
OK
SETUP
RETURN
MARKER
MDV410/430 2/7/02 11:18 AM Page 16
16 Front Panel
STOP C Button
Press to stop Disc playback.
Details are on page 19.
PLAY B Button
Press to start or resume
Disc playback. Details are
on page 19.
Disc tray
Insert a Disc here.
OPEN/CLOSE A Button
Press to open or close the
Disc tray.
Details are on page 19.
P3
OPEN/CLOSE
OPEN
CLOSE
MP3 CD PLAYBACK
G
H
SKIP/SEARCH
SKIP
SEARCH
Remote Sensor
Receives a signal from your remote
control so you can operate your
DVD Player from a distance.
POWER y Button
Press to turn the DVD Player’s power
on and off. Details are on page 19.
PAUSE F Button
Press to pause Disc
playback. Press repeatedly to advance DVD
playback one frame at
a time. Details are on
page 21.
SKIP/SEARCH
j / G Buttons
Press to go to previous or subsequent
Tracks or Chapters.
Press and hold for
about three seconds
for a fast forward
or reverse search.
MDV410/430 2/7/02 11:18 AM Page 17
Display Panel 17
MDV430
Display with Dimmer
Messages about current DVD Player operations appear here. See Display Messages below.
You can adjust the brightness of the display.
Details are on pages 40-41.
P3
OPEN/CLOSE
H
MP3 CD PLAYBACK
G
SKIP/SEARCH
DVD: Lights when a
DVD is in the tray and
ready for playback.
TITLE
REPEAT: Appears during
Repeat Playback, along with
A-B, TITLE, CHP, or TRK.
Details are on pages 26-27.
CHP. TRK.
CD: Lights when an
Audio CD is in the tray
and ready for playback.
REPEAT
A–B
B: Appears during Disc
playback.
Displays the elapsed playing
time of the current Title or
Track. Briefly displays Title,
Chapter, or Track numbers.
F : Appears when
play is paused.
Display Messages (MDV430)
Power is turning on.
Tray is closing.
Appears after the disc tray closes if the tray is empty, if
there is an error reading the disc, or if an unacceptable
disc is installed.
Disc is loading.
Tray is opening or is open.
Power is turning off.
MDV410
POWER Light
This red light appears
when the power is on.
POWER
PLAY
PLAY Light
This green light appears
during Disc playback.
DISC IN
DISC IN Light
This green light appears when
a disc is in the DVD Player.
MDV410/430 2/7/02 11:18 AM Page 18
18 Rear Panel
Y Cr Cb COMPONENT VIDEO OUT
Jacks (MDV430 only)
Connect optional component video cables
here and to the component Video In jacks
of a television. Details are on page 12.
COAXIAL Jack
Connect an optional audio coaxial
digital cable here and to the coaxial
digital Audio In jack of a stereo.
Details are on pages 11 and 13.
S-VIDEO OUT Jack
Connect an optional S-Video cable here
and to the S-Video In jack of a television.
Details are on page 10.
Y
Cr
VIDEO
OUT
Cb
DIGITAL AUDIO OUT
PCM/MULTICHANNEL
COAXIAL
R
L
AUDIO OUT
AC Power Cord
Connect to a standard AC
outlet to supply power to
the DVD Player.
AUDIO OUT Jacks
Connect the supplied red and white
audio cables here and to the Audio In
jacks of a television or stereo. Match
the cable colors to the jack colors.
Details are on pages 9, 10, and 12.
COMPONENT
VIDEO OUT
S-VIDEO
OUT
VIDEO OUT Jack
Connect the yellow video cable
(supplied) here and to the TV’s
Video In jack. Details are on
pages 9, 11, and 13.
Helpful Hint
• You only need one audio connection and one video connection, so
you will not have a cable connected to every jack. For example, if you are using the S-VIDEO
OUT jack, you will not use the
yellow VIDEO OUT jack or the Y
Cr Cb COMPONENT VIDEO
OUT jacks.
MDV410/430 2/7/02 11:18 AM Page 19
Playing a Disc 19
DVD
AUDIO CD
2,4
Before you begin, turn on the power of the TV, stereo, and
any other equipment connected to the DVD Player. Make
sure the TV and the stereo (if applicable) are set to the correct channel. Details are on pages 8-13.
1
Press POWER to turn on the DVD Player.
P-ON will appear briefly on the display panel of the
MDV430. The red POWER light will appear on the
front of the MDV410 when the power is on.
1
5
POWER
REPEAT
SKIP
DISPLAY
1
A-B
OPEN/
CLOSE
PAUSE
AUDIO
2
3
SUBTITLE
2
3
Press OPEN/CLOSE A to open the Disc tray.
4
5
6
7
8
9
ANGLE
SEARCH
MODE
CLEAR
0
MENU
Place a Disc into the tray. Make sure the Disc is
sitting properly in the recessed groove of the tray.
Some DVDs are recorded on both sides. Make sure
the side you want to play is facing up. Or, if the DVD
is recorded on only one side, place the Disc in the
tray with the label facing up (shiny side facing down).
+10
TITLE
MODE
RETURN
MARKER
ZOOM
OK
SETUP
Helpful Hints
4
Press OPEN/CLOSE A to close the tray. Disc
playback may start automatically. Or, if the DVD has
a menu, the menu may appear on the screen instead.
Details are on page 20.
With some Audio CDs, playback will not begin until
you press Play B.
To search forward or backward during playback, see
page 22.
5
Press Stop C to stop playback.
Remember, this DVD Player
will play only certain Discs.
See page six for details.
• An “X” may appear in the top
right corner of the TV screen
when you try a feature. This
means either the feature you tried
is not available on the Disc, or the
DVD Player can not access the
feature at this time. This does not
indicate a problem with the DVD
Player.
• If a Disc is dirty or has scratches,
the pictures may appear distorted
and playback may stop. In such
cases, remove the Disc and turn
off the DVD Player. Unplug the
power cord, then reconnect it to
the power outlet. Clean the Disc,
then turn on the DVD Player
again and reinsert the Disc for
playback.
• If a Disc has multiple layers, the
picture may freeze occasionally.
This happens when the first layer
switches to the second layer. This
is not a malfunction.
MDV410/430 2/7/02 11:18 AM Page 20
20 Menus
DVD
DVD Disc Menus
Some DVDs contain menus that describe the contents of
the Disc or allow you to customize Disc playback. For
example, the menu may offer choices for subtitle languages,
director’s commentary, or soundtrack playback.
To use the DVD menu and select playback features, follow
these steps.
POWER
REPEAT
AB
SKIP
DISPLAY
CLOSE
PAUSE
AUDIO
1
2
1
Press MENU. The DVD’s main menu will appear.
2
3
SUBTITLE
4
5
6
7
8
9
ANGLE
Press o p s B to select an item, then press
OK. Continue this process to set up all the features
you wish to see on the Disc or to start playback.
SEARCH
MODE
CLEAR
+10
0
1
MENU
TITLE
MODE
RETURN
MARKER
ZOOM
OK
SETUP
2
Title Menu
Some DVDs have a Title Menu, which lists the Titles available on the Disc. Use the Title Menu to start playback at a
specific Title.
1
While playback is stopped, press TITLE. The
Title Menu will appear.
If a Title menu is not available, the “X” may appear
on the TV screen. If the DVD only has a main menu,
the main menu may appear when you press the
TITLE button.
POWER
REPEAT
SKIP
DISPLAY
2
OPEN/
CLOSE
PAUSE
AUDIO
1
2
4
5
7
8
CLEAR
Press o p s B to select the desired Title,
then press OK.
Playback will begin at the Title you selected.
A-B
0
MENU
3
1
SUBTITLE
6
ANGLE
9
SEARCH
MODE
+10
TITLE
MODE
RETURN
MARKER
ZOOM
OK
SETUP
2
Helpful Hints
• Menus may vary among Discs.
Refer to the literature accompanying the Disc for details.
• Not all DVDs have Title menus.
• Some DVDs may refer to
Chapters as “scenes.” Some
DVDs may refer to the Title
Menu as the “scene index.”
• The TITLE button may not be
active with all DVDs.
MDV410/430 2/7/02 11:18 AM Page 21
Paused and Step-by-Step Playback, Resume On 21
DVD
AUDIO CD
Paused and Step-by-Step Playback
1
During playback of a DVD or Audio CD, press
PAUSE F. Playback will pause and the sound will be
mute.
During DVD playback, press PAUSE F repeatedly to
advance the picture one frame at a time.
POWER
REPEAT
A-B
SKIP
DISPLAY
OPEN/
CLOSE
PAUSE
2
1
AUDIO
1
2
3
SUBTITLE
2
Press Play B to resume playback.
4
5
6
7
8
9
ANGLE
SEARCH
MODE
CLEAR
+10
0
TITLE
MENU
MODE
ZOOM
OK
RETURN
SETUP
DVD
AUDIO CD
POWER
REPEAT
A-B
OPEN/
CLOSE
Resume On
You may choose to resume playback from the point at
which playback stopped last.
1
Press Stop C during playback. In a few seconds,
the following Resume message will appear on the TV
screen.
SKIP
DISPLAY
PAUSE
2
1
AUDIO
1
2
3
4
5
6
7
8
9
SUBTITLE
ANGLE
SEARCH
MODE
CLEAR
0
Press 'PLAY' to play from here.
To play the beginning, press 'STOP' first
and then 'PLAY'.
MENU
+10
TITLE
MODE
RETURN
MARKER
ZOOM
OK
SETUP
2
Press Play B. In a few seconds, playback will
resume from the point at which playback stopped
last.
Helpful Hints
• To cancel resume playback and
start playing the Discs from the
beginning, press Stop C a second time while playback is
stopped.
The C will appear briefly at the
top right corner of the TV
screen. Press Play B to play the
Disc from the beginning.
• Resume On is retained when you
turn off the DVD Player’s power.
When you turn on the power
again later, RESUME ON will
appear on the TV screen when
the Disc is loaded and ready for
playback. Press Play B to
resume play at the point you last
stopped it.
• Opening the disc tray will cancel
Resume On.
MDV410/430 2/7/02 11:18 AM Page 22
22 Fast Forward/Reverse Search
DVD
1
AUDIO CD
During playback, press Fast Forward g or
Reverse h on the remote control.
● On a DVD, pressing Fast Forward g or Reverse
h repeatedly will forward or reverse the picture at
twice, eight times, 30 times, or 60 times the normal
playback speed. Sound will be mute.
Use Fast Forward g for a forward search. Press
Reverse h for a reverse search.
Press Reverse E
during DVD playback.
Press Fast Forward D
during DVD playback.
Ex2
Dx2
POWER
REPEAT
SKIP
DISPLAY
2
Ex30
Dx30
Ex60
Dx60
PAUSE
3
SUBTITLE
4
7
5
6
8
9
1
0
Dx8
2
OPEN/
CLOSE
AUDIO
1
CLEAR
Ex8
A-B
MENU
ANGLE
SEARCH
MODE
+10
TITLE
MODE
RETURN
MARKER
ZOOM
OK
●
On an Audio CD, you may search forward or
backward at 16 times the normal playback speed
(hx16 or gx16). Pressing the Fast Forward g
or Reverse h button repeatedly will not affect the
speed of the search. Sound will be intermittent during
searching on an Audio CD.
Use Fast Forward g for a forward search. Press
Reverse h for a reverse search.
Press the Reverse E button during Audio CD playback.
Ex16
Press the Fast Forward D button during Audio CD playback.
Dx16
2
Press Play B to return to normal playback.
SETUP
MDV410/430 2/7/02 11:18 AM Page 23
Slow Motion, Zoom 23
DVD
Slow Motion
1
2
Press PAUSE F during playback.
POWER
REPEAT
SKIP
DISPLAY
Press Fast Forward D. Slow motion playback will
begin. Press Fast Forward D repeatedly during slow
motion playback to vary the speed of slow motion
playback. You may play the DVD at 1/16, 1/8, or 1/2
the normal playback speed.
A-B
OPEN/
CLOSE
PAUSE
3
1
2
AUDIO
1
2
3
SUBTITLE
Press Fast Forward D while play is paused.
4
5
6
7
8
9
x1/16
ANGLE
SEARCH
MODE
CLEAR
+10
0
Press Fast Forward D again.
MENU
TITLE
MODE
RETURN
MARKER
x1/8
ZOOM
OK
SETUP
Press Fast Forward D again.
x1/2
Press Fast Forward D again.
3
Press Play B to return to normal playback.
DVD
Zoom
POWER
You can enlarge the DVD picture during playback or when
you have paused the picture. The picture can be two or four
times larger than normal.
1
REPEAT
SKIP
DISPLAY
Press ZOOM during playback or when play is
paused. The picture will appear twice as large. Press
ZOOM again to make the picture four times as large
as normal.
A-B
OPEN/
CLOSE
PAUSE
AUDIO
1
2
3
1,3
SUBTITLE
4
5
7
8
6
ANGLE
2
While the picture is enlarged, press o p s B
to move the zoomed image up, down, left, or
right. To remove the C from the lower right screen
corner, press OK.
ZOOM [x2]
ZOOM [x4]
ZOOM [OFF]
0
MENU
2
9
SEARCH
MODE
CLEAR
+10
TITLE
MODE
RETURN
MARKER
ZOOM
OK
SETUP
Helpful Hints
3
To return the picture to its normal size, press
ZOOM so that ZOOM [OFF] appears briefly in
the top right corner of the TV screen.
• The sound will be mute when
playback is paused and during
slow motion playback.
• You can not play the DVD in
reverse slow motion.
MDV410/430 2/7/02 11:18 AM Page 24
24 Specific Track Playback
AUDIO CD
There are three ways to begin playback on an Audio CD at
a specific Track. You may use the Number buttons, the
SEARCH MODE button, or the SKIP H G buttons.
A
B
Using the Number Buttons to Select a Track
Press the Number buttons to enter the
desired Track number. Playback will start at the
selected Track. You may select a Track with the
Number buttons during playback or when playback is
stopped.
For single-digit Tracks (1-9), press a single Number
button. For example, to play Track three, press the
Number 3 button.
For Tracks 10 and above, press the +10 button once
so the Track Search display (TR) appears on the TV
screen. Then press the Number button of the first
digit, then press the Number button of the second
digit.
For example, to play Track 26, press the +10 button,
then press the Number 2 button, then press the
Number 6 button.
If you enter a Track number that is not available on
the Disc, playback will not begin (or the current
Track will continue to play). An “X” will appear in
the top right corner of the TV screen.
REPEAT
POWER
C
A-B
SKIP
DISPLAY
OPEN/
CLOSE
PAUSE
AUDIO
1
2
3
SUBTITLE
A-B
4
5
6
7
8
9
ANGLE
SEARCH
MODE
CLEAR
0
+10
TITLE
MENU
MODE
B
ZOOM
OK
SETUP
RETURN
MARKER
Using SEARCH MODE to Select a Track
Press SEARCH MODE once so the Track
Search display appears (TR). Within 30 seconds, press the Number buttons to select the
Track number you desire. Playback will begin
at the selected Track.
For a single-digit Track (1-9), enter a zero first. For
example, to play Track 5, press 0, 5.
For Tracks numbered 10 or above, use the Number
buttons. For example, for Track 15, press the
Number button 1, then the Number button 5. (You
do not have to use the +10 button.)
TR: _ /26
C
Using SKIP H G to Select a Track
Press SKIP G during playback to skip the
current Track and move to the next Track.
Press SKIP G repeatedly to skip subsequent
Tracks.
Press SKIP H during playback to return to
the beginning of the current Track. Press SKIP
H repeatedly to go to previous Tracks.
Helpful Hints
• The SKIP H / G buttons are
not active when playback is
stopped.
• You can not use SKIP H / G
to go from the last Track on the
disc to the first Track.
MDV410/430 2/7/02 11:18 AM Page 25
Specific Title/Chapter Playback, Specific Time Playback 25
DVD
Specific Title/Chapter Playback
1
2
3
POWER
Press SEARCH MODE so the Title/Chapter
Search display appears on the TV screen.
Within 30 seconds, press o or p to select the
TT (Title) space, then press the Number buttons to enter the Title number. CH (Chapter)
will be selected next automatically.
While CH is selected and within 30 seconds,
press the Number buttons to enter the
Chapter number. The DVD Player will begin playback at the selected Chapter.
A-B
SKIP
DISPLAY
OPEN/
CLOSE
PAUSE
AUDIO
2-3
1
2
3
SUBTITLE
4
5
6
7
8
9
ANGLE
SEARCH
MODE
CLEAR
0
2
+10
TITLE
MENU
TT:4 / 4
CH:12/17
DVD
REPEAT
MODE
1
ZOOM
OK
RETURN
SETUP
MARKER
AUDIO CD
Specific Time Playback
AUDIO
1
During playback, press SEARCH MODE
repeatedly so the Time Search display appears on
the TV screen.
TIME –:–:–
TOTAL 1:29:00
1
2
3
SUBTITLE
2
4
5
6
7
8
9
ANGLE
SEARCH
MODE
CLEAR
0
+10
TITLE
MENU
MODE
1
ZOOM
OK
SETUP
2
Within 30 seconds, use the Number buttons to
enter the elapsed playing time at which you
want playback to begin. Within a few seconds,
playback will start at the specified time.
● Example: 1 hour, 23 minutes and 30 seconds
1→2→3→3→0
● Make sure the time you enter is within the total
time of the current Title or Track. If it is not, you
must re-enter a valid time.
● If you make a mistake, press CLEAR. Then, enter
the correct information.
RETURN
MARKER
Helpful Hints
• Title/Chapter playback is not
available with some DVDs.
• Press SKIP G during DVD
playback to skip the current
Chapter and move to the next
Chapter. Press SKIP G repeatedly to skip subsequent
Chapters. Press SKIP H during
DVD playback to return to the
beginning of the current Chapter.
Press SKIP H repeatedly to go
to previous Chapters.
MDV410/430 2/7/02 11:18 AM Page 26
26 Repeat Playback
DVD
1
AUDIO CD
Press REPEAT repeatedly until the repeat
mode you want appears in the top left corner
of the TV screen.
● On a DVD, repeatedly pressing REPEAT during
playback lets you choose Repeat Chapter, Repeat
Title, or Repeat Off.
● Selecting a new Chapter or Title will cancel repeat
playback on a DVD.
REPEAT
[OFF]
1
POWER
REPEAT
A-B
SKIP
DISPLAY
OPEN/
CLOSE
PAUSE
AUDIO
1
2
3
SUBTITLE
4
5
6
7
8
9
ANGLE
Regular playback will occur.
SEARCH
MODE
CLEAR
0
MENU
+10
TITLE
MODE
RETURN
MARKER
ZOOM
OK
REPEAT
[CHAPTER]
REPEAT
[TITLE]
SETUP
The current Chapter plays
over and over.
The entire current Title plays
over and over.
●
On an Audio CD, repeatedly pressing REPEAT during playback lets you choose Repeat Track, Repeat
All, or Repeat Off.
● Selecting a new Track will cancel repeat playback
on an Audio CD.
REPEAT
[OFF]
REPEAT
[TRACK]
REPEAT
[ALL]
Repeat playback is cancelled.
The current Track will play
repeatedly.
The entire Audio CD will
play repeatedly.
Helpful Hint
• Repeat playback is not available
with some Discs.
MDV410/430 2/7/02 11:18 AM Page 27
A-B Repeat Playback 27
DVD
AUDIO CD
2-4
You can play a section of an Audio CD or DVD repeatedly.
Follow these steps to set up the section that you want to
play over and over.
1
2
Press Play B to play the Disc to the point at
which you want repeated playback to begin.
Press A-B REPEAT to set the starting point
(A). If you make a mistake, press CLEAR. This will
erase point A and let you start over. REPEAT [OFF]
will appear briefly on the TV screen.
REPEAT
[A – ]
POWER
1
REPEAT
A-B
SKIP
DISPLAY
OPEN/
CLOSE
PAUSE
AUDIO
1
2
3
SUBTITLE
4
5
6
7
8
9
ANGLE
SEARCH
MODE
CLEAR
0
MENU
+10
TITLE
MODE
RETURN
MARKER
ZOOM
OK
SETUP
3
Play the Disc to the point at which you want
repeated playback to end, then press A-B
REPEAT again. Within a few seconds, the section
will begin to play. The segment will play over and
over until you cancel the A-B Repeat feature.
REPEAT
[A–B]
4
To cancel A-B Repeat Playback, press A-B
REPEAT so REPEAT [Off] appears on the TV
screen. Regular Disc playback will resume.
Helpful Hints
• A-B Repeat playback is not available with some DVDs.
• With DVDs, the entire A-B
repeat section must be within a
single Title. The DVD Player will
automatically set the end point
(B) at the end of the Title if you
do not set “B” before the end of
the Title is reached.
• With Audio CDs, the A-B repeat
section must be within a single
Track. The DVD Player will automatically set the end point (B) at
the end of the Track if you do
not set “B” before the end of the
Track is reached.
• Point B must be later on the
Disc than Point A.
• You can not set up A-B Repeat
Playback during Repeat playback
(as described on page 26).
MDV410/430 2/7/02 11:18 AM Page 28
28 Programmed Playback
AUDIO CD
You may determine the order in which Tracks will play. The
order that you set is called the Program. To set up programmed playback, follow these steps.
POWER
REPEAT
SKIP
DISPLAY
1
While playback is stopped, press MODE. The
Program screen will appear.
PROGRAM
TIME
0:00:00
1/1
A-B
OPEN/
CLOSE
PAUSE
4
AUDIO
1
--
2
3
SUBTITLE
4
5
6
7
8
9
ANGLE
START: PLAY
RANDOM: MODE
DELETE: CLEAR
EXIT: RETURN
SEARCH
MODE
CLEAR
0
MENU
2
Press the Number buttons to enter the number of the first Track you want to play.
● Press CLEAR to erase the last Track in the
Program.
● Enter single-digit Tracks with a single Number button. For example, for Track three, press the Number
3 button.
● For Tracks 10 and above, press the +10 button,
then the Number button for the first digit, then the
Number button for the second digit. For example, to
play Track 26, press the +10 button, then press the
Number 2 button, then press the Number 6 button.
● The first Program screen can display 50 Tracks.
Press p to go to the next page, which can display 49
Tracks. Press o to return to the first Program
screen.
PROGRAM
TIME 2:07:43
1/1
02 05 07 04 10 14 06 15 21 08
20 28 10 25 35 12 30 42 11 34
49 16 40 58 18 45 63 01 03 _
START: PLAY
RANDOM: MODE
DELETE: CLEAR
EXIT: RETURN
3
Repeat step 2 until you have selected all the
Tracks you wish to play in the Program. Make
sure the Track numbers you enter are available on
the Audio CD. If you enter an incorrect Track number, you must re-enter a valid Track number.
4
Press Play B.
The Tracks will play in the order in which you programmed them. The Program will play once. Turning
off the Player or opening the disc tray will erase the
Program.
+10
TITLE
MODE
RETURN
MARKER
ZOOM
OK
SETUP
1
2-3
Helpful Hints
• You can not use the Number buttons or SEARCH MODE to select
another Track during programmed playback. You may use
the SKIP G / H buttons to
select other Tracks within the
Program. Details are on page 24.
• You can not combine random
playback with programmed playback.
• You may play a Program or a
Track within a Program repeatedly. During programmed playback,
press REPEAT so REPEAT [ALL]
or REPEAT [TRACK] appears. The
entire Program or the current
Track will play over and over.
• You can not alter a Program during program playback.
• While the Program is playing,
press MODE to see the Program
screen. The currently playing
Track will appear in yellow. To
remove the Program screen, press
RETURN.
• A Program can have a maximum
of 99 Tracks.
MDV410/430 2/7/02 11:18 AM Page 29
Random Playback, MP3 Playback 29
AUDIO CD
POWER
REPEAT
A-B
Random Playback
You may play the Tracks of an Audio CD in Random order
instead of the order in which they are recorded (1,2,3...). To
set up Random Playback, follow these steps.
1
While playback is stopped, press MODE twice
so the RANDOM screen appears.
SKIP
DISPLAY
OPEN/
CLOSE
PAUSE
2
AUDIO
1
2
3
SUBTITLE
4
5
6
7
8
9
RANDOM
ANGLE
SEARCH
MODE
CLEAR
1
+10
0
TITLE
MODE
RETURN
MARKER
MENU
ZOOM
START:
PLAY
EXIT:
MODE
OK
SETUP
2
While the RANDOM screen appears, press
Play B. The Tracks will play in random order. After
each Track plays once, playback will stop.
MP3
MP3 Playback
1
When you put a CD-RW with MP3 files in the DVD
Player, the MP3 menu will appear on the TV screen.
While playback is stopped, press o or p to
select the Album or Track you want to play.
● If you choose a Track, press Play B or OK. The
tracks will play in the order in which they were
recorded, i.e. 1, 2, 3, starting with the Track you
selected.
● If you select an Album and press OK, the Track
selection screen will appear. Press K or L to select
the Track you want to play, then press Play B or
OK.
● Choose FIRST PLAY to start play from the first
Track listed.
● Press the TITLE button to go back to the first item
on the first MP3 screen.
POWER
REPEAT
A-B
SKIP
DISPLAY
OPEN/
CLOSE
PAUSE
1
2
AUDIO
1
2
3
4
5
6
7
8
9
SUBTITLE
ANGLE
SEARCH
MODE
CLEAR
0
1
+10
TITLE
MENU
MODE
ZOOM
OK
SETUP
RETURN
1
MARKER
Helpful Hints
2
To stop playback, press Stop C .
• Folders are known as Albums; files
are known as Tracks.
• A “+” will appear at the start of
the Album name.
• If all the Tracks can not appear
on the screen at the same time,
p indicates more Tracks on the
next screen; K indicates previous
screens. The current screen number and the total number of
screens will appear on the screen.
• The player will recognize a total of
255 Albums and Tracks.
MDV410/430 2/7/02 11:18 AM Page 30
30 MP3 Display Information, MP3 Track Selection
MP3
MP3 Display Information
You can check the MP3 files during playback.
1
2
Press DISPLAY during playback. The currently
playing Track will be highlighted in yellow.
REPEAT
POWER
1-3
SKIP
DISPLAY
Press DISPLAY again.
The elapsed playing time of the current track will
appear at the top of the display.
D indicates Disc repeat
OPEN/
CLOSE
A-B
PAUSE
AUDIO
1
2
3
SUBTITLE
4
5
6
7
8
9
ANGLE
SEARCH
MODE
CLEAR
+10
0
A indicates Album (folder) repeat
MENU
TITLE
MODE
RETURN
MARKER
ZOOM
OK
T indicates Track repeat.
3
SETUP
Press DISPLAY again to remove the display.
MP3
MP3 Track Selection
1
1/15
START:
A-B
SKIP
OPEN/
CLOSE
PAUSE
2
AUDIO
1
2
3
SUBTITLE
4
5
6
7
8
9
ANGLE
1/1
+ALBUM01
TRACK11
TRACK12
TRACK13
TRACK14
SELECT: o p
REPEAT
DISPLAY
Press the SEARCH MODE button.
● The SEARCH menu will appear.
● The current Track or the Track at which play will
Resume (Resume On) will be highlighted. If Resume is
off and playback is stopped, the first Track of the Disc
will be highlighted.
ALBUM NAME
2
POWER
PLAY
Press o or p to select a Track you want to
play. Press Play B to start playing the Track.
● Press the RETURN or SEARCH MODE button to
remove the SEARCH menu.
2
2
SEARCH
MODE
CLEAR
0
+10
TITLE
MENU
MODE
1
ZOOM
OK
SETUP
RETURN
MARKER
Helpful Hints
• During playback, press the
Number buttons to select another
Track, which will begin playing
immediately. Or, press SKIP H
or G to move to previous or
subsequent Tracks.
• If the Track you chose is not available or can not be accessed, “X”
will appear in the top right corner
of the TV screen. Play may
resume at a different Track.
• Specific Time playback is not possible with MP3 files.
MDV410/430 2/7/02 11:18 AM Page 31
Random MP3 Playback, Programmed MP3 Playback, 31
MP3
Random MP3 Playback
1
POWER
Press MODE twice while playback is stopped.
PLAY
A-B
SKIP
DISPLAY
OPEN/
CLOSE
PAUSE
2
RANDOM
START:
REPEAT
MODE
EXIT:
AUDIO
1
2
3
SUBTITLE
2
4
5
6
7
8
9
ANGLE
Press Play B to play the tracks in random order.
SEARCH
MODE
CLEAR
+10
0
MENU
TITLE
MODE
RETURN
MARKER
ZOOM
OK
SETUP
1
MP3
Programmed MP3 Playback
1
While playback is stopped, press MODE. The
Program screen will appear.
POWER
PROGRAM FOLDER NAME
REPEAT
DELETE:
EXIT:
CLEAR
RETURN
OPEN/
CLOSE
4
SKIP
DISPLAY
+ALBUM01
+ALBUM02
+ALBUM03
TRACK01
TRACK02
1/2
START: PLAY
RAMDOM: MODE
A-B
1/1
PAUSE
3
AUDIO
1
2
Press o or p to select a track, then press OK
to save it in the Program. The programmed track
will appear on the right side of the Program screen.
Press o or p if necessary to see additional Tracks.
Repeat step 2 to enter all the Tracks you want.
PROGRAM - ALBUM01
TRACK01
+ALBUM11
+ALBUM12
TRACK11
TRACK12
1/2
START: PLAY
RAMDOM: MODE
3
4
1/1
TRACK11
2
3
SUBTITLE
4
5
6
7
8
9
ANGLE
SEARCH
MODE
CLEAR
0
2
MENU
+10
TITLE
MODE
RETURN
MARKER
ZOOM
OK
SETUP
1
1/1
DELETE:
EXIT:
CLEAR
RETURN
Press Play B to start programmed playback.
Press Stop C to stop playing the Program.
Helpful Hints
• Press CLEAR to delete the last
item in the Program.
• Turning off the DVD Player’s
power or opening the Disc tray
will erase the entire Program.
MDV410/430 2/7/02 11:18 AM Page 32
32 Audio Language, Stereo Sound Mode
DVD
Audio Language
The DVD Player allows you to select a language for DVDs
during playback. You can change the language only if multiple
languages are available on the DVD.
1
Press AUDIO during playback so the audio display appears at the top of the TV screen. Press
AUDIO repeatedly until you select your desired language.
POWER
REPEAT
A-B
SKIP
DISPLAY
OPEN/
CLOSE
PAUSE
AUDIO
1
2
3
SUBTITLE
AUDIO 1.ENG DolbyD 5.1CH 48k/3
4
5
6
ANGLE
7
8
9
0
+10
SEARCH
MODE
CLEAR
AUDIO 2.FRE DolbyD 5.1CH 48k/3
1
TITLE
MODE
RETURN
MARKER
MENU
ZOOM
OK
SETUP
AUDIO 3.JPN DolbyD 5.1CH 48k/3
AUDIO CD
POWER
Stereo Sound Mode
REPEAT
SKIP
DISPLAY
1
A-B
OPEN/
CLOSE
PAUSE
Press AUDIO repeatedly during playback to
choose AUDIO STEREO, AUDIO L-CH, or
AUDIO R-CH.
AUDIO STEREO
Both right and left channels
are active (stereo).
AUDIO
1
2
3
SUBTITLE
4
5
6
7
8
9
0
+10
1
ANGLE
AUDIO L-CH
Only the left channel is active.
SEARCH
MODE
CLEAR
Helpful Hints
AUDIO R-CH
Only the right channel is active.
• If a desired language is not available after pressing AUDIO several
times, the DVD does not have
that language.
• The display will disappear after
about five seconds.
• Some DVDs only allow you to
change the language in the Disc
menu.
• If you are using the COAXIAL
jack, changing the sound mode is
not applicable. Details are on
pages 11 and 13.
• For some Audio languages, three
dashes (- - -) may appear instead
of a three-letter abbreviation for
the language (ENG, FRE, etc.).
MDV410/430 2/7/02 11:18 AM Page 33
Subtitle Language 33
DVD
The DVD Player allows you to select a language for subtitles
during playback. You may select only the subtitles that are
available on the Disc.
POWER
REPEAT
SKIP
DISPLAY
1
Press SUBTITLE repeatedly to select a subtitle language. The subtitle display will appear at the
top of the TV screen. The number of available languages appears at the right of the audio display. In
this example, six languages are available (1/6). The
display will disappear after about five seconds.
A-B
OPEN/
CLOSE
PAUSE
AUDIO
1
2
3
SUBTITLE
4
5
6
7
8
9
ANGLE
SUBTITLE 1.ENG/6
SEARCH
MODE
CLEAR
0
Press SUBTITLE.
MENU
1
+10
TITLE
MODE
RETURN
MARKER
ZOOM
OK
SUBTITLE 2.FRE/6
SUBTITLE OFF
Press SUBTITLE to
select another language.
SETUP
To turn off subtitles, press
SUBTITLE or s/B repeatedly
until SUBTITLE OFF appears in
the display.
Helpful Hints
• With some DVDs, you may select a
subtitle language only in the Disc
menu.
• If the desired language does not
appear after pressing the SUBTITLE
button several times, the Disc does
not have subtitles in that language.
• The subtitles may be delayed for a
few seconds.
• For some Subtitle languages, three
dashes (- - -) may appear instead of
a three-letter abbreviation for the
language (ENG, FRE, etc.).
MDV410/430 2/7/02 11:18 AM Page 34
34 Camera Angles
DVD
Some DVDs contain scenes that were recorded from different angles. You may select a camera angle with the DVD
Player’s remote control during playback.
1
Press ANGLE repeatedly to select a different
angle. The Angle display will appear in the top left
corner of the TV screen. The number of available
angles appears at the right of the Angle display. In this
example, eight angles are available (1/8).
The Angle display will disappear after about five seconds. Playback will continue from the angle you
selected, as long as it is available.
POWER
REPEAT
A-B
SKIP
DISPLAY
OPEN/
CLOSE
PAUSE
AUDIO
1
2
3
SUBTITLE
ANGLE 1 / 8
Angle 1 of eight
available angles
4
5
6
7
8
9
ANGLE
SEARCH
MODE
CLEAR
0
MENU
ANGLE 2 / 8
Press ANGLE repeatedly
to select another angle.
+10
TITLE
MODE
RETURN
MARKER
1
ZOOM
OK
SETUP
ANGLE 8 / 8
Helpful Hints
• The current camera angle will
appear when you first press
ANGLE.
• If the Disc contains sequences
recorded from different camera
angles, the angle symbol will
appear at the top right corner of
the screen. You can change the
camera angle when the symbol
appears on the screen. ANGLE
ICON must be ON. Details are
on pages 40-41.
• The camera angle will not
change if the Disc does not contain sequences recorded from
different camera angles.
MDV410/430 2/7/02 11:18 AM Page 35
Changing The On-Screen Display 35
DVD
You can check information about the current Disc by pressing DISPLAY on the remote control.
Press DISPLAY during playback.
1
CH 7/49 0:01:46 - 0:03:27
POWER
1-4
REPEAT
A-B
SKIP
DISPLAY
OPEN/
CLOSE
PAUSE
Elapsed playing time
of the current Chapter;
remaining playing time
of the current Chapter
CH (Chapter):
Current Chapter number
/ total Chapters
AUDIO
1
2
3
SUBTITLE
2
Press DISPLAY again. If you want, you can press a
Number button now to start playing a specific Chapter.
TT
1/2
5
6
7
8
9
ANGLE
SEARCH
MODE
CLEAR
+10
0
MENU
0:00:00 - 1:23:45
TITLE
MODE
RETURN
MARKER
ZOOM
TT (Title):
Current Title number
/ Total Titles
3
4
Elapsed playing time of the
current Title; remaining playing
time of the current Title
OK
SETUP
4
Press DISPLAY again.
BIT RATE: The quantity of
information recorded on the DVD.
BIT RATE
C L0
Layer number, if applicable
L0: Layer 0 is playing
L1: Layer 1 is playing
Current Repeat setting, if active
C: Chapter repeat
T: Title repeat
A B: A-B repeat
4
Press DISPLAY or RETURN to remove the
display.
AUDIO CD
Press DISPLAY during playback.
1
TR
4/12 0:03:21 - 0:02:15
TR (Track):
Current Track number
/ total Tracks
Elapsed playing time
of the current Track;
remaining playing time
of the current Track
POWER
1-3
REPEAT
A-B
SKIP
DISPLAY
OPEN/
CLOSE
PAUSE
AUDIO
1
2
Press DISPLAY again. If you want, you can press a
Number button now to start playing a specific Track.
ALL 4/12 0:13:45 - 0:45:40
ALL:
Current track number
/ total Tracks
3
SUBTITLE
4
5
6
7
8
9
ANGLE
SEARCH
MODE
CLEAR
T
Current Repeat setting, if active
T: Track repeat
A: All repeat
A B: A-B repeat
Elapsed playing time
of the current Audio CD;
remaining playing time of
the current Audio CD
3
2
Press DISPLAY or RETURN to remove the display.
0
MENU
+10
TITLE
MODE
RETURN
MARKER
ZOOM
OK
SETUP
3
MDV410/430 2/7/02 11:18 AM Page 36
36 Parental Controls Password
Follow these steps to change your Parental Controls password. You will need a password to change the levels of the
Parental Controls and to play Discs that are locked by
Parental Controls.
1
POWER
While playback is stopped, press SETUP. The
setup screen will appear.
SET-UP
REPEAT
A-B
SKIP
DISPLAY
OPEN/
CLOSE
PAUSE
2-5
1.LANGUAGE
2.DISPLAY
3.AUDIO
4.PARENTAL
AUDIO
SELECT:
EXIT:
/
SETUP
1
SET:
OK
CANCEL: RETURN
2
3
SUBTITLE
4
5
6
7
8
9
ANGLE
2
Press the Number 4 button to select Parental.
The SET-UP PARENTAL CONTROLS PASSWORD
menu will appear.
SEARCH
MODE
CLEAR
0
+10
TITLE
MENU
SET-UP
PARENTAL CONTROLS
PASSWORD
SETUP
PARENTAL CONTROLS
PASSWORD
Please enter a 4-digit password.
----
Enter current password.
----
EXIT:
EXIT:
SETUP
CANCEL: RETURN
SETUP
MODE
ZOOM
OK
SET-UP
5
RETURN
MARKER
1,6
CANCEL: RETURN
3
Press the Number buttons to enter your fourdigit password. When doing this for the first time,
enter any four digits, then press OK. That number
will be used as the password from that point forward.
4
Press the Number 2 button to select
CHANGE.
SET-UP
PARENTAL CONTROLS
PASSWORD
Please enter a 4-digit password.
----
EXIT:
SETUP
CANCEL: RETURN
Helpful Hints
5
6
Press the Number buttons to enter your new
four-digit password, then press OK.
Press SETUP to remove the menu.
• Write down your password in
case you forget it.
• The default (factory preset)
password is 4737. If you forget
your password, press Number
buttons 4, 7, 3, 7 at step 3. The
Player immediately will ask you
to enter a new four-digit code.
Use the Number buttons to
enter a new four-digit code, then
press OK. PARENTAL LEVEL
automatically will be reset to
ALL. See page 37 to reset
PARENTAL LEVEL as you desire.
MDV410/430 2/7/02 11:18 AM Page 37
Parental Controls Levels 37
Follow these steps to set the rating level for Parental
Controls. Discs whose ratings exceed the level you set will
not play. See Helpful Hints below.
AUDIO
1
2
3
SUBTITLE
4
5
6
7
8
9
ANGLE
1
While playback is stopped, press SETUP. The
setup screen will appear.
SEARCH
MODE
CLEAR
0
MENU
+10
TITLE
MODE
RETURN
MARKER
SET-UP
ZOOM
OK
1.LANGUAGE
2.DISPLAY
3.AUDIO
4.PARENTAL
SELECT:
EXIT:
2
/
SETUP
SET:
OK
CANCEL: RETURN
1,6
PARENTAL CONTROLS
PASSWORD
Enter current password.
----
EXIT:
SETUP
CANCEL: RETURN
Press the Number buttons to enter your fourdigit password. If your entry is incorrect, press OK,
then enter the correct password as prompted by the
on-screen message.
SET-UP
PARENTAL CONTROLS
1.PARENTAL LEVEL
2.CHANGE
SELECT:
EXIT:
4
2-5
Press the Number 4 button to select Parental.
The SET-UP PARENTAL CONTROLS PASSWORD
screen will appear.
SET-UP
3
SETUP
/
SETUP
ALL
SET:
OK
CANCEL: RETURN
Press the Number 1 button to select Parental
Level.
SET-UP
PARENTAL CONTROLS
PARENTAL LEVEL
ALL
8
7 [NC-17]
6 [R]
5
SELECT:
EXIT:
/
SETUP
SET:
OK
CANCEL: RETURN
5
Press a Number button to select the level you
desire. For example, if you want to play Discs rated
PG-13, press the Number 4 button. The level you
select will appear on the screen beside PARENTAL
LEVEL in the SET-UP PARENTAL CONTROLS
screen.
6
Press SETUP to remove the menu.
RATING EXPLANATIONS
• ALL - Parental Controls is inactive.
All discs can play.
• 8 - Adult material
• 7 - NC-17 Not appropriate for
children under 17
• 6 - R - Restricted; parental
approval required for viewers
under 18.
• 4 - PG-13 - Unsuitable for children
under 13.
• 3 - PG - Parental Guidance suggested.
• 1- G - General Audience; recommended for audiences of all ages.
Helpful Hints
• When you play a Disc whose rating exceeds the level you set, a
message will appear on the
screen, indicating the Disc cannot
play. If this happens, remove the
Disc, then select a level that
allows playback. Or, select All to
turn off Parental Controls. Load
the Disc again and begin playback
as usual. Some Discs may allow
you to enter your four-digit password to begin playback. Refer to
the instructions of the Disc.
• Some DVDs are not compatible
with Parental Controls. Make sure
the DVD plays according to the
Parental Controls settings you
have made before you allow children access to the DVD Player.
• You can not change Parental Level
settings until you enter the correct
password.
MDV410/430 2/7/02 11:18 AM Page 38
38 Marker Setup Screen
AUDIO CD
DVD
Use Markers to remember your favorite places on a Disc.
To set the Markers, follow these steps. Before you begin,
play the Disc to approximately the point at which you want
to place the Marker.
AUDIO
1
2
3
SUBTITLE
4
5
6
7
8
9
ANGLE
1
During playback, press MARKER. The Marker display will appear in the top left corner of the screen.
+10
TITLE
MODE
RETURN
MARKER
OK
2,4-5
SETUP
1,5
Within 30 seconds, press s or B to select 1, 2,
3, 4, or 5. Make sure “NOT SET” appears in the display beneath the number you select.
Within 30 seconds, play the Disc to the point at
which you want to set the Marker.
When the Disc reaches the point that you want
to remember, press OK. The Title and elapsed playing time (DVD) or Track and its elapsed playing time
(Audio CD) will appear in the display.
1 2 3 4 5 AC
TT01_0:12:01
5
0
MENU
ZOOM
1 2 3 4 5 AC
NOT SET
2
3
4
SEARCH
MODE
CLEAR
1 2 3 4 5 AC
TR 05_0:00:41
To return to the Marker later, press MARKER
during playback. Press s or B to choose the
Marker you want, then press OK. Disc play will
continue from the marked point.
Helpful Hints
• Opening the disc tray or turning
off the DVD Player will erase all
the Markers.
• To erase a single Marker, press
MARKER, then press s or B to
select your desired Marker. Press
CLEAR. “NOT SET” will appear
on the Marker display. Press
RETURN or MARKER to remove
the display.
• To erase all the Markers, press
MARKER, then press B repeatedly to select “AC.” Press OK.
Press MARKER to remove the
display.
MDV410/430 2/7/02 11:18 AM Page 39
Audio Controls 39
1
While playback is stopped, press SETUP. The
setup screen will appear.
POWER
SET-UP
/
SETUP
A-B
SKIP
DISPLAY
1.LANGUAGE
2.DISPLAY
3.AUDIO
4.PARENTAL
SELECT:
EXIT:
REPEAT
OPEN/
CLOSE
PAUSE
2
SET:
OK
CANCEL: RETURN
AUDIO
1
2
3
SUBTITLE
2
3
4
Press the Number 3 button to select Audio.
Press o or p to select an item, then follow
step 4 accordingly.
4
5
6
7
8
9
ANGLE
3-4
0
MENU
DRC
SET-UP
/
SETUP
ON
ON
OFF
AUTO
SET:
OK
CANCEL: RETURN
MPEG
RETURN
MARKER
ZOOM
1,5
DOLBY DIGITAL
AUDIO CONTROLS
1.DRC
2.DOLBY DIGITAL
3.MPEG
4.DOWN SAMPLING
SELECT:
EXIT:
/
SETUP
OFF
ON
OFF
AUTO
SET:
OK
CANCEL: RETURN
DOWN SAMPLING
SET-UP
SET-UP
AUDIO CONTROLS
1.DRC
2.DOLBY DIGITAL
3.MPEG
4.DOWN SAMPLING
SELECT:
EXIT:
MODE
SET-UP
AUDIO CONTROLS
1.DRC
2.DOLBY DIGITAL
3.MPEG
4.DOWN SAMPLING
SELECT:
EXIT:
+10
TITLE
OK
SETUP
● If you selected DRC, press OK repeatedly to turn
Dynamic Range Control (DRC) ON or OFF. This compresses the range of sound volume by suppressing loud
sound and raising the volume of low sound.
● If you selected DOLBY DIGITAL, press OK repeatedly to turn DOLBY DIGITAL ON or OFF. Select ON
if you connected the DVD Player to a stereo that is
Dolby Digital compatible. Details are on page 11.
● If you selected MPEG, press OK repeatedly to turn
MPEG ON or OFF. Select ON when the DVD Player
is connected to an MPEG-compatible Stereo. Details are
on page 11.
● If you selected DOWN SAMPLING, press OK. Then,
press o or p to select AUTO, 48 kHz, or 96 kHz,
then press OK. The AUDIO CONTROLS menu will
reappear.
Select 96 kHz if the Disc was recorded in PCM 96 kHz.
Otherwise, select 48 kHz.
SEARCH
MODE
CLEAR
/
SETUP
OFF
ON
ON
AUTO
SET:
OK
CANCEL: RETURN
AUDIO CONTROLS
1.DRC
2.DOLBY DIGITAL
3.MPEG
4.DOWN SAMPLING
SELECT:
EXIT:
/
SETUP
OFF
ON
OFF
AUTO
SET:
OK
CANCEL: RETURN
Helpful Hint
5
Press SETUP to remove the menu.
• Selecting 96 kHz activates copyright protection and mutes the
sound. Selecting AUTO sets
downsampling to 48 kHz.
MDV410/430 2/7/02 11:18 AM Page 40
40 Display Controls
DVD
Display Controls
REPEAT
POWER
1
Press SETUP while playback is stopped. The
setup screen will appear.
A-B
SKIP
DISPLAY
OPEN/
CLOSE
PAUSE
2
SET-UP
1.LANGUAGE
2.DISPLAY
3.AUDIO
4.PARENTAL
AUDIO
1
2
3
SUBTITLE
SELECT:
EXIT:
/
SETUP
SET:
OK
CANCEL: RETURN
4
5
6
7
8
9
ANGLE
SEARCH
MODE
CLEAR
0
2
Press the Number 2 button to select
DISPLAY.
SET-UP
DISPLAY CONTROLS
1.TV ASPECT
2.PANEL DISPLAY
3.ANGLE ICON
4.AUTO POWER OFF
5.BACKGROUND
SELECT:
EXIT:
/
SETUP
4:3 LETTER BOX
BRIGHT
ON
ON
BLUE
SET:
OK
CANCEL: RETURN
MENU
+10
TITLE
MODE
RETURN
MARKER
ZOOM
OK
1
SETUP
MDV410/430 2/7/02 11:18 AM Page 41
Display Controls (cont’d) 41
3
Press K or L to select an item, then press OK.
● If you selected TV ASPECT, press o or p to select
a setting, then press OK. Choose 4:3 LETTER BOX if
POWER
you want black bars to appear at the top and bottom of the
screen. Choose 4:3 PAN & SCAN for a full height picture,
with both sides trimmed. Choose 16:9 WIDE : If a
widescreen TV is connected to the DVD Player.
● If you selected PANEL DISPLAY, press o or p to
select BRIGHT, DIMMER, or AUTO, then press OK.
This adjusts the brightness of the display panel. The
default setting is BRIGHT. If you choose AUTO, the
display dims only during playback.
● If you selected ANGLE ICON, press OK repeatedly
to turn ANGLE ICON ON or OFF. The default setting
is ON. Choose ON to see the Angle icon when multiple camera angles are available. Details are on page 34.
Choose OFF to disable the Angle icon.
● If you selected AUTO POWER OFF, press OK
repeatedly to turn AUTO POWER OFF ON or OFF.
The default setting is ON. Choose ON if you want the
DVD Player to turn itself off automatically after 35 minutes of no use. Details are on page 47.
● If you selected BACKGROUND, press OK repeatedly to select BLUE or GRAY as the background color
for the on-screen menus.
TV ASPECT
SET-UP
DISPLAY CONTROLS
PAUSE
AUDIO
1
2
3
SUBTITLE
3
4
4
5
6
7
8
9
ANGLE
SEARCH
MODE
CLEAR
0
MENU
+10
TITLE
MODE
RETURN
MARKER
ZOOM
OK
SETUP
PANEL DISPLAY
DISPLAY CONTROLS
PANEL DISPLAY
SET:
OK
CANCEL: RETURN
ANGLE ICON
SELECT:
EXIT:
/
SETUP
SET:
OK
CANCEL: RETURN
AUTO POWER OFF
SET-UP
SET-UP
DISPLAY CONTROLS
1.TV ASPECT
2.PANEL DISPLAY
3.ANGLE ICON
4.AUTO POWER OFF
5.BACKGROUND
SELECT:
EXIT:
SKIP
DISPLAY
OPEN/
CLOSE
1. BRIGHT
2. DIMMER
3. AUTO
1.4:3 LETTER BOX
2.4:3 PAN & SCAN
3.16:9 WIDE
/
SETUP
A-B
SET-UP
TV ASPECT
SELECT:
EXIT:
REPEAT
/
SETUP
4:3 LETTERBOX
BRIGHT
ON
ON
BLUE
SET:
OK
CANCEL: RETURN
DISPLAY CONTROLS
1.TV ASPECT
2.PANEL DISPLAY
3.ANGLE ICON
4.AUTO POWER OFF
5.BACKGROUND
SELECT:
EXIT:
/
SETUP
4:3 LETTERBOX
BRIGHT
OFF
ON
BLUE
SET:
OK
CANCEL: RETURN
BACKGROUND
SET-UP
DISPLAY CONTROLS
1.TV ASPECT
2.PANEL DISPLAY
3.ANGLE ICON
4.AUTO POWER OFF
5.BACKGROUND
SELECT:
EXIT:
4
/
SETUP
4:3 LETTERBOX
BRIGHT
OFF
ON
GRAY
SET:
OK
CANCEL: RETURN
Press SETUP to remove the menus.
Helpful Hints
• Selecting a different TV Aspect
setting is only effective if it is
available on the Disc.
• PANEL DISPLAY is not available
in the menu on the MDV410.
MDV410/430 2/7/02 11:18 AM Page 42
42 Language Controls
DVD
1
While playback is stopped, press SETUP. The
setup screen appears.
POWER
REPEAT
A-B
SKIP
DISPLAY
OPEN/
CLOSE
PAUSE
SET-UP
1.LANGUAGE
2.DISPLAY
3.AUDIO
4.PARENTAL
SELECT:
EXIT:
/
SETUP
SET:
OK
CANCEL: RETURN
AUDIO
1
2
3
SUBTITLE
2
4
5
6
7
8
9
ANGLE
Press o or p to select LANGUAGE, then
press OK.
SEARCH
MODE
CLEAR
0
MENU
SET-UP
SELECT:
EXIT:
3
/
SETUP
MODE
RETURN
MARKER
ZOOM
LANGUAGE CONTROLS
1.AUDIO
2.SUBTITLE
3.DISC MENU
4.PLAYER MENU
2-3
+10
TITLE
OK
1
ORIGINAL
ENGLISH
ORIGINAL
ENGLISH
SETUP
SET:
OK
CANCEL: RETURN
Press o or p to select AUDIO, SUBTITLE,
DISC MENU, or PLAYER MENU. Then, press
OK. The menu for the selected item will appear.
AUDIO: The DVD’s audio
plays in the selected language, if
available on the Disc.
SET-UP
LANGUAGE CONTROLS
AUDIO
1.ORIGINAL
2. ENGLISH
3. FRENCH
4. SPANISH
5. GERMAN
SELECT:
EXIT:
p
/
SETUP
SET:
OK
CANCEL: RETURN
SUBTITLE: Subtitles appear in
the chosen language, if available
on the Disc.
SET-UP
LANGUAGE CONTROLS
SUBTITLE
1. OFF
2. ENGLISH
3. FRENCH
4. SPANISH
5. GERMAN
SELECT:
EXIT:
p
/
SETUP
SET:
OK
CANCEL: RETURN
DISC MENU: A DVD’s Disc
menu appears in the chosen
language, if available.
SET-UP
LANGUAGE CONTROLS
DISC MENU
1. ORIGINAL
2. ENGLISH
3. FRENCH
4. SPANISH
5. GERMAN
SELECT:
EXIT:
/
SETUP
p
SET:
OK
CANCEL: RETURN
SET-UP
LANGUAGE CONTROLS
PLAYER MENU
1. ENGLISH
2. FRANÇAIS
3. ESPAÑOL
SELECT:
EXIT:
/
SETUP
SET:
OK
CANCEL: RETURN
PLAYER MENU: The DVD
Player’s Setup menu appears in
the selected language.
Helpful Hints
• If the DVD’s default settings for
Audio and Subtitle are the same
language, the subtitles may not
show until you turn them on.
• Language options for AUDIO,
SUBTITLE, and DISC MENU are
not available with some Discs.
Use the AUDIO and SUBTITLE
buttons instead to select different languages for the audio and
subtitles among those available
on the Disc. Details are on
pages 32-33.
MDV410/430 2/7/02 11:18 AM Page 43
Language Controls (cont’d) 43
4
Press o or p to select a setting, then press
OK.
● If you select OTHER at the AUDIO, SUBTITLE, or
DISC MENU screen, press four Number buttons to
enter the code for the language you desire. Refer to
the list below.
● You can only select other languages for AUDIO,
SUBTITLE, and DISC MENU if the language is available on the Disc.
POWER
REPEAT
A-B
SKIP
DISPLAY
OPEN/
CLOSE
PAUSE
AUDIO
1
2
3
SUBTITLE
4
5
6
7
8
9
ANGLE
SET-UP
LANGUAGE CONTROLS
DISC MENU
LANGUAGE CODE
4
5
Please enter a 4-digit language code.
----
EXIT:
5
SETUP
CANCEL: RETURN
Press SETUP to remove the menu.
Language
A-B
Abkhazian
Afar
Afrikaans
Albanian
Amharic
Arabic
Armenian
Assamese
Aymara
Azerbaijani
Bangla
Bashkir
Basque
Bengali
Bhutani
Bihari
Bislama
Breton
Bulgarian
Burmese
Byelorussian
C-E
Cambodian
Catalan
Chinese [CHI]
Corsican
Croatian
Czech
Danish [DAN]
Code Language
4748
4747
4752
6563
4759
4764
5471
4765
4771
4772
4860
4847
5167
4860
5072
4854
4855
4864
4853
5971
4851
5759
4947
7254
4961
5464
4965
5047
Code Language
Dutch [DUT]
6058
English [ENG]
5160
Esperanto
5161
Estonian
5166
F-H
Faroese
5261
Fiji
5256
Finnish [FIN]
5255
French [FRE]
5264
Frisian
5271
Gaelic (Scots)
5350
Galician
5358
Georgian
5747
German [GER] 5051
Greek [GRE]
5158
Greenlandic
5758
Guarani
5360
Gujarati
5367
Hausa
5447
Hebrew
5569
Hindi
5455
Hungarian [HUN] 5467
I-K
Icelandic [ICE]
5565
Indonesian
5560
Interlingua
5547
Interlingue
5551
Inupiak
5557
Irish [IRI]
5347
Italian [ITA]
5566
Code Language
Japanese [JPN]
5647
Javanese
5669
Kannada
5760
Kashmiri
5765
Kazakh
5757
Kinyarwanda
6469
Kirghiz
5771
Kirundi
6460
Korean [KOR] 5761
Kurdish
5767
L-N
Laothian
5861
Latin
5847
Latvian
5868
Lettish
5868
Lingala
5860
Lithuanian
5866
Macedonian
5957
Malagasy
5953
Malay
5965
Malayalam
5958
Maltese
5966
Maori
5955
Marathi
5964
Moldavian
5961
Mongolian
5960
Nauru
6047
Nepali
6051
Norwegian [NOR]6061
SEARCH
MODE
CLEAR
0
MENU
+10
TITLE
MODE
RETURN
MARKER
ZOOM
OK
SETUP
Code Language
O-R
Occitan
Oriya
Oromo (Afan)
Panjabi
Pashto
Persian
Polish
Portugese [POR]
Pushto
Quechua
Rhaeto-Romance
Romanian [RUM]
Russian [RUS]
S
Samoan
Sangho
Sanskrit
Serbian
Serbo-Croatian
Sesotho
Setswana
Shona
Sindhi
Singhalese
Siswat
Slovak
Slovenian
Somali
Spanish [SPA]
6149
6164
6159
6247
6265
5247
6258
6266
6265
6367
6459
6461
6467
6559
6553
6547
6564
6554
6566
6660
6560
6550
6555
6565
6557
6558
6561
5165
Sundanese
Swahili
Swedish [SWE]
T
Tagalog
Tajik
Tamil
Tatar
Telugu
Thai
Tibetan
Tigrinya
Tonga
Tsonga
Turkish [TUR]
Turkmen
Twi
U-Z
Ukrainian
Urdu
Uzbek
Vietnamese
Volapuk
Welsh
Wolof
Xhosa
Yiddish
Yoruba
Zulu
Code
6567
6569
6568
6658
6653
6647
6666
6651
6654
4861
6655
6661
6665
6664
6657
6669
6757
6764
6772
6855
6861
4971
6961
7054
5655
7161
7267
MDV410/430 2/7/02 11:18 AM Page 44
44 Black Level Settings, TruSurround Setting
DVD
POWER
Black Level Settings
Adjust the Black Level Settings to make the black parts of
the picture as bright as you prefer.
1
2
REPEAT
A-B
SKIP
DISPLAY
OPEN/
CLOSE
PAUSE
Press MODE during playback.
AUDIO
1
Press OK repeatedly to choose ON or OFF.
ON makes the dark parts brighter. OFF shows the
original picture as recorded.
2
3
SUBTITLE
4
5
6
7
8
9
ANGLE
+10
0
BLACK LEVEL : ON
1
SEARCH
MODE
CLEAR
MENU
TITLE
MODE
RETURN
MARKER
ZOOM
OK
2
SETUP
DVD
SRS TruSurround Setting
POWER
You can enjoy improved stereo sound when you play Discs
in Dolby Digital, PCM 48 kHz, or MPEG Audio.
1
2
REPEAT
A-B
SKIP
DISPLAY
OPEN/
CLOSE
PAUSE
Press MODE twice during playback.
AUDIO
1
Press OK repeatedly to choose ON or OFF.
The default setting is OFF. Choose ON only if you
connected the DVD Player to a stereo that has a
Dolby Digital or MPEG decoder. Details are on page
11. Make sure the current DVD is recorded in Dolby
Digital, PCM 48 kHz, or MPEG Audio.
2
3
SUBTITLE
4
5
6
7
8
9
ANGLE
1
SEARCH
MODE
CLEAR
0
MENU
+10
TITLE
MODE
RETURN
MARKER
ZOOM
OK
SRS TruSurround ON
2
SETUP
Helpful Hints
• SRS TruSurround is available
only when the DVD Player is
connected to a TV or Stereo
using the red and white AUDIO
OUT jacks on the DVD Player.
• If you connected the DVD Player
to a stereo using the COAXIAL
DIGITAL AUDIO OUT jack as
described on page 11, turn off
SRS TruSurround; otherwise,
there will be no sound.
MDV410/430 2/7/02 11:18 AM Page 45
Care and Maintenance, Glossary 45
Care and Maintenance
Cleaning the DVD Player
• Wipe the front panel and other exterior surfaces of the DVD Player with a
soft, slightly damp cloth.
• Never use a solvent, thinner, benzene, or alcohol to clean the DVD Player.
Do not spray insecticide liquid near the DVD Player. Such chemicals may discolor the surface or damage the DVD Player.
Don’t use cleaners.
Cleaning a Disc
• Use a soft, dry cloth to wipe the Disc.
• Wipe the Disc in a straight line from the center to the edge. Never wipe the
Disc in a circular motion.
• Do not use detergent or abrasive cleaning agents.
• Handle the Discs by the edges so fingerprints and dust do not adhere to the
surfaces of the Discs.
• Always store the Disc in its protective case when it is not in use.
Wipe Discs from the
center to the edge.
Checking the Laser
• If the DVD Player does not operate as described in this owner’s manual, the
laser may be dirty. Consult an Authorized Service Center for inspection and
cleaning of the laser.
Glossary
AUDIO OUT Jacks: Jacks on the back of the DVD Player that send audio
to another system (TV or stereo).
COAXIAL jack: Sends digital audio to a stereo, allowing you to adjust the
volume at the stereo. The stereo must have a Coaxial In jack. This connection
provides the 5.1 channel surround sound as heard in movie theaters.
COMPONENT VIDEO OUT Jacks (MDV430 only): Jacks on the back
of the DVD Player that send high-quality video to a TV that has Component
Video In jacks.
Dolby Digital: A surround sound system that provides 5.1 channel sound as
used in movie theaters.
Letterbox: A TV Aspect setting (4:3). Displays the video in full-width, with
black bars at the top and bottom of the TV screen. This format is used often
when you see a movie in a theater. If the Disc does not include a letterbox
format , selecting Letterbox may have no effect. (For example, some DVD
discs are two-sided, with one side playing in Letterbox and the other side
playing in a normal format.)
Pan & Scan: A TV Aspect setting (4:3). Displays the video with full-height
picture, with one or both sides of the picture trimmed to fit your screen.
Remote Control: The small electronic unit that came with your DVD
Player; allows you to operate your DVD Player from a distance.
S-Video: Produces a clearer picture by sending separate signals for the luminance and the color. If you connect an optional S-Video cable, you will not
need to use the supplied yellow video cable. You can use S-Video only if your
TV has an S-Video In jack.
VIDEO OUT Jack: Jack on the back of the DVD Player that sends video to
a TV. Use the supplied yellow video cable to make this connection.
Wide: A TV Aspect setting (16:9). Displays the video appropriately when
you connect the DVD Player to a widescreen TV.
Handle Discs
by the edges.
MDV410/430 2/7/02 11:18 AM Page 46
46 Helpful Hints
If you are having problems with your product, check this list of problems and possible
solutions before requesting service. You may be able to solve the problem yourself.
If you need to call a customer service representative, please know the model number
and serial number of your product before you call. This information is on the back of
the product. Also, please take a moment to identify the problem you are having, and
be prepared to explain this to the representative. If you believe the representative will
need to help you with operations, please stay near the product. Our representatives
will be happy to assist you.
The DVD Player has no power.
• Make sure the power cord is connected completely to an AC (alternating current)
outlet.
• Press the POWER y button to turn on the DVD Player. “P-ON” will appear briefly
on the display panel of the MDV430 as the power is turning on. The red POWER
light will appear on the front of the MDV410 when the power is on.
The remote control will not operate the DVD Player.
• Aim the remote control directly at the DVD Player’s remote sensor.
Details are on page 16.
• Remove all obstacles between the remote control and the DVD Player.
• Inspect and/or replace the batteries in the remote control. Details are on page seven.
• Use the remote control within 23 feet of the DVD Player.
No picture
• Make sure the video cable is connected correctly. You may connect either the yellow video cable (supplied), an optional S-Video cable, or optional component video
(MDV430 only) cables. You only need one video connection between the DVD
Player and the TV. Details are on pages 8-13.
• Make sure the TV is set to the correct Video channel (usually the AUX IN, A/V IN,
Auxiliary In, EXT or External In, Component Video In or S-Video In channel). These
channels usually are located near channel 00. Check your TV owner’s manual for
details. Or, change channels at the TV until you see the DVD logo or DVD playback
on the TV screen.
• Insert a Disc that is playable on this DVD Player. Details are on page six.
Disc cannot play.
• Insert a playable Disc. Details are on page six.
• Place the Disc correctly in the recesses in the Disc tray. If the Disc is one-sided,
place the Disc in the tray with the label facing up. If the Disc is two-sided, make sure
the side you want to play is facing up.
• Clean the Disc. Details are on page 45.
• Check the Parental Controls and adjust if necessary. Details are on pages 36-37.
No sound
• Connect the audio cables firmly. Make sure the cables are connected to the AUDIO
IN jacks on the TV or audio equipment. Details are on pages 8-13.
• Check the Audio Settings of the DVD Player. Details are on page 39.
• Turn on the power of the audio equipment and make sure it is set to the correct
channel, usually Auxiliary IN. Refer to the owner’s manual of the audio equipment
for details.
• Check the Audio Settings of the Disc. For example, you may have selected “soundtrack” playback on a DVD. Only the music of the movie will play, not the characters’
dialog; music might not be recorded throughout the entire DVD.
Details are on page 32.
MDV410/430 2/7/02 11:18 AM Page 47
Helpful Hints (cont’d) 47
Distorted picture
• Connect the DVD Player directly to the TV. Details are on page eight.
• There are some cases where the picture may be distorted slightly and briefly; this is
not a malfunction of the DVD Player.
You can not change the camera angle.
• The DVD might not contain segments recorded from different camera angles. See if
multiple angles are available by referring to the DVD case or menu for more information. Details are on page 34.
You can not change the audio or subtitle language.
• The DVD does not contain audio or subtitles in the desired language. Not all DVDs
contain audio or subtitles in multiple languages. See if other languages are available.
Details are on page 32-33.
An “X” appears on the TV screen, prohibiting an operation.
• You can not access the current operation at the current time or the feature is not
available on the Disc. For example, some menus or features can be accessed or
changed only when Disc play is stopped, while some are available only during playback. Check the instructions for accessing the feature before trying again. Details are
on page five.
The DVD Player turns off after 35 minutes.
• If AUTO POWER OFF is activated, the DVD Player turns off automatically if playback stops for more than 35 minutes and you press no buttons on the remote control or the DVD Player. When you receive the DVD Player, the factory has set
AUTO POWER OFF to ON. Details are on pages 40-41.
A large DVD logo appears on the TV screen.
• The DVD logo will appear on the TV screen if you stop Disc playback for more than
five minutes and you do not press any buttons on the remote control or the DVD
Player. The logo will appear on the screen for 35 minutes, then the Player will turn
off automatically as described above. To prevent damage to your TV’s picture tube,
avoid leaving the DVD logo on the TV screen. Turn off the DVD Player when it is
not in use. A prolonged still image, including TV station identification logos or video
games, may damage your TV picture tube.
RENEWED
90 DAY
LIMITED WARRANTY
MDV410/430 2/7/02 11:18 AM Page 50
50 Specifications
Product Type
Digital Video Disc Player
Frequency Response
DVD (linear sound): 20 Hz to 22 kHz (sample rate: 48 kHz)
20 Hz to 44 kHz (sample rate: 96 kHz)
Audio CD: 20 Hz to 20 kHz
Signal-to-Noise Ratio (S/N Ratio)
Audio CD: 110 dB EIAJ (Electronic Industries Association of Japan)
Dynamic Range
DVD (linear sound): 95 dB
Audio CD: 94 dB (EIAJ)
Total Distortion Factor
Audio CD: 0.005% (EIAJ)
Wow and Flutter
Below the measurement limitation (±0.001% W PEAK) (EIAJ)
Power Requirement
120V AC ± 10%, 60 Hz ± 0.5%
Connections
S-Video output
Video output
Coaxial digital output
Analog audio output
Component video output
(MDV430 only)
Mini DIN 4-pin jack (75 Ω)
One pin jack, 1 Vpp (75 Ω)
One pin jack, 500m Vpp (75Ω)
Two pin jacks
(one left channel, one right channel)
2 Vrms (47 kΩ)
One pin jack (Y), 1 Vpp (75Ω)
Two pin jacks (Cb and Cr), 700m Vpp (75Ω)
Power Consumption
Power on: 14 W
Power off: 1.2 W (MDV410)
2.2 W (MDV430)
Operating Temperature
41°F (5°C) to 104°F (40°C)
Relative Humidity
30% to 80%
Dimensions
17-1/8” (W) x 2-15/16” (H) x 8-5/16” (D)
(360mm x 75mm x 211mm)
Weight
4.42 lbs. (2.0 kg.)
NOTE: Designs and specifications are subject to change without notice.
MDV410/430 2/7/02 11:18 AM Page 51
Index 51
ac power cord . . . . . . . . . . . . .18
accessories . . . . . . . . . . . . . . .51
angle button . . . . . . . . . . .15, 34
arrow buttons . . . . . . . . . . . . .14
audio button . . . . . . . . . . .15, 32
audio cd . . . . . . . . . . . . . . .6, 19
audio controls . . . . . . . . . . . . .39
audio out jacks . . . . . . . .8-10, 15
a-b repeat . . . . . . . . . . . . . . . .27
a-b repeat button . . . . . . .14, 27
batteries . . . . . . . . . . . . . . . . . .7
bit rate . . . . . . . . . . . . . . . . . .35
black level settings . . . . . . . . . .34
camera angle . . . . . . . . . . . . . .34
chapters . . . . . . . . . . . . . . . . .25
clear button . . . . . . . . . . . . . . .14
coaxial jack . . . . . .11, 13, 18, 45
color systems . . . . . . . . . . . . .56
component video
out jacks (MDV430 only)12, 18, 45
connections . . . . . . . . . . . . .8-13
contents, table of . . . . . . . . . . .3
controls, remote . . . . . . . .14-15
disc in light (MDV410 only) . . .17
disc menus . . . . . . . . . . . . . . .20
disc tray . . . . . . . . . . . . . . . . .16
display button . . . . . . . . . .14, 35
display controls . . . . . . . . .40-41
display panel . . . . . . . . . . . . . .17
display screens . . . . . . . . . . . .35
dvd video . . . . . . . . . . . . . . . . .6
fast forward button . . . . . .15, 22
front panel . . . . . . . . . . . . . . . .16
glossary . . . . . . . . . . . . . . . . . .45
helpful hints . . . . . . . . . . . .46-47
hookups
amplifier with digital in jacks/
md deck/dat deck . . . . . . . .13
dolby digital/mpeg . . . . . . . . .11
s-video . . . . . . . . . . . . . . . . .10
stereo . . . . . . . . . . . . . . .11-13
tv . . . . . . . . . . . . . . . . . . . .8-13
language controls . . . . . . . .42-43
maintenance . . . . . . . . . . . . . .45
marker button . . . . . . . . . .14, 38
markers . . . . . . . . . . . . . . . . . .38
menu button . . . . . . . . . . .14, 20
menus . . . . . . . . . . . . . . . . .5, 20
mode button . . . . . . . .14, 28-29
MP3 playback . . . . . . . . . . .29-31
video out jack . .9, 11, 13, 18, 45
warranty . . . . . . . . . . . . . . .
48
number buttons . . . . . . . . . . . .14
“x” . . . . . . . . . . . . . . . . . . .5, 47
ok button . . . . . . . . . . . . . . . .15
on-screen display . . . . . . . . . . .35
open/close button . . . .14, 16, 19
parental controls . . . . . . . .36-37
password . . . . . . . . . . . . . . . . .36
pause button . . . . . .15-16, 21, 23
play button . . . . . . . . . .15-16, 19
play light (MDV410 only) . . . . .17
playing . . . . . . . . . . . . . . . . . . .19
power
button . . . . . . . . . . . . . . .14, 16
cord . . . . . . . . . . . . . . . . . . .18
light (MDV410 only) . . . . . . .17
program . . . . . . . . . . . . . .28, 31
random . . . . . . . . . . . . . . .29, 31
rear panel . . . . . . . . . . . . . . . .18
region codes . . . . . . . . . . . . . . .6
remote control
buttons . . . . . . . . . . . . . .14-15
sensor . . . . . . . . . . . . . . . . . .16
using . . . . . . . . . . . . . . . . . . . .7
repeat button . . . . . . . . . .14, 26
repeat playback . . . . . . . . . . . .26
resume on . . . . . . . . . . . . . . . .21
return button . . . . . . . . . . . . .15
reverse button . . . . . . . . . .15, 22
safety precautions . . . . . . . . . . .4
search mode button . . .14, 24-25
searching . . . . . . . . . . . . . . . . .22
setup button . . .14, 36-37, 39-43
skip buttons . . . . . . .15-16, 24-25
slow motion . . . . . . . . . . . . . .23
specifications . . . . . . . . . . . . . .50
step-by-step playback . . . . . . .21
stereo sound mode . . . . . . . . .32
still picture . . . . . . . . . . . . . . .21
stop button . . . . . . . . .15-16, 19
subtitle button . . . . . . . . . .15, 33
s-video out jack . . . . . .10, 18, 45
table of contents . . . . . . . . . . . .3
time search . . . . . . . . . . . . . . .25
title button . . . . . . . . . . . .15, 20
title menu . . . . . . . . . . . . . . . .20
titles . . . . . . . . . . . . . . . . .20, 25
tracks . . . . . . . . . . . . . . . . . . .24
trusurround . . . . . . . . . . . . . . .44
zoom button . . . . . . . . . . .14, 23
MDV410/430 2/7/02 11:18 AM Page 52
SUPPLIED ACCESSORIES
The following items are supplied with your DVD Player;
they are provided to help you use or set up your DVD Player.
PO
W
ER
AT
PE
RE
Y
LA
SP
DI
B
A/
EN
OP OS
CL
IP
SK
E
E
US
PA
1
4
2
7
5
R
EA
CL
3
8
NU
ME
O
DI
AU
6
SU
0
E
ITL
BT
9
AN
CH
AR DE
SE MO
LE
TIT
OK
E
GL
0
+1
P
TU
SE
OM
ZO
RN
TU
RE
DE
MO
ER
RK
MA
Remote Control 4835 218 37332
Two AA Batteries 4835 138 17012
Audio and Video Cables
4835 321 17148
This owner’s manual is made of recyclable materials.
Remember to recycle!
IB8337E001
Printed In China
0VMN02956 / E56UD * * * * *