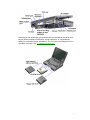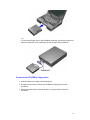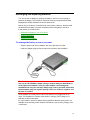
1
HP OmniBook 2000/5700
User’s Guide
(Windows 95)
HP OMNIBOOK 2000/5700 USER’S GUIDE ............................................ 4
Using This Online Manual ....................................................................................................4
Finding More Information ....................................................................................................4
Notice .....................................................................................................................................4
1. GETTING COMFORTABLE .................................................................. 6
Identifying Parts of the OmniBook .......................................................................................6
Adjusting the Display ............................................................................................................8
To adjust the display ............................................................................................................8
Using the Pointing Device......................................................................................................9
To use the pointing device ...................................................................................................9
To clean the pointing device ................................................................................................9
Using Sound .........................................................................................................................11
To adjust the speaker volume .............................................................................................11
To connect a microphone, speakers, or headphones............................................................11
To record and play sound...................................................................................................12
Using the OmniBook Keyboard ..........................................................................................13
To tilt the keyboard............................................................................................................13
To use special features of the OmniBook keyboard.............................................................13
Learning About Windows....................................................................................................15
To learn about Windows ....................................................................................................15
2. OPERATING THE OMNIBOOK .......................................................... 16
Checking the Status of the OmniBook ................................................................................16
Starting and Stopping the OmniBook.................................................................................18
To start the OmniBook ......................................................................................................18
To stop the OmniBook.......................................................................................................18
To reset and restart the OmniBook.....................................................................................20
Using Storage Devices..........................................................................................................22
To install the floppy drive ..................................................................................................22
T........................................................................................................................................23
To insert and eject a floppy disk.........................................................................................24
To install the CD-ROM drive.............................................................................................24
1
To insert and remove a CD ................................................................................................25
To insert a PC card ............................................................................................................25
To remove a PC card .........................................................................................................27
3. MANAGING BATTERY POWER......................................................... 28
Monitoring Battery Power ..................................................................................................28
To get the battery status .....................................................................................................28
Recharging and Replacing Batteries ..................................................................................29
To recharge the battery or run on ac power ........................................................................29
To replace the battery.........................................................................................................30
To install a second battery..................................................................................................31
Controlling Battery Power ..................................................................................................32
To respond to a low-battery warning ..................................................................................32
To save battery power ........................................................................................................32
To change how power is managed......................................................................................32
4. PROTECTING YOUR OMNIBOOK ..................................................... 34
Attaching a Security Cable..................................................................................................34
To attach a security cable...................................................................................................34
Setting Up Password Protection ..........................................................................................35
To record your name or other PC identification..................................................................35
To set up password security................................................................................................35
To delete a password..........................................................................................................37
Protecting Your Data...........................................................................................................38
To repair and clean up a disk .............................................................................................38
To delete a set of OmniBook files.......................................................................................38
5. USING THE PERSONAL INFORMATION APPLICATIONS ............... 39
Managing Your Time with Appointment Book ..................................................................40
To start Appointment Book................................................................................................40
To view your appointments ................................................................................................40
To change to a different day, month, or year ......................................................................41
To add a new appointment.................................................................................................41
To add a new event ............................................................................................................41
To delete an appointment or event .....................................................................................42
To run a program automatically.........................................................................................42
Listing People in Phone Book..............................................................................................43
To start Phone Book ..........................................................................................................43
To add a person to the list..................................................................................................43
To search for a person........................................................................................................44
Getting Answers from HP Financial Calculator.................................................................45
To start HP Calculator .......................................................................................................45
2
To perform a math function on one number .......................................................................45
To do simple arithmetic .....................................................................................................46
6. CHANGING THE CONFIGURATION .................................................. 48
Using HP User Tools............................................................................................................50
To run HP User Tools ........................................................................................................50
Using the System Configuration Utility ..............................................................................52
To run the SCU during reboot............................................................................................52
To run the SCU without rebooting .....................................................................................52
System Resources.................................................................................................................56
7. TROUBLESHOOTING ........................................................................ 58
Solving Problems .................................................................................................................58
Printing Problems ..............................................................................................................58
Memory Problems..............................................................................................................59
Pointing Device and Mouse Problems ................................................................................59
File, Drive, and PC Card Problems ....................................................................................60
Serial and Infrared Communications Problems ..................................................................61
Sound Problems.................................................................................................................61
Display Problems...............................................................................................................62
Power Problems .................................................................................................................62
Lockup Problems ...............................................................................................................64
3
HP OmniBook 2000/5700 User’s Guide
This manual describes how to use the OmniBook with the Microsoft® Windows® 95
operating system. It focuses on the special Hewlett-Packard hardware and software,
not the Windows operating system itself. For questions about the operating system,
refer to the Microsoft Windows 95 manual shipped with the OmniBook.
Using This Online Manual
This online User’s Guide looks similar to a printed manual—and it works like a
printed manual in many ways, too. But you can do several handy things you can’t do
with a manual. For example, you can make the type larger or smaller. You can click
pictures to enlarge them. You can add electronic bookmarks for marking key
information. And you can print all or part of the manual on your printer.
• Press F1. You’ll quickly see how to use this manual.
Finding More Information
This OmniBook User’s Guide introduces the OmniBook and shows you how to
operate your OmniBook. For more information about using your OmniBook, look in
these additional places:
• The OmniBook Installation and Setup Guide shows how to set up the operating
system, install and connect accessories, and maintain and upgrade the
OmniBook. It also includes troubleshooting information.
• The Introducing Microsoft Windows 95 manual, shipped with your OmniBook,
contains information about using the standard features of Windows 95.
• The online Help for Windows applications provides information about those
applications. Use the Help menu or Help button, or just press F1.
• The OmniBook Notes icon gives late-breaking information available after the
online manual was completed. Double-click the OmniBook Notes icon in the
OmniBook Library.
• Many bookstores have books about Windows and MS-DOS for people with
different levels of experience.
• For updates to the BIOS and other technical information, connect to our Web
site on the internet at http://www.hp.com/go/omnibook.
Notice
This manual and any examples contained herein are provided “as is” and are subject
to change without notice. Hewlett-Packard Company makes no warranty of any kind
with regard to this manual, including, but not limited to, the implied warranties of
merchantability and fitness for a particular purpose. Hewlett-Packard Co. shall not be
4
liable for any errors or for incidental or consequential damages in connection with
the furnishing, performance, or use of this manual or the examples herein.
Consumer transactions in Australia and the United Kingdom: The above disclaimers
and limitations shall not apply to Consumer transactions in Australia and the United
Kingdom and shall not affect the statutory rights of Consumers.
© Copyright Hewlett-Packard Company 1997. All rights reserved. Reproduction,
adaptation, or translation of this manual is prohibited without prior written permission
of Hewlett-Packard Company, except as allowed under the copyright laws.
The programs that control this product are copyrighted and all rights are reserved.
Reproduction, adaptation, or translation of those programs without prior written
permission of Hewlett-Packard Co. is also prohibited.
Portions of the programs that control this product may also be copyrighted by
Microsoft Corporation, SystemSoft Corp., Advanced Micro Devices, Inc., Crystal
Semiconductor Corporation, and Chips & Technologies, Inc. See the individual
programs for additional copyright notices.
Microsoft, MS, MS-DOS, and Windows are registered trademarks of Microsoft
Corporation (U.S. patent numbers 4955066 and 4974159). Pentium is a U.S.
registered trademark of Intel Corporation. TrackPoint is a U.S. trademark of
International Business Machines.
For warranty information, see the Support and Service booklet.
Hewlett-Packard Company
Mobile Computing Division
1000 N.E. Circle Blvd.
Corvallis, OR 97330, U.S.A.
Edition 1
April 1997
5
1. Getting Comfortable
• Identifying Parts of the OmniBook.
• Adjusting the Display.
• Using the Pointing Device.
• Using Sound.
• Using the OmniBook Keyboard.
• Learning About Windows.
Congratulations! Your OmniBook sets a new standard in personal computing.
Although it’s compact and easy to carry, the OmniBook is equipped with a full-size
keyboard, and a built-in CD-ROM or floppy drive.
This chapter introduces the OmniBook and helps you get familiar with your new
computer.
Identifying Parts of the OmniBook
The illustrations below point out key parts of the OmniBook.
6
Depending on the accessories you purchased with your OmniBook, the center drive
bay can hold an internal CD-ROM drive, a floppy disk drive, or a high-capacity
battery for extra battery power. Alternatively, you can connect the floppy drive to the
OmniBook externally—see "To install the floppy drive."
7
Adjusting the Display
Your OmniBook display controls are located to the right of the display.
• All OmniBooks are equipped with a brightness control.
• Some models may also have a contrast control.
To adjust the display
• Slide the control up or down to adjust the brightness or contrast.
Hint
Brightness affects battery time. Keep in mind that a higher brightness setting
gives a shorter battery operating time—because the internal light is using more
power. (The contrast setting doesn’t affect the operating time.)
8
Using the Pointing Device
The TrackPoint III pointing device is located in the center of the keyboard, and the
two click buttons are located below the keyboard.
The pointing device controls the motion of the cursor on the screen by detecting
pressure. The pointing device itself does not move. The cursor speed corresponds to
the amount of pressure. The click buttons work like those on a standard mouse.
What the buttons do depends on the software that is used.
In this section you’ll learn how to
• Use the pointing device.
• Clean the pointing device cap.
To use the pointing device
1. Place your hands in the typing position.
2. With your index finger, press the pointing device in the direction you want the
pointer to move.
3. Pressing the pointing device away from you moves the pointer up the screen
and pressing it toward you moves the pointer down the screen.
4. Click the buttons with your thumb to select and drag.
You can customize the operation of the pointing device using Windows Control
Panel Mouse.
Hint
Drifting pointer. If you ever notice the pointer slowly “drifting” on the screen, don’t
touch the pointing device for at least 3 seconds. It automatically stops moving.
To clean the pointing device
The cap on the end of the pointing device is removable.
9
• To maintain a smooth pointing operation, occasionally lift the cap off the post
and clean it with a soft, moistened cloth. When the cap wears out, you can
replace it with one of the spares shipped with your OmniBook.
10
Using Sound
The OmniBook supports Sound Blaster compatible sound.
In this section you’ll learn how to
• Adjust the speaker volume.
• Connect a microphone, speakers, or headphones.
• Record and play sound.
To adjust the speaker volume
• Hold down Fn and press F8 or F9 as needed to gradually increase or decrease
the maximum volume. (The Fn key is at the front-left corner of the OmniBook
keyboard.)
–or–
1. Click the speaker symbol in the taskbar.
2. Drag the volume control up or down to adjust the volume.
Double-click the speaker symbol in the taskbar to open the mixer controls.
To temporarily silence the speaker output without changing the volume setting, click
Mute in the Volume window.
Important
When you adjust the volume using the Fn+F8 or Fn+F9 key combinations, you are
adjusting the current volume and you are also setting the maximum volume that can
be played in Windows. If the volume in Windows is too low, you may want to adjust
it with the Fn keys.
To connect a microphone, speakers, or headphones
Your OmniBook has a built-in microphone above the keyboard and two stereo
speakers.
11
You can also plug in an external microphone, external speakers or headphones, and
a stereo input source, such as a CD player.
• Plug the microphone into the microphone jack. The built-in microphone turns off.
• Plug the stereo speakers or headphones into the output jack. The built-in
speakers turn off.
• Plug a stereo input source into the input jack.
To record and play sound
• Use the Windows Sound Recorder application. You can record sounds, and you
can open an existing sound file and play it.
Click Start, Programs, Accessories, Multimedia, Sound Recorder.
12
Using the OmniBook Keyboard
In the section you’ll learn how to
• Tilt the keyboard.
• Use the special features of the keyboard.
To tilt the keyboard
You can adjust the keyboard angle for more comfortable typing.
• Flip down the built-in tilt feet located on the bottom of the OmniBook.
To use special features of the OmniBook keyboard
In addition to the standard typing keys, the OmniBook keyboard contains the
following special keys and features:
Fn combination keys
The gold Fn key is located at the front-left corner of the keyboard. Use the Fn key in
combination with other keys to execute special functions. For example, Fn+F8
decreases the speaker volume. You press and hold the Fn key, then you press the
other key.
Numeric keypad
Press the NUM LOCK (number lock) key to use the numeric keypad. With the
keypad active, keys change to the designations shown on their front, slanted faces.
13
ALT GR key
If your keyboard has an ALT GR key to the right of the spacebar, hold that key to
type the characters printed at the bottom-right corners of keys. For keys that have
four characters, hold SHIFT and ALT GR to type the upper-right characters.
SHIFT
Unshifted
¬
‘
ALT GR
14
Learning About Windows
To learn about Windows
This OmniBook User’s Guide does not discuss the Windows operating system.
Rather, it introduces the OmniBook and shows you how to operate it. For information
about Windows, see the following sources:
• Start the 10-minute tour of Windows 95. Click Start, Programs, OmniBook
Library, Tour of Windows 95.
• See the Windows online Help. Click Start, then Help.
• See the Introducing Microsoft Windows 95 manual shipped with your OmniBook.
• Many bookstores have books about Windows for people with different levels of
experience.
15
2. Operating the OmniBook
• Checking the Status of the OmniBook.
• Starting and Stopping the OmniBook.
• Using Storage Devices.
Your OmniBook has been specifically designed for ease-of-use on the road. It
features “instant-on” power that immediately restores your last screen. The Status
Panel provides convenient status information. And the OmniBook supports a variety
of storage devices.
Checking the Status of the OmniBook
The OmniBook Status Panel, located above the keyboard, contains indicators that
show the current status of the OmniBook. The indicators in the Status Panel show
• Power status.
• Data storage status.
• Keyboard status.
AC power
Appears when the ac adapter is
plugged in.
Battery status
The shading of the battery indicator
shows the approximate charge level of
the battery relative to a full charge.
The indicator blinks when the battery
charge is low. A second indicator
appears if you insert a second battery.
Battery charging
Appears when the battery is charging.
CD-ROM
Appears when the OmniBook is
reading from the built-in CD-ROM
drive.
Floppy disk
Appears when the OmniBook is
reading or writing to the floppy disk
drive.
Hard disk
Appears when the OmniBook is
reading or writing to drive C.
PC card
Appears when you insert PC cards into
the card slots. The number of
indicators shows whether one or two
cards are present.
Suspend
Appears when the OmniBook is
suspended (turned off with the
On/Suspend button). The “bookmark”
16
reminds you that the state of the
computer has been saved.
Caps Lock
Appears when Caps Lock is active.
Num Lock
Appears when Num Lock is active.
Scroll Lock
Appears when Scroll Lock is active.
The Windows 95 taskbar also shows status information about ac power or battery
use, sound, infrared, and PC card use. The indicators shown vary depending on the
current state of the OmniBook—whether a PC card is present or whether ac power is
connected, for example.
Some of the taskbar indicators provide information or control when you move the
mouse pointer over the indicator or when you click the indicator (or double-click, or
right-click). For example, double-click the ac or battery indicator to find out how
much battery power remains.
17
Starting and Stopping the OmniBook
You can easily start and stop your OmniBook using the blue On/Suspend button. But
at certain times, you may want to use other methods for starting and stopping your
OmniBook, depending on power considerations, types of active connections, and
startup time.
In this section you’ll learn how to:
• Start the OmniBook.
• Stop the OmniBook in different ways.
• Reset and restart the OmniBook.
To start the OmniBook
• Press the blue On/Suspend button. Either your previous session resumes or the
computer reboots, depending on how you stopped the computer. See the next
topic.
To stop the OmniBook
You can stop or “turn off” the OmniBook several ways, including “Instant-On” so you
can quickly continue your work where you left off. That’s unlike a desktop PC that
starts from scratch every time you turn it on. Often, the way you stop your OmniBook
depends on how you intend to use it the next time.
• To stop with “Instant-On” with ac
power, press the blue On/Suspend
button.
• To stop with “Instant-On” on battery
power, press the blue On/Suspend
button.
• To shut down while saving your
current session, press Fn+F12 with
the ac adapter unplugged.
• To shut down without saving your
session, shut down Windows, then
press the square Off button on the
left side of the case for 2 seconds.
(For Windows 95, the OmniBook
Display Off: Ready to continue immediately and
maintains external connections. (Most
convenient method for Windows 95 and
Windows for Workgroups if ac power is
available.)
Suspend: Ready to resume immediately. You
intend to continue within 24 hours. (Most
convenient method for Windows 95 and
Windows for Workgroups if ac power is not
available.)
Hibernate: Preserves work in progress. Saves
maximum battery power. Reboots at turn-on,
restores the session.
Off: Starts a new session next time. Saves
maximum battery power. Reboots at turn-on.
(Standard method for Windows NT and OS/2.)
18
automatically turns off when you
shut down Windows.)
Hint
Preserving connections. If you have active network connections, or if you have
any SCSI devices connected, use the ac adapter and press the blue On/Suspend
button to stop the OmniBook. These connections and devices are disconnected if
you stop the OmniBook any other way.
However, Windows 95 can restore network connections and SCSI devices when you
turn on the OmniBook. For a different operating system, you may have to reboot the
OmniBook or restart the operating system to restore them.
If you want to know more about what happens when you stop the OmniBook, you
can check the following table.
Power States after Stopping the OmniBook
Method of Stopping
Power State
Condition
Blue On/Suspend button
(with ac adapter connected)
Display Off
Powered/operating state. The computer
looks off, but only the display, keyboard, and
pointer are turned off. Network and SCSI
devices are maintained. Everything
continues at turn-on.
Blue On/Suspend button
(with no ac adapter)
Suspend
Low-power/stopped state. Everything is off or
in a low-power state. Network and SCSI
devices are off. The bookmark indicator
appears in the Status Panel. Everything
resumes operating at turn-on. For Windows
95, SCSI changes are detected at turn-on.
Fn+F12
(with no ac adapter)
Hibernate
No-power/stopped state. Session is saved on
the hard disk. Everything is shut down.
Computer reboots and restores previous
19
session at turn-on.
Off button
Off
No-power/stopped state. Everything is shut
down (battery charges if ac adapter is
connected). Computer reboots at turn-on.
The Start button provides two commands that stop the OmniBook.
• Suspend changes the OmniBook to the Suspend state if the ac adapter isn’t
connected.
• Shut Down (Shut down the computer) changes the OmniBook to the Off state.
If you plug in the ac adapter while the OmniBook is stopped, battery-charging
components are activated, but the OmniBook stays in the same power state. On the
other hand, if you unplug the ac adapter while the OmniBook is in the Display Off
state, it changes to the Suspend state.
In addition, Advanced Power Management (APM) provides several automatic powersaving features that affect the power state. You can adjust settings in the System
Configuration Utility to control features such as these:
• If the OmniBook is running on battery power and there’s no activity for a short
period of time, it automatically stops by changing to the Suspend state.
• If you leave the OmniBook stopped in the Suspend state for a long time without
plugging in the ac adapter, it automatically saves power by changing to the
Hibernate state. Your session is saved.
To reset and restart the OmniBook
If Windows or the OmniBook gets stuck and stops responding (and you can’t get
around this in Windows), you can reset the OmniBook and restart Windows.
1. If possible, shut down Windows.
2. Press Ctrl+Alt+Del to reboot the OmniBook.
–or–
Press the square Off button on the left side of the case for 2 seconds, then press
the blue On/Suspend button.
–or–
Insert a straightened paperclip into the small hole below the ac adapter socket
and press the reset button inside the hole.
20
If these actions have no effect, remove the battery and ac adapter and press the
reset button. Then install the battery or plug in the ac adapter and try pressing the
reset button again.
Hint
Rebooting from a floppy disk. If you want to reboot from a boot disk in the floppy
drive, put the disk in the floppy drive before you restart the OmniBook. For example,
you can reboot from the Support Utility disk, then use the commands on this disk to
check your hard disk.
21
Using Storage Devices
Your OmniBook can access information in the following types of data storage
devices. Each device is assigned a drive letter by the operating system. For
example, the floppy drive is drive A, and the internal hard disk is drive C. Drive
letters for other devices depend on what devices are present.
• The floppy disk drive (if present).
• The internal hard disk drive.
• The internal CD-ROM drive (if present).
• Data storage cards in one or both PC card slots (if present).
• SCSI CD-ROM drives or hard drives (if present, as with a docking system).
For a large hard disk drive, one that’s bigger than about 2 GB (2 gigabytes, slightly
more than 2 billion bytes), the hard disk may have two partitions or divisions. These
two partitions appear as drive C and drive D.
In this section you’ll learn how to
• Install a floppy disk drive.
• Remove the CD-ROM or floppy drive.
• Insert and remove a floppy disk.
• Install a CD-ROM drive.
• Insert and remove a CD.
• Insert a PC card.
• Remove a PC card.
To install the floppy drive
You can install the floppy drive or attach it externally to the parallel port.
1. If necessary, remove the CD-ROM drive (or high-capacity battery) from the
OmniBook.
2. Slide the floppy drive into the OmniBook until it clicks into place.
22
–or–
• To connect the floppy drive to the OmniBook externally, pull out the floppy drive
cable and connect it to the parallel port on the left side of the OmniBook.
To remove the CD-ROM or floppy drive
1. Slide the switch to the right. A pull-tab pops out.
2. Pull the pull-tab firmly to remove the CD-ROM or floppy drive from the
OmniBook.
3. Push the pull-tab back into the drive after you remove the drive from the
OmniBook.
23
To insert and eject a floppy disk
When the OmniBook is reading or writing data to the floppy drive,
the floppy disk indicator appears on the Status Panel.
Caution
Do not insert or remove a floppy disk while the OmniBook is actively reading
or writing data. Wait until the floppy drive is done. Otherwise, you could lose
data or the OmniBook could stop responding.
• Hold the disk with its face up, then slide it into the floppy drive slot until it clicks
into place.
• To remove the floppy disk, press the eject button.
To install the CD-ROM drive
1. Important
Save your work—you’ll be resetting the OmniBook.
2. If necessary, remove the floppy drive or high-capacity battery from the
OmniBook.
3. Slide the CD-ROM drive into the OmniBook until it clicks into place.
4. Press the square Off button, then press the blue On/Suspend button to restart
the OmniBook.
–or–
24
Press the reset button.
To insert and remove a CD
When the OmniBook is reading data from the CD-ROM drive, the
CD disk indicator appears on the Status Panel.
Caution
Do not insert or remove a CD while the OmniBook is actively reading data.
Wait until the CD-ROM drive is done. Otherwise, the OmniBook could stop
responding.
1. Press the open button on the front of the CD-ROM drive.
2. Place the CD in the drive and gently press down to seat it on the spindle.
3. Close the door to the drive.
4. To remove the CD, press the open button on the front of the CD-ROM drive.
To insert a PC card
The OmniBook PC card slots are available for storing data and expanding the
communication capabilities of the OmniBook. The OmniBook supports standard
Type I, II, and III PC cards (PCMCIA and CardBus). You can use two thin cards or
one thick card. The lower card slot supports Zoomed Video, which allows a zoomed
video card to show high-quality multimedia presentations.
25
For information about compatible cards, visit our Web site at
http://www.hp.com/go/omnibook. Or contact Hewlett-Packard as described in the
Support and Service booklet.
Caution
Do not install Card Services or Socket Services software if it comes with your
PC card. The OmniBook already includes Card Services and Socket Services,
which automatically detect and set up PC cards you install in the upper and
lower card slots. Different versions of this software will disrupt this support.
Never insert or remove a plug-in card while an OmniBook PC card drive is
actively reading or writing data. Wait until the PC card drive is done.
Otherwise, you could lose data or the OmniBook could stop responding.
The OmniBook automatically detects and sets up a card when you insert it in a card
slot. See the card’s instructions for additional information.
1. Hold the card with its face up and its connector holes toward the card slot, then
slide it into a PC card slot until it won’t go any further.
When the card is fully inserted, the PC card indicator appears on
the Status Panel. A double beep signals that the card has been
recognized and is successfully configured by your computer.
2. Inserting a card causes the slot’s eject button to protrude from the case. You can
rotate the button towards the front to make it flush with the case.
About RAM Cards
Start popup
About RAM Cards
If you’re using a RAM card with the OmniBook, keep these suggestions in mind:
• For a new RAM card, install its battery before you insert the card.
• Replace the RAM card battery yearly.
When you want to replace a RAM card battery, plug the card into the OmniBook
and make sure the OmniBook stays turned on while you replace the battery. You
can plug in the ac adapter to keep it from turning off. Otherwise, the data on the
card will be lost.
End popup
26
To remove a PC card
Caution
Never remove an I/O card while an application is open that’s set up to use that
card. Exit the application first. If you remove the card, the application (or the
OmniBook) might behave unpredictably or stop responding until you restart
the OmniBook.
Never insert or remove a plug-in card while the PC card drive is actively
reading or writing data. Wait until the PC card drive is done. Otherwise, you
could lose data or the OmniBook could stop responding.
1. Click the PC card indicator in the taskbar, then click Stop.
This protects your data and avoids unexpected problems. You can restart the
card by removing it, then inserting again.
2. If necessary, rotate the ejector button so that it protrudes from the case.
3. Press the black ejector button until the card pops out, then pull out the card.
27
3. Managing Battery Power
• Monitoring Battery Power.
• Recharging and Replacing Batteries.
• Controlling Battery Power.
The primary source of power for the OmniBook is its rechargeable battery. The
OmniBook provides several safeguards so that you won’t be surprised by a deadbattery condition. The status panel shows the remaining battery charge and built-in
warnings are displayed for low-battery conditions.
To preserve your current work session, the OmniBook automatically turns off when
the battery charge gets too low. Your session continues when you plug in the ac
adapter or insert a fresh battery.
Monitoring Battery Power
To get the battery status
• Check the Battery indicator in the Status Panel. The shading
indicates the approximate charge level. It’s approximate
because it’s rounded to the nearest 1/4. (The AC and Charge
indicators show whether the ac adapter is plugged in and
whether the battery is charging.)
–or–
• Press Fn+F2 to see the battery level in the System Configuration Utility.
–or–
• Move the mouse pointer onto the battery indicator at the right end of the taskbar.
The approximate battery charge is displayed in a pop-up window.
For additional power information, open the Control Panel Power window.
All battery indicators show approximately the same battery charge level. However,
because they have different resolutions, they may not show identical levels.
Hint
Updating the battery indicator. If you ever suspect a battery indicator does not
represent the actual condition of the battery, do the following to update the indicator:
• Plug in the ac adapter and wait until the Charge indicator turns off, or
• Make sure only one battery is in the computer, unplug the ac adapter, press the
blue On/Suspend button to turn off the computer, then turn it on again.
28
Recharging and Replacing Batteries
You can use the ac adapter to recharge the battery—and to run on ac power to
preserve the battery. The OmniBook conserves power by using Advanced Power
Management (APM), software that controls power drain.
Data on any of the drives is not affected by a low battery. However, the data could
be affected if the battery runs down completely while writing data to the drive.
In this section you’ll learn how to
• Recharge the battery or run on ac power.
• Replace the battery.
• Install a second battery.
To recharge the battery or run on ac power
• Plug the power cord into the adapter, then into a grounded ac outlet.
• Insert the adapter plug into the socket on the left side of the OmniBook.
Caution
Use only an HP F1044B ac adapter (the type shipped with your OmniBook) or
an HP-approved ac adapter. Using any other adapter could damage the
OmniBook and void your warranty. Always plug it into a grounded outlet. Note
that the adapter plug has negative polarity—the inner contact is negative, and
the outer is positive.
The ac adapter is normally warm to the touch whenever it’s plugged into an ac
outlet. The OmniBook is normally warm while it’s charging. Don’t charge it in a
briefcase or other small space.
It’s a good idea to use the ac adapter during operations that take more power—for
example, those involving certain external connections, such as using a floppy drive
or serial port.
29
The orange charging light on the battery turns on while the battery is charging. The
light turns off when the battery isn’t charging.
Hint
Optimum charging. To get the longest battery operating time, wait until the Charge
indicator (lightning bolt) turns off in the Status Panel. The light on the battery will
also turn off. Charging stops when the battery is fully charged.
Because of rounding, a battery indicator can show a full battery before it’s fully
charged. The Charge indicator turns off only when the battery is actually full.
You can continue working while the battery is charging. The charging rate is not
affected by using the computer.
To replace the battery
You may never need to remove the rechargeable battery in ordinary use. Just
connect the ac adapter to the OmniBook and recharge the battery while you work.
However, you can replace a low battery with another that is more fully charged.
Caution
If you have the ac adapter plugged in when you remove the battery, do not
disconnect it while the battery is out. If you do, your current session and any
unsaved data will be lost.
1. Important
Save your work. Then press the blue On/Suspend button to stop the OmniBook.
2. If available, plug in the ac adapter.
3. Slide the battery switch to the right and slide the battery out of its compartment.
4. Slide the new battery all the way into the battery compartment.
Caution
Do not mutilate, puncture, or dispose of the battery in fire. The battery can
burst or explode, releasing hazardous chemicals. A rechargeable battery pack
must be recycled or disposed of properly.
Hint
30
Maintaining the backup battery. The permanent, internal backup battery recharges
whenever you plug the ac adapter into the OmniBook. The backup battery can run
down if you always charge the main battery in an external charger and never
connect the ac adapter to the OmniBook.
To install a second battery
To increase the time you can work on battery power, you can install a second, highcapacity battery in the floppy or CD-ROM drive bay.
1. Important
Save your work. Then press the blue On/Suspend button to stop the OmniBook.
2. If necessary, remove the floppy drive or CD-ROM drive from the OmniBook.
3. Slide the high-capacity battery into the OmniBook until it clicks into place.
A second Battery indicator appears in the Status Panel, showing the charge level
of the new battery.
31
Controlling Battery Power
The OmniBook uses Advanced Power Management (APM) to conserve battery
power. You can take steps to optimize your battery operating time.
In this section you’ll learn how to
• Respond to a low-battery warning.
• Save battery power.
• Change how power is managed.
To respond to a low-battery warning
When battery power is critically low, the Battery indicator in the Status Panel
appears empty and starts to flash. The OmniBook automatically suspends (turns off)
to preserve your current session as long as possible. You won’t be able to turn it on
again until you restore power by one of the following actions:
• Plug in the ac adapter. See “To recharge the battery or run on ac power.”
–or–
• Replace the battery with one that’s charged, or install a second battery that’s
charged. See “To replace the battery” or “To install a second battery.”
Caution
If you don’t restore power and you don’t save your work before the OmniBook
turns itself off, your work will be lost if the battery runs down completely—
within as little as several hours after the warning.
To save battery power
You can follow these suggestions for conserving battery power.
• Plug in the ac adapter, especially while using the floppy drive, the CD-ROM
drive, or any external connections.
• Turn down the brightness of the display to the lowest comfortable level. This
reduces the backlight power, which can increase the battery operating time.
• Set power management to an option that emphasizes saving power. See “To
change how power is managed.”
• If you work with an application that uses the serial port or an I/O card, exit the
application when you’re done using it.
• If you have an I/O PC card—that is, a PC card having an external connection,
such as a modem or network card—remove it when you’re not using it. Some I/O
cards use significant power, even while they’re inactive.
To change how power is managed
You can change power-management settings that affect power usage and
performance. For example, you can change automatic timeout settings. A larger
32
timeout setting usually uses more battery power. For ideas about how to save battery
power, see “To save battery power.”
• Run HP User Tools and click the OmniBook button on the Setup tab. On the
Power tab you can change these power settings:
Automatic timeout settings.
–or–
• Save your work, then run the System Configuration Utility and use its Power
menu. You can change these power settings:
Automatic timeout settings (rebooting is required).
Additional power-saving settings (rebooting is required).
Battery charging order for two batteries (rebooting is not required).
Note
Most OmniBook automatic timeout features operate only when the OmniBook is
running on battery power. For example, if the ac adapter is powering the unit, the
OmniBook does not automatically turn off.
33
4. Protecting Your OmniBook
• Attaching a Security Cable.
• Setting Up Password Protection.
• Protecting Your Data.
Your OmniBook provides several ways for you to identify and protect your computer.
Attaching a Security Cable
Your OmniBook has three built-in connectors that allow you to secure the OmniBook
with a cable—two on the back of the computer and one on the right side. The
Kensington MicroSaver lock system works with these connectors and is available at
many computer stores. The same lock works with an OmniBook docking system.
To attach a security cable
1. Wrap the cable around a stationary object, such as a table leg.
2. Loop the cable to create a slip knot around the stationary object. Make sure it
can’t slip off.
3. Insert the lock into one of the OmniBook security connectors and release the
key. Store the key in a safe place away from the OmniBook.
34
Setting Up Password Protection
You can protect your OmniBook against unauthorized use by activating password
security. You can create a user password for normal protection against unauthorized
use. You can also create an administrator password for a system administrator or as
a backup for the user password. Or your system administrator might set up this
password.
In this section you’ll learn how to
• Record your name for identification purposes.
• Set up password security.
• Delete a password.
To record your name or other PC identification
By recording your name and other information, you identify your OmniBook and
make a record of purchase information that will be handy if you have to contact
Hewlett-Packard for support or service. Your personal information is displayed each
time you reboot the OmniBook.
• Run HP User Tools and click the PC Identification button on the Advanced tab.
–or–
• Run the System Configuration Utility and use its System menu PC Identification
command (rebooting is not required).
To set up password security
If you activate password security, you must enter the password in certain situations.
This prevents unauthorized access to your OmniBook. The following types of
protection are available:
• Turn-on protection. Prevents an unauthorized person from turning on the
computer and accessing your work. You can choose to always require the
password at turn-on (even after automatic turn-off), or you can require it only
after you do a “secure” stop (pressing Fn+blue On/Suspend).
• Undocking protection. Prevents an unauthorized person from removing the
computer from a docking system. If you activate undocking protection, you can
undock your OmniBook only while it’s turned on.
• Setup protection. Prevents an unauthorized person from changing OmniBook
settings like those in the System Configuration Utility, such as password security
and more.
• Hard disk drive protection (“drive lock”). Prevents an unauthorized person
from accessing your data after removing the hard disk drive from your computer
and installing it in another computer. (Your user password serves as the drive’s
password. The user password for the other computer must match the drive’s
password to access the data.) Don’t use hard disk drive protection if you
frequently swap drives between computers.
35
• PC identification protection. Prevents an unauthorized person from changing
your identification stored in the computer.
• Separate user and administrator passwords. The user password is the
general password for most types of protection. The administrator password can
serve as a backup for the user password—you can enter it any time the user
password is requested. The administrator password can provide setup and PC ID
protection, and you can use it to change or delete the user password.
Hint
Before you type a password, check the status of Num Lock in the Status Panel.
Normally, you’d want it off so you can type letters.
Use the following steps to set up password security.
1. Run the System Configuration Utility and use its System menu Passwords
commands (rebooting is not required).
–or–
Run HP User Tools and click the OmniBook button on the Setup tab. Then click
the Password tab.
2. Choose to set a user or administrator password according to the table below.
The password can contain up to eight characters. The display shows * for each
character in your password. After you type the password, press TAB and type it
again in the Verify box.
3. Set or clear the password options you want according to the table below.
36
Type of Protection
Steps
Turn-on protection
1. Set a user password.
2. Select one of the “turn-on” options (not Never).
Undocking protection
1. Set a user password.
2. Select the “undock” option.
3. Connect a Kensington lock to the dock (to
prevent manual undocking).
Setup protection
1. Set a user or administrator password.
2. Select the “setup” option.
Hard disk drive protection
1. Set a user password.
2. Select one of the “turn-on” options (not Never).
3. Make sure the “disable drive lock” option is
unchecked (in the SCU).
PC ID protection
1. Set an administrator password.
2. Select the “PC Identification” option.
Caution
Be sure you record your password in a safe place. To restore operation if you
forget your password, have your proof-of-purchase handy and call HewlettPackard at the number in the Support and Service booklet.
Hint
Hard disk drive protection. When moving a password-protected hard disk drive to
another OmniBook, do one of the following:
• Remove user password protection before transferring the hard disk drive to
another OmniBook, or
• Set the user password of the new OmniBook to match the current password on
your hard disk drive.
To delete a password
1. Run the System Configuration Utility and use its System menu Password
commands (rebooting is not required).
–or–
Run HP User Tools and click the OmniBook button on the Setup tab. Then click
the Password tab.
2. Choose to set the user or administrator password, whichever one you want to
delete.
3. When prompted, type your old password, but leave the new password empty and
exit.
37
Protecting Your Data
As you create or add information on your OmniBook, the need to make backup
copies of that information becomes more important. By making backup copies of key
files, you can reduce the chance of accidentally losing that data. You can back up
individual files to floppy disks using the Windows File Manager. For more elaborate
backup storage, you might need to obtain one of the many commercially available
software packages.
In this section you’ll learn how to
• Repair and clean up a disk.
• Delete a set of OmniBook files.
Caution
If you swap the hard disk drive in your OmniBook, carefully follow the steps in
the Installation and Setup Guide. In particular, make sure you shut down
Windows, unplug the ac adapter, and remove the battery from the OmniBook
before you remove the drive. Otherwise, data on the drive could be corrupted.
To repair and clean up a disk
After a period of use, the file structure on a disk may develop corrupted sections or
disjointed files, causing errors or slightly longer response time in some situations. If
you clean up the disk every few months or so, you can optimize your disk’s
operation.
• Use the disk-scanning and disk-defragmenting utilities provided by your
operating system.
Caution
Back up your files periodically, especially before doing maintenance.
For Windows 95, you can follow these steps:
1. Plug in the ac adapter.
2. Click Start, Programs, Accessories, System Tools, Disk Defragmenter to
optimize the use of space on a disk.
3. Select the drive you want to defragment.
4. If Disk Defragmenter finds errors on the disk, you can click Start, Programs,
Accessories, System Tools, ScanDisk to repair disk errors.
To delete a set of OmniBook files
If you need to make more disk space available on drive C, you have the option of
uninstalling certain sets of OmniBook files. The files you can delete depend on the
operating system.
• Run HP User Tools and click the Uninstall button on the Advanced tab.
Choose the sets of files you want to delete, or exit without deleting files.
38
5. Using the Personal Information Applications
• Managing Your Time with Appointment Book.
• Listing People in Phone Book.
• Getting Answers from HP Financial Calculator.
This chapter introduces three applications to help you keep track of things—
meetings and appointments, addresses and telephone numbers, personal records
and finances—to mention just a few.
Hint
Appointment Book (and Phone Book ) keeps the working file open, and it updates
the file for each change you make. Follow these suggestions to prevent accidental
damage to your appointment and phone files:
• Exit Appointment Book and Phone Book when you’re not using them or before
you turn off your OmniBook. If Appointment Book or Phone Book is open and
your OmniBook has an unexpected problem, it could corrupt the current
appointment file or phone file.
• Open only files that reside on drive C, not on a removable disk. An open file on
a removable disk (such as a floppy disk or PC card) is susceptible to corruption
in certain situations.
39
Managing Your Time with Appointment Book
Appointment Book in your OmniBook is the perfect replacement for that old pocket
calendar or bulky scheduler you may have used in the past. Appointment Book helps
allocate your time, and is as easy to use as other Windows applications. Here are
some of the ways to put Appointment Book to work:
• View your daily, weekly, or monthly calendar at a glance.
• Quickly add and delete appointments.
• Use your OmniBook to signal the next appointment.
• Keep detailed records of past appointments kept and tasks performed.
• Print a copy of your schedule for others.
This section shows selected features of Appointment Book, and briefly illustrates
how to make and delete an appointment.
To start Appointment Book
• Click Start, Programs, OmniBook, and Appointment Book.
To view your appointments
• Click the Day button on the Toolbar.
40
To change to a different day, month, or year
• Click the desired day, month, or year in the Calendar.
To add a new appointment
1. If necessary, click the day in the Calendar to display the day of your new
appointment.
2. Click the mouse on the line next to the desired time in the Appointment area.
Double-click to open the Add Appointment/Event box.
3. Type a description of the appointment.
4. Press ENTER or click OK to create the appointment. (Click SAVE to save the
appointment and create another one.)
When the OmniBook signals an appointment, it displays a dialog box to signal the
alarm, even if you have exited Appointment Book or are working in another
application. If the OmniBook is off, it turns on to display the box and signal your
alarm.
To add a new event
Events (like holidays and anniversaries) are special days you don’t want to forget.
41
1. If necessary, click the Day button to display and change to the day of your new
event.
2. Click the mouse on the top blank line in the Event area. You see the highlight
move there.
3. Type a description of the event.
4. Press ENTER to add the event.
To delete an appointment or event
1. Click the appointment or event to move the highlight there.
2. From the Edit menu, select Delete to delete the appointment or event.
Appointment Book saves every change to your schedule for you as you make it. So
if for some reason you decide to exit the Appointment Book application, you don’t
need to worry about saving changes first.
To run a program automatically
• Create an appointment whose Description field starts with | followed by the
command line. For example, to run a batch file called BACKUP (in directory
MYFILES) at 1:00 a.m., set an appointment for 1:00 with this Description field:
|C:\MYFILES\BACKUP.BAT
42
Listing People in Phone Book
Phone Book is another valuable part of your portable OmniBook. It is actually a
personal database containing names, addresses, and—most important—telephone
numbers, all ready for handy reference. You can add entries, delete them, search for
a specific name, or even search for specific text. This section gives a brief
introduction into using Phone Book.
To start Phone Book
• Click Start, Programs, OmniBook, and Phone Book.
To add a person to the list
1. Double-click a blank line in the display area.
–or–
Press F2.
2. In the Name box, type a person’s name—for example, “Martin, Jean-Claude.”
Remember to type the last name first, because when you sort or search the list
of items, the operation begins by looking at the leftmost character. Putting last
names first will make it easier to find people later.
3. Type information in the rest of the Add New Item box. See the hints below.
4. Click OK or press ENTER to enter the item into the list.
43
–or–
Click Save to enter the item into the list and open a new, blank item. This is a
good way to add several items to the list, one after another.
When you add new persons to the list, they’re automatically placed in alphabetical
order.
Hints
• For ease of typing, you can use the TAB key to tab between fields. (SHIFT+TAB
tabs backwards.)
• The Category entry allows you to sort your list into sections for relatives,
personal acquaintances, business contacts, and so on.
• You can leave almost any field blank.
To search for a person
1. Type the first letters of the name you want to find. When you start typing a
name, Phone Book’s Fast Goto dialog box pops up and searches as you type.
The highlight moves to the name as you type it.
2. When the highlight is on the name you want, press ENTER to close the Fast
Goto dialog box.
44
Getting Answers from HP Financial Calculator
HP Financial Calculator gives you all the power and convenience of a full-fledged
Hewlett-Packard handheld calculator. It lets you quickly perform mathematical
operations, as well as sophisticated financial and scientific calculations. Here’s a
sample of what you can do with this handy OmniBook application:
• Perform general arithmetic problems involving addition, subtraction,
multiplication, and division.
• Execute sophisticated TVM (time value of money) and financial calculations.
• Produce analyses of financial alternatives.
• Do conversions involving currency, length, temperature, and other units.
• Perform calculations using scientific functions like sine, cosine, polar/rectangular
functions, and more.
• Solve algebraic equations with the Solver.
• Switch between conventional algebraic mode and the RPN (Reverse Polish
Notation) familiar to many HP calculator users.
Attention HP Calculator Veterans
If you’ve already used another Hewlett-Packard calculator like the HP 19BII or the
HP 200LX’s Calculator, you’ll find HP Calculator remarkably similar. But now you
can press buttons on the keyboard or click buttons in the HP Calculator window to
accomplish the same tasks.
To start HP Calculator
• Click Start, Programs, OmniBook, and HP Financial Calculator.
To perform a math function on one number
1. Type the number. The number appears in the Calc line.
2. Click the button for the desired math function.
–or–
Press the key on the OmniBook keyboard corresponding to the desired math
function.
45
HP Calculator “takes over” part of your OmniBook’s keyboard and reassigns
functions to it. You can see these functions and the applicable keys on the display of
calculator buttons—for example, pressing the Q key takes the square root of the
number in the Calc line.
Hints
Use BACKSPACE to correct a single keystroke on the Calc line.
Use DEL to erase the entire Calc line and reset it to zero.
To do simple arithmetic
1. Type the calculation in the Calc line.
2. Press ENTER (or the = key).
Your OmniBook’s HP Calculator application starts in algebraic mode, shown by the
letters ALG in the status line. When algebraic mode is active, you can type a number
into the Calc line, then type an arithmetic operator like +, then type another number
and press ENTER or the = key to see the answer.
46
If you are entering a multi-step problem, intermediate results are calculated when
you type the next arithmetic operator. You can also type parentheses to group
different parts of a calculation.
47
6. Changing the Configuration
• Using HP User Tools.
• Using the System Configuration Utility.
• System Resources.
You can use the System Configuration Utility (SCU) or the Tools application to
change OmniBook configuration settings. The SCU provides more options for certain
settings.
The following chart summarizes the OmniBook settings you can change. See the
sections of this chapter for details. To change any settings not accessible using this
software, try using Windows Control Panel.
Settings
HP User Tools
SCU
Display, keyboard, pointer
Display resolution
x
Display switching
x
x
Keyboard setup
x
External keyboard setup
x
External pointer setup
x
Power management
Power, timeout setup
x
x
Advanced power setup
x
Battery charging
x
Connections
Printer setup
x
PC card setup
x
COM port setup
x
Printer port setup
x
SCSI BIOS setup
x
Security
Password setup
x
x
PC identification
x
x
Hard disk security
x
48
Other
Date and time
x
x
Sound volume
x
Boot setup
x
Drive types
x
Cache setup
x
Memory size
x
x
BIOS version
x
x
Uninstall software
x
49
Using HP User Tools
HP User Tools give you a convenient way in Windows 95 to change the way your
OmniBook looks and operates. For many settings, it’s an alternative to using the
System Configuration Utility.
To run HP User Tools
1. Click Start, HP User Tools.
2. Click the tabs and buttons for the changes you want to make. You’re prompted if
you need to reboot the computer. Click Help or see the table below for more
information.
3. After you make the changes, exit HP User Tools.
Information 1
Opens the OmniBook User’s Guide and other online sources of
information.
Information 2
Shows the HP software license agreement, and shows the
BIOS version and the amount of system memory.
Setup
OmniBook
Display:
Sets whether the built-in display is on or off when an external
display is present.
Password:
“Set User Password.” The user password protects certain
events, but doesn’t give access to protected administrator
options, such as PC ID.
“User Password Required” sets whether a password is required
when the computer starts, before undocking, or when changing
OmniBook settings such as those in the SCU.
“Set Admin Password.” The administrator password provides
protection equal to the user password plus PC ID and
OmniBook setting protection. The administrator password can
be used whenever the user password is requested, such as
when changing the user password.
“Admin Password Required” sets whether PC ID and
OmniBook setting changes are protected by the administrator
password.
Power:
“Options for Battery Power” balances the tradeoffs between
power savings and performance speed while operating on
battery power. Click Custom to set timeouts individually.
“Idle Time Before Turn-Off” shows the individual timeouts.
50
Date/Time
Sets date, time, and time zone.
Display
Sets display properties, including resolution and color palette
settings.
Printers
Opens the Printers folder for setting up and controlling printers.
PC Card
Sets PC Card properties, including identification, settings, and
taskbar setup.
Control Panel
Opens the Windows Control Panel for changing other settings.
Advanced
PC Identification
Lets you define four text strings for name, title, company,
address, phone, etc.
Uninstall
Lets you remove selected sets of OmniBook software from the
hard disk drive.
51
Using the System Configuration Utility
The System Configuration Utility (SCU) provides access to basic configuration
settings. It is independent of the operating system.
To run the SCU during reboot
1. Close all applications, then shut down Windows and reboot the OmniBook. If
necessary, you can press Ctrl+Alt+Del to reboot.
2. During reboot, at the message “<F2> to enter System Configuration Utility,”
press F2 to start the SCU.
3. The mouse is not active in the SCU. Press ALT to activate menus, and use
arrow keys, spacebar, ENTER, and ESC to navigate and change settings. See
the tables below for more information.
4. After you select the options you want, use the Exit menu to close the SCU.
Certain settings require that you reboot the OmniBook before they take effect.
To run the SCU without rebooting
This method is not supported by certain operating systems, such as OS/2.
1. Save your data in any open applications.
2. Press Fn+F2 simultaneously to start the SCU.
3. The mouse is not active in the SCU. Press ALT to activate menus, and use
arrow keys, spacebar, ENTER, and ESC to navigate and change settings. See
the tables below for more information.
4. After you select the options you want, use the Exit menu to close the SCU.
Certain settings require that you reboot the OmniBook before they take effect.
System menu
Date and Time
Sets the date and time.
Reboot required.
Boot Devices
Boot Device:
Reboot required.
“FDD First” is the typical PC boot, where drive
A is searched first for a system disk, then drive
C.
“HDD Only” boots the computer from drive C
only. Provides protection from boot-sector virus.
Boot Configuration:
"Full" configures all devices at boot time.
Compatible with a non-PnP operating system.
"Boot devices only" configures all devices at
boot time except PnP ISA cards set up as boot
devices. Compatible with a PnP operating
52
system, which configures such cards.
"Auto-detect" performs a boot-device-only or
full configuration, depending on whether the
operating system last used was PnP or not.
Fast Boot. Skips the RAM test.
Enable SCSI BIOS. Enable only if drivers aren’t
available for the operating system.
Enable boot sector virus check. Avoids a
potential boot sector message during reboot.
Docking Messages
On or off. Provides prompts during docking and
undocking.
Save required.
“Administrator Password” sets whether PC ID
and SCU-type changes are protected by the
administrator password.
Immediate.
Passwords
Password options
“User Password” sets whether a user password
is required when the computer turns on, before
undocking, or when making SCU-type changes.
“Disable hard disk drive lock” sets whether a
user password with turn-on security can secure
data on the hard disk if the disk is moved to
another computer.
Set Admin
password
The administrator password provides protection
equal to the user password plus PC ID and SCU
protection. The administrator password can be
used whenever the user password is requested,
such as when changing the user password.
Immediate.
Set User password
The user password protects user events
selected in Password Options, but doesn’t give
access to protected administrator options, such
as PC ID.
Immediate.
PC Identification
Four text strings for name, company, address,
phone, etc.
Immediate.
Internal Cache
Enables faster performance by using internal
processor memory.
Reboot required.
External Cache
Enables faster performance by using external
cache memory.
Reboot required.
Floppy Disk Drive
Specifies the type of floppy drive.
Reboot required.
Hard Disk Drive
Specifies the type of hard disk for a
nonstandard hard disk.
Reboot required.
Disks menu
53
Input/Output menu
COM Ports
Sets serial and infrared port addresses and
interrupts.
Reboot required.
LPT Port
Sets printer port address.
Reboot required.
LPT Type
Sets printer port communication.
Reboot required.
Keyboard Setup
“Key Delay” sets how long you hold a key down
before the character starts repeating.
Reboot required.
“Key Repeat Rate” sets how fast characters
repeat.
“Keyboard Numlock” sets whether Num Lock is
active after rebooting.
External devices
“VGA Display device” sets whether the built-in
display is on or off when an external display is
present.
Save required.
“Force recognition of external VGA” overrides
automatic detection of an external display.
“Enable External Fn Key” lets you press
CTRL+ALT instead of Fn on an external
keyboard with no Fn key.
“Ignore External Pointing Device” activates the
built-in pointing device when an external mouse
is connected.
Audio Port
Sets the volumes for the beeper signal and the
sound speaker.
Save required.
“Power Saving” should be On for power
savings, Off for no power management. If an
Advanced Power Management driver is loaded,
power saving is active regardless of this setting.
Reboot required.
Power menu
Power Controls
“Suspend,” “Auto Hibernate,” HDD powerdown,” “CPU power-down” are automatic turnoff times.
“Enable Hibernate” enables or prevents saving
and restoring a session from the hard disk.
“Timeout during screen activity” permits
automatic suspend if the only activity is display
activity.
“HDD power-down when on AC” permits the
hard disk to turn off when operating on ac
power.
“Disable low battery message” can block this
message if it interferes with the operating
54
system.
Battery Charging
Sets the order for charging two batteries. Only
one battery charges at a time.
Save required.
Exit menu
Save and Exit
Saves changes and exits without rebooting.
Save and Reboot
Saves changes and reboots the computer.
Exit (No Save)
Discards changes and exits.
Default Settings
Resets all settings to defaults without exiting.
Restore Settings
Discards changes without exiting.
Version Info
Shows the BIOS version.
Reboot suggested.
55
System Resources
Below are default values for system resources. To see other, non-default
possibilities, use the System Configuration Utility, which lists port and audio device
configurations in the Input/Output menu.
The tables in this section show typical resource usage as set up by the OmniBook
BIOS. Plug-and-play operating systems, drivers, and SCU settings may change
some of the entries.
System Interrupts
0
System timer
1
Keyboard
2
Redirect IRQ 9
3
COM2 and COM4 (undocked) / Free (docked)
4
COM1 and COM3 (serial port)
5
Crystal sound
6
Floppy drive
7
LPT1 (parallel port)
8
Real-time clock
9
MIDI
10
PCI-type interrupt: CardBus, and SCSI (docked)
11
Free
12
Mouse
13
Coprocessor
14
Internal hard disk (primary IDE controller)
15
Internal CD-ROM (secondary IDE controller)
System Memory
C0000 - CAFFF
Chips & Technologies video BIOS
CB000 - CBFFF
Enhanced parallel port BIOS
CC000 - E7FFF
Free (see below)
E8000 - FFFFF
Plug-and play, PCI, and system BIOS
Valid uses for memory addresses CC000-E7FFF:
• Upper memory blocks (UMBs) in the range CC000-E7FFF.
• PC card and ISA/PCI card memory windows in the range CC000-DFFFF.
• ISA/PCI card boot ROM in the range CE000-DFFFF.
56
System Input/Output Addresses (100-3FF)
15C-15D
Super I/O (docked)
170-177
Secondary HDD controller (internal CD-ROM)
1F0-1F7
Internal hard disk
200-207
Joystick
220-22F
Crystal sound
2F8-2FF
COM2 (infrared port)
330-331
MPU 401 (MIDI)
376
Secondary HDD controller (internal CD-ROM)
378-37F
LPT1 (printer port)
388-38B
Sound
3B0-3BB
VGA adapter
3C0-3DF
VGA adapter
3E0-3E1
PC card bridge on PCI
3F0-3F5
Floppy controller
3F6
Primary HDD controller
3F7
Floppy controller
3F8-3FF
COM1 (serial port)
DMA Channels
0
Sound record
1
Sound playback
2
Floppy drive
3
Fast IR
4
DMA controller
5
Free
6
Free
7
Free
57
7. Troubleshooting
• Solving Problems.
If you run into problems using your OmniBook, you can use the suggestions in this
chapter for getting back on track. You can also check the contents and index for
pointers to related information.
If you have questions that this manual doesn’t answer, you can
• See the troubleshooting chapter in the OmniBook Installation and Setup Guide if
you have problems that interfere with turning on or starting the OmniBook.
• Check OmniBook Notes for the most current troubleshooting suggestions.
• Look at the online Help for Windows and other applications.
• Check with your computer system administrator, if you have one.
• Check your local library or bookstore for other books about Windows, MS-DOS,
and other applications.
• Contact your dealer, or contact Hewlett-Packard. See the OmniBook Support
and Service booklet or open OmniBook Support in the online OmniBook Library.
• Click Start and Help to use the Windows “troubleshooters” provided for several
types of common problems. On the Contents tab, open the Troubleshooting
book, then start the desired troubleshooter.
Solving Problems
This section separates problems into the following categories:
• Printing problems.
• Memory problems.
• Pointing device and mouse problems.
• File, drive, and PC card problems.
• Serial and infrared communications problems.
• Sound problems.
• Display problems.
• Power problems.
• Lockup problems.
Printing Problems
Hint
For most printing problems, use the Print Troubleshooter in Windows Help.
If a serial printer doesn’t print
58
• Check that you’re using a proper cable or cable adapter.
If an infrared printer doesn’t print
• If you’re printing to an infrared printer, make sure its port is set to LPT3 (not
LPT1). Check the printer’s settings. You can also try using COM4 instead.
• Start Infrared Monitor before you print.
• In Windows Help, use the Print Troubleshooter.
• For infrared printing from an MS-DOS program, run the program in an MS-DOS
window instead of in MS-DOS mode.
• Make sure the infrared light path is not blocked.
• Make sure Windows is running—infrared printing is supported only while
Windows is running.
• Make sure the infrared printer is IrDA compatible.
• Make sure you have not disabled IrDA support on your OmniBook.
• If you have a PC card that uses interrupt 3, try removing it before printing.
If a printer stops when you turn off the OmniBook
• If the ac adapter is connected, don’t turn off the OmniBook until the job is
finished printing. When you turn off the OmniBook while the ac adapter is
connected, it sends a reset signal to the printer. (If you’re not using the ac
adapter, no reset signal is sent.)
If the left edge of printed output is missing
• If the printer you’re using is a 600-dpi (dots per inch) printer, try selecting a
compatible printer driver for a 300-dpi printer. For example, for a 600-dpi
HP LaserJet printer, try using the HP LaserJet IIIsi driver (300-dpi). Certain
applications may not work properly with 600-dpi printers.
Memory Problems
If a message says you’re out of memory
To find out how much memory is in your OmniBook, run the System Configuration
Utility.
• In Windows Help, use the memory troubleshooter.
• If you’re having memory problems running MS-DOS programs, in Windows Help
use the MS-DOS troubleshooter.
Pointing Device and Mouse Problems
If the pointer is difficult to control
• Adjust the pointer settings using the Mouse icon in Control Panel.
If the pointing device doesn’t work
• Make sure you don’t have an external mouse connected to the OmniBook.
59
• If you just disconnected an external mouse, try exiting and restarting Windows to
make the OmniBook pointing device active again.
• Unplug the ac adapter if present, then press the blue On/Suspend button to turn
off (suspend) the OmniBook, then turn it on again without moving the pointing
device.
• Reset the OmniBook.
If a mouse connected to the serial port doesn’t work properly
• Set up the serial mouse manually. In Control Panel, double-click Add New
Hardware and follow the instructions on the screen. Keep the serial mouse
connected when you restart the OmniBook.
File, Drive, and PC Card Problems
If a PC card doesn’t work properly in a card slot
• Try removing and reinserting the card.
• Try inserting the card in the other card slot to check the connector.
• Try removing a PC card from the other card slot, if another card is present.
• For a data storage card, check that you’re using the correct drive letter.
• If a data storage card doesn’t work properly, check if it has a write-protect switch
and that it is set properly.
• Shut down Windows, then reset the OmniBook.
• If a modem card doesn’t work properly, in Windows Help use the modem
troubleshooter.
• In Device Manager, check the settings for the PC card. Look for conflicts with
other devices.
If a floppy drive doesn’t work
• Make sure the floppy drive is connected to the OmniBook parallel port. It doesn’t
work when connected to the parallel port on a docking system.
• Check that the floppy drive configuration is correct (1.44 MB) using the System
Configuration Utility.
If the OmniBook doesn’t reboot successfully from drive A
• If the OmniBook can’t reboot from drive A, use the System Configuration Utility
to check that the floppy drive is the first boot device.
If drive C has problems
• Insert the Support Utility floppy disk in the floppy drive, then press Ctrl+Alt+Del
to reboot from drive A. You can use commands on the floppy disk to check and
possibly repair drive C.
If a CD isn’t automatically detected when inserted in a drive
60
• Use Device Manager to view the CD-ROM drive properties. Select the auto-
detect setting. WARNING: This setting prevents the OmniBook from
automatically suspending after a period of inactivity if the CD-ROM drive is
present.
Serial and Infrared Communications Problems
For serial and infrared problems
• If a modem doesn’t work properly, in Windows Help use the modem
troubleshooter.
If an application can’t access a serial port
Use the System Configuration Utility to check the COM port settings and
assignments.
• Check that the COM name you’re using is actually assigned to the port you’re
using.
• If an application doesn’t support the COM port number assigned, change the port
number in the System Configuration Utility.
• Check whether another application is preventing access to the port, even if it’s
not actively using it.
• Check in the communications application that you haven’t changed the address
and interrupt for the OmniBook port.
If the OmniBook stops responding after accessing a serial port
• If the OmniBook stops working, try pressing the blue On/Suspend button to
suspend and turn on the OmniBook.
• Reboot the OmniBook.
If an I/O card stops communicating properly
• It may have been reset if the OmniBook suspended or turned off. Exit and
restart the application, and plug in the ac adapter, if possible.
If you have problems with infrared communications
• Check that only one application is using the infrared port.
• Check that both devices are using the same protocol, such as IrDA.
Sound Problems
If sounds aren’t audible
• Check the playback or recording sound levels, channels, and muting. See "Using
Sound."
• Press Fn+F9 several times to make sure the volume isn’t set too low. (If you’re
using an external keyboard, make sure you’ve enabled the external Fn keys,
such as by using the System Configuration Utility.
61
• If you’re running an MS-DOS program outside Windows and you need access to
sound and other system devices, use the special MS-DOS Mode command:
Click Start, Programs, OmniBook, MS-DOS Mode. This shuts down Windows
and loads drivers for MS-DOS. When you're done, type exit to restart Windows.
Display Problems
If the display works improperly
• Check whether the display resolution is set to its default setting, 800 x 600
(SVGA) or 1024 x 768 (XGA).
You can use HP User Tools.
• Try changing the display resolution to the standard VGA option.
If the screen is difficult to read
• Try adjusting the display controls.
• If the OmniBook is cold, allow it to warm up.
If the display scrolls when the pointer reaches the edge
• A high-resolution display setting is active. You can use a high-resolution external
display and turn off the OmniBook display by pressing Fn+F5, or you can choose
the default OmniBook display setting.
Power Problems
If you have power problems that interfere with turning on or starting the OmniBook,
see the troubleshooting chapter in the OmniBook Installation and Setup Guide, which
came with the OmniBook.
If the battery runs down too fast
• Try conserving power using any of the suggestions listed under “To save battery
power”
• Check your power management settings using the System Configuration Utility.
Make sure the OmniBook is set up so it can automatically change from Suspend
to Hibernate.
• If the operating time has gotten shorter and the battery pack is more than a year
or two old, you may need a new battery pack.
If the OmniBook turns off immediately after it turns on
• Battery power is probably extremely low. Plug in the ac adapter, or make sure
the OmniBook isn’t turned on and insert a fresh battery—see “To replace the
battery.”
If the OmniBook doesn’t suspend automatically
• If the ac adapter is connected, the OmniBook doesn’t suspend.
• If you have a connection to another computer, the OmniBook doesn’t suspend if
the connection is actively in use.
62
• Check your power management settings using the System Configuration Utility.
• If Infrared Monitor is running, the OmniBook doesn’t suspend if automatic
searching is active. In Infrared Monitor, check the status of the search option.
• If you have a CD-ROM drive connected, use Device Manager to view the CD-
ROM drive properties. If the auto-detect setting is active, it prevents the
OmniBook from automatically suspending after a period of inactivity while the
CD-ROM drive is present.
If the OmniBook doesn’t turn on
• Connect the ac adapter.
• Press the blue On/Suspend button to try turning on the unit.
• Try adjusting the display.
• Reboot the OmniBook.
If you get no response, remove the battery and ac adapter and press the reset
button again—then install the battery or plug in the ac adapter and try resetting
again.
If the OmniBook doesn’t turn on with a fresh battery
• If the new battery pack is low, plug in the ac adapter.
If the OmniBook doesn’t suspend immediately
• If the OmniBook is performing an operation, it normally waits for the operation to
finish.
• If you’re using MS-DOS Prompt in the full screen (not inside a window), it may
take up to 10 to 15 seconds to suspend.
If the OmniBook reboots every time you turn it on
• This is normal if you turn it off by pressing the square Off button on the left side
of the computer.
• Advanced power management (APM) may be disabled. Check your power
management settings using the System Configuration Utility.
If the battery pack doesn’t charge or stops charging
• Check that the battery is fully installed and locked in place.
• Turn off the OmniBook, then check that the battery contacts are clean and that
the ac adapter cables are fully plugged in.
• Move the OmniBook away from any nearby heat source. Unplug the ac adapter
and allow the battery to cool down. An elevated battery temperature prevents
charging.
If the OmniBook won’t undock
• Try turning it on and then undocking. If you’ve set up a password for undocking,
the OmniBook can’t undock while it’s off.
If your OmniBook password doesn’t work
63
• Check whether Num Lock is off. Try changing it.
• If you’ve forgotten your password, have your OmniBook and proof of purchase
at hand and call Hewlett-Packard at the phone number in the Support and
Service booklet or in OmniBook Support in the online OmniBook Library.
Lockup Problems
If you have problems that interfere with turning on or starting the OmniBook, see the
troubleshooting chapter in the OmniBook Installation and Setup Guide, which came
with the OmniBook.
If the OmniBook stops responding during startup
• Don’t move the pointing device or an external mouse excessively during startup.
If an application stops responding
• Press Ctrl+Alt+Del, then stop the application.
• Reboot the OmniBook.
If a screen saver causes lockup
• If you’ve previously set up an OmniBook password, you should delete the
OmniBook password. Screen savers conflict with password protection, and
together they can lock up the OmniBook.
64
—A—
ac adapter
charging battery, 29
connecting, 29
preserves connections, 19
socket for, 6
status, 16
type, 29
adding
appointments, 41
events, 42
phone entries, 43
address resources, 56
adjusting
brightness, 8
contrast, 8
keyboard angle, 13
volume, 11
admin password
deleting, 37
options, 50, 52
setting up, 35
Advanced Power Management, 28
alarms, 41
ALT GR key, 14
APM (Advanced Power Management), 28
Appointment Book, 40
appointments, 40, 41
audio system
compatibility, 11
connections, 11
microphone, 11
troubleshooting, 61
turning off, 11
using, 12
volume, 11, 52
—B—
backup battery, 30
battery
backup, 30
brightness affects, 8
charge level, 28
charging, 29
charging light, 30
charging order, 32
high-capacity location, 7
installing high-capacity, 31
location, 6
low warning, 32, 52
operating time, 8, 30, 32
power settings, 32, 50, 52
RAM card, 26
removing high-capacity, 23
replacing, 30
safeguards, 28
saving power, 32
second battery, 31
status, 16, 28
updating charge level, 28
blocks (upper memory), 56
boot configuration, 52
boot disks, 21
brightness adjustment, 8
—C—
cables
floppy drive, 23
security lock, 34, 36
cache, 52
Calculator, 45
cap (pointing device), 9
CardBus, 25
cards
inserting, 25
RAM, 26
removing, 27
troubleshooting, 60
CD-ROM drive
data storage, 22
inserting CDs, 25
installing, 24
removing, 23
status, 16
CDs, 25
charging
battery order, 32
light, 30
starting, 29
status, 16, 28, 30
cleaning pointing device, 9
cleaning up disks, 38
configuration settings, 48, 50, 52
connecting
ac adapter, 29
floppy drive, 22
headphones, 11
microphone, 11
speakers, 11
contrast adjustment, 8
Ctrl+Alt+Del, 20
cursor (pointer), 9
—D—
data storage devices, 22
data storage status, 16
defragmenting disks, 38
deleting
OmniBook files, 38
passwords, 37
disks (floppy), 24
65
display
adjusting, 8
brightness and contrast, 8
configuration settings, 50, 52
latches, 6
troubleshooting, 62
turning off, 18
Display Off state, 19
displaying
appointments, 40
DMA channels, 56
docking messages, 52
docking port, 6
drive A
booting from, 21
location, 22
drive C
booting from, 20
deleting files, 38
location, 22
partitions, 22
repairing, 38
security, 35
drive letters, 22
drive lock, 35, 52
drives
CD-ROM, 7
floppy, 7
installing CD-ROM drive, 24
installing floppy drive, 22
removing CD-ROM drive, 23
removing floppy drive, 23
repairing, 38
security, 35, 52
swapping, 38
troubleshooting, 60
types, 22
—E—
events (Appointment Book), 42
—F—
F1044 ac adapter, 29
files
deleting, 38
troubleshooting, 60
Financial Calculator, 45
finding phone entries, 44
floppy drive
booting from, 21
drive A, 22
inserting disks, 24
installing, 22
location, 7
removing, 23
status, 16
FN key
combinations, 13
external keyboard, 52
Hibernate, 18
secure turn-off, 35
volume control, 11
Fn+F12, 18
Fn+F8/F9, 11
Fn+Suspend, 35
—G—
getting help
information sources, 4
online manual, 4
—H—
hard disk
drive C, 22
location, 6
partitions, 22
repairing, 38
security, 35
swapping, 38
headphones, 11
help
information sources, 4
online manual, 4
Windows, 15
Hibernate state, 19
HP F1044 ac adapter, 29
HP Financial Calculator, 45
HP User Tools
comparison, 48
passwords, 36
PC identification, 35
power settings, 33
summary, 50
uninstalling files, 38
—I—
I/O addresses, 56
icons (Status Panel), 16
identification, 35
indicators (Status Panel), 16
infrared port, 6, 61
Installation and Setup Guide, 4
installing
CD-ROM drive, 24
floppy drive, 22
high-capacity battery, 31
PC cards, 25
Instant On, 18
interrupts, 56
—K—
Kensington lock, 34, 36
66
keyboard
external, 52
FN key, 13, 52
HP Calculator, 46
numeric keypad, 13
shifted keys, 14
status, 16
tilting, 13
—L—
learning Windows, 15
light (orange charging), 30
lockup problems, 64
low battery
charging, 29
replacing, 30
warning, 32, 52
—M—
math, 45
memory
addresses, 56
amount, 50, 52, 59
troubleshooting, 59
microphone, 11
MicroSaver lock, 34, 36
MIDI port, 6
mouse
external, 52
moving the pointer, 9
MS-DOS Mode, 62
mute, 11
—N—
networks
at turn-off, 19
Num Lock, 13, 16
numeric keypad, 13
—O—
Off button
location, 6
rebooting, 20
turn-off, 18
Off state, 19
OmniBook
configuration settings, 48, 50, 52
deleting files, 38
identifying, 35
power states, 19
rebooting, 20
resetting, 20
turning display off, 18
turning off, 18, 32
turning on, 18
On/Suspend button
location, 6
secure suspend, 35
suspend, 18
turn-on, 18
online User’s Guide, 4
operating system, 4
orange light, 30
—P—
parallel port
floppy drive, 23
location, 6
passwords
admin, 35
deleting, 37
options, 35, 50, 52
setting, 35
user, 35
PC cards
inserting, 25
removing, 27
saving power, 32
slots for, 6, 25, 27
status, 16
troubleshooting, 60
types, 25
PC identification, 35
PCMCIA, 25, 27
Phone Book, 43
playing sound, 12
pointer
customizing, 9
drift, 9
moving, 9
pointing device
cleaning cap, 9
customizing, 9
drift, 9
external, 52
troubleshooting, 59
using, 9
ports, 6
power
connecting ac, 29
saving, 32
settings, 32, 50, 52
troubelshooting, 62
power cord, 29
power management
introduction, 28
settings, 32, 50, 52
status, 16, 28
power states, 19
printer problems, 58
protection
identification, 35
passwords, 35
67
security cable, 34, 36
types, 35
—R—
RAM cards
battery, 26
rebooting
configuration, 52
from drive C, 20
from floppy drive, 21
recharging battery, 29
recording sound, 12
removing
appointments and events, 42
battery, 30
CD-ROM drive, 23
floppy drive, 23
high-capacity battery, 23
OmniBook files, 38
passwords, 37
PC cards, 27
pointing device cap, 9
replacing
battery, 30
pointing device cap, 9
reset button
location, 6
using, 20
resources, 56
—S—
saving battery power, 32
scanning disks, 38
SCSI BIOS, 52
SCSI devices
at turn-off, 19
data storage, 22
searching (Phone Book), 44
security
attaching cable, 34, 36
identification, 35
passwords, 35
types, 35
serial port
conserving power, 32
location, 6
troubleshooting, 61
setting
configuration options, 48, 50, 52
passwords, 35
power options, 32
timeouts, 32
Solver, 45
sound
connections, 11
troubleshooting, 61
turning off, 11
using, 12
volume, 11, 52
Sound Blaster, 11
speakers, 11
Status Panel
charge status, 30
indicators, 16
power status, 28
stereo input, 11
Support Utility disk, 21
Suspend state
description, 19
indicator, 16
low battery, 32
swapping drives, 38
System Configuration Utility
comparison, 48
passwords, 36
PC identification, 35
power settings, 33
summary, 52
system disks, 21
system resources, 56
—T—
tilt feet
location, 6
using, 13
timeouts
not for ac, 33
setting, 32, 50, 52
tour of Windows, 15
TrackPoint, 9
troubleshooting, 4
display problems, 62
files and drives, 60
infrared problems, 61
lockup problems, 64
memory problems, 59
PC cards, 60
pointing device, 59
power problems, 62
printing problems, 58
serial problems, 61
sound problems, 61
turning off
automatically, 20, 32
manually, 18
secure, 35
turning on
normally, 18
security, 35
TVM (time value of money), 45
typing
keyboard angle, 13
numbers, 13
special characters, 14
68
—U—
undocking security, 35
uninstalling software, 38
updates, 4
upper memory blocks, 56
user password
deleting, 37
options, 50, 52
setting up, 35
volume
adjusting, 11, 52
muting, 11
—W—
warning (low battery), 32, 52
Web site, 4
Windows
installing, 4
learning about, 15
—V—
VGA output, 6
viewing
appointments, 40
—Z—
Zoomed Video, 25
69