1
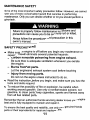
Click SAVE to save this manual to your computer. Thank you for choosing Honda.
ENGINES'
OWNER'S MANUAL
GlOO
The engine exhaust from this roduct
contains chemicals known toe tState
of Cahfornla to cause cancer,blrth
defects or other reproductwe harm.
R
I
31260623
00x31-ZGO-6230
I
1
K2
0 Honda Motor Co., LTd. 2000
@
@ 1200.2000.
I
11
@@PRINTED IN JAPAN
INTRODUCTION
Thank you for purchasing a Honda engine. We want
to help youto get the
to operate it safely. This manual
best results from your new engine and
contains information on how to
do that; please read it carefully before
operating the engine. If a problem should arise,if or
you have any questions about your engine, consult an authorized Honda servicing dealer.
All information in this publication is based on the latest product information
available at the timeof printing. Illustrations are based on the
GIOOQA
to make changes at any
model. Honda Motor Co., Ltd. reserves the right
time without notice and without incurring any obligation. No part of this
publication maybe reproduced without written permission.
This manual shouldbe considered a permanent part of the engine and
should remain with the engine
if resold.
SAFETY MESSAGES
Your safety and the safety of others is very important. We have provided
important safety messages in this manual and
on the engine. Please read
these messages carefully.
A safety message alerts you to potential hazards that could hurt you or
A and
others. Each safety messageis preceded by a safety alert symbol
one of three signal words: DANGER, WARNING,
or CAUTION.
These signal words mean:
You CAN be KILLED or SERIOUSLY
HURT if you don’t follow instructions.
You CAN be HURTif you don’t follow
instructions.
Each message tells you what the hazard
is, what can happen, and what
you can doto avoid or reduce injury.
2
DAMAGE PREVENTION MESSAGES
You will also see other important messages that are preceded
by the word
NOTICE.
This word means:
1-
Your engine or other property can be damage
if you don’t follow instructions.
The purpose of these messages
is to help prevent damageto your engine,
other property, or the environment.
SAFETY INFORMATION
0
0
0
Understand the operation ofall controls and learn how to stop the
engine quickly in case of emergency. Make sure the operator
receives adequate instruction before operating the equipment.
Your engine’s exhaust contains poisonous carbon monoxide.
Do not
run the engine without adequate ventilation, and never run the
engine indoors.
The engine and exhaust become very hot during operation. Keep
the engine at least 1 meter (3 feet) away from buildings and other
equipment during operation. Keep flammable materials away, and
do not place anything on the engine while
it is running.
3
COMPONENT & CONTROL LOCATION
CHOKE LEVER
\
FUEL VALVE
AIR
FUEL FILLER CAP
SPARK PLUG
MUFFLER
OIL FILLER CAP
OIL DRAIN PLUG
4
BEFORE OPERATION CHECKS
IS YOUR ENGINE READY TO GO?
For your safety, andto maximize the servicelife of your equipment,it is
very important to take a few moments before you operate the engine
to
of any problem youfind, or have
check its condition. Be sure to take care
your servicing dealer correctit, before you operate the engine.
Improperly maintaining this engine,or failure to correct a
problem before operation, can causea malfunction in
which you can be seriously hurt
or killed.
Always perform a preoperation inspection before each
operation, and correct any problem.
Before beginning your preoperation checks, be sure the engine
is level
and the engine switch is theOFF position.
Always check the following items before you start the engine:
1. Fuel level (see page 13).
2. Oil level (see page 14).
3. Air cleaner (see page 16).
4. General inspection: Check for fluid leaks and loose or damaged
parts.
5. Check the equipment powered by this engine.
Review the instructions provided with the equipment powered by
this engine for any precautions and procedures that should be
followed before engine startup.
5
OPERATION
SAFE OPERATING PRECAUTIONS
Before operating the engine for the first time, please reviewSAFETY
the
INFORMATION section on page 3 and the BEFORE OPERATION
CHECKS section on page5.
Carbon monoxide gasis toxic.
unconsciousness and evenkill you.
Avoid any areasor actions that expose you
to carbon
monoxide.
Review the instructions provided with the equipment powered by this
engine for any safety precautions that should
be observed with engine
startup, shutdown, or operation.
STARTING
THE
ENGINE
FUEL
VALV
1. Turn the fuel valve to the ON
position.
ON
2. Turn the engine switch to the
ON position.
6
Move the throttle lever
down
slightly.
THROTTLE LEVER
FOR STARTINGA COLD
ENGINE:
Move the choke lever
to
CLOSE position.
CHOKE LEVER
FOR RESTARTINGA WARM
ENGINE:
Do not use the chokewhen
the engine is warmor the air
temperature is high.
Pull the starter grip lightly until
resistance is felt, then pull
briskly.
I
NOTICE
I
STARTER GRIP
Do not allow the starter grip to
snap back against the engine.
Return it gently to preventdamage to the starter.
7
7. If the choke was usedto start the
engine, move the choke leverto
the open position as soonas the
engine warms up enough to run
smoothly without useof the choke.
CHOKE LEVER
OPEN
SETTING ENGINE SPEED
Position the throttle lever for the desired engine speed.
Some engine applications use are
remotely-mounted throttle control rather
than the engine-mounted throttle lever
mown here.
For engine speed recommendations,
refer to the instructions provided with the
equipment powered by this engine.
THROTTLE
LEVER
8
STOPPING THE ENGINE
To stop the engine in an emergency, turn the engine switch to theOFF
position. Under normal conditions, use the following procedure.
1. Move the throttle lever up fully.
Some engine applications use
remotely-mounted throttle
control rather than the enginemounted throttle lever snown
here.
THROTTLE LEVER
2. Turn the engine switch to the
OFF position.
GlNE SWITCH
3. Turn the fuel valveto the OFF
position.
FUEL VALVE
9
y
SERVICING YOUR HONDA ENGINE
THE IMPORTANCEOF MAINTENANCE
Good maintenanceis essential for safe, economical and trouble-free
operation. It will also help reduce pollution.
before operation, can causea malfunction in which you
can beseriously hurt orkilled.
Always follow the inspection and maintenance
To help you properly care for your engine, the following pages include a
maintenance schedule, routine inspection procedures, and simple
tools. Other service tasks that
maintenance procedures using basic hand
tools, are best handledby professionare more difficult, or require special
als and are normally performedby a Honda technician or other qualified
mechanic.
The maintenance schedule applies
to normal operating conditions.If you
operate your engine under severe conditions, such
as sustained high-load
or high-temperature operation, or use
in unusually wet or dusty conditions,
to your
consult your servicing dealer for recommendations applicable
individual needs and use.
Maintenance, replacement, or repair
of the emission control devices
and systems may be performed by any engine repair establishment
or individual, using parts that are “certified” EPA
to standards.
10
MAINTENANCE SAFETY
Some of the most important safety precautions follow. However, we canno
warn you of every conceivable hazard that can arise
in performing
maintenance. Only you can decide whether or not you should perform a
given task.
Failure to properly follow maintenance instructions and
precautions can cause youto be seriously hurt or killed.
Always follow the procedures and precautions
in this
owner’s manual.
SAFETY PRECAUTIONS
Make sure the engineis off before you begin any maintenance or
repairs. Thiswill eliminate several potential hazards:
-
Carbon monoxide poisoning from engine exhaust.
Be sure thereis adequate ventilation whenever you operate
the engine.
Burns from hot parts.
Let the engine and exhaust system cool before touching.
Injury from moving parts.
Do not run the engine unless instructed
to do so.
Read the instructions before you begin, and make sure you have the
tools and skills required.
To reduce.the possibility offire or explosion, be careful when
working around gasoline. Use onlya nonflammable solvent, not
gasoline, to clean parts. Keep cigarettes, sparks and flames away
from all fuel related parts.
Remember that an authorized Honda servicing dealer knows your engine
best and is fully equippedto maintain and repairit.
To ensure the best quality and reliability, use only new genuine Honda
parts or their equivalents for repair and replacement.
11
MAINTENANCE SCHEDULE
REGULAR SERVICE PERIOD
(3)
\\
,
I
Perform at every indicated month or Before
months
month
operating hour interval whichever
each
comes first.
use
20hrs 50 hrs
ITEM
U
oilEngine
Checklevel
Chanoe
I
hrs
loo
h rs
14
0
15
-
10
Check
Air cleaner
Clean
Spark
Check-readjust
plug
16
I
17
Replace
19
20
-
Clean
Sediment
cup
I
SDark
Clean
arrester
Check-adiust
speed
Idle
Combustion
chamber
Clean
Valve
Clearance
Adjust
Fuel
tank
line
0:
I
8 filter
Clean
Fuel
(Every
1 year
year or
I
I
O(2)
Every years (Replaceif necessary) (2)
Emission related items
(1) Service more frequently when used in dusty
areas.
(2) These items should be serviced by your servicing
dealer,
unless you havethe proper tools and are mechanically
proficient. Refer to Honda shop manualfor service procedures.
(3) For commercial use, log hours of operation to determine proper
maintenance intervals.
12
REFUELING
Use unleaded gasoline with a pump octane rating
of 86 or higher. This
engine is certified to operate on unleaded gasoline. Unleaded gasoline
produces fewer engine and spark plug deposits and extends exhaust
system life.
flammable and explosive, and you can
be burned orseriously injured when refueling.
0
0
Stop engine and keep heat, sparks, and flame away.
Handle fuelonly outdoors.
Wipe up spills immediately.
pii5K-j
Fuel can damagepaint andsome typesof plastic. Be careful not
to spill
fuel when filling your fueltank. Damagecaused by spilled fuelis not
covered undertheDistributor’sLimitedWarranty.
F U E TANK
~
CAP
Never use stale or contaminated
gasoline or oillgasoline mixture.
Avoid gettingdirt or water in the fuel
tank.
Adding fuel
1. Remove the fuel tank cap.
2. Add fuel to the shoulder of the
fuel strainer.
Do not overfill. Wip
fuel before starting
Fuel tank capacity: 1.
(1.47 us qt)
ENGINE OIL
RecommendedOil
Use 4-stroke motoroil that meets or
exceeds the requirements for API
service classificationSJ. Always
check the API SERVICE label on the
oil containertobesure it includesthe -30 -'O -lo
letters SJ.
TEMPERATURE
AMBIENT
lo
2o
30
SAE IOW-30 is recommended for general use. Other viscosities shown
in
the chart may be used when the average temperature
in your area is
within the indicated range.
Oil Level Check
1. Check the oil level with the engine stopped and level.
2. Remove the oilfiller cap/dipstick and wipeit clean.
3. Insert the oilfiller cap/dipstick into the oilfiller neck as shown,
but do not screw it in, then remove it to check the oil level.
4. If the level is low,fill to the top of theoil filler neck with the
recommended oil.
5. Reinstall the oil filler cap/dipstick.
OIL FILLER CAP1
DlPSTlGK
UPPER
LIMIT
14
Oil Change
Drain the engine oil when the engineis warm. Warm oil drains quickly and
completely.
1. Place a suitable container nextto the oil drain bolt area.
filler cap/
2. Wipe the oil filler area clean, then remove the oil
dipstick.
3. Remove the oil drainbolt and
sealing washer, and allow the
oil to drain into a suitable
container. After draining,
install the drain bolt with the
sealing washer and tightenit
securely.
4. With the engine in a level
position, fill with the recommended oil. Do not overfill.
Measure the oil level as shown
on page 14.
DRAIN
BOLT
Engine oil capacity: 0.45 J? (0.48 US qt)
Please dispose of used motor oil and the oil containers
in a manner that is
compatible with the environment.We suggest you take usedoil in a sealed
Do not throw it in the
container to your local service station for reclamation.
trash, pour it on the ground, or down a drain.
I
NOTICE
I
Running the engine with alow oil level can cause engine damage.
5. Reinstall the oil filler capldipstick securely.
15
AIR CLEANER
A dirty air cleaner will restrict air flow
to the carburetor and cause poor
engine performance. Inspect the filter element each time the engine
is
operated. You will needto clean the filter element more frequently than
usual if you operate the engine very
in dusty areas.
p E i q
Operating the engine without a filter,or with damaged filter, will allow dirt
to enter theengine, causing rapid engine wear. This type of damage is not
covered underthe Distributor’s Limited Warranty.
Inspection
1. Remove the wing nut, then remove the air cleaner cover. Be
careful to prevent dirt and debris from falling into the air cleaner
base.
2. Remove the foamfilter element from the air cleaner base.
3. Inspect the filter element. Replace a damaged filter. Clean or
replace a dirty filter.
ELEMENT
CLEANING
1. Clean the air filter with warm
soapy water, rinse, and allowto
dry thoroughly.
Or clean in nonflammable
solvent and allowto dry.
2. Dip
the
filter in clean
engine
oil,
WING
NUT
then squeeze outall excess oil.
The engine will smoke when
AIR CLEANER
started if too much oil is left in
COVER
the foam.
3. Wipe dirt from the air cleaner body and cover, usinga moist rag.
Be carefulto prevent dirt from entering the carburetor.
16
SPARK PLUG
Recommended Spark Plug: NGK BPMR4A
The recommended spark plug is the correct heat range for normal engine
operating temperatures.
[
NOTICE
I
Incorrect spark plugcan cause engine damage.
For good performance, the
spark plug must be properly
gapped and free of deposits.
1. Disconnect the cap from
the spark plug, and remove
any dirt from the spark plug
area.
2. Use the proper size spark
plug wrenchto remove the
spark plug.
3. Inspect the spark plug. Replace it if
damaged,
badly
fouled,
if the
sealing
washer is in poor condition,or if the
electrodeisworn.Ifthesparkplugis
to be reused,
clean it with
wire
a
brush.
4. Measure the electrode gap with a
suitable gauge. The correct gapis
0.6 - 0.7 mm (0.024 - 0.028 in). If
adjustment is needed, correct the
gap by carefully bending the side
electrode.
17
SPARK
SPARK
PLUG
CAP
0.6 - 0.7 rnrn
(0.024 - 0.028 in)
Install the spark plug carefully, by hand, to avoid cross-threading.
After the spark plug isseated, tighten with the proper size spark
plug wrenchto compress the washer.
When installing a new sparkplug, tighten 1/2 turn after the spark
plug seats to compressthe washer.
When reinstalling the original sparkplug, tighten 118 - 114 turn after
the spark plug seats to compress the washer.
I
NOTICE
I
A loose spark plug can become veryhot and can damage the engine.
Overtightening the spark plug can damage the threadsin the cylinder
head.
9. Attach the spark plug cap to the spark plug.
SEDIMENT CUP CLEANING
1. Move the fuel valve to the OFF position, then remove the fuel
sediment cup and O-ring.
Gasoline ishighly flammable and explosive, and you can
be burned orseriously injured when handlingfuel.
Stop engine and keepheat, sparks, and flame away.
Handle fuel only outdoors.
Wipe up spills immediately.
2. Wash the sediment cup and O-ring
in nonflammable solvent,
and dry them thoroughly.
3. Place the O-ring inthe fuel valve, and installthe sediment cup.
Tighten the sediment cupsecurely.
4. Move the fuel valve to the ON position, and check for leaks.
Replace the O-ring it there is any leakage.
FUEL VALVE
O-RING
SEDIMENT CUP
SPARK ARRESTER(optional equipment)
In some areas, it is illegal to operate an engine withouta USDA (United
States Departmentof Agriculture)-qualified spark arrester. Check local
laws and regulations.A USDA-qualified spark arresteris available froman
authorized Honda servicing dealer.
19
The spark arrester must be serviced every
100 hours to keep it functioning
as designed.
If the engine has been running, the muffler will be hot. Allow
it to cool
before servicing the spark arrester.
Spark Arrester Removal
1. Remove the two 6 mm nuts and the two screws and remove the
muffler cover.
2. Remove the two tapping screws from the muffler deflector, and
remove the muffler deflector, arrester plate and spark arrester.
SPARK
ARRESTER
ARRESTER
'SCREWS
MUFFLER DEFLECTOR'
0
MUFFLER COVER
6 rnrn NCTS
Spark Arrester Cleaning8 Inspection
1. Use a brush to remove carbon deposits
from the spark arrester screen. Be careful
not to damage the screen. Replace the
spark arrester if it has breaks or holes.
2. Install the spark arrester in the reverse
order of removal.
20
HELPFUL TIPS & SUGGESTIONS
STORING YOUR ENGINE
Storage Preparation
Proper storage preparationis essential for keeping your engine
troublefree and looking good. The following steps
will help to keep rust
and corrosion from impairing your engine’s function and appearance,
to start when you useit again.
and will make the engine easier
Cleaning
If the engine has been running, allow
it to cool for at least half an hour
before cleaning. Cleanall exterior surfaces, touch up any damaged
paint, and coat other areas that may rust with
a light film of oil.
Using a garden hose
or pressurewashing equipment can force water
into
the air cleaner or muffleropening. Waterin the air cleaner will soak theair
filter, and water thatpasses through theair filter or muffler, can enter the
cylinder causing damage.
Fuel
Gasoline will oxidize and deteriorate
in storage. Deteriorated gasolinewill
cause hard starting, andit leaves gum deposits that clog the fuel system. If
to
the gasoline in your engine deteriorates during storage, you may need
have the carburetor, and other fuel system components, serviced or
replaced.
The length of time that gasoline can be inleft
your fuel tank and carburetor
without causing functional problems will vary with such factors as gasoline
blend, your storage temperatures, and whether the fuel tank
is partially or
completely filled. The airin a partially filled fuel tank promotes fuel deterioration. Very warm storage temperatures accelerate fuel deterioration. Fue
problems may occur within a few months, or even less if the gasoline w
not fresh when you filled the fuel tank.
21
Fuel system damage or engine performance problems resulting from
the Distributor’s
neglected storage preparation are not covered under
Limited Warranty.
You can extend fuel storage life by adding a gasoline stabilizer that
is
formulated for that purpose, or you
can avoid fuel deterioration
problems by draining thefuel tank and carburetor.
ADDING A GASOLINE STABILIZER TO EXTEND FUEL
STORAGE LIFE
When adding a gasoline stabilizer,fill the fuel tank with fresh gasoline. If
only partially filled, air in the tank will promote fuel deterioration during
storage. If you keep a container
of gasoline for refueling, be sure that it
contains only fresh gasoline.
1. Add gasoline stabilizer following the manufacturer’s instructions.
2. After adding a gasoline stabilizer, run the engine outdoors for10
minutes to be sure that treated gasoline has replaced the untreated
gasoline in the carburetor.
3. Stop the engine, and turn the fuel valveto the OFF position (see
Page 9).
DRAINING THE FUEL TANK AND CARBURETOR
Gasoline is highly flammable and explosive, and you can
be burned or seriously injured when handling fuel.
Stop engine and keep heat, sparks, and flame away.
Handle fuel only outdoors.
Wipe up spills immediately.
22
1. With the fuel valveOFF, remove and emptythe sediment cup.
2. Turn the fuel valve ON and drainthe gasoline inthe fuel tank
into a suitable container.
3. Replace the sediment cup and tighten securely.
4. Drain the carburetorby loosening the drain screw.
Drain the gasoline into a suitable
container.
FUEL VALVE
SEDIMENT CUP
DRAIN SCREW
OIL
Engine oil
SPARK PLUG HOLE
1. Change the engine oil (see
page 15).
2. Remove the spark plug (see
page 17).
3. Pour a tablespoon(5 - 10 cc) of
clean engine oil into the
cylinder.
4. Pull the recoil starter several
times to distribute the oil.
5. plug.
Reinstall
spark
the
23
f
Storage Precautions
If your engine will be stored with gasoline
in the fuel tank and carburetor,
it
is important to reduce the hazard of gasoline vapor ignition. Select a
well-ventilated storage area away from any appliance that operates with a
flame, suchas a furnace, water heater,or clothes dryer.Also avoid any
area with a spark-producing electric motor,
or where power toolsare
operated.
If possible, avoid storage areas with high humidity, because that promotes
rust and corrosion.
If thereis gasoline in the fuel tank, leave the fuel valve
in the OFF position
(see page9).
Keep the engine levelin storage. Tilting can cause fuel
or oil leakage.
With the engine and exhaust system cool, cover the engine to keep out
dust. A hot engine and exhaust system
can ignite or melt some materials.
Do not use sheet plastic as a dust cover.
A nonporous cover will trap
moisture around the engine, promoting rust
and corrosion.
Removal From Storage
Check your engine as describedin the BEFORE OPERATION CHECKS
section of this manual (see page
5).
If the fuel was drained during storage preparation,
fill the tank with fresh
gasoline. If you keep a container of gasoline for refueling,
be sure it
contains only fresh gasoline. Gasoline oxidizes
and deteriorates over time,
causing hard starting.
If the cylinder was coated with
oil during storage preparation, the engine
will smoke brieflyat startup. Thisis normal.
TMNSPORTING
Keep the engine level when transporting to reduce the possibility of fuel
OFF position (see page9).
leakage. Turn the fuel valve to the
24
TAKING CARE OF UNEXPECTED PROBLEMS
ENGINE
WILL
NOT START
I
POSSIBLE
CAUSE
1
1. Check choke lever
position
Choke leverin wrong
position.
CORRECTION
Move choke lever to the
CLOSE position unless engine
is warm (p.7)
2. Check fuel.
Out of fuel.
Fuel valve OFF. Turn
Refuel (p.13)
fuel valve ON.
Drain fuel tank and carburetor
Bad fuel; engine stored
draining
(p.22 and 23) Refuel with without
gasoline, or refueled withbad fresh gasoline (p.13).
gasoline.
Clean, gap, or replace spark
plug (p.17 and 18). improperly gap
Dry and reinstall spark plug.
Try to start the engine. (p.6,7
and 8)
4. Take the Honda engine to Fuel filter clogged, carburetor Replace or repair faulty
ignition
components as necessary. malfunc
a Honda engine dealer, or
to shop manual.
malfunction, compression refer
problem.
CORRECTION
LOSS OF POWER
POSSIBLE CAUSE
Air filters clogged.
Clean or replace air filters
1. Check air filter?..
(P. 16)
Drain fuel tank and carburetor
2. Check fuel.
Bad fuel; engine stored
without treatingor draining
(p.22 and 23) Refuel with
gasoline, or refueled with bad fresh gasoline (p.13).
gasoline.
Position the throttle leverin
Throttle lever in wrong
3. Check throttle lever
fast position.
position.
position.
Fuel filter clogged, carburetor Replace or repair faulty
4. Take the engine to your
components asnecessaiy.
malfunction, ignition
setvicing Honda engine
dealer or refer to the shop malfunction, compression
manual.
problem.
3. Remove and inspect spark Spark plug faulty, fouled, or
Plug.
Spark plug wet with fuel
(flooded engine).
25
TECHNICAL & CONSUMER INFORMATION
TECHNICAL INFORMATION
Serial Number Location
Record the engineserial number in the space below. Youwill need this
information when orderingparts and when making technical or warranty
inquiries.
Engine serial number: GJAE
-
26
Carburetor Modification For High Altitude Operation
At high altitude,the standard carburetor air-fuel mixture will be
too rich.
Performance will decrease, and fuel consumption will increase. A very ric
mixture will also foul the spark plug and cause hard starting.
High altitude performance can be improved by specific modifications
to the
1,500
carburetor. If you always operate your engine at altitudes above
meters (5,000 feet) have an authorized Honda servicing dealer perform
this carburetor modification.
Even with carburetor modification, engine horsepower will decrease about
3.5% for each 300 meter(1,000 foot) increasein altitude. The effect of
altitude on horsepower willbe greater than this ifno carburetor
modification is made.
I
NOTICE
I
When the carburetor has been modified for high altitude operation, the
air-fuel mixture will be too lean for low altitude use. Operation at altitudes
below 1,500 meters (5,000 feet} with a modified carburetor may cause the
engine to overheat and result in serious engine damage. For use at low
altitudes, have an authorized Honda servicing dealer return the carburetor
to original factory specifications.
27
Oxygenated Fuels
Some conventional gasolinesare being blended with alcoholor an ether
compound. These gasolines are collectively referredto as oxygenated
fuels. To meet clean air standards, some areas of the United States and
Canada use oxygenated fuelsto help reduce emissions.
If you use oxygenated fuel, be sure it is unleaded and meets the minimum
octane rating requirements.
Before using an oxygenated fuel, try
to confirm the fuel’s contents.
to be posted on the pump.
Some stateslprovinces require this information
The following are the EPA approved percentages of oxygenates:
ETHANOL
- (ethyl or grain alcohol) 10% by volume
You may use gasoline containingup to 10% ethanol
by volume. Gasoline containing ethanol may
be
marketed under thename Gasohol.
MTBE
-
(methyl tertiary butyl ether) 15% by volume
You may use gasoline containing upto 15% MTBE by
volume.
METHANOL
-
(methyl or wood alcohol) 5% by volume
You may use gasoline containingup to 5%
methanol by volume as long
as it also contains
cosolvents and corrosion inhibitorsto protect the
5%
fuel system. Gasoline containing more than
methanol by volume may cause starting andlor
performance problems.It may also damage metal,
rubber, and plastic parts of your fuel system.
If you notice any undesirable operating symptoms, try another service
station or switch to another brand of gasoline.
Fuel system damageor performance problems resulting from the
use
of an oxygenated fuel containing more than the percentages
of
oxygenates mentioned above are not covered under the
Distributor’s
Limited Warranty.
28
Emission Control System Information
Source of Emissions
The combustion process produces carbon monoxide, oxides of nitrogen,
and hydrocarbons. Controlof hydrocarbons and oxides of nitrogen is very
important because, under certain conditions, they react
to form
photochemical smog when subjectedto sunlight. Carbon monoxide does
not reactin the same way, butit istoxic.
Honda utilizes lean carburetor settings and other systems to reduce the
emissions of carbon monoxide, oxides of nitrogen, and hydrocarbons.
The U.S. and California Clean Air Acts
EPA and California regulations requireall manufacturers to furnish written
instructions describing the operation and maintenance of emission contro
systems.
The following instructions and procedures must
be followed in order to
keep the emissions from your Honda engine within the emission
standards.
Tampering and Altering
Tampering withor altering the emission control system may increase
emissions beyond the legal limit. Among those acts that constitute
tampering are:
0
Removal or alteration of any part of the intake, fuel, or exhaust
systems.
Altering or defeating the governor linkage or speed-adjusting
mechanism to cause the engine to operate outside
its design
parameters.
29
Probiems That May Affect Emissions
If you are aware of any
of the following symptoms, have your engine
inspected and repaired by your servicing dealer.
Hard starting or stalling after starting.
Roughidle.
Misfiring or backfiring under load.
Afterburning(backfiring).
Black exhaust smokeor high fuel consumption.
Replacement Parts
The emission control systems on your Honda engine were designed, built
and certified to conform with EPA and California emission regulations. We
recommend the use of genuine Honda parts whenever you have maintenance done. These original-design replacement parts are manufactured to
the same standards as the original parts,so you can be confident of their
performance. Theuse of replacement parts that are not of the original
design and quality may impair the effectiveness of your emission control
system.
A manufacturer of an aftermarket part assumes the responsibility that the
part will not adversely affect emission performance. The manufacturer or
rebuilder of the part must certify that
use of the part will not result in a
failure of the engineto comply with emission regulations.
Maintenance
Follow the maintenance scheduleon page 12. Remember that this
schedule is based on the assumption that your machine will
be used forits
designed purpose. Sustained high-load or high-temperature operation, or
use in unusually wetor dusty conditions, will requiremore frequent
service.
30
Specifications
* Rated
speed is 3,600 rpm.
Specifications are subject to change without notice.
Tuneup
. Specifications
.
ITEM
I
I
SPECIFICATION
I
Valve Clearance (cold)
I
0.08- 0.16 mm
(0.003- 0.006 in)
I
PAGE
I
Seevour
No other adjustmentsneeded.
Other specifications
Quick Reference Information
Fuel
TY Pe
Unleaded gasoline witha pump oclane
rating of 66 or higher (page 13).
Engine Oil
Capacity
Type
1.4 (1.47 US qt)
SAE IOW-30. API SJ for general use,
Refer to page 14.
e
e
Capacity
0.45 (0.48 US qt)
Type Spark plug BPMR-4A
gap
(NGK)
0.6 - 0.7 mm (0.24 - 0.28in)
Gap
Refer to page 16.
31
I
CONSUMER INFORMATION
Honda Publications
These publications will give you additional information for maintaining and
repairing you engine. You may order them from an authorized Honda
enaine servicing dealer.
Shop Manual
This manual covers complete maintenance and
overhaul procedures.It is intended to be used by a
skilled technician.
This manual provides complete,illustratedparts lists.
Parts Catalog
Warranty
Service Information
Honda engine dealership personnel are trained professionals. They should
be able to answer any question you may have. If you encounter a problem
that your dealer does not solve to your satisfaction, please discuss
it with
the dealership’s management. The Service Manager or General Manager
can help. Almostall problems are solvedin this way.
If you are dissatisfied with the decision made
by the dealership’s
management, contact the Honda Power Equipment Customer Service
Office. You can write:
American Honda MotorCo., Inc.
Power Equipment Division
Customer Relations Office
4900 Marconi Drive
Alpharetta, GA 30005-8847
Or telephone: (770) 497-6400, M-F, 8:30 am
- 500 pm EST
When you write orcall, please giveus this information:
Model and serial numbers (see page
26)
Name of the dealer who sold the engine you
to
Name and address of the dealer who services your engine
Date of purchase
Your name, address, and telephone number
A detailed description of the problem
32