1
~Use&nd&re & ln~llation Guid6
ElectricRange
❑
❑
!
Safe~ Instructions...................3-5
Anti-Tp Device ................................ 3, 23,31
Problem Solver.............................. 32
More questions?...call
GEAnswerCenteP 800.626.2000
OperatingInstrutiions,~ps
Clock and Tmer ................................... 10, I I
Features......................................................- 6,7
Oven ....................................................... 11-22
Bating ................................................. 13-17
Broiling................................................ 19,20
Control Settings....................................... I I
Preheating........................... 11, 13, 15, 16
Roasting..................................................... 18
Self< leaning Instructions.............. 21, 22
Treed Baking.................................... 13-17
Surface Cooking........................................ 8,9
Control Setiings.......................................... 8
CooWare Taps...................................... 9
installation
................................. 28-31
Anti-Tp Device ............................................ 3 I
Flooring Under the Range ........................... 5
Leveling............................................................ 5
Careand Cleaning...................23-27
~Models:
Cooktop......................................................... 24
Door Removal .............................................. 26
Oven Light..................................................... 25
Self-CleaningInstructions.................21. 22
Standard Oven............................................. 27
Surface Units................................................ 23
GEAppliances
Consumer Services..................35
Appliance Registration..................................2
Important Phone Numbers....................... 35
Model and Serial Location ...........................2
Warranw ........................................Back Cover
JCS57
JCP67
I
~LP
US ~LP
Before using your range,
read this guide carefully.
YOU
If you receiveda damaged range...
It is intended to help you operate and maintain your
new range properly.
Keep it handy for answers to your questions.
If you don’t understand something or need more help,
write (include your phone number):
Consumer Mairs
GE Appliances
Appliance Park
Louisville, KY 40225
Immediately contact the deder (or builder) that sold
you the range.
Save time and money.
Beforeyou request service...
Check the Problem Solver in the back of this guide.
It lists causes of minor operating problems that you
can correct yourself.
Write dom the model
and serial numbers.
You’ll find them on a label on the front of the range,
behind the left oven or storage compartment door:
These numbers are also on the Consumer Product
Ownership Registration Card that came with your
range. Before sending in this card, please write these
numbers here:
Model Number
Serial Number
Use these numbers in any correspondence or service
calls concerning your range.
W YOU~ED SERWCE
To obtain service, see the Consumer Services page
in the back of this guide.
We’re proud of our service and want you to be
pleased. If for some reason you are not happy with
the service you receive, here are three steps to follow
for further help.
HRST, contact the people who serviced your
appliance. Explain why you are not pleased. In most
cases, this will solve the problem.
2
NEXT, if you are still not pleased, write all the
details-including your phone number—to:
Manager, Consumer Relations GE Appliances
Appliance Park
Louisville, KY 40225
HNWLY, if your problem is still not resolved, write:
Major Appliance Consumer Action Panel
20 North Wacker ~ive
Chicago, ~ 60606
HORTANT
SAFETY NOTICE
. The Ctiornia Safe Drinking Water and Tofic
EnforcementAct requires the Governor of
Cdifomia to pubfish a list of substancesknown to
the stateto cause birth defectsor otherreproductive
harm, and requires businesses to warn customers
of potential exposure to such substances.
The fiber@assinitiation in sex-clean ovens
gives off a very sm~ amount of carbon
monoxide during the cleaning cycle. Exposure
can be minimized by venting with an open
window or using a ventilationfan or hood.
●
Fluorescentlight bulbs contain mercury.
If your model has a surface light, you must
recycle the fluorescent light bulb according to
local, state and federd codes.
●
men using electrical appliances,basic safety
precautions should be followed, includingthe
following:
●
●
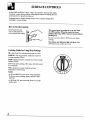
AWA~IN&
AUranges can tip and injury could
resdt. To prevent accidental tipping
of the range, attach it to the floor by
instiling the Anti-Tip device supplied.
To check if the device is installed and
engaged properly,remove the storage
drawer and inspect the rear leveting
legs. Make sure they fit securely under
the ends of the bracket.
E you pull the range out from the wall for any
reason, make sure the device is properly engaged
when you push the range back against the wall.
Hit is not, there is a possible risk of the range
tipping over and causing injury if you or a child
stand, sit or lean on an open door.
Please refer to the Anti-Tip device information
in this guide.Failure to take this precaution could
result in tipping of the range and injury.
●
Use this appliance only for its intended use
as described in this guide.
Be sure your appliance is properly instiled
and grounded by a qualified technician in
accordancewith the provided installation
instructions.
●
●
●
●
●
●
Do not attempt to repair or replace any
part of your range unless it is spec~ldy
recommendedin this guide. All other servicing
shouldbe referred to a qualified technician.
Before performing any service, DISCONNECT
T~ RANGE POWER SUPPLYAT THE
HOUSEHOLD DISTNBUTION PANEL BY
REMOWG T~ FUSE OR S~C~G
OFF
THE CRCU~ BREAKER.
Do not leave children done<hildren should
not be left alone or unattendedin an area where an
applianceis in use. They should never be allowed
to sit or stand on any part of the appliance.
Do not allow anyone to climb, stand or hang
on the door,storage drawer or cooktop. They
could dmage the range and even tip it over,
causing severe personal injury.
Keep the hood and greasefiiters clean to
maintaingood venting and to avoid grease fires.
Do not let cooking grease or other flammable
materials accnmdate in or near the range.
CAUTION: ITEMS OF ~TEREST TO
CH~DREN SHOULD NOT BE STORED ~
CAB~ETS ABOVE A RANGE OR ON THE
BACKSPLASH OF A RANGE-C~LDWN
CLMB~G ON THE RANGE TO REACH
nEMS COULD BE SERIOUSLYIN~~D.
●
Do not store flammable materials in an oven or
near the cooktop.
QNever wear loose-fitting or hanging garrnenfi
while using the appliance. Be careful when
reaching for items stored over the range.
Hammable material could be ignited if brought
in contact with hot surface units or heating
elements and may cause severe burns.
Use only dry pot holders-moist
or damp pot holders on hot surfaces
may result in burns from steam. Do
not let pot holders touch the hot surface units or
the heating elements. Do not use a towel or other
buky cloth.
●
●
●
For your safety, never use your appliance for
warming or heating the room.
DO NOT STORE OR USE COMBUST~LE
MATE~LS, GASOLINE OR OTHER
FLAMMABLE VAPORSAND LIQUIDS IN
THE VIC~ITY OF T~S OR ANY OTHER
APPLMNCE.
(continued nextpage)
2
!
U
w
WORTMT
S~W
Do not use water on grease fires.
Never pick up a flaming pan.
Turn the surface units and the
heating elements off. Smother a flting pan
on a surface unit by covering the pan completely
with a well-fitting fid, cookie sheet or flat tray.
Use a multi-purposedry chemical or foam-type
fiie extinguisher.
;’9’
●
●
~STRUC~ONS
(Condnued)
●
Do not touch the surface unifi, the hating
elements or the interior surface of the oven.
These surfaces may be hot enough to bum even
though they are dark in color. During and after
use, do not touch, or let clothing or other
flammable materials contact surface units, areas
nearby surface units or any interior area of the
oven; allow sufficienttime for cooling, f~st.
Potentiallyhot surfaces include the cooktop,
areas facing the cooktop, oven vent opening,
surfaces near the opening and crevices around
the oven door.
Remember: The inside surface of the oven may
be hot when the door is opened.
When cooking pork, follow the directions
exactly and always cook the meat to an internal
temperatureof at least 170°F.This assures that,
in the remote possibilitythat trichina maybe
present in the meat it will be tiled and the meat
will be safe to eat.
●
●
●
●
●
●
●
●
●
Do not heat unopened food containers.
Pressure could build up and the container
could burst, causing an injury.
c Keep the oven vent
<A.-Q ,- duct unobstructed.
● Keep the oven free
from grease buildup.
h
●
Place the oven shelf in desired position
while the oven is cool. If shelves must be
handled when hot, do not let pot holder contact
the heating elements in the oven.
Do not use oven for a storage area. Items stored
in an oven can ignite,
Do not leave paper products, cooking utensils
or food in the oven when not in use.
Self-Cleating Oven
Oven
Stand away from the range when opening
the oven door.Hot air or steam which escapes
can cause burns to hands, face andor eyes.
When using cooking or roasting bags in the
oven, follow the manufacturer’sdirections.
c Do not use your oven to dry newspapers.
If overheated,they can catch fire.
●
●
Wing out the sheti to the she~ stop is a
conveniencein lifting hmvy foods. It is also
a precaution againstbums from touching hot
surfaces of the door or oven walls.
●
Do not clean the door gasket. The door gasket is
essential for a good seal. Care should be taken not
to rub, damage or move the gasket.
Do not use oven cleaners. No commercial
oven cleaner or oven liner protective coating
of any kind should be used in or around any
part of the oven. Residue from oven cleaners
will damage the inside of the oven when the
seE-clean cycle is used.
Clean only parts listed in this Use and
Care Guide.
Before self-cleaning the oven, remove the
brofler pan and other cookware.
Be sure to wipe up excess spillage before
starting the seti-cleaningoperation.
E the seti-cleaningmode matiunctions,turn the
oven off and disconnectthe power supply.Have
it serviced by a qualified technician.
Sutiace CookingUnits
Use proper pan siz*Select
&%_
cookwarehavingflat bottoms
large enoughto cover the surface
e ~
unit heatingelement.The use of undersized
cookwarewtil exposea portionof the surface
unit to direct conmctand may result in ignition
of clothing.hoper relationshipof cookwareto
surfaceunit will dso improveefficiency.
●
GNever leave surface units unattended at high
heat settings. Boiloverscause smoking and
greasy spilloversthat may catch on fire.
4
●
Be sure the drip pans and the vent duct are not
covered and are in place. Theirabsence during
cooking could damage range parts and wiring.
●
Do not use ahuninum foil to tine the drip pans
or anywhere in the oven except as described in
this guide. Misuse could result in a shock, fire
hazard or damage to the range.
●
●
Ody certain types of @ass, ~as#ceramic,
earthenware or other glazed containers are
suitible for cooktop service; others may break
because of the sudden change in temperature.
●
●
●
●
●
men flaming foods are under the hood,
turn the fan off. The fan, if operating, may spread
the flame.
Keep an eye on foods being fried at high or
medium high heat settings.
Foods for frying should be as dry as possible.
Frost on frozen foods or moisture on fresh foods
can cause hot fat to bubble up and over the sides
of the pan.
●
Use Uttiefat for effective shallow or deep-fat
frying. Filling the pan too full of fat can cause
spilloverswhen food is added.
●
To minimize the possibfity of burns, ignitionof
flammable materialsand spillage,the handle of a
container shouldbe turned toward the center of the
range withoutextendingover nearby surface units.
●
Always turn the surface units off before
removing cookware.
●
To avoid the possibility of a burn or electric
shock, always be certain that the controls for
all surface units are at the off position and dl
coils are cool before attemptingto lift or remove
a unit.
E a combinationof otis or fa~ will be used
in frying, stir together before heating, or as fats
melt slowly.
●
Always heat fat slowly, and watch as it heats.
Use a deep fat thermometer whenever
possibleto prevent overheating fat beyond
the smoking point.
Do not immerse or soak the removable surface
units. Do not put them in a dishwasher. Do not
seH-clean the surface uniti in the oven.
Instilkg the Range
Your range, like many other household items, is
heavy and can settle into soft floor coverings such
as cushioned vinyl or carpeting. Be careful when
moving the range on this type of flooring. It should be
installed on a 1/4” thick sheet of plywood (or similar
material) as follows:
Men the floor covering ends at the front of the
range, the area that the range will rest on should be
built up with plywood to the same level or higher than
the floor covering. This will allow the range to be
moved for cleaning or servicing.
Leveltig the Range
~veling screws maybe located on each comer of
the base. By removing the bottom drawer you can
level the range to an uneven floor by adjusting the
leveling legs.
To remove the drawer, pull tie drawer out all the way,
tilt up the front and remove it. To replace, insert the
glides at the back of the tiawer beyond the stop on
the range glides. Lift the drawer if necessary to insert
it easily. Let the front of the drawer down, then push
it in to close.
5
JCS57
JCP67
6
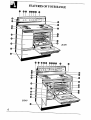
Features
1 Surface Light Switch
2 Oven Temp Knob
3 Oven Set Knob
4 SurfaceUnit Control Knobs
5 Automatic Oven Timer, Clock and Minute Tmer
6 Surface Unit “ON’ Indicator Klght
7 Oven Vent
Located under the right and left rear surface units.
8 Lift-Up Cooktop
9 Oven Interior Light
Comes on automaticallywhen the door is opened.
10 Oven SheK Supports Shelf positionsfor cooking are
suggestedin the Baking,Roastingand Broiling sections.
11 Oven Shelves with Stop-Locks
12 Bake Element In the right oven, maybe lified gently
for wiping the oven floor.
13 Oven Light Switch
14 Storage Drawer
15 Lift-Off Oven Door with Brofl Stop Position
16 Storage Compartment with Shelf (Model JCS57)
17 Broiler Pan and Grid
Do not clean in the self-cleaning oven (Model JCP67).
18 Broil Element
19 Drip Pans
20 Surface Uni&
21 Oven CycHngLight
22 Left Oven Control Knob (Model JCP67)
23 Companion (Left) Oven (Model JCP67)
24 Companion (Left) Oven Cychng Light
(Model JCP67)
25 Oven Cleaning Light (Model JCP67)
26 Self-Cleaning Oven (Model JCP67)
Explained
On Page
24
11, 13, 14,
18, 19,21,
22,24
11, 13, 14,
18, 19,21,
22,24
8,9,24
10, 11.13,
14,21
8
4
24
11,25
12
12, 1618,
25
3,4,27
11
24
19,21,26
27
18.19.
2i, 25
3,4, 19,27
5,23
3-5,
8,9,23
11,
13-15,21
11, 15, 18,
19,24
11, 12, 15,
18, 19,27
15
21,22
21,22
SU~ACE CONTROLS
At both OFF and HI the control “clicks” into position. You may hear slight
“clicking” sounds during cooking, indicating the control is keeping the unit
at the heat level or power level you set.
Switching heats to higher settings always shows a quicker change than
switching to a lower setting.
How to Set the Controls
Wsh the knob in and
~rn in either direction
to the desired heat setting.
Cooting Guide for Using Heat Settings
~—Quick start for cooking; bring water to a boil.
MED HI—Fast fry, pan broil; maintains a fast boil
on large amounts of food.
MED-Saut6 and brown; maintain slow boil on large
amount of food.
LO<ook
after starting at ~; cooks with little water
in covered pan.
WM+team rice, cereal; maintain serving
temperature of most foods.
NOTE:
● At ~
and MED HI, never leave food unattended.
Boilovers cause smoking; greasy spillovers may
catch fire.
● At WM and LO, melt chocolate, butter on a small
surface unit.
8
The control must be pushed in to set only from
the OFF position. When the control is in any
position other than OFF, it maybe turned without
pushing it in.
Be sureyou turn control to OFF when you finish
cooking.
The surface unit indicator light will glow when
ANY heat on any surfaceunit is on.
SHACE
COOKWA~ ~S
Cookware
Use medium- or heavy-weight cookware. Aluminum
cookware conducts heat faster than other metals.
Cast-iron and coated cast-iron cookware are slow to
absorb heat, but generally cook evenly at low to
medium heat settings. Steel pans may cook unevenly
if not combined with other metals.
For best cooking results pans should be flat on the
bottom. Match the size of the saucepan to the size of
the surface unit. The pan should not extend over the
edge of the surface unit more than 1 inch.
RIGHT
WRONG
Not over 1 inch
Over 1 inch
Deep Fat Frying
Do not ovetilll cookware with fat that may spill over when adding food.
Frosty foods bubble vigorously. Watch food frying at high temperatures.
Keep the range and hood clean from grease.
Wok Cooking
We recommend that you use
only a flat-bottomedwok.
~
They are availableat your
local retailstore.
Do not use woks that have
vZ:.
,,l:;
support rings. Use of these
typesof~oks Wither
withoutthe ri;g in place,
~*,;*~’~S4
*
can be dangerous.Placing
the ring over the surface unit
‘:’
“‘
will cause a build-up of heat that will damage
the porcelain cooktop. Do not try to use such woks
without the ring. You could be seriously burned if the
wok tipped over.
9
The automatic timer and clock on your range are helpful devices that serve
several purposes.
To Set the Clock
To Set the Minute Timer
Model JCS57
The minute timer has been combined with the
range clock. Use it to time dl your precise cooking
operations. You will recognize the minute timer as
the pointer which is different in color and shape than
the clock hands.
To set the minute timer, turnthe centerknob,
withoutpushingin, untilthepointerreachesthe
numberof minutesyouwishto time.(Minutesare
marked,upto 60, in thecenterringontheclock.)
Model JCS57
To set the clock, pushthe centerknob of the clock in
and turn the clock hands to the correct time.
NOTE: The minutetimerpointerwill move also; let
the knob out and turnthe timerpointerto 12.
At the end of the set time, a buzzer sounds to tell
you time is up. Turn the knob, without pushing in,
untilthe pointerreaches 12 and the buzzer stops.
ToSet the Digiti Clock
To Set the Minute Timer
Model JCP67
Toset the minutetimer,turnthecenterknob
clockwise,withoutpushingin, untilthepointer
reachesthenumberof minutesyouwishto time
Model JCP67
(Up to 60).
At the end of the set time, a buzzer sounds to tell you
time is up. Turn the center knob, without pushing in,
until the pointerreaches0~ andthe buzzer stops.
Toset the clock,push in the center knob of the
minute timer and turn the knob in either direction to
set the digital clock numerals to the correct time.
NOTE: After setting the clock, let the knob out, and
turn the minute timer pointer to 0~.
TimedBakingUses the AutomaticTimer
Self-CleaningUses the AutomaticTimer
Using the automatic timer, you can Time Bake
with the oven starting immediately and turning off
at the Stop Time set or set both the STOP and the
START dials to automatically start and stop the oven
at a later time of day. It takes the worry out of not
being home to start or stop tie oven. See the Timed
Baking section.
Model JCP67—Right Oven
The self-cleaning function on your range uses the
automatic timer to set the length of time needed to
clean whether you wish to clean immediately, or
delay the cleaning. By setting the START andor
STOP dials you may choose to begin immediately
or clean at low energy times such as during the night.
See the Operating the Self-Cleaning Oven section.
NOTE: Before beginning Timed Baking or
Self-Cleaning, make sure the oven clock shows
the correct time of day.
10
Questions and Answers
Q. How can 1use the minutetimerto makemy
surfacecookingeasier?
A. Theminute timer will help time total cooking,
which includes time to boil food and change
temperatures. Do not judge cooking time by
visible steam only. Food will cook in covered
containers even though you can’t see my steam.
Q. Can I w the minutetimerduringovencooking?
A. The minute timer can be used during any cooking
function. The automatic timers (START and STOP
dids) are used with TIME BAKE and CLEAN
functions.
Q. Can I changethe time of day on the clock
whkleI’m TimeBtilng in the oven?
A. The time of day on the clock should not be changed
I
during any program that uses the oven timer. You
must either stop those programs or wait until they
are finished before changing the time.
USmG YOUR OWN
Before Using YourOven
1. Look at the controls. Be sure you understand how
to set them properly.
2. Check the oven interior. hok at the shelves.
Take a practice run at removing and replacing
them properly to give sure, sturdy support.
3. Read over the information and tips that follow.
4. Keep this guide handy so you can refer to it,
especially during the first weeks of getting
acquainted with your range.
I
Oven Controls
The controls for the right oven aremarkedOVEN
SET and OVEN TEMP
The OVEN SET knob has settings for TIME BAKE,
BAKE, CLEAN, BRO~ and OFF.
The OVEN TEMP knob maintains the temperature
you set from WARM (200°F.) to BROIL (550°F.) and
also at CLEAN (over 800°F.).
The control for the lefi oven is markedLE~
OVEN. The LEFTOVEN controlknob has
temperaturesettingsthatrangefrom 150°F.to
500°F. andBROL.
The Oven Cycfing Light glows until the oven
reaches the selected temperature, then goes off and
on with the heating elements during cooking.
Preheatingthe oven, evento hightemperature
settings,is speedy—rarely
takingmorethan5 to
6 minutes.Preheattheovenonlywhennecessary.
Manyfoodswillcooksatisfactorilywithout
preheating.If youfindpreheatingis necessary,see
the How to Set Your Range for Preheating section.
Oven Light
The light comes on automatically when the door is opened. Use the switch
on the control panel to turn the light on and off when the door is closed.
(continued mxtpage)
11 I
a,,
US~G YOUR OWN
(continued)
Oven Interior Shelves
Rght Oven
The shelv~ in the right oven are designed tith
stop-loch so that when placed correctly on the
she~ supports, the she~ Ml stop before coming
completely out from the oven, and will not tilt when
remoting food nor when placing food on them.
To remove a shelf from the right oven, pull the shelf
forward until it stops. Lift the front and slide it out.
Be certain that the shelf is cool before touching it.
To replace the sheMin the oven, fit
the shelf onto
the guides. Tilt the front up and slide into place.
Left Oven—Model JCP67
The left oven comes with a removableshelf for
easy cleaning.
To remove, pull the shelf out and up in one
smooth motion. Be certain that the shelf is cool
before touching it.
To replace, tilt the front of the shelf up and slide
it into place.
Shelf Positions
Kght Oven
The oven has four
shelf supports—
1 (bottom), 2,
3 and 4 (top).
Shelf positions for
cooking are
suggested in the
Baking, Roasting
and Broiling
sections.
Left Oven—Model JCP67
This oven also has four shelf supports-1 (bottom),
2,3 and 4 (top). See the Baking, Roasting and
Broiling sections for the suggested shelf positions.
Using Foil Correctlyin the Oven
If you wish to use foil for possible spillovers, cut a piece of foil slightly
larger than the pan and turn up the edges. Place the foil on the oven shelf
below the pan.
CAUTION: Never cover an entire oven shelf or the oven bottom with foil.
The foil can obstruct normal heat flow, cause cooking failure and damage
the oven interior.
12
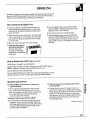
BA~G
Am MD
BA~G
Your oven temperature is controlled very accurately using an oven control
system. We recommend that you operate the range for a number of weeks
using the time given on recipes as a guide to become familiar with your new
oven’s performance.
NOTE: When the oven gets hot, the top and outside surfaces of the range
get hot too.
How to Set the Range for Preheating (tight
Oven)
Preheating is generally done before baking. The oven
should be preheated to the temperature you want
unless your recipe says not to.
To avoid possible bums, place the shelves in the
correct position before you turn the oven on.
How to Set the Range for Baking (Rght
1. Turn the OVEN SET knob to BAW.
2. Turn the OVEN TEMP knob to the desired
temperature setting.
3. When the oven has preheated, the Oven Cycling
Light will go out. (This indicates the oven has
reached the set temperature.)
Oven)
To avoid possible burns, place the shelves in
the correct position before you turn the oven on.
1. Turn the OVEN SET knob to BA~ and
the OVEN TEMP knob to the temperature
in the recipe.
2. Check food for doneness at minimum time
in the recipe. Cook longer if necess~.
3. Turn the OVEN SET and the OVEN TEMP knobs
to 0~ and then remove the food from the oven.
@@
How to The Bake (Wght Oven)
The automatic oven timer controls are designed
to turn the oven on or off automatically at specific
times that you set. Examples of Immediate Start and
Automatic Stop (the oven turns on now and you set
it to turn off automatically) or Delay Start and
Automatic Stop (setting the oven to turn on
automatically at a later time and turn off at the preset
Stop Time) will be described.
On model JCP67, the STOP and ST~T dials are
different in appearance than the dials on the JCS57.
However, they do operate in the same manner.
NOTE: Before beginning, make sure the clock
shows the correct time of day.
‘:“’’:,,-’
.;
k
--
8$.:
.’.
,
=
‘
.~ :\\.’
●,(,, ,,l\
7=5
$)
0.,,,,,,>....’4
4
7e5
:39:
s)”::
❑7es
;,,,,,, >...$4
Model JCS57
I
I
1
m
Model JCP67
(continued neti page)
13
BA~G
~
HD
BA~G
(continued)
How to Set Immediate Start and Automatic Stop (Right Oven)
To avoid possible burns, place the shelves in the
correct position before you turn the oven on.
The oven will turn on immediately and cook for a
selected length of time. At the end of Cook Time the
oven will turn off automatically.
@@
OVEN ~MP
o
OVEN SET
Appearancemay vary.
Turn the OVEN SET knob to TIMED BA~.
Turn the OVEN TEMP knob to the desired oven
temperature, for example, 250°F.
NOTE: Foods that spoil easily such as milk, eggs,
fish, stuffings, poultry and pork should not be allowed
to sit for more than one hour before or after cooking.
Room temperature promotes the growth of harmful
bacteria. Be sure that the oven light is off because heat
from the bulb will speed harmful bacteria growth.
2.
Appearancemay va~,
1. The ST~T dial should be at the same position as
the time of day on the clock. To set the Stop Time,
push in the knob on the STOP did and turn the
pointer to the time you want the oven to turn off,
for example 7:00.
How to Set Delay Start and Automatic Stop (Right Oven)
To avoid possible burns, place the shelves in the
correct position before you program the oven.
You can set the oven control to turn the oven on
automatically, cook for a specific length of time
and turn off automatically.
@@
OVEN
TEMP
o
OVEN SET
Appearancemay vay.
Turn the OVEN SET knob to TIMED BA~.
Turn the OVEN TEMP knob to the temperature
you want.
Place the food in the oven, close the door and
automatically the oven will be turned on and off
at the times you have set.
4. Turn the OVEN SET and the OVEN TEMP knobs
to OFF and remove the food from the oven.
The Oven Cycling Light(s) at the T~ED BA~
setting may work differently than they do at the
BA~ setting.
Carefully recheck the steps given. If all operations are
done as explained, the oven will operate as it should.
NOTE: Foods that spoil easily such as milk, eggs,
fish, stuffings, poultry and pork should not be allowed
to sit for more than one hour before or after cooking.
Room temperature promotes the growth of harmful
bacteria. Be sure that the oven light is off because heat
from the bulb will speed harmful bacteria growth.
3.
Appearancemay vary.
1. To set the Start Time, push in the knob on the
START dial and turn the pointer to the time you
want the oven to turn on, for example 6:30.
2. To set the Stop Time, push in the knob on the
STOP dial and turn the pointer to the time you
want the oven to turn off, for example 9:00. You
have now set the oven for 2% hours of delayed
bake time.
NOTE: The time on the STOP dial must be
later than the time shown on the range clock
and the START dial,
14
How to Set the Range for Preheating(Left Oven) Model JCP67
To preheat the left oven, follow these directions:
1. Turn the LE~ OWN knob to the temperature in the recipe and the left
Oven Cycling Light will come on.
2. When the light goes out, put the food in the oven. (This indicates tiat the
oven has reached the desired temperature.)
I
How to Set the Range for Bting
(Left Oven) Model JCP67
1. Turn the LEFT OVEN knob to the temperature
Your left oven is designed for a variety of small food
in the recipe.
loads that do not completely cover the oven shelf.
Cookie sheets and other cookware that completely
2. Check the food for doneness at the minimum time
cover the oven shelf are not recommended.
in the recipe. Cook longer if necessary.
To set the oven for Baking, proceed as follows:
3. Turn the LE~ OVEN knob to OFF when the food
is done and remove the food.
To avoid possible burns, place the shelf in the
correct position before you turn the oven on.
Questions and Answers
Q. Must the clock be set on the correct time of day
when I wish to use the automatictimer for baking?
A. Yes, if you wish to use the START and STOP
dials to turn on and off at the set times during
the time functions.
Q. Can I Time Bake in the companion (left) oven
(model JCP67)?
A. No, your companion oven is not equipped with a
Time Bake function. H you want to Time Bake use
the right oven.
Q. What type of food should I cook using
automatic timer functions?
A. Meats, fruits and vegetables usually cook well using
the Time Bake function. Foods of a highly
perishable nature such as rnik, eggs, fish, stuffing,
poultry and pork should not be cooked
automatically unless standing time in the oven is
not more than one hour before and after cooking.
Food should be thoroughly chilled before placing
it in the oven.
(continued nextpage)
15
BA~G
W
T-D
BAmG
(continued)
NOTE: Whenthe oven is hot, the top andoutside surfacesof the rangeget
hot too. Forbest bakingresults,follow these suggestions:
Oven Shelves
Arrange the oven
shelf or shelves in
the desired locations
while the oven is
cool. The correct
shelf position
depends on the kind
of food and the
browning desired.
As a general rule,
place-most foods in the middle of the oven, on either
shelf position 2 or 3. See the chart for suggested shelf
positions. Two will be used more than 3.
Type of Food
Shelf Position
Angel food cake
1
Layer cakes
2or3
Bundt or pound cakes
lor2
I Pies or pie shells
1 2or3
Frozen pies
1 (on cookie sheet)
Casseroles
2or3
Roasting
lor2
fieheating
Preheat the oven if the recipe calls for it. Preheat means
bringing the oven up to the specified temperature
before putting the food in the oven. To preheat, set the
oven at the correct temperature-selecting a higher
temperature does not shorten preheat time.
Preheating is necess~ for good results when baking
cakes, cookies, pastry and breads. For most casseroles
and roasts, preheating is not necessary. After tie oven
is preheated, place the food in the oven as quickly as
possible to prevent heat from escaping.
Baking Pans
Pan Placement
Use the proper baking pan. The type of finish on the
pan determines the amount of browning that will occur.
● Dark, rough or dull pans absorb heat resulting
in a browner, cfisper crust. Use this type for pies.
● Shiny, bright and smooth pans reflect heat, resulting
in a lighter, more delicate browning. Cakes and
cookies require this type of pan.
● Glass baking dishes also absorb heat. When baking
in glass baking dishes, the temperature may need to
be reduced by 25°F.
For even cooking and proper browning, there must be
enough room for air circulation in the oven. Baking
results will be better if baking pans are centered as
much as possible rather than being placed to the front
or to the back of the oven.
Pans should not touch each other or the walls of the
oven. Allow 1- to 1X-inch space between pans as well
as from the back of the oven, the door and the sides.
If you use two shelves, stagger the pans so one is not
directly above the other.
16
I
Baking Gtides
When using prepared baking mixes, follow package recipe or instructions
for the best baking results.
Cookies
When baking cookies, flat cookie sheets (without
sides) produce better-looking cookies. Cookies baked
in a jelly roll pan (short sides dl around) may have
darker edges and pale or light browning may occur.
Do not use a cookie sheet so large that it touches the
walls or the door of the oven. Never entirely cover
a shelf with a large cookie sheet.
For best results, use only one cookie sheet in the oven
at a time.
Pies
Cakes
For best results, bake pies in dark, rough or dull pans
to produce a browner, crisper crust. Frozen pies in foil
pans should be placed on an aluminum cookie sheet
for baking since the shiny foil pan reflects heat away
from the pie crust; the cookie sheet helps retain it.
When baking cakes, warped or bent pans will cause
uneven baking results and poorly shaped products.
A cake baked in a pan larger than the recipe
recommends will usually be crisper, thinner and drier
than it should be. If baked in a pan smaller than
recommended, it maybe undercooked and batter may
oveflow. Check the recipe to make sure the pan size
used is the one recommended.
Alminm
Foil
Never entirely cover a shelf with aluminum foil.
This will disturb the heat circulation and result in
poor baking. A smaller sheet of foil maybe used
to catch a spillover by placing it on a lower shelf
several inches below the food.
Don’t Peek
Set the timer for the estimated cooking time and do not open the door to
look at your food. Most recipes provide minimum and maximum baking
times such as “bake 30-40 minutes.”
DO NOT open the door to check until the minimum time. Opening the oven
door frequently during cooking allows heat to escape and makes baking
times longer. Your baking results may also be affected.
17
ROAST~G
Roasting is cooking by dry heat. Tender meat or
poultry can be roasted uncovered in your oven.
Roasting temperatures, which should be low and
steady, keep spattering to a minimum.
Roasting is really a baking procedure used for
meats. Therefore, oven controls are set to BA~
or TMED BA~. (You may hear a slight clicking
sound, indicating the oven is working properly.)
Roasting is easy; just follow these directions:
How to Roast in the Right Oven
1. Place the shelf in position 1 or 2. No preheating
is necessary.
2. Check the weight of the meat. Place the meat fatside-up, or poultry breast-side-up, on roasting rack
in a shallow pan. The melting fat will baste the
meat. Select a pan as close to the size of the meat as
possible. (The broiler pan with grid is a good pan
for this.) Line the broiler pan with aluminum foil
when using the pan for marinating, cooking with
fruits, cooking heavily cured meats or basting food
during cooking. Avoid spilling these materials
inside the oven or inside the oven door.
3. Turn the OVEN SET knob to BA~ and the
OVEN TEMP knob to 325°F. Small poultry may
be cooked at 375°F. for best browning.
4. After roasting is complete, turn the OVEN SET and
the OVEN TEMP knobs to OFF.
Most meats continue to cook slightly while standing,
after being removed from the oven. Standing time
recommended for roasts is 10 to 20 minutes. This
allows roasts to firm up and makes them easier to
carve. ktemal temperature will rise about 5° to 10°F.
during standing. To compensate for this temperature
increase, remove the roast from the oven before it
reaches the temperature you want.
NOTE:
● You may wish to use Timed Baking to turn the oven
on and off automatically.
● Remember that food will continue to cook in the
hot oven and therefore should be removed when
the desired internal temperature has been reached.
Frozen Roasts
How to Roast in the Left Oven Model JCP67
Frozen roasts of beef, pork, lamb, etc., can be started
without thawing, but allow 10 to 25 minutes per
pound additional time (1Ominutes per pound for
roasts under 5 pounds, more time for larger roasts).
Thaw most frozen poultry before roasting to insure
even doneness. Some commercial frozen poultry can
be cooked successfully without thawing. Follow the
directions given on the package label.
Follow Steps 1 and 2 as outlined above.
Then turn the LE~ OVEN knob to the desired
temperature.
NOTE: If you use the broiler pan, be sure to use the
pan designated for use in the left oven.
Questionsand Answers
Q. Is it necessary to check for doneness with
a meat thermometer?
A. It is a good idea to check the finished intemd
temperature at the completion of cooking time.
Use a basic cookbook to find food temperatures.
Q. When buying a roast, are there any special tips
that would help me cook it more evenly?
A. Yes. Buy a roast as even in thickness as possible,
or buy rolled roasts.
Q. Do I need to preheat my oven each time
I cook a roast or poultry?
A. It is not necessary to preheat your oven.
Q. Can I seal the sides of my foil ‘tent” when
roasting a turkey?
A. Sealing the foil will steam the meat. Leaving it
unsealed allows the air to circulate and brown
the meat.
BROm~G
Broiling is cooking food by intense radiant heat from the upper element in
the oven. Most fish and tender cuts of meat can be broiled. Follow these
directions to keep spattering and smoking to a minimum.
How to Brofiin the Wght Oven
1. If the meat has fat or gristle around the edge, cut
vertical slashes through both about 2 inches apart.
If desired, the fat maybe trimmed, leaving a layer
about 1/8” thick.
2. Place the meat on the broiler grid in the broiler pan.
Always use the grid so the fat drips into the broiler
pan; otherwise the juices may become hot enough
to catch on fire.
3. Place the shelf in position 3 for most broiling.
4. Leave the door open to
the broil stop position.
The door stays open
by itself, yet the proper
temperature is maintained
in the oven.
5. Turn the OVEN SET and the OVEN TEMP
knobs to BROIL. Reheating the broiler in the
right-side oven is not necessary.
6. Turn the food only once during broiling.
7. When finished broiling, turn the OVEN SET
and the OVEN TEMP knobs to OFF. Serve the
food immediately, leaving the broiler pan and
grid outside the oven to cool during meal for easiest
cleaning.
How to Brofi in the Left Oven Model JCP67
Follow Steps 1 through 3 as outlined above.
have the door ajar about 3 inches. Then turn the LEFT OVEN knob to
BRO~. Preheat 10 minutes before broiling in the left oven.
Turn the food only once during broiling.
Turn the LE~ OVEN knob to OFF. Serve the food immediately, leaving
the pan outside the oven to cool during the meal for easiest cleaning.
Questionsand Answers
Q. When broiling, is it necessary to always use
a grid in the pan?
A. Yes. Using the grid suspends the meat over the
pan. As the meat cooks, the juices fall into the
pan, thus keeping meat drier. Juices are protected
by the grid and stay cooler, thus preventing
excessive spatter and smoking.
Q. Shodd I salt the meat before broifing?
A. No. Sdt draws out the juices and allows them to
evaporate. Always salt after cooking. Turn meat
with tongs; piercing meat with a fork allows juices
to escape. When broiling poultry or fish, brush
each side often with butter.
Q. Why are my meats not turning out as brown
as they should?
A. h some areas, the power (voltage) to the oven
may be low. In these cases, preheat for 10 minutes
before placing the broiler pan with food in the oven.
Check to see if you are using the recommended
shelf position. Broil for the longest period of time
indicated in the Broiling Guide. Turn food only
once during broiling.
{continuednempage)
19
men arranging food on the pan, do not let fatty edges
hang over the sides. These could soil the oven bottom.
● Frozen steaks can be broiled bv
. .uositionin~ the oven
shelf at next lowest shelf position and increasing
cooking time given in this guide 1k times per side.
If desired, marinate meats or chicken before
broiling, or brush with barbecue sauce last 5 to
10 minites only.
QReheat the left oven 10 minutes before broiling.
You do not need to preheat the right oven broiler.
●
●
The times in this guide are approximate. Theymay varydependingon the wei@t and shapeof the food.
Food
Amounti
Thickness
Time in Minutes
ShelfPosition
Mght
Left
Nght Oven
Oven Oven 1st Side I 2nd Side
Bacon
1/2 lb. (about8
thinslices)
3
4
3Xmin.
3%min.
GroundBeef
1 lb. (4 patties)
3
4
7 tin.
5 tin.
Time in Minutes I
Lefl Oven
Comments
1stSide 2nd Side
4 min. I Arrangein single
5 min.
laver,
9 min.
Spaceevenly.
9 min.
1/2 to 3/4 inch
+
thick
Beef Steaks
1 inchthick
Medium
(1 to 1%lbs.)
Chicken
1 whole
3
4
1
2
3
4
(2 to 2% lbs.),
T
1
9 tin.
9 min.
9 min.
9 min.
35 min.
15min.
35 min.
15 tin.
5 tin.
5 min.
6 min.
5 min.
splitlengthwise
Fish
20
l-lb. fillets1/4to
1/2inchthick
I
Steakslessthan1
inchthickcook
throughbefore
browning.Panfrying
is recommended.
Slashfat.
Reducetimeabout5
to 10minutesper
sidefor cut-up
chicken.Brusheach
sidewithmelted
butter.Broilskinside-downfirst.
Handleandturnvery
carefully.Brushwith
lemonbutterbefore
andduringcooking,
if desired.Preheat
broilerto increase
browning.
OPEM~G
~
SELF-CLEA~G
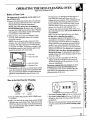
Right Oven on Model JCP67
OWN
w
Before a Clean Cycle
The range must be completely cool in order to set
the se~-clean cycle.
1. Remove the broiler pan, broiler grid, all cookware
and any aluminum foil from the oven—they can’t
withstand the high cleaning temperatures.
NOTE: The oven shelves may be cleaned in
the seE-cleaning oven. However, they will darken,
lose their luster and become hard to slide. Wipe the
shelf supports with cooking oil after self-cleaning
to make shelves slide more easily.
2. Wipe up heavy soil on the oven bottom. If you
use soap, rinse thoroughly before self-cleaning
to prevent staining.
NOTE: Do not clean the bake element or broil
element. Any soil will burn off when the elements
are heated. The bake element can be lifted gently
to clean the oven floor. If spillovers, residue or ash
accumulate around the bake element, gently wipe
around the element with warm water.
ven tight
ven Front Frame
-
~, ‘\
Oven Door Gasket
J
—Openings
in Door
—
3. Clean spatters or soil on the oven front frame and the
oven door outside the gasket with a dampened cloth.
The oven front frame and the oven door outside the
gasket do not get cleaned by the self-clean cycle.
On these areas, use detergent and hot water or a
soap-filled steel wool pad. Rinse well with a
vinegar and water solution. This will help prevent
a brown residue from forming when the oven is
heated. Buff these areas with a dry cloth. Do not
clean the gasket. Never use a commercial oven
cleaner in or around the self-cleaning oven.
Clean the top, sides and outside front of the oven
door with soap and water. Do not use abrasives or
oven cleaners.
Make sure the oven light bulb cover is in place.
Do not rub or clean the door gasket—
the fiberglass material of the gasket has an
extremely low resistance to abrasion. An intact
and well-fitting oven door gasket is essential for
energy-efficient oven operation and good baking
results. If you notice the gasket becoming worn,
frayed or damaged in any way or if it has become
displaced on the door, you should have it replaced.
Do not let water run down through openings in
the top of the door. To help prevent water from
getting in these slots when cleaning, open the door
as far as it will go.
4. Close the oven door and make sure the oven
light is off. If the oven light is not turned off,
the life of the bulb will be shortened or it may
bum out immediately.
Do not use commercial oven cleaners or oven
protectors in or near the se~-claning oven.
A combination of any of these products plus the
high clean-cycle temperamre may damage the
porcelain finish of the oven.
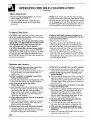
How to Set the Oven for Cleanhg
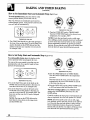
@@
OVEN TEMP
o
OVEN SET
1. Turn the OVEN SET and the OVEN TEMP knobs
to CLEAN.
2. Make sure that both the range clock and the START
dial show the correct time of day. Push and turn the
STOP time dial on the timer to the desired cleaning
time, this automatically locks the door. (3 hours for
normal cleaning time.)
The Oven Cleaning Light will be on continuously.
● The Oven Cycling Light will be on. It will cycle
off and on when your oven has reached the clean
temperature.
● The door will automatically unlock when the oven
switch is turned off and the Oven Cleaning Light
●
is off.
(continuedneti page)
21
a
/
OPEM~G
T~
SELF-CLEAMG OWN
(continued)
After a Clean Cycle
1. When the Oven Cleaning Light is off, turn the
OVEN TEMP knob to OFF.
2. Turn the OVEN SET knob to OFF. The door
will automatically unlatch and all signal lights
will be off.
NOTE: If you wish to start and stop clean at a later
time than shownon the clock,push in and turn the START
dial to the time you wish to start. Add the hours needed
for the cleaning to this start time, then push in and turn
the STOP (CLEAN) dial to the desired time. The oven
will automatically turn on and off at the set times.
To Stop a Clean Cycle
CAUTION: After setting the oven for a clean cycle,
do not try to open the oven door as this can damage
the automatic door-locking system.
U you want to use the oven any time before a clean
cycle is done, turn the OVEN SET and the OVEN
TEMP knobs to OFF. After the oven cools, the
door will udock and can then be opened.
CAUTION: Should the oven door become locked
accidentally, to open the door, turn the OVEN SET
knob back to CLEAN, push in and advance the STOP
dial past the time of day. Wait one minute then turn
the OVEN SET knob to OFF. Wait a few seconds and
the door may be opened.
H the door latch finger becomes positioned so as
to keep the oven door from closing all the way, this
can be corrected as follows:
Make surethe oven is cool.
● Open the oven door, turn the OVEN SET knob to
●
CLEAN. Push in and advance the STOP dial past
the time of day. Push in the oven interlock button
(button is at the right top of the oven door opening)
and hold the button in for about 15 seconds.
● Next, turn the OVEN SET knob to OFF and again
push in the oven interlockbutton for about 15 seconds.
The latch finger, being motor driven, will turn so the
oven door may be closed.
Questionsand Answers
Q. ~ my oven clock is not set to the correct time
of day, can I still seE-clean my oven?
A. If the clock is not set to the correct time of day you
will not be able to set a delay clean to end at a
specific time.
Q. Is the “cracUing” or ‘~opping” sound I hear
during cleaning normal?
A. Yes.This is the sound of the meti heatingand cookg
during both the cooking and cleaning functions.
Q. My oven shelves do not sfide easily.
What is the matter?
A. After cleaning, oven shelves will become so clean
they do not slide easily. To make the shelves slide
more easily, after each self-cleaning, dampen
fingers with a small amount of cooking oil and rub
lightly over the sides of the shelves where they
contact the shelf supports.
Q. What causes the hair-tike Hn= on the enameled
surface of my oven?
A. This is a normal condition, resulting from heating
and cooling during cleaning. These lines do not
affect how your oven performs.
Q. Should there be any odor during the cleaning?
A. Yes, there will be an odor during the first few
cleanings. Failure to wipe out excessive soil might
also cause a strong odor when cleaning.
22
Q. Why do I have ash left in my oven after cleaning?
A. Some types of soil will leave a deposit which is
ash. It can be removed with a damp sponge or cloth.
Q. What should I do if excessive smoking occurs
during cleaning?
A. This is caused by excessive soil. Turn the oven off.
Open the windows to rid the room of smoke. Wait
until the oven has cooled and the word “LOCK’ is
off in the display. Wipe up the excess soil and reset
the clean cycle.
Q. Can I use commercial oven cleaners on any part
of my seti-cleaning oven?
A. No cleaners or coatings should be used around any
part of this oven. If you do use them and do not
thoroughly rinse the oven with water, wiping it
absolutely clean afterwards, the residue can scar
the oven surface and damage metal parts the next
time the oven is automatically cleaned.
Q. My oven shelves have become gray after the
seti-clean cycle. Is this normal?
A. Yes. After the self-clean cycle, the shelves will
lose some luster and change to a deep gray color.
Q. Why won’t my oven clean immediately even
though I have set all the time and clean knobs
correctly?
A. Check to be sure that your START dial is set to the
same time as the oven clock.
Proper care and cleaning are important so your range will give you efficient
and satisfactory service. Follow these directions carefully in caring for it to
help assure safe and proper maintenance.
BE SURE ELECTNC POWER IS OFF BEFORE CLE~NG
ANY PART
OF THE RANGE.
H your range is removed for cleaning, servicing or any reason,
be sure the anti-tip device is m-engaged properly when the
range is replaced. Failure to take this precaution could result in
tipping of the range and cause injury.
A
Sutiace Uni@and Drip Pans
To clean the surface units, turn the control to the
highest setting for a minute. The coils will bum off
any soil.
CAUTION
● Be sure dl the controls are turned to OFF and
the surface units are cool before attempting to
remove them.
● Do not immerse the surface units in liquids
of any kind.
● Do not clean the surface units in a dishwasher.
● Do not bend the surface unit plug terminals.
● Do not attempt to clean, adjust or in any way repair
the plug-in receptacle.
To remove a surface unit:
To remove the drip pans for cleaning, the surface units
must be removed first.
Sutiace Unit
Receptacle
Dtip Pan
Lift the surface unit about 1 inch above the drip pan
and pull it out.
Do not lift the surface unit more than 1 inch.
H you do, it may not lie flat on the drip pan when
YOUplug it back in.
Repeated tifting of the surface unit more
than 1 inch above the Wlp pan can permanently
damage the receptacle.
To replace a surface unit:
● Replace the tilp pan into the recess in the
cooktop. Make sure opening in the pan lines up
with the receptacle.
● Insert the terminals of the surface unit through the
opening in the drip pan and into the receptacle.
● Guide the surface unit into place so it rests evenly.
Drip Pans
Remove the surface units. Then lift out the drip pans.
For best results, cl-n the drip pans by hand.
Place them in a covered container (or a plastic bag)
with 1/4 cup ammonia to loosen the soil. Then scrub
with a soap filled scouring pad if necessary. Rinse
with clean water and polish with a clean soft cloth.
The drip pans may also be cleaned in the dishwasher.
Black drip pans (on some models) may be cleaned in
a self-cleaning oven after they have been thoroughly
rinsed. However, self-cleaning them may cause them
to lose their original luster and shine.
Clean the area under the drip pans often.
Built-up soil, especially grease, may catch on fire.
Do not cover the drip pans with foil. Using foil
so close to the receptacle could cause shock, fire or
damage to the range,
(continuednextpage)
23
CA~ ~
CLEMG
(continual)
ControlPanel and mobs
Clean up any spills or spatters with a damp cloth.
Remove heavier soil with warm, soapy water.
Clean control panel with mild liquid dish detergent
and a soft cloth. Rub control panel lightly.
CAUTION: Do not use abrasives of any kind
on the control panel.
The control knobs may
be removed for easier
cleaning. To remove a
knob, pull it straight off
the stem. Wash the
knobs in soap and
water but do not soak.
Lift-Up Cooktop
Clean the area under the cooktop often. Built-up soil,
especially grease, may catch fire.
To make cleaning easier, the entire cooktop may be
lifted up and supported in the up position.
Be sure dl surface unib are turned off before
raising the cooktop. Grasp the front sides of the
cooktop and lift. The surface units and drip pans do
not need to be removed before raising the cooktop,
however, you may remove one to make raising the
cooktop easier.
To lift the cooktop:
1. Remove all items
which may slide off
the cooktop.
2. With both hands,
grasp the front edge
of the cooktop.
3. Lift the cooktop.
4. Raise the support rod and let the cooktop rest on it.
Clean under the cooktop with hot, mild soapy water
and a clean cloth.
To lower the cooktop:
1. Lift the cooktop and lower the support rod.
2. Lower the cooktop and allow it to lock into position.
Cleatig Under the Range
The area under the range can be reachedeastiy
for cleaningby removingthe bottomdrawer.
Toremove,pullthedraweroutalltheway,tiltupthe
frontandremoveit. Toreplace,insertglidesatthe
backof thedrawerbeyondthestopon rangeglides.
Liftthedrawerif necessaryto inserteasily.Letthe
frontof thedrawerdown,thenpushin to close.
BacksplashLight
Press the backsplash light switch for ON.
Ress again for OFF.
To repiace the light located in the backsplash:
1. If the light cover has screws, remove the four
screws that hold it in position. Two are located
on top of the backsplash and two are located under
the backsplash overhang.
2. If there are no screws or after they are removed, lift
the cover away and twist out the fluorescent light.
24
CAUTION: Be sure the light is cool before removing.
3. Insert the new fluorescent light and twist into the
lock position. (Check to make sure the new light
operates. If not, the light maybe blown.)
4. Replace the backsplash cover and reinsert the
screws that hold it into position (on some models).
I
Oven Light
@Q
-0
The oven light has a glass lens held in place with a
spring wire to protect the oven bulb from the heat of
the oven.
CAUTION: Before replacing your oven bulb,
disconnect the electrical power for the range at the
main fise or circuit breaker panel or pull the plug.
Be sure to let the light cover and bulb cool completely
before removing or replacing.
To remove the light bulb:
1. Swing the wire to the side and hold.
2. Lift off the glass lens.
3. Remove the bulb.
To replace the light bdb:
1. Insert a new 40 watt appliance bulb.
2. Replace the lens over the socket.
3. Swing the wire over the glass lens.
4. Reconnect the electrical power to the range.
NOTE: The glass lens must be in place whenever
the oven is in use.
I
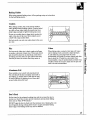
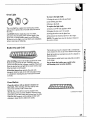
Broiler Pan and Grid
After brofiing, remove the broiler pan from the oven.
Remove the grid from the pan. Carefully pour out
grease from the pan into a proper container. Wash and
rinse the broiler pan and grid in hot water with a soapfilled or plastic scouring pad.
H food has burned on, sprinkle the grid with
detergent while hot and cover with wet paper towels
or a dishcloth. Soaking the pan will remove burned
on foods.
The broiler pan may be cleaned with a commercial
oven cleaner. Do not use an oven cleaner on the grid.
Both the broiler pan and grid can also be cleaned in
the dishwasher.
Do not store a soiled broiler pan and grid anywhere
in the range.
Do not clan the broiler pan or grid in the
se~-cleaning oven (on some models).
I
I
Oven Shelves
Clean the shelves with an abrasive cleanser or
steel wool. After cleaning, rinse the shelves with
clean water and dry with a clean cloth.
NOTE: The oven shelves may be cleaned in the
self-cleaning oven (on some models). However, they
will darken, lose their luster and become hard to slide.
Wipe the shelf supports with cooking oil after selfcleaning to make shelves slide more easily.
I
(continued next page)
25 I
CA~ Am CLEA~G
(continued)
Ltit-Off Oven Door
Most normal oven cleaning can be done without
removing the oven door. The door is heavy. You
may need help removing and replacing it. Do not
lift the door by the handle. This can cause the glass
to break or can cause damage to the door.
To remove the door
1. Open the door all the way.
2. Wll up the lock on
Lockin
both hinge supports.
normal
position
‘, i,
Secure each lock in
the hook of the hinge
\\:
lever. You may have to
press down on the door
a bit to pull the locks E
completely over the hooks.
3. Hold the door by the
Lock
sides. Pull the bottom engaged
for door
of the door up and
\\\ &
,.
toward you to release it removal
q
from the hinges.
*
Keep pulling the
bottom of the door
toward you while
pushing the top of the
door toward the range.
Pull the door free of the
hinges.
HINGE
SLOT
+= ‘1
Door
./
removed
from the
.
//
range ~ p / /,’
/
Y
To replace the door
1. Position the door slots squarely over both hinges
to replace it.
Make sure the hinge supports are completely in
position before unlocking the hinge levers.
26
TO CLEAN THE DOOR:
Inside of door: (not on self-cleaning models)
● Clean the inside of the oven window with a mild
non-scratching cleaner and a damp cloth.
● Soap and water wfll normally do the job. Heavy
spattering or spillovers may require cleaning with
a mild abrasive cleaner. Soapy, wet metrd pads may
also be used. Do not allow food spills with a high
sugar or acid content (such as milk, tomatoes,
sauerkraut, fruit juices or pie filling) to remain on
the surface. They may cause a dull spot even after
cleaning.
● If neeessary, you may use an oven cleaner
(not on se~-cleaning models). Follow the package
directions.
Outiide of door:
● Use soap and water to thoroughly clean the top,
sides and front of the oven door. DO NOT let water
run down through openings in the top of the door.
Mnse well. You may also use a glass cleaner to
clean the glass on the outside of the door.
● Spillage of marinades, fruit juices, tomato sauces
and basting materials containing acids may cause
discoloration and should be wiped up immediately.
When the surface is cool, clean and rinse.
● Do not use oven cleaners, cleansing powders
or harsh abrasives on the outside of the door.
porcelain Oven Interior (JCS57—rightside ody; JCP67—left oven only)
With proper care, the porcelain enamel finish on the
inside of the oven—top, bottom, sides, back and
inside of the door—will stay new-looking for years.
Let the range cool before cleaning. We recommend
that you wear rubber gloves when cleaning the range.
Soap and water will normally do the job. Heavy
spattering or spillovers may require cleaning with a
mild abrasive cleaner. Soapy, wet met~ pads may also
be used. Do not allow food spills with a high sugar or
acid content (such as milk, tomatoes, sauerkraut, fruit
juices or pie filling) to remain on the surface. They
may cause a dull spot even after cleaning.
Household ammonia may make the cleaning job
easier. Place 1/2 cup in a shallow glass or pottery
container in a cold oven overnight. The ammonia
fumes will help loosen the burned-on grease and food.
~ necessary, you may use an oven cleaner.
Follow the package directions.
Cautions about using spray-on oven cleaners:
● Do not spray on the electrical controls and switches
because it could cause a short circuit and result in
sparking or fire.
● Do not allow a film from the cleaner to build up
on the tem~rature sensor—it could cause the oven
to heat improperly. (The sensor is located at the top
of the oven.) Carefully wipe the sensor clean after
each oven cleaning, being careful not to move the
sensor as a change in its position could affect how
the oven bakes.
● Do not spray any oven cleaner on the oven door,
handles or any exterior surface of the oven, cabinets
or painted surfaces. The cleaner can damage these
surfaces.
Oven Heating Elementi
Do not clean the bake element or the broil element.
Any soil will bum off when the elements are heated.
The bake element can be lifted gently to clean the
oven floor. If spillovers, residue or ash accumulate
around the bake element gently wipe around the
element with warm water.
Broil Element
Bake Element
PorcelainEnamel Cooktop
The porcelain enamel finish is sturdy but
breakable if misused. This finish is acid-resistant.
However, any acidic foods spilled (such as fruit
juices, tomato or vinegar) should not be permitted to
remain on the finish.
H acids spill on the cooktop while it is hot, use
a dry paper towel or cloth to wi~ it up right away.
When the surface has cooled, wash with soap and
water. Rinse well.
For other spills such as fat smatterings, wash with
soap and water or cleansing powders after the surface
has cooled. Rinse well. Polish with a dry cloth.
27 I
BEFOREYOU BEGIN
POWERSUPPLYCORDKIT
Read these instructions completely and carefully.
WPORT~:
Save these instructions for the
local electrical inspector’s use.
~PORT~:
Observe W governing codes
and ordinances.
N~
TO INSTWR:
have these
instructions tith the appHance *r
initiation
is completed.
N~
TO CONSU~R
Keep tis Use and
&e Guide and kstihtion
kstiuctions for
fiture use.
This appliance may be connected by means of a
ELE~RIU
REQUIREMENTS
This appliance may be connected by means
of permanent “hard wiring” or power supply
cord kit.
It is the personal responsibility of the customer
to conbct a qualified technician to assure that
the electrical instigation is adequate and is in
conformance with the National Electrical Code
and local codes and ordinances.
THE WGE MUW BE CONNE~D ~H
COPPER WRE ONLY.Numinum wire must
not be used to avoid potentially unsatisfactory
connections.
28
power supply cord kit. Only a power supply cord
kit rated at 125/250 volts minimum, 40
amps and marked for use with ranges shall be
used. Cord must have 3 conductors.
Mobile home instigation or area where local
codes do not permit grounding tirough neutral,
a 4 conductor power supply cord kit rated at
125/250 volh minimum, 40 amps and
marked for use with ranges shall be used.
Terminals on end of wires must be either closed
loop or open-nd spade lugs with upturned ends.
Cord must have strain relief clamp.
I
MODELSWITH FA~ORY CONNECTED
POWERSUPPLYCORD
Some models may be equipped with a factory
connected 3 conductor power supply cord.
Mobile home instigation or area where local
codes do not permit grounding through neutral,
a 4 conductor power supply cord kit rated at
125/250 vol@ minim-,
40 amps and
investigated for use with ranges shall be used.
Terminals on end of wires must be either closed
loop or open-end spade lugs with upturned ends.
I
STEP1
WARN~G: E~~C~
GROUND IS
REQU~D
ON ~IS APP~CE.
~is apphance is manufactured with the neuti
terminal connected to the frame.
1. H lod codes permit comection of tie
be
grounding conductor to the neuti
wire of the copper power supp~ cord:
2. If connecting to a four-wire electrical system
(mobile home):
I POWER SUPPLY!
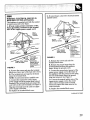
FIGURE 2
A Removethe screws md rtise the terminal
block cover ~ower part of the back wire cover).
B. me terminal nuts are taped to the frame
below the terminal block.
N~:
Do not loosen factory instiled nuts.
C. Connect the neuti wire of the copper
power supplycord to the center sflvercolored
terminal of the terminal block and connect the
outer wires to the outer terminals. See Figure 1.
Ring type terminals must be used on copper
power supply cord wires.
D. Replacethe terminal block cover.
A. Remove the screws and raise the
terminal block cover.
B. Removethe ground strap from tie
terminal block and horn the apphance
frame. Retain the ground screw.
C. Connect the ground wire been) of the
copper power supply cord to the frame of
the appfiancewith the ground screw, using
the hole in the frame where the ground
strap was removed. See Figure 2.
D. Connect the neutral (white) wire of the
copper power supply cord to the center
silver colored terminal of the terrnind
block and connect the other wires to the
outer terrninds.
E. Replace the terminal block cover.
(continued flint page)
29
GENEWL
To eliminate the hward of reaching over heated
surface elements, cabinets or storage spaces
should not be provided over a range.
Hcabinets are provided, the hward can be
reduced by insting a range hood that projects
hotiontily a minimum of W beyond the bottom
of the cabinets.
men insta~ing the range between base cabinets,
refer to figure below for the stie of the opening
needed. Do not seal the range to cabinets.
CA~ON: men unpacking the range, do not
discard the 4 shipping bolts as these are the
leveling legs.
Ha service cord is used, the wdl receptacle
should be located in accordance with the
dimensions below.
The figure below shows the recommended
instigation relationship of the ranges to the
vertical walls of the surrounding structure.
Please note the following
N~:
1. The back of the range maybe instiled
directiy against the rear wdl of the structure.
2. These ranges conform to UL requirements for
“Wspacing from the range to adjacentvertical
walls abovethe countertop level.However,to
reduce possible scorching ofvertical WWSand to
tilmke potentialfire hmards under abnormal
surface unit use conditionssuch as high heat or
no pans, a minimum of ~ spacing should be
provided on both sides of the cooktop.
3. To eliminate the hward of reaching over
heated surface units, cabinet storage space
located above the surface units should be
avoided. H a cabinet is to be provided, the hward
can be reduced by instilling a range hood that
projects hotiontily a minimum of W beyond
the bottom of the mbinets.
N~:
There is a minimum V clearance
required from the left side of the range to a wall.
This clearance is needed to open the left side
oven door or to remove the oven rack.
Not Less Than
/
7
+
m=
Y
-
\
\
11+=
DividedCooMop(40” Range)
30
See Note 2
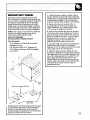
IMMRTMT
WFEN WARUIHG
~ls range must be properly secured to the
floor by using the included anti-tipbrackets and
screws. Failure to instil the brackets could allow
the range to accidentily tip over if excessive
weight is placed on an open door or if a child
cfimbs upon it. Serious injury might result from
spilled hot liquids or from the range itseti. Refer
to the instructions below for proper instigation.
N~:
Hthe range is ever moved to a different
location,the anti-tipbrackets must dso be
moved and instiled with the range.
~-~P
B~C~
~~W~ON
~~U~ONS
Tools Required:
5/lW Nutdriver or Nat Head Screwdriver
Adjustable Wrench
3/W Electric Dfl & 3/l& Diameter Bit
3/lV Diameter Masonry Drill (i instiing
in concrete)
Back Edge of Range or Rear Wall
I
I
1. Unfoldthe paper template and place it flat on
the floor with the back and side edges positioned
endy where the back and sides of the range dl
be locatedwhen instied. @se the diagramto
locate the brackets tithe template is not available.)
2. Mark on the floor the location of the 4
mounting holes shown on tie template. For
easier installation,3/16 diameter pilot holes,
1/7 deep can be dri~ed into the floor.
3. Remove the template and place the brackets
on the floor with turned up flanges to the front.
Line up the holes in the brackets with marks on
the floor and a~ch with the 4 screws provided.
Brackets must be secured to a sotid floor. H
attaching to masonry floor,first drill 3/l&
diameter pilot holes using a concrete bit
4. bvel the range if necessary, by adjusting the
4 leg levelers with a wrench. (Aminimum
clearance of l/W is required between the bottom
of the range and the rear leveling feet)
5. Slide tie range into place making sure the
rear legs are trapped by tie ends of the brackets.
me range may need to be shifted slightiy to one
side as it is being pushed back to allowthe rear
legs to tign with the brackets. Removethe
storage drawer to inspect brackets or grasp the
top rear edge of the range and carefully attempt
to tilt it forward to make sure the range is
properly anchored.
I
Brackets attach to the floorat the back of the range
to hold both rear leg levelers.When fasteningto
the floor,be sure that screws do not penetrate
electricalwiringor plumbing.me screws provided
wiflwork in either wood or concrete.
31
w
●
●
QUESmONS?
USE THIS PROBLEM SOLVER
PROBLEM
POSS~LE CAUSE
OWN WLL
NOT WORK
The plug on the range is not completely inserted in the electrical outlet.
● The circuit breaker in your house has been tripped, or a fuse has been blown.
● The oven controls are not properly set.
OVEN LIGHT
DOES NOT WORK
c The fight bulb is loose or defective. Tighten or replace.
● The switch operating the oven light is broken. Call for service.
FOOD DOES NOT
BRO~ PROPE~Y
The OVEN SET knob not set at BROIL.
● The OVEN TEMP knob not set at BROIL.
● Door not left open to the broil stop position as recommended.
● Improper sheE position being used. See the Broiling Guide.
● Food is being cooked on hot pan.
● Cookware not suited for broiling.
● Murninum foil used on the broiler pan and rack has not been fhted properly
and slit as recommended.
FOOD DOES NOT
ROAST OR BAKE
PROPERLY
The OVEN SET knob not set on BAKE.
● The OVEN TEMP knob not set correctly.
● Shelf position is incorrect.
c kcorrect cookware or cookware of improper size is being used.
● A foil tent was not used when needed to slow down browning during roasting.
OVEN ~LL NOT
SELF-CLEAN
(model JCP67)
Automatic timer dids not set or not set properly. The clock must be set
to time of day and the STOP dial must be set and advanced beyond the
time noted on the oven clock.
● The STOP dial was not advanced for long enough.
● Both the OVEN SET and the OVEN TE~
knobs must be set at CLEAN settings.
● When the oven is seti-cleaned, a thick pile of spillover can leave a heavy
layer of ash and insulate that area from further heat.
OVEN NOT CLEAN
AFTER CLEAN CYCLE
(model JCP67)
The oven controls are not set properly.
● Heavily soiled ovens rquire
31/2-to4-hour clean time.
“ Heavy spillovers should be cleaned up before starting the clean cycle.
AUTOMA~C OVEN
~ER
DOES NOT
WORK PROPERLY
SURFACE LIGHT
DOES NOT WORK
SURFACE UNITS
NOT FUNCTIOMNG
●
●
●
●
●
●
Check to be certain step by step directions were followed correctly.
See the Automatic Timer and Clock section.
The fluorescent light is loose or defective. Adjust or replace.
● Press the switch for 2 seconds. If the light does not come on, repeat.
● The switch operating the light is broken. Call for service.
●
The surface units are not plugged in sofidly.
● The surface unit controls are not properly set.
●
M you need more help.. cdl, toll free
The GE Answer Centerm
800.626.2000
consumer information service
32
NO~S
34
WtillBeThere
With the purchaseofyournew GEapphance,receivetheassurancethatifyou everneed
idormation or resistancehorn GE,we’Ube here. AUyou haveto do iscall—toll-bee!
GEhswer~nte~
Whateveryourquestionabout anyGE major appliance, GEAnswerCenter”
information serviceisavailableto help. Your call—andyour question-will be
answeredpromptly and cowteously. And you can call anytime.GEAnswer
Center@serviceisopen 24 hours a day, 7 daysa week.
lmHome
RepakSemite
80MEXARES(80M32-2737)
AGE consumer serviceprofessionalwillprovide expert repairservice,
scheduled at a time that’sconvenient for you. ManyGE Consumer Service
company~perated locations offer you servicetodayor tomorrow, or atyour convenience (7:00 a.m. to 7:00 p.m. weekdays,9:00 a.m. to 2:00 p.m. Saturdays).
Our facto~-trained techniciansknowyour appliance insideand out–so most
repairscan be handled injust one visit.
ForCustome~
Wti SpecialNeeds...
80f1626.2000
Upon request, GEwillprovide
Braillecontrols for a varietyof GE
appliances,and a brochure to
assistin planning a barrier-free
kitchenfor personswithlimited
mobility.To obtain theseitems,
free of charge, call 800.626.2000.
Consumerswithimpaired hearingor speech who have
accessto a TDD or a conventional teletypetiter may
call 800-TDD-GMC (800-8334322) to request
information or service.
SemiteCon&a&
80M2&2224
You canhavethe secure feeling thatGEConsumer Semitewillstillbe there
afteryour warrantyexpires.Purchasea GE conmactwhileyourwarrantyisstill
in effect and you’ll receive a substantialdiscount. With a multiple-yearcontract,
you’re assuredof future serviceat today’s prices.
Pati andAccessories
80M2&2002
hdividti
q@fied to servicetheirownappliances
can havepartsor accessoriessentdirectlyto fieir home.
The GE partssystemprovidesaccessto over 47,000
parts...and all GE Genuine RenewalPar@are fully
warranted.VISA, MasterCardand Discovercards
are accepted.
User maintenanceinstructionscontainedin thisguide
coverprocedurestitended to be performed by anyuser.
Other servicbggenedy shodd be referred to quWled
service personnel.Cautionmustbe exercised,since
improper servichg may cause unsafe operation.
YOUR GE ELECTRICRANGE
WARRAN~
WHAT IS COVERED
Staple sales slip or cancelled check
here. Proof of original purchase date
is needed to obtain sewice
under warranty.
FULL ONE-YEAR WARRANTY
For one year from date of original
purchase, we will provide, free of
charge, patis and servicelaborin
your hometo repairor replace
any pafi of the range that fails
becauseof a manufacturing
defect.
WHATIS NOTCOVERED
c Servicetripsto your hometo teach
you howto use the product.
Read your Use and Care material.
If you then have any questions
about operatingthe product,
please contactyourdealer or our
ConsumerAffairsofficeat the
addressbelow,or call, toll free:
GE AnswerCenteF
800.626.2000
consumerinformationservice
● Improperinstallation.
If you have an installationproblem,
contactyour dealer or installer.
You are responsiblefor providing
adequateelectrical,gas, exhausting
and otherconnectingfacilitiesas
describedin the Installation
Instructionsprovidedwiththe
product.
This warranty is extended to
the original purchaser and any
succeeding owner for products
purchased for ordinary home use
in the 48 mainlandstates, Hawaii
and Washington,D.C. In Alaskathe
warrantyis the same exceptthat it
is LIMITED becauseyou must pay
to shipthe productto the service
shopor for the servicetechnician’s
travelcoststo your home.
All warrantyservicewill be
providedby our FactoryService
Centersor by our authorized
CustomerCar@ servicersduring
normalworkinghours.
Shouldyourapplianceneed
service,duringwarrantyperiodor
beyond,call 800-GE-CARES
(800-432-2737).
Replacementof housefuses or
resettingof circuitbreakers.
● Failureof the productif it is used
for otherthan its intendedpurpose
or used commercially.
. Damage to productcaused
by accident,fire, floodsor acts
of God.
WARRANTOR IS NOT
RESPONSIBLE FOR
CONSEQUENTIAL DAMAGES.
●
Some states do not allow the exclusion or limitation of incidental or consequential damages, so the above limitation or exclusion
may not apply to you. This warranty gives you specific legal rights, and you may also have other rights whichvary from state to state.
To know what your legal rights are in your state, consult your local or state consumer affairs office or your state’s Attorney General.
Warrantor: General Electric Company
If further help is needed concerning this warranty, write:
Manager+onsumer
Affairs, GE Appliances, Louisville, KY 40225
Pafl No. 184D2966P177
Pub No. 49-8663
5-95 CG
JCS57
JC,
Ptinted in the United States
318068400 (9503)