1
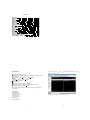
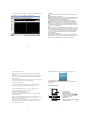
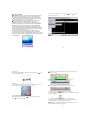
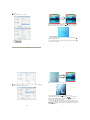
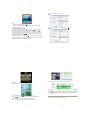
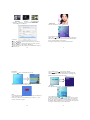
MPK1040
MP3 PLAYER
User S Manual
Downloading of music files from your computer (PC) to the MP3
player
1. If the operating system of your PC is of version Windows 98 or
below ,then you need to install additional software .If your PC has an
operating system of version Windows 2000 or above (or MAC OSX10.3
or above . or LINUX 2.4.2 or above), no additional software is needed .
2. Connect the USB cable to the MP3 player (in off state) first. Then ,
connect it to the PC USB port.
3. Open My Computer from the desk top of the PC . Click
and open the Removable Drive icon. List of the songs in the MP3
player will display. Minimize this window at this stage.
4. Open the file containing the songs that you have already downloaded
from the Internet. Select the song that you want to download into the
player. Right click the mouse and then select copy.
5. Open the window of the Removable Drive. Right click and then
select Paste . The selected song will be copied into the MP3 player.
Features
Support MP3, WMA, WAV format music
Support SMV movie format
USB removable disk function
Built-in MIC for recording
Support five play modes: Normal, repeat one, repeat all, shuffle repeat
and preview.
Support six EQ modes.
Humanistic tree content file and menu navigation.
Support programmable playback and playback according to the catalog
Humanistic batch deletion of music and files
Instant display of memory capacity and free capacity CSTN display
screen, lyric sync, lyric sync when fast rewinding and fast forwarding
Humanistic power-saving design, exceeding long period playing
Intellectual charging management of Lithium battery, extending the
life of the Lithium battery to the maximum extent.
Note: Do not turn off your computer or MP3 player during this procedure
Reset function
when there is no function please long press the key
and VOL key
simultaneously to reset the MP3 player, and then turn on the MP3 player
again.
36
1
Content
Features
Specification
Notice
Charging
Appearance
Power on
Music playing
Volume adjustment
Movie
Pictures browsing
Mic Record
E-book
Navigation
Setup
Delelt File
Power off
Converting video file to SMV format file
Support DRM9 function
Downloading music files
1
2
3
4
5
6
6
7
8
10
11
11
13
14
22
24
25
32
36
Specifications:
6) Then click Icon
DRM to the player.
Voltage: built-in lithium battery
Continuous playing time: at most 9 hours (Take MP3 128Kbps
20 for reference. )
Support file: 8Kbps 320Kbps 8KHz 48KHz
WMA
22Kbps 192Kbps 8KHz 48KHz
Shell: aluminum, plastic
SNR: 85~95Db
Earphone output: 5mW CH 32Ohm
Loudspeaker output: 250mW CH 8ohm most 500mW
Output frequency range: 20Hz 20KHz
Copy
to transfer the WMA music with
VOL
Note: Product design and spec may change for improving performance
without notice.
Accessories
1.One MP3 player
2.One USB cable
3.One pair of earphone
4.One drive disk
5.One user manual
6.One charger
7.One warranty card
7) Safely remove the MP3 player from PC
2
35
5) In the opening windows , choose the desired WMA music
with DRM. And choose Removable Disk
Notice:
Not allowed to transfer MP3 files to the outside without permission
(offend international copyright law)
Shake produced by walking or movement will not influence the music
playing, but the falling down and colliding with the hard objects will
cause damage to the player and the playing effect.
Avoid pouring any liquid into the player or wetting the player.
Do not make the player close to the heat resources or expose in the
sunshine, excessive dust, humidity and rain directly. Do not put the
player on the accidented surface or in the sealed car when it is too hot,
which will cause damage to the device and shorten the life of the device.
Notice of using the earphone
Do not use the earphone to listen to the player when driving a car, riding
bike or motorbike for preventing any accidents, especially when you
use the earphone in extreme high volume when walking or crossing the
road. It is very dangerous. Be careful and do not use earphone when
you are in one place with potential danger (for example: Beside the
building ground.)
Prevent the hurt of audition
Do not uses the earphone in extreme high volume, the hearing expert
suggests that it is not good to listen to the music in extreme high volume.
Please lower the volume or stop using when you have tinnitus.
34
Support DRM9 function
3
4.The player may display
Warning : Download operation of WMA music with DRM
protection
On Window 98/ Window ME / Windows 2000/ Windows XP ,
WMA music with DRM should be transferred by Windows
Media Player 9.0
Other download operation probably will cause the player
can not read the WMA music with DRM file.
Operation instroduction :
On Window 98/ Window ME / Windows 2000/ Windows XP ,
user should upgrade Windows Media Player to 9.0
On Windows Media Player 9.0 version : (Window 98/
Window ME / Windows 2000/ Windows XP)
1) Connect MP3 player to PC
2) Open Windows Media Player 9.0
3) In Windows Media Player 9.0 , open the desired WMA
music with DRM
System maybe request to download the license in case if
user does not download the WMA music with DRM
properly from the website .
In this case , user need download the license from music
publisher as instruction of Microsoft Website showing in
the operating window.
32
Battery is full
after the battery is full.
5.Unplug the charger, the MP3 player is ready to use.
Note: the power ON/OFF switch must be at the ON position during the
charging process.
Appearance & Keys
9
1
8
2
3
4
5
6
7
1.LCD display
2.MENU button
3.Next track/Forward (
)
4.Play / Stop / turn on/off button
5.volume control button(VOL)
6.Headphone jack
7.USB port
8.Previous track/ Rewind (
)
9.Power switch
5
Charging procedures
The device should be charged when the device turning off automatically
without power, please charge with the accessory charger. Although the
device could be charged by the USB port of the PC, the voltage outputted
is not steady thus the device can not make sure whether the battery is fully
charged. So we suggest you use the accessory charger.
When using the accessory charger to charge, the device will turn on
automatically and display the charging state (the battery sign is
continuously changing), the screen will display The battery is full
after full charging.There is a circuit for intellectual charging management
built in the device, so the internal circuit may cut off the charging circuit
automatically after full charging. Floating charge with small current will
not cause damage to the battery, extending the life of the battery exceedingly.
1.Slide the power ON/OFF switch to its ON position first, and then connect
the player with the charger by USB cable.
2.Connect the charger to AC power supply, the red light will turn on.
3.The MP3 player can be in charging station after a short moment after
connecting, the player enters the corresponding sub-interface, the icon of the
battery begins to flicker, and the green light will turn on indicating the charger
can work normally.
4
lPower on
Slide the Power ON/OFF switch to its ON position. Press
to turn on the MP3 player.
4) In operation windows , click
to Portable Device
File
Copy
Copy
33
key
Dimension: Choose resolution 128*128, best suited for your
screen size of 1.5 `
Choose start point of the video you want to convert.
lMusic
Select Music icon after power on, press MENU key to enter
Music interface, it begins to play music or voice.
Choose ending point of the video you want to convert.
4. After setting, click
at last to start converting.
5. After converting, connect the MP3 player to your PC by USB cable.
6. Enter C:\Output\
lStop playing music( power off )
When in play mode, short press key to pause playing, long
press
key to stop playing.
7. Copy Ski_trip.smv to the catalog of your MP3 player.
8. Disconnect the MP3 player from PC, turn on the player and
enter Video menu to watch the converted video.
Notice:
You'd better use the window default of the software if you are
not so familiar with video converting.
6
31
Frame
Source Frame Rate: 15, 10, 5, 4
When in pause or stop mode, short press
key to play music.
When in power on mode, long press
key will turn the MP3
player off, and the power off icon will appear. See as follows:
lVolume adjustment
1 When in play mode, short press VOL key, and then press
key to increase volume.
2 When in play mode, short press VOL key, and then press
key to decrease volume.
30
7
lVideo
Enter the main menu, select
Video .
Audio Sampling: Bigger the figure, better is the quality; bigger
the figure, larger the space it takes.
1.Short press MENU key or
key to play movie.
2.When in play/pause mode, short press
key to change
movies forward and backward, long press
key to fast
forward or fast rewind the movie.
3. Short press MENU key to display movie list interface, press
navigation key to choose movies, and then short press M
key or
key to play movie, long press MENU key to go back to
the main interface.
28
9
Audio: Select stereo or mono
Note:
Volume adjustment range: 0 31
Short press for section by section adjustment, long press for
continuous adjustment
l Inquire music voice files
1When in play/pause/stop mode, short press
navigation
key to change songs forward and backward, long press
navigation key for fast forwarding or fast rewinding.
2. When in play/pause/stop mode, short press M key to display
music list interface, press
navigation key to choose songs,
and then press MENU key to play.
3.When in play mode, short press
key to pause; When in play/
pause/stop mode, short press MENU key to enter music list, and
long press MENU key to the main interface.
Graphic Data Size in 1 sec Kbytes
8
lPhoto
Enter the main menu, select
: 3 40
29
Generally, they are 3 levels of video quality:
Photo .
High: video playback length is one hour; it takes up about 200MByte
space.
Medium: video playback length is one hour; it takes up about 128Mbyte
space.
Low: video playback length is one hour; it takes up about 83MByte
space.
1.Press MENU key or
key to browse photos.
2.Press
key to browse photos forward and backward.
3.Press VOL key to browse photos automatically.
4.Press MENU key to go back to the main interface.
10
Custom
User-defined video quality
27
2. Running video2smv program under folder of SMV
Transcoding in accessory CD.
3. Settings:
Click
to select the video source file you want to
convert in Input .
Click
to select the position you want to preserve
and file name after converting in Output .
Select the level of video quality you would like the output to
be converted to:
26
Power off
Long press
key to turn the MP3 player off.
The following interface may appear and the player may turn off
automatically if the player is in low power.
lMic Record
Enter the main menu, select
Mic Record .
1.Press MENU key or
key to start recording.
2.Short press
key to pause recording and then short press
VOL key to stop recording. Voice file is produced and will be
preserved in the VOICE of Navigation.
3.Long press MENU key to go back to the main menu.
11
1.Press MENU key or
key to browse EBook.
2.Press
key to browse EBook forward and backward.
3.Short press MENU key to enter EBook list, and long press
MENU key to go back to the main menu.
lNavigator
Enter the main menu, select
Navigator .
Low power
Note
It is convenient to delete files and you can choose several files to
delete at the same time.
If the player doesn't work completely, press VOL key + key to
restore, it will turn on again.
24
1.Press MENU key or
key to enter Navigator
2.Short press MENU key or
key, if you choose music, it will p
lay music; if you choose video, it will play movie; if you choose
photo, you can browse photo; if you choose EBook, you can read
the EBook. Short press MENU key to go back to the last step menu.
3.Long press MENU key to go to the main menu.
13
How to convert video format
l Video format
AVI WMV MPG
The player can only play movies after converting other video
formats to SMV format.
Support the following video formats to be converted to SMV
format:
AVI WMV MPG
Note:
1.Produced as voice file according to the sequence V001 V002
automatically. The file is WAV format.
2.It will stop recording if the storage is full.
Note:
1.Recording audio quality can select high middle and low.
2.Use earphone to monitor when recording audio frequency.
3.Please adjust the volume of external audio device properly
before recording. The tone will be not good if the volume is
exceedingly high.
lEBook
Enter the main menu, select
Ebook
.
l Converting video format
Accessory disk has provided video converting tool. It is
unnecessary to install, you can use it by coping it to your PC
directly. For example: copy the whole folder of SMV
Transcoding to the folder c:\program files\ of your PC.
Then enter this folder, click video2smv.exe to open video
converting tool:
Converting video file to SMV format file
Notice: Before playing video file, please use SIGMATEL
MOTION, the VIDEO software to convert other format to
SMV format. Operating steps are as follows:
1. Please make sure that the target video source (the video that
needs to be converted) is /has been saved in your PC and save it
under C:\converting objects\. The format of the video should be
AVI, MPG, or WMA.
12
25
3.Long press MENU key, it will prompt that whether you want to
delete the file or not. Choose Yes or No by pressing
key.
If you choose YES, then press MENU key to delete these files,
and then go back to the main interface.
4.Long press MENU key to go back to the main interface directly
if there is no delete icon. If there is delete icon, it will prompt you
whether you want to delete the file or not. If you choose YES, these
selected files will be deleted, then go back to the main interface.
lSetup
Enter the main menu, select Setup .
Enter the main menu, select Setup .
1.Press MENU key or
key to enter Setup, press
key to
select the option you want to set, then press MENU key to enter
the selected option, press
key to choose parameter, press
MENU key to confirm and exit to the last step menu, press
key
to give up and exit to the last step menu.
2.Long press MENU key to go back to the main menu.
Please Wait
14
23
Delete File
Enter the main menu, select
Delete
.
1.Press MENU key or
key to enter Delete interface, press
MENU key to enter the next step catalogue, press
key to go
back to the main interface.
2.If you choose the file, press MENU key to have delete icon, and
press MENU key again to cancel delete icon. You can select several
files at the same time. If you choose the folder, press M key to enter
sub-file of this folder.
lPlay Mode
1.After entering this menu, press MENU key to enter Play Mode
interface.
2.Press
key to choose play mode, press MENU key to
confirm and exit to the last step menu, press key to give up and
exit to the last step menu.
lEQ
After entering this menu, press MENU key to enter EQ interface.
22
Notice: Lyric on-off indicates that whether you need lyric
when playing music or not. The lyric can only
display when
having support of lyric file after choosing Lyric ON.
15
Press
key to choose contrast size, press MENU key to
confirm and exit to the last step menu, press
key to give up
and exit to the last step menu.
l Languages
After entering this menu, press MENU key to enter language
interface.
lDisplay
After entering this menu, press MENU key to enter Display interface.
Press
key to choose language, press MENU key to confirm
and exit to the last step menu, press
key to give up and exit to
the last step menu.
lAbout
After entering this menu, press MENU key to enter About interface.
20
Press
key to choose display time, press MENU key to
confirm and exit to the last step menu, press
key to give up
and exit to the last step menu.
17
Press
key to choose EQ mode, press MENU key to
confirm and exit to the last step menu, press
key to give up
and exit to the last step menu.
lContrast
After entering this menu, press MENU key to enter Contrast
interface.
16
Note: Display time is specially designed for saving power, the
system will turn off the screen for saving power if there is no any
key operation within the display time you set. The screen will
light automatically if you press any key.
Player information could be found after entering this interface,
see as follows:
lExit
After entering this menu, press MENU key to confirm and exit
this menu.
21
lRecord Settings
After entering this menu, press MENU key to enter Record
Settings interface.
lPower
After entering this menu, press MENU key to enter Power interface.
Press
key to choose record setting, press MENU key to
confirm and exit to the last step menu, press
ey to give up and
exit to the last step menu.
Press
key to choose off time, press MENU key to confirm
and exit to the last step menu, press
key to give up and exit to
the last step menu.
18
19