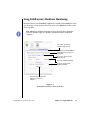
1
DiskWarrior
™
Alsoft, Inc.
PO Box 927
Spring, TX 77383
Sales: 281-353-4090, Fax: 281-353-9868
E-Mail: [email protected]
Support: 281-353-1510
E-Mail: [email protected]
World Wide Web: www.Alsoft.com
Copyright
This manual and the software described in it are copyrighted with all rights reserved. Under the
copyright laws, this manual or the software may not be copied, in whole or part, without written
consent of Alsoft, Inc., except in the normal use of the software or to make a backup copy. The
same proprietary and copyright notices must be affixed to any permitted copies as were affixed
to the original. This exception does not allow copies to be made for others, whether or not sold
to another person. Under the law, copying includes translating into another language or format.
Limited Warranty
Alsoft warrants the program to perform substantially in accordance with the manual and the disk
on which the program is recorded to be free from defects in materials and faulty workmanship
under normal use and service for a period of ninety (90) days from the date the program is purchased. If, during the 90-day period, a defect in the program or the disk should occur, Alsoft will
replace the disk and the program at no charge to you, provided you return the disk with proof
of purchase to Alsoft. Alsoft’s entire liability and your exclusive remedy shall be replacement of
the disk and its contents as provided above. If failure of the disk has resulted from accident,
abuse or misapplication of the disk, then Alsoft shall have no responsibility to replace the disk
under the terms of this limited warranty.
All implied warranties on the program and the disk, including implied warranties of merchantability and fitness for a particular purpose, are limited in duration to ninety (90) days from the
date of the original retail purchase of this product.
IN NO EVENT SHALL ALSOFT NOR ANYONE ELSE WHO HAS BEEN INVOLVED IN THE CREATION,
PRODUCTION, DELIVERY, OR SUPPORT OF THE PROGRAM OR THIS MANUAL BE LIABLE FOR
ANY DIRECT, INDIRECT, SPECIAL, CONSEQUENTIAL, OR INCIDENTAL DAMAGES ARISING OUT
OF THE USE, THE RESULTS OF USE, OR INABILITY TO USE THE PROGRAM OR MANUAL EVEN IF
ALSOFT HAS BEEN ADVISED OF THE POSSIBILITY OF SUCH DAMAGES OR CLAIM. In particular,
Alsoft shall have no liability for any programs or data used with the program, including the costs
of recovering such programs or data.
©1998 - 2003 by Alsoft, Inc. All rights reserved. Alsoft, DiskWarrior, DiskExpress and
MasterJuggler are registered trademarks and PlusMaker, PlusMaximizer and PlusOptimizer are
trademarks of Alsoft, Inc. All other names are trademarks of their respective companies.
Portions ©1989-99 Apple Computer, Inc.
ii
:
iii
DiskWarrior Credits
DiskWarrior written by
Manual written by
iv
Al Dion, Rusty Little, Steve Clarner and Brian Webster
Al Dion, Stephanie Jones, Rusty Little and Joe Muscara
Table of Contents
Chapter 1: Introduction
Welcome to DiskWarrior . . . . . . . . . . . . . . . . . . . . . . . . . . . . . . . . . . . . . . . . . . . . . . . . . . . . . . .8
Alsoft, the Utility Company . . . . . . . . . . . . . . . . . . . . . . . . . . . . . . . . . . . . . . . . . . . .8
What Is DiskWarrior? . . . . . . . . . . . . . . . . . . . . . . . . . . . . . . . . . . . . . . . . . . . . . . . . .8
What Is the Directory? . . . . . . . . . . . . . . . . . . . . . . . . . . . . . . . . . . . . . . . . . . . . . . . .9
What Is Directory Damage and How Does It Affect Me? . . . . . . . . . . . . . . . . . . . . . .9
How Does Directory Damage Occur? . . . . . . . . . . . . . . . . . . . . . . . . . . . . . . . . . . . .10
When Should I Rebuild My Directory with DiskWarrior? . . . . . . . . . . . . . . . . . . . .10
What Is Directory Optimization? . . . . . . . . . . . . . . . . . . . . . . . . . . . . . . . . . . . . . . .11
Why Alsoft DiskWarrior Is the Only Answer . . . . . . . . . . . . . . . . . . . . . . . . . . . . . . .11
We Put the State-of-the-Art Technologies You Expect from Alsoft in DiskWarrior 13
Basic Terms You Need To Know . . . . . . . . . . . . . . . . . . . . . . . . . . . . . . . . . . . . . . . . . . . . . . . .14
Chapter 2: Using DiskWarrior
Installation of DiskWarrior. . . . . . . . . . . . . . . . . . . . . . . . . . . . . . . . . . . . . . . . . . . . . . . . . . . .20
Requirements . . . . . . . . . . . . . . . . . . . . . . . . . . . . . . . . . . . . . . . . . . . . . . . . . . . . . .20
Copyright Notice. . . . . . . . . . . . . . . . . . . . . . . . . . . . . . . . . . . . . . . . . . . . . . . . . . . .20
Before You Install. . . . . . . . . . . . . . . . . . . . . . . . . . . . . . . . . . . . . . . . . . . . . . . . . . .20
If You Received DiskWarrior Electronically. . . . . . . . . . . . . . . . . . . . . . . . . . . . . . .21
If You Received DiskWarrior on a CD-ROM . . . . . . . . . . . . . . . . . . . . . . . . . . . . . .21
Installing DiskWarrior . . . . . . . . . . . . . . . . . . . . . . . . . . . . . . . . . . . . . . . . . . . . . . .21
Deinstalling DiskWarrior . . . . . . . . . . . . . . . . . . . . . . . . . . . . . . . . . . . . . . . . . . . . .22
Opening DiskWarrior . . . . . . . . . . . . . . . . . . . . . . . . . . . . . . . . . . . . . . . . . . . . . . . .22
Quitting DiskWarrior . . . . . . . . . . . . . . . . . . . . . . . . . . . . . . . . . . . . . . . . . . . . . . . .22
How To Get Even More from DiskWarrior . . . . . . . . . . . . . . . . . . . . . . . . . . . . . . . .23
Running DiskWarrior . . . . . . . . . . . . . . . . . . . . . . . . . . . . . . . . . . . . . . . . . . . . . . . . . . . . . . . .24
Rebuilding Your HFS and HFS Plus Disks. . . . . . . . . . . . . . . . . . . . . . . . . . . . . . . .24
What to Look for in the DiskWarrior Report . . . . . . . . . . . . . . . . . . . . . . . . . . . . . .29
What to Look for During Preview . . . . . . . . . . . . . . . . . . . . . . . . . . . . . . . . . . . . . . . . . . . . . . .30
Previewing When the DiskWarrior CD Is the Startup Disk . . . . . . . . . . . . . . . . . . .30
Previewing When the DiskWarrior CD Is Not the Startup Disk. . . . . . . . . . . . . . . .32
DiskWarrior Shortcuts - AppleScripting and Drag and Drop. . . . . . . . . . . . . . . . . . . . . . . . . .34
Strategies for Rebuilding with DiskWarrior . . . . . . . . . . . . . . . . . . . . . . . . . . . . . . . . . . . . . . .35
Using DiskWarrior as Preventative Maintenance . . . . . . . . . . . . . . . . . . . . . . . . . .35
Using DiskWarrior When There Seems to Be a Problem. . . . . . . . . . . . . . . . . . . . .35
Using DiskWarrior to Recover Data from Malfunctioning Disks . . . . . . . . . . . . . .36
What to Do If Your Computer Has a Malfunctioning Internal Disk. . . . . . . . . . . .36
What to Do If You Used Another Utility First . . . . . . . . . . . . . . . . . . . . . . . . . . . . . .36
v
Graphing a Disk Directory . . . . . . . . . . . . . . . . . . . . . . . . . . . . . . . . . . . . . . . . . . . . . . . . . . . .38
Background . . . . . . . . . . . . . . . . . . . . . . . . . . . . . . . . . . . . . . . . . . . . . . . . . . . . . . .38
About DiskWarrior’s Directory Optimization Graph . . . . . . . . . . . . . . . . . . . . . . . .40
Graphing a Disk . . . . . . . . . . . . . . . . . . . . . . . . . . . . . . . . . . . . . . . . . . . . . . . . . . . .40
Understanding the Graph . . . . . . . . . . . . . . . . . . . . . . . . . . . . . . . . . . . . . . . . . . . .41
Using DiskWarrior’s Hardware Monitoring . . . . . . . . . . . . . . . . . . . . . . . . . . . . . . . . . . . . . . .43
About DiskWarrior’s Hardware Monitoring . . . . . . . . . . . . . . . . . . . . . . . . . . . . . . .44
Manual Diagnostics . . . . . . . . . . . . . . . . . . . . . . . . . . . . . . . . . . . . . . . . . . . . . . . . .44
Automatic Diagnostics . . . . . . . . . . . . . . . . . . . . . . . . . . . . . . . . . . . . . . . . . . . . . . .45
Chapter 3: Troubleshooting and Error Messages
Troubleshooting . . . . . . . . . . . . . . . . . . . . . . . . . . . . . . . . . . . . . . . . . . . . . . . . . . . . . . . . . . . .48
Disk Status Messages. . . . . . . . . . . . . . . . . . . . . . . . . . . . . . . . . . . . . . . . . . . . . . . . . . . . . . . . .50
vi
Chapter 1
Introduction
Welcome to DiskWarrior
Alsoft, the Utility Company
At Alsoft, we have been writing software for Mac OS computers since 1984. We are a Macintosh
only software company whose expertise is in providing powerful, useful and safe utilities that enhance the user experience while maintaining the ease-of-use Macintosh owners have come to
expect. Some of these utilities include DiskExpress®, MasterJuggler®, PlusMaker™, and
PlusOptimizer™.
When we introduced DiskExpress in 1986, it was the first and only disk optimizer for the Macintosh. Our MasterJuggler Pro is the most comprehensive font management utility package on
the market today. With the release of Mac OS 8.1 in January 1998, Apple introduced their new
disk format for Mac OS computers, known as Mac OS Extended format or HFS Plus. Simultaneously, Alsoft introduced PlusMaker to let you effortlessly convert your older HFS disks to the
new format. Later that year when Alsoft shipped PlusOptimizer, it was the first disk optimizer
compatible with Mac OS 8.1 and HFS Plus. You can expect to find the safest and most powerful
disk directory damage elimination utility for Mac OS computers only from Alsoft. DiskWarrior
has won more awards than any other disk utility and is recommended as the first choice of Mac
experts everywhere.
What Is DiskWarrior?
DiskWarrior is a utility designed from the ground up with a totally different approach to resolving
directory damage. DiskWarrior resolves disk damage by rebuilding your disk directory using
data recovered from the original directory, thereby recovering files and folders that you thought
were lost. The directories DiskWarrior creates are also optimized for maximum directory performance.
DiskWarrior is not a disk repair program in the conventional sense. It does not attempt to solve
all of the possible problems that can occur with a disk. It specializes in eliminating directory errors -- the most common problems Mac OS users have with their disks. DiskWarrior rebuilds
your disk directories making them error-free, eliminating any problems the errors would have
caused, and recovering lost files. It fixes any problem with master directory blocks and alternate
master directory blocks (HFS), volume headers and alternate volume headers (HFS Plus), volume bit maps, catalog trees, and extents trees.
8
Chapter 1: Introduction
Welcome to DiskWarrior
This approach has a significant advantage that other utilities overlook. Other products attempt
to repair your directory one step at a time, ignoring the big picture of what is truly wrong with
your directory and risking file information that could be saved. Too often, they will incorrectly
begin to “repair” your directory, then give up when they realize they have modified the directory
to an irreparable state. At Alsoft, we know that the most important thing when you are attempting
to repair your disks is getting your data back. That's why the first thing DiskWarrior checks is
your directory data, and that’s what it uses to create a replacement directory. DiskWarrior continues its rebuild operations unless no directory data can be found.
Hardware failure presents another potential threat to your data. When a drive mechanism fails,
the data on the drive can be lost, with an expensive data recovery service your only option to retrieve your data. DiskWarrior can be configured to automatically check your drives for possible
drive malfunction, giving you the opportunity to back up your data before a drive failure.
What Is the Directory?
The directory is an area of a disk used by the Mac OS to “map” all the information stored on the
disk. Some of what is stored in the directory is the numbers, names, locations, types, and sizes
of files and folders saved on the disk. When any software wants information from a disk, the Mac
OS must go to the directory to find out where the information is located. Also, when any software
wants to save information to a disk, the Mac OS must go to the directory to find out where the
information can be placed. All the necessary information about where the data was saved is then
recorded in the directory.
The directory has two components, the data and the structure. The directory data is the information the directory contains, such as the numbers, names, locations, and sizes of files and folders
saved on the disk. The directory structure is the organization of this data in the directory. The
Mac OS uses the structure to quickly access the data and thus find out where in the directory the
data is located. (The directory structure is not the folder organization you see on your disk, nor
is it organized as such.) This structure can be thought of as analogous to a telephone directory,
where the data are the names and phone numbers, and the structure can vary depending upon
which method for finding the data is more convenient. The names and numbers can be organized
alphabetically or by category (automotive, computers, physicians, etc.).
What Is Directory Damage and How Does It Affect Me?
When any of the information about the numbers, names, locations or sizes of files and folders in
a directory (the directory data) or the structure of a directory is either incorrectly updated or
not updated at all, that directory is considered damaged. This damage is normally limited to only
a specific area of the directory. Therefore, it’s quite common for directory damage to remain un-
Welcome to DiskWarrior
Chapter 1: Introduction
9
detected until long after the damage actually occurred. Also, if any portion of the directory is
overwritten by an errant program that inadvertently writes its own data, the directory is damaged.
When the Mac OS attempts to use the incorrect directory information to read or write information on a disk, an error will occur. This error may be very minor and go unnoticed. It might cause
a kernel panic or crash. Or, worst of all, the entire contents of your disk could become inaccessible.
Note: Many people mistakenly think that the invisible desktop files are a part of the
directory. They are not. The truth is that the desktop files are maintained by the Finder. They
contain a list of your applications and the folders in which they are located (for quick
opening), and the icons and “Get Info” comments of all files. DiskWarrior does not “check”
or rebuild the contents of the desktop files. Rebuilding the desktop files will not repair any
directory damage and may even worsen any existing damage.
How Does Directory Damage Occur?
The continued accuracy of information in the directory depends on the ability of the Mac OS to
perform ALL of its update and maintenance operations without any unexpected interruptions. Also, to help speed up many Mac OS computer operations, important pieces of information are
temporarily cached in memory instead of being immediately saved to the disk.
Common types of unexpected interruptions are kernel panics and crashes, power loss (lights
flicker), turning your Mac OS computer off without using the proper “Shut Down” procedure,
and pressing the “RESET” button. Depending upon the exact moment of the interruption, you
stand a good chance that your directory was either not updated correctly and/or some information had not been saved to the disk. You now have directory damage and/or information loss.
Another way that your directory can be damaged is if an errant program inadvertently writes its
own data to the portion of the disk that is reserved for the directory. If this occurs, then your
directory data has been overwritten and may be permanently lost.
When Should I Rebuild My Directory with DiskWarrior?
Obviously, you should run DiskWarrior when you suspect that there is directory damage on one
of your disks. Directory damage can result in the disk not mounting (not appearing on the desktop when the computer is started), missing files or folders, or crashes when files are used. You
will also find DiskWarrior useful when another program such as PlusOptimizer reports directory
damage.
10
Chapter 1: Introduction
Welcome to DiskWarrior
But the best use of DiskWarrior is for preventative maintenance of your disks. Many forms of directory damage do not manifest themselves until long after the damage has actually occurred.
You can prevent this damage from escalating by running DiskWarrior on your disks regularly.
DiskWarrior will rebuild your disk directory, eliminating all existing directory damage. The directory DiskWarrior creates is also optimized for maximum directory performance, and this will
speed up the performance of your disk. You will find doing this regular maintenance of your directories more useful than rebuilding your desktop.
What Is Directory Optimization?
In a directory, there is a logical order and a physical order of the file and folder information that
is stored. The logical order is based on the name of the files and the creation order of folders.
The physical order depends upon the available free space on the disk and space within the directory made available as files are deleted and added. Creating and deleting files makes the physical order less like the logical order as files and folders are added to the directory where space
is available. Directory searches are performed using the logical order of the directory. As the
physical order becomes less like the logical order, the drive mechanism must move more to follow the logical order.
Nearly everything uses a search based upon logical order to find files, including Find File/Sherlock, the Finder, applications that search for their preference files, applications that build font
menus, and open dialogs. DiskWarrior optimizes the directory, improving the speed of all of
these activities and many more. Other programs may not provide the true directory optimization
provided by DiskWarrior.
Why Alsoft DiskWarrior Is the Only Answer
When you use DiskWarrior to rebuild your directory, it focuses on what you care most about on
your disk -- your data as it is stored in your files. DiskWarrior rebuilds your directory based upon
the data it finds in the original directory. If you have journaling enabled, the journal file may also
be used. DiskWarrior then uses this information to build an entirely new replacement directory
structure. This approach is similar to that taken by FileMaker with its databases and the Finder
with desktop files. If you crash or otherwise close a FileMaker database improperly, the next time
you open that database, the first thing FileMaker does is rebuild the database indexes (the database structure) using the data in the database. When you rebuild your desktop, you are rebuilding the structure of the desktop database. DiskWarrior takes these processes a step further. When
directory data is severely damaged, DiskWarrior scavenges the directory, finding all the salvageable data. It then uses this data to build a new error-free replacement directory, recovering lost
files and folders as well as making it possible for the disk to appear on the desktop.
Welcome to DiskWarrior
Chapter 1: Introduction
11
When other utilities attempt to repair your directory, they attempt to do so by “patching” the directory structure. This method can result in sections of the directory being patched over and deleted. Since whole sections of the directory can be deleted, this attempt at repair can cause loss
of directory data and thus loss of access to your files. Because of this, you should always use
DiskWarrior first when you suspect directory damage on your disk. Otherwise, you risk losing
directory data (and thus access to your files). Successful directory rebuilding, repair, and recovery by DiskWarrior is based on the quality of the directory data present.
If you have used another utility to repair your directory and you now have a directory with no
errors but missing data, you can make DiskWarrior scavenge the directory to find the lost data.
This is the same scavenge procedure DiskWarrior uses to recover your data when it finds directory errors, but it normally skips the scavenge procedure when the directory has no major errors.
With DiskWarrior, there is never a risk of losing directory data and thus never a risk of losing
access to your files. DiskWarrior uniquely verifies the replacement directory before it can be
written to disk to ensure that it is completely error-free. This also ensures that the disk will have
no problems when rebuilding is complete.
DiskWarrior compares the original directory with the replacement directory and determines if
there have been any changes to the number or contents of your files and folders. It then lists any
differences found in the DiskWarrior Report. You'll know right away what files and folders are
affected by directory damage. You can use this information to see what items you need to test or
inspect in the preview (see below).
DiskWarrior’s patent-pending preview feature lets you examine your disk as it will appear after
the directory is rebuilt, but before any directory changes are written to disk. You can use the results of the comparison shown in the DiskWarrior Report to find out which files and folders you
should inspect first because they may have been affected by directory damage. This assures you
that you will get the expected results before any changes are made permanent.
Even though they are not part of the directory, DiskWarrior will also repair damaged boot blocks
and rebless the system/system folder if it is necessary to do so on your disk. This ensures that
your disk will properly start your Mac OS computer once the rebuilding is complete.
DiskWarrior also checks pre-Mac OS X System and Finder files for damage, eliminates a common cause of system crashes by checking custom icon files for corruption, and repairs wrapper
System file damage, allowing Macs with these disks to start up.
12
Chapter 1: Introduction
Welcome to DiskWarrior
DiskWarrior can be used to activate internal diagnostics that are built into disk devices to help
determine if a drive is in danger of physical malfunction. These tests can be executed manually,
or you can choose to have the tests run automatically every day, week or month. DiskWarrior
also provides several notification options should the diagnostics report a problem.
We Put the State-of-the-Art Technologies You Expect from Alsoft in
DiskWarrior
• Uses directory data to quickly rebuild the directory structure
• Eliminates risk of losing access to files – other disk “repair” utilities attempt to fix the
directory by patching the directory structure and risk deleting sections of the directory
• Scavenges directory to find all salvageable file and folder data, even data contained in
damaged nodes
• Eliminates unseen directory errors, preventing minor directory errors from escalating
into major problems
• Recovers lost files and folders
• Optimizes directory for maximum directory performance, speeding up overall disk
performance
• Monitors drive hardware for potential drive failure
• Verification of replacement directory ensures data integrity
• Comparison of original directory with replacement directory tells you which files and
folders may have been affected by directory damage
• Preview feature to view what the disk will look like after the directory is rebuilt, allowing
you to test files, folders, and applications before any directory changes are written to
disk
• Repairs damaged boot blocks and blesses the system folder to ensure that the computer
will start from the repaired disk
• Checks custom icon files for corruption, eliminating a common cause of system crashes
• Repairs problems with wrapper volume System files caused when HFS Plus disks are
initialized under Mac OS 9.0 - 9.0.4
• Safely permits interruptions of any kind, including power outages
• Advanced “Verify Reads and Writes” technology protects your data
• Supports bad block sparing software
• Rebuilds directories on disks as large as 2,000 gigabytes (2 terabytes)
• Supports file journaling (Mac OS X 10.2.2 or later)
Welcome to DiskWarrior
Chapter 1: Introduction
13
Basic Terms You Need To Know
This section explains some terms and concepts that are used throughout this manual.
Application
An application is a tool your computer uses to manipulate information and perform a
useful function for you. Applications include such products as AppleWorks.
Block
The physical surface of a disk is comprised of many 512 byte storage areas called
physical blocks. The larger the disk, the greater the number of physical blocks on the
disk. An allocation block is a group of one or more physical blocks treated as a single
storage area by the Mac OS. The older Mac OS Standard format, or HFS, can only keep
track of 65,535 allocation blocks per disk. Therefore, the larger the size of a disk, the
greater the number of physical blocks in each allocation block, so that the total
number of storage areas on the disk does not exceed the maximum of 65,535. The
newer Mac OS Extended format, or HFS Plus, can keep track of over 4 billion allocation
blocks per disk. HFS Plus uses allocation blocks sizes ranging from 0.5 KB to 4 KB. The
Macintosh filing system stores files by breaking them into allocation block-size pieces
and writing them into unused allocation blocks wherever they are available.
Damaged Items Folder
When DiskWarrior performs its directory rebuild function, it may recover files that
potentially have problems due to directory damage that existed before the application
was run. If such files are recovered, DiskWarrior will create a Damaged Items folder
for these files.
Directory
The directory of a disk is a group of allocation blocks set aside by the Mac OS to store
the number, name, location (which allocation blocks), and size of each file and folder
stored on the volume.
Directory Data
The directory data includes the information about the numbers, names, locations,
types, and sizes of files and folders saved on the disk.
Directory Structure
The directory structure is how the directory data is organized within the directory. The
Mac OS uses the directory structure to quickly access the directory data. Its structure
is an indexed database, similar to that used by the Finder in the desktop database, as
well as by FileMaker with its databases.
14
Chapter 1: Introduction
Basic Terms You Need To Know
Disk
A disk is the medium on which information is stored. There are many types of disks
including floppy disks, hard disks (like the one that is probably inside your Mac OS
computer), and removable disks. A disk must be initialized before it can be used.
Document
A document is a type of file that you create with an application. Documents include the
information you enter, modify, view, or save to a disk.
Driver
This is the software that translates requests from the Mac OS into the commands that
the disk hardware itself understands. It is usually supplied by the vendor of the disk
drive mechanism. In the case of the internal disk that was supplied with your
Macintosh, Apple provides the driver.
Eligible Disk
To be eligible to be rebuilt by DiskWarrior, a disk must have been formatted as a Mac
OS Standard (HFS) or Mac OS Extended (HFS Plus) disk. In addition, an eligible disk
must be locally attached to a computer on which DiskWarrior is running, and it must
not be write protected. The disk must have a valid partition map.
Note: A copy of DiskWarrior running on your computer will not rebuild any disk that you
must access via a network. These disks are only eligible to another copy of DiskWarrior
running on the computer to which they are locally connected.
File
A file is a collection of information stored on a disk. Files can be system files,
application files or document files.
File Server
A file server is an application designed to allow many users to share common files via
a network. Examples of AppleTalk network file server applications are AppleShare and
File Share.
Free Space
The free space encompasses all the unused allocation blocks on a disk. As free space,
these blocks are available to be allocated to files or to the directory. Once a file is
deleted, the blocks previously occupied by the file will be returned to the free space.
Mac OS X System Disk
A disk that contains the files and information necessary to run Mac OS X.
Basic Terms You Need To Know
Chapter 1: Introduction
15
Partition
Many disks come with management utilities which allow you to divide a disk into
additional disks called partitions. There is also independent system software which
allows you to partition a disk.
Partition Map
The partition map is a section of the disk that contains the information for each
partition on the disk. Most Mac OS disks are set up as one partition, but if you set up
your disk as multiple partitions, each partition will behave as a separate disk. (Each
partition can be unmounted individually, and files dragged between partitions will be
copied instead of moved.)
Preview Disk
When DiskWarrior is used to rebuild a directory, the application creates its
replacement directory in memory. When you activate the Preview Mode, DiskWarrior
uses its replacement directory to create a preview disk, allowing you to see the results
of the rebuild before any changes are made. The preview disk is locked; you may copy
files from the preview disk to another disk, but the preview disk itself cannot be
modified.
Rescued Items Folder
When DiskWarrior performs its directory rebuild function, it may recover files and
folders for which an enclosing folder could not be found. DiskWarrior will create a
Rescued Items folder for such items. Contents of this folder should be inspected for
damage and may need to have new enclosing folders created, the associated
application may need to be reinstalled, or the items may need to be discarded.
Root Level
The root level of a disk is the lowest level of the disk. When you double-click a disk
icon on the desktop, the window that opens shows you all of the files and folders at the
root level of that disk.
Shared Disk
A shared disk is one that can act as a file server and can be seen, or “shared,” by
multiple computers.
Startup Disk
The startup disk is the disk which contains a group of special files stored in the System
Folder. Your computer cannot operate without the information in these files. The
startup disk icon appears at the top-right corner of the desktop.
16
Chapter 1: Introduction
Basic Terms You Need To Know
Wrapper Volume
An HFS Plus volume may be contained within an HFS volume (wrapper volume) in a
way that makes the volume look like an HFS volume to systems without HFS Plus
support. Embedding an HFS Plus volume within an HFS volume also allows a Mac OS
computer to start up from an HFS Plus volume if it has built-in support for HFS but not
HFS Plus.
Basic Terms You Need To Know
Chapter 1: Introduction
17
18
Chapter 1: Introduction
Basic Terms You Need To Know
Chapter 2
Using DiskWarrior
Installation of DiskWarrior
Requirements
To rebuild the directory on a Mac OS Standard (HFS) or Mac OS Extended (HFS Plus) disk,
DiskWarrior requires a G3-based or higher Mac OS computer with at least 128 MB RAM. The
disk to be rebuilt must be locally connected, must not be write protected, and must have a valid
partition map. If you plan to rebuild the directory on your startup disk, you need to start up from
another disk capable of starting up Mac OS X v. 10.2.1 or later, such as the DiskWarrior CD
(refer to Rebuilding Your HFS and HFS Plus Disks on page 24 in this chapter).
To install the DiskWarrior application, you must have a Mac OS computer running Mac OS X v.
10.2.1 or later with at least 128 MB RAM.
To build a graph for the directory of a disk, all of the following must be true:
1)The disk must appear on the desktop.
2)The disk must be an HFS (Mac OS Standard) or HFS Plus disk (Mac OS Extended).
3)The disk must be locally attached.
4)There must not be any detected hardware problems with the disk.
Copyright Notice
As stated in the copyright notice in this manual, you may install and use DiskWarrior on any computer owned by you, for the purpose of performing its functions on any disk owned by you. The
software may not exist on more than one computer at a time.
Before You Install
First make a backup
DiskWarrior is not copy protected, so the Finder can be used to create a backup of the
DiskWarrior package that you received.
Be sure to register your purchase
If you received DiskWarrior on a CD-ROM, then you should perform the following
steps:
1) Note your DiskWarrior serial number on the CD label.
2) Completely fill out the product registration card and mail it to Alsoft. Be sure to
include the serial number. You can also register your product on the Web at <http://
www.Alsoft.com/registrationform.html>.
20
Chapter 2: Using DiskWarrior
Installation of DiskWarrior
If you received DiskWarrior electronically, you can register your software on the Web
at <http://www.Alsoft.com/registrationform.html>. You will need to enter your
registration number as your serial number.
Note: Your DiskWarrior serial number is required for proper registration of your purchase
so that you may receive Technical Support, updates and future product special offers.
If You Received DiskWarrior Electronically
DiskWarrior cannot be run from the disk image containing the DiskWarrior application that you
received electronically. Please refer to Installing DiskWarrior below for instructions on how to
install DiskWarrior. It is recommended that you put the disk image containing the DiskWarrior
application and the other files on another hard disk or a third-party removable media disk so
that you have a copy of DiskWarrior available even if you cannot access your startup disk.
Record the registration number you received in the e-mail that confirmed your purchase of
DiskWarrior. You will need this serial number the first time you run DiskWarrior.
If You Received DiskWarrior on a CD-ROM
DiskWarrior can be run directly from the DiskWarrior CD, and your Mac OS computer can be
started from this CD-ROM. This will allow you to rebuild the directories on any HFS or HFS Plus
disks that DiskWarrior can rebuild as described in this chapter, including your normal startup
disk.
Installing DiskWarrior
Installation of DiskWarrior will require an administrative password and your DiskWarrior serial
number. Follow these steps to install DiskWarrior:
Note: If you suspect there is directory damage on your disk, then you should proceed to
Rebuilding Your HFS and HFS Plus Disks on page 24 in this chapter before installing
DiskWarrior on your disk. Alsoft recommends that you run DiskWarrior on your disk before
installing DiskWarrior.
Installing from the DiskWarrior CD:
1) Insert the DiskWarrior CD into your CD drive.
Installation of DiskWarrior
Chapter 2: Using DiskWarrior
21
2) Select the DiskWarrior icon found in the CD window and drag it to your hard disk.
Alsoft recommends that DiskWarrior reside in the Utilities folder of the
Applications folder.
3) To run DiskWarrior from your hard disk, simply double-click the DiskWarrior icon.
In order to run DiskWarrior, you must be started from Mac OS X v. 10.2.1 or later.
Installing the DiskWarrior received via download purchase:
1) Open the ‘DiskWarrior.dmg’ file you received via download. Doing so will cause the
disk image named ‘DiskWarrior’ to appear on your desktop.
2) Select the DiskWarrior application icon found in the DiskWarrior disk image
window and drag it to your hard disk. Alsoft recommends that DiskWarrior reside
in the Utilities folder of the Applications folder.
3) To run DiskWarrior from your hard disk, simply double-click the DiskWarrior icon.
In order to run DiskWarrior, you must be started from Mac OS X v. 10.2.1 or later.
Before using a new utility for the first time, it is recommended that you back up your data to safeguard against any unforeseen incompatibilities with other programs running on your Mac OS
computer.
Deinstalling DiskWarrior
If you ever have a need to deinstall DiskWarrior, simply drag the DiskWarrior application icon
from the Utilities folder of the Applications folder to the trash.
Opening DiskWarrior
If the DiskWarrior CD is the startup disk, the DiskWarrior application will open automatically,
bypassing the normal Finder desktop.
To open an installed copy of DiskWarrior, double-click the DiskWarrior icon located in the
Utilities folder of the Applications folder.
Quitting DiskWarrior
To quit the DiskWarrior application, choose Quit from the DiskWarrior menu. This closes the
DiskWarrior application window, but any automatic DiskWarrior features you have enabled will
still take place. If the DiskWarrior CD is the startup disk, quitting the DiskWarrior application
will cause your machine to restart.
22
Chapter 2: Using DiskWarrior
Installation of DiskWarrior
How To Get Even More from DiskWarrior
At this point you could simply let DiskWarrior automatically take excellent care of your disks.
But we highly recommend that you learn how to work with all the powerful yet easy-to-use features of DiskWarrior. To learn how to use these advanced features, continue reading.
Installation of DiskWarrior
Chapter 2: Using DiskWarrior
23
Running DiskWarrior
Rebuilding Your HFS and HFS Plus Disks
You will find DiskWarrior extremely easy to use. You will start by selecting a disk, clicking
Rebuild, and then waiting a few moments for the DiskWarrior Report. Then you will view the Report, making note of the problems that were found and repaired and anything that DiskWarrior
recommends to you. At this point, you should preview the rebuilt disk, checking if any files or
folders you may have lost have been recovered. Once you have determined that the Preview disk
is satisfactory, you will click Replace to replace the directory on the original disk with the new,
optimized replacement directory that you just previewed.
Alsoft recommends, however, that you thoroughly read the remainder of this chapter so that you
understand how DiskWarrior works, and what you should look for in each step. Follow these
steps to rebuild your disks with DiskWarrior:
Note: Alsoft recommends that you regularly make a complete backup of your disks. This
will allow you to restore your data regardless of any problem that might arise, including
those that DiskWarrior cannot repair, such as damaged partition maps or mechanical disk
malfunctions.
1) Restart your computer from a disk other than the disk to be rebuilt.
DiskWarrior cannot rebuild the directory on the disk from which the Mac OS computer
was started. If you startup from the DiskWarrior CD, this will allow DiskWarrior to
rebuild the directory of any HFS or HFS Plus disk locally connected to your Mac OS
computer.
Note: Due to the increased number of files and folders associated with the operating
system, starting up Mac OS X from the DiskWarrior CD takes longer than starting up Mac OS
9 and earlier, and may take significantly longer on machines with a slower CD drive.
Note: You cannot access System Preferences while started from the DiskWarrior CD. We do
not recommend choosing the DiskWarrior CD as the Startup Disk in your System
Preferences.
2) Close all open applications.
Directories cannot be rebuilt on disks with open applications.
24
Chapter 2: Using DiskWarrior
Running DiskWarrior
Note: To ensure that no files are open on your disk, start up from the DiskWarrior CD.
3) Double-click the DiskWarrior application.
This will start DiskWarrior. If the DiskWarrior CD is your Startup Disk, then the
DiskWarrior application will open, bypassing the normal Finder desktop. If this is the
first time you have run DiskWarrior, and you are not running the application from the
DiskWarrior CD, you will be presented with several dialogs. Read each carefully and
respond appropriately to each. You will then be presented with the DiskWarrior main
window from which you can rebuild disk directories.
Note: Running Mac OS X from a CD can cause some processes to take longer than they
would when started from an internal hard disk. Occasional pauses of what appear to be no
activity can take place.
Select a disk to rebuild
or graph from this list.
Information provided
here will tell you if the
selected disk directory
can be rebuilt.
If the disk directory
cannot be rebuilt, a list of
the reasons why it cannot
be rebuilt will be
displayed.
Click to graph the selected
disk’s directory.
Click to rebuild the
selected disk’s directory.
Figure 2-1
The DiskWarrior Main Window
Running DiskWarrior
Chapter 2: Using DiskWarrior
25
4) Select the disk to be rebuilt from the disks pop-up menu.
If you have problems finding the disk whose directory you want to rebuild, refer to
Problem: The disk I want to rebuild does not appear in the Disks Pop-up menu. on
page 48, "Chapter 3: Troubleshooting and Error Messages."
5) The lower portion of the main window will indicate whether the directory is
ready to be rebuilt.
If for some reason DiskWarrior cannot rebuild the disk’s directory, it will indicate the
reasons the directory cannot be rebuilt. For more information on disk requirements
for repair, refer to Requirements on page 20 in this chapter. For methods to overcome
the reasons a disk directory cannot be rebuilt, refer to Disk Status Messages on page
50, "Chapter 3: Troubleshooting and Error Messages."
6) Click the Rebuild button.
DiskWarrior will begin building the replacement directory on the disk to be rebuilt. It
will first analyze the disk. This analysis can take anywhere from several seconds to
several minutes or longer, depending on the number of files and folders on the disk.
7) Read the DiskWarrior Report.
When DiskWarrior is finished, it will display a window informing you of the results of
the rebuild. This will include any files and folders that may have been affected by
directory damage. You should pay particular attention to these files and folders while
inspecting the Preview disk in the next step. For further information on what
DiskWarrior reports, refer to What to Look for in the DiskWarrior Report on page 29
in this chapter. If you have used another utility to “repair” your disk before running
DiskWarrior, refer to What to Do If You Used Another Utility First on page 36 in this
chapter.
8) Test the replacement directory.
At this point, the original directory information on your disk has not been replaced, and
it will not be until you click “Replace” in step 10) Click “Replace” to use the
replacement directory, or “Cancel” to leave the directory untouched. The
DiskWarrior Report gives you an option to preview how your disk will appear after the
original directory is replaced. If, for instance, you are using DiskWarrior to recover lost
files or folders, you can verify that the replacement directory has these files. For further
information, refer to What to Look for During Preview on page 30 in this chapter.
26
Chapter 2: Using DiskWarrior
Running DiskWarrior
If the DiskWarrior CD is the startup disk:
• Clicking Preview will cause the DiskWarrior Preview Window to open. The
left pane of the DiskWarrior Preview Window will show the contents of your
disk in its original state, displayed with its original icon. The right pane of
the DiskWarrior Preview Window will show the contents of the preview disk
if the disk was originally mounted and appeared on the desktop.
• If the original disk did not appear on the desktop, then the preview disk will
be shown in one pane of the DiskWarrior Preview Window, and the Disk
pop-up menu will ask you to select a disk to display in the second pane.
Note: If, while attempting to use the DiskWarrior Preview Window, DiskWarrior displays
out of memory messages, simply quit the DiskWarrior Preview, switch back to the
DiskWarrior application, and continue with the following steps to rebuild the original disk.
This situation may occur due to a combination of the amount of available memory in your
computer and the number of files on the original and preview disks.
If the DiskWarrior CD is not the startup disk:
• If you are working with a disk that was originally mounted and appeared on
the desktop, clicking Preview will cause DiskWarrior to present you with an
icon for the disk in its original state and a separate icon for the preview disk
in the Finder. You can double click both icons and compare them.
• If the original disk did not appear on the desktop, then only the preview
disk icon will appear in the Finder.
Caution: Never remove the original disk or the preview disk from the desktop during
preview.
Note: If, when DiskWarrior switches you to the Finder during Preview, the Finder displays
out of memory messages, simply switch back to DiskWarrior, stop the Preview, and continue
with the following steps to rebuild the original disk. This situation can occur due to a
combination of the amount of available memory in your computer and the number of files
on the original and preview disks.
Caution: In the unlikely event that the preview disk remains on the desktop when
DiskWarrior is not running, do not use the preview disk. You should restart your computer
and attempt to rebuild the disk with DiskWarrior again.
Running DiskWarrior
Chapter 2: Using DiskWarrior
27
9) If the DiskWarrior CD is not the startup disk, make sure you close all files
and folders and quit any applications you have tested in the previous step
before proceeding.
You do not need to stop the Preview before proceeding, but you may if you wish.
Note: If the disk you have selected is locked, you will be able to preview the replacement
directory but you will not be able to write the new directory to the disk.
10) Click “Replace” to use the replacement directory, or “Cancel” to leave the
directory untouched.
If you click “Replace,” DiskWarrior will write the replacement directory to your disk.
This will result in your disk being “replaced” by the Preview disk described in step 8)
Test the replacement directory. If you click “Cancel,” your disk will be untouched and
you will be returned to step 4) Select the disk to be rebuilt from the disks pop-up
menu. The Replace button is disabled when the disk is locked, there is a malfunction,
or the disk is too severely damaged to be repaired.
Note: In the event that critical items that you wish to recover remain missing during the
preview, it is recommended that you do not proceed with the rebuild (refer to What to
Look for During Preview on page 30 in this chapter).
11) DiskWarrior will write the rebuilt directory to the disk and keep you
updated with its progress.
DiskWarrior uses a fail-safe method of replacing the directory whenever possible,
which will be most cases. To use the fail-safe method, there merely needs to be enough
free space on the disk to write the new directory. There is redundancy designed into
the fail-safe method, assuring there is never any risk of ending up with an unusable disk
if the process is interrupted. You can go back to step 4 for any disk for which the
process was interrupted.
12) If there were any files listed in the DiskWarrior Report as occupying
portions of the disk already occupied by other files, DiskWarrior will
relocate the files to unique portions of the disk now.
When the procedure is complete, you must inspect these files to determine which of
them had been overwritten and damaged. The detailed view of the report lists the files
that overlap. The amount of time that this process takes depends upon the amount of
disk space taken by the overlapped files.
28
Chapter 2: Using DiskWarrior
Running DiskWarrior
13) If you have started your Mac OS computer from a disk besides your normal
startup disk (such as the DiskWarrior CD), select “Restart” from the Apple
menu to resume running from your normal startup disk.
If the DiskWarrior CD is the startup disk, quitting the application will cause your
computer to restart.
What to Look for in the DiskWarrior Report
After the rebuild has been completed, DiskWarrior will show you a DiskWarrior Report. When
DiskWarrior first displays the DiskWarrior Report, it defaults to showing you a summary of the
results of the comparison, all the problems found and repaired, and DiskWarrior’s recommendation to you. However, if you wish to see more detail regarding the problems found and repaired, you can select the Detail button for this information. This will also list all the files and
folders that were affected by directory damage. You should pay particular attention to these files
and folders while inspecting the Preview disk.
Running DiskWarrior
Chapter 2: Using DiskWarrior
29
What to Look for During Preview
When DiskWarrior presents the preview disk, you have the opportunity to check and test the disk
as it will appear after it is rebuilt. You can see if files and folders that you lost have been recovered. You can also inspect the files and folders listed in the DiskWarrior Report.
Previewing When the DiskWarrior CD Is the Startup Disk
If the DiskWarrior CD is the startup disk, clicking Preview will cause the DiskWarrior Preview to
open. If your original disk was visible on the desktop, then the left pane of the DiskWarrior
Preview will show the contents of your disk in its original state. The right pane of the DiskWarrior
Preview will show the contents of the preview disk. If your original disk was not visible on the
desktop, then only the preview disk will be shown in the DiskWarrior Preview Window.
Figure 2-2
The DiskWarrior Preview Window
The lower section of each pane will show the icon, kind, size, creation date and modified date
of the selected item in that pane. To check for differences in specific items between your original
disk and the preview disk, select the “Navigate both disks simultaneously” check box in the right
pane.
DiskWarrior may create special folders at the root level of the disk. You should pay particular
attention to the files and folders that DiskWarrior places in these folders. The folder called
“Rescued Items” contains files and folders whose enclosing folder could not be found and files
30
Chapter 2: Using DiskWarrior
What to Look for During Preview
that had an entry in an inaccessible portion of the directory. If any of the files or folders whose
enclosing folder could not be found are part of a software package, you may need to create enclosing folders with the correct names and locations after you have rebuilt your disk so that the
software that uses these files works correctly, or you may need to reinstall the software package.
The files that had an entry in an inaccessible portion of the directory may have been lost or
thrown away. You must inspect these files to determine the extent of any damage. You must also
determine whether these files should be discarded.
If DiskWarrior creates a folder titled “Damaged Items,” then this folder contains files that were
recovered but may have problems. For instance, these files may have been truncated because
blocks were missing from the file. Once the rebuild is complete, you will need to determine if
these files can be salvaged.
In the event that critical items that you wish to recover remain missing from the preview disk, it
is recommended that you do not proceed with the rebuild. Since the directory information
for the items that are missing was overwritten or deleted at some point previously, DiskWarrior
could not recover these items. You will need to send your disk to a professional recovery service
to recover your lost files. While in the DiskWarrior Preview Window, you should copy as many
items from your disk as possible to another hard disk, removable media, floppy disks, etc. Select
the disk to which you wish to copy from the Disk drop-down menu in the left pane. Then select
the files you wish to copy and click the Copy button in the right pane.
You may need to copy the original files to several disks, depending upon the amount and size of
the files on the source and the size of the disks to which you are copying the files. Another option
is to copy only the files that you absolutely need, such as those that have changed since your last
backup, or only your data files if you are planning to reinstall your system and applications. In
either case, it is possible that you will not be able to copy all of the files you select. If an error
dialogue is displayed, select “Continue” to continue copying the remainder of the files you selected. When the copy operation is complete, you may want to attempt to copy the skipped files
again in case the error is intermittent and the copy operation can be performed for those files.
This will minimize the number of items that the recovery service will need to recover for you. If
you wish to copy files from the preview disk to another media source (such as another hard disk
or other removable media), select the media source from the Disk drop-down menu in the left
pane. Then select the files you wish to copy and click the Copy button in the right pane to copy
the files onto your media. When you have finished copying files, you can eject the disk by clicking
the Eject icon next to the Disk drop-down menu.
What to Look for During Preview
Chapter 2: Using DiskWarrior
31
Warning: If you have copied files to a FireWire disk and did not eject the disk after copying
files in the DiskWarrior Preview Window, do not unplug the drive until after your machine
has finished restarting and you eject the disk in the Finder.
When you have finished with the DiskWarrior Preview Window, return to the DiskWarrior report
window and choose either Rebuild or Cancel.
Previewing When the DiskWarrior CD Is Not the Startup Disk
If the DiskWarrior CD is not the startup disk, and the original disk was visible on the desktop
before you ran DiskWarrior, DiskWarrior will display both the original disk and the preview disk
on the desktop during the preview. Both of these disks will be locked during the preview, so you
will not be able to make any changes to either of them. Both the original disk and the preview
disk will appear with the same name on the desktop. The original disk will have its normal icon,
and the preview disk will have a special DiskWarrior preview icon.
Figure 2-3
The Default DiskWarrior Preview Disk Icon
DiskWarrior may create special folders at the root level of the disk. You should pay particular
attention to the files and folders that DiskWarrior places in these folders. The folder called
“Rescued Items” contains files and folders whose enclosing folder could not be found and files
that had an entry in an inaccessible portion of the directory. If any of the files or folders whose
enclosing folder could not be found are part of a software package, you may need to create enclosing folders with the correct names and locations after you have rebuilt your disk so that the
software that uses these files works correctly, or you may need to reinstall the software package.
The files that had an entry in an inaccessible portion of the directory may have been lost or
thrown away. You must inspect these files to determine the extent of any damage. You must also
determine whether these files should be discarded.
If DiskWarrior creates a folder titled “Damaged Items,” then this folder contains files that were
recovered but may have problems. For instance, these files may have been truncated because
blocks were missing from the file. Once the rebuild is complete, you will need to determine if
these files can be salvaged.
32
Chapter 2: Using DiskWarrior
What to Look for During Preview
At this point, if you discover that there are items missing from the preview disk, use the Find command in the File menu of the Finder to search for these items. Choose Specific Places in the
“Search in” pop-up list. Then select the preview disk to search. Under “Add criteria,” choose
visibility, then select items with visibility off. Click the Search button. Check the search results to
see if the missing items are included. If they are, you will need to use a utility to make the item
visible after the rebuild is completed.
In the event that critical items that you wish to recover remain missing during the preview, it is
recommended that you do not proceed with the rebuild. Since the directory information for
the items that are missing was overwritten or deleted at some point previously, DiskWarrior
could not recover these items. You will need to send your disk to a professional recovery service
to recover your lost files. While in preview, you should copy as many items from your disk as
possible to another hard disk, removable media, floppy disks, etc., using the Finder. You may
need to copy the original files to several disks, depending upon the amount and size of the files
on the source and the size of the disks to which you are copying the files.
Another option is to copy only the files that you absolutely need, such as those that have changed
since your last backup, or only your data files if you are planning to reinstall your system and
applications. In either case, it is possible that you will not be able to copy all of the files you select. If an error dialogue is displayed, select “Continue” to continue copying the remainder of
the files you selected. When the copy operation is complete, you may want to attempt to copy the
skipped files again in case the error is intermittent and the copy operation can be performed for
those files. This will minimize the number of items that the recovery service will need to recover
for you.
What to Look for During Preview
Chapter 2: Using DiskWarrior
33
DiskWarrior Shortcuts - AppleScripting and Drag
and Drop
Now that you fully understand the steps required to rebuild your disks with DiskWarrior, there
are two other methods you can use to rebuild your disks with DiskWarrior. However, you should
be aware of the following two caveats:
1. Make sure that you have entered in your registration information as described in step 3)
Double-click the DiskWarrior application. on page 25 in this chapter.
2. Any error messages will halt the operation of DiskWarrior while it waits for your response.
If either of these occur while using DiskWarrior as described below, no further progress will be
made on any analysis or repair that you expected DiskWarrior to perform.
AppleScripts
DiskWarrior is AppleScriptable. For more information, see the document
“DiskWarrior Read Me” that came with DiskWarrior. There are sample AppleScripts in
the DiskWarrior CD Extras folder on the DiskWarrior CD.
Drag and Drop
By simply dragging a disk in the Finder onto the DiskWarrior application (or an alias
of it), DiskWarrior will begin rebuilding the disk’s directory immediately. You can also
drag a group of disks onto the DiskWarrior application and DiskWarrior will rebuild
them all sequentially.
34
Chapter 2: Using DiskWarrior
DiskWarrior Shortcuts - AppleScripting and Drag and Drop
Strategies for Rebuilding with DiskWarrior
Caution: If you suspect there is directory damage on your disk, it is recommended that you
run DiskWarrior before other disk repair utilities. Other disk repair utilities may render the
directory damage irreparable even to DiskWarrior. As you have seen in the previous section,
DiskWarrior shows you your rebuilt disk before finalizing the repairs. This allows you to
preview what your rebuilt disk will look like before you decide to finalize the rebuild. The
other utilities may perform actions on your disk that result in a “repaired” directory
structure but with missing or damaged data, or they will incorrectly begin to “repair” your
directory and then give up when they realize that they have modified the directory to an
irreparable state (for more information on directory structure and directory data, refer to
What Is the Directory? on page 9, "Chapter 1: Introduction."). These cases may prevent
even DiskWarrior from recovering all of your files.
Using DiskWarrior as Preventative Maintenance
The most basic use of DiskWarrior is as preventative maintenance for your disks. Many forms of
directory damage do not manifest themselves until long after the damage has actually occurred.
You can prevent this damage from escalating by running DiskWarrior on your disks regularly.
DiskWarrior will rebuild your disk directory, eliminating all existing directory damage. The rebuilt disk directory will also be optimized for maximum disk performance. Simply run
DiskWarrior on a regular basis, and you will be able to prevent minor directory errors from turning into major catastrophes!
Using DiskWarrior When There Seems to Be a Problem
As you use your computer, particularly after crashes, you may believe files or folders to be
missing, or there may be crashes when files are used. You may have another program, such as
PlusOptimizer, reporting directory damage. You can use DiskWarrior to rebuild your disk directories, and thus recover the missing files or folders, reduce the likelihood of crashes, or allow
your disk optimization program to optimize your disk.
Previously accessible data suddenly disappearing, an error message stating your drive is not recognized, a scraping or rattling sound from your hard drive, or your hard drive not spinning may
all be symptoms of hardware problems. Most times, DiskWarrior’s hardware monitoring will be
able to tell you what problems are being caused by your drive. However, the drive’s built-in diagnostics will have to detect the malfunction in order for DiskWarrior to report it. For information on DiskWarrior’s hardware monitoring, refer to About DiskWarrior’s Hardware
Monitoring on page 44 in this chapter.
Strategies for Rebuilding with DiskWarrior
Chapter 2: Using DiskWarrior
35
Using DiskWarrior to Recover Data from Malfunctioning Disks
Occasionally, due to a mechanical malfunction, a disk becomes unusable. Unfortunately, you
usually still have data you need on the disk when this happens. Although a malfunctioning disk
cannot be repaired, DiskWarrior may be able to allow you to recover as much data as possible
from such a disk, even if it is a disk to which data can no longer be written.
Follow the directions in the section Running DiskWarrior on page 24 in this chapter. At step 8)
Test the replacement directory. on page 26, use the DiskWarrior replacement directory to
access the damaged disk. Copy as many files and folders as possible to another hard disk,
removable media, network disk, etc., using the Finder or the DiskWarrior Preview Window. You
may need to copy the original files to several disks, depending upon the amount and size of the
files on the source and the size of the disks to which you are copying the files.
Another option is to copy only the files that you absolutely need, such as those that have changed
since your last backup, or only your data files if you are planning to reinstall your system and
applications. In either case, with this type of damaged disk, it is possible that the System will not
be able to copy all of the files you select. If the System displays such an error, select “Continue”
to continue copying the remainder of the files you selected. When the copy operation is complete, you may want to attempt to copy the skipped files again in case the error is intermittent
and the copy operation can be performed for those files.
What to Do If Your Computer Has a Malfunctioning Internal Disk
The easiest way to rebuild your normal startup disk, whether you are having problems with it or
not, is to use the DiskWarrior CD. Just follow the directions in Rebuilding Your HFS and HFS
Plus Disks on page 24 in this chapter, using the DiskWarrior CD as the startup disk.
If the normal startup disk has a mechanical malfunction, follow the instructions in the section
Previewing When the DiskWarrior CD Is the Startup Disk on page 30 in this chapter to recover
your files to another hard disk, removable media or network disk.
What to Do If You Used Another Utility First
If you have used another utility before DiskWarrior and now have a directory that has no errors
but is missing data, you can make DiskWarrior scavenge the directory to find the lost data if the
other utility did not write over it. Hold down the Option key in step 6) Click the Rebuild button. The Rebuild button will change to Scavenge and when you press Scavenge, DiskWarrior will
scavenge the directory.
36
Chapter 2: Using DiskWarrior
Strategies for Rebuilding with DiskWarrior
Note: This is the same scavenge procedure DiskWarrior uses to recover your data when it
finds directory errors, but it normally skips the scavenge procedure when the directory has
no major errors. Therefore, you do not need to make DiskWarrior scavenge the directory
except when DiskWarrior states “All file and folder data was easily located” in the
DiskWarrior Report but you suspect that files and/or folders are still missing from the
replacement directory.
Strategies for Rebuilding with DiskWarrior
Chapter 2: Using DiskWarrior
37
Graphing a Disk Directory
DiskWarrior allows you to create a graph that indicates the degree the directory is internally fragmented. This graph visually shows you the number of fragments and the distance each fragment
is out of place. Rebuilding your directory with DiskWarrior optimizes your directory. Other programs don't provide the true directory optimization provided by DiskWarrior.
Background
To understand directory optimization you first have to understand the way that the directory is
internally organized. If you don't want to read the details it is enough to know that the data structures in the directory can be internally fragmented and use space inefficiently. Directory optimization is the process of organizing the data structures for fastest access. Directory optimization
typically results in a 50% to 60% decrease in the time it takes programs to scan the directory and
a 10% to 20% decrease in startup time. If you want the details then read on.
Mac OS Standard (HFS) and Mac OS Extended (HFS Plus) disk directories have a very complex
structure. Each file or folder (item) on a disk has an entry in the disk's directory. These entries
are in order of enclosing folder and then item name. This is similar to a yellow pages directory
being sorted by type of business and then business name. Just like a yellow pages directory, the
disk directory has pages—except that its pages are called nodes. Unlike the yellow pages, nodes
are dynamic and change as you add and delete items. It's sort of like a real-time yellow pages.
Imagine that the pages of the yellow pages are not in order and at the bottom of each page it says
"Continued on page n," where n is the page that contains the next set of listings for the particular
type of business that you're looking up. Well, nodes are not necessarily arranged in order and
each node has a reference, or link, to the next node that contains the next set of ordered items.
When you have a fresh new directory, all of the nodes are in order. So node 1 has a link to node
2 which has a link to node 3, and so on. Nodes don't stay in order for very long. Whenever a file
or folder (item) is created, an entry for the item is added to the directory in the appropriate
node. When a node fills up, a new node is added and the entries are divided evenly between the
old node and the new node. This leaves both nodes only half full. The new node is most likely
going to be at the end of the directory, just like an addendum. To keep the items in the nodes in
order, node 1—which was previously linked to the old node—will link to the new node and the
new node will link to the old node.
For example, let's say that you have a directory with 3 nodes. Node 1 links to node 2 which links
to node 3 (Figure 2-4). If you add an item that causes node 2 to overflow, a new node 4 will be
added. The items from node 2 and the new item will be split between node 2 and node 4. Node
38
Chapter 2: Using DiskWarrior
Graphing a Disk Directory
1 will now link to node 4 and node 4 will now link to node 2. This causes the nodes to be out of
order. The links indicate the order in which the nodes are to be read. Following the links you
visit all of the nodes and items in the correct order. However, to follow the links, you will have to
jump from node 1 to node 4 then back to node 2 and then to node 3 (Figure 2-5). As more items
are added to the directory, this process of splitting is repeated and the nodes are increasingly out
of order. A typical directory has hundreds or thousands of nodes. If a program or the Mac OS
needs to search the directory it will follow the links and jump back and forth in the directory.
Directory optimization is the process of defragmenting and packing nodes. Defragmenting
makes the physical order equal the linked (logical) order. Packing combines nodes that are not
full so that you end up with fewer nodes. Continuing with the directory in the previous example,
the directory is defragmented and the items are packed into just 2 nodes (Figure 2-6). The resulting speed increase is due to the fact that fewer nodes need to be read and there is no need
to jump around within the directory.
Figure 2-4
Example directory with 3 nodes. Files are in order.
Figure 2-5
Adding "File H" causes node 2 to split and fragment the directory.
Graphing a Disk Directory
Chapter 2: Using DiskWarrior
39
Figure 2-6
Optimizing defragments and removes unnecessary nodes.
About DiskWarrior’s Directory Optimization Graph
DiskWarrior’s Directory Optimization Graph creates an optimization graph that indicates the degree the directory is internally fragmented. It doesn't just indicate the number of fragments. You
can visually determine the number of fragments and the distance each fragment is out of place.
Note: The Directory Optimization Graph does not (and can not) modify the directory or any
other part of the disk in any way while graphing a directory.
Graphing a Disk
To build a graph for the directory of a disk, all of the following must be true.
1)The disk must appear on the desktop.
2)The disk must be an HFS (Mac OS Standard) or HFS Plus disk (Mac OS Extended).
3)The disk must be locally attached.
4)There must not be any detected hardware problems with the disk.
Follow these steps to graph the directory of a disk.
1) Double-click the DiskWarrior application.
This will start DiskWarrior.
2) Make sure the Directory Tool is selected.
3) Select the disk to be graphed from the disks pop-up menu.
40
Chapter 2: Using DiskWarrior
Graphing a Disk Directory
4) Click the Graph button.
A progress dialog will appear and, after a brief delay, it will be replaced with a window
containing the graph.
Note: In order to graph a disk, your display will need to be set to thousands of colors. If it
is not, you will be shown a message that will ask if you want DiskWarrior to change this
display setting. Then, when you close the graph window, DiskWarrior will return your
display setting to its previous setting.
5) If you wish to save a copy of the graph, choose “Save” from the File menu.
A Save dialog will appear. Pick a location and name for the saved graph.
Understanding the Graph
Each part (node) of the directory is assigned a color along a gradient between white and dark
blue depending upon its optimized position. The graph of a perfectly optimized directory is a
perfect gradient from white to blue. Fragmentation interrupts the gradient. The more distant a
fragment is from its optimized position, the greater the difference between the color of the fragment and the color of the same position in the example optimized graph.
Directory optimization is the process of defragmenting and packing nodes. Defragmenting
makes the physical order equal the linked (logical) order. Packing combines nodes that are not
full so that you end up with fewer nodes. The graph does not indicate whether the nodes need to
be packed. It would take a completely different representation of the nodes to indicate that information. However, fragmentation has a far greater impact on performance. It is much worse
to jump around from one part of the directory to another than to read some extra nodes.
The more nodes that are out of order, the more files and folders are out of order and the more
impact you'll see on performance. Other utilities may not optimize your directory the way
DiskWarrior does.
Graphing a Disk Directory
Chapter 2: Using DiskWarrior
41
Figure 2-7
Graph of a typical hard disk before optimization.
Figure 2-8
Graph of the same disk after optimization, nodes are packed and in order.
42
Chapter 2: Using DiskWarrior
Graphing a Disk Directory
Using DiskWarrior’s Hardware Monitoring
Click the hardware icon in the DiskWarrior application to manually activate DiskWarrior’s hardware monitoring, to set the frequency of the tests, and to set how DiskWarrior notifies you if it
detects a problem.
Note: DiskWarrior’s hardware monitoring will only work on ATA drives with built-in
S.M.A.R.T. capabilities. Apple uses ATA drives as internal hard drives on Macintosh
computers.
Select either the manual or
automatic diagnostics tab.
Check this box to have DiskWarrior
automatically test your drives for
malfunction.
Choose how often to have the
diagnostics run.
Choose the notification method.
Specify any options for the
notification method.
If you have chosen e-mail as the
notification, click here to
configure.
Figure 2-9
The DiskWarrior Hardware Monitoring Window
Using DiskWarrior’s Hardware Monitoring
Chapter 2: Using DiskWarrior
43
About DiskWarrior’s Hardware Monitoring
DiskWarrior’s hardware monitoring capability uses internal diagnostic routines built into disk
drives by their manufacturers to detect and track how often a drive exceeds its operating tolerances. The more frequently the drive exceeds these tolerances, the more likely the drive is to experience hardware malfunction, and the more at risk any data on that drive becomes.
The hardware monitoring can be configured to run on your hard drives automatically, or you
may choose to run it when you suspect a drive of malfunctioning. By activating the automatic diagnostic, DiskWarrior will activate internal diagnostic routines built into your drive as often as
you specify. You also choose what action DiskWarrior should take in the event that it does detect
the potential for hardware failure.
Most hard drives manufactured in 1996 or later have internal diagnostic routines that can monitor the drive and detect the deterioration of the drive mechanics. If a hard drive was manufactured before 1996, it’s internal diagnostics may report an error only when the drive is completely
non-functional. In these cases, the drive will have to be sent to a recovery facility to retrieve the
data.
Note: DiskWarrior’s hardware monitoring relies upon internal diagnostic routines built
into hard drives by their manufacturers. Different drive manufacturers may have different
tolerances in their tests.
Caution: In most hard drives, the internal diagnostic routines are inactive by default, and
will remain inactive until DiskWarrior’s hardware monitoring is activated for the first time
on the hard drive. Since the internal diagnostic routines measure changes in the drive over
time, to get the maximum benefit from the hardware monitoring, use DiskWarrior to test
your drive(s) as soon as possible.
Manual Diagnostics
If you wish to run the hardware monitoring manually, open the DiskWarrior application and
click the hardware icon. Choose the hard disk device you wish to test from the pop-up menu.
The lower portion of the window will indicate the volumes and type of hard disk device in the
pop-up menu. Click the Test Device button to test the disk.
Note: Some hard drives will generate a sound when the internal diagnostic is run. This
sound is normal and not an indicator of mechanical malfunction.
44
Chapter 2: Using DiskWarrior
Using DiskWarrior’s Hardware Monitoring
Automatic Diagnostics
You can also configure DiskWarrior to run the hardware monitoring automatically. If you choose
to have DiskWarrior automatically check your drives, DiskWarrior will install a small program
in your Login Items. The program checks every few hours of running time to see if it should activate. The program requires very little system resources and virtually no CPU time. It neither
reads nor modifies any data from any disk.
Caution: The hardware monitoring can only detect gradual failure of the hard drive over a
period of time. It cannot detect unpredictable hard drive failures, such as those caused by
a power surge. Therefore, Alsoft recommends that you regularly make a complete backup
of your disks.
The hardware monitoring can be scheduled to run hourly, daily or weekly.
Note: Some hard drives will generate a sound when the internal diagnostic is run. This
sound is normal and not an indicator of mechanical malfunction.
If the hardware monitoring detects a malfunction with the drive device, you may choose how
DiskWarrior notifies you of the problem.
Alert
By choosing this option, DiskWarrior will give you an alert message if the hardware
monitoring detects a malfunction.
E-mail
By choosing this option, DiskWarrior will generate an e-mail to be sent to the e-mail
address (or addresses) you specify when this option is selected. This type of
notification may be preferable in server situations, or when machine support is
provided by someone other than the user. If you wish to enter two or more e-mail
addresses, seperate each address with a comma.
Using DiskWarrior’s Hardware Monitoring
Chapter 2: Using DiskWarrior
45
Figure 2-10
The E-mail Configuration Window
You may have e-mail sent via either SMTP or sendmail. If you choose sendmail, you will
need only to specify the recipients and the subject of the e-mail notification if you do
not wish to use the default subject.
Note: In order to specify sendmail as your e-mail delivery method, you will need to
configure your system to use sendmail. It is not configured by default.
If you choose SMTP as the delivery method, you will need to provide some additional
information. In the From field, enter an e-mail address from which the notification email will be sent. Then enter the SMTP server for the e-mail address in the From field.
If you wish to use authentication when sending mail, check the appropriate box and
enter the SMTP account and password.
AppleScript
By choosing this option, DiskWarrior will run an AppleScript applet that you designate
when it detects a malfunction.
Note: DiskWarrior will only execute AppleScript applets. It will not execute script files,
whether compiled or not.
46
Chapter 2: Using DiskWarrior
Using DiskWarrior’s Hardware Monitoring
Chapter 3
Troubleshooting and
Error Messages
Troubleshooting
Note: Be sure to read the document “DiskWarrior Read Me”. Last minute changes to the
documentation are detailed there.
❏ Problem: The disk I want to rebuild does not appear in the Disks Pop-up
menu.
DiskWarrior cannot rebuild a disk that is not HFS or HFS Plus (Mac OS Standard or Mac OS Extended). The disk to be rebuilt must be locally connected, must not be write protected, and must
have a valid partition map.
❏ Problem: DiskWarrior tells me that the disk to be rebuilt is locked. The
“Replace” button is disabled.
The disk you have selected either is locked or is a media type such as a CD-ROM to which data
cannot be written. For a disk reported as locked, first check if there is a mechanical lock switch
on the disk and make sure it is set to the unlocked position. If the disk is still reported as locked,
open the software driver package that was used to initially set up the disk (for Apple disks, the
software is Disk Utility and can be found on Mac OS system CDs) and follow the instructions that
came with the software to unlock the disk.
❏ Problem: When I start up, a disk icon with a blinking question mark
appears.
This indicates that your computer cannot find the system software it needs to start up. If you already have reblessed your system folder, there are some other possibilities.
Your Macintosh may be having a problem recognizing external SCSI, FireWire, or USB peripherals such as hard disks, scanners, or removable media drives. Turn off your Macintosh and all
external devices and disconnect them from your computer. Restart your computer. If your computer then starts up properly, refer to the documentation that came with these devices to determine what is causing the problem.
There may be a problem with the system software installed on the disk you are attempting to use.
If, after rebuilding your disk directory with DiskWarrior and reblessing your System folder, this
problem continues to occur, you may need to reinstall your system software. Refer to the documentation supplied with the version of the Mac OS you are using for directions on how to reinstall system software.
48
Chapter 3: Troubleshooting and Error Messages
Troubleshooting
❏ Problem: My Mac OS computer “hangs” during the rebuild (pointer moves
when the mouse is moved, but there is no reaction when I click anywhere on
the screen).
If your Macintosh hangs during the operation of DiskWarrior, this could be caused by hardware
or software problems with a hard disk or a problem with the SCSI, USB, or FireWire chain.
Make sure that the disk drivers are the current versions for the operating system running on your
computer. If the operating system was recently updated to a new version, you may need to update
the drivers as well. For disks from vendors other than Apple, check with the manufacturer of the
formatting software for the latest version of their drivers. It is also possible that the driver has
become corrupted, so a simple reinstallation of the driver may solve the problem.
If the problem is due to bad blocks on the disk or DiskWarrior has problems reading or writing
to the disk, you will need to reformat the disk. In the case that bad blocks were the problem, the
disk needs to be reformatted to exclude the bad blocks. Follow the procedure recommended by
the manufacturer for your particular disk for reformatting. Note that reformatting is not simply
erasing the hard disk. Make sure to backup up your hard disk first because everything will be
erased by reformatting.
❏ Problem: The power to my Mac OS computer was disconnected, shut off, or
otherwise interrupted while doing the repair.
DiskWarrior was designed to permit interruptions. Simply run DiskWarrior again to complete
the repair of the disk that was being rebuilt.
❏ Problem: My hard drive does not appear in the Hardware Tool’s devices popup menu.
DiskWarrior’s hardware monitoring only supports ATA drives with built-in S.M.A.R.T. testing capabilities. If you do not have such a hard drive, no drive will be listed in the devices pop-up
menu, and all options will be disabled.
Troubleshooting
Chapter 3: Troubleshooting and Error Messages
49
Disk Status Messages
These messages appear in the main window and describe the status of the selected disk.
❏ Directory is ready to be rebuilt.
Click Rebuild to rebuild the selected disk.
❏ Directory cannot be rebuilt because this is the startup disk.
Your startup disk is the disk containing the current System folder. The selected disk is the startup
disk. To rebuild this disk, refer to Rebuilding Your HFS and HFS Plus Disks on page 24, "Chapter 2: Using DiskWarrior."
❏ Directory cannot be rebuilt because DiskWarrior resides on this disk.
DiskWarrior cannot rebuild the directory of the disk on which it resides. To rebuild the directory
of this disk, copy DiskWarrior to another disk, such as a FireWire disk, and run that copy of
DiskWarrior.
❏ Directory cannot be replaced because this disk is locked.
This disk is not writable. You need to unlock the disk.
❏ Directory cannot be rebuilt because an error occurred trying to access this
disk (error number, error number).
This status message indicates that DiskWarrior was unable to access this disk. This could be evidence of a bad block on the disk, a hardware defect, or problems with termination or cabling.
❏ This disk is a [Mac OS Standard or Mac OS Extended] disk.
❏ This disk appears to be a [Mac OS Standard or Mac OS Extended] disk.
The disk does not appear on the desktop. A quick exam of the disk was made to try to determine
its format. The actual format will be determined, if possible, while rebuilding.
❏ This disk does not appear on the desktop.
❏ Directory has been successfully rebuilt and replaced.
50
Chapter 3: Troubleshooting and Error Messages
Disk Status Messages
❏ Rebuilding was canceled.
❏ Rebuilding was stopped because of an error (error number).
❏ Directory cannot be rebuilt because of a problem communicating with this
disk (error number, error number).
This status message indicates that DiskWarrior was unable to access this disk. This could be evidence of a bad block on the disk, a hardware defect, or problems with termination or cabling.
❏ Directory is ready to be previewed.
This disk is locked. The directory cannot be replaced, but the disk can be previewed. Click Rebuild to proceed.
❏ Directory cannot be rebuilt because this disk is used for virtual memory.
The Mac OS X startup script has been modified to force virtual memory to use this disk. To rebuild this disk, start your Macintosh from a disk other than the current startup disk, such as the
DiskWarrior CD.
Disk Status Messages
Chapter 3: Troubleshooting and Error Messages
51
52
Chapter 3: Troubleshooting and Error Messages
Disk Status Messages