1
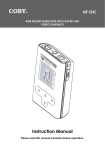
MP-C951
20GB DIGITAL MUSIC PLAYER with
COLOR SCREEN and VIDEO PLAYBACK
Instruction Manual
Please read this manual carefully before operation.
SAFETY INSTRUCTIONS
CAUTION
RISK OF ELECTRIC SHOCK
DO NOT OPEN
CAUTION: TO REDUCE THE RISK OF FIRE AND ELECTRIC SHOCK, DO NOT REMOVE THE COVER (OR BACK)
OF THE UNIT. REFER SERVICING ONLY TO QUALIFIED
SERVICE PERSONNEL.
For Customer Use:
Enter below the serial number that is located on the
bottom of the unit. Retain this information for future
reference.
Model No.
MP-C951
Serial No.
The lightning flash with arrowhead symbol within an equilateral triangle is intended to alert
the user to the presence of uninsulated “dangerous voltage” within the product’s enclosure
that may be of sufficient magnitude to constitute a risk of electric shock.
The exclamation point within an equilateral triangle is intended to alert the user to the presence of important operation and servicing instructions in the literature accompanying the
appliance.
WARNING:
To prevent fire or shock hazard, do not expose this device to rain or moisture. Dangerous high voltage is present inside the
enclosure. Do not open the cabinet.
CAUTION:
To prevent electric shock, match wide blade of plug to wide slot of outlet and fully insert.
WARNING:
Handling the cords on this product will expose you to lead, a chemical known to the State of California to cause cancer, and
birth defects or other reproductive harm. Wash hands after handling.
NOTICE:
This product is protected by certain intellectual property rights of Microsoft. Use or distribution of such technology outside of
this product is prohibited without a license from Microsoft.
Protect your hearing:
Hearing experts advise against the constant use of personal stereos played at high volume. Constant exposure to high volumes can lead to hearing loss. If you should experience ringing in the ears or hearing loss, discontinue use and seek medical
advice.
For recycling or disposal information about this product, please
contact your local authorities or the Electronics Industries Alliance:
www.eiae.org.
SAFETY INSTRUCTIONS
In addition to the careful attention devoted to quality standards in the manufacture of this device,
safety is a major factor in the design of every instrument. However, safety is your responsibility,
too. This sheet lists important information that will help to assure your enjoyment and proper use
of this device and accessory equipment. Please read this carefully before operation and use of
your device.
1.
Read these instructions carefully. Keep these instructions for future reference.
2.
Heed all warnings and follow all instructions.
3.
Do not expose to water or moisture.
4.
Clean only with a dry cloth.
5.
This device should be operated only from the type of power source indicated on the rating
label. If you are not sure of the type of power supply to your home, consult your video
dealer or local power company. For devices intended to operate from battery power or other
sources, refer to the operating instructions.
6.
Do not overload wall outlets or extension cords as this can result in a risk of fire or electric
shock. Overloaded AC outlets, extension cords, frayed power cords, damaged or cracked
wire insulation, and broken plugs are dangerous. They may result in a shock or fire hazard.
Examine the cord periodically, and if its appearance indicates damage or deteriorated
insulation, have it replaced by a service technician.
7.
Do not force the power plug into a wall outlet. If the plug provided does not fit into your
outlet, consult an electrician for replacement of the obsolete outlet. (A polarized plug has
two blades where one is wider than the other; the wide blade is provided for your safety.)
8.
Do not place heavy objects on the power cord. Protect the cord from being walked on,
pinched by objects, or torn and exposed to liquids (especially at plugs, convenience
receptacles, and the point at which they exit from the device).
9.
Do not use this device near water. Do not place objects filled with liquids (eg, vases) on the
device. Never spill liquid of any kind on the device.
10. Do not drop or otherwise subject the device to impact. Keep objects away from ventilation
openings. Do not block ventilation openings at any time.
11. Never push objects of any kind into this device through openings as they may touch dangerous voltage points or short out parts that could result in a fire or electric shock.
12. Do not install near any apparatus that produces heat such as stoves, radiators, amplifiers, etc.
13. Use only with attachments/accessories specified by the manufacturer. Use of attachments/
accessories not recommended by the product manufacturer may be hazardous.
14. Unplug the device during lightning storms. Unplug the device and remove any batteries
when the device will be unused for long periods of time.
15. Do not open or attempt to repair this device. Refer all repairs to authorized service personnel.
16. When replacements parts are required, be sure the service technician has used replacement parts specified by the manufacturer or that have the same characteristics as the
original part. Unauthorized substitutions may result in fire, electric shock, or other hazards.
17. Upon completion of any service or repairs to this device, ask the service technician to
perform safety checks to determine that the device is in proper operating condition.
TABLE OF CONTENTS
SAFETY INSTRUCTIONS.................................................................................................................... 2
TABLE OF CONTENTS....................................................................................................................... 4
FEATURES.......................................................................................................................................... 7
PACKAGE CONTENTS..................................................................................................................... 8
LOCATION OF CONTROLS............................................................................................................. 9
OVERVIEW: DISPLAY & MAIN MENU........................................................................................... 10
POWER SUPPLY...............................................................................................................................11
Charging Your Player..............................................................................................................11
Turning Your Player On/Off.....................................................................................................11
Locking/Unlocking Your Player’s Controls (Hold).................................................................. 11
USB CONNECTIONS...................................................................................................................... 12
USB-MSC versus USB-MTP..................................................................................................12
USB Driver Installation (Required for Windows 98 SE Only).................................................13
Connecting to a Computer......................................................................................................13
Disconnecting from a Computer.............................................................................................13
Microsoft Windows.........................................................................................................13
Macintosh OS X..............................................................................................................14
Transferring Files....................................................................................................................14
Microsoft Windows.........................................................................................................14
Macintosh OS X..............................................................................................................14
USB HOST CONNECTION.............................................................................................................. 15
BASIC OPERATIONS...................................................................................................................... 16
Using the Touchpad Controls.................................................................................................16
Basic Navigation.....................................................................................................................16
Basic Music Playback.............................................................................................................16
Basic Movie Playback.............................................................................................................16
Adjusting the Volume..............................................................................................................16
Play Mode Options..................................................................................................................17
Repeat A-B Function..............................................................................................................17
MUSIC MODE................................................................................................................................. 18
Music.......................................................................................................................................18
Encode....................................................................................................................................19
Voice.......................................................................................................................................19
Playlists...................................................................................................................................19
Search.....................................................................................................................................19
Advanced Functions: Music....................................................................................................20
Favorite (+/-)....................................................................................................................20
EQ (Equalizer).................................................................................................................20
Play Speed......................................................................................................................20
Info..................................................................................................................................20
TABLE OF CONTENTS
MOVIE MODE................................................................................................................................ 21
PHOTO MODE................................................................................................................................ 22
FM RADIO MODE.......................................................................................................................... 23
Basic FM Radio Operation......................................................................................................23
Advanced Functions: FM Radio..............................................................................................23
E-BOOK MODE.............................................................................................................................. 24
Advanced Functions: E-Book.................................................................................................24
RECORDING.................................................................................................................................. 25
Voice Recording......................................................................................................................25
Line-In Recording...................................................................................................................25
FM Recording.........................................................................................................................26
EXPLORER MODE.......................................................................................................................... 27
Delete......................................................................................................................................27
Copy.......................................................................................................................................27
Cut (Move)...............................................................................................................................28
Info..........................................................................................................................................28
SETUP MODE.................................................................................................................................. 29
Sound......................................................................................................................................29
User EQ..........................................................................................................................29
Balance...........................................................................................................................29
Display....................................................................................................................................29
Backlight Time................................................................................................................29
Brightness.......................................................................................................................30
Language........................................................................................................................30
Lyric.................................................................................................................................30
General...................................................................................................................................30
Auto Play.........................................................................................................................30
Format.............................................................................................................................30
USB Charge....................................................................................................................30
Load Default....................................................................................................................31
Timer.......................................................................................................................................31
Sleep...............................................................................................................................31
Date / Time......................................................................................................................31
Alarm...............................................................................................................................31
Record.....................................................................................................................................32
MIC Quality.....................................................................................................................32
Line-In Quality................................................................................................................32
Radio Quality..................................................................................................................32
Sync On/Off....................................................................................................................32
Voice Detect....................................................................................................................32
Information..............................................................................................................................32
TABLE OF CONTENTS
CREATING MOVIES WITH VIRTUALDUB....................................................................................... 33
Installing VirtualDub and Media Codecs on your Computer..................................................33
Installing XviD.................................................................................................................33
Installing LAME...............................................................................................................34
Installing VirtualDub.......................................................................................................35
Using VirtualDub to Create Movies........................................................................................35
Restoring Your Player.............................................................................................................39
Updating Your Player’s Firmware...........................................................................................40
TROUBLESHOOTING...................................................................................................................... 41
SPECIFICATIONS............................................................................................................................ 43
FEATURES
•
Plays Music, Video, Photos, and Text
•
Plays digital music from most online stores and subscription services.
•
Bright 2” TFT LCD color display.
•
20GB hard disk for all your storage needs.
•
Elegant touchpad interface control.
•
USB 2.0 for ultra-fast file transfers (up to 40x faster than USB 1.0).
•
Real-Time MP3 recording allows you to encode your CDs without a computer.
•
USB On-the-Go Host support allows you to transfer files from other USB-enabled devices
without a computer.
•
Digital voice recording through the integrated microphone.
•
FM radio and recorder.
•
ID3 and LRC support for song and synchronized lyric information display.
PACKAGE CONTENTS
Please make sure that the items shown below are included in the package. Should an item be
missing, please contact the local retailer from which you purchased this product.
MP-C951
for Windows 98 SE
No installation required for
Windows ME/2K/XP or Mac OS X
LOCATION OF CONTROLS
13 12 11
14
10 9
15
16
BOTTOM
TOP
1
2
7
3
5
6
4
8
FRONT
BACK
17
Front View
Bottom View
1.
Menu
14. DC 5V Power Jack
2.
Up / Volume Up
15. USB-MSC Port
3.
Left / Previous
16. USB-MTP/HOST Port
4.
Down / Volume Down
5.
Right / Next
6.
Enter
7.
Play / Pause
8.
Record / A-B
Top View
9.
Back View
17. Reset
To use the touchpad interface, press
lightly on the red-lit markings to activate the control.
Power On / Off (slide right)
10. Lock / Unlock (slide left)
11. Microphone
12. Line-In Jack
13. Headphone Jack
OVERVIEW: DISPLAY & MAIN MENU
1
2
3
8
9
Playback Status:
Play;
Pause;
2.
Repeat Play Status
3.
Equalizer Status
4.
Clock Time
5.
AM/PM
6.
Battery Level
Stop
Main Menu
10
6
10
11
12
13
10. FM Radio
Display
1.
5
NORMAL 12:30 P
1
7
4
7.
Music:
Music, Encode, Voice, Playlists, Search
8.
Movie:
Movie File (Folder)
9.
Photo
Image File (Folder)
11. E-book
Text File (Folder)
12. Explorer
Tree View (Folder Display)
13. Setup
Sound, Display, General, Timer, Record,
Information
Note:
You can browse all folders and files in EXPLORER mode (refer to the Explorer Mode
section for details).
POWER SUPPLY
Charging Your Player
Your player has a rechargeable lithium-polymer battery that will provide up to 12 hours of play time.
The battery should be charged fully (minimum 4 hours) before its initial use to ensure
optimum lifetime performance.
To charge your player:
•
AC Adapter: Plug one end of the supplied AC Adapter into the DC 5V Power
Jack and plug the other end into a 100240V wall outlet.
•
USB Port: Your player can be charged
through its USB MSC Port. Charging
through the USB MSC port will take
longer than charging with the AC
Adapter.
1.
2.
AC 100-240V
Wall Outlet
Set your player’s USB Charge
option to “On” (refer to the
DC 5V
Setup section for details).
Power Jack
While your player is off, plug
one end of the USB cable into the USB
MSC Port and plug the other end into the USB
port of a powered-on computer.
WARNING:
•
The battery used in this device may present a fire or chemical burn if mistreated. Do not,
disassemble, incinerate, or heat the battery.
•
Do not connect the power plug to a power outlet other than that which is indicated here and
on the label as this may result in the risk of fire or electric shock.
•
Do not handle the power plug with wet hands. Doing so may cause electric shock.
•
Use only AC adapters of the type specified here. Failure to do so may case a fire or damage
the player.
Turning Your Player On/Off
•
To turn the player on, slide the Power/Lock switch to the right.
•
To turn the player off, slide and hold the Power/Lock switch to the
right until you see the “Goodbye!” screen.
Locking/Unlocking Your Player’s Controls (Hold)
Slide right to turn on/off
Slide left to lock
Front
Top View
When engaged, the Lock feature disables your player’s controls to prevent accidental key presses when it is in your pocket or bag.
•
To lock the player, slide the Power/Lock switch to the left (it will click into place). The
Lock icon will appear on-screen.
•
To unlock the player, slide the Power/Lock switch to the right to release it from the Lock position.
11
USB CONNECTIONS
USB-MSC versus USB-MTP
The MP-C951 comes equipped with two types of USB ports: USB-Mass Storage Class (USBMSC) and USB-Media Transfer Protocol (USB-MTP). Both USB connections allow for simple,
high-speed transfers of files between your player and a computer, and allow you to use your computer’s operating system to view, manage, and transfer files to your player from your computer
There are, however, a few differences to take note of.
USB MSC
USB MTP
Simple plug-and-play support for all major
operating systems (Microsoft Windows 98SE
and newer, Macintosh OS X, Linux)
Simple plug-and-play support for most versions of Microsoft Windows
Supports Windows Media DRM 9
Supports Windows Media DRM 9 (WMDRM9)
Supports Windows Media DRM 10 (WMDRM10) -- requires Windows XP and Windows Media Player 10 or newer
Draws power and charges the battery
Draws power to run the player, only
USB 2.0 high-speed file transfers
USB 2.0 high-speed file transfers
Note that you MUST use the USB MTP port in conjunction with Windows XP and Windows
Media Player 10 to transfer and synchronize encrypted WMDRM10 files. Most online music
stores and subscription services use WMDRM10 files*. Please refer to the documentation
of either Microsoft or the store from which you purchased your music for details.
Content owners use Windows Media digital rights management technology (WMDRM)
to protect their intellectual property, including copyrights. This device uses WMDRM
software to access WMDRM-protected content. If the WMDRM software fails to protect
the content, content owners may ask Microsoft to revoke the software’s ability to use
WMDRM to play or copy protected content. Revocation does not affect unprotected
content. When you download licenses for protected content, you agree that Microsoft
may include a revocation list with the licenses. Content owners may require you to upgrade WMDRM to access their content. If you decline an upgrade, you will not be able
to access content that requires the upgrade.
* A few examples of online music stores that support WMDRM10 are:
• AOL Music Now
• Napster To Go
• F.Y.E. Download Center
• URGE
• Virgin Digital
• Y! Music (Yahoo! Music)
Music purchased and downloaded from the iTunes music store are AAC files encrypted
with Apple Fairplay DRM. The MP-C951 does not support AAC file playback. Please use
only MP3, WMA, OGG, or WAV music files with your player.
12
USB CONNECTIONS
USB Driver Installation (Required for Windows 98 SE Only)
It is not necessary to install the USB driver if your computer is running Microsoft Windows
ME/2000/XP or newer, or Macintosh OS X. Computers running these operating systems will recognize your player automatically when connected.
If your computer is running Windows 98 SE:
1.
Insert the Installation CD into your computer’s CD or DVD drive. Make sure to place the
mini-CD in the center, recessed well of the drive tray.
2.
Navigate to MY COMPUTER and double-click on the CD/DVD drive icon (usually “D:”).
3.
Double-click on the folder “Win98 USB Drivers” and then on the folder “english”.
4.
Double-click on the SETUP icon (SETUP.EXE) to start the USB driver installation program.
5.
Follow the on-screen instructions to complete the installation and then restart your computer.
Note:
Mini-CDs should only be used in normal tray-loading CD/DVD drives. Mini-CDs may
be used in slot-loading drives with the proper adapter; please contact your computer or
drive manufacturer for more information.
Connecting to a Computer
To connect the player to your computer:
1.
2.
Connect the player to your
computer with the supplied
USB cable as shown in the
diagram.
•
If the USB Charge option is
set to OFF, continue to the
next step.
•
If the USB Charge option is
set to ON, you may see the USB Port (mini)
Battery Charge icon. Touch
to continue connecting to your computer.
USB Port (computer)
Your computer will recognize the player as a Removable Disk.
Disconnecting from a Computer
Disconnect your player as instructed below to prevent data loss or corruption. If you are using a
USB-MTP connection, you can simply disconnect the cable from your player.
Microsoft Windows
1.
Double-click the green arrow in the taskbar located on the lower-right side of the
computer screen (Safely Remove Hardware).
2.
Select “USB Mass Storage Device” from the list that appears and then click on “Stop”.
3.
Select “USB Mass Storage Device” from the list that appears and then click on “OK”.
4.
Disconnect the USB cable from the player and your computer.
13
USB CONNECTIONS
Macintosh OS X
1.
On the left side of the Finder window, identify the appropriate
Removable Disk icon.
2.
Click on the “Eject” arrow on the right of the Removable Disk icon.
3.
Disconnect the USB cable from the player and your computer.
Transferring Files
USB connections makes it easy to transfer music, video, photo, and text files (or any other data)
quickly between the player and your computer.
Do not disconnect or otherwise interrupt the player during transmission - this could damage
or corrupt the player’s firmware or your files. If the player is accidentally disconnected and is
not working properly, use a pin to press the reset button on the back of the player.
Do NOT delete the following files:
•
sample.hds
•
wmpinfo.xml
Microsoft Windows
1.
Open a Windows Explorer window. Locate the files or folders you would like to transfer from
your computer. Select the files/folders with the mouse and press CTRL-C (copy) on the
keyboard.
2.
Navigate to MY COMPUTER and double-click on the Removable Disk icon. The computer
will display all files and folders currently stored in the player.
3.
Press CTRL-V (paste) on the keyboard to transfer the files you selected in Step 1 to the
player.
Macintosh OS X
1.
Open a Finder window. Locate the files you would like to transfer from your computer.
Select the files/folders with the mouse and press APPLE-C (copy) on the keyboard.
2.
Click on the Removable Disk icon located on the left side of the finder window. The computer will display all files and folders currently stored in the player.
3.
Press APPLE-V (paste) on the keyboard to transfer the files you selected in Step 1 to the
player.
Note:
You may also use the mouse to drag-and-drop files between the player and your computer.
If you need further assistance with transferring files, please refer to your operating system’s
instruction manual or on-screen help. If you are using media management software such as
iTunes, Winamp, or Windows Media Player, please refer to their documentation for support.
14
USB HOST CONNECTION
The USB HOST connection allows you to transfer data from other USB drives directly to your
player -- without the use of a computer. This makes it easy to use the MP-C951 to save photos
from a digital camera or documents from a thumb-drive while you’re on the go.
The USB Host connection will work with most USB devices that are formatted as FAT16 drives and
are USB Mass Storage Class devices.
To use the USB Host connection:
1.
Connect the USB Host cable to your player’s USB-MTP/HOST port.
2.
Use the USB cable to connect the external device to the player through the USB Host
cable.
3.
Navigate to the Main menu. From the Main menu, touch and hold
USB Host connection.
4.
Upon successfully connecting, you will see the USB HOST ROOT folder structure. This
screen displays all the files and folders on the external device.
5.
Use the Navigation keys to select a file or folder. Touch and hold
context menu:
•
Copy: Copy the selected file.
•
Whole Copy: Copy the contents of the entire external device.
•
Info: View information about the selected file.
to initiate a
to see the file operation
6.
The player will then prompt you to select a destination to save the files to. The screen will
display all the files and folders on your player (Tree View). Highlight a folder and touch to
confirm.
7.
Once the file has been saved, the player will return to the USB HOST ROOT screen.
8.
To end the USB HOST connection, simply disconnect the cable from your player.
15
BASIC OPERATIONS
Using the Touchpad Controls
Your player comes equipped with a touch-sensitive control pad. The active key areas glow red;
touch these areas lightly to use the controls as you would a button. If you touch and hold a key, it
will register as a continuous button press.
Basic Navigation
To navigate through the different menu options and files on your player:
•
Touch the Navigation keys to move the selection in the direction of the arrow.
Touch and hold a Navigation key to scroll quickly in the direction of the arrow.
•
Touch
•
From most screens, you can touch
to the next screen.
•
Touch and hold
(ENTER) to confirm a selection.
to return to the previous screen, or touch
to advance
to return to the Main menu at any time.
Basic Music Playback
1.
Select and confirm MUSIC from the Main menu.
2.
Select a track from the File Browser list and touch
to pause playback; touch
to confirm and play the track.
•
Touch
again to resume playback.
•
During playback, touch to skip to the next track; touch and hold
through the current track.
•
During playback, touch to skip to the previous track; touch and hold
through the current track.
•
During playback, touch to return to the File Browser list (the current track will continue to
play). To return to the Current Track screen, touch
.
to fast forward
to reverse
Basic Movie Playback
1.
Select and confirm MOVIE from the Main menu.
2.
Select a track from the File Browser list and touch
to pause playback; touch
to confirm and play the track.
•
Touch
again to resume playback.
•
During playback, touch
normal playback.
to fast forward through the current track; touch
•
During playback, touch
normal playback.
to reverse through the current track; touch
•
During playback, touch to display the progress bar on screen. The on-screen display
will disappear automatically after a few seconds.
•
During playback, touch
to resume
to resume
to stop playback and return to the File Browser list.
Adjusting the Volume
•
During playback, touch
to raise the volume level; touch
to lower the volume level.
WARNING: Set the volume to the lowest level before headphone use to avoid damage
to your hearing or to your headphones.
16
BASIC OPERATIONS
Play Mode Options
Play Mode options change the order in which music tracks are played. The current Play Mode is
indicated at the top of the screen.
Note: Play Mode options can be used for music or voice playback only.
To change the Play Mode options:
1.
Enter Music mode and play a track.
2.
Touch
to cycle through and change the Play Mode.
The available options are:
ALL
1
ALL
INTRO
S1
S
S
S ALL
1
Repeat A-B Function
The Repeat A-B function allows you to set a segment of a track to be played repeatedly.
1.
Touch
to set the start point (A) of the track segment to be repeated. The Repeat
A-B Indicator will display A.
2.
Touch
again to set the end point (B) of the track segment. The segment will now
play in a loop and the Repeat A-B Indicator will display AB.
3.
Touch
again to resume normal playback.
Note: You will not be able to see the Repeat A-B Indicator during movie playback.
17
MUSIC MODE
Enter Music mode to play your MP3, WMA, OGG, or WAV audio files.
To enter Music mode, select and confirm MUSIC in the Main menu. Upon entering Music mode,
you will have the following options: Music, Encode, Voice, Playlists, and Search.
Music
Select and confirm MUSIC in the Music Mode menu to access the File Browser to look for music
files in the ROOT folder of your player.
•
Use the Navigation keys to select folders and music files to play. Refer to the Basic Operations section for details.
•
While a track is playing (Current Track), touch
playing track will continue to play.
•
With a file selected in the File Browser, touch and hold to display a context menu with the
following advanced functions: Favorite (+/-), Info, and Exit. Refer to the Advanced Functions:
Music section for details.
•
While a music track is playing, touch and hold to display a context menu with the following
advanced functions: Favorite (+/-), EQ, Play Speed, Info, and Exit.
Play Status Indicator
Track Time
Track Progress Bar
to return to the File Browser. The currently
MUSIC
0005/0600
192 kbps
44 khz
00:01:24
Song (ID3)/File Name
Artist Info (ID3)
Album Info (ID3)
Current / Total Track #
Bit Rate
Sampling Rate
Song Title
Artist Name
Album Name
Folder Name
Visualization
Player Status
P
ALL Normal
14
L
Volume Level
R
Current Track Screen
Play Status
Indicator
Current Folder
List of
Subfolders
ALL Normal
MUSIC
+
ROOT
Subfolder 1
+
Subfolder 2
+
Subfolder 3
+
Subfolder 4
+
Subfolder 5
Player Status
P
0005/0600
Track 1
List of Files
Track 2
Track 3
Track 4
File Browser Screen
18
# of Folders / # of Files
MUSIC MODE
Encode
Select and confirm ENCODE in the Music Mode menu to access the File Browser to look for LineIn and FM Radio recording files in the ENCODE folder of your player. This is where your player
stores Line-in and FM Radio recordings; refer to the Recording section for more details).
•
Use the Navigation keys to select folders and recording files to play. Refer to the Basic Operations section for details.
•
With a file selected in the File Browser, touch and hold
•
While a music track is playing, touch and hold to display a context menu with the following
advanced functions: Favorite (+/-), EQ, Play Speed, and Info. Refer to the Advanced Functions: Music section for details.
to view file or folder information.
Voice
Select and confirm VOICE in the Music Mode menu to access the File Browser to look for Microphone (Voice) recording files in the VOICE folder of your player. This is where your player stores
Voice recordings; refer to the Recording section for more details).
•
Use the Navigation keys to select folders and recording files to play. Refer to the Basic Operations section for details.
•
With a file selected in the File Browser, touch and hold
•
While a music track is playing (Current Track), touch and hold
to display a context menu
with the following advanced functions: Favorite (+/-), EQ, Play Speed, and Info. Refer to the
Advanced Functions: Music section for details.
to view file or folder information.
Playlists
Select and confirm PLAYLISTS in the Music Mode menu to access your quick-add Favorites Playlist (refer to the Advanced Functions: Music section for details). You can also access M3U playlists
that have been created on your computer and saved in the PLAY LIST folder of your player.
Search
Select and confirm SEARCH in the Music
Mode menu to quickly find music by the first 3
letters of its file name.
1.
2.
3.
Touch
or to select the first letter and
then touch .The list below will reflect all
files that start with the letter you have
selected.
Touch
or to select the second letter
and then touch . The list will now reflect
all files that start with the first and second
letters you have selected.
Player Status
Play Status
Indicator
Search Term
ALL Normal
P
MUSIC
[E l ]
Electric Blues
Electricity
Elephant
List of Results
Elise
Elvis 01
Elvis 02
Elvis 03
Elvis 04
Elvis 05
Search Screen
Touch
or to select the third letter and then touch . The list will now reflect all files that
start with the first, second, and third letters you have selected.
19
MUSIC MODE
Advanced Functions: Music
Favorite (+/-)
Use the Favorite function to quickly add a song to your Favorites Playlist. Favorite tracks can be
found in by selecting Music > Playlists > Favorite.
•
If a track has not been stored as a Favorite, the Favorite option will have a (+) symbol next to
it. Select and confirm the option to add the track to your Favorites Playlist.
•
If a track has been stored as a Favorite, the Favorite option will have a (-) symbol next to it.
Select and confirm the option to remove the track from your Favorites Playlist.
EQ (Equalizer)
Use the EQ function to adjust the equalizer settings to optimize the way the player processes
audio signals. The EQ options are: Normal, Rock, Classic, Jazz, U-Bass (Ultra-Bass), and User.
The User equalizer setting can be customized in the Setup > Sound > User EQ menu; refer to
the Setup section for details.
Play Speed
Use the Play Speed function to adjust playback tempo. The Play Speed options are: 70% (slower),
100% (normal speed), and 120% (faster).
Info
Use the Info function to view file type, size, and date-added information.
20
•
You can view information on folders as well as files.
•
Touch
to cancel when you have finished viewing the information.
MOVIE MODE
Enter Movie mode to play your XviD-encoded AVI video files.
The MP-C951 supports playback of XviD-encoded AVI files. Please see the Creating Movies
with VirtualDub section for details on how to create video files that are compatible with the
MP-C951.
To enter Movie mode, select and confirm MOVIE in the Main menu. Upon entering Movie mode,
you can use the File Browser to look for movie files in the MOVIE FILE folder of your player.
•
Use the Navigation keys to select folders and movie files to play. Refer to the Basic Operations section for details.
•
With a file selected in the File Browser, touch and hold
•
While a movie file is playing, touch
to display the progress bar on screen. The on-screen
display will disappear automatically after a few seconds.
to view file information.
21
PHOTO MODE
Enter Photo mode to play your JPEG and BMP photo files.
To enter Photo mode, select and confirm PHOTO in the Main menu. Upon entering Photo mode,
you can use the File Browser to look for photo files in the IMAGE FILE folder of your player.
•
Use the Navigation keys to select folders and photo files to play.
•
While a photo is displayed:
•
22
•
Touch
to skip to the next photo; touch
to skip to the previous photo
•
Touch to view thumbnails of your photos. Use the Navigation keys to select a
thumbnail and then touch to view it.
•
Touch
•
Touch and hold
to view the photos as a slideshow.
to view information on the file or to set the Slide-Show Time option.
With a file selected in the File Browser, touch and hold
to display file information.
FM RADIO MODE
Enter FM Radio mode to play tune into FM Radio broadcasts.
You must have a pair of headphones connected to the headphone jack to receive FM
broadcasts; your player will utilize the headphone cord as an FM antenna.
To enter FM Radio mode, select and confirm FM RADIO in the Main menu.
Basic FM Radio Operation
Upon entering FM Radio mode, you can tune into stations manually (FREQ) or by using preset
stations (PRESET).
•
Touch
to toggle between FREQ and PRESET tuning modes. If no Preset stations have
been saved, you will not be able to toggle between FREQ and PRESET tuning mode -please save a preset station first as described below.
•
FREQ: Listen to Manually-Tuned Channels.
Touch to tune to higher frequencies; touch to tune to lower frequencies.
•
PRESET: Listen to Preset Channels.
Touch to tune higher Preset stations or
to tune to lower Preset stations.
•
Touch
to automatically detect and save as a preset station any frequency with a signal.
This will overwrite any previously saved preset stations.
•
Touch
to toggle between Stereo and Mono receptions modes.
Advanced Functions: FM Radio
Touch and hold
to access the Advanced Function options: Presetting, Scan-Level, and Area.
•
Presetting: Manually save the current station as a Preset.
•
Scan-Level: sets the sensitivity of the Auto-Scan feature (low, medium, high).
•
Area: Sets the FM frequency range area (US, Japan, Europe).
23
E-BOOK MODE
Enter E-Book mode to read TXT E-book files.
To enter E-Book mode, select and confirm E-BOOK from the Main menu. Upon entering E-Book
mode, you can use the File Browser to look for text files in the TEXT FILE folder of your player.
•
Use the Navigation keys to select folders and text files to play.
•
While a text file is displayed:
•
•
Touch
to skip forward one line; press
to skip forward one page.
•
Touch
to skip back one line; press
•
Touch
to toggle the auto-scroll feature on or off.
•
Touch
•
Touch and hold to access the Advanced Function options: Go To, Language, AutoScroll Time, and Info.
to skip back one page.
to view the photos as a slideshow.
With a file selected in the File Browser, touch and hold
to display its file information.
Advanced Functions: E-Book
While a text file is displayed, touch and hold
Auto-Scroll Time, Info.
24
to access the Advanced Function options: Go to,
•
Go To: Select a page to go to directly. The “Max” number indicates the total number of pages
in the text file.
•
Auto Scroll Time: Set the time interval for the auto-scroll feature (in seconds).
•
Info: View file information.
RECORDING
Your player can record from 3 types of sources: Microphone, Line-In, or FM Radio. (See the
SETUP section for details about changing your player’s recording options.)
Voice Recording
Make voice recordings through the integrated microphone located on the top of your player.
1.
Place the player in MUSIC mode.
2.
Disconnect any cables from the Line-In jack located on the top of your player.
3.
Touch and hold
4.
to start recording through the microphone.
•
Touch
•
If the VAD option is set to “On”, the player will automatically pause recording when no
signal is detected through the microphone (refer to the Setup section for more details).
Touch
to pause recording; press
again to resume recording.
to stop and save the recording.
•
The resulting file will be saved to the VOICE folder.
•
The file will be named VOCXXX.MP3 where XXX corresponds to the numerical sequence in which the recording was made (numbering starts from 001.)
Line-In Recording
Make recordings from an external device through the Line-In jack located on the top of your
player.
To Line-In
Jack
1.
Connect the external device to
the Line-In jack of your player
as shown in the diagram below.
2.
Place the player in MUSIC mode.
Start playback on the external
device.
3.
Touch and hold
to start
recording through the Line-In jack.
4.
•
Touch
press
•
If the Sync On/Off option is set to “On”, the
player will start recording automatically when a
signal is detected through the Line-In jack (refer
to the Setup section for more details).
Touch
To Headphone Jack
External Audio Source
to pause recording;
again to resume recording.
to stop and save the recording.
•
The resulting file will be saved to the ENCODE
folder.
•
The file will be named ENCXXX.MP3 where
XXX corresponds to the numerical sequence
in which the recording was made (numbering
starts from 001.)
25
RECORDING
FM Recording
Make recordings of FM Radio broadcasts.
1.
Place the player in FM RADIO mode.
2.
Tune to the FM broadcast station you would like to record.
3.
Touch and hold
•
4.
26
Touch
Touch
to start recording the FM Radio broadcast.
to pause recording; press
again to resume recording.
to stop and save the recording.
•
The resulting file will be saved to the ENCODE folder.
•
The file will be named FMXXX.MP3 where XXX corresponds to the numerical sequence in which the recording was made (numbering starts from 001.)
EXPLORER MODE
Enter Explorer mode to view and manage the folders and files on your player.
To enter Explorer mode, select and confirm EXPLORER from the Main menu. Upon entering
Explorer mode, you will see a “Tree View” which will display all of the folders on your player (see
figure below). Use the Navigation keys to select a folder and touch to view its contents.
ALL Normal
Player Status
P
EXPLORER
0010/0000
Tree View
# of Folders / # of Files
ROOT
Folder 1
Folder 2
Folder 3
Folder 4
Level 2, Folder 1
Level 2, Folder 2
Level 3, Folder 1
Selected Folder
Folder 5
Explorer File Browser
Note:
Tree View will display all your folders and subfolders, only. Select and confirm the folder ROOT
to access all files and folders on your player.
You can use the Explorer File Browser to delete, copy, cut (move), and view information about
your files and folders.
Delete
1.
From “Tree View”, use the Navigation keys to select a folder and touch
contents.
to view its
2.
Use the Navigation keys to select a file/folder to delete. Touch and hold
and confirm DELETE.
, and then select
3.
Select and confirm NO to cancel, or YES to delete the file or folder.
Do NOT delete the following files: “sample.hds” and “wmpinfo.xml”.
Copy
1.
From “Tree View”, use the Navigation keys to select a folder and touch
contents.
to view its
2.
Use the Navigation keys to select a file/folder to delete. Touch and hold
and confirm COPY.
, and then select
3.
Select and confirm NO to cancel, or YES to copy the file/folder. The player will prompt you
to select a destination folder and will display the Tree View of your folders.
4.
Use the Navigation keys to select a destination folder and touch
to confirm.
27
EXPLORER MODE
Cut (Move)
1.
From “Tree View”, use the Navigation keys to select a folder and touch
contents.
to view its
2.
Use the Navigation keys to select a file/folder to delete. Touch and hold
and confirm CUT.
, and then select
3.
Select and confirm NO to cancel, or YES to move the file/folder. The player will prompt you
to select a destination folder and will display the Tree View of your folders.
Info
28
1.
From “Tree View”, use the Navigation keys to select a folder and touch
contents.
2.
Use the Navigation keys to select a file/folder for which to view information about. Touch
and hold , and then select and confirm INFO
3.
Touch
again to return to the Explorer File Browser.
to view its
SETUP MODE
Enter Setup mode to set the system options of your player. To enter SETUP mode, select and confirm
SETUP in the Main menu.
Upon entering Setup mode, you will have the following options: Sound, Display, General, Timer,
Record, and Information.
Sound
Select and confirm SOUND in the Setup Mode menu to set options relating to the way audio is
processed by your player. The Sound options are: User EQ and Balance.
User EQ
Selected Band
Set your custom, user-defined equalizer setting.
1.
Touch
and
to select a band to adjust. Select the
bands to the left to adjust low (bass) frequencies; select
the bands in the middle to adjust mid-frequencies; and
select the bands to the right to adjust high frequencies
(treble).
2.
Touch
to raise the selected band level; touch
lower the selected band level.
3.
Touch
to
when you are finished to save.
15
0
60
250
1K
4K
12K
Once this has been set up, you can access this digital equalizer preset through the equalizer menu
(please refer to the Music Mode > Advanced Functions: Music section for details).
Balance
Set the left-channel and right-channel levels.
1.
Touch
to increase the left-channel level (L); touch
to increase the right-channel level (R). The center-position (C) will result in a balanced left/right stereo mix.
2.
Touch
L
C
R
when you are finished to save.
Display
Select and confirm DISPLAY in the Setup Mode menu to set options relating to your player’s display. The Display options are: Backlight Time, Brightness, Language, and Lyric.
Backlight Time
Set the duration of time (in seconds) that the LCD backlight
remains on after a key-press.
1.
Touch
to decrease the time interval; touch
to increase the time interval. A setting of “A” (always) will
keep the backlight on at all times.
2.
Touch
when you are finished to save.
29
SETUP MODE
Brightness
Set the brightness of the LCD screen.
1.
Touch
to decrease the screen’s brightness; touch
to increase the screen’s brightness. A setting of 0 is
darkest; a setting of 10 is brightest.
2.
Touch
when you are finished to save.
0
[5]
10
Selected Value
Language
Set the language of the player’s on-screen menu. The language options are: English, Korean,
Dutch, Italian, French, Spanish, Portuguese, and Chinese.
1.
Touch
and
2.
Touch
when you are finished to save.
to select a language option.
Lyric
Set song lyric display support on or off. Lyric display requires a “.LRC” lyric file which may be found
on the internet or may be created with a Lyric file editor. Lyric files can contain synchronized timing
information as well as lyric information.
Lyric files must have the same name as its corresponding music file (e.g., “SongTitle1.lrc” and
“SongTitle1.mp3”) and must be placed in the same directory.
General
Select and confirm GENERAL in the Setup Mode menu to set options relating to your player’s
general features. The General options are: Auto Play, Format, USB Charge, and Load Default.
Auto Play
Set the Auto Play feature on or off. When Auto Play is set to ON, your player will automatically
resume playback from where it left off when it wakes from standby.
Format
Prepare the hard disk for use with the player. It may become necessary to format your player if
data or files become corrupt. Always use the Format function of the player when it is necessary
to format a disk.
Formatting will destroy all data on a disk so make sure to back up your data before
formatting the disk.
1.
Select and confirm NO to cancel; select and confirm YES to begin formatting. Again, you
should always back up your data before formatting.
USB Charge
Set the USB Charge function on or off.
30
•
When this is set to ON, your player will start charging when it is connected to a computer using
a USB MSC connection. You may need to touch to continue connecting to the computer.
•
When this is set to OFF, your player will connect to the computer automatically
SETUP MODE
Load Default
Restore all of the player’s settings to their factory-default state.
Timer
Select and confirm TIMER in the Setup Mode menu to set options relating to your player’s internal
clock features. The Timer options are: Sleep, Date / Time, and Alarm.
Sleep
Set the Sleep Timer (in minutes). The player will automatically turn off after the set amount of time.
1.
Touch
to decrease the time interval; touch
to
increase the time interval. A setting of “Off” (00) will
disable this power-saving feature.
2.
Touch
when you are finished to save.
Date / Time
Set the internal clock of your player.
1.
Touch
touch
2.
Touch
adjust.
and to select the date or the time and then
to confirm and adjust.
and
to select which date or time field to
•
For the Date, the fields are Month, Date, and
Year (from left to right).
•
For the Time, the fields are AM/PM, Hour, and Minutes.
3.
Touch
field.
and
to adjust the value of the selected field. Touch
4.
Touch
to save the Date or Time.
and
to move to the next
Alarm
Set the player’s alarm. The alarm will turn the player on
automatically at the set time.
1.
Touch
2.
With On/Off selected, touch
ON or OFF.
and
to select Alarm On/Off or Alarm Set.
3.
With the Alarm Set field selected, touch
and adjust.
•
Touch
•
Touch and
next field.
and
•
Touch
and
to set the alarm
to confirm
to select which Alarm Set field to adjust (AM/PM, Hour, and Minutes).
to adjust the value of the selected field. Touch
and
to move to the
to confirm and save the Alarm Set changes.
31
SETUP MODE
Record
Select and confirm RECORD in the Setup Mode menu to set options relating to your player’s
recording features. The Record options are: MIC Quality, Line-In Quality, Radio Quality, Sync
On/Off, and Voice Detect.
MIC Quality
Set the quality of recordings made through the integrated microphone. The options are: L (Low),
M (Medium), and H (High). High-quality recordings will sound best, but will take up more of the
player’s memory.
Line-In Quality
Set the quality of recordings made through the Line-In jack. The options are: L (Low), M (Medium), and H (High). High-quality recordings will sound best, but will take up more of the player’s
memory.
Radio Quality
Set the quality of recordings made from the FM Radio. The options are: L (Low), M (Medium), and
H (High). High-quality recordings will sound best, but will take up more of the player’s memory.
Sync On/Off
Set the recording Sync feature on or off. When this is set to ON, your player will detect audio signals from the Line-In jack and automatically synchronize the beginning and ending of recordings
with the signal.
Voice Detect
Set the Voice Detect feature on or off. When this is set to ON, your player will detect audio signals
from the integrated microphone and automatically pause recording when no signal is detected.
Information
Select and confirm INFORMATION in the Setup Mode menu to view information about your player.
The Information options are: HDD Info, Total File, and Version.
32
•
HDD Info
View information about your player’s hard disk drive: Size (total memory), Free (available
memory), and Used (percentage of memory used).
•
Total File
View information about the files stored on your player’s hard disk drive: Total Number of
Folders and Total Number of Files.
•
Version
View information about your player’s firmware (software): Version.
CREATING MOVIES WITH VIRTUALDUB
Use the VirtualDub video conversion software utility included on the Installation CD to create movies that are suitable for playback on the MP-C951.
Your player supports XviD-encoded AVI files with the following specifications:
•
QCIF+ resolution (220x176), 12 frames per second (FPS)
•
QCIF resolution (176x144), 15 frames per second (FPS)
Note:
QCIF+ and QCIF are standard video resolution sizes. QCIF+ is larger in size but not be as smooth
as a QCIF video owing to a slight drop in FPS.
The VirtualDub software is included for your convenience and is compatible with Microsoft Windows operating systems only. There are many other video conversion utilities for the Macintosh
(e.g., ffmpegX) and other operating systems available for download on the internet.
Because the program is licensed free of charge, there is no warranty for the program, to the extent
permitted by applicable law. Except when otherwise stated in writing the copyright holders and/or
other parties provide the program “as is” without warranty of any kind, either expressed or implied,
including, but not limited to, the implied warranties of merchantability and fitness for a particular
purpose. The entire risk as to the quality and performance of the program is with you. Should the
program prove defective, you assume the cost of all necessary servicing, repair or correction.
In no event unless required by applicable law or agreed to in writing will any copyright holder, or
any other party who may modify and/or redistribute the program as permitted above, be liable to
you for damages, including any general, special, incidental or consequential damages arising out
of the use or inability to use the program (including but not limited to loss of data or data being
rendered inaccurate or losses sustained by you or third parties or a failure of the program to operate with any other programs), even if such holder or other party has been advised of the possibility
of such damages.
Installing VirtualDub and Media Codecs on your Computer
Installing XviD
The XviD video codec must be installed on your computer in order to properly encode videos using VirtualDub.
1.
Insert the Installation CD into your computer’s CD or DVD drive. Make sure to place the
mini-CD in the center, recessed well of the drive tray.
2.
Navigate to MY COMPUTER and double-click on the CD/DVD drive icon (usually “D:”).
3.
Double-click on the folder “XviD”.
4.
Double-click on the file icon named “XviD-1.1.0-30122005.exe” to start the XviD codec
installation program.
5.
Follow the on-screen instructions (the default options are recommended) to complete the
installation.
33
CREATING MOVIES WITH VIRTUALDUB
Installing LAME
The LAME audio codec must be installed on your computer in order to properly encode videos
using VirtualDub.
34
1.
Insert the Installation CD into your computer’s CD or DVD drive. Make sure to place the
mini-CD in the center, recessed well of the drive tray.
2.
Navigate to MY COMPUTER and double-click on the CD/DVD drive icon (usually “D:”).
3.
Double-click on the folder “lame 3.96.1”.
4.
Double-click on the folder “ACM”.
5.
Locate the file icon “LameACM.inf” and right-click on the file. In the context menu that
appears, select “INSTALL”.
6.
A warning window will appear. Click “CONTINUE ANYWAY” to install the LAME encoder.
CREATING MOVIES WITH VIRTUALDUB
Installing VirtualDub
VirtualDub is a standalone application and does not need to be “installed” like a regular program.
Simply copy the folder to a location on your computer and double-click the application icon to start
VirtualDub.
1.
Insert the Installation CD into your computer’s CD or DVD drive. Make sure to place the
mini-CD in the center, recessed well of the drive tray.
2.
Navigate to MY COMPUTER and double-click on the CD/DVD drive icon (usually “D:”).
3.
Double-click on the folder “Video Transcoder”.
4.
Copy the folder “VirtualDub” to a location on your computer (e.g., “C:\Program Files”).
5.
Double-click on the VirtualDub folder.
6.
Locate the VirtualDub.exe icon. Double-click this to start the VirtualDub program.
Note:
You may wish to create a shortcut to VirtualDub for your convenience. To create a shortcut to
VirtualDub on your desktop, right-click “VirtualDub.exe” and then select “Send To” > “Desktop
(create shortcut)” from the menu that appears. You can now run VirtualDub by double-clicking
the new shortcut icon on your desktop.
Using VirtualDub to Create Movies
1.
Start the VirtualDub application.
2.
Select the source video file to convert.
•
From the top menu bar, select File > Open Video File. Alternately, you may press
Ctrl+O on the keyboard.
35
CREATING MOVIES WITH VIRTUALDUB
•
3.
Load a Processing Setting preset.
•
36
Use the dialog box that appears to find and select the source video file and then click
the OPEN button.
From the top menu bar, select File > Load Processing Settings. Alternately, you may
press Ctrl+L on the keyboard.
CREATING MOVIES WITH VIRTUALDUB
•
Select “QCIF.vcf” for smaller (176x144) video files; select “QCIF-plus.vcf” for larger
(220x176) video files. Click the OPEN button to load the selected preset.
Note:
The QCIF preset contains the following settings:
•
Video > Filters > Add > Resize (New Width: 176; New Height: 144)
•
Video > Framerate > Frame rate conversion (Convert to fps: 15)
•
Video > Compression > XviD MPEG-4 Codec (configured to the “Handheld” profile)
•
With Audio in “Full Processing Mode”: Audio > Compression > Lame MP3 (set to 44100Hz,
128kbps CBR, Stereo)
The QCIF preset contains the following settings:
•
Video > Filters > Add > Resize (New Width: 220; New Height: 144)
•
Video > Framerate > Frame rate conversion (Convert to fps: 12)
•
Video > Compression > XviD MPEG-4 Codec (configured to the “Handheld” profile)
•
With Audio in “Full Processing Mode”: Audio > Compression > Lame MP3 (set to 44100Hz,
128kbps CBR, Stereo)
If you find you are having problems playing the converted file, try reducing the Frame rate conversion setting.
Use the settings detailed above if you decide to use an alternate video conversion software program.
37
CREATING MOVIES WITH VIRTUALDUB
4.
38
Convert the source file to an XviD-encoded AVI output file.
•
From the top menu bar, select File > Save as AVI. Alternately, you may press F7 on
the keyboard.
•
Use the dialog box that appears to select a destination folder to save the converted
output file to. Type a file name for the file in the “File name” box, and then click the
SAVE button.
RESTORE & FIRMWARE UPDATES
From time to time, COBY may release firmware updates to improve MP-C951 performance or to
add additional features. Please check the COBY website at www.cobyusa.com periodically to see
if a new firmware has been release for your player.
If you are experiencing abnormal behavior with your player, you may choose to first restore (format) the player and then update its firmware.
Restoring Your Player
Formatting your player will erase all of your data from it (including music, movies, photos,
text files). Make sure to copy and back up any data on your player that you do not want to
lose prior to formatting.
To format your player:
1.
Connect the MP-C951 to a computer using the USB-MSC connection.
2.
On the computer, locate the Removable Disk icon that corresponds to the MP-C951.
3.
Right-click on the Removable Disk icon and select “Format”
4.
A dialog box will appear on-screen. Set the options as shown below, then click the START
button to begin formatting the MP-C951.
5.
When the formatting process is complete, disconnect the USB cable from the player. Turn
the player off (slide the Power/Lock switch to the right and hold until the screen turns off)
and then turn it back on.
39
RESTORE & FIRMWARE UPDATES
Updating Your Player’s Firmware
Firmware updates may be found on the COBY Electronics website at www.cobyusa.com. Check
this site periodically for new updates. Firmware updates may improve performance or add new
functionality to your player.
IMPORTANT: Do not disconnect your player from the computer or otherwise interrupt
the firmware upgrade process—doing so could damage your player and render it inoperable.
To upgrade your player’s firmware:
40
1.
Download the latest firmware for your player from www.cobyusa.com. Save this file to the
computer.
2.
Connect your player to the computer. Double-click the Removable Icon that corresponds to
your player, then double-click the FIRMWARE folder to open it.
3.
Double-click the downloaded firmware file (you may need a file compression utility installed
on your computer). In the window that appears, select the file that ends with “.BIN” and copy
it to your player’s FIRMWARE folder.
4.
Disconnect your player from the computer and turn the player off.
5.
Turn the player back on. The player should update its firmware automatically.
TROUBLESHOOTING
If you have a problem with this player, please read the troubleshooting guide below and check
our website at www.cobyusa.com for Frequently Asked Questions (FAQs) and firmware updates.
If these resources do not resolve the problem, please contact Technical Support.
COBY Electronics Technical Support
Hours:
Monday to Friday, 8:30 AM–11:00 PM EST
Saturday to Sunday, 9:00 AM–11:00 PM EST
Email:
[email protected]
Phone:
800-681-2629 or 718-416-3197
Web:
www.cobyusa.com
The player does not turn on.
•
Ensure that the battery is charged or that the player is operating on AC power.
•
Ensure that the Lock switch is disengaged.
•
Try rebooting the player by sliding and holding the Power/Lock switch to the right for several
seconds, or try using a pin to press the Reset button on the rear of the player.
I cannot transfer files to the player.
•
Ensure that your computer is running a supported operating system.
•
If you are running Microsoft Windows 98 SE, ensure that the USB driver has been properly
installed.
•
Ensure that the supplied USB cable is securely attached to the player and the PC, or try using
another USB cable.
•
If you have connected the player through a USB hub, try connecting the player directly to
your computer.
•
If you are connected using the USB MTP/HOST port, try using the USB MSC port to connect
to your computer.
•
The files you are trying to transfer may contain Digital Rights Management (DRM) restrictions. Please refer to the documentation of the site from which you downloaded these files
for more information.
•
Ensure that the player’s memory capacity is not full.
The buttons do not work.
•
Ensure that battery is charged or that the player is operating on AC power.
•
Ensure that the Lock switch is disengaged.
The sound quality of the music is poor.
•
Try playing the file on your computer. If the sound quality is still poor, try downloading the file
again or re-encoding the file yourself.
•
Ensure that the bit rate of the file is not too low. The higher the bit rate of the file, the better it
will sound. For MP3s and OGGs the minimum recommended bitrate is 128kbps; for WMAs,
the minimum recommended bitrate is 96kbps.
41
TROUBLESHOOTING
There is something wrong with the LCD display.
•
Ensure that battery is charged or that the player is operating on AC power.
•
Try rebooting the player by sliding and holding the Power/Lock switch to the right for several
seconds, or try using a pin to press the Reset button on the rear of the player.
The player has malfunctioned.
42
•
Try rebooting the player by sliding and holding the Power/Lock switch to the right for several
seconds, or try using a pin to press the Reset button on the rear of the player.
•
Try updating the player’s firmware. Please refer to the Firmware Update section of this manual for detailed instructions.
SPECIFICATIONS
Display Type
2” Full-Color TFT LCD
Display Resolution
220 x 176
Memory
20GB HDD
Audio Format Support
MP3, WMA, OGG, WAV
Video Format Support
AVI (XviD):
Photo Format Support
JPEG, BMP
E-Book Format Support
TXT
Song Info Support
ID3, LRC
PC Interface
USB MSC: USB 2.0 High-Speed
USB MTP/HOST: USB 2.0 High-Speed/Full-Speed
DRM Support
Windows Media DRM 10
(Requires Windows XP and Windows Media Player 10
or higher)
Plug and Play Support
Windows 98SE/2000/ME/XP or newer
Macintosh OS X or newer
Audio Output
RCA Stereo 3.5mm (Headphone)
Audio Input
RCA Stereo 3.5mm (Line-In)
Integrated Microphone
Menu Language Support
English, French, Spanish, German, Italian,
Portuguese, Korean, Japanese
Power Supply
Integrated Rechargeable Lithium-Polymer Battery
DC 5V, 100-240V AC Adapter
Unit Dimensions
2.43” x 4.17” x 0.55” (WHD)
220 x 176 (QCIF+) 13fps
176 x 120 (QCIF) 15fps
43
COBY Electronics Corp.
56-65 Rust Street
Maspeth, NY 11378
www.cobyusa.com
www.ecoby.com