1
NEDERLANDS
Conceptronic Media Giant met DVB-T
Gebruiksaanwijzing
Gefeliciteerd met uw nieuwe
Conceptronic mediarecorder en -speler
In deze gebruiksaanwijzing vindt u stap-voor-stap instructies voor installatie en gebruik van de
Conceptronic mediarecorder en -speler.
Als u meer informatie of ondersteuning voor uw product nodig heeft, kunt u het beste naar onze Service &
Support website op www.conceptronic.net gaan en een van de volgende mogelijkheden kiezen:
• FAQ
• Downloads
• Contact
: Database met veel gestelde vragen
: Gebruiksaanwijzingen, stuurprogramma's, firmware en overige downloads
: Contact opnemen met Conceptronic Support
Tip:
De firmware van de Conceptronic Media Giant kan worden bijgewerkt. Om uw apparaat bij te
werken met de nieuwste firmware-versie gaat u naar de Conceptronic website, of gebruikt u de
ingebouwde Firmware Upgrade optie van de Media Giant.
Tip:
Ga naar www.conceptronic.net voor de nieuwste lijst met codecs voor de ondersteunde
bestandsindelingen.
Voor algemene informatie over Conceptronic producten gaat u naar de Conceptronic website op
www.conceptronic.net.
1. Inhoud verpakking
U vindt de volgende items in de verpakking van de Conceptronic mediarecorder en -speler:
•
Conceptronic Media Giant (in deze gebruiksaanwijzing aangeduid als 'de speler' of 'Media Giant'). **
De verpakking bevat een van de volgende twee modellen:
CM3GD
[C08-147]: Media Giant met digitale (DVB-T) tuner.
CM3GDP [C08-148]: Media Giant met digitale (DVB-T) tuner en Powerline netwerkadapter.
•
•
•
•
•
•
•
•
•
•
•
•
•
•
Conceptronic Powerline netwerkadapter. (Alleen meegeleverd bij CM3GDP)
Netsnoer.
Afstandsbediening.
2 AAA-batterijen voor de afstandsbediening.
Antennekabel.
Composiet videokabel (met drie tulpstekkers: rood, wit en geel).
S-videokabel.
Component videokabel (met drie tulpstekkers: rood, groen en blauw).
Coaxiale digitale audiokabel (zwarte tulpstekkers).
Scartadapter voor composiet videokabel/s-videokabel.
HDMI AV-kabel (HDMI 1.3).
Netwerkkabel.
USB-kabel.
Deze gebruiksaanwijzing.
BELANGRIJK:
Bepaalde mogelijkheden die in deze gebruiksaanwijzing worden besproken, zijn alleen van toepassing
voor de CM3GDP (met digitale DVB-T tuner en Powerline adapter). Deze mogelijkheden zijn
aangegeven met **.
1
NEDERLANDS
2. Mogelijkheden
•
•
•
•
•
•
•
•
•
•
•
•
•
Ingebouwde Powerline netwerkadapter. **
Ingebouwde digitale (DVB-T) tv-tuner met automatische zenderzoeker.
Opname van digitale tv (DVB-T).
Opname van AV-signaal van bijvoorbeeld een videorecorder, dvd-speler of videocamera.
DV-ingang voor weergave/opname van een DV-videocamera.
Opname op interne harde schijf.
Uitgangsresolutie tot 1080i.
Weergaveresolutie tot 1080i.
Neemt dvd-kwaliteit bestanden op in TS-formaat (voor digitale opnamen van de DVB-T tuner) of
MPEG2-formaat (voor analoge opnamen van de AV-ingangen); deze kunnen worden weergegeven op
pc's en andere mediaspelers).
Opnamemogelijkheden: Directe eentoetsopname, geprogrammeerde opname, timeshift (pauze
tijdens tv-uitzending).
Weergave van MPEG1/2/4, MP3, WMA, JPG bestanden die op de interne harde schijf of op een USBapparaat staan.
Kopiëren van bestanden van een USB-apparaat of netwerklocatie naar de interne harde schijf.
Automatische omschakeling tussen mediaspeler en USB-opslagapparaat voor pc:
Wanneer de speler via USB met een pc verbonden is, gedraagt hij zich als USB-opslagapparaat.
Wanneer hij niet via USB met een pc verbonden is, gedraagt hij zich als mediaspeler.
3. Opmerkingen en voorzorgen
•
•
•
•
•
•
•
•
•
•
•
•
Probeer de speler niet uit elkaar te halen. Dit kan leiden tot verwondingen door elektriciteit met een
hoge spanning.
Houd de speler uit de buurt van te vochtige situaties.
Stel de speler niet bloot aan vloeistoffen en voorkom dat hij wordt ondergedompeld.
Haal de stekker uit het stopcontact als u de speler langere tijd niet wilt gebruiken.
Zorg ervoor dat het stopcontact waarop de Media Giant is aangesloten makkelijk bereikbaar is.
Gebruik de speler niet in de buurt van brandbare stoffen.
Vervang de batterij van de afstandsbediening door hetzelfde type wanneer hij leeg is. Lever oude
batterijen in voor hergebruik. Om corrosie te voorkomen, moet u de batterij verwijderen als de
afstandsbediening langere tijd niet gebruikt zal worden.
Controleer of de batterijen juist geplaatst zijn in de afstandsbediening om schade te voorkomen.
Houd de afstandsbediening uit de buurt van te vochtige omstandigheden en laat hem niet vallen.
Gebruik de afstandsbediening niet in fel zonlicht.
Zorg dat de speler NOOIT valt of wordt gestoten of geschud.
Om oververhitting te voorkomen, mag u de speler niet afdekken.
BELANGRIJK:
Formatteer de harde schijf NIET met uw computer! De speler raakt dan al zijn
systeemgegevens kwijt en zal opnieuw moeten worden geïnitialiseerd. Als u de harde
schijf van de speler wilt formatteren, moet u het ingebouwde formatteerprogramma uit
het instellingenmenu van de speler gebruiken.
2
NEDERLANDS
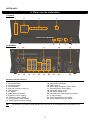
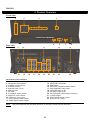
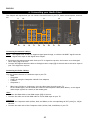
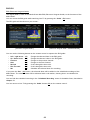
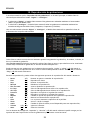
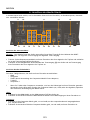
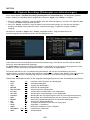
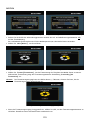
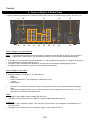
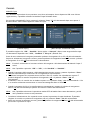
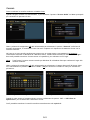
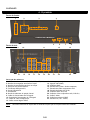
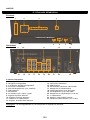
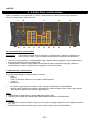
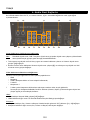
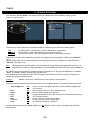
4. Plaats van de onderdelen
Voorkant
1
2
3
4
5
Achterkant
9
14
10
15
11
16
17
18
19
20
21
6
7
8
12
13
22
23
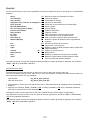
Betekenis van de nummers:
1. Statuslampje: aan/uit, REC (opname), ACT, LAN)
2. Navigatietoetsen
3. Weergavetoetsen
4. Infraroodsensor
5. Mini-usb-connector (naar pc)
6. Usb-hostpoort
7. Dv-ingang
8. Open toets frontpaneel
9. Digitale tv-tuner uitgang
10. Digitale tv-tuner ingang
11. AV composiet video-uitgang
12. SPDIF digitale optische uitgang
NB:
13. Hoofdschakelaar
14. LAN (RJ45) aansluiting
15. HDMI-uitgang
16. AV1-ingang (composiet video/audio)
17. AV2 component video-ingang
18. AV2 audio-ingang (L/R)
19. AV audio-uitgang (L/R)
20. AV component video-uitgang (Y/Pb/Pr)
21. S-video uitgang
22. SPDIF digitale optische uitgang
23. Lichtnetaansluiting (110~240 V)
De toetsen op de speler bieden basisfuncties die ook op de afstandsbediening beschikbaar zijn.
3
NEDERLANDS
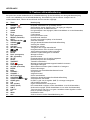
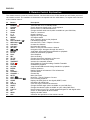
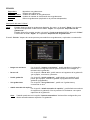
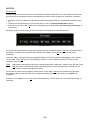
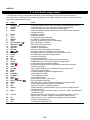
5. Toetsen afstandsbediening
De speler kan worden bediend met de afstandsbediening. Op de binnenflap van deze gebruiksaanwijzing
vindt u een afbeelding van de afstandsbediening. De nummering van de toetsen verwijst naar de
onderstaande tabel, waarin de betreffende functies worden uitgelegd.
Nr.
Toets
Beschrijving
1.
2.
3.
4.
5.
6.
7.
8.
9.
10.
11.
12.
13.
14.
15.
16.
17.
18.
19.
20.
21.
22.
23.
24.
25.
26.
27.
28.
29.
30.
31.
32.
33.
34.
35.
36.
37.
38.
39.
40.
41.
AAN/UIT ( )
SOURCE (bron)
MEDIA
AUDIO
ZOOM
0–9
COPY (kopiëren)
REPEAT (herhalen)
GOTO
TERUGSPOELEN (
)
VORIGE (
)
VOLUME +
VOLUME RETURN (terug)
, , ,
INS.REP.
PAUSE
PLAY (weergeven)
REC (opnemen)
TV SYS
SETUP
TIMESHIFT
STOP ( )
SLOW (langzaam)
CM.SKIP (overslaan)
ENTER
INFO
CHANNEL CHANNEL +
MUTE (dempen)
VOLGENDE (
)
)
VOORUITSPOELEN (
GUIDE (gids)
A-B
DEL (wissen)
ANGLE (hoek)
SUB-T
LIVE-TV
DV
MENU
LED
De speler inschakelen of op standby zetten
Omschakelen tussen digitale tuner, AV-ingang en afspelen
Directe knop naar de Media Browser
Dvd-geluidsspoor/taal wijzigen (indien beschikbaar in uw dvd-bestanden)
In/uitzoomen
Cijfertoetsen
Het kopieermenu tonen
Herhaalstand instellen
Ga naar een bepaald tijdstip in het bestand
Versneld achteruit
Vorig(e) bestand/nummer/hoofdstuk/afbeelding
Verhoog het volume
Verlaag het volume
Terug naar het vorige menu/kanaal
Navigatietoetsen: door de menu's navigeren
10 seconden teruggaan tijdens weergave
Pauzeren tijdens weergave of timeshift
Weergave starten
Opname starten
Uitgangsresolutie van de speler aanpassen
Directe knop naar het Setup Menu
Timeshift inschakelen
Weergave stoppen/opname stoppen/timeshift uitzetten
Vertraagde weergave
30 seconden overslaan tijdens timeshift of weergave
Selectie bevestigen
Informatie over kanaal/zender/bestand tonen
Vorige kanaal
Volgende kanaal
Geluid uitschakelen
Volgend(e) bestand/nummer/hoofdstuk/afbeelding
Vooruitspoelen met beeld
De EPG tv-gids van de digitale (DVB-T) ontvanger weergeven
A-B herhaling instellen
Ingave wissen/selectie verwijderen
Dvd-camerahoek wijzigen (indien beschikbaar in uw dvd-bestanden)
Ondertitels wijzigen (indien beschikbaar in uw video/dvd-bestanden)
Toets om direct naar live-tv te gaan / wisselen tussen digitale tv/radio
Naar dv-opname/weergave
Hoofdmenu tonen
Geeft activiteit van de afstandsbediening aan
4
NEDERLANDS
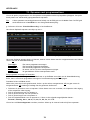
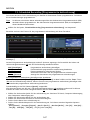
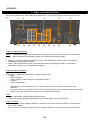
6. Uw Media Giant aansluiten
In dit hoofdstuk leest u hoe u de Media Giant aansluit op uw tv, home cinema, netwerk, etc.
9
14
10
15
11
16
17
18
19
20
21
12
13
22
23
Antennekabel(s) aansluiten
NB:
De digitale tuner van de speler geeft het digitale DVB-T ingangsignaal ongewijzigd door aan de
digitale tv-uitgang van de tuner.
• Haal de antennekabel uit uw tv of digitale set-top box en doe hem in de ingang van de digitale tuner
[10] van de speler.
• Sluit de meegeleverde antennekabel aan op de uitgang van de digitale tuner [9] van de speler en op de
antenne-ingang van uw tv of digitale set-top box.
Videokabel(s) aansluiten
U kunt de speler op 5 manieren op uw tv aansluiten:
- HDMI
- Composiet
- SCART (met behulp van de composietkabel en de scartadapter)
- S-video *
- Component *
*
Bij gebruik van s-video of component gaat alleen het beeld naar uw tv.
Voor het geluid moet u in dat geval gebruik maken van de tulpaansluitingen van de composietkabel
(rood en wit) of de digitale audio-uitgang (optisch of coaxiaal) van de Media Giant.
HDMI:
• Doe de hdmi-kabel in de hdmi-uitgang [15] van de speler.
• Doe de andere kant van de hdmi-kabel in de hdmi-ingang van uw tv.
Composiet:
• Doe de connectors van de composietkabel (geel, rood en wit) in de bijbehorende AV OUT uitgangen [11,
19] van de speler.
• Doe de andere kant van de composietkabel (gele, rode en witte tulpstekker) in uw tv.
5
NEDERLANDS
SCART:
• Doe de connectors van de composietkabel (geel, rood en wit) in de bijbehorende AV OUT uitgangen [11,
19] van de speler.
• Doe de andere kant van de composietkabel (gele, rode en witte tulpstekker) in de connectors van de
scartadapter.
• Doe de scartadapter in de scartaansluiting van uw tv.
S-video:
• Doe de s-videokabel in de s-video-uitgang [21] van de speler.
• Doe de andere kant van de s-videokabel in de s-video-ingang van uw tv.
Component:
• Doe de connectors van de componentkabel (rood, groen en blauw) in de componentaansluitingen [20]
van de speler.
• Doe de andere kant van de componentkabel in de componentingang van uw tv.
Audiokabel(s) aansluiten
U kunt de speler op drie manieren op uw tv en/of home cinemasysteem aansluiten:
- analoog, via de Audio tulpaansluitingen van de A/V-uitgang.
- digitaal, via de coaxiale digitale SPDIF-uitgang.
- digitaal, via de optische digitale SPDIF-uitgang.
Analoog:
• Doe de audio-connectors van de composietkabel (rood en wit) in de Audio tulpaansluitingen [19] van de
AV OUT uitgang.
• Doe de andere kant van de composietkabel in de tulp-geluidsingangen van uw tv of
ontvanger/versterker.
Digitaal coaxiaal:
• Doe de digitale coaxiale kabel in de digitale coaxiale uitgang [12] van de speler.
• Doe de andere kant van de digitale coaxiale kabel in de digitale coaxiale ingang van uw
ontvanger/versterker.
Digitaal optisch:
• Doe de digitale optische kabel in de digitale optische uitgang [22] van de speler.
• Doe de andere kant van de digitale optische kabel in de digitale optische ingang van uw
ontvanger/versterker.
Andere audio/videoapparaten aansluiten
U kunt een audio/videobron, zoals een videorecorder, dvd-speler of set-top box op de speler aansluiten om
van deze bron op te nemen.
De Media Giant ondersteunt apparaten met een composiet- of een component-uitgang.
Composiet:
• Doe de bij uw andere audio/videoapparaat geleverde audio/videokabel in de AV OUT uitgangconnectors
van het audio/videoapparaat.
• Doe de andere kant van de composietkabel (gele, rode en witte tulpstekker) in de AV1 IN ingangen [16]
van de speler.
Component:
• Doe de bij uw andere audio/videoapparaat geleverde component videokabel in de bijpassende
componentuitgangen van het audio/videoapparaat.
• Doe de andere kant van de componentkabel (rode, groene en blauwe tulpstekker) in de AV2 IN ingangen
[17] van de speler.
6
NEDERLANDS
NB:
Component-videokabels brengen alleen beeld over, geen geluid. Voor het geluid moet u ook een
audiokabel aansluiten tussen het audio/videoapparaat en de AV2 IN audio-ingangen [18] van de
speler.
Netsnoer aansluiten
Nadat u de speler heeft aangesloten op uw externe audio/videoapparatuur, kunt u hem op het lichtnet
aansluiten.
• Sluit het meegeleverde netsnoer aan op de speler [23] en doe de stekker in een stopcontact.
• Zet de hoofdschakelaar [12] aan de achterkant van de speler op I om de speler aan te zetten.
De speler gaat aan.
Afstandsbediening voorbereiden
• Verwijder het batterijklepje van de achterkant van de afstandsbediening.
• Doe de meegeleverde AAA-batterijen in de afstandsbediening.
• Zet het batterijklepje terug op de achterkant van de afstandsbediening.
NB:
-
De afstandsbediening werkt het best op een afstand tot ongeveer 5 meter.
Richt de afstandsbediening op de infraroodsensor op het frontpaneel van de speler.
De ontvangsthoek van de sensor is ±30 graden.
Vervang de batterijen als ze zwak worden of leeg zijn.
7
NEDERLANDS
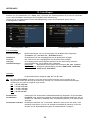
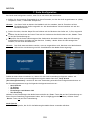
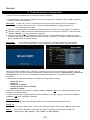
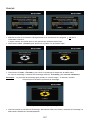
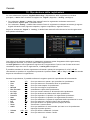
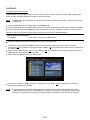
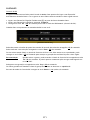
7. In gebruik nemen en configureren
De mediaspeler moet worden geconfigureerd wanneer u hem voor het eerst aanzet.
• Kies op de tv de ingang waarop de speler is aangesloten (hdmi, composiet, scart, s-video of component).
NB:
In de rest van deze gebruiksaanwijzing wordt ervanuit gegaan dat uw tv staat ingesteld op de
ingang waarop de speler is aangesloten. Alle beschreven stappen hebben betrekking op de
bediening van de speler.
• Kijk of de hoofdschakelaar aan de achterkant van de speler op I (aan) staat.
• Zet de speler aan met de aan/uitknop aan de voorkant van de speler, of met de Power (1) toets van de
afstandsbediening.
• Controleer het aan/uitlampje aan de voorkant van de Media Giant. Wanneer het lampje oranje is, staat
het apparaat in de standby-stand. Wanneer het lampje blauw is, is de speler klaar voor gebruik.
NB:
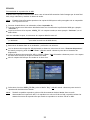
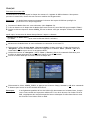
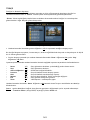
De speler moet zichzelf initialiseren nadat hij is aangezet. Dit kan enige tijd duren. Tijdens deze
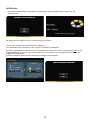
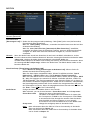
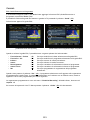
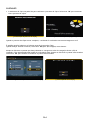
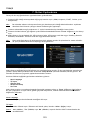
initialisatie verschijnt het startscherm van de Media Giant.
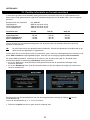
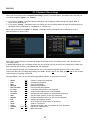
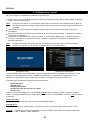
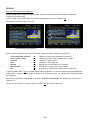
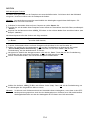
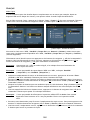
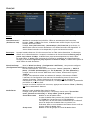
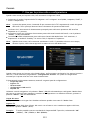
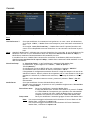
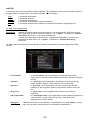
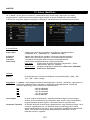
[ Startscherm ]
[ Setup Wizard]
Nadat de Media Giant is geïnitialiseerd, moet hij voor het eerste gebruik worden geconfigureerd. Om u te
helpen bij deze eenmalige configuratie toont de Media Giant de Wizard instellingen op uw scherm, die u
door de benodigde configuratiestappen zal leiden.
De Setup Wizard toont de volgende configuratiestappen:
-
Menutalen
Tv-ingang
Zenderzoeken
Instellingen bekabeld netwerk
Tijd instellen
Met de navigatietoetsen en de Enter (26) toets van de afstandsbediening kunt u uw Media Giant instellen.
Als u een instelling heeft gekozen maar deze wilt veranderen, drukt u op de Return (14) toets van de
afstandsbediening.
Menutaal
Selecteer de taal die u wilt gebruiken om de Media Giant te bedienen.
Tv-ingang
Selecteer uw land in de landenlijst. Als uw land er niet bij staat, selecteert u 'Overige' in de lijst.
Tip: U kunt ook een specifieke DVB-T frequentieband doorzoeken door te kiezen voor '6M' (600 Mhz), '7M'
(700 Mhz) of '8M' (800 Mhz).
8
NEDERLANDS
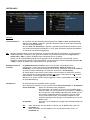
Zenderzoeken
• Kies 'OK' om de digitale (DVB-T) tuner van de Media Giant naar digitale (DVB-T) tv-kanalen te laten
zoeken. Automatisch zenderzoeken kan enige tijd in beslag nemen; hierbij worden alle gevonden
zenders automatisch vastgelegd in het geheugen van de Media Giant.
• Kies na afloop van het zenderzoeken 'OK' om verder te gaan met de instellingenwizard.
Wanneer u het zenderzoeken wilt overslaan (als u bijvoorbeeld alleen gebruik maakt van een set-top box of
geen digitaal (DVB-T) tv-signaal heeft) selecteert u 'Annuleren' om meteen door te gaan met de
instellingenwizard.
Instellingen bekabeld netwerk
In de netwerkinstellingen kunt u het IP-adres van de Media Giant aangeven. In de meeste gevallen wordt de
Media Giant verbonden met een netwerk met een DHCP-server (meestal een router).
• Als uw netwerk een DHCP-server bevat, selecteert u de keuze DHCP IP.
• De Setup Wizard vraagt u de keuze te bevestigen. Selecteer OK om door te gaan.
• Als u het IP-adres handmatig wilt instellen, selecteert u VAST IP.
• De Setup Wizard toont nu de velden waarin u het statische IP-adres kunt invullen. Geef met behulp van
de navigatietoetsen (15) en de cijfertoetsen 0-9 (6) IP-adres, subnetmasker, standaardgateway en DNSserver in.
• Wanneer u de juiste waarden heeft ingegeven, drukt u op de Enter toets (26) van de afstandsbediening.
• De Setup Wizard vraagt u de keuze te bevestigen. Selecteer OK om door te gaan.
Als uw Media Giant niet met een netwerk verbonden is, selecteert u Annuleren om deze stap over te slaan
en verder te gaan met de Setup Wizard.
Tijd instellen
Met de optie Tijd instellen kunt u de Media Giant op de juiste tijd en datum zetten.
• Als u de tijd en de datum zelf wilt ingeven, selecteert u Handmatig.
• Geef met behulp van de navigatietoetsen (15) en de cijfertoetsen 0-9 (6) jaar, maand, dag, uren,
minuten en seconden in. Wanneer u klaar bent, drukt u op de Enter toets (26) van de
afstandsbediening.
• De Setup Wizard vraagt u de keuze te bevestigen. Selecteer OK om door te gaan.
• Als de Media Giant op een netwerk met een actieve internetverbinding aangesloten wordt, kunt u Auto
(via netwerk) selecteren.
• De Setup Wizard toont nu de velden waarin u de automatische tijdinstellingen kunt invullen. U kunt de
standaard NTP-server laten staan, of desgewenst in het veld NTP-server op de Enter toets (26) drukken
om het internetadres van een andere NTP-server in te vullen.
• Selecteer een tijdzone die overeenkomt met die van het land waar u zich bevindt.
• Zet de Aanpassing zomertijd instelling Aan als u in een land bent dat gebruik maakt van zomertijd.
Wanneer u de juiste waarden heeft ingegeven, drukt u op de Enter toets (26) van de afstandsbediening.
• De Setup Wizard vraagt u de keuze te bevestigen. Selecteer OK om door te gaan.
De Setup Wizard is nu gereed en de basisconfiguratie van de Media Giant is voltooid.
NB:
Meer instellingen vindt u in de keuze Instellingen van het hoofdmenu. Het instellingenmenu wordt
beschreven in hoofdstuk 13.
NB:
Als u de Setup Wizard later opnieuw wilt uitvoeren, selecteert u Instellingen in het hoofdmenu
gevolgd door de keuze Standaard herstellen. De Media Giant maakt dan alle gewijzigde
instellingen ongedaan en de Setup Wizard wordt opnieuw gestart.
NB:
Als u een Media Giant met ongeformatteerde harde schijf heeft gekocht, verschijnt de Wizard
Formatteren na afloop van de Setup Wizard. De Wizard Formatteren wordt beschreven in
hoofdstuk 15 van deze gebruiksaanwijzing.
9
NEDERLANDS
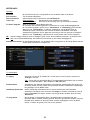
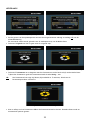
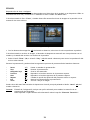
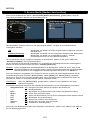
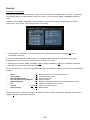
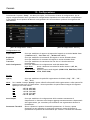
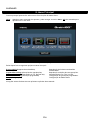
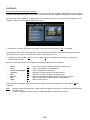
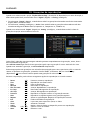
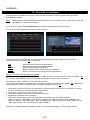
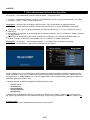
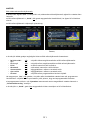
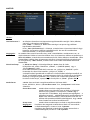
8. Hoofdmenu
In het hoofdmenu kunt u verschillende functies van de Media Giant kiezen.
NB:
Wanneer het hoofdmenu niet op het scherm staat, kun u met de Menu toets (40) van de
afstandsbediening naar het hoofdmenu gaan.
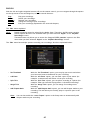
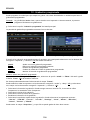
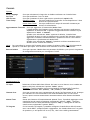
[ Hoofdmenu ]
Het hoofdmenu bevat de volgende keuzes:
Browse Media (Medialijst)
Playback Recordings (Opnamen weergeven)
TV Tuner / AV Input (TV-tuner/AV-ingang)
Scheduled Recording (Opnamen programmeren)
Setup (Instellingen)
Opgeslagen mediabestanden afspelen.
Uw opnamen afspelen en bewerken.
Tv-uitzending/materiaal via AV.
Lijst met geplande opnamen bewerken.
De Media Giant configureren.
De bovenstaande keuzes worden beschreven in de nu volgende hoofdstukken van deze gebruiksaanwijzing.
10
NEDERLANDS
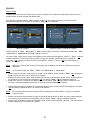
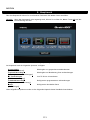
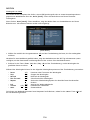
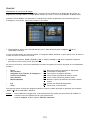
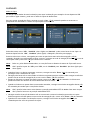
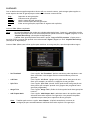
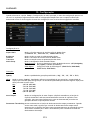
9. Browse Media (Medialijst)
Wanneer u in het hoofdmenu voor ‘Browse Media’ kiest, verschijnt de mediabrowser van de Media Giant
op uw scherm:
[ Opslaglocatie selecteren ]
[ Mediatype kiezen: film, muziek, foto's ]
In de Mediabrowser kunt u het opslagapparaat kiezen waar de mediabestanden staan die u wilt afspelen:
USB
Harddisk
Netwerk
Media afspelen van een aangesloten usb-opslagapparaat (via de usb-hostpoort).
Media afspelen van de interne harde schijf van de Media Giant.
Media afspelen vanuit Samba/netwerkshares in uw netwerkomgeving.
Om door de bestanden op uw usb-apparaat of de ingebouwde harde schijf te bladeren, kiest u in de lijst
met opslaglocaties voor USB of Harddisk.
Om door de bestanden op uw gedeelde netwerklocaties te bladeren, kiest u in de lijst met opslaglocaties
voor Netwerk.
NB:
Als u door netwerkshares wilt bladeren, moet u ervoor zorgen dat u deze locaties op correcte
wijze heeft gedeeld. Zie voor meer informatie over het delen van en bladeren door
netwerklocaties hoofdstuk 17.
Nadat u een opslaglocatie heeft geselecteerd, kunt u omschakelen tussen Films, Muziek en Foto's met de
linker en rechter navigatietoetsen van de afstandsbediening.
Wanneer u een van de drie opties kiest, filtert de Media Giant de inhoud van de gekozen opslaglocatie
automatisch zodat alleen bestanden met het gekozen type worden getoond.
Voorbeeld:
Als u Films selecteert, staan er alleen films op het scherm.
In het menu Mediabrowser kunt u gebruik maken van de volgende bladerfuncties op de afstandsbediening:
- Navigatietoetsen
-
Enter
Return
Copy (kopiëren)
Afspelen/pauzeren
Volgende
Vorige
Menu
(15)
(26)
(14)
(7)
(18)
(31)
(11)
(40)
Door de bestanden en mappen navigeren, of andere weergavemodus
kiezen.
Het geselecteerde bestand afspelen of de geselecteerde map openen.
Naar vorige map.
Naar kopieermenu (zie de betreffende paragraaf in dit hoofdstuk)
Geselecteerd bestand afspelen.
Naar de volgende pagina met bestanden.
Naar de vorige pagina met bestanden.
Terug naar hoofdmenu.
Als u vanuit het Mediabrowsermenu terug wilt naar het hoofdmenu, drukt u op de Menu toets (40) van de
afstandsbediening.
11
NEDERLANDS
Uw films afspelen
U kunt films op uw tv afspelen vanaf de interne harde schijf, een usb-opslagapparaat of een netwerklocatie
met behulp van het filter Films van de Media Giant.
Als het filter Films is gekozen, toont de Media Giant alleen filmbestanden op uw scherm. Alle andere
bestanden zijn niet zichtbaar.
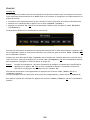
[ Filmmodus ]
• Ga met de navigatietoetsen (15) van de afstandsbediening naar het bestand dat u wilt afspelen.
Als u een filmbestand heeft geselecteerd, toont de Mediabrowser rechts op het scherm een voorbeeld met
de bestandsnaam en -grootte.
• Druk op de Enter (26) toets of de Afspelen (18) toets van de afstandsbediening om het geselecteerde
bestand te starten.
Tijdens het afspelen kunt u met de afstandsbediening de volgende weergavefuncties gebruiken:
-
Pause
Slow (langzaam)
Stop
Terugspoelen
Vooruitspoelen
Ins. Rep.
CM. Skip
Goto (ga naar)
Repeat (herhalen)
Info
Zoom
Sub-t
- Audio
(17)
(24)
(23)
(10)
(32)
(16)
(25)
(9)
(8)
(27)
(5)
(37)
(4)
- Volume
(12), (13)
- Mute (dempen)
(30)
Weergave pauzeren of hervatten.
Vertraagde weergave.
De weergave stoppen.
Versnelde weergave achteruit.
Versnelde weergave.
10 seconden teruggaan tijdens weergave
30 seconden verdergaan tijdens weergave.
Ga naar een bepaald tijdstip in de film.
De herhaalmethode voor het huidige bestand instellen.
Bestandsinfo tonen tijdens weergave.
Inzoomen/uitzoomen
Andere ondertitels kiezen (indien beschikbaar in het weergegeven
bestand).
Ander geluidsspoor/taal kiezen (indien beschikbaar in het weergegeven
bestand).
Geluidsvolume instellen.
Geluid uitschakelen.
Als u vanuit het Mediabrowsermenu terug wilt naar het hoofdmenu, drukt u op de Menu toets (40) van de
afstandsbediening.
12
NEDERLANDS
Dvd weergeven
Wanneer de Media Giant dvd-bestanden van de harde schijf afspeelt, werkt hij hetzelfde als een dvdspeler. U kunt door het dvd-menu navigeren, ondertitels kiezen en geluidssporen instellen.
NB:
De Media Giant ondersteunt uitsluitend de weergave van niet beveiligde dvd-bestanden. CSS
beveiliging wordt niet ondersteund.
• Sluit de Media Giant op uw computer aan (zie hoofdstuk 13).
• Maak een map met de naam van uw dvd op de harde schijf van de Media Giant (voorbeeld: Film1).
• Kopieer de bestanden uit de map VIDEO_TS van uw dvd naar de zojuist gemaakte map (voorbeeld:
Film1) op de Media Giant.
Na het kopiëren moet de mapstructuur er als volgt uitzien:
- [Harde schijf van de Media Giant]
|-> Film1
(met alle dvd-bestanden de hierin staan)
• Verbreek de usb-verbinding tussen de Media Giant en uw computer en sluit de speler op uw tv aan.
• Selecteer het pictogram Mediabrowser in het hoofdmenu met de Navigatietoetsen (15) van de
afstandsbediening en druk op de Enter toets (26) van de afstandsbediening om de Mediabrowser te
openen.
• Ga met de Navigatietoetsen (15) en de Enter toets (26) van de afstandsbediening naar de map op de
interne harde schijf waar uw dvd-bestanden zijn opgeslagen.
• Open de dvd-map die u op de harde schijf heeft gemaakt.
[ Filmmodus ]
• Selecteer het bestand VIDEO_TS.IFO en druk op de toets Afspelen (18) van de afstandsbediening om de
geselecteerde dvd te starten.
NB: De Media Giant kan ook ISO-bestanden rechtstreeks afspelen wanneer deze in een NTSF-partitie
staan. Bij het afspelen van een ISO-bestand van een dvd beschikt u over dezelfde
weergavemogelijkheden als bij weergave van het IFO-bestand van deze dvd.
13
NEDERLANDS
Tijdens dvd-weergave kunt u met de afstandsbediening de volgende weergavefuncties gebruiken:
-
Pause
Slow (langzaam)
Stop
Navigatietoetsen
Enter
Terugspoelen
Vooruitspoelen
Vorige
Volgende
Ins. Rep.
CM. Skip
Goto (ga naar)
Repeat (herhalen)
Info
Zoom
Angle (hoek)
(17)
(24)
(23)
(15)
(26)
(10)
(32)
(11)
(31)
(16)
(25)
(7)
(8)
(27)
(5)
(36)
-
Volume
(12), (13)
Mute (dempen)
(30)
Sub-t
(37)
Audio
(4)
Weergave pauzeren of hervatten.
Vertraagde weergave.
De weergave stoppen.
Door het dvd-menu navigeren.
Keuze bevestigen in dvd-menu.
Terugspoelen met beeld.
Vooruitspoelen met beeld.
Vorig hoofdstuk.
Volgend hoofdstuk.
10 seconden teruggaan tijdens weergave.
30 seconden verdergaan tijdens weergave.
Ga naar een bepaald tijdstip in de film.
De herhaalmethode voor het huidige bestand instellen.
Bestandsinfo tonen tijdens weergave.
Inzoomen/uitzoomen.
Camerahoek van de dvd wijzigen (als de dvd meer camerastandpunten
bevat).
Geluidsvolume instellen.
Geluid uitschakelen.
Ondertitels van de dvd uitzetten of andere ondertitels kiezen.
Geluidsspoor van de dvd wijzigen (als de dvd meer geluidssporen/talen
bevat).
Als u vanuit het Mediabrowsermenu terug wilt naar het hoofdmenu, drukt u op de Menu toets (40) van de
afstandsbediening.
Ondertitels weergeven
De Media Giant kan tijdens het weergeven van AVI-bestanden ook ondertitels tonen.
Om ondertitels te kunnen weergeven bij een AVI-bestand moet u het ondertitelbestand dezelfde naam
geven als het AVI-bestand; bijvoorbeeld:
Naam film:
Naam ondertitelbestand:
Mijn_film_met_ondertitels.AVI
Mijn_film_met_ondertitels.SRT
• Ga met de navigatietoetsen van de afstandsbediening naar het bestand dat u wilt afspelen.
• Druk op de Enter (26) toets of de Afspelen (18) toets van de afstandsbediening om het geselecteerde
bestand te starten.
De weergave van het AVI-bestand wordt gestart nadat het bijbehorende ondertitelbestand is geladen.
Om de ondertitels tijdens het afspelen aan of uit te zetten, drukt u op de Sub-t toets (37) van de
afstandsbediening.
Als u vanuit het Mediabrowsermenu terug wilt naar het hoofdmenu, drukt u op de Menu toets (40) van de
afstandsbediening.
14
NEDERLANDS
Uw muziek afspelen
U kunt muziekbestanden afspelen vanaf de interne harde schijf, een usb-opslagapparaat of een
netwerklocatie met behulp van het filter Muziek van de Media Giant.
Als het filter Muziek is gekozen, toont de Media Giant alleen muziekbestanden op uw scherm. Alle andere
bestanden zijn niet zichtbaar.
[ Muziekmodus ]
• Ga met de navigatietoetsen (15) van de afstandsbediening naar het bestand dat u wilt afspelen.
Als u een muziekbestand heeft geselecteerd, toont de Mediabrowser rechts op het scherm de ID3-tag
informatie (indien beschikbaar) met de bestandsnaam en -grootte.
• Druk op de Enter (26) toets of de Afspelen (18) toets van de afstandsbediening om het geselecteerde
bestand te starten.
Tijdens het afspelen kunt u met de afstandsbediening de volgende weergavefuncties gebruiken:
-
Pause
(17)
Stop
(23)
Terugspoelen
(10)
Vooruitspoelen
(32)
Repeat (herhalen) (8)
Info
(27)
Volume
(12), (13)
Mute (dempen)
(30)
Weergave pauzeren of hervatten.
De weergave stoppen.
Versnelde weergave achteruit.
Versnelde weergave.
De herhaalmethode voor het huidige bestand of de huidige map instellen.
Weergavedetails tonen.
Geluidsvolume instellen.
Geluid uitschakelen.
Als u vanuit het Mediabrowsermenu terug wilt naar het hoofdmenu, drukt u op de Menu toets (40) van de
afstandsbediening.
15
NEDERLANDS
Uw foto's en afbeeldingen weergeven
U kunt foto- en afbeeldingbestanden afspelen vanaf de interne harde schijf, een usb-opslagapparaat of een
netwerklocatie met behulp van het filter Foto's van de Media Giant.
Als het filter Foto's is gekozen, toont de Media Giant alleen foto- en afbeeldingbestanden op uw scherm.
Alle andere bestanden zijn niet zichtbaar.
[ Fotomodus ]
• Ga met de navigatietoetsen (15) van de afstandsbediening naar het bestand dat u wilt afspelen.
Als u een fotobestand heeft geselecteerd, toont de Mediabrowser rechts op het scherm een klein voorbeeld
met de bestandsnaam en -grootte.
• Druk op de Enter (26) toets of de Afspelen (18) toets van de afstandsbediening om het geselecteerde
bestand te starten.
Tijdens het afspelen kunt u met de afstandsbediening de volgende weergavefuncties gebruiken:
-
Pause
Stop
Navigatietoetsen
Vorige
Volgende
Repeat (herhalen)
Info
Zoom
(17)
(23)
(15)
(11)
(31)
(8)
(27)
(5)
Weergave pauzeren of hervatten.
De diashow stoppen.
De getoonde foto draaien.
Het voorgaande bestand in de huidige map starten.
Het volgende bestand in de huidige map starten.
De herhaalmethode voor het huidige bestand of de huidige map instellen.
Bestandsinfo tonen tijdens de diashow.
Inzoomen/uitzoomen.
Als u vanuit het Mediabrowsermenu terug wilt naar het hoofdmenu, drukt u op de Menu toets (40) van de
afstandsbediening.
Tip:
In het instellingenmenu kunt u de overgangen van de diavertoning wijzigen.
Zie hoofdstuk 13 voor de keuze 'Overgangeffect'.
16
NEDERLANDS
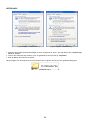
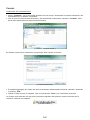
Kopieermodus
Als u bestanden van de ene locatie naar de andere wilt kopiëren (bijvoorbeeld van een usb-apparaat naar
de interne harde schijf) kunt u de kopieermodus van de Media Giant gebruiken.
Om naar de kopieermodus te gaan, drukt u terwijl u in de Mediabrowser bent op de Copy toets (7) van uw
afstandsbediening. Het kopieermenu wordt op uw scherm weergegeven:
[ Kopieermenu ]
[ Kopieermenu – Wizard kopiëren]
U kunt voor de bron van uw kopie kiezen tussen USB, Harddisk en Netwerk. De beschikbare doellocaties
zijn USB, Harddisk en Recycle (bestanden verwijderen).
Selecteer eerst de bronlocatie met de navigatietoetsen (15) van de afstandsbediening. Nadat u de juiste
bron heeft geselecteerd, drukt u op de rechter navigatietoets (15) en gaat u met de navigatietoetsen (15)
omhoog of omlaag naar de gewenste doellocatie.
NB:
Aan de oplichtende rand ziet u of het brongedeelte of het doelgedeelte van het kopieermenu
actief is.
NB:
U kunt niet kopiëren van USB naar USB of van Harddisk naar Harddisk.
• Wanneer u de juiste bronlocatie en doellocatie heeft ingegeven, drukt u op de Enter toets (26) van de
afstandsbediening om door te gaan met de kopieerwizard.
• Navigeer nu in uw bronlocatie naar de bestanden of de mappen die u wilt kopiëren. U kunt door de
mappen navigeren met de navigatietoetsen (15) en de Enter toets (26) van de afstandsbediening.
• Markeer de bestanden of mappen die uw wilt kopiëren met de toets Afspelen (18) van de
afstandsbediening. De gemarkeerde bestanden of mappen zijn te herkennen aan een pictogram achter
de naam.
• Wanneer u de juiste bestanden of mappen heeft gemarkeerd, drukt u op de rechter navigatietoets (15)
van de afstandsbediening om naar het doelgedeelte te gaan.
NB:
Het is niet mogelijk om een NTFS-mediapartitie op de Media Giant als doellocatie te kiezen, omdat
de Media Giant niet zelf (zonder computer) gegevens naar een NTFS-partitie kan wegschrijven.
• Navigeer nu in uw doellocatie naar de map waar u naartoe wilt kopiëren. U kunt door de mappen
navigeren met de navigatietoetsen (15) en de Enter toets (26) van de afstandsbediening.
• Wanneer u de juiste locatie heeft bereikt, drukt u op de rechter navigatietoets (15) van de
afstandsbediening om het kopieerproces te starten.
17
NEDERLANDS
• De kopieerwizard vraagt u het kopiëren te bevestigen. Selecteer OK om door te gaan met het
kopieerproces.
[ Kopieerbevestiging ]
[ Bezig met kopiëren... ]
Na afloop van het kopiëren krijgt u een melding op het scherm.
U kunt in het kopieermenu ook bestanden verwijderen.
Als u bestanden wilt verwijderen, kiest u bij de bronlocatie voor Recycle.
Markeer de bestanden of mappen die u wilt verwijderen en druk op de rechter navigatietoets (15) van de
afstandsbediening; u krijgt nu een venster waarin u het verwijderen van de geselecteerde bestanden of
mappen kunt bevestigen.
Selecteer OK om de geselecteerde bestanden of mappen te verwijderen.
[ Kopieermenu – verwijderwizard ]
[ Verwijderen bevestigen ]
18
NEDERLANDS
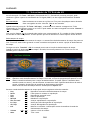
10. Playback Recordings (Opnamen weergeven)
Wanneer u in het hoofdmenu voor 'Opnamen afspelen' heeft gekozen, vraagt de Media Giant u te kiezen
tussen 'Digitaal' en 'Analoog'.
• Als u 'Digitaal' kiest, toont de Media Giant de opnamen die zijn gemaakt via de digitale (DVB-T) tuner
van de Media Giant.
• Als u 'Analoog' kiest, toont de Media Giant alle opnamen die zijn gemaakt via de analoge ingangen van
de Media Giant (Composite-in, Component-in, FireWire-in).
Wanneer u voor 'Digitaal' of 'Analoog' heeft gekozen, toont de Media Giant de lijst met opnamen van de
gekozen bron op uw scherm:
[ Opnamen selecteren ]
[ Lijst met opnamen ]
Bij iedere video ziet u een miniatuur voorbeeldweergave (eerste beeld van de opname), naam, tijd, datum
en opnamekwaliteit.
Een gele ster achter een opname betekent dat de opname nieuw is en nog nooit is afgespeeld. Wanneer u
een opname bekeken heeft, verdwijnt de gele ster.
U kunt met de navigatietoetsen (15) van de afstandsbediening omhoog en omlaag door uw opnamen
navigeren en de geselecteerde opname afspelen met de toets 'Enter' (26) of 'Afspelen' (18) van de
afstandsbediening.
Tijdens het afspelen kunt u met de afstandsbediening de volgende weergavefuncties gebruiken:
-
Pause
Slow (langzaam)
Stop
Terugspoelen
Vooruitspoelen
Ins. Rep.
CM. Skip
Vorig
Volgend
Repeat (herhalen)
Info
Goto (ga naar)
Zoom
Audio
(17)
(24)
(23)
(10)
(32)
(16)
(25)
(11)
(31)
(8)
(27)
(9)
(5)
(4)
- Volume
(12), (13)
- Mute (dempen)
(30)
Weergave pauzeren of hervatten.
Vertraagde weergave.
De weergave stoppen.
Versnelde weergave achteruit.
Versnelde weergave.
10 seconden teruggaan tijdens weergave.
30 seconden verdergaan tijdens weergave.
Het voorgaande hoofdstuk of de voorgaande opname afspelen.
Het volgende hoofdstuk of de volgende opname afspelen.
De herhaalmethode voor het huidige bestand instellen.
Bestandsinfo tonen tijdens weergave.
Ga naar een bepaald tijdstip in de film.
Inzoomen/uitzoomen
Ander geluidsspoor/taal kiezen (indien beschikbaar in het weergegeven
bestand).
Geluidsvolume instellen.
Geluid uitschakelen.
19
NEDERLANDS
Met de linker en rechter navigatietoetsen (15) van de afstandsbediening kunt u door de opties van het
topmenu van de lijst met opnamen navigeren om verschillende mogelijkheden te selecteren:
Afspelen
Verwijderen
Hernoemen
Sorteren
Bewerken
Uw opnamen afspelen.
Uw opnamen verwijderen.
Uw opnamen een andere naam geven.
De volgorde van uw opnamen veranderen.
Uw opnamen bewerken (zie volgende paragraaf).
Het menu 'Bewerken'
NB:
Digitale opnamen kunnen niet worden bewerkt met de Media Giant. Daarom zijn verschillende
opties van het menu Bewerken niet beschikbaar als u voor 'Digitaal' heeft gekozen in het scherm
'Opnamen afspelen'.
De Media Giant geeft u alleen toegang tot de optie 'Naar FAT32 partitie kopiëren' van het
menu Bewerken als u voor 'Digitaal' heeft gekozen in het scherm ' Opnamen afspelen '.
Het menu Bewerken heeft verschillende keuzes voor het aanpassen van uw opnamen; deze worden
hieronder uitgelegd:
[ Opnamen – menu Bewerken]
- Afbeelding instellen
Met de keuze Afbeelding instellen kunt u uw film afspelen en uw
favoriete afbeelding als miniatuurvoorbeeld voor de film instellen.
- A-B wissen
Met de keuze A-B wissen kunt u een gedeelte van uw film markeren
(bijvoorbeeld reclame) en uit uw opname verwijderen.
- Titel splitsen
Met de keuze Titel splitsen kunt u een opname in twee afzonderlijke
bestanden delen (bijvoorbeeld: als u twee tv-programma's heeft
opgenomen tijdens één opname met de programmatimer).
- Titel samenvoegen
Met de keuze Titel samenvoegen kunt u twee opnamen achter elkaar
zetten om er één opname van te maken.
- Hfdstkmark. toevoegen
Met de keuze Hfdstkmark. toevoegen kunt u uw opname in
hoofdstukken verdelen. U kunt dan makkelijk naar verschillende plaatsen
in de opname "springen".
NB:
U kunt ook de keuze Autom.hfdst. van het instellingenmenu aanzetten om tijdens het
opnemen automatisch hoofdstukmarkeringen aan uw opname toe te voegen.
20
NEDERLANDS
- Hfdstkmark. wissen
Met de keuze Hfdstmark. wissen kunt u hoofdstukmarkeringen
verwijderen uit uw opname. Dit kan handig zijn als u de Media
Giant automatisch hoofdstukmarkeringen heeft laten toevoegen
maar deze later weer wilt verwijderen.
- Kopieer naar FAT32 partitie
Met de keuze Kopieer naar FAT32 partitie kunt u uw opname van
de opnamepartitie naar de map REC in de mediapartitie van de
Media Giant kopiëren.
Wanneer de opname naar de FAT32 partitie is gekopieerd, kunt u
hem met uw computer afspelen, kopiëren en bewerken wanneer de
Media Giant via usb met de computer is verbonden, en kunt u de
opname via het netwerk naar een UPnP A/V-client (zoals de
Conceptronic C54WMP of de Conceptronic CFULLHDMA) streamen.
NB:
Zie voor meer informatie over de UPnP A/V server van de Media Giant hoofdstuk 16.
21
NEDERLANDS
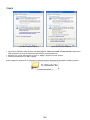
11. TV Tuner / AV Input (TV-tuner / AV-ingang)
Met de optie 'TV-tuner / AV-ingang' van het hoofdmenu kunt u kiezen of u van de digitale (DVB-T) tv-tuner
opneemt of van een op de AV-ingangen van de Media Giant aangesloten apparaat.
Tip: U kunt vanuit ieder menu van de Media Giant rechtstreeks naar het live tv-scherm gaan door op de
toets Live-TV (38) van uw afstandsbediening te drukken.
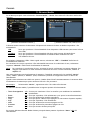
Wanneer u voor ‘TV Tuner/AV Input’ kiest, toont de Media Giant het programma waarop de tv-tuner is
afgestemd. Terwijl u naar live-tv kijkt, kunt u van zender wisselen met de toetsen Channel + (29) en
Channel - (28) van de afstandsbediening.
Met de Source toets (2) van de afstandsbediening kunt u schakelen tussen de tv-tuner, composiet-ingang
en component-ingang. De bron wordt kort aangegeven in de rechter bovenhoek van het scherm.
Timeshifting (tv-uitzending pauzeren)
De Media Giant ondersteunt timeshifting. Met timeshift pauzeert u een tv-uitzending of andere
beeld/geluidsbron; het materiaal van de huidige opnamebron (zender/AV-ingang) wordt opgenomen vanaf
het moment dat de functie wordt geactiveerd.
Druk op de Timeshift toets (22) van de afstandsbediening om timeshift te activeren.
Wanneer timeshift actief is, wordt de uitzending of het AV-materiaal gepauzeerd terwijl de speler op de
achtergrond het materiaal opneemt.
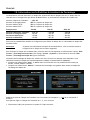
[ Timeshift: activeren ]
NB:
[ Timeshift: actief ]
Wanneer timeshift actief is, geeft een voortgangsbalk op het scherm de maximale buffergrootte
aan. Als u deze buffer wilt veranderen (groter of kleiner), moet u de harde schijf van de Media
Giant opnieuw formatteren om de grootte van de timeshift bufferpartitie aan te passen.
Meer informatie over formatteren vindt u in hoofdstuk 15.
Tijdens timeshift kunt u de volgende toetsen van de afstandsbediening gebruiken:
-
Afspelen/pauzeren (18)
Pause
(17)
Slow (langzaam) (24)
Stop
(23)
Terugspoelen
(10)
Vooruitspoelen
(32)
Ins. Rep.
(16)
CM. Skip
(25)
Info
(27)
Volume
(12), (13)
Mute (dempen)
(30)
Inhoud timeshiftbuffer afspelen.
Weergave pauzeren of hervatten.
Vertraagde weergave.
De weergave stoppen.
Versnelde weergave achteruit.
Versnelde weergave.
10 seconden teruggaan tijdens weergave
30 seconden verdergaan tijdens weergave.
Informatie over timeshiftbuffer tonen of verbergen.
Geluidsvolume instellen.
Geluid uitschakelen.
22
NEDERLANDS
Permanente timeshift
In het instellingenmenu van de Media Giant kunt u de Permanente timeshift aanzetten. Wanneer deze
functie aan staat, is de timeshift altijd actief en kunt u de weergave onmiddellijk pauzeren en met de
bovengenoemde toetsen door de timeshiftbuffer "springen".
Opnemen
Wanneer u via de speler naar een live tv-uitzending of materiaal van de AV-ingang kijkt, kunt u het
materiaal waar u naar kijkt direct opnemen met de Rec toets (19) van de afstandsbediening. De speler
blijft opnemen tot u op de Stop toets (23) van de afstandsbediening drukt.
Tijdens de opname brandt de REC LED op het frontpaneel.
NB:
De speler herkent een eventuele kopieerbescherming op een aangesloten bron, zoals MacroVision
op dvd's. Wanneer een aangesloten bron tegen kopiëren is beveiligd, neemt de speler niet op en
verschijnt een waarschuwing wanneer de opnametoets wordt ingedrukt.
NB:
De Media Giant neemt standaard op in HQ (hoge kwaliteit). U kunt de opnamekwaliteit aanpassen
in het instellingenmenu.
NB:
U kunt tijdens een opname niet naar een andere zender gaan.
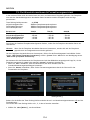
Wanneer u tijdens een lopende opname op de Rec toets (19) drukt, wordt de opnameduur ingesteld op 30
minuten vanaf het moment waarop u op de Rec toets drukt.
De melding OTR: 30 min. verschijnt op uw scherm.
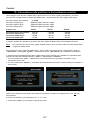
[ Normale opname ]
[ Met opnametimer ]
Druk opnieuw op de Rec toets (19) om de opnameduur met 30 minuten te verlengen tot maximaal 240
minuten. De speler blijft opnemen tot de ingestelde tijd is verstreken of u op de Stop toets (23) van de
afstandsbediening drukt.
Digitale radio
De Media Giant ondersteunt ook digitale radio-ontvangst via de DVB-T tuner.
U kunt de digitale radiostations beluisteren via de luidsprekers van uw tv of een op de Media Giant
aangesloten ontvanger/versterker.
Naar digitale radiostations luisteren.
Wanneer de digitale tuner aan staat, kunt u ook naar digitale radiokanalen luisteren.
• Kies in het hoofdmenu van de Media Giant voor 'TV tuner / AV ingang'.
De Media Giant toont nu live-beelden van de tv-ontvanger.
• Druk op de 'Live-TV' toets (38) van de afstandsbediening om naar de digitale radiostand te gaan.
De digitale radiofunctie wordt ingeschakeld.
• Met de toetsen 'Channel +' (29) en 'Channel -' (28) kunt u een digitaal radiostation kiezen.
• Om naar de digitale tv-stand terug te gaan, drukt u opnieuw op de 'Live-TV' toets (38) van de
afstandsbediening.
23
NEDERLANDS
EPG (elektronische programmagids)
Dankzij de digitale (DVB-T) tuner beschikt de Media Giant over een elektronische tv-gids (EPG).
Wanneer u tv kijkt via de Media Giant kunt u de EPG tv-gids openen door op de 'Guide' (33) toets te
drukken.
De EPG-programmagids wordt op uw scherm weergegeven:
[ Elektronische programmagids ]
[ Elektronische programmagids: geplande opname ]
U kunt de volgende toetsen van de afstandsbediening gebruiken om de EPG-gids te bedienen:
-
Pijl naar links/rechts
Pijl omhoog/omlaag
Vorig
Volgend
Terugspoelen
Vooruitspoelen
Rec (opnemen)
(15)
(15)
(11)
(31)
(10)
(32)
(19)
Andere datum kiezen in de EPG-programmagids.
Ander programma kiezen in de EPG-programmagids.
Terug naar het vorige kanaal.
Naar het volgende kanaal.
Door de programmainformatie bladeren.
Door de programmainformatie bladeren.
De opname van het geselecteerde programma instellen.
Als u op de 'Rec' (19) toets drukt, wordt het geselecteerde programma toegevoegd aan de lijst met
geplande opnamen van de Media Giant. Het geselecteerde programma krijgt een rode markering die
aangeeft dat het zal worden opgenomen.
U vindt de geplande opname in het menu 'Opnametimer' van de Media Giant, zoals beschreven in
hoofdstuk 12.
Als u terug wilt gaan naar de tv-uitzending drukt u op de 'Guide' toets (33) van de afstandsbediening.
24
NEDERLANDS
DV-bediening
Via de mini FireWire aansluiting achter het frontpaneel van de Media Giant kunt u uw dv-camera
rechtstreeks op de Media Giant aansluiten en uw opnamen bekijken of vastleggen op de interne harde
schijf van de Media Giant.
• Sluit uw dv-camera aan op de mini Firewire aansluiting [7] aan de voorkant van de Media Giant.
• Schakel uw dv-camera in en zet hem op Afspelen (Play).
• Druk op de DV toets (39) van uw afstandsbediening om naar DV bediening te gaan.
De Media Giant toont nu de dv-bediening op uw scherm:
[ DV bediening ]
U kunt de knoppen van de dv-bediening selecteren met de navigatietoetsen (15) van de afstandsbediening.
U bevestigt de gekozen knop met de Enter toets (26) van de afstandsbediening.
Wanneer u in het dv-bedieningsscherm voor Afspelen heeft gekozen en uw video wordt weergegeven, kunt
u op de Rec (19) toets van de afstandsbediening drukken om uw dv-video op de harde schijf op te nemen.
Tip: U kunt het dv-bedieningsscherm tijdens de opname verbergen met de DV toets (39) van uw
afstandsbediening. Het bedieningsscherm verschijnt opnieuw als u nogmaals op de DV toets drukt.
U kunt de opname beëindigen met de Stop toets (23) van de afstandsbediening.
De opgenomen video's verschijnen in de lijst met opnamen, zoals beschreven in hoofdstuk 10.
Om de dv-bediening af te sluiten, drukt u op de Return toets (14) van de afstandsbediening.
25
NEDERLANDS
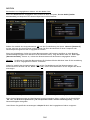
12. Opnemen met programmatimer
U kunt de speler programmeren voor de opname van bepaalde zenders op bepaalde tijdstippen. De speler
heeft plaats voor maximaal 8 geprogrammeerde opnamen.
Tip:
U kunt opnamen eenvoudig plannen met behulp van de EPG-gids van de Media Giant. De EPG-gids
wordt beschreven in hoofdstuk 11 van deze gebruiksaanwijzing.
• Selecteer de keuze ‘Scheduled Recording’ in het hoofdmenu.
Het scherm Geplande opname verschijnt op uw tv.
[ Menu Geplande opname ]
[ Programma toevoegen]
Het menu Geplande opname heeft vijf keuzes, waaruit u kunt kiezen met de navigatietoetsen naar links en
rechts (15) van de afstandsbediening:
Toevoegen
Bewerken
Verwijderen
Status
Geschiedenis
Een nieuw programma toevoegen.
Een bestaand programma bewerken.
Een bestaand programma verwijderen.
De status van de lijst met timeropnamen wijzigen.
De geschiedenis van de timeropnamen tonen.
Een programma toevoegen of bewerken
Als u de menuoptie Toevoegen of Bewerken kiest en op de Enter toets (26) van de afstandsbediening
drukt, kunt u een nieuw programma toevoegen of een bestaand programma wijzigen.
Standaard is het veld Bron actief.
Nadat u de juiste bron heeft geselecteerd, drukt u op de rechter navigatietoets (15) en gaat u met de
navigatietoetsen (15) omhoog of omlaag naar de gewenste doellocatie.
• Selecteer de juiste bron voor uw opname. U kunt kiezen voor een tv-zender, de composiet video-ingang
of de component video-ingang.
• Stel de juiste datum voor uw opname in.
• Stel de juiste starttijd voor uw opname in.
• Stel de juiste lengte voor uw opname in.
• Stel de herhaalmethode voor uw opname in. U kunt uit de volgende mogelijkheden kiezen:
Eenmaal, Elke dag, Ma-vr, Ma-za, Zo, Ma, Di, Wo, Do, Vr of Za.
U kunt het veld Device/Apparaat overslaan, omdat u alleen op de interne harde schijf kunt opnemen.
26
NEDERLANDS
• Stel de opnamekwaliteit in. U kunt kiezen uit HQ, SP, LP, EP en SLP.
NB:
Als u het veld Kwaliteit verandert, heeft dit invloed op de kwaliteit van uw opname en de
hoeveelheid ruimte die deze op de harde schijf inneemt. De beschikbare opnametijd voor de
verschillende kwaliteitsinstellingen staat linksboven in het timerscherm.
• Zet de keuze Nicam op aan of uit.
Nicam moet aan staan als de bron die u wilt opnemen een tv-uitzending met twee verschillende
audiotalen is (bijvoorbeeld Eurosport).
• Wanneer u alle opties voor uw opname heeft ingesteld, drukt u op de Enter toets (26) van de
afstandsbediening om het timerprogramma op te slaan.
• Nu verschijnt een bevestigingsvenster op uw scherm. Selecteer Bevestigen en druk op de Enter toets
(26) van de afstandsbediening om het timerprogramma op te slaan.
De opname is nu geprogrammeerd en de speler start de opname op het ingestelde kanaal wanneer het
ingestelde tijdstip is aangebroken, ook als de speler op dat moment op standby staat.
NB:
U kunt tijdens een opname niet naar een andere zender gaan.
27
NEDERLANDS
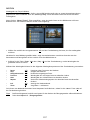
13. Instellingen
Wanneer u in het hoofdmenu voor ‘Setup’ kiest, verschijnt het instellingenmenu op uw scherm. Hieronder
vindt u alle beschikbare instellingen met de bijbehorende beschrijving.
U kunt met de navigatietoetsen van de afstandsbediening tussen de verschillende opties van het
instellingenmenu wisselen.
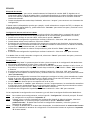
[ Instellingenmenu – Video ]
[ Instellingenmenu – Opnemen]
A/V instellingen:
Beeldverhoudingen
Helderheid
Contrast
Overgang
Geluidsinstellingen
Beeldverhoudingen van het uitvoersignaal van de Media Giant aanpassen.
('Letterbox 4:3', 'Pan-Scan 4:3', 'Breedbeeld 16:9')
De helderheid van het uitgangsignaal van de Media Giant wijzigen.
Het contrast van het uitgangsignaal van de Media Giant wijzigen.
De overgang tussen opeenvolgende beelden van de diavertoning instellen.
Geluidsinstellingen van de Media Giant aanpassen.
Nachtstand
Nachtstand van het geluid aan/uitzetten (Uit, Aan, Comfort).
Digitale uitgang De digitale geluidsuitgang instellen (HDMI-LPCM, HDMI-RAW,
SPDIF-LPCM, SPDIF-RAW).
Opnemen:
Kwaliteit
De opnamekwaliteit aanpassen (HQ, SP, LP, EP, SLP).
NB: Als u het veld Kwaliteit verandert, heeft dit invloed op de kwaliteit van uw opname en de
hoeveelheid ruimte die deze op de harde schijf inneemt. De verschillende kwaliteitsinstellingen
vereisen per uur video de volgende vrije ruimte:
HQ: 4,85 GB (4850 MB)
SP: 2,42 GB (2420 MB)
LP: 1,62 GB (1620 MB)
EP: 1,21 GB (1210 MB)
SLP: 0,80 GB (800 MB)
Automatische
hoofdstukken
Permanente timeshift
Instellingen voor automatische hoofdstuknummering aanpassen. De functie Auto
hoofdstuk voegt tijdens het opnemen automatisch hoofdstukmarkeringen aan uw
opname toe, waarmee u makkelijk naar verschillende plaatsen in de opname kunt
"springen".
Permanente timeshift aan- of uitzetten. Wanneer deze functie aan staat, is de
timeshift altijd actief en kunt u de weergave onmiddellijk pauzeren en met de
toetsen van de afstandsbediening door de timeshiftbuffer "springen".
28
NEDERLANDS
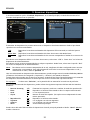
[ Instellingenmenu – Netwerk]
[ Instellingenmenu – Systeem ]
Netwerk:
LAN Voorkeuze **
De voorkeur voor de netwerkverbinding instellen: Kabel of Auto (via Powerline).
Wanneer voor Kabel is gekozen, gebruikt de Media Giant altijd de LAN-aansluiting
voor de netwerkverbinding.
Als voor Auto (via Powerline) is gekozen, gebruikt de Media Giant Powerline als er
een Powerline netwerk beschikbaar is. Als er geen Powerline netwerk beschikbaar
is, wordt de LAN-aansluiting gebruikt.
NB: Wanneer de Media Giant zowel op Powerline als op een LAN-kabel is aangesloten, is Powerline het
standaardnetwerk. Wanneer in dat geval de snelheid van het Powerline netwerk terugloopt tot
minder dan 1 Mbps, schakelt de Media Giant automatisch over op Kabel.
Terwijl van de netwerkkabel gebruik wordt gemaakt, blijft de Media Giant de snelheid van het
Powerline netwerk controleren. Zodra de snelheid van het Powerline netwerk oploopt tot meer dan
1 Mbps, schakelt de Media Giant automatisch over op Powerline.
Bekabeld netwerk
instellen
Bij Bekabeld netwerk instellen kunt u het IP-adres van de Media Giant
configureren. U kunt hier kiezen tussen Annuleren, DHCP IP (Auto) en IP
handmatig. Als uw netwerk een DHCP-server bevat, selecteert u de keuze DHCP IP.
Als u het IP-adres handmatig wilt instellen, selecteert u IP handmatig.
De Setup Wizard toont nu de velden waarin u het statische IP-adres kunt invullen.
Geef met behulp van de navigatietoetsen (15) en de cijfertoetsen 0-9 (6) IP-adres,
subnetmasker, standaardgateway en DNS-server in.
Wanneer u de juiste waarden heeft ingegeven, drukt u op de Enter toets (26) van
de afstandsbediening.
Mediaserver
De netwerknaam van de Media Giant wijzigen.
Als u deze optie selecteert, kunt u kiezen tussen 'Server/hostnaam' en 'Groepnaam'.
Server/hostnaam
Naam van de Media Giant aanpassen.
Dit is de naam van de UPnP A/V-server van de Media Giant,
waarvan UPnP A/V-clients (zoals de Conceptronic C54WMP of
de Conceptronic CFULLHDMA) gebruik kunnen maken om via
het netwerk mediabestanden te streamen vanaf de harde
schijf van de Media Giant, en waarmee computers in uw
netwerk toegang kunnen krijgen tot de Samba server van de
Media Giant.
Groepnaam
De naam van de werkgroep wijzigen waar de Media Giant toe
behoort.
NB:
Meer informatie over de UPnP A/V-server van de Media Giant vindt u in
hoofdstuk 16.
Meer informatie over de Samba server van de Media Giant vindt u in
hoofdstuk 18.
29
NEDERLANDS
Systeem:
Menutaal
Klok instellen
HDD formatteren
Timer inst.
De taal selecteren die u wilt gebruiken om de Media Giant te bedienen.
Tijd en datum aanpassen.
Interne harde schijf formatteren (zie hoofdstuk 15).
Timer diashow:
Wachttijd per foto instellen voor diashow.
Hier kunt u de wachttijd voor de screensaver instellen.
Timer screensaver:
Firmware Upgrade
Werk de firmware van de Media Giant bij.
De firmware kan worden bijgewerkt via internet of via een USB opslagapparaat.
De ‘Firmware Upgrade’ optie kan op ‘Automatisch’ of ‘Handmatig’ gezet worden.
Wanneer voor ‘Automatisch’ is gekozen (standaard), zal de Media Giant op
wisselende tijden controleren of er nieuwe firmware beschikbaar is en deze
automatisch bijwerken als het apparaat niet bezig is met een opname of afspelen.
Wanneer voor ‘Handmatig’ is gekozen kunt u zelf zoeken naar nieuwe firmware.
NB: Om uw huidige firmware-versie te bekijken, gaat u naar het hoofdmenu en drukt u op de Info toets
(27) van de afstandsbediening. De firmware-versie wordt op uw scherm weergegeven.
Standaard herstellen De standaardinstellingen van de Media Giant terugzetten en de Setup Wizard starten
om de speler opnieuw te configureren.
[ Instellingenmenu – tv-instellingen]
[ Kanaal bewerken ]
Tv-instellingen:
Tv-ingang
Zenderzoeken
Handmatig afstemmen
Tv-programma
Selecteer uw land in de landenlijst. Als uw land er niet bij staat, selecteert u
'Overige' in de lijst.
Tip: U kunt ook een specifieke DVB-T frequentieband doorzoeken door te kiezen
voor '6M' (600 Mhz), '7M' (700 Mhz) of '8M' (800 Mhz).
Automatisch alle kanalen doorzoeken. Automatisch zenderzoeken kan enige tijd
in beslag nemen; hierbij worden alle gevonden zenders automatisch vastgelegd in
het geheugen van de Media Giant.
Onder 'Handmatig afstemmen' kunt u nieuwe zenders aan uw bestaande
zenderlijst toevoegen (met de keuze 'Toevoegen'), zenders verwijderen (met de
keuze 'Overslaan') en namen invullen voor de gevonden zenders (met de keuze
'Bewerken').
Met de keuze 'Tv-programma' kunt u de Media Giant zo instellen dat alle
gevonden DVB-T kanalen worden getoond (inclusief gecodeerde zenders waarvoor
betaald moet worden en die niet kunnen worden weergegeven door de Media
Giant), of alleen de gratis (FTA/free to air) kanalen.
30
NEDERLANDS
14. Op computer aansluiten via USB
De speler kan op uw computer worden aangesloten om gegevens van en naar de interne harde schijf van de
speler te kopiëren (films, muziek, foto's, documenten, etc.).
NB:
In het onderstaande voorbeeld wordt uitgegaan van een computer met Windows XP, maar de
speler kan worden verbonden met alle computers met usb-aansluiting die apparaten met het
FAT32 bestandssysteem kunnen lezen en schrijven.
Sluit de speler op uw computer aan
• Sluit de meegeleverde USB naar Mini-USB kabel aan op de Mini-USB poort aan de voorkant van de speler
en op een vrije USB poort van uw computer.
• Zet de speler aan met de hoofdschakelaar aan de achterkant van de speler. De speler wordt automatisch
herkend en geïnstalleerd, waarna hij als een verwisselbare harde schijf wordt aangegeven op de
computer.
NB:
Wanneer de harde schijf maar één (FAT32) mediapartitie heeft, is er maar één stationsletter
zichtbaar. Wanneer de harde schijf twee mediapartities heeft (FAT32 en NTFS), toont de Media
Giant twee stationsletters.
Opnamen afspelen op uw computer
Voordat u uw opnamen op een computer kunt afspelen, moet u ze eerst van de opnamepartitie naar de
mediapartitie van de Media Giant kopiëren. U kunt hiervoor de keuze Kopieer naar FAT32 partitie
gebruiken; u vindt deze keuze in het menu Opnamen afspelen zoals beschreven in hoofdstuk 10.
Nadat uw opnamen naar de FAT32-partitie zijn gekopieerd, kunt u ze op uw computer afspelen wanneer de
speler met de computer is verbonden.
Koppel de speler los van uw computer
•
•
•
•
Klik op het pictogram Veilig verwijderen in de systeembalk.
Selecteer USB massaopslagapparaat veilig verwijderen in de lijst die wordt getoond.
Wacht op de melding U kunt de hardware nu veilig verwijderen.
Verwijder de USB kabel.
31
NEDERLANDS
15. Partitie-informatie en formatteerwizard
In de meeste gevallen wordt de Media Giant geleverd met een harde schijf die al is geformatteerd. De
harde schijf wordt geformatteerd volgens de standaardconfiguratie van de Media Giant, met de volgende
partities:
Bufferpartitie voor timeshift:
Opnamepartie:
FAT32 mediapartitie:
NTFS mediapartitie:
Ca. 4,85 GB
50% van de harde schijf.
25% van de harde schijf.
25% van de harde schijf.
Voorbeeld met:
500 GB
750 GB
1000 GB
Bufferpartitie voor timeshift:
Opnamepartitie:
FAT32 mediapartitie:
NTFS mediapartitie:
~ 4,85 GB
~ 250 GB
~ 125 GB
~ 125 GB
~ 4,85 GB
~ 375 GB
~ 187 GB
~ 187 GB
~ 4,85 GB
~ 500 GB
~ 250 GB
~ 250 GB
U kunt afwijken van de standaardconfiguratie voor de harde schijf van de Media Giant door de schijf
opnieuw te formatteren.
NB:
Als u de harde schijf van de Media Giant formatteert, worden alle bestanden verwijderd die op de
harde schijf zijn opgeslagen of opgenomen!
Om de harde schijf van de Media Giant te formatteren, gaat u naar het instellingenmenu en selecteert u de
keuze HDD formatteren op de Systeem pagina. Selecteer ter bevestiging nogmaals HDD formatteren.
De wizard 'HDD formatteren' verschijnt op uw scherm, met als eerste de vraag of u de harde schijf
automatisch ('Auto') of handmatig ('Handmatig') wilt formatteren.
• Als u voor 'Auto' kiest, wordt de Media Giant geformatteerd met de standaard instellingen zoals
hierboven genoemd.
• Als u voor 'Handmatig' kiest, leidt de formatteerwizard u door de stappen die nodig zijn om de harde
schijf te formatteren.
[ Wizard formatteren – Auto of Handmatig ]
[ Wizard formatteren – Timeshift buffer ]
Pas de grootte van de timeshiftbuffer aan met de navigatietoetsen omhoog en omlaag (15) van de
afstandsbediening.
U kunt de timeshiftbuffer op 1, 2, 3 of 4 uur zetten.
• Selecteer Volgende om door te gaan naar de volgende stap.
32
NEDERLANDS
[ Wizard formatteren – Opnamepartitie ]
[ Wizard formatteren – FAT32/NTFS partitie ]
• Pas de grootte van de opnamepartitie aan met de navigatietoetsen omhoog en omlaag (15) van de
afstandsbediening.
De resterende ruimte wordt gebruikt voor de mediapartitie(s) van de Media Giant.
• Selecteer Volgende om door te gaan naar de volgende stap.
[ Wizard formatteren – Start formatteren ]
[ Wizard formatteren – Formatteren... ]
• Selecteer Formatteren om te beginnen met het formatteren van de harde schijf van de Media Giant.
Tijdens het formatteren geeft de formatteerwizard de tekst Bezig... aan.
NB:
Het formatteren kan enige tijd duren (bijvoorbeeld ca. 5 minuten). Wacht tot de
formatteerprocedure voltooid is.
[ Wizard formatteren – Voltooid ]
• Kies na afloop van het formatteren OK om de formatteerwizard te sluiten. De Media Giant wordt nu
automatisch opnieuw gestart.
33
NEDERLANDS
16. UPnP A/V-server (Twonky mediaserver)
Een van de mogelijkheden van de Media Giant is de UPnP A/V-server.
Hiermee wordt de Media Giant met al zijn media-inhoud beschikbaar gesteld aan de UPnP A/V-clients in uw
netwerk (bijvoorbeeld de Conceptronic CFULLHDMA of de Conceptronic C54WMP).
Als UPnP A/V-server beschikt de Media Giant over de Twonky mediaserver.
De Twonky mediaserver indexeert automatisch alle mediabestanden in de FAT32 en NTFS mediapartities.
Zodra er nieuwe inhoud aan deze partities wordt toegevoegd, is deze automatisch beschikbaar voor de
UPnP A/V-clients in uw netwerk.
U kunt de naam van uw UPnP A/V-server wijzigen in het instellingenmenu van de Media Giant, bij Netwerk.
NB:
De naam van de UPnP A/V-server staat standaard op media giant.
Als u bekend bent met de Twonky mediaserver software, kunt u de geavanceerde instellingen van de
Twonky server via uw computer aanpassen.
Voor de configuratiepagina's van de Twonky mediaserver software geeft u in de adresbalk van uw
internetbrowser het IP-adres van de Media Giant in, gevolgd door een dubbele punt en het poortnummer
9000.
Voorbeeld:
HTTP://192.168.0.100:9000/ (ervan uitgaande dat 192.168.0.100 het IP-adres van uw
Media Giant is).
De Twonky mediaserver heeft een ingebouwde Troubleshooting gids voor het oplossen van problemen; u
vindt deze in de linker navigatiebalk van het Twonky Media Server configuratievenster. Deze gids assisteert
u bij het configureren van de Twonky mediaserver.
Ga voor meer informatie over de Twonky mediaserver naar de Twonky website:
http://www.twonkymedia.com/
34
NEDERLANDS
17. Door gedeelde netwerklocaties bladeren
De Media Giant kan door uw netwerkshares bladeren en de daar gevonden mediabestanden rechtstreeks
afspelen. Voordat u van deze mogelijkheid gebruik kunt maken, moet u binnen uw netwerk een of meer
mediamappen delen, zodat de Media Giant ze kan vinden en openen.
In dit hoofdstuk wordt uitgelegd hoe u bestanden kunt delen onder Windows XP of Windows Vista.
NB:
In dit hoofdstuk wordt uitsluitend uitgelegd hoe u bestanden kunt delen onder Windows XP of
Windows Vista.
Zie de gebruiksaanwijzing van het besturingssysteem van uw computer(s) of
netwerkopslagapparaten voor informatie over het delen van mappen met mediabestanden.
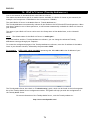
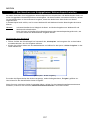
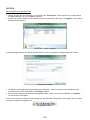
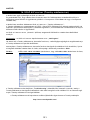
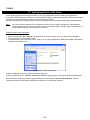
Bestanden delen onder Windows XP
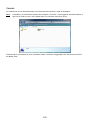
• Open Deze computer vanuit het Windows Startmenu en ga naar de map met de mediabestanden die u
wilt delen.
• Klik eenmaal op de map met mediabestanden en selecteer in de menubalk links in het venster de keuze
Deze map delen.
[ Deze computer – Map delen ]
De eigenschappen van de map worden getoond en het tabblad Delen wordt geactiveerd.
Bij Delen en beveiliging kunt u aangeven dat u de map wilt delen.
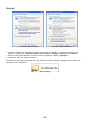
Als u nog niet eerder mappen heeft gedeeld, moet u de wizard Netwerkinstellingen uitvoeren door in het
venster op de regel Wizard netwerkinstellingen te klikken.
35
NEDERLANDS
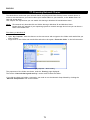
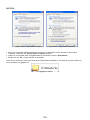
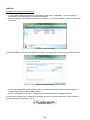
[ Eigenschappen – tabblad Delen ]
[ Eigenschappen – tabblad Delen ]
• Wanneer de wizard Netwerkinstellingen al eens is uitgevoerd, kunt u uw map delen door op Deze map
delen te klikken.
• Geef in het tekstveld een naam in voor de gedeelde locatie en klik op Toepassen.
• Klik op OK om het venster te sluiten.
Het pictogram van de map bevat nu een hand om aan te geven dat het om een gedeelde map gaat.
[ Gedeelde map ]
36
NEDERLANDS
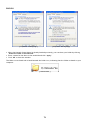
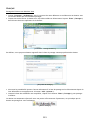
Bestanden delen onder Windows Vista
• Open Deze computer vanuit het Windows Startmenu en ga naar de map met de mediabestanden die u
wilt delen.
• Klik eenmaal op de map met mediabestanden en selecteer in de werkbalk bovenin het venster de keuze
Delen.
[ Computer – Map delen ]
Standaard staat uw eigen gebruikersaccount als eigenaar van de map ingevuld in de sharelijst.
[ Eigenschappen delen ]
• U kunt meer gebruikers aan de sharelijst toevoegen door ze te selecteren in het afrolmenu en op de
knop Toevoegen te klikken.
• Wanneer u alle gebruikers heeft ingevuld, klikt u op de knop Delen om de map te delen.
Het pictogram van de map toont nu twee personen om aan te geven dat het om een gedeelde map gaat.
[ Gedeelde map ]
37
NEDERLANDS
Door gedeelde mappen bladeren vanuit de Media Giant
Wanneer u mediabestanden heeft gedeeld in uw netwerk kunt u met de keuze Mediabrowser van het
hoofdmenu door uw netwerklocaties bladeren.
[ Opslaglocatie selecteren ]
[ Netwerkshare – Gebruiker aanmelden ]
Ga met de navigatietoetsen (15) van de afstandsbediening in de lijst met opslaglocaties naar de keuze
Netwerk en navigeer binnen het netwerk naar uw computer of netwerkopslagapparaat met de gedeelde
mappen.
Wanneer een gedeelde map beveiligd is met een gebruikersnaam en een wachtwoord (bijvoorbeeld:
standaard gedeelde locatie in Windows XP of Windows Vista), toont de Media Giant het venster Gebruiker
aanmelden waarin u een gebruikersnaam en een wachtwoord moet invullen.
NB:
U kunt de gegevens van uw normale Windows XP of Windows Vista gebruikersaccount gebruiken om
in te loggen op de gedeelde map.
Selecteer met de navigatietoetsen (15) van de afstandsbediening het veld voor de gebruikersnaam of het
wachtwoord en druk op de Enter toets (26), waarna het virtuele toetsenbord op het scherm verschijnt en u
de gevraagde gegevens kunt ingeven.
[ Virtueel toetsenbord ]
[ Netwerkshare – Gebruiker aanmelden ]
Nadat u de gebruikersnaam en het wachtwoord correct heeft ingegeven, selecteert u de knop OK of de
knop OK & Opslaan in Mijn Snelkoppelingen om de gedeelde netwerklocatie te openen.
U kunt nu door de gedeelde map navigeren, zoals beschreven in hoofdstuk 9.
38
NEDERLANDS
18. Delen via netwerk - configureren en gebruiken
De Conceptronic Media Giant kan benaderd worden als gedeelde netwerklocatie (Samba server). Met deze
functie kunt u de FAT32 partitie (HDD1) van de Media Giant delen via uw netwerk, zodat andere computers
de in deze partitie opgeslagen gegevens kunnen bereiken.
Configuratie
Selecteer de keuze 'Instellingen' in het hoofdmenu. Het menu Instellingen wordt op uw scherm
weergegeven. Kies in het instellingenmenu voor 'Systeeminstellingen'. Het menu Systeeminstellingen bevat
de keuze 'Media server'.
Onder 'Media server' kunt u de volgende instellingen wijzigen:
- Server/hostnaam
- Groepnaam
De netwerknaam van de Media Giant opgeven. De netwerknaam van de Media
Giant staat standaard op 'media giant’.
De naam opgeven van de werkgroep waar u bij hoort. De werkgroep van de Media
Giant staat standaard op 'WORKGROUP’.
Druk na afloop op de 'Return' (14) toets van de afstandsbediening om naar het hoofdmenu terug te gaan.
Gebruik
Wanneer u de netwerkinstellingen van de Media Giant heeft geconfigureerd, kunt u de gedeelde locatie
benaderen vanuit computers binnen uw netwerk.
NB:
De onderstaande stappen geven aan hoe u de gedeelde netwerklocatie van de Media Giant kunt
benaderen met de standaardinstellingen van een computer met Windows Vista.
De netwerknaam van de Media Giant is standaard 'media giant'. Onder deze naam kunt u de gedeelde
locatie van de speler bereiken via het netwerk.
• Selecteer 'Start', 'Netwerk'.
Windows Explorer toont nu het venster Netwerk.
In de adresbalk bovenaan kunt u de netwerknaam van de Media Giant als volgt ingeven:
\\<NETWERKNAAM_VAN_MEDIA_GIANT>\
Voorbeeld:
Als de Media Giant is geconfigureerd met de standaardinstellingen, is de netwerknaam
'media giant' en geeft u in:
\\media giant\
39
NEDERLANDS
De gedeelde netwerklocatie van de Media Giant verschijnt op uw scherm, zoals te zien in het onderstaande
scherm:
NB:
Hoewel Windows automatisch de gedeelde locatie 'Printers' aan iedere Samba server in het
netwerk toevoegt, werkt de Media Giant niet als printserver.
Wanneer u een gedeelde netwerklocatie selecteert, kunt u bestanden kopiëren, verwijderen, toevoegen en
afspelen op de FAT32 partitie van de Media Giant.
40
ENGLISH
Conceptronic Media Giant with DVB-T
User Manual
Congratulations on the purchase of your
Conceptronic Media Recorder & Player.
This User Manual gives you a step-by-step explanation how to install and use the Conceptronic Media
Recorder & Player.
When you need more information or support for your product, we advise you to visit our Service & Support
website at www.conceptronic.net/support and select one of the following options:
• FAQ
• Downloads
• Contact
: Frequently Asked Questions database
: Manuals, Drivers, Firmware and more downloads
: Contact Conceptronic Support
Tip :
The Conceptronic Media Giant is firmware upgradable. To upgrade your unit with the latest
firmware version, you can visit the Conceptronic Web Site, or use the built-in firmware upgrade
feature of the Media Giant.
Tip :
Please check www.conceptronic.net/FAQ for the latest list of supported codecs and files.
For general information about Conceptronic products visit the Conceptronic website at
www.conceptronic.net.
1. Package Contents
The following items should be present in the package of the Conceptronic Media Recorder & Player:
•
Conceptronic Media Giant (described as ‘unit’ or ‘Media Giant’ in the manual). **
The device in the package is 1 of the 2 models listed below:
CM3GD
[C08-147]: Media Giant with digital (DVB-T) tuner.
CM3GDP [C08-148]: Media Giant with digital (DVB-T) tuner and Powerline Adapter.
•
•
•
•
•
•
•
•
•
•
•
•
•
•
Conceptronic Powerline Network Adapter. (Only included with CM3GDP)
Power cord.
Remote control.
2 AAA batteries for remote control.
RF Antenna Cable.
Composite Video Cable (Red, White, Yellow RCA Jacks).
S-Video Cable.
Component Video Cable (Red, Green, Blue RCA Jacks).
Coaxial Digital Audio Cable (Black RCA Jacks).
SCART Adapter for Composite Video Cable / S-Video Cable.
HDMI A/V cable (HDMI 1.3).
Network Cable.
USB Cable.
This User Manual.
IMPORTANT:
In this manual, some features are explained which are only valid for the CM3GDP (with digital (DVB-T)
tuner and Powerline Adapter). These features are marked with **.
41
ENGLISH
2. Product Features
•
•
•
•
•
•
•
•
•
•
•
•
•
Built-in Powerline network adapter. **
Built-in digital (DVB-T) TV Tuner with TV channel auto-search.
Digital (DVB-T) TV signal recording.
AV signal recording from e.g. a VCR, DVD or Video Camera.
DV input for playback / recording from a DV Video Camera.
Record to internal HDD.
Up to 1080i output resolution.
Up to 1080i playback resolution.
DVD quality of recorded files in TS format (for digital recordings through digital DVB-T tuner) or
MPEG2 format (for analog recordings through AV inputs) (can be played on PC or other media player).
Record Options: One-key instant record, Scheduled record, Time-shift.
Playback of MPEG1/2/4, MP3, WMA, JPG files stored in internal HDD or USB Device.
Copy files from USB Device or network location to internal HDD.
Auto switch between USB-PC and Player Mode:
When connected by USB to the PC, the unit acts as an USB Storage Device.
When not connected by USB to the PC, the unit acts as a Media Recorder & Player.
3. Notes & Cautions
•
•
•
•
•
•
•
•
•
•
•
•
Do not attempt to disassemble the unit. This may cause high-voltage injuries.
Keep the unit away from excessive moisture.
Do not immerse or expose the unit to liquids.
Disconnect the power cable if you do not intend to use the unit for an extended period of time.
Make sure the power socket where the Media Giant is connected to is easily accessible.
Avoid using the unit in a location near combustibles.
Change the battery of the remote control with the same kind when it is weak or dead. Recycle old
batteries where possible. To avoid corrosion, remove the battery when the remote will not be used
for a long time.
Make sure the batteries are placed correctly in the remote control to prevent damage.
Keep the remote away from excessive moisture; do not drop it.
Do not operate the remote under intense sunlight.
NEVER drop, shake or bump the unit.
To prevent overheating, do not cover the unit.
IMPORTANT:
Do NOT format the harddisk on your computer! This will cause the unit to loose all system
data and will require a re-initialisation. When you want to format the harddisk of the unit,
use the built-in format tool in the Setup menu of the unit.
42
ENGLISH
4. Product Overview
Front View
1
2
3
4
5
Rear view
9
14
10
15
11
16
17
18
19
20
21
6
7
8
12
13
22
23
Description of the numbers:
1. Status LED’s (Power, REC, ACT, LAN)
2. Navigation touch buttons
3. Playback touch buttons
4. Infrared receiver
5. Mini-USB Jack (To PC)
6. USB Host Port
7. DV input
8. Frontpanel ‘Open’ button
9. Digital TV-Tuner output
10. Digital TV-Tuner input
11. AV Composite video output
12. SPDIF digital coaxial output
Note:
13. Main power switch
14. LAN (RJ45) connection
15. HDMI ouput
16. AV1 input (Composite Video/Audio)
17. AV2 Component video input
18. AV2 audio input (L/R)
19. AV audio output (L/R)
20. AV Component video output (Y/Pb/Pr)
21. S-Video output
22. SPDIF digital optical output
23. AC input (110 ~240v)
The touch buttons have the same functions as the basic remote control functions.
43
ENGLISH
5. Remote Control Explanation
The remote control is used to control the unit. On the inside cover of this manual you will find a picture of
the remote control. The numbers of the buttons correspond with the table below, to explain each function
of the remote control.
Nr
Button
Description
1.
2.
3.
4.
5.
6.
7.
8.
9.
10.
11.
12.
13.
14.
15.
16.
17.
18.
19.
20.
21.
22.
23.
24.
25.
26.
27.
28.
29.
30.
31.
32.
33.
34.
35.
36.
37.
38.
39.
40.
41.
POWER ( )
SOURCE
MEDIA
AUDIO
ZOOM
0–9
COPY
REPEAT
GOTO
FAST REWIND (
)
PREVIOUS (
)
VOLUME +
VOLUME RETURN
, , ,
INS.REP.
PAUSE
PLAY
REC
TV SYS
SETUP
TIMESHIFT
STOP ( )
SLOW
CM.SKIP
ENTER
INFO
CHANNEL CHANNEL +
MUTE
NEXT (
)
)
FAST FORWARD (
GUIDE
A-B
DELETE
ANGLE
SUB-T
LIVE-TV
DV
MENU
LED
Turn the unit on or to standby mode
Switch between digital tuner, AV & playback
Direct button to the Media Browser
Change the DVD Audio track (when available on your DVD files)
Zoom in / zoom out
Numeric buttons
Display the Copy menu
Set Repeat mode
Goto a specific point in the playback
Fast Rewind playback
Previous File / Track / Chapter / Picture
Increase the Volume
Decrease the Volume
Return to the previous screen / channel
Navigation Keys: Navigate through the menu’s
Jump back 10 seconds during timeshift or playback
Pause the (timeshift) playback
Start Playback
Start recording
Change the output resolution of the unit
Direct button to the Setup menu
Activate the timeshift feature
Stop Playback / Stop Recording / Disable Timeshift
Slowmotion playback
Jump forward 30 seconds during timeshift or playback
Confirm selection
Display Channel information / File information
Channel Down
Channel Up
Mute the sound
Next File / Track / Chapter / Picture
Fast Forward playback
Display the EPG guide of the digital (DVB-T) tuner
Initialize A-B repeat loop
Clear the input / Delete the selection
Change the DVD angle (when available on your DVD files)
Change the subtitle (when available on your video/DVD files)
Direct button to Live-TV / switch between digital TV and digital radio
Switch to DV Playback & Record mode
Display the Main menu
Indicates the operation of the remote control
44
ENGLISH
6. Connecting your Media Giant
This chapter will explain how you can connect the Media Giant to your TV, home cinema system, network,
etc.
9
10
11
12
13
14
15
16
17
18
19
20
21
22
23
Connecting the antenna cable(s)
Note:
The digital tuner of the unit supports signal pass-through, to redirect the DVB-T signal from the
digital tuner input to the digital tuner output.
• Disconnect the main antenna cable from your TV or digital set-top box, and connect it to the digital
tuner input [10] of the unit.
• Connect the supplied antenna cable to the digital tuner output [9] of the unit and to the tuner input of
your TV or digital set-top box.
Connecting the Video Cable(s)
You can connect the unit in 5 different ways to your TV:
- HDMI
- Composite
- SCART (by using the Composite cable & Scart Adapter)
- S-Video *
- Component *
*
When using S-Video or Component, only the video signal is send to your TV.
For the audio signal, use the Audio RCA Jacks on the Composite cable (Red, White), or the digital
audio output (optical or coaxial) of the media giant.
HDMI:
• Connect the HDMI cable to the HDMI output [15] of the unit.
• Connect the other end of the HDMI cable to a free HDMI input on your TV.
Composite:
• Connect the Composite cable (Yellow, Red, and White) to the corresponding AV OUT jacks [11, 19] on
the unit.
• Connect the other side of the Composite cable (Yellow, Red, and White) to your TV.
45
ENGLISH
SCART:
• Connect the Composite cable (Yellow, Red, and White) to the corresponding AV OUT jacks [11, 19] on
the unit.
• Connect the other side of the Composite cable (Yellow, Red, and White) to the jacks on the SCART
Adapter.
• Connect the SCART Adapter to the SCART Input of your TV.
S-Video:
• Connect the S-Video cable to the S-Video output [21] of the unit.
• Connect the other end of the S-Video cable to the S-Video Input on your TV.
Component:
• Connect the Component Cable (Red, Green, and Blue) to the Component Jacks [20] on the unit.
• Connect the other end of the Component cable to the Component Jacks on your TV.
Connecting the Audio Cable(s)
You can connect the unit to your TV and/or your home cinema system in 3 different ways:
- Analog, through the RCA Audio Jacks of the A/V Output
- Digital, Through the Coaxial Digital SPDIF Output
- Digital, Through the Optical Digital SPDIF Output
Analog:
• Connect the Audio Jacks (Red, White) of the Composite cable to the RCA Audio Jacks [19] of the AV
OUT.
• Connect the other end of the Composite cable to the RCA Audio Jacks of your TV or Receiver.
Digital Coaxial:
• Connect the Digital Coaxial cable to the Digital Coaxial output [12] of the unit.
• Connect the other end of the Digital Coaxial cable to the Digital Coaxial Input of your Receiver.
Digital Optical:
• Connect the Digital optical cable to the Digital optical output [22] of the unit.
• Connect the other end of the Digital Optical cable to the Digital Optical Input of your Receiver.
Connecting other Audio/Video Equipment
You can connect an Audio/Video source, like a VCR, DVD Player or Set-Top Box to the unit so you can
record from the Audio/Video source.
The Media Giant supports devices with Composite or Component output.
Composite:
• Connect the Audio/Video cable delivered with your Audio/Video device to the corresponding AV Output
jacks on the Audio/Video device.
• Connect the other side of the Composite cable (Yellow, Red, and White) to the AV1 IN jacks [16] of the
unit.
Component:
• Connect the Component Video cable delivered with your Audio/Video device to the corresponding
Component output on the Audio/Video device.
• Connect the other side of the Component Video cable (Red, Green, and Blue) to the AV2 IN jacks [17] of
the unit.
Note:
The Component video cables only transfer video, no sound. To transfer sound, you also need to
connect audio cables from the Audio/Video device to the AV2 IN audio jacks [18] of the unit.
46
ENGLISH
Connecting the Power Cable
When the unit is connected to your Audio/Video equipment, you can connect the power supply to the unit.
• Connect the included power cable to the unit [23] and to a free wall socket.
• Set the main power switch [12] on the back of the unit to ‘I’ to power the unit.
The unit will now turn on.
Preparing the Remote Control
• Remove the battery cap from the back of the remote control
• Insert the included AAA batteries in the remote control.
• Replace the battery cap on the back of the remote control.
Notes:
-
The best operational range of the remote control is about 5 meters.
Point the remote control to the IR receiver which is embedded in the front panel of the unit.
The receiving angle of the IR receiver is ±30 degrees.
Change the batteries when they are weak or empty.
47
ENGLISH
7. First-Time Configuration
The unit needs to be configured when you turn it on the first time.
• Select the correct input channel on your TV where the unit is connected to. (HDMI, Composite, SCART,
S-Video or Component).
Note:
From this point, the manual is based on the fact that your TV is set to the input channel of the
unit. All steps described are related to the operation of the unit.
• Check if the main power switch on the back of the unit is set to ‘I’ (On).
• Turn on the unit with the power button on the front of the unit, or with the ‘Power’ button (1) on the
remote control.
• Check the Power LED on the front of the Media Giant. When the LED is Orange, the device is in
‘Standby’ mode. When the LED is Blue, the device is operational.
Note:
The unit needs to be initialized when it is turned on. This can take a little while. During
initializing, the Media Giant startup screen is shown.
[ Startup Screen ]
[ Setup Wizard ]
When the Media Giant is initialized, it needs to be configured for first time usage. To assist you with the
first time configuration, the Media Giant will display the ‘Setup Wizard’ on your screen with the required
configuration steps for first time usage.
The Setup Wizard will display the following configuration steps:
-
Menu Language
TV Input
Channel Scan
Wired LAN Setup
Set Time
Use the navigation keys and the ‘Enter’ button (26) on the remote control to setup your Media Giant.
If you made a setting and you want to revise it, press the ‘Return’ button (14) on the remote control.
Menu Language
Select the language you want to use when operating the Media Giant.
TV Input
Select your country from the country-list. If your country is not listed, select ‘Other’ from the list.
Tip: You can also scan a specific DVB-T frequency band by selecting ‘6M’ (600Mhz), ‘7M’ (700Mhz) or ‘8M’
(800Mhz).
48
ENGLISH
Channel Scan
• Select ‘OK’ to start the automatic channel scan of digital (DVB-T) channels through the digital (DVB-T)
tuner of the Media Giant. The automatic channel scan of the Media Giant can take a while, but will
search & store automatically all found channels in the memory of your Media Giant.
• When the Channel Scan is finished, select ‘OK’ to continue with the Setup Wizard.
If you want to skip the Channel Scan (for example when you are using a set-top box and do not have a
digital (DVB-T) TV signal), you can select ‘Cancel’ to skip the Channel Scan and continue with the Setup
Wizard.
Wired LAN Setup
The Network Setup is to set your IP Address for the Media Giant. In most situations, the Media Giant is
connected to a network which has a DHCP server (mostly a router).
• When you have a DHCP server in your network, select the option ‘DHCP IP’.
• The Setup Wizard will ask you to confirm the selection. Select ‘OK’ to continue.
• When you want to use a static IP address, select ‘FIX IP’.
• The Setup Wizard will show you the fields to enter a static IP address. Use the navigation buttons (15)
and the numeric buttons 0-9 (6) to enter the IP address, Subnet mask, Default gateway and DNS server.
• When the entered values are correct, press the ‘Enter’ button (26) on the remote control.
• The Setup Wizard will ask you to confirm the selection. Select ‘OK’ to continue.
If your Media Giant is not connected to a network, select ‘Cancel’ to skip this step and continue with the
Setup Wizard.
Set Time
The ‘Set Time’ option allows you to set the correct time and date in the configuration of the Media Giant.
• To setup the time and date manually, select ‘Manual’.
• Use the navigation buttons (15) and the numeric buttons 0-9 (6) to enter the Year, Month, Day, Hour,
Minutes and Seconds. When you are finished, press the ‘Enter’ button (26) on the remote control.
• The Setup Wizard will ask you to confirm the selection. Select ‘OK’ to continue.
• When you have an active internet connection, and the Media Giant is connected to your network, you
can select ‘Auto (Via Network)’.
• The Setup Wizard will show you the fields to configure the Automatic time configuration. You can keep
the default NTP server, but it you want to use another NTP server, press the ‘Enter’ button (26) on the
NTP server field to adjust the value.
• Change the Time Zone to the correct timezone of your country.
• Set the ‘Daylight Savings Correction’ to ‘Disable’ or ‘Enable’, depending if your country uses daylight
saving time. When the entered values are correct, press the ‘Enter’ (26) button on the remote control.
• The Setup Wizard will ask you to confirm the selection. Select ‘OK’ to continue.
The Setup Wizard is now complete and the basic configuration of the Media Giant is finished.
Note:
For more configuration settings, use the ‘Setup’ option in the Main menu. The Setup menu is
explained in chapter 13.
Note:
If you want to run the Setup Wizard again after it is completed, select ‘Setup’ in the Main menu
and select the option ‘Restore Default’. The Media Giant will reset the made settings and run the
Setup Wizard again.
Note:
If you bought a Media Giant without a preformatted harddisk, the Media Giant will show the
‘Format Wizard’ after the ‘Setup Wizard’ is completed. This ‘Format Wizard’ is explained in
chapter 15 of this manual.
49
ENGLISH
8. Main menu
The Main menu allows you to select several functions of the Media Giant.
Note:
When the Main menu is not displayed, you can press the ‘Menu’ button (40) on the remote control
to show the Main menu on your screen.
[ Main menu ]
The following options are available in the Main menu:
Browse Media
Playback Recordings
TV Tuner/AV Input
Scheduled Recording
Setup
Playback of stored media files.
Playback & edit of your recordings.
View Live-TV & Live-AV.
Configure scheduled records.
Configuration of the Media Giant.
The above options are described in the following chapters of this manual.
50
ENGLISH
9. Browse Media
When you have selected the ‘Browse Media’ option in the Main menu, the Media Giant will display the
Media browser on your screen:
[ Storage Location Selection ]
[ Mode Selection: Movies, Music, Photos ]
The Media browser allows you to select the storage device where you want to play your media files from:
USB
Harddisk
Network
Play Media from a connected USB device (through the USB Host Port).
Play Media from the internal harddisk of the Media Giant.
Play Media from Samba / Network shares in your network environment.
To browse through your USB device or the internal harddisk, select the ‘USB’ or ‘Harddisk’ from the
storage location list.
To browse through your network to play media from network shares, select the ‘Network’ option from the
storage location list.
Note:
To browse through your network shares, make sure that you have setup your network shares
correctly. For more information about making network shares and browsing through network
shares, see chapter 17.
When a storage location is selected, you can switch between ‘Movies’, ‘Music’ and ‘Photos’ mode with the
left and right navigation buttons on the remote control.
When selecting 1 of the 3 options, the Media Giant will automatically filter the content on the storage
location so only corresponding files are shown.
For example:
If you select ‘Movies’, only movie files will be shown on your screen.
In the Media browser menu, you can use the following browser options on the remote control:
-
Navigation keys
Enter
Return
Copy
Play
Next
Previous
Menu
(15)
(26)
(14)
(7)
(18)
(31)
(11)
(40)
Navigate through the files & folders or change playback mode.
Play the selected file or open the selected folder.
Go to the previous folder.
Open the Copy menu. (explained in a subchapter of this chapter)
Play the selected file.
Go to the next page with files.
Go to the previous page with files.
Return to the Main menu.
You can return from the Media Browser menu to the Main menu by pressing the ‘Menu’ button (40) on the
remote control.
51
ENGLISH
Playback of your movies
You can play movies, stored on the HDD of the unit, a USB storage device or a network location, on your TV
through the ‘Movies’ filter of the Media Giant.
When the ‘Movies’ filter is selected, the Media Giant will display only movie files on your screen. All other
files will not be visible.
[ Movie Mode ]
• Select the file you would like to play with the navigation buttons (15) on the remote control.
If you have selected a movie file, the Media browser will display a preview with the filename and filesize in
the right part of the screen.
• Press the ‘Enter’ button (26) or the ‘Play’ button (18) on the remote control to start the playback of
the selected file.
During playback, you can use the following playback options on the remote control:
-
Pause
(17)
Slow
(24)
Stop
(23)
Rewind
(10)
Fast Forward
(32)
Ins. Rep.
(16)
CM. Skip
(25)
Goto
(9)
Repeat
(8)
Info
(27)
Zoom
(5)
Sub-t
(37)
Audio
(4)
Volume
(12), (13)
Mute
(30)
Pause or resume the playback.
Slowmotion playback.
Stop the playback.
Rewind the playback.
Fast Forward the playback.
Jump back 10 seconds in the playback.
Jump forward 30 seconds in the playback.
Go to a specific point (time) in the movie.
Change the Repeat option of the current playback.
Display the playback details.
Zoom in / zoom out
Change the subtitle (if available for your playback).
Change the audio track (if available for your playback).
Adjust the volume level.
Mute the sound.
You can return from the Media browser menu to the Main menu by pressing the ‘Menu’ button (40) on the
remote control.
52
ENGLISH
DVD Playback functionality
The Media Giant plays DVD’s from the hard disk as if they are a normal DVD. You can navigate through the
DVD menu, choose subtitles or change audio languages.
Note:
The Media Giant supports the playback of unprotected DVD copies only. CSS protection is not
supported.
• Connect the Media Giant to your computer (See chapter 13).
• Create a folder on the Media Giant hard disk with the name of your DVD movie (for example: 'Movie1').
• Copy the files from the 'VIDEO_TS' folder to the created folder (for example: ‘Movie1’) on the Media
Giant.
After copying, the folder structure should look like below:
- [HDD of Media Giant]
|-> Movie1
(with all the DVD files inside)
• Disconnect the Media Giant from your computer and connect it to your TV.
• Select the ‘Browse Media’ icon in the Main menu with the ‘Navigation’ buttons (15) on the remote
control, and press the ‘Enter’ button (26) on the remote control to open the Media browser.
• Use the ‘Navigation’ buttons (15) and the ‘Enter’ button (26) on the remote control to navigate to the
folder on the internal hard disk where your DVD is stored.
• Open the DVD folder which you have created on the harddisk.
[ Movie Mode ]
• Select the ‘VIDEO_TS.IFO’ file and press the ‘Play’ button (18) on the remote control to start the
playback of the selected DVD.
Note:
It is also possible to play ISO files directly on the Media Giant, when they are stored on the NTFS
media partition. When playing an ISO file of a DVD, the same playback features will apply as when
playing the IFO file of a DVD.
53
ENGLISH
During DVD playback, you can use the following playback options on the remote control:
-
Pause
(17)
Slow
(24)
Stop
(23)
Navigation keys
(15)
Enter
(26)
Rewind
(10)
Fast Forward
(32)
Previous
(11)
Next
(31)
Ins. Rep.
(16)
CM. Skip
(25)
Goto
(7)
Repeat
(8)
Info
(27)
Zoom
(5)
Angle
(36)
Volume
(12), (13)
Mute
(30)
Sub-t
(37)
Audio
(4)
Pause or resume the playback.
Slowmotion playback.
Stop the playback.
Navigate through the DVD menu.
Confirm DVD menu selection(s).
Fast Rewind.
Fast Forward.
Previous Chapter.
Next Chapter.
Jump back 10 seconds in the playback.
Jump forward 30 seconds in the playback.
Go to a specific point (time) in the movie.
Change the Repeat option of the current playback.
Display the playback details.
Zoom in / zoom out
Change the DVD angle (when the DVD contains multiple angles).
Adjust the volume level.
Mute the sound.
Change or turn off the subtitle of the DVD.
Change the audio track of the DVD (when the DVD contains multiple
audio tracks).
You can return from the Media Browser menu to the Main menu by pressing the ‘Menu’ button (40) on the
remote control.
Playback of subtitles
The Media Giant can play subtitle files when playing AVI videofiles.
To play AVI files with subtitles, you need to assign the same name to the subtitle file as the AVI file, for
example:
Movie name:
Subtitle name:
My_Movie_With_Sub.AVI
My_Movie_With_Sub.SRT
• Select the file you would like to play with the navigation buttons on the remote control.
• Press the ‘Enter’ button (26) or the ‘Play’ button (18) on the remote control to start the playback of
the selected file.
The AVI file will start playing with the corresponding subtitle file loaded.
To disable/enable subtitles during playback, press the ‘Sub-t’ button (37) on the remote control.
You can return from the Media Browser menu to the Main menu by pressing the ‘Menu’ button (40) on the
remote control.
54
ENGLISH
Playback of your Music
You can play music files, which can be stored on the HDD of the unit, a USB storage device or a network
location, on your TV through the ‘Music’ filter of the Media Giant.
When the ‘Music’ filter is selected, the Media Giant will display only music files on your screen. All other
files will not be visible.
[ Music Mode ]
• Select the file you would like to play with the navigation buttons (15) on the remote control.
If you have selected a music file, the Media browser will display the ID3 tag information (when available)
with the filename and filesize in the right part of the screen.
• Press the ‘Enter’ button (26) or the ‘Play’ button (18) on the remote control to start the playback of
the selected file.
During playback, you can use the following playback options on the remote control:
-
Pause
(17)
Stop
(23)
Rewind
(10)
Fast Forward
(32)
Repeat
(8)
Info
(27)
Volume
(12), (13)
Mute
(30)
Pause or resume the playback.
Stop the playback.
Rewind the playback.
Fast Forward the playback.
Change the Repeat option of the current file/folder.
Display the playback details.
Adjust the volume level.
Mute the sound.
You can return from the Media Browser menu to the Main menu by pressing the ‘Menu’ button (40) on the
remote control.
55
ENGLISH
Playback of your Photos & Pictures
You can view your photos and pictures, which can be stored on the HDD of the unit, a USB storage device
or a network location, on your TV through the ‘Photos’ filter of the Media Giant.
When the ‘Photos’ filter is selected, the Media Giant will display only photo and picture files on your
screen. All other files will not be visible.
[ Photos Mode ]
• Select the file you would like to play with the navigation buttons (15) on the remote control.
If you have selected a photo file, the Media Browser will display a small preview with the filename and
filesize in the right part of the screen.
• Press the ‘Enter’ button (26) or the ‘Play’ button (18) on the remote control to start the playback of
the selected file.
During playback, you can use the following playback options on the remote control:
-
Pause
Stop
Navigation keys
Previous
Next
Repeat
Info
Zoom
(17)
(23)
(15)
(11)
(31)
(8)
(27)
(5)
Pause or resume the slideshow.
Stop the slideshow.
Rotate the shown photo.
Play the previous file in the current folder.
Play the next file in the current folder.
Change the Repeat option of the current file/folder.
Display the slideshow details.
Zoom in / zoom out
You can return from the Media Browser menu to the Main menu by pressing the ‘Menu’ button (40) on the
remote control.
Tip:
In the Setup Menu, an option is added to change the transition of your photo slideshow.
See chapter 13 for the option ‘Transition Effect’.
56
ENGLISH
Copy mode
If you want to copy data from 1 location to another location (for example: from a USB device to the
internal harddisk), you can use the Copy mode of the Media Giant.
To access the Copy mode, press the ‘Copy’ button (7) on your remote control when you are in the media
browser. The Copy menu will be shown on your screen:
[ Copy menu ]
[ Copy menu – Copy Wizard ]
You can select between ‘USB’, ‘Harddisk’ or ‘Network’ as source for your copy. The available desinations
are ‘USB’, ‘Harddisk’ and ‘Recycle’ (delete files).
First select the source by pressing the up and down navigation buttons (15) on the remote control. When
the correct source is selected, press the right navigation button (15) and use the up and down navigation
buttons (15) to select the destination.
Note:
You can see by the highlighted border if the Source or Destination section of the Copy menu is
active.
Note:
It is not possible to copy from ‘USB’ to ‘USB’, or from ‘Harddisk’ to ‘Harddisk’.
• When the source and destination location are correct, press the ‘Enter’ button (26) on the remote
control to proceed with the Copy Wizard.
• Navigate through your source until you have found the files or folders you want to copy. You can
navigate through the folders with the navigation buttons (15) and the ‘Enter’ button (26) on the remote
control.
• Mark the files or folders you want to copy with the ‘Play’ button (18) on the remote control. The
marked files or folders will show a marked icon behind the name.
• When the source files or folders are marked, press the right navigation button (15) on the remote
control to switch to the destination section.
Note:
It is not possible to select the NTFS media partition of the Media Giant as destination, since it is
not possible to write on the NTFS media partition.
• Navigate through your destination until you have found the correct copy location. You can navigate
through the folders with the navigation buttons (15) and the ‘Enter’ button (26) on the remote control.
• When the correct location is found, press the the right navigation button (15) on the remote control to
start the copy process.
57
ENGLISH
• The copy wizard will ask your confirmation for the copy process. Select ‘OK’ to proceed with the copy
process.
[ Copy Confirmation ]
[ Copy in progress ]
When the copy process is complete, you will be notified with a message on your screen.
It is also possible to delete files through the Copy menu.
When you want to delete files, select ‘Recycle’ as your destination.
Mark the files or folders which you want to delete and press the right navigation button (15) on the remote
control, you will see a confirmation window for deleting the selected files or folders.
Select ‘OK’ to delete the selected files or folders.
[ Copy menu – Delete Wizard ]
[ Delete Confirmation ]
58
ENGLISH
10. Playback Recordings
When you have selected the ‘Playback Recordings’ option in the Main menu, the Media Giant will ask you
to choose between ‘Digital’ and ‘Analog’.
• If you select ‘Digital’, the Media Giant will display the recordings made through the digital (DVB-T)
tuner of the Media Giant.
• If you select ‘Analog’, the Media Giant will display all the recordings made through the analog inputs of
the Media Giant (Composite-in, Component-in, FireWire-in).
When you have selected ‘Digital’ or ‘Analog’, the Media Giant will display the recordings-list of the
selected option on your screen:
[ Select Recording ]
[ Recordings-list ]
Each video is indicated with a thumbnail image (first frame of the recording), name, time and date and
recording quality.
A yellow star behind your recording means that the recording is new and not been watched yet. When you
have watched the recording, the yellow star will disappear.
You can navigate through your recordings with the up and down navigation buttons (15) on the remote
control and play the recordings by pressing the ‘Enter’ button (26) or the ‘Play’ button (18) on the remote
control when a recording is selected.
During playback, you can use the following playback options on the remote control:
-
Pause
(17)
Slow
(24)
Stop
(23)
Rewind
(10)
Fast Forward
(32)
Ins. Rep.
(16)
CM. Skip
(25)
Previous
(11)
Next
(31)
Repeat
(8)
Info
(27)
Goto
(9)
Zoom
(5)
Audio
(4)
Volume
(12), (13)
Mute
(30)
Pause or resume the playback.
Slowmotion playback.
Stop the playback.
Rewind the playback.
Fast Forward the playback.
Jump back 10 seconds in the playback.
Jump forward 30 seconds in the playback.
Play the previous chapter or the previous recording.
Play the next chapter or the next recording.
Change the Repeat option of the current playback.
Display the playback details.
Go to a specific point (time) in the movie.
Zoom in / zoom out
Change the audio track (if available for your playback).
Adjust the volume level.
Mute the sound.
59
ENGLISH
With the left and right navigation buttons (15) on the remote control, you can navigate through the options
on the top menu of the recordings-list, to select several features:
Play
Delete
Rename
Sorting
Edit
Play your recordings.
Delete your recordings.
Rename your recordings.
Change the sorting of your recordings.
Edit your recordings (explained in the next sub-chapter).
The ‘Edit’ menu explained
Note:
Digital recordings cannot be edited by the Media Giant. Therefore, the Edit menu contains
several options which are not available when you have selected ‘Digital’ in the ‘Playback
Recordings’ screen.
The Media Giant only allows you to access the ‘Copy to FAT32 partition’ option in the Edit
menu when you have selected ‘Digital’ in the ‘Playback Recordings’ screen.
The ‘Edit’ menu has multiple options to modify your recordings, which are explained below:
[ Recordings – Edit menu]
- Set Thumbnail
With the ‘Set Thumbnail’ option, you can play your movie and select
your favourite frame as thumbnail for your recording.
- A-B Erase
With the ‘A-B Erase’ option, you can mark a part of your movie (for
example: a commercial) and delete it from your recording.
- Split Title
With the ‘Split Title’ option, you can split a recording in 2 pieces (for
example: when you recorded 2 programs in 1 scheduled recording).
- Merge Title
With the ‘Merge Title’ option, you can merge 2 recordings into 1
recording.
- Add Chapter Mark
With the ‘Add Chapter Mark’ option, you can add chapter marks to your
recording. This will allow you to easily jump to a specific part in the
recording.
Note:
You can also enable the ‘Auto Chapter’ option in the Setup menu to automatically add
chapter marks on your recording.
60
ENGLISH
- Remove Chapter Mark
With the ‘Remove Chapter Mark’ option, you can remove chapter marks
from your recording. This option can be usefull when you configured the
Media Giant to automatically make chapter marks, but you want to
remove them from the recording.
- Copy to FAT32 partition
With the ‘Copy to FAT32 Partition’ option, you can copy your recording
from the recording partition to the ‘REC’ folder on the media partition of
the Media Giant.
When the recording is copied to the FAT32 partition, you are able to
play, copy or edit it on your computer when the Media Giant is
connected through USB, or you can stream it to a UPnP A/V client (like
the Conceptronic C54WMP or the Conceptronic CFULLHDMA) through the
network.
Note:
For more information about the UPnP A/V Server feature of the Media Giant, see chapter
16.
61
ENGLISH
11. TV Tuner / AV Input
Through the ‘TV Tuner / AV Input’ option in the main menu, you can view and record from the digital
(DVB-T) TV tuner or the AV Input sources of the Media Giant.
Tip: You can easily access the Live-TV screen from any menu in the Media Giant by pressing the ‘Live-TV’
button (38) on your remote control.
When you select the option ‘TV Tuner / AV Input’, the Media Giant will show the Live-TV image from the
TV tuner. While watching live TV, you can change the channels by pressing the ‘Channel +’ (29) or
‘Channel -’ (28) button on the remote control.
With the ‘Source’ button (2) on the remote control, you can switch between the TV-Tuner, Composite
input and Component input. The source will be shown shortly in the upper right corner of the screen.
Timeshifting
The Media Giant supports timeshifting. The timeshift feature ‘pauses’ Live TV or Live Audio/Video by
recording the current channel/input when timeshift is activated.
Press the ‘Timeshift’ button (22) on the remote control to initialize the timeshift feature.
When the timeshift feature is initialized, the Live TV or Live A/V will be ‘paused’ and the unit will record
the channel on the background.
[ Timeshift : Initializing ]
Note:
[ Timeshift : Active ]
When the timeshift feature is activated, the onscreen progress bar shows the maximum timeshift
buffer time. If you want to adjust this buffer (smaller or larger), you need to re-format the
harddisk of the Media Giant in order to adjust the size of the timeshift buffer partition.
More information about formatting can be found in chapter 15.
During the timeshift, you can use the following buttons on the remote control:
-
Play
(18)
Pause
(17)
Slow
(24)
Stop
(23)
Rewind
(10)
Fast Forward
(32)
Ins. Rep.
(16)
CM. Skip
(25)
Info
(27)
Volume
(12), (13)
Mute
(30)
Play the timeshift buffer.
Pause or resume the playback.
Slowmotion playback.
Stop the playback.
Rewind the playback.
Fast Forward the playback.
Jump back 10 seconds in the playback.
Jump forward 30 seconds in the playback.
Show or hide the timeshift buffer information.
Adjust the volume level.
Mute the sound.
62
ENGLISH
Permanent Timeshifting
In the Setup menu of the Media Giant, you can enable ‘Permanent Timeshifting’. When this feature is
enabled, the timeshift feature will be active at all times and allows you to instantly pause the playback or
use the above buttons on the remote control to ‘jump’ in your timeshift buffer.
Recording
While watching Live TV or Live A/V through the unit, you can start a record of the current channel by
pressing the ‘Rec’ button (19) on the remote control. The unit starts recording, until you press the ‘Stop’
button (23) on the remote control.
During recording, the ‘REC’ LED on the frontpanel will light up.
Note:
The unit detects copy protection on the connected source, for example MacroVision protection on
DVD discs. When a connected source is copy-protected, the unit will prevent recording and shows
a warning message when the record button is pressed.
Note:
The Media Giant records in HQ (High Quality) by default. You can change the recording quality in
the Setup menu.
Note:
During recording, you cannot change the current channel.
When you press the ‘Rec’ button (19) during a record, the record time will be set to 30 minutes, starting
at the time you pressed the ‘Record’ Button.
The message ‘OTR: 30 min.’ will be shown on your screen.
[ Normal Record ]
[ Record Timer activated ]
Press the ‘Rec’ button (19) again to increase the time with another 30 minutes, up to a maximum of 240
minutes. The unit keeps recording until the record time is elapsed, or until you press the ‘Stop’ button
(23) on the remote control.
Digital Radio
The Media Giant also supports digital radio, which are broadcasted through the digital (DVB-T) signal.
You can listen to digital radio stations through the speakers of your TV, or through the receiver which is
connected to your Media Giant.
To listen to digital radio stations.
When you are using the Digital tuner function, you can also listen to digital radio channels.
• Select the the option ‘TV Tuner / AV Input’ in the main menu of the Media Giant.
The Media Giant will show the Live-TV image from the TV tuner.
• Press the ‘Live-TV’ button (38) on the remote control to switch to Digital Radio mode.
The digital radio function will be enabled.
• You can use the ‘Channel +’ (29) or ‘Channel -’ (28) buttons to select a digital radio station.
• To return to Digital TV mode, press the the ‘Live-TV’ button (38) on the remote control again.
63
ENGLISH
EPG (Electronic Program Guide)
The digital (DVB-T) tuner of the Media Giant adds EPG (Electronic Program Guide) to the functions of the
Media Giant.
You can access the EPG guide while watching Live-TV by pressing the ‘Guide’ (33) button.
The EPG guide will be shown on your screen:
[ Electronic Program Guide ]
[ Electronic Program Guide : Scheduled Record ]
You can use the following buttons on the remote control to operate the EPG guide:
-
Left / right arrow
Up / down arrow
Previous
Next
Rewind
Fast Forward
Rec
(15)
(15)
(11)
(31)
(10)
(32)
(19)
Change the selected date in the EPG guide.
Change the selected show in the EPG guide.
Change to the previous channel.
Change to the next channel.
Scroll through the show info.
Scroll through the show info.
Schedule the selected show for recording.
If you press the ‘Rec’ (19) button, the selected show will be added to the scheduled recordings of the
Media Giant. The selected show will be indicated with a red marker, showing that it is scheduled for
recording.
You can find the scheduled recording in the ‘Scheduled Recording’ menu of the Media Giant, described in
chapter 12.
You can return to Live-TV by pressing the ‘Guide’ button (33) on the remote control.
64
ENGLISH
DV Control
The mini FireWire connection behind the frontpanel of the Media Giant allows you to connect your DV
camera directly to the Media Giant and view or record your home videos on the internal harddisk.
• Connect your DV camera to the mini Firewire connection [7] on the front of the Media Giant.
• Turn on your DV camera and set it to ‘Playback’ mode.
• Press the ‘DV’ button (39) on your remote control to initialize the ‘DV Control’ mode.
The Media Giant will display the DV Controls on your screen:
[ DV Control Panel ]
You can select the buttons of the DV Control panel with the navigation buttons (15) on the remote control.
You can confirm your selection with the ‘Enter’ button (26) on the remote control.
When you have selected ‘Play’ in the DV Control window and your movie is playing, you can press the ‘Rec’
(19) button on the remote control to start recording your DV movie to the harddisk.
Tip: When you are recording, you can hide the DV Control panel by pressing the ‘DV’ button (39) on your
remote control. The panel will be shown again after pressing the ‘DV’ button a second time.
You can stop this recording by pressing the ‘Stop’ button (23) on the remote control.
The recorded movies will be listed in the recordings-list, as described in chapter 10.
To exit the DV Control mode, press the ‘Return’ button (14) on the remote control.
65
ENGLISH
12. Scheduled Recording
You can program the unit to record channels on specific times. You can program up to 8 scheduled
recordings in the unit.
Tip:
You can easily schedule recordings through the EPG guide of the Media Giant. The EPG guide is
explained in chapter 11 of this manual.
• Select the option ‘Scheduled Recording’ in the Main menu.
The Scheduled Recording screen will be shown on your TV.
[ Scheduled Recording menu ]
[ Add a scheduled recording ]
The Scheduled Recording menu shows 5 options, which can be selected with the left and right navigation
buttons (15) of the remote control:
Add
Edit
Delete
Status
History
Add a new scheduled recording
Edit an existing scheduled recording
Delete a scheduled recording
Change the status of the scheduled recording list
Display the scheduled recording history list
Add or Edit a schedule
When you select the ‘Add’ or ‘Edit’ option in the menu and you press the ‘Enter’ button (26) on the
remote control, you can add a new schedule or edit an existing schedule.
By default, the ‘Source’ field is selected.
All options can be changed with the up and down navigation buttons (15), and you can select another field
with the left and right navigation buttons (15).
• Select the correct source for your recording. This can be TV channel, the Composite video input or the
Component video input.
• Set the correct date for your recording.
• Set the correct start time for your recording.
• Set the length of your recording.
• Set the repeat option for your recording. You can select the following options:
‘Once’, ‘Everyday’, ‘Mon-Fri’, ‘Mon-Sat’, ‘Sun’, ‘Mon’, ‘Tue’, ‘Wed’, ‘Thu’, ‘Fri’ or ‘Sat’.
You can Skip the ‘Device’ field, since you can only record on the internal harddisk.
66
ENGLISH
• Set the recording quality. You can choose between ‘HQ’, ‘SP’, ‘LP’, ‘EP’ and ‘SLP’.
Note:
Changing the ‘Quality’ field influences the quality of your record and the amount of space
needed for the record. The available recording time for each quality setting is shown in the
upper left part of the scheduling window.
• Set the ‘Nicam’ option to ‘on’ or ‘off’.
The Nicam option should be set to ‘on’ if the source you want to record a broadcast with 2 different
audio languages (for example: Eurosport).
• When all the options are set for your recording, press the ‘Enter’ button (26) on the remote control to
save the schedule.
• A confirmation popup will be shown on your screen. Select ‘Confirm’ and press the ‘Enter’ button (26)
on the remote control to save the schedule.
The recording is now programmed as a scheduled recording and the unit will start recording on the
programmed time and channel, even when the device is set to ‘Standby’.
Note:
During recording, you cannot change the current channel.
67
ENGLISH
13. Setup
When you select the ‘Setup’ option in the Main menu, the Setup menu will be shown on your screen. The
explanation below shows all available settings with the including description.
You can switch between the various options of the Setup menu with the navigation buttons of the remote
control.
[ Setup menu – Video ]
[ Setup menu – Record ]
A/V Setup:
Aspect Ratio
Brightness
Contrast
Transition
Audio Setup
Change the aspect ratio of the Media Giant outputsignal.
(‘Letterbox 4:3’, ‘Pan-Scan 4:3’, ‘Widescreen 16:9’)
Change the brightness of the Media Giant output signal.
Change the contrast of the Media Giant output signal.
Change the transition between photo slideshows.
Change the audio setup of the Media Giant.
Night Mode
Enable or disable Night Mode audio. (Off, On, Comfort).
Digital Output Set the digital audio output. (HDMI-LPCM, HDMI-RAW, SPDIFLPCM, SPDIF-RAW)
Record:
Quality
Note:
Change the default record quality. (‘HQ’, ‘SP’, ‘LP’, ‘EP’, ‘SLP’)
Changing the ‘Quality’ field influences the quality of your record and the amount of space needed
for the record. The different quality settings will require the following space for 1 hour of video:
HQ:
4.85 GB (4850 MB)
SP:
2.42 GB (2420 MB)
LP:
1.62 GB (1620 MB)
EP:
1.21 GB (1210 MB)
SLP:
0.80 GB (800 MB)
Auto Chapter
Permanent Timeshift
Change the Auto Chapter setting. The Auto Chapter function will automatically
add chapter marks to your recording, to easier jump trough your recordings
during playback.
Enable or disable the permanent timeshift feature. When this feature is enabled,
the timeshift feature will be active at all times and allows you to instantly pause
the playback or the buttons on the remote control to ‘jump’ in your timeshift
buffer.
68
ENGLISH
[ Setup menu – Network ]
[ Setup menu – System ]
Network:
LAN Preference **
Note:
Change the preferred LAN connection: Cable or Auto (Via Powerline)
When ‘Cable’ is chosen, the Media Giant will always use the LAN port as network
connection.
When ‘Auto (Via Powerline)’ is chosen, the Media Giant will use the Powerline
feature if a Powerline network is available. If there is no Powerline network
available, the LAN port will be used.
When the Media Giant is connected to both Powerline and LAN Cable , the default network will be
the Powerline network. When the performance of the Powerline network will decrease to below
1Mbps, the Media Giant automatically switches to Cable mode. During Cable mode, the Media
Giant will keep checking the Powerline network performance. When the performance increases to
above 1Mbps, the Media Giant will switch from Cable mode to Powerline mode.
Wired Lan Setup
In the ‘Wired Lan Setup’, you can configure the IP address of the Media Giant.
When selected, you can choose between ‘Cancel’, ‘DHCP IP (Auto)’ or
‘Fix IP (Manual)’.
When you have a DHCP server in your network, select the option ‘DHCP IP’.
When you want to use a static IP address, select ‘FIX IP’.
The Setup Wizard will show you the fields to enter a static IP address. Use the
navigation buttons (15) and the numeric buttons 0-9 (6) to enter the IP address,
Subnet mask, Default gateway and DNS server.
When the entered values are correct, press the ‘Enter’ button (26) on the remote
control.
Media Server
Change the name of the Media Giant in the network.
When selected, you can choose between ‘Server/Host name’ and ‘Group name’.
Server/Host name
Change the name of the Media Giant.
The name of the Media Giant allows UPnP A/V clients (like
the Conceptronic C54WMP or the Conceptronic CFULLHDMA)
to stream media files through the network from the Media
Giant harddisk and allows computer in your network
environment to access the Samba server of the Media Giant.
Group name
Change the workgroup name of the Media Giant.
Note:
More information about the UPnP A/V Server functionality of the Media
Giant can be found in chapter 16.
More information about the Samba Server functionality of the Media Giant
can be found in chapter 18.
69
ENGLISH
System:
Menu Language
Set Time
HDD Format
Timer Setup
Firmware Upgrade
Restore Default
Select the language you want to use when operating the Media Giant.
Change the time and date.
Format the internal harddisk (See chapter 15).
Slideshow Timer:
Change the slideshow interval during a picture slideshow.
Screen Saver Timer: Change the inactivity time to activate the screensaver.
Upgrade the firmware of the Media Giant.
A firmware upgrade can be done through the internet or through a USB storage
device. The firmware Upgrade option can be set to ‘Auto’ or to ‘Manual’.
When ‘Auto’ is selected (default), the Media Giant will check on random times for
new firmware online and upgrades the firmware automatically when no recording /
playback is running on the Media Giant.
When ‘Manual’ is selected, you can manually check for new firmware.
Note: To check your current firmware version, press the ‘Info’ button (27) on the
remote control when you are in the Main menu. The firmware version will
be shown on your screen.
Restore the Media Giant to the default settings and initialize the Setup Wizard to
reconfigure the unit.
[ Setup menu – TV Setup ]
[ Channel Edit ]
TV Setup:
TV Input
Channel Scan
Manual Tune
TV Program
Select your country from the country-list. If your country is not listed, select
‘Other’ from the list.
Tip:
You can also scan a specific DVB-T frequency band by selecting ‘6M’
(600Mhz), ‘7M’ (700Mhz) or ‘8M’ (800Mhz).
Start an automatic channel scan. The automatic channel scan of the Media Giant can
take a while, but will search and store automatically all found channels in the
memory of your Media Giant.
With the Manual Tune feature, you can add new channels to your existing channel
list (with the ‘Add’ option) , remove channels from your channel list (with the ‘Skip’
option), or assign names to the found channels (with the ‘Edit’ option).
With the option TV Program, you can configure the Media Giant to show all DVB-T
channels (including paid channels, which cannot be played on the Media Giant), or
only show the Free (FTA) channels.
70
ENGLISH
14. Computer USB Connectivity
The unit can be connected to your computer to copy data (movies, music, pictures, records, etc.) from and
to the internal HDD.
Note:
In our example below, we are using a computer running Windows XP, but the unit can be used on
computers with USB support and the capability of reading & writing FAT32 & NTFS file systems.
Connect the unit to your computer
• Connect the delivered USB to Mini-USB cable to the Mini-USB port on the frontside of the unit and to a
free USB port on your computer.
• Turn the unit on with the main power switch on the backside of the unit. The unit will be recognized
and installed automatically and will be shown as extra drives on your computer.
Note:
When the harddisk is partitioned with 1 media partition (FAT32 only), there will be only 1 drive
letter visible. When the harddisk is partitioned with 2 media partitions (FAT32 and NTFS), the
Media Giant will show 2 drive letters.
Recording playback on your computer
To play your recordings on your computer, you first need to copy the recordings from the record partition
to the media partition. You can do this with the ‘Copy to FAT32 Partition’ command, which can be found
in the ‘Playback Recordings’ menu, explained in chapter 10.
When your recordings are copied to the FAT32 partition, you can play the recorded programs on your
computer, when the unit is connected to the computer.
Disconnect the unit from your computer
•
•
•
•
Single-click the “Safe Removal” icon on the system tray.
Select “Stop USB Mass Storage Device” when prompted.
Wait for the message “Safe to remove Hardware”.
Disconnect the USB cable.
71
ENGLISH
15. Partition Information & Format Wizard
The Media Giant will be delivered with a preformatted harddisk in most situations. The harddisk is
formatted with the default configuration of the Media Giant, and will partition the harddisk as following:
Timeshift buffer partition:
Recording partition:
FAT32 media partition:
NTFS media partition :
~ 4.85 GB
50% of the harddisk space.
25% of the harddisk space.
25% of the harddisk space.
Example with:
500GB
750 GB
1000GB
Timeshift buffer partition:
Recording artition:
FAT32 media partition:
NTFS media partition:
~ 4.85 GB
~ 250 GB
~ 125 GB
~ 125 GB
~ 4.85 GB
~ 375 GB
~ 187 GB
~ 187 GB
~ 4.85 GB
~ 500 GB
~ 250 GB
~ 250 GB
You can change the default harddisk configuration by reformatting the harddisk of the Media Giant.
Note:
If you reformat the harddisk of the Media Giant, all stored and recorded content on the harddisk
will be deleted!
To format the harddisk of the Media Giant, go to the Setup menu and select the option ‘HDD Format’ on
the ‘System’ page. Select again ‘HDD format’ as confirmation.
The HDD Format Wizard will now be shown on your screen with the question for format the harddisk
automatically (‘Auto’) or manually (‘Manual’).
• When you select ‘Auto’, the Media Giant will be formatted with the default format settings, as
mentioned above.
• When you select ‘Manual’, the Format Wizard will guide you through the steps to format the harddisk.
[ Format Wizard – Auto or Manual ]
[ Format Wizard – Timeshift Buffer ]
Change the Timeshift Buffer size with the up and down navigation buttons (15) on the remote control.
You can set the Timeshift Buffer to 1, 2, 3 or 4 hours.
• Select ‘Next’ to continue to the next step.
72
ENGLISH
[ Format Wizard - Recording Partition ]
[ Format Wizard – FAT32 / NTFS Partition ]
• Change the Recording Partition size with the up and down navigation buttons (15) on the remote
control.
The remaining space will be used for the media partition(s) of the Media Giant.
• Select ‘Next’ to continue to the next step.
[ Format Wizard – Start Format ]
[ Format Wizard – Formatting ]
• Select ‘Format’ to start with formatting the harddisk of the Media Giant.
During format, the Format Wizard will show ‘Proceeding’.
Note:
The format procedure can take a while (~ 5 minutes). Please wait until the format procedure is
finished.
[ Format Wizard – Completed ]
• When the Format process is finished, select ‘OK’ to close the Format Wizard. The Media Giant will
reboot automatically.
73
ENGLISH
16. UPnP A/V Server (Twonky Mediaserver)
One of the features of the Media Giant is the UPnP A/V Server.
This makes the Media Giant and all its media content available for UPnP A/V clients in your network (for
example: the Conceptronic CFULLHDMA or the Conceptronic C54WMP).
The used UPnP A/V Server in the Media Giant is ‘Twonky Mediaserver’.
The Twonky Mediaserver automatically indexes all the media on the FAT32 and NTFS media partition. When
new data is added to one of these partitions, it will become automatically available for UPnP A/V clients in
your network.
The name of your UPnP A/V Server can be set in the Setup menu of the Media Giant, at the ‘Network’
section.
Note:
The default name of the UPnP A/V Server is ‘media giant’.
If you are familiar with the Twonky Mediaserver software, you can change the advanced Twonky
Mediaserver settings through your computer.
To access the configuration pages of the Twonky Mediaserver software, enter the IP address of the Media
Giant in your browser window, followed by the portnumber 9000.
For example:
HTTP://192.168.0.100:9000/ (assuming that 192.168.0.100 is the IP address of your
Media Giant).
The Twonky Media Server has a built-in ‘Troubleshooting’ guide, which can be found in the left navigation
bar of the Twonky Media Server configuration window. This guide will help you with the configuration of
the Twonky Media Server.
For more information of the Twonky Media Server, visit the Twonky website at:
http://www.twonkymedia.com/
74
ENGLISH
17. Browsing Network Shares
The Media Giant can browse your network shares and play media files directly from a network share. In
order to use this feature, you need to share your media folders in your network, so the Media Giant can
find and access them.
This chapter will explain how you can enable file sharing in Windows XP and Windows Vista.
Note:
This manual only describes file and folder sharing in Windows XP and Windows Vista.
Please check the manual of your operating system or network storage device how you can share a
folder with media files.
File sharing in Windows XP
• Open ‘My Computer’ with the shortcut in the start menu and navigate to the folder with media files you
want to share.
• Single click on the folder with media files and select the option ‘Share this folder’ in the left menu bar.
[ My Computer – Share Folder ]
The properties of the folder are shown, with the ‘Sharing’ page displayed.
The section ‘Network sharing and security’ can be used to share the folder.
If you did not share any folders previously, you need to run the Network Setup Wizard by clicking the
‘Network Setup Wizard’ line in the window.
75
ENGLISH
[ Properties – Sharing Page ]
[ Properties – Sharing Page ]
• When the Network Setup Wizard is already finished previously, you can share your folder by clicking
‘Share this folder on the network’.
• Enter a name for the share in the textfield and click ‘Apply’.
• Click ‘OK’ to close the window.
The folder is now listed with a hand beneath the folder icon, indicating that the folder is shared on your
computer.
[ Shared Folder ]
76
ENGLISH
File sharing in Windows Vista
• Open ‘Computer’ with the shortcut in the Start menu and navigate to the folder with media files you
want to share.
• Single click on the folder with media files and select the option ‘Share’ in the top menu bar of the
window.
[ Computer – Share Folder ]
By default, your own user is in the share list as owner of the folder.
[ Sharing Properties ]
• You can add more users to the sharing list by selecting them from the drop-down list and press the ‘Add’
button.
• When the list with users is complete, click the ‘Share’ button to share the folder.
The folder is now listed with a small icon displaying 2 people, indicating that the folder is shared on your
computer.
[ Shared Folder ]
77
ENGLISH
Browse shared folders on the Media Giant
When your media files are shared, you can use the ‘Browse Media’ option in the Main menu to browse your
network locations.
[ Storage Location Selection ]
[ Network Share – User Login ]
Use the navigation buttons (15) on the remote control to select the option ‘Network’ in the storage
location list, and navigate through the network to your computer or network storage device with the
shared folders.
When a shared folder is protected with a username and password (for example: default sharing in Windows
XP and Windows Vista), the Media Giant will show a ‘User Login’ popup, to enter the username and
password.
Note:
You can use your normal user account for Windows XP or Windows Vista to login to your shared
folder.
Use the navigation buttons (15) on the remote control to select the User ID or the Password field and press
the ‘Enter’ button (26) to show the onscreen keyboard for entering the value.
[ Onscreen Keyboard ]
[ Network Share – User Login ]
When the username and password are correctly entered, select the ‘OK’ or the ‘OK & Save to
MyShortcuts’ button to enter the network share.
You are now able to navigate through the shared folder like described in chapter 9.
78
ENGLISH
18. Network sharing - configuration and usage
The Conceptronic Media Giant can be accessed as network share (Samba Server). With the network sharing
feature, you can share the FAT32 partition (HDD1) of the Media Giant through your network, so other
computers can reach the data stored on that partition.
Configuration
Select the option ‘Setup’ in the main menu. The Setup menu will be shown on your screen. In the Setup
menu, select ‘Network’. In the System Setup menu, there is an option called ‘Media Server’.
At the option ‘Media Server’, you can change the following settings:
- Server/Host name
- Group name
Specify the name of the Media Giant in your network. The default name of the
Media Giant is ‘media giant’.
Specify the name of your home network. The default group name is
‘WORKGROUP’.
When the settings are changed, press the ‘Return’ (14) button on the remote control to return to the main
menu.
Usage
When you have configured the network settings of the Media Giant, you can access the network share
through a computer in your network.
Note:
The steps below show how you can access the Media Giant network share with the default settings
on a computer running Windows Vista.
By default, the network name of the Media Giant is ‘media giant’. With this name, you can reach the
network share of the device in the network.
• Select ‘Start’, ‘Network’.
Windows Explorer will show your network settings.
In the top bar, you can enter the network name of the Media Giant as following:
\\<NETWORK_NAME_OF_MEDIA_GIANT>\
For example:
If the Media Giant is configured with the default settings, the network name is ‘media
giant’ and you should enter:
\\media giant\
79
ENGLISH
The network share of the Media Giant will be displayed on your screen, as shown in the screenshot below:
Note:
In Windows, the share ‘Printers’ is automatically added to every Samba server in the network, but
the Media Giant cannot function as print server.
By selecting the network share, you can copy, delete, play and add files to the FAT32 partition of the
Media Giant.
80
ESPAÑOL
Media Giant con DVB-T de Conceptronic
Manual del usuario
Felicidades por la compra de su
Reproductor grabador multimedia de Conceptronic.
Este manual de usuario le ofrece una descripción paso a paso acerca de cómo instalar y utilizar el
Reproductor grabador multimedia de Conceptronic.
Si necesita información adicional o ayuda en relación con su producto, le recomendamos que visite la
sección Soporte de nuestro sitio web en www.conceptronic.net/support y seleccione una de las opciones
siguientes:
• FAQ
• Descargas
• Contacto:
: base de datos de las preguntas más frecuentes
: manuales, drivers, firmware y otras descargas
: contacta con el departamento de Soporte de Conceptronic
Consejo: El Media Giant de Conceptronic puede actualizarse mediante firmware. Para actualizar la
unidad con la última versión de firmware, visite el sitio web de Conceptronic o utilice la característica de
actualización de firmware integrada del Media Giant.
Consejo: Compruebe en www.conceptronic.net/FAQ la lista actualizada de códecs y archivos
compatibles.
Para obtener información general sobre los productos de Conceptronic, visite nuestro sitio web:
www.conceptronic.net.
1. Contenido del paquete
El paquete del Reproductor grabador multimedia de Conceptronic debe incluir los siguientes artículos:
•
Media Giant de Conceptronic (descrito como “unidad” o “Media Giant” en el manual). **
El dispositivo del paquete es uno de los dos modelos indicados a continuación:
CM3GD
[C08-147]: Media Giant con sintonizador (DVB-T) digital.
CM3GDP [C08-148]: Media Giant con sintonizador (DVB-T) digital y adaptador Powerline.
•
•
•
•
•
•
•
•
•
•
•
•
•
•
Adaptador de red Powerline de Conceptronic (sólo incluido con el CM3GDP).
Cable de alimentación.
Mando a distancia.
2 pilas tipo AAA para el mando a distancia.
Cable de antena RF.
Cable de vídeo Composite (conectores RCA rojo, blanco y amarillo).
Cable S-Vídeo.
Cable de Vídeo Component (conectores RCA rojo, verde y azul).
Cable de audio digital coaxial (conectores RCA negros).
Adaptador SCART de cable de vídeo Composite / cable S-Vídeo.
Cable HDMI A/V (HDMI 1.3).
Cable de red.
Cable USB.
Este manual de usuario.
IMPORTANTE:
En este manual, se explican algunas características que son válidas únicamente para el CM3GDP (con
sintonizador (DVB-T) digital y adaptador Powerline). Dichas características están marcadas con dos
asteriscos (**).
81
ESPAÑOL
2. Características del producto
•
•
•
•
•
•
•
•
•
•
•
•
•
Adaptador de red Powerline incorporado. **
Sintonizador de TV (DVB-T) digital incorporado con búsqueda automática de canales.
Grabación de señal de TV (DVB-T) digital.
Grabación de señal A/V procedente, por ejemplo, de un aparato de vídeo, un DVD o una
videocámara.
Entrada DV para la reproducción o grabación de la señal de una videocámara DV.
Grabación al disco duro interno.
Resolución de salida de hasta 1080i.
Resolución de reproducción de hasta 1080i.
Calidad de DVD de los archivos grabados en formato TS (para grabaciones digitales mediante el
sintonizador DVB-T digital) o en formato MPEG2 (para grabaciones analógicas mediante entradas AV)
(pueden reproducirse en un PC o en otros reproductores multimedia).
Opciones de grabación: grabación instantánea, grabación programada y grabación con TimeShift.
Reproducción de archivos MPEG1/2/4, MP3, WMA o JPG almacenados en el disco duro interno o en el
dispositivo USB.
Copia de archivos desde un dispositivo USB o una ubicación en la red en el disco duro interno.
Modo USB-PC o modo reproductor automáticos:
Cuando está conectada al ordenador mediante conexión USB, la unidad actúa como dispositivo
de almacenamiento USB.
Cuando no está conectada al ordenador mediante conexión USB, la unidad actúa como
Reproductor grabador multimedia.
3. Notas y avisos
•
•
•
•
•
•
•
•
•
•
•
•
No intente desmontar la unidad. El alto voltaje puede causar lesiones.
Mantenga el dispositivo apartado de ambientes excesivamente húmedos.
No moje o sumerja la unidad en líquidos.
Desconecte el cable de corriente si no va a utilizar el dispositivo durante un largo período de tiempo.
Asegúrese que el cable de alimentación está conectado al Media Giant y es fácilmente accesible.
Evite utilizar el dispositivo en lugares cercanos a sustancias combustibles.
Cambie las pilas del mando a distancia por unas del mismo tipo cuando empiecen a agotarse o se
hayan agotado completamente. Recicle las pilas agotadas siempre que sea posible. Para evitar la
corrosión, retire las pilas del mando a distancia si no va a utilizarlo durante un largo período de
tiempo.
Asegúrese que ha reemplazado correctamente las baterías del mando a distancia para prevenir
riesgos.
Mantenga el mando a distancia apartado de ambientes excesivamente húmedos; no lo deje caer al
suelo.
No utilice ni exponga el mando a distancia a luz del sol intensa.
Evite SIEMPRE que la unidad se caiga o sufra sacudidas o golpes.
Para evitar su calentamiento, no cubra el dispositivo.
IMPORTANTE:
¡NO formatee el disco duro de la unidad desde un ordenador! Eso haría que se perdieran
todos los datos de sistema y haría necesaria una reinicialización. Cuando desee formatear
el disco duro de la unidad, utilice la utilidad de formato incorporada que encontrará en el
menú Configuración de la unidad.
82
ESPAÑOL
4. Descripción del producto
Vista frontal
1
2
3
4
5
Vista posterior
9
14
10
15
11
16
17
18
19
20
21
6
7
8
12
13
22
23
Descripción de los números:
1. LED de estado (encendido, grabación, ACT, LAN)
2. Botones táctiles de navegación
3. Botones táctiles de reproducción
4. Receptor de infrarrojos
5. Conector Mini-USB (a PC)
6. Puerto USB Host
7. Entrada DV
8. Botón “Open” del panel frontal
9. Salida del sintonizador de TV digital
10. Entrada del sintonizador de TV digital
11. Salida AV de vídeo Composite
12. Salida coaxial digital SPDIF
Nota:
13. Interruptor de alimentación
14. Conexión LAN (RJ45)
15. Salida HDMI
16. Entrada AV1 (Vídeo/Audio Composite)
17. Entrada AV2 (Vídeo Component)
18. Entrada AV2 (audio I/D)
19. Salida AV de audio (I/D)
20. Salida AV de vídeo (Y/Pb/Pr)
21. Salida S-Vídeo
22. Salida óptica digital SPDIF
23. Toma de corriente alterna (110 ~240V)
Los botones táctiles tienen las mismas funciones que las funciones básicas del mando a distancia.
83
ESPAÑOL
5. Descripción del mando a distancia
El mando a distancia se utiliza para manejar la unidad. Encontrará una representación del mando a
distancia detrás de la portada de este manual. Los números de los botones corresponden a los de la tabla
de abajo, en la cual se explica cada función del mando a distancia.
Nº
Botón
Descripción
1.
2.
3.
4.
POWER (
SOURCE
MEDIA
AUDIO
5.
6.
7.
8.
9.
10.
11.
12.
13.
14.
15.
16.
ZOOM
0–9
COPY
REPEAT
GOTO
FAST REWIND (
PREVIOUS (
)
VOLUME +
VOLUME RETURN
, , ,
INS.REP.
17.
18.
19.
20.
21.
22.
23.
24.
25.
PAUSE
PLAY
REC
TV SYS
SETUP
TIMESHIFT
STOP ( )
SLOW
CM.SKIP
26.
27.
28.
29.
30.
31.
32.
33.
34.
35.
36.
ENTER
INFO
CHANNEL CHANNEL +
MUTE
NEXT (
)
FAST FORWARD (
GUIDE
A-B
DEL
ANGLE
37.
SUB-T
38.
LIVE-TV
39.
30.
41.
DV
MENU
LED
)
)
)
Enciende la unidad o la sitúa en modo “standby”
Cambia entre el sintonizador digital, AV y reproducción
Botón de acceso directo al buscador de archivos multimedia
Cambia la pista de audio del DVD (si está disponible con los archivos del
DVD)
Acerca o aleja la imagen
Botones numéricos
Muestra el menú de copiado
Habilita el Modo de Repetición
Va a un punto específico de la reproducción
Rebobinado rápido
Va al archivo, pista, capítulo o imagen anterior
Subir el volumen
Bajar el volumen
Vuelve a la pantalla o canal anterior
Teclas de navegación: navegar en los menús
Salto de 10 segundos hacia atrás durante la reproducción o la función
TimeShift
Pausa la reproducción o el TimeShift
Inicia la reproducción
Inicia la grabación
Cambia la resolución de salida de la unidad
Botón de acceso directo al menú de configuración
Activa la función TimeShift
Detiene la reproducción / detiene la grabación / desactiva el TimeShift
Reproducción lenta
Salto de 30 segundos hacia adelante durante la reproducción o la función
TimeShift
Confirma la selección
Muestra la información del canal o del archivo
Bajar un canal
Subir un canal
Silencia el sonido
Va al archivo, pista, capítulo o imagen siguiente
Avance rápido
Muestra la guía EPG del sintonizador (DVB-T) digital
Inicializa la repetición de intervalo A-B
Desactiva la entrada / Borra la selección
Cambia el ángulo de visión del DVD (si está disponible con los archivos
del DVD)
Cambia el idioma de los subtítulos (si está disponible con los archivos del
DVD)
Botón de acceso rápido a la señal de TV en directo / Cambio entre TV
digital y radio digital
Cambia a modo de reproducción y de grabación DV
Muestra el menú principal
Indica que el mando a distancia está funcionando.
84
ESPAÑOL
6. Conexiones del Media Giant
En este capítulo se explica cómo conectar el Media Giant a su TV, su sistema de “home cinema”, su red,
etc.
9
10
11
12
13
14
15
16
17
18
19
20
21
22
23
Conectar el cable o cables de antena
Nota:
El sintonizador digital de la unidad es compatible con Signal Pass-Through para poder redireccionar
la señal DVB-T de la entrada a la salida del sintonizador.
• Desconecte el cable principal de antena de su televisor o receptor de TDT y conéctelo a la entrada del
sintonizador digital [10] de la unidad.
• Conecte el cable de antena que incluye el producto a la salida del sintonizador digital [9] de la unidad y
a la entrada del sintonizador de su televisor o receptor de TDT.
Conectar el cable o cables de vídeo
Puede conectar la unidad a su televisor de 5 formas distintas:
- HDMI
- Composite
- SCART (utilizando el adaptador de cable Composite a Scart)
- S-Vídeo *
- Component *
*
Cuando utilice S-Vídeo o Component, a su televisor sólo se enviará la señal de vídeo.
Para la señal de audio, use los conectores RCA de audio del cable Composite (rojo y blanco), o la
salida de audio digital (óptica o coaxial) del Media Giant.
HDMI:
• Conecte el cable HDMI a la salida HDMI (15) de la unidad.
• Conecte el otro extremo del cable HDMI a una entrada HDMI libre de su televisor.
Composite:
• Conecte el cable Composite (amarillo, rojo y blanco) a los correspondientes conectores de salida de AV
(11, 19) de la unidad.
• Conecte el otro extremo del cable Composite (amarillo, rojo y blanco) a su televisor.
85
ESPAÑOL
SCART:
• Conecte el cable Composite (amarillo, rojo y blanco) a los correspondientes conectores de salida de AV
(11, 19) de la unidad.
• Conecte el otro extremo del cable Composite (amarillo, rojo y blanco) a los conectores del adaptador
SCART.
• Conecte el adaptador SCART a la entrada SCART de su televisor.
S-Vídeo:
• Conecte el cable S-Vídeo a la salida S-Vídeo (21) de la unidad.
• Conecte el otro extremo del cable S-Vídeo a la entrada S-Vídeo de su televisor.
Component:
• Conecte el cable Component (rojo, verde y azul) a los conectores Component (20) de la unidad.
• Conecte el otro extremo del cable Component a los conectores Component de su televisor.
Conectar el cable o cables de audio
Puede conectar la unidad a su televisor o a su sistema de “home cinema” de 3 formas distintas:
Analógica, mediante los conectores de audio RCA de la salida de A/V
Digital, mediante la salida SPDIF digital coaxial
Digital, mediante la salida SPDIF digital óptica
Analógica:
• Conecte los conectores de audio (rojo y blanco) del cable Composite a los conectores RCA de audio (19)
de la salida AV.
• Conecte el otro extremo del cable Composite a los conectores RCA de audio de su televisor o receptor.
Digital Coaxial:
• Conecte el cable coaxial digital a la salida coaxial digital (12) de la unidad.
• Conecte el otro extremo del cable coaxial digital a la entrada coaxial digital de su receptor.
Digital óptica:
• Conecte el cable óptico digital a la salida óptica digital (22) de la unidad.
• Conecte el otro extremo del cable óptica digital a la entrada óptica digital de su receptor.
Conectar otros equipos de audio o vídeo
Puede conectar otras fuentes de audio o vídeo a la unidad, como por ejemplo un aparato de vídeo o DVD o
un sintonizador digital terrestre, y grabar su señal.
Puede conectar al Media Giant dispositivos con salida Composite o Component.
Composite:
• Conecte el cable de audio o vídeo suministrado con su dispositivo de A/V a la salida correspondiente de
A/V del dispositivo.
• Conecte el otro extremo del cable Composite (amarillo, rojo y blanco) a los conectores de entrada AV1
(16) de la unidad.
Component:
• Conecte el cable de vídeo Component suministrado con su dispositivo de audio/vídeo a la salida
correspondiente de A/V del dispositivo.
• Conecte el otro extremo del cable de vídeo Component (rojo, verde y azul) a los conectores de entrada
AV2 (17) de la unidad.
Nota:
Los cables de vídeo Component sólo transmiten vídeo, no sonido. Para transmitir el audio, deberá
conectar también cables de audio desde el dispositivo de audio/vídeo a los conectores de entrada
de audio AV2 (18) de la unidad.
86
ESPAÑOL
Conectar el cable de alimentación
Cuando la unidad esté conectada a su equipo de audio o vídeo, puede conectar la fuente de alimentación a
la unidad.
• Conecte el cable de alimentación suministrado a la unidad (23) y a una toma de corriente disponible.
• Sitúe el interruptor de alimentación (12) de la parte trasera de la unidad a la posición “I” para
alimentar la unidad.
La unidad se encenderá.
Preparar el mando a distancia
• Quite la cubierta del compartimento de las pilas de la parte trasera del mando a distancia.
• Introduzca en el mando a distancia las pilas AAA incluidas.
• Vuelva a colocar la cubierta del compartimento de las pilas del mando a distancia.
Notas:
-
El alcance operacional óptimo del mando llega hasta unos 5 metros.
Apunte el mando hacia el receptor de infrarrojos situado en el panel frontal de la unidad.
El ángulo de recepción del receptor infrarrojo es de ±30 grados.
Cambie las pilas cuando estén parcial o totalmente agotadas.
87
ESPAÑOL
7. Configuración inicial
Hay que configurar la unidad al encenderla por primera vez.
• Seleccione el canal correcto de entrada del televisor donde esté conectada la unidad (HDMI, Composite,
SCART, S-Vídeo o Component).
Nota:
A partir de este punto, en el manual se asume que en su televisor tiene seleccionado el canal de
entrada de señal de la unidad. Todos los pasos que se describen se refieren al funcionamiento de
la unidad.
• Compruebe que el interruptor de alimentación de la parte trasera de la unidad está en posición ‘I’
(encendido).
• Encienda la unidad con el botón de encendido de la parte frontal de la unidad, o con el botón ‘Power’
(1) del mando a distancia.
• Compruebe el indicador LED de corriente situado en el frontal del Media Giant. Cuando el LED está
naranja, el dispositivo se encuentra en modo “Standby”. Cuando el LED está azul, el dispositivo se
encuentra operativo.
Nota:
Cuando se enciende, la unidad tiene que inicializarse. Esto puede tomar un poco de tiempo.
Durante la inicialización, se muestra la pantalla de inicio del Media Giant.
[Pantalla de inicio]
[Asistente de configuración]
Cuando el Media Giant se ha inicializado, hay que configurarlo antes de utilizarlo por primera vez. Para
ayudarlo con la configuración inicial, el Media Giant mostrará el “Asistente de configuración” en su
pantalla y le mostrará los pasos a seguir para realizar la configuración previa al primer uso.
El Asistente de configuración mostrará los siguientes pasos:
-
Idioma del menú
Entrada de TV
Búsqueda de canales
Configuración de una red LAN con cables
Fecha y hora
Utilice las teclas de navegación y el botón Enter (26) del mando a distancia para configurar su Media
Giant. Si configuró un parámetro y luego desea revisarlo, pulse el botón Return (“volver”) (14) del mando
a distancia.
Idioma del menú
Seleccione el idioma que desee para la utilización del Media Giant.
Entrada de TV
Seleccione su país de la lista de países. Si su país no aparece en la lista, seleccione la opción “Otro”.
Consejo: También puede buscar una banda de frecuencia DVB-T específica seleccionando “6M” (600
Mhz), “7M” (700 Mhz) u “8M” (800 Mhz).
88
ESPAÑOL
Búsqueda de canales
• Seleccione “Aceptar” para iniciar automáticamente la búsqueda de canales (DVB-T) digitales con el
sintonizador (DVB-T) digital del Media Giant. La búsqueda automática de canales del Media Giant puede
llevar unos minutos; el Media Giant buscará y almacenará automáticamente en su memoria todos los
canales encontrados.
• Cuando la búsqueda de canales haya finalizado, seleccione “Aceptar” para continuar con el Asistente de
configuración.
Si desea omitir la búsqueda de canales (por ejemplo, si está utilizando un receptor de TDT y no dispone de
señal de televisión digital (DVB-T)), puede seleccionar “Cancelar” para omitir este paso y continuar con el
Asistente de configuración.
Configuración de una red LAN con cables
La configuración de red sirve para adjudicar una dirección de IP al Media Giant. La mayoría de veces el
Media Giant estará conectado a una red que dispondrá de un servidor DHCP (generalmente un router).
• Cuando en su red haya un servidor HDCP, seleccione la opción “DHCP IP”.
• El Asistente de configuración le pedirá que confirme la selección. Seleccione “OK” para continuar.
• Cuando desee utilizar una IP estática, seleccione “FIX IP”.
• El Asistente de configuración le mostrará los campos para introducir una IP estática. Utilice los botones
de navegación (15) y los botones numéricos 0-9 (6) para introducir la dirección IP, la máscara de subred,
la puerta de acceso predeterminada y el servidor DNS.
• Cuando haya introducido los valores correspondientes, pulse el botón “Enter” (26) del mando a
distancia.
• El Asistente de configuración le pedirá que confirme la selección. Seleccione “OK” para continuar.
Si su Media Giant no está conectado a ninguna red, seleccione “Cancel” para omitir este paso y continuar
con el Asistente de configuración.
Fecha y hora
La opción “Fecha y hora” le permite ajustar la fecha y hora correctas en la configuración del Media Giant.
• Para ajustar manualmente la fecha y hora, seleccione “Manual”.
• Utilice los botones de navegación (15) y los botones numéricos 0-9 (6) para introducir el año, el mes, el
día, la hora, los minutos y los segundos. Cuando haya terminado, pulse el botón “Enter” (26) del mando
a distancia
• El Asistente de configuración le pedirá que confirme la selección. Seleccione “OK” para continuar.
• Si dispone de una conexión a Internet activa y el Media Giant está conectado a su red, puede seleccionar
"Auto (Via Network)”.
• El Asistente de configuración le mostrará los campos para configurar la fecha y hora automáticas. Puede
utilizar el servidor NTP predeterminado, pero si desea utilizar un servidor NTP distinto, pulse el botón
“Enter” (26) en el campo del servidor FTP para ajustar el valor.
• Introduzca la zona horaria que se corresponda con la de su país.
• Escoja “Desactivar” o “Activar” para desactivar o activar, respectivamente, la actualización automática
a horario de verano, dependiendo de si su país utiliza esta medida. Cuando haya introducido los valores
correspondientes, pulse el botón “Enter” (26) del mando a distancia.
• El Asistente de configuración le pedirá que confirme la selección. Pulse “OK” para continuar.
Se ha completado la configuración con el Asistente y ya está lista la configuración básica del Meda Giant.
Nota:
Nota:
Nota:
Para realizar otras configuraciones, utilice la opción “Configuración” del menú principal. El menú
de configuración se explica en el apartado 13.
Si desea volver a utilizar el Asistente de configuración después de haberlo utilizado, seleccione
“Configuración” en el menú principal y seleccione la opción “Restaurar valores
predeterminados”. El Media Giant borrará la configuración realizada y volverá a ejecutar el
Asistente de configuración.
Si compró el Media Giant sin el disco duro formateado, la unidad mostrará el Asistente de formato
una vez finalizado el Asistente de configuración. El Asistente de formato se explica en el apartado
15 de este manual.
89
ESPAÑOL
8. Menú principal
Desde el menú principal podrá acceder a varias funciones del Media Giant.
Nota:
Si no está en la pantalla del menú principal, puede pulsar el botón "Menú" (40) del mando a
distancia para que aparezca el menú principal en la pantalla.
[Menú principal ]
En el menú principal encontrará las siguientes opciones:
Examinar dispositivos
Reproducción de grabaciones
Sintonizador de TV / Entrada AV
Grabación programada
Configuración
Reproducir archivos multimedia almacenados.
Reproducir y editar sus grabaciones.
Ver la televisión o la señal de la entrada AV.
Establecer grabaciones programadas.
Configuración del Media Giant.
Estas opciones se describen en los siguientes apartados de este manual.
90
ESPAÑOL
9. Examinar dispositivos
Si ha seleccionado la opción “Examinar dispositivos” en el menú principal, el Media Giant mostrará el
buscador de dispositivos en su pantalla:
[Selección de dispositivos de almacenamiento]
[Selección de modo: Películas, Música, Fotos]
El buscador de dispositivos le permite seleccionar el dispositivo de almacenamiento desde el que desea
reproducir sus archivos multimedia:
USB
Disco duro
Red
Reproduce los archivos multimedia del dispositivo USB conectado (a través del puerto
USB).
Reproduce los archivos multimedia del disco duro interno del Media Giant.
Reproduce los archivos multimedia de los recursos compartidos o Samba de su entorno de
red.
Para buscar en el dispositivo USB o en el disco duro interno, seleccione “USB” o “Disco duro” en la lista de
dispositivos de almacenamiento.
Para buscar en los recursos compartidos de su red para reproducir desde éstos, seleccione la opción “Red”
en la lista de dispositivos de almacenamiento.
Nota:
Para buscar en los recursos compartidos de su red, asegúrese de haber configurado estos recursos
compartidos correctamente. Para más información acerca de los recursos compartidos en red y
cómo buscar en ellos, véase el apartado 17.
Una vez seleccionado un dispositivo de almacenamiento, puede escoger entre los modos Películas, Música
y Fotos con los botones de navegación (“izquierda” y “derecha”) del mando a distancia.
Cuando haya seleccionado una de esas tres opciones, el Media Giant filtrará automáticamente el contenido
del dispositivo de almacenamiento de forma que sólo verá los archivos del tipo seleccionado.
Por ejemplo:
Si selecciona “Películas”, en la pantalla sólo se mostrarán los archivos de películas.
En el menú del buscador de dispositivos, puede utilizar las siguientes opciones del buscador del mando a
distancia:
-
Botones de naveg.
Enter
Atrás
Copiar
(15)
(26)
(14)
(7)
-
Reproducción
Siguiente
Anterior
Menú
(18)
(31)
(11)
(40)
Examinar las carpetas y archivos o cambiar el modo de reproducción.
Reproducir el archivo seleccionado o abrir la carpeta seleccionada.
Ir a la carpeta anterior.
Muestra el menú de copiado. (Se explica en un subapartado de este
mismo apartado).
Reproducir el archivo seleccionado.
Ir a la página con archivos siguiente.
Ir a la página con archivos anterior.
Vuelve al menú principal.
Puede volver del menú del buscador de dispositivos al menú principal pulsando el botón “Menú” (40) del
mando a distancia.
91
ESPAÑOL
Reproducción de películas
Puede reproducir películas almacenadas en el disco duro de la unidad, en un dispositivo USB o en una
ubicación de la red y verlas en su TV mediante el filtro “Películas” del Media Giant.
Si ha seleccionado el filtro “Películas”, el Media Giant sólo mostrará en la pantalla los archivos de
películas. No se mostrarán los otros archivos.
[Modo Películas]
• Con los botones de navegación (15) del mando a distancia, seleccione el archivo que desee reproducir.
Si ha seleccionado un archivo de película, el buscador de dispositivos mostrará una vista preliminar con el
nombre y el tamaño del archivo en la derecha de la pantalla.
• Pulse el botón "Enter” (26) o el botón “Play” (18) del mando a distancia para iniciar la reproducción del
archivo seleccionado.
Durante la reproducción, puede utilizar las siguientes opciones de reproducción del mando a distancia:
-
Pause
Slow
Stop
Rewind
Fast Forward
Ins. Rep.
CM. Skip
Goto
Repeat
Info
Zoom
Sub-t
- Audio
- Volume
- Mute
(17)
(24)
(23)
(10)
(32)
(16)
(25)
(8)
(9)
(27)
(5)
(37)
(4)
(12), (13)
(30)
Pausar o reanudar la reproducción.
Reproducción lenta.
Detener la reproducción.
Rebobinar.
Avance rápido.
Salto de 10 segundos hacia atrás en la reproducción.
Salto de 30 segundos hacia adelante en la reproducción.
Ir a un punto (momento) específico de la película.
Cambiar la opción de repetición de la presente reproducción.
Mostrar la información de reproducción.
Acercar o alejar la imagen
Cambiar el idioma de los subtítulos (si está disponible para esta
reproducción).
Cambiar la pista de audio (si está disponible para esta reproducción).
Ajustar el volumen.
Silenciar el sonido.
Puede volver del menú del buscador de dispositivos al menú principal pulsando el botón “Menú” (40) del
mando a distancia.
92
ESPAÑOL
Funcionalidad de reproducción de DVD
El Media Giant reproduce DVD del disco duro como si fueran DVD normales. Podrá navegar por el menú del
DVD, elegir subtítulos y cambiar el idioma de audio.
Nota:
El Media Giant sólo puede reproducir las copias de DVD que no estén protegidos. No es compatible
con la protección CSS.
• Conecte el Media Giant a su ordenador (véase el apartado 13).
• Cree una carpeta en el disco duro del Media Giant con el nombre de la película del DVD (por ejemplo:
“Película1”).
• Copie los archivos de la carpeta “VIDEO_TS” a la carpeta creada (en este ejemplo: “Película1”) en el
Media Giant.
Una vez realizada la copia, la estructura de carpetas debería verse así:
- [Disco duro del Media Giant]
|-> Película1
(con todos los archivos del DVD dentro)
• Desconecte el Media Giant de su ordenador y conéctelo a su televisor.
• Con los botones de navegación (15) del mando a distancia, seleccione el icono “Examinar dispositivos”
del menú principal y pulse el botón “Enter” (26) del mando a distancia para abrir el buscador de
dispositivos.
• Utilice los botones de navegación (15) y el botón “Enter” (26) del mando a distancia para ir a la carpeta
del disco duro interno en la que se encuentra el DVD.
• Abra la carpeta del DVD que ha creado en el disco duro.
[Modo Películas]
• Seleccione el archivo VIDEO_TS.IFO y pulse el botón "Play” (18) del mando a distancia para iniciar la
reproducción del DVD seleccionado.
Nota:
También es posible reproducir archivos ISO directamente desde el Media Giant si están
almacenados en la partición NTFS. Al reproducir un archivo ISO de un DVD, se podrán utilizar las
mismas funciones de reproducción que cuando se reproduce un archivo IFO de un DVD.
93
ESPAÑOL
Durante la reproducción del DVD, puede utilizar las siguientes opciones de reproducción del mando a
distancia:
-
Pause
Slow
Stop
Navigation keys
Enter
Rewind
Fast Forward
Previous
Next
Ins. Rep.
CM. Skip
Goto
Repeat
Info
Zoom
Angle
-
Volume
Mute
Sub-t
Audio
(27)
(24)
(23)
(15)
(26)
(10)
(32)
(11)
(31)
(16)
(25)
(7)
(8)
(27)
(5)
(36)
(12), (13)
(30)
(37)
(4)
Pausar o reanudar la reproducción.
Reproducción lenta.
Detener la reproducción.
Navegar en el menú del DVD.
Confirmar el elemento o elementos seleccionados en el menú del DVD.
Rebobinado rápido.
Avance rápido.
Capítulo anterior.
Capítulo siguiente.
Salto de 10 segundos hacia atrás en la reproducción.
Salto de 30 segundos hacia adelante en la reproducción.
Ir a un punto (momento) específico de la película.
Cambiar la opción de repetición de la presente reproducción.
Mostrar la información de reproducción.
Acercar o alejar la imagen
Cambiar el ángulo de visión del DVD (si el DVD contiene múltiples
ángulos).
Ajustar el volumen.
Silenciar el sonido.
Cambiar el idioma de los subtítulos del DVD o desactivarlos.
Cambiar la pista de audio del DVD (si el DVD contiene múltiples pistas de
audio).
Puede volver del menú del buscador de dispositivos al menú principal pulsando el botón “Menú” (40) del
mando a distancia.
Reproducción de subtítulos
El Media Giant puede reproducir archivos de subtítulos cuando se reproducen archivos de vídeo AVI.
Para reproducir archivos AVI con subtítulos, debe asignar el mismo nombre al archivo AVI y al archivo de
subtítulos. Por ejemplo:
Nombre de la película:
Nombre del archivo de subtítulos:
My_Movie_With_Sub.AVI
My_Movie_With_Sub.SRT
• Con los botones de navegación del mando a distancia, seleccione el archivo que desee reproducir.
• Pulse el botón "Enter” (26) o el botón “Play” (18) del mando a distancia para iniciar la reproducción del
archivo seleccionado.
Se empezará a reproducir el archivo AVI con el archivo de subtítulos correspondiente cargado.
Para activar o desactivar los subtítulos durante la reproducción, pulse el botón “Sub-t” (37) del mando a
distancia.
Puede volver del menú del buscador de dispositivos al menú principal pulsando el botón “Menú” (40) del
mando a distancia.
94
ESPAÑOL
Reproducción de música
Puede reproducir archivos de música almacenados en el disco duro de la unidad, en un dispositivo USB o en
una ubicación de la red y escucharlos en su TV mediante el filtro “Música” del Media Giant.
Si ha seleccionado el filtro “Música”, el Media Giant sólo mostrará archivos de música en la pantalla. No se
mostrarán los otros archivos.
[Modo Música]
• Con los botones de navegación (15) del mando a distancia, seleccione el archivo que desee reproducir.
Si ha seleccionado un archivo de música, el buscador de dispositivos mostrará la información de la etiqueta
ID3 (cuando esté disponible) con el nombre y el tamaño del archivo a la derecha de la pantalla.
• Pulse el botón "Enter” (26) o el botón “Play” (18) del mando a distancia para iniciar la reproducción del
archivo seleccionado.
Durante la reproducción, puede utilizar las siguientes opciones de reproducción del mando a distancia:
-
Pause
(17)
Stop
(23)
Rewind
(10)
Fast Forward
(32)
Repeat
(8)
Info
(27)
Volume
(12), (13)
Mute
(30)
Pausar o reanudar la reproducción.
Detener la reproducción.
Rebobinar.
Avance rápido.
Cambiar la opción de repetición del presente archivo o carpeta.
Mostrar la información de reproducción.
Ajustar el volumen.
Silenciar el sonido.
Puede volver del menú del buscador de dispositivos al menú principal pulsando el botón “Menú” (40) del
mando a distancia.
95
ESPAÑOL
Reproducción de fotos e imágenes
Puede visualizar sus fotos o imágenes almacenadas en el disco duro de la unidad, en un dispositivo USB o en
una ubicación de la red y verlas en su TV mediante el filtro “Fotos” del Media Giant.
Si ha seleccionado el filtro “Fotos”, el Media Giant sólo mostrará archivos de imagen en la pantalla. No se
mostrarán los otros archivos.
[Modo Fotos]
• Con los botones de navegación (15) del mando a distancia, seleccione el archivo que desee reproducir.
Si ha seleccionado un archivo de imagen, el buscador de dispositivos mostrará una vista preliminar con el
nombre y el tamaño del archivo a la derecha de la pantalla.
• Pulse el botón "Enter” (26) o el botón “Play” (18) del mando a distancia para iniciar la reproducción del
archivo seleccionado.
Durante la presentación, puede utilizar las siguientes opciones de presentación del mando a distancia:
-
Pause
Stop
Navigation keys
Previous
Next
Repeat
Info
Zoom
(17)
(23)
(15)
(11)
(31)
(8)
(27)
(5)
Pausar o reanudar la presentación.
Detener la presentación.
Girar la foto mostrada.
Reproducir el archivo anterior de la presente carpeta.
Reproducir el archivo siguiente de la presente carpeta.
Cambiar la opción de repetición del presente archivo o carpeta.
Mostrar la información de la presentación.
Acercar o alejar la imagen
Puede volver del menú del buscador de dispositivos al menú principal pulsando el botón “Menú” (40) del
mando a distancia.
Consejo:
El Menú de Configuración incluye una opción adicional para cambiar la transición de su
presentación de fotografías.
Véase apartado 13 para obtener más información sobre la opción “Efecto de Transición”.
96
ESPAÑOL
Modo Copiado
Si desea copiar datos de una ubicación a otra (por ejemplo, de un dispositivo USB al disco duro interno),
puede utilizar el modo Copiado del Media Giant.
Para acceder al modo Copiado, pulse el botón “Copy” (7) del mando a distancia cuando esté en el
buscador de dispositivos. El menú de copiado se mostrará en su pantalla:
[Menú de copiado]
[Menú de copiado – Asistente de copiado]
Puede seleccionar “USB”, “Disco duro” o “Red” como origen de copiado. Los destinos posibles son: “USB”,
“Disco duro” y “Papelera de reciclaje” (borrar archivos).
En primer lugar, seleccione el origen de copiado con los botones de navegación “arriba” y “abajo” (15) del
mando a distancia. Cuando haya seleccionado el origen de copiado, pulse el botón de navegación
“derecha” (15) y luego utilice los botones de navegación “arriba” y “abajo” (15) para seleccionar el
destino de copiado.
Nota:
Podrá ver si está activa la sección de Origen o la de Destino del menú de copiado por el borde
iluminado.
Nota:
No es posible copiar de “USB” a “USB” o de “Disco duro” a “Disco duro”.
• Cuando haya introducido la ubicación de origen y la de destino, pulse el botón “Enter” (26) del mando a
distancia para proceder con el Asistente de copiado.
• Examine la ubicación de origen para localizar los archivos o carpetas que desee copiar. Puede examinar
las carpetas con los botones de navegación (15) y el botón “Enter” (26) del mando a distancia.
• Marque los archivos o carpetas que desee copiar con el botón "Play" (18) del mando a distancia. Los
archivos o carpetas marcados mostrarán un icono de marcado después del nombre.
• Cuando haya marcado los archivos o carpetas que desee copiar, pulse el botón de navegación “derecha”
(15) del mando a distancia para ir a la sección de destino.
Nota:
No es posible seleccionar la partición NTFS del Media Giant como destino, ya que no es posible
escribir en ella.
• Examine la zona de destino hasta localizar la ubicación donde quiere realizar la copia. Puede examinar
las carpetas con los botones de navegación (15) y el botón “Enter” (26) del mando a distancia.
• Cuando haya localizado la ubicación deseada, pulse el botón de navegación “derecha” (15) del mando a
distancia para iniciar el proceso de copiado.
97
ESPAÑOL
• El Asistente de copiado le pedirá la confirmación del proceso de copiado. Seleccione “OK” para
proceder con el proceso de copiado.
[Confirmación de copiado]
[Copiado en curso]
Cuando se haya completado el proceso de copiado, aparecerá un mensaje de notificación en la pantalla.
También es posible eliminar archivos con el menú de copiado.
Si desea eliminar archivos, seleccione “Papelera de reciclaje” como destino.
Marque los archivos o carpetas que desee eliminar y pulse el botón de navegación “derecha” (15) del
mando a distancia. Aparecerá una ventana de confirmación de borrado de los archivos o carpetas
seleccionados.
Seleccione “OK” para borrar los archivos o carpetas seleccionados.
[Menú de copiado – Asistente de borrado]
[Confirmación de borrado]
98
ESPAÑOL
10. Reproducción de grabaciones
Si ha seleccionado la opción “Reproducción de grabaciones” en el menú principal, el Media Giant le
solicitará que seleccione el modo “Digital” o “Analógico”.
• Si selecciona “Digital”, el Media Giant mostrará las grabaciones realizadas mediante el sintonizador
(DVB-T) digital del Media Giant.
• Si selecciona “Analógico”, el Media Giant mostrará todas las grabaciones realizadas mediante las
entradas analógicas del Media Giant (Composite, Component y FireWire).
Una vez seleccionado el modo “Digital” o “Analógico”, el Media Giant mostrará en pantalla la lista de
grabaciones de la opción seleccionada:
[ Seleccionar grabación ]
[ Lista de grabaciones ]
Cada vídeo se indica con una vista en miniatura (primer fotograma de la grabación), el nombre, la fecha, la
hora y la calidad de grabación.
Una estrella amarilla al lado de la grabación indicará que ésta es nueva y que todavía no se ha visualizado.
Cuando haya visualizado la grabación, la estrella amarilla desaparecerá.
Puede navegar por sus grabaciones con los botones de navegación “arriba” y “abajo” (15) del mando a
distancia, e iniciar la reproducción de un archivo seleccionado pulsando el botón “Enter” (26) o el botón
“Play” (18) del mando a distancia.
Durante la reproducción, puede utilizar las siguientes opciones de reproducción del mando a distancia:
-
Pause
(17)
Slow
(24)
Stop
(23)
Rewind
(10)
Fast Forward
(32)
Ins. Rep.
(16)
CM. Skip
(25)
Previous
(11)
Next
(31)
Repeat
(8)
Info
(27)
Goto
(9)
Zoom
(5)
Audio
(4)
Volume
(12), (13)
Mute
(30)
Detener en pausa o reanudar la reproducción.
Reproducción lenta.
Detener la reproducción.
Rebobinar la reproducción.
Avance rápido de la reproducción.
Salto de 10 segundos hacia atrás en la reproducción.
Salto de 30 segundos hacia delante en la reproducción.
Reproducir el capítulo o la grabación anterior.
Reproducir el capítulo o la grabación siguiente.
Cambiar la opción de repetición de la presente reproducción.
Mostrar la información de reproducción.
Ir a un punto (momento) específico de la película.
Acerca / Alejar la imagen
Cambiar la pista de audio (si está disponible para esta reproducción).
Ajustar el volumen.
Silenciar el sonido.
Con los botones de navegación “izquierda” y “derecha” (15) del mando a distancia podrá navegar por las
opciones del menú superior de la lista de grabaciones y seleccionar varias funciones:
99
ESPAÑOL
Reproducir
Eliminar
Cambiar nombre
Ordenar
Editar
Reproducir sus grabaciones.
Eliminar sus grabaciones.
Cambiar el nombre de sus grabaciones.
Cambiar el sistema de clasificación de sus grabaciones.
Editar sus grabaciones (explicado en el próximo subapartado).
Descripción del menú “Editar”
Nota:
El Media Giant no edita las grabaciones digitales. Por tanto, en el menú “Editar” hay diversas
opciones no disponibles si selecciona el modo “Digital” en la pantalla “Reproducción de
grabaciones”.
El Media Giant sólo permite acceder a la opción “Copiar a partición FAT32” del menú “Editar”
si selecciona el modo “Digital” en la pantalla “Reproducción de grabaciones”.
El menú “Edición” dispone de varias opciones para modificar sus grabaciones, explicadas a continuación:
[Grabaciones – Menú Edición]
- Imagen en miniatura
Con la opción “Imagen en miniatura”, podrá reproducir la grabación y
seleccionar su fotograma favorito para convertirlo en la imagen en
miniatura de la grabación.
- Borrar A-B
Con la opción “Borrar A-B”, podrá marcar un fragmento de la grabación
(por ejemplo, un anuncio) y borrarlo.
- Dividir grabación
Con la opción “Dividir grabación”, podrá dividir una grabación en 2
partes (por ejemplo, cuando ha grabado 2 programas en una misma
grabación programada).
- Unir grabaciones
Con la opción “Unir grabaciones”, podrá unir 2 grabaciones y
convertirlas en una.
- Añadir marcador de capítulo
Con la opción “Añadir marcador de capítulo”, podrá añadir marcadores
de capítulo a su grabación. Esto le permitirá ir fácilmente a una parte
específica de la grabación.
Nota:
También puede activar la opción "Capítulos automáticos" del menú de configuración para
añadir automáticamente capítulos a su grabación.
100
ESPAÑOL
- Quitar marcador de capítulo Con la opción “Quitar marcador de capítulo”, podrá quitar marcadores
de capítulo de su grabación. Esta opción puede ser útil si configuró el
Media Giant para que añadiera automáticamente marcas de capítulo y
posteriormente desea borrarlas de la grabación.
- Copiar a partición FAT32
Nota:
Con la opción “Copiar a partición FAT32”, podrá copiar su grabación
desde la partición de grabación hacia la carpeta “REC” de la partición
multimedia del Media Giant.
Cuando la grabación se haya copiado a la partición FAT32, podrá
reproducirla, copiarla o editarla en su ordenador si el Media Giant está
conectado a éste por USB, o puede enviarla y reproducirla en un cliente
UPnP A/V (como el C54WMP o el CFULLHDMA de Conceptronic) a través
de la red.
Para más información sobre la función de servidor UPnP A/V del Media Giant, véase el
capítulo 16.
101
ESPAÑOL
11. Entrada AV y sintonizador de TV
Con la opción “Sintonizador de TV / Entrada AV” del menú principal, podrá visualizar y grabar desde el
sintonizador de TV (DVB-T) digital o desde las entradas AV del Media Giant.
Consejo:
Puede acceder fácilmente desde cualquier menú del Media Giant a la pantalla de TV en directo
pulsando el botón “Live-TV” (38) del mando a distancia.
Cuando seleccione la opción “Entrada AV y sintonizador de TV”, el Media Giant mostrará la imagen de TV
en directo desde el sintonizador de TV. Mientras esté viendo la señal de TV, puede cambiar de canal
pulsando los botones “Channel +” (29) o “Channel -“ (28) del mando a distancia.
Con el botón “Source” (2) del mando a distancia, podrá seleccionar el sintonizador de TV, la entrada
Composite o la entrada Component. La fuente escogida se mostrará brevemente en el rincón superior
derecho de la pantalla.
Opción TimeShift
El Media Giant incorpora la función TimeShift. Esta función “pausa” la recepción de televisión o de la
entrada A/V y graba la emisión del canal o entrada que esté viendo mientras TimeShift está activado.
Pulse el botón “TimeShift” (22) del mando a distancia para inicializar la función TimeShift.
Cuando se haya inicializado la función, se “pausará” la recepción de televisión o de la entrada A/V y la
unidad empezará a grabar la señal internamente.
[TimeShift: iniciándose]
Nota:
[TimeShift: activo ]
Cuando la característica TimeShift está activada, la barra de progresión muestra el tiempo máximo
de almacenamiento del búfer del TimeShift. Si desea ajustar la capacidad de almacenamiento del
búfer (mayor o menor), deberá volver a formatear el disco duro del Media Giant para reajustar el
tamaño de la partición del búfer del TimeShift.
Encontrará más información sobre cómo formatear el disco duro en el apartado 15.
Durante el TimeShift, puede utilizar las siguientes opciones del mando a distancia:
-
Play
(18)
Pause
(17)
Slow
(24)
Stop
(23)
Rewind
(10)
Fast Forward
(32)
Ins. Rep.
(16)
CM. Skip
(25)
Info
(27)
Volume
(12), (13)
Mute
(30)
Reproducir el contenido del búfer del TimeShift.
Pausar o reanudar la reproducción.
Reproducción lenta.
Detener la reproducción.
Rebobinar.
Avance rápido.
Salto de 10 segundos hacia atrás en la reproducción.
Salto de 30 segundos hacia adelante en la reproducción.
Mostrar u ocultar la información del búfer del TimeShift.
Ajustar el volumen.
Silenciar el sonido.
102
ESPAÑOL
TimeShift permanente
En el menú de configuración del Media Giant puede habilitar el “TimeShift permanente”. Cuando esta
característica esté activada, el TimeShift estará siempre activo y le permitirá pausar instantáneamente la
reproducción o utilizar los botones superiores del mando a distancia para “saltar” en el búfer del
TimeShift.
Grabación
Cuando esté viendo la televisión o la señal de entrada de A/V a través de la unidad, puede empezar a
grabar instantáneamente la señal pulsando el botón “Rec” (19) del mando a distancia. La unidad empezará
a grabar y lo hará hasta que pulse el botón “Stop” (23) del mando a distancia.
Durante la grabación, se encenderá el LED de grabación del panel frontal.
Nota:
La unidad detecta si la señal de la fuente de entrada tiene protección anti-copia, como por
ejemplo la protección MacroVision en los discos de DVD. Cuando la fuente conectada esté
protegida anti-copia, la unidad no permitirá la grabación y mostrará un mensaje de alerta cuando
se pulse el botón de copiado.
Nota:
El Media Giant graba en HQ (alta calidad) de forma predeterminada. Puede cambiar la calidad de
grabación en el menú de configuración.
Nota:
Durante la grabación no podrá cambiar el canal seleccionado.
Si pulsa el botón “Rec” (19) durante una grabación, el tiempo de grabación se establecerá en 30 minutos
contados a partir de la primera vez que pulsó el botón “Rec” (para iniciar la grabación).
En la pantalla se mostrará el mensaje “OTR: 30 min.”
[Grabación normal]
[Temporizador de grabación activado]
Para incrementar este tiempo de grabación en 30 minutos más, pulse de nuevo el botón “Rec” (19), y así
hasta un máximo de 240 minutos. La unidad continuará grabando hasta que haya finalizado el tiempo de
grabación o hasta que pulse el botón “Stop” (23) del mando a distancia.
Radio digital
El Media Giant también incluye radio digital, que emite mediante la señal (DVB-T) digital.
Puede escuchar emisoras de radio digital por los altavoces de su televisor o por el receptor que esté
conectado a su Media Giant.
Para escuchar emisoras de radio digital.
Cuando utilice la función de sintonizador digital, también podrá escuchar emisoras digitales de radio.
• Seleccione la opción “Sintonizador de TV / Entrada AV” del menú principal del Media Giant,
que mostrará la imagen de TV en directo desde el sintonizador de TV.
• Pulse el botón “Live-TV” (38) del mando a distancia para cambiar al modo de radio digital.
A continuación estará habilitada la función de radio digital.
• Puede utilizar los botones “Channel +” (29) o “Channel -” (28) para seleccionar una emisora de radio
digital.
• Para volver al modo de TV digital, pulse de nuevo el botón “‘Live-TV” (38) del mando a distancia.
103
ESPAÑOL
EPG (Guía Electrónica de Programas)
El sintonizador (DVB-T) digital del Media Giant incorpora a las funciones de la unidad la EPG (Guía
Electrónica de Programas).
Podrá acceder a la guía EPG mientras ve televisión pulsando en botón “Guide” (33).
La guía EPG se mostrará en su televisor:
[ Guía Electrónica de Programas ]
[ Guía Electrónica de Programas: Grabación programada ]
Puede utilizar los botones siguientes del mando a distancia para navegar por la guía EPG:
-
Flecha izquierda / derecha
Flecha arriba / abajo
Previous
Next
Rewind
Fast Forward
Rec
(15)
(15)
(11)
(31)
(10)
(32)
(19)
Cambiar la fecha seleccionada en la guía EPG.
Cambiar la emisión seleccionada en la guía EPG.
Cambiar al canal anterior.
Cambiar al canal siguiente.
Navegar por la información de la emisión.
Navegar por la información de la emisión.
Programar la emisión seleccionada para la grabación.
Si pulsa el botón “Rec” (19), la emisión seleccionada se añadirá a la lista de grabaciones programadas del
Media Giant. La emisión seleccionada se indicará con un distintivo rojo, que significa que está programada
para grabarse.
Encontrará la grabación programada en el menú “Grabación programada” del Media Giant, descrito en el
apartado 12.
Para volver al modo de TV, pulse el botón “Guide” (33) del mando a distancia.
104
ESPAÑOL
Control DV
La conexión mini Firewire situada detrás del panel frontal del Media Giant le permitirá conectar
directamente su cámara DV al Media Giant y grabar sus vídeos domésticos en el disco duro interno.
• Conecte su cámara DV al conector mini Firewire (7) situado en el frontal del Media Giant.
• Encienda su cámara DV y póngala en modo Reproducción.
• Pulse el botón “DV” (39) del mando a distancia para inicializar la función “Control DV”.
El Media Giant mostrará los controles de DV en la pantalla:
[Panel de control de DV]
Puede seleccionar los botones del panel de control de DV con los botones de navegación (15) del mando a
distancia. Confirme su selección con el botón “Enter” (26) del mando a distancia.
Cuando haya seleccionado “Play” en la ventana de control de DV y se esté reproduciendo la grabación,
puede pulsar el botón “Rec” (19) del mando a distancia para iniciar la grabación del vídeo DV al disco
duro.
Consejo:
Cuando esté grabando, puede ocultar el panel de control de DV pulsando el botón “DV” (39) del
mando a distancia. El panel se volverá a mostrar si pulsa de nuevo el botón “DV”.
Puede detener esta grabación pulsando el botón “Stop” (23) del mando a distancia.
Los vídeos grabados aparecerán en la lista de grabaciones, tal como se describe en el apartado 10.
Para salir del modo Control DV, pulse la tecla “Return” (14) del mando a distancia.
105
ESPAÑOL
12. Grabación programada
Puede programar la unidad para que empiece a grabar a una hora determinada. La unidad acepta hasta 8
grabaciones programadas.
Consejo:
La guía EPG del Media Giant, que se describe en el apartado 11 de este manual, le permite
programar fácilmente sus grabaciones.
• Seleccione la opción “Grabación programada” del menú principal.
La pantalla de grabación programada se mostrará en su televisor.
[Menú de grabación programada]
[Añadir una grabación programada]
El menú de la grabación programada muestra 5 opciones, que usted puede seleccionar con los botones de
navegación “izquierda” y “derecha” (15) del mando a distancia:
Añadir
Editar
Eliminar
Estado
Historial
Añadir una nueva grabación programada
Editar una grabación programada existente
Eliminar una grabación programada
Cambiar el estado de la lista de grabaciones programadas
Muestra el historial de grabaciones programadas
Añadir o editar una grabación programada
Para añadir o editar una grabación programada, seleccione la opción “Añadir” o “Editar” del menú y pulse
el botón “Enter” (26) del mando a distancia.
De forma predeterminada estará seleccionado el campo "Fuente".
Puede modificar todas las opciones con los botones de navegación “arriba” y “abajo” (15) y seleccionar
otro campo con los botones de navegación “izquierda” y “derecha” (15).
• Seleccione la fuente de la grabación. Puede escoger entre un canal de TV, la entrada de vídeo
Composite o la entrada de vídeo Component.
• Seleccione la fecha de la grabación.
• Seleccione la hora de inicio de la grabación.
• Establezca la duración de la grabación.
• Seleccione la opción de repetición de la grabación. Puede seleccionar las siguientes opciones:
“Una vez”, “Cada día”, “Lun-vié.”, “Lun-sáb.”, “Domingo”, “Lunes”, “Martes”, “Miércoles”,
“Jueves”, “Viernes” y “Sábado”.
Puede omitir el campo “Dispositivo”, ya que sólo se puede grabar al disco duro interno.
106
ESPAÑOL
• Establezca la calidad de grabación. Puede escoger entre: “HQ”, “SP”, “LP”, “EP" y “SLP”.
Nota:
Cambiar el campo “Calidad” influirá en la calidad de la grabación y en el espacio necesario
para dicha grabación. El tiempo de grabación disponible para cada tipo de calidad se mostrará
en la parte superior izquierda de la ventana de programación de grabación.
• Active o desactive la opción “Nicam”.
La opción Nicam debería estar activada si la fuente de la que desea grabar emite con dos tipos de audio
(idiomas) diferentes (por ejemplo, Eurosport).
• Cuando haya configurado todas las opciones, pulse el botón “Enter” (26) del mando a distancia para
guardar la grabación programada.
• Aparecerá una ventana emergente de confirmación en su pantalla. Seleccione “Confirmar” y pulse el
botón “Enter” (26) del mando a distancia para guardar la grabación programada.
La grabación se encuentra ya programada y la unidad empezará a grabar el canal seleccionado en la fecha
y hora determinadas, incluso si el dispositivo se encuentra en modo “Standby”.
Nota:
Durante la grabación no podrá cambiar el canal seleccionado.
107
ESPAÑOL
13. Configuración
Al seleccionar la opción “Configuración” del menú principal, se mostrará el menú de configuración en la
pantalla. Abajo se muestran todos los parámetros configurables y su descripción correspondiente.
Puede ir a las diferentes opciones del menú de configuración con los botones de navegación del mando a
distancia.
[Menú de configuración - Vídeo]
[Menú de configuración - Grabación]
Configuración A/V:
Relación de pantalla
Cambiar la relación de pantalla de la señal de salida del Media Giant.
(“Letterbox 4:3”, “Pan-Scan 4:3”, “Panorámica 16:9”)
Brillo
Cambiar el brillo de la señal de salida del Media Giant.
Contraste
Cambiar el contraste de la señal de salida del Media Giant.
Transición
Cambiar la transición entre las presentaciones de fotografías.
Configuración de audio Cambiar la configuración de audio del Media Giant.
Modo nocturno Activar o desactivar el modo nocturno del audio (Off, On,
Confort).
Salida digital
Configurar la salida de audio digital (HDMI-LPCM, HDMI-RAW,
SPDIF-LPCM, SPDIF-RAW).
Grabación:
Calidad
Nota:
Cambiar la calidad de grabación predeterminada. (“HQ”, “SP”, “LP”, “EP" y
“SLP”)
Cambiar el campo “Calidad” influirá en la calidad de la grabación y en el espacio necesario para
dicha grabación. 1 hora de vídeo con los diferentes tipos de calidad requerirán el siguiente
espacio:
HQ:
4,85 GB (4,850 MB)
SP:
2,42 GB (2,420 MB)
LP:
1,62 GB (1,620 MB)
1,21 GB (1,210 MB)
EP:
SLP:
0,80 GB (800 MB)
Capítulos automáticos
TimeShift permanente
Activar o desactivar los capítulos automáticos. La función de Capítulos
automáticos añadirá automáticamente marcadores de capítulo a sus grabaciones
para poder ir fácilmente a distintos puntos durante la reproducción.
Activar o desactivar la característica de TimeShift permanente. Cuando esta
característica esté activada, el TimeShift estará siempre activo y le permitirá
pausar instantáneamente la reproducción o utilizar los botones superiores del
mando a distancia para “saltar” en el búfer del TimeShift.
108
ESPAÑOL
[Menú de configuración - Red]
[Menú de configuración - Sistema]
Red:
Preferencia de LAN ** Cambiar la conexión de LAN preferida: Cable o Auto (vía Powerline)
Si se escoge “Cable”, el Media Giant siempre utilizará el puerto LAN como conexión
de red.
Si se ha escogido “Auto (Via Powerline)”, el Media Giant utilizará la característica
Powerline si existe una red de este tipo disponible. Si no hay ninguna red Powerline
disponible, se utilizará el puerto LAN.
Nota:
Si el Media Giant está conectado tanto a Powerline como a cable LAN, la red por defecto será la
red Powerline. Cuando el rendimiento de la red Powerline baje por debajo de 1Mbps, el Media
Giant cambiará automáticamente a modo cable. Mientras esté en modo cable, el Media Giant
continuará comprobando el rendimiento de la red Powerline. Cuando su rendimiento suba por
encima de 1Mbps, el Media Giant volverá a cambiar a modo Powerline.
Configuración de LAN En “Configuración de LAN", podrá configurar la dirección IP del Media Giant.
Podrá escoger entre “Cancel”, “DHCP IP (Auto)” o “Fix IP (Manual)”.
Cuando en su red haya un servidor HDCP, seleccione la opción “DHCP IP”
Cuando desee utilizar una IP estática, seleccione “FIX IP”.
El Asistente de configuración le mostrará los campos para introducir una IP estática.
Utilice los botones de navegación (15) y los botones numéricos 0-9 (6) para
introducir la dirección IP, la máscara de subred, la puerta de acceso predeterminada
y el servidor DNS.
Cuando haya introducido los valores correspondientes, pulse el botón “Enter” (26)
del mando a distancia.
Servidor multimedia Cambiar el nombre del Media Giant en la red.
Una vez seleccionado, puede elegir entre “Nombre del servidor/host” y “Nombre
del grupo”.
Nombre del servidor/host
Cambiar el nombre del Media Giant.
El nombre del Media Giant permite a los clientes UPnP A/V (como el
C54WMP o el CFULLHDMA de Conceptronic) transmitir archivos
multimedia por la red desde el disco duro del Media Giant y que los
ordenadores conectados al entorno de la red accedan al servidor Samba
del Media Giant.
Nombre del grupo
Cambiar el nombre del grupo de trabajo del Media Giant.
Nota:
Podrá encontrar más información sobre la función de servidor UPnP A/V del Media
Giant en el apartado 16.
Podrá encontrar más información sobre la función de servidor Samba del Media Giant
en el apartado 18.
109
ESPAÑOL
Sistema:
Idioma del menú
Seleccione el idioma que desee para la utilización del Media Giant.
Fecha y hora
Cambiar la fecha y la hora.
Formatear disco duro
Formatear el disco duro interno (véase apartado 15).
Configuración del temporizadorTemporizador de presentaciones: Modificar el intervalo de presentación
durante una presentación de
imágenes.
Temporizador del salvapantallas: Cambiar el tiempo de inactividad para
que se active el salvapantallas.
Actualización de firmware
Nota:
Actualizar el firmware del Media Giant.
La actualización de firmware puede hacerse tanto a través de internet
como desde un dispositivo USB. En la opción de actualización de
firmware puede escoger entre “Automático” o “Manual”.
Si se selecciona “Automático” (predeterminado), el Media Giant automáticamente
buscará y realizará actualizaciones de firmware online aleatoriamente cuando el Media
Giant no esté reproduciendo o grabando.
Si se selecciona “Manual”, podrá buscar manualmente las actualizaciones de firmware.
Para comprobar la versión actual de firmware, pulse el botón "Info" (33) del mando a distancia
cuando se encuentre en el menú principal. La versión de firmware se mostrará en su pantalla.
Restaurar valores predeterminados Restaura la configuración del Media Giant a sus valores
predeterminados e inicializa el Asistente de configuración para volver
a configurar la unidad.
[ Menú de configuración – Configuración de TV ]
[ Editar canal ]
Configuración de TV:
Entrada de TV
Seleccione su país de la lista de países. Si su país no aparece en la lista, seleccione
la opción “Otro”.
Consejo:
También puede buscar una banda de frecuencia DVB-T específica seleccionando
“6M” (600 Mhz), “7M” (700 Mhz) u “8M” (800 Mhz).
Búsqueda de canales Inicia una búsqueda automática de canales. La búsqueda automática de canales del
Media Giant puede llevar unos minutos; el Media Giant buscará y almacenará
automáticamente en su memoria todos los canales encontrados.
Búsqueda manual
Con la característica “Búsqueda manual”, podrá añadir nuevos canales a la lista de
canales ya existente (con la opción “Añadir”), quitar canales de la lista (con la
opción “Quitar”), o asignar nombres a los canales encontrados (con la opción
“Editar”).
Programación de TV Con la opción “Programación de TV”, podrá configurar el Media Giant para que
muestre todos los canales DVB-T (incluidos los canales de pago, que no pueden
reproducirse en el Media Giant), o únicamente los canales en abierto.
110
ESPAÑOL
14. Conexión al ordenador mediante USB
Puede conectar la unidad a su ordenador para copiar datos (películas, música, imágenes, grabaciones, etc.)
desde y hacia el disco duro interno.
Nota:
En el ejemplo siguiente se ha utilizado un ordenador con sistema operativo Windows XP, pero la
unidad puede ser utilizada en cualquier ordenador con entrada USB y la posibilidad de leer y
escribir archivos con los sistemas FAT32 o NTFS.
Conectar la unidad a su ordenador
• Conecte el cable adaptador de USB a Mini-USB suministrado al puerto Mini-USB del frontal de la unidad y
a un puerto USB libre en su ordenador.
• Encienda la unidad con el interruptor de alimentación de la parte trasera de la unidad. El ordenador
reconocerá e instalará automáticamente la unidad y la mostrará como unidades extra en su listado de
unidades.
Nota:
Si se ha realizado una partición multimedia en el disco duro (sólo FAT32), únicamente se mostrará
una letra para la unidad. Si se han realizado dos particiones multimedia en el disco duro (FAT32 y
NTFS), se mostrarán dos letras para el Media Giant.
Reproducir grabaciones en su ordenador
Para reproducir grabaciones en su ordenador, en primer lugar tiene que copiar las grabaciones desde la
partición de grabación hacia la partición multimedia. Puede hacerlo con el comando “Copiar a partición
FAT32” que encontrará en el menú “Reproducción de grabaciones”, explicado en el apartado 10.
Cuando haya copiado sus grabaciones a la partición FAT32, y con la unidad conectada a su ordenador,
podrá reproducir en él los programas grabados en la unidad.
Desconectar la unidad de su ordenador
• Haga clic una vez en el icono de “Extracción segura” de la barra del sistema.
• Cuando aparezca, seleccione la opción “Extracción segura del dispositivo
de almacenamiento masivo USB”.
• Espere a ver el mensaje “Es seguro retirar el hardware”.
• Desconecte el cable USB.
111
ESPAÑOL
15. Información sobre particiones y Asistente de formato
En la mayoría de ocasiones, el Media Giant se suministra con el disco duro ya formateado. El disco duro
estará formateado con la configuración predeterminada del Media Giant y tendrá las siguientes particiones:
Partición del búfer del TimeShift:
Partición de grabación:
Partición multimedia FAT32:
Partición multimedia NTFS:
~ 4,85 GB
50% de la capacidad del disco duro.
25% de la capacidad del disco duro.
25% de la capacidad del disco duro.
Ejemplo con:
500 GB
750 GB
1.000 GB
Partición del búfer
del TimeShift:
Partición de grabación:
Partición multimedia FAT32:
Partición multimedia NTFS:
~ 4,85 GB
~ 250 GB
~ 125 GB
~ 125 GB
~ 4,85 GB
~ 375 GB
~ 187 GB
~ 187 GB
~ 4,85 GB
~ 500 GB
~ 250 GB
~ 250 GB
Puede cambiar la configuración predeterminada del disco duro formateando de nuevo el disco duro del
Media Giant.
Nota:
¡Si formatea el disco duro del Media Giant, se borrará todo su contenido!
Para formatear el disco duro del Media Giant, vaya al menú de configuración y seleccione la opción
“Formatear disco duro” de la página "Sistema”. Seleccione de nuevo “Formatear disco duro” como
confirmación.
El Asistente de formato del disco duro aparecerá en pantalla y el sistema le solicitará si desea formatear el
disco duro automática (“Auto”) o manualmente (“Manual”).
• Si selecciona “Auto”, el Media Giant se formateará con la configuración de formato predeterminada,
como se indica arriba.
• Si selecciona “Manual”, el Asistente de formato le guiará para que siga los pasos del proceso para
formatear el disco duro.
[ Asistente de formato – Automático o Manual ]
[Asistente de formato – Búfer del Timeshift]
Cambie el tamaño del búfer del TimeShift con los botones de navegación “arriba” y “abajo” (15) del
mando a distancia.
Puede asignar 1, 2, 3 ó 4 horas al búfer del TimeShift.
• Seleccione “Siguiente” para continuar e ir al siguiente paso.
112
ESPAÑOL
[Asistente de formato – Partición de grabación]
[Asistente de formato – Particiones FAT32 y NTFS]
• Cambie el tamaño de la partición de grabación con los botones de navegación “arriba” y “abajo” (15)
del mando a distancia.
La capacidad restante se utilizará para la partición o particiones multimedia del Media Giant.
• Seleccione “Siguiente” para continuar e ir al siguiente paso.
[Asistente de formato – Iniciar formato]
[Asistente de formato – Formateando]
• Seleccione “Formatear” para iniciar el formateado del disco duro del Media Giant.
Durante el formateado, el Asistente de formato mostrará el mensaje “Formateando”.
Nota:
El proceso de formateado puede tomar unos minutos (unos 5 minutos). Espere hasta que haya
finalizado el proceso de formateado.
[Asistente de formato – Completado]
• Cuando el proceso de formateado haya finalizado, seleccione “OK” para cerrar el Asistente de formato.
El Media Giant se reiniciará automáticamente.
113
ESPAÑOL
16. Servidor UPnP A/V (servidor multimedia Twonky)
Una de las características del Media Giant es su servidor UPnP A/V.
Esto hace que el Media Giant y todo su contenido multimedia esté disponible para clientes UPnP A/V de su
red (por ejemplo: el CFULLHDMA o el C54WMP de Conceptronic).
El servidor UPnP A/V utilizado en el Media Giant se el servidor multimedia Twonky.
El servidor multimedia Twonky indexa automáticamente todo el contenido multimedia de las particiones
multimedia FAT32 y NTFS. Cuando grabe nuevo contenido en una de estas particiones, estará disponible
automáticamente para los clientes UPnP A/V de su red.
Puede definir el nombre de su servidor UPnP A/V en la sección “Red” del menú de configuración del Media
Giant.
Nota:
El nombre predeterminado para el servidor UPnP A/V es “media giant”.
Si está familiarizado con el software del servidor multimedia Twonky, puede cambiar los parámetros
avanzados del servidor desde su ordenador.
Para acceder a las páginas de configuración del software del servidor multimedia Twonky, introduzca la
dirección IP del Media Giant en la ventana de su navegador, seguido del número de puerto 9000.
Por ejemplo:
HTTP://192.168.0.100:9000/ (en el caso de que 192.168.0.100 fuera la dirección IP de
su Media Giant).
El servidor multimedia Twonky incorpora una guía de resolución de problemas que podrá encontrar en la
barra de navegación situada en la izquierda de la pantalla de configuración del servidor. Esta guía le
ayudará con la configuración del servidor multimedia Twonky.
Para más información sobre el servidor multimedia Twonky, visite la página web de Twonky en:
http://www.twonkymedia.com/
114
ESPAÑOL
17. Buscar en los recursos compartidos
El Media Giant puede buscar en los recursos compartidos de su red y reproducir archivos directamente
desde un recurso compartido. Para poder utilizar esta característica, deberá compartir sus carpetas
multimedia en la red para que el Media Giant pueda acceder a ellas.
En este apartado se explica cómo puede compartir archivos bajo Windows XP y Windows Vista.
Nota:
En este manual sólo se describe cómo compartir archivos y carpetas bajo Windows XP y Windows
Vista.
Consulte el manual de su sistema operativo o el de su dispositivo de almacenamiento en red para
más información sobre cómo compartir una carpeta con archivos multimedia.
Compartir archivos bajo Windows XP
• Abra “Mi PC” con el acceso directo del menú inicio y vaya hasta la carpeta que contenga los archivos
multimedia que desea compartir.
• Haga clic en la carpeta que contenga los archivos multimedia y seleccione la opción “Compartir esta
carpeta” en el menú de la izquierda.
[Mi PC – Compartir carpeta]
Se mostrarán las propiedades de la carpeta, mostrando la pestaña “Compartir”.
Utilice la sección “Uso compartido y seguridad de red" para compartir la carpeta.
Si no ha compartido carpetas antes, deberá ejecutar el Asistente de configuración de red haciendo clic en
el enlace “Asistente de configuración de red” de la ventana.
115
ESPAÑOL
[Propiedades – Página de compartir carpetas]
[Propiedades – Página de compartir carpetas]
• Cuando previamente ya ha utilizado el Asistente de configuración de red, puede compartir la carpeta
seleccionando “Compartir esta carpeta en la red”.
• Introduzca un nombre para este recurso compartido en el campo de texto y haga clic en “Aplicar”.
• Haga clic en “Aceptar” para cerrar la ventana.
La carpeta aparecerá listada con una mano bajo el icono de la carpeta, indicando que la carpeta está
compartida en su ordenador.
[Carpeta compartida]
116
ESPAÑOL
Compartir archivos bajo Windows Vista
• Abra “Mi PC” con el acceso directo del menú inicio y vaya hasta la carpeta que contenga los archivos
multimedia que desea compartir.
• Haga clic en la carpeta que contenga los archivos multimedia y seleccione la opción “Compartir” en la
barra superior de menú de la ventana.
[Mi PC – Compartir carpeta]
De forma predeterminada, el propio usuario es el que aparece en la lista de carpetas compartidas como
propietario de la carpeta.
[Propiedades de Compartir]
• Puede añadir más usuarios a la lista de archivos compartidos seleccionándolos en la lista desplegable y
haciendo clic en el botón “Añadir”.
• Cuando haya finalizado de añadir usuarios, haga clic en el botón “Compartir” para compartir la carpeta.
La carpeta aparecerá listada con un pequeño icono con dos personas debajo, indicando que la carpeta está
compartida en su ordenador.
[Carpeta compartida]
117
ESPAÑOL
Buscar en carpetas compartidas con el Media Giant
Cuando sus archivos multimedia estén compartidos, puede utilizar la opción "Buscar contenido
multimedia" del menú principal para buscar en sus recursos en red.
[Selección de dispositivos de almacenamiento]
[Compartir en red – Identificación de usuario]
Seleccione la opción “Red” de la lista de dispositivos de almacenamiento con los botones de navegación
(15) del mando a distancia, y acceda a través de la red a su ordenador o al dispositivo de almacenamiento
que contenga las carpetas compartidas.
Cuando una carpeta compartida esté protegida mediante nombre de usuario y contraseña (por ejemplo,
compartir archivos por defecto bajo Windows XP y Windows Vista), el Media Giant mostrará una ventana
emergente donde deberá introducir el nombre de usuario y contraseña.
Nota:
Puede utilizar su cuenta normal de usuario para Windows XP o Windows Vista para acceder a su
carpeta compartida.
Con los botones de navegación (15) del mando a distancia, seleccione el campo de identificación de
usuario o el de contraseña y pulse el botón “Enter” (26) para que aparezca el teclado en pantalla para
introducir los valores.
[Teclado en pantalla]
[Compartir en red – Identificación de usuario]
Una vez haya introducido el nombre de usuario y la contraseña, seleccione el botón "OK" o "OK y guardar a
Mis enlaces" para acceder al recurso compartido.
Ya puede buscar en la carpeta compartida tal como se describe en el apartado 9.
118
ESPAÑOL
18. Recurso compartido: configuración y uso
El Media Giant de Conceptronic puede utilizarse como recurso compartido (servidor Samba). Con la función
de recurso compartido, puede compartir la partición FAT32 (HDD1) del Media Giant a través de su red para
que otros ordenadores puedan acceder a los datos que almacena en esa partición.
Configuración
Seleccione la opción “Configuración” del menú principal. El menú de configuración aparecerá en pantalla.
Seleccione la opción “Red” en el menú de configuración. En el menú de configuración del sistema, hay una
opción que se llama “Servidor multimedia”, en la que puede cambiar los siguientes parámetros:
- Nombre del servidor/host
- Nombre del grupo
Especifique el nombre del Media Giant en la red. El nombre
predeterminado del Media Giant es “Media Giant”.
Especifique el nombre de su red doméstica. El nombre predeterminado del grupo
es “GRUPO DE TRABAJO”.
Una vez modificadas las opciones, pulse el botón “Return” (14) del mando a distancia para volver al menú
principal.
Utilización
Una vez configuradas las opciones de red del Media Giant, podrá acceder al recurso compartido con un
ordenador conectado a su red.
Nota:
Los pasos que indicamos a continuación muestran cómo acceder al recurso compartido del Media
Giant con las opciones de configuración predeterminadas en un ordenador con sistema operativo
Windows Vista.
El nombre predeterminado del recurso compartido del Media Giant es “Media Giant”. Con este nombre
podrá acceder al recurso compartido del dispositivo en la red.
• Seleccione “Inicio” y “Red”.
A continuación, Windows Explorer mostrará las opciones de red.
En la barra superior deberá introducir el nombre del recurso compartido del Media Giant como mostramos a
continuación:
\\<NETWORK_NAME_OF_MEDIA_GIANT>\
Por ejemplo:
Si el Media Giant está configurado con las opciones predeterminadas, el nombre del
recurso compartido será “Media Giant”, de modo que deberá introducir:
\\media giant\
119
ESPAÑOL
El recurso compartido del Media Giant aparecerá en pantalla, tal como indica la captura de pantalla
siguiente:
Nota:
En el entorno Windows, el recurso compartido “Impresoras” se añade automáticamente a todos los
servidores Samba de la red, pero el Media Giant no funciona como servidor de impresión.
Si selecciona el recurso compartido, podrá copiar, eliminar, reproducir y añadir archivos a la partición
FAT32 del Media Giant.
120
DEUTSCH
Conceptronic Media Giant mit DVB-T
Benutzerhandbuch
Wir gratulieren Ihnen zum Kauf Ihres
Conceptronic Media Recorders & Players.
In dieser Bedienungsanleitung wird Ihnen Schritt für Schritt gezeigt, wie der Conceptronic Media Recorder
& Player installiert und verwendet wird.
Wenn Sie weitere Informationen oder Support für Ihr Produkt benötigen, besuchen Sie unsere Service &
Support-Webseite www.conceptronic.net/support und wählen Sie eine der folgenden Optionen:
• FAQ
• Downloads
• Kontakt
: Datenbank mit den häufig gestellten Fragen
: Handbücher, Treiber, Firmware und weitere Downloads
: Kontakt für den Conceptronic Support
Tipp:
Die Firmware des Conceptronic Media Giants kann upgegradet werden. Die neueste FirmwareVersion Ihres Geräts finden Sie auf der Conceptronic Webseite. Alternativ dazu können Sie auch die
integrierte Firmware-Upgrade-Funktion des Media Giants verwenden.
Tipp:
Die aktuelle Liste der unterstützten Codecs und Dateien finden Sie auf
www.conceptronic.net/FAQ.
Allgemeine Informationen über Conceptronic-Produkte finden Sie auf der Conceptronic-Webseite unter
www.conceptronic.net.
1. Packungsinhalt
In der Verpackung des Conceptronic Media Recorders & Players ist Folgendes enthalten:
•
Conceptronic Media Giant (im Handbuch als ‚Gerät’ oder ‚Media Giant’ bezeichnet). **
Beim Gerät in der Verpackung handelt es sich um eines der beiden folgenden Modelle:
CM3GD
[C08-147]: Media Giant mit digitalem (DVB-T)-Tuner
CM3GDP [C08-148]: Media Giant mit digitalem (DVB-T)-Tuner und Powerline-Adapter.
•
•
•
•
•
•
•
•
•
•
•
•
•
•
Conceptronic Powerline-Netzwerk-Adapter. (nur beim Modell CM3GDP)
Anschlusskabel
Fernbedienung
2x AAA-Batterien für Fernbedienung
RF-Antennenkabel
Composite-Video-Kabel (roter, weißer, gelber RCA-Stecker)
S-Video-Kabel
Component-Videokabel (roter, grüner, blauer RCA-Stecker)
Digitales Koaxial-Audiokabel (schwarzer RCA-Stecker)
SCART-Adapter für Composite-Video-Kabel/ S-Video-Kabel
HDMI A/V-Kabel (HDMI 1.3)
Netzwerkkabel
USB-Kabel
Dieses Benutzerhandbuch
WICHTIG:
In diesem Handbuch sind einige Funktionen erklärt, die nur für den CM3GDP (mit digitalem (DVB-T)Tuner und Powerline-Adapter) gelten. Diese Funktionen sind mit ** gekennzeichnet.
121
DEUTSCH
2. Produkteigenschaften
•
•
•
•
•
•
•
•
•
•
•
•
•
Integrierter Powerline-Netzwerkadapter **
Integrierter digitaler (DVB-T)-TV-Tuner mit automatischer TV-Kanalsuche
Digitale-(DVB-T)-TV-Signalaufzeichnung
AV-Signalaufzeichnung z.B. ab VCR, DVD oder Videokamera
DV-Eingang für die Wiedergabe / Aufzeichnung von einer DV-Videokamera
Aufzeichnung auf integrierte Festplatte
Bis zu 1080i-Ausgabeauflösung
Bis zu 1080i-Wiedergabeauflösung
DVD-Qualität der im TS-Format (für digitale Aufzeichnungen über den digitalen DVB-T-Tuner) oder
MPEG2-Format (für analoge Aufzeichnungen über AV-Eingänge) aufgezeichneten Dateien (diese
können auf PC oder anderem Media Player wiedergegeben werden)
Aufzeichnungsmöglichkeiten: Sofortaufzeichnung auf Tastendruck, programmierte Aufzeichnung,
Time-Shifting
Wiedergabe von MPEG1-/2-/4-, MP3-, WMA-, JPG-Dateien, die auf der integrierten Festplatte oder
einem USB-Gerät gespeichert sind
Kopieren von Dateien von einem USB-Gerät oder Netzwerkspeicherort auf die integrierte Festplatte
Automatische Umschaltung zwischen USB-PC- und Player-Modus:
Wenn das Gerät über USB an einen PC angeschlossen ist, hat es die Funktion eines USBSpeichergeräts.
Wenn es nicht über USB an einen PC angeschlossen ist, hat das Gerät die Funktion eines Media
Recorders & Players.
3. Hinweise und Warnungen
•
•
•
•
•
•
•
•
•
•
•
•
Versuchen Sie nicht, das Gerät zu zerlegen. Dies könnte zu Verletzungen aufgrund von Hochspannung
führen.
Setzen Sie das Gerät nicht extremer Feuchtigkeit aus.
Tauchen Sie das Gerät nicht in Flüssigkeiten und setzen Sie es keinen Flüssigkeiten aus.
Trennen Sie das Stromkabel von der Stromversorgung, wenn Sie das Gerät für längere Zeit nicht
benutzen.
Stellen Sie sicher, dass die Steckdose, wenn der Media Giant verbunden ist leicht zugänglich sein.
Verwenden Sie das Gerät nicht in der Nähe von Brennstoffen.
Ersetzen Sie die Batterie der Fernbedienung mit einer Batterie des gleichen Typs, wenn diese
schwach oder leer ist. Führen Sie die alten Batterien, wenn möglich, der Wiederverwertung zu. Wenn
Sie die Fernbedienung für längere Zeit nicht verwenden, entfernen Sie die Batterie, um Korrosion zu
verhindern.
Stellen Sie sicher, dass die Batterien richtig in der Fernbedienung, um Schäden zu vermeiden.
Setzen Sie die Fernbedienung nicht extremer Feuchtigkeit aus und lassen Sie sie nicht fallen.
Verwenden Sie die Fernbedienung nicht bei intensiver Sonnenbestrahlung.
Lassen Sie das Gerät NIEMALS fallen und setzen Sie es keinen Stößen oder Erschütterungen aus.
Decken Sie das Gerät nicht ab, um eine Überhitzung zu vermeiden.
WICHTIG:
Formatieren Sie die Festplatte NICHT auf Ihrem Computer! Dadurch verliert das Gerät alle
Systemdaten und muss erneut initialisiert werden. Wenn Sie die Festplatte des Geräts
formatieren möchten, verwenden Sie dazu das im Einstellungsmenü des Geräts enthaltene
Formatierungstool.
122
DEUTSCH
4. Gerätekomponenten
Vorderseite
1
2
3
4
5
Rückseite
9
14
10
15
11
16
17
18
19
20
21
6
7
8
12
13
22
23
Legende:
1. Status-LEDs (Power, REC, ACT, LAN)
2. Navigationstasten
3. Wiedergabetasten
4. Infrarotempfänger
5. Mini-USB-Buchse (für Anschluss an PC)
6. USB-Host-Port
7. DV-Eingang
8. Taste zum ‚Öffnen’ der Frontblende
9. Digitaler TV-Tuner-Ausgang
10. Digitaler TV-Tuner-Eingang
11. AV-Composite-Videoausgang
12. Digitaler koaxialer SPDIF-Ausgang
Hinweis:
13. Haupt-Ein-Aus-Schalter
14. LAN (RJ45)-Anschluss
15. HDMI-Ausgang
16. AV1-Eingang (Composite-Video/Audio)
17. AV2-Component-Videoeingang
18. AV2-Audioeingang (L/R)
19. AV-Audioausgang (L/R)
20. AV-Component-Videoausgang (Y/Pb/Pr)
21. S-Video-Ausgang
22. Optisch-digitaler SPDIF-Ausgang
23. Wechselstromeingang (110 ~240V)
Die Funktionen der Steuerungstasten sind grundsätzlich dieselben wie die der Fernbedienung.
123
DEUTSCH
5. Erläuterungen zur Fernbedienung
Die Fernbedienung wird zur Steuerung des Geräts verwendet. Im inneren Einband dieses Handbuchs finden
Sie ein Bild der Fernbedienung. Die Zahlen der Tasten entsprechen denen der nachfolgenden Tabelle mit
Erklärungen aller Funktionen der Fernbedienung.
Nr.
Taste
Beschreibung
1.
2.
3.
4.
5.
6.
7.
8.
9.
10.
11.
12.
13.
14.
15.
16.
17.
18.
19.
20.
21.
22.
23.
POWER ( )
SOURCE
MEDIA
AUDIO
ZOOM
0–9
COPY
REPEAT
GOTO
FAST REWIND (
)
PREVIOUS (
VOLUME +
VOLUME RETURN
, , ,
INS.REP.
PAUSE
WIEDERGABE
REC
TV SYS
SETUP
TIMESHIFT
STOP ( )
24.
25.
SLOW
CM.SKIP
26.
27.
28.
29.
30.
31.
32.
33.
ENTER
INFO
CHANNEL CHANNEL +
MUTE
NEXT (
)
FAST FORWARD (
GUIDE
34.
35.
36.
37.
38.
A-B
DEL
ANGLE
SUB-T
LIVE-TV
39.
40.
41.
DV
MENU
LED-Anzeige
Einschalten des Geräts oder Umschalten in den Standby-Modus
Umschalten zwischen digitalem Tuner, AV & Wiedergabe
Direkttaste zum Media-Browser
Ändern der DVD-Audiospur (wenn auf DVD-Datei verfügbar)
Vergrößern / verkleinern
Zifferntasten
Anzeige des Kopiermenüs
Einstellen des Wiederholmodus
Zu einem bestimmten Punkt in der Wiedergabe gehen
Schnellrücklauf der Wiedergabe
Vorherige(r/s) Datei / Titel / Kapitel / Bild
Lautstärke erhöhen
Lautstärke reduzieren
Zurückkehren zum vorherigen Bildschirm / Kanal
Navigationstasten: Navigieren durch die Menüs
10 Sekunden zurückspringen während Time-Shifting oder der Wiedergabe
Pausieren der (Time-Shifting)-Wiedergabe
Starten der Wiedergabe
Starten der Aufzeichnung
Ändern der Ausgabeauflösung des Geräts
Direkttaste zum Einstellungsmenü
Aktivieren der Time-Shifting-Funktion
Anhalten der Wiedergabe / Anhalten der Aufzeichnung / Deaktivieren von
Time-Shifting
Zeitlupenwiedergabe
30 Sekunden vorwärts springen während Time-Shifting oder der
Wiedergabe
Bestätigung der Auswahl
Anzeigen der Kanalinformationen / Dateiinformationen
Einen Kanal tiefer
Einen Kanal höher
Stummschalten
Nächste(r/s) Datei / Titel / Kapitel / Bild
Schnellvorlauf der Wiedergabe
Anzeige der elektronischen Programmzeitschrift (EPG) des digitalen
(DVB-T)-Tuners
Initialisieren der A-B-Wiederholungsschleife
Löschen einer Eingabe / Auswahl
Ändern des DVD-Angles (wenn auf DVD-Datei verfügbar)
Ändern des Untertitels (wenn auf Video-/DVD-Datei verfügbar)
Direkttaste für Live-TV / zum Umschalten zwischen digitalem TV und
digitalem Radio
Umschalten zwischen DV-Wiedergabe- und Aufzeichnungsmodus
Anzeige des Hauptmenüs
Anzeige der Aktivität der Fernbedienung
)
)
124
DEUTSCH
6. Anschluss des Media Giants
In diesem Kapitel wird erklärt, wie Sie den Media Giant an Ihren Fernseher, Ihr Heimkinosystem, Netzwerk
usw. anschließen können.
9
14
10
15
11
16
17
18
19
20
21
12
13
22
23
Anschluss der Antennenkabel
Hinweis: Der digitale Tuner des Geräts unterstützt Signal Pass Through für das Umleiten des DVB-TSignals vom digitalen Tuner-Eingang zum digitalen Tuner-Ausgang.
• Trennen Sie das Hauptantennenkabel von Ihrem Fernseher oder Ihrer digitalen Set Top Box und schließen
Sie es am Tunereingang [10] des Geräts an.
• Schließen Sie das mitgelieferte Antennenkabel am Tunerausgang [9] des Geräts und am Tunereingang
Ihres Fernsehers oder Ihrer digitalen Set Top Box an.
Anschluss des/der Videokabel/s
Sie haben 5 Möglichkeiten, das Gerät an Ihren Fernseher anzuschließen:
- HDMI
- Composite
- SCART (durch Verwendung des Composite-Kabels & Scart-Adapters)
- S-Video *
- Component *
*
Wenn Sie S-Video oder Component verwenden, wird nur das Videosignal an Ihren Fernseher gesendet.
Verwenden Sie die RCA-Audio-Stecker des Composite-Kabels (rot, weiß) oder den digitalen (optischen
oder koaxialen) Audioausgang des Media Giants.
HDMI:
• Schließen Sie das HDMI-Kabel an den HDMI-Ausgang [15] des Geräts an.
• Schließen Sie das andere Ende des HDMI-Kabels an einem freien HDMI-Eingang an Ihrem Fernseher an.
Composite:
• Schließen Sie das Composite-Kabel (gelb, rot und weiß) an den entsprechenden AV-Ausgangsbuchsen
[11, 19] des Geräts an.
• Schließen Sie das andere Ende des Composite-Kabels (gelb, rot und weiß) an Ihrem Fernseher an.
125
DEUTSCH
SCART:
• Schließen Sie das Composite-Kabel (gelb, rot und weiß) an den entsprechenden AV-Ausgangsbuchsen
[11, 19] des Geräts an.
• Schließen Sie das andere Ende des Composite-Kabels (gelb, rot und weiß) an den Buchsen des SCARTAdapters an.
• Schließen Sie den SCART-Adapter an den SCART-Eingang Ihres Fernsehers an.
S-Video:
• Schließen Sie das S-Video-Kabel an den S-Videoausgang [21] des Geräts an.
• Schließen Sie das andere Ende des S-Video-Kabels am S-Video-Eingang Ihres Fernsehers an.
Component:
• Schließen Sie das Component-Kabel (rot, grün und blau) an den Component-Buchsen [20] des Geräts an.
• Schließen Sie das andere Ende des Component-Kabels an den Component-Buchsen an Ihrem Fernseher
an.
Anschluss des/der Audiokabel/s
Sie haben 3 Möglichkeiten für den Anschluss des Geräts an Ihren Fernseher / Ihr Heimkinosystem.
- Analog, über die RCA-Audiobuchsen des A/V-Ausgangs
- Digital, über den digitalen Koaxial-SPDIF-Ausgang
- Digital, über den digitalen-optischen SPDIF-Ausgang
Analog:
• Schließen Sie die Audiostecker (rot, weiß) des Composite-Kabels an den RCA-Audiobuchsen [19] des AVAusgangs an.
• Schließen Sie das andere Ende des Composite-Kabels an die RCA-Audiobuchsen Ihres Fernsehers oder
Empfängers an.
Digital-koaxial:
• Schließen Sie das digitale Koaxialkabel an den digitalen Koaxialausgang [12] des Geräts an.
• Schließen Sie das andere Ende des digitalen Koaxialkabels am digitalen Koaxialeingang Ihres Empfängers
an.
Digital-optisch:
• Schließen Sie das digitale-optische Kabel an den digitalen-optischen Ausgang [22] des Geräts an.
• Schließen Sie das andere Ende das digitalen-optische kabel an den digitalen-optischen eingang.
Anschluss von anderen Audio-/Videogeräten
Sie können eine Audio-/Videoquelle wie einen VCR, DVD-Player oder eine Set-Top-Box an das Gerät
anschließen und von dieser Audio-/Videoquelle aufzeichnen.
Der Media Giant unterstützt Geräte mit Composite- oder Component-Ausgang.
Composite:
• Schließen Sie das im Lieferumfang Ihres Audio-/Videogeräts enthaltene Audio-/Videokabel an die
entsprechenden AV-Ausgangsbuchsen des Audio-/Videogeräts an.
• Schließen Sie das andere Ende des Composite-Kabels (gelb, rot und weiß) an den AV1-Eingangsbuchsen
[16] des Geräts an.
Component:
• Schließen Sie das im Lieferumfang Ihres Audio-/Videogeräts enthaltene Component-Videokabel am
entsprechenden Component-Ausgang des Audio-/Videogeräts an.
• Schließen Sie das andere Ende des Composite-Videokabels (rot, grün und blau) an den AV2Eingangsbuchsen [17] des Geräts an.
126
DEUTSCH
Hinweis:
Die Component-Videokabel übertragen lediglich Video, keinen Ton. Für die Übertragung von Ton
müssen Sie außerdem die Audiokabel des Audio-/Videogeräts an den AV2-Audioeingangsbuchsen
[18] des Geräts anschließen.
Anschluss des Stromversorgungskabels
Sobald das Gerät an Ihr Audio-/Videogerät angeschlossen ist, können Sie das Gerät an die Stromversorgung
anschließen.
• Schließen Sie das mitgelieferte Stromkabel am Gerät [23] und an einer freien Steckdose an.
• Stellen Sie den Haupt-Ein-Aus-Schalter [12] auf der Rückseite des Geräts auf ‚I’, um das Gerät mit Strom
zu versorgen.
Daraufhin schaltet das Gerät ein.
Vorbereiten der Fernbedienung
• Entfernen Sie die Batterieabdeckung von der Rückseite der Fernbedienung.
• Legen Sie die im Lieferumfang enthaltenen AAA-Batterien in die Fernbedienung ein.
• Setzen Sie die Batterieabdeckung auf der Rückseite der Fernbedienung wieder ein.
Hinweise: -
Die Fernbedienung funktioniert am besten bei einem Abstand bis ca. 5 Meter.
Richten Sie die Fernbedienung auf den IR-Empfänger in der Frontblende des Geräts.
Der Empfangswinkel des IR-Empfängers beträgt ±30 Grad.
Ersetzen Sie die Batterien, wenn diese schwach oder leer sind.
127
DEUTSCH
7. Erste Konfiguration
Das Gerät muss konfiguriert werden, wenn Sie es zum ersten Mal einschalten.
• Wählen Sie den korrekten Eingangskanal an Ihrem Fernseher, an den das Gerät angeschlossen ist. (HDMI,
Composite, SCART, S-Video oder Component).
Hinweis:
Von dieser Stelle an basiert das Handbuch auf der Annahme, dass Ihr Fernseher auf den
Eingangskanal des Geräts eingestellt ist. Alle beschriebenen Schritte beziehen sich auf den
Betrieb des Geräts.
• Stellen Sie sicher, dass der Haupt-Ein-Aus-Schalter auf der Rückseite des Geräts auf ‚I’ (Ein) eingestellt
ist.
• Schalten Sie das Gerät mit der Power-Taste auf der Vorderseite des Geräts oder mit der ‚Power’-Taste
(1) auf der Fernbedienung ein.
• Überprüfen Sie die Power-LED-Anzeige auf der Vorderseite des Media Giants. Wenn die LED-Anzeige
orangefarben leuchtet, befindet sich das Gerät im ‚Standby’—Modus. Wenn die LED-Anzeige blau
leuchtet, ist das Gerät betriebsbereit.
Hinweis:
Das Gerät muss initialisiert werden, wenn es eingeschaltet wird. Dies kann eine Weile dauern.
Während der Initialisierung wird der Startbildschirm des Media Giants angezeigt.
[ Startbildschirm]
[ Setup Wizard (Einrichtungsassistent) ]
Sobald der Media Giant initialisiert ist, muss er für die erste Verwendung konfiguriert werden. Als
Unterstützung bei dieser ersten Konfiguration zeigt der Media Giant den „Setup Wizard
[Einrichtungsassistenten]“ mit den für die erste Verwendung erforderlichen Konfigurationsschritten an.
Der Einrichtungsassistent zeigt die folgenden Konfigurationsschritte an:
- Menü-Sprache
- TV-Eingang
- Kanalsuche
- Einstellungen verdrahtetes LAN
- Zeit-Einstellung
Nehmen Sie die Einstellungen des Media Giants mithilfe der ‚Enter’-Taste (26) auf der Fernbedienung vor.
Wenn Sie eine Einstellung vorgenommen haben, die Sie rückgängig machen möchten, drücken Sie die
‚Return’-Taste (14) auf der Fernbedienung.
Menü-Sprache
Wählen Sie die Sprache, die Sie für die Bedienung des Media Giants verwenden möchten.
128
DEUTSCH
TV-Eingang
Wählen Sie Ihr Land aus der Länderliste. Wenn Ihr Land nicht aufgeführt ist, wählen Sie ‚Other [Anderes]’
aus der Liste.
Tipp:
Sie können auch ein bestimmtes DVB-T-Frequenzband durchsuchen, indem Sie ‚6M’ (600Mhz), ‚7M’
(700Mhz) oder ‚8M’ (800Mhz) auswählen.
Kanalsuche
• Wählen Sie ‚OK’, um die automatische Suche nach digitalen (DVB-T)-Kanälen über den digitalen (DVB-T)Tuner des Media Giants zu starten. Die automatische Kanalsuche des Media Giants kann eine Weile
dauern. Alle gefundenen Kanäle werden automatisch im Speicher Ihres Media Giants gespeichert.
• Sobald die Kanalsuche beendet ist, wählen Sie ‚OK’, um mit der Konfiguration fortzufahren.
Wenn Sie die Kanalsuche überspringen möchten (wenn Sie beispielsweise eine Set-Top-Box verwenden und
kein digitales (DVB-T)-TV-Signal haben), können Sie ‚Cancel [Abbrechen]’ wählen, um die Kanalsuche zu
überspringen und die Konfiguration fortzusetzen.
Einstellungen verdrahtetes LAN
Über die Netzwerk-Einstellungen können Sie die IP-Adresse für den Media Giant einstellen. In den meisten
Fällen ist der Media Giant an ein Netzwerk angeschlossen, das einen DHCP-Server hat (meistens einen
Router).
• Wenn Sie einen DHCP-Server in Ihrem Netzwerk haben, wählen Sie die Option ‚DHCP IP’.
• Der Einrichtungsassistent fordert Sie auf, die Auswahl zu bestätigen. Wählen Sie ‚OK’, um fortzufahren.
• Wenn Sie hingegen eine statische IP-Adresse verwenden möchten, wählen Sie ‚FIX IP [Feste IP]’.
• Der Einrichtungsassistent zeigt Ihnen die Felder an, in denen Sie eine statische IP-Adresse eingeben
können. Geben Sie die IP-Adresse, Subnetzmaske, das Standardgateway und den DNS-Server mithilfe der
Navigationstasten (15) und der Ziffertasten 0-9 (6) ein.
• Wenn die eingegebenen Werte korrekt sind, drücken Sie die ‚Enter’-Taste (26) auf der Fernbedienung.
• Der Einrichtungsassistent fordert Sie auf, die Auswahl zu bestätigen. Wählen Sie ‚OK’, um fortzufahren.
Wenn Ihr Media Giant nicht mit einem Netzwerk verbunden ist, wählen Sie ‚Cancel [Abbrechen]’, um
diesen Schritt zu überspringen und mit der Konfiguration fortzufahren.
Zeit-Einstellung
Über die Option ‚Set Time [Zeit-Einstellung]’ können Sie die korrekte Zeit und das korrekte Datum in der
Konfiguration des Media Giants einstellen.
• Um Uhrzeit und Datum manuell einzustellen, wählen Sie ‚Manual [Manuell]’.
• Geben Sie Jahr, Monat, Tag, Stunde, Minuten und Sekunden mithilfe der Navigationstasten (15) und der
Ziffertasten 0-9 (6) ein. Wenn Sie mit der Eingabe fertig sind, drücken Sie die ‚Enter’-Taste (26) auf der
Fernbedienung.
• Der Einrichtungsassistent fordert Sie auf, die Auswahl zu bestätigen. Wählen Sie ‚OK’, um fortzufahren.
• Wenn Sie eine aktive Internetverbindung haben und der Media Giant an Ihr Netzwerk angeschlossen ist,
können Sie die Option ‚Auto (Via Network) [Automatisch (Über Netzwerk)]’ wählen.
• Der Einrichtungsassistent zeigt die zu konfigurierenden Felder der automatischen Zeitkonfiguration an.
Sie können den Standard-NTP-Server beibehalten. Wenn Sie jedoch einen anderen NTP-Server
verwenden möchten, drücken Sie die ‚Enter’-Taste (26) im NTP-Server-Feld, um den Wert zu ändern.
• Stellen Sie die korrekte Zeitzone Ihres Landes ein.
• Stellen Sie ‚Daylight Savings Correction [Korrektur Sommerzeit]’ auf ‚Disable [Deaktivieren]’ oder
‚Enable [Aktivieren]’, je nachdem, ob in Ihrem Land Sommerzeit angewendet wird oder nicht. Wenn
die eingegebenen Werte korrekt sind, drücken Sie die ‚Enter’-Taste (26) auf der Fernbedienung.
• Der Einrichtungsassistent fordert Sie auf, die Auswahl zu bestätigen. Wählen Sie ‚OK’, um fortzufahren.
Damit ist der Einrichtungsassistent fertig gestellt und die Grundkonfiguration des Media Giants
vorgenommen.
129
DEUTSCH
Hinweis:
Hinweis:
Hinweis:
Weitere Konfigurationseinstellungen können Sie über die Option ‚Setup [Einstellungen]' im
Hauptmenü vornehmen. Das Einstellungsmenü ist in Kapitel 13 erklärt.
Wenn Sie den Einrichtungsassistenten erneut starten möchten, nachdem Sie die Konfiguration
abgeschlossen haben, wählten Sie ‚Setup [Einstellungen]’ im Hauptmenü und dann die Option
‚Restore Default [Standardwerte wiederherstellen]’. Daraufhin setzt der Media Giant die
vorgenommenen Einstellungen zurück und startet den Einrichtungsassistenten erneut.
Wenn Sie einen Media Giant ohne vorformatierte Festplatte erworben haben, zeigt der Media
Giant den ‚Format Wizard [Formatierungsassistenten]’ an, nach dem die Konfiguration mit
dem Einrichtungsassistenten fertig gestellt ist. Dieser ‚Format Wizard
[Formatierungsassistent]’ ist im Kapitel 15 dieses Handbuchs beschrieben.
130
DEUTSCH
8. Hauptmenü
Über das Hauptmenü können Sie verschiedene Funktionen des Media Giants auswählen.
Hinweis:
Wenn das Hauptmenü nicht angezeigt wird, können Sie es über die ‚Menu’-Taste (40) auf der
Fernbedienung aufrufen.
[ Hauptmenü ]
Im Hauptmenü sind die folgenden Optionen verfügbar:
Browse Media
[Medien durchsuchen]
Playback Recordings
[Wiedergabe von Aufzeichnungen]
TV Tuner/AV Input
[TV-Tuner/AV-Eingang]
Scheduled Recording
[Programmierte Aufzeichnung]
Setup
[Einstellungen]
Wiedergabe von gespeicherten Mediendateien
Wiedergabe und Bearbeitung Ihrer Aufzeichnungen
Live-TV & Live-AV anschauen
Konfiguration programmierter Aufzeichnungen
Konfiguration des Media Giants
Oben aufgeführte Optionen werden in den folgenden Kapiteln dieses Handbuchs beschrieben.
131
DEUTSCH
9. Browse Media [Medien durchsuchen]
Wenn Sie im Hauptmenü die Option ‚Browse Media [Medien durchsuchen]’ gewählt haben, zeigt der
Media Giant den Medien-Browser auf Ihrem Bildschirm an:
[ Auswahl des Speicherorts ]
[ Modusauswahl: Filme, Musik, Fotos ]
Über den Medien—Browser können Sie das Speichergerät wählen, von dem Sie Ihre Mediendateien
wiedergeben möchten:
USB
Harddisk [Festplatte]
Network [Netzwerk]
Wiedergabe von Medien von einem angeschlossenen USB-Gerät (über den
USB-Host-Port)
Wiedergabe von Medien von der integrierten Festplatte des Media Giants
Wiedergabe von Medien von freigegebenen Samba- / anderen
Netzwerkspeicherorten in Ihrer Netzwerkumgebung
Um ein USB-Gerät oder die integrierte Festplatte zu durchsuchen, wählen Sie die Option ‚USB’ oder
‚Harddisk [Festplatte]’ aus der Speicherortliste.
Um Ihr Netzwerk zu durchsuchen und Medien von freigegebenen Netzwerkspeicherorten wiederzugeben,
wählen Sie aus der Speicherortliste die Option ‚Network [Netzwerk]’.
Hinweis:
Um die freigegebenen Netzwerkspeicherorte zu durchsuchen, stellen Sie sicher, dass Sie die
Netzwerkfreigabe korrekt eingestellt haben. Weitere Informationen über die Netzwerkfreigabe
und das Durchsuchen von freigegebenen Netzwerkspeicherorten finden Sie in Kapitel 17.
Wenn ein Speicherort ausgewählt wird, können Sie mit der rechten und linken Navigationstaste auf der
Fernbedienung zwischen den Modi ‚Movies [Filme]', ‚Music [Musik]' und ‚Photos [Fotos]' umschalten.
Nachdem Sie eine der drei Optionen gewählt haben, filtert der Media Giant automatisch den Inhalt des
Speicherorts, damit nur die entsprechenden Dateien angezeigt werden.
Zum Beispiel:
Wenn Sie ‚Movies [Filme]’ gewählt haben, werden nur die Filmdateien auf Ihrem
Bildschirm angezeigt.
Im Medienbrowsermenü können Sie die folgenden Browseroptionen auf der Fernbedienung verwenden:
Navigationstasten (15) Navigieren durch die Dateien und Ordner oder Ändern des
Wiedergabemodus
Enter
(26) Wiedergabe der gewählten Datei oder Öffnen des gewählten Ordners
Return
(14) Zurück zum vorherigen Ordner
Copy
(7) Öffnen des Kopiermenüs (wird in einem Unterkapitel dieses Kapitels erklärt)
Play
(18) Wiedergabe der gewählten Datei
Next
(31) Anzeige der nächsten Seite mit Dateien
Previous
(11) Anzeige der vorherigen Seite mit Dateien
menu
(40) Zurückkehren zum Hauptmenü
Sie können vom Medienbrowsermenü zum Hauptmenü zurückkehren, indem Sie die ‚Menu’-Taste (40) auf
der Fernbedienung drücken.
132
DEUTSCH
Wiedergabe von Filmen
Sie können auf der Festplatte des Geräts, einem USB-Speichergerät oder an einem Netzwerkspeicherort
gespeicherte Filme über den ‚Movies [Filme]’-Filter des Media Giants auf Ihrem Fernseher wiedergeben.
Wenn Sie den ‚Movies [Filme]’-Filter auswählen, zeigt der Media Giant nur die Filmdateien auf Ihrem
Bildschirm an. Alle anderen Dateien werden nicht angezeigt.
[ Film-Modus ]
• Wählen Sie mithilfe der Navigationstasten (15) auf der Fernbedienung die Datei, die Sie wiedergeben
möchten.
Nachdem Sie eine Filmdatei gewählt haben, zeigt der Medienbrowser eine Vorschau mit den Dateinamen
und Dateigrößen auf der rechten Seite des Bildschirms an.
• Drücken Sie die Taste ‚Enter’ (26) oder ‚Play’ (18) auf der Fernbedienung, um die Wiedergabe der
gewählten Datei zu starten.
Während der Wiedergabe können Sie die folgenden Wiedergabeoptionen auf der Fernbedienung verwenden:
- Pause
(17)
Pausieren oder Fortsetzen der Wiedergabe
- Slow
(24)
Zeitlupenwiedergabe
- Stop
(23)
Stoppen der Wiedergabe
- Rewind
(10)
Rücklauf der Wiedergabe
- Fast Forward
(32)
Schnellvorlauf der Wiedergabe
- Ins. Rep.
(16)
10 Sekunden zurückspringen in der Wiedergabe
- CM. Skip
(25)
30 Sekunden vorwärts springen in der Wiedergabe
- Goto
(9)
Zu einem bestimmten Punkt (Zeit) im Film gehen
- Repeat
(8)
Ändern der Wiederholungsoption der aktuellen Wiedergabe
- Info
(27)
Anzeige der Wiedergabedetails
- Zoom
(5)
Vergrößern / verkleinern
- Sub-t
(37)
Ändern des Untertitels (wenn verfügbar)
- Audio
(4)
Ändern der Audiospur (wenn verfügbar)
- Volume
(12), (13)
Einstellen der Lautstärke
- Mute
(30)
Stummschalten
Sie können vom Medienbrowsermenü zum Hauptmenü zurückkehren, indem Sie die ‚Menu’-Taste (40) auf
der Fernbedienung drücken.
133
DEUTSCH
DVD-Wiedergabe-Funktion
Der Media Giant gibt DVDs von der Festplatte wie normale DVDs wieder. Sie können durch das DVD-Menü
navigieren, Untertitel wählen oder die Audiosprache ändern.
Hinweis: Der Media Giant unterstützt ausschließlich die Wiedergabe ungeschützter DVD-Kopien. CSSSchutz wird nicht unterstützt.
• Schließen Sie den Media Giant an Ihren Computer an (siehe Kapitel 13).
• Erstellen Sie auf der Media Giant-Festplatte einen Ordner mit dem Namen Ihres DVD-Films (zum Beispiel:
‚Movie1').
• Kopieren Sie die Dateien aus dem ‚VIDEO_TS'-Ordner in den auf dem Media Giant erstellten Ordner (zum
Beispiel: ‚Movie1’).
Nach dem Kopieren sollte die Struktur wie folgt aussehen:
- [Festplatte des Media Giants]
|-> Movie1
(mit allen DVD-Dateien)
• Trennen Sie den Media Giant von Ihrem Computer und schließen Sie ihn am Fernseher an.
• Wählen Sie mithilfe der Navigationstasten (15) auf der Fernbedienung im Hauptmenü das Symbol
‚Browse Media [Medien durchsuchen]’ [1] und drücken Sie die Taste ‚Enter’ (26) auf der
Fernbedienung, um den Medienbrowser zu starten.
• Navigieren Sie mithilfe der Navigationstasten (15) und der ‚Enter’-Taste (26) auf der Fernbedienung
zum Ordner auf der integrierten Festplatte, in dem die DVD gespeichert ist.
• Öffnen Sie den DVD-Ordner, den Sie auf der Festplatte erstellt haben.
[ Film-Modus ]
• Wählen Sie die Datei ‚VIDEO_TS.IFO’ und drücken Sie die ‚Play’-Taste (18) auf der Fernbedienung, um
die Wiedergabe der ausgewählten DVD zu starten.
Hinweis:
Sie können auch ISO-Dateien direkt auf dem Media Giant wiedergeben, wenn diese in der NTFSMedienpartition gespeichert sind. Bei der Wiedergabe einer ISO-Datei einer DVD sind dieselben
Wiedergabefunktionen wie bei der Wiedergabe der IFO-Datei einer DVD anwendbar.
134
DEUTSCH
Während der Wiedergabe der DVD können Sie die folgenden Wiedergabeoptionen auf der Fernbedienung
verwenden:
-
Pause
(17)
Slow
(24)
Stop
(23)
Navigationstasten (15)
Enter
(26)
Rewind
(10)
Fast Forward
(32)
Previous
(11)
Next
(31)
Ins. Rep.
(16)
CM. Skip
(25)
Goto
(7)
Repeat
(8)
Info
(27)
Zoom
(5)
Angle
(36)
Volume
(12), (13)
Mute
(30)
Sub-t
(37)
Audio
(4)
Pausieren oder Fortsetzen der Wiedergabe
Zeitlupenwiedergabe
Stoppen der Wiedergabe
Navigieren durch das DVD-Menü
Bestätigen der DVD-Menüauswahl
Schnellrücklauf
Schnellvorlauf
Vorheriges Kapitel
Nächstes Kapitel
10 Sekunden zurückspringen in der Wiedergabe
30 Sekunden vorwärts springen in der Wiedergabe
Zu einem bestimmten Punkt (Zeit) im Film gehen
Ändern der Wiederholungsoption der aktuellen Wiedergabe
Anzeige der Wiedergabedetails
Vergrößern / verkleinern
Ändern des DVD-Angles (wenn die DVD mehrere Angles enthält)
Einstellen der Lautstärke
Stummschalten
Ändern oder Deaktivieren der Untertitel einer DVD
Ändern der Audiospur der DVD (wenn eine DVD mehrere Audiospuren
enthält)
Sie können vom Medienbrowsermenü zum Hauptmenü zurückkehren, indem Sie die ‚Menu’-Taste (40) auf
der Fernbedienung drücken.
Wiedergabe von Untertiteln
Der Media Giant kann Untertitel von AVI-Videodateien wiedergeben.
Um AVI-Dateien mit Untertiteln wiederzugeben, müssen Sie der Untertiteldatei denselben Namen geben
wie der AVI-Datei. Zum Beispiel:
Name der Filmdatei:
Name der Untertiteldatei:
My_Movie_With_Sub.AVI
My_Movie_With_Sub.SRT
• Wählen Sie mithilfe der Navigationstasten auf der Fernbedienung die Datei, die Sie wiedergeben
möchten.
• Drücken Sie die Taste ‚Enter’ (26) oder ‚Play’ (18) auf der Fernbedienung, um die Wiedergabe der
gewählten Datei zu starten.
Daraufhin wird die Wiedergabe der AVI-Datei mit der entsprechenden Untertiteldatei gestartet.
Um während der Wiedergabe die Untertitel zu deaktivieren/aktivieren, muss die ‚Sub-t’-Taste (37) auf der
Fernbedienung gedrückt werden.
Sie können vom Medienbrowsermenü zum Hauptmenü zurückkehren, indem Sie die ‚Menu’-Taste (40) auf
der Fernbedienung drücken.
135
DEUTSCH
Wiedergabe von Musik
Sie können auf der Festplatte des Geräts, einem USB-Speichergerät oder an einem Netzwerkspeicherort
gespeicherte Musikdateien über den ‚Music [Musik]’-Filter des Media Giants auf Ihrem Fernseher
wiedergeben.
Wenn Sie den ‚Music [Musik]’-Filter auswählen, zeigt der Media Giant nur die Musikdateien auf Ihrem
Bildschirm an. Alle anderen Dateien werden nicht angezeigt.
[ Musik-Modus ]
• Wählen Sie mithilfe der Navigationstasten (15) auf der Fernbedienung die Datei, die Sie wiedergeben
möchten.
Nachdem Sie eine Musikdatei gewählt haben, zeigt der Medienbrowser die ID3-Tag-Informationen (wenn
verfügbar) mit den Dateinamen und Dateigrößen auf der rechten Seite des Bildschirms an.
• Drücken Sie die Taste ‚Enter’ (26) oder ‚Play’ (18) auf der Fernbedienung, um die Wiedergabe der
gewählten Datei zu starten.
Während der Wiedergabe können Sie die folgenden Wiedergabeoptionen auf der Fernbedienung verwenden:
-
Pause
Stop
Rewind
Fast Forward
Repeat
- Info
- Volume
- Mute
(17)
(23)
(10)
(32)
(8)
(27)
(12), (13)
(30)
Pausieren oder Fortsetzen der Wiedergabe
Stoppen der Wiedergabe
Rücklauf der Wiedergabe
Schnellvorlauf der Wiedergabe
Ändern der Wiederholungsoption der aktuellen Datei/des aktuellen
Ordners
Anzeige der Wiedergabedetails
Einstellen der Lautstärke
Stummschalten
Sie können vom Medienbrowsermenü zum Hauptmenü zurückkehren, indem Sie die ‚Menu’-Taste (40) auf
der Fernbedienung drücken.
136
DEUTSCH
Wiedergabe von Fotos & Bildern
Sie können auf der Festplatte des Geräts, einem USB-Speichergerät oder an einem Netzwerkspeicherort
gespeicherte Fotos und Bilder über den ‚Photos [Fotos]’-Filter des Media Giants auf Ihrem Fernseher
wiedergeben.
Wenn Sie den ‚Photos [Fotos]’-Filter auswählen, zeigt der Media Giant nur die Bilddateien auf Ihrem
Bildschirm an. Alle anderen Dateien werden nicht angezeigt.
[ Foto-Modus ]
• Wählen Sie mithilfe der Navigationstasten (15) auf der Fernbedienung die Datei, die Sie wiedergeben
möchten.
Nachdem Sie eine Bilddatei gewählt haben, zeigt der Medienbrowser eine kleine Vorschau mit den
Dateinamen und Dateigrößen auf der rechten Seite des Bildschirms an.
• Drücken Sie die Taste ‚Enter’ (26) oder ‚Play’ (18) auf der Fernbedienung, um die Wiedergabe der
gewählten Datei zu starten.
Während der Wiedergabe können Sie die folgenden Wiedergabeoptionen auf der Fernbedienung verwenden:
-
Pause
Stop
Navigationstasten
Previous
Next
Repeat
(17)
(23)
(15)
(11)
(31)
(8)
-
Info
Zoom
(27)
(5)
Pausieren oder Fortsetzen der Diashow
Stoppen der Diashow
Drehen des angezeigten Fotos
Wiedergabe der vorherigen Datei im aktuellen Ordner
Wiedergabe der nächsten Datei im aktuellen Ordner
Ändern der Wiederholungsoption der aktuellen Datei/des aktuellen
Ordners
Anzeige der Diashowdetails
Vergrößern / verkleinern
Sie können vom Medienbrowsermenü zum Hauptmenü zurückkehren, indem Sie die ‚Menu’-Taste (40) auf
der Fernbedienung drücken.
Tipp:
Das Einstellungsmenü enthält eine Option für das Ändern des Übergangsmodus während Diashows.
Siehe dazu Kapitel 13 –‚Übergangseffekt’.
137
DEUTSCH
Kopiermodus
Wenn Sie Dateien von einem Speicherort auf einen anderen kopieren möchten (zum Beispiel von einem
USB-Gerät auf die integrierte Festplatte), können Sie dies mithilfe des Kopiermodus des Media Giants tun.
Für den Zugriff auf den Kopiermodus müssen Sie die ‚Copy [Kopier]’-Taste (7) auf der Fernbedienung
drücken, wenn Sie sich im Medienbrowser befinden. Daraufhin wird das Kopiermenü auf Ihrem Bildschirm
angezeigt.
[ Kopier-Menü ]
[ Kopier-Menü – Kopier-Assistent ]
Sie können ‚USB’, ‚Harddisk [Festplatte]’ oder ‚Network [Netzwerk]’ als Quelle auswählen. Die
verfügbaren Speicherorte sind ‚USB’, ‚Harddisk [Festplatte]’ oder ‚Recycle [Papierkorb]’ (wenn Dateien
gelöscht werden sollen).
Wählen Sie zuerst die Quelle mithilfe der Auf- und Abwärtsnavigationstasten (15) auf der Fernbedienung.
Nachdem Sie die korrekte Quelle ausgewählt haben, drücken Sie die rechte Navigationstaste (15) und
wählen Sie mithilfe der Auf- und Abwärtsnavigationstasten (15) den Speicherort.
Hinweis:
Sie erkennen am hervorgehobenen Rand, ob der Abschnitt Quelle oder der Abschnitt Speicherort
des Kopier-Menüs aktiv ist.
Hinweis:
Von ‚USB’ auf ‚USB’ oder von ‚Harddisk [Festplatte]’ auf ‚Harddisk [Festplatte]’ kann nicht
kopiert werden.
• Wenn Sie die Quelle und den Speicherort korrekt gewählt haben, drücken Sie die ‚Enter’-Taste (26) auf
der Fernbedienung, um den Kopier-Assistenten fortzusetzen.
• Navigieren Sie durch die Quelle zu der Datei oder dem Ordner, die/den Sie kopieren möchten. Sie
können mithilfe der Navigationstasten (15) und der ‚Enter’-Taste (26) auf der Fernbedienung durch die
Ordner navigieren.
• Markieren Sie die Dateien oder Ordner, die Sie kopieren möchten, mithilfe der ‚Play'-Taste (18) auf der
Fernbedienung. Die markierten Dateien oder Ordner werden mit einem Markiersymbol hinter dem
Namen angezeigt.
• Sobald die Quelldateien oder –ordner markiert sind, drücken Sie die rechte Navigationstaste (15) auf der
Fernbedienung, um zum Abschnitt Speicherort zu wechseln.
Hinweis:
Die NTFS-Medienpartition des Media Giants kann nicht als Speicherort ausgewählt werden, da
auf die NTFS-Medianpartition nicht geschrieben werden kann.
• Navigieren Sie zum Speicherort, an dem Sie die Dateien/Ordner speichern möchten. Sie können mithilfe
der Navigationstasten (15) und der ‚Enter’-Taste (26) auf der Fernbedienung durch die Ordner
navigieren.
• Sobald Sie den korrekten Speicherort gefunden haben, drücken Sie die rechte Navigationstaste (15) auf
der Fernbedienung, um den Kopierprozess zu starten.
138
DEUTSCH
• Der Kopier-Assistent fordert Sie auf, das Starten des Kopierprozesses zu bestätigen. Drücken Sie ‚OK',
um den Kopierprozess zu starten.
[ Bestätigung des Kopierprozesses ]
[ Kopierprozess läuft ]
Sie werden mit einer Meldung auf Ihrem Bildschirm über das Fertigstellen des Kopierprozesses informiert.
Sie können auch Dateien über das Kopier-Menü löschen.
Wenn Sie Dateien löschen möchten, wählen Sie ‚Recycle [Papierkorb]’ als Speicherort.
Markieren Sie die Dateien oder Ordner, die Sie löschen möchten, und drücken Sie die rechte
Navigationstaste (15) auf der Fernbedienung. Es erscheint ein Fenster, in dem Sie zur Bestätigung des
Löschens der ausgewählten Dateien oder Ordner aufgefordert werden.
Wählen Sie ‚OK’, um die ausgewählten Dateien oder Ordner zu löschen.
[ Kopier-Menü – Lösch-Assistent ]
[ Bestätigung des Löschens ]
139
DEUTSCH
10. Playback Recordings [Wiedergabe von Aufzeichnungen]
Wenn Sie die Option ‚Playback Recordings [Wiedergabe von Aufzeichnungen]’ im Hauptmenü gewählt
haben, werden Sie vom Media Giant aufgefordert, zwischen ‚Digital’ und ‚Analog’ zu wählen.
• Wenn Sie ‚Digital’ auswählen, zeigt der Media Giant die Aufzeichnungen an, die über den digitalen (DVBT)-Tuner des Media Giants gemacht wurden.
• Wenn Sie ‚Analog’ auswählen, zeigt der Media Giant alle Aufzeichnungen an, die über die analogen
Eingänge des Media Giants gemacht wurden (Composite-Eingang, Component-Eingang, FireWireEingang).
Nachdem Sie entweder ‚Digital’ oder ‚Analog’ ausgewählt haben, zeigt der Media Giant die
Aufzeichnungsliste der gewählten Option auf Ihrem Bildschirm an:
[ Aufzeichnung auswählen ]
[ Aufzeichnungsliste ]
Jedes Video ist mit einem Minibild (erstes Bild der Aufzeichnung), dem Namen, der Zeit und dem Datum
sowie der Aufzeichnungsqualität angezeigt.
Ein gelber Stern hinter einer Aufzeichnung bedeutet, dass diese neu ist und noch nicht angeschaut wurde.
Sobald Sie sich die Aufzeichnung angeschaut haben, verschwindet der gelbe Stern.
Sie können mithilfe der Auf- und Abwärtsnavigationstasten (15) auf der Fernbedienung durch Ihre
Aufzeichnungen navigieren und die Aufzeichnungen wiedergeben, indem Sie die ‚Enter’-Taste (26) oder die
‚Play’-Taste (18) auf der Fernbedienung drücken, nachdem Sie eine Aufzeichnung ausgewählt haben.
Während der Wiedergabe können Sie die folgenden Wiedergabeoptionen auf der Fernbedienung verwenden:
-
Pause
(17)
Slow
(24)
Stop
(23)
Rewind
(10)
Fast Forward
(32)
Ins. Rep.
(16)
CM. Skip
(25)
Previous
(11)
Next
(31)
Repeat
(8)
Info
(27)
Goto
(9)
Zoom
(5)
Audio
(4)
Lautstärke (12), (13)
Mute
(30)
Pausieren oder Fortsetzen der Wiedergabe
Zeitlupenwiedergabe
Stoppen der Wiedergabe.
Rücklauf der Wiedergabe.
Schnellvorlauf der Wiedergabe.
10 Sekunden zurückspringen in der Wiedergabe
30 Sekunden vorwärtsspringen in der Wiedergabe
Wiedergabe des vorherigen Kapitels oder der vorherigen Aufzeichnung
Wiedergabe des nächsten Kapitels oder der nächsten Aufzeichnung
Ändern der Wiederholungsoption der aktuellen Wiedergabe
Anzeige der Wiedergabedetails.
Zu einem bestimmten Punkt (Zeit) im Film gehen
Vergrößern / verkleinern
Ändern der Audiospur (wenn verfügbar)
Einstellen der Lautstärke
Stummschalten
140
DEUTSCH
Sie können mithilfe der linken und rechten Navigationstasten (15) auf der Fernbedienung durch die
Optionen in der oberen Menüleiste der Aufzeichnungsliste navigieren und verschiedene Funktionen
auswählen:
Play
Delete [Löschen]
Rename [Umbenennen]
Sorting [Sortieren]
Edit [Bearbeiten]
Wiedergabe Ihrer Aufzeichnungen
Löschen Ihrer Aufzeichnungen
Umbenennen Ihrer Aufzeichnungen
Ändern der Art, wie Ihre Aufzeichnungen sortiert werden
Bearbeiten Ihrer Aufzeichnungen (wird im nächsten Unterkapitel erklärt)
Erklärungen zum Menü ‚Edit [Bearbeiten]’
Hinweis:
Digitale Aufzeichnungen können vom Media Giant nicht bearbeitet werden. Aus diesem Grund
sind im Menü Bearbeiten verschiedene Optionen nicht verfügbar, wenn Sie unter ‚Playback
Recordings [Wiedergabe von Aufzeichnungen] ‚Digital’ ausgewählt haben.
Der Media Giant lässt nur dann den Zugriff auf die Option ‚Copy to FAT32 partition [Kopieren
auf FAT32-Partition]’ im Bearbeitungsmenü zu, wenn Sie unter ‚Playback Recordings
[Wiedergabe von Aufzeichnungen]’ ‚Digital’ ausgewählt haben.
Im Menü ‚Edit [Bearbeiten]’ stehen Ihnen verschiedene Möglichkeiten für die Änderung Ihrer
Aufzeichnungen zur Verfügung. Dies sind:
[ Aufzeichnungen – Menü Bearbeiten ]
-
-
-
Set Thumbnail
[Minibild einstellen]
Über die Option ‚Set Thumbnail [Minibild einstellen]’ können Sie
Ihre Filme wiedergeben und Ihr jeweiliges Lieblingsbild als Minibild
für Ihre Aufzeichnung auswählen.
A-B Erase [A-B löschen]
Über die Option ‚A-B Erase [A-B löschen]’ können Sie einen Teil
Ihres Films markieren (zum Beispiel eine Werbung) und diesen aus
Ihrer Aufzeichnung löschen.
Split Title [Titel aufteilen]
Über die Option ‚Split Title [Titel aufteilen]’ können Sie eine
Aufzeichnung in zwei Teile teilen (zum Beispiel wenn Sie zwei
Sendungen in einem programmierten Aufzeichnungsvorgang
aufgezeichnet haben).
Merge Title [Titel zusammenführen] Über die Option ‘Merge Title [Titel zusammenführen]’
können Sie zwei Aufzeichnungen in einer Aufzeichnung
zusammenführen.
Add Chapter Mark [Kapitelmarkierung hinzufügen] Über die Option ‚Add Chapter Mark
[Kapitelmarkierung hinzufügen]’ können Sie Ihren Aufzeichnungen
Kapitelmarkierungen hinzufügen. Damit können Sie auf einfache
Weise zu einem bestimmten Teil in der Aufzeichnung springen.
Hinweis:
Sie können auch die Option ‘Auto Chapter [Automatische Kapitel[’ im Einstellungsmenü
aktivieren. Damit werden Ihren Aufzeichnungen automatisch Kapitelmarkierungen hinzugefügt.
141
DEUTSCH
-
-
Remove Chapter Mark [Kapitelmarkierung entfernen] Über die Option ‚Remove Chapter Mark
[Kapitelmarkierung entfernen]’ können Sie Kapitelmarkierungen
von Ihren Aufzeichnungen entfernen. Diese Option kann nützlich
sein, wenn Sie den Media Giant so konfiguriert haben, dass er
automatisch Kapitelmarkierungen erstellt, Sie diese jedoch aus
einer Aufzeichnung entfernen möchten.
Copy to FAT32 partition [Kopieren auf FAT32-Partition] Über die Option ‚Copy to FAT32 Partition
[Kopieren auf FAT32-Partition]’ können Sie Aufzeichnungen von
der Aufzeichnungspartition in den ‚REC’-Ordner auf der
Medienpartition des Media Giants kopieren. Wenn eine
Aufzeichnung auf die FAT32-Partition kopiert wird, können Sie
diese auf Ihrem Computer wiedergeben, kopieren oder bearbeiten,
wenn der Media Giant über USB angeschlossen ist, oder Sie können
diese auf einen UPnP A/V-Client (wie beispielsweise den
Conceptronic C54WMP oder den Conceptronic CFULLHDMA) über
das Netzwerk streamen.
Hinweis:
Weitere Informationen über die UPnP A/V-Server-Funktion des Media Giants finden Sie in
Kapitel 16.
142
DEUTSCH
11. TV Tuner/AV Input [TV-Tuner/AV-Eingang]
Über die Option ‚TV Tuner / AV Input [TV-Tuner / AV-Eingang]’ im Hauptmenü können Sie vom digitalen
(DVB-T)-TV-Tuner oder von der AV-Eingangsquelle des Media Giants fernsehen und Sendungen aufzeichnen.
Tipp:
Sie können aus einem beliebigen Menü im Media Giant schnell auf den Live-TV-Bildschirm
zugreifen, indem Sie die ‚Live-TV’-Taste (38) auf der Fernbedienung drücken.
Wenn Sie die Option ‚TV Tuner / AV Input [TV-Tuner / AV-Eingang]’ wählen, zeigt der Media Giant das
Live-TV-Bild vom TV-Tuner an. Während Sie Live-TV schauen, können Sie die Kanäle durch Drücken der
Tasten ‚Channel +’ (29) oder ‚Channel -’ (28) auf der Fernbedienung ändern.
Über die ‚Source’-Taste (2) auf der Fernbedienung können Sie zwischen dem TV-Tuner, Composite-Eingang
und Component-Eingang umschalten. Kurz nach dem Umschalten wird die Quelle in der rechten oberen
Ecke des Bildschirms angezeigt.
Time-Shifting
Der Media Giant unterstützt Time-Shifting. Wenn Sie die Time-Shifting-Funktion aktivieren, können Sie
Live-TV oder Live-Audio/-Video durch Aufzeichnung des aktuellen Kanals/Eingangs ‚pausieren’.
Drücken Sie die Taste ‚Timeshift’ (22) auf der Fernbedienung, um die Time-Shifting-Funktion zu
initialisieren.
Sobald die Time-Shifting-Funktion initialisiert ist, wird das Live-TV oder Live-A/V ‚pausiert’ und das Gerät
zeichnet den Kanal im Hintergrund auf.
[ Initialisieren von Time-Shifting ]
Hinweis:
[ Time-Shifting aktiv ]
Wenn die Time-Shifting-Funktion aktiviert ist, zeigt der Fortschrittsbalken auf dem Bildschirm
die Höchstpufferzeit für das Time-Shifting. Wenn Sie diese Pufferzeit ändern möchten
(verkürzen oder verlängern), müssen Sie die Festplatte des Media Giants neu formatieren, um
die Größe der Time-Shifting-Pufferpartition zu verändern. Detaillierte Informationen über das
Formatieren finden Sie in Kapitel 15.
Während dem Time-Shifting können Sie die folgenden Tasten auf der Fernbedienung verwenden:
- Play
(18)
Wiedergabe des Time-Shifting-Puffers
- Pause
(17)
Pausieren oder Fortsetzen der Wiedergabe
- Slow
(24)
Zeitlupenwiedergabe
- Stop
(23)
Stoppen der Wiedergabe
- Rewind
(10)
Rücklauf der Wiedergabe
- Fast Forward
(32)
Schnellvorlauf der Wiedergabe
- Ins. Rep.
(16)
10 Sekunden zurückspringen in der Wiedergabe
- CM. Skip
(25)
30 Sekunden vorwärts springen in der Wiedergabe
- Info
(27)
Time-Shifting-Puffer-Informationen anzeigen oder ausblenden
- Volume
(12), (13)
Einstellen der Lautstärke
- Mute
(30)
Stummschalten
143
DEUTSCH
Permanentes Time-Shifting
Im Einstellungsmenü des Media Giants können Sie ‚Permanent Timeshifting [Permanentes Time-Shifting]'
aktivieren. Wenn diese Funktion aktiviert ist, ist die Time-Shifting-Funktion immer aktiviert und Sie können
die Wiedergabe sofort pausieren oder oben aufgeführte Tasten auf der Fernbedienung zum ‚Springen’ in
Ihrem Time-Shifting-Puffer verwenden.
Aufzeichnung
Während Sie über das Gerät Live-TV oder Live-A/V schauen, können Sie die Aufzeichnung des aktuellen
Kanals durch Drücken der Taste ‚Rec’ (19) auf der Fernbedienung starten. Das Gerät zeichnet so lange auf,
bis die ‚Stop'-Taste (23) auf der Fernbedienung gedrückt wird.
Während der Aufzeichnung leuchtet die ‚REC’-LED-Anzeige auf der Frontblende.
Hinweis:
Das Gerät erkennt Kopierschutz auf der angeschlossenen Quelle, zum Beispiel MacroVisionSchutz auf DVDs. Wenn auf der angeschlossenen Quelle ein Kopierschutz besteht, zeichnet das
Gerät nicht auf und zeigt eine Warnmeldung, wenn die Aufzeichnungstaste gedrückt wird.
Hinweis:
Der Media Giant zeichnet standardmäßig in HQ (Hochqualität) auf. Sie können die
Aufzeichnungsqualität im Einstellungsmenü ändern.
Hinweis:
Während der Aufzeichnung können Sie den aktuellen Kanal nicht ändern.
Wenn Sie während einer Aufzeichnung die Taste ‚Rec’ (19) drücken, wird die Aufzeichnungszeit auf 30
Minuten ab dem Zeitpunkt, an dem Sie die Taste ‚Rec’ gedrückt haben, eingestellt.
Die Meldung ‚OTR: 30 Min.’ wird auf Ihrem Bildschirm angezeigt.
[ Normale Aufzeichnung ]
[ Aufzeichnungstimer aktiviert ]
Bei jedem erneuten Drücken der ‚Rec’-Taste (19) erhöht sich die Zeit um 30 Minuten bis zu maximal 240
Minuten. Das Gerät zeichnet weiter auf, bis die Aufzeichnungszeit abgelaufen ist oder die Taste ‚Stop’ (23)
auf der Fernbedienung gedrückt wird.
Digital-Radio [Digitales Radio]
Der Media Giant unterstützt auch digitales Radio, das über das digitale (DVB-T)-Signal gesendet wird.
Sie können über die Lautsprecher Ihres Fernsehers oder über den an den Media Giant angeschlossenen
Empfänger digitale Radiosender hören.
Für das Hören digitaler Radiosender:
Wenn Sie die Digital-Tuner-Funktion verwenden, können Sie auch Digital-Radiokanäle hören.
• Wählen Sie die Option ‚TV Tuner / AV Input [TV-Tuner / AV-Eingang]’ im Hauptmenü des Media Giants
aus.
Daraufhin zeigt der Media Giant das Live-TV-Bild des TV-Tuners an.
• Drücken Sie die Taste ‚Live-TV’ (38) auf der Fernbedienung, um in den Digital-Radio-Modus
umzuschalten.
Damit wird die digitale Radiofunktion aktiviert.
• Für die Auswahl eines digitalen Radiosenders können Sie die Tasten ‚Channel +’ (29) oder ‚Channel -’
(28) verwenden.
• Um wieder in den Digital-TV-Modus zurückzukehren, müssen Sie erneut die Taste ‚Live-TV’ (38) auf der
Fernbedienung drücken.
144
DEUTSCH
EPG (Elektronische Programmzeitschrift)
Der digitale (DVB-T)-Tuner des Media Giants fügt die EPG (elektronische Programmzeitschrift) den
Funktionen des Media Giants hinzu.
Sie können auf die elektronische Programmzeitschrift (EPG) zugreifen, während Sie Live-TV schauen, indem
Sie auf die Taste ‚Guide’ (33) drücken.
Daraufhin erscheint die elektronische Programmzeitschrift (EPG) auf dem Bildschirm.
[ Elektronische Programmzeitschrift (EPG) ]
[ Elektronische Programmzeitschrift - Programmierte
Aufzeichnung ]
Für das Navigieren in der elektronischen Programmzeitschrift (EPG) können Sie die folgenden Tasten auf
der Fernbedienung benutzen.
- Links-/Rechtspfeil (15)
- Auf-/Abpfeil
-
Previous
Next
Rewind
Fast Forward
Rec
(15)
(11)
(31)
(10)
(32)
(19)
Ändern des ausgewählten Datums in der elektronischen
Programmzeitschrift.
Ändern des ausgewählten Programms in der elektronischen
Programmzeitschrift.
Zum vorherigen Kanal wechseln
Zum nächsten Kanal wechseln
Durch die angezeigten Informationen scrollen
Durch die angezeigten Informationen scrollen
Programmieren der Aufzeichnung der ausgewählten Sendung
Wenn Sie die Taste ‚Rec’ (19) drücken, wird die ausgewählte Sendung den programmierten Aufzeichnungen
des Media Giants hinzugefügt. Die ausgewählte Sendung wird rot markiert, was anzeigt, dass diese zur
Aufzeichnung programmiert ist.
Die programmierten Aufzeichnungen finden sich im Menü ‚Scheduled Recording [Programmierte
Aufzeichnungen]’ des Media Giants, das im Kapitel 12 erklärt wird.
Sie können zu Live-TV zurückkehren, indem Sie die Taste ‚Guide’ (33) auf der Fernbedienung drücken.
145
DEUTSCH
DV-Steuerung
Am Mini-FireWire-Anschluss hinter der Frontblende des Media Giants können Sie Ihre DV-Kamera direkt an
den Media Giant anschließen und Ihre selbstgedrehten Videos auf der integrierten Festplatte anschauen.
• Schließen Sie Ihre DV-Kamera an den Mini-FireWire-Anschluss [7] auf der Vorderseite des Media Giants
an.
• Schalten Sie Ihre DV-Kamera ein und setzen Sie sie in den ‚Playback [Wiedergabe]’-Modus.
• Drücken Sie die Taste ‚DV’ (39) auf der Fernbedienung, um den Modus ‚DV Control [DV-Steuerung]’ zu
initialisieren.
Daraufhin zeigt der Media Giant die DV Control [DV-Steuerung] auf Ihrem Bildschirm an:
[ DV-Bedienfeld ]
Sie können die Schaltflächen der DV-Steuerung mithilfe der Navigationstasten (15) auf der Fernbedienung
auswählen. Sie können Ihre Auswahl durch Drücken der ‚Enter’-Taste (26) auf der Fernbedienung
bestätigen.
Wenn Sie ‚Play’ in der DV-Steuerung ausgewählt haben und Ihr Film gerade wiedergegeben wird, können
Sie die ‚Rec’-Taste (19) auf der Fernbedienung drücken, um die Aufzeichnung Ihres DV-Films auf die
Festplatte zu starten.
Tipp:
Während der Aufzeichnung können Sie das DV-Bedienfeld ausblenden, indem Sie auf die ‚DV’-Taste
(39) auf Ihrer Fernbedienung drücken. Das Bedienfeld wird wieder angezeigt, nachdem Sie die
‚DV’-Taste ein zweites Mal gedrückt haben.
Sie können die Aufzeichnung stoppen, indem Sie die Taste ‚Stop’ (23) auf der Fernbedienung drücken.
Die aufgezeichneten Filme werden in der Aufzeichnungsliste gemäß der Beschreibung in Kapitel 10
aufgeführt.
Drücken Sie die ‚Return’-Taste (14) auf der Fernbedienung, um den Modus DV Control [DV-Steuerung] zu
schließen.
146
DEUTSCH
12. Scheduled Recording [Programmierte Aufzeichnung]
Sie können das Gerät für die Aufzeichnung von Kanälen zu bestimmten Zeiten programmieren. Sie können
bis zu 8 Aufzeichnungen programmieren.
Tipp:
Sie können auf einfache Weise Aufzeichnungen über die elektronische Programmzeitschrift (EPG)
des Media Giants programmieren. Die elektronische Programmzeitschrift (EPG) ist im Kapitel 11
dieses Handbuchs beschrieben.
• Wählen Sie die Option ‚Scheduled Recording [Programmierte Aufzeichnung]’ im Hauptmenü.
Daraufhin erscheint das Fenster für die programmierte Aufzeichnung auf Ihrem Fernseher.
hinzufügen ]
[ Menü Programmierte Aufzeichnungen ]
[ Programmierte Aufzeichnung
Im Menü Programmierte Aufzeichnungen werden 5 Optionen angezeigt, die Sie mithilfe der linken und
rechten Navigationstasten (15) auf der Fernbedienung auswählen können.
Add [Hinzufügen]
Edit [Bearbeiten]
Delete [Löschen]
Status
History [Historie]
Programmierte Aufzeichnung hinzufügen
Eine bestehende programmierte Aufzeichnung bearbeiten
Eine programmierte Aufzeichnung löschen
Ändern des Status der Liste der programmierten Aufzeichnungen
Anzeige der Historieliste der programmierten Aufzeichnungen
Eine programmierte Aufzeichnung hinzufügen oder bearbeiten
Wenn Sie die Option ‚Add [Hinzufügen]’ oder ‚Edit [Bearbeiten]' im Menü wählen und die ‚Enter’-Taste
(26) auf der Fernbedienung drücken, können Sie eine neue programmierte Aufzeichnung hinzufügen oder
eine bestehende programmierte Aufzeichnung bearbeiten.
Standardmäßig ist das Feld ‚Source [Quelle]’ ausgewählt.
Alle Optionen können mit den Auf- und Abwärtsnavigationstasten (15) geändert werden und Sie können
mithilfe der linken und rechten Navigationstasten (15) ein anderes Feld auswählen.
• Wählen Sie die korrekte Quelle für Ihre Aufzeichnung aus. Dies kann TV-Kanal, Composite-Videoeingang
oder Component-Videoeingang sein.
• Wählen Sie das korrekte Datum für Ihre Aufzeichnung aus.
• Wählen Sie die korrekte Startzeit für Ihre Aufzeichnung aus.
• Stellen Sie die Dauer Ihrer Aufzeichnung ein.
• Stellen Sie die Wiederholoption für Ihre Aufzeichnung ein. Sie können zwischen folgenden Optionen
wählen:
‚Once [Einmal]’, ‚Everyday [Täglich]’, ‚Mon-Fri [Mo-Fr]’, ‚Mon-Sat [Mo-Sa]’, ‚Sun [So]’, ‚Mon [Mo]’,
‚Tue [Di]’, ‚Wed [Mi]’, ‚Thu [Do]’, ‚Fri [Fr]’ oder ‚Sat [Sa]’.
147
DEUTSCH
Sie können das Feld ‚Device [Gerät]' überspringen, da Sie nur auf der integrierten Festplatte aufzeichnen
können.
• Stellen Sie die Aufzeichnungsqualität ein. Sie können wählen zwischen ‚HQ’, ‚SP’, ‚LP’, ‚EP’ und ‚SLP’.
Hinweis:
Die Änderung des Felds ‚Quality [Qualität]’ hat eine Auswirkung auf die Qualität Ihrer
Aufzeichnung und den Speicherplatz, der für die Aufzeichnung benötigt wird. Die verfügbare
Aufzeichnungszeit für jede Qualitätseinstellung wird im oberen linken Teil des Fensters für
programmierte Aufzeichnungen angezeigt.
• Stellen Sie die ‚Nicam’-Option auf ‚On [Ein]’ oder ‚Off [Aus]’ ein.
Die Nicam-Option sollte auf ‚On [Ein]’ eingestellt sein, wenn die Quelle, von der Sie aufzeichnen
wollen, in zwei verschiedenen Audiosprachen ausstrahlt (zum Beispiel Eurosport).
• Wenn alle Optionen für Ihre Aufzeichnung eingestellt sind, drücken Sie die ‚Enter’-Taste (26) auf der
Fernbedienung, um die Programmierung zu speichern.
• Danach wird eine entsprechende Bestätigung angezeigt. Wählen Sie ‚Confirm [Bestätigen]’ und drücken
Sie die ‚Enter’-Taste (26) auf der Fernbedienung, um die Programmierung zu speichern.
Damit ist die Aufzeichnung programmiert und das Gerät fängt zur programmierten Zeit an, den
programmierten Kanal aufzuzeichnen, auch wenn sich das Gerät im Standby-Modus befindet.
Hinweis:
Während der Aufzeichnung können Sie den aktuellen Kanal nicht ändern.
148
DEUTSCH
13. Setup [Einstellungen]
Wenn Sie im Hauptmenü die Option ‚Setup [Einstellungen]’ wählen, wird das Einstellungsmenü auf Ihrem
Bildschirm angezeigt. Im Folgenden sind alle verfügbaren Einstellungen erklärt.
Sie können mithilfe der Navigationstasten auf der Fernbedienung zwischen den verschiedenen Optionen des
Einstellungsmenüs wechseln.
[ Einstellungsmenü – Video ]
[ Einstellungsmenü – Record (Aufzeichnung) ]
A/V Setup [A/V-Einstellungen]:
Aspect Ratio [Bildformat] Ändern des Bildformats des Media Giant-Ausgangssignals
(‚Letterbox 4:3’, ‚Pan-Scan 4:3’, ‚Widescreen [Breitbild] 16:9’)
Brightness [Helligkeit] Ändern der Helligkeit des Media Giant-Ausgangssignals
Contrast [Kontrast]
Ändern des Kontrasts des Media Giant-Ausgangssignals
Transition [Übergang] Ändern des Übergangs zwischen den Bildern in Diashows.
Audio Setup [Audio-Einstellungen]
Ändern der Audioeinstellungen des Media Giants
Night Mode [Nachtmodus]
Aktivieren oder deaktivieren des Nachtmodus
Audio (Aus, Ein, Comfort).
Digital Output [Digitale Ausgabe] Einstellen der digitalen Audioausgabe. (HDMILPCM, HDMI-RAW, SPDIF-LPCM, SPDIF-RAW)
Record [Aufzeichnung]:
Qualität
Hinweis:
Ändern der standardmäßigen Aufzeichnungsqualität (‚HQ’, ‚SP’, ‚LP’, ‚EP’, ‚SLP’)
Die Änderung des Felds ‚Quality [Qualität]’ hat eine Auswirkung auf die Qualität Ihrer
Aufzeichnung und den Speicherplatz, der für die Aufzeichnung benötigt wird. Die verschiedenen
Qualitätseinstellungen erfordern folgenden Speicherplatz für 1 Stunde Videoaufzeichnung:
HQ:
4,85 GB (4850 MB)
SP:
2,42 GB (2420 MB)
1,62 GB (1620 MB)
LP:
EP:
1,21 GB (1210 MB)
0,80 GB (800 MB)
SLP:
Auto Chapter [Automatische Kapitel]
Permanent Timeshift
[Permanentes Time-Shifting]
Ändern der Einstellung für automatische Kapitel. Über die
Funktion ‚Auto Chapter [Automatische Kapitel]’ werden Ihrer
Aufzeichnung automatisch Kapitelmarkierungen hinzugefügt,
damit Sie während der Wiedergabe schnell durch Ihre
Aufzeichnung springen können.
Aktivieren oder Deaktivieren der Funktion Permanentes TimeShifting. Wenn diese Funktion aktiviert ist, ist die Time-ShiftingFunktion immer aktiviert und Sie können die Wiedergabe sofort
pausieren oder mithilfe der Tasten auf der Fernbedienung in
Ihrem Time-Shifting-Puffer ‚herumspringen’.
149
DEUTSCH
[ Einstellungsmenü – Network (Netzwerk) ]
[ Einstellungsmenü – System ]
Network [Netzwerk]:
LAN Preference
[Bevorzugtes LAN] ** Ändern der bevorzugten LAN-Verbindung: Cable [Kabel] oder Auto (Via Powerline)
[Automatisch (Über Powerline)]
Wenn Sie ‚Cable [Kabel]’ auswählen, verwendet der Media Giant stets den LAN-Port
als Netzwerkverbindung,
Wenn Sie ‚Auto (Via Powerline) [Automatisch (Über Powerline)]’ auswählen,
verwendet der Media Giant die Powerline-Funktion, wenn ein Powerline-Netzwerk
verfügbar ist. Wenn kein Powerline-Netzwerk verfügbar ist, wird der LAN-Port
verwendet.
Hinweis: Wenn der Media Giant sowohl mit Powerline als auch mit LAN-Kabel verbunden ist, ist das
Powerline-Netzwerk das Standard-Netzwerk. Wenn die Leistung des Powerline-Netzwerks unter
1Mbps sinkt, schaltet der Media Giant automatisch in den Kabel-Modus um.
Im Kabel-Modus überprüft der Media Giant ständig die Leistung des Powerline-Netzwerks. Wenn
die Leistung auf über 1Mbps steigt, schaltet der Media Giant vom Kabel-Modus wieder in den
Powerline-Modus um.
Wired Lan Setup [Einstellungen verdrahtetes LAN]
Unter ‘Wired Lan Setup [Einstellungen verdrahtetes LAN]’ können Sie die IPAdresse des Media Giants konfigurieren.
Wenn Sie diese Option ausgewählt haben, können Sie wählen zwischen ‚Cancel
[Abbrechen]', ‚DHCP IP (auto)' oder ‘Fix IP (Manual) [Feste IP (manuell)]’
Wenn Sie einen DHCP-Server in Ihrem Netzwerk haben, wählen Sie die Option ‚DHCP
IP’. Wenn Sie hingegen eine statische IP-Adresse verwenden möchten, wählen Sie
‚FIX IP [Feste IP]’. Der Einrichtungsassistent zeigt Ihnen die Felder an, in denen Sie
eine statische IP-Adresse eingeben können. Geben Sie die IP-Adresse, Subnetzmaske,
das Standardgateway und den DNS-Server mithilfe der Navigationstasten (15) und
der Ziffertasten 0-9 (6) ein. Wenn die eingegebenen Werte korrekt sind, drücken Sie
die ‚Enter’-Taste (26) auf der Fernbedienung.
Media Server
Change the name of the Media Giant in the network.
When selected, you can choose between ‘Server/Host name’ and ‘Group name’.
Server/Host name
Change the name of the Media Giant.
The name of the Media Giant allows UPnP A/V clients (like
the Conceptronic C54WMP or the Conceptronic CFULLHDMA)
to stream media files through the network from the Media
Giant harddisk and allows computer in your network
environment to access the Samba server of the Media Giant.
Group name
Change the workgroup name of the Media Giant.
Note:
More information about the UPnP A/V Server functionality of the Media
Giant can be found in chapter 16.
More information about the Samba Server functionality of the Media Giant
can be found in chapter 18.
150
DEUTSCH
System:
Menu Language [Menü-Sprache]
Set Time [Zeit einstellen]
HDD Format [Formatieren der Festplatte]
Auswahl der Sprache, die Sie für die Bedienung des Media
Giants verwenden möchten.
Ändern der Uhrzeit und des Datums
Formatieren der integrierten Festplatte (siehe Kapitel 15).
Timer Setup [Timer-Einstellungen]
Slideshow Timer [Diashow-Timer]:
Screen Saver Timer [Timer Bildschirmschoner]:
Ändern der Intervallzeit während einer Diashow
Ändern der Inaktivitätszeit für die Aktivierung des
Bildschirmschoners
Firmware Upgrade
Aktualisieren der Firmware des Media Giants
Das Aktualisieren der Firmware kann über das Internet oder über ein USBSpeichergerät erfolgen. Die Firmware-Upgrade-Option kann auf ‚Auto [Automatisch]’
oder auf ‚Manual [Manuell]’ eingestellt werden.
Wenn ‘Auto’ eingestellt wird (Standardeinstellung), überprüft der Media Giant hin
und wieder online, ob neue Firmware vorhanden ist und aktualisiert die Firmware
automatisch, wenn der Media Giant gerade keine Aufzeichnung / Wiedergabe
durchführt.
Wenn ‚Manual [Manuell]’ gewählt wird, können Sie manuell nach neuer Firmware
suchen.
Hinweis: Um Ihre gegenwärtige Firmware-Version zu überprüfen, drücken Sie die ‚Info’-Taste (27) auf
der Fernbedienung, wenn Sie sich im Hauptmenü befinden. Daraufhin wird die Firmware-Version
auf Ihrem Bildschirm angezeigt.
Restore Default [Standardwerte wiederherstellen] Wiederherstellen der Standardeinstellungen des
Media Giants und Initialisieren des
Einrichtungsassistenten für die Konfiguration des
Geräts
151
DEUTSCH
[ Einstellungsmenü – TV Setup (TV-Einstellungen) ]
[ Kanäle bearbeiten ]
TV Setup [TV-Einstellungen]:
TV Input [TV-Eingang]
Channel Scan [Kanalsuche]
Manual Tune [Manuelle Einstellung]
TV Program [Fernsehprogramm]
Wählen Sie Ihr Land aus der Länderliste. Wenn Ihr Land nicht
aufgeführt ist, wählen Sie ‚Other [Anderes]’ aus der Liste.
Tipp: Sie können auch ein bestimmtes DVB-T-Frequenzband
durchsuchen, indem Sie ‚6M’ (600Mhz), ‚7M’ (700Mhz)
oder ‚8M’ (800Mhz) auswählen.
Starten einer automatischen Kanalsuche. Die automatische
Kanalsuche des Media Giants kann eine Weile dauern. Alle
gefundenen Kanäle werden automatisch im Speicher Ihres Media
Giants gespeichert.
Über die Funktion ‚Manual Tune [Manuelle Einstellung]’ können
Sie Ihrer bestehenden Kanalliste (über die Option ‚Add
[Hinzufügen]’) neue Kanäle hinzufügen, (über die Option ‚Skip
[Entfernen]’) Kanäle aus der Kanalliste entfernen oder (über die
Option ‚Edit [Bearbeiten]’) den gefundenen Kanälen Namen
zuweisen.
Mit der Option TV Program [Fernsehprogramm] können Sie den
Media Giant so konfigurieren, dass er alle DVB-T-Kanäle
(einschließlich Zahlkanäle, die auf dem Media Giant nicht
wiedergegeben werden können) oder nur die Free-to-Air-Kanäle
anzeigt.
152
DEUTSCH
14. Computer-USB-Konnektivität
Das Gerät kann zum Kopieren von Daten (Filme, Musik, Bilder, Aufzeichnungen etc.) von der und auf die
integrierte Festplatte an einen Computer angeschlossen werden.
Hinweis:
Das nachfolgende Beispiel bezieht sich auf einen Computer mit dem Betriebssystem Windows
XP; das Gerät kann jedoch mit allen Computern mit USB-Unterstützung und der Fähigkeit,
FAT32- und NTFS-Dateisysteme zu lesen und zu schreiben, verwendet werden.
Anschluss des Geräts an einen Computer
• Schließen Sie das mitgelieferte USB-/Mini-USB-Kabel an den Mini-USB-Port auf der Vorderseite des
Geräts und an einen freien USB-Port Ihres Computers an.
• Schalten Sie das Gerät über den Hauptpowerschalter auf der Rückseite des Geräts an. Das Gerät wird
automatisch erkannt und installiert und als zusätzliches Laufwerk auf Ihrem Computer angezeigt.
Hinweis:
Wenn die Festplatte mit einer Medienpartition (nur FAT32) partitioniert ist, wird nur ein
Laufwerksbuchstabe angezeigt. Wenn die Festplatte mit 2 Medienpartitionen (FAT32 und NTFS)
partitioniert ist, zeigt der Media Giant zwei Laufwerksbuchstaben an.
Wiedergabe von Aufzeichnungen auf dem Computer
Um Ihre Aufzeichnungen auf Ihrem Computer wiedergeben zu können, müssen Sie zuerst die
Aufzeichnungen von der Aufzeichnungspartition auf die Medienpartition kopieren. Dies können Sie über den
Befehl ‚Copy to FAT32 Partition [Kopieren auf FAT32-Partition]’ tun, der sich im Menü ‚Playback
Recordings [Wiedergabe von Aufzeichnungen]’ befindet. Erklärungen dazu finden Sie in Kapitel 10.
Wenn Sie Ihre Aufzeichnungen auf die FAT32-Partition kopieren, können Sie die aufgezeichneten
Programme auf Ihrem Computer wiedergeben, wenn das Gerät an den Computer angeschlossen ist.
Trennen des Geräts von Ihrem Computer
•
•
•
•
Klicken Sie auf das Symbol „Sicher entfernen” in der Kontrollleiste.
Wählen Sie „USB-Massenspeichergerät beenden”, wenn Sie dazu aufgefordert werden.
Warten Sie, bis die Meldung „Hardware sicher entfernen“ erscheint.
Stecken Sie das USB-Kabel aus.
153
DEUTSCH
15. Partitionsinformationen & Formatierungsassistent
In den meisten Fällen wird der Media Giant mit einer vorformatierten Festplatte geliefert. Die Festplatte
wird mit der Standardkonfiguration des Media Giants formatiert und die Festplatte wird wie folgt
partitioniert:
Time-Shifting-Pufferpartition:
Aufzeichnungspartition:
FAT32-Medienpartition:
NTFS-Medienpartition:
~ 4,85 GB
50% des Festplattenspeicherplatzes.
25% des Festplattenspeicherplatzes.
25% des Festplattenspeicherplatzes.
Beispiel mit:
500GB
750 GB
1000GB
Time-Shifting-Pufferpartition:
Aufzeichnungspartition:
FAT32-Medienpartition:
NTFS-Medienpartition:
~ 4,85 GB
~ 250 GB
~ 125 GB
~ 125 GB
~ 4,85 GB
~ 375 GB
~ 187 GB
~ 187 GB
~ 4,85 GB
~ 500 GB
~ 250 GB
~ 250 GB
Sie können die Standard-Festplattenkonfiguration ändern, indem Sie die Festplatte des Media Giants neu
formatieren.
Hinweis:
Wenn Sie die Festplatte des Media Giants neu formatieren, werden alle auf der Festplatte
gespeicherten und aufgezeichneten Inhalte gelöscht!
Um die Festplatte des Media Giants zu formatieren, öffnen Sie das Einstellungsmenü und wählen Sie die
Option ‚HDD Format [Festplatte formatieren]' auf der ‚System'-Seite. Wählen Sie zur Bestätigung erneut
‚HDD format [Festplatte formatieren]’.
Der Assistent für das Formatieren der Festplatte wird auf dem Bildschirm angezeigt und fragt Sie, ob die
Festplatte automatisch (‚Auto') oder manuell (‚Manual') formatiert werden soll.
• Wenn Sie ‚Auto’ auswählen, wird der Media Giant (wie oben erwähnt) mit den
Standardformatierungseinstellungen formatiert.
• Wenn Sie ‚Manual’ auswählen, führt Sie der Formatierungsassistent durch die Schritte für das
Formatieren der Festplatte.
[Formatierungsassistent – Auto oder Manual ]
[ Formatierungsassistent – Timeshift Buffer (TimeShifting-Puffer) ]
Ändern Sie die Größe des Time-Shifting-Puffers mithilfe der Auf- und Abwärtsnavigationstasten (15) auf der
Fernbedienung.
Sie können den Time-Shifting-Puffer auf 1, 2, 3 oder 4 Stunden einstellen.
• Wählen Sie ‚Next [Weiter]’, um fortzufahren.
154
DEUTSCH
[ Formatierungsassistent – Aufzeichnungspartition ]
[ Formatierungsassistent – FAT32- / NTFS-Partition ]
• Ändern Sie die Größe der Aufzeichnungspartition mithilfe der Auf- und Abwärtsnavigationstasten (15)
auf der Fernbedienung.
Der verbleibende Speicherplatz wird für die Medienpartition(en) des Media Giants verwendet.
• Wählen Sie ‚Next [Weiter]’, um fortzufahren.
[ Formatierungsassistent – Formatierung starten ]
[ Formatierungsassistent – Am Formatieren ]
• Wählen Sie ‚Format [Formatieren]’, um die Formatierung der Festplatte des Media Giants zu starten.
Während der Formatierung zeigt der Formatierungsassistent die Meldung ‚Proceeding [Am
Formatieren]’ an.
Hinweis:
Der Formatierungsvorgang kann eine Weile dauern (~ 5 Minuten). Warten Sie bitte, bis der
Formatierungsvorgang abgeschlossen ist.
[ Formatierungsassistent – Fertig gestellt ]
• Wenn der Formatierungsvorgang fertig gestellt ist, wählen Sie ‚OK’, um den Formatierungsassistenten zu
schließen. Daraufhin startet der Media Giant automatisch neu.
155
DEUTSCH
16. UPnP A/V-Server (Twonky Mediaserver)
Eine der Funktionen des Media Giants ist der UPnP A/V-Server.
Damit ist der Media Giant mit seinem gesamten Medieninhalt für alle UPnP A/V-Clients in Ihrem Netzwerk
(zum Beispiel der Conceptronic CFULLHDMA oder der Conceptronic C54WMP) verfügbar.
Beim im Media Giant verwendeten UPnP A/V-Server handelt es sich um einen ‚Twonky Mediaserver'.
Der Twonky Mediaserver indiziert automatisch alle Medien auf der FAT32- und NTFS-Medienpartition. Wenn
einer dieser Partitionen neue Daten hinzugefügt werden, sind diese automatisch für UPnP A/V-Clients in
Ihrem Netzwerk verfügbar.
Der Name Ihres UPnP A/V-Servers kann im Einstellungsmenü des Media Giant unter ‚Network [Netzwerk]'
eingestellt werden.
Hinweis:
Der Standardname des UPnP A/V-Servers ist ‚media giant’.
Wenn Sie sich mit der Twonky Mediaserver-Software auskennen, können Sie die erweiterten Twonky
Mediaserver-Einstellungen über Ihren Computer ändern.
Für den Zugriff auf die Konfigurationsseiten der Twonky Mediaserver-Software müssen Sie die IP-Adresse
des Media Giants gefolgt von der Portnummer 9000 in Ihrem Browserfenster eingeben.
Zum Beispiel:
HTTP://192.168.0.100:9000/ (angenommen, die IP-Adresse Ihres Media Giants ist
192.168.0.100).
Der Twonky Mediaserver hat eine integrierte ‚Troubleshooting [Fehlerbeseitigungs-]' Anleitung. Diese
befindet sich in der linken Navigationsleiste des Twonky Mediaserver-Konfigurationsfensters. Diese
Anleitung unterstützt Sie bei der Konfiguration des Twonky Mediaservers.
Weitere Informationen über den Twonky Mediaserver finden Sie auf der Twonky-Webseite unter:
http://www.twonkymedia.com/
156
DEUTSCH
17. Durchsuchen von freigegebenen Netzwerkspeicherorten
Der Media Giant kann Ihre freigegebenen Netzwerkspeicherorte durchsuchen und Mediendateien direkt von
einem freigegebenen Netzwerkspeicherort wiedergeben. Um diese Funktion verwenden zu können, müssen
Sie die Medienordner in Ihrem Netzwerk freigeben, damit der Media Giant diese finden und darauf
zugreifen kann.
In diesem Kapitel wird erklärt, wie Sie unter Windows XP und Windows Vista die Dateifreigabe aktivieren
können.
Hinweis:
In diesem Handbuch wird lediglich die Datei- und Ordnerfreigabe unter Windows XP und
Windows Vista beschrieben.
Lesen Sie bitte im Handbuch Ihres Betriebssystems oder Netzwerkspeichergeräts nach, wie
Sie einen Ordner mit Mediendateien freigeben können.
Dateifreigabe unter Windows XP
• Öffnen Sie über den Schnellzugriff im Startmenü den ‚Arbeitsplatz’ und navigieren Sie zu dem Ordner
mit Mediendateien, den Sie freigeben möchten.
• Klicken Sie auf den Ordner mit den Mediendateien und wählen Sie die Option ‚Ordner freigeben’ in der
linken Menüleiste.
[ Arbeitsplatz – Ordner freigeben ]
Es werden die Eigenschaften des Ordners angezeigt, wobei die Registerkarte ‚Freigabe’ geöffnet ist.
Hier können Sie den betreffenden Ordner freigeben.
Wenn Sie zuvor noch keine Ordner freigegeben haben, müssen Sie den Netzwerkinstallationsassistenten
ausführen, indem Sie auf die Zeile ‚Netzwerkinstallationsassistent’ im Fenster klicken.
157
DEUTSCH
[ Eigenschaften – Registerkarte Freigabe ]
[ Eigenschaften – Registerkarte Freigabe ]
• Wenn der Netzwerkinstallationsassistent bereits zuvor ausgeführt wurde, können Sie den Ordner
freigeben, indem Sie auf ‚Diesen Ordner freigeben’ klicken.
• Geben Sie im Textfeld einen Freigabenamen ein und klicken Sie auf ‚Übernehmen’.
• Klicken Sie auf ‚OK’, um das Fenster zu schließen.
Jetzt ist der Ordner mit einer Hand unter dem Ordnersymbol aufgeführt, was anzeigt, das der Ordner auf
Ihrem Computer freigegeben ist.
[ Freigegebener Ordner ]
158
DEUTSCH
Dateifreigabe unter Windows Vista
• Öffnen Sie über den Schnellzugriff im Startmenü den ‚Arbeitsplatz’ und navigieren Sie zu dem Ordner
mit Mediendateien, den Sie freigeben möchten.
• Klicken Sie auf den Ordner mit den Mediendateien und wählen Sie die Option ‚Freigeben’ in der oberen
Menüleiste des Fensters.
[ Arbeitsplatz – Ordner freigeben ]
Standardmäßig erscheint Ihr eigenes Benutzerkonto auf der Freigabeliste als Eigentümer des Ordners.
[ Freigabeeigenschaften ]
• Sie können der Freigabeliste weitere Benutzer hinzufügen, indem Sie diese aus der Dropdown-Liste
auswählen und auf die Schaltfläche ‚Hinzufügen’ klicken.
• Wenn Sie alle gewünschten Benutzer hinzugefügt haben, klicken Sie auf die Schaltfläche ‚Freigeben’,
um den Ordner freizugeben.
Jetzt ist der Ordner mit einem kleinen Symbol mit zwei Menschen aufgeführt, was anzeigt, das der Ordner
auf Ihrem Computer freigegeben ist.
[ Freigegebener Ordner ]
159
DEUTSCH
Durchsuchen von freigegebenen Ordnern auf dem Media Giant
Wenn Ihre Mediendateien freigegeben sind, können Sie über die Option ‚Browse Media [Medien
durchsuchen] im Hauptmenü Ihre Netzwerkspeicherorte durchsuchen.
[ Auswahl des Speicherorts ]
[ Netzwerkfreigabe – User Login (Benutzeranmeldung) ]
Wählen Sie mithilfe der Navigationstasten (15) auf der Fernbedienung die Option ‚Network [Netzwerk]’
auf der Liste mit den Speicherorten und navigieren Sie über das Netzwerk zu Ihrem Computer oder
Netzwerkspeichergerät mit den freigegebenen Ordnern.
Wenn ein freigegebener Ordner mit einem Benutzernamen und Passwort geschützt ist (zum Beispiel:
standardmäßige Freigabe unter Windows XP und Windows Vista), zeigt der Media Giant ein ‚User Login
[Benutzeranmelde]’-Fenster an, in dem der Benutzername und das Passwort eingegeben werden.
Hinweis:
Sie können Ihr normales Benutzerkonto für Windows XP oder Windows Vista für die Anmeldung
zu Ihren freigegebenen Ordnern verwenden.
Gehen Sie mithilfe der Navigationstasten (15) auf der Fernbedienung auf das Benutzernamen- oder
Passwortfeld und drücken Sie die ‚Enter’-Taste (26), um die Onscreentastatur für die Eingabe der Werte
anzuzeigen.
[ Onscreentastatur ]
[ Netzwerkfreigabe – User Login (Benutzeranmeldung) ]
Wenn Sie den Benutzernamen und das Passwort korrekt eingegeben haben, wählen Sie die Schaltfläche
‚OK’ oder ‚OK & Save to MyShortcuts’ [OK und Speichern unter meinen Schnellzugriffen]’, um die
Netzwerkfreigabe einzugeben.
Jetzt können Sie gemäß den Anweisungen in Kapitel 9 durch die freigegebenen Ordner navigieren.
160
DEUTSCH
18. Netzwerkfreigabe – Konfiguration und Verwendung
Auf den Conceptronic Media Giant kann als Netzwerkfreigabe (Samba Server) zugegriffen werden. Mit der
Netzwerkfreigabefunktion können Sie die FAT32-Partition (HDD1) des Media Giants über Ihr Netzwerk
freigeben, damit andere Computer auf die auf dieser Partition gespeicherten Daten zugreifen können.
Konfiguration
Wählen Sie die Option ‚Setup [Einstellungen]’ im Hauptmenü. Daraufhin wird das Einstellungsmenü auf
Ihrem Bildschirm angezeigt. Wählen Sie im Einstellungsmenü ‚Network [Netzwerk]’. Im
Systemeinstellungsmenü gibt es eine Option ‚Media Server’.
Unter der Option ‚Media Server’ können Sie die folgenden Einstellungen ändern:
- Server-/Hostname
- Gruppenname
Festlegen des Namens des Media Giants im Netzwerk. Standardmäßig heißt der
Media Giant ‚media giant’.
Angabe des Namens Ihres Heimnetzwerks. Der standardmäßige Gruppenname
lautet ‚ARBEITSGRUPPE’.
Sobald Sie die Einstellungen geändert haben, drücken Sie die ‚Return’-Taste (14) auf der Fernbedienung,
um zum Hauptmenü zurückzukehren.
Verwendung
Wenn die Netzwerkeinstellungen des Media Giants konfiguriert sind, können Sie über einen Computer in
Ihrem Netzwerk auf die Netzwerkfreigabe zugreifen.
Hinweis:
Unten angeführte Schritte zeigen, wie Sie mit den Standardeinstellungen auf einem Computer
mit Windows Vista auf die Media Giant-Netzwerkfreigabe zugreifen können.
Standardmäßig lautet der Netzwerkname des Media Giant ‚media giant’. Mit diesem Namen können Sie auf
die Netzwerkfreigabe des Geräts im Netzwerk zugreifen.
• Klicken Sie auf ‚Start’, ‚Netzwerk’.
Der Windows Explorer zeigt Ihre Netzwerkeinstellungen an.
In der Leiste oben können Sie den Netzwerknamen des Media Giants wie folgt eingeben:
\\<NETZWERKNAME_DES_MEDIA_GIANTS>\
Zum Beispiel:
Wenn der Media Giant mit den Standardeinstellungen konfiguriert ist, lautet der
Netzwerkname ‚media giant’ und Sie müssen Folgendes eingeben:
\\media giant\
161
DEUTSCH
Die Netzwerkfreigabe des Media Giants wird auf Ihrem Bildschirm angezeigt (siehe Screenshot unten):
Hinweis:
In Windows wird die ‚Drucker’-Freigabe automatisch jedem Samba-Server im Netzwerk
hinzugefügt, der Media Giant kann jedoch nicht als Druckerserver verwendet werden.
Die Auswahl der Netzwerkfreigabe ermöglicht das Kopieren, Löschen, die Wiedergabe und das Hinzufügen
von Dateien auf der FAT32-Partition des Media Giants.
162
FRANÇAIS
Media Giant avec DVB-T de Conceptronic
Manuel d’Utilisateur
Nous vous félicitons d'avoir acheté votre
Enregistreur & Lecteur Multimédia de Conceptronic.
Vous trouverez dans ce Manuel d'Utilisateur une explication détaillée de l'installation de l'Enregistreur &
Lecteur Multimédia de Conceptronic.
Pour plus d'informations ou pour obtenir de l'aide concernant votre produit, nous vous conseillons de visiter
notre site web de Service & Support sur www.conceptronic.net/support et de sélectionner l'une des
options suivantes :
• Foire aux Questions
• Téléchargements
• Contact
: Base de Données de Questions les plus Fréquemment Posées
: Manuels, Drivers, Microprogramme et plus de téléchargements
: Pour contacter le Service support de Conceptronic
Astuce :
Le microprogramme du Media Titan de Conceptronic peut être mis à jour. Pour télécharger la
dernière version du microprogramme de votre appareil, visitez le site Web de Conceptronic ou
utilisez la fonction de mise à jour du microprogramme du menu configuration du Media Giant.
Astuce :
Visitez le site www.conceptronic.net/FAQ pour connaître la liste la plus récente de codecs et
de fichiers supportés.
Pour plus d'informations générales concernant les produits Conceptronic, visitez le site web de
Conceptronic sur www.conceptronic.net.
1. Contenu du Coffret
Les éléments suivants sont fournis dans le paquet avec l'Enregistreur&Lecteur Multimédia de Conceptronic :
•
Media Giant de Conceptronic (appelé ci-après "appareil" ou "Media Giant" dans le manuel). **
L’appareil contenu dans ce coffret est l’un des deux modèles indiqués ci-après :
CM3GD
[C08-147] : Media Giant avec syntoniseur numérique (DVB-T).
CM3GDP [C08-148] : Media Giant avec syntoniseur numérique (DVB-T) et Adaptateur
Powerline.
•
•
•
•
•
•
•
•
•
•
•
•
•
•
Adaptateur de Réseau Powerline de Conceptronic. (Uniquement fourni avec CM3GDP)
Câble d'alimentation.
Télécommande.
2 Piles AAA pour la télécommande.
Câble d'Antenne RF.
Câble Vidéo Composite (Fiches RCA Rouge, Blanche, Jaune).
Câble S-Video.
Câble Vidéo Composite (Fiches RCA Rouges, Vertes, Bleues).
Câble Audio Numérique Coaxial (Fiches RCA Noires).
Adaptateur Prise Péritel pour Câble Vidéo Composite / Câble S-Video.
Câble HDMI A/V (HDMI 1.3)
Câble de Réseau.
Câble USB.
Ce Manuel d'Utilisateur.
IMPORTANT :
Dans ce manuel, quelques-unes des caractéristiques expliquées ne sont valables que pour le CM3GDP
(avec le syntoniseur numérique (DVB-T) et l'Adaptateur Powerline). Ces fonctions sont signalées par **.
163
FRANÇAIS
2. Caractéristiques du Produit
•
•
•
•
•
•
•
•
•
•
•
•
•
Adaptateur de Réseau Powerline Intégré. **
Tuner TV numérique intégré (DVB-T) avec recherche automatique des chaînes de TV.
Enregistrement du TV numérique (DVB-T).
Enregistrement du signal AV à partir d'un magnétoscope, d'un lecteur de DVD ou d'une Caméra Vidéo.
Entrée DV pour lire / enregistrer à partir d'une Caméra Vidéo DV.
Enregistrement sur disque dur interne.
Résolution de sortie jusqu'à 1080i.
Résolution de lecture jusqu'à 1080i.
Qualité DVD des fichiers enregistrés en format TS (pour les enregistrements numériques par
syntoniseur numérique DVB-T) ou format MPEG2 (pour les enregistrements analogiques par entrées
AV) (peuvent être lus sur un PC ou d'autres lecteurs multimédias).
Options d'Enregistrement : Enregistrement instantané avec une seule touche, Enregistrement
programmé, Enregistrement décalé.
Lecture des fichiers MPEG1/2/4, MP3, WMA, JPG enregistrés dans un disque dur interne ou sur une
clé USB.
Copie de fichiers d'une clé USB ou d'un répertoire sur un réseau vers un disque dur interne.
Un commutateur automatique entre Mode PC-USB et Mode Lecture :
Lorsqu'il est connecté par USB à un PC, cet appareil agit comme un Dispositif de Stockage USB.
Lorsqu'il n'est pas connecté par USB à un PC, cet appareil agit comme Lecteur et Enregistreur
Multimédia.
3. Remarques & Avertissements
•
•
•
•
•
•
•
•
•
•
•
•
Ne pas essayer de démonter l’unité, afin d’éviter tout risque d’électrocution.
Tenir l’unité à l’abri d’une humidité extrême.
Ne pas plonger ou exposer l’unité aux liquides.
Débrancher le câble d’alimentation si vous envisagez de ne pas utiliser l’unité pendant un certain
temps.
Assurez-vous que la tension secteur où le géant des médias est relié à est facilement accessible.
Éviter d’utiliser l’unité à proximité de combustibles.
Remplacer la pile de la commande à distance par une pile similaire lorsqu’elle commence à être faible
ou à plat. Recycler les piles usagées dans les endroits prévus à cet effet. Pour éviter toute attrition,
retirer la pile si la commande à distance venait à ne pas être utilisée pendant un certain temps.
Assurez-vous que les piles sont placées correctement dans la télécommande afin de prévenir tout
dommage.
Tenir la commande à distance à l’abri d’une humidité extrême; ne pas la laisser tomber.
Ne pas faire fonctionner la commande à distance sous une lumière de soleil trop intense.
NE JAMAIS laisser tomber, secouer ou cogner l’unité.
Pour éviter toute surchauffe, ne pas recouvrir l’unité.
IMPORTANT:
NE PAS formater le disque dur sur votre ordinateur! Cela pourrait provoquer la perte de
toutes les données du système de l’unité et pourrait alors demander une réinitialisation.
Lorsque vous souhaitez formater le disque dur de l’unité, utilisez l’outil de formatage
intégré dans le menu de Configuration de l’unité.
164
FRANÇAIS
4. Vue d’Ensemble du Produit
Vue de Face
1
2
3
4
5
Vue de Dos
9
14
10
15
11
16
17
18
19
20
21
6
7
8
12
13
22
23
Description des chiffres:
1. Témoins Lumineux de Statut (Marche, REC, ACT, LAN) 13. Commutateur d’alimentation principal
2. Boutons tactiles de navigation
14. Connexion LAN (RJ45)
3. Boutons tactiles de lecture
15. Sortie HDMI
4. Récepteur infrarouge
16. Entrée AV1 (Composite Vidéo/Audio)
5. Mini Câble Jack USB (Pour PC)
17. Entrée vidéo Composante AV2
6. Port Hôte USB
18. Entrée audio AV2 (G/D)
7. Entrée DV
19. Sortie audio AV (G/D)
8. Bouton ‘Ouvrir’ du panneau de devant
20. Sortie vidéo Composante AV (Y/Pb/Pr)
9. Sortie de Syntoniseur TV numérique
21. Sortie S-Vidéo
10. Entrée de Syntoniseur TV numérique
22. Sortie optique numérique SPDIF
11. Sortie vidéo Composite AV
23. Entrée CA (110 ~240 V)
12. Sortie coaxiale numérique SPDIF
Remarque:
Les boutons tactiles possèdent des fonctions similaires à celles essentielles de la
commande à distance.
165
FRANÇAIS
5. Explication de la Commande à Distance
La commande à distance est utilisée à des fins de contrôle de l’unité. Sur la couverture intérieure de ce
manuel, vous trouverez une illustration de la commande à distance. Les chiffres des boutons coïncident
avec la table ci-dessous, laquelle a pour but d’expliquer chaque fonction propre à la commande à distance.
No
Bouton
Description
1.
2.
3.
4.
5.
6.
7.
8.
9.
10.
11.
12.
13.
14.
15.
16.
POWER ( )
SOURCE
MEDIA
AUDIO
ZOOM
0–9
COPY
REPEAT
GOTO
FAST REWIND (
PREVIOUS (
)
VOLUME +
VOLUME RETURN
, , ,
INS.REP.
17.
18.
19.
20.
21.
22.
23.
PAUSE
PLAY
REC
TV SYS
SETUP
TIMESHIFT
STOP ( )
24.
25.
SLOW
CM.SKIP
26.
27.
28.
29.
30.
31.
32.
33.
34.
35.
36.
37.
38.
ENTER
INFO
CHANNEL CHANNEL +
MUTE
NEXT (
)
FAST FORWARD (
GUIDE
A-B
DEL
ANGLE
SUB-T
LIVE-TV
Allumer l’unité ou la mettre en mode d’attente
Passer du syntoniseur numérique à AV et Lecture
Touche directe vers le navigateur Media
Changer la piste Audio du DVD (si disponible sur vos fichiers DVD)
Zoom avant / zoom arrière
Boutons numériques
Afficher le menu Copier
Définir le mode de Relecture
Aller à un point précis de la lecture
Retour Rapide
Fichier / Piste / Chapitre / Image Précédent(e)
Augmenter le volume
Baisser le volume
Revenir à l’écran / à la chaîne précédent(e)
Touches de Navigation: Parcourir les menus
Faire un bond en arrière de 10 secondes lors du Timeshifting ou de la
Lecture
Mettre en pause la lecture (timeshift)
Lancer la Lecture
Commencer l’enregistrement
Modifier la résolution de sortie de l’unité
Touche directe vers le menu de configuration
Activer la fonction Timeshifting
Interrompre la Lecture / Interrompre l’Enregistrement / Désactiver le
Timeshifting
Lecture au Ralenti
Faire un bond en avant de 30 secondes lors du Timeshifting ou de la
Lecture
Confirmer la sélection
Afficher l’information de la Chaîne / du Fichier
Canal précédent
Canal suivant
Mode Silence
Fichier / Piste / Chapitre / Image Suivant(e)
Avance Rapide
Afficher le guide EPG du syntoniseur numérique (DVB-T)
Initialiser la répétition en boucle de l’intervalle A-B
Retirer l’entrée / Supprimer la sélection
Modifier l’angle DVD (si disponible sur vos fichiers DVD)
Modifier les sous-titres (si disponibles sur vos fichiers vidéo/DVD)
Touche directe pour Live-TV / passer de la TV numérique à la radio
numérique
Passer au mode d’Enregistrement & de Lecture DV
Afficher le menu Principal
Indique que la télécommande est en fonctionnement
39. DV
40. MENU
41. LED
)
)
166
FRANÇAIS
6. Connexion de votre Media Giant
Ce chapitre vous expliquera le mode de connexion du Media Giant sur votre TV, système home cinema,
réseau, etc.
9
10
11
12
13
14
15
16
17
18
19
20
21
22
23
Connexion du/des câble/s d'antenne
Remarque : Le syntoniseur numérique de l'appareil supporte la conversion directe du signal pour rediriger
le signal DVB-T de l'entrée de syntoniseur numérique à la sortie de syntoniseur numérique.
• Débranchez le câble d'antenne principal de la TV ou du décodeur numérique, et branchez-le sur l'entrée
de syntoniseur numérique [10] de l'appareil.
• Branchez le câble d'antenne fourni sur la sortie numérique du syntoniseur [9] de l'appareil et sur l'entrée
de syntoniseur de votre TV ou décodeur numérique.
Connexion du (des) Câble(s)
Vous avez la possibilité de connecter l’unité de 5 façons différentes sur votre TV:
- HDMI
- Composite
- SCART (à l’aide du câble Composite & de l’Adaptateur Scart)
- S-Vidéo *
- Composante *
*
Lors du recours à la connexion S-Vidéo ou Composante, seul le signal vidéo est envoyé à votre TV.
Pour le signal audio, utilisez les connecteurs Jacks RCA Audio du câble Composite (Rouge, Blanc), ou
la sortie audio numérique (optique ou coaxiale) du Media giant.
HDMI:
• Connectez le câble HDMI sur la sortie HDMI [15] de l’unité.
• Connectez l’autre extrémité du câble HDMI sur une entrée HDMI libre de votre TV.
Composite:
• Connectez le câble Composite (Jaune, Rouge et Blanc) sur les connecteurs Jacks de SORTIE AV
correspondants [11, 19] de l’unité.
• Connectez l’autre extrémité du câble Composite (Jaune, Rouge et Blanc) sur votre TV.
167
FRANÇAIS
SCART:
• Connectez le câble Composite (Jaune, Rouge et Blanc) sur les connecteurs Jacks de SORTIE AV
correspondants [11, 19] de l’unité.
• Connectez l’autre extrémité du câble Composite (Jaune, Rouge et Blanc) sur les connecteurs Jacks de
l’Adaptateur SCART.
• Connectez l’Adaptateur SCART sur l’Entrée SCART de votre TV.
S-Vidéo:
• Connectez le câble S-Vidéo sur la sortie S-Vidéo [21] de l’unité.
• Connectez l’autre extrémité du câble S-Vidéo sur l’Entrée S-Vidéo de votre TV.
Composante:
• Connectez le Câble Composant (Rouge, Vert et Bleu) sur les connecteurs Jacks Composants [20] de
l’unité.
• Connectez l’autre extrémité du câble Composant sur les connecteurs Jacks Composants de votre TV.
Connexion des Câble(s) Audio
Vous avez la possibilité de connecter l’unité sur votre TV et/ou votre système home cinema de 3 façons
différentes:
- Analogique, via les connecteurs Jacks Audio RCA de la Sortie A/V
- Numérique, Via la Sortie SPDIF Numérique Coaxiale
- Numérique, Via la Sortie SPDIF Numérique Optique
Analogique:
• Connectez les connecteurs Jacks Audio (Rouges, Blancs) du câble Composite sur les connecteurs Jacks
Audio RCA [19] de la SORTIE AV.
• Connectez l’autre extrémité du câble Composite sur les connecteurs Jacks Audio RCA de votre TV ou
Récepteur.
Numérique Coaxiale:
• Connectez le câble Coaxial Numérique sur la sortie Coaxiale Numérique [12] de l’unité.
• Connectez l’autre extrémité du câble Coaxial Numérique sur l’Entrée Coaxiale Numérique de votre
Récepteur.
Numérique Optique:
• Connectez le câble optique Numérique sur la sortie optique Numérique [22] de l’unité.
• Connectez l’autre extrémité du câble optique Numérique sur l’Entrée Optique Numérique de votre
Récepteur.
Connexion d’un autre Équipement Audio/Vidéo
Vous avez la possibilité de connecter une source Audio/Vidéo, telle qu’un magnétoscope VCR, un Lecteur
DVD ou une Set-Top Box (Décodeur TV) sur l’unité de façon à pouvoir enregistrer depuis la source
Audio/Vidéo.
Le Media Giant supporte des dispositifs avec sortie Composite ou Composante.
Composite:
• Connectez le câble Audio/Vidéo fourni avec votre dispositif Audio/Vidéo sur les connecteurs Jacks de
Sortie AV correspondants du dispositif Audio/Vidéo.
• Connectez l’autre extrémité du câble Composite (Jaune, Rouge et Blanc) sur les connecteurs Jacks
d’ENTRÉE AV1 [16] de l’unité.
168
FRANÇAIS
Composante:
• Connectez le câble Vidéo Composant fourni avec votre dispositif Audio/Vidéo sur la sortie Composante
correspondante du dispositif Audio/Vidéo.
• Connectez l’autre extrémité du câble Vidéo Composant (Rouge, Vert et Bleu) sur les connecteurs Jacks
d’ENTRÉE AV2 [17] de l’unité.
Remarque:
Les câbles vidéo Composants transfèrent uniquement la vidéo, pas le son. Pour
transférer le son, il vous faut également connecter les câbles audio du dispositif sur
les connecteurs Jacks audio d’ENTRÉE AV2 [18] de l’unité.
Connexion du Câble d’Alimentation
Lorsque l’unité est connectée sur votre équipement Audio/Vidéo, il vous est possible de brancher
l’alimentation électrique sur l’unité.
• Connectez le câble d’alimentation inclus sur l’unité [23] et sur une prise (femelle) murale libre.
• Réglez le commutateur d’alimentation principal [12] situé au dos de l’unité sur ‘I’ pour faire
fonctionner l’unité.
L’unité s’allumera alors.
Préparation de la Télécommande.
• Démontez le couvercle du compartiment des piles de l'arrière de la télécommande.
• Insérez les piles AAA fournies dans la télécommande.
• Remontez le couvercle du compartiment des piles dans la partie arrière de la télécommande.
Remarques :
-
La portée optimale de la télécommande est d’environ 5 mètres.
Dirigez la télécommande vers le récepteur IR intégré dans la façade avant de l'appareil.
L'angle de réception du récepteur IR est de ±30 degrés.
Remplacez les piles lorsqu’elles sont usées ou épuisées.
169
FRANÇAIS
7. Toute Première Configuration
L’unité doit être configurée lors de sa toute première utilisation.
• Sélectionnez le canal d’entrée approprié de votre TV auquel est connectée l’unité. (HDMI, Composite,
SCART, S-Vidéo ou Composant).
Remarque:
À partir de ce point, le manuel part du principe selon lequel votre TV est réglée sur
le canal d’entrée de l’unité. Toutes les étapes détaillées ci-après portent sur le
fonctionnement de l’unité.
• Vérifiez si le commutateur d’alimentation principal situé au dos de l’unité est réglé sur ‘I’ (Marche).
• Allumez l’unité à l’aide du bouton d’alimentation situé sur le devant de l’unité ou à l’aide du bouton
‘Power’ (‘Marche’) (1) de la commande à distance.
• Vérifiez le Témoin Lumineux d’Alimentation situé sur le devant du Media Giant. Lorsque le Témoin
Lumineux est Orange, le dispositif est en mode ‘Standby’ (‘Attente’). Lorsque le Témoin Lumineux est
Bleu, le dispositif est en état de marche.
Remarque :
L’unité doit être initialisée, une fois allumée. Cela peut prendre un petit moment.
Au cours de l’initialisation, l’écran de démarrage du Media Giant est alors affiché.
[ Écran de Démarrage ]
[ Assistant de Configuration ]
Une fois initialisé le Media Giant, il doit être configuré en vue d’une toute première utilisation. Afin de
vous assister pour la toute première configuration, le Media Giant affiche le ‘Setup Wizard’ (‘Assistant de
Configuration’) à l’écran avec les étapes de configuration requises en vue d’une toute première
utilisation.
L’Assistant de Configuration affichera les étapes de configuration suivantes:
-
Langue du menu
Entrée TV
Recherche de Chaînes
Configuration du réseau LAN Câblé
Réglage de l’Heure
Utilisez les touches de navigation et le bouton ‘Enter’ (‘Entrée’) (26) de la commande à distance pour
configurer votre Media Giant.
Si vous avez effectué un réglage mais souhaitez finalement le corriger, appuyez sur le bouton ‘Return’
(‘Retour’) (14) de la commande à distance.
Langue du Menu
Sélectionnez la langue que vous souhaitez utiliser lors du fonctionnement du Media Giant.
Entrée TV
Sélectionnez votre pays dans la liste. Si votre pays n'est pas indiqué, sélectionnez "Autres" dans la liste.
Astuce :
Vous pouvez également rechercher une bande de fréquences spécifique de DVB-T en
sélectionnant "6M" (600Mhz), "7M" (700Mhz) ou "8M" (800Mhz).
170
FRANÇAIS
Recherche de Chaînes
• Sélectionnez "OK" pour lancer la recherche de chaînes automatique des chaînes numériques (DVB-T)
avec le syntoniseur numérique (DVB-T) du Media Giant. La recherche automatique de chaîne du Media
Giant peut prendre un certain temps, mais l'appareil recherchera et enregistrera automatiquement
toutes les chaînes détectées dans la mémoire de votre Media Giant.
• Lorsque la Recherche de Chaînes est terminée, sélectionnez "OK" pour continuer avec l'Assistant de
Configuration.
Si vous souhaitez ignorer la Recherche de Chaînes (par exemple si vous utilisez un décodeur et que vous
n'avez pas de signal de TV numérique (DVB-T), vous pouvez sélectionner "Cancel" [Annuler] pour ignorer la
Recherche de Chaînes et continuer avec l'Assistant de Configuration.
Configuration du réseau LAN Câblé
La Configuration Réseau est destinée à définir votre Adresse IP pour le Media Giant. Dans la plupart des
cas, le Media Giant est connecté sur un réseau ayant un serveur DHCP (bien souvent un routeur).
• Lorsque vous avez un serveur DHCP dans votre réseau, sélectionnez l’option ‘DHCP IP’.
• L’Assistant de Configuration vous demandera alors de confirmer la sélection. Sélectionnez ‘OK’ pour
poursuivre.
• Lorsque vous souhaitez utiliser une adresse IP statique, sélectionnez ‘FIX IP’ (‘IP FIXE’).
• L’Assistant de Configuration affichera les domaines vous permettant d’entrer une adresse IP statique.
Utilisez les boutons de navigation (15) et les boutons numériques 0-9 (6) pour entrer l’adresse IP, le
masque de Sous-réseau, la passerelle par défaut et le serveur DNS.
• Lorsque les valeurs entrées sont correctes, appuyez sur le bouton ‘Enter’ (‘Entrée’) (26) de la
commande à distance.
• L’Assistant de Configuration vous demandera alors de confirmer la sélection. Sélectionnez ‘OK’ pour
poursuivre.
Si votre Media Giant n’est pas connecté sur un réseau, sélectionnez ‘Cancel’ (‘Annuler’) pour passer cette
étape et poursuivre avec l’Assistant de Configuration.
Réglage de l’Heure
L’option ‘Set Time’ (‘Réglage de l’Heure’) vous permet de définir l’heure et la date correctes lors de la
configuration du Media Giant.
• Pour régler l’heure et la date manuellement, sélectionnez ‘Manual’ (‘Manuel’).
• Utilisez les boutons de navigation (15) et les boutons numériques 0-9 (6) pour entrer l’Année, le Mois, le
Jour, l’Heure, les Minutes et les Secondes. Une fois terminé, appuyez sur le bouton ‘Enter’ (‘Entrée’)
(26) de la commande à distance.
• L’Assistant de Configuration vous demandera alors de confirmer la sélection. Sélectionnez ‘OK’ pour
poursuivre.
• Lorsque vous avez une connexion Internet active et que le Media Giant est connecté sur votre réseau,
vous pouvez sélectionner ‘Auto (Via Network)’ (‘Automatique (Via Réseau)’).
• L’Assistant de Configuration affichera les domaines vous permettant de régler la configuration
Automatique de l’heure. Vous pouvez choisir de conserver le serveur NTP par défaut mais, si vous
souhaitez utiliser un autre serveur NTP, appuyez sur le bouton ‘Enter’ (‘Entrée’) (26) du domaine des
serveurs NTP pour ajuster la valeur.
• Réglez la Zone Horaire sur celle correcte de votre pays.
• Réglez la ‘Daylight Savings Correction’ (‘Correction du Changement d’Heure’) sur ‘Disable’
(‘Désactiver’) ou ‘Enable’ (‘Activer’), selon que votre pays utilise le changement d’heure ou pas.
Lorsque les valeurs entrées sont correctes, appuyez sur le bouton ‘Enter’ (‘Entrée’) (26) de la
commande à distance.
• L’Assistant de Configuration vous demandera alors de confirmer la sélection. Sélectionnez ‘OK’ pour
poursuivre.
L’Assistant de Configuration est désormais terminé et la configuration de base du Media Giant est achevée.
171
FRANÇAIS
Remarque:
Pour plus de paramètres de configuration, utilisez l’option ‘Setup’ (‘Configuration’)
du Menu principal. Le menu de Configuration est expliqué au chapitre 13.
Remarque:
Si vous souhaitez relancer l’Assistant de Configuration une fois terminé,
sélectionnez ‘Setup’ (‘Configuration’) dans le Menu principal puis choisissez
l’option ‘Restore Default’ (‘Restaurez les paramètres par Défaut’). Le Media Giant
restaurera alors les paramètres initiaux et relancera l’Assistant de Configuration.
Remarque:
Si vous avez acheté un Media Giant sans disque préformaté, le Media Giant affichera
le ‘Format Wizard’ (‘Assistant de Formatage’) une fois terminé le ‘Setup Wizard’
(‘Assistant de Configuration’). Ce ‘Format Wizard’ (‘Assistant de Formatage’) est
expliqué au chapitre 15 de ce manuel.
172
FRANÇAIS
8. Menu principal
Le Menu principal vous permet de sélectionner plusieurs fonctions du Media Giant.
Remarque:
Lorsque le Menu principal n’apparaît pas, vous pouvez appuyer sur le bouton ‘Menu’
(40) de la commande à distance pour l’afficher sur votre écran.
[ Menu principal ]
Les options suivantes sont disponibles dans le Menu principal:
Browse Media (Parcourir Média)
Playback Recordings (Lecture Enregistrements)
TV Tuner/AV Input (Tuner TV/Entrée AV)
Scheduled Recording (Enregistrement Programmé)
Setup (Configuration)
Lecture de fichiers média stockés.
Lecture & édition de vos enregistrements.
Voir TV en Direct & AV en Direct.
Configurer des enregistrements programmés.
Configuration du Media Giant.
Les options ci-dessus sont détaillées dans les chapitres suivants de ce manuel.
173
FRANÇAIS
9. Parcourir le Média
Lorsque vous avez sélectionné l’option ‘Browse Media’ (‘Parcourir Média’) du Menu principal, le Media
Giant affiche le navigateur Média sur votre écran:
[ Sélection de l’Emplacement de Stockage ]
[ Sélection du mode: Films, Musique, Photos ]
Le navigateur Média vous permet de sélectionner le dispositif de stockage depuis lequel vous souhaitez lire
vos fichiers média:
USB
Disque Dur
Réseau
Lire un Média depuis un dispositif USB connecté (via le Port Hôte USB).
Lire un Média depuis le disque dur interne du Media Giant.
Lire un Média depuis les partages Samba / Réseau de votre environnement réseau.
Pour parcourir votre dispositif USB ou le disque dur interne, sélectionnez ‘USB’ ou ‘Harddisk’ (‘Disque
Dur’) depuis la liste des emplacements de stockage.
Pour parcourir votre réseau afin de lire un média depuis vos partages réseau, sélectionnez l’option
‘Network’ (‘Réseau’) depuis la liste des emplacements de stockage.
Remarque:
Pour parcourir vos partages réseau, assurez-vous bien d’avoir configuré vos partages
réseau correctement. Pour plus de renseignements concernant la création de
partages réseau et la navigation via les partages réseau, voir le chapitre 17.
Lorsqu’un emplacement de stockage est sélectionné, vous avez la possibilité de commuter entre les modes
‘Movies’ (‘Films’), ‘Music’ (‘Musique’) et ‘Photos’ à l’aide des boutons de navigation droit et gauche de la
commande à distance.
Lors de la sélection de l’1 des 3 options, le Media Giant filtre automatiquement le contenu sur
l’emplacement de stockage et dès lors, seuls les fichiers correspondants sont affichés.
Par exemple:
-
Si vous sélectionnez ‘Movies’ (‘Films’), seuls les fichiers des films apparaîtront à l’écran.
Dans le menu du navigateur Média, vous avez la possibilité d’utiliser les options de navigation suivantes de
la commande à distance:
Navigation keys
(15) Parcourir les fichiers & dossiers ou modifier le mode de lecture.
(Touches de navigation)
Enter (Entrée)
(26) Lire le fichier sélectionné ou ouvrir le dossier sélectionné.
Return (Retour)
(14) Revenir au dossier précédent.
Copy (Copier)
(7) Ouvrir le menu Copier. (expliqué dans un sous-chapitre de ce chapitre)
Play (Lire)
(18) Lire le fichier sélectionné.
Next (Suivant)
(31) Aller à la page suivante avec des fichiers.
Previous (Précédent) (11) Aller à la page précédente avec des fichiers.
Menu
(40) Revenir au Menu principal.
Vous pouvez quitter le menu du Navigateur Média pour revenir au Menu principal en appuyant sur le bouton
‘Menu’ (40) de la commande à distance.
174
FRANÇAIS
Lecture de vos films
Vous avez la possibilité de lire des films, stockés sur le Disque Dur de l’unité, un dispositif de stockage USB
ou un emplacement réseau, sur votre TV via le filtre ‘Movies’ (‘Films’) du Media Giant.
Lorsque le filtre ‘Movies’ (‘Films’) est sélectionné, le Media Giant affiche uniquement les fichiers de films
sur votre écran. Aucun autre fichier n’est visible.
[ Mode Film ]
• Sélectionnez le fichier que vous souhaiteriez lire à l’aide des boutons de navigation (15) de la
commande à distance.
Si vous avez sélectionné un fichier de film, le Navigateur Média affiche alors un aperçu avec le nom et la
taille du fichier à la droite de l’écran.
• Appuyez sur le bouton ‘Enter’ (‘Entrée’) (26) ou ‘Play’ (‘Lecture’) (18) de la commande à distance
pour lancer la lecture du fichier sélectionné.
Au cours de la lecture, vous avez la possibilité d’utiliser les options de lecture suivantes sur la commande à
distance:
-
Pause
(17)
Slow (Ralenti)
(24)
Stop (Arrêter)
(23)
Rewind (Rembobiner)
(10)
Fast Forward (Avance rapide) (32)
Ins. Rep.
(16)
CM. Skip
(25)
Goto (Aller à)
(9)
Repeat (Répéter)
(8)
Info
(27)
Zoom
(5)
Sub-t
(37)
Audio
(4)
Volume
(12), (13)
Mute (Silence)
(30)
Mettre en pause ou reprendre la lecture.
Lecture au ralenti.
Interrompre la lecture.
Revenir en arrière.
Avance Rapide.
Faire un bond en arrière de 10 secondes.
Faire un bond en avant de 30 secondes.
Aller à un point (moment) bien précis du film.
Modifier l’option de Relecture de la reproduction actuelle.
Afficher les détails de la lecture.
Zoom avant / zoom arrière
Modifier les sous-titres (si disponibles lors de la lecture).
Modifier la piste audio (si disponible lors de la lecture).
Ajuster le volume sonore.
Mode Silence.
Vous pouvez quitter le menu du navigateur Média et revenir au Menu principal en appuyant sur le bouton
‘Menu’ (40) de la commande à distance.
175
FRANÇAIS
Fonctions de Lecture DVD
Le Media Giant lit des DVD depuis le disque dur comme s’il s’agissait de DVD ordinaires. Vous pouvez
parcourir le menu DVD, choisir des sous-titres ou modifier les langues audio.
Remarque:
Le Media Giant supporte uniquement la lecture des copies de DVD non protégés. La
protection CSS n’est pas supportée.
• Connectez le Media Giant sur votre ordinateur (Voir chapitre 13).
• Créez un dossier sur le disque dur du Media Giant sous le nom de votre film DVD (par exemple: 'Film1').
• Copiez les fichiers depuis le dossier 'VIDEO_TS' vers le dossier créé (par exemple: ‘Film1’) sur le Media
Giant.
Après copie, la structure du dossier doit présenter l’aspect ci-dessous:
- [Disque Dur du Media Giant]
|-> Film1
(avec tous les fichiers DVD à l’intérieur)
• Déconnectez le Media Giant de votre ordinateur et connectez-le sur votre TV.
• Sélectionnez l’icône ‘Browse Media’ (‘Parcourir Média’) du Menu principal à l’aide des boutons de
‘Navigation’ (15) de la commande à distance et appuyez sur le bouton ‘Enter’ (‘Entrée’) (26) de la
commande à distance pour ouvrir le navigateur Média.
• Utilisez les boutons de ‘Navigation’ (15) et ‘Enter’ (‘Entrée’) (26) de la commande à distance pour
accéder au dossier du disque dur interne dans lequel est stocké votre DVD.
• Ouvrez le dossier DVD que vous avez créé sur le disque dur.
[ Mode Film ]
• Sélectionnez le fichier ‘VIDEO_TS.IFO’ et appuyez sur le bouton ‘Play’ (‘Lecture’) (18) de la commande
à distance pour lancer la lecture du DVD sélectionné.
Remarque:
Il est également possible de lire des fichiers ISO directement sur le Media Giant, lorsque
ceux-ci sont stockés sur la partition média NTFS. Lors de la lecture d’un fichier ISO d’un
DVD, s’appliquent des caractéristiques de lecture identiques à celles observées au cours
de la lecture d’un fichier IFO d’un DVD.
176
FRANÇAIS
Au cours de la lecture, vous avez la possibilité d’utiliser les options de lecture suivantes sur la commande à
distance:
-
Pause
Slow (Ralenti)
Stop (Arrêter)
Navigation keys (Touches de navigation)
Enter (Entrée)
Rewind (Rembobiner)
Fast Forward (Avance rapide)
Previous (Précédent)
Next (Suivant)
Ins. Rep.
CM. Skip
Goto (Aller à)
Repeat (Répéter)
(17)
(24)
(23)
(15)
(26)
(10)
(32)
(11)
(31)
(16)
(25)
(7)
(8)
-
Info
Zoom
Angle
(27)
(5)
(36)
-
Volume
Mute (Silence)
Sub-t
Audio
(12), (13)
(30)
(37)
(4)
Mettre en pause ou reprendre la lecture.
Lecture au ralenti.
Interrompre la lecture.
Parcourir le menu DVD.
Confirmer la (les) sélection(s) du menu DVD.
Retour rapide.
Avance Rapide.
Chapitre Précédent.
Chapitre Suivant.
Faire un bond en arrière de 10 secondes.
Faire un bond en avant de 30 secondes.
Aller à un point (moment) bien précis du film.
Modifier l’option de Relecture de la reproduction
actuelle.
Afficher les détails de la lecture.
Zoom avant / zoom arrière
Modifier l’angle du DVD (lorsque le DVD contient des
angles multiples).
Ajuster le volume sonore.
Mode Silence.
Modifier ou désactiver les sous-titres du DVD.
Modifier la piste audio du DVD (lorsque le DVD
contient des pistes audio multiples).
Vous pouvez quitter le menu du navigateur Média et revenir au Menu principal en appuyant sur le bouton
‘Menu’ (40) de la commande à distance.
Lecture des sous-titres
Le Media Giant peut lire des fichiers de sous-titres tout en lisant des fichiers vidéo AVI.
Pour la lecture de fichiers AVI avec sous-titres, il vous faut attribuer le même nom aussi bien au fichier de
sous-titres qu’au fichier AVI, par exemple:
Nom du film:
Nom des sous-titres:
My_Movie_With_Sub.AVI
My_Movie_With_Sub.SRT
• Sélectionnez le fichier que vous souhaiteriez lire à l’aide des boutons de navigation de la commande à
distance.
• Appuyez sur le bouton ‘Enter’ (‘Entrée’) (26) ou ‘Play’ (‘Lecture’) (18) de la commande à distance
pour lancer la lecture du fichier sélectionné.
Commencera alors la lecture du fichier AVI avec le fichier de sous-titres chargé correspondant.
Pour désactiver/activer les sous-titres en cours de lecture, appuyez sur le bouton ‘Sub-t’ (‘Sous-Titres’)
(37) de la commande à distance.
Vous pouvez quitter le menu du navigateur Média et revenir au Menu principal en appuyant sur le bouton
‘Menu’ (40) de la commande à distance.
177
FRANÇAIS
Lecture de votre Musique
Vous pouvez lire des fichiers musicaux, qui peuvent être stockés sur le Disque Dur de l’unité, un dispositif
de stockage USB ou un emplacement réseau, sur votre TV via le filtre de ‘Music’ (‘Musique’) du Media
Giant.
Lorsque le filtre ‘Music’ (‘Musique’) est sélectionné, le Media Giant affiche uniquement les fichiers
musicaux sur votre écran. Aucun autre fichier n’est visible.
[ Mode Musique ]
• Sélectionnez le fichier que vous souhaiteriez lire à l’aide des boutons de navigation (15) de la
commande à distance.
Si vous avez sélectionné un fichier musical, le navigateur Média affiche les informations ID3 Tag (si
disponibles) avec la taille et le nom du fichier à la droite de l’écran.
• Appuyez sur le bouton ‘Enter’ (‘Entrée’) (26) ou ‘Play’ (‘Lecture’) (18) de la commande à distance
pour lancer la lecture du fichier sélectionné.
Au cours de la lecture, vous avez la possibilité d’utiliser les options de lecture suivantes sur la commande à
distance:
-
Pause
(17)
Stop (Arrêter)
(23)
Rewind (Rembobiner)
(10)
Fast Forward (Avance Rapide) (32)
Repeat (Répéter)
(8)
Info
(27)
Volume
(12), (13)
Mute (Silence)
(30)
Mettre en pause ou reprendre la lecture.
Interrompre la lecture.
Revenir en arrière.
Avance Rapide.
Modifier l’option de Relecture du fichier/dossier actuel.
Afficher les détails de la lecture.
Ajuster le volume sonore.
Mode Silence.
Vous pouvez quitter le menu du navigateur Média et revenir au Menu principal en appuyant sur le bouton
‘Menu’ (40) de la commande à distance.
178
FRANÇAIS
Visualisation de vos Photos & Images
Vous pouvez visualiser vos photos et images, qui peuvent être stockées sur le Disque Dur de l’unité, un
dispositif de stockage USB ou un emplacement réseau, sur votre TV via le filtre ‘Photos’ du Media Giant.
Lorsque le filtre ‘Photos’ est sélectionné, le Media Giant affiche uniquement vos fichiers de photos et
d’images sur votre écran. Aucun autre fichier n’est visible.
[ Mode Photo ]
• Sélectionnez le fichier que vous souhaiteriez lire à l’aide des boutons de navigation (15) de la
commande à distance.
Si vous avez sélectionné un fichier de photos, le navigateur Média affichera un petit aperçu avec la taille et
le nom du fichier à la droite de l’écran.
• Appuyez sur le bouton ‘Enter’ (‘Entrée’) (26) ou ‘Play’ (‘Lecture’) (18) de la commande à distance
pour lancer la lecture du fichier sélectionné.
Au cours de la lecture, vous avez la possibilité d’utiliser les options de lecture suivantes sur la commande à
distance:
-
Pause
Stop (Arrêter)
Navigation keys (Touches de navigation)
Previous (Précédent)
Next (Suivant)
Repeat (Répéter)
-
Info
Zoom
(17)
(23)
(15)
(11)
(31)
(8)
Mettre en pause ou reprendre le diaporama.
Interrompre le diaporama.
Faire pivoter les photos affichées.
Lire le fichier précédent du dossier actuel.
Lire le fichier suivant du dossier actuel.
Modifier l’option de Relecture du fichier/dossier
actuel.
(27) Afficher les détails du diaporama.
(5) Zoom avant / zoom arrière.
Vous pouvez quitter le menu du navigateur Média et revenir au Menu principal en appuyant sur le bouton
‘Menu’ (40) de la commande à distance.
Astuce :
Dans le Menu de Configuration, nous avons ajouté une option qui vous permet de modifier la
transition entre les diapositives de votre présentation.
Voyez le chapitre 13 pour l'option "Effet de Transition".
179
FRANÇAIS
Mode Copier
Si vous souhaitez copier des données depuis 1 emplacement vers un autre (par exemple: depuis un
dispositif USB vers le disque dur interne), vous pouvez utiliser le mode Copier du Media Giant.
Pour accéder au mode Copier, appuyez sur le bouton ‘Copy’ (‘Copier’) (7) de votre commande à distance
lorsque vous vous trouvez dans le navigateur média. Le menu Copier s’affichera lors sur votre écran:
[ Menu Copier ]
[ Menu Copier – Assistant de Copie ]
Vous avez le choix entre ‘USB’, ‘Harddisk’ (‘Disque Dur’) ou ‘Network’ (‘Réseau’) comme source pour
votre copie. Les destinations disponibles sont ‘USB’, ‘Harddisk’ (‘Disque Dur’) et ‘Recycle’ (‘Corbeille’)
(fichiers supprimés).
Sélectionnez tout d’abord la source en appuyant sur les boutons de navigation ↑↓ (15) de la commande à
distance. Une fois sélectionnée la source correcte, appuyez sur le bouton de navigation droit (15) et
utilisez les boutons de navigation ↑↓ (15) pour sélectionner la destination.
Remarque:
Vous pouvez voir, grâce au cadre surligné, si la rubrique Source ou Destination du
menu Copier est active.
Remarque:
Il n’est pas possible de copier depuis ‘USB’ vers ‘USB’, ou depuis ‘Harddisk’
(‘Disque Dur’) vers ‘Harddisk’ (‘Disque Dur’).
• Lorsque les emplacements de source et de destination sont corrects, appuyez sur le bouton ‘Enter’
(‘Entrée’) (26) de la commande à distance pour lancer l’Assistant de Copie.
• Parcourez votre source jusqu’à trouver les fichiers ou dossiers que vous souhaitez copier. Vous pouvez
parcourir les dossiers à l’aide des boutons de navigation (15) et du bouton ‘Enter’ (‘Entrée’) (26) de la
commande à distance.
• Marquez les fichiers ou dossiers que vous souhaitez copier à l’aide du bouton ‘Play’ (‘Lecture’) (18) de
la commande à distance. Les fichiers ou dossiers marqués afficheront une icône marquée derrière le
nom.
• Une fois marqués les fichiers ou dossiers source, appuyez sur le bouton de navigation droit (15) de la
commande à distance pour passer à la rubrique destination.
Remarque:
Il n’est pas possible de sélectionner la partition média NTFS du Media Giant comme
destination dans la mesure où il n’est pas possible d’écrire sur la partition média
NTFS.
• Parcourez votre destination jusqu’à trouver l’emplacement de copie correct. Vous pouvez parcourir les
dossiers à l’aide des boutons de navigation (15) et ‘Enter’ (‘Entrée’) (26) de la commande à distance.
• Une fois trouvé l’emplacement correct, appuyez sur le bouton de navigation droit (15) de la commande
à distance pour lancer le processus de copie.
180
FRANÇAIS
• L’assistant de copie demandera votre confirmation pour le processus de copie. Sélectionnez ‘OK’ pour
lancer le processus de copie.
[ Confirmation de Copie ]
[ Copie en cours ]
Une fois terminé le processus de copie, vous en serez averti par un message sur votre écran.
Il est également possible de supprimer des fichiers via le menu Copier.
Lorsque vous souhaitez supprimer des fichiers, sélectionnez ‘Recycle’ (‘Corbeille’) comme destination.
Indiquez les fichiers ou dossiers que vous souhaitez supprimer et appuyez sur le bouton de navigation droit
(15) de la commande à distance. Vous verrez alors apparaître une fenêtre de confirmation pour la
suppression des fichiers ou dossiers sélectionnés.
Sélectionnez ‘OK’ pour supprimer les fichiers ou dossiers sélectionnés.
[ Menu Copier – Assistant de Suppression ]
[ Confirmation de Suppression ]
181
FRANÇAIS
10. Enregistrements
Lorsque vous avez sélectionné l'option "Playback Recordings" [Lecture des Enregistrements] dans le
Menu Principal, le Media Giant vous demandera de choisir entre "Digital" [Numérique] et "Analog"
[Analogique].
• Si vous sélectionnez "Digital", le Media Giant affiche les enregistrements faits par le syntoniseur
numérique (DVB-T) du Media Giant.
• Si vous sélectionnez "Analog", le Media Giant affiche tous les enregistrements faits par les entrées
analogiques du Media Giant (Entrée de composites, Entrée de composants, Entrée de FireWire).
Lorsque vous avez sélectionné "Digital" ou "Analog", le Media Giant affiche la liste des enregistrements de
l'option sélectionnée sur votre écran :
[Sélection de l'Enregistrement]
[Liste des Enregistrements]
Chaque vidéo est indiquée avec une image vignette (première image de l'enregistrement), son nom, l'heure
et la date et la qualité de l'enregistrement.
Une étoile jaune à la fin de votre enregistrement signifie que l'enregistrement est nouveau et n'a pas
encore été reproduit. Lorsque vous aurez regardé l'enregistrement, l'étoile jaune disparaîtra.
Vous pouvez naviguer dans vos enregistrements avec les touches de navigation vers le haut et vers le bas
(15) sur la télécommande et lire les enregistrements en appuyant sur la touche "Enter" (26) ou sur la
touche "Play" (18) de la télécommande lorsqu'un enregistrement est sélectionné.
Pendant la lecture, vous pouvez utiliser les options de lecture suivantes de la télécommande :
-
Pause
(17)
Slow
(24)
Stop
(23)
Rewind
(10)
Fast Forward
(32)
Ins. Rep.
(16)
CM. Skip
(25)
Previous
(11)
Next
(31)
Repeat :
(8)
Info
(27)
Goto
(9)
Zoom
(5)
Audio
(4)
volume
(12), (13)
Muet
(30)
Mettre la lecture en pause ou reprendre la lecture.
Lecture au ralenti.
Mettre la lecture en pause.
Retour rapide pendant la lecture.
Avance rapide pendant la lecture.
Revenir 10 secondes en arrière dans la lecture.
Avancer de 30 secondes dans la lecture.
Lire le chapitre précédent ou l'enregistrement précédent.
Lire le chapitre suivant ou l'enregistrement suivant.
Changer l’option Répétition de la lecture en cours.
Afficher les détails de lecture.
Aller à un point spécifique (heure) du film.
Zoom avant / zoom arrière
Modifier la piste audio (si elle est disponible pour votre lecture).
Régler le niveau de volume.
Mode Muet.
182
FRANÇAIS
Avec les touches de navigation de gauche et de droite (15) de la télécommande, vous pouvez naviguer dans
les options du menu supérieur de la liste d'enregistrements, pour sélectionner plusieurs fonctions :
Play
Delete
Rename
Sorting
Edit
Lire vos enregistrements.
Effacer vos enregistrements.
Modifier le nom de vos enregistrements.
Modifier l'ordre de classement de vos enregistrements.
Éditer vos enregistrements (expliqué dans le sous-chapitre suivant).
Explication du menu "Edit"
Remarque : Les enregistrements numériques ne peuvent pas être édités par le Media Giant. Par
conséquent, le menu Edit contient plusieurs options non disponibles lorsque vous avez
sélectionné "Digital" à l'écran "Playback Recordings".
Le Media Giant ne vous permet que d'avoir accès à l'option "Copy to FAT32 partition"
[Copier sur partition FAT32] du menu Edit lorsque vous avez sélectionné "Digital" dans
l'écran "Playback Recordings".
Le menu ‘Edit’ (‘Éditer’) présente de multiples options vous permettant de modifier vos enregistrements,
qui vous sont expliquées ci-dessous:
[ Enregistrements – Menu Éditer ]
- Set Thumbnail
Grâce à l’option ‘Set Thumbnail’ (‘Définir la Vignette’), vous avez la
possibilité de visionner votre film puis de sélectionner et définir votre
cadre préféré comme vignette pour votre enregistrement.
(Définir la Vignette)
- A-B Erase
(Effacer A-B)
- Split Title
Grâce à l’option ‘A-B Erase’ (‘Effacer A-B’), vous pouvez marquer une
partie de votre film (par exemple: une publicité) et la supprimer de
votre enregistrement.
Grâce à l’option ‘Split Title’ (‘Fractionner le Titre’), vous pouvez
fractionner un enregistrement en 2 morceaux (par exemple: lorsque vous
avez enregistré 2 programmes dans 1 enregistrement programmé).
(Fractionner le Titre)
- Merge Title
Grâce à l’option ‘Merge Title’ (‘Fusionner le Titre’), vous pouvez
fusionner 2 enregistrements en 1.
(Fusionner le Titre)
183
FRANÇAIS
- Add Chapter Mark
Remarque:
Grâce à l’option ‘Add Chapter Mark’ (‘Ajouter une Marque de
Chapitre’), vous pouvez ajouter des marques de chapitre à votre
enregistrement. Cela vous permettra d’accéder facilement à une partie
bien précise de l’enregistrement.
Vous pouvez également activer l’option ‘Auto Chapter’ (‘Chapitrage Automatique’)
du menu de Configuration pour ajouter automatiquement des marques de chapitre à
votre enregistrement.
- Remove Chapter Mark
(Retirer la Marque de Chapitre) Grâce à l’option ‘Remove Chapter Mark’ (‘Retirer la Marque de
Chapitre’), vous pouvez retirer des marques de chapitre de votre
enregistrement. Cette option peut s’avérer utile lorsque vous avez
configuré le Media Giant de façon à créer automatiquement des
marques de chapitre mais que vous souhaitez finalement les retirer
de l’enregistrement.
- Copy to FAT32 partition
(‘Copier sur la Partition en FAT32’) Grâce à l’option ‘Copy to FAT32 Partition’ (‘Copier sur la
Partition en FAT32’), vous pouvez copier votre enregistrement
depuis la partition d’enregistrement vers le dossier ‘REC’ situé sur
la partition média du Media Giant. Lorsque l’enregistrement est
copié sur la partition en FAT32, vous avez la possibilité de le lire,
de le copier ou de l’éditer sur votre ordinateur dès lors que le
Media Giant est connecté via USB, ou vous pouvez même le diffuser
vers un client A/V UPnP (tel que le C54WMP ou le CFULLHDMA de
Conceptronic) via le réseau.
Remarque:
Pour plus de renseignements sur les caractéristiques du Serveur A/V UPnP du
Media Giant, reportez-vous au chapitre 16.
184
FRANÇAIS
11. Tuner TV / Entrée AV
Grâce à l'option "TV Tuner / AV Input" du menu principal, vous pouvez voir et enregistrer à partir du
syntoniseur TV numérique (DVB-T) ou des sources d'entrée AV du Media Giant.
Astuce:
Vous pouvez accéder facilement à l’écran de TV en Direct depuis n’importe quel menu du Media
Giant en appuyant sur le bouton ‘Live-TV’ (‘TV en Direct’) (38) de votre commande à distance.
Lorsque vous sélectionnez l’option ‘TV Tuner / AV Input’ (‘Tuner TV / Entrée AV’), le Media Giant affiche
l’image TV en Direct du Tuner TV. Tout en regardant la TV en Direct, vous pouvez changer de chaîne en
appuyant sur le bouton ‘Channel +’ (29) ou ‘Channel -’ (28) de la commande à distance.
Grâce au bouton ‘Source’ (2) de la commande à distance, vous pouvez commuter entre le Tuner TV,
l’Entrée Composite et l’Entrée Composante. La source sera affichée un court instant dans le coin en haut à
droite de l’écran.
Timeshifting
Le Media Giant supporte le timeshifting. La fonction Timeshifting ‘met en pause’ la TV en Direct ou la
Vidéo/Audio en Direct en enregistrant la chaîne/entrée actuelle lorsque le timeshift est activé.
Appuyez sur le bouton ‘Timeshift’ (22) de la commande à distance pour initialiser la fonction Timeshifting.
Lorsque la fonction Timeshifting est initialisée, La TV en Direct ou l’A/V en Direct seront ‘mis en pause’ et
l’unité enregistrera la chaîne en fond d’écran.
[ Timeshift : Initialisation ]
Remarque:
[ Timeshift : Actif ]
Lorsque la fonction Timeshifting est activée, la barre d’avancement virtuelle
affichera la durée maximale du tampon du timeshift. Si vous souhaitez régler ce
tampon (plus petit ou plus grand), il vous faudra reformater le disque dur du Media
Giant pour ajuster la taille de la partition du tampon du Timeshift.
Vous pourrez trouver plus d’informations sur le formatage au chapitre 15.
Au cours du timeshift, vous avez la possibilité d’utiliser les boutons suivants de la commande à distance:
-
Play (Lecture)
(18)
Pause
(17)
Slow (Ralenti)
(24)
Stop (Arrêter)
(23)
Rewind (Rembobiner)
(10)
Fast Forward (Avance rapide) (32)
Ins. Rep.
(16)
CM. Skip
(25)
Info
(27)
Volume
(12), (13)
Mute (Silence)
(30)
Lire le tampon du timeshift.
Mettre en pause ou reprendre la lecture.
Lecture au ralenti.
Interrompre la lecture.
Revenir en arrière.
Avance Rapide.
Faire un bond en arrière de 10 secondes.
Faire un bond en avant de 30 secondes.
Afficher ou masquer l’information du tampon du timeshift.
Ajuster le volume sonore.
Mode Silence.
185
FRANÇAIS
Timeshifting Permanent
Dans le menu de Configuration du Media Giant, vous pouvez activer le ‘Permanent Timeshifting’
(‘Timeshifting Permanent’). Lorsque cette fonction est activée, la fonction Timeshifting est active à tout
moment et vous permet de mettre en pause instantanément la lecture ou d’utiliser les boutons ci-dessus
de la commande à distance pour ‘faire un saut’ dans votre tampon de timeshift.
Enregistrement
Tout en enregistrant la TV en Direct ou l’A/V en Direct via l’unité, vous pouvez lancer un enregistrement
de la chaîne actuelle en appuyant sur le bouton ‘Rec’ (‘Enregistrer’) (19) de la commande à distance.
L’unité commencera alors à enregistrer, jusqu’à ce que vous appuyiez sur le bouton ‘Stop’ (‘Arrêt’) (23)
de la commande à distance.
Au cours de l’enregistrement, le Témoin Lumineux ‘REC’ du panneau de devant s’allume.
Remarque:
L’unité détecte la protection contre la copie sur la source connectée, par exemple
la protection MacroVision sur les disques DVD. Quand une source connectée est
protégée contre la copie, l’unité empêche tout enregistrement et affiche un
message d’avertissement lorsque vous appuyez sur le bouton d’enregistrement.
Remarque:
Le Media Giant enregistre en HQ (Haute Qualité) par défaut. Vous pouvez modifier la
qualité d’enregistrement dans le menu de Configuration.
Remarque:
Au cours de l’enregistrement, vous ne pouvez pas changer la chaîne actuelle.
Lorsque vous appuyez sur le bouton ‘Rec’ (‘Enregistrer’) (19) au cours d’un enregistrement, la durée de
l’enregistrement sera réglée sur 30 minutes, à compter du moment où vous avez appuyé sur le bouton
‘Rec’ (‘Enregistrer’).
Le message ‘OTR: 30 min.’ s’affichera alors sur votre écran.
[ Enregistrement Normal ]
[ Minuteur d’Enregistrement activé ]
Appuyez à nouveau sur le bouton ‘Rec’ (‘Enregistrer’) (19) pour augmenter la durée de 30 minutes, le
maximum étant de 240 minutes. L’unité continue d’enregistrer jusqu’à ce que la durée de l’enregistrement
soit écoulée ou jusqu’à ce que vous appuyiez sur bouton ‘Stop’ (‘Arrêt’) (23) de la commande à distance.
Radio Numérique
Le Media Giant supporte également la radio numérique, qui est diffusée par le signal numérique (DVB-T).
Vous pouvez écouter les stations de radio numériques par les haut-parleurs de votre TV, ou par le
récepteur connecté à votre Media Giant.
Pour écouter les stations de radio numériques.
Lorsque vous utilisez la fonction de tuner Numérique, vous pouvez également écouter les chaînes de radio
numériques.
• Sélectionnez l'option "TV Tuner / AV Input" dans le menu principal du Media Giant.
Le Media Giant affiche l'image Live-TV à partir du syntoniseur TV.
• Appuyez sur la touche "Live-TV" (38) de la télécommande pour passer en mode Radio Numérique.
La fonction de radio numérique est alors activée.
• Vous pouvez utiliser les touches "Channel +" (29) ou "Channel - " (28) pour sélectionner une station de
radio numérique.
• Pour revenir au mode TV Numérique, appuyez sur la touche "Live-TV" (38) de la télécommande à
nouveau.
186
FRANÇAIS
EPG Electronic Program Guide (Guide de Programmes Électronique)
Le syntoniseur numérique (DVB-T) du Media Giant ajoute l'EPG (Guide de Programmes Électronique) aux
fonctions du Media Giant.
Vous pouvez accéder au guide EPG tout en regardant la TV en direct en appuyant sur la touche "Guide"
(33).
Le guide EPG est affiché à l’écran :
[Guide de Programmes Électronique]
[Guide de Programmes Électronique : Enregistrement
Programmé]
Vous pouvez utiliser les touches suivantes de la télécommande pour utiliser le guide EPG :
-
Flèches vers la gauche / vers la droite
Flèches vers le haut / vers le bas
Previous
Next
Rewind
Fast Forward
Rec
(15)
(15)
(11)
(31)
(10)
(32)
(19)
Modifie la date sélectionnée dans le guide EPG.
Modifie l'émission sélectionnée dans le guide EPG.
Passe à la chaîne précédente.
Passe à la chaîne suivante.
Défile dans les informations sur les émissions.
Défile dans les informations sur les émissions.
Programme l'enregistrement de l'émission
sélectionnée.
Si vous appuyez sur la touche "Rec" (19), l'émission sélectionnée sera ajoutée aux enregistrements
programmés du Media Giant. L'émission sélectionnée sera indiquée par un symbole rouge, qui signifie que
son enregistrement a été programmé.
Vous pourrez voir l'enregistrement programmé dans le menu "Scheduled Recording" [Enregistrement
Programmé] décrit au chapitre 12.
Vous pouvez revenir à Live-TV en appuyant sur la touche "Guide" (33) de la télécommande.
187
FRANÇAIS
Contrôle DV
La mini connexion FireWire située au dos du panneau de devant du Media Giant vous permet de connecter
votre caméscope DV directement sur le Media Giant et de visionner ou enregistrer vos vidéos maison sur le
disque dur interne.
• Connectez votre caméscope DV sur la mini connexion Firewire [7] située sur le devant du Media Giant.
• Allumez votre caméscope DV et réglez-le sur le mode ‘Playback’ (‘Lecture’).
• Appuyez sur le bouton ‘DV’ (39) de votre commande à distance pour initialiser le mode ‘DV Control’
(‘Contrôle DV’).
Le Media Giant affichera les Contrôles DV sur votre écran:
[ Panneau des Contrôles DV ]
Vous pouvez sélectionner les boutons du panneau des Contrôles DV à l’aide des boutons de navigation (15)
de la commande à distance. Vous pouvez confirmer votre sélection grâce au bouton ‘Enter’ (‘Entrée’) (26)
de la commande à distance.
Lorsque vous avez sélectionné ‘Play’ (‘Lecture’) dans la fenêtre des Contrôles DV et que votre film est en
cours de lecture, vous pouvez appuyer sur le bouton ‘Rec’ (‘Enregistrer’) (19) de la commande à distance
pour commencer à enregistrer votre film DV sur le disque dur.
Astuce:
Lorsque vous enregistrez, vous avez la possibilité de masquer le panneau des Contrôles DV en
appuyant sur le bouton ‘DV’ (39) de votre commande à distance. Le panneau s’affichera à
nouveau si vous appuyez une deuxième fois sur le bouton ‘DV’.
Vous pouvez interrompre cet enregistrement en appuyant sur le bouton ‘Stop’ (‘Arrêt’) (23) de la
commande à distance.
Les films enregistrés seront répertoriés dans la liste des enregistrements, comme décrit au chapitre 10.
Pour quitter le mode des Contrôles DV, appuyez sur le bouton ‘Return’ (‘Retour’) (14) de la commande à
distance.
188
FRANÇAIS
12. Enregistrement Programmé
Vous pouvez programmer l'appareil pour enregistrer les chaînes à des heures spécifiques. Vous pouvez
programmer jusqu'à 8 enregistrements dans l'appareil.
Astuce :
Vous pouvez facilement programmer les enregistrements avec le guide EPG du Media Giant. Le
guide EPG est expliqué en détail au chapitre 11 de ce manuel.
• Sélectionnez l’option ‘Scheduled Recording’ (‘Enregistrement Programmé’) dans le Menu principal.
L’écran des Enregistrements Programmés s’affichera alors sur votre TV.
[ Menu des Enregistrements Programmés ]
[ Ajouter un enregistrement programmé ]
Le menu des Enregistrements Programmés affiche 5 options, qui peuvent être sélectionnées à l’aide des
boutons de navigation droit et gauche (15) de la commande à distance:
Add (Ajouter)
Edit (Éditer)
Delete (Supprimer)
Status (Statut)
History (Historique)
Ajouter un nouvel enregistrement programmé
Éditer un enregistrement programmé existant
Supprimer un enregistrement programmé
Changer le statut de la liste des enregistrements programmés
Afficher l’historique des enregistrements programmés
Ajouter ou éditer un programme
Lorsque vous sélectionnez l’option ‘Add’ (‘Ajouter’) ou ‘Edit’ (‘Éditer’) dans le menu et que vous appuyez
sur le bouton ‘Enter’ (‘Entrée’) (26) de la commande à distance, vous pouvez ajouter un nouveau
programme ou éditer un programme existant.
Par défaut, le domaine ‘Source’ est sélectionné.
Toutes les options peuvent être modifiées à l’aide des boutons de navigation ↑↓ (15) et vous avez la
possibilité de sélectionner un autre domaine avec les boutons de navigation droit et gauche (15).
• Sélectionnez la source appropriée pour votre enregistrement. Cela peut aussi bien être le canal TV,
l’entrée vidéo Composite que l’entrée vidéo Composante.
• Définissez la date correcte pour votre enregistrement.
• Définissez l’heure de début correcte pour votre enregistrement.
• Définissez la durée de votre enregistrement.
• Définissez l’option de répétition pour votre enregistrement. Vous pouvez sélectionner les options
suivantes:
‘Once’ (‘Une Fois’), ‘Everyday’ (‘Tous les Jours’), ‘Mon-Fri’ (‘Lundi-Vendredi), ‘Mon-Sat’ (‘LundiSamedi’), ‘Sun’ (‘Dimanche’), ‘Mon’ (‘Lundi’), ‘Tue’ (‘Mardi’), ‘Wed’ (‘Mercredi’), ‘Thu’ (‘Jeudi’),
‘Fri’ (‘Vendredi’) ou ‘Sat’ (‘Samedi’).
189
FRANÇAIS
Vous pouvez passer le domaine ‘Device’ (‘Dispositif’) dans la mesure où vous pouvez enregistrer
uniquement sur le disque dur interne.
• Définissez la qualité de l’enregistrement. Vous avez le choix entre ‘HQ’, ‘SP’, ‘LP’, ‘EP’ et ‘SLP’.
Remarque:
Le simple fait de changer le domaine ‘Quality’ (‘Qualité’) influe sur la qualité de
votre enregistrement et sur la quantité d’espace requis pour l’enregistrement. Le
temps d’enregistrement disponible pour chaque paramètre de qualité est affiché en
haut à gauche de la fenêtre de programmation.
• Réglez l’option ‘Nicam’ sur ‘On’ (‘Marche’) ou ‘Off’ (‘Arrêt’).
L’option Nicam doit être réglée sur ‘On’ (‘Marche’) si la source que vous souhaitez enregistrer présente
2 langues audio différentes (par exemple: Eurosport).
• Lorsque toutes les options de votre enregistrement sont définies, appuyez sur le bouton ‘Enter’
(‘Entrée’) (26) de la commande à distance pour sauvegarder le programme.
• Une fenêtre surgissante de confirmation s’affichera alors sur votre écran. Sélectionnez ‘Confirm’
(‘Confirmer’) et appuyez sur le bouton ‘Enter’ (‘Entrée’) (26) de la commande à distance pour
sauvegarder le programme.
L’enregistrement est maintenant planifié comme un enregistrement programmé et l’unité commencera à
enregistrer à l’horaire et sur la chaîne programmés, y compris lorsque le dispositif sera réglé sur ‘Standby’
(‘En Attente’).
Remarque:
Au cours de l’enregistrement, vous ne pouvez pas changer la chaîne actuelle.
190
FRANÇAIS
13. Configuration
Lorsque vous sélectionnez l’option ‘Setup’ (‘Configuration’) dans le Menu principal, le menu de
Configuration s’affiche sur votre écran. L’explication ci-dessous vous indique tous les réglages disponibles
avec la description fournie. Vous pouvez commuter entre les diverses options du menu de Configuration à
l’aide des boutons de navigation de la commande à distance.
[ Menu de Configuration – Vidéo ]
[ Menu de Configuration – Enregistrement ]
Réglage A/V :
Aspect Ratio
Change le format de l'image du signal de sortie du Media Giant.
(‘Letterbox 4:3’, ‘Pan-Scan 4:3’, ‘Widescreen 16:9’ [grand écran])
Modifie la clarté du signal de sortie du Media Giant.
Modifie le contraste du signal de sortie du Media Giant.
Modifie la transition entre deux diapositives d'une présentation.
Modifie la configuration audio du Media Giant.
Night Mode [Mode Nuit] Activer ou désactiver l'audio en Mode Nuit. (Off, On,
Comfort).
Digital Output [Sortie Numérique] Règle la sortie audio numérique. (HDMI-LPCM,
HDMI-RAW, SPDIF-LPCM, SPDIF-RAW).
Brightness
Contrast
Transition
Audio Setup
Enregistrement:
Quality (Qualité)
Remarque:
Modifier la qualité d’enregistrement par défaut. (‘HQ’, ‘SP’, ‘LP’, ‘EP’, ‘SLP’).
Le simple fait de modifier le domaine ‘Quality’ (‘Qualité’) influe sur la qualité de votre
enregistrement et sur la quantité de l’espace requis pour l’enregistrement. Les
différents paramètres de qualité requièrent l’espace suivant pour 1 heure de vidéo:
HQ:
4,85 GB (4850 MB)
2,42 GB (2420 MB)
SP:
LP:
1,62 GB (1620 MB)
EP:
1,21 GB (1210 MB)
SLP:
0,80 GB (800 MB)
Auto Chapter
(Chapitrage Automatique) Modifier le paramètre de Chapitrage Automatique. La fonction de Chapitrage
Automatique ajoutera automatiquement des marques de chapitre à votre
enregistrement, pour vous permettre de faire plus facilement un saut d’un
enregistrement à l’autre en cours de lecture.
Permanent Timeshift
Activer ou déscativer la fonction de timeshift permanent. Lorsque cette fonction
est activée, la fonction Timeshifting est active à tout moment et vous permet de
mettre en pause instantanément la lecture ou d’utiliser les boutons de la
commande à distance pour ‘faire un saut’ dans votre tampon de timeshift.
191
FRANÇAIS
[ Menu de Configuration – Réseau ]
[ Menu de Configuration – Système ]
Réseau:
LAN Preference**
(Préférence LAN)
Remarque:
Modifiez la connexion LAN préférée: Câble ou Automatique (Via Powerline)
Lorsque ‘Cable’ (‘Câble’) est choisi, le Media Giant utilise toujours le port LAN
comme connexion réseau.
Lorsque ‘Auto (Via Powerline)’ (‘Automatique’ (Via Powerline’)) est choisi, le
Media Giant uilise la fonction Powerline si un réseau Powerline est disponible. Si
aucun réseau Powerline n’est disponible, le port LAN sera alors utilisé.
Lorsque le Media Giant est à la fois connecté sur le Câble LAN et Powerline, le réseau par
défaut est le réseau Powerline. Lorsque le rendement du réseau Powerline baisse jusqu’à
passer sous la barre d’1Mbps, le Media Giant passe automatiquement en mode Câble.
En mode Câble, le Media Giant continue de contrôler le rendement du réseau Powerline.
Lorsque le rendement augmente jusqu’à passer au dessus d’1Mbps, le Media Giant passe du
mode Câble au mode Powerline.
Wired Lan Setup
Dans la ‘Wired Lan Setup’ (‘Configuration LAN Filaire’), vous pouvez configurer
(Configuration LAN Filaire) l’adresse IP du Media Giant.
Une fois sélectionnée, vous avez le choix entre ‘Cancel’ (‘Annuler’), ‘DHCP IP
(Auto)’ (‘IP DHCP (Automatique)’) ou ‘Fix IP (Manual)’ (‘IP Fixe (Manuelle)’).
Lorsque vous avez un serveur DHCP dans votre réseau, sélectionnez l’option
‘DHCP IP’.
Lorsque vous souhaitez utiliser une adresse IP statique, sélectionnez ‘FIX IP’.
L’Assistant de Configuration vous montrera les domaines servant à entrer une
adresse IP statique. Utilisez les boutons de navigation (15) et les boutons
numériques 0-9 (6) pour entrer l’adresse IP, le masque de Sous-réseau, la passerelle
par Défaut et le serveur DNS.
Lorsque les valeurs entrées sont correctes, appuyez sur le bouton ‘Enter’ (‘Entrée’)
(26) de la commande à distance.
Media Server
Modifie le nom du Media Giant dans le réseau.
Lorsque cette option est sélectionnée, vous pouvez choisir entre "Server/Host
name" [Nom de serveur/hôte] et "Group name" [nom de groupe].
Server/Host name
Modifie le nom du Media Giant.
Le nom du Media Giant permet aux clients UPnP A/V (comme
le C54WMP de Conceptronic ou le CFULLDHMA de
Conceptronic) de lire des fichiers multimédia sur le réseau à
partir du disque dur du Media Giant et permet à un
ordinateur dans un environnement de réseau d'avoir accès au
serveur Samba du Media Giant.
Group name
Modifie le nom du groupe de travail du Media Giant.
192
FRANÇAIS
Remarque :
Pour plus d'informations concernant les fonctions du Serveur UpnP A/V du Media Giant,
veuillez consulter le chapitre 16.
Pour plus d'informations concernant les fonctions du Serveur Samba du
Media Giant, veuillez consulter le chapitre 18.
Système:
Menu Language
Set Time
HDD Format
Pour sélectionner la langue que vous souhaitez utiliser lorsque vous vous servez du
Media Giant.
Pour modifier l'heure et la date.
Pour formater le disque dur interne (Voir chapitre 15).
Timer Setup (Configuration du Minuteur)
Minuteur du Diaporama:
Modifier l’intervalle du diaporama au cours d’un
diaporama d’images.
Minuteur de l’Économiseur d’Écran: Modifier le temps d’inactivité pour
activer l’économiseur d’écran.
Actualisation du firmware
Permet d’actualiser le firmware du Media Giant.
Vous pouvez actualiser le firmware à travers Internet ou à l’aide d’un
dispositif à mémoire USB. La fonction d’actualisation du firmware peut être
configurée en mode « Auto » ou en mode « Manuel ».
Si le mode « Auto » est activé (mode par défaut), le Media Giant vérifiera à
tout moment, de manière aléatoire, la disponibilité d’un nouveau firmware
en ligne et actualisera automatiquement le firmware lorsque le Media Giant
n’est pas en mode enregistrement / lecture.
Si le mode « Manuel » est activé, vous pouvez vérifier vous-même si un
nouveau firmware est disponible.
Remarque:
Pour vérifier la version actuelle de votre firmware, appuyez sur le bouton ‘Info’ (27) de la
commande à distance, une fois dans le Menu principal. La version du firmware sera alors
affichée sur votre écran.
Restore Default
(Restaurer les Paramètres par Défaut)
Restaurer les paramètres par défaut du Media Giant et initialiser
l’Assistant de Configuration pour reconfigurer l’unité.
[Menu configuration – Configuration de la TV]
[Édition des Chaînes]
193
FRANÇAIS
Configuration de la TV :
TV Input
Channel Scan
Manual Tune
TV Program
Sélectionnez votre pays dans la liste. Si votre pays n'est pas indiqué, sélectionnez
"Autres" dans la liste.
Astuce : Vous pouvez également rechercher une bande de fréquences spécifique
de DVB-T en sélectionnant "6M" (600Mhz), "7M" (700Mhz) ou "8M" (800Mhz).
Lance une recherche automatique des chaînes. La recherche automatique de
chaînes du Media Giant peut prendre un certain temps, mais l'appareil recherchera
et enregistrera automatiquement toutes les chaînes détectées dans la mémoire de
votre Media Giant.
Avec la fonction Manual Tune vous pouvez ajouter de nouvelles chaînes à celles
existantes dans la liste de chaînes (avec l'option "Add" [ajouter]), effacer des
chaînes de votre liste de chaînes (avec l'option "Skip" [ignorer]) ou attribuer des
noms aux chaînes trouvées (avec l'option "Edit" [éditer]).
Avec l'option TV Program, vous pouvez configurer le Media Giant pour afficher
toutes les chaînes DVB-T (dont les chaînes payantes, qui ne peuvent pas être lues sur
le Media Giant), ou n'afficher que les chaînes gratuites (FTA).
194
FRANÇAIS
14. Connectivité USB de l’Ordinateur
L’unité peut être connectée sur votre ordinateur pour copier des données (films, musique,
enregistrements, etc.) depuis et vers le Disque Dur interne.
Remarque:
Dans notre exemple ci-dessous, nous utilisons un ordinateur avec système
d’exploitation Windows XP, mais l’unité peut être utilisée sur des ordinateurs avec
support USB et pouvant lire & écrire des systèmes de fichiers en NTFS & FAT32.
Connecter l’unité sur votre ordinateur
• Connectez le câble USB voire Mini-USB fourni sur le port Mini-USB situé sur le devant de l’unité et sur un
port USB libre de votre ordinateur.
• Allumez l’unité avec le commutateur d’alimentation principal situé au dos de l’unité. L’unité sera alors
reconnue et installée automatiquement et apparaîtra sous la forme d’un lecteur supplémentaire de
votre disque dur.
Remarque:
Lorsque le disque dur est partitionné avec 1 partition média (FAT32 uniquement),
seule 1 lettre de lecteur est visible. Lorsque le disque dur est partitionné avec 2
partitions média (FAT32 et NTFS), le Media Giant affiche 2 lettres de lecteur.
Enregistrement sur votre ordinateur
Pour pouvoir lire vos enregistrements sur votre ordinateur, il vous faut tout d’abord copier les
enregistrements depuis la partition d’enregistrement vers la partition média. Pour ce faire, vous pouvez
utiliser la commande ‘Copy to FAT32 Partition’ (‘Copier vers la Partition en FAT32’), qui se trouve dans
le menu de ‘Playback Recordings’ (‘Lecture Enregistrements’), expliqué au chapitre 10.
Une fois vos enregistrements copiés vers la partition en FAT320, vous pouvez lire les programmes
enregistrés sur votre ordinateur, dès lors que l’unité est connectée sur l’ordinateur.
Déconnecter l’unité de votre ordinateur
• Cliquez une seule fois sur l’icône ‘Safe Removal’ (‘Retrait en Toute Sécurité’) du system tray (barre
d’état).
• Sélectionnez ‘Stop USB Mass Storage Device’ (‘Arrêter le Dispositif de Stockage de Masse USB’) quand
demandé.
• Attendez le message ‘Safe to remove Hardware’ (‘Retirez maintenant le Hardware en Toute
Sécurité’).
• Débranchez le câble USB.
195
FRANÇAIS
15. Information sur la Partition & Assistant de Formatage
Le Media Giant vous est remis avec un disque dur préformaté dans la plupart des cas. Le disque dur est
formaté avec la configuration par défaut du Media Giant, et partitionnera le disque dur comme suit:
Partition tampon du Timeshift:
Partition d’enregistrement:
Partition média FAT32:
Partition média NTFS :
~ 4,85 GB
50% de l’espace du disque dur.
25% de l’espace du disque dur.
25% de l’espace du disque dur.
Exemple avec:
500 GB
750 GB
1000 GB
Partition tampon du Timeshift:
Partition d’enregistrement:
Partition média FAT32:
Partition média NTFS:
~ 4,85 GB
~ 250 GB
~ 125 GB
~ 125 GB
~ 4,85 GB
~ 375 GB
~ 187 GB
~ 187 GB
~ 4,85 GB
~ 500 GB
~ 250 GB
~ 250 GB
Vous avez la possibilité de modifier la configuration par défaut du disque dur en reformatant le disque dur
du Media Giant.
Remarque:
Si jamais vous reformatez le disque dur du Media Giant, tout le contenu stocké et
enregistré sur le disque dur sera alors supprimé!
Pour formater le disque dur du Media Giant, allez au menu de Configuration et sélectionnez l’option ‘HDD
Format’ (‘Formatage du Disque Dur’) de la page ‘System’ (‘Système’). Sélectionnez à nouveau ‘HDD
Format’ (‘Formatage du Disque Dur’) pour confirmer.
L'Assistant de Formatage du Disque dur s'affiche sur votre écran et un message vous demande si vous
souhaitez formater le disque dur automatiquement ("Auto") ou manuellement ("Manual").
• Lorsque vous sélectionnez "Auto", le Media Giant sera formaté avec les paramètres de format par
défaut, comme indiqué ci-dessus.
• Lorsque vous sélectionnez "Manual", l'Assistant de Formatage vous guidera dans toutes les étapes de
formatage du disque dur.
[Assistant de Formatage – Automatique ou Manuel]
[Assistant de Formatage – Buffer de Programmation Horaire]
Modifiez la taille du Tampon du Timeshift avec les boutons de navigation ↑↓ (15) de la commande à
distance.
Vous pouvez régler le Tampon du Timeshift sur 1, 2, 3 ou 4 heures.
• Sélectionnez ‘OK’ pour poursuivre et passer à l’étape suivante.
196
FRANÇAIS
[ Assistant de Formatage - Partition d’Enregistrement ]
[ Assistant de Formatage – Partition en FAT32 / NTFS ]
• Modifiez la taille de la Partition d’Enregistrement avec les boutons de navigation ↑↓ (15) de la
commande à distance.
L’espace restant sera utilisé pour la (les) partition(s) média du Media Giant.
• Sélectionnez ‘Next’ (‘Suivant’) pour poursuivre et passer à la prochaine étape.
[ Assistant de Formatage – Lancer Formatage ]
[ Assistant de Formatage – Formatage ]
• Sélectionnez ‘Format’ (‘Formater’) pour lancer le formatage du disque dur du Media Giant.
Au cours du formatage, l’Assistant de Formatage affichera ‘Proceeding’ (‘En cours de traitement’).
Remarque:
Le processus de formatage peut prendre un certain temps (~ 5 minutes). Veuillez
attendre que se termine le processus de formatage.
[ Assistant de Formatage – Terminé ]
• Une fois terminé le processus de Formatage, sélectionnez ‘OK’ pour fermer l’Assistant de Formatage. Le
Media Giant redémarrera automatiquement.
197
FRANÇAIS
16. Serveur A/V UPnP (Serveur Média Twonky)
L’une des caractéristiques du Media Giant est le Serveur A/V UPnP.
Cela rend le Media Giant et l’ensemble de son contenu média disponibles pour tous les clients A/V UPnP de
votre réseau (par exemple: le CFULLHDMA ou le C54WMP de Conceptronic).
Le Serveur A/V UPnP utilisé pour le Media Giant est le ‘Twonky Mediaserver’ (‘Serveur Média Twonky’).
Le Serveur Média Twonky indexe automatiquement tout le média sur la partition média FAT32 et NTFS.
Lorsqu’une nouvelle donnée est ajoutée à l’une de ces partitions, elle devient automatiquement disponible
pour les clients A/V UPnP de votre réseau.
Le nom de votre Serveur A/V UPnP peut être défini dans le menu de Configuration du Media Giant, dans la
rubrique ‘Network’ (‘Réseau’).
Remarque:
Le nom par défaut du Serveur A/V UPnP est ‘media giant’.
Si vous connaissez le logiciel du Serveur Média Twonky, vous avez la possibilité de modifier les paramètres
avancés du Serveur Média Twonky via votre ordinateur.
Pour accéder aux pages de configuration du logiciel du Serveur Média Twonky, entrez l’adresse IP du Media
Giant dans votre fenêtre de navigation, suivie du numéro de port 9000.
Par exemple:
HTTP://192.168.0.100:9000/ (en considérant que 192.168.0.100 est l’adresse IP de
votre Media Giant).
Le Serveur Média Twonky possède un guide de ‘Troubleshooting’ (‘Dépannage’) intégré, qui se trouve
dans la barre de navigation de gauche de la fenêtre de configuration du Serveur Média Twonky. Ce guide
vous assistera dans la configuration du Serveur Média Twonky.
Pour plus de renseignements sur le Serveur Média Twonky, consultez le site Internet de Twonky à l’adresse:
http://www.twonkymedia.com/
198
FRANÇAIS
17. Parcourir des Partages Réseau
Le Media Giant peut parcourir vos partages réseau et lire des fichiers média directement depuis un partage
réseau. Pour pouvoir utiliser cette fonction, il vous faut partager vos fichiers média sur votre réseau de
façon à ce que le Media Giant puisse les trouver et y avoir accès.
Ce chapitre vous donnera des explications sur la façon de créer un partage de fichiers sous Windows XP ou
Windows Vista.
Remarque:
Ce manuel décrit uniquement le partage de fichiers et dossiers sous Windows XP et
Windows Vista.
Veuillez consulter le manuel de votre système d’exploitation ou dispositif de
stockage réseau pour savoir comment partager un dossier avec des fichiers média.
Partage de fichiers sous Windows XP
• Ouvrez ‘My Computer’ (‘Mon Ordinateur’) à l’aide du raccourci du menu Démarrer et accédez au
dossier avec les fichiers média que vous souhaitez partager.
• Cliquez une seule fois sur le dossier avec les fichiers média et sélectionnez l’option ‘Share this folder’
(‘Partager ce dossier’) dans la barre du menu de gauche.
[ Mon Ordinateur – Dossier de Partage ]
Les propriétés du dossier sont indiquées, avec la page ‘Sharing’ (‘Partage’) affichée.
La rubrique ‘Network sharing and security’ (‘Partage réseau et sécurité’) peut être utilisée pour
partager le dossier.
Si vous n’avez partagé aucun dossier précédemment, il vous faut lancer l’Assistant de Configuration Réseau
en cliquant sur la ligne ‘Network Setup Wizard’ (‘Assistant de Configuration Réseau’) dans la fenêtre.
199
FRANÇAIS
[ Propriétés – Page de Partage ]
[ Propriétés – Page de Partage ]
• Lorsque l’Assistant de Configuration Réseau est terminé au préalable, vous pouvez partager votre
dossier en cliquant sur ‘Share this folder on the network’ (‘Partager ce dossier sur le réseau’).
• Entrez un nom de partage dans la zone de texte et cliquez sur ‘Apply’ (‘Appliquer’).
• Cliquez sur ‘OK’ pour fermer la fenêtre.
Le dossier est maintenant répertorié avec une main sous l’icône du dossier, indiquant que le dossier est
partagé sur votre ordinateur.
[ Dossier Partagé ]
200
FRANÇAIS
Partage de Fichiers sous Windows Vista
• Ouvrez ‘Computer’ (‘Ordinateur’) avec le raccourci du menu Démarrer et accédez ainsi au dossier avec
les fichiers média que vous souhaitez partager.
• Cliquez une seule fois sur le dossier avec les fichiers média et sélectionnez l’option ‘Share’ (‘Partager’)
dans la barre de menu supérieure de la fenêtre.
[ Ordinateur – Partager Dossiers ]
Par défaut, votre propre utilisateur apparaît dans la liste de partage comme propriétaire du dossier.
[ Propriétés de Partage ]
• Vous avez la possibilité d’ajouter d’autres utilisateurs à la liste de partage en les sélectionnant depuis la
liste déroulante et en appuyant sur le bouton ‘Add’ (‘Ajouter’).
• Lorsque la liste des utilisateurs est complétée, cliquez sur le bouton ‘Share’ (‘Partager’) pour partager
le dossier.
Le dossier est maintenant répertorié avec une petite icône montrant 2 personnes, ce qui indique que le
dossier est partagé sur votre ordinateur.
[ Dossier Partagé ]
201
FRANÇAIS
Parcourir des dossiers partagés sur le Media Giant
Lorsque vos fichiers média sont partagés, vous pouvez utiliser l’option ‘Browse Media’ (‘Parcourir Média’)
du Menu principal pour parcourir vos emplacements réseau.
[ Sélection de l’Emplacement de Stockage ]
[ Partage Réseau – Connexion Utilisateur ]
Utilisez les boutons de navigation (15) de la commande à distance pour sélectionner l’option ‘Network’
(‘Réseau’) dans la liste des emplacements de stockage et parcourez le réseau vers votre ordinateur ou
dispositif de stockage réseau avec les dossiers partagés.
Lorsqu’un dossier partagé est protégé par un nom d’utilisateur et un mot de passe (par exemple: partage
par défaut sous Windows XP et Windows Vista), le Media Giant affiche une fenêtre surgissante dite pop-up
avec ‘User Login’ (‘Connexion Utilisateur’) vous permettant d’entrer le nom d’utilisateur et le mot de
passe.
Remarque:
Vous pouvez utiliser votre compte d’utilisateur habituel pour Windows XP ou
Windows Vista pour vous connecter à votre dossier partagé.
Utilisez les boutons de navigation (15) de la commande à distance pour sélectionner l’ID Utilisateur ou le
domaine du Mot de Passe et appuyez sur le bouton ‘Enter’ (‘Entrée’) (26) pour afficher le clavier virtuel
servant à entrer la valeur.
[ Clavier Virtuel ]
[ Partage Réseau – Connexion Utilisateur ]
Lorsque le nom d’utilisateur et le mot de passe sont correctement entrés, sélectionnez le bouton ‘OK’ ou
‘OK & Save to MyShortcuts’ (‘OK & Sauvegarder parmi Mes Raccourcis’) pour valider le partage réseau.
Vous pouvez dorénavant parcourir le dossier partagé, comme décrit au chapitre 9.
202
FRANÇAIS
18. Partage en réseau – configuration et utilisation
Vous pouvez accéder au Media Giant de Conceptronic en partage en réseau (Serveur Samba). Avec la
fonction de partage en réseau, vous pouvez partager la partition FAT32 (HDD1) du Media Giant sur votre
réseau, pour que d'autres ordinateurs puissent avoir accès aux données enregistrées sur cette partition.
Configuration
Sélectionnez l'option "Setup" [Configuration] dans le menu principal. Le menu de Configuration est affiché
à l’écran. Dans le menu de Configuration, sélectionnez "Network" [Réseau] Dans le Menu System Setup
[Configuration du Système], vous trouverez une option appelée "Media Server" [Serveur Multimédia].
Dans l'option "Media Server", vous pouvez modifier les paramètres suivants :
- Server/Host name [Nom du serveur / hôte] Indique le nom du Media Giant dans le réseau. Le nom par
défaut du Media Giant est "media giant".
- Group name [nom du groupe] Indique le nom de votre réseau domestique. Le nom du groupe par
défaut est "WORKGROUP".
Lorsque vous avez fini de modifier les paramètres, appuyez sur la touche "Return" (14) de la
télécommande pour revenir au menu de configuration principal.
Utilisation
Lorsque les paramètres du réseau du Media Giant sont configurés, vous pouvez accéder au partage en
réseau par un ordinateur sur votre réseau.
Remarque : Les étapes indiquées ci-après vous indiquent comment accéder au réseau partagé de Media
Giant avec les paramètres par défaut sur un ordinateur fonctionnant sous Windows Vista.
Le nom par défaut du Media Giant est "media giant". Avec ce nom, vous pouvez atteindre le partage en
réseau du dispositif dans le réseau.
• Sélectionnez "Start", "Network" [Démarrer, Réseau]
Windows Explorer affiche les paramètres du réseau.
Dans la barre supérieure vous pouvez indiquer le nom du réseau du Media Giant comme suit :
\\<NETWORK_NAME_OF_MEDIA_GIANT>\
Par exemple :
Si le Media Giant est configuré avec les paramètres par défaut, le nom du réseau est
"media giant" et vous devez indiquer :
\\media giant\
203
FRANÇAIS
Le partage en réseau du Media Giant sera affiché à votre écran, comme indiqué dans la copie d'écran ciaprès :
Remarque : Dans Windows, les "Printers" [Imprimantes] partagées sont automatiquement ajoutées à
chaque serveur Samba dans le réseau, mais le Media Giant ne peut pas fonctionner comme serveur
d'imprimante.
En sélectionnant le partage du réseau, vous pouvez copier, effacer, lire et ajouter des fichiers sur la
partition FAT32 du Media Giant.
204
ITALIANO
Conceptronic Media Giant con DVB-T
Manuale utente
Vi ringraziamo per aver acquistato
questo Registratore e Lettore Multimediale di Conceptronic.
Il presente Manuale spiega passo a passo come installare e usare il Registratore e Lettore Multimediale di
Conceptronic.
Per maggiori informazioni o supporto riguardanti il prodotto, si consiglia di consultare la nostra pagina web
di assistenza e supporto collegandovi con www.conceptronic.net/support e selezionando una delle
seguenti opzioni:
• FAQ
• Downloads
• Contact
: Database delle domande e risposte più frequenti
: Manuali, Driver, Firmware e altri download
: Contatto con il Servizio di Assistenza Conceptronic
Consiglio: Il firmware del Media Giant di Conceptronic è aggiornabile. Per disporre sempre dell’ultima
versione di firmware, si prega di consultare il sito web di Conceptronic, o utilizzare l’opzione di
aggiornamento firmware integrata nel Media Giant.
Consiglio: Consultare la pagina www.conceptronic.net/FAQ per ottenere un elenco aggiornato dei file e
dei Codec supportati.
Per informazioni generali riguardanti i prodotti di Conceptronic vi preghiamo di vistare il sito web
www.conceptronic.net.
1. Contenuto della confezione
La confezione contenente il Registratore e Lettore Multimediale di Conceptronic è composta dai seguenti
elementi:
•
Media Giant di Conceptronic (descritto come “unità” o “Media Giant” nel manuale). **
La confezione deve contenere uno dei due modelli di dispositivo riportati qui di seguito:
CM3GD
[C08-147]: Media Giant con sintonizzatore digitale (DVB-T).
CM3GDP [C08-148]: Media Giant con sintonizzatore digitale (DVB-T) e Adattatore Powerline.
•
•
•
•
•
•
•
•
•
•
•
•
•
•
Adattatore di rete Powerline di Conceptronic (incluso solo con il CM3GDP)
Cavo di alimentazione.
Telecomando.
2 batterie tipo AAA per telecomando.
Cavo Antenna RF.
Cavo Video Composito (jack RCA rosso, bianco e giallo).
Cavo S-Video.
Cavo Video Componente (jack RCA rosso, verde e blu).
Cavo Audio Digitale Coassiale (jack RCA nero).
Adattatore SCART per Cavo Video Composito / Cavo S-Video.
Cavo HDMI A/V (HDMI 1.3).
Cavo di rete.
Cavo USB.
Questo Manuale Utente.
IMPORTANTE:
In questo manuale, alcune delle caratteristiche mostrate sono valide esclusivamente per il CM3GDP
(con sintonizzatore digitale (DVB-T) e adattatore Powerline). Tali caratteristiche vengono
contrassegnate mediante il simbolo **.
205
ITALIANO
2. Caratteristiche del prodotto
•
•
•
•
•
•
•
•
•
•
•
•
•
Adattatore di rete Powerline incorporato. **
Sintonizzatore TV digitale integrato (DVB-T) con ricerca automatica canali TV.
Registrazione digitale segnale TV (DVB-T).
Registrazione segnale AV da, ad esempio, VCR, DVD o videocamere.
Ingresso DV per riproduzione / registrazione da una videocamera DV.
Registrazione su HDD interno.
Risoluzione in uscita fino a un massimo di 1080i.
Risoluzione in riproduzione fino a un massimo di 1080i.
Qualità DVD dei file registrati in formato TS (per registrazioni digitali mediante sintonizzatore digitale
DVB-T) o formato MPEG2 (per registrazioni analogiche mediante ingressi AV) (si possono riprodurre su
PC o qualsiasi altro lettore multimediale).
Opzioni di registrazione: Registrazione istantanea “one key”, Registrazione programmata, Time-shift.
Riproduzione dei file MPEG1/2/4, MP3, WMA, JPG memorizzati in HDD interni o dispositivi USB.
Copia file contenuti in dispositivi USB o postazioni di rete su HDD interno.
Commutazione automatica fra modalità USB-PC e Lettore:
Se viene collegata a un PC mediante porta USB, l’unità funziona come un Dispositivo di memoria
USB.
Se invece non viene collegata a un PC mediante porta USB, l’unità funziona come Registratore e
Lettore Multimediale.
3. Avvisi e precauzioni
•
•
•
•
•
•
•
•
•
•
•
•
Non cercare di smontare l’unità, poiché ciò potrebbe provocare lesioni dovute all’alta tensione.
Mantenere l’unità lontano da fonti di eccessiva umidità.
Non immergere né esporre a liquidi l’unità.
Nel caso in cui non si desideri utilizzare per un periodo di tempo prolungato l’unità, si consiglia di
scollegare l’alimentatore di corrente.
Assicurarsi che la presa di potere in cui i mezzi d'informazione Gigante è collegato a è facilmente
accessibile.
Evitare di utilizzare l’unità in aree prossime a combustibili.
Cambiare la batteria del telecomando con una dello stesso tipo quando funziona male o è esaurita.
Ove possibile, riciclare le batterie usate. Per evitare la corrosione, estrarre la batteria nel caso in cui
non venga usato il telecomando per un periodi di tempo prolungato.
Assicurarsi che le batterie sono collocati correttamente nel telecomando per evitare danni.
Mantenere il telecomando lontano da fonti di eccessiva umidità e non farlo cadere.
Non utilizzare il telecomando se esposto a intense fonti di calore.
Non fare MAI cadere, scuotere o colpire l’unità.
Per evitarne il surriscaldamento, non coprire l’unità.
IMPORTANTE:
NON formattare il disco rigido del computer! In caso contrario l’unità perderà tutti i dati
del sistema e sarà necessario inizializzarla di nuovo. Se si desidera formattare il disco
rigido dell’unità, usare lo strumento di formattazione integrato, attraverso il Menu di
configurazione dell’unità.
206
ITALIANO
4. Spiegazione del prodotto
Vista frontale
1
2
3
4
5
Vista posteriore
9
14
10
15
11
16
17
18
19
20
21
6
7
8
12
13
22
23
Descrizione dei numeri:
1. LED di stato (Power, REC, ACT, LAN)
2. Pulsanti di navigazione
3. Pulsanti di riproduzione
4. Ricevitore a infrarossi
5. Jack Mini-USB (a PC)
6. Porta host USB
7. Ingresso DV
8. Pulsante per apertura pannello frontale
9. Uscita Sintonizzatore TV Digitale
10. Ingresso Sintonizzatore TV Digitale
11. Uscita AV video composita
12. Uscita digitale coassiale SPDIF
Nota:
13. Interruttore di accensione principale
14. Connessione LAN (RJ45)
15. Uscita HDMI
16. Ingresso AV1 (Video/Audio composito)
17. Ingresso AV2 video componente
18. Ingresso audio AV2 (L/R)
19. Uscita audio AV (L/R)
20. Uscita AV video componente (Y/Pb/Pr)
21. Uscita S-Video
22. Uscita digitale ottica SPDIF
23. Ingresso AC (110 ~240v)
I pulsanti del dispositivo hanno le stesse funzioni di quelle principali che offre il telecomando.
207
ITALIANO
5. Spiegazione del telecomando
Il telecomando serve per controllare l’unità. Nella retrocopertina del presente Manuale appare
un’immagine del telecomando. I numeri che appaiono sui pulsanti corrispondono alla tabella riportata qui
di seguito, e servono per spiegare tutte le funzioni del telecomando.
N.
Pulsante
Descrizione
1.
2.
3.
4.
5.
6.
7.
8.
9.
10.
11.
12.
13.
14.
15.
16.
POWER ( )
SOURCE
MEDIA
AUDIO
ZOOM
0–9
COPY
REPEAT
GOTO
FAST REWIND (
)
PREVIOUS (
VOLUME +
VOLUME RETURN
, , ,
INS.REP.
17.
18.
19.
20.
21.
22.
23.
PAUSE
PLAY
REC
TV SYS
SETUP
TIMESHIFT
STOP ( )
24.
25.
SLOW
CM.SKIP
26.
27.
28.
29.
30.
31.
32.
33.
34.
35.
36.
37.
38.
ENTER
INFO
CHANNEL CHANNEL +
MUTE
NEXT (
)
FAST FORWARD (
GUIDE
A-B
DEL
ANGLE
SUB-T
LIVE-TV
39.
40.
41.
DV
MENU
LED
Serve per accendere l’unità o impostarla in modo standby
Serve per commutare fra sintonizzatore digitale, AV e riproduzione
Pulsante diretto per accedere al Browser Media
Serve per modificare la traccia audio del DVD (se disponibile nel file DVD)
Serve per zoomare avanti o indietro
Tasti numerici
Serve per mostrare il Menu di copia
Serve per impostare la modalità di riproduzione
Serve per andare a un punto determinato della riproduzione
Riavvolgimento veloce durante la riproduzione
Serve per tornare al file, alla traccia, al capitolo o alla foto precedente
Serve per alzare il volume
Serve per abbassare il volume
Serve per tornare alla videata o al canale precedente
Pulsanti di navigazione: servono per spostarsi all’interno dei menu
Serve per tornare indietro di 10 secondi durante la riproduzione differita o
la riproduzione standard
Serve per mettere in pausa la riproduzione differita (timeshift)
Serve per iniziare la riproduzione
Serve per avviare la registrazione
Serve per cambiare la risoluzione in uscita dell’unità
Pulsante diretto per accedere al Menu di configurazione
Serve per attivare l’opzione di timeshift
Serve per interrompere la riproduzione, la registrazione o per disattivare
l’opzione di registrazione differita (timeshift)
Avanzamento lento durante la riproduzione
Serve per andare avanti di 30 secondi durante la riproduzione differita o
la riproduzione standard
Serve per confermare la selezione
Serve per mostrare le informazioni del canale o del file
Canale giù
Canale su
Serve per mettere in silenzio l’audio
Serve per passare al file, alla traccia, al capitolo o alla foto successiva
Avanzamento veloce durante la riproduzione
Serve per mostrare la guida EPG del sintonizzatore digitale (DVB-T)
Serve per riprodurre ripetutamente un intervallo preselezionato
Serve per eliminare ciò che è stato introdotto o annullare la selezione
Serve per cambiare l’angolazione del DVD (se disponibile nel file DVD)
Serve per cambiare i sottotitoli (se disponibili nel file video o DVD)
Pulsante di accesso diretto a Live-TV / Serve per commutare fra TV digitale
e radio digitale
Serve per commutare fra riproduzione DV e modalità di registrazione
Serve per mostrare il Menu principale
Indica l’operatività del telecomando
)
)
208
ITALIANO
6. Come collegare il Media Giant
In questo capitolo si spiega come collegare il Media Giant alla TV, al sistema home cinema, alla rete, ecc.
9
14
10
15
11
16
17
18
19
20
21
12
13
22
23
Come collegare i cavi dell’antenna
Nota:
Il sintonizzatore digitale dell’unità supporta l’opzione di pass-through di segnale, per ridirigere il
segnale DVB-T dall’ingresso del sintonizzatore digitale all’uscita del sintonizzatore digitale.
• Scollegare il cavo principale dell’antenna dalla TV o dal decodificatore digitale, e collegarlo all’ingresso
del sintonizzatore digitale [10] dell’unità.
• Collegare il cavo dell’antenna in dotazione all’uscita del sintonizzatore digitale [9] dell’unità e
all’ingresso del sintonizzatore della TV o del decodificatore digitale.
Come collegare i cavi video
È possibile collegare l’unità alla TV in 5 modi diversi:
- HDMI
- Composito
- SCART (utilizzando il cavo composito e l’adattatore Scart)
- S-Video *
- Componente *
*
Nel caso in cui si utilizzi il sistema S-Video o componente, la TV riceverà esclusivamente il segnale
video.
Per ottenere il segnale audio, usare i jack RCA audio del cavo composito (rosso e bianco), o il cavo
audio (ottico o coassiale) del Media Giant.
HDMI:
• Collegare il cavo HDMI all’uscita HDMI [15] dell’unità.
• Collegare l’altro estremo del cavo HDMI a un ingresso HDMI disponibile della TV.
Composito:
• Collegare il cavo composito (giallo, rosso e bianco) alle USCITE AV jack composite corrispondenti [11,
19] dell’unità.
• Collegare l’altro estremo del cavo composito (giallo, rosso e bianco) alla TV.
209
ITALIANO
SCART:
• Collegare il cavo composito (giallo, rosso e bianco) alle USCITE AV jack composite corrispondenti [11,
19] dell’unità.
• Collegare l’altro estremo del cavo composito (giallo, rosso e bianco) ai jack dell’adattatore Scart.
• Collegare l’adattatore Scart all’ingresso Scart della TV.
S-Video:
• Collegare il cavo di connessione S-Video all’uscita S-Video [21] dell’unità.
• Collegare l’altro estremo del cavo S-Video all’ingresso S-Video della TV.
Componente:
• Collegare il cavo di connessione componente (rosso, verde e blu) ai jack componenti [20] dell’unità.
• Collegare l’altro estremo del cavo componente ai jack componenti della TV.
Come collegare i cavi audio
È
-
possibile collegare l’unità alla TV e/o all’home cinema in tre modi diversi:
Analogico, utilizzando i jack audio RCA dell’uscita A/V
Digitale, utilizzando l’uscita coassiale digitale SPDIF dell’unità.
Digitale, utilizzando l’uscita ottica digitale SPDIF dell’unità.
Analogico:
• Collegare i jack audio (rosso e bianco) del cavo composito ai jack audio RCA [19] dell’uscita AV.
• Collegare l’altro estremo del cavo composito ai jack audio RCA della TV o del ricevitore.
Digitale coassiale:
• Collegare il cavo digitale coassiale all’uscita digitale coassiale [12] dell’unità.
• Collegare l’altro estremo del cavo digitale coassiale all’ingresso digitale coassiale del ricevitore.
Digitale ottico:
• Collegare il cavo digitale ottico all’uscita digitale ottica [22] dell’unità.
• Collegare l’altro estremo del cavo digitale ottica all’ingresso digitale ottica del ricevitore.
Come collegare l’impianto audio/video
È possibile collegare all’unità una sorgente audio o video, come ad esempio un videoregistratore, un
lettore DVD o un decodificatore, in modo tale da poter registrare da tale sorgente audio/video.
Il Media Giant supporta dispositivi dotati di uscita composita o componente.
Composito:
• Collegare il cavo audio/video in dotazione con il dispositivo audio/video alle uscite AV jack
corrispondenti del dispositivo audio/video.
• Collegare l’altro estremo del cavo composito (giallo, rosso e bianco) all’INGRESSO AV1 jack [16]
dell’unità.
Componente:
• Collegare il cavo video componente in dotazione con il dispositivo audio/video all’uscita componente
corrispondente del dispositivo audio/video.
• Collegare l’altro estremo del cavo componente (rosso, verde e blu) all’INGRESSO AV2 jack [17]
dell’unità.
Nota:
I cavi video componenti trasferiscono solo video, senza audio. Per trasferire l’audio, sarà
necessario collegare anche i cavi audio dal dispositivo audio/video all’INGRESSO AV2 jack [18]
210
ITALIANO
Come collegare il cavo di alimentazione
Quando l’unità è collegata all’impianto audio/video, è possibile collegare l’alimentatore di corrente
all’unità.
• Collegare l’alimentatore di corrente in dotazione all’unità [23] e a una presa di corrente disponibile.
• Impostare l’interruttore di alimentazione principale [12] posto nella zona posteriore dell’unità su “I”
per accendere l’unità stessa.
L’unità si accenderà.
Come preparare il telecomando
• Togliere il coperchio della batteria dalla parte posteriore del telecomando
• Introdurre le batterie tipo AAA in dotazione nel telecomando.
• Mettere di nuovo al suo posto il coperchio della batteria.
Note:
- Il miglior range operativo del telecomando è di cinque metri circa.
- Dirigere il telecomando verso il ricevitore a infrarossi che si trova integrato nel pannello
frontale dell’unità.
- L’angolo di ricezione del ricevitore a infrarossi è di più o meno 30 gradi.
- Sostituire le batterie quando non funzionano più bene o sono scariche.
211
ITALIANO
7. Uso per la prima volta e configurazione
Quando viene accesa per la prima volta, sarà necessario configurare l’unità.
• Selezionare il canale d’ingresso della TV adeguato a cui è collegata l’unità (HDMI, composito, SCART, SVideo o componente).
Nota:
A partire da questo punto, il manuale dà per scontato che la TV è impostata sul canale d’ingresso
dell’unità. Tutti i passi qui descritti fanno riferimento all’operatività dell’unità.
• Verificare che l’interruttore di alimentazione principale posto nella zona posteriore dell’unità sia
impostato su “I” (Acceso).
• Accendere l’unità con il pulsante di accensione posto nella zona frontale dell’unità, o con il pulsante
“Power” (1) del telecomando
• Controllare il LED di alimentazione posto nella zona frontale del Media Giant. Se è arancione, il
dispositivo è in modalità “Standby”. Se invece è blu, il dispositivo è operativo.
Nota:
Quando viene accesa, sarà necessario inizializzare l’unità. Ci potrebbe volere un certo tempo,
durante il quale, sullo schermo apparirà la videata di avvio del Media Giant.
[ Videata di avvio ]
[ Configurazione assistita ]
Quando viene acceso per la prima volta il Media Giant, sarà necessario configurarlo. Per aiutare l’utente a
tale fine, l’unità mostrerà il programma di “Configurazione assistita” con i passi di configurazione
necessari per la prima volta che viene usato il Media Giant.
Il Programma di configurazione assistita, mostrerà i seguenti passi di configurazione:
- Lingua del menu
- Ingresso TV
- Ricerca canali
- Configurazione LAN con fili
- Imposta ora
Utilizzare i tasti di navigazione e il pulsante “Enter” (26) del telecomando per configurare il Media Giant.
Nel caso in cui siano già stati impostati i parametri di configurazione e si desidera verificarli, premere il
pulsante “Return” (14) del telecomando.
Lingua del menu
Serve per selezionare la lingua che si desidera utilizzare quando viene usato il il Media Giant.
Ingresso TV
Selezionare il Paese dalla lista di Paesi. Nel caso in cui in Paese in cui si risiede non appare nella lista,
selezionare l’opzione “Other” (Altro).
Consiglio:
È anche possibile ricercare una banda di frequenza DVB-T specifica, selezionando “6M”
(600Mhz), “7M” (700Mhz) o “8M” (800Mhz).
212
ITALIANO
Ricerca canali
• Selezionare “OK” per avviare la ricerca automatica dei canali digitali (DVB-T) utilizzando il
sintonizzatore digitale (DVB-T) del Media Giant. Sarà necessario un po’ di tempo per realizzare la ricerca
automatica dei canali del Media Giant, ma una volta trovati, questi verranno memorizzati
automaticamente nella memoria del Media Giant.
• Una volta terminata la ricerca automatica dei canali, selezionare “OK” per continuare con l’Assistente
per la Configurazione.
• Se si desidera saltare il passo relativo alla Ricerca dei canali (ad esempio quando viene usato un
decodificatore e non si dispone di segnale TV digitale (DVB-T)), è possibile selezionare “Cancel” e
continuare con l’Assistente per la Configurazione.
Configurazione LAN con fili
La Configurazione di rete serve per impostare l’indirizzo IP del Media Giant. Nella maggior parte delle
situazioni, il Media Giant si collega a una rete che dispone di un server DHCP (soprattutto un router).
• Se si dispone di un server DHCP nella rete in uso, selezionare l’opzione “DHCP IP”.
• Il Programma di configurazione assistita chiederà di confermare la selezione. Selezionare “OK” per
continuare.
• Nel caso in cui si desideri utilizzare un indirizzo IP statico, selezionare “FIX IP”.
• Il Programma di configurazione assistita mostrerà i campi da riempire nel caso di un indirizzo IP statico.
Usare il pulsanti di navigazione (15) e i tasti numerici 0-9 (6) per introdurre l’indirizzo IP, la Maschera di
sottorete, il Gateway di default e il Server DNS.
• Quando i valori introdotti saranno corretti, premere il pulsante “Enter” (26) del telecomando.
• Il Programma di configurazione assistita chiederà di confermare la selezione. Selezionare “OK” per
continuare.
Se il Media Giant non è collegato a una rete, selezionare “Cancel” per saltare questo passo e continuare
con il Programma di configurazione assistita.
Imposta ora
L’opzione “Set Time” consente di impostare l’ora e la data corretta durante la configurazione del Media
Giant.
• Per impostare l’ora e la data manualmente, selezionare “Manual”.
• Usare i pulsanti di navigazione (15) e i tasti numerici 0-9 (6) per introdurre Anno, Mese, Giorno, Ora,
Minuti e Secondi. Una volta terminato, premere il pulsante “Enter” (26) del telecomando.
• Il Programma di configurazione assistita chiederà di confermare la selezione. Selezionare “OK” per
continuare.
• Se si dispone di una connessione a Internet attiva, e il Media Giant è collegato alla rete, si può
selezionare l’opzione “Auto (Via Network)”.
• Il Programma di configurazione assistita mostrerà i campi da riempire per realizzare la configurazione
oraria automatica. Si può mantenere il server NTP di default, ma nel caso in cui si desideri usare un
altro server NTP, premere il pulsante “Enter” (26) nel campo relativo al server NTP per modificare il
parametro.
• Impostare la Zona oraria sulla zona corretta del paese in cui vive l’utente.
• Impostare l’opzione “Daylight Savings Correction” (Ora legale) su “Disable” (Disattiva) o “Enable”
(Attiva), a seconda del paese in cui si trova l’utente, e se fa uso o meno dell’ora legale. Quando i valori
introdotti saranno corretti, premere il pulsante “Enter” (26) del telecomando.
• Il Programma di configurazione assistita chiederà di confermare la selezione. Selezionare “OK” per
continuare.
Il Programma di configurazione assistita avrà così terminato e la configurazione di base del Media Giant è
finita.
213
ITALIANO
Nota:
Per altri parametri di configurazione, usare l’opzione “Setup” del Menu principale. Il Menu di
configurazione viene spiegato nel capitolo 13.
Nota:
Se si desidera aprire di nuovo il Programma di configurazione assistita una volta completato,
selezionare “Setup” nel Menu principale e selezionare l’opzione “Restore Default”. Il Media Giant
ritornerà sui parametri di default e aprirà di nuovo il Programma di configurazione assistita.
Nota:
Nel caso in cui sia stato acquistato un Media Giant privo di disco rigido preformattato, il Media
Giant mostrerà il “Programma di formattazione assistita” una volta portato a termine il
“Programma di configurazione assistita”. Il“Programma di formattazione assistita” viene
spiegato nel capitolo 15 del presente manuale.
214
ITALIANO
8. Menu principale
Il Menu principale consente di selezionare diverse funzioni del Media Giant.
Nota:
Quando il Menu principale non appare sullo schermo, basta premere il pulsante “Menu” (40) del
telecomando per mostrarlo.
[ Menu principale ]
Nel Menu principale sono disponibili le seguenti opzioni:
Browse Media
Playback Recordings
TV Tuner/AV Input
Scheduled Recording
Setup
Serve per riprodurre i file multimediali memorizzati.
Serve per riprodurre e per modificare le registrazioni realizzate.
Serve per vedere TV o AV in diretta.
Serve per configurare le registrazioni programmate.
Serve per configurare il Media Giant.
Le opzioni riportate qui in alto vengono descritte nei seguenti capitoli di questo manuale.
215
ITALIANO
9. Browse Media
Se nel Menu principale viene selezionato “Browse Media”, il Media Giant mostrerà il Browser media sullo
schermo:
[ Selezione localizzazioni memoria ]
[ Selezione modalità: Film, Musica, Foto ]
Il Browser media consente di selezionare il dispositivo di memoria da dove si desidera riprodurre i file
multimediali:
USB
Harddisk
Network
Serve per riprodurre i file multimediali da un dispositivo USB connesso (attraverso la Porta
Host USB).
Serve per riprodurre i file multimediali dal disco rigido interno del Media Giant.
Serve per riprodurre i file multimediali da Samba o dalle condivisioni di rete
nell’ambiente di rete.
Per sfogliare il dispositivo USB o il disco rigido interno, selezionare “USB” o “Harddisk” dalla lista di
localizzazioni di memoria.
Per consultare la rete per riprodurre i file multimediali attraverso le condivisioni di rete, selezionare
l’opzione “Network” dalla lista di localizzazioni di memoria.
Nota:
Per consultare le condivisioni di rete, accertarsi di averle configurate in maniera adeguata. Per
maggiori informazioni su come realizzare condivisioni di rete e e come consultarle, andare al
capitolo 17.
Una volta selezionata una localizzazione di memoria, è possibile commutare fra le modalità “Movies”
(Film), “Music” (Musica) e “Photos” (Foto) utilizzando i pulsanti di navigazione sinistro e destro del
telecomando.
Quando viene selezionata una delle tre opzioni, il Media Giant filtrerà automaticamente il contenuto della
localizzazione di memoria per poter mostrare così solo i file pertinenti.
Ad esempio:
Selezionando “Movies”, appariranno solo i file video sullo schermo.
Nel Menu del Browser Media, è possibile usare le seguenti opzioni del telecomando:
- Tasti di navigazione (15) Servono per consultare i file e le cartelle o per modificare la modalità di
-
Enter
Return
Copy
Play
Next
Previous
Menu
(26)
(14)
(7)
(18)
(31)
(11)
(40)
riproduzione.
Serve per riprodurre il file selezionato o per aprire la cartella selezionata.
Serve per andare alla cartella precedente.
Serve per aprire il Menu Copia (spiegato in una sezione di questo capitolo).
Serve per riprodurre il file selezionato.
Serve per andare alla successiva pagina con file.
Serve per andare alla precedente pagina con file.
Serve per tornare al Menu principale.
Per tornare dal Menu Browser Media al Menu principale basta premere il pulsante “Menu” (40) del
telecomando.
216
ITALIANO
Riproduzione dei film
È possibile riprodurre in TV i film memorizzati nel disco rigido dell’unità, in un dispositivo di memoria USB
o in una rete, utilizzando il filtro “Movies” del Media Giant.
Quando viene selezionato il filtro “Movies”, il Media Giant mostrerà solo i file video sullo schermo, mentre
tutti gli altri rimarranno invisibili.
[ Modalità Movie ]
• Selezionare il file che si desidera riprodurre con i pulsanti di navigazione (15) del telecomando.
Se è stato selezionato un file video, il Browser Media mostrerà un’anteprima con il nome e le dimensioni
del file sul lato destro dello schermo.
• Premere il pulsante “Enter” (26) o il pulsante “Play” (18) del telecomando per avviare la riproduzione
del file selezionato.
Durante la riproduzione, si possono usare le seguenti opzioni di riproduzione del telecomando:
-
Pause
Slow
Stop
Rewind
Fast Forward
Ins. Rep.
CM. Skip
Goto
Repeat
Info
Zoom
Sub-t
Audio
- Volume
- Mute
(17)
(24)
(23)
(10)
(32)
(16)
(25)
(9)
(8)
(27)
(5)
(37)
(4)
(12), (13)
(30)
Per mettere in pausa o per riavviare la riproduzione.
Avanzamento lento durante la riproduzione.
Serve per interrompere la riproduzione.
Riavvolgimento durante la riproduzione.
Avanzamento veloce durante la riproduzione.
Serve per tornare indietro di 10 secondi durante la riproduzione.
Serve per andare avanti di 30 secondi durante la riproduzione.
Serve per andare a un punto determinato del film.
Serve per modificare la modalità di riproduzione.
Serve per mostrare le informazioni relative alla riproduzione.
Serve per zoomare avanti o indietro
Serve per cambiare i sottotitoli (se disponibili nel file video).
Serve per modificare la traccia audio del DVD (se disponibile nel file
video).
Serve per alzare o abbassare il volume.
Serve per mettere in silenzio l’audio.
Per tornare dal Menu Browser Media al Menu principale basta premere il pulsante “Menu” (40) del
telecomando.
217
ITALIANO
Funzione di riproduzione DVD
Il Media Giant può riprodurre DVD contenuti nel disco rigido come se si trattasse di un DVD normale. È
possibile consultare il menu del DVD, scegliere i sottotitoli o modificare la lingua dell’audio.
Nota:
Il Media Giant supporta esclusivamente la riproduzione di copie di DVD non protette. Non è
supportata la protezione CSS.
• Collegare il Media Giant al computer (Vedi capitolo 13).
• Creare una cartella nel disco rigido del Media Giant con il nome del film contenuto nel DVD (ad esempio:
“Film1”).
• Copiare i file dalla cartella “VIDEO_TS” a quella appena creata (ad esempio: “Film1”) nel Media Giant.
Dopo aver copiato i file, la struttura della cartella dovrebbe essere la seguente:
- [Disco rigido del Media Giant]
|-> Film1
(con tutti i file DVD contenuti all’interno)
• Scollegare il Media Giant dal computer e collegarlo alla TV.
• Selezionare l’icona “Browse Media” nel Menu principale con i pulsanti di “Navigazione” (15) del
telecomando, e premere il pulsante “Enter” (26) del telecomando per aprire il Browser Media.
• Usare i pulsanti di “Navigazione” (15) e il pulsante “Enter” (26) del telecomando per sfogliare la
cartella del disco rigido interno dove è memorizzato il DVD.
• Aprire la cartella DVD creata nel disco rigido.
[ Modalità Movie ]
• Selezionare il file “VIDEO_TS.IFO” e premere il pulsante “Play” (18) del telecomando per avviare la
riproduzione del DVD selezionato.
Nota:
È anche possibile riprodurre file ISO direttamente dal Media Giant, sempre e quando questi siano
memorizzati nella partizione media NTFS. Quando viene riprodotto un file ISO di un DVD, sono
valide le stesse caratteristiche di riproduzione esistenti per un file IFO di un DVD.
218
ITALIANO
Durante la riproduzione di un DVD, si possono usare le seguenti opzioni di riproduzione del telecomando:
-
Pause
(17)
Slow
(24)
Stop
(23)
Tasti di navig.
(15)
Enter
(26)
Rewind
(10)
Fast Forward
(32)
Previous
(11)
Next
(31)
Ins. Rep.
(16)
CM. Skip
(25)
Goto
(7)
Repeat
(8)
Info
(27)
Zoom
(5)
Angle
(36)
Volume
(12), (13)
Mute
(30)
Sub-t
(37)
Audio
(4)
Per mettere in pausa o per riavviare la riproduzione.
Avanzamento lento durante la riproduzione.
Serve per interrompere la riproduzione.
Servono per consultare il menu del DVD.
Serve per confermare la selezione nel menu del DVD.
Riavvolgimento durante la riproduzione.
Avanzamento veloce durante la riproduzione.
Capitolo precedente.
Capitolo successivo.
Serve per tornare indietro di 10 secondi durante la riproduzione.
Serve per andare avanti di 30 secondi durante la riproduzione.
Serve per andare a un punto determinato del film.
Serve per modificare la modalità di ripetizione.
Serve per mostrare le informazioni relative alla riproduzione.
Serve per zoomare avanti o indietro.
Serve per cambiare l’angolazione del DVD (se disponibile nel file DVD).
Serve per alzare o abbassare il volume.
Serve per mettere in silenzio l’audio.
Serve per cambiare o disattivare i sottotitoli.
Serve per modificare la traccia audio del DVD (se disponibile nel file
video).
Per tornare dal Menu Browser Media al Menu principale basta premere il pulsante “Menu” (40) del
telecomando.
Riproduzione dei sottotitoli
Il Media Giant è in grado di supportare file sottotitoli quando riproduce file video AVI.
Per riprodurre file AVI con sottotitoli, si deve assegnare lo stesso nome al file sottotitoli e al file AVI, ad
esempio:
Nome film:
Nome sottotitolo:
Il_Film_Con_Sottot.AVI
Il_Film_Con_Sottot.SRT
• Selezionare il file che si desidera riprodurre con i pulsanti di navigazione del telecomando.
• Premere il pulsante “Enter” (26) o il pulsante “Play” (18) del telecomando per avviare la riproduzione
del file selezionato.
Il file AVI inizierà la riproduzione con il file sottotitoli corrispondente caricato.
Per attivare o disattivare i sottotitoli durante la riproduzione, premere il pulsante “Sub-t” (37) del
telecomando.
Per tornare dal Menu Browser Media al Menu principale basta premere il pulsante “Menu” (40) del
telecomando.
219
ITALIANO
Riproduzione dei brani audio
È possibile riprodurre in TV i brani musicali memorizzati nel disco rigido dell’unità, in un dispositivo di
memoria USB o in una rete, utilizzando il filtro “Music” del Media Giant.
Quando viene selezionato il filtro “Music”, il Media Giant mostrerà solo i file audio sullo schermo, mentre
tutti gli altri rimarranno invisibili.
[Modalità Music]
• Selezionare il file che si desidera riprodurre con i pulsanti di navigazione (15) del telecomando.
Se è stato selezionato un file audio, il Browser Media mostrerà una tag ID3 (se disponibile) con il nome e le
dimensioni del file sul lato destro dello schermo.
• Premere il pulsante “Enter” (26) o il pulsante “Play” (18) del telecomando per avviare la riproduzione
del file selezionato.
Durante la riproduzione, si possono usare le seguenti opzioni di riproduzione del telecomando:
-
Pause
(17)
Stop
(23)
Rewind
(10)
Fast Forward (32)
Repeat
(8)
Info
(27)
Volume (12), (13)
Mute
(30)
Per mettere in pausa o per riavviare la riproduzione.
Serve per interrompere la riproduzione.
Riavvolgimento durante la riproduzione.
Avanzamento veloce durante la riproduzione.
Serve per modificare la modalità di ripetizione del file/cartella aperti.
Serve per mostrare le informazioni relative alla riproduzione.
Serve per alzare o abbassare il volume.
Serve per mettere in silenzio l’audio.
Per tornare dal Menu Browser Media al Menu principale basta premere il pulsante “Menu” (40) del
telecomando.
220
ITALIANO
Riproduzione di foto e immagini
È possibile visualizzare sulla TV foto e immagini memorizzate nel disco rigido dell’unità, in un dispositivo di
memoria USB o in una rete, utilizzando il filtro “Photos” del Media Giant.
Quando viene selezionato il filtro “Photos”, il Media Giant mostrerà solo le foto e le immagini sullo
schermo, mentre tutti gli altri file rimarranno invisibili.
[Modalità Photos]
• Selezionare il file che si desidera riprodurre con i pulsanti di navigazione (15) del telecomando.
Se è stato selezionato un file immagine, il Browser Media mostrerà una breve anteprima con il nome e le
dimensioni del file sul lato destro dello schermo.
• Premere il pulsante “Enter” (26) o il pulsante “Play” (18) del telecomando per avviare la riproduzione
del file selezionato.
Durante la riproduzione, si possono usare le seguenti opzioni di riproduzione del telecomando:
-
Pause
Stop
Tasti di navig.
Previous
Next
Repeat
Info
Zoom
(17)
(23)
(15)
(11)
(31)
(8)
(27)
(5)
Per mettere in pausa o per riavviare la presentazione.
Serve per interrompere la presentazione.
Servono per ruotare la foto mostrata.
Serve per riprodurre il file precedente nella cartella aperta.
Serve per riprodurre il file successivo nella cartella aperta.
Serve per modificare la modalità di ripetizione del file/cartella aperti.
Serve per mostrare le informazioni relative alla presentazione.
Serve per zoomare avanti o indietro.
Per tornare dal Menu Browser Media al Menu principale basta premere il pulsante “Menu” (40) del
telecomando.
Consiglio:
Nel Menu di Configurazione, è stata aggiunta un’opzione per cambiare la transizione della
presentazione fotografica.
Consultare il capitolo 13 per l’opzione “Effetto di transizione”.
221
ITALIANO
Modalità Copia
Se si desidera copiare dati da una posizione a un’altra (ad esempio: da un dispositivo USB verso il disco
rigido interno), è possibile utilizzare la Modalità Copia del Media Giant.
Per accedere alla Modalità Copia, premere il pulsante “Copy” (7) del telecomando dopo aver aperto il
Browser Media. Sullo schermo apparirà il Menu di Copia:
[ Menu di Copia ]
[ Menu di Copia – Assistente di copia ]
È possibile scegliere fra “USB”, “Harddisk” (Disco rigido) o “Network” (Rete) come sorgente della copia.
Le destinazioni disponibili sono “USB”, “Harddisk” e “Recycle” (Elimina file).
Prima di tutto selezionare la sorgente premendo i pulsanti di navigazione Su e Giù (15) del telecomando.
Dopo aver selezionato la sorgente corretta, premere pulsante di navigazione Destro (15) e usare i pulsanti
di navigazione Su e Giù (15) per selezionare la destinazione.
Nota:
Il bordo è evidenziato se la sezione relativa alla sorgente o alla destinazione del Menu di Copia è
attiva.
Nota:
Non è possibile copiare da “USB” a “USB”, o da “Harddisk” a “Harddisk”.
• Quando la posizione della sorgente e della destinazione saranno corrette, premere il pulsante “Enter”
(26) del telecomando per continuare con il Programma di copia assistita.
• Consultare la sorgente fino a quando avrete trovato i file o le cartelle che si desiderano copiare. È
possibile sfogliare le cartelle con pulsanti di navigazione (15) e il pulsante “Enter” (26) del
telecomando.
• Evidenziare i file o le cartelle che si desidera copiare con il pulsante “Play” (18) del telecomando. I file
o le cartelle evidenziate mostreranno un’icona contrassegnata dietro al nome.
• Quando la sorgente dei file o le cartelle saranno contrassegnati, premere il pulsante di navigazione
Destro (15) del telecomando per passare alla sezione relativa alla destinazione.
Nota:
Non è possibile selezionare la partizione media NTFS del Media Giant come destinazione, poiché
non è possibile scrivere su tale partizione.
• Consultare la destinazione fino a quando avrete trovato la posizione di copia desiderata. È possibile
sfogliare le cartelle con pulsanti di navigazione (15) e il pulsante “Enter” (26) del telecomando
• Dopo aver trovato la posizione corretta, premere il pulsante di navigazione Destro (15) del telecomando
per avviare il processo di copia.
222
ITALIANO
• Il Programma di copia assistita chiederà di confermare che si desidera realizzare la copia. Selezionare
“OK” per continuare con il processo di copia.
[ Conferma copia ]
[ Copia in corso ]
Una volta portato a termine il processori copia, l’utente verrà informato mediante un messaggio sullo
schermo.
È anche possibile eliminare file attraverso il Menu di copia.
Se si desidera eliminare alcuni file, selezionare “Recycle” come destinazione.
Evidenziare i file o le cartelle che si desidera eliminare e premere il pulsante di navigazione Destro (15)
del telecomando, dopo di che apparirà una finestra ci conferma per l’eliminazione del file o delle cartelle
selezionate.
Selezionare “OK” per eliminare il file o le cartelle selezionate.
[ Menu di copia – Assistente di eliminazione ]
[ Conferma eliminazione ]
223
ITALIANO
10. Riproduzione delle registrazioni
Se viene selezionata l’opzione “Playback Recordings” (Riproduzione delle registrazioni) nel Menu
principale, il Media Giant chiederà di scegliere fra “Digital” (Digitale) e “Analog” (Analogico).
• Se si seleziona “Digital”, il Media Giant mostrerà tutte le registrazioni realizzate attraverso il
sintonizzatore digitale (DVB-T) del Media Giant.
• Se si seleziona “Analog”, il Media Giant mostrerà tutte le registrazioni realizzate attraverso gli ingressi
digitali del Media Giant (Ingresso composito, Ingresso componente, ingresso Firewire).
Dopo aver selezionato “Digital” o “Analog”, il Media Giant mostrerà sullo schermo la lista di registrazioni
dell’opzione selezionata:
[ Selezione registrazioni ]
[ Lista delle registrazioni ]
Ogni video viene mostrato mediante un’immagine in miniatura (primo fotogramma della registrazione),
accompagnato da nome, ora, data e qualità della registrazione.
La stella gialla dietro alla registrazione significa che la registrazione è nuova e non è stata ancora mai
visualizzata. Dopo aver visto la registrazione, la stella gialla scomparirà.
È possibile consultare le diverse registrazioni utilizzando i pulsanti di navigazione Su e Giù (15) del
telecomando e riprodurre le registrazioni premendo il pulsante“Enter” (26) o “Play” (18) del telecomando
dopo aver selezionato la registrazione.
Durante la riproduzione, è possibile utilizzare le seguenti opzioni di riproduzione del telecomando:
-
Pause
Slow
Stop
Rewind
Fast Forward
Ins. Rep.
CM. Skip
Previous
Next
Repeat
Info
Goto
Zoom
Audio
- Volume
- Mute
(17)
(24)
(23)
(10)
(32)
(16)
(25)
(11)
(31)
(8)
(27)
(9)
(5)
(4)
(12), (13)
(30)
Serve per mettere in pausa o per riprendere la riproduzione.
Serve per mettere in movimento lento la riproduzione.
Serve per interrompere la riproduzione.
Serve per riavvolgere la riproduzione.
Avanzamento rapido della riproduzione.
Serve per tornare indietro di 10 secondi nella riproduzione.
Serve per andare avanti 30 secondi nella riproduzione.
Serve per riprodurre il capitolo o la registrazione precedenti.
Serve per riprodurre il capitolo o la registrazione successivi.
Serve per modificare l’opzione di ripetizione della riproduzione in corso.
Serve per mostrare i dettagli relativi alla riproduzione.
Serve per andare a un punto specifico (tempo) del film.
Zoom avanti / zoom indietro
Serve per modificare la traccia audio (nel caso in cui la riproduzione
disponga di questa opzione).
Serve per alzare o abbassare il volume.
Serve per mettere in silenzio l’audio.
224
ITALIANO
Con i pulsanti di navigazione Sinistra e Destra (15) del telecomando, è possibile accedere alle opzioni del
Menu un alto nella lista delle registrazioni, dove si possono selezionare diverse caratteristiche:
Play
Delete
Rename
Sorting
Edit
Serve per riprodurre le registrazioni.
Serve per eliminare le registrazioni.
Serve per rinominare le registrazioni.
Serve per modificare il modo in cui vengono elencate le registrazioni.
Serve per modificare le registrazioni (spiegazione nel sottocapitolo successivo).
Spiegazione del Menu “Edit”
Nota:
Le registrazioni digitali non si possono modificare mediante il Media Giant, per cui il Menu Edit
contiene diverse opzioni non disponibili nel caso in cui sia stato selezionato “Digital” nella
videata relativa a “Playback Recordings”.
Se è stato selezionato “Digital” nella videata relativa a “Playback Recordings” il Media Giant
consente di accedere solo all’opzione “Copy to FAT32 partition” (Copia su partizione FAT32)
nel Menu Edit the Edit.
Il Menu “Edit” contiene diverse opzioni per modificare una registrazione, spiegate qui di seguito:
[ Registrazioni – Menu Edit]
- Set Thumbnail
Mediante l’opzione “Set Thumbnail”, si può riprodurre il film e
selezionare il fotogramma preferito come miniatura della registrazione.
- A-B Erase
Mediante l’opzione “A-B Erase”, si può contrassegnare una parte della
registrazioni (ad esempio: una pubblicità) ed eliminarla.
- Split Title
Mediante l’opzione “Split Title”, si può dividere una registrazione in due
parti (ad esempio: quando sono stati registrati due programmi in una sola
registrazione programmata).
- Merge Title
Mediante l’opzione “Merge Title”, si possono unire due registrazioni in
una sola.
- Add Chapter Mark
Mediante l’opzione “Add Chapter Mark”, si possono aggiungere
chaptermark alla registrazione, e in questo modo si potrà andare
facilmente a un punto specifico della registrazione.
Nota:
Si può anche attivare l’opzione “Auto Chapter” nel Menu di configurazione per aggiungere
automaticamente i chaptermark alla registrazione.
225
ITALIANO
- Remove Chapter Mark
Mediante l’opzione “Remove Chapter Mark”, si può eliminare un
chaptermark dalla registrazione. È un’opzione utile quando il Media
Giant è stato configurato in modo da creare automaticamente i
chaptermark, ma si desidera eliminarli dalla registrazione.
- Copy to FAT32 partition
Mediante l’opzione “Copy to FAT32 partition”, si può copiare la
registrazione dalla partizione delle registrazioni nella cartella “REC”
nella partizione media del Media Giant.
Quando la registrazione viene copiata nella partizione FAT32, è possibile
riprodurla, copiarla o modificarla sul computer quando il Media Giant è
collegato ad esso via USB, o la si può visualizzare su un client UPnP A/V
(come il C54WMP di Conceptronic o il CFULLHDMA di Conceptronic)
mediante la rete.
Nota:
Per maggiori informazioni sull’opzione di Server UPnP A/V del Media Giant, Vedi capitolo 16.
226
ITALIANO
11. Sintonizzatore TV / Ingresso AV
Attraverso l’opzione “TV Tuner / AV Input” (Sintonizzatore TV / Ingresso AV) nel Menu principale, è
possibile visualizzare e registrare attraverso il sintonizzatore digitale (DVB-T) TV o l’ingresso AV del Media
Giant.
Consiglio: Si può accedere facilmente alla TV in diretta da qualsiasi menu del Media Giant premendo il
pulsante “Live-TV” (38) del telecomando.
Quando viene selezionata l’opzione “TV Tuner / AV Input”, il Media Giant mostrerà le immagini della TV in
diretta dal sintonizzatore TV. Mentre si guarda la TV in diretta, si possono cambiare i canali premendo i
pulsanti “Channel +” (29) o “Channel -” (28) del telecomando.
Con il pulsante “Source” (2) del telecomando, si può commutare fra Sintonizzatore TV, Ingresso composito
e Ingresso componente. La sorgente apparirà per alcuni istanti nell’angolo in alto a destra della schermo.
Timeshift
Il Media Giant supporta l’opzione di timeshift, grazie alla quale viene “messa in pausa” la TV in diretta o
un audio/video in diretta, registrando il canale/ingresso in uso.
Premere il pulsante “Timeshift” (22) del telecomando per accedere all’opzione di timeshift.
Una volta aperta l’opzione di timeshift, la Tv o la sorgente A/V in diretta verranno “messe in pausa” e
l’unità registrerà il canale sullo sfondo.
[ Timeshift : inizializzazione ]
Nota:
[ Timeshift : attivo ]
Quando viene attivata l’opzione di timeshift, la barra di avanzamento che appare sullo schermo
mostrerà il tempo massimo di buffer. Se si desidera regolare il buffer (maggiore o minor tempo),
sarà necessario formattare di nuovo il disco rigido del Media Giant per poter così regolare le
dimensioni della partizione destinata al buffer del timeshift.
Per maggiori informazioni su come realizzare las formattazione, consultare il capitolo 15.
Durante il timeshift, si possono usare le seguenti opzioni di riproduzione del telecomando:
Play
(18) Serve per riprodurre il buffer del timeshift.
Pause
(17) Per mettere in pausa o per riavviare la riproduzione.
Slow
(24) Avanzamento lento durante la riproduzione.
Stop
(23) Serve per interrompere la riproduzione.
Rewind
(10) Riavvolgimento durante la riproduzione.
Fast Forward
(32) Avanzamento veloce durante la riproduzione.
Ins. Rep.
(16) Serve per tornare indietro di 10 secondi durante la riproduzione.
CM. Skip
(25) Serve per andare avanti di 30 secondi durante la riproduzione.
Info
(27) Serve per mostrare o nascondere le informazioni relative al buffer del
timeshift.
Volume
(12), (13) Serve per alzare o abbassare il volume.
Mute
(30) Serve per mettere in silenzio l’audio.
227
ITALIANO
Timeshift permanente
Nel Menu di configurazione del Media Giant, è possibile attivare l’opzione di “Permanent Timeshifting”
(Timeshift permanente), grazie alla quale il timeshift resterà sempre attivo, consentendo di mettere in
pausa all’istante la riproduzione o usare i suddetti pulsanti del telecomando per “saltare” nel buffer del
timeshift.
Registrazione
Mentre si guarda la TV o la sorgente A/V in diretta attraverso l’unità, si può iniziare la registrazione del
canale visualizzato premendo il pulsante “Rec” (19) del telecomando. L’unità inizierà a registrare fino a
quando non verrà premuto il pulsante “Stop” (23) del telecomando.
Durante la registrazione, si accenderà il LED “REC” nel pannello frontale.
Nota:
L’unità è in grado di rilevare la protezione di copia nella sorgente connessa; ad esempio la
protezione MacroVision nei DVD. Quando una sorgente connessa è protetta contro la copia, l’unità
non permetterà la registrazione e mostrerà un messaggio di avviso se verrà premuto il pulsante di
registrazione.
Nota:
Il Media Giant registra per default in HQ (Alta qualità). Si può modificare la qualità della
registrazione nel Menu di configurazione.
Nota:
Durante la registrazione non è possibile cambiare canale.
Quando viene premuto il pulsante “Rec” (19) durante una registrazione, il tempo di registrazione verrà
impostato su 30 minuti, che partiranno dal momento in cui avrete premuto il pulsante “Record”.
Sullo schermo apparirà il messaggio “OTR: 30 min.”.
[ Registrazione normale ]
[ Timer di registrazione attivato ]
Premere di nuovo il pulsante “Rec” (19) per aumentare il tempo di registrazione di 30 minuti, e così via
fino a un massimo di 240 minuti. L’unità continuerà a registrare fino a quando scadrà il tempo di
registrazione o fino a quando non verrà premuto il pulsante “Stop” (23) del telecomando.
Radio Digitale
Il Media Giant supporta anche la funzione di radio digitale, trasmessa attraverso il segnale digitale (DVB-T).
È possibile ascoltare stazioni radio digitali attraverso le casse acustiche della TV, o mediante il ricevitore
collegato al Media Giant.
Come ascoltare stazioni radio digitali.
Quando viene usata la funzione di Sintonizzatore digitale, è possibile ascoltare anche stazioni radio digitali.
• Selezionare l’opzione “TV Tuner / AV Input” del Menu principale del Media Giant.
Il Media Giant mostrerà l’immagine Live-TV attraverso il sintonizzatore TV.
• Premere il pulsante “Live-TV” (38) del telecomando per commutare a modo Radio Digitale.
La funzione di Radio Digitale verrà così attivata.
• È possibile utilizzare i pulsanti “Canale +” (29) o “Canale -” (28) per selezionare una stazione radio
digitale.
• Per tornare in modo TV Digitale, premere di nuovo il pulsante “Live-TV” (38) del telecomando.
228
ITALIANO
EPG (Guida Elettronica ai Programmi)
Il sintonizzatore digitale (DVB-T) del Media Giant aggiunge la funzione EPG (Guida Elettronica ai
Programmi) a quelle del Media Giant.
È possibile accedere alla guida EPG mentre si guarda la TV premendo il pulsante “Guide” (33).
Sullo schermo apparirà la guida EPG:
[ Guida Elettronica ai Programmi ]
[Guida Elettronica ai Programmi: Regist. Programm. ]
Quando si utilizza la guida EPG, è possibile usare i seguenti pulsanti del telecomando:
-
Freccia Destra / Sinistra
Freccia Su / Giù
Indietro
Avanti
Riavvolgimento
Avanti veloce
Rec
(15)
(15)
(11)
(31)
(10)
(32)
(19)
Serve per modificare la data selezionata nella guida EPG
Serve per modificare il programma selezionato nella guida EPG.
Serve per tornare al canale precedente.
Serve per saltare al canale successivo.
Serve per consultare le informazioni relative al programma.
Serve per consultare le informazioni relative al programma.
Serve per programmare la registrazione del programma
selezionato.
Quando viene premuto il pulsante “Rec” (19), il programma selezionato verrà aggiunto alle registrazioni
programmate del Media Giant. Il programma selezionato verrà indicato con un simbolo rosso, stando a
significare che è stato programmato per essere registrato.
La registrazione programmata si trova nel menu “Scheduled Recording” del Media Giant, descritto nel
capitolo 12.
Per tornare all’opzione di Live-TV basta premere il pulsante “Guide” (33) del telecomando.
229
ITALIANO
Controllo DV
La miniconnessione FireWire dietro al pannello frontale del Media Giant consente di collegare una camera
DV direttamente all’unità e visualizzare o registrare video domestici sul disco rigido interno.
• Collegare la Camera DV alla miniconnessione FireWire [7] posta nella zona frontale del Media Giant.
• Accendere la Camera DV e impostarla sulla modalità di “Riproduzione”.
• Premere il pulsante “DV” (39) del telecomando per aprire la modalità “DV Control”.
Il Media Giant mostrerà sullo schermo i controlli DV:
[ Pannello di controllo DV ]
Per selezionare le opzioni che offre il Pannello di controllo DV si possono usare i pulsanti di navigazione
(15) del telecomando. Per confermare qualsiasi selezione, premere il pulsante “Enter” (26) del
telecomando.
Se viene selezionato “Play” nel Pannello di controllo DV e si sta riproducendo il filmato, si può premere il
pulsante “Rec” (19) del telecomando per iniziare la registrazione del film contenuto nella camera DV verso
il disco rigido.
Consiglio: Quando si sta registrando, è possibile nascondere il Pannello di controllo DV premendo il
pulsante “DV” (39) del telecomando. Il pannello si potrà visualizzare di nuovo premendo una
seconda volta il pulsante “DV”.
La registrazione si può interrompere premendo il pulsante “Stop” (23) del telecomando.
I filmati registrati appariranno nella lista delle registrazioni, come descritto nel capitolo 10.
Per uscire dalla modalità Controllo DV, premere il pulsante “Return” (14) del telecomando.
230
ITALIANO
12. Registrazione programmata
È possibile programmare l’unità affinché registri determinati canali a un’ora specifica. Il numero massimo
di registrazioni consentite è di 8.
Consiglio: È possibile programmare le registrazioni più facilmente utilizzando la guida EPG del Media
Giant, il cui uso viene descritto nel capitolo 11 del presente manuale.
• Selezionare l’opzione “Scheduled Recording” (Registrazione programmata) nel Menu principale.
Sullo schermo verrà mostrata l’opzione di Registrazione programmata.
[ Menu Registrazione programmata ]
[ Aggiunta registrazione programmata ]
Il menu relativo alla Registrazione programmata offre cinque opzioni che si possono selezionare mediante i
pulsanti di navigazione Destra e Sinistra (15) del telecomando:
Add
Edit
Delete
Status
History
Serve per aggiungere una nuova registrazione programmata
Serve per modificare una registrazione programmata preesistente
Serve per eliminare una registrazione programmata
Serve per cambiare lo stato della lista di registrazioni programmate
Serve per mostrare la lista di tutte le registrazioni programmate
Come aggiungere o modificare una registrazione programmata
Quando si selezionano le opzioni “Add” (Aggiungi) o “Edit” (Modifica) nel menu e si preme il pulsante
“Enter” (26) del telecomando, si può aggiungere una nuova programmazione o modificarne una già
esistente.
Per default è selezionato il campo “Source”.
È possibile cambiare tutte le opzioni mediante i pulsanti di navigazione Su e Giù (15), e si può selezionare
un altro campo con i pulsanti di navigazione Destra e Sinistra (15).
• Selezionare la sorgente corretta per la registrazione (può essere un canale TV, l’ingresso video
composito o l’ingresso video componente).
• Impostare la data corretta per la registrazione.
• Impostare l’ora di inizio corretta per la registrazione.
• Impostare la durata della registrazione.
• Impostare l’opzione di ripetizione per la registrazione. Si possono selezionare le seguenti opzioni:
“Once” (Una sola volta) , “Everyday” (Tutti i giorni), “Mon-Fri” (Da lun a ven), “Mon-Sat” (Da lun a
sab), “Sun” (Dom), “Mon” (Lun), “Tue” (Mar), “Wed” (Merc), “Thu” (Gio), “Fri” (Ven) o “Sat” (Sab).
Il campo “Device” si può saltare, poiché si può registrare solo sul disco rigido interno.
231
ITALIANO
• Impostare la qualità di registrazione, scegliendo tra “HQ”, “SP”, “LP”, “EP” e “SLP”.
Nota:
Se si cambia il campo “Quality” questo influirà sulla qualità della registrazione e sulla quantità
di spazio necessario per la registrazione. Il tempo di registrazione disponibile per ogni tipo di
qualità appare nella parte superiore a sinistra della finestra di programmazione.
• Impostare l’opzione “Nicam” su “on” o “off”.
L’opzione Nicam deve essere su “on” se la sorgente da dove si desidera registrare, trasmette utilizzando
due sorgenti audio diverse per due lingue diverse (ad esempio: Eurosport).
• Dopo aver impostato tutte le opzioni di registrazione, premere il pulsante “Enter” (26) del telecomando
per memorizzare la programmazione.
• Verrà mostrata una finestra a comparsa di conferma. Selezionare “Confirm” e premere il pulsante
“Enter” (26) del telecomando per memorizzare la programmazione.
La registrazione è stata programmata e l’unità inizierà la registrazione all’ora e sul canale programmato,
anche nel caso in cui il dispositivo sia in “Standby”.
Nota:
Durante la registrazione non è possibile cambiare canale.
232
ITALIANO
13. Configurazione
Selezionando l’opzione “Setup” nel Menu principale, verrà mostrato il Menu di configurazione. Qui di
seguito vengono mostrati tutti i parametri di configurazione disponibili con la descrizione corrispondente.
Si può passare da un’opzione del Menu di configurazione all’altra mediante i pulsanti di navigazione del
telecomando.
[ Menu di configurazione – Video ]
[ Menu di configurazione – Record ]
Configurazione A/V:
Aspect Ratio
Brightness
Contrast
Transition
Audio Configuration
Serve per modificare il rapporto d’aspetto del segnale in uscita del Media Giant.
(“Letterbox 4:3”, “Pan-Scan 4:3”, “Widescreen 16:9”)
Serve per modificare la luminosità del segnale in uscita del Media Giant.
Serve per modificare il contrasto del segnale in uscita del Media Giant.
Serve per modificare la transizione fra una foto e l’altra durante una
presentazione.
Serve per modificare la configurazione audio del Media Giant.
Night Mode
Attiva o disattiva la modalità di Audio notturno (Off, On,
Comfort).
Digital Output Imposta l’uscita audio digitale (HDMI-LPCM, HDMI-RAW, SPDIFLPCM, SPDIF-RAW).
Record:
Quality
Nota:
Serve per modificare la qualità di registrazione di default (“HQ”, “SP”, “LP”,
“EP”, “SLP”)
Se si cambia il campo “Quality” questo influirà sulla qualità della registrazione e sulla quantità di
spazio necessario per la registrazione. I diversi parametri di qualità hanno bisogno del seguente
spazio per un’ora di video:
HQ:
4.85 GB (4850 MB)
SP:
2.42 GB (2420 MB)
1.62 GB (1620 MB)
LP:
EP:
1.21 GB (1210 MB)
0.80 GB (800 MB)
SLP:
Auto Chapter
Permanent Timeshift
Serve per modificare la configurazione della creazione automatica di
chaptermark. La funzione Auto Chapter aggiunge automaticamente chaptermark
alla registrazione, per consultare più facilmente una registrazione durante la
riproduzione.
Attiva o disattiva l’opzione di timeshift permanente. Se è attiva, questa
funzionerà in ogni momento e consente di mettere in pausa all’istante la
riproduzione o i pulsanti del telecomando per “saltare” nel buffer del timeshift.
233
ITALIANO
[ Menu di configurazione – Network ]
[ Menu di configurazione – System ]
Rete:
LAN Preference **
Serve per modificare la connessione LAN preferita: via cavo o auto (Via Powerline)
Se si sceglie “Cable”, il Media Giant userà sempre la porta LAN come connessione di
rete.
Se si sceglie “Auto (Via Powerline)”, il Media Giant userà l’opzione Powerline nel
caso in cui sia disponibile una rete Powerline. In caso contrario verrà usata la porta
LAN.
Nota: Quando il Media Giant è collegato sia a una rete Powerline che a una LAN, la rete di default sarà la
Powerline. Nel caso in cui il rendimento della rete Powerline diminuirà al di sotto di 1Mbps, il
Media Giant commuterà automaticamente alla modalità via cavo.
In modalità via cavo, il Media Giant continuerà a controllare il rendimento della rete Powerline.
Quando questa aumenterà al di sopra di 1Mbps, il Media Giant commuterà dalla modalità via cavo
alla rete Powerline.
Wired Lan Setup
In “Wired Lan Setup”, si può configurare l’indirizzo IP del Media Giant.
Se selezionato, si può scegliere fra “Cancel”, “DHCP IP (Auto)” o
“Fix IP (Manual)”.
Se si dispone di un server DHCP nella rete, selezionare l’opzione “DHCP IP”.
Se si desidera usare un indirizzo IP statico, selezionare “FIX IP”.
Il Programma di configurazione assistita mostrerà i campi da riempire nel caso di un
indirizzo IP statico. Usare il pulsanti di navigazione (15) e i tasti numerici 0-9 (6) per
introdurre l’indirizzo IP, la Maschera di sottorete, il Gateway di default e il Server
DNS.
Quando i valori introdotti saranno corretti, premere il pulsante “Enter” (26) del
telecomando.
Media Server
Serve per modificare il nome del Media Giant nella rete.
Quando viene selezionato, le opzioni tra cui è possibile scegliere sono “Server/Host
name” e “Group name”.
Server/Host name
Serve per modificare il nome del Media Giant.
Il nome del Media Giant accetta client UPnP A/V (come il C54WMP
o il CFULLHDMA di Conceptronic) per riprodurre file multimediali
via rete, contenuti nel disco rigido del Media Giant e consente a
computer di accedere via rete al server Samba del Media Giant.
Group name
Serve per modificare il nome del gruppo di lavoro del Media Giant.
Nota:
Per ottenere maggiori informazioni sulla funzione di Server UPnP A/V del
Media Giant, consultare il capitolo 16.
Per ottenere maggiori informazioni sulla funzione del Server Samba del
Media Giant, consultare il capitolo 18.
234
ITALIANO
System:
Menu Language
Set Time
HDD Format
Timer Setup
Serve per selezionare la lingua che si desidera utilizzare con il Media Giant.
Serve per modificare l’ora e la data.
Serve per formattare il disco rigido interno (consultare il capitolo 15).
Slideshow Timer:
Serve per modificare l’intervallo fra una diapositiva e l’altra
durante una presentazione.
Screen Saver Timer: Serve per modificare il tempo di inattività necessario per
attivare il salvaschermo.
Aggiornamento Firmware Serve per aggiornare il firmware del Media Giant.
L’aggiornamento del firmware si può realizzare via Internet o mediante un
dispositivo di memoria USB. L’opzione di aggiornamento del firmware si può
impostare su “Auto” o “Manual”.
Quando viene selezionato “Auto” (opzione di default), il Media Giant
verificherà di tanto in tanto se esistono nuove versioni del firmware online e
aggiornerà il firmware automaticamente, quando non sarà in corso nessuna
registrazione o riproduzione sul Media Giant.
Quando viene selezionato “Manual” è possibile verificare manualmente se
esistono nuove versioni del firmware.
Nota: Per controllare la versione del Firmware usata, premere il pulsante “Info” (27) del telecomando
quando si è nel Menu principale. Sullo schermo verrà mostrata la versione del Firmware.
Restore Default
Serve per riportare il Media Giant sui parametri di default e per aprire il Programma
di configurazione assistita per riconfigurare l’unità.
[Menu Configurazione– Configurazione TV]
[ Modifica Canale ]
Configurazione TV:
TV Input
Channel Scan
Manual Tune
TV Program
Selezionare il Paese dalla lista di Paesi. Nel caso in cui in Paese in cui si risiede non
appare nella lista, selezionare l’opzione “Other” (Altro).
Consiglio: È anche possibile ricercare una banda di frequenza DVB-T specifica,
selezionando “6M” (600Mhz), “7M” (700Mhz) o “8M” (800Mhz
Serve per avviare una ricerca automatica dei canali. Sarà necessario un po’ di tempo
per realizzare la ricerca automatica dei canali del Media Giant, ma una volta
trovati, questi verranno memorizzati automaticamente nella memoria del Media
Giant .
Grazie alla funzione di Sintonia Manuale (Manual Tune), è possibile aggiungere nuovi
canali alla lista di canali già esistente (utilizzando l’opzione “Add”) , eliminare
canali dalla lista di canali (utilizzando l’opzione “Skip”), o assegnare un nome ai
canali trovati (utilizzando l’opzione “Edit”).
Con la funzione TV Program, è possibile configurare il Media Giant affinché mostri
tutti i canali DVB-T (compresi quelli a pagamento, che il Media Giant non è in grado
di riprodurre), o solo quelli free to air (FTA), vale a dire visibili gratuitamente.
235
ITALIANO
14. Connettività USB computer
L’unità si può collegare al computer per copiare dati (film, musica, foto, registri, ecc.) da e verso il disco
rigido interno.
Nota:
Nell’esempio riportato di seguito, viene usato un computer con Windows XP; ad ogni modo l’unità
si può usare con tutti i computer dotati di supporto USB e in grado di leggere e scrivere i file
system FAT32 e NTFS.
Come collegare l’unità al computer
• Collegare il cavo USB to Mini-USB in dotazione alla porta Mini-USB nella zona frontale dell’unità e a una
porta USB disponibile del computer.
• Accendere l’unità utilizzando l”interruttore di accensione principale posto nella zona posteriore. L’unità
verrà riconosciuta e installata automaticamente e apparirà come un’unità extra del computer.
Nota:
Quando il disco rigido è partizionato con una sola partizione media (solo FAT32), apparirà solo una
lettera di unità; se invece è partizionato con due partizioni media (FAT32 e NTFS), il Media Giant
mostrerà due lettere di unità.
Riproduzione di una registrazione sul computer
Per riprodurre una registrazione sul computer, in primo luogo si dovranno copiare le registrazioni dalla
partizione relativa alle registrazione verso la partizione media. Per fare ciò usare il comando “Copy to
FAT32 Partition”, che appare nel menu “Playback recordings” spiegato nel capitolo 10.
Dopo aver copiato la registrazioni sulla partizione FAT32, sarà possibile riprodurre i programmi memorizzati
sul computer, quando l’unità è collegata al computer.
Come scollegare l’unità dal computer
•
•
•
•
Fare un solo clic sull’icona “Rimozione sicura” che appare nel vassoio di sistema.
Selezionare “Periferica archiviazione di massa USB” quando richiesto.
Aspettare che appaia il messaggio “Rimozione sicura dell’hardware”.
Scollegare il cavo USB.
236
ITALIANO
15. Informazione sulle partizioni e Formattazione assistita
Nella maggior parte dei casi il Media Giant viene fornito con un disco rigido preformattato, in base ai
parametri di configurazione di default del Media Giant, che partizionerà il disco rigido come segue:
Partizione buffer del timeshift:
Partizione registrazioni:
Partizione media FAT32:
Partizione media NTFS:
~ 4.85 GB
50% dello spazio del disco rigido.
25% dello spazio del disco rigido.
25% dello spazio del disco rigido.
Esempio con:
500GB
750 GB
1000GB
Partizione buffer del timeshift:
Partizione registrazioni:
Partizione media FAT32:
Partizione media NTFS:
~ 4.85 GB
~ 250 GB
~ 125 GB
~ 125 GB
~ 4.85 GB
~ 375 GB
~ 187 GB
~ 187 GB
~ 4.85 GB
~ 500 GB
~ 250 GB
~ 250 GB
Si possono modificare i parametri di default del disco rigido del Media Giant formattandolo di nuovo.
Nota:
Se si formatta di nuovo il disco rigido del Media Giant, tutto ciò che in esso era stato memorizzato
o registrato andrà perso!
Per formattare il disco rigido del Media Giant, aprire il Menu di configurazione e selezionare l’opzione
“HDD Format” nella pagina “System”. Selezionare di nuovo “HDD format” per confermare la selezione.
L’Assistente alla Formattazione del disco rigido apparirà sullo schermo per richiedere se si desidera dare
formato all’hard disk automaticamente (“Auto”) o manualmente (“Manual”).
• Se viene selezionato “Auto”, il Media Giant verrà formattato con i parametri di default, come
menzionato più in alto.
• Se viene selezionato “Manual”, l’Assistente alla Formattazione mostrerà i diversi passi per formattare il
disco rigido.
[ Assistente Formattazione – Automatico o Manuale ]
[Assistente Formattazione –Buffer Time-shift]
Modificare le dimensioni del buffer del timeshift utilizzando i pulsanti di navigazione Su e Giù (15) del
telecomando.
Il buffer del timeshift si può impostare su 1, 2, 3 o 4 ore.
• Selezionare “Next” per procedere al passo successivo.
237
ITALIANO
[Formattazione assistita - Partizione Registrazioni]
[Formattazione assistita – Partizione FAT32 / NTFS]
• Modificare le dimensioni della partizione registrazioni utilizzando i pulsanti di navigazione Su e Giù (15)
del telecomando
Lo spazio restante verrà usato per le partizioni media del Media Giant.
• Selezionare “Next” per procedere al passo successivo.
[Formattazione assistita – Avvia formattazione ]
[Formattazione assistita – Formattazione in corso ]
• Selezionare “Format” per iniziare a formattare il disco rigido del Media Giant.
Durante la formattazione, il Programma di formattazione assistita mostrerà “Proceeding”.
Nota:
Il processo di formattazione può durare alcuni minuti (~ 5 minuti). Attendere fino a quando la
formattazione sarà terminata.
[ Programma di formattazione assistita – Fine ]
• Una voklta finito il processo di formattazione, selezionare “OK” per chiudere il Programma di
formattazione assistita. Il Media Giant si riavvierà automaticamente.
238
ITALIANO
16. Server UPnP A/V (Twonky Media Server)
Una delle caratteristiche del Media Giant è il Server UPnP A/V, grazie al quale il Media Giant e tutto il
contenuto multimediale sono disponibili per i client UPnP A/V della rete in uso (ad esempio il CFULLHDMA
di Conceptronic o il C54WMP di Conceptronic).
Il Server UPnP A/V usato nel Media Giant è “Twonky Media Server”.
Il Twonky Media Server indicizza automaticamente tutti i file multimediali contenuti nelle partizioni FAT32
e NTFS. Quando vengono aggiunti nuovi dati a una di queste partizioni, questi diverranno atumaticamente
disponibili per i client UPnP A/V della rete in uso.
È possibile configurare il nome del Server UPnP A/V entrando nel Menu di configurazione del Media Giant,
nella sezione “Network”.
Nota:
Il nome di default del Server UPnP A/V è “media giant”.
Se già conoscete bene il software Twonky Media Server, è possibile modificare i parametri di
configurazione avanzati del Twonky Media Server attraverso il computer.
Per accedere alle pagine di configurazione del software Twonky Media Server, introdurre l’indirizzo IP del
Media Giant nel browser, seguito dal numero di porta 9000.
Ad esempio:
HTTP://192.168.0.100:9000/ (dove 192.168.0.100 corrisponderebbe all’indirizzo IP del
Media Giant).
Il Twonky Media Server dispone di una guida per la “Soluzione dei problemi” integrata, che appare nella
baradi navigazione sulla sinistra della finestra di configurazione del Twonky Media Server. Tale guida è un
utile aiuto per configurare il Twonky Media Server.
Per maggiori informazioni sul Twonky Media Server, consultare il sito web di Twonky:
http://www.twonkymedia.com/
239
ITALIANO
17. Come consultare le condivisioni di rete
Il Media Giant può consultare le condivisioni di rete e riprodurre file multimediali direttamente da una
condivisione di rete. Per poter usare questa caratteristica, è necessario mettere in condivisione le cartelle
multimediali nella rete, in modo che il Media Giant possa rilevarle e accedere a esse.
In questo capitolo si spiega come attivare la condivisione di file nel caso di Windows XP e Windows Vista.
Nota:
In questo manuale viene descritto solo il metodo di condivisione di file e cartelle per Windows XP e
Windows Vista.
Consultare il manuale del sistema operativo o del dispositivo di memoria di rete per sapere come
condividere una cartella contenente file multimediali.
Condivisione file in Windows XP
• Aprire “Risorse del computer” con la scorciatoia del Menu di avvio (Start) e selezionare la cartella
contenente i file multimediali che si desidera condividere.
• Fare un solo clic sulla cartella contenente i file multimediali e selezionare l’opzione “Condividi questa
cartella” nella barra menu posta sul lato sinistro.
[ Risorse del Computer – Condividi Cartella ]
Verranno mostrate le proprietà della cartella, con la pagina “Condivisione” sullo schermo.
Per condividere la cartella si può usare la sezione “Condivisione di rete e sicurezza”.
Se non avete mai condiviso prima nessuna cartella, sarà necessario aprire il Programma di configurazione di
rete assistita facendo clic sul pulsante “Network Setup Wizard” nella finestra.
240
ITALIANO
[ Proprietà – Pagina condivisioni ]
[ Proprietà – Pagina condivisioni ]
• Una volta concluso il Programma di configurazione di rete assistita, sarà possibile condividere la cartella
facendo clic su “Condividi questa cartella in rete”.
• Introdurre un nome per ciò che viene condiviso nell’apposito campo di testo, poi fare clic su “Apply”.
• Fare clic su “OK” per chiudere la finestra.
La cartella apparirà con una mano al di sotto, stando a indicare che la cartella è condivisa nel computer.
[ Cartella condivisa ]
241
ITALIANO
Condivisione file in Windows Vista
• Aprire “Computer” con la scorciatoia del Menu di avvio (Start) e selezionare la cartella contenente i file
multimediali che si desidera condividere.
• Fare un solo clic sulla cartella contenente i file multimediali e selezionare l’opzione “Condividi” nella
barra menu posta nella zona superiore della finestra.
[ Computer – Condividi cartella ]
Per default, nella lista di condivisioni il proprietario della cartella è l’utente.
[ Proprietà Condivisioni ]
• È possibile aggiungere altri utenti alla lista di condivisioni selezionandoli dal menu a discesa e premendo
il pulsante “Add”.
• Quando la lista di utenti è completa, fare clic sull’opzione “Share” per condividere la cartella.
La cartella verrà mostrata con una piccola icona dove appaiono due persone, stando a indicare che la
cartella è condivisa nel computer.
[ Cartella condivisa ]
242
ITALIANO
Come consultare le cartelle condivise nel Media Giant
Quando vengono condivisi file multimediali, si può utilizzare l’opzione “Browse Media” nel Menu principale
per consultare le posizioni di rete.
[ Selezione posizioni di memoria ]
[ Condivisione di rete – Login utente ]
Usare i pulsanti di navigazione (15) del telecomando per selezionare l’opzione “Network” nella lista di
posizioni di memoria, e consultare la rete che usa il computer o il dispositivo di memoria di rete con le
cartelle condivise.
Nel caso in cui una cartella condivisa sia protetta con un nome utente e una password (ad esempio:
condivisione di default in Windows XP e Windows Vista), il Media Giant mostrerà la finestra “User Login”
dove sarà possibile introdurre il nome utente e la password, per realizzare così il login.
Nota:
Si può usare l’account utente normale per Windows XP o Windows Vista per realizzare il login alla
cartella condivisa.
Usare i pulsanti di navigazione (15) del telecomando per selezionare il campo relativo all’ID Utente (User
ID) o alla Password e premere il pulsante “Enter” (26) per mostrare la tastiera a video per introdurre il
parametro.
[ Tastiera a video ]
[ Condivisione di rete – Login utente ]
Quando il nome utente e la password sono corretti, selezionare le opzioni “OK” o “OK & Save to
MyShortcuts” per accedere alle condivisioni di rete.
Ora è possibile consultare la cartella condivisa come descritto nel capitolo 9.
243
ITALIANO
18. Condivisione di rete – configurazione e uso
È possibile accedere al Media Giant di Conceptronic come una condivisione di rete (Samba Server). Grazie
alla funzione di Condivisione di rete, è possibile condividere in rete la partizione FAT32 (HDD1) del Media
Giant, di modo che i dati in essa contenuti siano visibili anche per altri computer.
Configurazione
Selezionare l’opzione “Setup” dal Menu principale. Sullo schermo apparirà il Menu di Configurazione. In
questo menu selezionare “Network”. Nel Menu di Configurazione Sistema c’è un’opzione chiamata “Media
Server”.
Nell’opzione “Media Server”, è possibile modificare i seguenti parametri di configurazione:
- Server/Host name
- Group name
Serve per specificare il nome del Media Giant nella rete in uso. Il nome di default
del Media Giant è “media giant”.
Serve per specificare il nome della rete domestica in uso. Il nome di gruppo di
default è “WORKGROUP”.
Dopo aver modificato i parametri, premere il pulsante “Return” (14) del telecomando per tornare al Menu
principale.
Uso
Dopo aver configurato i parametri di rete del Media Giant, è possibile accedere alla condivisione di rete
attraverso un computer nella rete in uso.
Nota:
I passi riportati qui in alto mostrano come accedere alla condivisione di rete del Media Giant
utilizzando i parametri di default su un computer che utilizza Windows Vista.
Per default, il nome di rete del Media Giant è “media giant”. Con questo nome è possibile accedere alla
condivisione di rete del dispositivo in rete.
• Selezionare “Start”, “Network”.
Windows Explorer mostrerà i parametri di rete.
Nella barra superiore è possibile introdurre il nome di rete del Media Giant come da esempio:
\\<NETWORK_NAME_OF_MEDIA_GIANT>\
Per esempio:
Se il Media Giant è stato configurato con i parametri di, il nome di rete sarà “media
giant” e si dovrà scrivere:
\\media giant\
244
ITALIANO
La condivisione di rete del Media Giant verrà mostrata sullo schermo, come da immagine:
Nota:
In Windows, la condivisione relativa alle stampanti (“Printers”) viene aggiunta automaticamente a
ogni Server Samba in rete, ma il Media Giant non funziona come print server.
Selezionando la condivisione di rete è possibile copiare, eliminare e aggiungere file alla partizione FAT32
del Media Giant.
245
PORTUGUÊS
Media Giant Conceptronic com DVB-T
Manual do Utilizador
Parabéns pela aquisição do seu
Gravador & Leitor Multimédia Conceptronic.
Este Manual do Utilizador oferece-lhe uma explicação detalhada sobre o modo de instalação e utilização do
Gravador & Leitor de Multimédia da Conceptronic.
Quando precisar de mais informações ou apoio para o seu produto, aconselhamo-lo a visitar o nosso site de
Assistência Técnica & Apoio em www.conceptronic.net/support e seleccione uma das seguintes opções:
• FAQ
• Downloads
• Contacto
: Base de dados das Perguntas Frequentes
: Manuais, Controladores, Firmware e mais downloads
: Contacte o Centro de Apoio da Conceptronic
Dica:
O Conceptronic Media Giant é actualizável através de firmware. Para actualizar a sua unidade com
a mais recente versão de firmware pode visitar o site da Conceptronic ou utilizar a característica
de actualização de firmware incorporada do Media Giant.
Dica:
Por favor, consulte o site www.conceptronic.net/FAQ para a mais recente lista de codecs e
ficheiros suportados.
Para informação geral sobre os produtos da Conceptronic, visite o site da Conceptronic em
www.conceptronic.net.
1. Conteúdo da Embalagem
Os seguintes itens devem integrar a embalagem do Gravador & Leitor de Multimédia da Conceptronic:
•
Conceptronic Media Giant (descrito como “unidade" ou “Media Giant” no manual). **
O dispositivo na embalagem é 1 dos 2 modelos listados abaixo:
CM3GD
[C08-147]: Media Giant com sintonizador digital (DVB-T).
CM3GDP [C08-148]: Media Giant com sintonizador digital (DVB-T) e Adaptador Powerline.
•
•
•
•
•
•
•
•
•
•
•
•
•
•
Adaptador de Rede Powerline da Conceptronic. (Apenas incluído com o CM3GDP)
Cabo de ligação.
Controlo remoto.
2 pilhas AAA para o controlo remoto.
Cabo de Antena RF.
Cabo de Vídeo Composto (Conectores RCA Vermelho, Branco, Amarelo).
Cabo S-Vídeo.
Cabo de Vídeo Componente (Conectores RCA Vermelho, Verde, Azul).
Cabo Áudio-digital Coaxial (Conectores RCA Preto).
Adaptador SCART para Cabo de Vídeo Composto / Cabo de S-Video.
Cabo A/V HDMI (HDMI 1.3).
Cabo de Rede.
Cabo USB.
Este Manual do Utilizador.
IMPORTANTE:
No presente manual, algumas características explicadas são apenas válidas para o CM3GDP (com
sintonizador digital (DVB-T) e Adaptador Powerline). Estas características estão marcadas com **.
246
PORTUGUÊS
2. Características do Produto
•
•
•
•
•
•
•
•
•
•
•
•
•
Adaptador de rede Powerline incorporado. **
Sintonizador de TV digital (DVB-T) incorporado com procura automática de canais de TV.
Gravação de sinal de TV digital (DVB-T).
Gravação de sinal AV a partir de, por exemplo, um gravador de vídeo, DVD ou Câmara de Vídeo.
Entrada DV para reprodução / gravação a partir de uma Câmara de Vídeo DV.
Grava para HDD interno.
Até 1080i de resolução de saída.
Até 1080i de resolução de reprodução.
Qualidade de DVD dos ficheiros gravados no formato TS (para gravações digitais através do
sintonizador digital DVB-T) ou no formato MPEG2 (para gravações analógicas através de entradas AV)
(pode ser reproduzido no PC ou outros leitores de multimédia).
Opções de Gravação: Gravação instantânea através de uma tecla, gravação Agendada, Deslocamento
de tempo.
Reprodução de ficheiros MPEG1/2/4, MP3, WMA, JPG armazenados no HDD interno ou Dispositivo USB.
Copia ficheiros a partir de um Dispositivo USB ou local de rede para o HDD interno.
Comutação automática entre USB-PC e Modo de Leitor:
Quando ligada ao PC através de USB, a unidade actua como um Dispositivo de Armazenamento
USB.
Quando não estiver ligada ao PC através de USB, a unidade actua como um Gravador & Leitor de
Multimédia.
3. Notas e Precauções
•
•
•
•
•
•
•
•
•
•
•
•
Não tente desmontar a unidade. Isso pode causar ferimentos por alta tensão.
Mantenha a unidade afastada da humidade excessiva.
Não introduza nem exponha a unidade a líquidos.
Desligue o cabo de corrente se não pretender usar a unidade por um longo período de tempo.
Certifique-se que a tomada onde o poder está ligado à Media Gigante é facilmente acessível.
Evite usar a unidade num local próximo de combustíveis.
Mude a pilha do comando sempre que esta estiver fraca ou gasta por uma do mesmo tipo. Recicle as
pilhas gastas sempre que possível. Para evitar corrosão, retire a pilha sempre que não usar o
comando por um longo período de tempo.
Verifique se as pilhas estão colocadas corretamente no controle remoto para evitar danos.
Mantenha o comando afastado da humidade excessiva; não o deixe cair.
Não use o comando com luz solar intensa.
NUNCA deixe cair, abane ou bata com a unidade.
Para evitar um sobreaquecimento, não cubra a unidade.
IMPORTANTE:
NÃO formate o disco rígido no seu computador! Isto pode causar a perda de todos os
dados do sistema da unidade e vai exigir uma reinicialização. Se quiser formatar o disco
rígido da unidade, use a ferramenta de formatação incorporada no menu de configuração
da unidade.
247
PORTUGUÊS
4. O produto
Parte da frente
1
2
3
4
5
Parte de trás
9
14
10
15
11
16
17
18
19
20
21
6
7
8
12
13
22
23
Descrição dos números:
1. LED’s indicadores de estado (PWR, REC, ACT, LAN)
2. Botões de navegação sensíveis ao toque
3. Botões de reprodução sensíveis ao toque
4. Receptor de Infravermelhos
5. Ficha Mini USB (para PC)
6. Porta USB anfitriã
7. Entrada DV
8. Botão de abertura do painel frontal
9. Saída do Sintonizador de TV Digital
10. Entrada do Sintonizador de TV Digital
11. Saída de vídeo composto AV
12. Saída coaxial digital SPDIF
Nota:
13. Interruptor principal
14. Ligação LAN (RJ45)
15. Saída de HDMI
16. Entrada AV1 (vídeo/ áudio composto)
17. Entrada de vídeo componente AV2
18. Entrada de áudio AV2 (E/D)
19. Saída de áudio AV (E/D)
20. Saída de vídeo componente AV (Y/Pb/Pr)
21. Saída S-Video
22. Saída óptica digital SPDIF
23. Entrada CA (110 ~ 240 V)
Os botões sensíveis ao toque têm as mesmas funções que as funções básicas do comando.
248
PORTUGUÊS
5. O comando
O comando usa-se para controlar a unidade. Na parte de dentro da capa deste manual pode ver uma
imagem do comando. Os números dos botões correspondem aos da tabela abaixo apresentada, a qual
exemplifica a função de cada número das teclas do comando.
Nº
Botão
Descrição
1.
2.
3.
4.
POWER (
SOURCE
MEDIA
AUDIO
5.
6.
7.
8.
9.
10.
11.
12.
13.
14.
15.
16.
17.
18.
19.
20.
21.
22.
23.
24.
25.
26.
27.
28.
29.
30.
31.
32.
33.
34.
35.
36.
ZOOM
0–9
COPY
REPEAT
GOTO
FAST REWIND (
)
PREVIOUS (
)
VOLUME +
VOLUME RETURN
, , ,
INS.REP.
PAUSE
PLAY
REC
TV SYS
SETUP
TIMESHIFT
STOP ( )
SLOW
CM.SKIP
ENTER
INFO
CHANNEL CHANNEL +
MUTE
NEXT (
)
FAST FORWARD (
)
GUIDE
A-B
DEL
ANGLE
37.
38.
SUB-T
LIVE-TV
39.
40.
41.
DV
MENU
LED
)
Liga a unidade ou fica em modo standby
Alterna entre sintonizador digital, AV & reprodução
Botão directo para o Explorador Media
Muda a faixa de áudio do DVD (quando disponível nos seus ficheiros de
DVD)
Mais ou menos zoom
Teclas numéricas
Mostra o menu de Cópia
Fixa o modo de repetição
Ir para um ponto específico da reprodução
Reprodução em modo de recuo rápido
Ficheiro / Faixa / Capítulo / Imagem anterior
Aumentar o Volume
Diminuir o Volume
Regressa ao ecrã / canal anterior
Teclas de navegação: Navega através dos menus
Anda para trás 10 segundos durante a reprodução ou paragem de tempo
Faz pausa na reprodução no modo de deslocamento de tempo
Começa a reprodução
Começa a gravar
Muda a resolução de saída da unidade.
Botão directo para o menu de Configuração
Activa o modo de deslocamento de tempo
Parar reprodução / Parar gravação / Desactivar deslocamento de tempo
Reprodução em modo lento
Avança 30 segundos durante a reprodução ou paragem de tempo
Confirma a selecção
Mostra informação sobre o canal / ficheiro
Canal anterior
Canal seguinte
Tira o som
Ficheiro / Faixa / Capítulo / Imagem seguinte
Reprodução em modo de avanço rápido
Exibe o guia EPG do sintonizador digital (DVB-T)
Inicia o ciclo de repetição A-B
Limpa a entrada/ Elimina a selecção
Muda o ângulo de visualização do DVD (quando disponível nos seus
ficheiros de DVD)
Muda as legendas (quando disponíveis no seu vídeo/ ficheiros de DVD)
Botão directo para a Live-TV (TV em directo) / alterna entre TV digital e
rádio digital
Muda para o modo de reprodução e gravação DV
Mostra o menu principal
Indica o funcionamento do comando
249
PORTUGUÊS
6. Ligar o seu Media Giant
Este capítulo explica-lhe como pode ligar o Media Giant à sua televisão, sistema de home cinema, rede,
etc.
9
10
11
12
13
14
15
16
17
18
19
20
21
22
23
Ligar o(s) cabo(s) de antena
Nota:
O sintonizador digital da unidade suporta a passagem do sinal para redireccionar o sinal DVB-T
desde a entrada do sintonizador digital até à saída do sintonizador digital.
• Desligue o cabo principal da antena da sua TV ou caixa adaptadora digital e ligue-o à entrada do
sintonizador digital [10] da unidade.
• Ligue o cabo de antena fornecido à saída do sintonizador digital [9] da unidade e à entrada do
sintonizador da sua TV ou caixa adaptadora digital.
Ligar o(s) cabo(s) de vídeo
Pode ligar a unidade à sua televisão de 5 maneiras diferentes:
- HDMI
- Vídeo Composto
- SCART (usando o cabo composto e o adaptador SCART)
- S-Video *
- Vídeo Componente *
*
Quando usar o vídeo componente ou o S-Video, apenas o sinal de vídeo é enviado para a sua
televisão.
Para enviar sinal de áudio tem de usar as fichas de áudio RCA do cabo de vídeo composto (vermelho e
branco) ou a saída de áudio digital (óptica ou coaxial) do Media Giant.
HDMI:
• Ligue o cabo HDMI à saída de HDMI [15] da unidade.
• Ligue a outra extremidade do cabo HDMI a uma entrada HDMI livre na sua televisão.
Vídeo Composto:
• Ligue o cabo de vídeo composto (amarelo, vermelho e branco) às fichas AV OUTPUT correspondentes
[11, 19] da unidade.
• Ligue a outra extremidade do cabo de vídeo composto (amarelo, vermelho e branco) à sua televisão.
250
PORTUGUÊS
SCART:
• Ligue o cabo de vídeo composto (amarelo, vermelho e branco) às fichas AV OUTPUT correspondentes
[11, 19] da unidade.
• Ligue a outra extremidade do cabo de vídeo composto (amarelo, vermelho e branco) às fichas do
adaptador Scart.
• Ligue o adaptador SCART à entrada SCART da sua televisão.
S-Video:
• Ligue o cabo de ligação de S-Vídeo à saída S-Vídeo [21] da unidade.
• Ligue a outra extremidade do cabo S-Video à entrada de S-Video da sua televisão.
Vídeo Componente:
• Ligue o cabo de vídeo componente (vermelho, verde e azul) às fichas de vídeo componente [20] da
unidade.
• Ligue a outra extremidade do cabo de vídeo Componente às fichas de vídeo Componente da sua
televisão.
Ligar o(s) cabo(s) de áudio
Pode ligar a unidade à sua televisão e/ou ao seu sistema de home cinema de 3 formas diferentes:
- Analógica, através das fichas Áudio RCA da Saída A/V
- Digital, através da Saída SPDIF Digital Coaxial
- Digital, através da Saída SPDIF Digital Óptica
Analógica:
• Ligue as fichas de áudio (vermelha e branca) do cabo de vídeo composto às fichas de áudio RCA [19] da
SAÍDA AV.
• Ligue a outra extremidade do cabo de vídeo Composto às fichas Áudio RCA da sua televisão ou receptor.
Digital Coaxial:
• Ligue o cabo digital coaxial à saída digital coaxial [12] da unidade.
• Ligue a outra extremidade do cabo Coaxial Digital à Entrada Coaxial Digital do seu receptor.
Digital Óptico:
• Ligue o cabo digital óptico à saída digital óptica [22] da unidade.
• Ligue a outra extremidade do cabo digital óptica à Entrada digital óptica do seu receptor.
Ligar outro equipamento Áudio/ Vídeo
Pode ligar uma fonte de Áudio/ Vídeo, como um VCR, Leitor de DVD ou Set-Top Box à unidade de modo a
poder gravar a partir da fonte de Áudio/ Vídeo.
O Media Giant suporta dispositivos com saída de vídeo/ áudio Composto ou Componente.
Vídeo Composto:
• Ligue o cabo de áudio / vídeo fornecido com o seu dispositivo de áudio / vídeo às correspondentes fichas
de Saída AV do dispositivo de áudio / vídeo.
• Ligue a outra extremidade do cabo de vídeo Composto (amarelo, vermelho e branco) às fichas AV1 IN
[16] da unidade.
Vídeo Componente:
• Ligue o cabo de vídeo Componente fornecido com o seu dispositivo áudio/ vídeo à saída Componente
correspondente do dispositivo de áudio/ vídeo.
• Ligue a outra extremidade do cabo de vídeo Componente (vermelho, verde e azul) às fichas AV2 IN [17]
da unidade.
251
PORTUGUÊS
Nota:
Os cabos de vídeo Componente apenas transferem vídeo, não som. Para transferir som também
tem de ligar os cabos de áudio do dispositivo de áudio/ vídeo às fichas de áudio AV2 IN [18] da
unidade.
Ligar o cabo de alimentação
Quando a unidade estiver ligada ao seu equipamento de áudio/ vídeo, pode ligar a fonte de alimentação à
unidade.
• Ligue o cabo de alimentação incluído à unidade [23] e a uma tomada que esteja livre.
• Coloque o interruptor [12] situado na parte de trás da unidade em ‘I’ para ligá-la.
A unidade liga-se.
Preparação do comando
• Retire a tampa do compartimento das pilhas, situado na parte de trás do comando.
• Insira as pilhas AAA fornecidas no comando.
• Coloque a tampa do compartimento das pilhas, situado na parte de trás do seu comando.
Notas:
-
O melhor alcance de funcionamento do comando é de cerca de 5 metros.
Aponte o comando para o receptor de infravermelhos do painel frontal da unidade.
O ângulo de recepção do receptor de infravermelhos é de ± 30 graus.
Mude as pilhas quando estas estiverem fracas ou vazias.
252
PORTUGUÊS
7. Primeira configuração
A unidade tem de ser configurada quando a ligar pela primeira vez.
• Seleccione na televisão o canal de entrada correcto ao qual está ligado o dispositivo. (HDMI, vídeo
Composto, SCART, S-Video, Vídeo Componente).
Nota:
A partir daqui, o manual baseia-se no facto da sua televisão estar sintonizada no canal de entrada
da unidade. Todos os passos descritos referem-se ao funcionamento da unidade.
• Verifique que o interruptor principal de alimentação na parte de trás da unidade está regulado para ‘I’
(Ligado).
• Ligue a unidade com o botão de alimentação na parte da frente da mesma ou com o botão ‘Power’ (1)
do comando.
• Verifique o LED indicador de estado na parte da frente do Media Giant. Se o LED estiver laranja, a
unidade está em modo de ‘Standby’. Se o LED estiver azul, o dispositivo está pronto a funcionar.
Nota:
Quando se liga, a unidade tem de iniciar. Isto pode demorar algum tempo. Durante a inicialização
aparece o ‘startup screen’ (ecrã de apresentação) do Media Giant
[ Ecrã de apresentação ]
[ Assistente de Configuração ]
Depois do Media Giant ter inicializado, tem de ser configurado para uma primeira utilização. Para o assistir
nesta primeira configuração, o Media Giant vai apresentar no seu ecrã o ‘Setup Wizard’ (Assistente de
configuração) com os passos necessários para uma primeira utilização.
O Assistente de Configuração vai apresentar os seguintes passos de configuração:
-
Menu Languages (idioma dos menus)
TV Input (Entrada de TV)
Channel Scan (Procura de Canais)
Wired LAN Setup (Configuração da LAN por cabo)
Set Time (Temporizador)
Use as teclas de navegação e a tecla ‘Enter’ (26) do comando para configurar o seu Media Giant.
Se fez uma determinada configuração e pretende agora revê-la, carregue na tecla ‘Return’ (14)
(Regressar) do comando.
253
PORTUGUÊS
Menu Languages (idioma dos menus)
Seleccione o idioma que quer usar no seu Media Giant.
TV Input (Entrada de TV)
Seleccione o seu país a partir da lista de países. Se o seu país não se encontrar listado, seleccione ‘Other’
(Outro) a partir da lista.
Dica:
Também pode procurar uma banda de frequências DVB-T específica, seleccionado ‘6M’ (600Mhz),
‘7M’ (700Mhz) ou ‘8M’ (800Mhz).
Channel Scan (Procura de Canais)
• Seleccione ‘OK’ para iniciar a procura automática de canais digitais (DVB-T) através do sintonizador
digital (DVB-T) do Media Giant. A procura automática de canais do Media Giant pode demorar algum
tempo, mas procurará & armazenará automaticamente todos os canais detectados na memória do seu
Media Giant.
• Quando a Procura de Canais tiver sido concluída, seleccione ‘OK’ para continuar com o Assistente de
Configuração.
Se pretender saltar a Procura de Canais (por exemplo, quando estiver a utilizar uma caixa adaptadora e
não possui um sinal de TV (DVB-T) digital), pode seleccionar ‘Cancel’ (Cancelar) para saltar a Procura de
Canais e continuar com o Assistente de Configuração.
Wired LAN Setup (Configuração da LAN por cabo)
A configuração de rede vai configurar o seu endereço IP para o Media Giant. Na maior parte dos casos, o
Media Giant está ligado a uma rede a qual tem um servidor DHCP (geralmente um router).
• Se tiver um servidor DHCP na sua rede, seleccione a opção ‘DHCP IP’.
• O Assistente de Configuração vai pedir-lhe para confirmar a selecção. Seleccione ‘OK’ para continuar.
• Se quiser usar um endereço IP fixo, seleccione ‘FIX IP’.
• O Assistente de Configuração vai mostrar-lhe os campos para introduzir um endereço IP fixo. Use as
teclas de navegação (15) e as teclas numéricas de 0 a 9 (6) para introduzir o endereço IP, a máscara de
sub-rede, a porta de ligação predefinida e o servidor de DNS.
• Quando os valores introduzidos estiverem correctos, carregue na tecla ‘Enter’ (26) do comando.
• O Assistente de Configuração vai pedir-lhe para confirmar a selecção. Seleccione ‘OK’ para continuar.
Se o seu Media Giant não estiver ligado a uma rede, seleccione ‘Cancel’ (Cancelar) para passar à frente
este passo e continuar com o Assistente de Configuração.
Set Time (Temporizador)
A opção ‘Set Time’ (Temporizador) permite-lhe definir a data e as horas correctas quando configurar o seu
Media Giant.
• Para configurar manualmente a data e a hora seleccione ‘Manual’ (Manual).
• Use as teclas de navegação (15) e as teclas numéricas de 0 a 9 (6) para introduzir o ano, mês, dia, hora,
minutos e segundos. Quando tiver terminado, carregue na tecla ‘Enter’ (26) do comando.
• O Assistente de Configuração vai pedir-lhe para confirmar a selecção. Seleccione ‘OK’ para continuar.
• Se tiver uma ligação à Internet activa e se o Media Giant estiver ligado à sua rede, pode seleccionar
‘Auto (Via Network)’ (Automático, por rede).
• O Assistente de Configuração vai mostrar-lhe os campos para fazer a configuração automática do tempo.
Pode manter o servidor NTP predefinido, mas se quiser usar outro servidor NTP carregue na tecla
‘Enter’(26) no campo do servidor NTP para ajustar o valor.
• Mude o Time Zone para corrigir o fuso horário do seu país.
• Coloque a ‘Daylight Savings Correction’ (correcção de horário de verão) em ‘Disable’ (Desactivar) ou
‘Enable’ (Activar) se o seu país usar o horário de verão. Quando os valores introduzidos estiverem
correctos, carregue na tecla ‘Enter’ (26) do comando.
• O Assistente de Configuração vai pedir-lhe para confirmar a selecção. Seleccione ‘OK’ para continuar.
254
PORTUGUÊS
O Assistente de Configuração está agora completo e a configuração base do Media Giant está concluída.
Nota:
Para mais definições de configuração, use a opção ‘Setup’ (Configurar) no menu principal. O menu
de configuração é explicado no capítulo 13.
Nota:
Se quiser abrir novamente o Assistente de Configuração depois de completar a configuração,
seleccione ‘Setup’ (Configurar) no menu principal e seleccione a opção ‘Restore Default’
(Restaurar predefinição). O Media Giant vai eliminar as alterações efectuadas e corre novamente o
Assistente de Configuração.
Nota:
Se comprou um Media Giant sem um disco rígido pré-formatado, o Media Giant vai apresentar o
‘Format Wizard’ (Assistente de Formatação) depois do ‘Setup Wizard’ (Assistente de
Configuração) estar concluído. Este ‘Format Wizard’ (Assistente de Formatação) é explicado neste
manual no capítulo 15.
255
PORTUGUÊS
8. Menu Principal
O menu principal permite-lhe seleccionar várias funções do Media Giant.
Nota:
Quando o menu principal não aparece, pode carregar na tecla ‘Menu’ (40) do comando para
apresentá-lo no seu ecrã.
[ Menu Principal ]
Estão disponíveis as seguintes opções no Menu Principal:
Browse Media (Pesquisa de multimédia)
Playback Recordings (Gravações de reproduções)
TV Tuner/AV Input (Sintonizador de TV/ Entrada AV)
Scheduled Recording (Gravação programada)
Setup (Configuração)
Reprodução de ficheiros multimédia
armazenados.
Reprodução e edição das suas gravações.
Visualização de Live-TV e Live AV.
Configuração de gravações programadas.
Configuração do Media Giant.
As opções acima são descritas nos próximos capítulos deste manual.
256
PORTUGUÊS
9. Pesquisa de multimédia
Se tiver seleccionado a opção ‘Browse Media’ (Pesquisa de multimédia) no menu principal, o Media Giant
vai apresentar no seu ecrã o pesquisador de multimédia:
[ Selecção da localização de armazenamento ]
[ Selecção de modo: Filmes, Música, Fotografias ]
O pesquisador de multimédia permite-lhe seleccionar o dispositivo de armazenamento a partir do qual
deseja reproduzir os seus ficheiros multimédia:
USB
Harddisk
Network
Reproduzir multimédia de um dispositivo USB ligado (através da porta USB anfitriã).
Reproduzir multimédia a partir do disco rígido interno do Media Giant.
Reproduzir multimédia de partilhas Samba/ de rede no seu ambiente de rede.
Para pesquisar no seu dispositivo USB ou no disco rígido interno, seleccione ‘USB’ ou ‘Harddisk’ (disco
rígido) na lista de localização de armazenamento.
Para pesquisar na sua rede a fim de reproduzir ficheiros de partilhas de rede, seleccione a opção
‘Network’ (Rede) da lista de localização de armazenamento.
Nota:
Para pesquisar nas suas partilhas de rede, assegure-se de que configurou correctamente as suas
partilhas de rede. Para mais informações acerca de como fazer partilhas de rede e de pesquisar
nas partilhas de rede consulte o capítulo 17.
Quando seleccionar uma localização de armazenamento, pode mudar entre ‘Movies’ (Filmes), ‘Music’
(Música) e ‘Photos’ (Fotografias) com as teclas de navegação esquerda e direita do comando.
Quando seleccionar uma destas três opções, o Media Giant vai filtrar automaticamente o conteúdo da
localização do armazenamento para que apenas os ficheiros correspondentes sejam apresentados.
Por exemplo:
Se seleccionar ‘Movies’ (Filmes), apenas os filmes serão apresentados no seu ecrã.
No menu de pesquisa multimédia pode usar as seguintes opções de pesquisa do comando:
- Teclas de navegação (15)
-
Enter
Return
Copy
Play
Next
Previous
Menu
(26)
(14)
(7)
(18)
(31)
(11)
(40)
Navegar através das pastas e ficheiros ou mudar o modo de
reprodução.
Reproduzir o ficheiro seleccionado ou abrir a pasta seleccionada.
Regressar à pasta anterior.
Abrir o menu de Cópia. (explicado num subcapítulo deste capítulo)
Reproduzir o ficheiro seleccionado.
Avançar até à página seguinte com ficheiros.
Ir para a página anterior com ficheiros.
Regressar ao Menu Principal.
Pode voltar do pesquisador de multimédia para o menu principal carregando no botão ‘Menu’ (40) do
comando.
257
PORTUGUÊS
Reprodução de filmes
Pode reproduzir filmes na sua televisão que estejam armazenados no disco rígido da unidade, num
dispositivo USB ou num local na rede através do filtro ‘Movies’ (Filmes) do Media Giant.
Se seleccionar o filtro ‘Movies’, o Media Giant só vai apresentar no seu ecrã ficheiros de filmes. Todos os
outros ficheiros não serão visíveis.
[ Modo de filme ]
• Seleccione o ficheiro que deseja reproduzir com as teclas de navegação (15) do comando.
Se seleccionou um ficheiro de filme, o pesquisador de multimédia vai apresentar uma pré-visualização com
o nome e tamanho do ficheiro no lado direito do ecrã.
• Carregue na tecla ‘Enter’ (26) ou na tecla ‘Play’ (18) do comando para começar a reprodução do
ficheiro seleccionado.
Durante a reprodução pode usar as seguintes opções de reprodução do comando:
-
Pause
(17)
Slow
(24)
Stop
(23)
Rewind
(10)
Fast Forward
(32)
Ins. Rep.
(16)
CM. Skip
(25)
Goto
(9)
Repeat
(8)
Info
(27)
Zoom
(5)
Sub-t
(37)
Audio
(4)
Volume
(12), (13)
Mute
(30)
Faz pausa ou retoma a reprodução.
Reprodução em modo lento.
Pára a reprodução.
Rebobina a reprodução.
Avança rapidamente a reprodução.
Anda para trás 10 segundos na reprodução.
Avança 30 segundos na reprodução.
Vai para um ponto específico (de tempo) no filme.
Muda a opção Repeat (Repetição) da reprodução actual.
Mostra os detalhes da reprodução.
Mais ou menos zoom
Muda as legendas (se disponíveis na sua reprodução).
Muda a faixa de áudio (se disponível na sua reprodução).
Ajusta o nível do volume.
Tira o som.
Pode voltar do pesquisador de multimédia para o menu principal carregando no botão ‘Menu’ (40) do
comando.
258
PORTUGUÊS
Função de reprodução de DVD
O Media Giant reproduz DVDs a partir do disco rígido como se fossem um DVD normal. Pode navegar pelo
menu do DVD, escolher legendas ou mudar o idioma de áudio.
Nota:
O Media Giant apenas suporta a reprodução de cópias de DVD desprotegidas. A protecção CSS não
é suportada.
• Ligue o Media Giant ao seu computador (ver capítulo 13).
• Crie uma pasta no disco rígido do Media Giant com o nome do seu filme em DVD (por exemplo: 'Filme1').
• Copie os ficheiros da pasta 'VIDEO_TS' para a pasta que criou (por exemplo: ‘Filme1’) no Media Giant.
Depois de copiar, a estrutura da pasta deve ser parecia com a que é mostrada abaixo:
- [Disco rígido do Media Giant]
|-> Filme1
(com todos os ficheiros do DVD dentro)
• Desligue o Media Giant do seu computador e ligue-o à sua televisão.
• Seleccione o ícone ‘Browse Media’ (Pesquisar multimédia) no menu principal com as teclas de
navegação (15) do comando e carregue na tecla ‘Enter’ (26) do comando para abrir assim o pesquisador
de multimédia.
• Use as teclas de navegação (15) e a tecla ‘Enter’ (26) do comando para navegar para a pasta do disco
rígido em que está armazenado o seu DVD.
• Abra a pasta de DVD que criou no disco rígido.
[ Modo de filme ]
• Seleccione o ficheiro ‘‘VIDEO_TS.IFO’ e carregue na tecla ‘Play’ (18) do comando para começar a
reprodução do DVD seleccionado.
Nota:
É também possível reproduzir directamente no Media Giant ficheiros ISO quando estes estão
armazenados na partição de multimédia NTFS. Quando se reproduz um ficheiro ISO de um DVD,
aplicam-se as mesmas características do que quando se reproduz um ficheiro IFO de um DVD.
259
PORTUGUÊS
Durante a reprodução do DVD pode usar as seguintes opções de reprodução no comando:
- Pause
(17)
- Slow
(24)
- Stop
(23)
- Teclas de navegação (15)
- Enter
(26)
- Rewind
(10)
- Fast Forward
(32)
- Previous
(11)
- Next
(31)
- Ins. Rep.
(16)
- CM. Skip
(25)
- Goto
(7)
- Repeat
(8)
- Info
(27)
- Zoom
(5)
- Angle
(36)
- Volume
(12), (13)
- Mute
(30)
- Sub-t
(37)
- Audio
(4)
Faz pausa ou retoma a reprodução.
Reprodução em modo lento.
Pára a reprodução.
Navegam pelo menu do DVD.
Confirma a selecção que fez no menu do DVD.
Rebobinar rápido.
Avanço rápido.
Capítulo anterior.
Capítulo seguinte.
Anda para trás 10 segundos na reprodução.
Avança 30 segundos na reprodução.
Vai para um ponto específico (de tempo) no filme.
Muda a opção Repeat (Repetição) da reprodução actual.
Mostra os detalhes da reprodução.
Mais ou menos zoom
Muda o ângulo do DVD (quando o DVD contém múltiplos ângulos).
Ajusta o nível do volume.
Tira o som.
Muda ou desliga as legendas do DVD.
Muda a faixa de áudio do DVD (quando o DVD tiver várias faixas áudio).
Pode voltar do pesquisador de multimédia para o menu principal carregando no botão ‘Menu’ (40) do
comando.
Reprodução de legendas
O Media Giant pode reproduzir ficheiros de legendas quando está a reproduzor ficheiros de vídeo AVI.
Para reproduzir ficheiros AVI com legendas, tem de atribuir o mesmo nome que o ficheiro AVI ao ficheiro
das legendas, por exemplo:
Nome do filme:
Nome das legendas:
My_Movie_With_Sub.AVI
My_Movie_With_Sub.SRT
• Seleccione o ficheiro que deseja reproduzir com os botões de navegação do comando.
• Carregue na tecla ‘Enter’ (26) ou na tecla ‘Play’ (18) do comando para começar a reprodução do
ficheiro seleccionado.
O ficheiro AVI vai começar a ser reproduzido com o ficheiro de legendas correspondente.
Para desactivar/ activar as legendas durante a reprodução, carregue no botão ‘Sub-t’ (37) do comando.
Pode voltar do pesquisador de multimédia para o menu principal carregando no botão ‘Menu’ (40) do
comando.
260
PORTUGUÊS
Reprodução de música
Pode reproduzir ficheiros de música na sua televisão que estejam armazenados no disco rígido da unidade,
num dispositivo USB ou num local na rede através do filtro ‘Music’ (Música) do Media Giant.
Se seleccionar o filtro ‘Music’, o Media Giant só vai apresentar no seu ecrã ficheiros de música. Todos os
outros ficheiros não serão visíveis.
[ Modo de música ]
• Seleccione o ficheiro que deseja reproduzir com as teclas de navegação (15) do comando.
Se seleccionou um ficheiro de música, o pesquisador de multimédia vai apresentar a respectiva etiqueta de
informação ID3 (quando disponível) com o nome e tamanho do ficheiro no lado direito do ecrã.
• Carregue na tecla ‘Enter’ (26) ou na tecla ‘Play’ (18) do comando para começar a reprodução do
ficheiro seleccionado.
Durante a reprodução pode usar as seguintes opções de reprodução do comando:
-
Pause
(17)
Stop
(23)
Rewind
(10)
Fast Forward
(32)
Repeat
(8)
Info
(27)
Volume
(12), (13)
Mute
(30)
Faz pausa ou retoma a reprodução.
Pára a reprodução.
Rebobina a reprodução.
Avança rapidamente a reprodução.
Muda a opção Repeat (Repetir) do ficheiro/ pasta actual.
Mostra os detalhes da reprodução.
Ajusta o nível do volume.
Tira o som.
Pode voltar do pesquisador de multimédia para o menu principal carregando no botão ‘Menu’ (40) do
comando.
261
PORTUGUÊS
Reprodução das suas fotografias e imagens
Pode reproduzir as suas fotografias e imagens na sua televisão que estejam armazenados no disco rígido da
unidade, num dispositivo USB ou num local na rede através do filtro ‘Photos’ (Fotografias) do Media Giant.
Se seleccionar o filtro ‘Photos’, o Media Giant só vai apresentar no seu ecrã ficheiros de fotografias e de
imagens. Todos os outros ficheiros não serão visíveis.
[ Modo de fotografia]
• Seleccione o ficheiro que deseja reproduzir com as teclas de navegação (15) do comando.
Se seleccionou um ficheiro de fotografia, o pesquisador de multimédia vai apresentar uma pequena prévisualização com o nome e tamanho do ficheiro no lado direito do ecrã.
• Carregue na tecla ‘Enter’ (26) ou na tecla ‘Play’ (18) do comando para começar a reprodução do
ficheiro seleccionado.
Durante a reprodução pode usar as seguintes opções de reprodução do comando:
-
Pause
Stop
Teclas de navegação
Previous
Next
Repeat
Info
Zoom
(17)
(23)
(15)
(31)
(21)
(8)
(27)
(5)
Faz pausa ou retoma a apresentação de diapositivos.
Pára a apresentação de diapositivos.
Roda a fotografia apresentada.
Reproduz o ficheiro anterior da pasta actual.
Reproduz o ficheiro seguinte da pasta actual.
Muda a opção Repeat (Repetir) do ficheiro/ pasta actual.
Mostra os detalhes da apresentação de diapositivos.
Mais ou menos zoom
Pode voltar do pesquisador de multimédia para o menu principal carregando no botão ‘Menu’ (40) do
comando.
Dica:
No Menu Setup (Configuração), é adicionada uma opção para alterar a transição da apresentação
das suas fotos.
Consulte o capítulo 13 para a opção ‘Transition Effect’ (Efeito de Transição).
262
PORTUGUÊS
Modo de cópia
Se desejar copiar dados de uma localização para outra localização (por exemplo: de um dispositivo USB
para o disco rígido interno), pode usar o modo de Cópia do Media Giant.
Para ter acesso ao modo de Cópia carregue na tecla ‘Copy’ (7) do comando quando se encontrar no
pesquisador de multimédia. O menu de Cópia aparece no seu ecrã:
[ Menu de cópia ]
[ Menu de cópia – Assistente de cópia ]
Pode seleccionar entre ‘USB’, ‘Harddisk’ (disco rígido) ou ‘Network’ (rede) como fonte da sua cópia. Os
destinos disponíveis são ‘USB’, ‘Harddisk’ (disco rígido) e ‘Recycle’ (ficheiros para apagar).
Primeiro seleccione a fonte, carregando para cima ou para baixo mas teclas de navegação (15) do
comando. Quando tiver seleccionado a fonte correcta, carregue na tecla de navegação direita (15) e use as
teclas para cima e para baixo (15) para seleccionar o destino.
Nota:
Pode ver, pelos limites demarcados, se a secção Fonte ou Destino do menu de Cópia está activa.
Nota:
Não é possível copiar de ‘USB’ para ‘USB’, ou de ‘Harddisk’ para ‘Harddisk’ (de disco rígido para
disco rígido).
• Quando a fonte e o destino estiverem correctos, carregue na tecla ‘Enter’ (26) do comando para
prosseguir com o Assistente de Cópia.
• Navegue pela fonte até ter encontrado os ficheiros ou pastas que quer copiar. Pode navegar através das
pastas com as teclas de navegação (8) e com a tecla ‘Enter’ (26) do comando.
• Marque os ficheiros ou pastas que deseja copiar com a tecla ‘Play’ (18) do comando. Os ficheiros ou
pastas marcados vão mostrar um ícone demarcado atrás do nome.
• Quando os ficheiros ou pastas fonte tiverem sido marcados, carregue na tecla de navegação direita (15)
do comando para mudar para a secção de destino.
Nota:
Não é possível seleccionar como destino a partição multimédia NTFS do Media Giant uma vez que
não é possível escrever na partição multimédia NTFS.
• Navegue através da secção de destino até ter encontrado a exacta localização para onde vai copiar.
Pode navegar através das pastas com as teclas de navegação (8) e com a tecla ‘Enter’ (26) do comando.
• Quando tiver encontrado a localização correcta, carregue na tecla de navegação direita (15) do
comando para dar início ao processo de cópia.
263
PORTUGUÊS
• O assistente de cópia vai pedir-lhe para confirmar o processo de cópia. Seleccione ‘OK’ para continuar
com o processo de cópia.
[ Confirmação do processo de cópia ]
[ Processo de cópia em progresso ]
Quando o processo de cópia estiver completo, o utilizador é notificado com uma mensagem no ecrã.
É também possível eliminar os ficheiros através do menu de Cópia.
Quando desejar eliminar ficheiros, seleccione ‘Recycle’ (Reciclagem) como destino.
Marque os ficheiros ou pastas que deseja eliminar e carregue na tecla de navegação direita (15) do
comando; é-lhe apresentada uma janela de confirmação para eliminar os ficheiros ou pastas seleccionados.
Seleccione ‘OK’ para eliminar os ficheiros ou pastas seleccionados.
[ Menu de cópia – Assistente de eliminação]
[ Confirmação da eliminação ]
264
PORTUGUÊS
10. Gravações de reproduções
Quando tiver seleccionado a opção ‘Playback Recordings’ (Gravações de Reprodução) no menu Principal, o
Media Giant pedir-lhe-á para escolher entre ‘Digital’ (Digital) e ‘Analog’ (Analógico).
• Se seleccionar ‘Digital’ (Digital), o Media Giant exibirá as gravações efectuadas através do sintonizador
digital (DVB-T) do Media Giant.
• Se seleccionar ‘Analog’ (Analógico), o Media Giant exibirá todas as gravações efectuadas através das
entradas analógicas do Media Giant (Composite-in, Component-in, FireWire-in).
Quando tiver seleccionado ‘Digital’ (Digital) ou ‘Analog’ (Analógico), o Media Giant exibirá a lista de
gravações da opção seleccionada no seu ecrã:
[ Seleccionar Gravação ]
[ Lista de gravações ]
Cada vídeo é indicado com uma imagem reduzida (primeiro enquadramento da gravação), nome, hora e
data e qualidade de gravação.
Uma estrela amarela por detrás da sua gravação significa que a gravação é nova e ainda não foi vista.
Quando tiver assistido à gravação, a estrela amarela desaparecerá.
Pode navegar pelas suas gravações com os botões de navegação para cima e para baixo (15) no controlo
remoto e reproduzir as gravações, premindo o botão ‘Enter’ (Confirmar) (26) ou o botão ‘Play’
(Reproduzir) (18) no controlo remoto quando uma gravação for seleccionada.
Durante a reprodução, pode utilizar as seguintes opções de reprodução no controlo remoto:
-
Pause
(17)
Slow
(24)
Stop
(23)
Rewind
(10)
Fast Forward
(32)
Ins. Rep.
(16)
CM. Skip
(25)
Previous
(11)
Next
(31)
Repeat
(8)
Info
(27)
Goto
(9)
Zoom
(5)
Audio
(4)
Volume
(12), (13)
Mute
(30)
Pausa ou retoma a reprodução.
Reprodução em câmara lenta.
Parar a reprodução.
Retroceder a reprodução.
Avançar Rapidamente a reprodução.
Retroceder 10 segundos na reprodução.
Avançar 30 segundos na reprodução.
Reproduzir o capítulo anterior ou a gravação anterior.
Reproduzir o capítulo seguinte ou a gravação seguinte.
Alterar a opção Repeat (Repetir) da reprodução corrente.
Exibir os detalhes da reprodução.
Ir para um ponto específico (hora) no filme.
Aumentar / diminuir
Mudar a faixa de áudio (se disponível para a sua reprodução).
Ajustar o nível do volume.
Remover o som.
265
PORTUGUÊS
Com os botões de navegação esquerda e direita (15) no controlo remoto, pode navegar pelas opções no
menu superior da lista de gravações para seleccionar diversas características:
Play
Delete
Rename
Sorting
Edit
Reproduz as suas gravações.
Elimina as suas gravações.
Muda o nome das suas gravações.
Muda a classificação das suas gravações.
Edita as suas gravações (explicado no seguinte sub-capítulo).
O menu ‘Edit’ (Editar) explicado
Nota:
As gravações digitais não podem ser editadas pela Media Giant. Como tal, o menu Edit contém
diversas opções que não se encontram disponíveis quando seleccionou ‘Digital’ (Digital) no ecrã
‘Playback Recordings’ (Gravações de Reprodução).
O Media Giant apenas permite-lhe aceder à opção ‘Copy to FAT32 partition’ (Copiar para a
partição FAT32) no menu Edit quando tiver seleccionado ‘Digital’ (Digital) no ecrã ‘Playback Recordings’
(Gravações de Reprodução).
O menu ‘Edit’ (Editar) tem várias opções para modificar as suas gravações, que são explicadas a seguir:
[ Gravações – Menu editar]
- Set Thumbnail
Com a opção ‘Set Thumbnail’ (Definir miniatura) pode reproduzir o seu
filme e escolher a sua imagem favorita como miniatura para a sua
gravação.
- A-B Erase
Com a opção ‘A-B Erase’ (Apagar A-B) pode marcar uma parte do seu
filme (por exemplo: um anúncio) e apagá-la da sua gravação.
- Split Title
Com a opção ‘Split Title’ (Dividir título) pode dividir uma gravação em
duas partes (por exemplo: quando tiver gragavo dois programas numa
gravação programada).
- Merge Title
Com a opção ‘Merge Title’ (Fusão de títulos) pode fundir duas gravações
numa só.
- Add Chapter Mark
Com a opção ‘Add Chapter Mark’ (Adicionar marca de capítulo) pode
adicionar marcas de capítulo à sua gravação. Isto permite-lhe passar
rapidamente para uma parte específica da sua gravação.
Nota:
Também pode activar a opção ‘Auto Chapter’ (Capítulo automático) no menu de
configuração para automaticamente adicionar marcas de capítulo à sua gravação.
266
PORTUGUÊS
- Remove Chapter Mark
Com a opção ‘Remove Chapter Mark’ (Remover marca de capítulo) pode
remover marcas de capítulo da sua gravação. Esta opção pode ser útil
quando configurou o Media Giant para fazer marcas de capítulo
automáticas mas que agora quer retirá-las da sua gravação.
- Copy to FAT32 partition
Com a opção ‘Copy to FAT32 Partition’ (Copiar para a partição FAT32)
pode copiar a sua gravação da partição de gravação para a pasta ‘REC’
da partição multimédia do Media Giant.
Quando a gravação é copiada para a partição FAT32 pode depois
reproduzir, copiar ou editar a sua gravação no seu computador quando o
Media Giant está ligado por USB ou então pode enviá-la através da rede
para um cliente A/V UPnP (tal como o Conceptronic C54WMP ou o
Conceptronic CFULLHDMA).
Nota:
Para mais informações acerca da característica A/V UPnP do Media Giant consulte o capítulo
16.
267
PORTUGUÊS
11. Sintonizador de TV/ Entrada AV
Através da opção ‘TV Tuner / AV Input’ (Sintonizador de TV / Entrada AV) no menu principal, pode
visualizar e gravar a partir do sintonizador de TV digital (DVB-T) ou das origens da Entrada AV do Media
Giant.
Recomendação:
Pode facilmente ter acesso ao ecrã de Live-TV a partir de qualquer menu do Media
Giant carregando na tecla ‘Live-TV’ (38) do seu comando.
Quando selecciona a opção ‘TV Tuner / AV Input’, o Media Giant vai mostrar a imagem Live-TV do
sintonizador de TV. Enquanto estiver a ver Live-TV pode mudar os canais carregando nas teclas ‘Channel +’
(29) ou ‘Channel -’ (28) do comando.
Com a tecla ‘Source’ (2) do comando pode mudar entre o sintonizador de TV, entrada de vídeo Composto
ou entrada de vídeo Componente. A fonte aparece por breves instantes no canto superior direito do ecrã.
Deslocamento de tempo
O Media Giant permite o deslocamento de tempo. A característica de deslocamento de tempo faz pausa na
Live-TV ou Live Audio/Video gravando o canal/ entrada actual quando se activa a opção de deslocamento
de tempo.
Carregue na tecla ‘Timeshift’ (22) do comando para iniciar a função de deslocamento de tempo.
Quando a função de deslocamento de tempo é iniciada, faz-se uma pausa na Live TV ou Live A/V e a
unidade grava o canal de fundo.
[ Deslocamento de tempo: Inicialização ]
Nota:
[ Deslocamento de tempo: Activo ]
Quando o modo de deslocamento de tempo é activado, a barra de progresso que aparece no ecrã
mostra a memória máxima para o tempo de deslocamento. Se quiser ajustar o tamanho dessa
memória (maior ou menor), tem de formatar novamente o disco rígido do Media Giant de modo a
ajustar o tamanho da partição de memória de deslocamento de tempo.
Pode encontrar mais informação sobre a formatação no capítulo 15.
Durante o modo de deslocamento de tempo pode usar as seguintes teclas do comando:
- Play
(18)
Reproduzir a memória de deslocamento de tempo.
- Pause
(17)
Fazer pausa ou retomar a reprodução.
- Slow
(24)
Reprodução em modo lento.
- Stop
(23)
Parar a reprodução.
- Rewind
(10)
Rebobinar a reprodução.
- Fast Forward
(32)
Avançar rapidamente a reprodução.
- Ins. Rep.
(16)
Andar para trás 10 segundos na reprodução.
- CM. Skip
(25)
Avançar 30 segundos na reprodução.
- Info
(27)
Mostrar ou esconder a informação acerca da memória do modo de
deslocamento de tempo.
- Volume
(12), (13)
Ajustar o nível do volume.
- Mute
(30)
Tirar o som.
268
PORTUGUÊS
Deslocamento de tempo permanente
No menu de configuração do Media Giant pode activar a função de ‘Permanent Timeshifting’
(Deslocamento de tempo permanente). Quando activar este modo significa que o modo de deslocamento de
tempo estará sempre activo e permite-lhe fazer pausa instantaneamente na reprodução ou usar as teclas
do comando acima indicadas para ‘saltar’ directamente para a memória do modo de deslocamento de
tempo.
Gravação
Quando vê Live TV ou Live A/V através da unidade, pode começar a gravar o canal actual carregando na
tecla ‘Rec’ (19) do comando. A unidade começa a gravar até que carregue na tecla ‘Stop’ (23) do
comando.
Durante a gravação, o LED de ‘REC’ no painel frontal acende-se.
Nota:
A unidade detecta protecção contra cópias na fonte que foi ligada, como por exemplo a protecção
MacroVision em DVDs. Quando uma fonte ligada estiver protegida contra cópia, a unidade vai
impedir a gravação e apresenta uma mensagem quando se carregar no botão de gravação.
Nota:
Por defeito, o Media Giant grava em HQ ((High Quality - alta qualidade). Pode mudar a qualidade
de gravação no menu de configuração.
Nota:
Durante a gravação não pode mudar o canal actual.
Quando carrega na tecla ‘Rec’ (19) (Gravar) durante uma gravação, o tempo de gravação é estabelecido
em 30 minutos a começar a partir do momento em que carregou pela segunda vez na tecla ‘Rec’.
A mensagem 30 min.’ aparece no seu ecrã.
[ Gravação normal ]
[ Temporizador de gravação activado ]
Carregue novamente na tecla ‘Rec’ (19) (Gravar) para aumentar o tempo em mais 30 minutos até a um
limite máximo de 240 minutos. A unidade continua a gravar até passar o tempo definido, ou até carregar
no botão ‘Stop’ (23) do comando.
Rádio Digital
O Media Giant também suporta rádio digital, a qual é transmitida através do sinal digital (DVB-T).
Pode ouvir estações de rádio digitais através das colunas da sua TV ou através do receptor que se encontra
ligado ao seu Media Giant.
Para ouvir estações de rádio digitais.
Quando estiver a utilizar a função de sintonizador Digital, também pode ouvir canais de rádio digitais.
• Seleccione a opção ‘TV Tuner / AV Input’ (Sintonizador de TV / Entrada AV) no menu principal do Media
Giant.
O Media Giant exibirá a imagem Live-TV a partir do sintonizador de TV.
• Prima o botão ‘Live-TV’ (TV em Directo) (38) no controlo remoto para mudar para o modo de Rádio
Digital.
A função do rádio digital será activada.
• Pode utilizar os botões ‘Channel +’ (Canal +) (29) ou ‘Channel -’ (Canal -) (28) para seleccionar uma
estação de rádio digital.
• Para retornar ao modo de TV Digital, prima novamente o botão ‘Live-TV’ (TV em Directo) (38) no
controlo remoto.
269
PORTUGUÊS
EPG (Electronic Program Guide) (Guia Electrónico de Programas)
O sintonizador digital (DVB-T) do Media Giant adiciona o EPG (Guia Electrónico de Programas) às funções do
Media Giant.
Pode aceder ao guia do EPG enquanto assiste à Live-TV, premindo o botão “Guide” (Guia) (33).
O guia EPG será exibido no seu ecrã:
[ Guia Electrónico de Programas ]
[ Guia Electrónico de Programas : Gravação Agendada ]
Pode utilizar os seguintes botões no controlo remoto para operar o guia do EPG:
-
Left / right arrow
Up / down arrow
Previous
Next
Rewind
Fast Forward
Rec
(15)
(15)
(11)
(31)
(10)
(32)
(19)
Muda a data seleccionada no guia do EPG.
Muda o programa seleccionado no guia do EPG.
Muda para o canal anterior.
Muda para o canal seguinte.
Percorre a informação do programa.
Percorre a informação do programa.
Agenda o programa seleccionado para gravação.
Se premir o botão ‘Rec’ (19), o programa seleccionado será adicionado às gravações agendadas do Media
Giant. O programa seleccionado será indicado com um marcador vermelho, indicando que está agendado
para gravação.
Pode encontrar a gravação agendada no menu ‘Scheduled Recording’ (Gravação Agendada) do Media
Giant, descrito no capítulo 12.
Pode retornar para Live-TV premindo o botão ‘Guide’ (Guia) (33) no controlo remoto.
270
PORTUGUÊS
Controlo de DV
A ligação FireWire mini atrás do painel frontal do Media Giant permite-lhe ligar a sua câmara DV
directamente ao Media Giant e ver ou gravar os seus vídeos caseiros contidos no disco rígido interno.
• Ligue a sua câmara DV à ligação FireWire mini [7] na parte da frente do Media Giant.
• Ligue a sua câmara DV e coloque-a em modo ‘Playback’.
• Carregue na tecla ‘DV’ (39) do comando para iniciar o modo de ‘DV Control’ (Controlo de DV).
O Media Giant vai apresentar os comandos de DV no seu ecrã:
[ Painel de controlo DV ]
Pode seleccionar os botões do painel de controlo DV através das teclas de navegação (15) do comando.
Pode confirmar a sua selecção carregando na tecla ‘Enter’ (26) do comando.
Se tiver seleccionado ‘Play’ na janela de Controlo de DV e o seu vídeo estiver a ser reproduzido, pode
carregar na tecla ‘Rec’ (19) do comando para começar a gravação do seu filme DV para o disco rígido.
Recomendação:
Quando estiver a gravar, pode esconder o Painel de Controlo DV carregando na tecla
‘DV’(39) do comando. O painel aparece novamente após carregar uma segunda vez
na tecla ‘DV’.
Pode parar esta gravação carregando na tecla ‘Stop’ (23) do comando.
Os vídeos gravados são listados na lista de gravações tal como se descreve no capítulo 10.
Para sair do modo de Controlo DV carregue na tecla ‘Return’ (14) (voltar) do comando.
271
PORTUGUÊS
12. Gravação programada
Pode programar a unidade para gravar canais em horas específicas. Pode programar até 8 gravações
agendadas na unidade.
Dica:
Pode agendar gravações facilmente através do guia de EPG do Media Giant. O guia EPG é explicado
no capítulo 11 do presente manual.
• Seleccione a opção ‘Scheduled Recording’ (Gravação programada) no menu principal.
O ecrã de Gravação Programada aparece na sua televisão.
[ Menu de gravação programada ]
[ Adicionar uma gravação programada ]
O menu de Gravação Programada contém 5 opções que podem ser seleccionadas com as teclas de
navegação direita e esquerda (15) do comando:
Add
Edit
Delete
Status
History
Adicionar uma nova gravação programada
Editar uma gravação programada existente
Eliminar uma gravação programada
Mudar o estado da lista de gravações programadas
Mostrar o histórico da lista de gravações programadas
Adicionar ou editar uma gravação programada
Quando selecciona as opções ‘Add’ (Adicionar) ou ‘Edit’ (Editar) no menu e depois carrega em ‘Enter’ (26)
no comando, pode adicionar uma nova gravação programada ou editar uma já existente.
Por defeito, o campo ‘Source’ (Fonte) está seleccionado.
Todas as opções podem ser alteradas com as teclas de navegação para cima e para baixo (15) e pode ainda
seleccionar outro campo com as teclas de navegação esquerda e direita (15).
• Seleccione a fonte correcta para a sua gravação. Essa fonte pode ser um canal de televisão, a entrada
de vídeo Composto ou a entrada de vídeo Componente.
• Seleccione a data correcta para a sua gravação.
• Seleccione a data de início correcta para a sua gravação.
• Estabeleça o tamanho da sua gravação.
• Seleccione a opção Repetir para a sua gravação. Pode seleccionar as seguintes opções:
‘Once’ (Uma vez), ‘Everyday’ (Todos os dias), ‘Mon-Fri’ (de segunda a sexta-feira), ‘Mon-Sat’ (de
segunda a sábado), ‘Sun’ (Domingo), ‘Mon’ (Segunda-feira), ‘Tue’ (Terça-feira), ‘Wed’ (Quarta-feira),
‘Thu’ (Quinta-feira), ‘Fri’ (Sexta-feira) ou ‘Sat’ (Sábado).
Pode saltar o campo ‘Device’ (Dispositivo) uma vez que apenas pode gravar no disco rígido interno.
272
PORTUGUÊS
• Configure a qualidade de gravação. Pode escolher entre ‘HQ’, ‘SP’, ‘LP’, ‘EP’ e ‘SLP’.
Nota:
Mudar o campo ‘Quality’ (Qualidade) influencia a qualidade da sua gravação e a quantidade de
espaço que necessita para essa gravação. O tempo de gravação disponível para cada tipo de
qualidade aparece na parte superior esquerda da janela de gravações programadas.
• Configure a opção ‘Nicam’ para ‘on’ (activa) ou ‘off’ (inactiva).
A opção Nicam deve estar configurada para ‘on’ (activa) se a fonte que deseja gravar for uma emissão
com duas línguas de áudio diferentes (por exemplo: Eurosport).
• Quando todas as opções para a sua gravação tiverem sido configuradas, carregue na tecla ‘Enter’ (26)
do comando para guardar o que programou.
• Aparece uma mensagem de confirmação no seu ecrã. Seleccione ‘Confirm’ (Confirmar) e carregue na
tecla ‘Enter’ (26) do comando para guardar o que programou.
A gravação está agora programada como uma gravação programada e a unidade começa a gravar no canal e
à hora programada, mesmo quando o dispositivo está em ‘Standby’.
Nota:
Durante a gravação não pode mudar o canal actual.
273
PORTUGUÊS
13. Configuração
Quando seleccionar a opção ‘Setup’ (Configuração) no menu principal, o menu de configuração aparece no
seu ecrã. A explicação seguinte mostra todas as configurações disponíveis com a respectiva descrição.
Pode mudar entre as várias opções do menu de configuração com as teclas de navegação do comando.
[ Menu de configuração – Vídeo ]
[ Menu de configuração – Gravação ]
Configuração A/V:
Aspect Ratio
Brightness
Contrast
Transition
Audio Setup
Muda o rácio de aspecto do sinal de saída do Media Giant.
(‘Letterbox 4:3’, ‘Pan-Scan 4:3’, ‘Widescreen 16:9’)
Muda o brilho do sinal de saída do Media Giant.
Muda o contraste do sinal de saída do Media Giant.
Muda a transição entre as apresentações das fotos.
Muda a configuração áudio do Media Giant.
Modo Nocturno Activa ou desactiva o áudio do Modo Nocturno. (Off (Desligado),
On (Ligado), Comfort (Conforto)).
Saída Digital
Configura a saída de áudio digital. (HDMI-LPCM, HDMI-RAW,
SPDIF-LPCM, SPDIF-RAW)
Gravação:
Quality
Nota:
Mudar a qualidade de gravação predefinida. (‘HQ’, ‘SP’, ‘LP’, ‘EP’ e ‘SLP’)
Mudar o campo ‘Quality’ (Qualidade) influencia a qualidade da sua gravação e a quantidade de
espaço que necessita para essa gravação. As diferentes qualidades precisam do seguinte espaço em
disco para uma hora de vídeo:
HQ:
4,85 GB (4850 MB)
2,42 GB (2420 MB)
SP:
LP:
1,62 GB (1620 MB)
1,21 GB (1210 MB)
EP:
SLP:
0,80 GB (800 MB)
Auto Chapter
Mudar as configurações de Auto Chapter (Capítulo automático) A função de
Capítulo Automático adiciona automaticamente marcas de capítulos à sua
gravação, para que possa facilmente ir para um determinado ponto da sua
gravação durante a reprodução da mesma.
Permanent Timeshifting Activar ou desactivar a função de deslocamento de tempo permanente. Quando
activar este modo, significa que o modo de deslocamento de tempo estará
sempre activo e permite-lhe fazer pausa instantaneamente na reprodução ou usar
as teclas do comando para ‘saltar’ directamente para a memória do modo de
deslocamento de tempo.
274
PORTUGUÊS
[ Menu de configuração – Rede ]
[ Menu de configuração – Sistema ]
Rede:
LAN Preference **
Muda a ligação LAN preferida: Cabo ou auto (por Powerline)
Quando escolher ‘Cable’ (cabo), o Media Giant vai usar sempre a porta LAN como
ligação de rede.
Quando escolher ‘Auto (Via Powerline)’ (Automático (por Powerline)), o Media
Giant vai usar a função de Powerline se estiver disponível uma rede Powerline. Se
não existir uma rede Powerline disponível, a porta LAN será usada.
Nota: Quando o Media Giant estiver ligado tanto por cabo LAN e por Powerline, a ligação de rede
predefinida será a Powerline. Quando o desempenho da ligação de rede Powerline diminuir para
menos de 1 Mbps, o Media Giant vai mudar automaticamente para o modo de ligação por cabo.
Durante a ligação por cabo, o Media Giant vai continuar a verificar o desempenho da ligação de
rede Powerline. Quando o desempenho aumentar para mais de 1 Mbps, o Media Giant vai mudar
do modo de ligação por cabo para o modo de ligação Powerline.
Wired Lan Setup
No ‘Wired Lan Setup’ (Configuração da ligação LAN por cabo) pode configurar o
endereço IP do Media Giant.
Quando seleccionado, pode escolher entre ‘Cancel’ (Cancelar), ‘DHCP IP (Auto)’ ou
‘Fix IP (Manual)’ (IP fixo (manual)).
Se tiver um servidor DHCP na sua rede, seleccione a opção ‘DHCP IP’.
Se quiser usar um endereço IP fixo, seleccione ‘FIX IP’.
O Assistente de Configuração vai mostrar-lhe os campos para introduzir um endereço
IP fixo. Use as teclas de navegação (15) e as teclas numéricas de 0 a 9 (6) para
introduzir o endereço IP, a máscara de sub-rede, a porta de ligação predefinida e o
servidor de DNS.
Quando os valores introduzidos estiverem correctos, carregue na tecla ‘Enter’ (26)
do comando.
Media Server
Muda o nome do Media Giant na rede.
Quando seleccionado, pode escolher entre ‘Server/Host name’ (Nome do
Servidor/Alojamento) e ‘Group name’ (Nome do grupo).
Server/Host name
Muda o nome do Media Giant.
O nome do Media Giant permite aos clientes UPnP A/V (tais
como o C54WMP da Conceptronic ou o CFULLHDMA da
Conceptronic) reproduzir ficheiros multimédia através da
rede a partir do disco rígido do Media Giant e permite ao
computador no ambiente da sua rede aceder ao servidor
Samba do Media Giant.
Group name
Muda o nome do grupo de trabalho do Media Giant.
Nota:
Poderá obter mais informações sobre a funcionalidade do Servidor UPnP A/V
do Media Giant no capítulo 16.
Poderá obter mais informações sobre a funcionalidade do Servidor Samba do
Media Giant no capítulo 18.
275
PORTUGUÊS
Sistema:
Menu Language
Seleccione o idioma que deseja utilizar quando estiver a operar o Media Giant.
Set Time
Mudar a hora e a data.
Formato HDD
Formata o disco rígido interno (Ver capítulo 15).
Timer Setup Temporizador de apresentação de diapositivos: Mudar os intervalos de apresentação
durante uma apresentação de diapositivos.
Temporizador de protecção de ecrã:
Mudar o tempo de inactividade necessário
para activar a protecção de ecrã.
Firmware Upgrade
Actualizar o firmware do Media Giant.
Pode fazer-se uma actualização do firmware através da Internet ou através de um
dispositivo de armazenamento USB. A opção de actualização do firmware pode ser
configurada como ‘Auto’ ou ‘Manual’.
Quando se selecciona ‘Auto’ (predefinição), o Media Giant vai procurar
aleatoriamente novo firmware online e actualiza automaticamente o firmware
quando o Media Giant não estiver a fazer nenhuma gravação / reprodução.
Quando se selecciona ‘Manual’, pode procurar-se novo firmware manualmente.
Nota: Para verificar a sua versão de firmware actual, carregue na tecla ‘Info’ (27) do comando quando
estiver no menu principal. A versão actual do firmware aparece no seu ecrã.
Restore Default
Restaura as definições predefinidas do Media Giant e inicia o Assistente de
Configuração para poder proceder a uma nova configuração da unidade.
[ Menu Configuração – Configuração TV ]
[ Editar Canal ]
Configuração da TV:
TV Input
Channel Scan
Manual Tune
TV Program
Seleccione o seu país a partir da lista de países. Se o seu país não se encontrar
listado, seleccione ‘Other’ (Outro) a partir da lista.
Dica: Também pode procurar uma banda de frequências DVB-T específica,
seleccionado ‘6M’ (600Mhz), ‘7M’ (700Mhz) ou ‘8M’ (800Mhz).
Inicia uma procura de canais automática. A procura automática de canais do Media
Giant pode demorar algum tempo, mas procurará e armazenará automaticamente
todos os canais detectados na memória do seu Media Giant.
Com a característica da Sintonia Manual, pode adicionar novos canais à sua lista de
canais existentes (com a opção ‘Add’ (Adicionar)) , remover canais a partir da sua
lista de canais (com a opção ‘Skip’ (Saltar)) ou atribuir nomes aos canais detectados
(com a opção ‘Edit’ (Editar)).
Com a opção Programa de TV, pode configurar o Media Giant de modo a exibir todos
os canais DVB-T (incluíndo os canais pagos que não podem ser reproduzidos no Media
Giant) ou apenas mostrar os canais Free (gratuitos) (FTA).
276
PORTUGUÊS
14. Ligação USB ao computador
Pode ligar a unidade ao seu computador para copiar dados (filmes, música, imagens, registos, etc.) de e
para o disco rígido interno.
Nota:
No nosso exemplo abaixo, estamos a usar um computador com o Windows XP, mas a unidade pode
ser usada em computadores que suportem USB e a função de leitura e escrita em sistemas de
ficheiros FAT32 e NTFS.
Ligue a unidade ao seu computador
• Ligue o cabo USB para cabo mini-USB à porta na parte da frente da unidade e a uma porta USB livre do
seu computador.
• Ligue a unidade no interruptor principal de alimentação da parte de trás da unidade. A unidade vai ser
automaticamente reconhecida e instalada e aparece como unidade extra no seu computador.
Nota:
Quando o disco rígido estiver dividido com uma partição multimédia (apenas FAT32), só vai ser
visível uma letra de unidade. Quando o disco rígido estiver dividido em duas partições multimédia
(FAT32 e NTFS), o Media Giant vai mostrar duas letras de unidade.
Reprodução de gravações no seu computador
Para reproduzir gravações no seu computador precisa de primeiro de copiar as gravações da partição de
gravação para a partição de multimédia. Pode fazer isto através do comando ‘Copy to FAT32 Partition’
(Copiar para a partição FAT32), o qual pode encontrar no menu ‘Playback Recordings’ (Reprodução de
gravações) explicado no capítulo 10.
Quando as suas gravações são copiadas para a partição FAT32, pode reproduzir os programas gravados no
seu computador quando a unidade estiver ligada ao computador.
Desligar a unidade do seu computador
• Clique uma vez no ícone “Safe Removal” (Remover o hardware com segurança) da bandeja do sistema.
• Seleccione “Stop USB Mass Storage Device” (Parar o dispositivo de armazenamento USB) quando
aparecer.
• Espere pela mensagem “Safe to remove Hardware” (É seguro remover o hardware).
• Desligue o cabo USB.
277
PORTUGUÊS
15. Informação sobre a partição e assistente de formatação
O Media Giant é entregue, na maior parte das vezes, com um disco rígido pré-formatado. O disco rígido é
formatado com a configuração de origem do Media Giant e vai dividir o disco rígido da seguinte forma:
Partição do modo de deslocamento de tempo:
Partição de gravação:
Partição multimédia FAT32:
Partição multimédia NTFS:
~ 4,85 GB
50% do espaço do disco rígido.
25% do espaço do disco rígido.
25% do espaço do disco rígido.
Exemplos com:
500 GB
750 GB
1000 GB
Partição do modo de
deslocamento de tempo:
Partição de gravação:
Partição multimédia FAT32:
Partição multimédia NTFS:
~ 4,85 GB
~ 250 GB
~ 125 GB
~ 125 GB
~ 4,85 GB
~ 375 GB
~ 187 GB
~ 187 GB
~ 4,85 GB
~ 500 GB
~ 250 GB
~ 250 GB
Pode mudar a configuração predefinida do disco rígido formatando novamente o disco rígido do Media
Giant.
Nota:
Se formatar novamente o disco rígido do Media Giant, todo o conteúdo armazenado e gravado no
disco será eliminado!
Para formatar o disco rígido do Media Giant vá ao menu de configuração e seleccione a opção ‘HDD
Format’ (Formatar disco rígido) na página ‘System’ (Sistema). Seleccione novamente ‘HDD Format’
(Formatar disco rígido) para confirmar.
O Assistente de Formatação HDD será então exibido no seu ecrã com a pergunta para formatar o disco
rígido automaticamente (‘Auto’) ou manualmente (‘Manual’).
• Quando selecciona ‘Auto’, o Media Giant será formatado com as configurações de formatação prédefinidas, conforme mencionado acima.
• Quando selecciona ‘Manual’, o Assistente de Formatação guiá-lo-á pelos passos relativos à formatação
do disco rígido.
(Assistente de Formatação – Automático ou Manual)
(Assistente de Formatação – Divisor Gravado)
Mude o tamanho da Memória de deslocamento de tempo com as teclas de navegação para cima ou para
baixo (15) do seu comando.
Pode estabelecer a Memória de deslocamento de tempo para 1, 2, 3 ou 4 horas.
• Seleccione ‘Next’ (Seguinte) para prosseguir para o próximo passo.
278
PORTUGUÊS
[ Assistente de formatação - Partição de gravação ]
[ Assistente de formatação – Partição FAT32 / NTFS ]
• Mude o tamanho da Partição de gravação com as teclas de navegação para cima e para baixo (15) do seu
comando.
O espaço que sobrar vai ser usado para a(s) partição(ões) de multimédia do Media Giant.
• Seleccione ‘Next’ (Seguinte) para prosseguir para o próximo passo.
[ Assistente de formatação – Começar formatação]
[ Assistente de formatação – A formatar ]
• Seleccione ‘Format’ (Formatar) para começar a formatar o disco rígido do Media Giant.
Durante a formatação, o Assistente de Formatação vai mostrar ‘Proceeding’ (A prosseguir).
Nota:
O procedimento de formatação pode demorar um pouco (~ 5 minutos). Por favor aguarde até que o
procedimento de formatação esteja concluído.
[ Assistente de formatação – Concluído ]
• Quando o processo de formatação terminar seleccione ‘OK’ para fechar o Assistente de Formatação. O
Media Giant vai reiniciar automaticamente.
279
PORTUGUÊS
16. Servidor A/V UPnP (Twonky Mediaserver)
Uma das características do Media Giant é o servidor A/V UPnP.
Isto faz com que o Media Giant e o seu conteúdo multimédia fique disponível para clientes A/V UPnP na sua
rede (por exemplo: o Conceptronic CFULLHDMA ou o Conceptronic C54WMP).
O servidor A/V UPnP usado no Media Giant é o ‘Twonky Mediaserver’.
O Twonky Mediaserver indexa automaticamente todos os ficheiros nas partições multimédia FAT32 e NTFS.
Quando são adicionados novos dados a uma dessas partições, esses tornam-se automaticamente disponíveis
para os clientes A/V UPnP na sua rede.
O nome do seu servidor A/V UPNP pode ser configurado no menu de configuração do Media Giant, na
secção ‘Network’ (Rede).
Nota:
O nome predefinido do servidor A/V UPnP é ‘media giant’.
Se está familiarizado com o software Twonky Mediaserver, pode mudar as configurações avançadas do
Twonky Mediaserver através do seu computador.
Para aceder às páginas de configuração do software Twonky Mediaserver introduza o endereço IP do Media
Giant na janela do navegador seguido do número de porta 9000.
Por exemplo:
HTTP://192.168.0.100:9000/ (assumindo que 192.168.0.100 é o endereço IP do seu
Media Giant).
O Twonky Media Server tem um guia ‘Troubleshooting’ (resolução de problemas) que pode ser encontrado
na barra de navegação à esquerda da janela de configuração do Twonky Media server. Este guia vai ajudálo com a configuração do Twonky Media Server.
Para mais informações acerca do Twonky Media Server visite a página web da Twonky em:
http://www.twonkymedia.com/
280
PORTUGUÊS
17. Pesquisa de partilhas na rede
O Media Giant pode procurar as suas partilhas na rede e reproduzir ficheiros multimédia directamente de
uma partilha da rede. De modo a usar esta função necessita de partilhar as suas pastas multimédia na sua
rede para que o Media Giant as possa encontrar e aceder.
Este capítulo vai explicar-lhe como pode activar a partilha de ficheiros no Windows XP e no Windows Vista.
Nota:
Este manual só descreve a partilha de pastas e ficheiros no Windows XP e no Windows Vista.
Por favor, consulte o manual do seu sistema operativo ou do seu dispositivo de armazenamento de
rede para saber como pode partilhar uma pasta com ficheiros multimédia.
Partilha de ficheiros no Windows XP
• Abra ‘My Computer’ (O Meu Computador) através do atalho no menu Iniciar e navegue até à pasta que
contém os ficheiros multimédia que deseja partilhar.
• Clique uma vez na pasta com os ficheiros multimédia e seleccione a opção ‘Share this folder’ (Partilhar
esta pasta) na barra de menus da esquerda.
[ O Meu Computador – Partilhar pasta ]
As propriedades da pasta aparecem com a página ‘Sharing’ (A partilhar) apresentada.
A secção ‘Network sharing and security’ (Partilha de rede e segurança) pode ser usada para partilhar a
pasta.
Se não tiver partilhado ficheiros anteriormente, precisa agora de correr o Network Setup Wizard (Assistente
de configuração de rede), clicando na linha que diz ‘Network Setup Wizard’ (Assistente de configuração
de rede) da janela.
281
PORTUGUÊS
[ Propriedades – Página de partilha ]
[ Propriedades – Página de partilha ]
• Quando o Assistente de Configuração de Rede já tiver sido finalizado anteriormente, pode partilhar a
sua pasta clicando em ‘Share this folder on the network’ (Partilhar esta pasta na rede).
• Introduza um nome para a partilha no campo de texto e clique em ‘Apply’ (Aplicar).
• Clique em ‘OK’ para fechar a janela.
A pasta está agora assinalada com um ícone que mostra uma mão a segurar uma pasta, indicando assim que
o ficheiro está a ser partilhado no seu computador.
[ Ficheiro partilhado ]
282
PORTUGUÊS
Partilha de ficheiros no Windows Vista
• Abra ‘Computer’ (Computador) através do atalho no menu Iniciar e navegue para a pasta que contém os
ficheiros multimédia que deseja partilhar.
• Clique uma vez na pasta com os ficheiros multimédia e seleccione a opção ‘Share’ (Partilhar) na barra
de menus na parte superior da janela.
[ Computador – Partilhar pasta ]
Por defeito, o seu próprio utilizador está na lista de partilha como sendo o proprietário da pasta.
[ Propriedades de partilha ]
• Pode adicionar mais utilizadores à lista de partilha seleccionando-os da lista pendente e carregando em
‘Add’ (Adicionar).
• Quando a lista com os utilizadores estiver completa, clique no botão ‘Share’ (Partilhar) para partilhar a
pasta.
A pasta está agora assinalada com um ícone que mostra duas pessoas à frente de uma pasta, indicando
assim que o ficheiro está a ser partilhado no seu computador.
[ Ficheiro partilhado ]
283
PORTUGUÊS
Pesquisar pastas partilhadas no Media Giant
Quando os seus ficheiros multimédia estão partilhados, pode usar a opção ‘Browse Media’ (Pesquisar
multimédia) do menu principal para pesquisar os seus locais na rede.
[ Selecção da localização de armazenamento de ficheiros]
[ Partilha de rede – Login de utilizador ]
Use as teclas de navegação (15) do comando para seleccionar a opção ‘Network’ (Rede) na lista de
localização de armazenamento e navegar através da rede do seu computador ou do dispositivo de
armazenamento de rede com as pastas partilhadas.
Quando uma pasta partilhada está protegida com um nome de utilizador e uma palavra-passe (por
exemplo: as partilhas predefinidas no Windows XP e Vista) o Media Giant apesenta uma janela ‘User Login’
(Login de utilizador) para poder introduzir o nome de utilizador e a palavra-passe.
Nota:
Pode usar a sua conta de utilizador normal para o Windows XP e Windows Vista para aceder à sua
pasta partilhada.
Use as teclas de navegação (15) do comando para seleccionar o User ID (Identificação do utilizador) ou o
campo da palavra-passe e carregue em ‘Enter’ (26) para poder aceder ao teclado no ecrã para introduzir o
valor.
[ Teclado no ecrã ]
[ Partilha de rede – Login de utilizador ]
Quando o nome de utilizador e a palavra-passe tiverem sido correctamente introduzidas, seleccione o
botão ‘OK’ ou ‘OK & Save to MyShortcuts’ (Ok e guardar nos meus atalhos) para entrar nas partilhas de
rede.
Está agora apto a navegar na pasta partilhada tal como se descreve no capítulo 9.
284
PORTUGUÊS
18. Partilha de rede – configuração e uso
O Media Giant da Conceptronic pode ser acedido como partilha de rede (Servidor Samba). Com a
característica de partilha de rede, pode partilhar a partição FAT32 (HDD1) do Media Giant através da sua
rede, de modo a que outros computadores possam alcançar os dados armazenados nessa partição.
Configuração
Seleccione a opção ‘Setup’ (Configurar) no menu principal. O menu Setup (Configurar) será exibido no seu
ecrã. No menu Setup (Configurar), seleccione ‘Network’ (Rede). No menu System Setup (Configurar
Sistema), existe uma opção designada ‘Media Server’ (Servidor de Multimédia).
Na opção ‘Media Server’ (Servidor de Multimédia), pode alterar as seguintes definições:
- Nome do Servidor/Alojamento Especifica o nome do Media Giant na sua rede. O nome pré-configurado
do Media Giant é ‘media giant’.
- Group name (Nome do grupo) Especifica o nome da rede da sua casa. O nome do grupo pré-configurado
é ‘WORKGROUP’.
Quando as definições forem alteradas, prima o botão ‘Return’ (14) (Voltar) no controlo remoto para voltar
ao menu principal.
Uso
Quando tiver configurado as definições de rede do Media Giant, pode aceder à partilha de rede através de
um computador na sua rede.
Nota:
Os passos abaixo indicados indicam como pode aceder à partilha de rede do Media Giant com as
definições pré-configuradas num computador com o Windows Vista.
O nome pré-configurado da rede do Media Giant é ‘media giant’. Com este nome, pode alcançar a partilha
de rede do dispositivo na rede.
• Seleccione ‘Start’ (Iniciar), ‘Network’ (Rede).
O Windows Explorer exibirá as definições da sua rede.
Na barra superior, pode inserir o nome da rede do Media Giant da seguinte forma:
\\<NETWORK_NAME_OF_MEDIA_GIANT>\
Por exemplo:
Se o Media Giant estiver configurado com as definições pré-configuradas, o nome da rede
é ‘media giant’ e deverá inserir:
\\media giant\
285
PORTUGUÊS
A partilha de rede do Media Giant será exibida no seu ecrã, conforme indicado na captura de ecrã abaixo:
Nota:
No Windows, a partilha de ‘Printers’ (Impressoras) é adicionada automaticamente a cada um dos
servidores Samba na rede, mas o Media Giant não pode funcionar como um servidor de impressão.
Ao seleccionar a partilha de rede, pode copiar, eliminar, reproduzir e adicionar ficheiros à partição FAT32
do Media Giant.
286
MAGYAR
Conceptronic Media Giant with DVB-T
Használati utasítás
Köszönjük, hogy a Conceptronic médiafelvevőjét és –lejátszóját
választotta.
A használati utasítás lépésről lépésre elmagyarázza, miként kell a Conceptronic médiafelvevőjét és
–lejátszóját telepítenie, illetve használnia.
Ha a termékkel kapcsolatban további adatokra vagy segítségre van szüksége, azt tanácsoljuk, hogy keresse
fel a Szolgáltatások és terméktámogatás (Service & Support) c. oldalt a www.conceptronic.net/support
honlapon, majd ott válassza ki az alábbi opciók valamelyikét:
• FAQ
• Downloads
• Contact
: A gyakran ismétlődő kérdések (GYIK) adatbázisa
: Használati utasítások, illesztőprogramok, firmware és további letöltések
: Kapcsolatfelvétel a Conceptronic termék támogatásával
Ötlet:
A Conceptronic Media Giant firmware-je frissíthető. Ahhoz, hogy a berendezést a firmware
legújabb verziójával frissíteni lehessen, látogasson el a Conceptronic honlapjára, vagy vegye
igénybe a Media Giantnek a beépített firmware-frissítési funkcióját.
Ötlet:
A támogatott kodekek és fájlok legfrissebb listájának a megtekintéséhez látogasson el a
www.conceptronic.net/FAQ oldalra.
A Conceptronic termékekkel kapcsolatos általános tájékozódás végett keresse fel a Conceptronic honlapját:
www.conceptronic.net.
1. A csomag tartalma
A Conceptronic médiafelvevőt és –lejátszót tartalmazó csomagban az alábbiak találhatók:
•
Conceptronic Media Giant (ebben a használati utasításban „berendezésként” vagy „Media Giant"-ként
hivatkozunk rá). **
A csomagban található eszköz az alább felsorolt 2 modell valamelyike:
CM3GD
[C08-147]: Media Giant, digitális (DVB-T) tunerrel.
CM3GDP [C08-148]: Media Giant, digitális (DVB-T) tunerrel és Powerline adapterrel.
•
•
•
•
•
•
•
•
•
•
•
•
•
•
Conceptronic Powerline hálózati adapter. (Csak a CM3GDP-nek tartozéka)
Tápkábel.
Távirányító.
2 AAA elem a távirányítóhoz.
Az RF-antenna kábele.
Összetett videokábel (piros, fehér, sárga RCA-dugaszok).
S-videó kábel.
Összetett videokábel (piros, zöld, kék RCA-dugaszok).
Koaxiális digitális hangkábel (fekete RCA-dugaszok).
SCART-adapter az összetett videokábelhez/S-videó kábelhez.
HDMI A/V-kábel (HDMI 1.3).
Hálózati kábel.
USB-kábel.
Ez a használati utasítás.
FONTOS!
Ebben a használati utasításban bizonyos olyan funkciókat is elmagyarázunk, amelyek kizárólag a
CM3GDP esetében érvényesek (ez utóbbi digitális (DVB-T) tunerrel és Powerline adapterrel egészül ki).
Ezeket a funkciókat **-gal jelöljük.
287
MAGYAR
2. Termékjellemzők
•
•
•
•
•
•
•
•
•
•
•
•
•
Beépített Powerline hálózati adapter.**
Beépített digitális (DVB-T) tévétuner a tévécsatornák automatikus keresésével.
Digitális (DVB-T) tévéjelrögzítés.
AV-jel rögzítése, például videofelvevőről, DVD-ről vagy videokameráról.
DV-bemenet a DV videokameráról történő lejátszáshoz/felvételhez.
Felvétel belső merevlemez-meghajtóra.
Akár 1080i kimeneti felbontás.
Akár 1080i lejátszási felbontás.
A felvett állományok DVD-minőségűek TS formátum (a digitális DVB-T tuneren keresztül történő
digitális felvételekhez) vagy MPEG2 formátum (az AV-bemeneteken keresztül történő analóg
felvételekhez) esetén (lejátszható PC-n vagy más médialejátszón).
Felvételi opciók: Egybillentyűs azonnali felvétel, programozott felvétel, időeltolás.
A belső merevlemez-meghajtón vagy USB-eszközön tárolt MPEG1/2/4, MP3, WMA, JPG állományok
lejátszása.
Fájlok átmásolása USB-eszközről vagy hálózati helyről belső merevlemez-meghajtóra.
Az USB PC-s , illetve lejátszó üzemmód automatikusan váltogatható:
Ha USB segítségével van csatlakoztatva a PC-hez, a berendezés USB-tárolóeszközként működik.
Ha nem USB-vel van a PC-hez csatlakoztatva, a berendezés médiafelvevőként és –lejátszóként
működik.
3. Megjegyzések és óvintézkedések
• Ne próbálkozzon az egység szétszerelésével. Ez ugyanis nagyfeszültség okozta sérüléseket
eredményezhet.
• Tartsa távol a túlzott nedvességtől az egységet.
• Az egységet ne merítse folyadékba, illetve ne tegye ki folyadék hatásának.
• Húzza ki a hálózati adaptert, ha huzamosabb ideig nem szándékozik az egységet használni.
• Ne használja az egységet gyúlékony anyagok közelében.
• Ha a távirányító eleme gyengül vagy lemerült, ugyanolyan típusúra cserélje ki. Ha lehet, gondoskodjon
arról, hogy a régi elemeket újrahasznosítsák. A korrózió elkerülése érdekében vegye ki az elemet, ha a
távirányítót huzamosabb ideig nem használja.
• Tartsa távol a távirányítót a túlzott nedvességtől; ne is ejtse le.
• Ne üzemeltesse erős napsütésben a távirányítót.
• SOHA ne ejtse le, ne rázogassa, illetve ne üsse neki semminek az egységet.
• A túlmelegedés megelőzése érdekében ne takarja le az egységet.
FONTOS:
NE saját számítógépén formázza a merevlemezt! Ezzel ugyanis azt idézi elő, hogy az
egységen tárolt összes rendszerinformáció elveszik, maga az egység pedig
újrainicializálást igényel. Ha az egység merevlemezét formázni kívánja, használja a
beépített formázóeszközt az egységnek a Beállítások menüjén.
288
MAGYAR
4. A termék áttekintése
Elölnézet
1
2
3
4
5
Hátulnézet
9
14
10
15
11
16
17
18
19
20
21
6
7
8
12
13
22
23
A számok ismertetése:
1. Állapotjelző LED-ek (Power, REC, ACT, LAN)
2. Navigációs érintőgombok
3. A lejátszásra szolgáló érintőgombok
4. Infravörös vevőkészülék
5. Mini-USB dugaszhüvely (a PC számára)
6. USB-gazdaport
7. DV-bemenet
8. Az előlapot nyitó („Open”) gomb
9. Digitális tévétuner-kimenet
10. Digitális tévétuner-bemenet
11. Összetett AV-videokimenet
12. Digitális, koaxiális SPDIF-kimenet
13. Hálózati főkapcsoló
14. LAN (RJ45) csatlakozás
15. HDMI-kimenet
16. AV1-bemenet (összetett videó/audió)
17. Komponens AV-videobemenet
18. AV2-hangbemenet (L/R) (bal/jobb)
19. AV-hangkimenet (L/R) (bal/jobb)
20. Komponens AV-videokimenet (Y/Pb/Pr)
21. S-videokimenet
22. Digitális, optikai SPDIF-kimenet
23. Váltakozó áramú bemenet (110 ~240 V)
Megjegyzés: Az érintőgomboknak és a távirányítónak az alapfunkciói azonosak.
289
MAGYAR
5. A távirányító magyarázata
A távirányítót az egység irányítására használják. Ennek a kézikönyvnek a belső borítóján látható a
távirányító képe. A gombokon lévő számok megegyeznek az alábbi táblázattal, amely a távirányító egyes
funkcióinak magyarázatára szolgál.
Sz.
Gomb
Leírás
1.
2.
3.
4.
POWER (
SOURCE
MEDIA
AUDIO
5.
6.
7.
8.
9.
10.
11.
12.
13.
14.
15.
16.
17.
18.
19.
20.
21.
22.
23.
24.
25.
26.
27.
28.
29.
30.
31.
32.
33.
34.
35.
36.
ZOOM
0–9
COPY
REPEAT
GOTO
FAST REWIND (
)
PREVIOUS (
)
VOLUME +
VOLUME RETURN
, , ,
INS.REP.
PAUSE
PLAY
REC
TV SYS
SETUP
TIMESHIFT
STOP ( )
SLOW
CM.SKIP
ENTER
INFO
CHANNEL CHANNEL +
MUTE
NEXT (
)
FAST FORWARD (
)
GUIDE
A-B
DEL
ANGLE
37.
SUB-T
38.
LIVE-TV
39.
40.
41.
DV
MENU
LED
)
Az egység bekapcsolására vagy a készenléti üzemmódba kapcsolásra
A digitális tuner, AV, illetve lejátszás közötti átkapcsolásra
A médiaböngésző közvetlen elérésére szolgáló gomb
A DVD-zeneszámok közötti váltásra (ha ez a funkció a DVD-fájloknál
rendelkezésre áll)
Nagyítás/kicsinyítés
Numerikus gombok
A Copy menü megjelenítésére
Az ismétlési üzemmód beállítására
Ugrás egy megadott ponthoz a lejátszáskor
Gyors lejátszásra visszafelé
Előző fájl/szám/fejezet/kép
A hangerő növelésére
A hangerő csökkentésére
Vissza az előző képernyőhöz/csatornához
Navigációs gombok: navigálásra a menün belül
Visszaugrás 10 mp-cel az időeltolás vagy lejátszás során
Az (időeltolásos) lejátszás szüneteltetése
Lejátszás elindítására
A felvétel elindítására
Az egység kimeneti felbontásának megváltoztatására
A Beállítások menü közvetlen elérésére szolgáló gomb
Az időeltolás funkciójának aktiválására
Lejátszás leállítására/felvétel leállítására/időeltolás letiltására
Lassított lejátszásra
Ugrás előrefelé 30 mp-cel az időeltolás vagy lejátszás alatt
A kijelölés megerősítésére
A csatornaadatok/fájladatok megjelenítésére
Csatornaléptetés lefelé
Csatornaléptetés felfelé
A hang elnémítására
Következő fájl/szám/fejezet/kép
Gyors lejátszásra előrefelé
A digitális (DVB-I) tuner EPG útmutatójának a megjelenítésére
Az A-B repeat (ismétlési) ciklus inicializálására
A bevitel törlésére/a kijelölés törlésére
A DVD szögének megváltoztatására (ha ez a funkció a DVD-fájloknál
rendelkezésre áll)
A feliratozás megváltoztatására (ha ez a funkció a video-/DVD-fájloknál
rendelkezésre áll)
Közvetlen gomb az élő tévéműsorhoz történő kapcsolásra, illetve a
digitális tévé, valamint a digitális rádió közötti átkapcsolásra
A DV-lejátszási, illetve –felvételi üzemmódba történő átváltásra
A főmenü megjelenítésére
A távirányító működését jelzi
290
MAGYAR
6. A Media Giant csatlakoztatása
Ebben a fejezetben azt magyarázzuk el, miként csatlakoztathatja a Media Giant-ot saját tévéjéhez,
házimozi rendszeréhez, hálózatához stb.
9
10
14
15
11
16
17
18
19
20
21
12
13
22
23
Az antennakábel(ek) csatlakoztatása
Megjegyzés:
A berendezés digitális tunerje támogatja a jelátmenenetet, amelynek segítségével át
lehet irányítani a DVB-T jelet a digitális tunerbemenetről a digitális tunerkimenetre.
• Húzza ki a fő antennakábelt a tévékészülékből vagy a digitális beltéri egységből, majd csatlakoztassa a
berendezés digitális tunerbemenetéhez [10].
• Csatlakoztassa a mellékelt antennakábelt a berendezés digitális tunerkimenetéhez [9], valamint a
tévékészüléknek, illetve a digitális beltéri egységnek a tunerbemenetéhez.
A videokábele(ek) csatlakoztatása
Az egység négyféleképpen csatlakoztatható a tévéhez:
- HDMI
- Összetett
- SCART (az összetett kábel és a Scart-adapter alkalmazásával)
- S-videó **
- Komponens *
*
Ha S-videót vagy komponenst használ, csak a videojel továbbítódik a tévékészülékhez.
Audiojel esetén használja az audió RCA-dugaszokat az összetett kábelen (piros, fehér) vagy a Media
Giant digitális hangkimenetét (optikai vagy koaxiális).
HDMI:
• Csatlakoztassa a HDMI-kábelt az egység HDMI-kimenetéhez [15].
• Csatlakoztassa a HDMI-kábel másik végét szabad HDMI-bemenethez a tévékészülékén.
Összetett:
• Csatlakoztassa az összetett kábelt (sárga, piros és fehér) az egység megfelelő AV OUT dugaszhüvelyeihez
[11, 19].
• Csatlakoztassa az összetett kábel (sárga, piros és fehér) másik végét tévékészülékéhez.
291
MAGYAR
SCART:
• Csatlakoztassa az összetett kábel (sárga, piros és fehér) az egység megfelelő AV OUT dugaszhüvelyeihez
[11, 19].
• Csatlakoztassa az összetett kábel (sárga, piros és fehér) másik végét a SCART-adapter
dugaszhüvelyeihez.
• Csatlakoztassa a SCART-adaptert saját tévéje SCART-bemenetéhez.
S-videó:
• Csatlakoztassa az S-videokábelt az egység S-videó kimenetéhez [21].
• Csatlakoztassa a S-vidokábel másik végét saját tévékészüléke S-videobemenetéhez.
Komponens:
• Csatlakoztassa a komponens kábelt (piros, zöld és kék) az egység komponens dugaszhüvelyeihez [20].
• Csatlakoztassa a komponens kábel másik végét saját tévékészüléke komponens dugaszhüvelyeihez.
Az audiokábel(ek) csatlakoztatása
Az egységet háromféleképpen csatlakoztathatja tévéjéhez és/vagy házimozirendszeréhez:
- Analóg módon, az A/V kimenet RCA audió dugaszhüvelyein keresztül
- Digitálisan, a koaxiális, digitális SPDIF-kimeneten keresztül
- Digitálisan, az optikai, digitális SPDIF-kimeneten keresztül
Analóg:
• Csatlakoztassa az összetett kábel audiodugaszait (piros, fehér) az AV OUT-nak az RCA audió
dugaszhüvelyeihez [19].
• Csatlakoztassa az összetett kábel másik végét saját tévékészüléke vagy vevőkészüléke RCA audió
dugaszhüvelyeihez.
Digitális koaxiális:
• Csatlakoztassa a digitális, koaxiális kábelt az egység digitális, koaxiális kimenetéhez [12].
• Csatlakoztassa a digitális, koaxiális kábel másik végét saját vevőkészüléke digitális, koaxiális
bemenetéhez.
Digitális optikai:
• Csatlakoztassa a digitális, optikai kábelt az egység digitális, optikai kimenetéhez [22].
• Csatlakoztassa a digitális, optikai kábel másik végét saját vevőkészüléke digitális, optikai bemenetéhez.
További hang-/videoberendezések csatlakoztatása
Az egységhez audio-/videoforrás is csatlakoztatható, például videomagnó, DVD-lejátszó vagy beltéri egység
formájában, tehát az fel is tud venni az audio-/videoforrásról.
A Media Giant az összetett vagy komponens kimenetű eszközöket támogatja.
Összetett:
• Csatlakoztassa a saját audio-/videoeszközéhez mellékelt audio-/videokábelt a megfelelő AV-kimeneti
dugaszhüvelyekhez az audio-/videoeszközön.
• Csatlakoztassa az összetett kábel (sárga, piros és fehér) másik végét az egység AV1 IN dugaszhüvelyeihez
[16].
Komponens:
• Csatlakoztassa a saját audio-/videoeszközéhez mellékelt komponens videokábelt a megfelelő komponens
kimenethez az audio-/videoeszközön.
• Csatlakoztassa a komponens videokábel (piros, zöld és kék) másik végét az egység AV2 IN
dugaszhüvelyeihez [17].
292
MAGYAR
Megjegyzés: A komponens videokábelek csak a videofelvételt továbbítják, a hangot viszont nem. A hang
továbbításához arra is szükség lesz, hogy az audio-/videoeszköz audiokábeleit is
csatlakoztassa az egység AV2 IN audió dugaszhüvelyeihez [18].
A hálózati kábel csatlakoztatása
Ha az egység saját audio-/videoberendezéshez van csatlakoztatva, a tápegység is csatlakoztatható az
egységhez.
• Csatlakoztassa a mellékelt hálózati kábelt az egységhez [23] és szabad falicsatlakozóhoz.
• Az egység áramellátása érdekében állítsa az egység hátoldalán a hálózati főkapcsolót [12] az „I” állásra.
Ezzel az egység be van kapcsolva.
A távirányító előkészítése
• Vegye le az akkumulátorrekesz fedelét a távirányító hátoldaláról.
• Tegye be a mellékelt AAA elemeket a távirányítóba.
• Tegye vissza az akkumulátorrekesz fedelét a távirányító hátoldalára.
Megjegyzések:
-
A távirányító legjobban kb. 5 méteren belül működik.
Irányítsa a távirányítót a berendezés előlapjába beépített infravörös vevőkészülék felé.
Irányítsa a távirányítót az infravörös vevőkészülékre ±30° eltéréssel.
Cserélje ki az elemeket, ha azok lemerülőben vannak vagy már lemerültek.
293
MAGYAR
7. Első alkalommal történő konfigurálás
Az egységet — első alkalommal történő bekapcsolásakor — konfigurálni kell.
• Jelölje ki a megfelelő bemeneti csatornát a tévékészülékén, ahová az egység csatlakoztatva van (HDMI,
összetett, SCART, S-videó, illetve komponens).
Megjegyzés: Innentől fogva a kézikönyv abból indul ki, hogy tévékészüléke az egység bemeneti
csatornájára lett beállítva. Minden ismertetett lépés az egység működésére vonatkozik.
• Ellenőrizze, hogy vajon az egység hátoldalán lévő hálózati főkapcsoló „I”-re van-e beállítva (be van-e
kapcsolva).
• Kapcsolja be az egységet az annak előlapján lévő bekapcsológomb, illetve a távirányító „Power” gombja
(1) segítségével.
• Ellenőrizze az áramellátást jelző LED-et a Media Giant előlapján. Ha a LED narancssárgán világít, az
eszköz „Standby” (készenléti) üzemmódban van. Ha a LED kék, az eszköz üzemképes.
Megjegyzés: Az egységet — annak bekapcsolásakor — inicializálni kell. Ez eltarthat egy ideig.
Inicializáláskor a Media Giant indítóképernyője látható.
[ Indítóképernyő ]
[ Telepítővarázsló ]
Amikor a Media Giant-ot inicializálják, az első alkalommal történő használat érdekében konfigurálni kell.
Annak érdekében, hogy az első alkalommal történő konfigurálásban segítséget nyújtson, a Media Giant az
Ön képernyőjén a „Setup Wizard”-ot és az első alkalommal történő alkalmazáshoz szükséges konfigurációs
lépéseket együttesen jeleníti meg.
A telepítővarázsló az alábbi konfigurációs lépéseket jeleníti meg:
-
A menü nyelve
Tévébemenet
Csatornakeresés
Hálózat beállítása
Idő beállítása
A Media Giant beállításához használja a navigációs gombokat és az „Enter” gombot (26) a távirányítón.
Ha végzett egy beállítással és azt módosítani kívánja, nyomja meg a távirányítón a „Return” gombot (14).
A menü nyelve
Jelölje ki a Media Giant működtetésekor használni kívánt nyelvet.
294
MAGYAR
Tévébemenet
Jelölje ki az adott országot a listán. Ha az adott ország a listán nem szerepel, jelölje ki a listán az
„Other”-t.
Ötlet:
Egy meghatározott DVB-T frekvenciasáv végigkereshető a „6M” (600 MHz), a „7M” (700 MHz),
illetve a „8M” (800 MHz) kijelölésével.
Csatornakeresés
• Jelölje ki az „OK”-t, hogy a digitális (DVB-T) csatornák automatikus keresését a Media Giantnek a
digitális (DVB-T) tunerjén keresztül elindíthassa. A Media Giant automatikus csatornakeresése eltarthat
egy ideig, viszont a berendezés ennek segítségével minden megtalálható csatornát megkeres, majd
automatikusan el is tárol a Media Giant memóriájában.
• Amikor a csatornakeresés befejeződött, jelölje ki az „OK”-t, hogy a telepítővarázslóval folytathassa.
Ha a csatornakeresést át akarja ugrani (például olyankor, ha éppen beltéri egységet használ, és nincs
digitális (DVB-T) tévéjele), a csatornakeresés átugrásához jelölje ki a „Cancel”-t, hogy a
telepítővarázslóval folytathassa.
Hálózat beállítása
A hálózat beállítását saját IP-címe beállítására használhatja a Media Giant esetében. A legtöbb esetben a
Media Giant olyan hálózathoz csatlakozik, amelynek DHCP-szervere van (többnyire útválasztóról van szó).
• Ha saját DHCP-szervere van az adott hálózaton belül, jelölje ki a „DHCP IP” opciót.
• A telepítővarázsló kéri majd, hogy erősítsék meg a kijelölést. A folytatáshoz jelölje ki az „OK”-t.
• Ha statikus IP-címet kíván használni, jelölje ki a „FIX IP”-t.
• A telepítővarázsló megjeleníti a statikus IP-cím beírására szolgáló mezőket. A navigációs gombokat (15)
és a 0-9 numerikus gombokat (6) használja az IP-cím, az alhálózati maszk, az alapértelmezett átjáró és
a DNS-szerver beírására.
• Ha a beírt értékek helyesek, nyomja meg a távirányítón az „Enter” gombot (26).
• A telepítővarázsló kéri majd a kijelölés megerősítését. A folytatáshoz jelölje ki az „OK”-t.
Ha a Media Giant nincs hálózathoz csatlakoztatva, ennek a lépésnek az átugrásához és a telepítővarázslóval
történő folytatáshoz jelölje ki a „Cancel”-t.
Idő beállítása
A „Set Time” opció segítségével lehet a pontos időt és a dátumot a Media Giant konfigurációjában
beállítani.
• Az idő és a dátum kézzel történő beállításához jelölje ki a „Manual”-t.
• Az év, hónap, nap, óra, perc és másodperc beírásához használja a navigációs gombokat (15), valamint a
0-9 numerikus gombokat (6). Amikor végzett, nyomja meg a távirányítón az „Enter” gombot (26).
• A telepítővarázsló kéri majd a kijelölés megerősítését. A folytatáshoz jelölje ki az „OK”-t.
• Ha aktív internetkapcsolata van, és a Media Giant rá van kapcsolódva a hálózatra, kijelölheti az „Auto
(Via Network)”-öt.
• A telepítővarázsló megjeleníti az Automatic time (automatikus idő) konfigurációnak a konfigurálására
szolgáló mezőket. Megtarthatja az alapértelmezett NTP-szervert, de ha másik NTP-szervert kíván
használni, nyomja meg az érték beállításához az NTP server mezőn az „Enter” gombot (26).
• Változtassa meg az időzónát az adott ország megfelelő időzónájára.
• Attól függően állítsa be a „Daylight Savings Correction”-t „Disable”-re vagy „Enable”-re, hogy vajon az
adott ország nyári időszámítást használ-e. Ha a beírt értékek helyesek, nyomja meg a távirányítón az
„Enter” (26) gombot.
• A telepítővarázsló kéri majd a kijelölés megerősítését. A folytatáshoz jelölje ki az „OK”-t.
A telepítővarázsló ezzel végzett, és a Media Giant alapkonfigurálása is befejeződött.
295
MAGYAR
Megjegyzés: A konfigurációval kapcsolatos további beállítások megtekintéséhez használja a „Setup”
opciót a főmenün. A Beállítások menü magyarázata a 13. fejezetben található.
Megjegyzés: Ha — miután az feladatát elvégezte — a telepítővarázslót ismét futtatni kívánja, jelölje ki a
„Setup”-ot a főmenün, majd jelölje ki a „Restore Default” opciót. A Media Giant az
alkalmazott beállításokat visszaállítja az alapértelmezett értékre, majd ismét lefuttatja a
telepítővarázslót.
Megjegyzés: Ha a Media Giant-ot előre formázott merevlemez nélkül vásárolta, a Media Giant a „Format
Wizard”-ot jeleníti meg, miután a „Setup Wizard” végzett. Ennek a „Format Wizard”-nak a
magyarázata a kézikönyv 15. fejezetében látható.
296
MAGYAR
8. Főmenü
A főmenü segítségével a Media Giant különböző funkcióit lehet kijelölni.
Megjegyzés: Ha a főmenü nem jelenik meg, annak a képernyőn történő megjelenítéséhez megnyomhatja
a „Menu” gombot (40) a távirányítón.
[ Főmenü ]
A főmenün az alábbi opciók állnak rendelkezésre:
Browse Media
Playback Recordings
TV Tuner/AV Input
Scheduled Recording
Setup
A tárolt médiafájlok lejátszására.
Saját felvételek lejátszására és szerkesztésére.
Live-TV és Live-AV megtekintésére.
Programozott felvételek konfigurálására.
A Media Giant konfigurálására.
A fenti opciókat ennek a kézikönyvnek a most következő fejezetei ismertetik.
297
MAGYAR
9. Browse Media (Médiaböngésző)
Ha a „Browse Media” opciót jelölte ki a főmenün, a Media Giant a képernyőn a médiaböngészőt fogja
megjeleníteni:
[ Tárolóhely kijelölése ]
[ Üzemmód kijelölése: Movies, Music, Photos
(filmek, zene, fényképek)]
A médiaböngésző révén az alábbiak közül kijelölheti azt a tárolóeszközt, amelyen saját médiafájljait
kívánja lejátszani:
USB
Harddisk
Network
Média lejátszása csatlakoztatott USB-eszközről (az USB-gazdaporton keresztül).
Média lejátszása a Media Giant belső merevlemezéről.
Média lejátszása a Samba-/hálózati megosztásról saját hálózati környezetben.
Ha saját USB-eszközén vagy a belső merevlemezen kíván böngészni, jelölje ki az „USB”-t vagy a
„Harddisk”-et a tárolóhelyek listáján.
Ha saját hálózatán annak érdekében kíván böngészni, hogy valamilyen médiát játsszon le a hálózati
megosztásokról, jelölje a „Network” opciót a tárolóhelyek listáján.
Megjegyzés: Ha saját hálózati megosztásai között böngészik, ügyeljen arra, hogy az említett hálózati
megosztások a megfelelő módon legyenek telepítve. A hálózati megosztások kialakításával és
a hálózati megosztások között történő böngészéssel kapcsolatos további tájékozódás végett
lásd a 17. fejezetet.
Ha a tárolóhelyet kijelölte már, a távirányító bal, illetve jobb oldali navigációs gombja segítségével
kapcsolgathat a „Movies”, „Music”, illetve „Photos” üzemmód között.
Ha a három opció valamelyikét kijelölték már, a Media Giant automatikusan szűri a tárolóhelyen megjelenő
tartalmat, tehát csak a megfelelő fájlok látszanak.
Például:
Ha a „Movies”-t jelöli ki, kizárólag a filmfájlok fognak a képernyőn megjelenni.
A Media Browser menün az alábbi böngészési opciókat alkalmazhatja a távirányítón:
- Navigation keys
(15)
- Enter
- Return
- Copy
(26)
(14)
(7)
-
Play
Next
Previous
Menu
(18)
(31)
(11)
(40)
A fájlok és mappák közötti navigálásra, illetve a lejátszási üzemmód
megváltoztatására.
A kijelölt fájl lejátszására vagy a kijelölt mappa megnyitására.
Az előző mappához történő ugrásra.
A Copy menü megnyitására (magyarázata ennek a fejezetnek az egyik
alfejezetében található).
A kijelölt fájl lejátszására.
A fájlokat tartalmazó következő oldalra történő ugrásra.
A fájlokat tartalmazó előző oldalra történő ugrásra.
A főmenühöz történő visszatérésre.
A távirányítón a „Menu” gomb (40) megnyomásával visszatérhet a Media Browser menüből a főmenübe.
298
MAGYAR
Saját filmek lejátszása
Az egység merevlemezén, az USB-tárolóeszközön vagy hálózati helyen tárolt filmeket is lejátszhat saját
tévékészülékén a Media Giant-nak a „Movies” szűrőjén keresztül.
Ha a „Movies” szűrőt kijelölte már, a Media Giant a képernyőn kizárólag filmfájlokat fog megjeleníteni.
Minden más fájl láthatatlan marad.
[ Film üzemmód ]
• Jelölje ki a távirányítón a navigációs gombok (15) segítségével a lejátszani kívánt fájlt.
Ha kijelölt már egy filmfájlt, a Media Browser az elölnézetet a fájlnévvel és fájlmérettel együtt a képernyő
jobb oldali részén jeleníti meg.
• A kijelölt fájl lejátszásának elindításához nyomja meg a távirányítón az „Enter” gombot (26) vagy a
„Play” gombot (18).
Lejátszáskor a távirányítón az alábbi lejátszási opciók vehetők igénybe:
-
Pause
Slow
Stop
Rewind
Fast Forward
Ins. Rep.
CM. Skip
Goto
Repeat
Info
Zoom
Sub-t
- Audio
- Volume
- Mute
(17)
(24)
(23)
(10)
(32)
(16)
(25)
(9)
(8)
(27)
(5)
(37)
(4)
(12), (13)
(30)
A lejátszás szüneteltetésére vagy folytatására.
Lassított mozgású lejátszásra.
A lejátszás leállítására.
A visszafelé történő lejátszásra.
Gyors lejátszásra előrefelé.
10 mp-cel történő visszaugrásra a lejátszásban.
30 mp-cel történő visszaugrásra a lejátszásban.
Ugrásra egy meghatározott ponthoz (az időben) az adott filmen belül.
Az aktuális lejátszás ismétlési opciójának a megváltoztatására.
A lejátszási részletek megjelenítésére.
Nagyításra/kicsinyítésre.
A feliratozás megváltoztatására (ha ez a funkció az adott lejátszás
esetében elérhető).
A zeneszám váltására (ha ez a funkció az adott lejátszás esetében
elérhető).
A hangerő szintjének szabályozására.
A hang elnémítására.
A Media Browser menüből a főmenübe úgy térhet vissza, ha megnyomja a „Menu” gombot (40) a
távirányítón.
299
MAGYAR
A DVD-lejátszás célalkalmassága
A Media Giant úgy játssza le a DVD-ket a merevlemezről, mintha azok normál DVD-k volnának. Navigálhat is
a DVD-menün, kiválaszthatja a feliratozást, illetve megváltoztathatja a beszéd nyelvét.
Megjegyzés: A Media Giant csak a nem védett DVD-másolatok lejátszását támogatja. A CSS-védelem nem
támogatott.
• Csatlakoztassa a Media Giant-ot saját számítógépéhez (lásd a 13. fejezetet).
• Állítson elő mappát a Media Giant merevlemezén a saját DVD-film nevével ( például: „Movie1”).
• Másolja át a fájlokat a „VIDEO_TS” mappából a most előállított mappába (például: „Movie1”) a Media
Giant-on.
Másolás után a mappastruktúra a következő legyen:
- [HDD of Media Giant]
|-> Movie1
(a benne lévő összes DVD-fájllal együtt)
• Húzza ki a Media Giant-ot a számítógépből, majd csatlakoztassa tévékészülékéhez.
• Jelölje ki a „Browse Media” ikont a főmenün a távirányítónak a „Navigation” gombjaival (15), majd a
Media Browser megnyitásához nyomja meg az „Enter” gombot (26) a távirányítón.
• Ha a belső merevlemezen ahhoz a mappához kíván navigálni, amelyen az adott DVD-t tárolja, használja
a „Navigation” gombokat (15), illetve az „Enter” gombot (26) a távirányítón.
• Nyissa meg azt a DVD-mappát, amelyet most állított elő a merevlemezen.
[ Film üzemmód ]
• Jelölje ki a „VIDEO_TS.IFO” fájlt, majd nyomja meg a „Play” gombot (18) a távirányítón, ha a kijelölt
DVD lejátszását el kívánja indítani.
Megjegyzés: Közvetlenül is le tud játszani ISO-fájlokat a Media Giant-on, ha azokat az NTFS
médiapartíción tárolják. Egy adott DVD valamelyik ISO-fájljának a lejátszásakor ugyanazok a
lejátszási jellemzők érvényesek, mintha egy DVD-nek az IFO-fájlját játszanák le.
300
MAGYAR
DVD lejátszásakor az alábbi lejátszási opciók vehetők igénybe a távirányítón:
-
Pause
Slow
Stop
Navigation keys
Enter
Rewind
Fast Forward
Previous
Next
Ins. Rep.
CM. Skip
Goto
Repeat
Info
Zoom
Angle
-
Volume
Mute
Sub-t
Audio
(17)
(24)
(23)
(15)
(26)
(10)
(32)
(11)
(31)
(16)
(25)
(7)
(8)
(27)
(5)
(36)
(12), (13)
(30)
(37)
(4)
A lejátszás szüneteltetésére vagy folytatására.
A lassított mozgású lejátszásra.
A lejátszás leállítására.
A DVD-menün történő navigálásra.
A DVD-menü kijelölésének (kijelöléseinek) a megerősítésére.
Gyors vissza.
Gyors előre.
Előző fejezet.
Következő fejezet.
10 mp-cel történő visszaugrásra a lejátszás során.
30 mp-cel történő előreugrásra a lejátszás során.
Az egy meghatározott (időbeli) ponthoz történő ugrásra a filmben.
Az aktuális lejátszás ismétlési opciójának a megváltoztatására.
A lejátszás részleteinek a megjelenítésére.
Nagyításra/kicsinyítésre
A DVD szögének a megváltoztatására (ha a DVD esetében többféle szög is
adott).
A hangerő beállítására.
A hang elnémítására.
A DVD feliratozásának megváltoztatására vagy kikapcsolására.
A DVD zeneszámának a váltására (ha a DVD-n több zeneszám is van).
A távirányítón a „Menu” gomb (40) megnyomásával térhet vissza a Media Browser menüből a főmenübe.
Feliratozás lejátszása
AVI-videofájlok lejátszásakor a Media Giant le tudja játszani a feliratfájlokat.
Felirattal ellátott AVI-fájlok lejátszásához az AVI-fájl nevével egyező nevet kell adnia a feliratfájlnak
például így:
Filmnév:
Feliratnév:
My_Movie_With_Sub.AVI
My_Movie_With_Sub.SRT
• A távirányító navigációs gombjai segítségével jelölje ki a lejátszani kívánt fájt.
• A kijelölt fájl lejátszásának elindításához nyomja meg az „Enter” gombot (26) vagy a „Play” gombot
(18) a távirányítón.
Az AVI-fájl lejátszása a megfelelő, betöltött feliratfájllal indul el.
A lejátszás alatti feliratok letiltásához/engedélyezéséhez nyomja meg a „Sub-t” gombot (37) a
távirányítón.
A távirányítón a „Menu” gomb (40) megnyomásával térhet vissza a Media Browser menüből a főmenübe.
301
MAGYAR
Saját zene lejátszása
Az egység merevlemezén, az USB-tárolóeszközön vagy hálózati helyen tárolható zenei fájlokat is lejátszhat
saját tévékészülékén a Media Giant „Music” szűrőjén keresztül.
Ha kijelölte már a „Music” szűrőt, a Media Giant csak zenei fájlokat fog a képernyőn megjeleníteni. Az
összes többi fájl láthatatlan marad.
[ Zenei üzemmód ]
• A távirányító navigációs gombjainak (15) a segítségével jelölje ki a lejátszani kívánt fájlt.
Ha kijelölt már egy zenei fájlt, a Media Browser a képernyő jobb oldali részén a fájlnévvel és fájlmérettel
együtt fogja megjeleníteni az ID3-címkeadatokat (amennyiben van ilyen).
• A kijelölt fájl lejátszásának elindításához nyomja meg a távirányítón az „Enter” gombot (26) vagy a
„Play” gombot (18).
Lejátszáskor a távirányítón az alábbi lejátszási funkciók adottak:
-
Pause
(17)
Stop
(23)
Rewind
(10)
Fast Forward
(32)
Repeat
(8)
Info
(27)
Volume
(12), (13)
Mute
(30)
A lejátszás szüneteltetésére vagy folytatására.
A lejátszás leállítására.
A visszafelé történő lejátszásra.
A gyors, előre irányú lejátszásra.
Az aktuális fájl/mappa ismétlési opciójának a megváltoztatására.
A lejátszás részleteinek a megjelenítésére.
A hangerő szabályozására.
A hang elnémítására.
A távirányítón a „Menu” gomb (40) megnyomásával térhet vissza a Media Browser menüből a főmenübe.
302
MAGYAR
Saját fényképek és képek lejátszása
Az egység merevlemezén, az USB-tárolóeszközön vagy hálózati helyen tárolható fényképeket és
fényképeket is megtekintheti saját tévékészülékén a Media Giant „Photos” szűrőjén keresztül.
Ha a „Photos” szűrőt kijelölte már, a Media Giant a képernyőn kizárólag fénykép- és képfájlokat fog
megjeleníteni. Az összes többi fájl láthatatlan marad.
[ Fényképes üzemmód ]
• A távirányítón a navigációs gombok (15) segítségével jelölheti ki a lejátszani kívánt fájlt.
Ha kijelölt már egy fényképfájlt, a Media Browser a fájlnévvel és fájlmérettel együtt kis előnézetet jelenít
meg a képernyő jobb oldali részén.
• A kijelölt fájl lejátszásának elindításához nyomja meg a távirányítón az „Enter” gombot (26) vagy a
„Play” gombot (18).
Lejátszáskor a távirányítón az alábbi lejátszási opciók állnak rendelkezésre:
-
Pause
Stop
Navigation keys
Previous
Next
Repeat
Info
Zoom
(17)
(23)
(15)
(11)
(31)
(8)
(27)
(5)
A diavetítés szüneteltetésére vagy folytatására.
A diavetítés leállítására.
Az éppen látható fénykép elforgatására.
Az aktuális mappa előző fájljának a lejátszására.
Az aktuális mappa következő fájljának a lejátszására.
Az aktuális fájl/mappa ismétlési opciójának a megváltoztatására.
A diavetítés részleteinek a megjelenítésére.
Nagyításra/kicsinyítésre.
A távirányítón a „Menu” gomb (40) megnyomásával térhet vissza a Media Browser menüből a főmenübe.
Ötlet:
A Beállítások menü olyan opcióval egészül ki, amelynek segítségével meg lehet változtatni a
fényképes diavetítés átmenetét.
A „Transition Effect” (Átmenet-effektus) opcióval kapcsolatban lásd a 13. fejezetet.
303
MAGYAR
Copy mode (másolási üzemmód)
Ha egyik helyről a másikra kíván adatokat átmásolni (például: USB-eszközről a belső merevlemezre),
használhatja a Media Giant Copy mode-ját.
A Copy mode úgy férhető hozzá, hogy olyankor nyomja meg a „Copy” gombot (7) a távirányítón, amikor Ön
éppen a médiaböngészőben van. A Copy menü jelenik meg a képernyőn:
[ Copy menü ]
[ Copy menü — Másolásvarázsló ]
Másolási forrásként választhat az „USB”, a „Harddisk” vagy a „Network” közül. A rendelkezésre álló
célhelyek az „USB”, a „Harddisk”, illetve a „Recycle” (fájlok törlésére).
Először a távirányítónak a felfelé, illetve lefelé irányú navigációs gombjainak (15) a megnyomásával jelölje
ki a forrást. Amikor a megfelelő forrást kijelölte már, nyomja meg a jobb oldali navigációs gombot (15),
majd a cél kijelölésére használja a felfelé, illetve lefelé irányú navigációs gombot (15).
Megjegyzés: Kiemelt keret látható körülötte, ha a Copy menü forrás- vagy célszegmense aktív.
Megjegyzés: „USB”-ről „USB”-re, illetve „Harddisk”-ről „Harddisk”-re nem lehet másolni.
• Ha a forrás-, illetve célhely helyes, a másolásvarázslóval való folytatás érdekében nyomja meg a
távirányítón az „Enter” gombot (26).
• Addig navigáljon saját forrásán belül, amíg meg nem találta az átmásolni kívánt fájlokat vagy mappákat.
A távirányítón a navigációs gombok (15), illetve az „Enter” gomb (26) segítségével navigálhat a mappák
között.
• A távirányítónak a „Play” gombja (18) segítségével jelölje meg az átmásolni kívánt fájlokat vagy
mappákat. A megjelölt fájlok vagy mappák neve mögött megjelölő ikon látható.
• Ha a forrásfájlokat vagy –mappákat már megjelölte, nyomja meg a távirányítón a jobb oldali navigációs
gombot (15), amennyiben át akar váltani a célszegmensre.
Megjegyzés: Nem lehet célként kijelölni a Media Giant NTFS-médiapartícióját, mivel az NTFSmédiapartícióra írni nem lehetséges.
• Addig navigáljon saját céleszközén belül, amíg meg nem találta a megfelelő másolási helyet. A
távirányítón a navigációs gombok (15), illetve az „Enter” gomb (26) segítségével navigálhat a mappák
között.
• Ha megtalálta már a megfelelő helyet, a másolási folyamat elindításához nyomja meg a távirányítón a
jobb oldali navigációs gombot (15).
304
MAGYAR
• A másolásvarázsló kéri majd a másolási folyamat megerősítését. Ha a másolási folyamatot folytatni
kívánja, jelölje ki az „OK”-t.
[ Másolás megerősítése ]
[ Másolás folyamatban ]
Amikor a másolási folyamat befejeződött, erről üzenet fogja értesíteni a képernyőn.
Fájlokat is törölni lehet a Copy menün keresztül.
Ha fájlokat kíván törölni, jelölje ki célként a „Recycle”-t.
Jelölje ki a törölni kívánt fájlokat vagy mappákat, majd nyomja meg a távirányítón a jobb oldali navigációs
gombot (15), ezután megerősítési ablak jelenik meg a kijelölt fájlok vagy mappák törlésére.
A kijelölt fájlok vagy mappák törléséhez jelölje ki az „OK”-t.
[ Copy menü — Törlésvarázsló ]
[ Törlés megerősítése ]
305
MAGYAR
10. Playback Recordings (Felvételek lejátszása)
Ha a „Playback Recordings” opciót jelölte ki a főmenün, a Media Giant kérni fogja, hogy válasszanak a
„Digital” és az „Analog” közül.
• Ha a „Digital”-t választotta, a Media Giant a kész felvételeket a Media Giantnek a digitális (DVB-T)
tunerjén keresztül jeleníti meg.
• Ha az „Analog”-ot jelöli ki, a Media Giant minden kész felvételt a Media Giantnek az analóg bemenetein
(Composite-in, Component-in, FireWire-in) keresztül jelenít meg).
Amikor a „Digital”-t vagy az „Analog”-ot kijelölte már, a Media Giant listát jelenít meg a képernyőn a
kijelölt opció szerinti felvételekről:
[ Select Recording ]
[ Felvételek listája ]
Minden egyes videofelvételt egy miniatűr (ez a felvétel első képkockája), név, időpont és dátum, valamint
a felvétel minősége jelöl.
A felvétel utáni sárga csillag azt jelenti, hogy a felvétel új, és még nem nézték meg. Ha a felvételt már
megtekintették, a sárga csillag eltűnik.
A felvételek között a távirányítónak a „fel” és „le” navigációs gombjai (15) segítségével navigálhat, majd a
felvételeket szintén a távirányítónak az „Enter” (26), illetve „Play” gombja (18) megnyomásával
játszhatja le, amikor a felvétel kiválasztása már megtörtént.
Lejátszáskor a távirányítón az alábbi lejátszási opciók érhetők el:
-
Pause
Slow
Stop
Rewind
Fast Forward
Ins. Rep.
CM. Skip
Previous
Next
Repeat
Info
Goto
Zoom
Audio
- Volume
- Mute
(17)
(24)
(23)
(10)
(32)
(16)
(25)
(11)
(31)
(8)
(27)
(9)
(5)
(4)
(12), (13)
(30)
A lejátszás felfüggesztésére vagy folytatására.
Lassított lejátszásra.
A lejátszás leállítására.
Visszatekerésre.
Gyorstekercselés előre.
10 mp-nyi visszaugrásra lejátszáskor.
30 mp-nyi előreugrásra lejátszáskor.
Az előző fejezet vagy az előző felvétel lejátszására.
A következő fejezet vagy a következő felvétel lejátszására.
Az aktuális lejátszás ismétlési opciójának a megváltoztatására.
A lejátszás részleteinek a megjelenítésére.
Az egy adott ponthoz (időpont) történő ugrásra a filmen belül.
Nagyításra/kicsinyítésre.
A hangsáv váltására (ha ez az adott lejátszás esetében rendelkezésre
áll).
A hangerő beállítására.
A hang elnémítására.
306
MAGYAR
A távirányító bal, illetve jobb oldali navigációs gombja (15) segítségével több funkció kijelölése céljából is
navigálni lehet az opciók között a felvételek listájának a felső menüjén:
Play
Delete
Rename
Sorting
Edit
A felvételek lejátszására.
A felvételek törlésére.
A felvételek átnevezésére.
A felvételek rendezésének a megváltoztatására.
A felvételek szerkesztésére (amelyet a következő alfejezetben magyarázunk el).
Az „Edit” menü magyarázata
Megjegyzés:
Digitális felvételek a Media Giant segítségével nem szerkeszthetők. Ennélfogva az Edit
menü több olyan opciót is tartalmaz, amelyek — ha a „Digital”-t jelölték ki a „Playback
Recordings” képernyőn — nem állnak rendelkezése.
A Media Giant csak akkor teszi lehetővé a „Copy to FAT32 partition” opcióhoz való
hozzáférést az Edit menün, ha a „Digital”-t jelölték ki a „Playback Recordings”
képernyőn.
Az „Edit” menünek több opciója is kínálkozik a felvételek módosítására, amelyek magyarázata alább
látható:
[ Felvételek — Szerkesztés menü]
- Set Thumbnail
A „Set Thumbnail” opció segítségével lejátszhatja saját filmjét,
egyszersmind a felvétel szempontjából miniatűrként jelölheti ki kedvenc
keretét.
- A-B Erase
Az „A-B Erase” opció segítségével megjelölheti saját filmjének egy
részét (például: reklám), majd törölheti is azt a felvételből.
- Split Title
A „Split Title” opció segítségével két részre oszthat egy felvételt
(például: ha két programot egyazon programozott felvétel során vett
fel).
- Merge Title
A „Merge Title” opció segítségével két felvételt egy felvétellé
egyesíthet.
- Add Chapter Mark
Az „Add Chapter Mark” opció segítségével fejezetjelekkel egészítheti ki
saját felvételeit. Ennek révén könnyen egy a felvételen belül
meghatározott részhez ugorhat.
Megjegyzés:
A Beállítások menün annak érdekében is engedélyezheti az „Auto Chapter” opciót,
hogy saját felvételét automatikusan fejezetjelekkel egészíthesse ki.
307
MAGYAR
- Remove Chapter Mark
A „Remove Chapter Mark” opció segítségével törölheti a fejezetjeleket
a felvételről. Ez az opció hasznos, ha a Media Giant-ot úgy konfigurálták,
hogy automatikusan alkalmazzon fejezetjeleket, viszont egy idő után
azokat a felvételről törölni kívánják.
- Copy to FAT32 partition
A „Copy to FAT32 Partition” opció segítségével átmásolhatja saját
felvételét a felvételt tartalmazó partícióról a „REC” mappába a Media
Giant médiapartícióján.
Ha a felvételt átmásolta már az FAT32-partícióra, azt saját számítógépén
le is tudja játszani, oda át is tudja másolni, illetve ugyanott
szerkesztheti is, ha a Media Giant USB-n keresztül van csatlakoztatva,
illetve a szóban forgó felvételt a hálózaton keresztül UPnP A/V-ügyfél
felé adatfolyam segítségével is továbbíthatja (ugyanúgy, mint a
Conceptronic C54WMP, illetve a Conceptronic CFULLHDMA esetében).
Megjegyzés:
A Media Giant-nak az UPnP A/V-szerver funkciójával kapcsolatos további
tájékozódás végett lásd a 16. fejezetet.
308
MAGYAR
11. TV Tuner/AV Input (Tévétuner/AV-bemenet)
A főmenün szereplő „TV Tuner/AV Input” opció segítségével megtekinthetők és fel is vehetők a Media
Giantnek a digitális (DVB-T) tévétunerjéről vagy annak az AV bemeneti forrásáról származó állományok.
Ötlet:
A Media Giant bármelyik menüjéből könnyen hozzáférhet a Live-TV képernyőhöz a
távirányító „Live-TV” gombjának (38) a megnyomásával.
Ha a „TV Tuner/AV Input” opciót jelöli ki, a Media Giant a tévétunerről származó Live-TV képet jeleníti
meg. Miközben élő tévéadást néz, csatornát is válthat a távirányítón a „Channel +” (29) vagy a
„Channel –” (28) gomb megnyomásával.
A távirányító „Source” gombjának (2) a segítségével lehet átváltani a tévétuner, az összetett bemenet és
a komponens bemenet között. A forrás rövid ideig a képernyő felső jobb sarkában látható.
Időeltolás
A Media Giant támogatja az időeltolást. Az időeltolás funkció segítségével — ha maga az időeltolás
aktiválva lett — az aktuális csatornáról/bemenetről történő felvétellel „szüneteltetni” lehet a Live TV-t
(élő tévéműsort), illetve a Live audiót/videót.
Az időeltolás funkciójának az inicializálásához nyomja meg a „Timeshift” gombot (22) a távirányítón.
Ha az időeltolás funkcióját inicializálták, a Live TV vagy Live A/V „felfüggesztődik”, maga az egység pedig
a háttérben hajtja végre a csatornáról történő felvétel rögzítését.
[ Időeltolás: Inicializálás ]
[ Időeltolás: Aktív ]
Megjegyzés: Ha az időeltolás funkcióját aktiválták, a képernyőn megjelenő állapotsáv mutatja az
időeltolás pufferének a maximális időtartamát. Ha ezen a pufferen állítani kíván (hogy kisebb
vagy nagyobb legyen), az időeltolás pufferéhez tartozó partíció méretének a beállításához
újra kell formáznia a Media Giant merevlemezét.
A formázással kapcsolatos további tájékozódás végett lásd a 15. fejezetet.
Az időeltolás során a távirányítón az alábbi gombok használhatók:
- Play
(18)
Az időeltolás pufferének a lejátszására.
- Pause
(17)
A lejátszás szüneteltetésére vagy folytatására.
- Slow
(24)
A lassú mozgással történő lejátszásra.
- Stop
(23)
A lejátszás leállítására.
- Rewind
(10)
A visszafelé történő lejátszásra.
- Fast Forward
(32)
A gyors előre irányú lejátszásra.
- Ins. Rep.
(16)
A 10 mp-cel történő visszaugrásra a lejátszás során.
- CM. Skip
(25)
A 30 mp-cel történő előreugrásra a lejátszás során.
- Info
(27)
Az időeltolás pufferére vonatkozó információ megjelenítésére vagy
elrejtésére.
- Volume
(12), (13)
A hangerő szabályozására.
- Mute
(30)
A hang elnémítására.
309
MAGYAR
Állandó időeltolás
A Media Giant-nak a Beállítások menüjén lehet engedélyezni a „Permanent Timeshifting”-et. Ha ezt a
funkciót engedélyezik, az időeltolás funkciója mindvégig aktív marad, egyszersmind lehetővé teszi, hogy a
lejátszást nyomban szüneteltethessék, illetve hogy — az időeltoláshoz tartozó pufferben történő
„ugráshoz” — a távirányítón a fenti gombokat használhassák.
Felvétel
Miközben élő tévéadást (Live TV) vagy Live A/V–t néz az egységen keresztül, a távirányítón a „Rec” gomb
(19) megnyomásával elindíthatja az aktuális csatornán látható műsor felvételét. Az egység megkezdi a
felvételt, és egészen addig folytatja, amíg a távirányítón meg nem nyomják a „Stop” gombot (23).
Felvétel alatt az előlapon a „REC” LED világít.
Megjegyzés: Az egység a csatlakoztatott forráson érzékeli a másolás elleni védelmet, például a
MacroVision védelmet DVD-lemezek esetén. Ha a csatlakoztatott forrás másolás ellen védett,
akkor az egység megakadályozza a felvételt, majd figyelmeztető üzenetet jelenít meg,
amikor megnyomják a felvevőgombot.
Megjegyzés: A Media Giant alapértelmezésben HQ (kiváló minőségű) felvételt készít. A felvétel minősége
a Beállítások menün megváltoztatható.
Megjegyzés: Felvétel alatt az aktuális csatornát nem lehet váltani.
Ha felvétel alatt megnyomja a „Rec” gombot (19), akkor a felvételi idő attól kezdve, hogy megnyomták a
„Rec” gombot, 30 percre állítódik be.
A képernyőn pedig a következő üzenet jelenik meg: „OTR: 30 min.”.
[ Normál felvétel ]
[ A felvételidőzítő aktiválva ]
Akár egészen 240 percig terjedően újabb és újabb 30 perccel növelheti az időt, ha ismét megnyomja a
„Rec” gombot (19). Az egység mindaddig folyamatosan folytatja a felvételt, amíg a felvételi idő le nem
telt, vagy amíg meg nyomták a „Stop” gombot (23) a távirányítón.
Digitális rádió
A Media Giant támogatja azokat a digitális rádióműsorokat is, amelyeket digitális (DVB-T) jelek segítségével
sugároznak.
A digitális rádióállomások a tévékészülék hangszóróin vagy azon a vevőkészüléken keresztül hallgathatók,
amely a Media Gianthez van csatlakoztatva.
Digitális rádióállomások hallgatása.
Ha éppen a digitális tuner funkciót használja, digitális rádiócsatornákat is hallgathat.
• Jelölje ki a „TV Tuner/AV Input” opciót a Media Giant főmenüjén.
A Media Giant megjeleníti a tévétunerről jövő, élő tévéképet.
• Nyomja meg a távirányítón a „Live-TV” gombot (38), hogy átválthasson digitális rádió üzemmódra.
A digitális rádió funkció ezzel bekapcsol.
• A „Channel +” (29) vagy „Channel –„ (28) gombok segítségével kijelölhető egy adott digitális
rádióállomás.
• Ha vissza kíván térni digitális tévé üzemmódba, nyomja meg ismét a távirányítón a „Live-TV” gombot
(38).
310
MAGYAR
EPG (elektronikus műsortájékoztató)
A Media Giant digitális (DVB-T) tunerje EPG-vel (elektronikus műsortájékoztató) egészíti ki a Media Giant
funkcióit.
Az EPG műsortájékoztató a „Guide” (33) gomb megnyomásával hozzáférhető, ha éppen élő tévéműsort
néznek.
Az EPG műsortájékoztató a képernyőn jelenik meg:
[ Elektronikus műsortájékoztató ]
[ Elektronikus műsortájékoztató: Programozott
felvétel)
A távirányító alábbi gombjai segítségével lehet az EPG műsortájékoztatót üzemeltetni:
- Bal/jobb oldali
(15)
A kijelölt dátum megváltoztatására az EPG műsortájékoztatón.
-
(15)
(11)
(31)
(10)
(32)
(19)
A kijelölt műsor megváltoztatására az EPG műsortájékoztatón.
Az előző csatornára való átváltásra.
A következő csatornára való átváltásra.
Végiggördülésre a műsorra vonatkozó infón.
Végiggördülésre a műsorra vonatkozó infón.
A kijelölt műsor programozására felvétel céljából.
nyíl
Fel/le nyíl
Előző
Következő
Visszacsévélés
Gyors előre
Felvétel
Ha megnyomja a „Rec” (19) gombot, a kijelölt műsor hozzáadódik a Media Giant már programozott
felvételeihez. A kijelölt műsort piros marker jelöli jelezve, hogy azt beprogramozták felvételre.
A beprogramozott felvétel a 12. fejezetben ismertetettek szerint megtalálható a Media Giantnek a
„Scheduled Recording” menüjén.
A távirányítón a „Guide” gomb (33) megnyomásával lehet visszalépni az élő tévéműsorhoz.
311
MAGYAR
DV Control (DV-szabályozás)
A Media Giant előlapja mögötti FireWire minicsatlakozás teszi lehetővé, hogy saját DV-kameráját
közvetlenül csatlakoztathassa a Media Giant-hoz, illetve otthoni videofelvételeket nézhessen vagy
rögzíthessen a belső merevlemezen.
• Csatlakoztassa DV-kameráját a Firewire minicsatlakozáshoz [7] a Media Giant előlapján.
• Kapcsolja be DV-kameráját, majd állítsa „Playback” üzemmódra.
• A „DV Control” üzemmód inicializálásához nyomja meg a „DV” gombot (39) a távirányítón.
A Media Giant a képernyőn a következőképpen jeleníti meg a DV-kezelőszerveket:
[ DV-vezérlőpult ]
A távirányító navigációs gombjaival (15) kijelölheti a DV-vezérlőpultjának a gombjait. Saját kijelölését
pedig a távirányító „Enter” gombjának (26) a segítségével erősítheti meg.
Ha kijelölte már a „Play”-t a DV-vezérlés ablakában és a film lejátszása elindult, nyomja meg a „Rec” (19)
gombot a távirányítón, amennyiben el kívánja indítani saját DV-filmjének a merevlemezre történő
felvételét.
Ötlet:
Ha éppen felvesz, a távirányítón a „DV” gomb (39) megnyomásával el is rejtheti a DVvezérlőpultot. A vezérlőpult ismét megjelenik, ha még egyszer megnyomják a „DV”
gombot.
Ez a felvétel a távirányító „Stop” gombjának (23) a megnyomásával leállítható.
A felvett filmek a 10. fejezetben ismertetett módon a felvételek listáján láthatók.
Ha ki kíván lépni a DV-vezérlés üzemmódból, nyomja meg a „Return” gombot (14) a távirányítón.
312
MAGYAR
12. Scheduled Recording (Programozott felvétel)
A berendezés beprogramozható az adott csatornákról történő felvételre meghatározott időpontokban. A
berendezés akár 8 programozott felvételre is beprogramozható.
Ötlet:
A felvételek könnyen programozhatók a Media Giantnek az EPG műsortájékoztatója segítségével.
Az EPG műsortájékoztató részletes magyarázata ennek a használati utasításnak a 11. fejezetében
található.
• Jelölje ki a „Scheduled Recording” opciót a főmenün.
A programozott felvétel képernyője jelenik meg a tévékészüléken.
[ Programozott felvétel menüje ]
[ Programozott felvétel hozzáadása ]
A programozott felvétel menüje 5 opciót kínál fel, amelyek a távirányító bal, illetve jobb oldali navigációs
gombjával (15) kijelölhetők:
Add
Edit
Delete
Status
History
Új, programozott felvétel hozzáadására
Meglévő, programozott felvétel szerkesztésére
Programozott felvétel törlésére
A programozott felvételeket tartalmazó lista állapotának a megváltoztatására
A programozás előzményeit tartalmazó listának a megjelenítésére
Programozás hozzáadása vagy szerkesztése
Ha a menün az „Add” vagy „Edit” opciót jelölte ki, a távirányítón pedig megnyomta az „Enter” gombot
(26), új programozást is hozzáadhat, illetve a meglévőt szerkesztheti.
Alapértelmezésben a „Source” mező van kijelölve.
Minden opció megváltoztatható a felfelé, illetve lefelé navigációs gombokkal (15), egyszersmind másik
mező is kijelölhető a bal, illetve jobb oldali navigációs gombbal (15).
• Jelölje ki a megfelelő forrást a felvételhez. Ez lehet tévécsatorna, az összetett videobemenet, vagy akár
komponens videobemenet.
• Állítsa be a felvétel megfelelő dátumát.
• Állítsa be a felvétel megkezdésének megfelelő időpontját.
• Állítsa be a felvétel hosszát.
• Állítsa be a felvételismétlési opciót. A következők közül választhat:
„Once”, „Everyday”, „Mon-Fri”, „Mon-Sat”, „Sun”, „Mon”, „Tue”, „Wed”, „Thu”, „Fri” vagy „Sat”.
Át is ugorhatja a „Device” mezőt, mivel csak a belső merevlemezre vehet fel.
313
MAGYAR
• Állítsa be a felvétel minőségét. A következők közül választhat: „HQ”, „SP”, „LP”, „EP” és „SLP”.
Megjegyzés: A „Quality” mező megváltoztatásával befolyásolhatja a felvétel minőségét, valamint a
felvételhez szükséges tárhely mértékét. Az egyes minőségbeállításokhoz rendelkezésre
álló felvételi idő a programozás ablakának a bal felső részén látható.
• Állítsa a „Nicam” opciót „on”-ra vagy „off”-ra.
A Nicam opciót „on”-ra kell állítani, ha annak a forrásnak, ahonnan műsort kíván felvenni, két
különböző beszédnyelve van (például: Eurosport).
• Ha a felvétel minden opcióját beállította már, a programozás elmentéséhez nyomja meg az „Enter”
gombot (26) a távirányítón.
• A képernyőn előbukkanó megerősítés jelenik meg. Jelölje ki a „Confirm”-öt, majd nyomja meg a
távirányítón az „Enter” gombot (26), ha a programozást el kívánja menteni.
A felvétel ezután programozott felvételként programozódik, az egység pedig még akkor is megkezdi a
felvétel készítését a beprogramozott időpontban és csatornán, ha az eszközt „Standby”-ra (készenléti
üzemmódba) állítják.
Megjegyzés: Felvétel alatt nem lehet az aktuális csatornát váltani.
314
MAGYAR
13. Setup (Beállítás)
Ha a „Setup” opciót jelöli ki a főmenün, a Beállítások menü jelenik meg a képernyőn. Az alábbi
magyarázatban a hozzá tartozó ismertetéssel együtt látható az összes rendelkezésre álló beállítás.
A távirányító navigációs gombjai segítségével váltogathat a Beállítások menü különböző opciói között.
[ Beállítások menü — Videó ]
[ Beállítások menü — Felvétel ]
A/V-beállítások.
Aspect Ratio
Brightness
Contrast
Transition
Audio Setup
A Media Giant kimenőjele esetében az oldalarány megváltoztatására.
(„Letterbox 4:3”, „Pan-Scan 4:3”, „Widescreen 16:9”)
A Media Giant kimenőjele esetében a fényesség megváltoztatására.
A Media Giant kimenőjele esetében a kontraszt megváltoztatására.
A fényképes diavetítések közötti átmenet megváltoztatására.
A Media Giant hangbeállításainak a megváltoztatására.
Night Mode
A Night Mode (éjszakai üzemmód) hangjának be-, illetve
kikapcsolására (Off, On, Comfort).
Digital Output A digitális hangkimenet beállítására (HDMI-LPCM, HDMI-RAW,
SPDIF-LPCM, SPDIF-RAW).
Felvétel:
Quality
Az alapértelmezett felvételi minőségének a megváltoztatására („HQ”, „SP”,
„LP”, „EP”, „SLP”) szolgál.
Megjegyzés: A „Quality” mező megváltoztatásával befolyásolhatja a felvétel minőségét, egyszersmind a
felvételhez szükséges tárhely mértékét. A különböző minőségbeállítások a következő
tárhelyet igénylik egy órányi videofelvétel elkészítéséhez:
HQ:
4,85 GB (4850 MB)
SP:
2,42 GB (2420 MB)
1,62 GB (1620 MB)
LP:
EP:
1,21 GB (1210 MB)
0,80 GB (800 MB)
SLP:
Auto Chapter
Permanent Timeshift
Az Auto Chapter beállításának a megváltoztatására szolgál. Az Auto Chapter
funkció révén automatikusan fejezetjeleket adhat hozzá a saját felvételekhez,
hogy könnyebben lehessen ugrálni a felvételek között a lejátszás során.
Az állandó időeltolás funkciójának engedélyezésére vagy letiltására szolgál. Ha ez
a funkció engedélyezve lett, az időeltolás funkciója mindvégig aktív marad,
egyszersmind lehetővé teszi azt is, hogy a lejátszást nyomban szüneteltethessék,
illetve a távirányító fenti gombjait használhassák az időtoláshoz tartozó
pufferben történő „ugráshoz”.
315
MAGYAR
[ Beállítások menü — Hálózat ]
[ Beállítások menü — Rendszer ]
Hálózat:
LAN Preference **
Az előnyben részesített LAN-kapcsolat megváltoztatására szolgál: Cable (kábeles)
vagy Auto (a Powerline segítségével).
Ha a „Cable”-t választja, a Media Giant mindig a LAN-portot fogja hálózati
kapcsolatként alkalmazni.
Ha az „Auto (Via Powerline)”-t választja, a Media Giant a Powerline-funkciót fogja
használni, ha Powerline-hálózat rendelkezésre áll. Ha nem áll rendelkezésre
Powerline-hálózat, a LAN-portot használja.
Megjegyzés:
Ha a Media Giant mind a Powerline-hoz, mind a LAN-kábelhez csatlakoztatva van, az
alapértelmezett hálózat a Powerline-hálózat lesz. Ha a Powerline-hálózat teljesítménye 1
Mb/s alá csökken, a Media Giant automatikusan átvált Cable (kábeles) üzemmódba. Cable
üzemmódban a Media Giant folyamatosan ellenőrzi a Powerline-hálózat teljesítményét.
Ha a teljesítmény 1 Mb/s fölé nő, a Media Giant átvált Cable üzemmódból Powerline
üzemmódba.
Wired Lan Setup
A „Wired Lan Setup”-nál konfigurálhatja a Media Giant IP-címét.
Ha kijelölte már, akkor választhat a „Cancel”, a „DHCP IP (Auto)” vagy a
„Fix IP (Manual)” közül.
Ha az adott hálózaton belül DHCP-szervere van, jelölje ki a „DHCP IP” opciót.
Ha statikus IP-címet kíván használni, jelölje ki a „FIX IP”-t.
A telepítővarázsló gondoskodik a statikus IP-cím beírásához szükséges mezőkről. Az
IP-cím, az alhálózati maszk, az alapértelmezett átjáró és a DNS-szerver beírásához
használja a navigációs gombokat (15), valamint a 0-9 numerikus gombokat (6).
Ha a beírt érték helyes, nyomja meg a távirányítón az „Enter” gombot (26).
Media Server
A Media Giant nevének a megváltoztatására a hálózaton belül.
Ha ezt jelölték ki, akkor a „Server/Host name” és a „Group name” közül lehet
választani.
Server/Host name
A Media Giant nevének a megváltoztatására
A Media Giant neve lehetővé teszi az UPnP A/V-ügyfelek
számára (ilyen például a Conceptronic C54WMP vagy a
Conceptronic CFULLHDMA), hogy adatfolyam segítségével — a
hálózaton keresztül — médiaállományokat juttathassanak el a
Media Giant merevlemezéről, illetve lehetővé teszi azt is a
hálózati környezetben működő számítógépnek, hogy a Media
Giant Samba-szerveréhez hozzáférhessen.
Group name
A Media Giant munkacsoport nevének a megváltoztatására.
Megjegyzés:
Ha többet akar megtudni a Media Giant UPnP A/V szerverének
a célalkalmasságáról, olvassa el a 16. fejezetet.
Ha többet akar megtudni a Media Giant Samba-szerverének a
célalkalmasságáról, olvassa el a 18. fejezetet.
316
MAGYAR
Rendszer:
Menu Language
Set Time
HDD Format
Timer Setup
Firmware Upgrade
Megjegyzés:
A Media Giant üzemeltetésekor használni kívánt nyelvnek a kijelölésére.
Az időpont és a dátum megváltoztatására.
A belső merevlemez formázására (lásd a 15. fejezetet).
Diavetítés időzítője:
Képes diavetítés alatt a diavetítés intervallumának a
megváltoztatására szolgál.
Képernyővédő időzítője:
A képernyővédő aktiválása szempontjából érdekes
inaktivitás időtartamának a megváltoztatására szolgál.
A Media Giant firmware-jének a bővítésére szolgál.
Firmware-bővítés az interneten vagy USB-tárolóeszközön keresztül történhet. A
firmware-bővítési opció beállítható „Auto”-ra, illetve „Manual”-re.
Ha az „Auto”-t jelölik ki (ez az alapértelmezett), a Media Giant véletlenszerűen online ellenőrzi az új firmware-t, majd a firmware-t automatikusan bővíti, amikor sem
felvétel/sem lejátszás nincs éppen a Media Gianton.
Ha a „Manual”-t jelölik ki, akkor az új firmware manuálisan ellenőrizhető.
Ha az aktuális firmware-verziót ellenőrizni kívánja, olyankor nyomja meg az „Info”
gombot (27) a távirányítón, amikor a főmenüben van. A firmware-verzió jelenik meg a
képernyőn.
Restore Default
A Media Giant-nak az alapértelmezett beállításokra történő visszaállítására,
egyszersmind a telepítővarázslónak az egység újbóli konfigurálásához szükséges
inicializálására szolgál.
[ Setup menu – TV Setup ]
[ Channel Edit ]
A tévé beállításai:
TV Input
Channel Scan
Manual Tune
TV Program
Jelölje ki az adott országot a listán. Ha az adott ország a listán nem található,
jelölje ki a listán az „Other”-t.
Ötlet: Egy adott DVB-T frekvenciasáv úgy is végigkereshető, hogy kijelöli a „6M”et (600 MHz), a „7M"-et (700 MHz), illetve a „8M”-et (800 MHz).
Indítsa el az automatikus csatornakeresést. A Media Giant automatikus
csatornakeresése eltarthat egy ideig, viszont ennek során megkeresi és
automatikusan el is tárolja az összes megtalált csatornát a Media Giant
memóriájába.
A Manual Tune (kézi hangolás) funkció segítségével új csatornákkal egészítheti ki a
már meglévő csatornalistát (az „Add” opció révén), illetve csatornákat törölhet az
adott csatornalistáról (a „Skip” opció révén), illetve neveket rendelhet hozzá a már
megtalált csatornákhoz (az „Edit” opció révén).
A tévéprogram opció segítségével úgy konfigurálható a Media Giant, hogy minden
DVB-T csatornát megjelenítsen (beleértve a fizetős csatornákat is, amelyek a Media
Gianten nem játszhatók le), illetve az adott konfiguráció segítségével elérhető, hogy
csak a szabad (FTA) csatornák jelenjenek meg.
317
MAGYAR
14. A számítógép USB-s összekapcsolhatósága
Az egység az adatoknak (filmek, zene, képek, felvételek stb.) a belső merevlemezről, illetve belső
merevlemezre történő átmásolásához csatlakoztatható az Ön számítógépéhez.
Megjegyzés: Az alábbi példában éppen Windows XP-n futó számítógépet használunk, az egység viszont
olyan számítógépen használható, ahol adott az USB-támogatás, illetve az FAT32- és NTFSfájlrendszerek olvasásának, valamint írásának a képessége.
Az egység csatlakoztatása saját számítógéphez
• Csatlakoztassa a mellékelt USB — mini-USB-kábelt az egység előlapján lévő mini-USB porthoz, valamint a
számítógép valamelyik szabad USB-portjához.
• Kapcsolja be az egységet az annak a hátoldalán lévő hálózati főkapcsoló segítségével. Az egység
felismerésére és telepítésére automatikusan kerül sor, azután pedig maga az egység további
meghajtóként jelenik meg a számítógépen.
Megjegyzés:
Ha a merevlemezt egy médiapartícióval particionálták (csak FAT32-ről van szó),
akkor kizárólag egy meghajtóbetűjel lesz látható. Ha a merevlemezt két médiapartícióval
particionálták (FAT32 és NTFS), a Media Giant két meghajtóbetüjelet jelenít majd meg.
Felvétel lejátszása a számítógépen
Ha saját felvételeit kívánja lejátszani a számítógépen, előbb át kell másolnia a felvételeket a rekordot
tartalmazó partícióból a médiapartícióba. Mindezt megteheti a „Copy to FAT32 Partition” parancs
segítségével, amely a „Playback Recordings” menün található, magyarázata pedig a 10. fejezetben
olvasható.
Amikor saját felvételeit átmásolta már az FAT32-partícióra, a felvett programokat számítógépén
lejátszhatja, ha az egység csatlakoztatva van a számítógéphez.
Az egység leválasztása a számítógépről
•
•
•
•
Kattintson egyszer a „Safe Removal” ikonra a tálcán.
Ha a gép erre kéri, jelölje ki a „Stop USB Mass Storage Device”-t.
Várjon a következő üzenetre: „Safe to remove Hardware”.
Húzza ki az USB-kábelt.
318
MAGYAR
15. A partícióval kapcsolatos adatok és a formázóvarázsló
A Media Giant-ot a legtöbb esetben előre formázott merevlemezzel szállítjuk. A merevlemezt a Media
Giant alapértelmezett konfigurációjának megfelelően formázzuk, maga a merevlemez pedig az alábbi
partíciókkal bír:
Az időeltolás pufferének a partíciója:
A felvételek partíciója:
Az FAT32-es médiapartíció:
Az NTFS médiapartíció:
~ 4,85 GB
a merevlemez tárhelyének 50%-a
a merevlemez tárhelyének 25%-a
a merevlemez tárhelyének 25%-a
Példa a következőkkel:
500 GB
750 GB
1000 GB
Az időeltolás pufferének a partíciója:
A felvételek partíciója:
Az FAT32-es médiapartíció:
Az NTFS médiapartíció:
~ 4,85 GB
~ 250 GB
~ 125 GB
~ 125 GB
~ 4,85 GB
~ 375 GB
~ 187 GB
~ 187 GB
~ 4,85 GB
~ 500 GB
~ 250 GB
~ 250 GB
A merevlemez alapértelmezett konfigurációja megváltoztatható a Media Giant merevlemezének az
újraformázásával.
Megjegyzés: Ha a Media Giant merevlemezét újraformázza, a merevlemezen tárolt és rögzített minden
tartalom törlődni fog!
A Media Giant merevlemezének a formázásához menjen a Beállítások menühöz, majd jelölje ki ott a „HDD
Format” opciót a „System” oldalon. Megerősítésként jelölje ki újból a „HDD format”-ot.
A merevlemez-meghajtó formázóvarázslója jelenik meg a képernyőn az arra irányuló kérdéssel együtt,
hogy a merevlemezt automatikusan („Auto”), illetve manuálisan („Manual”) kell-e formázni.
• Ha az „Auto”-t jelölte ki, a Media Giant az alapértelmezett formázási beállításokkal formázódik a
fentebb említettek szerint.
• Ha a „Manual”-t jelölte ki, a formázóvarázsló végigvezeti a merevlemez formázását célzó lépéseken.
[ Format Wizard – Auto or Manual ]
[ Formázóvarázsló — Időeltolás-puffer ]
A távirányító fel, illetve le navigációs gombjaival (15) változtassa meg az időeltolás pufferjének a méretét.
Az időeltolás pufferje 1, 2, 3, illetve 4 órára állítható be.
• Jelölje ki a „Next”-et, ha a következő lépéssel kívánja folytatni.
319
MAGYAR
[ Formázóvarázsló — Felvételi partíció ]
[ Formázóvarázsló — FAT32-/NTFS-partíció ]
• A távirányító fel, illetve le navigációs gombja (15) segítségével változtassa meg a felvételi partíció
méretét. A megmaradt tárhelyet a Media Giant médiapartíciójához (médiapartícióihoz) fogja a
berendezés felhasználni.
• Jelölje ki a „Next”-et, ha a következő lépéssel kívánja folytatni.
[ Formázóvarázsló — Formázás elindítása ]
[ Formázóvarázsló — Formázás ]
• Jelölje ki a „Format”-ot, ha a Media Giant merevlemezének formázásával kívánja kezdeni.
Formázás alatt a formázóvarázsló az alábbiakat jeleníti meg: „Proceeding”.
Megjegyzés: A formázási eljárás eltarthat egy ideig (~ 5 perc). Várjon, amíg a formázási eljárás be nem
fejeződött.
[ Formázóvarázsló — Befejezve ]
• Amikor a formázási eljárás befejeződött, a formázóvarázsló bezárásához jelölje ki az „OK”-t. A Media
Giant automatikusan újraindul.
320
MAGYAR
16. UPnP A/V-szerver (Twonky médiaszerver)
A Media Giant egyik sajátossága az UPnP A/V-szerver.
Ez gondoskodik arról, hogy a Media Giant és minden azon lévő médiatartalom rendelkezésére álljon a
hálózathoz tartozó UPnP A/V-ügyfeleknek (például: a Conceptronic CFULLHDMA-nak vagy a Conceptronic
C54WMP-nek).
A Media Giant esetében alkalmazott UPnP A/V-szerver a „Twonky médiaszerver”.
A Twonky médiaszerver automatikusan az FAT32-, illetve NTFS-médiapartíción indexel minden médiát. Ha
ezeknek a partícióknak valamelyikét új adatokkal egészítik ki, az automatikusan rendelkezésére áll majd a
hálózaton belüli UPnP A/V-ügyfeleknek.
Az UPnP A/V-szerver neve a „Network” (hálózat) szegmensnél állítható be a Media Giant Beállítások
menüjén.
Megjegyzés: Az UPnP A/V-szerver alapértelmezett neve: „media giant”.
Ha ismeri már a Twonky médiaszerver elnevezésű szoftvert, a számítógépe segítségével megváltoztathatja
a Twonky médiaszerver speciális beállításait.
Amennyiben a Twonky médiaszerver elnevezésű szoftver konfigurációs oldalaihoz kíván hozzáférni, írja be
a böngésző ablakába a Media Giant IP-címét, utána pedig a következő portszámot: 9000.
Például:
HTTP://192.168.0.100:9000/ (feltételezve, hogy 192.168.0.100 a Media Giant IP-címe).
A Twonky médiaszerverhez beépített „Troubleshooting” (hibaelhárítás) útmutató is tartozik, amely a
Twonky médiaszerver konfigurációs ablakának a bal oldali navigációs során található. Ez az útmutató segít
majd a Twonky médiaszerver konfigurálásában.
A Twonky médiaszerverrel kapcsolatos további tájékozódás végett keresse a Twonky webhelyét:
http://www.twonkymedia.com/
321
MAGYAR
17. Böngészés a hálózati megosztások között
A Media Giant segítségével böngészhet a hálózati megosztások között, egyszersmind közvetlenül le is
játszhat médiafájlokat egy adott hálózati megosztásról. Ahhoz, hogy ezt a funkciót használhassa,
gondoskodnia kell saját médiamappáinak az adott hálózaton belüli megosztásáról, hogy a Media Giant
azokat megtalálhassa, és hozzájuk is férhessen.
Ebben a fejezetben azt magyarázzuk el, miként engedélyezheti a fájlmegosztást Windows XP és Windows
Vista esetében.
Megjegyzés: Ez a kézikönyv csak Windows XP és Windows Vista használata esetében ismerteti a fájl-,
illetve mappamegosztást.
Ellenőrizze operációs rendszerének vagy hálózati tárolóeszközének a kézikönyvét arra nézve,
miként oszthat meg egy médiafájlokat tartalmazó mappát.
Fájlmegosztás Windows XP esetében
• A start menün található parancsikon segítségével nyissa meg a „My Computer”-t, majd navigáljon a
megosztani kívánt médiafájlokat tartalmazó mappához.
• Kattintson egyszer a médiafájlokat tartalmazó mappára, és jelölje ki a „Share this folder” opciót a bal
oldali menüsoron.
[ My Computer— Mappamegosztás ]
A mappa tulajdonságai jelennek meg a „Sharing” oldal egyidejű megjelenésével egyetemben.
A „Network sharing and security” szegmenst használhatja a mappa megosztására.
Ha korábban még nem osztott meg egyetlen mappát sem, az ablakban a „Network Setup Wizard” sorra
kattintva kell futtatnia a hálózattelepítő varázslót.
322
MAGYAR
[ Tulajdonságok — Oldalmegosztás ]
[ Tulajdonságok — Oldalmegosztás ]
• Ha a hálózattelepítő varázsló már korábban befejezte a működését, a „Share this folder on the
network”-re kattintva lehet megosztani az adott mappát.
• Írjon be egy a megosztásra vonatkozó nevet a szövegmezőbe, majd kattintson az „Apply”-ra.
• Az ablak bezárásához kattintson az „OK”-ra.
Innentől fogva a mappa egy a mappaikon alatt elhelyezkedő kézzel együtt jelenik meg a listán jelezve,
hogy a mappa a számítógépen megosztásra került.
[ Megosztott mappa ]
323
MAGYAR
Fájlmegosztás Windows Vista esetében
• A Start menün található parancsikon segítségével nyissa meg a „Computer”-t, majd navigáljon a
megosztani kívánt médiafájlokat tartalmazó mappához.
• Kattintson egyszer a médiafájlokat tartalmazó mappára, és jelölje ki a „Share” opciót az ablak felső
menüsorán.
[ Computer – Mappamegosztás ]
Alapértelmezésben az Ön saját felhasználója a mappa tulajdonosaként jelenik meg a megosztási listán.
[ Megosztási tulajdonságok ]
• Azzal, hogy a legördülő menün kiválasztja őket, további felhasználókat adhat hozzá a megosztási
listához, majd nyomja meg az „Add” gombot.
• Amikor a felhasználói lista teljes, a mappa megosztásához kattintson a „Share” gombra.
Innentől fogva a mappa egy 2 személyt megjelenítő, kis ikonnal jelenik meg jelezve, hogy a mappa az
adott számítógépen megosztásra került.
[ Megosztott mappa ]
324
MAGYAR
Böngészés megosztott mappák között a Media Giant-on
Amikor saját médiafájljait már megosztotta, a főmenün a „Browse Media” opció segítségével böngészhet a
hálózati helyeken.
[ Tárolóhely kijelölése ]
[ Hálózati megosztás — Felhasználói bejelentkezés ]
A távirányító navigációs gombjait (15) használja a „Network” opció kijelölésére a tárolóhelyek listáján,
majd navigáljon a hálózatban a megosztott mappákat tartalmazó számítógéphez vagy hálózati
tárolóeszközhöz.
Ha egy megosztott mappát felhasználónév és jelszó véd (például: alapértelmezett megosztás Windows XP
és Windows Vista esetében), a Media Giant „User Login” előugró menüt jelenít meg a felhasználónév és a
jelszó beírásához.
Megjegyzés: Saját normál felhasználói fiókját alkalmazhatja Windows XP vagy Windows Vista esetében a
megosztott mappába történő bejelentkezéshez.
A távirányító navigációs gombjai (15) segítségével jelölje ki a felhasználóazonosító vagy a jelszó
mezőjét, majd nyomja meg az „Enter” gombot (26), amennyiben — az érték beírásához — meg
kívánja jeleníteni a képernyőn a billentyűzetet.
[ Képernyő-billentyűzet ]
[ Hálózati megosztás — Felhasználói bejelentkezés ]
Ha a felhasználónevet és a jelszót helyesen írta be, jelölje ki az „OK” vagy az „OK & Save to
MyShortcuts” gombot a hálózati megosztás beírásához.
Innentől fogva a 9. fejezetben ismertetett módon navigálhat a megosztott mappában.
325
MAGYAR
18. Hálózati megosztás — Konfigurálás és használat
A Conceptronic Media Giantja hálózati megosztásként (Samba-szerver) hozzáférhető. A hálózati megosztás
funkciója segítségével a Media Giant FAT32-es partíciója (HDD1) megosztható a hálózaton, tehát más
számítógépek is hozzáférhetnek az azon a partíción tárolt adatokhoz.
Konfigurálás
Jelölje ki a „Setup” opciót a főmenün. A Beállítások menü jelenik meg a képernyőn. A Beállítások menün
jelölje ki a „Network”-öt. A System Setup (Rendszerbeállítások) menün van egy „Media Server” opció.
A „Media Server” opció esetében az alábbi beállítások változtathatók:
- Server/Host name
- Group name
A Media Giant nevének az adott hálózaton belüli meghatározására. A Media Giant
alapértelmezett neve a következő: „media giant”.
Az otthoni hálózat nevének a meghatározására. Az alapértelmezett csoportnév a
következő: „WORKGROUP”.
A Beállítások megváltoztatása után nyomja meg a távirányítón a „Return” (14) gombot, ha vissza kíván
térni a főmenübe.
Használat
Ha a Media Giant hálózati beállításait konfigurálta már, az adott hálózaton belüli számítógép segítségével
hozzáférhet a hálózati megosztáshoz.
Megjegyzés:
Az alábbi lépések segítségével nyilvánvaló, hogyan lehet hozzáférni a Media Giant hálózati
megosztásához a Windows Vistán futó számítógépen az alapértelmezett Beállítások
segítségével.
Alapértelmezésben a Media Giant hálózati neve a következő: „media giant”. Ennek a névnek a segítségével
hozzáférhető az eszköz hálózati megosztása a hálózaton.
• Jelölje ki a „Start”-ot, majd a „Network”-öt.
Ezután a Windows Explorer megjeleníti a hálózati beállításokat.
A felső sorra az alábbiak szerint írhatja be a Media Giant hálózati nevét:
\\<NETWORK_NAME_OF_MEDIA_GIANT>\
Például:
Ha a Media Giantot az alapértelmezett beállításokkal konfigurálták, a hálózati név a következő:
„media giant” és így az alábbiakat kell beírnia:
\\media giant\
326
MAGYAR
A Media Giant hálózati megosztása jelenik meg a képernyőn az alábbi képernyőfelvételen látható módon:
Megjegyzés:
Windows esetén a „Printers” (Nyomtatók) megosztás automatikusan hozzáadódik minden
Samba-szerverhez a hálózaton belül, de a Media Giant nyomtatókiszolgálóként nem
működhet.
A hálózati megosztás kijelölésével állományok átmásolhatók, törölhetők, lejátszhatók, illetve hozzáadhatók
a Media Giant FAT32-es partíciójához.
327
TÜRKÇE
Conceptronic DVB-T’li Media Giant
Kullanıcı Kılavuzu
Conceptronic Media Recorder & Player
Satın Aldığınız İçin Tebrikler.
Bu Kullanıcı Kılavuzu, Conceptronic Media Recorder & Player’ın adım adım nasıl kurulacağı ve kullanılacağı
konusunda bilgi içermektedir.
Ürününüzle ilgili daha fazla bilgi veya destek almak istediğinizde, www.conceptronic.net/support web
sitemizin Service & Support (Servis ve Destek) bölümünü ziyaret etmenizi ve aşağıdaki seçeneklerden
birini seçmenizi öneririz:
• FAQ
• Downloads
• Contact
: Sıkça Sorulan Sorular veritabanı
: Kullanım Kılavuzları, Sürücüler, Ürün Bilgisi ve diğer yüklemeler
: Conceptronic Destek İletişim Bilgileri
İpucu: Conceptronic Media Giant’ın ürün bilgisi yükseltilebilir. Ünitenizi güncel ürün bilgisi sürümüne
yükseltmek için, Conceptronic Web Sitesini ziyaret edebilir ya da Media Giant’ın yerleşik ürün
bilgisi yükseltme özelliğini kullanabilirsiniz.
İpucu: Lütfen desteklenen codec ve dosyaların güncel listesi için www.conceptronic.net/FAQ adresini
ziyaret edin.
Conceptronic ürünleri hakkında genel bilgi almak için www.conceptronic.net Conceptronic web sitesini
ziyaret edebilirsiniz.
1. Paket İçeriği
Conceptronic Media Recorder & Player paketinin içeriği aşağıdaki gibi olmalıdır:
•
Conceptronic Media Giant (bu kılavuzda ‘ünite’ ya da ‘Media Giant’ olarak tanımlanmıştır). **
Pakette aşağıdaki 2 modelden biri bulunur:
CM3GD
[C08-147]: Dijital (DVB-T) tunerli Media Giant.
CM3GDP [C08-148]: Dijital (DVB-T) tuner ve Powerline Adaptörlü Media Giant.
•
•
•
•
•
•
•
•
•
•
•
•
•
•
Conceptronic Powerline Network Adaptörü. (Sadece CM3GDP ürünü ile birlikte verilir)
Güç kablosu.
Uzaktan kumanda.
Uzaktan kumanda için 2 adet AAA pil.
RF Anten Kablosu.
Kompozit Video Kablosu (Kırmızı, Beyaz, Sarı RCA Jaklar).
S-Video Kablosu.
Komponent Video Kablosu (Kırmızı, Yeşil, Mavi RCA Jaklar).
Koaksiyel Dijital Ses Kablosu (Siyah RCA Jaklar).
Kompozit Video Kablosu / S-Video Kablosu için SCART Adaptör.
HDMI A/V kablosu (HDMI 1.3).
Ağ Kablosu.
USB Kablo.
Bu Kullanıcı Kılavuzu.
ÖNEMLİ:
Bu kılavuzda, sadece CM3GDP (dijital (DVB-T) tuner ve Powerline Adaptörlü) için geçerli olan bazı
özellikler açıklanmaktadır. Bu özellikler ** ile işaretlenmiştir.
328
TÜRKÇE
2. Ürün Özellikleri
•
•
•
•
•
•
•
•
•
•
•
•
•
Yerleşik Powerline network adaptörü. **
Otomatik TV kanal arama özellikli yerleşik dijital (DVB-T) TV Tuner.
Dijital (DVB-T) TV sinyal kaydı.
VCR, DVD ya da Video Kamera vb.’den AV sinyal kaydı.
DV Video Kameradan oynatma / kayıt için DV giriş.
Dahili HDD (Sabit Disk)’e kayıt.
Maksimum 1080i çıkış çözünürlüğü.
Maksimum 1080i oynatma çözünürlüğü.
TS formatında (dijital DVB-T tunerle dijital kayıt yapmak için) veya MPEG2 formatında (AV girişlerden
analog kayıt yapmak için) (PC veya diğer media player’larda oynatılabilir) kaydedilen dosyalarda DVD
kalitesi.
Kayıt Seçenekleri: Tek tuşla anlık kayıt, Programlı kayıt, Time-shift (Canlı görüntü durdurma ve
öteleme özelliği).
Dahili HDD (Sabit Disk) ya da USB aygıtta kayıtlı MPEG1/2/4, MP3, WMA, JPG dosyalarını oynatma.
USB Aygıt ya da ağ konumundan dahili HDD (Sabit Disk)’e dosya kopyalama.
USB-PC ve Oynatıcı Modu arasında otomatik geçiş:
PC bağlantısı USB üzerinden yapıldığında ünite USB Depolama Aygıtı olarak çalışır.
PC bağlantısı USB üzerinden yapılmadığında, ünite Media Recorder & Player olarak çalışır.
3. Notlar ve Uyarılar
•
•
•
•
•
•
•
•
•
•
Üniteyi parçalara ayırmaya çalışmayın. Yüksek voltaj yaralanmalarına neden olabilir.
Üniteyi aşırı nemden uzak tutun.
Üniteyi sıvı maddelere batırmayın ya da sıvı maddelere maruz bırakmayın.
Üniteyi uzun süre kullanmayı planlamıyorsanız güç kablosunu çıkarın.
Üniteyi kolay tutuşan maddelerin yakınında kullanmaktan kaçının.
Uzaktan kumanda pili zayıflamış ya da bitmiş ise bunu aynı tip pil ile değiştirin. Mümkün olduğunda
pilin geri dönüşümünü sağlayın. Kumanda uzun bir süre kullanılmayacaksa korozyonu önlemek için
pilini çıkarın.
Kumandayı aşırı nemden uzak tutun; yere düşürmeyin.
Kumandayı aşırı güneş ışığı altında çalıştırmayın.
Üniteyi ASLA düşürmeyin, sallamayın ya da çarpmayın.
Aşırı ısınmayı önlemek için ünitenin üzerini örtmeyin.
ÖNEMLİ:
Sabit diski bilgisayarınızda BİÇİMLENDİRMEYİN (formatlamayın)! Aksi halde ünite tüm
sistem verilerini kaybeder ve yeniden başlangıç durumunu getirilmesi gerekir. Ünitenin
sabit diskini biçimlendirmek istediğinizde ünitenin Setup menüsünde bulunan yerleşik
biçimlendirme aracını kullanın.
329
TÜRKÇE
4. Ürüne Genel Bakış
Ön Görünüm
1
2
3
4
5
Arka Görünüm
9
14
10
15
11
16
17
18
19
20
21
6
7
8
12
13
22
23
Rakamların açıklaması:
1. Durum LED’leri (Power, REC, ACT, LAN)
2. Dokunmatik gezinti düğmeleri
3. Dokunmatik oynatma düğmeleri
4. Kızılötesi alıcı
5. Mini-USB Jak (Bilgisayara)
6. USB Host Port
7. DV girişi
8. Ön panel ‘Açık’ düğmesi
9. Dijital TV-Tuner çıkışı
10. Dijital TV-Tuner girişi
11. AV Kompozit video çıkışı
12. SPDIF dijital koaksiyel çıkış
Not:
13. Ana güç düğmesi
14. LAN (RJ45) bağlantısı
15. HDMI çıkışı
16. AV1 girişi (Kompozit Video/Ses)
17. AV2 Komponent video girişi
18. AV2 ses girişi (L/R)
19. AV ses çıkışı (L/R)
20. AV Komponent video çıkışı (Y/Pb/Pr)
21. S-Video çıkışı
22. SPDIF dijital optik çıkışı
23. AC girişi (110 ~240v)
Dokunmatik düğmeler temel uzaktan kumanda fonksiyonları ile aynı fonksiyonlara sahiptir.
330
TÜRKÇE
5. Uzaktan Kumandanın Açıklaması
Uzaktan kumanda, üniteyi kontrol etmek için kullanılır. Bu kılavuzun iç kapağında uzaktan kumandanın bir
resmini bulacaksınız. Uzaktan kumandanın fonksiyonlarını açıklamak için bu resimdeki düğme numaraları
aşağıdaki tabloda bulunan numaralara karşılık gelmektedir.
No
Düğme
Tanım
1.
2.
3.
4.
5.
6.
7.
8.
9.
10.
11.
12.
13.
14.
15.
16.
17.
18.
19.
20.
21.
22.
23.
24.
25.
26.
27.
28.
29.
30.
31.
32.
33.
34.
35.
36.
37.
38.
39.
40.
41.
POWER ( )
SOURCE
MEDIA
AUDIO
ZOOM
0–9
COPY
REPEAT
GOTO
FAST REWIND (
)
PREVIOUS (
)
VOLUME +
VOLUME RETURN
, , ,
INS.REP.
PAUSE
PLAY
REC
TV SYS
SETUP
TIMESHIFT
STOP ( )
SLOW
CM.SKIP
ENTER
INFO
CHANNEL CHANNEL +
MUTE
NEXT (
)
)
FAST FORWARD (
GUIDE
A-B
DEL
ANGLE
SUB-T
LIVE-TV
DV
MENU
LED
Üniteyi açar ya da hazırda bekleme moduna getirir
Dijital tuner, AV ve oynatma arasında geçiş yapar
Doğrudan Media Browser düğmesi
DVD Ses parçasını değiştirir (DVD dosyalarınızda mevcut olduğunda)
Yakınlaştırma / uzaklaştırma yapar
Sayısal düğmeler
Kopyalama menüsünü gösterir
Tekrar modunu ayarlar
Oynatma sırasında belirli bir noktaya gitmek için kullanılır
Hızlı Geri oynat
Önceki Dosya / Parça / Bölüm / Resim
Sesi artırır
Sesi azaltır
Önceki ekrana / kanala döner
Gezinti Tuşları: Menüler içinde gezinmek için kullanılır
Yayın kaydırma ya da oynatma sırasında 10 saniye geri götürür
(Yayın kaydırmalı) oynatma işlemini duraklatır
Oynatma işlemini başlatır
Kayıt işlemini başlatır
Ünitenin çıkış çözünürlüğünü değiştirir
Doğrudan Setup (Ayarlar) menüsü düğmesi
Yayın kaydırma özelliğini etkinleştirir
Oynatma İşlemini Durdur / Kaydı Durdur / Timeshift Devre Dışı
Yavaşlatılmış oynatma için kullanılır
Yayın kaydırma ya da oynatma sırasında 30 saniye ileri götürür
Seçimi onaylar
Kanal bilgisi / Dosya bilgisini gösterir
Kanal Aşağı
Kanal Yukarı
Sessize alır
Sonraki Dosya / Parça / Bölüm / Resim
Hızlı İleri oynat
Dijital (DVB-T) tunerin EPG rehberini gösterir
A-B tekrar döngüsünü başlat
Girişi temizler / Seçimi siler
DVD açısını değiştirir (DVD dosyalarınızda mevcut olduğunda)
Altyazıyı değiştirir (Video/DVD dosyalarınızda mevcut olduğunda)
Doğrudan Live-TV / dijital TV ve dijital radyo arasında geçiş düğmesi
DV Oynatma ve Kayıt moduna geçiş yapar
Ana menüyü gösterir
Uzaktan kumandanın çalışmasını gösterir
331
TÜRKÇE
6. Media Giant Bağlantısı
Bu bölümde Media Giant ile TV, ev sinema sistemi, ağ vb. arasındaki bağlantıları nasıl yapacağınız
açıklanmaktadır.
9
14
10
15
11
16
17
18
19
20
21
12
13
22
23
Anten kablosunun (kablolarının) bağlanması
Not:
Ünitedeki dijital tuner, DVB-T sinyalini dijital tuner girişinden dijital tuner çıkışına yönlendirmek
amacıyla düz sinyal geçişini (pass-through) desteklemektedir.
• Televizyona veya dijital set üstü alıcıya giren ana anten kablosunu çıkarın ve ünitenin dijital tuner
girişine [10] bağlayın.
• Birlikte verilen anten kablosunu ünitenin dijital tuner çıkışına [9] ve televizyon veya dijital set üstü
alıcınızın tuner girişine bağlayın.
Video kablosunun/kablolarının bağlanması
Ünitenin televizyon bağlantısını 5 farklı şekilde yapabilirsiniz:
- HDMI
- Kompozit
- SCART (Kompozit kablo ve Scart Adaptör kullanarak)
- S-Video *
- Komponent *
*
S-Video ya da Komponent kullanırken televizyona sadece video sinyali gönderilir.
Ses sinyali için Kompozit kablodaki Ses RCA Jaklarını (Kırmızı, Beyaz) ya da media giant dijital ses
çıkışını (optik ya da koaksiyel) kullanın.
HDMI:
• HDMI kabloyu ünitenin HDMI çıkışına [15] bağlayın.
• HDMI kablonun diğer ucunu TV üzerinde bulunan boş bir HDMI girişine bağlayın.
Kompozit:
• Kompozit kabloyu (Sarı, Kırmızı ve Beyaz) ünitede karşılık gelen AV OUT jaklarına [11, 19] bağlayın.
• Kompozit kablonun diğer ucunu (Sarı, Kırmızı ve Beyaz) televizyona bağlayın.
332
TÜRKÇE
SCART:
• Kompozit kabloyu (Sarı, Kırmızı ve Beyaz) ünitede karşılık gelen AV OUT jaklarına [11, 19] bağlayın.
• Kompozit kablonun diğer ucunu (Sarı, Kırmızı ve Beyaz) SCART Adaptör üzerindeki jaklara bağlayın.
• SCART Adaptörü televizyonun SCART Girişine bağlayın.
S-Video:
• S-Video kablosunu ünitenin S-Video çıkışına [21] bağlayın.
• S-Video kablosunun diğer ucunu televizyonun S-Video Girişine bağlayın.
Komponent:
• Komponent kabloyu (Kırmızı, Yeşil ve Mavi) ünitedeki Komponent Jaklarına [20] bağlayın.
• Komponent kablonun diğer ucunu TV üzerindeki Komponent Jaklarına bağlayın.
Ses kablosunun/kablolarının bağlanması
Üniteyi TV ve/veya ev sinema sistemine 3 farklı şekilde bağlayabilirsiniz:
- Analog, A/V Çıkışının RCA Ses Jakları içinden
- Dijital, Koaksiyel Dijital SPDIF Çıkışı içinden
- Dijital, Optik Dijital SPDIF Çıkışı içinden
Analog:
• Kompozit kablonun Ses Jaklarını (Kırmızı, Beyaz) AV OUT’un RCA Ses Jaklarına [19] bağlayın.
• Kompozit kablonun diğer ucunu TV ya da Alıcının RCA Ses Jaklarına bağlayın.
Dijital Koaksiyel:
• Dijital Koaksiyel kabloyu ünitenin Dijital Koaksiyel çıkışına [12] bağlayın.
• Dijital Koaksiyel kablonun diğer ucunu Alıcının Dijital Koaksiyel Girişine bağlayın.
Dijital Optik:
• Dijital optik kabloyu ünitenin Dijital optik çıkışına [22] bağlayın.
• Dijital optik kablonun diğer ucunu Alıcının Dijital optik Girişine bağlayın.
Diğer Ses/Video Cihazlarının Bağlanması
Üniteye VCR, DVD Oynatıcı ya da Set Üstü Kutu (Set-Top Box) gibi bir Ses/Video kaynağı bağlayabilir,
Ses/Video kaynağından kayıt yapabilirsiniz.
Kompozit ya da Komponent çıkışlı aygıtlar Media Giant tarafından desteklenmektedir.
Kompozit:
• Ses/Video cihazınız ile birlikte verilen Ses/Video kablosunu Ses/Video cihazı üzerinde karşılık gelen AV
Çıkış jaklarına bağlayın.
• Kompozit kablonun diğer ucunu (Sarı, Kırmızı ve Beyaz) ünitenin AV1 IN jaklarına [16] bağlayın.
Komponent:
• Ses/Video cihazınız ile birlikte verilen Komponent Video kablosunu Ses/Video cihazı üzerinde karşılık
gelen Komponent çıkışına bağlayın.
• Komponent Video kablosunun diğer ucunu (Kırmızı, Yeşil ve Mavi) ünitenin AV2 IN jaklarına [17]
bağlayın.
Not:
Komponent video kabloları sadece video aktarımı yapar, sesi aktarmaz. Ses aktarımı için,
Ses/Video cihazından gelen ses kablolarını ünitenin AV2 IN ses jaklarına [18] bağlamanız gerekir.
333
TÜRKÇE
Güç Kablosunun Bağlanması
Ünite Ses/Video cihazınıza bağlı iken, güç kaynağını üniteye bağlayabilirsiniz.
• Birlikte verilen güç kablosunu üniteye [23] ve boş bir duvar prizine takın.
• Üniteye güç vermek için ünitenin arkasındaki ana güç anahtarını [12] ‘I’ konumuna getirin.
Ünite açılacaktır.
Uzaktan Kumandanın Hazırlanması
• Uzaktan kumandanın arkasından pil kapağını çıkarın.
• Birlikte verilen AAA pilleri uzaktan kumandaya takın.
• Pil kapağını tekrar uzaktan kumandanın arkasına takın.
Notlar:
-
Uzaktan kumandanın en iyi çalışma mesafesi yaklaşık 5 metredir.
Uzaktan kumandayı ünitenin ön paneline yerleştirilmiş olan IR alıcıya yönlendirin.
IR alıcının alma açısı ±30 derecedir.
Piller zayıfladığında ya da bittiğinde yenisiyle değiştirin.
334
TÜRKÇE
7. İlk Kez Yapılandırma
Üniteyi ilk kez açtığınızda bunun yapılandırılması gerekmektedir.
• Ünitenin bağlı olduğu televizyondaki doğru giriş kanalını seçin. (HDMI, Kompozit, SCART, S-Video ya da
Komponent).
Not:
Bu noktadan itibaren televizyonun ünite giriş kanalına ayarlı olduğu kabul edilecektir. Açıklanan
adımların tümü ünitenin çalışıyor olması durumuna göre yapılmıştır.
• Ünitenin arkasındaki ana güç anahtarının ‘I’ (Açık) konumunda olup olmadığını kontrol edin.
• Ünitenin önünde bulunan güç düğmesi ya da uzaktan kumandada bulunan ‘Power’ düğmesi (1) ile üniteyi
açın.
• Media Giant’ın ön tarafındaki Güç LED’ini kontrol edin. LED turuncu renk iken aygıt ‘Standby’ (Hazırda
bekleme) modundadır. LED mavi renk iken aygıt kullanıma hazırdır.
Not:
Ünite açıldığında bunun ilk kullanıma hazır hale gelmesi gerekir. Bu işlem kısa bir zaman sürebilir.
İlk açılış sırasında Media Giant başlangıç ekranı gösterilir.
[ Başlangıç Ekranı ]
[ Kurulum Sihirbazı ]
Media Giant açıldığında bunun ilk kullanım için yapılandırılması gerekir. İlk kez yapılandırma sırasında size
yardımcı olması amacıyla Media Giant tarafından ‘Setup Wizard’ (Kurulum Sihirbazı) ekrana getirilir. Bu
ekranda ilk kullanım için gerekli yapılandırma adımları bulunur.
Kurulum Sihirbazı aşağıdaki yapılandırma adımlarını gösterir:
-
Menu Language
TV Input
Channel Scan
Wired LAN Setup
Set Time
Media Giant ayarları için uzaktan kumanda üzerindeki gezinme tuşları ve ‘Enter’ düğmesini (26) kullanın.
Bir ayar yaptıysanız ve ayarı tekrar gözden geçirmek istiyorsanız, uzaktan kumanda üzerindeki ‘Return’
düğmesine (14) basın.
Menu Language
Media Giant’ı çalıştırırken kullanmak istediğiniz dili seçin.
TV Input
Ülke listesinden ülkenizi seçin. Ülkenizin adı listede yoksa, listeden ‘Other’ (Diğer)’i seçin.
İpucu:
‘6M’ (600Mhz), ‘7M’ (700Mhz) veya ‘8M’ (800Mhz)’i seçerek özel bir DVB-T frekans bandını da
taratabilirsiniz.
335
TÜRKÇE
Channel Scan
• Media Giant’ın dijital (DVB-T) tuneri üzerinden dijital (DVB-T) kanalların otomatik kanal taramasını
başlatmak için ‘OK’ (Tamam)’ı seçin. Media Giant'ın otomatik kanal taraması biraz zaman alabilir fakat
bulunan tüm kanallar otomatik olarak Media Giant belleğinde saklanacaktır.
• Kanal Taraması bittiğinde Kurulum Sihirbazına devam etmek için ‘OK’i seçin.
Kanal Taramasını atlamak isterseniz (örneğin bir set üstü alıcı kullanıyorken ve dijital (DVB-T) bir TV
sinyaliniz yokken) Kanal Taramasını ‘Cancel’ (İptal) ile geçip Kurulum Sihirbazına devam edebilirsiniz.
Wired LAN Setup
Ağ ayarları Media Giant’a IP Adresi belirlemek içindir. Çoğu durumda Media Giant DHCP sunucusu olan bir
ağa bağlıdır (genellikle bir router).
• Ağınızda bir DHCP sunucu varsa ‘DHCP IP’ seçeneğini seçin.
• Kurulum Sihirbazı, seçimi onaylamanızı isteyecektir. Devam etmek için ‘OK’i seçin.
• Statik IP adresi kullanmak istediğinizde ‘FIX IP’yi seçin.
• Kurulum Sihirbazı, bir statik IP adresi gireceğiniz alanları gösterecektir. IP adresi, Alt ağ maskesi,
Varsayılan ağ geçidi ve DNS sunucusunu girmek için gezinti düğmelerini (15) ve sayısal düğmeleri 0-9 (6)
kullanın.
• Girilen değerler doğru olduğunda uzaktan kumanda üzerindeki ‘Enter’ düğmesine (26) basın.
• Kurulum Sihirbazı seçimi onaylamanızı isteyecektir. Devam etmek için ‘OK’i seçin.
Media Giant bir ağa bağlı değilse, bu adımı atlamak için ve Kurulum Sihirbazına devam etmek için ‘Cancel’ı
seçin.
Set Time
‘Set Time’ seçeneği Media Giant yapılandırmasında doğru saat ve tarih ayarı yapmanıza olanak sağlar.
• Saat ve tarih ayarını manuel olarak yapmak için ‘Manual’i seçin.
• Yıl, Ay, Gün, Saat, Dakika ve Saniye değerlerini girmek için gezinti düğmelerini (15) ve sayısal düğmeleri
0-9 (6) kullanın. Giriş yaptıktan sonra uzaktan kumanda üzerindeki ‘Enter’ düğmesine (26) basın.
• Kurulum Sihirbazı seçimi onaylamanızı isteyecektir. Devam etmek için ‘OK’i seçin.
• Aktif İnternet bağlantınız varsa ve Media Giant ağa bağlı ise otomatik ayar için ‘Auto (Via Network)’
seçeneğini seçebilirsiniz.
• Kurulum Sihirbazı, otomatik saat yapılandırması için gerekli alanları gösterecektir. Varsayılan NTP
sunucusunu saklayabilirsiniz fakat başka bir NTP sunucu kullanmak isterseniz, değeri ayarlamak için NTP
sunucu alanında ‘Enter’ düğmesine (26) basın.
• Time Zone kısmını ülkenizin saat dilimine göre değiştirin.
• Ülkenizde yaz saati uygulaması olup olmadığına bağlı olarak ‘Daylight Savings Correction’ seçeneğini
‘Disable’ (Devre dışı) ya da ‘Enable’ (Etkin) yapın. Girilen değerler doğru olduğunda uzaktan kumanda
üzerindeki ‘Enter’ (26) düğmesine basın.
• Kurulum Sihirbazı seçimi onaylamanızı isteyecektir. Devam etmek için ‘OK’i seçin.
Böylece Kurulum Sihirbazı tamamlanır ve Media Giant temel yapılandırması sona erer.
Not:
Daha ileri yapılandırma ayarları için Ana menüden ‘Setup’ seçeneğini kullanın. Setup menüsü
bölüm 13’te açıklanmıştır.
Not:
Kurulum Sihirbazı tamamlandıktan sonra sihirbazı tekrar çalıştırmak isterseniz, Ana menüden
‘Setup’ı ve ‘Restore Default’ (Varsayılanı Geri Yükle) seçeneğini seçin. Media Giant yapılan
ayarları sıfırlar ve Kurulum Sihirbazını tekrar çalıştırır.
Not:
Önceden biçimlendirilmiş (formatlanmış) sabit diski olmayan bir Media Giant satın aldıysanız,
Media Giant ‘Setup Wizard’ tamamlandıktan sonra ‘Format Wizard’ (Biçimlendirme Sihirbazı)’nı
açacaktır. Bu ‘Format Wizard’ bölüm 15’te açıklanmıştır.
336
TÜRKÇE
8. Ana Menü
Ana menü, Media Giant fonksiyonlarını seçmenize olanak sağlar.
Not:
Ana menü gösterilmezse, uzaktan kumanda üzerindeki ‘Menu’ düğmesine (40) basarak Ana menüyü
ekrana getirebilirsiniz.
[ Ana menü ]
Ana menüde aşağıdaki seçenekler bulunmaktadır:
Browse Media
Playback Recordings
TV Tuner/AV Input
Scheduled Recording
Setup
Hafızadaki ortam dosyalarını oynatma.
Kayıtlarınızı oynatma ve düzenleme.
Canlı TV ve Canlı AV İzleme.
Programlanan kayıtları yapılandırma.
Media Giant Yapılandırması.
Yukarıdaki seçenekler bu kılavuzun ilerleyen bölümlerinde açıklanacaktır.
337
TÜRKÇE
9. Ortama Göz Atma
Ana menüden ‘Browse Media’ seçeneğini seçtiğinizde, Media Giant ekrana Media browser (Ortam
tarayıcı)’yı getirecektir.
[ Saklama Konumu Seçimi ]
[ Mod Seçimi: Film, Müzik, Fotoğraf ]
Ortam tarayıcı ortam dosyalarını oynatmak istediğiniz saklama aygıtını seçmenize olanak sağlar:
USB
Harddisk
Network
Bir USB aygıttan ortam dosyası oynatma (USB Host Port üzerinden).
Media Giant’ın dahili sabit diskinden ortam dosyası oynatma.
Ağ ortamında Samba / Network paylaşımlarından ortam dosyası oynatma.
USB aygıt ya da dahili sabit diskinize göz atmak için saklama konumu listesinden ‘USB’ ya da ‘Harddisk’i
seçin.
Ağ paylaşımlarından ortam dosyası oynatmak amacıyla ağa göz atmak için saklama konumu listesinden
‘Network’ seçeneğini seçin.
Not:
Ağ paylaşımlarınıza göz atmak için ağ paylaşımlarını doğru olarak ayarladığınızdan emin olun. Ağ
paylaşımları oluşturma ve ağ paylaşımlarına göz atma hakkında daha fazla bilgi için bkz. bölüm 17.
Bir saklama konumu seçildiğinde, uzaktan kumanda üzerindeki sol ve sağ gezinme düğmeleri ile ‘Movies’,
‘Music’ ve ‘Photos’ modları arasında geçiş yapabilirsiniz.
3 seçenekten birini seçtiğinizde Media Giant otomatik olarak saklama konumu içeriğini filtreleyecek ve
sadece ilgili dosyalar gösterilecektir.
Örneğin:
‘Movies’i seçerseniz, ekranda sadece film dosyaları gösterilecektir.
Ortam göz atma menüsünde, uzaktan kumanda üzerinde aşağıdaki tarayıcı seçeneklerini kullanabilirsiniz:
- Gezinti düğmeleri
-
Enter
Return
Copy
Play
Next
Previous
menu
(15)
(26)
(14)
(7)
(18)
(31)
(11)
(40)
Dosya ve klasörlerde gezinmek ya da oynatma modunu değiştirmek
için kullanılır.
Seçili dosyayı oynatır ya da seçili klasörü açar.
Önceki klasöre gitmek için kullanılır.
Kopyalama menüsünü açar. (bu bölümün alt bölümünde açıklanmıştır)
Seçili dosyayı oynatır.
Dosya içeren bir sonraki sayfaya gider.
Dosya içeren bir önceki sayfaya gider.
Ana Menüye dönmek için kullanılır.
Uzaktan kumanda üzerindeki ‘Menu’ düğmesine (40) basarak Ortam Tarayıcı menüsünden Ana Menüye
dönebilirsiniz.
338
TÜRKÇE
Filmlerinizin Oynatılması
Ünitenin sabit diskinde, bir USB saklama aygıtında ya da bir ağ konumunda depolanan filmleri Media
Giant’ın ‘Movies’ filtresi içinden televizyonunuzda oynatabilirsiniz.
‘Movies’ filtresi seçildiğinde, Media Giant tarafından ekranınızda sadece film dosyaları gösterilecektir.
Diğer dosyalar gösterilmeyecektir.
[ Film Modu ]
• Uzaktan kumanda üzerindeki gezinti düğmeleri (15) ile oynatmak istediğiniz dosyayı seçin.
Bir film dosyası seçtiyseniz, Ortam tarayıcı, ekranın sağ bölümünde dosya adı ve dosya boyutu ile bir
önizleme gösterecektir.
• Seçilen dosyayı oynatmak için uzaktan kumanda üzerindeki ‘Enter’ düğmesine (26) ya da ‘Play’
düğmesine (18) basın.
Oynatma işlemi sırasında uzaktan kumanda üzerinde aşağıdaki oynatma seçeneklerini kullanabilirsiniz:
-
Pause
(17)
Slow
(24)
Stop
(23)
Rewind
(10)
Fast Forward
(32)
Ins. Rep.
(16)
CM. Skip
(25)
Goto
(9)
Repeat
(8)
Info
(27)
Zoom
(5)
Sub-t
(37)
Audio
(4)
Volume
(12), (13)
Mute
(30)
Oynatma işlemini duraklatır ya da kaldığı yerden devam ettirir.
Yavaşlatılmış oynatma için kullanılır.
Oynatma işlemini durdurur.
Geriye doğru hızlı oynatır.
İleriye doğru hızlı oynatır.
Oynatma sırasında 10 saniye geri götürür.
Oynatma sırasında 30 saniye ileri götürür.
Filmde belirli bir noktaya (zamana) gitmek için kullanılır.
Geçerli oynatma işleminin Tekrar seçeneğini değiştirir.
Oynatma detaylarını gösterir.
Yakınlaştırma / uzaklaştırma yapar
Altyazıyı değiştirir (mevcutsa).
Ses parçasını değiştirir (mevcutsa).
Ses seviyesini ayarlar.
Sessize alır.
Uzaktan kumanda üzerindeki ‘Menu’ düğmesine (40) basarak Ortam tarayıcı menüsünden Ana Menüye
dönebilirsiniz.
339
TÜRKÇE
DVD Oynatma özelliği
Media Giant sabit diskten normal DVD gibi DVD oynatma özelliğine sahiptir. DVD menüsü içinde gezinebilir,
altyazı seçebilir ya da ses dillerini değiştirebilirsiniz.
Not:
Media Giant sadece koruması olmayan DVD kopyalarını oynatmayı destekler. CSS koruması
desteklenmez.
• Media Giant’ı bilgisayarınıza bağlayın (Bkz. bölüm 13).
• Media Giant sabit diski üzerinde DVD film ile aynı ada sahip bir klasör oluşturun (örneğin: 'Movie1').
• 'VIDEO_TS' klasöründeki dosyaları Media Giant üzerinde oluşturulan bu klasöre kopyalayın (örneğin:
‘Movie1’).
Kopyalamadan sonra klasör yapısı aşağıdaki gibi olmalıdır:
- [Media Giant Sabit Diski]
|-> Movie1
(içindeki tüm DVD dosyaları ile)
• Media Giant’ı bilgisayardan çıkarıp TV’nize bağlayın.
• Uzaktan kumanda üzerindeki ‘Gezinti’ düğmeleri (15) ile Ana Menüden ‘Browse Media’ simgesini seçin
ve Ortam tarayıcısını açmak için uzaktan kumanda üzerindeki ‘Enter’ düğmesine (26) basın.
• Dahili sabit disk üzerinde DVD’nin kopyalandığı klasöre gitmek için uzaktan kumandada bulunan
‘Gezinti’ düğmeleri (15) ve ‘Enter’ düğmesini (26) kullanın.
• Sabit disk üzerinde oluşturduğunuz DVD klasörünü açın.
[ Film Modu ]
• Seçilen DVD’yi oynatmaya başlamak için ‘VIDEO_TS.IFO’ dosyasını seçin ve uzaktan kumanda üzerindeki
‘Play’ düğmesine (18) basın.
Not:
Medai Giant üzerinde NTFS ortam bölümünde kayıtlı olduğunda doğrudan ISO dosyalarını oynatmak
da mümkündür. Bir DVD’nin ISO dosyasını oynatırken DVD’nin IFO dosyasını oynatma özelliklerinin
aynısı uygulanır.
340
TÜRKÇE
DVD oynatma işlemi sırasında uzaktan kumanda üzerinde aşağıdaki oynatma seçeneklerini kullanabilirsiniz:
-
Pause
(17)
Slow
(24)
Stop
(23)
Gezinti düğmeleri (15)
Enter
(26)
Rewind
(10)
Fast Forward
(32)
Previous
(11)
Next
(31)
Ins. Rep.
(16)
CM. Skip
(25)
Goto
(7)
Repeat
(8)
Info
(27)
Zoom
(5)
Angle
(36)
Volume
(12), (13)
Mute
(30)
Sub-t
(37)
Audio
(4)
Oynatma işlemini duraklatır ya da kaldığı yerden devam ettirir.
Yavaşlatılmış oynatma için kullanılır.
Oynatma işlemini durdurur.
DVD menüsü içinde gezinmek için kullanılır.
DVD menü seçim(ler)ini onaylar.
Geri Sarar.
İleri Sarar.
Önceki Bölüm.
Sonraki Bölüm.
Oynatma sırasında 10 saniye geri götürür.
Oynatma sırasında 30 saniye ileri götürür.
Filmde belirli bir noktaya (zamana) gitmek için kullanılır.
Geçerli oynatma işleminin Tekrar seçeneğini değiştirir.
Oynatma detaylarını gösterir.
Yakınlaştırma / uzaklaştırma yapar
DVD açısını değiştirir (DVD çoklu açı içerdiğinde).
Ses seviyesini ayarlar.
Sessize alır.
DVD’nin altyazısını değiştirir ya da kapatır.
DVD’nin ses parçasını değiştirir (DVD birçok ses parçası içerdiğinde).
Uzaktan kumanda üzerindeki ‘Menu’ düğmesine (40) basarak Ortam Tarayıcı menüsünden Ana Menüye
dönebilirsiniz.
Altyazıların oynatılması
Media Giant, AVI video dosyalarını oynatırken altyazı dosyalarını da oynatabilir.
Altyazılı AVI dosyalarını oynatmak için altyazı dosyasına AVI dosyası ile aynı adı atamanız gerekir, örneğin:
Film adı:
Altyazı adı:
My_Movie_With_Sub.AVI
My_Movie_With_Sub.SRT
• Uzaktan kumanda üzerindeki gezinti düğmeleri ile oynatmak istediğiniz dosyayı seçin.
• Seçilen dosyayı oynatmak için uzaktan kumanda üzerindeki ‘Enter’ düğmesine (26) ya da ‘Play’
düğmesine (18) basın.
AVI dosyası karşılık gelen altyazı dosyası ile birlikte oynatılmaya başlanacaktır.
Oynatma sırasında altyazıları devre dışı bırakmak/etkinleştirmek için uzaktan kumanda üzerindeki ‘Sub-t’
düğmesine (37) basın.
Uzaktan kumanda üzerindeki ‘Menu’ düğmesine (40) basarak Ortam Tarayıcı menüsünden Ana Menüye
dönebilirsiniz.
341
TÜRKÇE
Müzik Çalma
Ünitenin sabit diskinde, bir USB saklama aygıtında ya da bir ağ konumunda depolanan müzik dosyalarını
Media Giant’ın ‘Music’ filtresi içinden televizyonunuzda oynatabilirsiniz.
‘Music’ filtresi seçildiğinde, Media Giant tarafından ekranınızda sadece müzik dosyaları gösterilecektir.
Diğer dosyalar gösterilmeyecektir.
[ Müzik Modu ]
• Uzaktan kumanda üzerindeki gezinti düğmeleri (15) ile çalmak istediğiniz dosyayı seçin.
Bir müzik dosyası seçtiyseniz, Ortam tarayıcı, ekranın sağ bölümünde dosya adı ve dosya boyutu ile ID3
etiket bilgisini (varsa) gösterecektir.
• Seçilen dosyayı çalmak için uzaktan kumanda üzerindeki ‘Enter’ düğmesine (26) ya da ‘Play’ düğmesine
(18) basın.
Çalma işlemi sırasında uzaktan kumanda üzerinde aşağıdaki çalma seçeneklerini kullanabilirsiniz:
-
Pause
(17)
Stop
(23)
Rewind
(10)
Fast Forward
(32)
Repeat
(8)
Info
(27)
Volume
(12), (13)
Mute
(30)
Çalma işlemini duraklatır ya da kaldığı yerden devam ettirir.
Çalma işlemini durdurur.
Geriye doğru hızlı çalar.
İleriye doğru hızlı çalar.
Geçerli dosya/klasörün Tekrar seçeneğini değiştirir.
Çalma detaylarını gösterir.
Ses seviyesini ayarlar.
Sessize alır.
Uzaktan kumanda üzerindeki ‘Menu’ düğmesine (40) basarak Ortam Tarayıcı menüsünden Ana Menüye
dönebilirsiniz.
342
TÜRKÇE
Fotoğraf ve Resimleri Oynatma
Ünitenin sabit diskinde, bir USB saklama aygıtında ya da bir ağ konumunda depolanan fotoğraf ve
resimlerinizi Media Giant’ın ‘Photos’ filtresi içinden televizyonunuzda görüntüleyebilirsiniz.
‘Photos’ filtresi seçildiğinde, Media Giant tarafından ekranınızda sadece fotoğraf ve resim dosyaları
gösterilecektir. Diğer dosyalar gösterilmeyecektir.
[ Fotoğraf Modu ]
• Uzaktan kumanda üzerindeki gezinti düğmeleri (15) ile oynatmak istediğiniz dosyayı seçin.
Bir fotoğraf dosyası seçtiyseniz, Ortam tarayıcı, ekranın sağ bölümünde dosya adı ve dosya boyutu ile küçük
bir ön izleme gösterecektir.
• Seçilen dosyayı oynatmak için uzaktan kumanda üzerindeki ‘Enter’ düğmesine (26) ya da ‘Play’
düğmesine (18) basın.
Oynatma işlemi sırasında uzaktan kumanda üzerinde aşağıdaki oynatma seçeneklerini kullanabilirsiniz:
-
Pause
Stop
Gezinti düğmeleri
Previous
Next
Repeat
Info
Zoom
(17)
(23)
(15)
(11)
(31)
(8)
(27)
(5)
Slayt gösterisini duraklatır ya da kaldığı yerden devam ettirir.
Slayt gösterisini durdurur.
Gösterilen fotoğrafı döndürür.
Geçerli klasörde önceki dosyayı oynatır.
Geçerli klasörde sonraki dosyayı oynatır.
Geçerli dosya/klasörün Tekrar seçeneğini değiştirir.
Slayt gösterisi detaylarını gösterir.
Yakınlaştırma / uzaklaştırma yapar
Uzaktan kumanda üzerindeki ‘Menu’ düğmesine (40) basarak Ortam Tarayıcı menüsünden Ana Menüye
dönebilirsiniz.
İpucu: Ayarlar Menüsüne fotoğraf slayt gösterisi geçişlerini değiştirmek için bir seçenek eklenmiştir.
‘Transition Effect’ (Geçiş Efekti) seçeneği için bkz. Bölüm 13.
343
TÜRKÇE
Kopyalama modu
Bir konumdan diğer konuma veri kopyalamak isterseniz (örneğin: bir USB aygıttan dahili sabit diske), Media
Giant’ın Kopyalama modunu kullanabilirsiniz.
Kopyalama moduna ulaşmak için, ortam tarayıcıdayken uzaktan kumanda üzerindeki ‘Copy’ düğmesine (7)
basın. Kopyalama menüsü ekrana gelecektir:
[ Kopyalama menüsü ]
[ Kopyalama menüsü – Kopyalama Sihirbazı ]
Kopyalama için kaynak olarak ‘USB’, ‘Harddisk’ ya da ‘Network’ arasından seçim yapabilirsiniz.
Kullanılabilir hedefler ‘USB’, ‘Harddisk’ ve ‘Recycle’ (dosya silme)’dir.
Önce uzaktan kumanda üzerindeki yukarı ve aşağı gezinti düğmelerine (15) basarak kaynağı seçin. Doğru
kaynak seçildiğinde, sağ gezinti düğmesine (15) basın ve hedefi seçmek için yukarı ve aşağı gezinti
düğmelerini (15) kullanın.
Not:
Kopyalama menüsünün Kaynak ya da Hedef kısmı aktif ise vurgulanan çerçeveyle görebilirsiniz.
Not:
‘USB’den ‘USB’ye ya da ‘Harddisk’ten ‘Harddisk’e kopyalama yapmak mümkün değildir.
• Kaynak ve hedef konumu doğru olduğunda, Kopyalama Sihirbazına devam etmek için uzaktan kumanda
üzerindeki ‘Enter’ düğmesine (26) basın.
• Kopyalamak istediğiniz dosya ya da klasörleri buluncaya kadar kaynak içinde gezinin. Klasörlerin içinde,
uzaktan kumanda üzerindeki gezinti düğmeleri (15) ve ‘Enter’ düğmesi (26) ile gezinebilirsiniz.
• Uzaktan kumanda üzerindeki ‘Play’ düğmesi (18) ile kopyalamak istediğiniz dosya ya da klasörleri
işaretleyin. İşaretli dosya ya da klasör adlarının arkasında bir simge gösterilecektir.
• Kaynak dosya ya da klasörler işaretlendiğinde, hedef seçimine geçmek için uzaktan kumanda üzerindeki
sağ gezinti düğmesine (15) basın.
Not:
Media Giant’ın NTFS ortam bölümünü hedef olarak seçmek mümkün değildir, çünkü NTFS ortam
bölümüne yazmak mümkün değildir.
• Doğru kopyalama konumunu buluncaya kadar hedef içinde gezinin. Klasörlerin içinde, uzaktan kumanda
üzerindeki gezinti düğmeleri (15) ve ‘Enter’ düğmesi (26) ile gezinebilirsiniz.
• Doğru konum bulunduğunda, kopyalama işlemini başlatmak için uzaktan kumanda üzerindeki sağ gezinti
düğmesine (15) basın.
344
TÜRKÇE
• Kopyalama sihirbazı, kopyalama işlemi için onayınızı soracaktır. Kopyalama işlemine devam etmek için
‘OK’i seçin.
[ Kopyalama Onayı ]
[ Kopyalama devam ediyor ]
Kopyalama işlemi tamamlandığında ekranda bir mesaj ile bilgi verilecektir.
Kopyalama menüsü içinden dosya silmek de mümkündür.
Dosya silmek istediğinizde, hedef olarak ‘Recycle’ı seçin.
Silmek istediğiniz dosya ya da klasörleri işaretleyin ve uzaktan kumanda üzerinde sağ gezinti düğmesine
(15) basın, seçilen dosya ya da klasörleri silmek için bir onay penceresi göreceksiniz.
Seçilen dosya ya da klasörleri silmek için ‘OK’i seçin.
[ Kopyalama menüsü – Silme Sihirbazı ]
[ Silme Onayı ]
345
TÜRKÇE
10. Kayıtların Oynatılması
Ana menüden ‘Playback Recordings’ seçeneğini seçtiğinizde, Media Giant sizden ‘Digital’ ve ‘Analog’
arasında seçim yapmanızı isteyecektir.
• ‘Digital’ seçeneğini seçtiğinizde, Media Giant’ın dijital (DVB-T) tuneri üzerinden yapılan kayıtlar
gösterilecektir.
• ‘Analog’ seçeneğini seçtiğinizde, Media Giant’ın analog girişleri (Composite-in, Component-in, FireWirein) üzerinden yapılan tüm kayıtlar gösterilecektir.
‘Digital’ veya ‘Analog’ seçeneğini seçtiğinizde, Media Giant seçilen seçeneğin kayıtlar listesini ekrana
getirecektir:
[ Kayıt Seç ]
[ Kayıt-listesi ]
Her video bir küçük resim (kaydın ilk karesi), ad, saat - tarih ve kayıt kalitesi ile gösterilir.
Kaydınızın arkasında bulunan sarı yıldız simgesi kaydın yeni olduğunu ve henüz izlenmediğini gösterir. Kaydı
izlediğinizde sarı yıldız şekli kaybolacaktır.
Uzaktan kumanda üzerindeki yukarı ve aşağı düğmeleri (15) ile kayıtlarınız içinde gezinebilir, bir kayıt
seçildiğinde uzaktan kumanda üzerindeki ‘Enter’ düğmesi (26) ya da ‘Play’ düğmesine (18) basarak
kayıtlarınızı oynatabilirsiniz.
Oynatma işlemi sırasında uzaktan kumanda üzerinde aşağıdaki oynatma seçeneklerini kullanabilirsiniz:
-
Pause
(17)
Slow
(24)
Stop
(23)
Rewind
(10)
Fast Forward
(32)
Ins. Rep.
(16)
CM. Skip
(25)
Previous
(11)
Next
(31)
Repeat
(8)
Info
(27)
Goto
(9)
Zoom
(5)
Audio
(4)
Volume
(12), (13)
Mute
(30)
Oynatma işlemini duraklatır ya da kaldığı yerden devam ettirir.
Yavaşlatılmış oynatma için kullanılır.
Oynatma işlemini durdurur.
Geriye doğru hızlı oynatır.
İleriye doğru hızlı oynatır.
Oynatma sırasında 10 saniye geri götürür.
Oynatma sırasında 30 saniye ileri götürür.
Önceki bölümü ya da önceki kaydı oynatır.
Sonraki bölümü ya da sonraki kaydı oynatır.
Geçerli oynatma işleminin Tekrar seçeneğini değiştirir.
Oynatma detaylarını gösterir.
Filmde belirli bir noktaya (zaman) gitmek için kullanılır.
Yakınlaştırma / uzaklaştırma yapar
Ses parçasını değiştirir (mevcutsa).
Ses seviyesini ayarlar.
Sessize alır.
Uzaktan kumanda üzerindeki sol ve sağ gezinti düğmeleri (15) ile kayıt listesinin en üst menüsünde bulunan
seçenekler içinde gezinebilir, birçok özellik seçebilirsiniz:
346
TÜRKÇE
Play
Delete
Rename
Sorting
Edit
Kayıtlarınızı oynatır.
Kayıtlarınızı siler.
Kayıtlarınızı yeniden adlandırır.
Kayıtlarınızın sıralamasını değiştirir.
Kayıtlarınızı düzenler (bir sonraki alt bölümde açıklanacaktır).
‘Edit’ (Düzenle) menüsü
Not:
Dijital kayıtlar Media Giant tarafından düzenlenemez. Bu nedenle, Düzenle menüsü ‘Playback
Recordings’ ekranında ‘Digital’ seçeneğini seçtiğinizde mevcut olmayan çeşitli seçenekleri
içerir.
Media Giant, ‘Playback Recordings’ ekranında ‘Digital’ seçeneğini seçtiğinizde sadece Düzenle
menüsünde ‘Copy to FAT32 partition’ seçeneğine erişmenize olanak sağlar.
‘Edit’ (Düzenleme) menüsü kayıtlarınızı düzenlemenize olanak sağlayan birçok seçenek içerir. Bu
seçenekler aşağıda açıklanmıştır:
[ Kayıtlar – Düzenleme menüsü]
- Set Thumbnail
‘Set Thumbnail’ seçeneği ile film oynatabilir ve kaydınız için en
sevdiğiniz kareyi küçük resim olarak seçebilirsiniz.
- A-B Erase
‘A-B Erase’ seçeneği ile, filminizin bir kısmını işaretleyebilir (örneğin: bir
reklam) ve bu kısmı kayıttan silebilirsiniz.
- Split Title
‘Split Title’ seçeneği ile, bir kaydı iki parçaya bölebilirsiniz (örneğin: 1
programlı kayıtta 2 program kaydettiğinizde).
- Merge Title
- Add Chapter Mark
Not:
‘Merge Title’ seçeneği ile, 2 kaydı 1 kayıt içinde birleştirebilirsiniz.
‘Add Chapter Mark’ seçeneği ile kaydınıza bölüm işaretleri
ekleyebilirsiniz. Böylece kayıtta belirli bir bölüme kolayca
atlayabilirsiniz.
Kaydınıza otomatik olarak bölüm işaretleri eklemek için Setup menüsünde bulunan ‘Auto
Chapter’ seçeneğini de etkinleştirebilirsiniz.
- Remove Chapter Mark
‘Remove Chapter Mark’ seçeneği ile kaydınızdan bölüm işaretleri
silebilirsiniz. Bu seçenek, Media Giant’ı otomatik olarak bölüm işaretleri
yapacak şekilde yapılandırdığınızda fakat bu işaretleri kayıttan silmek
istediğinizde yararlı olabilir.
- Copy to FAT32 partition
‘Copy to FAT32 Partition’ seçeneği ile, kayıt bölümünden Media Giant’ın
ortam bölümündeki ‘REC’ klasörüne kaydınızı kopyalayabilirsiniz.
Kayıt, FAT32 disk bölümüne kopyalandığında, Media Giant, USB üzerinden
bağlı iken kaydı oynatabilir, kopyalayabilir, düzenleyebilir ya da ağ
üzerinden bir UPnP A/V istemciye (örn. Conceptronic C54WMP ya da
Conceptronic CFULLHDMA) akıcı yayın yapabilirsiniz.
Not:
Media Giant’ın UPnP A/V Sunucu özelliği hakkında daha fazla bilgi için bkz. bölüm 16.
347
TÜRKÇE
11. TV Tuner / AV Giriş
Ana menüdeki ‘TV Tuner / AV Input’ seçeneği ile Media Giant’ın dijital (DVB-T) TV tuner ya da AV Girişi
kaynaklarından izleme ve kayıt yapabilirsiniz.
İpucu:
Uzaktan kumanda üzerinde bulunan ‘Live-TV’ düğmesine (38) basarak Media Giant’taki
herhangi bir menüden Live-TV ekranına kolayca ulaşabilirsiniz.
‘TV Tuner / AV Input’ seçeneğini seçtiğinizde, Media Giant tarafından TV tuner Live-TV görüntüsü ekrana
getirilecektir. Canlı TV seyrederken, uzaktan kumanda üzerinde bulunan ‘Channel +’ (29) ya da
‘Channel -’ (28) düğmesine basarak kanal değiştirebilirsiniz.
Uzaktan kumanda üzerindeki ‘Source’ düğmesi (2) ile TV-Tuner, Kompozit giriş ve Komponent giriş arasında
geçiş yapabilirsiniz. Kaynak, ekranın sağ üst köşesinde kısa bir süre gösterilecektir.
Timeshifting (Öteleme)
Media Giant, timeshifting (canlı görüntü durdurma ve öteleme) özelliğine sahiptir. Timeshift özelliği
devrede iken geçerli kanal/giriş kaydedilerek Canlı TV ya da Canlı Ses/Video ‘duraklatılır’.
Timeshift özelliğini başlatmak için uzaktan kumanda üzerinde bulunan ‘Timeshift’ düğmesine (22) basın.
Timeshift özelliği başlatıldığında, Canlı TV ya da Canlı A/V ‘duraklatılacak’ ve ünite arka planda kanalı
kaydedecektir.
[ Timeshift : Başlatılıyor ]
Not:
[ Timeshift : Aktif ]
Timeshift özelliği etkinleştirildiğinde, ekran üstü ilerleme çubuğu maksimum timeshift arabellek
süresini gösterir. Bu arabelleği ayarlamak isterseniz (daha küçük ya da büyük), timeshift arabellek
bölümünün boyutunu ayarlamak için Media Giant’ın sabit diskini yeniden biçimlendirmeniz
(formatlamanız) gerekecektir.
Biçimlendirme hakkında daha fazla bilgi bölüm 15’te bulunabilir.
Timeshift sırasında, uzaktan kumanda üzerinde bulunan aşağıdaki düğmeleri kullanabilirsiniz:
-
Play
(18)
Pause
(17)
Slow
(24)
Stop
(23)
Rewind
(10)
Fast Forward
(32)
Ins. Rep.
(16)
CM. Skip
(25)
Info
(27)
Volume
(12), (13)
Mute
(30)
Timeshift arabelleğini oynatır.
Oynatma işlemini duraklatır ya da kaldığı yerden devam ettirir.
Yavaşlatılmış oynatma için kullanılır.
Oynatma işlemini durdurur.
Geriye doğru hızlı oynatır.
İleriye doğru hızlı oynatır.
Oynatma sırasında 10 saniye geri götürür.
Oynatma sırasında 30 saniye ileri götürür.
Timeshift arabellek bilgisini gösterir ya da gizler.
Ses seviyesini ayarlar.
Sessize alır.
348
TÜRKÇE
Permanent Timeshifting (Kalıcı Öteleme)
Media Giant’ın Setup menüsünde, ‘Permanent Timeshifting’i etkinleştirebilirsiniz. Bu özellik
etkinleştirildiğinde, timeshift özelliği sürekli olarak aktif olur ve oynatma işlemini anlık olarak
duraklatmanıza ya da timeshift arabelleğinde ‘jump’ (atlama) yapmak için uzaktan kumandanın yukarıda
açıklanan düğmelerini kullanmanıza olanak sağlar.
Kayıt Yapma
Ünite üzerinden Canlı TV ya da Canlı A/V izlerken, uzaktan kumanda üzerindeki ‘Rec’ düğmesine (19)
basarak geçerli kanalı kaydetmeye başlayabilirsiniz. Uzaktan kumanda üzerindeki ‘Stop’ düğmesine (23)
basıncaya kadar ünite kayıt yapacaktır.
Kayıt sırasında ön panelde bulunan ‘REC’ LED’i yanacaktır.
Not:
Üniteye bağlı kaynakta bulunan kopyalama koruması ünite tarafından algılanır - örneğin DVD
disklerdeki MacroVision koruması. Bağlı kaynak, kopyalamaya karşı korumalı ise ünite kayıt
yapmayı engeller ve kayıt düğmesine basıldığında bir uyarı mesajı gösterir.
Not:
Media Giant, varsayılan olarak HQ (High Quality-Yüksek Kalite)’de kayıt yapar. Setup menüsünden
kayıt kalitesini değiştirebilirsiniz.
Not:
Kayıt sırasında geçerli kanalı değiştiremezsiniz.
Kayıt sırasında ‘Rec’ düğmesine (19) bastığınızda, kayıt süresi ‘Rec’ düğmesine bastığınız andan itibaren 30
dakika olarak ayarlanacaktır.
Ekranda ‘OTR: 30 min.’ mesajı görünecektir.
[ Normal Kayıt ]
[ Kayıt Zamanlayıcısı etkin ]
Süreyi bir 30 dakika daha artırmak için ‘Rec’ düğmesine (19) tekrar basın. Bu işlemi maksimum 240
dakikaya kadar yapabilirsiniz. Kayıt süresi doluncaya kadar ya da uzaktan kumanda üzerindeki ‘Stop’
düğmesine (23) basıncaya dek kayıt işlemi devam edecektir.
Dijital Radyo
Media Giant’ın dijital (DVB-T) sinyali üzerinden yayınlanan dijital radyo desteği de mevcuttur.
Televizyonunuzun hoparlörlerinden veya Media Giant’a bağlı alıcı üzerinden dijital radyo istasyonlarını
dinleyebilirsiniz.
Dijital radyo istasyonlarını dinlemek için.
Dijital tuner fonksiyonunu kullanırken dijital radyo kanallarını da dinleyebilirsiniz.
• Media Giant’ın ana menüsünden ‘TV Tuner / AV Input’ seçeneğini seçin.
Media Giant TV tunerden Live-TV görüntüsünü gösterecektir.
• Dijital Radyo moduna geçmek için uzaktan kumanda üzerindeki ‘Live-TV’ düğmesine (38) basın.
Dijital radyo fonksiyonu etkinleştirilecektir.
• Bir dijital radyo istasyonu seçmek için ‘Channel +’ (29) ya da ‘Channel -’ (28) düğmelerini
kullanabilirsiniz.
• Digital TV moduna dönmek için, uzaktan kumanda üzerindeki ‘Live-TV’ düğmesine (38) tekrar basın.
349
TÜRKÇE
EPG (Elektronik Program Rehberi)
Media Giant’ın dijital (DVB-T) tuneri Media Giant’ın fonksiyonlarına EPG (Elektronik Program Rehberi)
ekler.
Live-TV seyrederken ‘Guide’ (33) düğmesine basarak EPG rehberine erişebilirsiniz.
EPG rehberi ekranınıza gelecektir:
[ Elektronik Program Rehberi ]
[ Elektronik Program Rehberi : Programlı Kayıt ]
EPG rehberini çalıştırmak için uzaktan kumanda üzerindeki şu düğmeleri kullanabilirsiniz:
-
Sol / sağ ok
Yukarı / aşağı ok
Previous
Next
Rewind
Fast Forward
Rec
(15)
(15)
(11)
(31)
(10)
(32)
(19)
EPG rehberinde seçilen tarihi değiştirir.
EPG rehberinde seçilen programı değiştirir.
Önceki kanala geçmek için kullanılır.
Sonraki kanala geçmek için kullanılır.
Program bilgileri içinde gezinmek için kullanılır.
Program bilgileri içinde gezinmek için kullanılır.
Seçilen programın kayıt zamanını ayarlamak için kullanılır.
‘Rec’ (19) düğmesine basarsanız, seçilen program Media Giant’ın programlı kayıtlarına eklenir. Seçilen
program kırmızı bir işaretleyici ile işaretlenir. Bu işaret programın kayıt için programlandığını gösterir.
Programlanan kaydı Media Giant’ın ‘Scheduled Recording’ menüsünde bulabilirsiniz. Bkz. bölüm 12.
Uzaktan kumanda üzerinde bulunan ‘Guide’ düğmesine (33) basarak Live-TV’ye dönebilirsiniz.
350
TÜRKÇE
DV Kontrol
Media Giant ön panelinin arkasındaki mini FireWire bağlantısı DV kameranızı doğrudan Media Giant’a
bağlamanıza ve dahili sabit diskte bulunan ev videolarınızı izlemenize ya da video kaydı yapmanıza olanak
sağlar.
• DV kameranızı Media Giant’ın önünde bulunan mini Firewire bağlantısına [7] bağlayın.
• DV kameranızı açın ve ‘Playback’ moduna ayarlayın.
• ‘DV Control’ modunu başlatmak için uzaktan kumanda üzerinde bulunan ‘DV’ düğmesine (39) basın.
Media Giant ekranda DV Control/DV denetimlerini gösterecektir:
[ DV Kontrol Paneli ]
Uzaktan kumanda üzerindeki gezinti düğmeleri (15) ile DV Kontrol panelinin düğmelerini seçebilirsiniz.
Seçiminizi uzaktan kumanda üzerindeki ‘Enter’ düğmesi (26) ile onaylayabilirsiniz.
DV Kontrol penceresinde ‘Play’i seçtiğinizde ve film oynuyorken, DV filminizin sabit diske kaydını başlatmak
için uzaktan kumanda üzerindeki ‘Rec’ (19) düğmesine basabilirsiniz.
İpucu:
Kayıt yaparken uzaktan kumanda üzerindeki ‘DV’ düğmesine (39) basarak DV Kontrol panelini
gizleyebilirsiniz. ‘DV’ düğmesine ikinci kez basıldıktan sonra panel tekrar görünecektir.
Uzaktan kumanda üzerindeki ‘Stop’ düğmesine (23) basarak bu kaydı durdurabilirsiniz.
Kaydedilen filmler bölüm 10’da açıklandığı gibi kayıt listesinde sıralanacaktır.
DV Kontrol modundan çıkmak için, uzaktan kumanda üzerinde bulunan ‘Return’ düğmesine (14) basın.
351
TÜRKÇE
12. Programlı Kayıt
Üniteyi belirli zamanlarda kanal kaydı yapmak üzere programlayabilirsiniz. Ünitede en fazla 8 adet
programlı kayıt yapılabilir.
İpucu: Media Giant’ın EPG rehberi ile kolayca kayıt programlaması yapmanız mümkündür. EPG rehberi bu
kılavuzun 11. bölüm’ünde açıklanmıştır.
• Ana menüden ‘Scheduled Recording’ (Programlı Kayıt) seçeneğini seçin.
Televizyonunuzda, Programlı Kayıt ekranı gösterilecektir.
[ Programlı kayıt menüsü]
[ Programlı kayıt ekleme ]
Programlı Kayıt menüsü, uzaktan kumandanın sol ve sağ gezinti düğmeleriyle (15) seçilebilen 5 seçenek
sunmaktadır:
Add
Edit
Delete
Status
History
Yeni bir programlı kayıt ekler
Mevcut bir programlı kaydı düzenler
Programlı bir kaydı siler
Programlı kayıt listesinin durumunu değiştirir
Programlı kayıt geçmişi listesini gösterir
Bir program Ekle ya da Düzenle
Menüden ‘Add’ ya da ‘Edit’ seçeneğini seçip uzaktan kumanda üzerindeki ‘Enter’ düğmesine (26)
bastığınızda, yeni bir program ekleyebilir ya da mevcut bir programı düzenleyebilirsiniz.
Varsayılan olarak, ‘Source’ alanı seçilidir.
Tüm seçenekler yukarı ve aşağı gezinti düğmeleri (15) ile değiştirilebilir, sol ve sağ gezinti düğmeleri (15)
ile başka bir alan seçebilirsiniz.
• Kaydınız için doğru kaynağı seçin. Bu kaynak TV kanalı, Kompozit video giriş ya da Komponent video
girişi olabilir.
• Kaydınız için doğru tarihi seçin.
• Kaydınız için doğru başlangıç saatini seçin.
• Kaydınızın uzunluğunu belirleyin.
• Kaydınız için tekrar seçeneğini belirleyin. Aşağıdaki seçenekleri seçebilirsiniz:
‘Once’ (Bir kez), ‘Everyday’ (Her gün), ‘Mon-Fri’ (Ptesi-Cuma), ‘Mon-Sat’ (Ptesi-Ctesi), ‘Sun’ (Pazar),
‘Mon’ (Ptesi), ‘Tue’ (Salı), ‘Wed’ (Çrş), ‘Thu’ (Prş), ‘Fri’ (Cuma) ya da ‘Sat’ (Ctesi).
Sadece dahili sabit diske kayıt yapabildiğiniz için ‘Device’ alanını atlayabilirsiniz.
352
TÜRKÇE
• Kayıt kalitesini belirleyin. ‘HQ’, ‘SP’, ‘LP’, ‘EP’ ve ‘SLP’ arasında seçim yapabilirsiniz.
Not:
‘Quality’ alanının değiştirilmesi, kayıt kalitesini ve kayıt için gerekli alan miktarını etkiler. Her
kalite ayarı için kullanılabilir kayıt süresi program penceresinin sol üst bölümünde gösterilir.
• ‘Nicam’ seçeneğini ‘on’ ya da ‘off’ olarak ayarlayın.
Kaydetmek istediğiniz yayın kaynağı 2 farklı ses diline sahipse Nicam seçeneği ‘on’ olarak ayarlanmalıdır
(örneğin: Eurosport).
• Kayıt için tüm seçenekler ayarlandığında, programı kaydetmek için uzaktan kumanda üzerindeki ‘Enter’
düğmesine (26) basın.
• Ekranda bir açılır onay penceresi belirecektir. Programı kaydetmek için ‘Confirm’ü seçin ve uzaktan
kumanda üzerindeki ‘Enter’ düğmesine (26) basın.
Kayıt işlemi böylece programlı bir kayıt olarak programlanmış olur ve aygıt ‘Standby’ olarak ayarlı
olduğunda bile programlanan zamanda ve kanalda ünite kayıt işlemini başlatır.
Not:
Kayıt sırasında geçerli kanalı değiştiremezsiniz.
353
TÜRKÇE
13. Setup (Ayarlar)
Ana menüde ‘Setup’ seçeneğini seçtiğinizde, Setup menüsü ekrana gelecektir. Aşağıda kullanılabilir tüm
ayarlar açıklanmıştır.
Uzaktan kumandanın gezinti düğmeleri ile Setup menüsü seçenekleri arasında geçiş yapabilirsiniz.
[ Setup menüsü – Video ]
[ Setup menüsü – Kayıt ]
A/V Ayarları:
Aspect Ratio
Brightness
Contrast
Transition
Audio Setup
Media Giant çıkış sinyalinin en boy oranını değiştirir.
(‘Letterbox 4:3’ (Sinemaskop), ‘Pan-Scan 4:3’ (Yatay kaymalı), ‘Widescreen
16:9’ (Geniş ekran))
Media Giant çıkış sinyalinin parlaklığını değiştirir.
Media Giant çıkış sinyalinin kontrastını değiştirir.
Fotoğraf slayt gösterileri arasındaki geçişi değiştirir.
Media Giant’ın ses ayarlarını değiştirir.
Night Mode
Gece Modu sesini etkinleştirir ya da devre dışı bırakır. (Off, On,
Comfort).
Digital Output Dijital ses çıkışını belirler. (HDMI-LPCM, HDMI-RAW, SPDIFLPCM, SPDIF-RAW)
Record:
Quality
Varsayılan kayıt kalitesini değiştirir. (‘HQ’, ‘SP’, ‘LP’, ‘EP’, ‘SLP’)
Not:
‘Quality’ alanının değiştirilmesi kayıt kalitesini ve kayıt için gerekli alan miktarını etkiler. Farklı
kalite ayarları, 1 saatlik video için aşağıdaki alan miktarlarını gerektirir:
HQ:
4,85 GB (4850 MB)
SP:
2,42 GB (2420 MB)
LP:
1,62 GB (1620 MB)
EP:
1,21 GB (1210 MB)
SLP:
0,80 GB (800 MB)
Auto Chapter
Permanent Timeshift
Otomatik Bölüm ayarını değiştirir. Otomatik Bölüm fonksiyonu, oynatma sırasında
kayıtlarınız içinde daha kolay geçiş yapmak için kaydınıza otomatik olarak bölüm
işaretleri ekler.
Kalıcı öteleme özelliğini etkinleştirir ya da devre dışı bırakır. Bu özellik
etkinleştirildiğinde, timeshift özelliği sürekli olarak aktif olur ve oynatma işlemini
anlık olarak duraklatmanıza ya da timeshift arabelleğinde ‘jump’ (atlama)
yapmak için uzaktan kumandanın düğmelerini kullanmanıza olanak sağlar.
354
TÜRKÇE
[ Setup menüsü – Network ]
[ Setup menüsü – Sistem ]
Network:
LAN Preference **
Not:
Tercih edilen LAN bağlantısını değiştirin: Cable (Kablo) ya da Auto (Otomatik)
(Powerline üzerinden)
‘Cable’ seçildiğinde Media Giant tarafından ağ bağlantısında her zaman LAN portu
kullanılacaktır.
‘Auto (Via Powerline)’ seçildiğinde, bir Powerline ağ olması durumunda Media Giant
tarafından Powerline özelliği kullanılacaktır. Powerline ağ yoksa LAN portu
kullanılacaktır.
Media Giant, hem Powerline hem LAN Kabloya bağlı olduğunda varsayılan ağ Powerline ağıdır.
Powerline ağın performansı 1Mbps altına düştüğünde Media Giant otomatik olarak Cable moda
geçer. Cable mod sırasında Media Giant tarafından Powerline ağ performansı sürekli olarak kontrol
edilir. Performans 1Mbps üzerine çıktığında, Media Giant, Cable modundan Powerline moduna
geçer.
Wired Lan Setup
Media Server
‘Wired Lan Setup’ seçeneğinde, Media Giant’ın IP adresini yapılandırabilirsiniz.
‘Cancel’, ‘DHCP IP (Auto)’ ya da ‘Fix IP (Manual)’ arasından seçim yapabilirsiniz.
Ağınızda bir DHCP sunucu varsa ‘DHCP IP’ seçeneğini seçin.
Statik IP adresi kullanmak istediğinizde ‘FIX IP’yi seçin.
Kurulum Sihirbazı, bir statik IP adresi gireceğiniz alanları gösterecektir. IP adresi, Alt
ağ maskesi, Varsayılan ağ geçidi ve DNS sunucusunu girmek için gezinti düğmelerini
(15) ve sayısal düğmeleri 0-9 (6) kullanın.
Girilen değerler doğru olduğunda uzaktan kumanda üzerindeki ‘Enter’ düğmesine
(26) basın.
Media Giant’ın ağdaki adını değiştirir.
Seçildiğinde, ‘Server/Host name’ ve ‘Group name’ arasında seçim yapabilirsiniz.
Server/Host name
Media Giant’ın adını değiştirir.
Media Giant’ın adı, UPnP A/V istemcilerinin (Conceptronic
C54WMP veya Conceptronic CFULLHDMA gibi) Media Giant
sabit diskinden ağı kullanarak ortam dosyalarını
oynatmalarına ve ağ ortamındaki bilgisayarın Media Giant’ın
Samba Sunucusuna erişmesine olanak sağlar.
Group name
Media Giant’ın çalışma grubu adını değiştirir.
Not:
Media Giant’ın UPnP A/V Sunucu özelliği hakkında daha fazla bilgi için bkz.
bölüm 16.
Media Giant’ın Samba Sunucu özelliği hakkında daha fazla bilgi için bkz.
bölüm 18.
355
TÜRKÇE
System:
Menu Language
Set Time
HDD Format
Timer Setup
Firmware Upgrade
Not:
Media Giant’ı çalıştırırken kullanmak istediğiniz dili seçin.
Saat ve tarihi değiştirin.
Dahili sabit diski biçimlendirir (Bkz. bölüm 15).
Slideshow Timer:
Bir slayt gösterisi sırasında resimler arası geçiş süresini
değiştirin.
Screen Saver Timer: Ekran koruyucunun devreye girmesi için hareketsiz kalma
süresini değiştirin.
Media Giant’ın ürün bilgisini yükseltir.
Ürün bilgisi yükseltme işlemi İnternetten ya da bir USB depolama aygıtından
yapılabilir. Ürün bilgisi Yükseltme seçeneği ‘Auto’ ya da ‘Manual’ olarak
ayarlanabilir.
‘Auto’ (varsayılan olarak) seçildiğinde Media Giant yeni ürün bilgisini online olarak
rastgele zamanlarda kontrol edecek ve Media Giant’ta herhangi bir kayıt / oynatma
işlemi yokken ürün bilgisini otomatik olarak yükseltecektir.
‘Manual’ seçildiğinde yeni ürün bilgisini manuel olarak kontrol edebilirsiniz.
Mevcut ürün bilgisi sürümünü kontrol etmek için, Ana menüdeyken uzaktan kumanda üzerinde
bulunan ‘Info’ düğmesine (27) basın. Ürün bilgisi sürümü ekranda gösterilecektir.
Restore Default
Media Giant’ı varsayılan ayarlara geri yükleyin ve üniteyi yeniden yapılandırmak için
Setup Wizard (Kurulum Sihirbazı)’nı başlatın.
[ Ayarlar menüsü – TV Ayarları ]
[ Kanal Düzenleme ]
TV Setup (TV Ayarları):
TV Input
Channel Scan
Manual Tune
TV Program
Ülke listesinden ülkenizi seçin. Ülkenizin adı listede yoksa, listeden ‘Other’ (Diğer)’i
seçin.
İpucu: ‘6M’ (600Mhz), ‘7M’ (700Mhz) veya ‘8M’ (800Mhz)’i seçerek özel bir DVB-T
frekans bandını da taratabilirsiniz.
Otomatik kanal tarama işlemini başlatır. Media Giant'ın otomatik kanal taraması
biraz zaman alabilir fakat bulunan tüm kanallar otomatik olarak Media Giant
belleğinde saklanacaktır.
Manual Tune özelliği ile mevcut kanal listenize yeni kanallar ekleyebilir (‘Add’
seçeneği ile), kanal listenizden kanal silebilir (‘Skip’ seçeneği ile) ya da bulunan
kanallara isim atayabilirsiniz (‘Edit’ seçeneği ile).
TV Program seçeneği ile Media Giant’ı tüm DVB-T kanallarını (Media Giant’ta
oynatılamayan şifreli kanallar dahil) veya sadece Ücretsiz (FTA) kanalları gösterecek
şekilde yapılandırabilirsiniz.
356
TÜRKÇE
14. Bilgisayar USB Bağlantısı
Üniteyi bilgisayarınıza bağlayarak dahili Sabit diskten ya da dahili Sabit diske veri (film, müzik, resim,
kayıtlar vb.) kopyalayabilirsiniz.
Not:
Aşağıdaki örnekte Windows XP ile çalışan bir bilgisayar kullanılmıştır ancak üniteyi USB desteği ve
FAT32 & NTFS dosya sistemlerini okuma ve yazma özelliği olan tüm bilgisayarlarda kullanmak
mümkündür.
Ünitenin bilgisayarınıza bağlanması
• Birlikte verilen, bir ucu USB diğer ucu Mini-USB olan kabloyu ünitenin ön tarafındaki Mini-USB portuna ve
bilgisayarınızda boş bir USB porta takın.
• Ünitenin arkasında bulunan açma kapama anahtarı ile üniteyi açın. Ünite otomatik olarak algılanacak,
yüklenecek ve bilgisayarınızda ilave bir sürücü olarak gösterilecektir.
Not:
Sabit disk, 1 ortam disk bölümü (sadece FAT32) ile bölümlendirildiğinde, sadece 1 sürücü harfi
görünecektir. Sabit disk, 2 ortam disk bölümü (FAT32 ve NTFS) ile bölümlendirildiğinde, Media
Giant, 2 sürücü harfi gösterecektir.
Kayıtlarınızın bilgisayarda oynatılması
Kayıtlarınızı bilgisayarda oynatmak için önce kayıtlarınızı kayıt disk bölümünden ortam disk bölümüne
kopyalamanız gerekir. Bu işlemi, bölüm 10’da açıklandığı gibi ‘Playback Recordings’ menüsünden ‘Copy to
FAT32 Partition’ komutu ile yapabilirsiniz.
Kayıtlarınız FAT32 disk bölümüne kopyalandığında, ünite bilgisayara bağlı iken kayıtlı programları
bilgisayarınızda oynatabilirsiniz.
Ünitenin bilgisayardan kaldırılması
•
•
•
•
Sistem tepsisinden “Safe Removal” simgesine tıklayın.
“Stop USB Mass Storage Device” seçeneğini seçin.
“Safe to remove Hardware” mesajını bekleyin.
USB kabloyu çıkarın.
357
TÜRKÇE
15. Disk Bölümü Bilgileri ve Biçimlendirme (Formatlama) Sihirbazı
Media Giant çoğu durumda önceden biçimlendirilmiş bir sabit disk ile birlikte gelir. Sabit disk, Media
Giant’ın varsayılan yapılandırması ile biçimlendirilir (formatlanır) ve disk bölümlendirmesi aşağıdaki şekilde
yapılır:
Öteleme arabellek disk bölümü:
Kayıt disk bölümü:
FAT32 ortam disk bölümü:
NTFS ortam disk bölümü:
~ 4,85 GB
Sabit disk alanının %50’si.
Sabit disk alanının %25’i.
Sabit disk alanının %25’i.
Örnek:
500GB
750 GB
1000GB
Öteleme arabellek disk bölümü:
Kayıt disk bölümü:
FAT32 ortam disk bölümü:
NTFS ortam disk bölümü:
~ 4,85 GB
~ 250 GB
~ 125 GB
~ 125 GB
~ 4,85 GB
~ 375 GB
~ 187 GB
~ 187 GB
~ 4,85 GB
~ 500 GB
~ 250 GB
~ 250 GB
Varsayılan sabit disk yapılandırmasını Media Giant’ın sabit diskini yeniden biçimlendirerek
değiştirebilirsiniz.
Not:
Media Giant’ın sabit diskini yeniden biçimlendirirseniz (formatlarsanız), sabit diskte kayıtlı tüm
içerik silinecektir!
Media Giant’ın sabit diskini biçimlendirmek için Setup menüsüne gidin ve ‘System’ sayfasında ‘HDD
Format’ seçeneğini seçin. Onay için tekrar ‘HDD format’ı seçin.
HDD Biçimlendirme Sihirbazı sabit diskin otomatik mi (‘Auto’) manuel olarak mı (‘Manual’)
biçimlendirileceğini soran bir pencere ekrana getirir.
• ‘Auto’ seçeneğini seçtiğinizde, Media Giant yukarıda açıklandığı gibi varsayılan biçimlendirme ayarları
ile biçimlendirilecektir.
• ‘Manual’ seçeneğini seçtiğinizde, Biçimlendirme Sihirbazı sabit diskin biçimlendirilmesi için gerekli
adımlarla sizi yönlendirecektir.
[ Biçimlendirme Sihirbazı – Auto veya Manual ]
[ Biçimlendirme Sihirbazı – Timeshift Tampon ]
Uzaktan kumanda üzerindeki yukarı ve aşağı gezinti düğmeleri (15) ile öteleme arabelleği boyutunu
değiştirin.
Öteleme arabelleği ayarını 1, 2, 3 ya da 4 saat olarak yapabilirsiniz.
• Bir sonraki adıma geçmek için ‘Next’i seçin.
358
TÜRKÇE
[ Biçimlendirme Sihirbazı – Kayıt Disk Bölümü ]
[ Biçimlendirme Sihirbazı – FAT32/NTFS Disk Bölümü ]
• Uzaktan kumanda üzerindeki yukarı ve aşağı gezinti düğmeleri (15) ile Kayıt Disk Bölümü boyutunu
değiştirin.
Kalan disk alanı Media Giant’ın ortam bölüm(ler)i için kullanılacaktır.
• Bir sonraki adıma geçmek için ‘Next’i seçin.
[ Biçimlendirme Sihirbazı – Biçimlendirmenin Başlatılması ]
[ Biçimlendirme Sihirbazı – Biçimlendirme ]
• Media Giant’ın sabit diskini biçimlendirmeye başlamak için‘Format’ı seçin.
Biçimlendirme sırasında Biçimlendirme Sihirbazı ‘Proceeding’ yazısını gösterecektir.
Not:
Biçimlendirme (formatlama ) işlemi yaklaşık 5 dakika sürebilir. Lütfen biçimlendirme işlemi sona
erinceye kadar bekleyin.
[ Biçimlendirme Sihirbazı – Tamamlandı ]
• Biçimlendirme işlemi bittiğinde, Biçimlendirme Sihirbazını kapatmak için ‘OK’i seçin. Media Giant
otomatik olarak yeniden başlatılacaktır.
359
TÜRKÇE
16. UPnP A/V Sunucu (Twonky Mediaserver)
Media Giant’ın özelliklerinden biri UPnP A/V Sunucudur.
Bu da Media Giant ve tüm ortam içeriğini ağınızdaki UPnP A/V istemcileri için kullanılabilir yapmaktadır
(örneğin: Conceptronic CFULLHDMA ya da Conceptronic C54WMP).
Media Giant’ta kullanılan UPnP A/V Sunucu ‘Twonky Mediaserver’dır.
Twonky Mediaserver FAT32 ve NTFS ortam disk bölümünde bulunan tüm ortamı otomatik olarak alfabetik
sıraya dizer. Bu disk bölümlerinden birine yeni veri eklendiğinde, veriler otomatik olarak ağınızdaki UPnP
A/V istemcilerinin kullanımına açılacaktır.
UPnP A/V Sunucunuzun adını Media Giant Setup menüsünün ‘Network’ bölümünde belirleyebilirsiniz.
Not:
Varsayılan UPnP A/V Sunucu adı ‘media giant’tır.
Twonky Mediaserver yazılımına aşikarsanız, bilgisayar üzerinden gelişmiş Twonky Mediaserver ayarlarını
değiştirebilirsiniz.
Twonky Mediaserver yazılımının yapılandırma sayfalarına erişmek için Media Giant IP adresini ve ardından
9000 port numarasını tarayıcı penceresine girin.
Örneğin:
HTTP://192.168.0.100:9000/ (Media Giant IP adresinin 192.168.0.100 olduğu göz önüne
alındığında).
Twonky Media Sunucuda yerleşik ‘Troubleshooting’ (Sorun giderme) kılavuzu mevcuttur. Bu kılavuz Twonky
Media Server configuration (yapılandırma) penceresinin sol gezinti çubuğunda bulunabilir. Bu kılavuz,
Twonky Media Server yapılandırması yaparken size yardımcı olacaktır.
Twonky Media Server ile ilgili daha fazla bilgi için Twonky websitesini ziyaret edin:
http://www.twonkymedia.com/
360
TÜRKÇE
17. Ağ Paylaşımlarına Göz Atma
Media Giant ağ paylaşımlarınıza göz atabilir ve bir ağ paylaşımından direkt olarak ortam dosyalarını
oynatabilir. Bu özelliği kullanmak için ortam klasörlerinizi ağda paylaştırmanız gerekir. Media Giant böylece
paylaştırılan ortam klasörlerini bulabilir ve bu klasörlere erişebilir.
Bu bölüm Windows XP ve Windows Vista’da dosya paylaşımını nasıl etkinleştirebileceğinizi açıklamaktadır.
Not:
Bu kılavuz sadece Windows XP ve Windows Vista’da dosya ve klasör paylaşımını açıklamaktadır.
Lütfen ortam dosyaları içeren bir klasörü nasıl paylaştırabileceğiniz ile ilgili işletim sisteminizin ya
da ağ saklama aygıtınızın kılavuzunu kontrol edin.
Windows XP’de dosya paylaşımı
• Başlat menüsünden ‘My Computer’ (Bilgisayarım)’ın kısa yol tuşunu açın ve paylaştırmak istediğiniz
ortam dosyalarını içeren klasöre gidin.
• Ortam dosyaları içeren klasöre bir kere tıklayın ve sol menü çubuğundan ‘Share this folder’ (Bu klasörü
paylaştır) seçeneğini seçin.
[ Bilgisayarım – Klasör Paylaştırma ]
Klasörün ‘Sharing’ sayfası ile birlikte özellikleri gösterilir.
Klasörü paylaştırmak için ‘Network sharing and security’ (Ağ paylaşımı ve güvenlik) bölümü kullanılabilir.
Daha önceden herhangi bir klasör paylaştırmadıysanız, penceredeki ‘Network Setup Wizard’ satırına
tıklayarak Network Setup Wizard (Ağ Kurulum Sihirbazı)’nı çalıştırmanız gerekir.
361
TÜRKÇE
[ Özellikler – Paylaşım Sayfası ]
[ Özellikler – Paylaşım Sayfası ]
• Ağ Kurulum Sihirbazı daha önceden tamamlandığında ‘Share this folder on the network’ (Bu klasörü
ağda paylaşıma aç) üzerine tıklayarak klasörünüzü paylaştırabilirsiniz.
• Paylaşım için metin alanında bir ad girin ve ‘Apply’ (Uygula) üzerine tıklayın.
• Pencereyi kapatmak için ‘OK’e tıklayın.
Klasör simgesinin altında bir el işaretinin görünmesi klasörün bilgisayarda paylaşıma açıldığını gösterir.
[ Paylaştırılmış Klasör ]
362
TÜRKÇE
Windows Vista’da dosya paylaşımı
• Başlat menüsünden ‘Computer’ (Bilgisayar) kısa yol tuşunu açın ve paylaştırmak istediğiniz ortam
dosyalarını içeren klasöre gidin.
• Ortam dosyaları içeren klasöre tek tıklayın ve pencerenin üst menüsünden ‘Share’ (Paylaşım) seçeneğini
seçin.
[ Bilgisayar – Klasör Paylaştırma ]
Varsayılan olarak kendi kullanıcınız klasörün sahibi olarak paylaşım listesindedir.
[ Paylaştırma Özellikleri ]
• Açılır listeden seçerek ve ‘Add’ düğmesine basarak paylaşım listesine daha fazla kullanıcı
ekleyebilirsiniz.
• Kullanıcı listesi tamamlandığında, klasörü paylaştırmak için ‘Share’ (Paylaşım) düğmesine tıklayın.
Klasör, üzerinde 2 insan resmi olan bir simge ile listelenir ve bu küçük simge klasörün bilgisayarınızda
paylaşıma açıldığını gösterir.
[ Paylaştırılmış Klasör ]
363
TÜRKÇE
Media Giant üzerindeki paylaştırılmış klasörlere göz atma
Ortam dosyalarınız paylaştırıldığında, ağ konumlarına göz atmak için Ana menüde bulunan ‘Browse Media’
(Ortama Göz At) seçeneğini kullanabilirsiniz.
[ Saklama Konumu Seçimi ]
[ Ağ Paylaşımı – Kullanıcı Oturum Açma ]
Saklama konumu listesinde ‘Network’ seçeneğini seçmek ve ağ içinden bilgisayarınıza ya da paylaşımlı
klasör içeren ağ saklama aygıtına gitmek için uzaktan kumanda üzerindeki gezinti düğmelerini (15)
kullanın.
Paylaşımlı bir klasör kullanıcı adı ve parola ile korunduğunda (örneğin: Windows XP ve Windows Vista’da
varsayılan paylaşım), kullanıcı adı ve parola girmek için Media Giant tarafından bir ‘User Login’ açılır
penceresi gösterilecektir.
Not:
Paylaştırılmış klasörünüze oturum açmak için Windows XP ya da Windows Vista için normal kullanıcı
hesabınızı kullanabilirsiniz.
Kullanıcı kimliği ya da parola alanını seçmek için uzaktan kumanda üzerindeki gezinti düğmelerini (15)
kullanın ve ekranüstü klavye ile değer girmek için ‘Enter’ düğmesine (26) basın.
[ Ekranüstü Klavye ]
[ Ağ Paylaşımı – Kullanıcı Oturum Açma ]
Kullanıcı adı ve parola doğru olarak girildiğinde, ağ paylaşımını girmek için ‘OK’ ya da ‘OK & Save to
MyShortcuts’ düğmesini seçin.
Artık bölüm 9’da açıklandığı gibi paylaştırılmış klasör içinde gezinebilirsiniz.
364
TÜRKÇE
18. Ağ Paylaşımı – Yapılandırma ve Kullanım
Conceptronic Media Giant’a ağ paylaşımı (Samba Sunucu) olarak erişmek mümkündür. Ağ paylaşım özelliği
ile ağ üzerinden Media Giant’ın FAT32 disk bölümünü (HDD1) paylaştırabilirsiniz, böylece o disk bölümünde
kayıtlı verilere diğer bilgisayarlar erişebilmektedir.
Configuration (Yapılandırma)
Ana menüden ‘Setup (Ayarlar)’ seçeneğini seçin. Setup menüsü ekrana gelecektir. Setup menüsünden
‘Network’ (Ağ) seçeneğini seçin. Sistem Setup menüsünde ‘Media Server’ isimli bir seçenek mevcuttur.
‘Media Server’ seçeneğinde aşağıdaki ayarları değiştirebilirsiniz:
- Server/Host name
- Group name
Media Giant’ın ağdaki adını belirler. Media Giant’ın varsayılan adı ‘media
giant’tır.
Ev ağınızın adını belirler. Varsayılan grup adı ‘WORKGROUP’tur.
Ayarlar değiştirildiğinde, ana menüye dönmek için uzaktan kumanda üzerindeki ‘Return’ (14) düğmesine
basın.
Kullanım
Media Giant’ın ağ ayarlarını yapılandırdığınızda, ağınızdaki bir bilgisayar üzerinden ağ paylaşımına
erişebilirsiniz.
Not:
Aşağıdaki adımlar Windows Vista ile çalışan bir bilgisayarda varsayılan ayarlarla Media Giant ağ
paylaşımına nasıl erişebileceğinizi göstermektedir.
Media Giant’ın varsayılan ağ adı ‘media giant’tır. Bu isimle ağdaki aygıtın ağ paylaşımına erişebilirsiniz.
• ‘Start (Başlat)’, ‘Network (Ağ)’ı seçin.
Windows Explorer ağ ayarlarınızı gösterecektir.
Üst çubukta Media Giant’ın ağ adını aşağıdaki gibi girebilirsiniz:
\\<NETWORK_NAME_OF_MEDIA_GIANT>\
Örneğin:
Media Giant varsayılan ayarlarla yapılandırılırsa, ağ adı ‘media giant’tır ve aşağıdaki adı
girmeniz gerekir:
\\media giant\
365
TÜRKÇE
Media Giant’ın ağ paylaşımı aşağıdaki ekran görüntüsünde gösterildiği şekilde ekrana gelir:
Not:
Windows’ta paylaşım ‘Yazıcılar’ı ağdaki her Samba sunucusuna otomatik olarak eklenir fakat Media
Giant yazdırma sunucusu olarak çalışamaz.
Ağ paylaşımını seçerek Media Giant’ın FAT32 disk bölümüne dosya kopyalayabilir, silebilir, oynatabilir ve
ekleyebilirsiniz.
366
LICENSING INFORMATION
This Conceptronic product (Media Giant) includes copyrighted third-party software licensed under the terms of the GNU
General Public License. Please see The GNU General Public License for the exact terms and conditions of this license.
Specially, the following parts of this product are subject to the GNU GPL:
Boot code
Bootup
Bootcode
Early-stage bootstrap loader
Bootstrap loader
GPL
GPL
Kernel
vmlinux
Usb
uclibc
busybox
Linux Kernel
USB device driver
Standard C Library
Provide basic rootfs and shell
GPL
GPL
GPL
GPL
Application
Freetype
Mp3info
libini
xine
dvdauthor
NTP
ebase
Samba
Hdparm
Font Rendering Engine
id3tag parser
Ini File Manipulate
VCD, DVD access
Sub Picture Encoder
Network time protocol demand
Timer record
SMB/CIFS client
Automatic Acoustic Management
FTL(freetype license)
GPL
GPL
GPL
GPL
GPL
LGPL
GPL
BSD
All listed software packages are copyright by their respective authors. Please see the source code for detailed information.
Availability of source code
Conceptronic. has eposed the full source code of the GPL licensed software, including any scripts to control compilation and
installation of the object code. All future firmware updates will also be accompanied with their respective source code. For
more information on how you can obtain our open source code, please visit our web site.
367
LICENSING INFORMATION
GNU GENERAL PUBLIC LICENSE
Version 2, June 1991
Copyright (C) 1989, 1991 Free Software Foundation, Inc.
Temple Place, Suite 330, Boston, MA 02111-1307 USA
Everyone is permitted to copy and distribute verbatim copies
of this license document, but changing it is not allowed.
Preamble
The licenses for most software are designed to take away your freedom to share and change it. By contrast, the GNU
General Public License is intended to guarantee your freedom to share and change free software--to make sure the software
is free for all its users. This General Public License applies to most of the Free Software Foundation's software and to any
other program whose authors commit to using it. (Some other Free Software Foundation software is covered by the GNU
Library General Public License instead.) You can apply it to your programs, too.
When we speak of free software, we are referring to freedom, not price. Our General Public Licenses are designed to make
sure that you have the freedom to distribute copies of free software (and charge for this service if you wish), that you
receive source code or can get it if you want it, that you can change the software or use pieces of it in new free programs;
and that you know you can do these things.
To protect your rights, we need to make restrictions that forbid anyone to deny you these rights or to ask you to surrender
the rights. These restrictions translate to certain responsibilities for you if you distribute copies of the software, or if you
modify it.
For example, if you distribute copies of such a program, whether gratis or for a fee, you must give the recipients all the
rights that you have. You must make sure that they, too, receive or can get the source code. And you must show them
these terms so they know their rights.
We protect your rights with two steps: (1) copyright the software, and (2) offer you this license which gives you legal
permission to copy, distribute and/or modify the software.
Also, for each author's protection and ours, we want to make certain that everyone understands that there is no warranty
for this free software. If the software is modified by someone else and passed on, we want its recipients to know that what
they have is not the original, so that any problems introduced by others will not reflect on the original authors' reputations.
Finally, any free program is threatened constantly by software patents. We wish to avoid the danger that redistributors of
a free program will individually obtain patent licenses, in effect making the program proprietary. To prevent this, we have
made it clear that any patent must be licensed for everyone's free use or not licensed at all.
The precise terms and conditions for copying, distribution and modification follow.
GNU GENERAL PUBLIC LICENSE
TERMS AND CONDITIONS FOR COPYING, DISTRIBUTION AND MODIFICATION
0. This License applies to any program or other work which contains a notice placed by the copyright holder saying it may
be distributed under the terms of this General Public License. The "Program", below, refers to any such program or work,
and a "work based on the Program" means either the Program or any derivative work under copyright law: that is to say, a
work containing the Program or a portion of it, either verbatim or with modifications and/or translated into another
language. (Hereinafter, translation is included without limitation in the term "modification".) Each licensee is addressed as
"you".
Activities other than copying, distribution and modification are not covered by this License; they are outside its scope. The
act of running the Program is not restricted, and the output from the Program is covered only if its contents constitute a
work based on the Program (independent of having been made by running the Program). Whether that is true depends on
what the Program does.
1. You may copy and distribute verbatim copies of the Program's source code as you receive it, in any medium, provided
that you conspicuously and appropriately publish on each copy an appropriate copyright notice and disclaimer of warranty;
keep intact all the notices that refer to this License and to the absence of any warranty; and give any other recipients of the
Program a copy of this License along with the Program.
You may charge a fee for the physical act of transferring a copy, and you may at your option offer warranty protection in
exchange for a fee.
368
LICENSING INFORMATION
2. You may modify your copy or copies of the Program or any portion of it, thus forming a work based on the Program, and
copy and distribute such modifications or work under the terms of Section 1 above, provided that you also meet all of these
conditions:
a) You must cause the modified files to carry prominent notices stating that you changed the files and the date of any
change.
b) You must cause any work that you distribute or publish, that in whole or in part contains or is derived from the Program
or any part thereof, to be licensed as a whole at no charge to all third parties under the terms of this License.
c) If the modified program normally reads commands interactively when run, you must cause it, when started running for
such interactive use in the most ordinary way, to print or display an announcement including an appropriate copyright notice
and a notice that there is no warranty (or else, saying that you provide a warranty) and that users may redistribute the
program under these conditions, and telling the user how to view a copy of this License. (Exception: if the Program itself is
interactive but does not normally print such an announcement, your work based on the Program is not required to print an
announcement.)
These requirements apply to the modified work as a whole. If identifiable sections of that work are not derived from the
Program, and can be reasonably considered independent and separate works in themselves, then this License, and its terms,
do not apply to those sections when you distribute them as separate works. But when you distribute the same sections as
part of a whole which is a work based on the Program, the distribution of the whole must be on the terms of this License,
whose permissions for other licensees extend to the entire whole, and thus to each and every part regardless of who wrote
it.
Thus, it is not the intent of this section to claim rights or contest your rights to work written entirely by you; rather, the
intent is to exercise the right to control the distribution of derivative or collective works based on the Program.
In addition, mere aggregation of another work not based on the Program with the Program (or with a work based on the
Program) on a volume of a storage or distribution medium does not bring the other work under the scope of this License.
3. You may copy and distribute the Program (or a work based on it, under Section 2) in object code or executable form
under the terms of Sections 1 and 2 above provided that you also do one of the following:
a) Accompany it with the complete corresponding machine-readable source code, which must be distributed under the
terms of Sections 1 and 2 above on a medium customarily used for software interchange; or,
b) Accompany it with a written offer, valid for at least three years, to give any third party, for a charge no more than your
cost of physically performing source distribution, a complete machine-readable copy of the corresponding source code, to be
distributed under the terms of Sections 1 and 2 above on a medium customarily used for software interchange; or,
c) Accompany it with the information you received as to the offer to distribute corresponding source code. (This
alternative is allowed only for noncommercial distribution and only if you received the program in object code or executable
form with such an offer, in accord with Subsection b above.)
The source code for a work means the preferred form of the work for making modifications to it. For an executable work,
complete source code means all the source code for all modules it contains, plus any associated interface definition files,
plus the scripts used to control compilation and installation of the executable. However, as a special exception, the source
code distributed need not include anything that is normally distributed (in either source or binary form) with the major
components (compiler, kernel, and so on) of the operating system on which the executable runs, unless that component
itself accompanies the executable.
If distribution of executable or object code is made by offering access to copy from a designated place, then offering
equivalent access to copy the source code from the same place counts as distribution of the source code, even though third
parties are not compelled to copy the source along with the object code.
369
LICENSING INFORMATION
4. You may not copy, modify, sublicense, or distribute the Program except as expressly provided under this License. Any
attempt otherwise to copy, modify, sublicense or distribute the Program is void, and will automatically terminate your rights
under this License. However, parties who have received copies, or rights, from you under this License will not have their
licenses terminated so long as such parties remain in full compliance.
5. You are not required to accept this License, since you have not signed it. However, nothing else grants you permission to
modify or distribute the Program or its derivative works. These actions are prohibited by law if you do not accept this
License. Therefore, by modifying or distributing the Program (or any work based on the Program), you indicate your
acceptance of this License to do so, and all its terms and conditions for copying, distributing or modifying the Program or
works based on it.
6. Each time you redistribute the Program (or any work based on the Program), the recipient automatically receives a
license from the original licensor to copy, distribute or modify the Program subject to these terms and conditions. You may
not impose any further restrictions on the recipients' exercise of the rights granted herein. You are not responsible for
enforcing compliance by third parties to this License.
7. If, as a consequence of a court judgment or allegation of patent infringement or for any other reason (not limited to
patent issues), conditions are imposed on you (whether by court order, agreement or otherwise) that contradict the
conditions of this License, they do not excuse you from the conditions of this License. If you cannot distribute so as to satisfy
simultaneously your obligations under this License and any other pertinent obligations, then as a consequence you may not
distribute the Program at all. For example, if a patent license would not permit royalty-free redistribution of the Program by
all those who receive copies directly or indirectly through you, then the only way you could satisfy both it and this License
would be to refrain entirely from distribution of the Program.
If any portion of this section is held invalid or unenforceable under any particular circumstance, the balance of the section is
intended to apply and the section as a whole is intended to apply in other circumstances. It is not the purpose of this section
to induce you to infringe any patents or other property right claims or to contest validity of any such claims; this section has
the sole purpose of protecting the integrity of the free software distribution system, which is implemented by public license
practices. Many people have made generous contributions to the wide range of software distributed through that system in
reliance on consistent application of that system; it is up to the author/donor to decide if he or she is willing to distribute
software through any other system and a licensee cannot impose that choice.
This section is intended to make thoroughly clear what is believed to be a consequence of the rest of this License.
8. If the distribution and/or use of the Program is restricted in certain countries either by patents or by copyrighted
interfaces, the original copyright holder who places the Program under this License may add an explicit geographical
distribution limitation excluding those countries, so that distribution is permitted only in or among countries not thus
excluded. In such case, this License incorporates the limitation as if written in the body of this License.
9. The Free Software Foundation may publish revised and/or new versions of the General Public License from time to time.
Such new versions will be similar in spirit to the present version, but may differ in detail to address new problems or
concerns.
Each version is given a distinguishing version number. If the Program specifies a version number of this License which applies
to it and "any later version", you have the option of following the terms and conditions either of that version or of any later
version published by the Free Software Foundation. If the Program does not specify a version number of this License, you
may choose any version ever published by the Free Software Foundation.
10. If you wish to incorporate parts of the Program into other free programs whose distribution conditions are different,
write to the author to ask for permission. For software which is copyrighted by the Free Software Foundation, write to the
Free Software Foundation; we sometimes make exceptions for this. Our decision will be guided by the two goals of
preserving the free status of all derivatives of our free software and of promoting the sharing and reuse of software
generally.
370
LICENSING INFORMATION
NO WARRANTY
11. BECAUSE THE PROGRAM IS LICENSED FREE OF CHARGE, THERE IS NO WARRANTY FOR THE PROGRAM, TO THE EXTENT
PERMITTED BY APPLICABLE LAW. EXCEPT WHEN OTHERWISE STATED IN WRITING THE COPYRIGHT HOLDERS AND/OR OTHER
PARTIES PROVIDE THE PROGRAM "AS IS" WITHOUT WARRANTY OF ANY KIND, EITHER EXPRESSED OR IMPLIED, INCLUDING, BUT
NOT LIMITED TO, THE IMPLIED WARRANTIES OF MERCHANTABILITY AND FITNESS FOR A PARTICULAR PURPOSE. THE ENTIRE
RISK AS TO THE QUALITY AND PERFORMANCE OF THE PROGRAM IS WITH YOU. SHOULD THE PROGRAM PROVE DEFECTIVE, YOU
ASSUME THE COST OF ALL NECESSARY SERVICING, REPAIR OR CORRECTION.
12. IN NO EVENT UNLESS REQUIRED BY APPLICABLE LAW OR AGREED TO IN WRITING WILL ANY COPYRIGHT HOLDER, OR ANY
OTHER PARTY WHO MAY MODIFY AND/OR REDISTRIBUTE THE PROGRAM AS PERMITTED ABOVE, BE LIABLE TO YOU FOR
DAMAGES, INCLUDING ANY GENERAL, SPECIAL, INCIDENTAL OR CONSEQUENTIAL DAMAGES ARISING OUT OF THE USE OR
INABILITY TO USE THE PROGRAM (INCLUDING BUT NOT LIMITED TO LOSS OF DATA OR DATA BEING RENDERED INACCURATE OR
LOSSES SUSTAINED BY YOU OR THIRD PARTIES OR A FAILURE OF THE PROGRAM TO OPERATE WITH ANY OTHER PROGRAMS),
EVEN IF SUCH HOLDER OR OTHER PARTY HAS BEEN ADVISED OF THE POSSIBILITY OF SUCH DAMAGES.
END OF TERMS AND CONDITIONS
How to Apply These Terms to Your New Programs
If you develop a new program, and you want it to be of the greatest possible use to the public, the best way to achieve this
is to make it free software which everyone can redistribute and change under these terms.
To do so, attach the following notices to the program. It is safest to attach them to the start of each source file to most
effectively convey the exclusion of warranty; and each file should have at least the "copyright" line and a pointer to where
the full notice is found.
, 1 April 1989
Ty Coon, President of Vice
This General Public License does not permit incorporating your program into proprietary programs. If your program is a
subroutine library, you may consider it more useful to permit linking proprietary applications with the lib
371
LICENSING INFORMATION
GNU LESSER GENERAL PUBLIC LICENSE
Version 2.1, February 1999
Copyright (C) 1991, 1999 Free Software Foundation, Inc. 51 Franklin Street, Fifth Floor, Boston, MA 02110-1301 USA
Everyone is permitted to copy and distribute verbatim copies of this license document, but changing it is not allowed.
[This is the first released version of the Lesser GPL. It also counts as the successor of the GNU Library Public License, version
2, hence the version number 2.1.]
Preamble
The licenses for most software are designed to take away your freedom to share and change it. By contrast, the GNU
General Public Licenses are intended to guarantee your freedom to share and change free software--to make sure the
software is free for all its users.
This license, the Lesser General Public License, applies to some specially designated software packages--typically libraries-of the Free Software Foundation and other authors who decide to use it. You can use it too, but we suggest you first think
carefully about whether this license or the ordinary General Public License is the better strategy to use in any particular
case, based on the explanations below.
When we speak of free software, we are referring to freedom of use, not price. Our General Public Licenses are designed
to make sure that you have the freedom to distribute copies of free software (and charge for this service if you wish); that
you receive source code or can get it if you want it; that you can change the software and use pieces of
it in new free programs; and that you are informed that you can do these things.
To protect your rights, we need to make restrictions that forbid distributors to deny you these rights or to ask you to
surrender these rights. These restrictions translate to certain responsibilities for you if you distribute copies of the library or
if you modify it.
For example, if you distribute copies of the library, whether gratis or for a fee, you must give the recipients all the rights
that we gave you. You must make sure that they, too, receive or can get the source code. If you link other code with the
library, you must provide complete object files to the recipients, so that they can relink them with the library after making
changes to the library and recompiling it. And you must show them these terms so they know their rights.
We protect your rights with a two-step method: (1) we copyright the library, and (2) we offer you this license, which gives
you legal permission to copy, distribute and/or modify the library.
To protect each distributor, we want to make it very clear that there is no warranty for the free library. Also, if the library
is modified by someone else and passed on, the recipients should know that what they have is not the original version, so
that the original author's reputation will not be affected by problems that might be introduced by others.
Finally, software patents pose a constant threat to the existence of any free program. We wish to make sure that a
company cannot effectively restrict the users of a free program by obtaining a restrictive license from a patent holder.
Therefore, we insist that any patent license obtained for a version of the library must be consistent with the full freedom of
use specified in this license.
Most GNU software, including some libraries, is covered by the ordinary GNU General Public License. This license, the GNU
Lesser General Public License, applies to certain designated libraries, and is quite different from the ordinary General Public
License. We use this license for certain libraries in order to permit linking those libraries into non-free programs.
When a program is linked with a library, whether statically or using a shared library, the combination of the two is legally
speaking a combined work, a derivative of the original library. The ordinary General Public License therefore permits such
linking only if the entire combination fits its criteria of freedom. The Lesser General Public License permits more lax criteria
for linking other code with the library.
We call this license the "Lesser" General Public License because it does Less to protect the user's freedom than the ordinary
General Public License. It also provides other free software developers Less of an advantage over competing non-free
programs. These disadvantages are the reason we use the ordinary General Public License for many libraries. However, the
Lesser license provides advantages in certain special circumstances.
For example, on rare occasions, there may be a special need to encourage the widest possible use of a certain library, so
that it becomes a de-facto standard. To achieve this, non-free programs must be allowed to use the library. A more
frequent case is that a free library does the same job as widely used non-free libraries. In this case, there is little to gain by
limiting the free library to free software only, so we use the Lesser General Public License.
372
LICENSING INFORMATION
In other cases, permission to use a particular library in non-free programs enables a greater number of people to use a large
body of free software. For example, permission to use the GNU C Library in non-free programs enables many more people to
use the whole GNU operating system, as well as its variant, the GNU/Linux operating system.
Although the Lesser General Public License is Less protective of the users' freedom, it does ensure that the user of a
program that is linked with the Library has the freedom and the wherewithal to run that program using a modified version of
the Library.
The precise terms and conditions for copying, distribution and modification follow. Pay close attention to the difference
between a "work based on the library" and a "work that uses the library". The former contains code derived from the library,
whereas the latter must be combined with the library in order to run.
GNU LESSER GENERAL PUBLIC LICENSE
TERMS AND CONDITIONS FOR COPYING, DISTRIBUTION AND MODIFICATION
0. This License Agreement applies to any software library or other program which contains a notice placed by the copyright
holder or other authorized party saying it may be distributed under the terms of this Lesser General Public License (also
called "this License"). Each licensee is addressed as "you".
A "library" means a collection of software functions and/or data prepared so as to be conveniently linked with application
programs (which use some of those functions and data) to form executables.
The "Library", below, refers to any such software library or work which has been distributed under these terms. A "work
based on the Library" means either the Library or any derivative work under copyright law: that is to say, a work containing
the Library or a portion of it, either verbatim or with modifications and/or translated straightforwardly into another
language. (Hereinafter, translation is included without limitation in the term "modification".)
"Source code" for a work means the preferred form of the work for making modifications to it. For a library, complete
source code means all the source code for all modules it contains, plus any associated interface definition files, plus the
scripts used to control compilation and installation of the library.
Activities other than copying, distribution and modification are not covered by this License; they are outside its scope. The
act of running a program using the Library is not restricted, and output from such a program is covered only if its contents
constitute a work based on the Library (independent of the use of the Library in a tool for writing it). Whether that is true
depends on what the Library does and what the program that uses the Library does.
1. You may copy and distribute verbatim copies of the Library's complete source code as you receive it, in any medium,
provided that you conspicuously and appropriately publish on each copy an appropriate copyright notice and disclaimer of
warranty; keep intact all the notices that refer to this License and to the absence of any warranty; and distribute a copy of
this License along with the Library.
You may charge a fee for the physical act of transferring a copy, and you may at your option offer warranty protection in
exchange for a fee.
2. You may modify your copy or copies of the Library or any portion of it, thus forming a work based on the Library, and
copy and distribute such modifications or work under the terms of Section 1 above, provided that you also meet all of these
conditions:
a) The modified work must itself be a software library.
b) You must cause the files modified to carry prominent notices stating that you changed the files and the date of any
change.
c) You must cause the whole of the work to be licensed at no charge to all third parties under the terms of this License.
d) If a facility in the modified Library refers to a function or a table of data to be supplied by an application program that
uses the facility, other than as an argument passed when the facility is invoked, then you must make a good faith effort to
ensure that, in the event an application does not supply such function or
table, the facility still operates, and performs whatever part of its purpose remains meaningful.
(For example, a function in a library to compute square roots has a purpose that is entirely well-defined independent of
the application. Therefore, Subsection 2d requires that any application-supplied function or table used by this function
must be optional: if the application does not supply it, the square root function must still compute square roots.)
373
LICENSING INFORMATION
These requirements apply to the modified work as a whole. If identifiable sections of that work are not derived from the
Library, and can be reasonably considered independent and separate works in themselves, then this License, and its terms,
do not apply to those sections when you distribute them as separate works. But when you distribute the same sections as
part of a whole which is a work based on the Library, the distribution of the whole must be on the terms of this License,
whose permissions for other licensees extend to the entire whole, and thus to each and every part regardless of who wrote
it.
Thus, it is not the intent of this section to claim rights or contest your rights to work written entirely by you; rather, the
intent is to exercise the right to control the distribution of derivative or collective works based on the Library.
In addition, mere aggregation of another work not based on the Library with the Library (or with a work based on the Library)
on a volume of a storage or distribution medium does not bring the other work under the scope of this License.
3. You may opt to apply the terms of the ordinary GNU General Public License instead of this License to a given copy of the
Library. To do this, you must alter all the notices that refer to this License, so that they refer to the ordinary GNU General
Public License, version 2, instead of to this License. (If a newer version than version 2 of the ordinary GNU General Public
License has appeared, then you can specify that version instead if you wish.) Do not make any other change in
these notices.
Once this change is made in a given copy, it is irreversible for that copy, so the ordinary GNU General Public License applies
to all subsequent copies and derivative works made from that copy.
This option is useful when you wish to copy part of the code of the Library into a program that is not a library.
4. You may copy and distribute the Library (or a portion or derivative of it, under Section 2) in object code or executable
form under the terms of Sections 1 and 2 above provided that you accompany it with the complete corresponding machinereadable source code, which must be distributed under the terms of Sections 1 and 2 above on a medium customarily used
for software interchange.
If distribution of object code is made by offering access to copy from a designated place, then offering equivalent access to
copy the source code from the same place satisfies the requirement to distribute the source code, even though third parties
are not compelled to copy the source along with the object code.
5. A program that contains no derivative of any portion of the Library, but is designed to work with the Library by being
compiled or linked with it, is called a "work that uses the Library". Such a work, in isolation, is not a derivative work of the
Library, and therefore falls outside the scope of this License.
However, linking a "work that uses the Library" with the Library creates an executable that is a derivative of the Library
(because it contains portions of the Library), rather than a "work that uses the library". The executable is therefore covered
by this License.Section 6 states terms for distribution of such executables.
When a "work that uses the Library" uses material from a header file that is part of the Library, the object code for the
work may be a derivative work of the Library even though the source code is not. Whether this is true is especially significant
if the work can be linked without the Library, or if the work is itself a library. The threshold for this to be true is not
precisely defined by law.
If such an object file uses only numerical parameters, data structure layouts and accessors, and small macros and small
inline functions (ten lines or less in length), then the use of the object file is unrestricted, regardless of whether it is legally
a derivative work. (Executables containing this object code plus portions of the Library will still fall under Section 6.)
Otherwise, if the work is a derivative of the Library, you may distribute the object code for the work under the terms of
Section 6. Any executables containing that work also fall under Section 6, whether or not they are linked directly with the
Library itself.
6. As an exception to the Sections above, you may also combine or link a "work that uses the Library" with the Library to
produce a work containing portions of the Library, and distribute that work under terms of your choice, provided that the
terms permit modification of the work for the customer's own use and reverse engineering for debugging such modifications.
374
LICENSING INFORMATION
You must give prominent notice with each copy of the work that the Library is used in it and that the Library and its use are
covered by this License. You must supply a copy of this License. If the work during execution displays copyright notices, you
must include the copyright notice for the Library among them, as well as a reference directing the user to the copy of this
License. Also, you must do one of these things:
a) Accompany the work with the complete corresponding machine-readable source code for the Library including whatever
changes were used in the work (which must be distributed under Sections 1 and 2 above); and, if the work is an executable
linked with the Library, with the complete machine-readable "work that uses the Library", as object code and/or source
code, so that the user can modify the Library and then relink to produce a modified executable containing the modified
Library. (It is understood that the user who changes the contents of definitions files in the Library will not necessarily be
able to recompile the application to use the modified definitions.)
b) Use a suitable shared library mechanism for linking with the Library. A suitable mechanism is one that (1) uses at run
time a copy of the library already present on the user's computer system, rather than copying library functions into the
executable, and (2) will operate properly with a modified version of the library, if the user installs one, as long as the
modified version is interface-compatible with the version that the work was made with.
c) Accompany the work with a written offer, valid for at least three years, to give the same user the materials
specified in Subsection 6a, above, for a charge no more than the cost of performing this distribution.
d) If distribution of the work is made by offering access to copy from a designated place, offer equivalent access to copy
the above specified materials from the same place.
e) Verify that the user has already received a copy of these materials or that you have already sent this user a copy.
For an executable, the required form of the "work that uses the Library" must include any data and utility programs needed
for reproducing the executable from it. However, as a special exception, the materials to be distributed need not include
anything that is normally distributed (in either source or binary form) with the major components (compiler, kernel, and so
on) of the operating system on which the executable runs, unless that component itself accompanies
the executable.
It may happen that this requirement contradicts the license restrictions of other proprietary libraries that do not normally
accompany the operating system. Such a contradiction means you cannot use both them and the Library together in an
executable that you distribute.
7. You may place library facilities that are a work based on the Library side-by-side in a single library together with other
library facilities not covered by this License, and distribute such a combined library, provided that the separate distribution
of the work based on the Library and of the other library facilities is otherwise permitted, and provided that you do these
two things:
a) Accompany the combined library with a copy of the same work based on the Library, uncombined with any other library
facilities. This must be distributed under the terms of the Sections above.
b) Give prominent notice with the combined library of the fact that part of it is a work based on the Library, and
explaining where to find the accompanying uncombined form of the same work.
8. You may not copy, modify, sublicense, link with, or distribute the Library except as expressly provided under this
License. Any attempt otherwise to copy, modify, sublicense, link with, or distribute the Library is void, and will
automatically terminate your rights under this License. However, parties who have received copies, or rights, from you
under this License will not have their licenses terminated so long as such parties remain in full compliance.
9. You are not required to accept this License, since you have not signed it. However, nothing else grants you permission to
modify or distribute the Library or its derivative works. These actions are prohibited by law if you do not accept this
License. Therefore, by modifying or distributing the Library (or any work based on the Library), you indicate your
acceptance of this License to do so, and all its terms and conditions for copying, distributing or modifying the Library or
works based on it.
10. Each time you redistribute the Library (or any work based on the Library), the recipient automatically receives a license
from the original licensor to copy, distribute, link with or modify the Library subject to these terms and conditions. You may
not impose any further restrictions on the recipients' exercise of the rights granted herein. You are not responsible for
enforcing compliance by third parties with this License.
375
LICENSING INFORMATION
11. If, as a consequence of a court judgment or allegation of patent infringement or for any other reason (not limited to
patent issues), conditions are imposed on you (whether by court order, agreement or otherwise) that contradict the
conditions of this License, they do not excuse you from the conditions of this License. If you cannot distribute so as to satisfy
simultaneously your obligations under this License and any other pertinent obligations, then as a consequence you
may not distribute the Library at all. For example, if a patent license would not permit royalty-free redistribution of the
Library by all those who receive copies directly or indirectly through you, then the only way you could satisfy both it and this
License would be to refrain entirely from distribution of the Library.
If any portion of this section is held invalid or unenforceable under any particular circumstance, the balance of the section is
intended to apply, and the section as a whole is intended to apply in other circumstances.
It is not the purpose of this section to induce you to infringe any patents or other property right claims or to contest validity
of any such claims; this section has the sole purpose of protecting the integrity of the free software distribution system
which is implemented by public license practices. Many people have made generous contributions to the wide range of
software distributed through that system in reliance on consistent application of that system; it is up to the author/donor to
decide if he or she is willing to distribute software through any other system and a licensee cannot impose that choice.
This section is intended to make thoroughly clear what is believed to be a consequence of the rest of this License.
12. If the distribution and/or use of the Library is restricted in certain countries either by patents or by copyrighted
interfaces, the original copyright holder who places the Library under this License may add an explicit geographical
distribution limitation excluding those countries, so that distribution is permitted only in or among countries not thus
excluded. In such case, this License incorporates the limitation as if written in the body of this License.
13. The Free Software Foundation may publish revised and/or new versions of the Lesser General Public License from time
to time. Such new versions will be similar in spirit to the present version, but may differ in detail to address new problems or
concerns.
Each version is given a distinguishing version number. If the Library specifies a version number of this License which applies
to it and "any later version", you have the option of following the terms and conditions either of that version or of any later
version published by the Free Software Foundation. If the Library does not specify a license version number, you may choose
any version ever published by the Free Software Foundation.
14. If you wish to incorporate parts of the Library into other free programs whose distribution conditions are incompatible
with these, write to the author to ask for permission. For software which is copyrighted by the Free Software Foundation,
write to the Free Software Foundation; we sometimes make exceptions for this. Our decision will be guided by the two goals
of preserving the free status of all derivatives of our free software and of promoting the sharing and reuse of software
generally.
NO WARRANTY
15. BECAUSE THE LIBRARY IS LICENSED FREE OF CHARGE, THERE IS NO WARRANTY FOR THE LIBRARY, TO THE EXTENT
PERMITTED BY APPLICABLE LAW. EXCEPT WHEN OTHERWISE STATED IN WRITING THE COPYRIGHT HOLDERS AND/OR OTHER
PARTIES PROVIDE THE LIBRARY "AS IS" WITHOUT WARRANTY OF ANY KIND, EITHER EXPRESSED OR IMPLIED, INCLUDING, BUT
NOT LIMITED TO, THE IMPLIED WARRANTIES OF MERCHANTABILITY AND FITNESS FOR A PARTICULAR PURPOSE. THE ENTIRE
RISK AS TO THE QUALITY AND PERFORMANCE OF THE LIBRARY IS WITH YOU. SHOULD THE LIBRARY PROVE DEFECTIVE, YOU
ASSUME THE COST OF ALL NECESSARY SERVICING, REPAIR OR CORRECTION.
16. IN NO EVENT UNLESS REQUIRED BY APPLICABLE LAW OR AGREED TO IN WRITING WILL ANY COPYRIGHT HOLDER, OR ANY
OTHER PARTY WHO MAY MODIFY AND/OR REDISTRIBUTE THE LIBRARY AS PERMITTED ABOVE, BE LIABLE TO YOU FOR
DAMAGES, INCLUDING ANY GENERAL, SPECIAL, INCIDENTAL OR CONSEQUENTIAL DAMAGES ARISING OUT OF THE USE OR
INABILITY TO USE THE LIBRARY (INCLUDING BUT NOT LIMITED TO LOSS OF DATA OR DATA BEING RENDERED INACCURATE OR
LOSSES SUSTAINED BY YOU OR THIRD PARTIES OR A FAILURE OF THE LIBRARY TO OPERATE WITH ANY OTHER SOFTWARE),
EVEN IF SUCH HOLDER OR OTHER PARTY HAS BEEN ADVISED OF THE POSSIBILITY OF SUCH DAMAGES.
END OF TERMS AND CONDITIONS
376
LICENSING INFORMATION
The FreeType Project LICENSE
2006-Jan-27
Copyright 1996-2002, 2006 by
David Turner, Robert Wilhelm, and Werner Lemberg
INTRODUCTION
The FreeType Project is distributed in several archive packages; some of them may contain, in addition to the FreeType
font engine, various tools and contributions which rely on, or relate to, the FreeType Project.
This license applies to all files found in such packages, and which do not fall under their own explicit license. The
license affects thus the FreeType font engine, the test programs, documentation and makefiles, at the very least.
This license was inspired by the BSD, Artistic, and IJG (Independent JPEG Group) licenses, which all encourage
inclusion and use of free software in commercial and freeware products alike.
As a consequence, its main points are that:
o We don't promise that this software works. However, we will be interested in any kind of bug reports. (`as is'
distribution)
o You can use this software for whatever you want, in parts or full form, without having to pay us. (`royalty-free' usage)
o You may not pretend that you wrote this software. If you use it, or only parts of it, in a program, you must
acknowledge somewhere in your documentation that you have used the FreeType code. (`credits')
We specifically permit and encourage the inclusion of this software, with or without modifications, in commercial
products. We disclaim all warranties covering The FreeType Project and assume no liability related to The FreeType
Project.
Finally, many people asked us for a preferred form for a credit/disclaimer to use in compliance with this license. We
thus encourage you to use the following text:
"""
Portions of this software are copyright © <year> The FreeType Project (www.freetype.org). All rights reserved.
"""
Please replace <year> with the value from the FreeType version you actually use.
LEGAL TERMS
0. Definitions
Throughout this license, the terms `package', `FreeType Project', and `FreeType archive' refer to the set of files
originally distributed by the authors (David Turner, Robert Wilhelm, and Werner Lemberg) as the `FreeType Project', be
they named as alpha, beta or final release.
`You' refers to the licensee, or person using the project, where `using' is a generic term including compiling the project's
source code as well as linking it to form a `program' or `executable'. This program is referred to as `a program using
the FreeType engine'.
This license applies to all files distributed in the original FreeType Project, including all source code, binaries and
documentation, unless otherwise stated in the file in its original, unmodified form as distributed in the original
archive. If you are unsure whether or not a particular file is covered by this license, you must contact us to verify this.
The FreeType Project is copyright (C) 1996-2000 by David Turner, Robert Wilhelm, and Werner Lemberg. All rights
reserved except as specified below.
377
LICENSING INFORMATION
1. No Warranty
THE FREETYPE PROJECT IS PROVIDED `AS IS' WITHOUT WARRANTY OF ANY KIND, EITHER EXPRESS OR IMPLIED, INCLUDING,
BUT NOT LIMITED TO, WARRANTIES OF MERCHANTABILITY AND FITNESS FOR A PARTICULAR PURPOSE. IN NO EVENT
WILL ANY OF THE AUTHORS OR COPYRIGHT HOLDERS BE LIABLE FOR ANY DAMAGES CAUSED BY THE USE OR THE INABILITY
TO USE, OF THE FREETYPE PROJECT.
2. Redistribution
This license grants a worldwide, royalty-free, perpetual and irrevocable right and license to use, execute, perform,
compile, display, copy, create derivative works of, distribute and sublicense the FreeType Project (in both source and
object code forms) and derivative works thereof for any purpose; and to authorize others to exercise some or all of
the rights granted herein, subject to the following conditions:
o Redistribution of source code must retain this license file (`FTL.TXT') unaltered; any additions, deletions or changes
to the original files must be clearly indicated in accompanying documentation. The copyright notices of the unaltered,
original files must be preserved in all copies of source files.
o Redistribution in binary form must provide a disclaimer that states that the software is based in part of the work of
the FreeType Team, in the distribution documentation. We also encourage you to put an URL to the FreeType web page
in your documentation, though this isn't mandatory.
These conditions apply to any software derived from or based on the FreeType Project, not just the unmodified files. If
you use our work, you must acknowledge us. However, no fee need be paid to us.
3. Advertising
Neither the FreeType authors and contributors nor you shall use the name of the other for commercial, advertising, or
promotional purposes without specific prior written permission.
We suggest, but do not require, that you use one or more of the following phrases to refer to this software in your
documentation or advertising materials: `FreeType Project', `FreeType Engine', `FreeType library', or `FreeType
Distribution'.
As you have not signed this license, you are not required to accept it. However, as the FreeType Project is
copyrighted material, only this license, or another one contracted with the authors, grants you the right to use, distribute,
and modify it. Therefore, by using, distributing, or modifying the FreeType Project, you indicate that you understand and
accept all the terms of this license.
4. Contacts
There are two mailing lists related to FreeType:
o [email protected]
Discusses general use and applications of FreeType, as well as future and wanted additions to the library and
distribution. If you are looking for support, start in this list if you haven't found anything to help you in the
documentation.
o [email protected]
Discusses bugs, as well as engine internals, design issues, specific licenses, porting, etc.
Our home page can be found at http://www.freetype.org
378
LICENSING INFORMATION
BSD LICENSE
Redistribution and use in source and binary forms, with or without modification, are permitted provided that the following
conditions are met:
*
*
*
Redistributions of source code must retain the above copyright notice, this list of conditions and the following disclaimer.
Redistributions in binary form must reproduce the above copyright notice, this list of conditions and the following
disclaimer in the documentation and/or other materials provided with the distribution.
Neither the name of Conceptronic nor the names of its contributors may be used to endorse or promote products derived
from this software without specific prior written permission.
THIS SOFTWARE IS PROVIDED BY CONCEPTRONIC ''AS IS'' AND ANY EXPRESS OR IMPLIED WARRANTIES, INCLUDING, BUT NOT
LIMITED TO, THE IMPLIED WARRANTIES OF MERCHANTABILITY AND FITNESS FOR A PARTICULAR PURPOSE ARE DISCLAIMED.
IN NO EVENT SHALL CONCEPTRONIC BE LIABLE FOR ANY DIRECT, INDIRECT, INCIDENTAL, SPECIAL, EXEMPLARY, OR
CONSEQUENTIAL DAMAGES INCLUDING, BUT NOT LIMITED TO, PROCUREMENT OF SUBSTITUTE GOODS OR SERVICES; LOSS OF
USE, DATA, OR PROFITS; OR BUSINESS INTERRUPTION) HOWEVER CAUSED AND ON ANY THEORY OF LIABILITY, WHETHER IN
CONTRACT, STRICT LIABILITY, OR TORT (INCLUDING NEGLIGENCE OR OTHERWISE) ARISING IN ANY WAY OUT OF THE USE OF
THIS SOFTWARE, EVEN IF ADVISED OF THE POSSIBILITY OF SUCH DAMAGE.
379