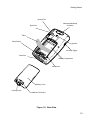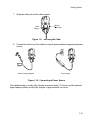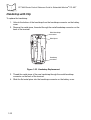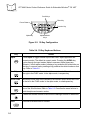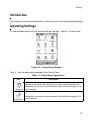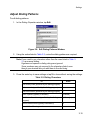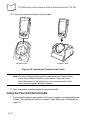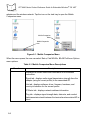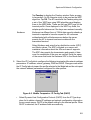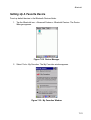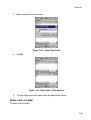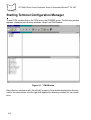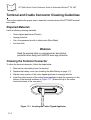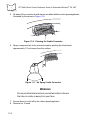
1
PPT 8800 Series
Product Reference Guide
for Embedded Windows® CE .NET
PPT 8800 Series
Product Reference Guide
for Embedded Windows® CE .NET
72E-58094-03
Revision A
March 2005
© 2003-2005 by Symbol Technologies, Inc. All rights reserved.
No part of this publication may be reproduced or used in any form, or by any electrical or
mechanical means, without permission in writing from Symbol. This includes electronic or
mechanical means, such as photocopying, recording, or information storage and retrieval
systems. The material in this manual is subject to change without notice.
The software is provided strictly on an “as is” basis. All software, including firmware,
furnished to the user is on a licensed basis. Symbol grants to the user a non-transferable
and non-exclusive license to use each software or firmware program delivered hereunder
(licensed program). Except as noted below, such license may not be assigned,
sublicensed, or otherwise transferred by the user without prior written consent of Symbol.
No right to copy a licensed program in whole or in part is granted, except as permitted under
copyright law. The user shall not modify, merge, or incorporate any form or portion of a
licensed program with other program material, create a derivative work from a licensed
program, or use a licensed program in a network without written permission from Symbol.
The user agrees to maintain Symbol’s copyright notice on the licensed programs delivered
hereunder, and to include the same on any authorized copies it makes, in whole or in part.
The user agrees not to decompile, disassemble, decode, or reverse engineer any licensed
program delivered to the user or any portion thereof.
Symbol reserves the right to make changes to any software or product to improve reliability,
function, or design.
Symbol does not assume any product liability arising out of, or in connection with, the
application or use of any product, circuit, or application described herein.
No license is granted, either expressly or by implication, estoppel, or otherwise under any
Symbol Technologies, Inc., intellectual property rights. An implied license only exists for
equipment, circuits, and subsystems contained in Symbol products.
Symbol, Spectrum One, and Spectrum24 are registered trademarks of Symbol
Technologies, Inc. Bluetooth is a registered trademark of Bluetooth SIG. Microsoft,
Windows and ActiveSync are either registered trademarks or trademarks of Microsoft
Corporation. Other product names mentioned in this manual may be trademarks or
registered trademarks of their respective companies and are hereby acknowledged.
Symbol Technologies, Inc.
One Symbol Plaza
Holtsville, New York 11742-1300
http://www.symbol.com
ii
Revision History
Changes to the original manual are listed below:
Change
Date
Description
-01 to -02
9/2003
Add Bluetooth functionality.
Add CRD8800-4000E, CRD8800B-1000S, CRD8800-4000S
operating procedures to Chapter 1 and Chapter 4.
Add IPL mode key combination for 15-key keypad.
-02 to -03
3/2005
Update battery charging temperature; add mobile computer and
cradle connection cleaning procedures.
iii
iv
Contents
About This Guide
Introduction . . . . . . . . . . . . . . . . . . . . . . . . . . . . . . . . . . . . . . . . . . . . . . . . . . . . . . . . . . . . . . . . . . . xv
Chapter Descriptions . . . . . . . . . . . . . . . . . . . . . . . . . . . . . . . . . . . . . . . . . . . . . . . . . . . . . . . . . . . . xv
Notational Conventions . . . . . . . . . . . . . . . . . . . . . . . . . . . . . . . . . . . . . . . . . . . . . . . . . . . . . . . . . . xvi
Related Documents . . . . . . . . . . . . . . . . . . . . . . . . . . . . . . . . . . . . . . . . . . . . . . . . . . . . . . . . . . . . xvii
Service Information . . . . . . . . . . . . . . . . . . . . . . . . . . . . . . . . . . . . . . . . . . . . . . . . . . . . . . . . . . . . xvii
Symbol Support Center . . . . . . . . . . . . . . . . . . . . . . . . . . . . . . . . . . . . . . . . . . . . . . . . . . . . . xviii
Chapter 1. Getting Started
Introduction . . . . . . . . . . . . . . . . . . . . . . . . . . . . . . . . . . . . . . . . . . . . . . . . . . . . . . . . . . . . . . . . . . 1-3
Unpacking the Terminal . . . . . . . . . . . . . . . . . . . . . . . . . . . . . . . . . . . . . . . . . . . . . . . . . . . . . . . . . 1-3
Parts of the Terminal . . . . . . . . . . . . . . . . . . . . . . . . . . . . . . . . . . . . . . . . . . . . . . . . . . . . . . . . . . . 1-4
Accessories . . . . . . . . . . . . . . . . . . . . . . . . . . . . . . . . . . . . . . . . . . . . . . . . . . . . . . . . . . . . . . . . . . 1-6
Getting Started. . . . . . . . . . . . . . . . . . . . . . . . . . . . . . . . . . . . . . . . . . . . . . . . . . . . . . . . . . . . . . . . 1-7
Installing the Main Battery . . . . . . . . . . . . . . . . . . . . . . . . . . . . . . . . . . . . . . . . . . . . . . . . . . . . . . . 1-7
Installing the Optional Larger Capacity Battery . . . . . . . . . . . . . . . . . . . . . . . . . . . . . . . . . . . 1-9
Charging the Terminal Battery . . . . . . . . . . . . . . . . . . . . . . . . . . . . . . . . . . . . . . . . . . . . . . . . . . . 1-10
Charging the Main Battery and Memory Backup Battery . . . . . . . . . . . . . . . . . . . . . . . . . . . 1-10
Using the Serial Charging Cable . . . . . . . . . . . . . . . . . . . . . . . . . . . . . . . . . . . . . . . . . . . . . 1-11
Using the Single-Slot Serial Cradle . . . . . . . . . . . . . . . . . . . . . . . . . . . . . . . . . . . . . . . . . . . 1-11
Using the Four-Slot Cradles . . . . . . . . . . . . . . . . . . . . . . . . . . . . . . . . . . . . . . . . . . . . . . . . . 1-13
Using the Universal Cable Cup. . . . . . . . . . . . . . . . . . . . . . . . . . . . . . . . . . . . . . . . . . . . . . . 1-14
Charging Spare Batteries. . . . . . . . . . . . . . . . . . . . . . . . . . . . . . . . . . . . . . . . . . . . . . . . . . . . . . . 1-16
Using the CRD8800 Single-Slot Cradle . . . . . . . . . . . . . . . . . . . . . . . . . . . . . . . . . . . . . . . . 1-16
Using the CRD8800B Single-Slot Cradle . . . . . . . . . . . . . . . . . . . . . . . . . . . . . . . . . . . . . . . 1-17
Using the UBC Battery Adapter . . . . . . . . . . . . . . . . . . . . . . . . . . . . . . . . . . . . . . . . . . . . . . 1-18
Charge LED Indicator . . . . . . . . . . . . . . . . . . . . . . . . . . . . . . . . . . . . . . . . . . . . . . . . . . . . . . 1-19
Starting the Terminal . . . . . . . . . . . . . . . . . . . . . . . . . . . . . . . . . . . . . . . . . . . . . . . . . . . . . . . . . . 1-19
Calibrating the Screen . . . . . . . . . . . . . . . . . . . . . . . . . . . . . . . . . . . . . . . . . . . . . . . . . . . . . 1-19
Checking Battery Power . . . . . . . . . . . . . . . . . . . . . . . . . . . . . . . . . . . . . . . . . . . . . . . . . . . . . . . 1-21
v
PPT 8800 Series Product Reference Guide for Embedded Windows® CE .NET
Replacing the Handstrap. . . . . . . . . . . . . . . . . . . . . . . . . . . . . . . . . . . . . . . . . . . . . . . . . . . . . . . . 1-21
Handstrap with Clip . . . . . . . . . . . . . . . . . . . . . . . . . . . . . . . . . . . . . . . . . . . . . . . . . . . . . . . . 1-22
Attaching the Neck Strap . . . . . . . . . . . . . . . . . . . . . . . . . . . . . . . . . . . . . . . . . . . . . . . . . . . . . . . 1-23
Configuring the Terminal. . . . . . . . . . . . . . . . . . . . . . . . . . . . . . . . . . . . . . . . . . . . . . . . . . . . . . . . 1-24
Accessories. . . . . . . . . . . . . . . . . . . . . . . . . . . . . . . . . . . . . . . . . . . . . . . . . . . . . . . . . . . . . . . . . . 1-24
Universal Cable Cup . . . . . . . . . . . . . . . . . . . . . . . . . . . . . . . . . . . . . . . . . . . . . . . . . . . . . . . 1-24
Connecting to the Terminal . . . . . . . . . . . . . . . . . . . . . . . . . . . . . . . . . . . . . . . . . . . . . . 1-24
Removing from the Terminal . . . . . . . . . . . . . . . . . . . . . . . . . . . . . . . . . . . . . . . . . . . . . 1-25
Connecting the Power Cable . . . . . . . . . . . . . . . . . . . . . . . . . . . . . . . . . . . . . . . . . . . . . . . . . 1-25
Connecting Communication Cable . . . . . . . . . . . . . . . . . . . . . . . . . . . . . . . . . . . . . . . . . . . . 1-26
Magnetic Strip Reader . . . . . . . . . . . . . . . . . . . . . . . . . . . . . . . . . . . . . . . . . . . . . . . . . . . . . . 1-26
Installing the MSR . . . . . . . . . . . . . . . . . . . . . . . . . . . . . . . . . . . . . . . . . . . . . . . . . . . . . 1-26
Removing the MSR . . . . . . . . . . . . . . . . . . . . . . . . . . . . . . . . . . . . . . . . . . . . . . . . . . . . 1-27
Using the MSR . . . . . . . . . . . . . . . . . . . . . . . . . . . . . . . . . . . . . . . . . . . . . . . . . . . . . . . . 1-27
Charging the Terminal’s Battery . . . . . . . . . . . . . . . . . . . . . . . . . . . . . . . . . . . . . . . . . . . 1-29
Chapter 2. Operating the PPT 8800
Introduction . . . . . . . . . . . . . . . . . . . . . . . . . . . . . . . . . . . . . . . . . . . . . . . . . . . . . . . . . . . . . . . . . . . 2-3
Using the Power Button . . . . . . . . . . . . . . . . . . . . . . . . . . . . . . . . . . . . . . . . . . . . . . . . . . . . . . . . . 2-3
Adjusting the Backlight . . . . . . . . . . . . . . . . . . . . . . . . . . . . . . . . . . . . . . . . . . . . . . . . . . . . . . . . . . 2-3
Standard 6-Key Configuration . . . . . . . . . . . . . . . . . . . . . . . . . . . . . . . . . . . . . . . . . . . . . . . . . 2-3
15-Key Configuration . . . . . . . . . . . . . . . . . . . . . . . . . . . . . . . . . . . . . . . . . . . . . . . . . . . . . . . . 2-3
Using the Stylus . . . . . . . . . . . . . . . . . . . . . . . . . . . . . . . . . . . . . . . . . . . . . . . . . . . . . . . . . . . . . . . 2-4
Using the Keyboard. . . . . . . . . . . . . . . . . . . . . . . . . . . . . . . . . . . . . . . . . . . . . . . . . . . . . . . . . . . . . 2-4
Standard 6-Key Configuration . . . . . . . . . . . . . . . . . . . . . . . . . . . . . . . . . . . . . . . . . . . . . . . . . 2-4
15-Key Configuration . . . . . . . . . . . . . . . . . . . . . . . . . . . . . . . . . . . . . . . . . . . . . . . . . . . . . . . . 2-5
Desktop . . . . . . . . . . . . . . . . . . . . . . . . . . . . . . . . . . . . . . . . . . . . . . . . . . . . . . . . . . . . . . . . . . . . . . 2-8
Taskbar . . . . . . . . . . . . . . . . . . . . . . . . . . . . . . . . . . . . . . . . . . . . . . . . . . . . . . . . . . . . . . . . . . 2-9
Start Button. . . . . . . . . . . . . . . . . . . . . . . . . . . . . . . . . . . . . . . . . . . . . . . . . . . . . . . . . . . . 2-9
Open Programs . . . . . . . . . . . . . . . . . . . . . . . . . . . . . . . . . . . . . . . . . . . . . . . . . . . . . . . 2-10
Status Icons . . . . . . . . . . . . . . . . . . . . . . . . . . . . . . . . . . . . . . . . . . . . . . . . . . . . . . . . . . 2-10
Date/Time Properties . . . . . . . . . . . . . . . . . . . . . . . . . . . . . . . . . . . . . . . . . . . . . . . . . . . 2-11
Desktop Button . . . . . . . . . . . . . . . . . . . . . . . . . . . . . . . . . . . . . . . . . . . . . . . . . . . . . . . . 2-11
Taskbar and Start Menu Settings . . . . . . . . . . . . . . . . . . . . . . . . . . . . . . . . . . . . . . . . . . 2-11
Entering Information . . . . . . . . . . . . . . . . . . . . . . . . . . . . . . . . . . . . . . . . . . . . . . . . . . . . . . . . . . . 2-12
Entering Information Using 15-Key Keypad. . . . . . . . . . . . . . . . . . . . . . . . . . . . . . . . . . . . . . 2-12
Entering Information Using the Keyboard Input Panel. . . . . . . . . . . . . . . . . . . . . . . . . . . . . . 2-12
Entering Data via the Bar Code Scanner (Scan Wedge). . . . . . . . . . . . . . . . . . . . . . . . . . . . 2-13
Scanning . . . . . . . . . . . . . . . . . . . . . . . . . . . . . . . . . . . . . . . . . . . . . . . . . . . . . . . . . . . . . . . . . . . . 2-13
Scan LED Indicator . . . . . . . . . . . . . . . . . . . . . . . . . . . . . . . . . . . . . . . . . . . . . . . . . . . . . . . . 2-14
Resetting the Terminal . . . . . . . . . . . . . . . . . . . . . . . . . . . . . . . . . . . . . . . . . . . . . . . . . . . . . . . . . 2-15
Performing a Soft Reset. . . . . . . . . . . . . . . . . . . . . . . . . . . . . . . . . . . . . . . . . . . . . . . . . . . . . 2-15
Performing a Hard Reset . . . . . . . . . . . . . . . . . . . . . . . . . . . . . . . . . . . . . . . . . . . . . . . . . . . . 2-15
vi
Contents
Chapter 3. Settings
Introduction . . . . . . . . . . . . . . . . . . . . . . . . . . . . . . . . . . . . . . . . . . . . . . . . . . . . . . . . . . . . . . . . . . 3-3
Adjusting Settings . . . . . . . . . . . . . . . . . . . . . . . . . . . . . . . . . . . . . . . . . . . . . . . . . . . . . . . . . . . . . 3-3
Certificates . . . . . . . . . . . . . . . . . . . . . . . . . . . . . . . . . . . . . . . . . . . . . . . . . . . . . . . . . . . . . . . . . . . 3-7
Date/Time . . . . . . . . . . . . . . . . . . . . . . . . . . . . . . . . . . . . . . . . . . . . . . . . . . . . . . . . . . . . . . . . . . . 3-8
Device Management . . . . . . . . . . . . . . . . . . . . . . . . . . . . . . . . . . . . . . . . . . . . . . . . . . . . . . . . . . . 3-9
Resetting the Device Management Server . . . . . . . . . . . . . . . . . . . . . . . . . . . . . . . . . . . . . . . 3-9
Provisioning . . . . . . . . . . . . . . . . . . . . . . . . . . . . . . . . . . . . . . . . . . . . . . . . . . . . . . . . . . . . . 3-10
Polling the Management Server . . . . . . . . . . . . . . . . . . . . . . . . . . . . . . . . . . . . . . . . . . . . . . 3-11
Installing Optional Packages . . . . . . . . . . . . . . . . . . . . . . . . . . . . . . . . . . . . . . . . . . . . . . . . 3-12
Viewing Installed Packages. . . . . . . . . . . . . . . . . . . . . . . . . . . . . . . . . . . . . . . . . . . . . . 3-12
Information About Device Management . . . . . . . . . . . . . . . . . . . . . . . . . . . . . . . . . . . . . . . . 3-12
Dialing . . . . . . . . . . . . . . . . . . . . . . . . . . . . . . . . . . . . . . . . . . . . . . . . . . . . . . . . . . . . . . . . . . . . . 3-14
Adjusting Dialing Location Settings . . . . . . . . . . . . . . . . . . . . . . . . . . . . . . . . . . . . . . . . . . . 3-14
Adjust Dialing Patterns . . . . . . . . . . . . . . . . . . . . . . . . . . . . . . . . . . . . . . . . . . . . . . . . . . . . . 3-15
Display . . . . . . . . . . . . . . . . . . . . . . . . . . . . . . . . . . . . . . . . . . . . . . . . . . . . . . . . . . . . . . . . . . . . . 3-17
Selecting a Background Image. . . . . . . . . . . . . . . . . . . . . . . . . . . . . . . . . . . . . . . . . . . . . . . 3-17
Modifying the Desktop’s Appearance . . . . . . . . . . . . . . . . . . . . . . . . . . . . . . . . . . . . . . . . . . 3-17
Changing the Desktop's Color Scheme. . . . . . . . . . . . . . . . . . . . . . . . . . . . . . . . . . . . . 3-17
Creating a Custom Color Scheme. . . . . . . . . . . . . . . . . . . . . . . . . . . . . . . . . . . . . . . . . 3-18
Changing Backlight Settings. . . . . . . . . . . . . . . . . . . . . . . . . . . . . . . . . . . . . . . . . . . . . . . . . 3-18
Changing the Backlight Brightness. . . . . . . . . . . . . . . . . . . . . . . . . . . . . . . . . . . . . . . . . . . . 3-20
Input Panel. . . . . . . . . . . . . . . . . . . . . . . . . . . . . . . . . . . . . . . . . . . . . . . . . . . . . . . . . . . . . . . . . . 3-22
IrDA . . . . . . . . . . . . . . . . . . . . . . . . . . . . . . . . . . . . . . . . . . . . . . . . . . . . . . . . . . . . . . . . . . . . . . . 3-23
Keyboard . . . . . . . . . . . . . . . . . . . . . . . . . . . . . . . . . . . . . . . . . . . . . . . . . . . . . . . . . . . . . . . . . . . 3-24
Adjusting Keyboard Repeat Settings . . . . . . . . . . . . . . . . . . . . . . . . . . . . . . . . . . . . . . . . . . 3-24
Program Button Assignment. . . . . . . . . . . . . . . . . . . . . . . . . . . . . . . . . . . . . . . . . . . . . . . . . 3-25
Owner . . . . . . . . . . . . . . . . . . . . . . . . . . . . . . . . . . . . . . . . . . . . . . . . . . . . . . . . . . . . . . . . . . . . . 3-27
Password . . . . . . . . . . . . . . . . . . . . . . . . . . . . . . . . . . . . . . . . . . . . . . . . . . . . . . . . . . . . . . . . . . . 3-30
PC Connection. . . . . . . . . . . . . . . . . . . . . . . . . . . . . . . . . . . . . . . . . . . . . . . . . . . . . . . . . . . . . . . 3-31
Power. . . . . . . . . . . . . . . . . . . . . . . . . . . . . . . . . . . . . . . . . . . . . . . . . . . . . . . . . . . . . . . . . . . . . . 3-32
Checking Battery Power Status . . . . . . . . . . . . . . . . . . . . . . . . . . . . . . . . . . . . . . . . . . . . . . 3-32
Optimizing Battery Life . . . . . . . . . . . . . . . . . . . . . . . . . . . . . . . . . . . . . . . . . . . . . . . . . . . . . 3-32
Setting Up Power Schemes . . . . . . . . . . . . . . . . . . . . . . . . . . . . . . . . . . . . . . . . . . . . . . . . . 3-33
Checking the Power Levels . . . . . . . . . . . . . . . . . . . . . . . . . . . . . . . . . . . . . . . . . . . . . . . . . 3-34
Regional Settings. . . . . . . . . . . . . . . . . . . . . . . . . . . . . . . . . . . . . . . . . . . . . . . . . . . . . . . . . . . . . 3-35
Remove Programs . . . . . . . . . . . . . . . . . . . . . . . . . . . . . . . . . . . . . . . . . . . . . . . . . . . . . . . . . . . . 3-38
Storage Manager . . . . . . . . . . . . . . . . . . . . . . . . . . . . . . . . . . . . . . . . . . . . . . . . . . . . . . . . . . . . . 3-39
Managing Storage Devices . . . . . . . . . . . . . . . . . . . . . . . . . . . . . . . . . . . . . . . . . . . . . . . . . 3-39
Managing Disk Partitions . . . . . . . . . . . . . . . . . . . . . . . . . . . . . . . . . . . . . . . . . . . . . . . . . . . 3-39
Creating A New Partition . . . . . . . . . . . . . . . . . . . . . . . . . . . . . . . . . . . . . . . . . . . . . . . . 3-40
Advanced Partition Options . . . . . . . . . . . . . . . . . . . . . . . . . . . . . . . . . . . . . . . . . . . . . . 3-40
Stylus . . . . . . . . . . . . . . . . . . . . . . . . . . . . . . . . . . . . . . . . . . . . . . . . . . . . . . . . . . . . . . . . . . . . . . 3-41
vii
PPT 8800 Series Product Reference Guide for Embedded Windows® CE .NET
Adjusting the Stylus Double-tap Rate . . . . . . . . . . . . . . . . . . . . . . . . . . . . . . . . . . . . . . . . . . 3-41
Recalibrating the Touch Screen. . . . . . . . . . . . . . . . . . . . . . . . . . . . . . . . . . . . . . . . . . . . . . . 3-41
Symbol Settings . . . . . . . . . . . . . . . . . . . . . . . . . . . . . . . . . . . . . . . . . . . . . . . . . . . . . . . . . . . . . . 3-43
Waking the Terminal . . . . . . . . . . . . . . . . . . . . . . . . . . . . . . . . . . . . . . . . . . . . . . . . . . . . . . . 3-43
Settings Tab. . . . . . . . . . . . . . . . . . . . . . . . . . . . . . . . . . . . . . . . . . . . . . . . . . . . . . . . . . . . . . 3-44
System Tab . . . . . . . . . . . . . . . . . . . . . . . . . . . . . . . . . . . . . . . . . . . . . . . . . . . . . . . . . . . . . . 3-45
Config Tab . . . . . . . . . . . . . . . . . . . . . . . . . . . . . . . . . . . . . . . . . . . . . . . . . . . . . . . . . . . . . . . 3-46
System . . . . . . . . . . . . . . . . . . . . . . . . . . . . . . . . . . . . . . . . . . . . . . . . . . . . . . . . . . . . . . . . . . . . . 3-48
General Tab . . . . . . . . . . . . . . . . . . . . . . . . . . . . . . . . . . . . . . . . . . . . . . . . . . . . . . . . . . . . . . 3-48
Memory Tab. . . . . . . . . . . . . . . . . . . . . . . . . . . . . . . . . . . . . . . . . . . . . . . . . . . . . . . . . . . . . . 3-48
Programs Located in ROM and RAM . . . . . . . . . . . . . . . . . . . . . . . . . . . . . . . . . . . . . . . 3-49
Device Name Tab . . . . . . . . . . . . . . . . . . . . . . . . . . . . . . . . . . . . . . . . . . . . . . . . . . . . . . . . . 3-49
Copyrights Tab . . . . . . . . . . . . . . . . . . . . . . . . . . . . . . . . . . . . . . . . . . . . . . . . . . . . . . . . . . . 3-50
Volume & Sounds . . . . . . . . . . . . . . . . . . . . . . . . . . . . . . . . . . . . . . . . . . . . . . . . . . . . . . . . . . . . . 3-52
Adjusting Volume and Sounds. . . . . . . . . . . . . . . . . . . . . . . . . . . . . . . . . . . . . . . . . . . . . . . . 3-52
Changing Event Sounds . . . . . . . . . . . . . . . . . . . . . . . . . . . . . . . . . . . . . . . . . . . . . . . . . . . . 3-52
Adjusting Microphone Gain . . . . . . . . . . . . . . . . . . . . . . . . . . . . . . . . . . . . . . . . . . . . . . . . . . 3-53
Chapter 4. Communications
Introduction . . . . . . . . . . . . . . . . . . . . . . . . . . . . . . . . . . . . . . . . . . . . . . . . . . . . . . . . . . . . . . . . . . . 4-3
Installing Communication Software. . . . . . . . . . . . . . . . . . . . . . . . . . . . . . . . . . . . . . . . . . . . . . . . . 4-3
Installing ActiveSync . . . . . . . . . . . . . . . . . . . . . . . . . . . . . . . . . . . . . . . . . . . . . . . . . . . . . . . . 4-3
Setting up a Partnership . . . . . . . . . . . . . . . . . . . . . . . . . . . . . . . . . . . . . . . . . . . . . . . . . . 4-4
Installing eConnect . . . . . . . . . . . . . . . . . . . . . . . . . . . . . . . . . . . . . . . . . . . . . . . . . . . . . . . . . 4-9
Communication Setup. . . . . . . . . . . . . . . . . . . . . . . . . . . . . . . . . . . . . . . . . . . . . . . . . . . . . . . . . . . 4-9
Using the Serial Charging Cable . . . . . . . . . . . . . . . . . . . . . . . . . . . . . . . . . . . . . . . . . . . . . . . 4-9
Using the Single-Slot Serial Cradle . . . . . . . . . . . . . . . . . . . . . . . . . . . . . . . . . . . . . . . . . . . . 4-13
Using the Four-Slot Serial Cradle . . . . . . . . . . . . . . . . . . . . . . . . . . . . . . . . . . . . . . . . . . . . . 4-16
Using a Four-Slot Ethernet Cradle. . . . . . . . . . . . . . . . . . . . . . . . . . . . . . . . . . . . . . . . . . . . . 4-21
DHCP Mode . . . . . . . . . . . . . . . . . . . . . . . . . . . . . . . . . . . . . . . . . . . . . . . . . . . . . . . . . . 4-21
Static Mode. . . . . . . . . . . . . . . . . . . . . . . . . . . . . . . . . . . . . . . . . . . . . . . . . . . . . . . . . . . 4-22
Connecting the Cradle to a Network. . . . . . . . . . . . . . . . . . . . . . . . . . . . . . . . . . . . . . . . 4-22
Configuring the Cradle for DHCP Address Mode . . . . . . . . . . . . . . . . . . . . . . . . . . . . . . 4-23
Configuring the Cradle for Static Mode. . . . . . . . . . . . . . . . . . . . . . . . . . . . . . . . . . . . . . 4-25
Network Address Translation (NAPT). . . . . . . . . . . . . . . . . . . . . . . . . . . . . . . . . . . . . . . 4-27
Inter-Connecting Cradles . . . . . . . . . . . . . . . . . . . . . . . . . . . . . . . . . . . . . . . . . . . . . . . . 4-28
Configuration of the Host Computer . . . . . . . . . . . . . . . . . . . . . . . . . . . . . . . . . . . . . . . . 4-29
Configuration of the Terminal . . . . . . . . . . . . . . . . . . . . . . . . . . . . . . . . . . . . . . . . . . . . . 4-30
Communication. . . . . . . . . . . . . . . . . . . . . . . . . . . . . . . . . . . . . . . . . . . . . . . . . . . . . . . . 4-31
Communication LED Indicator . . . . . . . . . . . . . . . . . . . . . . . . . . . . . . . . . . . . . . . . . . . . 4-32
Using the Universal Cable Cup . . . . . . . . . . . . . . . . . . . . . . . . . . . . . . . . . . . . . . . . . . . . . . . 4-33
Serial Communication . . . . . . . . . . . . . . . . . . . . . . . . . . . . . . . . . . . . . . . . . . . . . . . . . . . . . . . . . . 4-35
Connecting to the Internet on a Wireless Network . . . . . . . . . . . . . . . . . . . . . . . . . . . . . . . . . . . . 4-36
viii
Contents
Chapter 5. Applications
Introduction . . . . . . . . . . . . . . . . . . . . . . . . . . . . . . . . . . . . . . . . . . . . . . . . . . . . . . . . . . . . . . . . . . 5-3
Terminal . . . . . . . . . . . . . . . . . . . . . . . . . . . . . . . . . . . . . . . . . . . . . . . . . . . . . . . . . . . . . . . . . . . . . 5-5
Creating a New Terminal Session . . . . . . . . . . . . . . . . . . . . . . . . . . . . . . . . . . . . . . . . . . . . . 5-5
Connecting using an Existing Session . . . . . . . . . . . . . . . . . . . . . . . . . . . . . . . . . . . . . . 5-5
Adjusting Session Properties . . . . . . . . . . . . . . . . . . . . . . . . . . . . . . . . . . . . . . . . . . . . . 5-5
ActiveSync . . . . . . . . . . . . . . . . . . . . . . . . . . . . . . . . . . . . . . . . . . . . . . . . . . . . . . . . . . . . . . . . . . . 5-6
Copying Files . . . . . . . . . . . . . . . . . . . . . . . . . . . . . . . . . . . . . . . . . . . . . . . . . . . . . . . . . . . . . 5-6
Command Prompt . . . . . . . . . . . . . . . . . . . . . . . . . . . . . . . . . . . . . . . . . . . . . . . . . . . . . . . . . . . . . 5-7
DataSync . . . . . . . . . . . . . . . . . . . . . . . . . . . . . . . . . . . . . . . . . . . . . . . . . . . . . . . . . . . . . . . . . . . . 5-8
Remote Desktop . . . . . . . . . . . . . . . . . . . . . . . . . . . . . . . . . . . . . . . . . . . . . . . . . . . . . . . . . . . . . . 5-9
Connecting to a Terminal Server . . . . . . . . . . . . . . . . . . . . . . . . . . . . . . . . . . . . . . . . . . . . . . 5-9
Disconnecting Without Ending a Session . . . . . . . . . . . . . . . . . . . . . . . . . . . . . . . . . . . . . . . . 5-9
Disconnecting and Ending a Session . . . . . . . . . . . . . . . . . . . . . . . . . . . . . . . . . . . . . . . . . . 5-10
Internet Explorer . . . . . . . . . . . . . . . . . . . . . . . . . . . . . . . . . . . . . . . . . . . . . . . . . . . . . . . . . . . . . 5-11
Browsing the Web . . . . . . . . . . . . . . . . . . . . . . . . . . . . . . . . . . . . . . . . . . . . . . . . . . . . . . . . 5-11
Setting up a Proxy Server . . . . . . . . . . . . . . . . . . . . . . . . . . . . . . . . . . . . . . . . . . . . . . . 5-12
Enable Cookies . . . . . . . . . . . . . . . . . . . . . . . . . . . . . . . . . . . . . . . . . . . . . . . . . . . . . . . 5-12
Media Player . . . . . . . . . . . . . . . . . . . . . . . . . . . . . . . . . . . . . . . . . . . . . . . . . . . . . . . . . . . . . . . . 5-13
ScanSamp2 . . . . . . . . . . . . . . . . . . . . . . . . . . . . . . . . . . . . . . . . . . . . . . . . . . . . . . . . . . . . . . . . . 5-14
Scanning Data Fields . . . . . . . . . . . . . . . . . . . . . . . . . . . . . . . . . . . . . . . . . . . . . . . . . . . . . . 5-14
Scanning Options . . . . . . . . . . . . . . . . . . . . . . . . . . . . . . . . . . . . . . . . . . . . . . . . . . . . . . . . . 5-14
Windows Explorer . . . . . . . . . . . . . . . . . . . . . . . . . . . . . . . . . . . . . . . . . . . . . . . . . . . . . . . . . . . . 5-17
Viewing Files as Icons or Lists . . . . . . . . . . . . . . . . . . . . . . . . . . . . . . . . . . . . . . . . . . . 5-17
Creating a New Folder . . . . . . . . . . . . . . . . . . . . . . . . . . . . . . . . . . . . . . . . . . . . . . . . . 5-17
Network and Dialup Connections. . . . . . . . . . . . . . . . . . . . . . . . . . . . . . . . . . . . . . . . . . . . . . . . . 5-18
Chapter 6. Spectrum24 Network Configuration
Introduction . . . . . . . . . . . . . . . . . . . . . . . . . . . . . . . . . . . . . . . . . . . . . . . . . . . . . . . . . . . . . . . . . . 6-3
Mobile Companion . . . . . . . . . . . . . . . . . . . . . . . . . . . . . . . . . . . . . . . . . . . . . . . . . . . . . . . . . . . . . 6-3
Finding WLANs. . . . . . . . . . . . . . . . . . . . . . . . . . . . . . . . . . . . . . . . . . . . . . . . . . . . . . . . . . . . 6-5
Status . . . . . . . . . . . . . . . . . . . . . . . . . . . . . . . . . . . . . . . . . . . . . . . . . . . . . . . . . . . . . . . . . . 6-12
Setting Options . . . . . . . . . . . . . . . . . . . . . . . . . . . . . . . . . . . . . . . . . . . . . . . . . . . . . . . . . . . 6-18
Changing Profiles . . . . . . . . . . . . . . . . . . . . . . . . . . . . . . . . . . . . . . . . . . . . . . . . . . . . . . . . . 6-19
Editing a Profile . . . . . . . . . . . . . . . . . . . . . . . . . . . . . . . . . . . . . . . . . . . . . . . . . . . . . . . 6-20
Creating a New Profile . . . . . . . . . . . . . . . . . . . . . . . . . . . . . . . . . . . . . . . . . . . . . . . . . 6-20
Deleting a Profile . . . . . . . . . . . . . . . . . . . . . . . . . . . . . . . . . . . . . . . . . . . . . . . . . . . . . . 6-20
Ordering Profiles . . . . . . . . . . . . . . . . . . . . . . . . . . . . . . . . . . . . . . . . . . . . . . . . . . . . . . 6-20
ix
PPT 8800 Series Product Reference Guide for Embedded Windows® CE .NET
Chapter 7. Bluetooth
Introduction . . . . . . . . . . . . . . . . . . . . . . . . . . . . . . . . . . . . . . . . . . . . . . . . . . . . . . . . . . . . . . . . . . . 7-3
Turning Bluetooth On and Off . . . . . . . . . . . . . . . . . . . . . . . . . . . . . . . . . . . . . . . . . . . . . . . . . . . . . 7-3
Connecting to a Bluetooth Phone . . . . . . . . . . . . . . . . . . . . . . . . . . . . . . . . . . . . . . . . . . . . . . . . . . 7-5
Ericsson, Nokia 6210, NTT DoCoMo, Sony Phones . . . . . . . . . . . . . . . . . . . . . . . . . . . . . . . . 7-5
Motorola Timeport 270C, Nokia 3650/6310/7650/8910/8910i . . . . . . . . . . . . . . . . . . . . . . . . . 7-8
Bluetooth Configuration. . . . . . . . . . . . . . . . . . . . . . . . . . . . . . . . . . . . . . . . . . . . . . . . . . . . . . . . . 7-11
Configuring the Terminal . . . . . . . . . . . . . . . . . . . . . . . . . . . . . . . . . . . . . . . . . . . . . . . . . . . . 7-11
Assigning COM Ports. . . . . . . . . . . . . . . . . . . . . . . . . . . . . . . . . . . . . . . . . . . . . . . . . . . . . . . 7-12
Object Sharing . . . . . . . . . . . . . . . . . . . . . . . . . . . . . . . . . . . . . . . . . . . . . . . . . . . . . . . . . . . . 7-13
Discovering Bluetooth Device(s) . . . . . . . . . . . . . . . . . . . . . . . . . . . . . . . . . . . . . . . . . . . . . . 7-13
Bonding with Discovered Device(s) . . . . . . . . . . . . . . . . . . . . . . . . . . . . . . . . . . . . . . . . . . . . 7-17
View Device Properties . . . . . . . . . . . . . . . . . . . . . . . . . . . . . . . . . . . . . . . . . . . . . . . . . . . . . 7-19
Setting Up A Favorite Device. . . . . . . . . . . . . . . . . . . . . . . . . . . . . . . . . . . . . . . . . . . . . . . . . 7-21
Change Views . . . . . . . . . . . . . . . . . . . . . . . . . . . . . . . . . . . . . . . . . . . . . . . . . . . . . . . . . . . . 7-22
Deleting a Device. . . . . . . . . . . . . . . . . . . . . . . . . . . . . . . . . . . . . . . . . . . . . . . . . . . . . . . . . . 7-24
Bluetooth Communications . . . . . . . . . . . . . . . . . . . . . . . . . . . . . . . . . . . . . . . . . . . . . . . . . . . . . . 7-25
Dial-up to Your Network. . . . . . . . . . . . . . . . . . . . . . . . . . . . . . . . . . . . . . . . . . . . . . . . . . . . . 7-25
Bluetooth ActiveSync . . . . . . . . . . . . . . . . . . . . . . . . . . . . . . . . . . . . . . . . . . . . . . . . . . . . . . . 7-30
ActiveSync with a Favorite Computer. . . . . . . . . . . . . . . . . . . . . . . . . . . . . . . . . . . . . . . 7-31
ActiveSync with a Discovered Computer . . . . . . . . . . . . . . . . . . . . . . . . . . . . . . . . . . . . 7-32
ActiveSync with Undiscovered Computer. . . . . . . . . . . . . . . . . . . . . . . . . . . . . . . . . . . . 7-33
Bluetooth LAN Access . . . . . . . . . . . . . . . . . . . . . . . . . . . . . . . . . . . . . . . . . . . . . . . . . . . . . . 7-36
Connecting to a Favorite Access Point. . . . . . . . . . . . . . . . . . . . . . . . . . . . . . . . . . . . . . 7-36
Connecting to a Discovered Access Point . . . . . . . . . . . . . . . . . . . . . . . . . . . . . . . . . . . 7-37
Connecting to an Undiscovered Access Point . . . . . . . . . . . . . . . . . . . . . . . . . . . . . . . . 7-38
Automatic Connection . . . . . . . . . . . . . . . . . . . . . . . . . . . . . . . . . . . . . . . . . . . . . . . . . . . . . . 7-39
Socket OBEX . . . . . . . . . . . . . . . . . . . . . . . . . . . . . . . . . . . . . . . . . . . . . . . . . . . . . . . . . . . . . . . . 7-41
Sending a File . . . . . . . . . . . . . . . . . . . . . . . . . . . . . . . . . . . . . . . . . . . . . . . . . . . . . . . . . . . . 7-41
Browse Remote Device . . . . . . . . . . . . . . . . . . . . . . . . . . . . . . . . . . . . . . . . . . . . . . . . . . . . . 7-42
Prepare for File Transfer. . . . . . . . . . . . . . . . . . . . . . . . . . . . . . . . . . . . . . . . . . . . . . . . . 7-42
Send/Receive File or Folder . . . . . . . . . . . . . . . . . . . . . . . . . . . . . . . . . . . . . . . . . . . . . . 7-44
Create a Folder. . . . . . . . . . . . . . . . . . . . . . . . . . . . . . . . . . . . . . . . . . . . . . . . . . . . . . . . 7-44
Delete a File or Folder . . . . . . . . . . . . . . . . . . . . . . . . . . . . . . . . . . . . . . . . . . . . . . . . . . 7-45
Refresh Remote View. . . . . . . . . . . . . . . . . . . . . . . . . . . . . . . . . . . . . . . . . . . . . . . . . . . 7-47
Connecting or Disconnecting to a Remote Device . . . . . . . . . . . . . . . . . . . . . . . . . . . . . 7-47
Exit Bluetooth File Explorer . . . . . . . . . . . . . . . . . . . . . . . . . . . . . . . . . . . . . . . . . . . . . . 7-48
Receiving a File or Contact . . . . . . . . . . . . . . . . . . . . . . . . . . . . . . . . . . . . . . . . . . . . . . . . . . 7-48
Enable File Sharing . . . . . . . . . . . . . . . . . . . . . . . . . . . . . . . . . . . . . . . . . . . . . . . . . . . . . . . . 7-49
Bluetooth Printing . . . . . . . . . . . . . . . . . . . . . . . . . . . . . . . . . . . . . . . . . . . . . . . . . . . . . . . . . . . . . 7-49
x
Contents
Chapter 8. Software Installation on Development PC
Introduction . . . . . . . . . . . . . . . . . . . . . . . . . . . . . . . . . . . . . . . . . . . . . . . . . . . . . . . . . . . . . . . . . .
Before You Install the SDK . . . . . . . . . . . . . . . . . . . . . . . . . . . . . . . . . . . . . . . . . . . . . . . . . . .
Symbol Windows CE SDK . . . . . . . . . . . . . . . . . . . . . . . . . . . . . . . . . . . . . . . . . . . . . . . . . . . . . . .
Installing the SDK on the Development PC . . . . . . . . . . . . . . . . . . . . . . . . . . . . . . . . . . . . . . . . . .
Installing the SDK . . . . . . . . . . . . . . . . . . . . . . . . . . . . . . . . . . . . . . . . . . . . . . . . . . . . . . . . . .
Installing Other Development Software . . . . . . . . . . . . . . . . . . . . . . . . . . . . . . . . . . . . . . . . . . . . .
8-3
8-3
8-3
8-4
8-4
8-4
Chapter 9. Configuring the Terminal
Introduction . . . . . . . . . . . . . . . . . . . . . . . . . . . . . . . . . . . . . . . . . . . . . . . . . . . . . . . . . . . . . . . . . . 9-3
Starting Terminal Configuration Manager . . . . . . . . . . . . . . . . . . . . . . . . . . . . . . . . . . . . . . . . . . . 9-4
Defining Script Properties . . . . . . . . . . . . . . . . . . . . . . . . . . . . . . . . . . . . . . . . . . . . . . . . . . . . . . . 9-6
Creating the Script for the Hex Image . . . . . . . . . . . . . . . . . . . . . . . . . . . . . . . . . . . . . . . . . . . . . . 9-8
Opening a New or Existing Script . . . . . . . . . . . . . . . . . . . . . . . . . . . . . . . . . . . . . . . . . . . . . . 9-8
Copying Components to the Script . . . . . . . . . . . . . . . . . . . . . . . . . . . . . . . . . . . . . . . . . . . . . 9-9
Saving the Script . . . . . . . . . . . . . . . . . . . . . . . . . . . . . . . . . . . . . . . . . . . . . . . . . . . . . . . . . . 9-9
Building the Image . . . . . . . . . . . . . . . . . . . . . . . . . . . . . . . . . . . . . . . . . . . . . . . . . . . . . . . . . . . . 9-10
If the Build Fails . . . . . . . . . . . . . . . . . . . . . . . . . . . . . . . . . . . . . . . . . . . . . . . . . . . . . . . 9-11
Sending the Hex Image . . . . . . . . . . . . . . . . . . . . . . . . . . . . . . . . . . . . . . . . . . . . . . . . . . . . . . . . 9-11
Connecting the Terminal and Development PC . . . . . . . . . . . . . . . . . . . . . . . . . . . . . . . . . . 9-12
Set Up IPL to Receive the File . . . . . . . . . . . . . . . . . . . . . . . . . . . . . . . . . . . . . . . . . . . . . . . 9-12
Beginning the Send in TCM . . . . . . . . . . . . . . . . . . . . . . . . . . . . . . . . . . . . . . . . . . . . . . . . . 9-15
Error Messages . . . . . . . . . . . . . . . . . . . . . . . . . . . . . . . . . . . . . . . . . . . . . . . . . . . . . . . . . . . . . . 9-20
IPL Error Detection . . . . . . . . . . . . . . . . . . . . . . . . . . . . . . . . . . . . . . . . . . . . . . . . . . . . . . . . 9-20
TCM Error Messages . . . . . . . . . . . . . . . . . . . . . . . . . . . . . . . . . . . . . . . . . . . . . . . . . . . . . . 9-22
Creating and Loading a Splash Screen . . . . . . . . . . . . . . . . . . . . . . . . . . . . . . . . . . . . . . . . . . . . 9-22
Loading the Splash Screen via TCM . . . . . . . . . . . . . . . . . . . . . . . . . . . . . . . . . . . . . . . . . . 9-23
Flash Storage . . . . . . . . . . . . . . . . . . . . . . . . . . . . . . . . . . . . . . . . . . . . . . . . . . . . . . . . . . . . . . . 9-24
FFS Partitions . . . . . . . . . . . . . . . . . . . . . . . . . . . . . . . . . . . . . . . . . . . . . . . . . . . . . . . . . . . . 9-24
Working with FFS Partitions . . . . . . . . . . . . . . . . . . . . . . . . . . . . . . . . . . . . . . . . . . . . . . . . . 9-24
RegMerge.dll . . . . . . . . . . . . . . . . . . . . . . . . . . . . . . . . . . . . . . . . . . . . . . . . . . . . . . . . . 9-25
CopyFile . . . . . . . . . . . . . . . . . . . . . . . . . . . . . . . . . . . . . . . . . . . . . . . . . . . . . . . . . . . . 9-25
Non-FFS Partitions . . . . . . . . . . . . . . . . . . . . . . . . . . . . . . . . . . . . . . . . . . . . . . . . . . . . . . . . 9-26
Assigning User-Written Applications to Buttons. . . . . . . . . . . . . . . . . . . . . . . . . . . . . . . . . . . . . . 9-27
Adding Programs . . . . . . . . . . . . . . . . . . . . . . . . . . . . . . . . . . . . . . . . . . . . . . . . . . . . . . . . . . . . . 9-27
Adding a Program from the Internet . . . . . . . . . . . . . . . . . . . . . . . . . . . . . . . . . . . . . . . . . . . 9-28
xi
PPT 8800 Series Product Reference Guide for Embedded Windows® CE .NET
Chapter 10. AirBEAM Smart
Introduction . . . . . . . . . . . . . . . . . . . . . . . . . . . . . . . . . . . . . . . . . . . . . . . . . . . . . . . . . . . . . . . . . . 10-3
AirBEAM Package Builder . . . . . . . . . . . . . . . . . . . . . . . . . . . . . . . . . . . . . . . . . . . . . . . . . . . . . . 10-3
AirBEAM Smart Client. . . . . . . . . . . . . . . . . . . . . . . . . . . . . . . . . . . . . . . . . . . . . . . . . . . . . . . . . . 10-4
AirBEAM Smart License . . . . . . . . . . . . . . . . . . . . . . . . . . . . . . . . . . . . . . . . . . . . . . . . . . . . 10-4
Configuring the AirBEAM Smart Client . . . . . . . . . . . . . . . . . . . . . . . . . . . . . . . . . . . . . . . . . 10-4
Packages(1) Tab . . . . . . . . . . . . . . . . . . . . . . . . . . . . . . . . . . . . . . . . . . . . . . . . . . . . . . 10-5
Packages(2) Tab . . . . . . . . . . . . . . . . . . . . . . . . . . . . . . . . . . . . . . . . . . . . . . . . . . . . . . 10-5
Server Tab - - - - - - - - - - - - - - - - - - - - - - - - - - - - - - - - - - - - - - - - - - - - - - - - - - - - - 10-6
Misc(1) Tab - - - - - - - - - - - - - - - - - - - - - - - - - - - - - - - - - - - - - - - - - - - - - - - - - - - - 10-7
Misc(2) Tab - - - - - - - - - - - - - - - - - - - - - - - - - - - - - - - - - - - - - - - - - - - - - - - - - - - - 10-9
Misc(3) Tab - - - - - - - - - - - - - - - - - - - - - - - - - - - - - - - - - - - - - - - - - - - - - - - - - - - 10-10
Synchronizing with the Server . . . . . . . . . . . . . . . . . . . . . . . . . . . . . . . . . . . . . . . . . . . . . . . 10-10
Manual Synchronization - - - - - - - - - - - - - - - - - - - - - - - - - - - - - - - - - - - - - - - - - - 10-11
Automatic Synchronization . . . . . . . . . . . . . . . . . . . . . . . . . . . . . . . . . . . . . . . . . . . . . . 10-11
AirBEAM Staging . . . . . . . . . . . . . . . . . . . . . . . . . . . . . . . . . . . . . . . . . . . . . . . . . . . . . . . . . . . . 10-12
Chapter 11. Maintenance and Troubleshooting
Introduction . . . . . . . . . . . . . . . . . . . . . . . . . . . . . . . . . . . . . . . . . . . . . . . . . . . . . . . . . . . . . . . . . . 11-3
Safely Maintaining the PPT 8800 . . . . . . . . . . . . . . . . . . . . . . . . . . . . . . . . . . . . . . . . . . . . . . . . . 11-3
Terminal and Cradle Connector Cleaning Guidelines. . . . . . . . . . . . . . . . . . . . . . . . . . . . . . . . . . 11-4
Required Materials. . . . . . . . . . . . . . . . . . . . . . . . . . . . . . . . . . . . . . . . . . . . . . . . . . . . . . . . . 11-4
Cleaning the Terminal Connector . . . . . . . . . . . . . . . . . . . . . . . . . . . . . . . . . . . . . . . . . . . . . 11-4
Cleaning the Cradle Connector . . . . . . . . . . . . . . . . . . . . . . . . . . . . . . . . . . . . . . . . . . . . . . . 11-7
Troubleshooting . . . . . . . . . . . . . . . . . . . . . . . . . . . . . . . . . . . . . . . . . . . . . . . . . . . . . . . . . . . . . 11-10
Appendix A. Technical Specifications
Environment . . . . . . . . . . . . . . . . . . . . . . . . . . . . . . . . . . . . . . . . . . . . . . . . . . . . . . . . . . . . . . . . . .C-1
COM Port Definitions . . . . . . . . . . . . . . . . . . . . . . . . . . . . . . . . . . . . . . . . . . . . . . . . . . . . . . . . . . .C-3
Pin-Outs . . . . . . . . . . . . . . . . . . . . . . . . . . . . . . . . . . . . . . . . . . . . . . . . . . . . . . . . . . . . . . . . . . . . .C-4
Appendix B. Keyboard Maps
Introduction . . . . . . . . . . . . . . . . . . . . . . . . . . . . . . . . . . . . . . . . . . . . . . . . . . . . . . . . . . . . . . . . . . .D-1
Keyboards . . . . . . . . . . . . . . . . . . . . . . . . . . . . . . . . . . . . . . . . . . . . . . . . . . . . . . . . . . . . . . . . . . . .D-2
Index
xii
About This Guide
Introduction
The PPT 8800 Series Product Reference Guide for Embedded Windows® CE .NET
provides information about the PPT 8800 Series terminal using the Windows® CE .NET
Operating System, and its accessories. The PPT 8800 Series includes the following
variations of the terminal:
PPT 8800 Performs 1-dimensional scanning and batch communication. Memory configuration:
32 MB ROM/32 MB RAM, optional 128 MB additional CF memory.
PPT 8846 Performs 1-dimensional scanning and uses the Symbol Spectrum24® radio to perform
11 MB local area network (LAN) wireless communication. Memory configuration: 32 MB
ROM/32 MB RAM.
PPT 8860 Performs 1-dimensional scanning with Bluetooth® wireless technology to perform
personal area network (PAN) communication. Memory configuration: 32 MB ROM/
32 MB RAM.
Chapter Descriptions
Topics covered in this guide are as follows:
•
Chapter 1, Getting Started explains the physical buttons and controls on your
terminal, how to install and charge the batteries, insert and remove the compact
flash card, replace the handstrap, and start your PPT 8800 terminal for the first
time.
•
Chapter 2, Operating the PPT 8800 explains how to use your terminal, including
instructions for powering on and resetting the terminal, using the stylus and a
headset, entering information, and scanning.
xiii
PPT 8800 Series Product Reference Guide for Embedded Windows® CE .NET
•
Chapter 3, Settings explains how to adjust settings on the terminal, and add and
delete programs.
•
Chapter 4, Communications explains how to use Microsoft® ActiveSync™ for
communications between the terminal and host computer.
•
Chapter 5, Applications describes how to use the applications installed on the
terminal.
•
Chapter 6, Spectrum24 Network Configuration describes how to configure the
Spectrum24 wireless connection.
•
Chapter 7, Bluetooth describes how to use and configure the Bluetooth wireless
connection.
•
Chapter 8, Software Installation on Development PC provides instructions for
installing the Software Developer’s Kit on your host computer.
•
Chapter 9, Configuring the Terminal describes how to install and use the Terminal
Configuration Manager (TCM) and Initial Program Loader (IPL).
•
Chapter 10, AirBEAM Smart explains how to set up you terminal to synchronize
with a server over using the AirBEAM Client and AirBEAM Staging applications.
•
Chapter 11, Maintenance and Troubleshooting provides information to help you
take proper care of your PPT 8800 terminal and solve problems that may come up.
•
Appendix A, Technical Specifications includes a table listing the technical
specifications for the terminal.
•
Appendix B, Keyboard Maps includes tables listing key functionality for the
keyboard.
Notational Conventions
This document uses these conventions:
•
“terminal” or “PPT 8800” refers to any model of the terminal.
•
“User” refers to anyone using an application on the terminal.
•
“You” refers to the End User, System Administrator or Technical Support person
using this manual as a reference to install, configure, operate, maintain and
troubleshoot the terminal.
•
Italics are used to highlight specific items in the general text, and to identify
chapters and sections in this and related documents. It also identifies names of
windows, menus, menu items, and fields within windows.
•
BOLD identifies buttons to be tapped or clicked on windows.
xiv
About This Guide
•
•
Bullets (•) indicate:
•
lists of alternatives or action items.
•
lists of required steps that are not necessarily sequential.
Numbered lists indicate a set of sequential steps, i.e., those that describe step-bystep procedures.
Related Documents
The following documents provide more information about your terminal.
•
PPT 8800 Series Quick Reference Guide, p/n 72-58093-xx
•
CRD8800-1000S Serial Cradle Quick Reference Guide, p/n 72-58095-xx
•
CRD8800B-1000S Serial Cradle Quick Reference Guide, p/n 72-64181-xx
•
CRD8800-4000S Serial Cradle Quick Reference Guide, p/n 72-58096-xx
•
CRD8800-4000E Ethernet Cradle Quick Reference Guide, p/n 72-59203-xx
•
MSR8800 Magnetic Stripe Reader Quick Reference Guide, p/n 72-64824-xx
•
TRG8800 Trigger Handle Quick Reference Guide, p/n 72-64623-xx
•
AirBEAM Package Builder Product Reference Guide, p/n 72-55769-xx
•
AirBEAM Smart Windows® CE Client Product Reference Guide, p/n 72-63060-xx
•
Windows CE Help File for Symbol Terminals, p/n 72E-38880-xx
•
Symbol Windows CE Software Developer’s Kit (SDK) for PPT 8800, available at
http://software.symbol.com/devzone
•
ActiveSync software, available at http://www.microsoft.com.
Service Information
If you have a problem with your equipment, contact the Symbol Support Center for your
region. See page xviii for contact information. Before calling, have the model number, serial
number, and several of your bar code symbols at hand.
Call the Support Center from a phone near the scanning equipment so that the service
person can try to talk you through your problem. If the equipment is found to be working
properly and the problem is symbol readability, the Support Center will request samples of
your bar codes for analysis at our plant.
If your problem cannot be solved over the phone, you may need to return your equipment
for servicing. If that is necessary, you will be given specific directions.
xv
PPT 8800 Series Product Reference Guide for Embedded Windows® CE .NET
Note: Symbol Technologies is not responsible for any damages incurred
during shipment if the approved shipping container is not used.
Shipping the units improperly can possibly void the warranty. If the
original shipping container was not kept, contact Symbol to have
another sent to you.
Symbol Support Center
For service information, warranty information or technical assistance contact or call the
Symbol Support Center in:
United States
Symbol Technologies, Inc.
One Symbol Plaza
Holtsville, New York 11742-1300
1-800-653-5350
Canada
Symbol Technologies Canada, Inc.
2540 Matheson Boulevard East
Mississauga, Ontario, Canada L4W 4Z2
905-629-7226
United Kingdom
Symbol Technologies
Symbol Place
Winnersh Triangle, Berkshire RG41 5TP
United Kingdom
0800 328 2424 (Inside UK)
+44 118 945 7529 (Outside UK)
Asia/Pacific
Symbol Technologies Asia, Inc (Singapore
Branch)
230 Victoria Street #05-07/09
Bugis Junction Office Tower
Singapore 188024
Tel: +65-6796-9600
Fax: +65-6337-6488
Australia
Symbol Technologies Pty. Ltd.
432 St. Kilda Road
Melbourne, Victoria 3004
1-800-672-906 (Inside Australia)
+61-3-9866-6044 (Outside Australia)
Austria/Österreich
Symbol Technologies Austria GmbH
Prinz-Eugen Strasse 70 / 2.Haus
1040 Vienna, Austria
01-5055794-0 (Inside Austria)
+43-1-5055794-0 (Outside Austria)
Denmark/Danmark
Symbol Technologies AS
Dr. Neergaardsvej 3
2970 Hørsholm
7020-1718 (Inside Denmark)
+45-7020-1718 (Outside Denmark)
Europe/Mid-East Distributor Operations
Contact your local distributor or call
+44 118 945 7360
xvi
About This Guide
Finland/Suomi
Oy Symbol Technologies
Kaupintie 8 A 6
FIN-00440 Helsinki, Finland
9 5407 580 (Inside Finland)
+358 9 5407 580 (Outside Finland)
France
Symbol Technologies France
Centre d'Affaire d'Antony
3 Rue de la Renaissance
92184 Antony Cedex, France
01-40-96-52-21 (Inside France)
+33-1-40-96-52-50 (Outside France)
Germany/Deutchland
Symbol Technologies GmbH
Waldstrasse 66
D-63128 Dietzenbach, Germany
6074-49020 (Inside Germany)
+49-6074-49020 (Outside Germany)
Italy/Italia
Symbol Technologies Italia S.R.L.
Via Cristoforo Columbo, 49
20090 Trezzano S/N Navigilo
Milano, Italy
2-484441 (Inside Italy)
+39-02-484441 (Outside Italy)
Latin America Sales Support
2730 University Dr.
Coral Springs, FL 33065 USA
1-800-347-0178 (Inside United States)
+1-954-255-2610 (Outside United States)
954-340-9454 (Fax)
Mexico/México
Symbol Technologies Mexico Ltd.
Torre Picasso
Boulevard Manuel Avila Camacho No 88
Lomas de Chapultepec CP 11000
Mexico City, DF, Mexico
5-520-1835 (Inside Mexico)
+52-5-520-1835 (Outside Mexico)
Netherlands/Nederland
Symbol Technologies
Kerkplein 2, 7051 CX
Postbus 24 7050 AA
Varsseveld, Netherlands
315-271700 (Inside Netherlands)
+31-315-271700 (Outside Netherlands)
Norway/Norge
Symbol’s registered and mailing address:
Symbol Technologies Norway
Hoybratenveien 35 C
N-1055 OSLO, Norway
Symbol’s repair depot and shipping address:
Symbol Technologies Norway
Enebakkveien 123
N-0680 OSLO, Norway
+47 2232 4375
xvii
PPT 8800 Series Product Reference Guide for Embedded Windows® CE .NET
South Africa
Symbol Technologies Africa Inc.
Block B2
Rutherford Estate
1 Scott Street
Waverly 2090 Johannesburg
Republic of South Africa
11-809 5311 (Inside South Africa)
+27-11-809 5311 (Outside South Africa)
Spain/España
Symbol Technologies S.L.
C/ Peonias, 2
Edificio Piovera Azul
28042 Madrid, Spain
91 324 40 00 (Inside Spain)
+34 91 324 40 00 (Outside Spain)
Sweden/Sverige
“Letter” address:
Symbol Technologies AB
Box 1354
S-171 26 SOLNA
Sweden
Visit/shipping address:
Symbol Technologies AB
Solna Strandväg 78
S-171 54 SOLNA
Sweden
Switchboard: 08 445 29 00 (domestic)
Call Center: +46 8 445 29 29 (international)
Support E-Mail:
[email protected]
If you purchased your Symbol product from a Symbol Business Partner, contact that
Business Partner for service.
For the latest version of this guide go to:http://www.symbol.com/manuals.
xviii
Chapter 1
Getting Started
Chapter Contents
Introduction . . . . . . . . . . . . . . . . . . . . . . . . . . . . . . . . . . . . . . . . . . . . . . . . . . . . . . . . . . . . . . . . . . 1-3
Unpacking the Terminal . . . . . . . . . . . . . . . . . . . . . . . . . . . . . . . . . . . . . . . . . . . . . . . . . . . . . . . . . 1-3
Parts of the Terminal . . . . . . . . . . . . . . . . . . . . . . . . . . . . . . . . . . . . . . . . . . . . . . . . . . . . . . . . . . . 1-4
Accessories . . . . . . . . . . . . . . . . . . . . . . . . . . . . . . . . . . . . . . . . . . . . . . . . . . . . . . . . . . . . . . . . . . 1-6
Getting Started. . . . . . . . . . . . . . . . . . . . . . . . . . . . . . . . . . . . . . . . . . . . . . . . . . . . . . . . . . . . . . . . 1-7
Installing the Main Battery . . . . . . . . . . . . . . . . . . . . . . . . . . . . . . . . . . . . . . . . . . . . . . . . . . . . . . . 1-7
Installing the Optional Larger Capacity Battery . . . . . . . . . . . . . . . . . . . . . . . . . . . . . . . . . . . 1-9
Charging the Terminal Battery . . . . . . . . . . . . . . . . . . . . . . . . . . . . . . . . . . . . . . . . . . . . . . . . . . . 1-10
Charging the Main Battery and Memory Backup Battery . . . . . . . . . . . . . . . . . . . . . . . . . . . 1-10
Using the Serial Charging Cable . . . . . . . . . . . . . . . . . . . . . . . . . . . . . . . . . . . . . . . . . . . . . 1-11
Using the Single-Slot Serial Cradle . . . . . . . . . . . . . . . . . . . . . . . . . . . . . . . . . . . . . . . . . . . 1-11
Using the Four-Slot Cradles . . . . . . . . . . . . . . . . . . . . . . . . . . . . . . . . . . . . . . . . . . . . . . . . . 1-13
Using the Universal Cable Cup. . . . . . . . . . . . . . . . . . . . . . . . . . . . . . . . . . . . . . . . . . . . . . . 1-14
Charging Spare Batteries. . . . . . . . . . . . . . . . . . . . . . . . . . . . . . . . . . . . . . . . . . . . . . . . . . . . . . . 1-16
Using the CRD8800 Single-Slot Cradle . . . . . . . . . . . . . . . . . . . . . . . . . . . . . . . . . . . . . . . . 1-16
Using the CRD8800B Single-Slot Cradle . . . . . . . . . . . . . . . . . . . . . . . . . . . . . . . . . . . . . . . 1-17
Using the UBC Battery Adapter . . . . . . . . . . . . . . . . . . . . . . . . . . . . . . . . . . . . . . . . . . . . . . 1-18
Charge LED Indicator . . . . . . . . . . . . . . . . . . . . . . . . . . . . . . . . . . . . . . . . . . . . . . . . . . . . . . 1-19
Starting the Terminal . . . . . . . . . . . . . . . . . . . . . . . . . . . . . . . . . . . . . . . . . . . . . . . . . . . . . . . . . . 1-19
Calibrating the Screen . . . . . . . . . . . . . . . . . . . . . . . . . . . . . . . . . . . . . . . . . . . . . . . . . . . . . 1-19
Checking Battery Power . . . . . . . . . . . . . . . . . . . . . . . . . . . . . . . . . . . . . . . . . . . . . . . . . . . . . . . 1-21
Replacing the Handstrap . . . . . . . . . . . . . . . . . . . . . . . . . . . . . . . . . . . . . . . . . . . . . . . . . . . . . . . 1-21
Handstrap with Clip . . . . . . . . . . . . . . . . . . . . . . . . . . . . . . . . . . . . . . . . . . . . . . . . . . . . . . . 1-22
Attaching the Neck Strap . . . . . . . . . . . . . . . . . . . . . . . . . . . . . . . . . . . . . . . . . . . . . . . . . . . . . . . 1-23
Configuring the Terminal . . . . . . . . . . . . . . . . . . . . . . . . . . . . . . . . . . . . . . . . . . . . . . . . . . . . . . . 1-24
Accessories . . . . . . . . . . . . . . . . . . . . . . . . . . . . . . . . . . . . . . . . . . . . . . . . . . . . . . . . . . . . . . . . . 1-24
1-1
PPT 8800 Series Product Reference Guide for Embedded Windows® CE .NET
Universal Cable Cup . . . . . . . . . . . . . . . . . . . . . . . . . . . . . . . . . . . . . . . . . . . . . . . . . . . . . . . 1-24
Connecting to the Terminal . . . . . . . . . . . . . . . . . . . . . . . . . . . . . . . . . . . . . . . . . . . . . . 1-24
Removing from the Terminal . . . . . . . . . . . . . . . . . . . . . . . . . . . . . . . . . . . . . . . . . . . . . 1-25
Connecting the Power Cable . . . . . . . . . . . . . . . . . . . . . . . . . . . . . . . . . . . . . . . . . . . . . . . . . 1-25
Connecting Communication Cable . . . . . . . . . . . . . . . . . . . . . . . . . . . . . . . . . . . . . . . . . . . . 1-26
Magnetic Strip Reader . . . . . . . . . . . . . . . . . . . . . . . . . . . . . . . . . . . . . . . . . . . . . . . . . . . . . . 1-26
Installing the MSR . . . . . . . . . . . . . . . . . . . . . . . . . . . . . . . . . . . . . . . . . . . . . . . . . . . . . 1-26
Removing the MSR . . . . . . . . . . . . . . . . . . . . . . . . . . . . . . . . . . . . . . . . . . . . . . . . . . . . 1-27
Using the MSR . . . . . . . . . . . . . . . . . . . . . . . . . . . . . . . . . . . . . . . . . . . . . . . . . . . . . . . . 1-27
Charging the Terminal’s Battery . . . . . . . . . . . . . . . . . . . . . . . . . . . . . . . . . . . . . . . . . . . 1-29
1-2
Getting Started
Introduction
This chapter explains the physical buttons and controls on your terminal, how install and
charge the batteries, replace the handstrap, and start your terminal for the first time.
Unpacking the Terminal
Carefully remove all protective material from around the terminal and save the shipping
container for later storage and shipping.
Verify that you received all equipment listed below:
•
terminal
•
lithium-ion battery
•
handstrap, attached to the terminal
•
case
•
stylus, in the stylus silo
•
Quick Reference Guide.
Inspect the equipment for damage. If you are missing any equipment or if you find any
damaged equipment, contact the Symbol Technologies Support Center immediately. See
page xviii for contact information.
1-3
PPT 8800 Series Product Reference Guide for Embedded Windows® CE .NET
Parts of the Terminal
Scan LED
Exit Window
LCD Display
Right Scan Trigger
F1
Keypad
(Standard 6-key
shown)
F2
F3
F4
ENTER
Figure 1-1. Front View
1-4
Getting Started
Infrared Port
Neckstrap/Handstrap
Connector
Stylus Silo
Tether
Reset Button
Speaker
Left Scan Trigger
Serial Port
Battery Compartment
Microphone
Battery Cover
Locking Screw
Handstrap Connectors
Figure 1-2. Back View
1-5
PPT 8800 Series Product Reference Guide for Embedded Windows® CE .NET
Accessories
Note: For specific part numbers for PPT 8800 Series accessories, visit the
PPT 8800 with WIndows Embedded CE .NET accessory web page:
http://www.symbol.com/products/mobile_computers/
ppt8800acc.html.
•
Spare standard lithium-ion battery.
•
Larger capacity lithium-ion battery kit.
•
Stylus: for performing pen functions.
•
Cable Cup: connects to the terminal to an autocharge adapter and various cables.
•
Cables:
•
DEX Cable: connects the terminal to a vending machine.
•
Autocharger: connects to the cigarette lighter in a vehicle to charge the terminal.
•
Printer Cables: adds printing capabilities to the terminal.
•
•
USB Cable: allows USB connection from the Cable Cup to a host computer
Attachable power supply and line cord: allows charging of the terminal through
the Universal Cable Cup.
•
Serial Charging Cable: allows serial connection of the terminal to a host computer.
•
Single-Slot Serial Cradle: charges the terminal and spare standard battery and
synchronizes the terminal with a host computer through a serial connection.
•
Single-Slot Serial Cradle with Larger Capacity Battery Support: charges the
terminal with standard or larger capacity battery and spare standard battery and
synchronizes the terminal with a host computer through a serial connection.
•
Four-Slot Serial Cradle: charges up to four terminals with standard or larger
capacity battery and synchronizes the terminals with a host computer through a
serial connection.
•
Four-Slot Ethernet Cradle: charges the terminals with standard or larger capacity
battery and synchronizes the terminal with a host computer through an ethernet
connection.
•
Holster: stores the terminal when not in use.
•
Pistol Grip Handle: provides gun form factor ergonomics for scan intensive
applications.
1-6
Getting Started
•
Magnetic Stripe Reader (MSR): snaps on to the terminal to add magstripe
capabilities.
•
Vehicle Cradle: powers the terminal and charges its battery, and can be used to
communicate with other devices such as printers.
•
Symbol PPT 8800 Software Developer’s Kit (SDK) for Embedded Windows CE
.NET.
Getting Started
In order to start using the terminal for the first time:
•
install the main battery
•
charge the main battery and backup battery
•
start the terminal
•
configure the terminal.
Installing the Main Battery
Before using your terminal, install a lithium-ion battery:
1. Turn the locking screw counterclockwise until the cover releases from the terminal.
2. Lift the battery door away from the terminal.
Locking
Screw
Figure 1-3. Locking Screw
1-7
PPT 8800 Series Product Reference Guide for Embedded Windows® CE .NET
3. Insert the lithium-ion battery in the battery compartment with the battery tether
positioned as shown, ensuring the battery snaps into place.
Tether
Figure 1-4. Inserting the Battery
Note: Ensure the battery is positioned correctly. The battery charging
contacts should be placed on top of the charging contacts in the
battery compartment.
4. Replace the battery cover by inserting the top first, then pressing the bottom in
firmly.
Figure 1-5. Closing the Back Cover
5. Turn the locking screw clockwise to secure the battery cover to the terminal.
1-8
Getting Started
Installing the Optional Larger Capacity Battery
To install the optional larger capacity battery:
1. Remove the bottom of the handstrap from the battery cover.
2. Unscrew the locking screw and remove the battery cover.
Figure 1-6. Unscrew Locking Screw
3. If a battery is installed, pull tether up to release battery.
4. Insert the larger capacity battery in the battery compartment with the battery tether
positioned as shown, ensuring the battery snaps into place.
Figure 1-7. Installing the Larger Capacity Battery
1-9
PPT 8800 Series Product Reference Guide for Embedded Windows® CE .NET
5. Replace the new battery cover by inserting the top first, then pressing the bottom
down firmly.
Figure 1-8. Secure New Battery Cover
6. Tighten the locking screw to secure the new battery cover to the terminal.
7. Re-attach the handstrap to the handstrap connector on the new battery cover.
Charging the Terminal Battery
Note: To charge the battery for your mobile device, battery and charger
temperatures must be between +32° F and +104° F
(0° C and +40° C).
Charging the Main Battery and Memory Backup Battery
Before using your terminal for the first time, charge the lithium-ion battery in the terminal for
about 2 1/2 hours, using the cradle or the serial charging cable.
Note: To ensure the quickest charging time, turn the terminal off while
charging.
Your terminal is equipped with a memory backup battery which automatically charges from
the fully-charged lithium-ion battery. This backup battery retains data in memory when the
terminal’s battery is removed. When you first use your terminal, it takes about 24 hours to
charge the backup battery from the main battery.
1-10
Getting Started
Note: If you remove your lithium-ion battery before the backup battery is
fully charged, data may be lost. For this reason, DO NOT remove the
battery within the first 24 hours of use.
Using the Serial Charging Cable
AC Line
Cord
F1
F2
F3
F4
ENTER
Serial Charging
Cable
Power
Supply
Figure 1-9. Power Set Up
The battery usually charges in 2 1/2 hours to fully charge.
Using the Single-Slot Serial Cradle
You can charge the battery in the terminal using either the CRD8800 or CRD8800B SingleSlot Serial Cradle. The CRD8800B cradle accepts a terminal with the larger capacity
battery kit installed on the terminal. To charge the terminal’s battery using the Single-Slot
Serial cradle:
1. Connect the cradle to a power source.
Line
Cord
Serial
Port
Power
Input
Cable
Power
Port
Figure 1-10. Connecting Power to the CRD8800 Cradle
1-11
PPT 8800 Series Product Reference Guide for Embedded Windows® CE .NET
Power
Port
Power
Supply
AC Line
Cord
Figure 1-11. Connecting Power to the CRD8800B Cradle
2. Insert the terminal into the cradle. The terminal starts to charge automatically.
F1
F1
F2
F3
F4
F2
F3
F4
ENTER
CRD8800
CRD8800B
Figure 1-12. Inserting the Terminal into the Cradle
The standard battery usually fully charges in approximately 2 1/2 hours and the optional
larger capacity battery usually fully charges in approximately five hours.
1-12
Getting Started
Using the Four-Slot Cradles
To charge the terminal’s battery using the Four-Slot Charging Cradle or the Four-Slot
Ethernet Cradle:
1. Connect the cradle to a power source.
Power
Port
AC Line
Cord
Power
Supply
Figure 1-13. Connecting Power to the Four-Slot Cradle
2. Insert the terminal into the cradle. The terminal starts to charge automatically.
Figure 1-14. Inserting the Terminal into the Four-Slot Cradle
The standard battery usually fully charges in approximately 2 1/2 hours and the optional
larger capacity battery usually fully charges in approximately five hours.
1-13
PPT 8800 Series Product Reference Guide for Embedded Windows® CE .NET
Using the Universal Cable Cup
To charge the terminal’s battery using the Universal Cable Cup with the vehicle charging
adapter or the wall outlet power supply and line cord:
1. Ensure the locking tabs are in the open position (up).
2. Insert the terminal into the cable cup.
3. Press down on the two locking tabs.
4. Pull on the cable cup to ensure that it is securely attached to the terminal.
Locking Tabs
Figure 1-15. Attaching the Universal Cable Cup to the Terminal
5. Open the rubber cap covering the power port.
Rubber
Cap
Figure 1-16. Connecting the Power Cable
6. Plug the power connector into the power port.
1-14
Getting Started
7. Wrap the cable around the cable support.
Cable
Support
Back of
Cable Cup
Figure 1-17. Securing the Cable
8. Connect the other end of the cable to a vehicle power adapter or appropriate power
source.
Vehicle Charging Adapter
Power Supply
Figure 1-18. Connecting to Power Source
The standard battery usually fully charges in approximately 2 1/2 hours and the optional
larger capacity battery usually fully charges in approximately five hours.
1-15
PPT 8800 Series Product Reference Guide for Embedded Windows® CE .NET
Charging Spare Batteries
A spare battery can be charged using the single-slot cradle(s).
Note: You can also use a UBC adaptor to charge spare batteries. Refer to
the UBC 2000 Universal Battery Charge Product Guide for more
information.
Using the CRD8800 Single-Slot Cradle
The CRD8800 Single-Slot Serial Cradle charges only the standard battery.
1. Connect the cradle to a power source.
AC Line
Cord
Power
Supply
Spare Battery
Charging Slot
Power
Port
Figure 1-19. Connecting Power to the CRD8800 Cradle
2. Insert the battery into the spare battery charging slot on the back of the cradle.
Position it with the charging contacts facing down (over charging pins) and gently
press down on the battery to ensure proper contact.
The spare battery charging LED turns red to indicate that the spare battery is charging. The
battery fully charges in approximately 2 1/2 hours. See Charge LED Indicator on page 1-19
for spare battery charging indications.
1-16
Getting Started
Using the CRD8800B Single-Slot Cradle
The CRD8800B Single-Slot Serial Cradle charges both the standard and larger capacity
battery in the spare battery well.
1. Connect the cradle to a power source.
Spare Battery
Charging Well
Power
Port
Line
Cord
Power
Supply
Figure 1-20. Connecting Power to the CRD8800B Cradle
2. Insert the battery into the spare battery charging well on the back of the cradle.
Insert the contact end first and then press the back end into the well.
Standard Battery
Larger Capacity Battery
Figure 1-21. Inserting the Spare Battery into the Battery Well
1-17
PPT 8800 Series Product Reference Guide for Embedded Windows® CE .NET
The spare battery charging LED turns red to indicate that the spare battery is charging. The
standard battery usually fully charges in approximately 2 1/2 hours and the optional larger
capacity battery usually fully charges in approximately five hours. See Charge LED
Indicator on page 1-19 for spare battery charging indications.
Using the UBC Battery Adapter
1. Insert the appropriate battery adapter (up to four) into the UBC 2000 charger base.
2. Insert the battery into its appropriate adapter. Ensure the polarity markings on the
battery (+, -) match with those of the adapter.
Battery Adapter
Battery status
display
Charger base
Figure 1-22. Inserting the Spare Battery
When the battery is inserted, the charging system begins the rapid charge cycle. When this
cycle is completed, the “READY” indicator on the battery status display turns solid green,
and the battery is charged to approximately 95% of its rated capacity. To attain 100% of its
capacity the battery should remain in the charger for 3 hours. A charged battery may be
stored in the charger indefinitely. Upon completion of the charging cycle, the charger
switches to “Maintenance Mode” where it maintains the battery at 100% of its rated
capacity.
Caution
Do not charge a battery that is below 0° C (32° F) or above 45° C (113° F).
Allow the battery to warm up to room temperature before charging.
1-18
Getting Started
Charge LED Indicator
Table 1-1. Charge LED Indicator
LED
Indication
Spare Battery Charging (Cradle LED)
Off
No spare battery in slot; spare battery not placed
correctly; cradle is not powered.
Solid red
Spare battery is charging.
Flashing red
Error in charging; check placement of spare
battery.
Solid green
Charging is complete.
Starting the Terminal
Press the
button to turn on the terminal. If the terminal does not power on, perform a
hard reset. See Resetting the Terminal on page 2-15.
When turning the terminal on for the first time, the terminal initializes its Flash File system,
the Symbol splash screen displays for about a minute followed by the calibration screen.
Note that these screens also appear every time you perform a hard reset.
Calibrating the Screen
To calibrate the screen so the cursor on the touch screen aligns with the tip of your stylus:
1. Remove the stylus from its storage silo on the back of the terminal.
2. Carefully press and briefly hold the tip of stylus on the center of each target that
appears on the screen.
1-19
PPT 8800 Series Product Reference Guide for Embedded Windows® CE .NET
Note: To re-calibrate the screen at anytime, press
+
on a 15-key
terminal or press
+
on a Standard 6-key terminal to launch
the calibration screen application.
Figure 1-23. Calibration Screen
1-20
Getting Started
Checking Battery Power
To check whether the main battery or backup battery in the terminal is charged, tap Start Settings - Control Panel. Double-tap the Power icon to display the Power Properties
window. (If the Battery tab is not displayed, tap the Battery tab.)
Figure 1-24. Power Properties Window
To save battery power, set your terminal to turn off after a specified number of minutes.
Refer to Power on page 3-32 to set power management options.
Replacing the Handstrap
The terminal has a factory-installed handstrap which increases comfort when holding the
terminal for extended periods of time. There are two types of handstraps depending upon
the configuration of the terminal; a handstrap that has a clip that mounts to the terminal and
a handstrap snaps onto the top connector. The handstrap may be removed or replaced, if
damaged.
1-21
PPT 8800 Series Product Reference Guide for Embedded Windows® CE .NET
Handstrap with Clip
To replace the handstrap:
1. Unhook the bottom of the handstrap from the handstrap connector on the battery
cover.
2. Remove the metal piece, threaded through the metal handstrap connector on the
back of the terminal.
Metal handstrap
connector
Metal piece
Handstrap
connector
Figure 1-25. Handstrap Replacement
3. Thread the metal piece of the new handstrap through the metal handstrap
connector on the back of the terminal.
4. Slide the flat metal piece into the handstrap connector on the battery cover.
1-22
Getting Started
Attaching the Neck Strap
To attach the neck strap to the terminal:
1. Thread the elastic band on the neck strap through the handstrap connector on the
back of the terminal.
2. Slip the strap through the elastic band, and pull it through to secure the strap to the
connector.
Thread elastic band
through connector
Figure 1-26. Attaching the Neck Strap
1-23
PPT 8800 Series Product Reference Guide for Embedded Windows® CE .NET
Configuring the Terminal
Refer to the following chapters to configure the terminal:
•
For customizing the settings on your terminal, see Chapter 3, Settings.
•
To set up ActiveSync to synchronize your terminal with your host computer, see
Chapter 4, Communications.
•
To configure your terminal for Spectrum24, see Chapter 6, Spectrum24 Network
Configuration.
•
To install development software on your development PC, see Chapter 8, Software
Installation on Development PC.
•
To configure your terminal using the Terminal Configuration Manager, see Chapter
9, Configuring the Terminal.
•
To set up AirBEAM to synchronize your terminal with your host server, see Chapter
10, AirBEAM Smart.
Accessories
Universal Cable Cup
The UCC 8800 Universal Cable Cup provides the ability to connect the terminal to printers
and vending machines, and to charge the terminal using the vehicle charging adapter or
the wall outlet power supply and line cord.
Connecting to the Terminal
1. Ensure that locking tabs are in the open position (up).
Locking Tabs
Figure 1-27. Insert Terminal Into Cable Cup
1-24
Getting Started
2. Insert the terminal into the cable cup.
3. Press down on the two locking tabs.
4. Pull on the cable cup to ensure that it is securely seated on the terminal.
Removing from the Terminal
1. Lift the two locking tabs.
2. Pull the cable cup from the terminal.
Connecting the Power Cable
1. Open the rubber cap covering the power port.
Rubber
Cap
Cable
Support
Back of
Cable Cup
Figure 1-28. Connecting Power Connector to Cable Cup
2. Plug the power connector into the power port.
3. Wrap the cable around the cable support.
4. Connect the other end of the cable to the appropriate power source.
1-25
PPT 8800 Series Product Reference Guide for Embedded Windows® CE .NET
Connecting Communication Cable
1. Open the rubber cap covering the serial port.
Rubber
Cap
Connector
Screws
Figure 1-29. Connect Communication Cable to Cable Cup
2. Connect the cable connector to the serial port.
3. Secure the connector to the cable cup by tightening the two connector screws.
4. Connect the other end of the cable to the appropriate device.
Magnetic Strip Reader
The MSR8800 Magnetic Stripe Reader is an essential accessory for the PPT 8800 Series
terminal, allowing easy data capture with the swipe of a magnetic stripe card. The magnetic
stripe reader snaps easily on to the bottom of the PPT 8800 Series terminal, and can be
easily removed when not in use.
Installing the MSR
1. Ensure that locking tabs are in the open position (up).
2. Insert the terminal into the MSR.
3. Press down on the two locking tabs.
1-26
Getting Started
4. Pull on the MSR to ensure that it is securely seated on the terminal.
Locking Tabs
Figure 1-30. MSR Installation
Removing the MSR
1. Lift the two locking tabs.
2. Pull the MSR8800 from the terminal.
Using the MSR
In order to use the MSR, your terminal must have an application installed which accepts
magnetic stripe data. Your terminal has a terminal emulator installed which can be used to
access data acquired by the MSR.
To use the terminal emulator you must create a new session or connect using an existing
one. Depending on your terminal’s operating system, use the appropriate set of steps
below to create a new terminal session.
1. Select Start - Programs - Communication - Terminal.
2. Double-tap the Make a New Session icon.
3. In the Session Name box, enter a name for the session.
4. In the Select a Modem list, select the name of your modem or Hayes Compatible
on Com1:.
5. Tap Configure under your modem selection.
6. From the Baud Rate: drop-down list, select 9600.
1-27
PPT 8800 Series Product Reference Guide for Embedded Windows® CE .NET
7. Under Terminal, check both checkboxes.
8. Check the Manual Dial checkbox.
9. Tap OK.
10. On the Windows CE Networking dialog, tap OK.
11. Enter a telephone number. It does not need to be a valid number.
12. Select the Emulation tab.
13. In the Choose an emulation type list, select DEC VT-100 (default).
14. In the Code page selection list, select Auto-detect (default).
15. Check the Local Echo checkbox.
16. In the Use small font by default box, set your font preference.
17. In the CR -> CR/LF box, check the Inbound checkbox.
18. In the Automatic Scrolling box, set your scrolling preference.
19. Tap OK. A terminal emulation window opens.
Swipe the magnetic stripe card through the reader, ensuring the magnetic stripe on the card
is positioned as shown. Data encoded on the magnetic stripe displays in the terminal
window on the terminal.
Figure 1-31. Swiping a Card
Note: The card may be swiped in either direction, from left to right, or from
right to left. For best results, gently press down on the card while
swiping to ensure contact with the bottom of the reader.
If the terminal is left idle long enough to go into the Suspend-Resume state, or the power
is turned off and then on again, it may be necessary to close and restart the terminal
program to reinitialize the serial port.
1-28
Getting Started
To disconnect the terminal emulation, select File - Cancel. The session you created
appears as an icon in the Terminal folder. You can create a desktop shortcut for the session,
and connect by double-tapping it.
Charging the Terminal’s Battery
The terminal’s battery can be charged while the MSR is installed on the bottom of the
terminal, using the Serial Charging Cable (p/n 25-38383-01) and power supply (p/n 5014000-107). The standard battery charges in approximately 2 1/2 hours.
Power Supply
Serial Charging Cable
Figure 1-32. Charging the Terminal Using the MSR
1-29
PPT 8800 Series Product Reference Guide for Embedded Windows® CE .NET
1-30
Chapter 2
Operating the PPT 8800
Chapter Contents
Introduction . . . . . . . . . . . . . . . . . . . . . . . . . . . . . . . . . . . . . . . . . . . . . . . . . . . . . . . . . . . . . . . . . . 2-3
Using the Power Button . . . . . . . . . . . . . . . . . . . . . . . . . . . . . . . . . . . . . . . . . . . . . . . . . . . . . . . . . 2-3
Adjusting the Backlight . . . . . . . . . . . . . . . . . . . . . . . . . . . . . . . . . . . . . . . . . . . . . . . . . . . . . . . . . 2-3
Standard 6-Key Configuration . . . . . . . . . . . . . . . . . . . . . . . . . . . . . . . . . . . . . . . . . . . . . . . . 2-3
15-Key Configuration . . . . . . . . . . . . . . . . . . . . . . . . . . . . . . . . . . . . . . . . . . . . . . . . . . . . . . . 2-3
Using the Stylus . . . . . . . . . . . . . . . . . . . . . . . . . . . . . . . . . . . . . . . . . . . . . . . . . . . . . . . . . . . . . . . 2-4
Using the Keyboard . . . . . . . . . . . . . . . . . . . . . . . . . . . . . . . . . . . . . . . . . . . . . . . . . . . . . . . . . . . . 2-4
Standard 6-Key Configuration . . . . . . . . . . . . . . . . . . . . . . . . . . . . . . . . . . . . . . . . . . . . . . . . 2-4
15-Key Configuration . . . . . . . . . . . . . . . . . . . . . . . . . . . . . . . . . . . . . . . . . . . . . . . . . . . . . . . 2-5
Desktop . . . . . . . . . . . . . . . . . . . . . . . . . . . . . . . . . . . . . . . . . . . . . . . . . . . . . . . . . . . . . . . . . . . . . 2-8
Taskbar. . . . . . . . . . . . . . . . . . . . . . . . . . . . . . . . . . . . . . . . . . . . . . . . . . . . . . . . . . . . . . . . . . 2-9
Start Button . . . . . . . . . . . . . . . . . . . . . . . . . . . . . . . . . . . . . . . . . . . . . . . . . . . . . . . . . . . 2-9
Open Programs . . . . . . . . . . . . . . . . . . . . . . . . . . . . . . . . . . . . . . . . . . . . . . . . . . . . . . . 2-10
Status Icons. . . . . . . . . . . . . . . . . . . . . . . . . . . . . . . . . . . . . . . . . . . . . . . . . . . . . . . . . . 2-10
Date/Time Properties . . . . . . . . . . . . . . . . . . . . . . . . . . . . . . . . . . . . . . . . . . . . . . . . . . 2-11
Desktop Button . . . . . . . . . . . . . . . . . . . . . . . . . . . . . . . . . . . . . . . . . . . . . . . . . . . . . . . 2-11
Taskbar and Start Menu Settings . . . . . . . . . . . . . . . . . . . . . . . . . . . . . . . . . . . . . . . . . 2-11
Entering Information . . . . . . . . . . . . . . . . . . . . . . . . . . . . . . . . . . . . . . . . . . . . . . . . . . . . . . . . . . 2-12
Entering Information Using 15-Key Keypad . . . . . . . . . . . . . . . . . . . . . . . . . . . . . . . . . . . . . 2-12
Entering Information Using the Keyboard Input Panel . . . . . . . . . . . . . . . . . . . . . . . . . . . . . 2-12
Entering Data via the Bar Code Scanner (Scan Wedge) . . . . . . . . . . . . . . . . . . . . . . . . . . . 2-13
Scanning . . . . . . . . . . . . . . . . . . . . . . . . . . . . . . . . . . . . . . . . . . . . . . . . . . . . . . . . . . . . . . . . . . . 2-13
Scan LED Indicator. . . . . . . . . . . . . . . . . . . . . . . . . . . . . . . . . . . . . . . . . . . . . . . . . . . . . . . . 2-14
Resetting the Terminal. . . . . . . . . . . . . . . . . . . . . . . . . . . . . . . . . . . . . . . . . . . . . . . . . . . . . . . . . 2-15
Performing a Soft Reset . . . . . . . . . . . . . . . . . . . . . . . . . . . . . . . . . . . . . . . . . . . . . . . . . . . . 2-15
Performing a Hard Reset . . . . . . . . . . . . . . . . . . . . . . . . . . . . . . . . . . . . . . . . . . . . . . . . . . . 2-15
2-1
PPT 8800 Series Product Reference Guide for Embedded Windows® CE .NET
2-2
Operating the PPT 8800
Introduction
This chapter provides basic instructions for using and navigating the terminal.
Using the Power Button
Press the
button to turn the terminal on and off. See Starting the Terminal on page 1-19.
Adjusting the Backlight
Standard 6-Key Configuration
Use the key combinations listed in Table 2-1 to adjust the backlight.
Table 2-1. Standard 6-Key Keyboard Backlight Controls
Keys
Description
Press and hold
Turn backlight on or off.
Press
+
Decrease backlight (decrease brightness).
Press
+
Increase backlight (increase brightness).
15-Key Configuration
Use the key combinations listed in Table 2-2 to adjust the backlight.
Table 2-2. 15-Key Keyboard Backlight Controls
Keys
Description
Press and hold
Turn backlight on or off.
Press
+
Decrease backlight (decrease brightness).
Press
+
Increase backlight (increase brightness).
2-3
PPT 8800 Series Product Reference Guide for Embedded Windows® CE .NET
Using the Stylus
Your terminal has a stylus for selecting items and entering information. The stylus functions
as a mouse.
•
Tap: Touch the screen once with the stylus to press option buttons and open menu
items.
•
Double-Tap: Touch the screen twice to execute application software.
•
Drag: Hold the stylus on the screen and drag across the screen to select text and
images. Drag in a list to select multiple items.
Using the Keyboard
The terminal has two keyboard configurations; a standard 6-key configuration and a 15-key
configuration.
Standard 6-Key Configuration
The standard 6-key keyboard contains a power button, application keys, scroll keys and a
function key. Refer to Table 2-3 for descriptions for the keyboard buttons and keys.
Application
Keys
Scroll Up/Down Keys
Application
Keys
Function Key
Power Button
Enter Button
Figure 2-1. Standard 6-Key Configuration
Table 2-3. 6-Key Keyboard Actions
Key
Application
2-4
Action
These keys can be assigned to an application program. Refer
to Program Button Assignment on page 3-25 for default
settings.
Operating the PPT 8800
Table 2-3. 6-Key Keyboard Actions (Continued)
Key
Action
Scroll Up
Moves up from one item to another.
Increases the brightness of the backlight when simultaneously
pressed with the Function key.
Scroll Down
Moves down from one item to another.
Decreases the brightness of the backlight when simultaneously
pressed with the Function button.
Function
Executes an operation when it's pressed with another key
(keys) simultaneously, such as one of the Scroll keys.
Power
Powers the terminal on and off and turns the backlight on and
off when held.
Enter
Executes a selected item or function.
15-Key Configuration
The 15-key keypad uses an alphanumeric keypad that produces the 26-character alphabet
(A-Z, both lowercase and uppercase), numbers (0-9), function keys (F1 - F10) and assorted
characters. The keyboard is color-coded to indicate which modifier key (ALPHA or FUNC)
to press to produce a particular character or action. The keyboard default is numeric,
producing numbers.
2-5
PPT 8800 Series Product Reference Guide for Embedded Windows® CE .NET
Scroll Keys
Enter Key
Power Button
*
Function Key
.
Alpha Key
Alphanumberic
Keys
Figure 2-2. 15-Key Configuration
Table 2-4. 15-Key Keyboard Actions
Key
Action
Alpha
Press Alpha to toggle between alpha lower case, alpha uppercase and
numeric modes. The default is numeric mode. Pressing the ALPHA key
cycles through the input modes (Alpha Lowercase, Alpha Uppercase,
Numeric). In both alpha modes, pressing a key produces the yellow letter on
that key; in numeric mode, pressing a key produces the white number on that
key. Refer to Table 2-5.
Scroll Up
Moves the cursor up on the window in the numeric mode. Moves the cursor to
the right in the FUNC mode. In the alpha mode, is a space key.
Scroll Down
Moves the cursor down on the window in the numeric mode. Moves the cursor
to the left in the FUNC mode. In the alpha mode, is a backspace key.
Function
Execute an operation when pressed with another key simultaneously, such as
one of the Scroll buttons. Refer to Table 2-5. Executes the same function in
both the alpha and numeric modes.
Power
Powers the terminal on and off and turns the backlight on and off when held.
Enter
Executes a selected item or function.
2-6
Operating the PPT 8800
Table 2-5. 15-Key Keyboard Input Modes
Numeric Mode
Key
Alpha Lowercase Mode
FUNC+
Key
1st
Press
Alpha Uppercase Mode
2nd
3rd
4th
Press Press Press
1
1
F1
@
-
_
2
2
F2
a
b
3
3
F3
d
4
4
F4
5
5
6
2nd
3rd
4th
Press Press Press
:
?
!
c
A
B
C
e
f
D
E
F
g
h
i
G
H
I
F5
j
k
l
J
K
L
6
F6
m
n
o
M
N
O
7
7
F7
p
q
r
P
Q
R
8
8
F8
t
u
v
T
U
V
9
9
F9
w
x
y
W
X
Y
0
0
F10
UP
UP
RIGHT
SPACE
SPACE
DOWN
DOWN
LEFT
BK SPC
BK SPC
ENTER
ENTER
ENTER ENTER
/
1st
Press
s
z
,
S
Z
Note: The key functions can be changed by an application. The keyboard may not
function exactly as described.
Note: For detailed keyboard configurations including ASCII values and VK
codes, see Appendix B, Keyboard Maps.
For information about using the soft keyboard from the input panel, refer to Entering
Information on page 2-12.
2-7
PPT 8800 Series Product Reference Guide for Embedded Windows® CE .NET
Desktop
When you power on the terminal, the desktop window appears.
Figure 2-3. PPT 8800 Desktop
Major functions on the desktop include:
•
Recycle Bin: Dragging and dropping an unnecessary file on this icon transfers it to
Recycle Bin folder and the file is stored there until you empty the bin for deletion.
•
My Computer: Double tapping on this icon opens My Computer.
•
Internet Explorer: Double tapping on this icon open Internet Explorer application.
•
Taskbar: This contains the Start Button, Open Programs, Status Icons, Date/Time
Properties and the Desktop Button.
2-8
Operating the PPT 8800
Taskbar
The Taskbar at the bottom of the window displays the active programs, current time, battery
status and communication status.
Status Icons
Start Button
Open Programs
Desktop Button
Date/Time Properties
Figure 2-4. Taskbar
Start Button
The Start button is used to quickly start a program, find a file, access the settings window
or access help.
Figure 2-5. Start Menu
•
Tapping Programs displays Programs menu. See Chapter 5, Applications for
detailed information on available programs.
•
Tapping Favorites displays a list of files as your Favorites.
•
Tapping Documents displays files you have used or edited recently.
•
Tapping Settings displays Settings menu. See Chapter 3, Settings for detailed
information on terminal settings.
2-9
PPT 8800 Series Product Reference Guide for Embedded Windows® CE .NET
•
Tapping Help opens Windows CE Help.
•
Tapping Run opens Run… dialog to open a program.
Open Programs
If you have a number of programs open, you can use the buttons on the taskbar to toggle
between the open programs. Tapping on a button opens the associated program. These
buttons only appear if a program is open.
Status Icons
Status icons are shown in the taskbar to indicate present status of the terminal. Double
tapping each status icon displays the corresponding setup window and enables you to
change or adjust its settings from the window.
Table 2-6. Status Icons
Status Icon
Description
Indicates the current time.
This icon indicates that the keyboard input panel is selected.
This icon indicates that the keyboard input panel is hidden.
This icon indicates that the main battery is under charged or that the terminal is
operating on AC power.
Double tapping on this icon opens the Power Properties window.
This icon is displayed when the memory backup battery level is low. Charge the
battery.
This icon is displayed when the memory backup battery level is very low.
Charge the battery immediately.
This icon is displayed when the main battery level is low. Charge the battery.
This icon is displayed when the main battery level is very low. Charge the
battery immediately.
2-10
Operating the PPT 8800
Table 2-6. Status Icons (Continued)
Status Icon
Description
It is displayed when the terminal is connected to a host computer with a serial
cable.
Spectrum24 wireless connection status icon. Double-tap to open the Mobile
Companion utility (PPT 8846 Only).
Bluetooth icon. Tap to open the Bluetooth menu (PPT 8860 only).
Date/Time Properties
Double-tapping on the current time opens the Date/Time Properties window. Use this
window to customize the date and time for the terminal.
Desktop Button
The Desktop button allows you to hide all open programs and display the desktop.
Taskbar and Start Menu Settings
The behavior of the taskbar is controlled by the Taskbar and Start Menu Properties window.
To open the window:
1. Select Start - Settings - Taskbar and Start Menu... .
2. Select the General tab.
3. To enable the taskbar to always appear on top, select Always on top checkbox.
4. To allow the taskbar to disappear (hide) when not being used, select Auto hide
checkbox. To show the taskbar, tap the bottom of the display.
5. To display the clock on the taskbar, select Show Clock checkbox.
2-11
PPT 8800 Series Product Reference Guide for Embedded Windows® CE .NET
Entering Information
To enter information, you may:
•
Use the keypad (15-key configuration only).
•
Use the input panel (soft keyboard) to enter typed text.
•
Scan bar code data into data fields.
•
Use Microsoft® ActiveSync® to synchronize or copy information from your host
computer to your terminal. For more information on ActiveSync, see Chapter 4,
Communicationsor ActiveSync Help on your host computer.
Entering Information Using 15-Key Keypad
The 15-key keypad uses an alphanumeric keypad that produces the 26-character alphabet
(A-Z), numbers (0-9), Function keys (F1 - F10) and assorted characters. The keyboard is
color-coded to indicate which modifier key (Alpha or function) to press to produce a
particular character or action. The keyboard default is numeric, producing numbers.See
Using the Keyboard on page 2-4 and Appendix B, Keyboard Maps for keyboard functions.
Entering Information Using the Keyboard Input Panel
Use the keyboard input panel to enter information in any program. To show or hide the soft
keyboard, tap the Keyboard Input Panel icon:
Figure 2-6. Input Panel
To change keyboard input panel settings refer to Input Panel on page 3-22.
To type with the soft keyboard:
1. Double-tap the Keyboard Input Panel icon in the taskbar
or
Press Function + F2
or
2-12
Operating the PPT 8800
Single-tap the Keyboard Input panel icon in the taskbar and tap Keyboard in the
menu.
2. On the keyboard input panel, tap the keys with your stylus.
Entering Data via the Bar Code Scanner (Scan Wedge)
Using the Scan Wedge program, the integrated bar code scanner can scan data into data
fields in the same way data is entered via the keyboard. See ScanSamp2 on page 5-14 for
more information.
Scanning
The terminal has an integrated scanner which allows you to collect data by scanning one
or two-dimensional bar codes. See ScanSamp2 on page 5-14 for a sample scanning
application.
To scan bar codes with the PPT 8800:
1. Ensure that your terminal is loaded with a scanning application.
2. Aim the scan exit window at the bar code.
3. Press either the right or left scan trigger. Make sure the red scan beam covers the
entire bar code. The green scan LED lights and a beep sounds to indicate a
successful decode.
Figure 2-7. Scanning
2-13
PPT 8800 Series Product Reference Guide for Embedded Windows® CE .NET
Scan LED Indicator
See Parts of the Terminal on page 1-4 for the location of the Scan LED on the terminal.
Table 2-7. Scan LED Indicator
LED Status
2-14
Indication
Off
Not scanning.
Solid Red
Laser enabled. Scanning in process.
Solid Green
Successful decode.
Operating the PPT 8800
Resetting the Terminal
If the terminal stops responding to input, reset it.
Performing a Soft Reset
A soft reset restarts the terminal and saves all stored records and entries.
Caution
Files that remain open during a soft reset may not be retained.
DO NOT perform a soft reset if the terminal is suspended. Press the power
button to wake the terminal.
To perform a soft reset on the Standard 6-key keypad, press the Enter and
holding down either the left or right scan trigger and then releasing the keys.
keys while
To perform a soft reset on the 15-key keypad, press
and
keys while holding
down either the left or right scan trigger and then releasing the keys.
Performing a Hard Reset
A hard reset also restarts the terminal, but erases all stored records and entries. Therefore,
never perform a hard reset unless a soft reset does not solve the problem.
Note: You can restore any data previously synchronized with a computer
during the next ActiveSync operation. See Chapter 4,
Communications for detailed ActiveSync instructions.
To perform a hard reset:
1. Remove the battery cover.
2-15
PPT 8800 Series Product Reference Guide for Embedded Windows® CE .NET
2. While holding down the Function key, use the stylus to gently press the reset
button.
Reset
Button
Figure 2-8. Reset Button
3. Release the Function key.
4. Replace the battery cover.
5. Press
.
6. As the terminal initializes its Flash File system, the Symbol splash screen displays
for about a minute.
7. Calibrate the screen. See Calibrating the Screen on page 1-19 to perform an initial
setup of the terminal.
Caution
With a hard reset, formats, preferences, and other settings are restored to
their factory default settings.
2-16
Chapter 3
Settings
Chapter Contents
Introduction . . . . . . . . . . . . . . . . . . . . . . . . . . . . . . . . . . . . . . . . . . . . . . . . . . . . . . . . . . . . . . . . . . 3-3
Adjusting Settings . . . . . . . . . . . . . . . . . . . . . . . . . . . . . . . . . . . . . . . . . . . . . . . . . . . . . . . . . . . . . 3-3
Certificates . . . . . . . . . . . . . . . . . . . . . . . . . . . . . . . . . . . . . . . . . . . . . . . . . . . . . . . . . . . . . . . . . . . 3-7
Date/Time . . . . . . . . . . . . . . . . . . . . . . . . . . . . . . . . . . . . . . . . . . . . . . . . . . . . . . . . . . . . . . . . . . . 3-8
Device Management . . . . . . . . . . . . . . . . . . . . . . . . . . . . . . . . . . . . . . . . . . . . . . . . . . . . . . . . . . . 3-9
Resetting the Device Management Server . . . . . . . . . . . . . . . . . . . . . . . . . . . . . . . . . . . . . . . 3-9
Provisioning . . . . . . . . . . . . . . . . . . . . . . . . . . . . . . . . . . . . . . . . . . . . . . . . . . . . . . . . . . . . . 3-10
Polling the Management Server . . . . . . . . . . . . . . . . . . . . . . . . . . . . . . . . . . . . . . . . . . . . . . 3-11
Installing Optional Packages . . . . . . . . . . . . . . . . . . . . . . . . . . . . . . . . . . . . . . . . . . . . . . . . 3-12
Viewing Installed Packages. . . . . . . . . . . . . . . . . . . . . . . . . . . . . . . . . . . . . . . . . . . . . . 3-12
Information About Device Management . . . . . . . . . . . . . . . . . . . . . . . . . . . . . . . . . . . . . . . . 3-12
Dialing . . . . . . . . . . . . . . . . . . . . . . . . . . . . . . . . . . . . . . . . . . . . . . . . . . . . . . . . . . . . . . . . . . . . . 3-14
Adjusting Dialing Location Settings . . . . . . . . . . . . . . . . . . . . . . . . . . . . . . . . . . . . . . . . . . . 3-14
Adjust Dialing Patterns . . . . . . . . . . . . . . . . . . . . . . . . . . . . . . . . . . . . . . . . . . . . . . . . . . . . . 3-15
Display . . . . . . . . . . . . . . . . . . . . . . . . . . . . . . . . . . . . . . . . . . . . . . . . . . . . . . . . . . . . . . . . . . . . . 3-17
Selecting a Background Image. . . . . . . . . . . . . . . . . . . . . . . . . . . . . . . . . . . . . . . . . . . . . . . 3-17
Modifying the Desktop’s Appearance . . . . . . . . . . . . . . . . . . . . . . . . . . . . . . . . . . . . . . . . . . 3-17
Changing the Desktop's Color Scheme. . . . . . . . . . . . . . . . . . . . . . . . . . . . . . . . . . . . . 3-17
Creating a Custom Color Scheme. . . . . . . . . . . . . . . . . . . . . . . . . . . . . . . . . . . . . . . . . 3-18
Changing Backlight Settings. . . . . . . . . . . . . . . . . . . . . . . . . . . . . . . . . . . . . . . . . . . . . . . . . 3-18
Changing the Backlight Brightness. . . . . . . . . . . . . . . . . . . . . . . . . . . . . . . . . . . . . . . . . . . . 3-20
Input Panel. . . . . . . . . . . . . . . . . . . . . . . . . . . . . . . . . . . . . . . . . . . . . . . . . . . . . . . . . . . . . . . . . . 3-22
IrDA . . . . . . . . . . . . . . . . . . . . . . . . . . . . . . . . . . . . . . . . . . . . . . . . . . . . . . . . . . . . . . . . . . . . . . . 3-23
Keyboard . . . . . . . . . . . . . . . . . . . . . . . . . . . . . . . . . . . . . . . . . . . . . . . . . . . . . . . . . . . . . . . . . . . 3-24
Adjusting Keyboard Repeat Settings . . . . . . . . . . . . . . . . . . . . . . . . . . . . . . . . . . . . . . . . . . 3-24
Program Button Assignment. . . . . . . . . . . . . . . . . . . . . . . . . . . . . . . . . . . . . . . . . . . . . . . . . 3-25
3-1
PPT 8800 Series Product Reference Guide for Embedded Windows® CE .NET
Owner . . . . . . . . . . . . . . . . . . . . . . . . . . . . . . . . . . . . . . . . . . . . . . . . . . . . . . . . . . . . . . . . . . . . . . 3-27
Password . . . . . . . . . . . . . . . . . . . . . . . . . . . . . . . . . . . . . . . . . . . . . . . . . . . . . . . . . . . . . . . . . . . 3-30
PC Connection . . . . . . . . . . . . . . . . . . . . . . . . . . . . . . . . . . . . . . . . . . . . . . . . . . . . . . . . . . . . . . . 3-31
Power . . . . . . . . . . . . . . . . . . . . . . . . . . . . . . . . . . . . . . . . . . . . . . . . . . . . . . . . . . . . . . . . . . . . . . 3-32
Checking Battery Power Status . . . . . . . . . . . . . . . . . . . . . . . . . . . . . . . . . . . . . . . . . . . . . . . 3-32
Optimizing Battery Life. . . . . . . . . . . . . . . . . . . . . . . . . . . . . . . . . . . . . . . . . . . . . . . . . . . . . . 3-32
Setting Up Power Schemes . . . . . . . . . . . . . . . . . . . . . . . . . . . . . . . . . . . . . . . . . . . . . . . . . . 3-33
Checking the Power Levels . . . . . . . . . . . . . . . . . . . . . . . . . . . . . . . . . . . . . . . . . . . . . . . . . . 3-34
Regional Settings . . . . . . . . . . . . . . . . . . . . . . . . . . . . . . . . . . . . . . . . . . . . . . . . . . . . . . . . . . . . . 3-35
Remove Programs . . . . . . . . . . . . . . . . . . . . . . . . . . . . . . . . . . . . . . . . . . . . . . . . . . . . . . . . . . . . 3-38
Storage Manager . . . . . . . . . . . . . . . . . . . . . . . . . . . . . . . . . . . . . . . . . . . . . . . . . . . . . . . . . . . . . 3-39
Managing Storage Devices . . . . . . . . . . . . . . . . . . . . . . . . . . . . . . . . . . . . . . . . . . . . . . . . . . 3-39
Managing Disk Partitions . . . . . . . . . . . . . . . . . . . . . . . . . . . . . . . . . . . . . . . . . . . . . . . . . . . . 3-39
Creating A New Partition . . . . . . . . . . . . . . . . . . . . . . . . . . . . . . . . . . . . . . . . . . . . . . . . 3-40
Advanced Partition Options . . . . . . . . . . . . . . . . . . . . . . . . . . . . . . . . . . . . . . . . . . . . . . 3-40
Stylus . . . . . . . . . . . . . . . . . . . . . . . . . . . . . . . . . . . . . . . . . . . . . . . . . . . . . . . . . . . . . . . . . . . . . . 3-41
Adjusting the Stylus Double-tap Rate . . . . . . . . . . . . . . . . . . . . . . . . . . . . . . . . . . . . . . . . . . 3-41
Recalibrating the Touch Screen. . . . . . . . . . . . . . . . . . . . . . . . . . . . . . . . . . . . . . . . . . . . . . . 3-41
Symbol Settings . . . . . . . . . . . . . . . . . . . . . . . . . . . . . . . . . . . . . . . . . . . . . . . . . . . . . . . . . . . . . . 3-43
Waking the Terminal . . . . . . . . . . . . . . . . . . . . . . . . . . . . . . . . . . . . . . . . . . . . . . . . . . . . . . . 3-43
Settings Tab. . . . . . . . . . . . . . . . . . . . . . . . . . . . . . . . . . . . . . . . . . . . . . . . . . . . . . . . . . . . . . 3-44
System Tab . . . . . . . . . . . . . . . . . . . . . . . . . . . . . . . . . . . . . . . . . . . . . . . . . . . . . . . . . . . . . . 3-45
Config Tab . . . . . . . . . . . . . . . . . . . . . . . . . . . . . . . . . . . . . . . . . . . . . . . . . . . . . . . . . . . . . . . 3-46
System . . . . . . . . . . . . . . . . . . . . . . . . . . . . . . . . . . . . . . . . . . . . . . . . . . . . . . . . . . . . . . . . . . . . . 3-48
General Tab . . . . . . . . . . . . . . . . . . . . . . . . . . . . . . . . . . . . . . . . . . . . . . . . . . . . . . . . . . . . . . 3-48
Memory Tab. . . . . . . . . . . . . . . . . . . . . . . . . . . . . . . . . . . . . . . . . . . . . . . . . . . . . . . . . . . . . . 3-48
Programs Located in ROM and RAM . . . . . . . . . . . . . . . . . . . . . . . . . . . . . . . . . . . . . . . 3-49
Device Name Tab . . . . . . . . . . . . . . . . . . . . . . . . . . . . . . . . . . . . . . . . . . . . . . . . . . . . . . . . . 3-49
Copyrights Tab . . . . . . . . . . . . . . . . . . . . . . . . . . . . . . . . . . . . . . . . . . . . . . . . . . . . . . . . . . . 3-50
Volume & Sounds . . . . . . . . . . . . . . . . . . . . . . . . . . . . . . . . . . . . . . . . . . . . . . . . . . . . . . . . . . . . . 3-52
Adjusting Volume and Sounds. . . . . . . . . . . . . . . . . . . . . . . . . . . . . . . . . . . . . . . . . . . . . . . . 3-52
Changing Event Sounds . . . . . . . . . . . . . . . . . . . . . . . . . . . . . . . . . . . . . . . . . . . . . . . . . . . . 3-52
Adjusting Microphone Gain . . . . . . . . . . . . . . . . . . . . . . . . . . . . . . . . . . . . . . . . . . . . . . . . . . 3-53
3-2
Settings
Introduction
This chapter provides basic instructions for customizing your terminal by adjusting settings.
Adjusting Settings
To view available options for your terminal settings, tap Start - Settings - Control Panel.
Figure 3-1. Control Panel Window
Table 3-1 lists the applications available in the Control Panel.
Table 3-1. Control Panel Applications
Icon
Description
View and modify digital certificates which are used by some applications for
establishing trust for secure communications. See Certificates on page 3-7 for
more information.
Change date, time and time zone information. See Date/Time on page 3-8 for
more information.
3-3
PPT 8800 Series Product Reference Guide for Embedded Windows® CE .NET
Table 3-1. Control Panel Applications (Continued)
Icon
Description
Configure device management, install and view available software. See Device
Management on page 3-9 for more information.
Set dialing properties for modem communication and change telephony settings.
See Dialing on page 3-14 for more information.
Change desktop background, appearance, backlight, and brightness. See
Display on page 3-17 for more information.
Switch input methods and set input options. See Input Panel on page 3-22 for
more information.
Turns the IrDA port on or off to allow the Bluetooth radio access to two more
COM ports (PPT 8860 only). See IrDA on page 3-23 for more information.
Change keyboard repeat delay and rate. See Keyboard on page 3-24 for more
information.
Adjust double-click sensitivity for both the speed and timing.
Connect to other computers, networks, and the Internet through a modem. See
Certificates on page 3-7 for more information.
3-4
Settings
Table 3-1. Control Panel Applications (Continued)
Icon
Description
Change owner's personal profiles. See Owner on page 3-27 for more
information.
Change owner's password and set security options. See Password on page 330 for more information.
Change settings for connectivity of a host computer. See PC Connection on
page 3-31 for more information.
View battery status and change power management options. See Power on
page 3-32 for more information.
Change how numbers, currencies, dates, and times are displayed. See Regional
Settings on page 3-35 for more information.
Remove loaded programs from RAM. See Remove Programs on page 3-38 for
more information.
Manage storage media and disk partitions. See Storage Manager on page 3-39
for more information.
Calibrate the touch screen and adjust double-tap timing. See Stylus on page 341 for more information.
3-5
PPT 8800 Series Product Reference Guide for Embedded Windows® CE .NET
Table 3-1. Control Panel Applications (Continued)
Icon
Description
Change settings unique to the PPT 8800. See Symbol Settings on page 3-43 for
more information.
View system information, and change memory settings. See System on page 348 for more information.
Set event sounds and volume options. See Volume & Sounds on page 3-52 for
more information.
To change a terminal setting:
1. Tap Start - Settings - Control Panel. The Control Panel window appears.
2. Double-tap on the item for which you would like to change settings.
3. If necessary, tap on the each tab to switch displayed window.
4. Change setting(s).
5. Tap OK. The Properties window closes.
Note: Depending on what you set, you may be required to reset the
terminal.
3-6
Settings
Certificates
Certificates are used by some applications for establishing trust and for secure
communications. Certificates are signed and issued by certificate authorities and are valid
for a prescribed period of time. Windows CE manages multiple certificate stores.
1. Select Start - Settings - Control Panel.
2. Double-tap the Certificates icon.
Figure 3-2. Certificates Window
3. In the Stores tab, select the certificate store you wish to view or modify from the
drop-down list.
•
The My Certificates store contains your personal certificates, which you use to
identify yourself.
•
Intermediate certificate authorities that help establish a chain of trust are stored
in the Other Authorities store.
•
The Trusted Authorities store lists the top-level certificates for authorities you
trust.
4. To add a certificate or associated private key to the selected store, tap Import.
5. To view more details of the selected certificate, such as the expanded name or
expiration date, tap View.
6. To delete the selected certificate from the store, tap Remove.
7. Tap OK for the settings to take effect.
3-7
PPT 8800 Series Product Reference Guide for Embedded Windows® CE .NET
Date/Time
Use the Date/Time Properties window to change the date, time and time zone information.
1. Select Start - Settings - Control Panel.
2. Double-tap the Date/Time icon.
Figure 3-3. Date/Time Properties Window
3. To set the month in the Date/Time tab, select the arrows on either side of the month
shown, or tap on the month and select from a list of months.
4. To set the date, select it in the calendar.
5. To set the time, enter it in the box under the month calendar.
6. To change the time zone, select it from the list labeled Time Zone.
7. Tap Apply or OK for the settings to take effect.
3-8
Settings
Device Management
Device Management is one of the key requirements for deploying embedded devices in the
Enterprise scenario. A wide variety of enterprises can benefit from having devices that are
manageable off the shelf. Managing devices involves being able to distribute software,
keep track of software and hardware, inventory, and configure devices remotely.
Current methods of installing files or applications on Microsoft Windows CE-based devices
require user interaction and offer no way of keeping a device updated over time, nor do they
offer an administrator an easy way to centrally distribute software, and manage hardware
and software.
A download/install engine that allows users to receive software and notifications when there
are new applications or Operating System (OS) updates is the basis for a device
management client. To enable configuration and customized management, the device
management system also allows the downloading and running of scripts. The Windows CE
Device Management Client works with the Microsoft Systems Management Server (SMS),
one of the premier Enterprise management software offerings in the industry.
Use Device Management settings to configure device management, to install and view
available software, and to find information about the Device Management client and server.
Resetting the Device Management Server
1. Select Start - Settings - Control Panel.
2. Double-tap the Device Management icon.
3-9
PPT 8800 Series Product Reference Guide for Embedded Windows® CE .NET
3. Select the Configure tab.
Figure 3-4. Device Management - Configure Tab
4. In the Current management server field, enter the name of the new device
management server.
Your System Administrator can supply this name.
5. Tap OK. This closes the window and sets up the next poll to contact the new server.
Note: This does not re-provision the device. If you are prompted to reprovision the device, see Provisioning.
Provisioning
1. Select Start - Settings - Control Panel.
2. Double-tap the Device Management icon.
3. Select the Configure tab.
4. In Current management server field, enter the name of the new device
management server.
Your System Administrator can supply this name.
5. From the list of Available Actions, select Provision Device for Management Server.
6. Tap the Run Action button. This contacts the Management Server and brings up
further provisioning steps. It also automatically schedules a new Poll task.
3-10
Settings
Note: Provisioning requires that an application capable of displaying html
pages is available.
Polling the Management Server
Ensure that provisioning the terminal is complete before polling.
1. In the Device Management window, select the Configure tab.
2. Enter the name of the correct device management server in the Current
management server field.
3. Ensure that a network connection is available.
4. From the list of Available actions, select Poll the Management Server.
5. Tap the Run Action button. This schedules a poll task that contacts the
Management Server immediately.
Note: You can do polling only if provisioning is already complete. A
network connection should be available. If the network connection is
not available, the poll is automatically rescheduled after a default
interval.
3-11
PPT 8800 Series Product Reference Guide for Embedded Windows® CE .NET
Installing Optional Packages
If your system administrator has made optional packages available for the terminal, you can
install them using the following steps:
1. Select the Software Packages tab.
Figure 3-5. Device Management Window - Software Packages Tab
2. Choose the package to install from the listed packages.
3. Tap the Install button. This causes the Management Server to download the
package.
Viewing Installed Packages
To view packages that the Management Server installed on the terminal:
1. Select the Software Packages tab.
2. Tap the View downloaded packages button. This launches a new window that
displays the downloaded packages.
Information About Device Management
Select the Information tab to display:
•
Device Management client version and ID number
•
Management Server Name and ID
•
Polling times.
3-12
Settings
Figure 3-6. Device Management - Information Tab
3-13
PPT 8800 Series Product Reference Guide for Embedded Windows® CE .NET
Dialing
Use the Dialing Properties window to set dialing properties for modem communication and
change telephony settings.
Adjusting Dialing Location Settings
1. Select Start - Settings - Control Panel.
2. Double-tap the Dialing icon.
Figure 3-7. Dialing Properties Window
3. In the Location: drop-down list, select the location for which you want to change
settings.
To create a new location, tap the New button. Enter the name of the location, and
then press the Enter key.
To remove a location, select the location from the drop-down list and tap Delete.
4. Enter or edit the area code and local country code as needed.
5. Select Tone dialing or Pulse dialing. (Most phone lines are tone.)
6. To automatically disable call waiting, select the Disable call waiting check box.
Then select the appropriate number sequence from the dial drop-down list, or enter
a new sequence.
3-14
Settings
Adjust Dialing Patterns
To edit dialing patterns:
1. In the Dialing Properties window, tap Edit.
Figure 3-8. Edit Dialing Patterns Window
2. Using the codes listed in Table 3-2, revise the dialing patterns as required.
Note: If you need to use characters other than the ones listed in Table 32, use manual dialing.
Hyphens and spaces in dialing strings are ignored.
Some modems may not respond to the characters listed, even
though your terminal lets you add them to the dial string.
3. Press the enter key to save settings or tap X to close without saving the settings.
Table 3-2. Dialing Characters
To
Enter
Dial country code (specified by the dialing program)
E
Dial area code (specified by the dialing program)
F
Dial local number (specified by the dialing program)
G
Insert a pause (typically 2 seconds)
, (comma)
Wait for credit card tone (specified by the dialing
program)
$(dollar sign)
Wait for second tone (typically used after $)
W
Tone-dial the following numbers
T
3-15
PPT 8800 Series Product Reference Guide for Embedded Windows® CE .NET
Table 3-2. Dialing Characters (Continued)
To
3-16
Enter
Pulse-dial the following numbers
P
Transfer to another extension (0.5 sec on hook, 0.5
sec off hook)
! (hookflash)
Wait for “quiet answer” (typically indicated by 6.5
seconds of silence followed by a ringing tone)
@
Use special controls on some systems (tone only)
ABCD or * or #
Settings
Display
Use the Display Properties window to change desktop background, appearance, backlight
and brightness settings.
Selecting a Background Image
To change the background image on the desktop:
1. Select Start - Settings - Control Panel.
2. Double-tap the Display icon. Select the Background tab.
Figure 3-9. Display Properties - Background Tab
3. From the Image: drop-down list, select an image you want as the background of
the desktop. To locate an image in another folder, tap Browse.
4. To have the image cover the entire background, select Tile image on background.
5. Tap OK to save settings.
Modifying the Desktop’s Appearance
The following sections describe how to change the appearance of the desktop.
Changing the Desktop's Color Scheme
To change the color scheme of the desktop:
3-17
PPT 8800 Series Product Reference Guide for Embedded Windows® CE .NET
1. Select the Appearance tab.
Figure 3-10. Display Properties - Appearance Tab
2. From the Scheme: drop-down list, select a scheme.
3. View your choice in the preview box. If you like the scheme, tap Apply.
Creating a Custom Color Scheme
To create a custom scheme for your desktop:
1. Select the Appearance tab.
2. From the Item: drop-down list, select a display item.
3. Tap the square next to the Item: drop-down list.
4. From the Basic colors: list, select a color, and tap OK.
5. View your color selection(s) in the preview box.
6. To save the scheme, tap Save.
7. In the Save scheme As box, enter a name for the scheme, and tap OK.
8. Tap Apply.
Changing Backlight Settings
Change the backlight settings to conserve battery power or to turn off the backlight when
the terminal is idle. You also have options to turn on the backlight when you tap the screen
or press a button.
3-18
Settings
1. Select the Backlight tab.
Figure 3-11. Display Properties - Backlight Tab
2. Make desired selections. Refer to Table 3-3 for backlight settings.
Note: When you perform a hard reset all settings selected in this view
return to the default settings. The settings are maintained after a soft
reset.
Table 3-3. Backlight Settings
Status
Conditions of light On/Off
Default (Hard Reset)
On Battery Power
Select the Turn off backlight if device is
not used for checkbox to turn off the
backlight after a certain period of time
has passed unused. Period of time can
be selected from the list. Available
timings are 10 sec, 30 sec, 1 min, 2
min, 3 min, 4 min and 5 min.
Checkbox is selected.
Default time is one
minute.
Select the Turn on backlight when a
button is pressed or the screen is
tapped checkbox to turn on the
backlight when a button is pressed or
the screen is tapped.
Checkbox is not
selected.
3-19
PPT 8800 Series Product Reference Guide for Embedded Windows® CE .NET
Table 3-3. Backlight Settings (Continued)
Status
On External
Power
Conditions of light On/Off
Default (Hard Reset)
Select the Turn off backlight if device is
not used for checkbox to turn off the
backlight after a certain period of time
has passed unused. Period of time can
be selected from the list. Available
timings are 1 min, 2 min, 3 min, 4 min,
5 min, 6 min, 7 min, 8 min, 9 min and 10
min.
Checkbox is selected.
Default time is one
minute.
Select the Turn on backlight when a
button is pressed or the screen is
tapped checkbox to turn on the
backlight when a button is pressed or
the screen is tapped.
Checkbox is not
selected.
Changing the Backlight Brightness
To change the brightness of the backlight:
1. Select the Brightness tab.
Figure 3-12. Display Properties - Brightness Tab
3-20
Settings
2. Select one of the brightness levels listed in Table 3-4.
Table 3-4. Brightness Settings
Brightness
Comment
Power save
Power-saving mode. Default after hard reset.
Low Bright
Slightly dark
Med Bright
Medium
High Bright
Slightly bright
Super Bright
Very bright
Note: Backlight brightness goes to “Power save” automatically when the
battery is low, regardless of the setting.
3-21
PPT 8800 Series Product Reference Guide for Embedded Windows® CE .NET
Input Panel
Use the Input Panel Properties window to switch input methods and set input options.
1. Select Start - Settings - Control Panel.
2. Double-tap the Input Panel icon.
Figure 3-13. Input Panel Properties
3. From the Current input method: drop-down list, select the input method.
4. Tap Options.
Figure 3-14. Soft Keyboard Options Window
5. Make the desired changes to the settings.
6. Tap OK.
7. Tap OK to apply the changes.
3-22
Settings
IrDA
Use the IrDA Settings window to enable or disable the IrDA.
1. Select Start - Settings - Control Panel.
2. Double-tap the IrDA icon. The IrDA Settings window appears.
Figure 3-15. IrDA Settings Window
3. Select either Enable IrDA ports or Disable IrDA ports radio button.
4. Tap OK. A confirmation box appears requesting to reset the terminal. Tap OK.
5. Perform a soft reset. See Resetting the Terminal on page 2-15.
3-23
PPT 8800 Series Product Reference Guide for Embedded Windows® CE .NET
Keyboard
Use the Keyboard Properties window to change the keyboard repeat rate and delay. You
can also assign a function to each key on the terminal’s keyboard in this window.
Adjusting Keyboard Repeat Settings
To adjust the keyboard repeat rate:
1. Select Start - Settings - Control Panel.
2. Double-tap the Keyboard icon.
3. Select the Repeat tab.
Figure 3-16. Keyboard Properties - Repeat Tab
4. Tap the Enable character repeat check box.
5. To change the amount of time between depressions before repetition starts, adjust
the Repeat delay slider.
6. To change the repeat rate, adjust the Repeat rate slider.
7. Test your new settings in the text box provided.
8. Tap OK to apply the changes.
3-24
Settings
Program Button Assignment
Note: In addition to key functions, you can assign an application to a key.
Then you can open a frequently used application by pressing one
key.
To assign a function to a key on the keypad:
1. Select the Program Buttons tab.
Figure 3-17. Keyboard Properties - Program Buttons Tab
2. Select a key from the Buttons list.
3. Select a key or application from the Button Assignment drop-down list. Table 3-5
lists available options.
Table 3-5. Available Button Functions
Function
Description
<None>
No settings.
Escape
Closes an application, a file, or a window.
Tab
Switches fields.
Enter
Fixes data or command input.
Behavior after fixing depends on an application.
Caps
Switches back and forth between upper cases and lower cases for
alpha input mode.
3-25
PPT 8800 Series Product Reference Guide for Embedded Windows® CE .NET
Table 3-5. Available Button Functions (Continued)
Function
Description
Backlight
Turns backlight On/Off.
Decrease
brightness
Decreases brightness of backlight.
Increase
brightness
Increases brightness of backlight.
UP cursor
Moves the cursor up a line.
DOWN cursor
Moves the cursor down a line.
RIGHT cursor
Moves the cursor to the right one letter.
LEFT cursor
Moves the cursor to the left one letter.
Space
Inserts a space after the cursor.
Back Space
Deletes a letter in front of the cursor.
Home
Moves the cursor to the front of text line.
End
Moves the cursor to the end of the text line.
Insert
Switches back and forth between insert mode and write-over mode.
Delete
Deletes a letter in the position of the cursor.
<User
application>
Assigns an application to the key.
Windows Explorer Opens Windows Explorer.
Internet Explorer
Opens Internet Explorer.
Recalibrate
Opens the Calibration screen to readjust the touch screen.
Soft keyboard
Opens the soft keyboard.
Volume
Opens the Volume & Sounds Properties window to adjust volume
settings.
4. Tap OK to apply the changes.
3-26
Settings
To restore defaults at anytime tap Restore Defaults. Defaults are also restored when you
hard reset the terminal. Table 3-6 lists the default button/key assignments.
Table 3-6. Default Button Assignments
Standard 6-key Keypad
Button/Key
Default
15-key Keypad
Button/Key
Default
Trigger
Trigger
Trigger
Trigger
Enter
Enter
Enter
Enter
F1
Tab
F1
<None>
F2
LEFT cursor
F2
<None>
F3
RIGHT cursor
F3
<None>
F4
Escape
F4
<None>
Func + F1
<None>
F5
<None>
Func + F2
Soft keyboard
F6
Recalibrate
Func + F3
<None>
F7
Decrease brightness
Func + F4
Recalibrate
F8
Increase brightness
F9
Escape
F10
Tab
Owner
Use the Owner Properties window to enter information about the owner. The information
can be displayed when the terminal is turned on. To enter information:
1. Select Start - Settings - Control Panel.
2. Double-tap the Owner icon.
3-27
PPT 8800 Series Product Reference Guide for Embedded Windows® CE .NET
3. Select the Identification tab.
Figure 3-18. Owner Properties Window - Identification Tab
4. Fill in or edit the data as desired.
5. To have this information displayed when you start the terminal, select the Display
Owner Identification check box.
6. To add more information, select the Notes tab and enter information in the Notes
box.
To include this information on startup, select Display owner notes.
Figure 3-19. Owner Properties Window - Notes Tab
3-28
Settings
7. To setup identification for remote networks, select the Network ID tab. Enter the
user name, password, and domain name you use to log on to the remote network.
Figure 3-20. Owner Properties Window - Network Tab
After the information is entered and the Display owner identification/notes check boxes are
selected, the Welcome window appears whenever the terminal is powered on.
Figure 3-21. Welcome Window
3-29
PPT 8800 Series Product Reference Guide for Embedded Windows® CE .NET
Password
Change the owner's password and set security options.
Caution
If you forget your password, or if your terminal has become corrupted and
resetting doesn't work, you must perform a hard reset. Performing a hard
reset erases all files and data that you have created, and programs you
have installed.
1. Select Start - Settings - Control Panel.
2. Double-tap the Password icon.
Figure 3-22. Password Properties Window
3. In the Password box, enter the password.
4. In the Confirm password box, enter the password again.
5. To require the password on startup, select Enable password protection at poweron check box.
6. To require the password to unlock the screen saver, select Enable password
protection for screen saver check box.
7. Tap OK to apply the settings.
3-30
Settings
PC Connection
The PC Connection Properties window allows you to set the baud rate that the terminal will
communicates with the host computer.
1. Select Start - Settings - Control Panel.
2. Double-tap the PC Connection icon.
Figure 3-23. PC Connection Properties Window
3. Select the Enable direct connections to the desktop computer checkbox to allow
for direct connections.
4. Tap the Change Connection button to change the baud rate.
Figure 3-24. Change Connection Window
5. From the drop-down list, select the baud rate to connect to the desktop.
6. Tap OK.
7. In the PC Connection Properties window tap OK to apply the changes.
3-31
PPT 8800 Series Product Reference Guide for Embedded Windows® CE .NET
Power
The Power Properties window allows you to view the status of the main and backup
batteries and set power management options.
Checking Battery Power Status
1. Select Start - Settings - Control Panel.
2. Double-tap the Power icon.
3. Select the Battery tab.
Figure 3-25. Power Properties - Battery Tab
The Battery tab provides general information on battery conditions. The amount of useful
operating time remaining varies depending on battery type and how you use the terminal.
Optimizing Battery Life
You want your batteries to last as long as possible, especially when you're on the road.
Under normal conditions, you can get many hours of use from a single charge. Here are a
few tips to help you get the most of the battery.
•
3-32
Use external power whenever possible. Use the AC adapter whenever possible,
especially when:
•
Using the backlight feature.
•
Connecting to a desktop computer.
•
Using attachments.
Settings
•
Set the terminal to turn off when idle. While on battery power, the terminal
automatically turns off, or suspends operation, if you haven't touched the keyboard
or used the stylus for three minutes. Maximize battery life by shortening this time.
•
Turn off sounds you don't need. By default, the terminal produces sounds in
response to a number of events, such as warnings, appointments, and hardwarebutton presses. To optimize battery life, turn off any sounds you don't need. See
Volume & Sounds on page 3-52 for instructions.
Note: When batteries are low, a battery icon appears in the taskbar. See
Taskbar on page 2-9 for more information.
Setting Up Power Schemes
1. Select the Schemes tab.
Figure 3-26. Power Properties - Schemes Tab
2. Select the desired options for entering reduced power states.
The time choices represent the amount of time that must pass before the terminal switches
to the next power conservation state. For example, if “Switch state to System Idle:” is set to
“After 5 minutes,” then the system transitions from the User Idle state to the System Idle
state after five minutes of inactivity.
Even if a time of “Never” is selected, the system may still enter a lower power conservation
state if circumstances warrant. For instance, if “Switch state to Suspend:” is set to “Never,”
the battery reaching a critical level might still cause the system to suspend.
3-33
PPT 8800 Series Product Reference Guide for Embedded Windows® CE .NET
Note: Shorter times help conserve battery power.
Checking the Power Levels
1. Select the Device Status tab.
Figure 3-27. Power Properties - Device Status Tab
All components that have active power management enabled appear in the left column with
their current power level in the right column. The power level ranges from “High (D0),”
which means the terminal is at the highest power level to “Off (D4),” which means the
terminal is at the lowest power level.
3-34
Settings
Regional Settings
With Regional Settings, you can change the way the terminal displays dates, times,
currency amounts, large numbers, and numbers with decimal fractions. You can also
choose the metric or U.S. system of measurement.
You can also choose from a large number of input locales. When you switch to another
input locale, some programs offer special features, such as font characters or spell
checkers designed for different languages.
1. Select Start - Settings - Control Panel.
2. Double-tap the Regional Settings icon.
Figure 3-28. Regional Settings Properties - Region Tab
3. From the Your locale: drop-down list, select the country in which you are currently
located.
3-35
PPT 8800 Series Product Reference Guide for Embedded Windows® CE .NET
4. Select the Number tab.
Figure 3-29. Regional Settings Properties - Number Tab
5. Select desired options. The characteristics available are determined by the region
selected on the Region tab.
6. Select the Currency tab.
Figure 3-30. Regional Settings Properties - Currency Tab
7. Select desired options. The characteristics available are determined by the region
selected on the Regional tab.
3-36
Settings
8. Select the Time tab.
Figure 3-31. Regional Settings Properties - Time Tab
9. Select desired options. The characteristics available are determined by the region
selected on the Region tab.
10. Select the Date tab.
Figure 3-32. Regional Settings Properties Window - Date Tab
11. Select desired options. The characteristics available are determined by the region
selected on the Region tab.
3-37
PPT 8800 Series Product Reference Guide for Embedded Windows® CE .NET
Remove Programs
To remove programs that were loaded onto the terminal:
1. Select Start - Settings - Control Panel.
2. Double-tap the Remove Programs icon.
3. From the programs list, select the program you want to remove.
Figure 3-33. Remove Programs Tab
4. Tap Remove.
Note: You can only remove programs that you have installed in RAM.
3-38
Settings
Storage Manager
The Storage Properties window allows you to manage your storage media and disk
partitions.
Figure 3-34. Storage Properties Window
Managing Storage Devices
Available storage devices are listed by device name in the Store Info: drop-down list. To
view information about the disk or perform store operations, select a device from the list.
•
To unmount all partitions on the selected storage device, tap Dismount.
•
To format the partition table, tap Format. The partition table cannot be formatted if
any partitions on the storage device are mounted.
Managing Disk Partitions
Available partitions on the selected storage device are listed in the Partitions: list box.
•
To create a new partition on the storage device, tap New.
•
To delete a partition from the storage device, select the partition to delete and tap
Delete. Mounted partitions cannot be deleted.
•
To view partition information or perform advanced partition functions, such as
formatting, select the partition to view from the list and tap Properties. See
Advanced Partition Options on page 3-40.
3-39
PPT 8800 Series Product Reference Guide for Embedded Windows® CE .NET
Creating A New Partition
To create a new partition, select a storage device from the Store info: list and tap New.
1. Type the name of the new partition.
2. Type the size (in sectors) for the new partition, or check the Use All Available Disk
Space box.
3. Tap OK to create the partition, or tap X to cancel.
Advanced Partition Options
To view advanced partition options, select a partition from the list and tap Properties.
•
To mount an unmounted partition, tap Mount.
•
To dismount a mounted partition, tap Dismount.
•
To format a partition, tap Format.
•
To scan and repair a partition, tap Scan.
•
To defragment a partition, tap Defrag.
Note: Depending on a partition's file system, the Format, Scan, and
Defrag options may not be available. The behavior of these features
will vary depending on the implementation of the file system's utility
library.
3-40
Settings
Stylus
Use the Stylus Properties window to calibrate the touch screen and adjust double-tap
timing.
Adjusting the Stylus Double-tap Rate
1. Select Start - Settings - Control Panel.
2. Double-tap the Stylus icon.
Figure 3-35. Stylus Properties - Double-Tap Tab
3. In the Double-Tap tab, double-tap the checkerboard grid at a comfortable speed.
4. Double-tap the clapboard to test your settings.
5. Tap OK to apply changes.
Recalibrating the Touch Screen
1. Select Start - Settings - Control Panel.
3-41
PPT 8800 Series Product Reference Guide for Embedded Windows® CE .NET
2. Double-tap the Stylus icon.
Figure 3-36. Stylus Properties - Calibration Tab
3. Select the Calibration tab.
4. In the Calibration tab, tap Recalibrate.
5. Tap a target with the stylus and following the on-screen messages.
6. Tap OK.
3-42
Settings
Symbol Settings
Waking the Terminal
The terminal can be configured to wakeup by pressing the trigger key.
1. Select Start - Settings - Control Panel.
2. Double-tap the Symbol Settings icon.
Figure 3-37. Symbol Settings - Wakeups Tab
You can set the terminal to go into sleep mode with the power button or set it to go into sleep
mode automatically by an automatic power-off function. Refer to for wakeup condition
settings based on the selected sleep mode operation.Settings can be made for the case
where it goes into sleep with the power button and the case where it goes into sleep
automatically by automatic power-off function. Table 3-7 lists the wakeup conditions
settings.
Note: All wakeup condition settings are not retained after a hard reset.
After a hard reset, wakeup only with the Power button. However, all
settings are maintained after a soft reset.
3-43
PPT 8800 Series Product Reference Guide for Embedded Windows® CE .NET
Table 3-7. Wakeup Conditions
Status
Description
Power Off When the terminal goes into
sleep mode by pressing the
Power button, these actions
wake the terminal up.
Auto Off
Action
Conditions for wakeup
Trigger
Trigger button is pressed.
WLAN
Wireless LAN access the terminal.
When the terminal goes into Trigger
sleep mode by an automatic
WLAN
power-off function, these
actions wake the terminal up.
Trigger button is pressed.
Wireless LAN access the terminal.
Settings Tab
Use the Settings tab to control power to the external connector.
1. Select Start - Settings - Control Panel.
2. Double-tap the Symbol Settings icon.
Figure 3-38. Symbol Settings - Settings Tab
3. In the Settings tab select the appropriate options to control power to the external
connector.
3-44
Settings
The following selections can be made from the External 5 volts power drop-down list:
Table 3-8. External 5 Volts Power Settings
Setting
Description
Off
5V is not supplied to the serial port.
Active On
The terminal outputs 5V while the serial port is open (by an application).
Always On
5V is always available at the serial port
The default setting is Off after a hard reset. The selected setting is maintained after soft
reset.
System Tab
The System tab displays terminal system data.
1. Select Start - Settings - Control Panel.
2. Double-tap the Symbol Settings icon.
3. Select the System tab.
Figure 3-39. Symbol Setting - System Tab
3-45
PPT 8800 Series Product Reference Guide for Embedded Windows® CE .NET
In the System tab you can view system data. Refer to Table 3-9 for field descriptions.
Table 3-9. System Tab Data
Item
Description
Format
UUID
Inherent value of built-in flash
XXXXXXXXXXXXXXXX
ROM.
(where X is an alphanumeric character)
Part 1: Flash ROM of data bus high
order word.
Part 2: Flash ROM of data bus low
order word.
Build ID
Control version of when OS image X.XX.XXXXX
is built.
(where X is an alphanumeric character)
IPL ID
Version of IPL.
X.XX
(where X is an alphanumeric character)
Boot ID
Version of Boot.
X.XX
(where X is an alphanumeric character)
Platform ID
Version of Platform.
PPT 88XX-XXX
(where X is an alphanumeric character)
Config Tab
The Config tab displays terminal configuration data.
1. Select Start - Settings - Control Panel.
2. Double-tap the Symbol Settings icon.
3-46
Settings
3. Select the Config tab.
Figure 3-40. Symbol Settings - Config Tab
3-47
PPT 8800 Series Product Reference Guide for Embedded Windows® CE .NET
System
Use the System Properties window to view general system properties, change memory
settings, input device name and view copyright information.
General Tab
The General tab view displays general system settings:
1. Select Start - Settings - Control Panel.
2. Double-tap the System icon.
3. Select the General tab to view basic system and computer properties.
Figure 3-41. System Properties - General Tab
Memory Tab
The Memory tab view allows you to adjust RAM allocation:
1. Select Start - Settings - Control Panel.
2. Double-tap the System icon.
3-48
Settings
3. Select the Memory tab.
Figure 3-42. System - Memory Tab
4. To adjust RAM allocation move the slider to allocate more memory for programs or
storage. If you don't have enough space for a file, increase the amount of storage
memory. If your terminal is running slowly, try increasing the amount of program
memory.
Note: Resetting your terminal can make additional storage or program
memory available. If you continue to experience memory problems,
reset your terminal.
The General tab provides general information about the hardware
and software configurations on your device.
A maximum of 16 MB of RAM can be allocated to files.
Programs Located in ROM and RAM
Programs supplied with the terminal are located in ROM and will remain after a hard reset.
Programs you install are located in RAM and need to be reinstalled after a hard reset. If you
have trouble reinstalling programs, adjust RAM allocation.
Device Name Tab
The Device Name tab allows you to customize the name and description of your device:
1. Select Start - Settings - Control Panel.
2. Double-tap the System icon.
3-49
PPT 8800 Series Product Reference Guide for Embedded Windows® CE .NET
3. Select the Device Name tab.
Figure 3-43. System Properties - Device Name Tab
4. Enter a device name for the terminal in the Device name (without spaces): field.
Ensure that you use no spaces.
5. Enter a description for the terminal in the Device description: field.
Copyrights Tab
The Copyrights tab allows you to view any relevant copyright information.
1. Select Start - Settings - Control Panel.
2. Double-tap the System icon.
3-50
Settings
3. Tap the Copyrights tab.
Figure 3-44. System Properties - Copyrights Tab
3-51
PPT 8800 Series Product Reference Guide for Embedded Windows® CE .NET
Volume & Sounds
Use the Volume & Sounds Properties window to set event sounds and volume options.
Adjusting Volume and Sounds
1. Select Start - Settings - Control Panel.
2. Double-tap the Volume & Sounds icon.
Figure 3-45. Volume & Sounds Properties Window - Volume Tab
3. Select the Volume tab.
4. Use the slide bar to change the volume.
5. Select the desired enable sound options.
Note: Turning off sounds saves power and prolongs battery life.
Changing Event Sounds
1. Select Start - Settings - Control Panel.
2. Double-tap the Volume & Sounds icon.
3-52
Settings
3. Select the Sound tab.
Figure 3-46. Volume & Sounds Properties - Sounds Tab
4. From the Event: drop-down list, select an event.
5. From the Sound: drop-down list, select a sound.
To remove a sound from the selected event, select (None).
6. To save the changes to a different scheme, tap Save As, and then name the sound
scheme.
7. To delete a sound scheme, select the scheme in the Scheme: drop-down list and
tap Delete.
Note: To quickly turn off all event sounds, select No sounds from the
Scheme: list.
Adjusting Microphone Gain
1. Select Start - Settings - Control Panel.
2. Double-tap the Volume & Sounds icon.
3-53
PPT 8800 Series Product Reference Guide for Embedded Windows® CE .NET
3. Select the Microphone tab.
Figure 3-47. Volume & Sound Properties - Microphone Tab
4. Move the slider to adjust the microphone gain. Table 3-10 list the sensitivity settings
for a microphone.
Table 3-10. Microphone Sensitivity Settings
Sensitivity
3-54
Comment
Very low (furthest left)
Sensitivity is low.
Low
Sensitivity is slightly low.
Med
Sensitivity is medium. Default after
hard reset.
High
Sensitivity is slightly high.
Very high (furthest right)
Sensitivity is high.
Chapter 4
Communications
Chapter Contents
Introduction . . . . . . . . . . . . . . . . . . . . . . . . . . . . . . . . . . . . . . . . . . . . . . . . . . . . . . . . . . . . . . . . . . 4-3
Installing Communication Software . . . . . . . . . . . . . . . . . . . . . . . . . . . . . . . . . . . . . . . . . . . . . . . . 4-3
Installing ActiveSync. . . . . . . . . . . . . . . . . . . . . . . . . . . . . . . . . . . . . . . . . . . . . . . . . . . . . . . . 4-3
Setting up a Partnership . . . . . . . . . . . . . . . . . . . . . . . . . . . . . . . . . . . . . . . . . . . . . . . . . 4-4
Installing eConnect . . . . . . . . . . . . . . . . . . . . . . . . . . . . . . . . . . . . . . . . . . . . . . . . . . . . . . . . . 4-9
Communication Setup . . . . . . . . . . . . . . . . . . . . . . . . . . . . . . . . . . . . . . . . . . . . . . . . . . . . . . . . . . 4-9
Using the Serial Charging Cable . . . . . . . . . . . . . . . . . . . . . . . . . . . . . . . . . . . . . . . . . . . . . . 4-9
Using the Single-Slot Serial Cradle . . . . . . . . . . . . . . . . . . . . . . . . . . . . . . . . . . . . . . . . . . . 4-13
Using the Four-Slot Serial Cradle . . . . . . . . . . . . . . . . . . . . . . . . . . . . . . . . . . . . . . . . . . . . . 4-16
Using a Four-Slot Ethernet Cradle . . . . . . . . . . . . . . . . . . . . . . . . . . . . . . . . . . . . . . . . . . . . 4-21
DHCP Mode . . . . . . . . . . . . . . . . . . . . . . . . . . . . . . . . . . . . . . . . . . . . . . . . . . . . . . . . . 4-21
Static Mode . . . . . . . . . . . . . . . . . . . . . . . . . . . . . . . . . . . . . . . . . . . . . . . . . . . . . . . . . . 4-22
Connecting the Cradle to a Network . . . . . . . . . . . . . . . . . . . . . . . . . . . . . . . . . . . . . . . 4-22
Configuring the Cradle for DHCP Address Mode . . . . . . . . . . . . . . . . . . . . . . . . . . . . . 4-23
Configuring the Cradle for Static Mode . . . . . . . . . . . . . . . . . . . . . . . . . . . . . . . . . . . . . 4-25
Network Address Translation (NAPT) . . . . . . . . . . . . . . . . . . . . . . . . . . . . . . . . . . . . . . 4-27
Inter-Connecting Cradles . . . . . . . . . . . . . . . . . . . . . . . . . . . . . . . . . . . . . . . . . . . . . . . 4-28
Configuration of the Host Computer . . . . . . . . . . . . . . . . . . . . . . . . . . . . . . . . . . . . . . . 4-29
Configuration of the Terminal . . . . . . . . . . . . . . . . . . . . . . . . . . . . . . . . . . . . . . . . . . . . 4-30
Communication . . . . . . . . . . . . . . . . . . . . . . . . . . . . . . . . . . . . . . . . . . . . . . . . . . . . . . . 4-31
Communication LED Indicator. . . . . . . . . . . . . . . . . . . . . . . . . . . . . . . . . . . . . . . . . . . . 4-32
Using the Universal Cable Cup. . . . . . . . . . . . . . . . . . . . . . . . . . . . . . . . . . . . . . . . . . . . . . . 4-33
Serial Communication . . . . . . . . . . . . . . . . . . . . . . . . . . . . . . . . . . . . . . . . . . . . . . . . . . . . . . . . . 4-35
Connecting to the Internet on a Wireless Network. . . . . . . . . . . . . . . . . . . . . . . . . . . . . . . . . . . . 4-36
4-1
PPT 8800 Series Product Reference Guide for Embedded Windows® CE .NET
4-2
Communications
Introduction
Your PPT 8800 Series terminal is capable of communicating with a number of hosts,
including development PCs, serial devices, printers, etc. The available accessories serve
as essential data communication devices, enabling you to synchronize the information on
your terminal with the information on your host device using ActvieSync. With the
appropriate accessory and software, the terminal can establish a number of connection
types, such as a serial connection and a modem connection.
This chapter provides information on installing the appropriate communication software
and setting up the appropriate accessory to enable communication between the terminal
and the host device.
Installing Communication Software
To successfully communicate with the various host devices the following must be installed
on your host computer:
•
Microsoft ActiveSync
•
eConnect.
Installing ActiveSync
Using ActiveSync, you can synchronize the information on your terminal with the
information on your host computer. Changes you make on your terminal or host computer
appear in both places after you synchronize.
With ActiveSync software you can:
•
Work with terminal-compatible host applications on your host computer.
ActiveSync replicates data from your terminal so you can view, enter and modify
any data stored on your terminal with the host application.
•
Synchronize files between your terminal and host computer. Your files are
automatically converted to the correct format.
•
Back up the data stored on your terminal. Synchronization is a one-step procedure
that ensures your data is always safe and up-to-date.
•
Copy (rather than synchronize) files between your terminal and host computer.
•
Control when synchronization occurs by selecting a synchronization mode, e.g.,
you may synchronize continually while the terminal is connected to the host
computer, or only when you select the synchronize command.
4-3
PPT 8800 Series Product Reference Guide for Embedded Windows® CE .NET
•
Select the types of information to synchronize, and control how much data is
synchronized.
To install ActiveSync on your host computer:
1. Download version 3.7 or higher of the software from http://www.microsoft.com.
Refer to the installation and RAS instructions included with the ActiveSync
software you download.
2. Set up a partnership between the terminal and host computer through the
ActiveSync connection using a serial connection or Universal Cable Cup/USB
cable.
Note: Prior to synchronizing a terminal using the Four-Slot Ethernet cradle,
a Partnership must be set up between the terminal and the host
computer using either a serial or USB connection.
Setting up a Partnership
After installation is complete, the ActiveSync Setup Wizard helps you connect your terminal
to your host computer, set up a partnership so you can synchronize information between
your terminal and host computer, and customize synchronization settings.
4-4
Communications
1. If the Get Connected window does not appear, select Start - Programs - Microsoft
ActiveSync.
Figure 4-1. Get Connected Window
2. Connect the terminal to the host computer.
3. On the host computer, select Next in the Getting Connected window.
4-5
PPT 8800 Series Product Reference Guide for Embedded Windows® CE .NET
4. The host computer and the terminal will attempt to synchronize. The New
Partnership window appears.
Figure 4-2. New Partnership Window
5. Click the Yes radio button and then select Next. The New Partnership/Select
Number of Partnerships window appears.
Figure 4-3. Select Number of Partnerships
4-6
Communications
6. Select Next. The New Partnership/Select Synchronization Settings window
appears.
Figure 4-4. Select Synchronization Settings Window
7. To synchronize file, click on Files check box. The File Synchronization window
appears.
Figure 4-5. File Synchronization Folder Confirmation
8. Select OK to display the Setup Complete window.
4-7
PPT 8800 Series Product Reference Guide for Embedded Windows® CE .NET
9. Select Next.
Figure 4-6. Setup Complete Window
10. Select Finish.
Figure 4-7. ActiveSync Connected Window
During the first synchronization, information stored on your host computer is copied to your
terminal. When the copy is complete and all data is synchronized, you can disconnect your
terminal from your host computer.
4-8
Communications
Note: You must perform your first ActiveSync operation with a local, direct
connection.
To retain partnerships after a hard reset, capture partnership registry
information in a .reg file and save it in the Flash File System. See the
Windows CE Help File for Symbol Terminals for details.
For more information about using ActiveSync, start ActiveSync on your host computer, then
see ActiveSync Help.
Installing eConnect
eConnect is a control panel applet that automates the launch of a modem connection and
applications, such as ActiveSync or Internet Explorer.
Note: eConnect is needed when establishing a connection using the FourSlot Serial or Four-Slot Ethernet cradles.
To install eConnect, download it (for Windows CE .NET) from http://devzone.symbol.com.
Follow the installation instructions included to install the software on your terminal.
Communication Setup
The terminal can communicate with the host computer using the following accessories:
•
Serial Charging Cable (through a serial connection)
•
Single-Slot Serial Cradle (through a serial connection)
•
Four-Slot Serial Cradle (through a serial connection)
•
Four-Slot Ethernet Cradle (through an Ethernet connection).
For each accessory, you need to follow instructions on configuring your host computer,
setting up the connection between the terminal and the host computer, and configuring the
terminal.
Using the Serial Charging Cable
1. Ensure that ActiveSync was installed on the host computer and a partnership was
created. See Installing ActiveSync on page 4-3 and Setting up a Partnership on
page 4-4.
4-9
PPT 8800 Series Product Reference Guide for Embedded Windows® CE .NET
2. Start ActiveSync if it is not running on the host computer. To start, select Start Programs - Microsoft ActiveSync.
Figure 4-8. ActiveSync - Not Connected
4-10
Communications
3. In the ActiveSync window, select File - Connection Settings and ensure the
selections shown in Figure 4-9 are made. (Select the appropriate COM port for
your host computer.)
Figure 4-9. Connection Settings
4. Select OK to save any changes made.
5. On the terminal, select Start - Settings - Control Panel. Double-tap the PC
Connection icon. Tap the Change Connection button.
Figure 4-10. Change Connection Window
6. From the Connect to desktop computer using: list, ensure ‘Desktop @ 115200 is
selected.
7. Tap OK on the Change Connection window.
4-11
PPT 8800 Series Product Reference Guide for Embedded Windows® CE .NET
8. Tap OK.
Note: Every terminal should have a unique device name. Never try to
synchronize more than one terminal to the same name. See Device
Name Tab on page 3-49 for instructions on changing the device
name.
9. Connect the Serial Charging Cable to your terminal and host computer as shown
in Figure 4-11.
Line Cord
F1
F2
F3
F4
To serial port of
host computer
Serial Charging
Cable
Figure 4-11. Connecting the Serial Charging Cable
Note: The serial charging cable requires a dedicated port. It cannot share
a port with an internal modem or other device. If you are unsure
about the location of the serial port on your computer, refer to the
user’s manual supplied with the computer.
4-12
Communications
10. Upon connection, synchronization occurs automatically.
Using the Single-Slot Serial Cradle
Note: The following procedures pertain to both the CRD8800-1000S and
CRD8800B-1000S Single-Slot Serial cradles.
1. Ensure that ActiveSync was installed on the host computer and a partnership was
created. See Installing ActiveSync on page 4-3 and Setting up a Partnership on
page 4-4.
2. Start ActiveSync if it is not running on the host computer. To start, select Start Programs - Microsoft ActiveSync.
Figure 4-12. ActiveSync - Not Connected
4-13
PPT 8800 Series Product Reference Guide for Embedded Windows® CE .NET
3. In the ActiveSync window, select File - Connection Settings and ensure the
selections shown in Figure 4-13 are made. (Select the appropriate COM port for
your host computer.)
Figure 4-13. Connection Settings
4. Select OK to save any changes made.
5. On the terminal, select Start - Settings - Control Panel. Double-tap the PC
Connection icon. Tap the Change Connection button.
Figure 4-14. Change Connection Window
6. From the Connect to desktop computer using: list, ensure ‘Desktop @ 115200 is
selected.
7. Tap OK on the Change Connection window.
4-14
Communications
8. Tap OK.
Note: Every terminal should have a unique device name. Never try to
synchronize more than one terminal to the same name. See Device
Name Tab on page 3-49 for instructions on changing the device
name.
9. Connect your CRD8800-1000S cradle to your host computer as shown in Figure
4-15.
Serial device
cable
Serial device
cable
CRD8800-1000S
CRD8800-1000S
Figure 4-15. Connecting the Cradle to the Host
Note: The cradle requires a dedicated port. It cannot share a port with an
internal modem or other device. If you are unsure about the location
of the serial port on your host computer, refer to the user’s manual
supplied with the computer.
4-15
PPT 8800 Series Product Reference Guide for Embedded Windows® CE .NET
10. Turn on the terminal and slide it into the cradle.
F1
F2
F3
F4
ENTER
CRD8800-1000S
CRD8800-1000S
Figure 4-16. Inserting the Terminal in the Cradle
Note: The serial charging cable requires a dedicated port. It cannot share
a port with an internal modem or other device. If you are unsure
about the location of the serial port on your computer, refer to the
user’s manual supplied with the computer.
11. Upon connection, synchronization occurs automatically.
Using the Four-Slot Serial Cradle
1. Ensure that ActiveSync was installed on the host computer and a partnership was
created. See Installing ActiveSync on page 4-3 and Setting up a Partnership on
page 4-4.
4-16
Communications
2. Start ActiveSync if it is not running on the host computer. To start, select Start Programs - Microsoft ActiveSync.
Figure 4-17. ActiveSync - Not Connected
4-17
PPT 8800 Series Product Reference Guide for Embedded Windows® CE .NET
3. In the ActiveSync window, select File - Connection Settings and ensure the
selections shown in Figure 4-18 are made. (Select the appropriate COM port for
your host computer.)
Figure 4-18. Connection Settings
4. Select OK to save any changes made.
5. On the terminal, select Start - Settings - Control Panel. Double-tap the PC
Connection icon. Tap the Change Connection button.
Figure 4-19. Change Connection Window
6. From the Connect to desktop computer using: list, ensure ‘Desktop @ 115200 is
selected.
7. Tap OK on the Change Connection window.
4-18
Communications
8. Tap OK.
Note: Every terminal should have a unique device name. Never try to
synchronize more than one terminal to the same name. See Device
Name Tab on page 3-49 for instructions on changing the device
name.
9. Connect your CRD8800-4000S cradle to your host computer as shown in Figure
4-15.
Serial device
cable
Figure 4-20. Connecting the Cradle to the Host
Note: The cradle requires a dedicated port. It cannot share a port with an
internal modem or other device. If you are unsure about the location
of the serial port on your host computer, refer to the user’s manual
supplied with the computer.
4-19
PPT 8800 Series Product Reference Guide for Embedded Windows® CE .NET
10. Turn on the terminal and slide it into the cradle.
Figure 4-21. Inserting the Terminal in the Four-Slot Serial Cradle
Note: The serial charging cable requires a dedicated port. It cannot share
a port with an internal modem or other device. If you are unsure
about the location of the serial port on your computer, refer to the
user’s manual supplied with the computer.
11. Upon connection, synchronization occurs automatically.
4-20
Communications
Using a Four-Slot Ethernet Cradle
The CRD8800-4000E Four-Slot Ethernet Cradle allows communication between terminals
and their associated host computers connected to an Ethernet network using ActiveSync
and eConnect. The CRD8800-4000E must be connected to an Ethernet network which is
connected to the same network as the host computers, or an Ethernet network connected
to the larger Internet via an Internet gateway. The cradle uses one of two configurations to
accomplish this: DHCP mode or Static mode.
ActiveSync only allows one terminal to connect to a host at a time. eConnect is a required
control panel applet that is installed on the terminal and allows ActiveSync, or any custom
synchronization application, to be launched when the terminal is inserted into the cradle.
eConnect can also be set up to start a TCP/IP connection with the cradle, allowing any IPbased application to communicate through the cradle. When the terminals are inserted in
the cradle, the cradle appears to be a direct-connect PPP service.
The cradle must be properly configured for use with the terminal. The configuration steps
include:
•
Connecting the cradle to a network
•
Configuring the cradle
•
Configuring the host computer
•
Configuring the terminal.
DHCP Mode
1 DHCP Address Mode
When using DHCP mode, the cradle acquires its IP address dynamically from the DHCP
server. There must be a DHCP server or a DHCP relay agent on the same subnet as the
CRD8800-4000E with IP addresses, a gateway IP address, at least one DNS address, at
least one WINS server address, and a subnet mask for the unit to be automatically
configured. The cradle acquires one DHCP address from the DHCP server.
6 DHCP Address Mode
The 6 DHCP address mode is the cradle’s default mode. When using this mode, the cradle
acquires 6 IP addresses dynamically from the DHCP server: one for the cradle, one for
each of the 4 slots, and one for the expansion slot.
In this mode, each slot has its own IP address and may be directly accessed by the
network. On power-up, the 6 IP addresses are acquired. Periodically, the lease times are
checked and renewed as required. If the renewal request is NAKed by the server, the cradle
4-21
PPT 8800 Series Product Reference Guide for Embedded Windows® CE .NET
enters Panic mode and re-boots. If the cradle receives no response from the server and is
unable to re-bind, it enters Panic mode and re-boots.
Caution
In 6 DHCP address mode, the cradle must acquire 6 addresses from the
DHCP server by requesting addresses with different requestor IDs. Some
DHCP servers use the MAC address instead and with those cradles the
cradle only receives one address and will not operate. This situation has
occurred on some Novell servers. To remedy the situation, use static
mode.
Static Mode
If there is no DHCP server on the network, the cradle must be manually configured with IP
addresses and other network-related information.
Connecting the Cradle to a Network
To set up network communications:
1. Ensure there is a DHCP server accessible to the cradle on the subnet.
2. Connect one end of a standard 10 Base-T network cable to the connector labeled
Ethernet on the back of the cradle. Connect the other end of the cable to a subnet
hub.
Ethernet Cable
To Ethernet hub
Figure 4-22. Connecting the Four-Slot Ethernet Cradle
4-22
Communications
3. Configure the cradle. See Configuring the Cradle for DHCP Address Mode on page
4-23 or Configuring the Cradle for Static Mode on page 4-25.
4. Power up the cradle; the cradle performs a power-up sequence, then attempts to
collect its network parameters from the DHCP server. While collecting network
parameters, all LEDs flash green. Once configuration completes, all LEDs shut off.
If configuration of the cradle from the DHCP server fails, all LEDs flash red. The cradle
retries the DHCP request every 10 minutes.
Configuring the Cradle for DHCP Address Mode
1. Start a terminal emulation session for the cradle:
a. Connect the modular end of cable (p/n 170013-000) to the Expansion port of
the cradle. Connect the DB-9 end of the cable using a null modem adapter to
the COM port on the host computer.
Figure 4-23. Connecting the Four-Slot Ethernet Cradle to Host Computer
b. Start a terminal emulation session on the host computer. Use standard terminal
emulator software, such as Pro-CommTM or HyperterminalTM. Use the following
terminal emulation settings: 115200 bps, 8N1, XON/XOFF flow control, ASCII
file transfer protocol.
c. Power on the cradle. Before the power up LED sequence begins, on the host
computer press “a” from the terminal program to load the Cradle Utilities
4-23
PPT 8800 Series Product Reference Guide for Embedded Windows® CE .NET
configuration interface. The Cradle Utilities Version screen appears on the host
computer:
Cradle Utilities Version x.xx
Firmware Datecode: xxxxxxxx
1: Public network settings
2: Advanced settings
3: PPP settings
4: Private network settings
5: Firmware Download
Select a submenu OR:
Q: Discard changes and restart
F: Save changes and restart
2. Press 1 to display the Public network settings menu:
Public network settings
1: Static Mode: 1
2: NAPT Mode: 1
The following settings are only used when Static
mode is 1
3: Cradle IP Address: 0.0.0.0
4: Router (Gateway) IP Address: 0.0.0.0
5: 1st DNS IP Address: 0.0.0.0
6: 2nd DNS IP Address: 0.0.0.0
7: 1st WINS IP Address: 0.0.0.0
8: 2nd WINS IP Address: 0.0.0.0
9: Subnet Mask: 0.0.0.0
The following settings are only used when
NAPT mode is 0 and Static mode is 1
A: Terminal 1 IP Address: 0.0.0.0
B: Terminal 2 IP Address: 0.0.0.0
C: Terminal 3 IP Address: 0.0.0.0
D: Terminal 4 IP Address: 0.0.0.0
E: Expansion Port IP Address: 0.0.0.0
3. From the Public network settings menu:
a. Press 1 to set the Static Mode. The Static Mode selection appears:
Enter ‘1’ to enable Static mode
Enter ‘0’ to disable Static mode
Enter new value:
4-24
Communications
b. Press 1 to enable or 0 to disable Static mode. The Public network settings menu
re-appears with the new Static Mode value.
c. Press 2 to set the NAPT Mode. The NAPT Mode selection appears:
Enter ‘1’ to enable NAPT mode
Enter ‘0’ to disable NAPT mode
Enter new value:
d. Press 1 to enable NAPT or 0 to disable NAPT mode. The Public network
settings menu re-appears with the new NAPT Mode value.
e. Set the DHCP Address Mode as follows:
For the 6 DHCP Address Mode: Set NAPT Mode to 0 (see step c).
When Static Mode and NAPT Mode are both set to 0, the cradle acquires 6 IP
addresses from the DHCP server.
For the 1 DHCP Address NAPT Mode: Set NAPT Mode to 1 (see step c).
When NAPT Mode is set to 1, the cradle uses 5 private NAPT addresses
(192.168.1.1 through 192.168.1.5 by default; the network does not see these
addresses).
f. Press Q to return to the main Cradle Utilities menu.
g. Press F to write these values to flash memory and reset the cradle.
Configuring the Cradle for Static Mode
1. Start a cradle terminal emulation session:
a. Connect the modular end of the cable (p/n 170013-000) and a null modem
adapter between the expansion port of the cradle and a COM port on a host
computer. See Figure 4-23 on page 4-23.
b. Start a terminal emulation session on the host computer. Use standard terminal
emulator software, such as Pro-CommTM or HyperterminalTM. Use the following
terminal emulation settings: 115200 bps, 8N1, XON/XOFF flow control, ASCII
file transfer protocol.
c. Power on the cradle. Before the power up LED sequence begins, on the host
computer press “a” from the terminal program to load the Cradle Utilities
4-25
PPT 8800 Series Product Reference Guide for Embedded Windows® CE .NET
configuration interface. The Cradle Utilities Version screen appears on the host
computer:
Cradle Utilities Version x.xx
Firmware Datecode: xxxxxxxx
1: Public network settings
2: Advanced settings
3: PPP settings
4: Private network settings
5: Firmware Download
Select a submenu OR:
Q: Discard changes and restart
F: Save changes and restart
2. Press 1 to display the Public Network Settings menu:
Public Network Settings
1: Static Mode: 0
2: NAPT Mode: 1
The following settings are only used when Static
mode is 1
3: Cradle IP Address: 0.0.0.0
4: Router (Gateway) IP Address: 0.0.0.0
5: 1st DNS IP Address: 0.0.0.0
6: 2nd DNS IP Address: 0.0.0.0
7: 1st WINS IP Address: 0.0.0.0
8: 2nd WINS IP Address: 0.0.0.0
9: Subnet Mask: 0.0.0.0
The following settings are only used when
NAPT mode is 0 and Static mode is 1
A: Terminal 1 IP Address: 0.0.0.0
B: Terminal 2 IP Address: 0.0.0.0
C: Terminal 3 IP Address: 0.0.0.0
D: Terminal 4 IP Address: 0.0.0.0
E: Expansion Port IP Address: 0.0.0.0
3. From the Public network settings menu:
a. Set Static Mode to 1 (see page 25).
b. Set NAPT Mode to 0 (see page 25).
c. Select 3 to access the set cradle IP address prompt.
Enter the new cradle IP Address at the prompt.
d. Select 4 to access the set Router IP address prompt.
4-26
Communications
Enter the new internet gateway IP address at the prompt.
e. Select 5 to access the first set the DNS IP addresses prompt.
Enter the first new DNS IP address at the prompt.
f. Select 6 to access the second set the DNS IP addresses prompt.
Enter the second new DNS IP address at the prompt.
g. Select 7 to access the set the first WINS IP addresses prompt. This is required
for ActiveSync to function properly.
Enter the first new WINS IP address at the prompt.
h. Select 8 to access the set the second WINS IP addresses prompt.
Enter the second new WINS IP address at the prompt.
i. Select 9 to access the set the correct subnet mask IP addresses prompt.
Enter the new subnet mask IP address at the prompt.
j. Select A to access the Terminal 1 IP addresses prompt.
Enter the new Terminal 1, IP address at the prompt.
k. Select B to access the Terminal 2 IP addresses prompt.
Enter the new Terminal 2, IP address at the prompt.
l. Select C to access the Terminal 3 IP addresses prompt.
Enter the new Terminal 3, IP address at the prompt.
m. Select D to access the Terminal 4 IP addresses prompt.
Enter the new Terminal 4, IP address at the prompt.
4. Select Q to return to the main Cradle Utilities menu.
5. Select F to reset cradle and write values to flash memory.
Network Address Translation (NAPT)
When Network Address Translation (NAPT) is enabled in both DHCP and Static mode, the
cradle assigns private IP addresses to each terminal and performs Network Address
Translation (NAPT) on all TCP/IP and UDP/IP packets as they transmit through the cradle
between the outside network and the cradle’s private network. The terminals are assigned
private addresses specified in options A through E in the Public network setting menu.
4-27
PPT 8800 Series Product Reference Guide for Embedded Windows® CE .NET
The cradle modifies one IP address and port number pair inside a TCP/IP and UDP/IP
packet header. Those packets going to the outside network have their source address
translated to the IP address of the cradle and their source port changed to a unique port
number associated with the cradle slot from which it came. Conversely, packets designated
to the cradle’s private network have their destination IP address and port number mapped
to the equivalent private network IP address and port number. The differences in the port
numbers distinguish between packets for different slots in the cradle. The benefit of both IP
address and port translation is that multiple slots can simultaneously share the one network
IP address of the cradle.
Accessing the outside network with the CRD8800-4000E is not the same as a direct
connection to the outside network. When using NAPT, many network services do not
function at all. Since NAPT modifies addresses in TCP/IP and UDP/IP headers, it is
insufficient for network services that embed IP addresses inside packet data. Also, the
CRD8800-4000E assumes that terminals sending data with one TCP or UDP source port
expects to receive replies on the same port number, but some network services may reply
with data over a range of ports. These network services are unusable with the CRD88004000E. Also, some services listen to incoming requests from the network. Since port
numbers are usually fixed for a given service, no terminals can be set up as listeners.
Note: Turn off NAPT mode before using ActiveSync.
Inter-Connecting Cradles
Up to four 4-slot serial cradles (CRD8800-4000S) may be inter-connected (daisy-chained)
with the CRD8800-4000E. Use the Ethernet RJ-45/10 to RJ-45/10 inter-cradle cable (p/n
170142-001) to connect the CRD8800-40000S to the CRD8800-4000E and use the serial
RJ-45/10 to RJ-45/10 inter-cradle cable (p/n 70349-001) to connect the CRD8800-4000S
to another CRD8800-4000S.
WARNING
Each cradle must have its own power supply. Any other
method of power hookup is unsafe.
To inter-connect cradles:
1. Connect the power supply to the second 4-slot cradle.
4-28
Communications
Note: You must use a 8 VDC 5 A power supply on the serial cradle being
connected to the ethernet cradle.
2. Plug one end of the inter-cradle cable into the Expansion Connector modular jack
labeled EXPANSION on the back of the first cradle.
Serial Cradle
Ethernet Cradle
Inter-Cradle Cable
3. Plug the other end of the inter-cradle cable into the modular jack labeled Serial on
the back of the second serial cradle.
4. Repeat these steps for any additional 4-slot serial cradles you want to connect.
Note: The inter-connect interface does not support daisy-chaining to a
Single-Slot Serial cradle.
Configuration of the Host Computer
The host computer that you intend to synchronize with the terminal must be setup with the
appropriate communication software and connection settings. This guide assumes that you
are using Microsoft® ActiveSync software on both the terminal and the host computer. To
configure the host computer:
1. Download and install ActiveSync. See Installing ActiveSync on page 4-3.
2. Configure the connection settings. The host computer must be configured for TCP/
IP network communications.
a. Click on the ActiveSync icon from the system tray
b. Tap File - Connection settings.
c. In the Connection settings dialog box, select the Allow Network (Ethernet) and
Remote Access Service (RAS) server connection with this desktop computer
option.
4-29
PPT 8800 Series Product Reference Guide for Embedded Windows® CE .NET
You may have other options selected, for example, Allow serial cable or infrared
connection to this COM port.
d. Click OK.
Note: Before communicating through an ethernet connection, you must
create a partnership between your terminal and your host computer.
See Setting up a Partnership on page 4-4 for detailed instructions.
Configuration of the Terminal
When you insert a terminal into the cradle, the cradle provides a direct-connect RAS
service. You need to configure each terminal for use with the cradle, just as you would
configure any remote client to connect to an Internet Service Provider (ISP). To configure
the terminal install eConnect. See Installing eConnect on page 4-9.
1. On the terminal, tap Start - Settings - Control Panel - eConnect. The eConnect
window appears.
Figure 4-24. eConnect Properties - Docking Tab
2. Enable the Use eConnect for Docking Events checkbox.
3. Enable the Launch ActiveSync checkbox.
4. Tap OK.
4-30
Communications
Communication
To communicate with a host computer over a network:
1. Insert the terminal into the cradle or a slot on an interconnected serial cradle.This
initiates the communication between the terminal and the host computer to
automatically ActiveSync the terminal. All local slots in the cradle operate
simultaneously.
Figure 4-25. Insert Terminal Into the Cradle
2. The cradle’s communication LED turns red, then flashes green, indicating that the
host computer and terminal are communicating. See Communication LED
Indicator on page 4-32 for other indications.
Note: If you remove the terminal from the cradle while the LED is flashing
green, you disrupt communication and data may be lost. When the
terminal finishes communicating, the slot’s LED turns solid green
until the terminal is removed from the slot.
3. On the terminal, a succession of dialog boxes appear, indicating the status of the
connection. When successfully connected and synchronized, the status of the host
computer is Connected/Synchronized.
If the terminal is inserted into an interconnected serial cradle slot while another terminal on
the serial cradle chain is communicating with a host computer, the terminal waits (its LED
remains red) until the first terminal finishes communicating. Then the slot’s LED turns green
until the terminal is removed from the slot. To remove the terminal, pull it straight up from
the cradle slot.
4-31
PPT 8800 Series Product Reference Guide for Embedded Windows® CE .NET
Communication LED Indicator
Table 4-1. Communication LED Indicator
LED
4-32
Indication
Off
Terminal not in cradle; terminal not placed
correctly; cradle is not powered.
Solid Red
Terminal is present, but communication has not
started.
Flashing Green
Terminal is in the cradle, and communicating with
the host computer.
Slow Flashing Red
Error, communication did not start.
Fast Flashing Red
Warning: Terminal inactivity timeout. The terminal
did not finish data synchronization or had an open
connection for more than 15 minutes. This time is
programmable in the cradle flash parameters.
Solid Green
Terminal is present in the slot and communication
is complete.
All LEDs Flashing Red
Failed automatic cradle configuration via local
DHCP Service.
Communications
Using the Universal Cable Cup
1. Ensure that ActiveSync was installed on the host computer and a partnership was
created. See Installing ActiveSync on page 4-3 and Setting up a Partnership on
page 4-4.
2. Start ActiveSync if it is not running on the host computer. To start, select Start Programs - Microsoft ActiveSync. The Microsoft ActiveSync window appears.
Figure 4-26. ActiveSync - Not Connected
Note: Every terminal should have a unique device name. Never try to
synchronize more than one terminal to the same name. See Device
Name Tab on page 3-49 for instructions on changing the device
name.
3. Ensure that locking tabs on the cable cup are in the open position (up).
4. Insert the terminal into the cable cup.
5. Press down on the two locking tabs.
6. Pull on the cable cup to ensure that it is securely seated on the terminal.
4-33
PPT 8800 Series Product Reference Guide for Embedded Windows® CE .NET
7. Open the rubber cap covering the serial port.
Rubber
Cap
Connector
Screws
Figure 4-27. Connecting the Communication Cable
8. Connect the cable connector to the serial port.
9. Secure the connector to the cable cup by tightening the two connector screws.
10. Connect the other end of the USB cable to the USB port on your host computer.
USB Cable
Figure 4-28. Connecting the Cable Cup to Host Computer
11. Turn on the terminal.
12. Upon connection, synchronization occurs automatically.
4-34
Communications
Serial Communication
The UCC 8800 Universal Cable Cup provides the ability to connect the terminal to printers
and vending machines.
1. Ensure that locking tabs are in the open position (up).
2. Insert the terminal into the cable cup.
3. Press down on the two locking tabs.
4. Pull on the cable cup to ensure that it is securely seated on the terminal.
5. Open the rubber cap covering the serial port.
Rubber
Cap
Connector
Screws
6. Connect the cable connector to the serial port.
7. Secure the connector to the cable cup by tightening the two connector screws.
8. Connect the other end of the serial cable to the appropriate device.
4-35
PPT 8800 Series Product Reference Guide for Embedded Windows® CE .NET
Connecting to the Internet on a Wireless Network
With a PPT 8846 terminal, you can connect to the Internet across a wireless network. To
set up a wireless connection:
1. Tap the Mobile Companion icon on the task tray.
Mobile
Companion Menu
Mobile
Companion Icon
Figure 4-29. Mobile Companion Menu
2. Tap Find WLANs. The Mobile Companion window appears.
Figure 4-30. Find WLANs Window
3. The terminal tries to locate Access Points (APs) in the area. When it locates a
wireless LAN(s), the ESSID name displays in the WLAN Profile list.
4. Tap the ESSID name and then tap Connect.
4-36
Communications
5. The Mobile Companion Mode tab appears.
Figure 4-31. Mobile Companion - Mode Tab
6. The profile name and ESSID name appears in the respective fields.
7. In the Operating Mode: list, select Infrastructure.
8. Tap the Encryption tab.
Figure 4-32. Mobile Companion - Encryption Tab
9. Select the encryption algorithm used on the wireless network (Open System, 40bit Shared Key, 128-bit Shared Key or Kerberos).
If you select 40-bit Shared Key, 128-bit Shared Key or Kerberos, enter the required
data in the fields that appear in the window. See your network administrator for this
information.
4-37
PPT 8800 Series Product Reference Guide for Embedded Windows® CE .NET
10. Tap the IP Config tab.
Figure 4-33. Mobile Companion - IP Config Tab (DHCP)
11. In the IP Type drop-down menu, select either DHCP or Static.
If you select static IP, enter the required data in the fields that appear in the
window.See your network administrator for this information.
12. Tap OK.
13. Tap OK.
14. The Mobile Companion wireless status icon should indicate that the terminal is
connected to the AP. If the status icon does not indicate that the terminal is
connected to the AP, see your system administrator.
15. Select Start - Programs - Internet Explorer.
16. In the address bar, enter the URL.
4-38
Chapter 5
Applications
Chapter Contents
Introduction . . . . . . . . . . . . . . . . . . . . . . . . . . . . . . . . . . . . . . . . . . . . . . . . . . . . . . . . . . . . . . . . . . 5-3
Terminal . . . . . . . . . . . . . . . . . . . . . . . . . . . . . . . . . . . . . . . . . . . . . . . . . . . . . . . . . . . . . . . . . . . . . 5-5
Creating a New Terminal Session . . . . . . . . . . . . . . . . . . . . . . . . . . . . . . . . . . . . . . . . . . . . . 5-5
Connecting using an Existing Session . . . . . . . . . . . . . . . . . . . . . . . . . . . . . . . . . . . . . . 5-5
Adjusting Session Properties . . . . . . . . . . . . . . . . . . . . . . . . . . . . . . . . . . . . . . . . . . . . . 5-5
ActiveSync . . . . . . . . . . . . . . . . . . . . . . . . . . . . . . . . . . . . . . . . . . . . . . . . . . . . . . . . . . . . . . . . . . . 5-6
Copying Files . . . . . . . . . . . . . . . . . . . . . . . . . . . . . . . . . . . . . . . . . . . . . . . . . . . . . . . . . . . . . 5-6
Command Prompt . . . . . . . . . . . . . . . . . . . . . . . . . . . . . . . . . . . . . . . . . . . . . . . . . . . . . . . . . . . . . 5-7
DataSync . . . . . . . . . . . . . . . . . . . . . . . . . . . . . . . . . . . . . . . . . . . . . . . . . . . . . . . . . . . . . . . . . . . . 5-8
Remote Desktop . . . . . . . . . . . . . . . . . . . . . . . . . . . . . . . . . . . . . . . . . . . . . . . . . . . . . . . . . . . . . . 5-9
Connecting to a Terminal Server . . . . . . . . . . . . . . . . . . . . . . . . . . . . . . . . . . . . . . . . . . . . . . 5-9
Disconnecting Without Ending a Session . . . . . . . . . . . . . . . . . . . . . . . . . . . . . . . . . . . . . . . . 5-9
Disconnecting and Ending a Session . . . . . . . . . . . . . . . . . . . . . . . . . . . . . . . . . . . . . . . . . . 5-10
Internet Explorer . . . . . . . . . . . . . . . . . . . . . . . . . . . . . . . . . . . . . . . . . . . . . . . . . . . . . . . . . . . . . 5-11
Browsing the Web . . . . . . . . . . . . . . . . . . . . . . . . . . . . . . . . . . . . . . . . . . . . . . . . . . . . . . . . 5-11
Setting up a Proxy Server . . . . . . . . . . . . . . . . . . . . . . . . . . . . . . . . . . . . . . . . . . . . . . . 5-12
Enable Cookies . . . . . . . . . . . . . . . . . . . . . . . . . . . . . . . . . . . . . . . . . . . . . . . . . . . . . . . 5-12
Media Player . . . . . . . . . . . . . . . . . . . . . . . . . . . . . . . . . . . . . . . . . . . . . . . . . . . . . . . . . . . . . . . . 5-13
ScanSamp2 . . . . . . . . . . . . . . . . . . . . . . . . . . . . . . . . . . . . . . . . . . . . . . . . . . . . . . . . . . . . . . . . . 5-14
Scanning Data Fields . . . . . . . . . . . . . . . . . . . . . . . . . . . . . . . . . . . . . . . . . . . . . . . . . . . . . . 5-14
Scanning Options . . . . . . . . . . . . . . . . . . . . . . . . . . . . . . . . . . . . . . . . . . . . . . . . . . . . . . . . . 5-14
Windows Explorer . . . . . . . . . . . . . . . . . . . . . . . . . . . . . . . . . . . . . . . . . . . . . . . . . . . . . . . . . . . . 5-17
Viewing Files as Icons or Lists . . . . . . . . . . . . . . . . . . . . . . . . . . . . . . . . . . . . . . . . . . . 5-17
Creating a New Folder . . . . . . . . . . . . . . . . . . . . . . . . . . . . . . . . . . . . . . . . . . . . . . . . . 5-17
Network and Dialup Connections. . . . . . . . . . . . . . . . . . . . . . . . . . . . . . . . . . . . . . . . . . . . . . . . . 5-18
5-1
PPT 8800 Series Product Reference Guide for Embedded Windows® CE .NET
5-2
Applications
Introduction
To open an application installed on the terminal, tap Start - Programs. When the Programs
menu list displays, tap the program name to launch it.Table 5-1 lists the factory installed
applications that appear on the Programs menu.
Figure 5-1. Programs Menu
Table 5-1. Program Description
Icon
Program Name
Description
Terminal
Provides TTY or VT-100 terminal emulation. See Terminal on
page 5-5 for more information.
ActiveSync
Synchronizes data on the terminal with a host computer.See
ActiveSync on page 5-6 for more information.
AirBEAM Client
The AirBEAM Client is configured with the server access
information, the names of the packages to be downloaded and
other controlling parameters. When the Client is launched, the
device connects to the specified FTP server and checks the
packages it is configured to look for. If the package version has
been updated, the client requests the transfer. See Chapter 10,
AirBEAM Smart.
5-3
PPT 8800 Series Product Reference Guide for Embedded Windows® CE .NET
Table 5-1. Program Description
Icon
5-4
Program Name
Description
AirBEAM
Staging
The AirBEAM Smart staging support is intended to speed up and
simplify the process of staging custom or updated operating
software onto mobile devices directly from manufacturing. See
Chapter 10, AirBEAM Smart.
Command
Prompt
Provides a DOS type command line interface. See Command
Prompt on page 5-7 for more information.
DataSync
Synchronizes data on the terminal with data on the host computer.
See DataSync on page 5-8 for more information.
Internet
Explorer
Views intranet and internet web pages. See Internet Explorer on
page 5-11 for more information.
Media Player
Plays audio and video files. See Media Player on page 5-13 for
more information. The Media Player is supplied as part of the SDK
and can be installed on the terminal.
ScanSamp2
A sample program, for scanning bar codes. See ScanSamp2 on
page 5-14 for more information.
Windows
Explorer
Windows Explorer. See Windows Explorer on page 5-17 for more
information.
Applications
Terminal
Use Terminal to connect to an online service or corporate server that requires TTY or VT100 terminal emulation. For example, you can view and download files from a bulletin board
or send and receive e-mail. Use Terminal only when communicating with services that
require terminal emulation.
Creating a New Terminal Session
To create a new terminal session:
1. Select Start - Programs - Communication - Terminal.
2. Double-tap the Make a New Session icon.
3. In the Session Name box, enter a name for the session.
4. In the Select a Modem list, select the name of your modem.
5. Enter the telephone number for the remote computer.
6. Unless you need to adjust the emulation properties, tap OK to connect.
Note: The session you created appears as an icon in the Terminal folder.
To disconnect, select File - Cancel.
Connecting using an Existing Session
To connect to an existing session:
1. In the Terminal window, double-tap the icon for the session you want to use.
When the terminal is connected to the online service, the Terminal window
appears.
2. You can create a desktop shortcut for the session, and connect by double-tapping
it.
3. To disconnect, select File - Cancel.
Adjusting Session Properties
To set the Terminal properties:
1. In the Terminal window, select the icon for the session you want to modify.
2. Tap Properties.
3. In the Communications tab, modify the settings as needed.
5-5
PPT 8800 Series Product Reference Guide for Embedded Windows® CE .NET
4. To modify the emulation settings, select the Emulation tab.
5. In the Choose an emulation type list, select the type of terminal to emulate.
6. In the Code page selection list, select the code page option for the character set
you want.
7. To display the text you type before sending, select Local Echo.
8. In the Use small font by default box, set your font preference.
9. In the CR -> CR/LF box, adjust the carriage return/line feed, and select Inbound or
Outbound settings.
10. In the Automatic Scrolling box, set your scrolling preference.
11. When finished, tap OK.
ActiveSync
Using Microsoft ActiveSync, you can synchronize the information on your desktop
computer with the information on terminal. Synchronization compares the data on the
terminal with your desktop computer and updates both computers with the most recent
information.
ActiveSync automatically connects when the terminal is connected to the host computer. If
ActiveSync was disconnected, start ActiveSync. Tap Start - Programs - ActiveSync. The
terminal begins to connect to the host computer.
Figure 5-2. Connecting to Host Computer
Copying Files
Copying a file results in separate versions of a file on your terminal and desktop computer.
Since the files are not synchronized, changes made to one file will not affect the other.
1. Connect your terminal to your host computer.
2. In ActiveSync on the host computer, click Explore. Windows Explorer will open the
Mobile Device window for your terminal.
5-6
Applications
3. Open a new Windows Explorer and browse to the file that you want to copy on your
terminal or host computer.
4. Do one of the following:
To copy the file to your terminal, right-click the file and select Copy. Place the cursor
in the desired folder on your terminal, right-click, and select Paste.
To copy the file to your host computer, right-click the file and select Copy. Open a
new Windows Explorer, browse to the desired folder on your host computer, rightclick, and select Paste.
Command Prompt
Command Prompt is a shell application that looks similar to DOS. It is not a DOS emulator
but a way to use a command line interface. You are limited to 10 different console windows
or applications at any given time. To use the console:
1. Select Start - Programs - Command Prompt.
2. The Command Prompt window appears.
Figure 5-3. Command Prompt Window
3. At the command prompt you can launch applications by typing their filename and
pressing the Enter key.
5-7
PPT 8800 Series Product Reference Guide for Embedded Windows® CE .NET
DataSync
Use DataSync to synchronize data between the terminal and host computer.
1. Connect the terminal to the host computer.
2. Ensure that ActiveSync is running on the host computer.
3. Select Start - Programs - DataSync. The Connection Status window appears.
Figure 5-4. DataSync - Connection Status Window
4. Tap Sync Now.
Figure 5-5. Data Synchronizing
5. Data will sync between the terminal and host computer.
5-8
Applications
Remote Desktop
Using the Remote Desktop connection you can log onto a Windows Terminal Server and
use all programs installed on this server. For example, instead of running Microsoft Pocket
Word, you can run the desktop version of Microsoft Word.
Connecting to a Terminal Server
To connect to a terminal server:
1. Select Start - Programs - Remote Desktop Connection, or run 'MSTSC' from the
command prompt. The initial Remote Desktop Connection window appears.
Figure 5-6. Remote Desktop Connection Window
2. In the Computer drop-down list, type a Terminal Server name or TCP/IP address,
or select a server.
3. Tap Connect.
4. In the next Remote Desktop Connection window, type your user name, password,
and domain (if required), and then tap OK.
Disconnecting Without Ending a Session
To disconnect a session:
1. In the Remote Desktop Connection window, select Start - Shutdown.
2. Tap Disconnect.
3. Tap OK.
5-9
PPT 8800 Series Product Reference Guide for Embedded Windows® CE .NET
Note: If you previously disconnected from a Terminal Server without
ending the session, the Terminal Server will continue to execute any
running processes. Remote Desktop Connection can later
reconnect to this same session (if your administrator configured
Remote Desktop Connection to reconnect to disconnected
sessions).
Disconnecting and Ending a Session
To end a session:
1. In the Remote Desktop Connection window, select Start - Shutdown.
2. Tap Log Off.
3. Tap OK.
5-10
Applications
Internet Explorer
With Internet Explorer, you can view Internet or intranet Web pages on your terminal. You
need to use a modem, an Ethernet connection or a Spectrum24 connection to connect to
an Internet service provider (ISP) or network.
To open Internet Explorer, tap Start - Programs - Internet Explorer.
Figure 5-7. Pocket Internet Explorer
Browsing the Web
To browse the Web:
1. Connect to a network using a wireless connection. See Connecting to the Internet
on a Wireless Network on page 4-36.
2. Once connected, go to a specific Web page in one of the following ways:
•
Select View, then Address Bar (if the Address bar is not already displayed). In
the address bar, using the soft keyboard or 15-key keypad, enter the Web
address. Press or tap the ENTER key. You can also tap the Address Bar dropdown arrow to choose from previously entered addresses.
3. To end the connection, select File - Close.
5-11
PPT 8800 Series Product Reference Guide for Embedded Windows® CE .NET
Note: If you select Internet Explorer before setting up the network
connections, a window may appear allowing you to proceed to the
connection settings window. After you select your settings, you
return to Internet Explorer.
Setting up a Proxy Server
Proxy servers are often used when connecting to the Internet through a local network, such
as a corporate network, for added security. To set the proxy server settings:
1. From the Menu bar, select View - Options - Proxy Server tab.
2. Select Use Proxy Server.
3. Enter the proxy server address and port. For more information, see your network
administrator.
4. To bypass the proxy server for local addresses, such as corporate intranet pages,
select Bypass Proxy for Local Addresses.
5. Tap OK.
Enable Cookies
A cookie file contains information about your identity and preferences so that a Web site
can tailor information to your needs. The Web site sends the file, and it is stored on the
terminal.
1. From the Menu bar, select View - Options - Advanced tab.
2. Select Enable Cookies.
3. Tap OK.
5-12
Applications
Media Player
With Windows Media Player on the PPT 8800 you can play digital audio and video files that
are stored on your terminal. The Media Player is supplied as part of the SDK and can be
installed on the terminal. To open Windows Media Player, select Start - Programs - Media
Player.
Indicates the progress of
the current track.
Slide to control volume..
Tap to turn volume on and off.
Tap to play next file.
Tap to play previous file.
Tap to stop.
Tap to play or pause.
Figure 5-8. Media Player Window
5-13
PPT 8800 Series Product Reference Guide for Embedded Windows® CE .NET
ScanSamp2
The sample scanning application enables the terminal’s scanner, allows the user to change
scan parameters, and displays scanned data. To access ScanSamp2 select Start Programs - ScanSamp2.
Figure 5-9. ScanSamp2 Example Window
Scanning Data Fields
After a bar code is scanned, the following data appears in the scan window:
•
Data displays the data encoded in the scanned bar code.
•
Type indicates the hex type scanned.
•
SRC indicates the scanner being used and the bar code type scanned
(e.g., Code 128).
•
Time displays the time the bar code was scanned.
Scanning Options
The following options are available in the Scan window:
•
5-14
Tapping the Scan button provides an alternative to the trigger buttons on the
terminal.
Applications
•
Tapping the View button displays the bar code content in a separate window.
Figure 5-10. View Window
•
Tapping the Param button allows you to change options, such as:
•
scanning feedback parameters:
•
beep time (length of decode beep)
•
beeper frequency (tone)
•
LED-on time (length of time LED remains on upon decode)
•
Wav File (sound of decode beep)
•
Code ID (AIM, Symbol)
•
Scan type (foreground, background, monitor).
Figure 5-11. Parameter Window
5-15
PPT 8800 Series Product Reference Guide for Embedded Windows® CE .NET
•
Tapping Codes allows the selection of the code types the terminal is able to
decode, and allows you to set the options for each code type. (Param and Length
buttons.)
Figure 5-12. Codes Window
•
5-16
Tapping Cancel closes the ScanSamp2 window.
Applications
Windows Explorer
Windows Explorer allows you to browse, cut, copy, paste, and delete files as well as
execute the program.
To open Windows Explorer select Start - Programs - Windows Explorer.
Menu Bar
Button Bar
Address Bar
Figure 5-13. Windows Explorer Window
Windows Explorer contains a button bar, menu bar and address bar that allows you to
navigate organize files on the terminal.
Viewing Files as Icons or Lists
1. To view icons, select View - Large Icons or Small Icons.
2. To view a list, select View - Details.
Creating a New Folder
To create a new folder:
1. If necessary, open the folder where you want the new folder to reside.
2. Select File - New Folder.
3. Enter a name for the new folder.
4. Double-tap a program icon to open. The program starts.
5-17
PPT 8800 Series Product Reference Guide for Embedded Windows® CE .NET
Network and Dialup Connections
The Network and Dialup Connection is used to access network resources from a remote
location. First, a connection is established with the remote computer, and then the Windows
CE based device, or client, can upload and download files.
5-18
Chapter 6
Spectrum24 Network Configuration
Chapter Contents
Introduction . . . . . . . . . . . . . . . . . . . . . . . . . . . . . . . . . . . . . . . . . . . . . . . . . . . . . . . . . . . . . . . . . . 6-3
Mobile Companion . . . . . . . . . . . . . . . . . . . . . . . . . . . . . . . . . . . . . . . . . . . . . . . . . . . . . . . . . . . . . 6-3
Finding WLANs. . . . . . . . . . . . . . . . . . . . . . . . . . . . . . . . . . . . . . . . . . . . . . . . . . . . . . . . . . . . 6-5
Status . . . . . . . . . . . . . . . . . . . . . . . . . . . . . . . . . . . . . . . . . . . . . . . . . . . . . . . . . . . . . . . . . . 6-12
Setting Options . . . . . . . . . . . . . . . . . . . . . . . . . . . . . . . . . . . . . . . . . . . . . . . . . . . . . . . . . . . 6-18
Changing Profiles . . . . . . . . . . . . . . . . . . . . . . . . . . . . . . . . . . . . . . . . . . . . . . . . . . . . . . . . . 6-19
Editing a Profile . . . . . . . . . . . . . . . . . . . . . . . . . . . . . . . . . . . . . . . . . . . . . . . . . . . . . . . 6-20
Creating a New Profile . . . . . . . . . . . . . . . . . . . . . . . . . . . . . . . . . . . . . . . . . . . . . . . . . 6-20
Deleting a Profile . . . . . . . . . . . . . . . . . . . . . . . . . . . . . . . . . . . . . . . . . . . . . . . . . . . . . . 6-20
Ordering Profiles . . . . . . . . . . . . . . . . . . . . . . . . . . . . . . . . . . . . . . . . . . . . . . . . . . . . . . 6-20
6-1
PPT 8800 Series Product Reference Guide for Embedded Windows® CE .NET
6-2
Spectrum24 Network Configuration
Introduction
Wireless LANs allow PPT 8846 terminals to communicate wirelessly, and to send captured
data “real time” to a host device. Before a terminal can be used on a Spectrum24 LAN your
facility must be set up with the equipment required to run the wireless LAN and the terminal
must be properly configured. Refer to the documentation that came with your Access Points
(APs) for instructions on setting up the required hardware.
The PPT 8846 terminal Network Adapter settings and Spectrum24 settings configure and
monitor the wireless connection. The Mobile Companion icon appears in the task tray, and
indicates terminal signal strength as follows:
Icon
Status
Excellent signal strength
Very good signal strength
Good signal strength
Fair signal strength
Poor signal strength
Out-of-network range (not associated)
Mobile Companion
The Mobile Companion utility is used to configure the terminal’s wireless network settings.
The Mobile Companion utility starts automatically and appears as an icon on the task tray.
The status icon changes in real-time to reflect the signal strength and availability of the
6-3
PPT 8800 Series Product Reference Guide for Embedded Windows® CE .NET
adapter and the wireless network. Tap the icon on the task tray to open the Mobile
Companion menu.
Mobile Companion
Menu
Mobile Companion
icon
Figure 6-1. Mobile Companion Menu
When the menu opens, the user can select Status, Find WLANs, WLAN Profiles or Options
menu options.
Table 6-1. Mobile Companion Menu Descriptions
Menu Item
Status
Description
Displays the current status and information for the wireless
connection.
Signal tab - displays radio signal transmission strength from the
adapter (using its current profile) to the associated AP.
Info tab - displays software, driver, firmware, hardware, and
country information for the current profile.
IP Status tab - displays network address information.
Ping tab - displays signal strength data, data rate, and conduct
data transmission tests between the terminal and associated AP or
client.
6-4
Spectrum24 Network Configuration
Table 6-1. Mobile Companion Menu Descriptions (Continued)
Menu Item
Status (Contd)
Description
APs tab - displays APs with the same ESSID as the current
terminal profile. The terminal's roaming capabilities can be set from
this tab.
Peers tab - displays the BSSIDs, power modes, transmit rates and
data rates of other networked clients within the Ad Hoc (peer-topeer) network. When in Ad Hoc operating mode, the Peers tab
displays instead of the APs tab.
WLAN Profiles
Displays the current profiles and allows the user to add, edit and
delete profiles.
Find WLANs
Displays a list of those Spectrum24 networks (APs and networked
peers) available to the terminal for association. The networks are
listed by their ESSID. To the right of each network is a signal
strength icon. Networks with a signal strength of Good (three green
bars out of five) or better should be considered for connection. Tap
a network and tap Connect to interoperate with the AP
representing that network. Once connected, the Mode, Encryption,
IP Config and Power tabs display the ESSID, security settings,
network address information and power consumption level set for
that network. See Finding WLANs on page 6-5 for more
information.
Options
Displays settings for configuring battery consumption avoidance
capabilities, system sounds, AP and terminal association
capabilities, profile roaming options, as well as password
protecting the Mobile Companion utility.
Finding WLANs
A completed profile is a set of terminal configuration settings that can be used in different
locations to connect to a Spectrum24 network. Creating different profiles is a good way of
having pre-defined terminal operating parameters available for use in various Spectrum24
network environments.
6-5
PPT 8800 Series Product Reference Guide for Embedded Windows® CE .NET
Select Find WLANs from the Mobile Companion menu to locate the APs in the area. The
Mobile Companion window displays the available WLAN networks.
Figure 6-2. Available WLAN Networks
1. Select an available WLAN network from the list.
2. Tap Connect. The Mode tab displays.
Infrastructure Mode
Ad Hoc Mode
Figure 6-3. Mode Tab
3. The Profile Name: and 802.11 ESSID: fields are populated with the name and
(WLAN) identifier of the network connection. You can change the Profile Name: if
desired.
Use the Profile Name field to enter the name of the terminal profile used to transmit
with either an AP or another networked computer.
The ESSID is the 802.11 Extended Service Set Identifier. The ESSID is 32character (maximum) string identifying the WLAN. The ESSID assigned to the
terminal is required to match the AP ESSID for the terminal to communicate with
the AP.
6-6
Spectrum24 Network Configuration
4. In the Operating Mode: drop-down list, select the operating mode:
Infrastructure
Select Infrastructure to enable the terminal to transmit and
receive data with an AP. Infrastructure is the terminal default
mode when Mobile Companion initially displays.
Ad Hoc
Select Ad Hoc to enable the terminal to form its own local
network where terminals communicate peer-to-peer without
APs using a shared ESSID. Select the Long preamble
checkbox if the terminal and its profile are using a long
preamble when transmitting data. A long preamble is
approximately 8 bytes of the packet header attached to the
packet prior to transmission. Devices in Ad Hoc mode are
required to use the same preamble length to interoperate.
The terminal initiating the Ad Hoc network sets the channel
(using the Channel drop-down list) used by each peer in the
Ad Hoc network.
5. In the Country: drop-down list, select the country of operation for the terminal. This
ensures the terminal is using country code information compatible with the country
code data used by the associated AP. Select International if using the terminal with
a non-Symbol AP or a pre AP-4131 model.
6. Select the Encryption tab to set the terminal profile security level.
Figure 6-4. Encryption Tab
The terminal supports Open System (no encryption), 40-bit Shared Key, 128-bit
Shared Key and Kerberos encryption algorithms. The absence of a physical
connection makes wireless links vulnerable to information theft. Encryption is an
efficient method of preventing data theft and improving data security.
6-7
PPT 8800 Series Product Reference Guide for Embedded Windows® CE .NET
The AP and the terminal are required to use the same encryption algorithm to
associate and transmit data. If an AP is set to Open System and an adapter is set
to 40-bit or 128-bit, no association takes place. Similarly, if an adapter is set to
Open System and an AP is set to 40-bit or 128-bit, no association takes place.
If an AP is set to 40-bit and a terminal is set to 128-bit the terminal can associate
to the AP, but no data transmission and reception can take place.
7. Select one of the following Encryption options from the Algorithm: drop-down list:
Open System
(no encryption)
Use the Open System option as the default setting when no
data packet encryption is needed over the network. Selecting
Open System provides no security for the data being
transmitted over the network.
40-bit Shared
Key
Select 40-bit encryption and enter a 10-digit hex encryption
key. Tap Reset Keys to set the encryption key to the default
values.
128-bit Shared
Key
Select 128-bit encryption and enter a 26-digit hex encryption
key. The 128-bit encryption option provides a higher level of
security than 40-bit encryption while maintaining an 11 Mbps
data rate. Tap Reset Keys to set the encryption key to the
default values.
Note: The default Hex digit keys are visible any time they are
used. As a security precaution after setting the key values for
the network, the digits are replaced with asterisks * within the
encryption key fields.
If the associated AP is using an optional Passkey, the "active"
terminal profile is required to use one as well. The Passkey is
a plain text representation of the WEP keys displayed in the
Encryption tab. The Passkey provides an easy way to enter
WEP key data without having to remember the entire 40-bit
(10 character) or 128-bit (26 character) Hex digit string.
6-8
Spectrum24 Network Configuration
Tap Passkey to display the Passkey window. Enter an easyto-remember 4 to 26 character string to be used as the WEP
algorithm. Tap OK. The AP transforms the Passkey string into
a set of four WEP keys using MD5 algorithms and displays
them in the WEP fields. These are the new WEP keys for the
terminal profile. Once displayed in the WEP key fields, the
adapter profile behaves as if the keys were entered manually.
Kerberos
Kerberos is a different form of 128-bit data security whereby a
terminal is required to have its request for AP resources
authenticated with a Kerberos server before the server
permits the AP to transmit and receive data with the
associated terminal.
Select Kerberos and enter the key distribution center (KDC)
and Realm values. The KDC is located on a server and
maintains information about the APs and users it supports.
The KDC also permits the transmission and receipt of data
once the credentials of the user are verified. Enter the name
of the server that hosts the Kerberos KDC in the Realm field.
8. Select the IP Config tab to configure the following terminal profile network address
parameters: IP address, subnet, gateway, DNS and WINS. Changes made within
the IP Config tab only impact the profile selected in the Mode tab and do not impact
the network address parameters configured for other profiles.
Figure 6-5. Mobile Companion - IP Config Tab (DHCP)
•
Select Dynamic Host Configuration Protocol (DHCP) from the IP Type dropdown list to obtain a leased IP address and network configuration information
from a remote server. DHCP is the default setting for the terminal profile. When
DHCP is selected, the IP address fields are read-only.
6-9
PPT 8800 Series Product Reference Guide for Embedded Windows® CE .NET
•
Select Static to manually assign the IP, subnet mask, default gateway, DNS and
WINS addresses used by the terminal profile.
Figure 6-6. Mobile Companion - IP Config Tab (Static)
6-10
IP Address
The Internet is a collection of networks with users that
communicate with each other. Each communication carries
the address of the source and destination networks and the
particular machine within the network associated with the user
or host computer at each end. This address is called the IP
address (Internet Protocol address). Each node on the IP
network must be assigned a unique IP address that is made
up of a network identifier and a host identifier. Enter the IP
address as a dotted-decimal notation with the decimal value of
each octet separated by a period, for example, 192.168.7.27.
Subnet Mask
Most TCP/IP networks use subnets in order to effectively
manage routed IP addresses. Having an organization's
network divided into subnets allows it to be connected to the
Internet with a single shared network address, for example,
255.255.255.0.
Gateway
The default gateway is a device that is used to forward IP
packets to and from a remote destination.
DNS
The Domain Name System (DNS) is a distributed Internet
directory service. DNS is used mostly to translate domain
names and IP addresses. It is also used to control Internet
email delivery. Most Internet service requires DNS to operate
properly. If DNS is not configured, Web sites cannot be located
and/or email delivery fails.
Spectrum24 Network Configuration
WINS is a Microsoft® Net BIOS name server. WINS eliminates
the broadcasts needed to resolve computer names to IP
addresses by providing a cache or database of translations.
WINS
9. Select the Power tab to set the Radio Transmission Power level and the Power
Saving Modes for the terminal profile.
Infrastructure Mode
Ad Hoc Mode
Figure 6-7. Mobile Companion - Power Tab
Adjusting the Radio Transmission Power level enables you to expand or confine
the transmission area with respect to other wireless devices that could be operating
nearby. Reducing a coverage area in high traffic areas improves transmission
quality by reducing the number of noises in that coverage area.
•
•
In Infrastructure mode there are two transmission power options:
•
Select Automatic to use the AP power level. Automatic is the default mode
for terminals operating in Infrastructure mode.
•
Select Power Plus to set the terminal transmission power one level higher
than the level set for the AP.
In Ad Hoc mode there are five transmission power options:
•
Select Maximum power to set the terminal to the highest transmission
power level. Select Maximum power when operating in highly
reflective environments and areas where other devices could be
operating nearby. Additionally, use the maximum power level when
attempting to communicate with devices at the outer edge of a
coverage area.
6-11
PPT 8800 Series Product Reference Guide for Embedded Windows® CE .NET
•
Choose 50%, 25% or 10% to set the transmit power level to that
percentage of the maximum power level.
•
Choose Minimum power to set the terminal to the lowest transmission
power level. Use the minimum power level when communicating with
other devices in very close proximity. Additionally, select minimum
power in instances where little or no radio interference from other
devices is anticipated.
The Automatic Power Saving Mode switches to Best Network Performance when
an AC power supply is detected. If a battery is used, an appropriate setting
between Best Network Performance and Acceptable Network Performance is
automatically chosen based on a real-time analysis of network usage. The
Automatic Power Saving Mode is the default setting and extends the operating time
before the battery is recharged.
The Manual Power Saving Mode allows you to select a performance level suited to
intended operation. There are six settings ranging from the Best Network
Performance (using the most battery power) to Acceptable Network Performance
(using the least battery power). A network performance description is displayed for
each power range.
10. Tap OK to implement power consumption changes for the terminal profile.
Status
To view the status of the wireless network connection, select Status from the Mobile
Companion menu.
1. Select the Signal tab to display a real-time graph of the signal quality of the terminal
to the associated AP (Infrastructure Mode only). The number of times the terminal
has roamed to and from APs, the current data rate, and the network status are
6-12
Spectrum24 Network Configuration
displayed. Signal quality is an indicator of how clearly the adapter can hear the
associated AP.
Figure 6-8. Mobile Companion - Signal Tab
Missed Beacons Displays the amount of beacons (uniform system packets
broadcast by the AP to keep the network synchronized)
missed by the terminal. The fewer the missed beacons the
better the signal. As long as the LED to the right of the graph
is green the AP association is not jeopardized by an excess of
missed AP beacons. If the LED is Red, an association with a
different AP could be warranted to reduce the amount of
missed beacons and improve the signal.
Txmit Retries
(Transmit
Retries)
Displays the number of data packets retransmitted by the
terminal. The fewer transmit retries the stronger the signal. As
long as the LED to the right of the graph is green the AP
association is not jeopardized. If the LED is red, an association
with a different AP could be warranted to reduce the amount of
transmit retries and improve the signal.
Signal
Displays the Relative Signal Strength Indicator (RSSI) of the
signal transmitted between the AP and terminal. As long as the
LED to the right of the graph is green the AP association is not
jeopardized. If the LED is red, an association with a different
AP could be warranted to improve the signal.
Note: The Signal tab is view only and is not available if the
current operating mode is Ad Hoc.
6-13
PPT 8800 Series Product Reference Guide for Embedded Windows® CE .NET
2. Select the Info tab to view the terminal’s current software and driver revision data
as well as the operating parameters of the current profile.
Figure 6-9. Mobile Companion - Info Tab
6-14
Version
Information
Displays the terminal's software, driver, firmware and
hardware versions as well as country information. This data is
consistent for the terminal regardless of which terminal profile
is the current profile.
Current Status
Displays the terminal’s current Profile Name, ESSID, and
Encryption mode. Terminal performance is displayed using a
verbal indicator of signal strength. Terminal operating
information differs depending on which profile has been
enabled as the current profile.
Spectrum24 Network Configuration
3. Select the IP Status tab to view the terminal’s network address information. Unlike
the IP Config tab in Finding WLANs, the IP Status tab is view only with no userconfigurable data fields.
Figure 6-10. Mobile Companion - IP Status Tab
IP Type
If DHCP was selected from the IP Config tab, leased IP
address and network address data displays for the terminal. If
Static was selected, the values displayed were input manually
in the IP Config tab.
IP Address
The Internet is a collection of networks with users that
communicate with each other. Each communication carries
the address of the source and destination networks and the
particular machine within the network associated with the user
or host computer at each end. This address is called the IP
address. Each node on the IP network must be assigned a
unique IP address that is made up of a network identifier and
a host identifier. Enter the IP address as a dotted-decimal
notation with the decimal value of each octet separated by a
period, for example, 192.168.7.27.
Subnet Mask
Most TCP/IP networks use subnets in order to effectively
manage routed IP addresses. Having an organization's
network divided into subnets allows it to be connected to the
Internet with a single shared network address, for example,
255.255.255.0.
Gateway
The gateway is a device that is used to forward IP packets to
and from a remote destination.
6-15
PPT 8800 Series Product Reference Guide for Embedded Windows® CE .NET
DNS
The Domain Name System (DNS) is a distributed Internet
directory service. DNS is used mostly to translate domain
names and IP addresses. It is also used to control Internet email delivery. Most Internet service requires DNS to operate
properly. If DNS is not configured, Web sites cannot be located
or e-mail delivery fails.
WINS
WINS is a Microsoft Net BIOS name server. WINS eliminates
the broadcasts needed to resolve computer names to IP
addresses by providing a cache or database of translations.
MAC Address
An IEEE 48-bit address the terminal is assigned at the factory
that uniquely identifies the adapter at the physical layer.
Host Name
Displays the name of the terminal.
4. Tap Renew to refresh the information displayed on the IP Status tab.
5. Select the Ping tab to send and receive ICMP ping packets across the network to
the specified IP address.
Figure 6-11. Mobile Companion - Ping Tab
6. In the IP drop-down list, select a target device IP address.
7. In the Size drop-down list, select the size of the packet transmission.
8. Tap Start Test to begin the ping test.
9. Tap Stop Test to terminate the ping test.
The average mega-bits per second, signal strength, data rate currently in use, test
statistics and round trip (RT) times are displayed for each test. The associated AP
MAC address is also displayed. The signal strength level and the data transmission
rate are displayed in real-time bar graphs.
6-16
Spectrum24 Network Configuration
10. Select the APs tab to view APs with the same ESSID as the terminal’s profile.
Figure 6-12. Mobile Companion - APs Tab
The associated AP displays a radio wave radiating from its antenna to indicate its
associated status. Tapping on the icon displays a menu with Set Mandatory and
Set Roaming options.
Selecting the Set Mandatory item prohibits the terminal from associating with a
different AP. The letter M displays on top of the icon when the Set Mandatory option
has been selected.
Selecting Set Roaming allows the terminal to roam to any AP with a better signal.
These settings are temporary and never saved to the registry.
Tap Refresh to update the list of the APs with the same ESSID. A signal strength
value of 32 is the highest possible. The APs tab only displays when Infrastructure
is selected as the terminal operating mode from the Mode tab.
11. If the terminal is in Ad Hoc mode, select the Peers tab displays the BSSID or MAC
addresses of the other terminals in the network, their operating mode (PSP or
CAM), their transmit rate, their supported data rate and the length of time an
6-17
PPT 8800 Series Product Reference Guide for Embedded Windows® CE .NET
adapter has been out of the Ad Hoc network. Tap Refresh to update the Peers tab
to the latest Ad Hoc network performance and terminal membership data.
Figure 6-13. Mobile Companion - Peers Tab
Setting Options
Select Options from the Mobile Companion menu to enable or disable international
roaming, configure consumption avoidance capabilities, enable system sounds, and set
temporary settings.
Figure 6-14. Mobile Companion - Option Settings
1. Select the Access AP networks checkbox to display available AP networks and
their signal strength within the Available WLAN Networks tab. These are the APs
available to the terminal profile for association. If this option was previously
disabled, refresh the Available WLAN Networks tab to display the AP networks
available to the terminal.
2. Select the Access Ad-Hoc networks checkbox to display available peer (adapter)
networks and their signal strength within the Available WLAN Networks tab. These
are peers available to the terminal profile for association. If this option was
6-18
Spectrum24 Network Configuration
previously disabled, refresh the Available WLAN Networks tab to display the Ad
Hoc networks available to the terminal.
3. Select the Disable Profile Roaming checkbox to disable the terminal from roaming
and associating to APs with country codes other than the United States.
4. Select the Enable Sounds checkbox to initiate an audible signal when performing
a ping test and associating with an AP. The tones are important to notify users if
the pinging is received or if the terminal has roamed to another AP.
Note: Mobile Companion has a password protection feature. When Mobile
Companion initially displays, the password is off by default.
5. To create a password, tap Change Password.
Figure 6-15. Mobile Companion - Change Password
6. Enter a case sensitive password (10 characters maximum) in the Current
Password field and tap OK. To change the current password, enter the current
password in the Current Password field and enter a new password in the New
Password and Confirm Password fields and tap OK.
Changing Profiles
Select WLAN Profiles from the Mobile Companion menu to view, connect to, create and edit
a profile. A completed profile is a set of adapter configuration settings that can be used in
different locations to connect to a wireless network. Creating different profiles is a good way
of having pre-defined operating parameters available for use in various network
6-19
PPT 8800 Series Product Reference Guide for Embedded Windows® CE .NET
environments. When the WLAN Profiles initially displays, existing profiles appear in the
WLAN Profiles list.
Figure 6-16. Mobile Companion - WLAN Profiles
Select a profile from the list and tap Connect to set that profile as the active profile. The
active profile displays the transmit and receive icon to the left. Once selected, the terminal
is using the ESSID, encryption and power consumption settings initially configured for that
profile.
Editing a Profile
Select a profile from the list and tap Edit to display the Mode tab where the ESSID and
operating mode can be changed for the profile. Use the Encryption, IP Config, and Power
tabs as necessary to edit the profile power consumption and security parameters.
Creating a New Profile
Tap New to display the Mode tab wherein the profile name and ESSID can be set. Use the
Encryption, IP Config and Power tabs as required to set security, network address
information and power consumption level for the new profile.
Deleting a Profile
Select a profile to delete from the list and tap Delete to remove the selected profile.
Ordering Profiles
Select a profile from the list and tap Move Up or Move Down to order the profile. If the
current profile association is lost, Mobile Companion attempts to associate with the first
profile in the list and then the next until a new association is achieved.
6-20
Chapter 7
Bluetooth
Chapter Contents
Introduction . . . . . . . . . . . . . . . . . . . . . . . . . . . . . . . . . . . . . . . . . . . . . . . . . . . . . . . . . . . . . . . . . . 7-3
Turning Bluetooth On and Off . . . . . . . . . . . . . . . . . . . . . . . . . . . . . . . . . . . . . . . . . . . . . . . . . . . . 7-3
Connecting to a Bluetooth Phone . . . . . . . . . . . . . . . . . . . . . . . . . . . . . . . . . . . . . . . . . . . . . . . . . 7-5
Ericsson, Nokia 6210, NTT DoCoMo, Sony Phones . . . . . . . . . . . . . . . . . . . . . . . . . . . . . . . 7-5
Motorola Timeport 270C, Nokia 3650/6310/7650/8910/8910i . . . . . . . . . . . . . . . . . . . . . . . . 7-8
Bluetooth Configuration . . . . . . . . . . . . . . . . . . . . . . . . . . . . . . . . . . . . . . . . . . . . . . . . . . . . . . . . 7-11
Configuring the Terminal . . . . . . . . . . . . . . . . . . . . . . . . . . . . . . . . . . . . . . . . . . . . . . . . . . . 7-11
Assigning COM Ports . . . . . . . . . . . . . . . . . . . . . . . . . . . . . . . . . . . . . . . . . . . . . . . . . . . . . . 7-12
Object Sharing . . . . . . . . . . . . . . . . . . . . . . . . . . . . . . . . . . . . . . . . . . . . . . . . . . . . . . . . . . . 7-13
Discovering Bluetooth Device(s). . . . . . . . . . . . . . . . . . . . . . . . . . . . . . . . . . . . . . . . . . . . . . 7-13
Bonding with Discovered Device(s) . . . . . . . . . . . . . . . . . . . . . . . . . . . . . . . . . . . . . . . . . . . 7-17
View Device Properties. . . . . . . . . . . . . . . . . . . . . . . . . . . . . . . . . . . . . . . . . . . . . . . . . . . . . 7-19
Setting Up A Favorite Device . . . . . . . . . . . . . . . . . . . . . . . . . . . . . . . . . . . . . . . . . . . . . . . . 7-21
Change Views . . . . . . . . . . . . . . . . . . . . . . . . . . . . . . . . . . . . . . . . . . . . . . . . . . . . . . . . . . . 7-22
Deleting a Device . . . . . . . . . . . . . . . . . . . . . . . . . . . . . . . . . . . . . . . . . . . . . . . . . . . . . . . . . 7-24
Bluetooth Communications . . . . . . . . . . . . . . . . . . . . . . . . . . . . . . . . . . . . . . . . . . . . . . . . . . . . . 7-25
Dial-up to Your Network . . . . . . . . . . . . . . . . . . . . . . . . . . . . . . . . . . . . . . . . . . . . . . . . . . . . 7-25
Bluetooth ActiveSync . . . . . . . . . . . . . . . . . . . . . . . . . . . . . . . . . . . . . . . . . . . . . . . . . . . . . . 7-30
ActiveSync with a Favorite Computer . . . . . . . . . . . . . . . . . . . . . . . . . . . . . . . . . . . . . . 7-31
ActiveSync with a Discovered Computer. . . . . . . . . . . . . . . . . . . . . . . . . . . . . . . . . . . . 7-32
ActiveSync with Undiscovered Computer . . . . . . . . . . . . . . . . . . . . . . . . . . . . . . . . . . . 7-33
Bluetooth LAN Access . . . . . . . . . . . . . . . . . . . . . . . . . . . . . . . . . . . . . . . . . . . . . . . . . . . . . 7-36
Connecting to a Favorite Access Point . . . . . . . . . . . . . . . . . . . . . . . . . . . . . . . . . . . . . 7-36
Connecting to a Discovered Access Point. . . . . . . . . . . . . . . . . . . . . . . . . . . . . . . . . . . 7-37
Connecting to an Undiscovered Access Point. . . . . . . . . . . . . . . . . . . . . . . . . . . . . . . . 7-38
Automatic Connection . . . . . . . . . . . . . . . . . . . . . . . . . . . . . . . . . . . . . . . . . . . . . . . . . . . . . 7-39
7-1
PPT 8800 Series Product Reference Guide for Embedded Windows® CE .NET
Socket OBEX . . . . . . . . . . . . . . . . . . . . . . . . . . . . . . . . . . . . . . . . . . . . . . . . . . . . . . . . . . . . . . . . 7-41
Sending a File . . . . . . . . . . . . . . . . . . . . . . . . . . . . . . . . . . . . . . . . . . . . . . . . . . . . . . . . . . . . 7-41
Browse Remote Device . . . . . . . . . . . . . . . . . . . . . . . . . . . . . . . . . . . . . . . . . . . . . . . . . . . . . 7-42
Prepare for File Transfer. . . . . . . . . . . . . . . . . . . . . . . . . . . . . . . . . . . . . . . . . . . . . . . . . 7-42
Send/Receive File or Folder . . . . . . . . . . . . . . . . . . . . . . . . . . . . . . . . . . . . . . . . . . . . . . 7-44
Create a Folder. . . . . . . . . . . . . . . . . . . . . . . . . . . . . . . . . . . . . . . . . . . . . . . . . . . . . . . . 7-44
Delete a File or Folder . . . . . . . . . . . . . . . . . . . . . . . . . . . . . . . . . . . . . . . . . . . . . . . . . . 7-45
Refresh Remote View. . . . . . . . . . . . . . . . . . . . . . . . . . . . . . . . . . . . . . . . . . . . . . . . . . . 7-47
Connecting or Disconnecting to a Remote Device . . . . . . . . . . . . . . . . . . . . . . . . . . . . . 7-47
Exit Bluetooth File Explorer . . . . . . . . . . . . . . . . . . . . . . . . . . . . . . . . . . . . . . . . . . . . . . 7-48
Receiving a File or Contact . . . . . . . . . . . . . . . . . . . . . . . . . . . . . . . . . . . . . . . . . . . . . . . . . . 7-48
Enable File Sharing . . . . . . . . . . . . . . . . . . . . . . . . . . . . . . . . . . . . . . . . . . . . . . . . . . . . . . . . 7-49
Bluetooth Printing . . . . . . . . . . . . . . . . . . . . . . . . . . . . . . . . . . . . . . . . . . . . . . . . . . . . . . . . . . . . . 7-49
7-2
Bluetooth
Introduction
The PPT 8860 terminal provides Bluetooth communication with Bluetooth enabled devices
such as phones, printers, access points (APs) and other terminals.
Turning Bluetooth On and Off
Turn off the Bluetooth radio to save power or if entering an area with radio restrictions (e.g.,
an airplane).
1. Tap the Bluetooth icon - Turn Transmitter OFF.
Figure 7-1. Bluetooth Menu - Turn Transmitter Off
7-3
PPT 8800 Series Product Reference Guide for Embedded Windows® CE .NET
2. The Bluetooth radio transmitter turns off. The Bluetooth icon becomes gray, as well
as relevant menu options.
Figure 7-2. Bluetooth Menu - Turning Transmitter On
3. To turn the Bluetooth radio transmitter back on, tap the gray Bluetooth icon.
4. Select Turn Transmitter ON.
Note: When the terminal is placed in suspend mode, the Bluetooth radio
turns off. When the terminal resumes, it take 10 seconds for the
Bluetooth radio driver to re-initialize the radio.
7-4
Bluetooth
Connecting to a Bluetooth Phone
The Get Connected! Wizard guides you through a one-time setup process that prepares
the terminal and a Bluetooth enabled phone for connection. The wizard varies depending
on the phone.
Ericsson, Nokia 6210, NTT DoCoMo, Sony Phones
1. Tap the Bluetooth icon - Get Connected! The Get Connected! Wizard window
appears.
Figure 7-3. Get Connected! Wizard Window
7-5
PPT 8800 Series Product Reference Guide for Embedded Windows® CE .NET
2. Tap Next >.
Figure 7-4. Select Your Phone Window
3. In the My Bluetooth phone is: drop-down list, select a Bluetooth phone. The wizard
provides tailored instructions based on the selection. Tap Next >.
4. The next window(s) vary and provide instructions for preparing the phone for
Bluetooth connections. Some or all of the following may need to be performed:
•
Naming the Bluetooth phone
•
Setting the Bluetooth phone in discoverable mode
•
Preparing a Bluetooth passkey.
Figure 7-5. Get Connected! Wizard Windows
7-6
Bluetooth
5. Read the instructions and perform the task on the phone then tap Next >. The
terminal searches for a Bluetooth phone. When the search is complete, a list of
discovered Bluetooth phones appears.
Figure 7-6. Get Connected! - Select Device Window
6. Select the phone to connect to and tap Select. A service discovery phase begins
which lasts for about 5 to 10 seconds.
7. As prompted in the next window, prepare the phone for bonding. For instructions
on setting the phone to “Bondable” or “Pairable” mode, refer to the phone’s user
manual. Have the passkey ready, then tap Next >. The Passkey Required window
appears.
Figure 7-7. Enter Passkey Window
7-7
PPT 8800 Series Product Reference Guide for Embedded Windows® CE .NET
8. Enter the passkey. Tap Reply.
9. The phone may then either automatically accept the passkey or ask you to enter
one. If prompted for a passkey, use the same one entered on the terminal.
Note: Ericsson T68/T68i only: When the phone requests to bond, select 2:
Add to paired devices. Do not tap ACCEPT.
10. Tap Finish. After successfully connecting, the phone appears in the Bluetooth
Devices folder. In the Today screen, the Bluetooth icon blinks.
Note: You may also switch between different phones by assigning a new
“favorite phone” in the Bluetooth Devices folder.
Motorola Timeport 270C, Nokia 3650/6310/7650/8910/8910i
1. Tap the Bluetooth icon - Get Connected! The Get Connected! Wizard window
appears.
Figure 7-8. Get Connected! Wizard Window
7-8
Bluetooth
2. Tap Next >.
Figure 7-9. Select Your Phone Window
3. In the My Bluetooth phone is drop-down list, select a Bluetooth phone. The wizard
provides tailored instructions based on the selection. Tap Next >.
4. The next window(s) vary and provide instructions for preparing the phone for
Bluetooth connections. Some or all of the following may need to be performed:
•
Naming the Bluetooth phone.
•
Setting the Bluetooth phone in Discoverable mode.
•
Preparing a Bluetooth passkey.
Figure 7-10. Get Connected! Wizard Windows
7-9
PPT 8800 Series Product Reference Guide for Embedded Windows® CE .NET
5. Read the instructions and perform the task on the phone. Tap Next >. The terminal
searches for a Bluetooth phone. When the search is complete, a list of discovered
Bluetooth phones appears.
Figure 7-11. Get Connected! - Select Device Window
6. Select the phone to connect to and tap Select. A service discovery phase begins
which lasts for about 5 to 10 seconds.
7. The next two screens describe procedures you can only complete after the wizard
is completed. Read through each screen but do not complete the described
procedures until you exit the wizard.
8. Continue to the last screen of the wizard and tap Finish. See Bonding with
Discovered Device(s) on page 7-17 to complete the bonding process and, if
desired, set up automatic connections.
7-10
Bluetooth
Bluetooth Configuration
The terminal uses a Bluetooth radio to communicate with other Bluetooth enabled devices
and must be set up properly to do so. This section provides instructions for setting up the
terminal to enable, find and communicate with other devices.
Configuring the Terminal
To configure the PPT 8860:
1. Tap the Bluetooth icon - Advanced Features - My Bluetooth Device. The Device
Manager window appears.
Figure 7-12. Device Manager - General Tab
2. In the Friendly Name field, enter a name for the terminal.
Note: In normal phone connect operation, Discoverable mode is not
needed and should be disabled. If you do enable Discoverable mode
(e.g., for ActiveSync), note that it does not shut off by itself. To save
power, disable it when not needed.
3. Select the Discoverable checkbox to make the terminal discoverable by other
Bluetooth devices.
7-11
PPT 8800 Series Product Reference Guide for Embedded Windows® CE .NET
Note: Connectable, Use Authentication, and Use Encryption are also not
required for printing or dial-up networking applications.
4. Select the Connectable checkbox to enable other Bluetooth device to connect to
the terminal.
5. Select the Use Authentication checkbox to enable other Bluetooth device to
connect to the terminal.
Note: Check Use Authentication to enable the Use Encryption option.
6. Select the Use Encryption checkbox to enable other Bluetooth device to connect
to the terminal.
7. Tap OK.
Assigning COM Ports
To communicate with Bluetooth phones, printers, APs, computers and FAXs, the
appropriate COM ports must be enabled.
1. Tap Bluetooth icon - Advanced Features - My Bluetooth Device. The Device
Manager window appears.
Figure 7-13. Device Manager - COM Ports
2. Tap the COM Ports tab.
7-12
Bluetooth
Note: The Bluetooth COM port cannot be disabled. To free COM ports,
disable IrDA COM ports, see IrDA on page 3-23.
3. As required, enable or disable the Bluetooth COM port assignments.
4. Tap OK.
Object Sharing
Use the Object Sharing tab to set the default directory for storing files to share with other
devices.
1. Tap Bluetooth icon - Advanced Features - My Bluetooth Device - Object Sharing
tab.
Figure 7-14. Device Manager - Object Sharing Tab
2. In the My Shared Folder: field, enter the directory where shared files reside. The
directory path cannot end with “\”.
3. Tap OK.
Discovering Bluetooth Device(s)
Use the Bluetooth Device Discovery wizard to discover other Bluetooth devices nearby.
The Bluetooth Device Discovery wizard is a more detailed alternative to using the Bluetooth
“Get Connected!” Wizard, Bluetooth ActiveSync or Bluetooth LAN Access options.
7-13
PPT 8800 Series Product Reference Guide for Embedded Windows® CE .NET
1. Tap the Bluetooth icon - Advanced Features - Bluetooth Devices. The Bluetooth
Devices window appears.
Figure 7-15. Bluetooth Devices Window
2. Select Tools - Device Discovery. The Discovery window appears.
Figure 7-16. Bluetooth Device Discovery Window
3. Tap Next >.
7-14
Bluetooth
4. Select the device type to search for.
Figure 7-17. Select Bluetooth Device to Search For
5. Tap Next >.
6. The terminal searches for Bluetooth devices in the area.
Figure 7-18. Searching for Bluetooth Devices
7-15
PPT 8800 Series Product Reference Guide for Embedded Windows® CE .NET
7. When the search is complete, a window appears listing the discovered Bluetooth
devices.
Figure 7-19. Discovered Bluetooth Devices
8. Select the checkbox next to the device(s).
9. Tap Next >.
10. A service discovery phase begins, which last about 5 to 10 seconds per chosen
device. When completed the Congratulations! window appears.
Figure 7-20. Bluetooth Device Discovery Congratulations Window
11. Tap Finish.
7-16
Bluetooth
Bonding with Discovered Device(s)
Follow these steps to bond with an already discovered Bluetooth device. In most cases,
bonding is for establishing secure communications with a Bluetooth-enabled phone. This is
a more detailed alternative to using the Bluetooth Get Connected! Wizard.
Caution
Do not bond with a Motorola Timeport 270C or Nokia 6310 phones.
Do not use this method to bond with a printer.
1. Tap the Bluetooth icon. Select Advanced Features - Bluetooth Devices.
Figure 7-21. Bluetooth Devices Window
2. Tap the device icon.
7-17
PPT 8800 Series Product Reference Guide for Embedded Windows® CE .NET
3. Select Device - Bond. The Bluetooth Device Bonding window appears.
Figure 7-22. Bluetooth Bonding Window
4. Tap Next >.
Note: Ensure that the Bluetooth device you want to bond with is in
Bondable mode. Refer to the device’s user documentation.
Figure 7-23. BT Device Manager Window
5. Tap Next >.
7-18
Bluetooth
6. If the remote device is set up to accept bonding, a Bluetooth Passkey Required
window appears.
Figure 7-24. Password Required Window
7. In the Bluetooth passkey: field, enter the passkey.
8. Tap Reply.
9. If required, enter the passkey on the other Bluetooth device.
10. When you have successfully bonded with the other device, tap Finish.
Figure 7-25. Bonding Complete Window
View Device Properties
To view the properties of an already discovered device:
7-19
PPT 8800 Series Product Reference Guide for Embedded Windows® CE .NET
1. Tap the Bluetooth icon - Advanced Features - Bluetooth Devices. The Bluetooth
Device window appears.
Figure 7-26. Bluetooth Device Window
2. Select a device.
3. Select Device - Properties. The Bluetooth Devices Property window appears.
Figure 7-27. Bluetooth Devices Property Window
4. Use the General and Services tabs to view device properties.
5. If needed, assign a new device type icon by tapping on the arrow buttons in the
General tab. You can also use the Device name field to rename the device. When
done, tap OK for the setting to take effect.
7-20
Bluetooth
Setting Up A Favorite Device
To set up default devices in the Bluetooth Devices folder:
1. Tap the Bluetooth icon - Advanced Features - Bluetooth Devices. The Device
Manager appears.
Figure 7-28. Device Manager
2. Select Tools - My Favorites. The My Favorites window appears.
Figure 7-29. My Favorites Window
7-21
PPT 8800 Series Product Reference Guide for Embedded Windows® CE .NET
Note: Tabs appears only for COM ports you have enabled. To enable a
port, see Assigning COM Ports on page 7-12.
3. Tap the tab for the type of device you would like to set a favorite for. If needed, use
the arrow buttons to scroll and find the tab you need.
4. To select a favorite device, select Use the favorite selected above radio button.
5. In the drop-down list, select your device.
6. Tap OK. After setting a device as your favorite, its icon appears in the Bluetooth
Devices window with a heart next to it.
Change Views
To switch between the large icons or details views in the Bluetooth Devices window:
1. Tap the Bluetooth icon - Advanced Features - Bluetooth Devices.
2. Select View. Choose between Large Icons or Details.
Figure 7-30. Large Icons View
7-22
Bluetooth
Figure 7-31. Details View
Note: In Details view, scroll right to see the current Bonded status.
7-23
PPT 8800 Series Product Reference Guide for Embedded Windows® CE .NET
Deleting a Device
If you no longer plan to connect with a device, delete it from the Bluetooth Devices window.
1. Tap the Bluetooth icon - Advanced Features - Bluetooth Devices. The Bluetooth
Device window appears.
Figure 7-32. Bluetooth Device Window
2. Select the device to delete.
3. Select Device - Delete.
4. A Confirm dialog appears. Tap Yes.
Figure 7-33. Delete Device Confirmation Dialog Box
7-24
Bluetooth
Bluetooth Communications
Dial-up to Your Network
Complete the following steps to create a new Bluetooth connection. Before setting up dialup networking, obtain dial-up information and other necessary settings for your office
network or ISP.
1. Tap Start - Settings - Control Panel - double-tap Network and Dial-up icon. The
Connections window appears.
Figure 7-34. Connection Window
7-25
PPT 8800 Series Product Reference Guide for Embedded Windows® CE .NET
2. Tap Connection - New or double-tap the Make New Connection icon. The Make
New Connection window appears.
Figure 7-35. Make New Connection Window
3. In the Type a name for the connection field, enter a name.
4. Tap Next >.
Figure 7-36. Select a Modem Window
5. In the Select a modem: drop-down list, select Bluetooth Phone.
7-26
Bluetooth
6. Tap Configure.
Figure 7-37. Device Properties - Port Settings Tab
7. In the Baud Rate drop-down list, select 115200.
8. Tap Call Options tab.
Figure 7-38. Device Properties - Call Options Tab
9. Uncheck Wait for dial tone before dialing checkbox.
10. Tap OK.
7-27
PPT 8800 Series Product Reference Guide for Embedded Windows® CE .NET
11. If required, tap TCP/IP Settings to enter any special network settings for your
office network or ISP.
Figure 7-39. TCP/IP Settings Window
12. Tap OK.
13. Tap NEXT >.
14. Enter the dial-up number for your office network or ISP.
15. Tap Finish.
Note: If you plan to travel or change area codes often, tap use dialing rules
to configure different dialing locations.
7-28
Bluetooth
16. In the Connections window, double-tap the new Bluetooth connection icon. The
Dial-up Connection window appears.
Figure 7-40. Dial-up Connection Window
17. Enter a User name and Password.
18. Tap Connect.
19. For Motorola Timeport 270C or Nokia 3650/6310/7650/8910/8910i phones:
a. After you tap Connect for the first time, the phone displays a message asking
if you want to bond. On Motorola phones, enter GRANT; on Nokia phones, enter
ACCEPT.
b. On the phone, enter a 4-16 digit passkey, then enter it on the terminal.
c. After successfully bonding with the phone, you may want to set up your phone
to automatically bond with your terminal without requiring a passkey every time.
This option is available with some Motorola and Nokia phones. See Automatic
Connection on page 7-39.
20. To use a different Bluetooth phone for dial-up networking, you can use the same
connection setup, but you must make the new phone your favorite. Run the Get
Connected! Wizard again, select the new phone, and make it your new Favorite
when prompted. Or you can use the Bluetooth Devices folder to change your
favorite phone (see Setting Up A Favorite Device on page 7-21).
7-29
PPT 8800 Series Product Reference Guide for Embedded Windows® CE .NET
Bluetooth ActiveSync
This section explains how to use the Bluetooth ActiveSync option to quickly and easily
ActiveSync to a Bluetooth enabled notebook or host computer with ActiveSync installed.
The procedures vary depending upon if you:
•
ActiveSync with a favorite computer
•
ActiveSync with a discovered computer
•
ActiveSync with an un-discovered computer.
Ensure that ActiveSync on the desktop is set to the proper com port. Determine what com
port the Bluetooth device is set to on the desktop.
Figure 7-41. Sample Bluetooth Configuration Window
7-30
Bluetooth
Set the com port in ActiveSync’s Connection Settings window.
Figure 7-42. Connection Setting Window
ActiveSync with a Favorite Computer
To ActiveSync with a computer that the terminal discovered and is a favorite:
1. Tap Bluetooth icon - Bluetooth ActiveSync.
2. The terminal automatically tries to connect to the favorite computer.
3. The Connect To dialog appears, indicating that it is trying to connect to wireless
ActiveSync.
Figure 7-43. Connecting to Host
7-31
PPT 8800 Series Product Reference Guide for Embedded Windows® CE .NET
4. After a successful connection is made, the dialog indicates Connected.
Figure 7-44. Connected to Host
5. Now you are ready to synchronize files.
ActiveSync with a Discovered Computer
To ActiveSync with a computer that the terminal discovered but is not a favorite:
1. Tap Bluetooth icon - Bluetooth ActiveSync. The Bluetooth Devices window
appears.
Figure 7-45. Bluetooth Devices Window
2. Choose a computer from the list and tap Select, or tap Find to search for another
computer.
7-32
Bluetooth
3. The terminal attempts to connect to the selected host computer.
Figure 7-46. Connecting to Host
4. After a successful connection is made, the status dialog indicates Connected.
Figure 7-47. Connected to Host
5. Now you are ready to synchronize files.
ActiveSync with Undiscovered Computer
To ActiveSync with a computer that the terminal has not discovered:
7-33
PPT 8800 Series Product Reference Guide for Embedded Windows® CE .NET
1. Tap Bluetooth icon - Bluetooth ActiveSync. A Bluetooth device search
automatically begins.
Figure 7-48. Searching for Bluetooth Devices
2. Choose a computer from the list and tap Select. If the computer is not listed, make
sure the computer is discoverable and tap Refresh to search again.
Figure 7-49. Select ActiveSync Device
3. The service discovery phase begins.
7-34
Bluetooth
4. The terminal attempts to connect to the selected host computer.
Figure 7-50. Connecting to Host
5. After a successful connection is made, the status dialog indicates Connected.
Figure 7-51. Connected to Host
6. Now you are ready to synchronize files.
7-35
PPT 8800 Series Product Reference Guide for Embedded Windows® CE .NET
Bluetooth LAN Access
This section explains how to use the Bluetooth LAN access feature to quickly and easily
connect to a Bluetooth-enabled LAN access point. The procedures vary depending upon if
you:
•
Connect with a favorite AP
•
Connect with a discovered AP
•
Connect with an un-discovered AP.
Connecting to a Favorite Access Point
To communicate with a favorite AP:
1. Tap the Bluetooth icon - Bluetooth LAN Access. A screen appears that allows you
to choose which AP to connect to in your Bluetooth Devices folder.
2. Choose an AP from the list and tap Select.
3. If you would like to save the new AP to your Bluetooth Devices manager, check
Save selection for future use.
Note: If your AP is not listed, tap Find and follow the instructions provided
in Connecting to an Undiscovered Access Point on page 7-38.
7-36
Bluetooth
4. Your terminal tries to connect to the selected AP.
Figure 7-52. Connecting to LAN
5. If your LAN requires a passkey, a screen appears, asking for the passkey. Enter
the passkey, then tap OK.
6. After a successful connection is made, the dialog box indicated Connected.
Figure 7-53. Connected to LAN
7. You are now ready to access your LAN for Internet and file access.
Connecting to a Discovered Access Point
To communicate with an AP that the terminal discovered but is not a favorite:
1. Tap the Bluetooth icon - Bluetooth LAN Access.
2. The terminal tries to connect automatically to the favorite AP.
Figure 7-54. Connecting to Favorite LAN
3. A screen appears that allows you to choose which AP to connect to in your
Bluetooth Devices folder.
7-37
PPT 8800 Series Product Reference Guide for Embedded Windows® CE .NET
4. If your LAN requires a passkey, a screen appears, asking for the passkey. Enter
the passkey, then tap OK.
5. After a successful connection is made, the dialog box indicated Connected.
Figure 7-55. Connected to LAN
6. You are now ready to access your LAN for Internet and file access.
Connecting to an Undiscovered Access Point
To connect to an AP that the terminal has not discovered:
1. Tap the Bluetooth icon - Bluetooth LAN Access.
2. The terminal automatically searches for new Bluetooth devices.
Figure 7-56. Searching for Bluetooth Devices
3. After the search is complete, select the AP you wish to connect to.
7-38
Bluetooth
4. Tap Select. If the AP is not listed, tap Refresh to search again.
Figure 7-57. New Bluetooth Devices Window
5. A service discovery phase begins.
6. If the LAN requires a Passkey, a screen appears, asking for the Passkey. Enter the
passkey, then tap OK.
7. After a successful connection is made, the screen indicates Connected.
8. Now you are ready to access your LAN for Internet access, files, etc.
Automatic Connection
Some Bluetooth enabled phones let you set up automatic connections with devices they
have successfully bonded with, without requiring you to manually enter a password every
time you try to connect. To set up automatic connections between your phone and your
terminal, follow the appropriate instructions below for your specific phone.
1. Motorola Timeport 270C:
a. On the phone, press MENU.
b. Scroll to Settings, then press SELECT.
c. Scroll to Connection, then press ON.
7-39
PPT 8800 Series Product Reference Guide for Embedded Windows® CE .NET
d. On Bluetooth Link, press SELECT.
e. Scroll to Devices, then press SELECT.
f. Choose your terminal, then press EDIT.
g. Scroll to Access:Ask, then press CHANGE.
h. Scroll to Automatic, then press SELECT. Press DONE.
2. Nokia 3650/7650:
a. On the phone, press MENU.
b. Scroll to Connectivity, then press Options.
c. The Open option should be highlighted. Press Select.
d. The Bluetooth option should be highlighted. Press Options.
e. The Open option should be highlighted. Press Select.
f. Scroll to the right tab to access the Paired devices list. Highlight your terminal,
then press Options.
g. Scroll to Set as authorised, then press Select.
h. In the confirmation screen, press Yes.
3. Nokia 6310/8910/8910i:
a. On the phone, press MENU.
b. Scroll to 10 Bluetooth, then press SELECT.
c. Scroll to 4 View Paired Devices, then press SELECT.
d. Highlight the Pocket PC, then press OPTIONS.
e. Scroll to 3 Request Connection Authorization, then press NO.
7-40
Bluetooth
Socket OBEX
This section explains how to use the Socket object exchange (OBEX) application to trade
files with another Bluetooth device that supports OBEX.
The OBEX application supports:
•
sending a file
•
browsing remote devices
•
receiving a file
•
enabling file sharing.
The first two operations are client-oriented and involve initiating an object exchange. The
last two operations are server-oriented and involve accepting objects in an exchange
initiated by another Bluetooth device.
Sending a File
To send a file to another Bluetooth device:
1. Ensure the other Bluetooth device is set up to receive a file. It must support the
OBEX Object Push server profile. Refer to the documentation that came with the
device for instructions.
2. Tap the Bluetooth icon - Transfer via Bluetooth - Send a File.
3. If the terminal has no devices in the Bluetooth Devices folder, it searches for
Bluetooth devices nearby.
4. Select the Bluetooth device you wish to send a file and tap Select. If the desired
device is not listed, tap Find. The Select File dialog box appears.
Figure 7-58. Select File Dialog Box
7-41
PPT 8800 Series Product Reference Guide for Embedded Windows® CE .NET
5. Navigate to the location where the file is located.
6. Tap the file you wish to send.
7. Tap OK.
8. The terminal sends the file to the other Bluetooth device.
Figure 7-59. Sending a File
Browse Remote Device
The Bluetooth File Explorer enables the terminal to share files with another Bluetooth
device. The other device must support the OBEX File Transfer server profile.
This section covers the following file transfer operations:
•
Prepare for file transfer
•
Send/receive file(s) or folder(s)
•
Create a folder
•
Delete file(s) or folder(s)
•
Refresh remote view
•
Connect/disconnect
•
Exit the program.
Note: “Local device” refers to the terminal you are running the Socket
OBEX from. “Remote device” refers to the Bluetooth device you are
trying to transfer files with.
Prepare for File Transfer
1. Ensure the remote device has file sharing enabled. It must support the OBEX File
Transfer server profile.
2. Tap the Bluetooth icon - Transfer via Bluetooth - Browse Remote Device.
7-42
Bluetooth
3. If the terminal has no devices in the Bluetooth Devices folder that supports OBEX
File Transfer, then it begins to search for Bluetooth devices nearby.
4. Select the Bluetooth device you wish to browse and tap Select. If the desired
device is not listed, tap Find.
5. The terminal begins to establish a file sharing connection.
6. After the devices successfully connect, the Bluetooth File Explorer appears.
Figure 7-60. Bluetooth File Explorer Window
7. Half of the window shows contents of the remote device, while the other half shows
contents of your terminal (the local device). The very bottom of the window displays
the connection status.
7-43
PPT 8800 Series Product Reference Guide for Embedded Windows® CE .NET
Note: A copy of the selected items will be transferred, not the original.
Send/Receive File or Folder
Select the file or folder that you wish to transfer. You can only select items from one device
per transfer session.
1. Tap items to select them for transfer.
2. Double-tap a folder to open it.
3. There are two different ways to initiate the transfer.
a. Select File - Send to remote or Get from remote, as applicable. The
inappropriate option should be gray.
b. Tap the Send to remote icon or Get from remote icon, as applicable. The
inappropriate icon should be gray.
4. A dialog box reports the status of the transfer.
5. After the transfer, a copy of each selected item appears in the other device.
Create a Folder
To create a folder:
1. Select File - Remote device or Local device.
Figure 7-61. Create Folder
2. Select Create remote folder or Create local folder, as applicable.
7-44
Bluetooth
3. Enter a name for the new folder.
Figure 7-62. Create New Folder
4. Tap OK.
Figure 7-63. New Folder in File Explorer
5. The new folder should be listed under the appropriate device.
Delete a File or Folder
To delete a file or folder:
7-45
PPT 8800 Series Product Reference Guide for Embedded Windows® CE .NET
1. Select item(s) that you wish to delete. You can only delete item(s) from one device
at a time.
2. Select File - Remote device or Local device, wherever the item(s) are located, then
select Delete remote item(s) or Delete local item(s), as applicable.
Figure 7-64. Delete a File or Folder
3. In the Confirm dialog, tap Yes.
Figure 7-65. Confirm File or Folder Deletion
7-46
Bluetooth
Refresh Remote View
1. Select the Device - Refresh remote view.
2. Your local device reads the contents of the remote device.
3. After a few seconds, the view of the contents of the remote device refreshes.
Connecting or Disconnecting to a Remote Device
To connect to the remote device:
1. Ensure the remote device has file sharing enabled.
2. Select Device - Select Connect or tap the Connect icon.
Figure 7-66. Connecting to a Remote Device
7-47
PPT 8800 Series Product Reference Guide for Embedded Windows® CE .NET
3. Select the device to connect to. Tap Select. The terminal attempts to connect to
the selected device.
To disconnect from the remote device:
1. Select Device - Disconnect or tap the Disconnect icon.
Figure 7-67. Disconnecting from a Remote Device
2. The terminal disconnects from the remote device. No contents is listed in the
remote device area.
Exit Bluetooth File Explorer
To exit the Bluetooth File Explorer, select File - Exit.
Receiving a File or Contact
Note: To view a contact from another device a 3rd party business card
viewer application is required.
To receive a file or contact from another Bluetooth device:
1. Tap the Bluetooth icon - Transfer via Bluetooth - Receive Contact or File.
2. The Receive Contact or Receive File status screen appears. Your mobile computer
waits two minutes for the contact or file.
3. After successfully connecting to the remote device, the status screen indicates that
it is connected then disappears after the file is transferred. The new contact or file
7-48
Bluetooth
is saved in the directory specified in the Object Sharing tab (see Object Sharing on
page 7-13).
4. If two minutes passes before you receive the file, tap Wait Again.
Enable File Sharing
To enable file sharing:
1. Tap the Bluetooth icon - Transfer via Bluetooth - Enable File Sharing. The Enable
File Sharing status screen appears.
Figure 7-68. Enable File Sharing Window
2. The terminal waits two minutes for the remote device to connect.
3. After successfully connecting to the remote device, the screen reports Connected.
4. If two minutes passes before you connect, tap Wait Again.
5. File sharing is enabled until you tap Cancel.
Bluetooth Printing
Printing to a Bluetooth printer requires a print-enabled application to be installed on the
terminal. To print to a printer:
1. Ensure that the terminal’s COM port for printing is enabled. See Assigning COM
Ports on page 7-12.
2. Ensure that a Bluetooth printer has been discovered. See Discovering Bluetooth
Device(s) on page 7-13.
3. Set the printer as the terminal’s default printer. See Setting Up A Favorite Device
on page 7-21.
4. Open a printer application and print.
7-49
PPT 8800 Series Product Reference Guide for Embedded Windows® CE .NET
7-50
Chapter 8
Software Installation on Development PC
Chapter Contents
Introduction . . . . . . . . . . . . . . . . . . . . . . . . . . . . . . . . . . . . . . . . . . . . . . . . . . . . . . . . . . . . . . . . . .
Before You Install the SDK . . . . . . . . . . . . . . . . . . . . . . . . . . . . . . . . . . . . . . . . . . . . . . . . . . .
Symbol Windows CE SDK . . . . . . . . . . . . . . . . . . . . . . . . . . . . . . . . . . . . . . . . . . . . . . . . . . . . . . .
Installing the SDK on the Development PC . . . . . . . . . . . . . . . . . . . . . . . . . . . . . . . . . . . . . . . . . .
Installing the SDK . . . . . . . . . . . . . . . . . . . . . . . . . . . . . . . . . . . . . . . . . . . . . . . . . . . . . . . . . .
Installing Other Development Software . . . . . . . . . . . . . . . . . . . . . . . . . . . . . . . . . . . . . . . . . . . . .
8-3
8-3
8-3
8-4
8-4
8-4
8-1
PPT 8800 Series Product Reference Guide for Embedded Windows® CE .NET
8-2
Software Installation on Development PC
Introduction
To develop applications to run on the PPT 8800, the Symbol Windows CE SDK for PPT
8800 is available. This SDK contains PPT 8800-specific software not available in the
standard Microsoft® Windows® CE Platform SDK.
The minimum system configuration required to install the SDK is:
• IBM-compatible host computer with Pentium 150 MHz processor or higher
•
Microsoft Windows XP, Microsoft Windows 2000 or Windows NT 4.0 with Service
Pack 6 or higher. operating system
•
32 MB RAM
•
100 MB available hard disk space
•
CD-ROM drive
•
One available serial port
•
Mouse.
Also, ensure the drive you are installing to accepts long filenames (larger than the 8.3
filename convention).
Before You Install the SDK
Before you install the Symbol Windows CE SDK for PPT 8800, install the following tools:
• Microsoft eMbedded Visual Tools 4.0
•
Microsoft ActiveSync version 3.5 or higher
•
Adobe® Acrobat® Reader® 3.0 or higher.
Symbol Windows CE SDK
The SDK installation program loads the required Windows CE components on the
development PC used to create the image files (via Terminal Configuration Manager) for
download to the terminal.
The Symbol SDK includes:
•
Symbol-provided files
•
Printer drivers
•
TCM scripts
•
Sample code.
8-3
PPT 8800 Series Product Reference Guide for Embedded Windows® CE .NET
Installing the SDK on the Development PC
The Symbol SDK installs through Windows in the directory C:\SYMBOL WINDOWS CE
SDK, and also installs files in the Windows CE Tools directory (generated by the CE Tool
Kit).
Installing the SDK
Install the SDK from the Symbol Web site www.symbol.com. Follow the installation
prompts.
Once installation of the SDK is complete, use eMbedded Visual C++ or eMbedded Visual
Basic to view the active Windows CE configuration, Microsoft Pocket PC, and display the
directory in which the SDK is installed.
Installing Other Development Software
Developing applications for the PPT 8800 may require installing other development
software such as application development environments on the development PC. Follow
the installation instructions provided with this software.
8-4
Chapter 9
Configuring the Terminal
Chapter Contents
Introduction . . . . . . . . . . . . . . . . . . . . . . . . . . . . . . . . . . . . . . . . . . . . . . . . . . . . . . . . . . . . . . . . . . 9-3
Starting Terminal Configuration Manager . . . . . . . . . . . . . . . . . . . . . . . . . . . . . . . . . . . . . . . . . . . 9-4
Defining Script Properties . . . . . . . . . . . . . . . . . . . . . . . . . . . . . . . . . . . . . . . . . . . . . . . . . . . . . . . 9-6
Creating the Script for the Hex Image . . . . . . . . . . . . . . . . . . . . . . . . . . . . . . . . . . . . . . . . . . . . . . 9-8
Opening a New or Existing Script . . . . . . . . . . . . . . . . . . . . . . . . . . . . . . . . . . . . . . . . . . . . . . 9-8
Copying Components to the Script . . . . . . . . . . . . . . . . . . . . . . . . . . . . . . . . . . . . . . . . . . . . . 9-9
Saving the Script . . . . . . . . . . . . . . . . . . . . . . . . . . . . . . . . . . . . . . . . . . . . . . . . . . . . . . . . . . 9-9
Building the Image . . . . . . . . . . . . . . . . . . . . . . . . . . . . . . . . . . . . . . . . . . . . . . . . . . . . . . . . . . . . 9-10
If the Build Fails . . . . . . . . . . . . . . . . . . . . . . . . . . . . . . . . . . . . . . . . . . . . . . . . . . . . . . . 9-11
Sending the Hex Image . . . . . . . . . . . . . . . . . . . . . . . . . . . . . . . . . . . . . . . . . . . . . . . . . . . . . . . . 9-11
Connecting the Terminal and Development PC . . . . . . . . . . . . . . . . . . . . . . . . . . . . . . . . . . 9-12
Set Up IPL to Receive the File . . . . . . . . . . . . . . . . . . . . . . . . . . . . . . . . . . . . . . . . . . . . . . . 9-12
Beginning the Send in TCM . . . . . . . . . . . . . . . . . . . . . . . . . . . . . . . . . . . . . . . . . . . . . . . . . 9-15
Error Messages . . . . . . . . . . . . . . . . . . . . . . . . . . . . . . . . . . . . . . . . . . . . . . . . . . . . . . . . . . . . . . 9-20
IPL Error Detection . . . . . . . . . . . . . . . . . . . . . . . . . . . . . . . . . . . . . . . . . . . . . . . . . . . . . . . . 9-20
TCM Error Messages . . . . . . . . . . . . . . . . . . . . . . . . . . . . . . . . . . . . . . . . . . . . . . . . . . . . . . 9-22
Creating and Loading a Splash Screen . . . . . . . . . . . . . . . . . . . . . . . . . . . . . . . . . . . . . . . . . . . . 9-22
Loading the Splash Screen via TCM . . . . . . . . . . . . . . . . . . . . . . . . . . . . . . . . . . . . . . . . . . 9-23
Flash Storage . . . . . . . . . . . . . . . . . . . . . . . . . . . . . . . . . . . . . . . . . . . . . . . . . . . . . . . . . . . . . . . 9-24
FFS Partitions . . . . . . . . . . . . . . . . . . . . . . . . . . . . . . . . . . . . . . . . . . . . . . . . . . . . . . . . . . . . 9-24
Working with FFS Partitions . . . . . . . . . . . . . . . . . . . . . . . . . . . . . . . . . . . . . . . . . . . . . . . . . 9-24
RegMerge.dll . . . . . . . . . . . . . . . . . . . . . . . . . . . . . . . . . . . . . . . . . . . . . . . . . . . . . . . . . 9-25
CopyFile . . . . . . . . . . . . . . . . . . . . . . . . . . . . . . . . . . . . . . . . . . . . . . . . . . . . . . . . . . . . 9-25
Non-FFS Partitions . . . . . . . . . . . . . . . . . . . . . . . . . . . . . . . . . . . . . . . . . . . . . . . . . . . . . . . . 9-26
Assigning User-Written Applications to Buttons. . . . . . . . . . . . . . . . . . . . . . . . . . . . . . . . . . . . . . 9-27
Adding Programs . . . . . . . . . . . . . . . . . . . . . . . . . . . . . . . . . . . . . . . . . . . . . . . . . . . . . . . . . . . . . 9-27
9-1
PPT 8800 Series Product Reference Guide for Embedded Windows® CE .NET
Adding a Program from the Internet. . . . . . . . . . . . . . . . . . . . . . . . . . . . . . . . . . . . . . . . . . . . 9-28
9-2
Configuring the Terminal
Introduction
This chapter describes the Terminal Configuration Manager (TCM), and how it is used to
specify and load files into the flash memory of the terminal using the terminal’s Initial
Program Loader (IPL).
In TCM, you create a script that contains the information (commands to copy files) for
building the image. TCM works with directory windows, which display the directory
structure of your script and the source directories, files, and scripts from which you pull
components. You can open multiple scripts, drag and drop items from a drive/directory to
the script, rename and delete files in the script, etc. Upon building the image, TCM adds all
the files, directories, and scripts referenced in the script to the image.
The SDK includes a number of standard scripts and demos/samples for you to use as a
base for creating your own scripts. These scripts can be found in the SYMSDK\TCMScripts
directory.
Note: Before you create a script to build a hex image, identify the files
required (system files, drivers, applications, etc.) and locate the files’
source directories to make the script building process easier.
The required processes for building a hex image in TCM include:
•
Starting TCM
•
Defining script properties
•
Creating or modifying a script
•
Building the hex image
•
Sending the hex image.
9-3
PPT 8800 Series Product Reference Guide for Embedded Windows® CE .NET
Starting Terminal Configuration Manager
To start TCM, double click on the TCM icon in the SYMSDK group. The following window
appears, displaying two directory windows; Script1 and File Explorer.
Figure 9-1. TCM Window
Each directory window is split; the left half (or pane) of the window displays the directory
tree for the current drive, and the right half displays the directory contents for the current
drive.
9-4
Configuring the Terminal
The following table lists the components of the TCM start-up window.
Table 9-1. TCM Window Components
Component
Description
Script Window
Associated with a script file containing the information to create a Flash Disk
image. This window is the target window, or the primary TCM window in which
you can create a script or change a script file’s contents by copying, deleting,
and renaming files and directories. More than one script window can be open at
a time.
The Script Window consists of two panes, the Directory Tree Pane on the left
and the Directory Contents Pane on the right. Subordinate directories and files
of each volume are listed in the Directory Contents Pane.
File Explorer
A read-only source window for files and/or directories to include in the script
being built.
Tool Bar
Contains the tools, illustrated below, for taking action on a script.
Create a new script file.
Check script for existing
files.
Open a script file.
Select the hex image to
load.
Save a script file.
Tile windows.
View script properties.
Build and send the hex
image to the terminal.
Build a script.
Preferences.
View large icons.
About TCM.
View small icons.
View list.
View details.
9-5
PPT 8800 Series Product Reference Guide for Embedded Windows® CE .NET
Defining Script Properties
Before a script is created, the script properties must be defined. This defines the type of
terminal, flash type, number of disks being created, and the memory configuration of each
disk volume.
To define the script properties:
1. With TCM open, click on the Script Window to make it the active window.
2. Under the Script menu, select the Properties option.
OR
Click on
from the tool bar. The SCRIPT PROPERTIES window displays.
Figure 9-2. Script Properties Window
3. From the Terminal drop-down list, select PPT8800-32M.
4. From the Disks drop-down list, select the number of disk volumes to be created.
9-6
Configuring the Terminal
Note: The options available under the disks drop-down list changes
depending on the flash type. Some flash types only have one option
for the number of disk volumes, others have two options.
5. If you have selected three volumes under the Disk drop-down list, you have the
option to change the memory configuration of the second and third volumes. To do
so, click on the up or down arrow for either of the volumes, until the memory
configuration of each is set to the desired value. You will notice that as you change
the values for one of the volumes, the other volume is automatically changed
accordingly.
6. For each disk volume, determine the Read/Write access option. The Script File
Path displays the path of the selected script file.
7. Click the OK button to complete the settings.
9-7
PPT 8800 Series Product Reference Guide for Embedded Windows® CE .NET
Creating the Script for the Hex Image
On start-up, TCM displays the window shown on page 9-4, with the Script1 window and File
Explorer window.
The Script1 window directory pane displays three volumes: Volume1, Volume2, and
Volume3. Depending on the type of flash chip you have, the number of volumes may
change. Files can be added to each of the volumes. With TCM, you can:
•
create a new script file or open an existing script
•
drag and drop existing files and directories to that script
•
save the script.
Each process is described in the sections that follow.
Opening a New or Existing Script
Scripts are created in the Script window. To open a new script:
•
From the File menu, choose New,
OR
•
Click on
from the tool bar.
To open an existing script (e.g., a standard script provided in the SDK):
•
From the File menu, choose Open. Navigate to the Symbol Windows CE
SDK(PPT8800)\SymbolPlatforms\PPT88xx\TCMScripts directory and select the
script file name
OR
•
Click on
from the toolbar. Navigate to the Symbol Windows CE
SDK(PPT8800)\SymbolPlatforms\PPT88xx\TCMScripts directory and select the
script file name
•
Double click on an existing script in the Script Browser window.
OR
9-8
Configuring the Terminal
Copying Components to the Script
To copy files or directories to the script being generated:
1. Click on the File Explorer window to make it the active window.
2. Click on the source directory in the Directory Tree Pane. TCM displays the directory
contents in the Contents Pane.
3. Click on the file(s) and/or directory in File Explorer.
Note: Optionally, use the standard Windows Shift+Left-click and
Control+Left-click features to select multiple files and directories.
4. Drag and drop the selected file(s) and/or directory from File Explorer to the target
directory in the Script window
OR
Click on the target directory and select the File Explorer Copy icon from the toolbar.
Saving the Script
To save the changes to a new script:
1. From the File menu, choose Save As
OR
Click on
from the toolbar.
2. Enter the path and filename. TCM appends a .TCM extension to the script.
3. Click the OK button.
Note: If you save an untitled script, TCM, by default, saves the script to the
directory to which the Script Browser is pointing.
To save changes to an existing script:
•
From the File menu, choose Save, OR
•
On the toolbar, click
.
9-9
PPT 8800 Series Product Reference Guide for Embedded Windows® CE .NET
Note: If you open and make changes to an existing script, saving the
changes writes over the existing script. If you wish to use an original
or Symbol-supplied standard script as a base and save the changes
in a new script, use Save As instead of Save after making the
changes, and save to a different filename.
Building the Image
As part of the build, TCM performs a check on the script which verifies that all files
referenced in the script exist. If the image is bootable, TCM verifies that the boot files are
available.
Note: Performing a check is more important for previously existing scripts
to ensure that files referenced in the script are still in the designated
locations.
To check a script:
1. In the Script window, select the script.
2. Save the script, if not already saved.
3. From the Script menu, choose Check,
OR
Click on
from the toolbar.
4. TCM verifies that files referenced in the script exist on available drives and lists an
error message in the Errors found box for any missing files.
5. Choose the OK button to exit.
To build a script:
1. In the Script window, select the script to be built.
2. From the Script menu, choose Build,
OR
Click on
9-10
from the toolbar. The Configure Build window appears.
Configuring the Terminal
Figure 9-3. Configure Build Window
3. Click a checkbox to select the item to build.
4. Use the BROWSE button to locate the file.
5. Select ASCII format for your hex image, or COMPRESSION, which reduces the
size of most hex images in order to speed downloading.
6. Click OK.
7. TCM performs a check. If the script has no errors, TCM proceeds with the build.
If the Build Fails
If the build fails, TCM displays a message indicating which file(s) are missing.
If the total amount of flash required by the script exceeds the image size, a TCM error
results. To correct this, reduce the number of files in the volume, or make the disk nonbootable. Refer to Defining Script Properties on page 9-6 for more information on setting
the image size appropriately.
Sending the Hex Image
Once the hex file is built, you are ready to download it to the terminal. A Hex image
download requires both TCM and a program loader stored on the terminal. The terminal
comes with a program loading utility, Initial Program Loader (IPL), stored in the terminal’s
9-11
PPT 8800 Series Product Reference Guide for Embedded Windows® CE .NET
write-protected flash. To run IPL, the terminal must be inserted in a cradle or connected to
a development PC by direct serial connection.
Connecting the Terminal and Development PC
To send the hex file to the terminal, first link the terminal and development PC by one of the
following devices:
•
Serial Charging Cable (p/n 25-38383-01)
•
Single-Slot Serial Cradle (p/n CRD8800-1000S)
•
Four-Slot Serial Charging Cradle (p/n CRD8800-4000S).
Set Up IPL to Receive the File
To set up IPL on the terminal to receive the files being downloaded via TCM:
1. Hard reset the terminal and replace the back cover. See Performing a Hard Reset
on page 2-15.
2. On the 6-key Standard keypad, simultaneously press and hold the F1 and the F4
keys then press and release the Power button.
On the 15-key keypad, simultaneously press and hold the down arrow key and the
1 key then press and release the Power button.
3. Continue to hold down the keys until the IPL screen appears.
9-12
Configuring the Terminal
4. IPL displays the Baud Rate menu which lists the available baud rates for the serial
connection.
IPL VER X.XX
IPL Key Sequence
-> 115,200
57,600
38,400
19,200
9600
Auto Baud
Press Up/Down to
select Baud Rate
Action to Continue
Figure 9-4. Baud Rate Menu
Note: If the platform application or data partition sizes are changed, you
must download a new partition table before selecting a baud rate.
5. Use the Up and Down Scroll buttons to select the appropriate baud rate, then press
the Enter button.
Auto Select is the default, and is selected if no other selection is made within 10
seconds.
9-13
PPT 8800 Series Product Reference Guide for Embedded Windows® CE .NET
6. The IPL Main Menu lists the partitions and/or applications that can be downloaded.
IPL VER X.XX
IPL Key Sequence
Windows CE
Platform
Application
Splash Screen
IPL
Partition Table
Auto Select
Press Up/Down to
select partition
Press Enter to
begin download
Figure 9-5. IPL Main Menu
Note: If the platform application or data partition sizes are changed, you
must download a new partition table before selecting a partition.
7. Use the up and down scroll buttons to select the partition to be received, then press
the Enter button.
When downloading more than one hex file, if is recommended that they be
downloaded in the following order:
9-14
•
Partition Table
•
Splash Screen
•
Application partition
•
Platform partition
•
Operating system
•
IPL.
Configuring the Terminal
Auto Select is the default, and is selected if no other selection is made within 10
seconds.
IPL VER X.XX
Partition Name
Waiting for Data
at Baud Rate XXX,XXX
Press Action to
return to Main Menu
Figure 9-6. Waiting for Data
•
Partition Name reflects the selection made in step 7.
•
Baud Rate XXX,XXX displays the selection chosen from the Baud Rate Menu
in step 5.
•
This screen continues to display until the first character of the image to be
downloaded is received from the host.
•
While this screen is displayed, pressing the Enter button returns the IPL to the
Main Menu.
Beginning the Send in TCM
On the development PC:
9-15
PPT 8800 Series Product Reference Guide for Embedded Windows® CE .NET
1. Open the ActiveSync Connection Settings window and ensure that the Allow serial
cable or infrared connection to this COM port checkbox is disabled.
Figure 9-7. ActiveSync Connection Settings Window
2. In TCM, select the script.
3. From the File menu, choose Load Terminal
OR
Click on
9-16
from the toolbar. The Load Terminal Dialog window appears.
Configuring the Terminal
Figure 9-8. Load Terminal Dialog Window
4. If the correct Hex file is not displayed in the HEX FILE TO LOAD field, click the
Browse button and navigate to the correct Hex file to be downloaded and click OK.
When downloading more than one hex file, if is recommended that they be
downloaded in the following order:
•
Partition Table
•
Splash Screen
•
Application partition
•
Platform partition
•
Operating system
•
IPL.
5. From the Comm Port drop-down list, select the COM port being used. Ports already
in use display in the Unavailable ports field.
6. From the Baud Rate drop-down list, select the appropriate baud rate. Your options
are 2400, 4800, 9600, 19200,38400, 57600, 115200.
7. From the Protocol drop-down list, select NONE.
8. Insert the terminal in a cradle, or connect it to a development PC with a serial cable.
9. Click OK to load the file.
10. Repeat steps 2 through 9 for each hex file.
9-17
PPT 8800 Series Product Reference Guide for Embedded Windows® CE .NET
On the terminal:
1. As soon as the first character of data is received, IPL displays the Receiving
screen.
IPL VER X.XX
Partition Name
Downloading Data
Processing XXXXX KB
of YYYYY KB image
Figure 9-9. Downloading Data
Note: If the partition being downloaded was set to first erase the flash, the
message “Pre-Erasing Flash” first appears before downloading
begins.
This screen indicates that the area selected in the Main Menu is currently
downloading and displays until an entire image is received, or until an error is
detected. As more data is received, the Receiving screen is updated to reflect the
current status.
9-18
Configuring the Terminal
2. When the entire image is received, IPL displays the following screen to indicate
that the download is complete:
IPL VER X.XX
Partition Name
Download Complete
Press Action to
return to Main Menu
Cold Boot Exits IPL
Figure 9-10. Download Complete
•
If Auto Select was selected on the Main Menu, the text “Auto Select Enabled”
appears in place of “Cold Boot Exits IPL.”
•
If Auto Select was selected on the Main Menu, IPL immediately returns to the
Waiting for Data screen to wait for the next image.
•
If any other selection was made on the Main Menu, IPL stays at the Success
screen until you press the ENTER button. Once the screen is acknowledged,
IPL returns to the Main Menu to wait for a new selection.
3. Hard reset the terminal (see Performing a Hard Reset on page 2-15) when all
partitions are downloaded successfully.
4. On the development PC, exit TCM by selecting File - Exit.
9-19
PPT 8800 Series Product Reference Guide for Embedded Windows® CE .NET
Error Messages
IPL Error Detection
While receiving data, IPL performs many checks on the data to ensure that the data is
received correctly. If an error is detected, IPL immediately aborts the download, and reports
the error on the terminal.
IPL VER X.XX
Download Failed!
Error Condition
Press Action to
return to Main Menu
Figure 9-11. IPL Error Message
This screen displays until you press Enter. Once the screen is acknowledged, IPL returns
to the Main Menu screen to wait for a new selection.
9-20
Configuring the Terminal
The cause of the error displays under the Download Failed! indication. The errors that can
be reported, and the probable cause of the error, are described in Table 9-2.
Table 9-2. IPL Error Messages
Error
Description
Invalid Image
This error occurs if another record is received before the
Header Record. Ensure the Header Record is the first record
downloaded.
Partition Not Defined
The destination code is a part of the Header record and is used
as an index into the partition table. The partition table entry
located at this index contains partition information for the data
downloaded. If the Auto Select option is selected, a check is
made to ensure that valid partition information exists in the
partition table at this index. The check verifies that the Area
Name and Sector Size are both non-zero. If not, this error
occurs.
Wrong Partition
If a specific partition is selected from the partition list, and the
destination code of the Header record downloaded does not
match the index of that partition, this error occurs.
Image Too Big
The size of the image is also part of the Header record. If the
data to be written exceeds the size of the partition as indicated
in the partition table, this error occurs.
Incorrect Byte Count
Image data is processed until the End Of File (EOF - Record
Type 01) record is received. This error occurs if IPL detects
that the number of bytes received does not equal the number
of bytes sent.
Unable to Verify Partition
Data
If the Receive and Verify bit is set for that partition, the data
(the Flash sector erased and the data written to the Flash part)
is verified. If this data can not be verified, this error occurs.
Transmission Errors
The following error messages may appear if an error occurs
during transmission:
•
“Checksum Error” occurs if an invalid checksum is
detected in the record.
•
“Invalid Record” occurs if a record is not defined in
the Symbol Hex File Format.
•
“Connection Lost” occurs if one of the handshaking
lines is de-asserted during download.
•
“Address Out of Sequence” occurs if the address of
the data received is not sequential.
9-21
PPT 8800 Series Product Reference Guide for Embedded Windows® CE .NET
TCM Error Messages
TCM validates the cells in your partition table when you press the Enter button. Cells
highlighted in red contain an error. Partition loading is disabled until all errors are corrected.
The errors that TCM may encounter and possible solutions are described in Table 9-3.
Table 9-3. TCM Error Messages
Error
Error - Partition Size
Description/Solution
The size of a partition must be an integral multiple of the
FFSSectorSizeInBytes specified by the .ini file. When the user enters a
partition size, TCM rounds up to the next highest integral multiple of the
sector size and displays this value in the partition table grid. This error
check is made upon value entry, independent of the Execute button.
Error - Image Larger than If the required size of the binary image file is larger than the associated
Partition
partition size, the Partition Size cell in the partition grid turns red to
highlight the error. The Required Size cell indicates the actual size
required.
Error - Total size of all
FFS Partition
If the total memory allocated to the 3 FFS partitions is greater than the
total Flash Memory on the terminal, the Used FFS Memory display box
turns red. Decrease the size of one or more of the partitions, then
recheck the configuration using the Execute button.
Error - Source/
Destination Path
Verification
If the directory paths specified by the Source and Destination cells do
not exist, the cell containing the non-existent path turns red to highlight
the error.
For more information on FFS Partitions and Non-FFS Partitions, see Flash Storage on
page 9-24.
Creating and Loading a Splash Screen
To generate a custom splash screen, use a bitmap editor.
1. Create a color bitmap with dimensions of BX x BY where:
•
BX is less than or equal to 240 pixels
•
BY is less than or equal to 320 pixels
Note: For best quality use a relatively high resolution color image (256
color). Lower resolution images also work.
9-22
Configuring the Terminal
2. Save the file as a 256 color bitmap.
3. Use TCM to convert the bitmap image file to a Hex file (see Building the Image on
page 9-10).
Loading the Splash Screen via TCM
To load the bitmap:
1. Open the TCM application.
2. Connect the terminal to the development PC and invoke IPL to prepare the terminal
to receive the splash screen download (see Set Up IPL to Receive the File on page
9-12).
3. Select Load Terminal from the File menu on the development PC.
4. Select your splash screen Hex file to begin downloading to the terminal.
5. Close the TCM application.
9-23
PPT 8800 Series Product Reference Guide for Embedded Windows® CE .NET
Flash Storage
Programs pre-installed on your terminal are stored in read-only memory (ROM). You
cannot remove, modify, or accidentally lose this software. You may add programs and data
files to random access memory (RAM).
In addition to the RAM-based storage standard on Windows CE terminals, the PPT 8800 is
also equipped with a non-volatile Flash-based storage area which can store data
(partitions) that can not be corrupted by a hard reset. This Flash area is divided into two
categories: Flash File System (FFS) Partitions and Non-FFS Partitions.
FFS Partitions
The PPT 8800 terminal includes three FFS partitions. These partitions appear to the
terminal as a hard drive that the OS file system can write files to and read files from. Data
is retained even if power is removed.
The three FFS partitions appear as three separate folders in the Windows CE file system
and are as follows:
•
Platform: The Platform FFS partition contains Symbol-supplied programs and
Dynamic Link Libraries (DLLs). This FFS is configured to include DLLs that control
system operation. Since these drivers are required for basic terminal operation,
only experienced users should modify the content of this partition.
•
Application: The Application FFS partition is used to store application programs
needed to operate the terminal.
Working with FFS Partitions
Because the FFS partitions appear as folders under the Windows CE file system, they can
be written to and read like any other folder. For example, an application program can write
data to a file located in the Application folder just as it would to the Windows folder.
However, the file in the Application folder is in non-volatile storage and is not lost on a hard
reset (e.g., when power is removed for a long period of time).
Standard tools such as ActiveSync can be used to copy files to and from the FFS partitions.
They appear as the “Application,” “Platform,” and “Data” folders to the ActiveSync explorer.
This is useful when installing applications on the PPT 8800. Applications stored in the
Application folder are retained even when the terminal is hard reseted, just as the PPT 8800
Demo program is retained in memory.
9-24
Configuring the Terminal
Windows CE expects certain files to be in the Windows folder, residing in volatile storage.
Windows CE maintains the System Registry in volatile storage. There are two device
drivers included in the Windows CE image to assist developers in configuring the terminal
following a hard reset: RegMerge and CopyFile.
RegMerge.dll
RegMerge.dll is a built-in driver that allows registry edits to be made to the Windows CE
Registry. Regmerge.dll runs very early in the boot process and looks for registry files (.reg
files) in certain Flash File System folders during a hard reset. It then merges the registry
changes that are in these files into the system registry located in RAM.
Since the registry is re-created on every hard reset from the default ROM image, the
RegMerge driver is necessary to make registry modifications persistent over hard resets.
RegMerge is configured to look in three specific folders for .reg files in the following order:
\Platform
\Application
Regmerge continues to look for .reg files in these folders until all folders are checked. This
allows folders later in the list to override folders earlier in the list. This way, it is possible to
override Registry changes made by the Platforms partitions folders. Take care when using
Regmerge to make Registry changes. The SDK contains examples of .reg files.
Note: Regmerge only merges the .reg files on hard resets. The merge
process is skipped during a soft reset.
Typically, you should not need to make modifications to registry values for drivers loaded
before RegMerge. However, sometimes during software development, you may need to
modify these values. Since these early loading drivers read these keys before RegMerge
gets a chance to change them, you must soft reset the terminal after a hard reset. The soft
reset does not re-initialize the registry, and the early loading driver reads the new registry
values.
Do not use Regmerge to modify built-in driver registry values, or merge the same Registry
value to two files in the same folder, as the results are undefined.
CopyFile
CopyFile copies files from one folder to another on a hard reset. Files can be copied from
a non-volatile partition (Application or Platform) to the Windows or other volatile partition
9-25
PPT 8800 Series Product Reference Guide for Embedded Windows® CE .NET
during a hard reset. During a hard reset CopyFile looks for files with a .CPY extension on
the FFS partition. These files are text files containing the source and destination for the
desired files to be copied separated by “>”.
Non-FFS Partitions
Non-FFS Partitions include additional software and data pre-loaded on your terminal that
can be upgraded. Unlike FFS Partitions, these partitions are not visible when the operating
system is running. They also contain system information. Non-FFS partitions include the
following:
•
Windows CE: The complete Windows CE operating system is stored on Flash
devices. If necessary, the entire OS image may be downloaded to the terminal
using files provided by Symbol. The current OS partition on the terminal is included
as part of the TCM installation package. Any upgrades must be obtained from
Symbol. This partition is mandatory for the PPT 8800.
•
Splash Screen: a bitmap displayed as the terminal hard resets. You may download
a customized screen to display.
•
IPL (Initial Program Loader): This program interfaces with the host computer and
allows you to download via cradle or serial cable any or all of the partitions listed
above, as well as updated versions of IPL. Use caution downloading updated IPL
versions; incorrect downloading of an IPL causes permanent damage to your
terminal. IPL is mandatory for the PPT 8800.
•
Partition Table: Identifies where each partition is loaded in the terminal.
9-26
Configuring the Terminal
Assigning User-Written Applications to Buttons
Use RegMerge to modify the registry during a hard reset to assign user-written applications
to the application buttons. These buttons remain assigned after a hard reset.
Note: Although located in the Flash File System, we recommend copying
user applications to the Windows directory (using CopyFile) and
running them from there. See the WinCE Help file on the SDK for
more information.
Adding Programs
Install the appropriate software on your host computer before installing it on your terminal.
1. Select Start - Settings - Control Panel. Double-tap the System icon. In the General
tab, note the information in Processor field.
2. Download the program to your host computer (or insert the CD or disk that contains
the program into your host computer). You may see a single *.xip file, *.exe file, a
*.zip file, or a Setup.exe file.
3. Read any installation instructions, Read Me files, or documentation that comes with
the program. Many programs provide special installation instructions.
4. Connect your terminal to the host computer.
5. Double-click the *.exe file on the host computer.
If the file is an installer, the installation wizard begins. Follow the directions on the
window. Once the software is installed on your host computer, the installer
transfers the software to your terminal.
If the file is not an installer, an error message states that the program is valid but is
designed for a different type of computer. Move this file to your terminal. If you
cannot find installation instructions for the program in the Read Me file or
documentation, use ActiveSync Explore to copy the program file to the Program
Files folder on your terminal. For more information on copying files using
ActiveSync, see ActiveSync Help.
When installation is complete, tap Start - Programs on the terminal, then select the program
icon.
9-27
PPT 8800 Series Product Reference Guide for Embedded Windows® CE .NET
Adding a Program from the Internet
1. Select Start - Settings - Control Panel on the terminal. Double-tap the System icon.
In the General tab, note the information in Processor field.
2. Download the program to your terminal from the Internet using Pocket Internet
Explorer. You may see a single *.xip, *.exe, *.zip file, or a Setup.exe file.
3. Read any installation instructions, Read Me files, or documentation that comes with
the program. Many programs provide special installation instructions.
4. Tap the file, such as a *.xip or *.exe file, to launch the installation wizard. Follow the
directions on the window.
9-28
Chapter 10
AirBEAM Smart
Chapter Contents
Introduction . . . . . . . . . . . . . . . . . . . . . . . . . . . . . . . . . . . . . . . . . . . . . . . . . . . . . . . . . . . . . . . . . 10-3
AirBEAM Package Builder . . . . . . . . . . . . . . . . . . . . . . . . . . . . . . . . . . . . . . . . . . . . . . . . . . . . . . 10-3
AirBEAM Smart Client . . . . . . . . . . . . . . . . . . . . . . . . . . . . . . . . . . . . . . . . . . . . . . . . . . . . . . . . . 10-4
AirBEAM Smart License . . . . . . . . . . . . . . . . . . . . . . . . . . . . . . . . . . . . . . . . . . . . . . . . . . . . 10-4
Configuring the AirBEAM Smart Client . . . . . . . . . . . . . . . . . . . . . . . . . . . . . . . . . . . . . . . . . 10-4
Packages(1) Tab . . . . . . . . . . . . . . . . . . . . . . . . . . . . . . . . . . . . . . . . . . . . . . . . . . . . . . 10-5
Packages(2) Tab . . . . . . . . . . . . . . . . . . . . . . . . . . . . . . . . . . . . . . . . . . . . . . . . . . . . . . 10-5
Server Tab - - - - - - - - - - - - - - - - - - - - - - - - - - - - - - - - - - - - - - - - - - - - - - - - - - - - - -10-6
Misc(1) Tab - - - - - - - - - - - - - - - - - - - - - - - - - - - - - - - - - - - - - - - - - - - - - - - - - - - - -10-7
Misc(2) Tab - - - - - - - - - - - - - - - - - - - - - - - - - - - - - - - - - - - - - - - - - - - - - - - - - - - - -10-9
Misc(3) Tab - - - - - - - - - - - - - - - - - - - - - - - - - - - - - - - - - - - - - - - - - - - - - - - - - - - - 10-10
Synchronizing with the Server . . . . . . . . . . . . . . . . . . . . . . . . . . . . . . . . . . . . . . . . . . . . . . 10-10
Manual Synchronization - - - - - - - - - - - - - - - - - - - - - - - - - - - - - - - - - - - - - - - - - - - 10-11
Automatic Synchronization . . . . . . . . . . . . . . . . . . . . . . . . . . . . . . . . . . . . . . . . . . . . . 10-11
AirBEAM Staging . . . . . . . . . . . . . . . . . . . . . . . . . . . . . . . . . . . . . . . . . . . . . . . . . . . . . . . . . . . . 10-12
10-1
PPT 8800 Series Product Reference Guide for Embedded Windows® CE .NET
10-2
AirBEAM Smart
Introduction
The AirBEAM Smart product allows specially designed software packages to be transferred
between a host server and Symbol wireless handheld devices. Before transfer, AirBEAM
Smart checks and compares package version, so that only updated packages are loaded.
AirBEAM Smart resides on radio-equipped client devices, and allows them to request,
download, and install software, as well as to upload files and status data. Both download
and upload of files can be accomplished in a single communications session. The ability to
transfer software over a radio network can greatly reduce the logistical efforts of client
software management.
In an AirBEAM system, a network-accessible host server acts as the storage point for the
software transfer. The AirBEAM Smart Client uses the industry standard FTP or TFTP file
transfer protocols to check the host system for updates, and if necessary, to transfer
updated software.
For detailed information about AIrBEAM Smart, refer to AirBEAM Smart Windows® CE
Client Product Reference Guide.
AirBEAM Package Builder
In a typical distributed AirBEAM system, software to be transferred is organized into
packages. In general, an AirBEAM package is simply a set of files that are assigned
attributes both as an entire package and as individual component files. The package is
assigned a version number, and the transfer occurs when an updated version is available.
An AirBEAM package can optionally contain developer-specified logic to be used to install
the package. Installation logic is typically used to update client device flash images or radio
firmware. Examples of common AirBEAM packages would include packages for custom
client application software, radio firmware and AirBEAM Client software.
Once these packages are built, they are installed on the host server for retrieval by the
handheld device. The AirBEAM Package Builder is a utility used to define, generate and
install AirBEAM packages to a server. The packages are then loaded from the server onto
a client device equipped with an AirBEAM Client executable.
For detailed instructions on how to define, generate and install AirBEAM packages to the
server, refer to the AirBEAM Package Builder Product Reference Guide, p/n 72-55769-xx.
10-3
PPT 8800 Series Product Reference Guide for Embedded Windows® CE .NET
AirBEAM Smart Client
The AirBEAM Smart Client is installed on your handheld terminal. It is configured with the
server access information, the names of the packages to be downloaded and other
controlling parameters. When the AirBEAM Smart Client is launched, the device connects
to the specified FTP server and checks the packages it is configured to look for. If the
package version was updated, the client requests the transfer.
AirBEAM Smart License
The AirBEAM Smart Client is a licensed software product. The AirBEAM Smart Client's
version synchronization functionality is enabled through a license key file that is stored on
the client device. The license key file can be built into AirBEAM Smart Client's image, or
downloaded in a special AirBEAM package.
The AirBEAM Smart license key file contains a unique key and a customer specific banner
that is displayed when the AirBEAM Smart Client version synchronization logic is invoked.
Configuring the AirBEAM Smart Client
1. Select Start - Programs - AirBEAM Client. The AirBEAM CE window appears.
2. Tap File - Configure. The AirBEAM configuration window appears.
Figure 10-1. AirBEAM Smart Configuration Window
The configuration window is used to view and edit AirBEAM Smart Client configurations.
This dialog box has six tabs that you can modify - Packages(1), Packages(2), Server,
Misc(1), Misc(2) and Misc(3).
10-4
AirBEAM Smart
Packages(1) Tab
This tab is used to specify the package name of the first four of eight
packages that are to be loaded during the AirBEAM Smart
synchronization process. The specified package name must
correspond to a package that is available on the specified package
server.
Field
Description
Package 1
Package name of the first of eight packages. This is an optional field.
Package 2
Package name of the second of eight packages. This is an optional field.
Package 3
Package name of the third of eight packages. This is an optional field.
Package 4
Package name of the fourth of eight packages. This is an optional field.
Packages(2) Tab
This tab is used to specify the package name of the last four of eight
packages that are to be loaded during the AirBEAM Smart
synchronization process. The specified package name must
correspond to a package that is available on the specified package
server.
Field
Description
Package 5
Package name of the fifth of eight packages. This is an optional field.
Package 6
Package name of the sixth of eight packages. This is an optional field.
Package 7
Package name of the seventh of eight packages. This is an optional field.
Package 8
Package name of the eighth of eight packages. This is an optional field.
Upload Pkg
Package name of a package that is to be processed for “upload files” during the
AirBEAM Smart synchronization process. The specified package name must
correspond to a package that is available on the specified package server. This is
an optional field.
10-5
PPT 8800 Series Product Reference Guide for Embedded Windows® CE .NET
Server Tab
This tab is used to specify the configurations of the server to which the
client connects during the package synchronization process.
Field
Description
IP Address
The IP Address of the server. It may be a host name or a dot notation format.
Directory
The directory on the server that contains the AirBEAM package definition files. All
AirBEAM package definition files are retrieved from this directory during the
package synchronization process.
User
The FTP user name that is used during the login phase of the package
synchronization process.
Password
The FTP password that corresponds to the FTP user specified in the User field. The
specified password is used during the login phase of the package synchronization
process.
10-6
AirBEAM Smart
Misc(1) Tab
This tab is used to configure various miscellaneous features.
Field
Auto-load
Description
This drop-down list is used to specify how the AirBEAM Smart Client is to be invoked
automatically when the client device is rebooted. The selections are:
Disable: the AirBEAM Smart Client is not invoked automatically during the boot
sequence.
Interactive: the AirBEAM Smart Client is invoked automatically during the boot
sequence. The package synchronization process is started automatically. The
Synchronization Dialog box appears, and the user is required to press the OK
button when the process is complete.
Non-interactive: the AirBEAM Smart Client is invoked automatically during the
boot sequence. The package synchronization process is started automatically.
The Synchronization Dialog box is displayed, but the user is not required to tap
OK when the process is complete. The Synchronization Dialog box terminates
automatically.
Background: the AirBEAM Smart Client is invoked automatically during the
boot sequence. The package synchronization process is started automatically.
Nothing is displayed while the synchronization process is occurring.
RAM
Management
This checkbox specifies whether the automatic RAM management is enabled during
the package synchronization process.
If enabled, RAM management logic is invoked when there is not enough free disk
space to download a package. The RAM management logic attempts to remove any
discardable AirBEAM packages resident on the client.
10-7
PPT 8800 Series Product Reference Guide for Embedded Windows® CE .NET
Field
Description
Suppress
Separator
This checkbox specifies whether the automatic insertion of a file path separator
character should be suppressed when the client generated server package
definition file names.
When enabled, the parameter also disables the appending of .apd to the package.
This feature is useful for AS/400 systems, in which the file path separator character
is a period. When this feature is enabled, the server directory (Directory) and
package name (Package 1, Package 2, Package 3, and Package 4) are appended
“as is” when building the name for the server package definition file.
When this feature is disabled, a standard file path separator is used to separate the
server directory (Directory) and package name (Package 1, Package 2, Package 3,
and Package 4) when building the name for the server package definition file. In
addition, an .apd extension is appended automatically.
TFTP
This checkbox specifies whether the TFTP protocol is to be used to download files.
By default, the AirBEAM Smart Client uses the FTP protocol.
WNMS
This checkbox specifies whether the AirBEAM Smart Client uploads a WNMS
information file at the end of each version synchronization.
10-8
AirBEAM Smart
Misc(2) Tab
This tab is used to configure various miscellaneous features.
Field
Auto-retry
Description
This field is used to specify whether the AirBEAM Smart Client automatically
retries if there is a failure during the synchronization process.
If this feature is enabled, the AirBEAM Smart Client displays a popup dialog
indicating the attempt of a retry. The popup dialog is displayed for the number of
seconds specified in the Retry Delay field.
The valid values for this field are:
-1: the AirBEAM Smart Client automatically retries indefinitely.
0: the AirBEAM Smart Client does not automatically retry.
-0: the AirBEAM Smart Client automatically retries up to the number of times
specified.
Retry Delay
This field specifies the amount of time, in seconds, that the AirBEAM Smart Client
will delay before automatically retrying after a synchronization failure.
In-use Test
This checkbox specifies whether the AirBEAM Smart Client tests to determine if
a file is in-use before downloading. If the In-use Test feature is enabled, the
AirBEAM Smart Client downloads a temporary copy of any files that are in-use. If
any temporary in-use files are downloaded the AirBEAM Smart Client
automatically resets the client to complete the copy of the in-use files. If the Inuse Test feature is disabled, the synchronization process fails (-813) if any
download files are in-use.
Wait Welcome
This checkbox specifies whether the AirBEAM Smart Client waits for the
WELCOME windows to be completed before automatically launching the
synchronization process after a reset.
Close Apps
This checkbox specifies whether the AirBEAM Smart Client automatically
attempts to close non-system applications prior to resetting the mobile unit. If
enabled the AirBEAM Smart Client sends a WM_CLOSE message to all nonsystem applications before resetting the mobile unit. This feature offers
applications the opportunity to prepare (i.e. close open files) for the pending reset.
10-9
PPT 8800 Series Product Reference Guide for Embedded Windows® CE .NET
Misc(3) Tab
This tab is used to configure various miscellaneous features.
Field
Description
Use DHCP
server
This checkbox control specifies whether the AirBEAM Smart Client uses the
DHCP response option 66 to specify the IP address of the FTP/TFTP server.
If enabled, special RF network registry settings are required to force the DHCP
server to return the “TFTP server name” field (option 66). The special RF network
registry settings are included, but commented out, in the radio network registry
initialization files (essid_xxxx_yy.reg).
Use DHCP
bootfile
This check box control specifies whether the AirBEAM Smart Client uses the
DHCP response option 67 to specify the Package and Package 1 parameters.
If enabled, special RF network registry settings are required to force the DHCP
server to return the “Bootfile name” field (option 67). The special RF network
registry settings are included, but commented out, in the radio network registry
initialization files (essid_xxxx_yy.reg).
Synchronizing with the Server
When the synchronization process is initiated, the AirBEAM Smart Client attempts to open
an FTP session using the AirBEAM Smart Client configuration. Once connected, the client
processes the specified packages. Packages are loaded only if the server version of a
given package is different from the version loaded on the client. Once the upload process
is complete, the AirBEAM Smart Client closes the FTP session with the server.
The AirBEAM Smart Client can launch an FTP session with the server either manually,
when initiated by the user, or automatically.
10-10
AirBEAM Smart
Manual Synchronization
1. Configure the AirBEAM Smart Client. See Configuring the AirBEAM Smart Client
on page 10-4.
2. From the main AirBEAM CE window, select File - Synchronize.
3. Once connected, the AirBEAM Synchronize window
appears.
•
The Status List displays status messages that indicate the
progress of the synchronization process.
•
Tap OK to return to the Main Menu. This button remains
inactive until the synchronization process is complete.
•
Tap Retry to restart the synchronization process. This
button is activated only if there is an error during the
synchronization process.
Automatic Synchronization
The AirBEAM Smart Client can be configured to launch automatically using the Misc(1)
Preference tab (see Misc(1) Tab on page 10-7). When setting automatic synchronization,
use the Auto-load drop-down list is to specify how the AirBEAM Smart Client should be
invoked automatically when the client device is rebooted. Refer to Misc(1) Tab on page 107 for instructions on enabling Auto Sync.
10-11
PPT 8800 Series Product Reference Guide for Embedded Windows® CE .NET
AirBEAM Staging
The AirBEAM Smart staging support is intended to speed up and simplify the process of
staging custom or updated operating software onto mobile devices directly from
manufacturing. The staging support is part of the AirBEAM Smart CE Client that is
integrated into the terminal.
The AirBEAM Smart support works by defaulting the AirBEAM Smart Client configuration
to a known set of values and launching the AirBEAM Smart package download logic. A
staging environment, including an RF network, FTP server and AirBEAM packages must
be setup. Ideally a staging network and server should be setup to match the default
AirBEAM Staging client configuration.
The AirBEAM Smart staging utility is invoked by selecting Start - Programs - AirBEAM
Staging.
The AirBEAM Staging support provides several benefits:
•
Many devices can be simultaneously loaded over the RF network.
•
The AirBEAM staging utility provides a simple single dialog user interface that is
used to quickly start the software installation process.
10-12
Chapter 11
Maintenance and Troubleshooting
Chapter Contents
Introduction . . . . . . . . . . . . . . . . . . . . . . . . . . . . . . . . . . . . . . . . . . . . . . . . . . . . . . . . . . . . . . . . . 11-3
Safely Maintaining the PPT 8800. . . . . . . . . . . . . . . . . . . . . . . . . . . . . . . . . . . . . . . . . . . . . . . . . 11-3
Terminal and Cradle Connector Cleaning Guidelines . . . . . . . . . . . . . . . . . . . . . . . . . . . . . . . . . 11-4
Required Materials . . . . . . . . . . . . . . . . . . . . . . . . . . . . . . . . . . . . . . . . . . . . . . . . . . . . . . . . 11-4
Cleaning the Terminal Connector . . . . . . . . . . . . . . . . . . . . . . . . . . . . . . . . . . . . . . . . . . . . . 11-4
Cleaning the Cradle Connector . . . . . . . . . . . . . . . . . . . . . . . . . . . . . . . . . . . . . . . . . . . . . . 11-7
Troubleshooting . . . . . . . . . . . . . . . . . . . . . . . . . . . . . . . . . . . . . . . . . . . . . . . . . . . . . . . . . . . . . 11-10
11-1
PPT 8800 Series Product Reference Guide for Embedded Windows® CE .NET
11-2
Maintenance and Troubleshooting
Introduction
This chapter includes instructions on cleaning and storing your terminal, and provides
troubleshooting solutions for potential problems during terminal operating.
Safely Maintaining the PPT 8800
For trouble-free service, observe the following tips when using your terminal:
•
Take care not to scratch the screen of your terminal. When working with your
terminal, use the supplied stylus or plastic-tipped pens intended for use with a
touch-sensitive screen. Never use an actual pen or pencil or other sharp object on
the surface of the terminal screen.
•
Although your terminal is water and dust resistant, do not expose it to rain or
moisture for an extended period of time. In general, treat your terminal as you
would a pocket calculator or other small electronic instrument.
•
The touch-sensitive screen of your terminal contains glass. Take care not to drop
your terminal or subject it to strong impact.
•
Protect your terminal from temperature extremes. Do not leave it on the dashboard
of a car on a hot day, and keep it away from heat sources.
•
Do not store or use your terminal in any location that is extremely dusty, damp or
wet.
•
Use a soft lens cloth to clean your terminal. If the surface of the terminal screen
becomes soiled, clean it with a soft cloth moistened with a diluted window-cleaning
solution. (See Terminal and Cradle Connector Cleaning Guidelines on page 11-4
for additional information about cleaning the terminal and cradle connectors.)
WARNING
Avoid exposing the PPT 8800, including its cradle, to contact with hot oil or other flammable liquids. If such exposure
occurs, immediately clean the terminal (or cradle) in accordance with the cleaning guidelines at the end of this guide.
11-3
PPT 8800 Series Product Reference Guide for Embedded Windows® CE .NET
Terminal and Cradle Connector Cleaning Guidelines
This section explains the proper way to clean the connector area of the PPT 8800 terminal
and cradle.
Required Materials
Use the following cleaning materials:
•
Cotton tipped applicators (Puritan)
•
Isopropyl alcohol
•
Can of compressed air with a tube/nozzle (Micro Blast)
•
Lint free cloth.
WARNING
Read the warning label on compressed air and alcohol
products before using and ALWAYS wear eye protection.
Cleaning the Terminal Connector
To clean the terminal connector, follow the steps below.
1. Remove the main battery from the terminal.
2. Replace the battery cover (see Installing the Main Battery on page 1-7).
3. Dip the cotton portion of the cotton tipped applicator in isopropyl alcohol.
4. Insert the cotton portion of the cotton tipped applicator inside the connector on the
bottom of the terminal as shown in Figure 11-1. (Ensure the tip of the cotton
touches the back of the connector.)
Figure 11-1. Inserting the Cotton Tipped Applicator
11-4
Maintenance and Troubleshooting
5. Twist the cotton tipped applicator and slowly move it back-and-forth from one side
of the connector to the other.
Figure 11-2. Cleaning the Connector
6. Repeat step 5 at least three times.
7. Remove the cotton tipped applicator from the connector.
Note: The cotton tipped applicator dipped in alcohol can also be used to
scrub off any grease and dirt near the connector area.
8. Using a dry cotton tipped applicator, repeat steps 3-5.
9. Spray compressed air in the connector area by pointing the tube/nozzle
approximately 1/2 inch away from the surface.
1/2"
Figure 11-3. Air Spray Terminal Connector
11-5
PPT 8800 Series Product Reference Guide for Embedded Windows® CE .NET
WARNING
Do not point the tube/nozzle at yourself and others. Ensure
the tube or nozzle is away from your face.
10. Inspect the area for any grease or dirt.
11. Repeat steps 3-9 as required.
12. Ensure there is no lint left by the cotton tipped applicator.
13. Remove lint, if found.
11-6
Maintenance and Troubleshooting
Cleaning the Cradle Connector
To clean the cradle connector, follow the steps below.
1. Remove the power to the cradle by unplugging the DC cable.
2. Position the cradle as shown in Figure 11-4.
Figure 11-4. Preparing the Cradle
3. Dip the cotton portion of the cotton tipped applicator in isopropyl alcohol.
4. Scrub the cotton portion of the cotton tipped applicator along the pins as shown in
Figure 11-5, slowly moving back-and-forth from one side of the connector to the
other.
Figure 11-5. Cleaning the Cradle Connector Pins
11-7
PPT 8800 Series Product Reference Guide for Embedded Windows® CE .NET
5. All sides of the connector should also be scrubbed with the cotton tipped applicator,
illustrated by the arrows in Figure 11-6.
Figure 11-6. Cleaning the Cradle Connector
6. Spray compressed air in the connector area by pointing the tube/nozzle
approximately 1/2 inch away from the surface.
Figure 11-7. Air Spray Cradle Connector
WARNING
Do not point the tube/nozzle at yourself and others. Ensure
the tube or nozzle is away from your face.
7. Ensure there is no lint left by the cotton tipped applicator.
8. Remove lint, if found.
11-8
Maintenance and Troubleshooting
9. If grease and other dirt is found on other areas of the cradle, use a lint free cloth
and alcohol to remove.
10. Allow at least 10-30 minutes (depending on ambient temperature/humidity) for the
alcohol to air dry before apply power to cradle.
Note: If temperature is low and humidity is high, longer drying time is
needed. Warm and dry requires less drying time. DO NOT PLACE
PRODUCTS IN AN OVEN OR UNDER HEAT LAMPS!
WARNING
Avoid exposing this product to contact with hot oil or other
flammable liquids. If such exposure occurs, unplug the unit
and clean the product immediately in accordance with
these guidelines.
11-9
PPT 8800 Series Product Reference Guide for Embedded Windows® CE .NET
Troubleshooting
Table 11-1. Troubleshooting the Terminal
Problem
Terminal does not turn on.
Rechargeable lithium-ion
battery did not charge.
Cause
Solution
Lithium-ion battery not
charged.
Charge or replace the lithium-ion battery in
the terminal.
Lithium-ion battery not
installed properly.
Ensure battery is installed properly. See
Installing the Main Battery on page 1-7.
System crash.
Perform a soft reset. If the terminal still does
not turn on, perform a hard reset. See
Resetting the Terminal on page 2-15.
Battery failed.
Replace battery. If your terminal still does
not operate, try a soft reset, then a hard
reset. See Resetting the Terminal on page
2-15.
Terminal removed from Insert terminal in cradle and begin charging.
cradle while battery was The lithium-ion battery requires 2 1/2 hours
charging.
to recharge fully.
Cannot see characters on
display.
Terminal not powered
on.
Fail to communicate with
IrDA printer.
Distance from printer is Bring the terminal closer to the printer and
between 5 inches and 39 attempt communication again.
inches.
11-10
Press the Power button.
Obstruction interfered
with communication.
Check the path to ensure no objects were in
the way.
Application is not
enabled to run IrDA
printing.
Printer support must be included with the
application to run IrDA printing on the
terminal. See your System Administrator.
Maintenance and Troubleshooting
Table 11-1. Troubleshooting the Terminal (continued)
Problem
During data
communication, no data
was transmitted, or
transmitted data was
incomplete.
Cause
Solution
Terminal removed from
cradle or unplugged
from host PC during
communication.
Replace the terminal in the cradle, or
replace the Synchronization cable, and retransmit.
Incorrect cable
configuration.
See your System Administrator.
Communication
Perform setup. Refer to.Chapter 4,
software was incorrectly Communications for details.
installed or configured.
No sound is audible.
Volume setting is low or
turned off.
Check the volume slider in the Volume &
Sound properties dialog box in the Control
Panel to ensure the volume is not turned
down.
Terminal turns itself off.
Terminal is inactive.
Your terminal turns off after a period of
inactivity. If the terminal is running on battery
power, this period can be set from 1 to 5
minutes, in one-minute intervals. If the
terminal is running on external power, this
period can be set to 1, 2, 5, 10, 15, and 30
minutes.
Check the Power dialog box (in the Control
Panel), and change the setting if you need a
longer delay before the automatic shutoff
feature activates.
Battery is depleted.
Replace the battery.
Battery cover is
removed.
Replace the battery cover.
Tapping the window
LCD screen not aligned
buttons or icons does not correctly.
activate the corresponding
feature.
The system is hung.
Re-calibrate the screen. See Recalibrating
the Touch Screen on page 3-41.
Soft reset the system. To perform a soft
reset, see Resetting the Terminal on page 215.
11-11
PPT 8800 Series Product Reference Guide for Embedded Windows® CE .NET
Table 11-1. Troubleshooting the Terminal (continued)
Problem
Cause
Solution
A message appears stating Too many files stored on Delete unused memos and records. You
that your terminal memory the terminal.
can save these records on your host
is full.
computer.
Too many applications
If you have installed additional applications
installed on the terminal. on your terminal, remove them to recover
memory. Select Start - Settings -Control
Panel. Double-tap the Remove Programs
icon. Select the unused program and tap
Remove.
Beamed data does not
transmit.
Terminals too close
Confirm that the terminals are at least 5
together or too far apart. inches and at most 39 inches apart. Also
ensure that there is a clear path between the
two devices.
Insufficient room
lighting.
When receiving beamed
data an out of memory
message appears.
11-12
Adjust the room lighting or move to a
different location.
Not enough free memory Your terminal requires at least twice the
available for receiving
amount of memory available as the data you
data.
are receiving. For example, if you are
receiving a 30K application, you must have
at least 60K free.
Maintenance and Troubleshooting
Table 11-1. Troubleshooting the Terminal (continued)
Problem
Cause
Your terminal does not
accept scan input.
Solution
Scanning application is
not loaded.
Verify that the unit is loaded with a scanning
application. See your System Administrator.
Unreadable bar code.
Ensure the symbol is not defaced.
Distance between exit
window and bar code is
incorrect.
Ensure you are within proper scanning
range.
Terminal is not
programmed for the bar
code.
Ensure the terminal is programmed to
accept the type of bar code you are
scanning.
Terminal is not
programmed to
generate a beep.
If you are expecting a beep on a good
decode and don’t hear one, check that the
application is set to generate a beep on
good decode.
Battery is low.
If the scanner stops emitting a laser beam
when you press the trigger, check your
battery level. When the battery is low, the
scanner shuts off before the terminal
notifies you of the low battery condition.
Note: If the scanner is still not reading
symbols, contact your distributor or Symbol
Technologies.
Note: If, after performing these checks, the terminal is still not reading
symbols, contact your distributor or Symbol Technologies.
Table 11-2. Troubleshooting Bluetooth Connection
Problem
Cannot connect to a
device in my folder.
Cause
The services for the devices
have not been discovered.
Solution
In the Bluetooth Devices window, tap
the device icon. Select Device Properties. Tap the Services tab. Tap
Update.
11-13
PPT 8800 Series Product Reference Guide for Embedded Windows® CE .NET
Table 11-2. Troubleshooting Bluetooth Connection (continued)
Problem
Cause
Solution
When using the Get
The phone is not in Bondable
Connected! Wizard to
mode.
connect to a phone, I get
a screen that says Partial
The passkey is incorrect.
Success.
Set the phone to Bondable mode. If
needed, consult your phone’s user
documentation for help.
The terminal cannot find
any Bluetooth devices
nearby.
Move closer to the other Bluetooth
device(s), within a range of 10 meters.
Too far from other Bluetooth
devices.
Ensure the same passkey is entered
on the phone and the terminal. If using
a pre-assigned passkey for the phone,
verify that your passkey is accurate.
The Bluetooth device(s) nearby Turn on the Bluetooth device(s) you
are not turned on.
wish to find.
The Bluetooth device(s) are not Set the Bluetooth device(s) to
in discoverable mode.
discoverable mode. If needed, refer to
the device’s user documentation for
help.
The terminal keeps
The terminal’s battery is low.
powering down to protect
The Bluetooth radio has been
memory contents.
in Discoverable mode for a
long time. This mode requires a
lot of battery power and should
be turned off whenever not
needed.
Recharge the battery.
Tap the Bluetooth icon, then select My
Bluetooth Device. Uncheck
Discoverable.
When trying to connect a
Bluetooth phone and
terminal, the phone
thinks that I am using a
different terminal that I
previously paired with the
phone.
The phone remembers the
name and address of the
terminal it last paired with via
your Bluetooth radio.
Can’t make my Ericsson
R520 phone
discoverable.
You attempted to bond with the Reset the phone by removing its
battery.
phone, and when the phone
presented a “pairing query,”
you entered No. This prevents
the phone from being
discoverable until it is reset.
11-14
Manually delete the pairing device and
name from your phone. Refer to your
phone’s user documentation for
instructions.
Appendix A
Technical Specifications
Environment
The following table summarizes the terminal’s intended operating environment.
Table A-1. Technical Specifications
Operating Temperature
14° to 122° F (-10° to +50° C)
Storage Temperature
-13° to 158° F (-25° to 70° C)
Battery Charging
Temperature
0° C to +40° C (+32° F to +104° F)
Note: To charge the battery for the mobile device,
battery and charger temperature must be between +32°
F and +104° F (0° C and +40° C).
Humidity
5% to 90% non-condensing
Electrostatic Discharge (ESD) +/-15 kVDC (air); +/- 8 kVDC (contact)
Drop to Concrete
4 feet (1.2 meters)
Sealing
IP54 (dust category 2)
Dimensions
1.3 in. H x 3.1 in. W x 5.7 in. L
(33 mm H x 80 mm W x 146 mm L)
Weight (including battery)
PPT 8800 with battery: 10.1 oz (286 g)
PPT 8846 with battery: 10.8 oz (306 g)
PPT 8860 with battery: 10.4 oz (296 g)
Display
Transflective color TFT-LCD, 65K colors, 240 (W) x 320
(L) (QVGA size)
A-1
PPT 8800 Series Product Reference Guide for Embedded Windows® CE .NET
Table A-1. Technical Specifications (Continued)
A-2
Touch Panel
Glass analog resistive touch
Main Battery
Standard:
Standard: Rechargeable Lithium-Ion 1700 mAh
minimum (3.7V)
Optional: Larger capacity rechargeable Lithium-Ion
3400 mAh minimum (3.7V)
Backup Battery
Ni-MH battery (rechargeable), 15mAh (2.4V) 2 cells
CPU
Intel® XScale™ PXA250
Operating Platform
Microsoft® Embedded Windows® CE 4.1 (CE .NET)
Memory
32MB RAM/ 32MB ROM
Interface
RS-232, max. 115.2 kbps min. 1200bps
CF Card Slot
Type II (not user accessible)
Options:
128 MB CF memory
802.11b radio
Bluetooth radio
Keypad Options
Standard 6-key and 15-key versions with power button.
1D Decode Capability
UPC/EAN/JAN, Code 39, Code 93, Code 128,
Interleaved 2 of 5, Discrete 2 of 5, Codabar (NW-7),
UCC/EAN-128
Technical Specifications
COM Port Definitions
Table A-2. PPT 8800 COM Port Definitions
COM Port
Definition
COM1
Serial/Cradle
COM2
Available
COM3
IRComm
COM4
Raw IrDA
COM5
Available
COM6
Scanner
COM7
VCOM Ext Power
COM8
Available
COM9
Available
A-3
PPT 8800 Series Product Reference Guide for Embedded Windows® CE .NET
Pin-Outs
Pin 1
Figure A-1. ActiveSync Port (COM1)
Table A-3. PPT 8800 ActiveSync Port (COM1) Pin-Outs
Pin
A-4
Description
1
ext ±5 volts
2
DSR
3
RXD
4
RTS
5
TXD
6
CTS
7
DCD
8
RI
9
DTR
10
RS232_gnd
11
Power_GND
12
9 Volts_In
13
NC
14
NC
Appendix B
Keyboard Maps
Introduction
This appendix contains the keyboard map for the keyboard configuration of the terminal.
Each key is listed in the table with its value, depending on the state of the keyboard.
As shown below, when the
key is pressed on the keyboard, the default state displays
the number ‘1’. After pressing the Shift key, the press of the ‘1’ key acts as a Clear button.
Key
Default
State
Shift
State
1
Clear
VK
Code
(Decimal)
ASCII
Value
(Decimal)
49
49
46
In addition to key values, VK codes and ASCII values are listed for each key, where
applicable.
B-1
PPT 8800 Series Product Reference Guide for Embedded Windows® CE .NET
Keyboards
Figure B-1. Standard 6-Key Keyboard
Table B-1. Standard 6-Key Keyboard Functionality
Key
Default
State
Shift
State
Func
State
TAB
LEFT
VK Code
(Decimal)
9
9
-
-
37
-
Software Keyboard
RIGHT
ESCAPE
Calibrate
UP
Lighten
screen
DOWN
Darken
screen
B-2
ASCII Value
(Decimal)
-
39
-
-
-
27
27
-
-
38
-
-
-
40
-
-
-
Keyboard Maps
Table B-1. Standard 6-Key Keyboard Functionality (Continued)
Key
Default
State
ENTER
Shift
State
Func
State
VK Code
(Decimal)
ASCII Value
(Decimal)
13
13
-
-
B-3
PPT 8800 Series Product Reference Guide for Embedded Windows® CE .NET
*
.
Figure B-2. 15-Key Keyboard
Table B-2. 15-Key Keyboard Functionality
Key
Default
State
Alpha
CAPS
State
Alpha
State
Shift
State
Func
State
1
*
ASCII
Value
(Decimal)
VK Code
(Decimal)
49
49
@
16+50
64
-
189
45
_
16+189
95
/
191
47
:
16+186
58
?
16+191
63
!
16+49
33
,
188
44
112
-
F1
* F6, F7, F8, F9 and F10 VK codes are generated when no function is defined on each
key at Control Panel.
B-4
Keyboard Maps
Table B-2. 15-Key Keyboard Functionality (Continued)
Key
Default
State
Alpha
CAPS
State
Alpha
State
Shift
State
Func
State
2
ASCII
Value
(Decimal)
VK Code
(Decimal)
50
50
a
65
97
b
66
98
c
67
99
A
65
65
B
66
66
C
67
67
113
-
51
51
d
68
100
e
69
101
f
70
102
D
68
68
E
69
69
F
70
70
114
-
F2
3
F3
* F6, F7, F8, F9 and F10 VK codes are generated when no function is defined on each
key at Control Panel.
B-5
PPT 8800 Series Product Reference Guide for Embedded Windows® CE .NET
Table B-2. 15-Key Keyboard Functionality (Continued)
Key
Default
State
Alpha
CAPS
State
Alpha
State
Shift
State
Func
State
4
ASCII
Value
(Decimal)
VK Code
(Decimal)
52
52
d
71
103
e
72
104
f
73
105
D
71
71
E
72
72
F
73
73
115
-
53
53
j
74
106
k
75
107
l
76
108
J
74
74
K
75
75
L
76
76
116
-
F3
5
F5
* F6, F7, F8, F9 and F10 VK codes are generated when no function is defined on each
key at Control Panel.
B-6
Keyboard Maps
Table B-2. 15-Key Keyboard Functionality (Continued)
Key
Default
State
Alpha
CAPS
State
Alpha
State
Shift
State
Func
State
6
ASCII
Value
(Decimal)
VK Code
(Decimal)
54
54
m
77
109
n
78
110
o
79
111
M
77
77
N
78
78
O
79
79
calibrate
*F6
117
-
55
55
p
80
112
q
81
113
r
82
114
s
83
115
P
80
80
Q
81
81
R
82
82
S
83
83
7
Darken
screen
*F7
118
-
* F6, F7, F8, F9 and F10 VK codes are generated when no function is defined on each
key at Control Panel.
B-7
PPT 8800 Series Product Reference Guide for Embedded Windows® CE .NET
Table B-2. 15-Key Keyboard Functionality (Continued)
Key
Default
State
Alpha
CAPS
State
Alpha
State
Shift
State
Func
State
8
ASCII
Value
(Decimal)
VK Code
(Decimal)
56
56
t
84
116
u
85
117
v
86
118
T
84
84
U
85
85
V
86
86
119
-
57
57
w
87
119
x
88
120
y
89
121
z
90
122
W
87
87
X
88
88
Y
89
89
Z
90
90
ESCAPE 27
27
*F9
-
Lighten
screen
*F8
9
120
* F6, F7, F8, F9 and F10 VK codes are generated when no function is defined on each
key at Control Panel.
B-8
Keyboard Maps
Table B-2. 15-Key Keyboard Functionality (Continued)
Key
Default
State
Alpha
CAPS
State
Alpha
State
Shift
State
Func
State
0
48
48
190
46
190
46
TAB
9
9
*F10
121
-
38
-
32
32
32
32
39
-
40
-
8
8
8
8
37
-
13
13
13
13
13
13
.
.
UP
SPACE
SPACE
RIGHT
DOWN
BK SPC
BK SPC
LEFT
ENTER
ENTER
ENTER
ASCII
Value
(Decimal)
VK Code
(Decimal)
* F6, F7, F8, F9 and F10 VK codes are generated when no function is defined on each
key at Control Panel.
B-9
PPT 8800 Series Product Reference Guide for Embedded Windows® CE .NET
B-10
Index
Numerics
128-bit Shared Key . . . . . . . . . . . . . . . . . . . 6-8
128-bit shared key . . . . . . . . . . . . . . 4-37, 6-7
15-key keyboard . . . . . . . . . . . . . . . . . . . . . 2-5
15-key keypad . . . . . . . . . . . . . . . . . . . . . 2-12
40-bit Shared Key . . . . . . . . . . . . . . . . . . . . 6-8
40-bit shared key . . . . . . . . . . . . . . . 4-37, 6-7
A
access points . . . . . . . . . . . . . . . . . . . . . . 4-36
accessories . . . . . . . . . . . . . . . . . . . . . . . . . 1-6
cables . . . . . . . . . . . . . . . . . . . . . . . . . 1-6
holster . . . . . . . . . . . . . . . . . . . . . . . . . 1-6
large capacity battery . . . . . . . . . . . . . 1-6
magnetic stripe reader . . . . . . . . . . . . . 1-7
pistol grip handle . . . . . . . . . . . . . . . . . 1-6
SDK . . . . . . . . . . . . . . . . . . . . . . . . . . . 1-7
serial charging cable . . . . . . . . . . . . . . 1-6
serial cradle . . . . . . . . . . . . . . . . . . . . . 1-6
snap-on autocharger . . . . . . . . . . . . . . 1-6
snap-on DEX cable . . . . . . . . . . . . . . . 1-6
snap-on printer cable . . . . . . . . . . . . . . 1-6
spare battery . . . . . . . . . . . . . . . . . . . . 1-6
stylus . . . . . . . . . . . . . . . . . . . . . . . . . . 1-6
vehicle cradle . . . . . . . . . . . . . . . . . . . . 1-7
ActiveSync . . . . . . . . . . . . . . . . . . . . . . . . . 5-6
using serial cable . . . . . . . . . . . . . . . . . 4-9
using serial cradle . . . . . . . . . . 4-13, 4-16
using USB-to-ethernet cradle . . . . . . 4-21
ad hoc . . . . . . . . . . . . . . . . . . . . . 6-5, 6-7, 6-11
adding programs . . . . . . . . . . . . . . . . . . . . 9-27
adjusting memory . . . . . . . . . . . . . . . . . . . 3-49
adjusting terminal settings . . . . . . . . . . . . . 3-3
adjusting the backlight . . . . . . . . . . . . . . . . 2-3
AirBEAM . . . . . . . . . . . . . . . . . . . . . . . . . 10-1
comfiguring . . . . . . . . . . . . . . . . . . . . 10-4
package builder . . . . . . . . . . . . . . . . 10-3
Staging . . . . . . . . . . . . . . . . . . . . . . 10-12
synchronization with server . . . . . . 10-10
AirBEAM configuration
Misc(1) tab . . . . . . . . . . . . . . . . . . . . 10-7
Misc(2) tab . . . . . . . . . . . . . . . . . . . . 10-9
Packages(2) tab . . . . . . . . . . . . . . . . 10-5
Server tab . . . . . . . . . . . . . . . . . . . . . 10-6
AirBEAM Smart
Client . . . . . . . . . . . . . . . . . . . . . . . . . 10-4
appearance . . . . . . . . . . . . . . . . . . . . . . . 3-17
applications
button assignment . . . . . . . . . . . . . . 9-27
attaching handstrap . . . . . . . . . . . . . . . . . 1-21
B
background . . . . . . . . . . . . . . . . . . . . . . . 3-17
backlight . . . . . . . . . . . . . . . . . . . . . . 3-17, 3-20
adjusting . . . . . . . . . . . . . . . . . . . . . . . 2-3
backup battery . . . . . . . . . . . . . . . . . 2-10, 3-32
charging . . . . . . . . . . . . . . . . . . . . . . 1-10
checking . . . . . . . . . . . . . . . . . . . . . . 1-21
batteries
charging . . . . . . . . . . . . . . . . . . . . . . 1-10
checking power . . . . . . . . . . . . . . . . . 1-21
battery
installing larger capacity . . . . . . . . . . . 1-9
battery icon . . . . . . . . . . . . . . . . . . . . . . . 2-10
beam data . . . . . . . . . . . . . . . . . . . . . . . 11-12
Bluetooth . . . . . . . . . . . . . . . . . . . . . . . . . 2-11
assign com ports . . . . . . . . . . . . . . . . 7-12
Index-1
PPT 8800 Series Product Reference Guide for Embedded Windows® CE .NET
automatic connection . . . . . . . . . . . . 7-39
bonding devices . . . . . . . . . . . . . . . . 7-17
communication . . . . . . . . . . . . . . . . . 7-25
configuration . . . . . . . . . . . . . . . . . . . 7-11
deleting a device . . . . . . . . . . . . . . . . 7-24
dial-up . . . . . . . . . . . . . . . . . . . . . . . . 7-25
discovering devices . . . . . . . . . . . . . . 7-13
file sharing . . . . . . . . . . . . . . . . . . . . 7-49
printing . . . . . . . . . . . . . . . . . . . . . . . 7-49
receiving a contact . . . . . . . . . . . . . . 7-48
receiving a file . . . . . . . . . . . . . . . . . . 7-48
setting favorites . . . . . . . . . . . . . . . . . 7-21
turning on and off . . . . . . . . . . . . . . . . 7-3
Bluetooth ActiveSync . . . . . . . . . . . . 7-13, 7-30
Bluetooth device
properties . . . . . . . . . . . . . . . . . . . . . 7-20
Bluetooth LAN access . . . . . . . . . . . 7-13, 7-36
Bluetooth resume . . . . . . . . . . . . . . . . . . . . 7-4
bondable . . . . . . . . . . . . . . . . . . . . . . . . . . 7-7
bonding Bluetooth devices . . . . . . . . . . . . 7-17
brightness . . . . . . . . . . . . . . . . . . . . 3-17, 3-20
BSSIDs . . . . . . . . . . . . . . . . . . . . . . . . . . . 6-5
button
assignment . . . . . . . . . . . . . . . . . . . . 3-25
buttons . . . . . . . . . . . . . . . . . . . . . . . . . . . 3-25
assigning applications . . . . . . . . . . . . 9-27
keypads . . . . . . . . . . . . . . . . . . . . . . . 2-4
power . . . . . . . . . . . . . . . . . . . . . . . . . 2-3
C
cable
pinouts . . . . . . . . . . . . . . . . . . . . . . . . C-4
cable cup . . . . . . . . . . . . . . . . . . . . . . 1-6, 1-14
universal cable cup . . . . . . . . . . . . . . 4-33
cables . . . . . . . . . . . . . . . . . . . . . . . . . . . . . 1-6
serial charging cable . . . . . . . . . . . . . . 1-6
snap-on autocharger . . . . . . . . . . . . . . 1-6
snap-on DEX cable . . . . . . . . . . . . . . . 1-6
snap-on printer cable . . . . . . . . . . . . . 1-6
calibrating the screen . . . . . . . . . . . . . 1-19, 3-5
certificates . . . . . . . . . . . . . . . . . . . . . . 3-3, 3-7
change record . . . . . . . . . . . . . . . . . . . . . . . xvi
changing profiles . . . . . . . . . . . . . . . . . . . 6-19
Index-2
changing the date . . . . . . . . . . . . . . . . . . . . 3-8
changing the time . . . . . . . . . . . . . . . . . . . . 3-8
Charge LED Indicator . . . . . . . . . . . . . . . . 1-19
charging . . . . . . . . . . . . . . . . . . . . . 1-11, 1-13
spare battery . . . . . . . . . . . . . . . . . . . 1-18
using four-slot cradle . . . . . . . . . . . . . 1-13
using MSR . . . . . . . . . . . . . . . . . . . . . 1-29
using single-slot cradle . . . . . . . . . . . 1-11
using UBC 2000 . . . . . . . . . . . . . . . . . 1-18
using universal cable cup . . . . . . . . . . 1-14
charging batteries . . . . . . . . . . . . . . . . . . . 1-10
charging spare batteries . . . . . . . . . . . . . . 1-16
cleaning
cradle connector . . . . . . . . . . . . . . . . 11-7
terminal connector . . . . . . . . . . . . . . . 11-4
cleaning terminal . . . . . . . . . . . . . . . . . . . . 11-3
command prompt . . . . . . . . . . . . . . . . . . . . 5-7
communicating with printers
communicating with vending machines . 435
communication
using the universal cable cup . . . . . . . 4-33
communication LED Indicator . . . . . . . . . . 4-32
communication LED indicator . . . . . . . . . . 4-32
configuring Bluetooth . . . . . . . . . . . . . . . . 7-11
connectable . . . . . . . . . . . . . . . . . . . . . . . . 7-12
connecting
to development PC . . . . . . . . . . . . . . 9-12
connecting to a Bluetooth phone . . . . . . . . . 7-5
contacting Symbol . . . . . . . . . . . . . . . . . . . . xvii
control panel . . . . . . . . . . . . . . . . . . . . . . . . 3-3
cookies . . . . . . . . . . . . . . . . . . . . . . . . . . . 5-12
country code . . . . . . . . . . . . . . . . . . . . . . . . 6-7
cradle
inserting terminal . . . . . . . . . . . 4-16, 4-20
performing ActiveSync
. . . . . . . . . . . . . 4-9, 4-13, 4-16, 4-21
cradles
serial cradle . . . . . . . . . . . . . . . . . . . . . 1-6
creating splash screen . . . . . . . . . . . . . . . 9-22
currency settings . . . . . . . . . . . . . . . . . . . . . 3-5
current time . . . . . . . . . . . . . . . . . . . . . . . . 2-10
custom scheme . . . . . . . . . . . . . . . . . . . . . 3-18
Index
D
G
datasync . . . . . . . . . . . . . . . . . . . . . . . . . . . 5-8
date . . . . . . . . . . . . . . . . . . . . . . . . . . . 3-3, 3-8
date settings . . . . . . . . . . . . . . . . . . . . . . . . 3-5
date/time . . . . . . . . . . . . . . . . . . . . . . . . . . 2-10
default gateway . . . . . . . . . . . . . . . . . . . . . 6-10
deleting a Bluetooth device . . . . . . . . . . . . 7-24
desktop . . . . . . . . . . . . . . . . . . . . . . . . . . . . 2-8
device management . . . . . . . . . . . . . . 3-4, 3-9
DHCP . . . . . . . . . . . . . . . . . . . . . . . . 4-38, 6-9
dialing . . . . . . . . . . . . . . . . . . . . . . . . 3-4, 3-14
dialup . . . . . . . . . . . . . . . . . . . . . . . . . . . . 5-18
discoverable . . . . . . . . . . . . . . . . . . . . . . . 7-11
discovering Bluetooth devices . . . . . . . . . 7-13
display settings . . . . . . . . . . . . . . . . . . . . . . 3-4
DNS . . . . . . . . . . . . . . . . . . . . . . . . . . . . . 6-10
gateway . . . . . . . . . . . . . . . . . . . . . . . . . . 6-10
Get Connected! Wizard . . . . . . . . . . . . . . . 7-5
E
enable file sharing . . . . . . . . . . . . . . . . . . . 7-49
encryption . . . . . . . . . . . . . . . . . . 4-37, 6-5, 6-7
128-bit shared key . . . . . . . . . . . . . . . 4-37
40-bit shared key . . . . . . . . . . . . . . . . 4-37
kerberos . . . . . . . . . . . . . . . . . . . . . . . 4-37
open system . . . . . . . . . . . . . . . . . . . 4-37
entering data with scanner . . . . . . . . . . . . 2-13
entering information . . . . . . . . . . . . . . . . . 2-12
scanning . . . . . . . . . . . . . . . . . . . . . . 2-13
error messages . . . . . . . . . . . . . . . . 9-20, 9-22
ESSID . . . . . . . . . . . . . . . . . . . . 4-36, 6-5, 6-17
external 5 volts . . . . . . . . . . . . . . . . . . . . . 3-44
F
flash file system . . . . . . . . . . . . . . . . . . . . 9-24
non-FFS partitions . . . . . . . . . . . . . . . 9-26
IPL . . . . . . . . . . . . . . . . . . . . . . . 9-26
splash screen . . . . . . . . . . . . . . . 9-26
partitions . . . . . . . . . . . . . . . . . . . . . . 9-24
copyfile . . . . . . . . . . . . . . . . . . . . 9-25
regmerge . . . . . . . . . . . . . . . . . . 9-25
flash storage . . . . . . . . . . . . . . . . . . . . . . . 9-24
friendly name . . . . . . . . . . . . . . . . . . . . . . 7-11
H
handstrap
attaching . . . . . . . . . . . . . . . . . . . . . . 1-21
hard reset . . . . . . . . . . . . . . . . . . . . . . . . . 2-15
help . . . . . . . . . . . . . . . . . . . . . . . . . . . . . 2-10
holster . . . . . . . . . . . . . . . . . . . . . . . . . . . . 1-6
I
icon
battery status . . . . . . . . . . . . . . . . . . 2-10
Infrared port . . . . . . . . . . . . . . . . . . . . . . 11-12
Infrastructure . . . . . . . . . . . . . . . . . . . . . . . 6-7
infrastructure . . . . . . . . . . . . . . . . . . . . . . 6-11
Initial Program Loader . . . . . . . . . . . 9-11, 9-26
installing development tools . . . . . . . . . . . . 8-4
installing the SDK . . . . . . . . . . . . . . . . . . . . 8-4
internet
wireless connection . . . . . . . . . . . . . 4-36
internet explorer . . . . . . . . . . . . . . . . . . . . 5-11
browsing web . . . . . . . . . . . . . . . . . . 5-11
IP . . . . . . . . . . . . . . . . . . . . . . . . . . . . . . . 4-38
IP Address . . . . . . . . . . . . . . . . . . . . . . . . 6-10
IPL . . . . . . . . . . . . . . . . . . . . . . . . . . 9-11, 9-26
error messages . . . . . . . . . . . . . . . . . 9-20
setup . . . . . . . . . . . . . . . . . . . . . . . . . 9-12
K
Kerberos . . . . . . . . . . . . . . . . . . . . . . . . . . 6-9
kerberos . . . . . . . . . . . . . . . . . . . . . . . 4-37, 6-7
keyboard . . . . . . . . . . . . . . . . . . 2-4, 3-4, 3-24
15-key . . . . . . . . . . . . . . . . . . . . . . . . . 2-4
standard 6-key . . . . . . . . . . . . . . . . . . 2-4
keyboard input panel . . . . . . . . . . . . . . . . 2-10
L
loading applications . . . . . . . . . . . . . . . . . 9-11
loading software . . . . . . . . . . . . . . . . . . . . 9-11
Index-3
PPT 8800 Series Product Reference Guide for Embedded Windows® CE .NET
loading splash screen . . . . . . . . . . . . . . . 9-23
locating WLANs . . . . . . . . . . . . . . . . . . . . . 6-4
M
magnetic stripe reader . . . . . . . . . . . . . . . 1-26
main battery . . . . . . . . . . . . . . . . . . . . . . . 3-32
charging . . . . . . . . . . . . . . . . . . . 1-7, 1-10
checking status . . . . . . . . . . . . . . . . . 1-21
installing . . . . . . . . . . . . . . . . . . . . . . . 1-7
maintenance . . . . . . . . . . . . . . . . . . . . . . 11-3
media player . . . . . . . . . . . . . . . . . . . . . . . 5-13
memory . . . . . . . . . . . . . . . . . . . . . . . . . . 3-49
program . . . . . . . . . . . . . . . . . . . . . . 3-49
storage . . . . . . . . . . . . . . . . . . . . . . . 3-49
microphone
adjusting . . . . . . . . . . . . . . . . . . . . . . 3-53
missed AP beacons . . . . . . . . . . . . . . . . . 6-13
missed beacons . . . . . . . . . . . . . . . . . . . . 6-13
mobile companion . . . . . . . . . . . . . . . . . . . 6-3
menu . . . . . . . . . . . . . . . . . . . . . . . . . 4-36
modem . . . . . . . . . . . . . . . . . . . . . . . . 3-4, 3-14
modem communications . . . . . . . . . . . . . 3-14
my computer . . . . . . . . . . . . . . . . . . . . . . . 2-8
N
neckstrap . . . . . . . . . . . . . . . . . . . . . . . . . 1-23
attaching . . . . . . . . . . . . . . . . . . . . . . 1-23
network . . . . . . . . . . . . . . . . . . . . . . . . . . 5-18
network and dial-up . . . . . . . . . . . . . . . . . . 3-4
notational conventions . . . . . . . . . . . . . . . . . xvi
numbers settings . . . . . . . . . . . . . . . . . . . . 3-5
O
OBEX . . . . . . . . . . . . . . . . . . . . . . . . . . . . 7-41
object exchange . . . . . . . . . . . . . . . . . . . . 7-41
object sharing
setup . . . . . . . . . . . . . . . . . . . . . . . . . 7-13
open system . . . . . . . . . . . . . . . . . . . . 4-37, 6-8
operating environment . . . . . . . . . . . . . . . . C-1
options . . . . . . . . . . . . . . . . . . . . . . . . . . . . 6-4
owner . . . . . . . . . . . . . . . . . . . . . . . . . . . . 3-27
owner profile . . . . . . . . . . . . . . . . . . . . . . . . 3-5
Index-4
P
pairable . . . . . . . . . . . . . . . . . . . . . . . . . . . . 7-7
partitions
FFS . . . . . . . . . . . . . . . . . . . . . . . . . . 9-24
non-FFS . . . . . . . . . . . . . . . . . . . . . . . 9-26
IPL . . . . . . . . . . . . . . . . . . . . . . . 9-26
splash screen . . . . . . . . . . . . . . . 9-26
parts of the terminal . . . . . . . . . . . . . . . . . . 1-4
password . . . . . . . . . . . . . . . . . . . . . . 3-5, 3-30
phone
Bluetooth connection . . . . . . . . . . . . . . 7-5
ping . . . . . . . . . . . . . . . . . . . . . . . . . . 6-4, 6-16
pin-outs . . . . . . . . . . . . . . . . . . . . . . . . . . . .C-4
power . . . . . . . . . . . . . . . . . . . . . . . . . . . . . 3-5
power button . . . . . . . . . . . . . . . . . . . . . . . . 2-3
power management . . . . . . . . . . . . . 3-5, 3-32
Power Saving Modes . . . . . . . . . . . . . . . . 6-11
printing with Bluetooth . . . . . . . . . . . . . . . . 7-49
profile
create new . . . . . . . . . . . . . . . . . . . . . 6-20
delete . . . . . . . . . . . . . . . . . . . . . . . . . 6-20
edit . . . . . . . . . . . . . . . . . . . . . . . . . . . 6-20
profiles . . . . . . . . . . . . . . . . . . . . . . . . . . . . . 6-5
program menu . . . . . . . . . . . . . . . . . . . . . . . 5-3
programs
adding . . . . . . . . . . . . . . . . . . . . . . . . 9-27
button assignment . . . . . . . . . . . . . . . 9-27
flash file system . . . . . . . . . . . . . . . . . 9-24
removing . . . . . . . . . . . . . . . . . . 3-5, 3-38
programs menu . . . . . . . . . . . . . . . . . . . . . . 2-9
proxy settings . . . . . . . . . . . . . . . . . . . . . . 5-12
R
radio signal transmission strength . . . . . . . . 6-4
radio transmission power . . . . . . . . . . . . . 6-11
receiving a contact . . . . . . . . . . . . . . . . . . 7-48
receiving a file . . . . . . . . . . . . . . . . . . . . . . 7-48
regional settings . . . . . . . . . . . . . . . . 3-5, 3-35
currency . . . . . . . . . . . . . . . . . . . . . . . 3-36
date . . . . . . . . . . . . . . . . . . . . . . . . . . 3-37
numbers . . . . . . . . . . . . . . . . . . . . . . . 3-36
time . . . . . . . . . . . . . . . . . . . . . . . . . . 3-37
remote desktop . . . . . . . . . . . . . . . . . . . . . . 5-9
Index
removing programs . . . . . . . . . . . . . . . . . . . 3-5
resetting . . . . . . . . . . . . . . . . . . . . . . . . . . 2-15
S
scan wedge . . . . . . . . . . . . . . . . . . . . . . . . 2-13
scanning . . . . . . . . . . . . . . . . . . . . . . . . . . 2-13
indicator . . . . . . . . . . . . . . . . . . . . . . . 2-14
LED indicators . . . . . . . . . . . . . . . . . . 2-14
scanning example . . . . . . . . . . . . . . . . . . . 5-14
scansamp2 . . . . . . . . . . . . . . . . . . . . . . . . 5-14
screen . . . . . . . . . . . . . . . . . . . . . . . . . . . . . 3-5
calibration . . . . . . . . . . . . . . . . . . . . . 1-19
scripts
building . . . . . . . . . . . . . . . . . . . . . . . 9-10
checking . . . . . . . . . . . . . . . . . . . . . . 9-10
creating . . . . . . . . . . . . . . . . . . . . . . . . 9-8
demo,samples . . . . . . . . . . . . . . . . . . . 9-3
opening in TCM . . . . . . . . . . . . . . . . . . 9-8
saving . . . . . . . . . . . . . . . . . . . . . . . . . 9-9
SDK . . . . . . . . . . . . . . . . . . . . . . . . . . xvii, 1-7
install . . . . . . . . . . . . . . . . . . . . . . . . . . 8-4
installing . . . . . . . . . . . . . . . . . . . . . . . . 8-4
installing on development PC . . . . . . . 8-4
system requirements . . . . . . . . . . . . . . 8-3
serial charging cable . . . . . . . . . . . . . 1-6, 1-11
serial communication . . . . . . . . . . . . . . . . 4-35
serial cradle . . . . . . . . . . . . . . . . . . . . . . . . 1-6
service information . . . . . . . . . . . . . . . . . . . xvii
setting Bluetooth favorites . . . . . . . . . . . . 7-21
settings . . . . . . . . . . . . . . . . . . . . . . . . . . . . 3-6
adjusting . . . . . . . . . . . . . . . . . . . . . . . 3-3
signal strength . . . . . . . . . . . . . . . . . 6-3, 6-13
single-slot cradle . . . . . . . . . . . . . . . 1-11, 1-13
snap-on autocharger . . . . . . . . . . . . . . . . . . 1-6
snap-on DEX cable . . . . . . . . . . . . . . . . . . . 1-6
snap-on printer cable . . . . . . . . . . . . . . . . . 1-6
soft keyboard . . . . . . . . . . . . . . . . . . . . . . 2-10
soft reset . . . . . . . . . . . . . . . . . . . . . . . . . . 2-15
sound
adjusting . . . . . . . . . . . . . . . . . . . . . . 3-52
sounds . . . . . . . . . . . . . . . . . . . . . . . . . . . . 3-6
spare batteries
charging . . . . . . . . . . . . . . . . . . . . . . . 1-16
spare battery
charging . . . . . . . . . . . . . . . . . . . . . . 1-16
specifications . . . . . . . . . . . . . . . . . . . . . . . C-1
Spectrum24 . . . . . . . . . . . . . . . . . . . . . . . . 6-3
spectrum24 status . . . . . . . . . . . . . . . . . . 2-11
splash screen . . . . . . . . . . . . . . . . . . . . . . 9-26
creating . . . . . . . . . . . . . . . . . . . . . . . 9-22
loading . . . . . . . . . . . . . . . . . . . . . . . 9-23
standard . . . . . . . . . . . . . . . . . . . . . . . . . . . 9-3
start button . . . . . . . . . . . . . . . . . . . . . . . . . 2-9
start menu . . . . . . . . . . . . . . . . . . . . . . . . . 2-8
start the terminal . . . . . . . . . . . . . . . . . . . . 1-7
starting the terminal . . . . . . . . . . . . . . . . . 1-19
Static . . . . . . . . . . . . . . . . . . . . . . . . . . . . 6-10
static . . . . . . . . . . . . . . . . . . . . . . . . . . . . . 4-38
Status . . . . . . . . . . . . . . . . . . . . . . . . . . . . . 6-4
status . . . . . . . . . . . . . . . . . . . . . . . . . . . . 2-10
status icon . . . . . . . . . . . . . . . . . . . . . . . . 2-10
stylus . . . . . . . . . . . . . . . . . . . . . . . . . 2-4, 3-41
subnet mask . . . . . . . . . . . . . . . . . . . . . . . 6-10
suspend mode . . . . . . . . . . . . . . . . . . . . . . 7-4
Symbol Software Developer’s Kit . . . . . . . . 1-7
symbol support center . . . . . . . . . . . . . . . . xviii
system information . . . . . . . . . . . . . . . . . . . 3-6
T
taskbar . . . . . . . . . . . . . . . . . . . . . . . . . . . . 2-9
TCM
building hex image . . . . . . 9-3, 9-10, 9-11
components . . . . . . . . . . . . . . . . . . . . 9-5
creating script . . . . . . . . . . . . . . . . . . . 9-8
defining properties . . . . . . . . . . . . . . . 9-6
error messages . . . . . . . . . . . . . . . . . 9-22
file browser window . . . . . . . . . . . . . . 9-5
hex image download . . . . . . . . . . . . . 9-11
loading splash screen . . . . . . . . . . . . 9-23
saving script . . . . . . . . . . . . . . . . . . . . 9-9
script window . . . . . . . . . . . . . . . . . . . 9-5
starting . . . . . . . . . . . . . . . . . . . . . . . . 9-4
tool bar . . . . . . . . . . . . . . . . . . . . . . . . 9-5
terminal
charging . . . . . . . . . . . . . . . . . . . . . . 2-10
customizing . . . . . . . . . . . . . . . . . . . . . 3-3
Index-5
PPT 8800 Series Product Reference Guide for Embedded Windows® CE .NET
hard reset . . . . . . . . . . . . . . . . . . . . . 2-15
power on . . . . . . . . . . . . . . . . . . . . . . . 2-3
reset . . . . . . . . . . . . . . . . . . . . . . . . . 2-15
scanning . . . . . . . . . . . . . . . . . . . . . . 2-13
soft reset . . . . . . . . . . . . . . . . . . . . . . 2-15
starting . . . . . . . . . . . . . . . . . . . . . . . 1-19
wakeup . . . . . . . . . . . . . . . . . . . . . . . 3-43
terminal charging . . . . . . . . . . . . . . . . . . . 2-10
terminal configuration . . . . . . . . . . . . . . . . . 1-7
time . . . . . . . . . . . . . . . . . . . . . . . . . . . 3-3, 3-8
time zone . . . . . . . . . . . . . . . . . . . . . . . 3-3, 3-8
troubleshooting . . . . . . . . . . . . . . . . . . . 11-10
infrared communications . . . . . . . . . 11-12
TTY terminal emulation . . . . . . . . . . . . . . . 5-5
turning Bluetooth off . . . . . . . . . . . . . . . . . . 7-3
turning Bluetooth on . . . . . . . . . . . . . . . . . . 7-3
U
universal cable cup . . . . . . . . . . . . . . . . . 1-24
connecting communication cable . . . 1-26
connecting power . . . . . . . . . . . . . . . 1-25
Index-6
unpacking . . . . . . . . . . . . . . . . . . . . . . . . . . 1-3
using stylus . . . . . . . . . . . . . . . . . . . . . . . . . 2-4
using the MSR . . . . . . . . . . . . . . . . . . . . . . 1-28
V
versions . . . . . . . . . . . . . . . . . . . . . . . . . . . 6-14
volume . . . . . . . . . . . . . . . . . . . . . . . . . . . . . 3-6
adjusting . . . . . . . . . . . . . . . . . . . . . . . 3-52
VT-100 terminal emulation . . . . . . . . . . . . . 5-5
W
web browser . . . . . . . . . . . . . . . . . . . . . . . 5-11
Windows desktop . . . . . . . . . . . . . . . . . . . . 2-8
windows explorer . . . . . . . . . . . . . . . . . . . 5-17
WINS . . . . . . . . . . . . . . . . . . . . . . . . . . . . . 6-10
wireless
internet . . . . . . . . . . . . . . . . . . . . . . . . 4-36
wireless LAN . . . . . . . . . . . . . . . . . . . . . . . 4-36
WLAN Profiles . . . . . . . . . . . . . . . . . . . . . . . 6-4
Tell Us What You Think...
We’d like to know what you think about this Manual. Please take a moment
to fill out this questionnaire and fax this form to: (631) 738-3318, or mail to:
Symbol Technologies, Inc.
One Symbol Plaza M/S B-4
Holtsville, NY 11742-1300
Attention: Technical Publications Manager
IMPORTANT: If you need product support, please call the appropriate
customer support number provided. Unfortunately, we cannot provide
customer support at the fax number above.
User’s Manual Title:___________________________________________
(please include revision level)
How familiar were you with this product before using this manual?
Very familiar
Slightly familiar
Not at all familiar
Did this manual meet your needs? If not, please explain.
___________________________________________________________
___________________________________________________________
What topics need to be added to the index, if applicable?
___________________________________________________________
___________________________________________________________
What topics do you feel need to be better discussed? Please be specific.
___________________________________________________________
___________________________________________________________
What can we do to further improve our manuals?
___________________________________________________________
___________________________________________________________
72E-58094-03
Revision A — March 2005
Symbol Technologies, Inc. One Symbol Plaza, Holtsville N.Y. 11742-1300
http://www.symbol.com/manuals