1
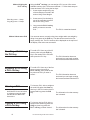
PC-220 Counting Scale
User’s Manual
EUROPEAN COUNTRIES
WARNING
This is a Class A product. In a domestic environment this product may cause radio
interference in which the user may be required to take adequate measures.
CAUTION
Risk of electrical shock. Do not remove cover. No user serviceable parts inside. Refer servicing to qualified service personnel.
Weigh-Tronix reserves the right to change
specifications at any time.
12/13/04 PC220_U.P65 PN 29772-0013D e1 Printed in USA
2
PC-220 Counting Scale User’s Manual
Table of Contents
Introduction .................................................................................................................................... 5
Installation ............................................................................................................................... 5
Sleep Mode ............................................................................................................................. 5
Error Messages ...................................................................................................................... 5
PC-220 Front Panel ................................................................................................................ 6
Keypad ............................................................................................................................. 6
Display .............................................................................................................................. 6
Using the Scale ............................................................................................................................. 8
Zeroing the Scale .................................................................................................................... 8
Using the Clear Key ................................................................................................................ 8
Clearing a Numeric Entry ........................................................................................................ 8
Using Tares ............................................................................................................................ 8
Keying in a known tare weight .......................................................................................... 8
Cancelling a tare ............................................................................................................... 9
Sampling Parts for Counting ................................................................................................... 9
Normal sampling .............................................................................................................. 9
Reverse sampling ........................................................................................................... 10
Resampling ........................................................................................................................... 10
Manual resampling ......................................................................................................... 10
Using Piece Weights ............................................................................................................. 10
Keyboard Entry of Piece Weights ................................................................................... 10
Viewing Active Piece Weight .......................................................................................... 10
Clearing the Active Piece Weight ................................................................................... 10
Using the High Limit Alarm ................................................................................................... 11
Setting the high limit ....................................................................................................... 11
View the current high limit .............................................................................................. 11
Clearing the high limit ..................................................................................................... 11
Using Part Look Up (PLU) Keys ............................................................................................ 11
Creating a PLU ............................................................................................................... 11
Recalling a PLU Using the PLU key ...................................................................................... 12
Recalling a PLU Using a PLUX hot key ................................................................................. 12
Clearing a PLU ...................................................................................................................... 12
Clearing a PLU Using a PLUX hot key ................................................................................... 12
Accumulator Function ........................................................................................................... 13
Accumulating counts ...................................................................................................... 13
Viewing accumulator values ........................................................................................... 13
Clearing accumulator values .......................................................................................... 13
Management Mode ..................................................................................................................... 14
Beeper Alarm ........................................................................................................................ 15
Keyboard Beeper .................................................................................................................. 15
Weight Limit Beeper ............................................................................................................. 15
Error Beeper ......................................................................................................................... 15
Changing Beeper Volume ..................................................................................................... 15
Changing Backlight Time ...................................................................................................... 15
Changing Sleep Time ........................................................................................................... 16
Changing Duration of a Long Press ...................................................................................... 16
Changing Minimum Sample Weight ...................................................................................... 16
Changing Manual Resampling Range .................................................................................. 16
Changing Automatic Resampling Range .............................................................................. 16
Changing a PLU Item Weight ............................................................................................... 17
Changing a PLU Tare ........................................................................................................... 17
Protecting a PLU ................................................................................................................... 17
PC-220 Counting Scale User’s Manual
3
4
PC-220 Counting Scale User’s Manual
Introduction
This manual covers the operation of the PC-220 parts counting scale by
Weigh-Tronix. Major sections of the manual begin with black barred text
as seen above. Minor section headings appear in the left column along
with important notes and warnings.
Installation
Place the unit on a firm, level surface that is free from drafts and vibration.
Place the unit in a location ergonomically suited for the user.
Level the scale using the adjustable footpads. Center the bubble in the
bubble level located below the Weigh-Tronix logo on the front panel.
The unit must be plugged into
a properly grounded outlet
that is within easy access
from the scale location.
Sleep Mode
Short key press = 1 beep
Long key press = 2 beeps
Error Messages
Plug the power adapter to an appropriate power source. See note at left.
The display will perform a self-test and then show the normal display
mode.
To put the unit to sleep, long press the I/O key. See note on short vs. long
key presses at left.
To wake up the scale, short press the I/O key.
Below are examples of various error messages you may see. If a persistent error message appears, disconnect then reconnect power to the unit.
If problem persists, contact your local authorized Weigh-Tronix distributor.
Temporary error
Weight unsteady
Over range
Balance failed
Under range
Error Code:
E0
Disconnect then reconnect power to the scale.
E5
Disconnect then reconnect power to the scale.
E 10
Battery failure. Recharge or replace batteries.
E11
Power supply voltage is too high.
E15
Contact local W-T distributor.
E 20
Weight error. Remove weight from scale and long press the
Clear key.
E 30
Contact local W-T distributor.
E 35
Contact local W-T distributor.
E 100 Invalid PLU contents. Reprogram the PLU.
E 101 Transaction failed. Remove weight from scale and long press
the Clear key.
E 102 PLU write failed.
E 103 Tare failed. Remove weight from scale and long press the
Clear key.
PC-220 Counting Scale User’s Manual
5
PC-220 Front Panel
Keypad
The front panel of the PC-220 is made up of the keypad, for entering
information, and the display. The keypad of the PC-220 is shown in Figure
1. The display window is shown in Figure 2.
Figure 1
PC-220 front panel
Below is a brief description of the keys on the keypad.
Display
On/Off key. Use this key to put the unit in sleep mode, wake it
from sleep mode or to access menus.
Use this key to zero the display.
Use this key to clear all active PLUs, tares, piece weights and
accumulator totals. Also used to clear an error message.
Press this key to tare a weight from the scale.
Use this key to calculate sample weights of items placed on
the scale.
Press this key to temporarily display the current pieceweight.
Use this key to set high limit alarm. This beeping alarm
sounds when the count exceeds the number you set.
6
PC-220 Counting Scale User’s Manual
Use this key to accumulate counts of items and to view
accumulated totals.
Use this key to enter or recall a PLU for PLU memory slot 1-7.
The three keys with arrows are also used when you navigate
the menus in management mode and for service functions.
Use this key to enter or recall a PLU for PLU memory slots 135.
Use these keys to enter numbers for tares, piece
weights, etc.
Figure 2
PC-220 display window
The appropriate annunciator will light next to the labels surrounding the
display. For example, when in net weighing mode a small triangle will
appear pointing at the word Net.
When you are in the counting mode the screen will display the information
shown in Figure 3.
Figure 3
Count mode display information
PC-220 Counting Scale User’s Manual
7
Using the Scale
This section shows you the steps required to perform weighing and
counting operations. The first few sections are general information on
zeroing the scale, clearing values, and using tares. After that are specific
instructions on performing sampling and doing counting operations.
Zeroing the Scale
Short key press = 1 beep
Long key press = 2 beeps
Using the Clear Key
Be sure the scale is always zeroed before doing a weighing or counting
function.
To zero the scale, make sure the
scale is empty and short press the
Zero key. . .
0 weight and the center-of-zero
mark is displayed.
Be sure there are no active tares, piece weights or PLU (piece weight
lookup) values.
To clear all these values, long press
the Clear key.
Clearing a Numeric
Entry
If you are keying in a value via the numeric keypad and make an error, you
can erase the last digit entered or the entire entry.
To erase the last digit entered, short
press the Clear key. . .
To erase the entire number, long
press the Clear key. . .
Using Tares
Keying in a known
tare weight
If there is scale motion as you
press the Tare key, the action
may not take place. Try
pressing Tare again.
8
To perform a tare, place the
container or object to be tared on
the scale platform and short press
the Tare key. . .
To key in a known tare weight, with
the scale empty and the display
zeroed, key in the tare value via the
keypad and short press the Tare
key. . .
Place the tared object and the items
to be weighed on the scale. . .
PC-220 Counting Scale User’s Manual
The last digit is deleted from the
display.
The entire number is deleted from
the display.
The Net annunciator lights and the
display shows zero weight.
The Net and Tare annunciators
light and the display shows a
negative weight.
The net weight of the items is
displayed.
Cancelling a tare
If there is scale motion as you
press the Tare key, the action
may not take place. Try
pressing Tare again.
To cancel an active tare value,
empty the scale and short press the
Tare key. . .
The Net annunciator disappears
and the display shows zero weight.
Sampling Parts
for Counting
There are two types of sampling—normal and reverse.
Normal sampling
To do a normal sampling, follow these steps:
When you sample light weight
items or items with a large
weight variation, use a large
sample size to increase the
accuracy and use either
manual or automatic
resampling. Resampling is
covered in a following section.
The minimum sample weight
is set through the management mode. See the Service
Manual.
1. Be sure the scale is empty and
short press the Zero key.
2. Place a counted quantity of
items on the scale, then key in
the quantity on the keypad and
short press the Sample key. . .
3. If the calculated sample weight
is below the minimum needed
by the scale for accuracy, the
display will ask you to place
more items on the scale. Place
the items on the scale and short
press the Sample key. . .
Short key press = 1 beep
Long key press = 2 beeps
The weight of the samples is
shown on the middle line of the
display. The number of items is
shown on the bottom line of the
display.
The weight of the samples is
shown on the middle line of the
display. The number of items is
shown on the bottom line of the
display.
4. The scale is now ready for
counting.
PC-220 Counting Scale User’s Manual
9
Reverse sampling
The reverse sampling method is described below.
1. Be sure the scale is empty and
short press the Zero key.
2. Place a quantity of items on the
scale, then short press the
Sample key. . .
3. Remove and count several
items from the scale, then key
in this number via the keypad.
Short press the Sample key. . .
SPLE is displayed on the top line of
the display and the weight of the
samples is shown on the middle
line.
The weight and count of all the
items on the scale is displayed.
4. The scale is ready to count.
Resampling
Resampling can increase the counting accuracy of your scale. You can do
this manually or the scale can be set up to do it automatically. The autoupdate function must be set through menus found in the Service Manual.
Below are the instructions for manual resampling.
Manual resampling
Once you have sampled a group of items, you can add an equal or greater
amount to the scale and then resample. Follow the steps below for this
manual resampling procedure.
Short key press = 1 beep
Long key press = 2 beeps
Sample the items normally as
described above, then add more
items to the scale (equal to or more
than the items already on the scale).
Long press the Sample key. . .
The piece weight is updated and
the count is shown.
Using Piece Weights
Below are the steps to enter, view and clear piece weights.
Keyboard Entry of Piece
Weights
You can key in a known piece weight via the keypad. Key in the weight in
pounds if using lb units or key in the weight in grams if in kg units, then
short press the Pcwt/Rcl key. This becomes the new active piece weight.
Viewing Active Piece
Weight
To view an active piece weight, short press the Pcwt/Rcl key. The Pcwt.
annunciator lights and the piece weight is briefly shown on the display.
Clearing the Active Piece
Weight
Short press the Pcwt/Rcl key and short press the Clear key while the
piece weight is displayed. The piece weight is deleted and the weight is
displayed.
10
PC-220 Counting Scale User’s Manual
Using the High
Limit Alarm
Below are instructions for setting, viewing, and clearing a high limit alarm
value. The high limit alarm will sound when the count displayed on the
scale exceeds the number you set. You can set a high limit before or after
sampling.
Setting the high limit
To set the high limit, key in the
number via the keypad and short
press the High Limit key. . .
View the current high limit
Clearing the high limit
Short key press = 1 beep
Long key press = 2 beeps
Using Part Look Up
(PLU) Keys
To view the current high limit value,
short press the High Limit key. . .
To clear a high limit, short press the
High Limit key and short press the
Clear key while the high limit is
displayed. . .
The high limit number becomes
active. When you count items, if
the count exceeds the high limit, a
beeping alarm will sound.
The value will be displayed briefly
in the display.
The high limit is deleted and the
weight is displayed.
Use Part Look Up (PLU) keys to store and recall piece weight and/or tare
weight for an item. You can store up to 35 PLUs.
Use the PLU key to set up or recall any of the 35 PLUs. There are 7 PLUX
keys called hot keys. Use these to quickly setup or recall PLUs for the first
seven of the 35 PLUs. You should assign the most commonly counted
items in your inventory to these 7 keys.
Below are instructions for creating, recalling and clearing PLUs.
Creating a PLU
Method 1 Using PLU key
Remember that a PLU can
store a piece weight and/or a
tare weight.
Individual PLUs can be locked
so changes cannot be made.
See the Service Manual for
instructions.
You can create a PLU using three methods; by using the PLU key, by
using the PLUX hot key, or using the auto-store PLU. All three methods
are described below.
Using the PLU key, you can assign a PLU to one of 35 available memory
slots. These are numbered 1-35. Follow these steps to create and store a
PLU:
1. Create a piece weight using any
of the techniques covered in the
section Using Piece Weights.
2. Create a tare (if so desired) by
one of the methods covered in
the section Using Tares.
3. Key in a number for the PLU
(1-35) and long press the PLU
key. If you want the PLU to be
available through one of the 7
hot keys on the front panel you
must choose a number between
1 and 7(inclusive). . .
PC-220 Counting Scale User’s Manual
The PLU is created and stored.
11
Method 2 Using the
PLUX hot key
Using the PLUX hot keys, you can assign a PLU to one of first seven
available memory slots. These are numbered 1-7. Follow these steps to
create and store a PLU using the hot keys:
1. Create a piece weight using any
of the techniques covered in the
section Using Piece Weights.
Short key press = 1 beep
Long key press = 2 beeps
2. Create a tare (if so desired) by
one of the methods covered in
the section Using Tares.
3. Long press the PLUX hot key
where you want to store the
PLU. . .
Method 3 Auto-store PLU
Recalling a PLU Using
the PLU key
Recalling a PLU Using
a PLUX hot key
Clearing a PLU
Individual PLUs can be locked
so changes cannot be made.
See the Service Manual for
instructions.
Clearing a PLU Using
a PLUX hot key
12
The PLU is created and stored.
You can auto-store a currently active piece weight and/or tare weight by
doing a long press of the PLU key. The data will be stored in the first
empty memory slot. The PLU number will be displayed on the top line of
the display if the action was successful.
To recall a PLU from any of the 35
memory slots using the PLU key,
Key in the number of the PLU and
short press the PLU key. . .
To recall a PLU from any of the first
seven memory slots using a
PLUX hot key, short press the hot
key where the PLU you want is
stored.. . .
To clear any PLU, with no weight on
the scale long press the Clear key
then key in the PLU number via the
keypad and long press the PLU
key. . .
To clear any hot key PLU, with no
weight on the scale long press the
Clear key then long press the
PLUX hot key you want cleared. . .
PC-220 Counting Scale User’s Manual
The PLU information becomes
active and you can begin counting
the items associated with that PLU.
The PLU information becomes
active and you can begin counting
the items associated with that PLU.
The information from that memory
slot is cleared.
The information from that memory
slot is cleared.
Accumulator Function
The PC-220 has an accumulator feature which allows you to add together
or accumulate counts of items to keep a running total of items counted so
far. You can store up to 9999 accumulations and a total count of
9,999,999. Follow the steps below to accumulate counts and clear the
accumulated totals.
Accumulating counts
With a count displayed on the
screen, short press the ACC key. . .
The displayed count must
change by 25% since the last
accumulation before a new
count can be accumulated.
This prevents double counting
of the same items.
The currently displayed count is
added to the accumulator total,
provided the count is able to be
added. The accumulator step count
is also incremented by 1. The
accumulator information is momentarily displayed. The number of
accumulations is on the top line of
the display and the accumulator
total is on the bottom line.
Viewing accumulator
values
To view the accumulator information,
short press the ACC key while no
count is displayed. . .
The information will be briefly
shown on the display.
Clearing accumulator
values
To clear accumulator information,
short press the ACC key, then short
press the Clear key while the
accumulator information is
displayed
OR
Long press the Clear key during
normal operation.
PC-220 Counting Scale User’s Manual
This clears all active data; piece
weight, tare, accumulator and
accumulator counter.
13
Management Mode
Management mode is a menu structure you enter to set various options in
the PC-220. The display will look similar to that shown in Figure 4 when
you are in management mode.
Figure 4
Management mode display sample
You MUST press the Clear
key to clear a value before
keying in a new one.
You use the following keys to enter and navigate through the menu and
set the options. Also see the note at left.
Short press this key, then key in the number 6231 to
enter the management mode.
Long press this key to move to the next branch.
Short press this key to move to the next sub-branch.
Long press this key to go to the previous branch.
Short press this key to go to the previous sub-branch.
Short press this key to select the value to be changed.
Long press this key to return to branch 00.
After you change a value, you
must go to the next branch to
accept the value.
Short press this key to increment the value.
Long press this key to increment the value 10x.
Press the
14
followed by the
PC-220 Counting Scale User’s Manual
key to exit management mode.
Beeper Alarm
Go to branch 19, sub-branch 00
Factory defaults are shown in
bold.
0 = off
1 = on
Keyboard Beeper
Go to branch 19, sub-branch 01
0 = off
1 = on
Weight Limit Beeper
Go to branch 19, sub-branch 02
0 = off
1 = on
Error Beeper
Go to branch 19, sub-branch 03
0 = off
1 = on
Changing Beeper
Volume
Go to branch 19, sub-branch 04
0 = Quiet
1 = Loud
Changing Backlight
Time
Go to branch 20, sub-branch 01
0 = always off
1 = 5 seconds
2 = 1 minute
3 = 5 minutes
4 = always on
PC-220 Counting Scale User’s Manual
15
Changing Sleep Time
Go to branch 20, sub-branch 01
Factory defaults are shown in
bold.
0 = none
1 = 1 minute
2 = 5 minutes
3 = 30 minutes
Changing Duration of a
Long Press
Go to branch 29, sub-branch 00
200 = 2 seconds
150 = 1½ seconds
50 = ½ second
Changing Minimum
Sample Weight
Go to branch 61, sub-branch 00. Enter the minimum sample weight in
grams on a KG scale and in pounds on an LB scale.
For example: 1 lb
Changing Manual
Resampling Range
Go to branch 61, sub-branch 01
0 = manual resampling off
100 - 1000 = % of initial sampling size (200)
Changing Automatic
Resampling Range
Go to branch 61, sub-branch 02
0 = automatic resampling off
100 - 1000 = % of initial sampling size (0)
16
PC-220 Counting Scale User’s Manual
Changing a PLU
Item Weight
Branch numbers for
PLUs = 100 + PLU number.
For example:
PLU 5 = 105
PLU 20 = 120
Changing a PLU Tare
Go to PLU branch number (example shown is PLU 5).
Sub-branch 00
Enter the item weight
(grams shown below)
Go to PLU branch number (example shown is PLU 5).
Sub-branch 02
Enter the tare weight
(grams shown below)
Protecting a PLU
Sub-branch 01
Enter the number of decimal places
Sub-branch 03
Enter the number of decimal places
Go to PLU branch number (example shown is PLU 5), sub-branch 4.
0 = Not protected
1 = Protected
PC-220 Counting Scale User’s Manual
17
18
PC-220 Counting Scale User’s Manual
PC-220 Counting Scale User’s Manual
19
Avery Weigh-Tronix USA
1000 Armstrong Dr.
Fairmont, MN 56031 USA
Telephone: 507-238-4461
Facsimile: 507-238-4195
e-mail: [email protected]
www.wtxweb.com
Avery Weigh-Tronix UK
Foundry Lane
Smethwick, West Midlands
England B66 2LP
Tel: +44 870 90 34343
Fax: +44 121 224 8183
Email: [email protected]
Web site:www.averyweigh-tronix.com
Avery Weigh-Tronix Canada, ULC
217 Brunswick Boulevard
Pointe Claire, QC H9R 4R7 Canada
Telephone: 514-695-0380
Toll free: 800-561-9461
Facsimile: 514-695-6820
www.weigh-tronix.ca
Weigh Bar® is a registered trademark of Weigh-Tronix Inc.