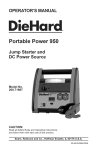
1
Triton Series™
High Efficiency Boiler
Models: T80 - T200
Installation, Operating & Maintenance Manual
A
S
M
E
H
T-2 00
•
•
•
•
•
•
Designed and Manufactured in Accordance with
ASME Code Section IV
ETL Tested and Listed:
ANSI Z21.13-2010 / CSA 4.9-2010
AHRI IBR Listing per BTS 2000
ASME Section IV H-Stamped
SCAQMD 1146.2
CRN
“Quality,
“
“Q
Quual
Q
ali
lliiity
tyy, value
ty,
value
va
luuuee and
aand service
seerv
rvic
rv
ice
ice
ce since
sin
nce 1919”
nce
19199
19
9”
”
Contents
A. Introduction ............................................................. 1
A.1. Standard Features & Benets .......................... 1
A.2. Miscellaneous ................................................... 1
B. Pre-Installation ........................................................ 3
B.1. Determining Unit Location ................................ 3
B.2. Connection Information .................................... 4
B.3. Combustion and Ventilation Air......................... 4
B.4. Conventional Flue Venting................................ 6
C. Installation ................................................................ 9
C.1. Product Inspection ............................................ 9
C.2. Rating and Certications ................................ 10
C.3. Installation Codes ............................................11
C.4. Preparing the Boiler ........................................11
C.5. Water System Piping .......................................11
C.6. Gas Supply .................................................... 12
C.7. Pump Installation ............................................ 13
C.8. Electrical ......................................................... 13
C.9. Flue Venting ................................................... 14
C.10. Condensate Drains ..................................... 15
C.11. Modular System Installations ....................... 15
D. Start Up Instructions ............................................ 18
D.1. Water Quality and Treatment......................... 18
D.2. Filling The System ......................................... 18
D.3. Factory Test Report (FTR) .............................. 19
D.4. Verication ...................................................... 19
D.5. Start-Up Detail ............................................... 19
D.6. Start Up And Maintenance Tests ................... 19
D.7. Startup Component Adjustments................... 22
D.8. Shutting Down The Unit................................. 23
D.9. After Startup Checklist ................................... 23
E. Maintenance .......................................................... 25
E.1. Maintenance Detail ........................................ 25
E.2. Maintenance Log ........................................... 27
F. Troubleshooting..................................................... 28
F.1. Controller lockout and hold codes. .................. 28
F.2. Controller alert codes. ..................................... 37
G. Warranty ............................................................... 42
A 1
A. INTRODUCTION
Congratulations on choosing the Atlas™ Triton Series™
high efciency boiler! The Triton Series™ combines solid
engineering and innovative design with all the quality and
features you would expect from a company with a proud
100 year tradition of building safe, reliable, high quality
products in the USA.
Your Triton boiler is E.T.L. tested, certied and listed and
is constructed and stamped in accordance with Section IV
of the ASME Code. The boiler is also AHRI IBR Listed per
BTS 2000.
A.1. STANDARD FEATURES & BENEFITS
A.1.a. Compact Water Tube Design
The Triton is a compact, vertically red water tube boiler
utilizing a double row, high nned copper tube design to
maximize efciency while minimizing the boiler footprint.
The gasketless cast iron headers are a 4-pass conguration.
A.1.b. Quality Construction Built in the USA.
Triton Series™ boilers are 100% designed and manufactured in the USA in accordance with ASME Code Section
IV. The nest quality components are used for many years
of trouble free service.
A.1.c. Advanced Pre-mix Gas Delivery and
Combustion System
Triton Series™ boilers provide clean, efcient combustion
with very low emission levels. The gas delivery system is
powered by a combustion blower which forces air and gas
into the venturi which pre-mixes the gas before entering
the combustion chamber. The Triton burner is a knit metal
alloy ber design which optimizes heat transfer, minimizes
surface temperatures, and is resistant to clogging.
A.1.d. Controls
A.1.f. Ease of Installation and Maintenance
Triton Series™ boilers include a heavy steel base with pallet jack access for ease of installation and movement. Routine maintenance and service are made simple with easy
access to all components front and rear. The entire heat
exchanger is easily removable and replaceable using hand
tools only, without performing welding or cutting operations
and without the use of gaskets.
A.1.g. Smart Boiler Control System
Triton
Triton Series™ boilers are factory equipped to accept the
accessory
accessory Smart
Smart Boiler
Boiler Control
Control System™.
System™. The
TheAce
AjaxHeating
Boiler
Solution,
LLC proprietary
Smart
Boiler
is a web-based
Inc. proprietary
Smart Boiler
Control
is Control
a web-based
system
system
providing
24/7 access
to the operational
boilers operational
providing
24/7 access
to the boilers
perforperformance
fromcomputer
any computer
or smart
with
an internet
mance from any
or smart
phonephone
with an
internet
connection.
connection. The
Thesystem
systemallows
allowspersonnel
personneltotoconveniently
conveniently
monitor
monitor critical
critical boiler
boiler information
information including
including inlet/
inlet/ outlet
outlet
temperatures,
temperatures, stack
stack temperatures,
temperatures, firing
firing rates,
rates, cycle
cycle counts
counts
and
and much
much more
more can
can be
be easily
easily accessed
accessed and
and analyzed,
analyzed, to
to
maximize
maximize boiler
boiler performance
performance and
and safety
safety.
A.2. MISCELLANEOUS
This manual
manual covers
covers installation,
installation, maintenance,
maintenance, and
and operating
operatThis
ing instructions
for Atlas™
Triton
Series™
Efciency
instructions
for Atlas™
Triton
Series™
HighHigh
Efficiency
hot water
water boilers.
boilers. Please
Pleasereview
reviewthe
theentire
entiremanual
manualcarefully
carefully
hot
before installation
installation or
or operation,
operation, and
and keep
keep itit in
in legible
legible condibefore
tion with the
at all at
times
for reference.
If thisIfmanual
condition
withboiler
the boiler
all times
for reference.
this
is misplaced
or lost, check
Ajaxthe
Boiler
website,
manual
is misplaced
or lost,the
check
AceInc.
Heating
www.ajaxboiler.com
to print
an electronic copy ortocontact
Solutions,
LLC. website,
www.aceheatingllc.com
print an
your local copy
Ajax or
Boiler
Inc. your
representative.
electronic
contact
local Ace Heating Solutions,
LLC. representative. The following terms and signs are used
The following
andtosigns
used throughout
this of
throughout
thisterms
manual
bringare
attention
to the presence
manual to
attention
to the
of hazards
of
hazards
of bring
various
risk levels,
orpresence
to important
information
various riskproduct
levels, or
concerning
life.to important information concerning
product life.
! DANGER:
Indicates an imminently hazardous situation
which, if not avoided, will result in death, serious
The Triton Series™ uses the advanced Honeywell SOLA
control system and high-resolution color LCD touch screen
Operator Interface display. This system provides the user
clear, quick and easy access to all of the system’s features
and capabilities from a single, user-friendly interface. Up
to 8 Triton Series™ boilers can be operated in a lead-lag
installation using standard controls.
injury or substantial property damage.
A.1.e. Heavy Duty, Solid Steel Cabinet
or substantial property damage.
Triton Series™ boilers include a solid, 18 gauge steel cabinet. The cabinet is nished inside and out with a tough UV
rated, outdoor quality powder coat paint.
!
WARNING:
Indicates a potentially hazardous situation which,
if not avoided, could result in death, serious injury
A 2
! CAUTION:
WARNING: If the information in this
manual is not followed exactly, a
re or explosion may result causing
property damage, personal injury or
loss of life.
Indicates a potentially hazardous situation which,
if not avoided, may result in moderate or minor
injury or property damage.
!
NOTE:
- Do not use or store gasoline or other
ammable vapors and liquids in the
vicinity of this or any other appliance.
Indicates special instructions on installation,
operation, or maintenance which are important
but not related to personal injury hazards.
- WHAT TO DO IF YOU SMELL GAS
• Do not try to light any appliance
• Do not touch any electrical switch;
do not use any phone in your
building.
• Immidiately call your gas supplier
from a neighbors phone. Follow
the gas suppliers instructions.
• If you cannot reach your gas supplier, call the re department.
- Installation and service must be performed by a qualied installer, service agency or the gas supplier.
Touch Screen
Control Display
Temp./
Pressure
Gauge
Rear Door
Panel
Front Door
Panel
Pressure
Relief
Valve
T-200
Gas
Inlet
Valve
Gas Inlet
Valve
Flow
Switch
Return Water
Inlet
Hot Water
Outlet
Manifold
Front Panel Rear Panel
Side Panel (L)
Flue
Collar
Condensate
Drain
Combustion
Air Inlet
Main System
Drain
Pallet Jack
Base
FRONT
REAR
SIDE
Figure A.1.1. Features and Components
B 3
B
B. PRE-INSTALLATION
Ace Heating Solutions, LLC. strongly recommends that this
Ajax
Boiler
manual
be Inc. strongly recommends that this manual be
reviewed
reviewed thoroughly
thoroughly before
before installing
installing your
your Triton
Triton Series™
Series™
high
ef
ciency
boiler.
The
factory
warranty
high efficiency boiler. The factory warranty does
does not
not apply
apply
to
to boilers
boilers that
that have
have been
been improperly
improperly installed
installed or
or operated
operated
(Refer
If,after
afterreviewing
reviewingthis
this
(Refer to
to the
the warranty
warranty in
in chapter
chapter 8).
8). If,
manual,
you
still
have
questions
not
covered
in
this
manual,
manual, you still have questions not covered in this
please
manual,contact the manufacturer or your local Ajax Boiler
Inc.
representative.
please
contact the manufacturer or your local Ace Heating
Solutions, LLC representative.
This
This section
section is
is intended
intended to
to provide
provide guidance
guidance in
in planning,
planning,
design,
construction
and
preparing
the
space
design, construction and preparing the space prior
prior to
to physical
installation
of
the
boiler,
its
venting,
and
the
necessary
physical
electrical
and
plumbing
installation
of the
boiler,connections.
its venting, and the necessary
T
M
N
P
A
S
K
G
electrical and plumbing connections.
!
NOTE:
The installation must conform to the requirements of the
authority having jurisdiction or, in the absence of
such requirements, to the National Fuel Gas Code, ANSI
Z223.1/NFPA 54, and/or Natural Gas and Propane
Installation Code, CAN/CSA B149.1.
L
H
E F
D
C
J
Q
R
REAR
SIDE
Figure A.2. Dimensions
MODEL
T-80
T-100
T-150
T-200
The boiler must not be installed on carpeting.
A: Total Height
60 11/16
60 11/16
68 11/16
76 11/16
Local and state codes requiring greater clearances supersede these minimum clearances.
B: Total Width
31 1/2
31 1/2
31 1/2
31 1/2
C: Base Height
3 3/8
3 3/8
3 3/8
3 3/8
D: System Drain Height
2 1/4
2 1/4
2 1/4
2 1/4
E: Condensate Drain Ht.
10 11/16
10 11/16
10 11/16
10 11/16
F: Air Intake Height
15 11/16
15 11/16
16 3/4
16 3/4
G: Flue Collar Height
20 7/16
20 7/16
22
23 15/16
H: Inlet/ Outlet Height
32 13/16
32 13/16
40 13/16
48 13/16
4 5/8
4 5/8
4 5/8
4 5/8
K: Air Intake Clearance
1
1
1
1
L: Flue Collar Clearance
7 1/8
7 1/8
7 1/8
7 1/8
M: Gas Valve Clearance
6 3/8
6 3/8
6 3/8
6 3/8
N: Manifold Clearance
12 3/4
12 3/4
12 3/4
12 3/4
16
16
16
16
Q: Drain/ Flue Center
15 3/4
15 3/4
15 3/4
15 3/4
R: Air Intake Center
6 11/16
6 11/16
6 11/16
6 11/16
S: Gas Valve Height
39 7/8
39 7/8
47 7/8
55 7/8
T: Gas Valve Center
9 15/16
9 15/16
9 15/16
9 15/16
•
•
Multiple appliances may be installed side by side with
6” clearance between adjacent appliances to allow
sufcient air for the pilot blower. It is recommended to
maintain 16” clearance between adjacent boilers to
allow access for service to the rear of the unit.
The minimum clearance between a Triton Series™
boiler and a storage tank is 6”. For alcove installations, the minimum clearance to combustible construction is 6” to side, 24” to rear walls and 22” from
top of the unit to the ceiling. The front alcove shall
remain open. This will allow boiler to be serviced in its
location without movement or removal of the unit.
B.1. DETERMINING UNIT LOCATION
J: Syst. Drain Clearance
P: Inlet/ Outlet Clearance
The boiler should be mounted on a level, structurally sound
surface. The boiler is not approved for mounting on a
combustible surface and Gas fueled equipment installed
in enclosed parking garages must be located at least 18”
above the oor.
The optimal location for the boiler is as close to an exterior
wall as possible to reduce vent loss and to minimize costly
stainless steel ue venting. Maintain minimum specied
clearances for adequate operation. All installations must
allow sufcient space behind the boiler to service vent connections, water pipe connections, piping and other auxiliary
equipment, as well as the appliance.
Table A.2. Triton Dimensions (inches).
All measurements are approximate and subject to change.
T-100
T-150
T-200
Top Clearance:
18”
18”
18”
18”
Front Clearance:
36”
36”
36”
36”
Side Clearance:
6”
6”
6”
6”
Bottom Clearance:
0”
0”
0”
0”
MODEL
T-80
Figure B.1.1. Triton Minimum Clearances Chart.
B 4
! CAUTION:
•
Locate the unit so that the condensate can be treated
and piped to meet city and local code requirements.
•
The boiler shall be installed such that the gas ignition
system components are protected from water (dripping, spraying, rain, etc.) during boiler operation or
service (circulator replacement, control replacement,
etc.)
•
Keep the area around the unit(s) free from combustibles and ammable liquids.
•
It is highly recommended that you allow sufcient
space in front and the rear of the unit for replacement
and adjustment of all parts requiring such attention.
T-80
MODEL
T-100
T-150
T-200
43-85
65-129
85-172
Inlet Temp.
Outlet Temp.
Rec. Flow Rate (gpm)
34-69
Pressure Drop For Rec. Flow
Min. Flow Rate (gpm)
Max. Flow Rate (gpm)
Table A.1. Triton Recommended Flow Rates.
B.1.a. Outdoor Installations (Optional)
Electrical Connection
Gas Inlet
! CAUTION:
Hot Water Outlet
Triton Series™ boilers are available for certied outdoor
installations.
•
Boilers must not be installed under an overhang that
is less than 3’ from the top of the vent terminal.
•
Three sides must be open in the area under the
overhang.
•
Roof water drainage must be diverted away from
boiler(s) installed under overhangs.
Cold Water Inlet
Exhaust Vent
Condensate Drain
Combustion Air Inlet
System Drain
B.1.b. Installations at Elevation.
Figure B.2.1. Connection Locations
Rated inputs are suitable for up to 2,000 ft.. elevation
without de-rating. Consult the factory for installations over
2,000 ft.. above sea level. No hardware changes are required to the unit. (Adjustments may be required).
B.2. CONNECTION INFORMATION
!
NOTE:
The boiler, when used in connection with a refrigeration
system, must be installed so the chilled
medium is piped in parallel with the boiler with appropriate valves to prevent the chilled medium from
entering the boiler.
The boiler piping system of a hot water boiler connected
to heating coils located in air handling
units where they may be exposed to refrigerated air circulation must be equipped with ow control valves
or other automatic means to prevent gravity circulation of
the boiler water during the cooling cycle.
All plumbing and electrical connections are conveniently
made at the rear of the boiler without the need to remove
any panels or components.
T-80
MODEL
T-100
T-150
T-200
Gas Connection:
1”
1”
1”
1 1/4”
Water Connection (In):
3” MPT
3” MPT
3” MPT
3” MPT
Water Connection (Out):
3” FPT
3” FPT
3” FPT
3” FPT
Vent Intake:
8”
8”
8”
8”
Exhaust Vent:
6”
6”
8”
8”
System Drain
1 1/4”
1 1/4”
1 1/4”
1 1/4”
Condensate Drain
1/2”
1/2”
1/2”
1/2”
Figure B.2.1. Piping Connection Sizing Chart.
B.3. COMBUSTION AND VENTILATION AIR
!
•
WARNING:
The lack of adequate combustion air is the single
biggest operating problem encountered with gas
fired water boilers.
B 5
•
•
Use of the boiler in construction areas where ne
particulate matter, such as concrete dust or drywall
dust, is present may result in damage to the boiler
that is not covered by the warranty. If operated in a
construction environment, a clean source of combustion air must be provided directly to the boiler.
Your Triton Series™ boiler is equipped with a lter to
help prevent such an occurrence above and must be
checked at least every month. A single replacement
lter is located inside the control box.
B.3.a. Indoor Units (Standard)
The boiler must be supplied with sufcient quantities of
non–contaminated air to support proper combustion and
equipment ventilation. Triton Series™ boiler combustion air
can be taken using the boiler room air or may be vented
directly outside.
It is generally recommended to take combustion air from a
well ventilated boiler room whenever possible. However
when using direct combustion air venting, the boiler is capable of up to 30 ft. of equivalent venting. If more than 30 ft.
of equivalent venting is required, an enlarged vent diameter
may be used to extend maximum vent lengths, but must be
properly sized to allow for sufcient combustion air to be
supplied to the boiler.
All installations must comply with the requirements of the
National Fuel Gas Code, NFPA 54, Canada B149, and all
local codes.
•
Note: All additional gas red equipment should be
considered when calculating the necessary air supply.
B.3.b. Direct Vent (Ducted Combustion Air)
If outside air will be drawn through the intake vent directly
to this unit for combustion:
•
The exhaust vent must be installed with a slight upward
slope of not more than ¼ inch per foot of horizontal run
to vent terminal.
•
The exhaust vent must be insulated through the length
of the horizontal run.
•
Intake and exhaust vents with vertical termination
should have a rain cap installed.
•
It is recommended to install a drain on the exhaust
vent.
•
In cold climates, and to mitigate potential freeze up,
Ace
Solutions,
LLC highly recommends
theof a
Ajax Heating
Boiler Inc.
highly recommends
the installation
installation
of
a
motorized
sealed
damper
to
prevent
motorized sealed damper to prevent circulation of cold
circulation
cold
air through
thenon
boiler
during thehours.
non –
air throughof
the
boiler
during the
– operating
operating
hours.
When
installing
motorized
damper
When installing motorized damper actuator with switch
actuator
switch
contacts,
the damper
is fully
contacts,with
prove
the damper
is prove
fully open
to prevent
unit
open
to
prevent
unit
from
firing
when
damper
is
not
fully
from ring when damper is not fully open.
open.
B.3.c. Conventional Combustion Air Supply
U.S. Installations
All Air from inside the building
!
•
•
NOTE:
In calculating free area, the required size of the opening for combustion, ventilation, and dilution air shall
be based on net free area of each opening. If free
area through a design of louver or grill is known, it
shall be used in calculating the size opening required
to provide the free area specied. For additional information, refer to the latest NFGC code requirements.
Provisions for combustion and ventilation air must be
in accordance with Air for Combustion and Ventilation,
of the latest edition of the National Fuel Gas Code,
ANSI Z223.1. In Canada the latest edition of CGA
Standard B149 Installation Code for Gas Burning Appliances and Equipment, or applicable provisions of
the local building codes.
•
In order to protect electrical components, the boiler
room ambient air temperature shall not exceed 100oF.
•
The equipment room MUST be provided with properly sized openings to assure adequate combustion
and ventilation air when unit is installed with a basic
Category IV venting system.
If all combustion air is drawn from inside the building and
the mechanical equipment room does not receive air from
outside, the following applies:
•
The mechanical room must be provided with two
permanent openings communicating directly with additional room(s) of sufcient volume so that the combined volume of all spaces meets the criteria for an
unconned space. (An unconned space is dened as
a space whose volume is more than 50 cubic feet per
1,000 BTUH of the aggregate input rating of all appliances installed in that space. (NFGC).
•
Each opening must have a minimum free area of 1
sq. in. per 1,000 BTUH of the total input rating of all
gas utilization equipment in the mechanical room.
•
One opening must commence within 12” of the top, and
one opening must commence within 12” of the bottom
of the room.
B 6
Louvers and grilles.
!
NOTE:
AjaxHeating
Boiler Inc.
recommends
that one opening
shall
comAce
Solutions,
LLC recommends
that one
opening
mence
with
6”
from
the
top
and
one
opening
shall
comshall commence with 6” from the top and one opening shall
mence 6” from
the the
bottom.
TheThe
combined
area
of the
twotwo
commence
6” from
bottom.
combined
area
of the
openings
should
not
be
less
than
200
sq.
in.
for
the
rst
openings should not be less than 200 sq. in. for the first
100,000BTUH
BTUHboiler
boilerinput,
input,and
and100
100sq.
sq.in.
in.for
foreach
eachadditional
ad100,000
ditional
100,000
BTUH
boiler
input.
100,000 BTUH boiler input.
All Air from Outdoors
If all the combustion air is drawn from the air outside the
building, and the mechanical equipment room directly communicates with outdoor air, either of the following methods
can be used:
Method 1
• The mechanical equipment room must be provided with
two permanent openings. One commencing within 12”
of the top and one commencing within 12” from the bottom of the room.
•
•
!
The required size openings for combustion, ventilation and dilution air shall be based on the net free area
of each opening. Where free area through a louver or
grille design is known, it shall be used in calculating the
size opening required to provide the free area specied.
Where the louver and grille design, and free area are not
known, it shall be assumed that wood louvers will have
25% free area, and metal louvers and grilles will have
75% free area (NFGC).
Canadian Installations
! CAUTION:
All combustion air must be drawn from the outside air of
the building; the mechanical equipment room must communicate directly with outdoor air.
The openings must communicate directly, or by ducts,
with the outdoors
Each opening must have a minimum free area of 1 sq.
in. per 4,000 BTUH of all equipment in the room when
the opening is communicating directly with the outdoors
or through vertical ducts. The minimum free area required for horizontal ducts is 1 sq. in. per 2,000 BTUH
of the total input rating to all the equipment in the room.
!
•
The opening must communicate directly or by ducts
with the outdoors.
•
The opening must have a minimum free area of 1 sq.
in. per 3,000 BTUH of the total input rating of all equipment in the room, or no less than the sum of the areas
of all vent connectors in the conned space.
(For additional information, refer to the latest NFGC)
!
WARNING:
Do not use the “one permanent opening” method if the
equipment room is under negative pressure conditions
or the equipment is common vented with other gas red
appliances.
WARNING:
Care must be taken to ensure that the equipment room is
not under negative pressure conditions.
•
Ventilation of the space occupied by the boiler shall
be provided by an opening(s) for ventilation air at
the highest practical point communicating with the
outdoors. The total cross-sectional area of such an
opening(s) shall be at least 10% of the area required
in (2) below, but no less than 10 sq. in.
•
For boilers using a barometric damper vent system
there shall be a permanent air supply opening(s)
having a cross section area of not less than 1 sq. in.
per 7,000 BTUH up to and including 1 million BTUH,
plus 1 sq. in. per 14,000 BTUH in excess of 1 million
BTUH. This opening(s) shall be located at or ducted
to a point no more than 18” nor less than 6” above
oor level. The duct can also “goose neck” through
the roof. The duct is preferred to be straight down
and terminated 18” from the oor, but not near the
piping. This air supply opening requirement shall be
in addition to the air opening for ventilation air required in (1). (above)
(For addition information, refer to the latest NFGC)
Method 2 (normally applied in cold climate regions):
• The mechanical equipment room must be provided with
at least one permanent opening, commencing within
12” of the top of the enclosure.
NOTE:
For additional information, refer to CGA, B149
B.4. CONVENTIONAL FLUE VENTING
! CAUTION:
Proper ue venting is critical for the safe and efcient
operation of the boiler.
B 7
Definition of ANSI Categories for High Efficiency
Appliances
•
Terminate the vent at least 6 ft. away from adjacent
walls.
•
•
Do not terminate vent closer than 5 ft. below roof
overhang.
•
Terminate vent at least 1 ft. above grade, including
snow line.
•
Multiple direct vent installations require a 4 ft. clearance between the ends of vent caps located on the
same horizontal plane.
Boilers are divided into four vent type categories based
on the pressure produced in the exhaust and the likelihood of condensate production in the vent. Atlas™
Triton Series™ Boilers require Category IV venting.
(See NFGC, NFPA 54, Section 7 “Venting Equipment”
for more detailed information).
Category IV: A boiler which operates with a positive
vent pressure and with a gas temperature that may
cause excessive condensate production in the vent.
•
!
!
WARNING:
NOTE:
This denition applies to the appliance and does not
necessarily reect the performance of the connected vent
system.
Canadian Installations
•
For additional information on appliance categorization, see appropriate ANSI Z21 Standard and the
NFGC (US), or CGA (Canada) B149, or applicable
provisions of local building codes.
•
A vent shall not terminate directly above a paved
sidewalk or driveway which is located between two
single family dwellings and serves both dwellings.
•
•
Triton Series™ boilers are designed to operate with a
chamber pressure of 0 to +0.5” WC. The boiler is capable of 100 feet of vertical equivalent exhaust when
equipped with the standard exhaust vent. When more
than 100 feet of exhaust venting is used, the chamber pressure could increase beyond the maximum
designed +0.5” WC. An optional enlarged vent may
be used to increase vent runs in case more than the
100 ft. maximum is needed, however venting must
be designed by a professional engineer to ensure the
boiler chamber pressure stays within the designed
range. Boiler vents must be constructed of AL29-4C
or similar suitable material acceptable for use with
exposure to condensate.
A vent shall not terminate less than 7 ft. above a
paved sidewalk or paved driveway located on public
property.
•
A vent shall not terminate within 6 ft. of a mechanical
air supply inlet to any building.
•
A vent shall not terminate above a meter/regulator
assembly within 3 ft. horizontally of the vertical center
line of the regulator.
•
A vent shall not terminate within 6 ft. of any gas service regulator.
•
A vent shall not terminate less than 1 ft. above grade
level.
•
A vent shall not terminate within 3 ft. of a window or
door which can be opened in any building, any non –
mechanical air supply inlet of any other appliance.
•
A vent shall not terminate underneath a verandah,
porch or deck, unless the verandah, porch or deck
is fully open on a minimum of two sides beneath the
oor, and the distance between the top of the vent
termination and the underside of the verandah, porch
or deck is greater than 1 ft..
!
WARNING:
Refer to the latest edition of CGA, B149 Installation
Code.
Using improper venting materials can result in personal injury, death or property damage.
U.S. Installations
Refer to the latest edition of the National Fuel Gas Code.
•
Vent Termination Location
Vent must terminate at least 4 ft. below, 4 ft. horizontally from, or 1 ft. above any door, window or gravity
air inlet to the building.
•
The vent must not be less than 7 ft. above grade
when located adjacent to public walkways.
•
Terminate the vent at least 3 ft. above forced air inlet
located within 10 ft..
•
The vent must terminate at least 4 ft. horizontally, and
in no case above or below unless 4 ft. horizontal distance is maintained, from electric meters, gas meters,
regulators, and relief equipment.
!
NOTE:
During winter months check the vent termination cap and
make sure no blockage occurs from buildup of snow and
ice. Condensate can freeze on the cap. Frozen condensate on the vent cap can result in a blocked ue.
•
Give special attention to the location of the vent
termination to avoid possibility of property damage or
personal injury.
B 8
•
Gases may form a white vapor plume in the winter.
The plume could allow hazardous ue gas in through
an open window or obstruct a window view if the
termination is installed near windows.
•
Prevailing winds, in combination with below freezing
temperatures, can cause freezing of condensate and
water/ice build up on building, plants or roofs.
•
The bottom of the vent terminal and air intake shall
be located at least 12” above grade, including normal
snow line.
•
Non-insulated single wall Category IV metal vent pipe
shall not be used outdoors in cold climates for venting gas–red equipment without insulation.
•
Through-the-wall vents for Category IV appliances
shall not terminate over public walkways or over an
area where condensate or vapor could be detrimental
to the operation of regulators, relief valves, or other
equipment.
•
Locate and guard vent termination to prevent accidental contact by people or pets.
•
Do not terminate vent in a window well, stairwell,
alcove, courtyard or other recessed area.
•
Do not terminate above any door, window, or gravity
air intake. Condensate can freeze, causing ice formations.
•
Locate or guard vent to prevent condensate from
damaging exterior nishes. Use a rust resistant sheet
metal backing plate against brick masonry surfaces.
•
Do not extend exposed vent pipe outside of building
beyond minimum distance required for vent termination. Condensate could freeze and block vent pipe.
C 9
C. INSTALLATION
!
!
WARNING:
• Altering
Alteringany
anyAtlas™
Atlas™Triton
TritonSeries™
Series™boiler’s
boiler’spressure
pressure
vessel
by
installing
replacement
heat
exchangers,
vessel by installing replacement heat exchangers,
tubebundles,
bundles,coils
coilsororany
anyASME
ASMEparts
partsnot
notmanufactured
manufactube
tured
and/or
approved
by
Ajax
Boiler
Inc.
will
instantly
and/or approved by Ace Heating Solutions, LLC
will
void
the
ASME
and
E.T.L.
rating
of
the
vessel
instantly void the ASME and E.T.L. rating of theand
vessel
anyany
warranty
on on
thethe
vessel.
Altering
the the
ASME
or or
and
warranty
vessel.
Altering
ASME
E.T.L.
ratings
of
the
vessel
also
violates
national,
E.T.L. ratings of the vessel also violates national,
state,and
andlocal
localcodes.
codes.
state,
• Installation and service must be performed by a qualied installer, service agency or gas supplier.
For Your Safety:
Do not store or use gasoline or other ammable vapors
and liquids or other combustible materials in the vicinity
of this or any other appliances. To do so may result in an
explosion or re.
WHAT TO DO IF YOU SMELL GAS:
• Do not try to light any appliance
• Open any windows and secure area
• Do not touch any electrical switch; do not use any
phone in your building.
• Immediately call your gas supplier from a neighbor’s
phone. Follow the gas supplier’s instructions.
• If you cannot reach your gas supplier, call the re
department.
•
Improper installation, adjustment, alteration, service
or maintenance can cause property damage, personal injury, loss of warranty, exposure to hazardous
materials or loss of life. Review the information in this
manual carefully.
•
Make sure the gas on which the boiler will operate is
the same as that specied on the boiler rating plate
(natural gas/propane).
•
•
Caution when servicing gas train components. Propane (LPG) is heavier than air and may be trapped
in pipes, vents, combustion chamber, or other areas.
Always handle with care.
In order to meet commercial hot water needs, the
high limit safety control on this hot water boiler is adjustable up to 240 degrees F. by the OEM or installer
only.
•
Safety and energy conservation are factors to consider when setting the temperature aquastat on the unit.
The most energy–efcient operation will result when
the temperature setting is the lowest that satises the
needs of the application.
•
Should overheating occur or if the gas supply valve
fails to shut, do not turn off or disconnect the electrical supply to the boiler. Instead, shut off the gas supply at a location external to the boiler.
•
Do not use this boiler if any part has been under
water. Immediately call a qualied service technician
to inspect the boiler and to replace any part of the
control system or any gas control which has been
under water.
•
!
NOTE:
C.1. PRODUCT INSPECTION
1. Upon receipt of the boiler, visually inspect the external
packaging and unit for damage. If the packaging or
boiler is damaged, make a note to that effect on the Bill
of Lading when signing for the shipment.
To minimize the possibility of improper operation,
serious injury, re, or damage to the boiler:
1. Always keep area around the unit(s) free of chlorine, combustible materials, gasoline, and other
ammable liquids and vapors.
2. Water to be heated in the boiler should be free
or have low levels of chlorine or other chemicals
or water conditions that would be harmful to the
copper heat exchanger. Boiler room ambient
temperature shall not exceed 100 degrees F.
3. Boiler should never be covered or have any
blockage to the ow of fresh air to the boiler.
•
Risk of electrical shock. More than one disconnect
switch may be required to de–energize the equipment
before servicing.
•
When servicing ceramic ber based refractory or
insulation blanket, gloves and respirators should
be worn to reduce exposure to airborne refractory
ceramic bers.
!
NOTE:
The boiler packaging is equipped with a tip and tell label.
If label indicates boiler has been tipped over during shipping, remove crate and inspect before trucker leaves
2. Remove the shipping carton from the boiler and inspect
it internally for both damage, and accuracy of the unit
against the bill of lading and original purchase order.
Report any damage, missing or incorrect parts, or other
discrepancy to the carrier and supplier immediately.
• Claims for damages must be led with the carrier
by the consignee.
• Permission to return goods must be received from
the factory prior to shipping.
• Goods returned to the factory without an authorized Return Goods Authorization number will not
be accepted.
• Ace
AjaxHeating
Boiler Inc.
is not responsible
for any dam-for
Solutions,
LLC is not responsible
any dam-
C 10
age that the unit receives while in shipping. As
each shipping company has its own procedure for
ling a claim, please contact the shipper for claim
instructions.
!
NOTE:
•
Minimum Btu/Hr. ratings apply to high-low and modulating type boilers only.
C.1.a. Model Identification
•
Boiler output ratings are based on factory tests under
appropriate conditions. Field results may vary.
•
•
Maximum allowable working pressure for the boiler
relief valve set pressure should not exceed the lowest
MAWP of any component in your system.
•
Applies to forced draft type burners only.
•
Minimum and maximum gas pressure values are
measured at the point of connection to the boiler gas
train. Manifold gas pressures are measured after the
gas train.
•
Your Atlas™ Triton Series™ Boiler carries two identication plates. The coil identication plate, which carries
the ASME Code Stamping and Registration Number
(when applicable), is attached to the water inlet, with a
duplicate on the heat exchanger top plate. The unit’s
nameplate is located on the right side of the rear panel
of the unit, and lists information concerning the input
and output of the unit, electrical and gas ratings, working pressure and clearance to adjacent construction
gures. In addition, the model and serial numbers are
on the plate. You will need these to order replacement
parts from the manufacturing representative in your
area or from the factory.
The information on the National Board plate is the
same as on the nameplate with the exception of the
National Board registration number, which is required in
most states for installation of the unit.
C.1.b. The Boiler Name Plate
The following illustration is an accurate depiction of the
nameplate found on the rear side of the boiler. You will also
nd an ASME nameplate on the inlet pipe with some of the
same information.
!
WARNING:
Do not remove any of these plates from the unit for any
reason. Removal of these plates will void the warranty.
C.1.c The Boiler Model Number
ATLAS T 150 P - W
Brand:
• ATLAS
Boiler Type:
• T = Triton Series
Firing Rate:
Since 1919
080 =
AJAX BOILER INC.
Ace Heating Solutions, LLC
800,000 Btu/Hr
150 = 1,500,000 Btu/Hr
100 = 1,000,000 Btu/Hr
200 = 2,000,000 Btu/Hr
DISCRIPTION
MODEL NO.
SERIAL NO.
MIN. RELIEF VALVE CAP.
MAX. BTU. /HR. INPUT
BTU. /HR. OUTPUT
H.P.
MIN. BTU. /HR. INPUT
BTU. /HR. OUTPUT
GROSS E.D.R.
VOLTS
MIN. GAS PRESS.
HERTZ
PH.
MAX. GAS PRESS.
HEATING SURFACE
AMPS.
M.A.W.P.
MOT. AMPS. CTRL. VOLT
MANIFOLD PRESS.
CTRL. AMP
Fuel Type:
• G = Natural Gas
• P = Propane
Cabinet Application:
• W = Outdoor
• (No Sufx refers to Indoor Jacketing)
FUEL TYPE
C.2. RATING AND CERTIFICATIONS
#2 OIL
IF OIL FIRED, DO NOT USE
OIL HEAVIER THAN #2
INTEGRAL GROUP
PRIMARY SAFETY
FOR EITHER INDOOR OR OUTDOOR INSTALLATION.
NOT FOR INSTALLATION ON COMBUSTIBLE FLOORING.
ETL LISTED
•
MINIMUM CLEARANCES TO
ADJACENT CONSTRUCTION
All units must be installed in accordance with all state
and local codes, and national codes, including but not
limited to:
•
•
CONFORMS TO
UL STD 795
ANSI Z223.1/ NFPA 54, National Fuel Code
ANSI/ NFPA 70, National Electric Code
CERTIFIED TO
9900456
CAN STD 1-3.1
2701 S. HARBOR BLVD. SANTA ANA, CA 92704
714.437.9050 FAX 714.437.9060
•
All Atlas™ Boilers are National Board approved and
designed–certied and tested by Intertek (E.T.L.),
standards for the US and Canada (Can Std 1-3.1), and
C 11
UL 795. Each unit is constructed in accordance with
Section IV of the American Society of Mechanical Engineers (ASME) Boiler Pressure Vessel Code and bears
the ASME “HLW” stamp or “H” stamp.
6. Move the boiler to its nal installed position.
!
C.3. INSTALLATION CODES
•
Installation of the Triton Series™ boilers must conform
to the require ments of the authority having jurisdiction,
or in the absence of such requirements, to the National
Fuel Gas Code, ANSI Z223.1/ NFPA 54, and/ or Natural
Gas and Propane Installation Code, CAN/CSA B149.1.
•
Where required by the authority having jurisdiction, the
installation must conform to the Standard for Controls
and Safety Devices for Automatically Fired Boilers,
ANSI/ASME CSD1
Installations must also follow:
• Local, state, provincial, and national codes, laws,
regulations and ordinances.
• National Electrical Code, ANSI/ NFPA 70 – latest
edition (NEC).
!
If any code listed above conict, the stricter of the
conicting codes shall be followed for installation.
•
Installation and Service must be performed by a
qualied installer, service agency or the gas supplier
C.4. PREPARING THE BOILER
!
AjaxHeating
Boiler Inc.
stronglyLLC
recommends
that you secure
Ace
Solutions,
strongly recommends
that the
boiler
to
the
base
pad
by
the
mounting
holes
provided
you secure the boiler to the base pad by the mounting at
the base
of theatunit.
holes
provided
the base of the unit.
C.5. WATER SYSTEM PIPING
! CAUTION:
This boiler requires forced water circulation when burner
is operating. See minimum and maximum ow rates
in Table C.3.1. below. Severe damage will occur if the
boiler is operated without proper water ow circulation.
A ow switch is used to ensure that water ows through
the boiler, but does not check for the minimum ow rate
into the boiler. Numbers are approximate and may vary
depending on installation.
!
NOTE:
•
NOTE:
NOTE:
AjaxHeating
Boiler Inc.
stronglyLLC
recommends
that you secure
Ace
Solutions,
strongly recommends
that the
boiler
to thethe
base
padtoby
the
mounting
provided at
you
secure
boiler
the
base
pad byholes
the mounting
the base
of theatunit.
holes
provided
the base of the unit.
All hot water outlet and return piping is connected at the
rear of the boiler. Piping is to be installed per local codes
and regulations. Piping for the hot water outlet and return
may be connected without removing cabinet panels. Unused connections must be safely blanked off.
NOTE:
Your Atlas™ Triton boiler comes equipped with a steel
pallet jack base for safe and easy movement and placement.
1. Place the boiler in its approximate installed location, on
a clean, level, structurally sound surface.
2. If the boiler is in its original packaging, remove the
banding, carton, corner posts and stand-offs, and
discard.
3. Unpack the manifold assembly from the small carton
attached to the rear of the boiler.
4. Install the manifold assembly to the hot water outlet at
the rear of the boiler until tight, and such that the pressure relief valve is in the vertical, upright position at the
top of the manifold.
5. Install the 2 loose wires at the rear of the boiler to
the ow switch installed at the side of the manifold as
shown in gure C.5.1.
T-80
T-100
T-150
T-200
Minimum Flow Rate (GPM):
34
43
65
85
Maximum Flow Rate (GPM):
69
85
129
172
MODEL
Pressure Drop:
Table C.5.1. Triton Flow Rates.
C.5.a. System Connections
1. Connect cold water return pipe to the primary water
inlet on the boiler.
2. Connect outlet system pipe to hot water outlet at manifold.
3. Install drain valve provided in the boiler drain line at
bottom rear of the boiler.
C 12
C.5.b. Pressure Relief Valve
The pressure relief valve safety is factory assembled on the
safety manifold previously installed to the boiler in Section
C.2. Discharge piping must be installed to the relief valve
outlet to avoid potential scalding of attendants. Discharge
piping should be as short and direct as possible and installed and terminated per local codes and regulations.
The boiler must be isolated from the gas supply piping
system by closing its individual manual shut–off valve
during any pressure testing of the gas supply piping
system at test pressures equal to or more than ½ psi (3.5
kPa).
Do not use Teon tape on gas line thread. A pipe compound rated for natural and propane gases are recommended. Apply sparingly only on the male pipe ends,
leaving the two end threads bare.
Gas Piping Leak Test
Upon rst installing the Triton Series™ boiler, it is important
to check the gas line leading up to the unit for gas leaks.
Pressure Relief
Valve Outlet
1. Follow the National Fuel Gas Code for instructions on
proper gas line piping and gas leak tests.
Manifold
Flow Switch
FRONT
SIDE
Figure C.5.1. Manifold and Components
C.6. GAS SUPPLY
! DANGER:
Make sure the gas on which the boiler will operate is the
same as that specied on the boiler rating plate (natural
gas/propane).
2. Measuring gas pressures can help detect leaks in isolated lines. Temporarily install a manometer or pressure
gauge with an upper limit of no more than 5 times the
testing pressure, 5 x 14” WC = 2.6psi for Triton Series™ boiler installations between the manual gas shut
off on the boiler and supply line’s regulator.
3. Leaving the shut off valve closed on the boiler, open
the supply line momentarily until the installed manometer reads a stable pressure and record the pressure
and ambient temperature.
•
The gas line should be a separate line running directly
from the gas meter to the unit, unless the existing gas
line is of ample capacity. Verify the capacity of the
existing gas piping if it is to be used.
4. Close the supply line and monitor the gas pressure for
a drop in pressure. The test should be monitored for at
least 10 minutes or ½ hour per each 500 ft3 of volume
in the testing pipe.
•
The gas pipe must have a sediment trap ahead of the
boiler connection controls and a manual shut–off valve
located outside the boiler cabinet. It is highly recommended that a union be installed in the gas supply
line adjacent to the boiler for servicing. The maximum
working gas pressure for both natural gas and propane
is 14” WC Keep in mind that an increase in gas pressure, without making additional adjustments, leads to
an increased BTU input and a decreased efciency.
5. At the end of the monitoring period, record the gas
pressure and temperature. If there is a drop in pressure, a gas leak may be present and should be further
investigated (Note: signicant temperature variations
may cause changes in the gas pressure and should be
retested).
WARNING:
Please refer to the latest National Fuel Gas Code for
leak test details. If instructions differ, the Fuel Gas Code
shall supersede the instructions in section D.6.a. of these
instructions.
!
A sediment trap MUST be installed on the gas piping for
each gas line.
C.6.a. Testing Gas Line
! CAUTION:
The boiler must be disconnected from the gas supply
during any pressure testing of the gas supply at test pressures in excess of ½ psi (3.5 kPa).
!
NOTE:
C 13
C.6.b. Gas Supply Pressure
!
C.7. PUMP INSTALLATION
WARNING:
!
Relieve the pressure in the gas supply line prior to connecting the boiler and its manual shut off valve to the gas
supply line. Failure to follow this procedure may damage
the gas valve. Gas valves damaged by high gas pressures are not covered by the warranty.
The boiler and its gas connections must be tested for
leaks before operation of the units.
Electrical Shock Hazard!
•
Electrical work must be done by a qualied electrician
only.
•
National Electrical codes, local codes and regulations
must be followed.
•
All electrical connections must be performed after the
electrical supply has been switched off and secured
against unauthorized switching.
•
Depending on installation, the pump/motor can become extremely hot. To avoid risk of burning, handle
pump with heat resistant gloves or ensure the pump
is cool before handling the pump.
Input may decrease if gas pressure falls below the values
shown below. The maximum gas supply pressure is 14”
WC for all Triton units. If gas pressure exceeds 14” WC
an intermediate gas pressure regulator of the lockup type
must be installed. If gas pressures less than those provided below are used, input may be decreased.
T-80
MODEL
T-100
T-150
T-200
Naturel Gas (“ WC)
5-14
5-14
5-14
5-14
Propane (“ WC)
5-14
5-14
5-14
5-14
! CAUTION:
Never operate the pump dry, the system must be lled
before starting the pump. Ensure all isolation valves are
open before start up
Table 2.3.1. Triton Gas Pressure Chart.
•
! CAUTION:
If the gas pressures exceed 14” WC, a gas pressure
regulator must be installed prior to the gas connection to
reduce the supply pressure.
When connecting additional gas utilization equipment to
the gas piping, the existing piping must be checked to
determine if it is adequate for the combined load.
C.6.c. Attach Gas Line
•
A fused plug or circuit breaker in the power line is
required.
•
The pump must be connected to the electrical supply
via an external contactor/relay to provide thermal overload protection. The contactor/relay must be connected
to the built-in thermal overload switch terminals P1
and P2 (potential-free normally closed contact, contact
load 250 VAC/1A) to protect the pump against thermal
overloading at all speeds.
•
If the pump is protected by means of a motor starter,
the starter must be set to the current consumption of
the pump at the selected speed. The motor starter
setting must be changed every time the pump speed
is changed. The current consumption at the individual
speeds is stated on the pump rating plate.
Safety Shut Off
Valve
Rear View
Figure C.6.1. Safety Shut Off Valve
An optional
optional pump
pump can
can be
be ordered
ordered through
throughAjax
Ace Boiler
An
Heating
Solutions,
LLC
properly
sized for
the
boiler.
Inc.
properly
sized for
the
boiler. Flange
kits
are
also
Flange kits
are
also
provided
with
the pump
to fi t
provided
with
the
pump
to t the
boiler
connection
the boiler
connection
sizes.
Please contact
an represizes.
Please
contact an
authorized
Ajax Boiler
authorizedorAce
Solutions,
sentative,
the Heating
factory for
details. LLC
representative, or the factory for details.
C.7.a. Pump Overload Protection
1. Attach main gas supply line to boiler gas shut-off valve
located outside at the rear of the boiler cabinet as
shown below.
Side View
(L)
WARNING:
C 14
C.8. ELECTRICAL
!
!
WARNING:
If an external electrical source is utilized, the boiler, when
installed, must be electrically bonded to ground in accordance with the requirements of the authority having
jurisdiction or, in the absence of such requirements, with
the National Electrical Code, ANSI/NFPA 70, and/or the
Canadian Electrical Code Part I, CSA C22.1, Electrical
Code.
!
NOTE:
Installations must follow these codes:
• National Electric Code and any other national, state,
provincial or local codes or regulations having jurisdiction
• Safety wiring must be NEC class 1.
• Boiler must be grounded as required by the NEC
ANSI/NFPA 70.
• In Canada, CSA C22.1 C.E.C. Part 1.
The Atlas™ Triton Series™ T80 – T100 boilers are wired
for 120 VAC, 10 amps, while models T150 – T200 are
wired for 120 VAC, 15 amps, although the units current
will usually be much lower. Before starting the boiler,
check to ensure proper voltage is supplied to the boiler
and pump (if supplied).
Current draw on rating plate does not include pump
current.
1. Turn off all power to the boiler. Verify that power has
been turned off by testing with a multi meter prior to
working with any electrical connections or components.
2. Observe proper wire colors while making electrical
connections. Many electronic controls are polarity
sensitive. Components damaged by improper electrical
installation are not covered by warranty.
3. Provide overload protection and a disconnect means
for equipment serviceability as required by local and
state code.
4. Install boiler controls, thermostats, or building management systems in accordance with the applicable
manufacturers’ instructions.
!
If any of the original wiring is replaced, 16 AWG, 105° C.
wire or equivalent must be used.
C.8.a. Checking the Power Source
1. Using a multi–meter, check the following voltages at
the circuit breaker panel prior to connecting any equipment.
2. Make sure proper polarity is followed and house
ground is proved.
AC = 108 VAC Minimum, 132 VAC Max; AB = 108
VAC Minimum, 132 VAC Max; BC = <1 VAC Max
C.6.b. Making the Electrical Connections
•
Verify that the circuit breaker is properly sized by
referring to the boiler rating plate. A dedicated circuit
breaker should be provided.
NOTE:
A grounding electrode conductor shall be used to connect the equipment grounding conductors, the equipment
enclosures, and the grounded service conductor to the
grounding electrode.
For multiple unit installations, each unit is to be wired
in parallel with other units so that each unit will operate
independently (see Section C.9.f).
The circulating pump (and the return pump if used)
should be wired in parallel with the unit(s) to run independently of the unit.
NOTE:
!
WARNING:
Conduit should not be used as the earth ground.
! CAUTION:
Label all wires prior to disconnection when servicing controls. Wiring errors can cause improper and dangerous
operation. Verify proper operation after servicing.
! DANGER:
Shock Hazard: Make sure electrical power to boiler is
disconnected to avoid potential serious injury or damage
to components.
C.9. FLUE VENTING
!
WARNING:
Improper venting may result in property damage and
the release of ue gasses which contain deadly carbon
monoxide (CO) into the building, which can cause severe
personal injury and/or death.
C 15
Vent pipe system must be made of materials approved for
use with condensing ue gasses.
•
Do not reduce the diameter of the vent pipe. The vent
pipe must not be smaller than the vent connector on the
boiler.
The diameter of the vent ue pipe should be sized
according to NFGC (US) and Appendix B of the CGA,
B149 (Canada). The minimum ue diameter for conventional venting using Category IV, stainless steel
AL29-4C vent is:
•
•
Vent pipe system shall be compatible either by directly
connecting, or by use of an adapter, to the boiler vent
connection
Horizontal vent runs must have an upward slope of at
least 1/4” per lineal foot (21mm/m). Supports must be
used at least every 5’ and braces must be used under
or near all elbows.
•
If any point of the vent pipe system is higher than the
boiler ue collar, the vent system must have adequate
condensate drain loop(s) to prevent condensate from
running back into the boiler.
•
For boilers connected to gas vents or chimneys, vent
installations shall be in accordance with the NFGC
(US) or CGA, B149 (Canada), or applicable provisions
of local building codes.
•
•
•
•
•
For boilers for connection to gas vents or chimneys,
vent installations shall be in accordance with “Venting
of Equipment,” of the National Fuel Gas Code, ANSI
Z223.1/NFPA 54, or “Venting Systems and Air Supply
for Appliances,” of the Natural Gas and Propane Installation Code, CAN/ CSA B149.1, or applicable provisions of the local building codes.
The weight of the vent stack or chimney must not rest
on the boiler vent connection. Support must be provided in compliance with applicable codes. The vent
should also be installed to maintain proper clearances
from combustible materials. Use insulated vent pipe
spacers where the vent passes through combustible
roofs and walls.
Vent connectors serving appliances vented by natural
draft shall not be connected into any portion of mechanical draft systems operating under positive pressure.
Use of cellular core PVC (ASTM F891), cellular core
CPVC, or Radel® (polyphenolsulfone) in venting systems is prohibited.
Do not cover non-metallic vent pipe or ttings with
thermal insulation.
C.9.a. Vertical Venting (Category IV)
•
The maximum and minimum venting length for this
Category IV appliance shall be determined per the
NFGC (US) or CGA, B149 (Canada).
T-80
MODEL
Flue Pipe Size
6”
T-100
T-150
T-200
6”
8”
8”
Table C.7.1. Triton Flue Pipe Sizing Chart.
•
The connections from the appliance vent to stack must
be as direct as possible and shall be the same diameter as the vent outlet. The horizontal breaching of a
vent must have an upward slope of not less than ¼”
per linear foot from the boiler to vent terminal. The horizontal portions of the vent shall also be supported for
the design and weight of the material clearances and
to prevent physical damage or separation of joints.
C.9.b. Common Venting
!
WARNING:
The NFGC does not address sizing guidelines for the
common venting of multiple Category IV boilers. When
common venting multiple units together, the venting must
be designed by a professional engineer to ensure the
chamber pressure of each boiler is always below 0.5” WC
at high re.
Vent connectors serving any other appliances shall not
be connected into any portion of the mechanical draft systems operating under positive pressure. If a Triton boiler
is installed to replace an existing boiler, the vent system
must be veried to be of the correct size and of Category
IV AL29-4C vent material. If it is not, it must be replaced.
!
NOTE:
When an existing boiler is removed from a common
venting system, the common venting system is likely to
be too large for proper venting of the appliances remaining connected to it. At the time of removal of an existing
boiler, the following steps shall be followed with each
appliance remaining connected to the common venting
system placed in operation, while the other appliances
remaining connected to the common venting system are
not in operation.
1. Seal any unused openings in the common venting
system.
2. Visually inspect the venting system for proper size and
horizontal pitch and determine there is no blockage or
restriction, leakage, corrosion and other deciencies
which could cause an unsafe condition.
C 16
3. Insofar as is practical, close all building doors and
windows and all doors between the space in which
the appliances remaining connected to the common
venting system are located and other spaces of the
building. Turn on clothes dryers and any appliance not
connected to the common venting system. Turn on
any exhaust fans, such as range hoods and bathroom
exhausts, so they will operate at maximum speed. Do
not operate a summer exhaust fan. Close replace
dampers.
adjacent buildings, openable windows and building
openings shall not be less than those values specied
in the National Fuel Gas Code, ANSI Z223.1/NFPA 54
and/or the Natural Gas and Propane Installation Code,
CAN/CSA B149.1.
•
Minimum twelve (12) inches above grade plus normally
expected snow accumulation or seven (7) feet above
grade if located adjacent to public walkways.
•
DO NOT INSTALL over public walkway where local
experience indicates condensation or vapor from the
boiler creates a nuisance or hazard.
•
Minimum three (3) feet above any forced air inlet located within ten (10) feet of the vent termination.
•
Minimum four (4) feet below, four (4) feet horizontally
or one (1) foot above any door, window or gravity air
inlet.
•
Minimum twelve (12) inches from corners of building.
•
Flue vents supported only by ashing and extended
above the roof more than 5 ft. should be secured by
guy-wires or braced to withstand snow and wind loads.
4. Place in operation the appliance being inspected. Follow the lighting instructions. Adjust thermostat so appliance will operate continuously.
5. Test for spillage at the draft hood relief opening after 5
minutes of main burner operation. Use the ame of a
match or candle, or smoke from a cigarette, cigar, or
pipe.
6. After it has been determined that each appliance
remaining connected to the common venting system
properly vents when tested as outlined above, return
doors, windows, exhaust fans, replace dampers, and
any other gas-burning appliance to their previous condition of use.
7. Any improper operation of the common venting system
should be corrected so the installation conforms with
the National Fuel Gas Code, ANSI Z223.1/NFPA 54,
and/or the Natural Gas and Propane Installation Code,
CAN/CSA B149.1. When resizing any portion of the
common venting system, the common venting system
should be resized to approach the minimum size as
determined using the appropriate tables in Chapter 13
of the National Fuel Gas Code, ANSI Z223.1/NFPA 54,
and/or the Natural Gas and Propane Installation Code,
CAN/CSA B149.1.
C.10. CONDENSATE DRAINS
Each Triton Series boiler contains a condensate drain.
In addition, most vent congurations require a drain “T”
located in the vent piping. Pipe each condensate drain
separately to a oor drain or condensate pump/sump.
!
•
Failure to properly pipe the condensate drainage system will greatly reduce boiler life. Do not install plugs,
caps or valves on condensate piping.
•
Do not manifold boiler condensate drains or vent
drains together.
•
Do not crimp condensate lines or reduce drain line
inner diameter size.
•
Each condensate drain must contain a siphon/pigtail
or trap to prevent ue gas ow through the condensate piping. The height of the top of the syphon/pigtail
loop or trap shall not exceed the height of the condensate drain outlet.
•
Do not use material that is not approved for use with
ue gas condensate for condensate piping.
•
Use continuous Teon, high temperature resistant silicone tubing, or other tubing material compatible with
ue gas condensate for condensate piping.
•
Do not install valves on condensate drain lines.
C.9.c. Termination
! CAUTION:
A listed vent cap terminal suitable for connection to the
Category IV vent materials, adequately sized, must be
used to evacuate the ue products from boilers.
The vent termination and cap must be installed as follows:
•
Must terminate vertically outside the building at least 2
ft above the highest point of the roof that is within 10 ft.
•
Should have minimum clearance of 4 ft horizontally
from, and in no case above or below (unless a 4 ft
horizontal distance is maintained), electric meters, gas
meters, regulators and relief equipment.
•
The minimum distance from adjacent public walkways,
WARNING:
C 17
•
A common condensate pump/sump may be used.
Run separate piping from each condensate drain to
the sump. A common drain may be used to discharge condensate from the sump. Consult pump/
sump manufacturer for compatibility of pump/sump
materials of construction. If a common sump is used,
individual drain lines should be connected such that
one drain cannot back feed into another drain.
Positive Pressure (Sidewall and Vertical) Venting
! CAUTION:
DO NOT manifold vent components of multiple boilers
without converting to a negative pressure venting arrangement.
•
• Consult
Consultlocal
localauthorities
authoritiesregarding
regardingdisposal
disposalofofflue
ue
gascondensate
condensateinto
intopublic
publicwaste
wastewater
watersystem.
system.
•
gas
Somejurisdictions
jurisdictionsrequire
requirethat
thatthe
thecondensate
condensatebebe
Some
bufferedbefore
beforedischarge.
discharge.This
Thisbuffering
bufferingisiscommonly
commonly
buffered
achievedbybydraining
drainingthe
thecondensate
condensatethrough
througha alimestone
limeachieved
stone (calcium
carbonate)
The condensate
will
•
(calcium
carbonate)
bed. Thebed.
condensate
will
slightlyacidic
acidicand
andrange
rangebetween
between3-5
3-5ononthe
thepH
pH
bebeslightly
scale.Consult
ConsultAce
Ajax
Boiler Solutions,
Inc., or a chemical
scale.
Heating
LLC, or atreatchemical
ment company
regarding
buffering
systems.
treatment
company
regarding
buffering
systems.
Positive pressure vent systems cannot be manifolded
together.
Positive pressure systems can be piped individually
through a common vertical or horizontal chase provided minimum clearances to combustible materials are
maintained.
Positive pressure systems can be piped individually
through a common vertical chase so that a single roof
penetration can be made. Each vent termination must
be one (1) foot from all other terminations.
Negative Pressure (Conventional) Venting
C.11. MODULAR SYSTEM INSTALLATIONS
!
Multiple Triton Series boilers may be installed together, or
as part of a single, modular lead-lag system. Up to 8 individual boilers may be installed using standard controls.
Installing multiple vent terminations close together promotes frost build up on buildings. To minimize this possibility, extend the distance from the building to the end of
the vent termination and increase the horizontal distance
between vent terminations.
C.11.a. General
•
•
•
•
Read and follow all venting, combustion air, water piping, gas piping and electrical instructions contained in
this manual unless otherwise instructed in this section.
•
Design and installation of modular systems should only
be undertaken by skilled and knowledgeable engineers
and contractors.
•
Consult Local Building Codes, National Fuel Gas Code,
or NFPA 54/ANSI Z223.1 for restrictions and instructions for modular boilers.
Refer to section 2. Pre-Installation for further warnings, cautions, notices and instructions.
WARNING:
•
•
•
Refer to National Fuel Gas Code to determine required
chimney diameter and common venting diameter. Note
that combined input, lateral length and chimney height
affect vent diameter.
Install a double acting barometric damper with integral
ue spillage interlock.
Locate boiler(s) with lowest input closest to chimney/
vertical common vent.
Chimney lining must be acceptable for use with condensing ue gases.
Install a condensate drain to collect any condensate
that may form in the lined chimney or vertical common
vent.
C.11.b. Sizing
Air Intake Piping
Consult your
your system
system mechanical
mechanical engineer,
engineer, or
or Ajax
Ace Boiler
Heating
Consult
Solutions,
LLC for recommended
sizeforofa
Inc.
for recommended
number andnumber
size of and
boilers
boilersinput.
for a given input.
given
•
Consult the system mechanical engineer or intake pipe
manufacturer for common air intake pipe sizing.
•
Refer to Figures 11 and 12 for common air intake
guidelines for modular boilers.
•
Individual air intake pipes may be used in lieu of common air intake piping.
•
Common air intake straight lengths and ttings should
be assumed to have the equivalent length the same
as an individual air intake pipe, used for a given boiler
intake pipe diameter.
C.11.c. Venting
This section outlines venting requirements for multiple
boiler installations and should be used in addition to the “
B.3. COMBUSTION AND VENTILATION AIR” and “B.4. CONVENTIONAL FLUE VENTING” sections earlier in this manual.
D 18
•
•
Position horizontal air intake termination center line below horizontal vent termination’s center line.
Vertical air intake pipe must terminate at least two (2)
feet above the closest portion of the roof.
!
NOTE:
Do not install boiler and circulator pump on the same
fused disconnect.
Refer to the Combustion Air section for further warnings, C.11.g. Condensate Piping
cautions, notices and instructions.
• Each boiler requires separate condensate drains. In
C.11.d. Water Piping
addition, most venting congurations require separate
condensate drains in the vent system.
• Refer to Figures 13 thru 18 for typical water piping for
• Refer to Section C.10. for additional information on
modular boilers.
condensate removal.
•
•
Installing a low water cut-off in the system piping is
highly recommended and may be required by Code, if
not factory mounted on boiler.
•
Refer to Table 1 for pressure drop and ow requirements
for each boiler.
•
Consult I=B=R Installation and Piping Guide.
•
Maintain ½” minimum distance between water piping
and combustible material.
•
Refer to Water Piping and Trim section for further warnings, cautions, notices and instructions.
C.11.e. Gas Piping
!
NOTE:
The pressure drop given in Table 1 is for the boiler only.
The pressure drop of each system tting and component
must be added to the boiler pressure drop to determine
the system pressure head requirement. See Table 6 for
tting and component equivalent lengths.
•
Refer to National Fuel Gas Code, Local Codes and
Tables 2 through 7 for gas pipe sizing.
•
Refer to Gas Piping section for further warnings, cautions, notices and instructions.
C.11.f. Electrical
•
Each boiler must be provided with a dedicated fused
disconnect.
•
Install wiring and ground boiler in accordance with
requirements of authority having jurisdiction. In absence
of such requirements, reference the National Electrical
Code, ANSI/NFPA 70 and/or CSA C22.1 Electrical Code.
Refer to Figure 1 for electrical data for each size boiler.
Refer to the Electrical section for further warnings, cautions, notices and instructions.
•
•
D 19
D. START UP INSTRUCTIONS
!
NOTE:
The boiler control parameters and setpoints are preprogrammed at the factory prior to shipping. If allowable
operational changes need to be made to the settings,
please consult the SOLA control operating instructions.
!
pair and/or replacement, and extend the working life of the
boiler and other system equipment.
Since water quality and conditions will vary signicantly
depending on the local area, it will be essential to obtain
the expertise of a qualied industrial water treatment professional for establishing a treatment plan. In addition, a
periodic testing/sampling plan should be developed. The
plan should ensure a process to maintain and conrm the
proper chemistry of the water in use.
SYSTEM WATER CHEMICAL AGENTS AND EFFECTS
WARNING:
Compound
Your Atlas™ Triton Series™ boiler and its gas connection
must be leak tested before placing boiler in operation.
•
•
Your Boiler has been pressure tested in accordance
with ASME CODE SECTION IV and re tested in accordance with UL 795. A copy of the factory test report
is included inside the unit behind the display panel, and
a test report label is located on the inside of the front
door panel.
It
It is
is required
required that
that the
the boiler
boiler and
and the
the system
system into
into which
which
itit is
installed
be
tested
before
operating
the
is installed be tested before operating the system.
system.
The
The exact
exact natures
natures of
of the
the tests
tests are
are listed
listed on
on the
the start-up
start-up
fire
test
report
located
in
the
back
of
this
manual.
re test report located in the back of this manual. This
This
start-up
start-up fire
re test
test report
report must
must be
be filled
lled out
out and
and a
a copy
copy
must
Ace Heating
Solutions,
LLC in the premust be
be sent
sent to
to Ajax
Boiler Inc.
in the pre-addressed
addressed
envelope
provided
with
the
unit
in order the
to
envelope provided with the unit in order to register
register
the
unit
for
the
warranty.
The
description
of
unit for the warranty. The description of each of the
each
of be
thetests
to be begins
completed
begins
the next
tests to
completed
on the
nexton
page.
This
page.
This
testing
should
be
completed
as
part
of the
testing should be completed as part of the normal
innormal
installation
by the installing
stallation
procedureprocedure
by the installing
company.
company.
•
Once the entire installation is complete, the unit should
have an operation test to ensure that the ignition system safety shut off device works properly. Instructions
in the manufacturer’s literature shall be followed in
conducting this test.
•
Boilers are pre-wired at the factory according to the wiring diagram supplied with the unit. If additional controls
are to be installed, care should be taken not to disturb
the continuity of the existing circuit. Refer to the boiler
wiring diagram and control manufacturer’s instructions
supplied with the boiler.
D.1. WATER QUALITY AND TREATMENT
Proper quality of water is essential for the successful
operation and longevity of the boiler and heating system
components. Examples of typical chemicals found in untreated water along with their potential effects are shown in
Table E.1.1. below. In order to avoid problems associated
with poor water quality, a comprehensive water treatment
plan must be developed to maintain efciency, reduce re-
Effect
Calcium Carbonate (CaCO3)
Soft Scale
Calcium Bicarbonate (CaHCO3)
Soft Scale/ CO2
Calcium Sulphate (CaSO4)
Hard Scale
Calcium Choloride (CaCl2)
Corrosion
Magnesium Carbonate (MgCO3)
Soft Scale
Magnesium Bicarbonate (MgHCO3)
Corrosion/ Scale
Magnesium Sulphate (MgSO4)
Corrosion
Silicon Dioxide (SiO2)
Hard Scale
Table D.1.1. Water Compounds and Effects
D.2. FILLING THE SYSTEM
!
NOTE:
The boiler and the entire system should be cleaned and
ushed prior to lling.
1. After cleaning, begin lling the system.
2. To prevent trapping air in the boiler tubing, open the
relief valve located on the water outlet manifold of the
boiler to bleed the system. Leave the valve open until a
steady ow of water is observed.
3. Close the relief valve and complete the lling of the
system.
•
The lighting instructions and the wiring diagram for the
control system furnished with each boiler are attached
to these instructions. After placing the boiler in operation, the ignition system safety shutoff device must be
tested.
•
Although the boiler pressure vessel and the gas train
are pressure tested prior to shipping, it is possible
for components to work loose during shipping. These
items may include relief valves and gas train components. These items should be checked and tightened
prior to operating the boiler.
•
All Atlas brand boilers are factory re tested and adjusted. The Factory Test Report (FTR) is sent with each
D 20
unit and must be used when starting the installed unit.
Like Forced Draft burners, all Pre-Mix burners must be
tested and adjusted, as necessary, to the factory settings.
•
Prior to Start-Up, check to make sure all the installation
procedures have been followed as outlined in this manual. This includes compliance with all local and state
codes as well as the manufacturer’s requirements.
•
•
•
•
•
D.3. FACTORY TEST REPORT (FTR)
•
Every Triton Series™ boiler is supplied with a Factory Test
Report (FTR). The FTR details the actual factory test settings for this unit as tested prior to shipment.
•
•
•
When the boiler is started up, it is important to check
the following parameters and adjust them to the values
seen on the factory test report. Please record the
values in the blank spaces below. The values must be
within the ranges shown below.
I.
Condition
II. Value
Carbon Monoxide:
Carbon Dioxide:
Excess Air:
NOx:
Comb. Chamber
Pressure:
III. Acceptable
Range
tion Blower drives to prepurge speed.
Prepurge rate is veried with blower feedback signal
and initiates 7 second prepurge.
After prepurge is completed, the combustion blower
drives to light off rate.
After light off rate is veried, 10 second PFEP (Pilot
Flame Establishment Period) is initiated.
During the rst half of PFEP, the Pilot Valve Solenoid
and Spark Transformer are both energized.
Spark Transformer is de-energized during second half
of PFEP and only Pilot Valve is energized.
When pilot ame is prooven, 4 second MFEP (Main
Flame Establishment Period) is initiated.
During MFEP, the Main Safety Shutoff Valve and Pilot
Valve Solenoids are energized and ring rate is held at
light off rate.
After MFEP, the Pilot Valve is de energized and the
Main Burner modulates its ring rate according to load
demand.
3. If a steady ame is not established, check the ame
failure signals on the ame safeguard and correct the
condition causing the ame failure. Several tries for
ignition may be required to purge the air from the gas
line.
ppm Less Than 100 ppm
% Between 7- 9%
% 30-45%
ppm Less Than 20 ppm
WC Under 0.5” WC
D.6. START UP AND MAINTENANCE TESTS
D.6.a. Gas Supply Piping Leak Test
Upon rst installing the Triton Series™ boiler, it is important
to check the gas supply line for leaks.
Table D.3.1. Start Up Parameters
D.4. VERIFICATION
1. Check the boiler nameplate and verify the voltage, type
of gas, gas pressure and regulator setting.
2. Verify that a wind deecting vent cap is securely fastened to the vent outlet to prevent downdrafts.
3. Read and verify the ame safeguard system installed
on the unit. All Triton Series™ units have a prepurge
and a postpurge time cycle of 7 seconds.
D.5. START-UP DETAIL
1. Verify and record the gas valve model, venturi model,
blower model, venting inlet and outlet sizes, and air
lter size.
2. Verify, but do not record the supply gas pressure, the
electrical voltage, the vent stack and the free combustion air openings to the boiler room to ensure that they
meet the requirements on the nameplate, local codes,
gas industry standards and the O & M manual.
•
•
Upon start-up, the ame safeguard will initialize and begin a prepurge cycle. Blower relay energizes and turns
on the Combustion Blower and the Auxiliary Blower.
Combustion Air Flow Switch closes and the Combus-
1. Follow the National Fuel Gas Code for instructions on
proper gas line piping and gas leak tests.
2. Measuring gas pressures can help detect leaks in isolated lines. Temporarily install a manometer or pressure
gauge with an upper limit of no more than 5 times the
testing pressure, 5 x 14” WC = 2.6psi for Triton Series™ boiler installations between the manual gas shut
off on the boiler and supply line’s regulator.
3. Leaving the shut off valve closed on the boiler, open
the supply line momentarily until the installed manometer reads a stable pressure and record the pressure
and ambient temperature.
4. Close the supply line and monitor the gas pressure for
a drop in pressure. The test should be monitored for at
least 10 minutes or ½ hour per each 500 ft3 of volume
in the testing pipe.
5. At the end of the monitoring period, record the gas
pressure and temperature. If there is a drop in pressure, a gas leak may be present and should be further
investigated (Note: signicant temperature variations
may cause changes in the gas pressure and should be
retested).
D 21
!
NOTE:
Please refer to the latest National Fuel Gas Code for leak
test details. If instructions differ, the Fuel Gas Code shall
supersede the instructions in this manual.**
D.6.b. Pilot Turndown Test - (Optional at Installation, Required Annually After)
Perform this test to determine the smallest pilot ame
that can be seen by the ame amplier and energize the
FLAME LED. This test should be performed annually.
1. Clean the ame detector to make sure that it detects
the smallest acceptable pilot ame.
2. Open the Master switch
3. Close the manual main fuel shut off valves.
4. Connect a manometer, or pressure gauge, to measure
pilot gas pressure during the turndown test.
5. Open the manual pilot shutoff valves.
6. Close the master switch.
a. Go to Pilot Test Mode,
b. If using the standard panel, refer to section Pilot
Test under the section 3-5 Setup Mode.
c. If using the enhanced panel, refer to section
5-10.10 TO ENABLE PILOT TEST
7. Start the system with a call for heat. Raise the setpoint of the operating controller. The Flame Safeguard
sequence should start, and the prepurge should begin.
The sequence will hold in the pilot ame establishing
period and the ame led comes on when the pilot ame
ignites.
!
NOTE:
If the sequence does not stop, reset the system and
make sure that the Pilot Test is selected.
8. Turn down the pilot gas pressure very slowly, reading
the manometer as it drops. Stop instantly when the
ame led turns off. Note the pressure reading. The pilot
ame is at the minimum turndown position. Immediately
turn up the pilot pressure until the ame led comes on
again or the ame signal increases to above the ame
threshold value, 0.8 Vdc.
!
NOTE:
If there is no ame for 15 seconds in the TEST position,
the Flame Safeguard locks out
9. Repeat step 7 to verify the pilot gas pressure reading at
the exact point the Flame LED turns off.
10. Increase the pilot gas pressure immediately until the
ame LED turns on, then turn it down slowly to obtain
a pressure reading just above the dropout point or until
the ame signal increases to above the ame threshold
value, 0.8 Vdc.
11. Turn the pilot hold test off and allow the Flame Safeguard to start a burner cycle. During the Main Flame
Establishing Period, make sure the automatic main fuel
valve opens. Then smoothly open the manual main fuel
shutoff valve and watch for the main burner ignition. If
the light off is not rough and the main burner ame is
established, go on to step 17.
!
NOTE:
This step requires 2 people, one to control the manual
valve and one to watch for ignition.
12. If the main burner ame is not established within 5
seconds, close the manual main fuel shutoff valve and
open the master switch. If the light off is rough, the pilot
ame size is too small.
13. Close the master switch and perform another pilot hold
test, see step 5.
14. Increase the pilot ame size by increasing its fuel ow
until a smooth main ame light off is accomplished.
15. Use orices in the ame scanner sight tube until the pilot ame signal voltage is in the range of 0.7Vdc above
the ame threshold.
16. When the main burner lights reliably with the pilot at
turndown, disconnect the manometer and turn up the
pilot gas ow to normal pressure of between 1”- 2” WC
17. Run the system through another cycle to check for
normal operation.
18. Return the system to normal operation.
D.6.c. Pilot Spark Pick Up Test - (Optional at Installation, Required Annually After)
Perform this pilot spark pick up test to check that the ignition spark is not actuating the Flame LED. This test should
be performed annually.
1. Open the Master switch.
2. Close the pilot and main burner manual fuel shut-off
valves, see gure 6.2.
3. Close the master switch.
d. Go to the S7999 Operator Interface Module.
e. Select Diagnostics Test button at the bottom of the
display.
f. Select Diagnostics Test button at the bottom of this
new screen.
g. Select Pilot Test at the bottom of this new screen
h. Select Start Test at the bottom of this screen.
9. Start the system with a call for heat. Raise the setpoint of the operating controller. The Flame Safeguard
sequence should start and the prepurge should begin.
The sequence will hold in pilot ame establishing period with only the ignition on. Ignition spark should occur
D 22
but the flame
ame signal should not be more than .5 Vdc.
If
the
flame
signalisishigher
higherthan
than0.5
0.5Vdc
Vdcand
andthe
theflame
10. If the ame signal
ame
LED does come on, contact your local Ajax
Ace Heating
Boiler Inc.
Solutions,
LLC for
representative
representative
more help. for more help.
D.6.d. Gas Valve Leak Test
This test is to check the closure tightness of the gas shutoff
valve. It should only be performed by trained, experienced,
ame safeguard technicians during the initial start up of the
burner system and whenever the valve is to be replaced.
This test should also be included in the scheduled maintenance and inspection procedures.
!
WARNING:
P
4. To test the rst Safety Shut Off Valve, remove the 1/8
in. plug from the pressure tap point P.
a. Install the Leak Test Tap into pressure tap
point P on the valve body.
5. Open the upstream Manual Gas Valve (A) to re-pressurize the rst Safety Shut Off Valve.
6. Immerse the 1/4in. tube vertically ½ in. in a jar of water,
see gure 6.2.
7. Slowly open the Manual Test Valve (F).
REMOVE POWER FROM THE SYSTEM BEFORE
BEGINNING THE VALVE LEAK TEST TO PREVENT
ELECTRICAL SHOCK.
2
3. Make sure the Manual Test Valve (D) is closed in the
leak test tap assembly
3
8. When the rate of bubbles coming through the water
stabilizes, count the number of bubbles appearing
during a ten-second period. Each bubble appearing
represents a ow rate of .001 cfh. See table below for
allowable ow.
9. Close the Upstream Manual Gas Valve (A)
10. Remove the Leak Test Tap from the valve body.
1
4
2
P
11. Using a small amount of pipe sealant on the 1/8 in.
NPT plug, reinstall the plug in Pressure Tap Point (P).
12. To test the second safety shut off valve, remove the
1/8” plug from the ange pressure tap point 4.
3
Figure D.6.1. Gas Valve Diagram
13. Install the leak test tap into pressure tap point 4.
14. Close the downstream manual gas cock (C).
B
Leak
Test Tap
A
Gas
Supply
C
Downstream
Manual Gas
Valve
Burner
Upstream
Manual Gas
1/4” flexible
Valve
tubing
D
Manual Test
1
Petcock
1/4” aluminum or
copper pilot tubing
Jar or glass
with water
1/2” (13mm)
Cut at
45o Angle
15. Immerse the ¼ in. tube vertically ½ in. into a jar of
water.
16. Slowly open the manual test petcock (D)
17. When the rate of bubbles coming through the water
stabilizes, count the number of bubbles appearing during a ten-second period. Each bubble appearing during
a 10 second period represents a ow rate of 0.001 cfh
(28 cch). See table 6.1
18. Remove the leak test tap from the valve body.
19. Using a small amount of pipe sealant on the 1/8 in.
plug, reinstall the plug in pressure tap point 4.
Figure D.6.2. Test Setup Diagram
1. De-energize the control system to make sure no power
goes to the valves.
2. Close the upstream Manual Gas Valve.
20. After completing the test, make sure the downstream
manual gas cock (C)
21. Open the upstream manual gas cock (A) and energize
the valve through the safety system.
D 23
22. Test with rich soap water solution to make sure there
is no leak at the test tap (B) or any pipe adapter/valve
mating surfaces.
23. De-energize the valve.
Opening a safety limit switch (Gas Pressure, Water
Flow, Drain switches and Recycle Interlock) during
PREPURGE, PILOT IGN, MAIN IGN or RUN period.
•
24. Open the downstream manual gas cock (C)
•
Hold code 63 will be displayed on the Basic Panel
or annunciation of opened limit switch is displayed
on the Operator Interface Module.
Safety shutdown occurs and recycle.
25. Restore the system to normal operation.
Pipe Size (NPT)
Max. Seat
Leakage (UL)
Max. Number of
Bubbles in 10 Sec
1/2 - 3/4
235 cch
6
1
235 cch
7
1 1/4
235 cch
8
Detection of flame 240 seconds after entry to STANDBY
from RUN or detection of flame from 10 seconds up to
30 seconds into PREPURGE time.
•
Table D.6.1 Maximum Bubbles per Pipe Size
D.6.e. Gas Train Leak Test
The gas train has been checked before shipping, but could
come loose during shipping.
1. Turn “OFF” all electric power and open the main gas
valve.
2. Turn the unit’s switch to the “ON” position and open the
main gas valve and the ball valve to the burner mixer
tube (the one between the fuel-air ratio valve and the
venturi).
3. If you smell gas, shut the main gas valve to the boiler
immediately and check for and eliminate all gas piping
leaks!
4. In addition to smelling for gas, it is necessary to spray
a soapy water mixture on all of the tting connections
on the gas train, around the pilot assembly, and around
the connection between the blower and the top plate.
5. If the soapy water mixture bubbles, then a gas leak is
present. If a gas leak is present, shut the main gas
valve to the boiler immediately and tighten the ttings
and retest until no more bubbles appear.
•
•
Simulate a ame to cause the ame signal voltage
level to rise above the ame threshold value for
240 seconds after entry to STANDBY from RUN
and also simulate a ame signal for 10 seconds to
30 seconds for PREPURGE.
Hold code 105 will be displayed on the Basic Panel
or *Flame Detected out of sequence* fault is displayed on the Enhanced Panel.
Safety shutdown occurs.
Failure to ignite main flame.
1. Open the manual pilot valve(s) and leave the main fuel
manual shutoff valve(s) closed.
2. Depress the RESET button.
3. Start the system.
4. The pilot should ignite and the ame signal should be
above the ame threshold value but the main burner
cannot light.
5. The ame signal should drop below the ame threshold
value within the FFRT after the interrupted pilot goes
out.
6. Hold code 109 will be displayed on the Basic Panel or
*Ignition Failure* fault is displayed on the Enhanced
Panel.
7. Safety shutdown occurs and lockout.
D.6.f. Safety Shutdown Tests (All Installations)
Loss of flame during RUN
Perform these tests at the end of startup after all other tests
are completed. If used, the external alarm should turn on.
Press the RESET pushbutton on the Flame Safe Guard
Module to restart the system.
1. Open the main fuel manual shutoff valve(s) and open
manual pilot shutoff valve(s).
2. Depress the RESET button.
3. Start the system. Start-up should be normal and the
main burner should light normally.
4. After the sequence is in the normal RUN period for
at least 10 seconds with the main burner ring, close
the manual main fuel shutoff valve(s) to extinguish the
main burner ame.
• The ame signal should drop below the ame
threshold value within the FFRT of the Flame Safe
Guard Module after the main ame and/or pilot
goes out.
• Hold code 106, 107 or 108 will be displayed on the
Basic Panel or *Main Flame Fail* fault is displayed
Opening a Lockout Interlock during PREPURGE, PILOT
IGN, MAIN IGN or RUN period
•
•
•
Hold code 67 will be displayed on the Basic Panel
or *Lockout ILK* fault is displayed on the Enhanced
Panel.
Safety shutdown occurs.
For boiler size up to 2.5 MMbtu input will recycle
after safety shutdown. For input greater than
2.5MMbtu boiler will lockout after safety shutdown.
E 24
•
on the Enhanced Panel.
Safety shutdown and lockout.
D.7. STARTUP COMPONENT ADJUSTMENTS
D.7.a. Firing Rate Check/Fuel Air Ratio Gas Valve
ADJUSTMENT
!
NOTE:
All Triton Series™ Near Condensing Boilers have been
factory re tested and tuned to operate at sea-level
standard conditions with up to 60 ft. of equivalent exhaust
venting.
Installations with a standard heating value fuel and at
elevations below 2,000 feet will generally only require
adjustment of the fuel-air ratio valve and air ow switch
to correct ring rate at appropriate fuel-air ratios. These
adjustments should be done for each fuel valve on combination fuel units.
To adjust fuel air ratio valve at high-fire (100%):
1. Turn off unit by setting the burner cutoff switch to the
OFF position.
2. Remove the plastic cover over the Throttle screw.
3. Using Enhanced/System Operator Interface Panel,
activate boiler demand by temporally adjusting setpoint
(about 40F) above normal operating setpoint by pressing Congure CH – Central Heat Conguration CH setpoint Textbox.
4. Set the burner cutoff switch to ON position to start the
unit.
5. Wait for the boiler to cycle on. Burner State Run will be
displayed on Summary Statue Page.
6. Enter Diagnostic Tests by pressing Diagnostics Diagnostic Tests on the Operator Interface. Once in diagnostic tests page, and press the Maximum button. RPM
rate will be changed to reect maximum ring rate.
Press the Start Test button. Unit will now be running at
100% ring rate. Five minute timer will be started with
press of Start Test button.
7. Using the combustion analyzer, adjust the Throttle
screw to achieve 30% - 45%, CO is less than 100 ppm,
and NOx is less than 15 ppm at 100% ring rate. Adjust
counter-clockwise for more gas and clockwise for less
gas. Make sure boiler in manual ring mode throughout
the adjustment period. Five minute timer will be started
with press of Start Test button.
8. Press the Stop Test button again to exit the manual
ring mode.
9. Readjust setpoint to normal operating setpoint.
10. Replace the plastic cover over the Throttle screw.
To adjust fuel air ratio valve at low-fire (0%):
1. Turn off unit by setting the burner cutoff switch to the
OFF position.
2. Remove aluminum protection screw on the pressure
regulator.
3. Using Operator Interface panel, activate boiler demand
by temporally adjusting setpoint (about 40F) above
normal operating setpoint by pressing Congure CH
– Central Heat Conguration CH setpoint Textbox.
4. Set the burner cutoff switch to ON position to start the
unit.
5. Wait for the boiler to cycle on. Run state will be displayed on Summary Statue Page.
6. Enter Diagnostic Tests by pressing Diagnostics Diagnostic Tests on the Operator Interface. Once in
diagnostic tests page, and press the Minimum button.
RPM rate will be changed to reect minimum ring rate.
Press the Start Test button. Unit will now be running
at 0% ring rate. Five minute timer will be started with
press of Start Test button.
7. Using the combustion analyzer, adjust the Throttle
screw to achieve 30% - 45%, CO is less than 100 ppm,
and NOx is less than 15 ppm at 0% ring rate. Adjust
clockwise for more gas and counter-clockwise for less
gas. Make sure boiler in manual ring mode throughout
the adjustment period. Five minute timer will be started
with press of Start Test button.
8. Press the Done button on the Basic Panel to exit the
manual ring mode.
9. Readjust setpoint to normal operating setpoint.
10. Replace the aluminum protection screw on the pressure regulator.
!
NOTE:
IN SOME EXTREME CONDITIONS, SUCH AS HIGH
ALTITUDES OR LOW HEATING VALUE GAS, IT MAY
NOT BE POSSIBLE TO FIRE AT THE RATED MAXIMUM
WITH THE APPROPRIATE AMOUNT OF EXCESS AIR.
IN THIS CASE, REDUCE THE HIGH-FIRING RATE UNTIL THE DESIRED EXCESS AIR HAS BEEN OBTAINED
AT THE MAXIMUM FIRING RATE.
D.7.b. Air Flow Switch Calibration
The air ow switch is a safety device that insures that
there is adequate air ow through the blower. The switch
is preset at the factory, in case air ow switch needs to be
recalibrated:
1. Make sure the boiler main switch is turned off.
2. Remove the Air ow switch cover.
3. Turn the ow switch adjustment screw counter clockwise until the switch is fully open.
4. Then make 4-1/2 full turns clockwise to set the switch
to the appropriate setpoint.
5. Replace the air ow switch cover.
D.8. SHUTTING DOWN THE UNIT
E 25
1. Set the burner cutoff switch on the display panel to the
off position.
2. Wait for the unit to complete its postpurge.
3. Turn off the power supply to the unit via the user installed disconnect switch.
4. Close the unit’s main gas valve.
E. MAINTENANCE
Maintenance is an important part of keeping the Triton
boiler running efciently and for a long period of time.
!
!
WARNING:
FAILURE TO FOLLOW THE SHUT DOWN PROCEDURE WILL RESULT IN EXCESSIVE WEAR AND WILL
VOID YOUR WARRANTY.
D.9. AFTER STARTUP CHECKLIST
1. Check the gas line piping for gas leaks.
2. Check for leaks. Look for water on the oor. Check
for water escaping from any part of the unit, valves or
piping. Water will continue to ow out of the drain for
a few minutes after the unit stops running. If the ow
does not stop after 10 minutes, a leak may be present
in the coil.
3. Check for proper supports on the water piping and gas
lines.
NOTE:
Ace
Solutions,
LLC recommends
that a schedAjaxHeating
Boiler Inc.
recommends
that a maintenance
maintenance
schedule
always
be
kept.
ule always be kept.
_______________________________________________
For extended warranty, schedule must be kept and made
For extended warranty, schedule must be kept and made
available to Ajax if failure occurs. A document must be
available to ACE if failure occurs. A document must be
produced for every year of operation, so it is recommendproduced for every year of operation, so it is recommended
ed that copies of the maintenance schedule be made
that copies of the maintenance schedule be made
before it is used.
before it is used.
!
! CAUTION:
Label all wires prior to disconnection when servicing controls. Wiring errors can cause improper and dangerous
operation.
Verify proper operation after servicing.
! DANGER:
! CAUTION:
Keep ammable materials away from the boiler. In the
event of the boiler overheating, shut the boiler down as
follows:
1. Turn off the manual gas valve located ON THE REAR
OF THE BOILER and;
2. Turn off the electricity to the boiler.
This boiler uses ammable gas, high voltage electricity,
moving parts, and very hot water under high pressure.
Assure that all gas and electric power supplies are off and
that the water temperature is cool before attempting any
disassembly or service.
More than one gas shut-off valve and electrical disconnect switch are used on the boiler. Assure that all gas
valves and electrical disconnect switches are off before
attempting any disassembly or service.
Do not attempt any service work if gas is present in the
air in the vicinity of the boiler. Never modify, remove or
tamper with any control device.
!
WARNING:
This boiler must only be serviced and repaired by skilled
and experienced service technicians.
If any controls are replaced, they must be replaced with
identical components.
Read, understand and follow all the instructions and
warnings contained in all the sections of this manual.
Never or bypass or disable any safety or operating control
or component of this boiler.
Assure that all safety and operating controls and components are operating properly before placing the boiler
back in service.
E 26
Annual
Semi
Ann.
Monthly
Daily
Triton Recommended Maintenance
Schedule Summary
•
Inspect Boiler Surrounds/ Area
•
Check Operating Temperature & Pressure
•
Verify Normal Boiler Sound
•
Check Lockout Codes
•
Check Operating Control
•
Check Pilot/ Main Flame Signal
•
Inspect Air Filter
•
Inspect/ Clean Condensate Drain
•
Observe Main Flame
•
Perform Gas Leak Test (E.4.e)
•
Perform Pilot Spark Test (E.4.c)
•
Clean Main Burner
•
Clean Heat Exchanger Tubes
•
Clean Gas Inlet Screen
•
Examine Vent System
•
Examine Connections
•
Corrosion Check
•
Combustion Test
Table E.1. Recommended Maintenance
E.1. MAINTENANCE DETAIL
E.1.a. Inspect Boiler Surrounds/ Area (daily)
1. Assure area is clean and that proper clearance to
combustible materials is maintained. Verify there is no
gasoline, or other ammable vapors and liquids in the
area.
2. Check for the presence of water in the area that may
indicate a leak.
1. Adjust the temperature necessary to check burner
operation.
E.1.f. Check Pilot/ Main Flame Signal (monthly)
1. Using a voltmeter, plug into the ame detection port on
the ame safeguard. The voltage reading should be
between 1-15 VDC.
2. Remove the UV scanner and using soft cloth wipe the
lens clean.
E.1.g. Inspect Air Filter (monthly)
The main burner air lter is gravity held horizontally at top
of the air box as shown. No tools are necessary to inspect
or service lter.
1. Open front access door.
2. Lift air lter frame from the top of the air box and remove lter and frame.
3. Clean lter with compressed air or replace lter as
necessary.
E.1.h. Inspect /Clean Condensate Drain (monthly)
E.1.i. Check Main Flame Condition (monthly)
1. Check to make sure high re ame is blue.
2. If the ame is yellow, adjust gas valve until blue ame
is achieved following initial set up procedure. Normal
low re ame is a yellowish-orange.
E.1.j. Perform Gas Valve, Pilot Assembly and Blower
Leak Test (semi-annually)
1. With the unit running, use soapy water to spray around
the pilot assembly, blower, and gas train. If bubbles
form, then a leak is present.
E.1.k. Perform Pilot Spark Test (semi-annually)
E.1.b. Check Operating Temperature (daily)
See secton E.4.c..
1. With boiler at stable operation, observe the readings on
the Temperature/ Pressure gauge and verify that they
are within acceptable ranges.
E.1.l. Clean Main Burner (annually)
E.1.c. Verify Normal Boiler Sound (daily)
1. After boiler has reached stable operation, listen to the
boiler and verify there are no unusual noises emitting
from the heat exchanger or combustion areas.
E.1.d. Check Lockout Codes (daily)
E.1.e. Check Operating Control (monthly)
1.
2.
3.
4.
5.
6.
7.
Shut off the manual gas cock at gas inlet.
Remove electrical power to boiler.
Remove top panel and open front door.
Remove nuts connecting blower to the top plate.
Remove combustion/ gas train assembly.
Remove burner.
Use low pressure air to remove dust and a clean soft
cloth to wipe the inside of the burner (do not wipe the
mesh/outside of burner).
E.1.m. Clean Heat Exchanger Tubes (annually)
E 27
E.1.r. Combustion Test (annually)
1. With burner removed (see F.1.m. above), check tubes
with ashlight for soot and remove with soft brush or
vacuum.
2. Spray tubes with high pressure water to remove any
foreign materials.
3. Check for corrosion
of burner, replace if
necessary
4. Reassemble burner
Filter
Frame
and combustion assembly as seen in gure 7.
E.1.n. Clean Gas Inlet
Screen (annually)
E.1.o. Examine Vent
System (annually)
Air
Filter
Air Box
1. Check all joints and
vent pipe connections
for tightness, corrosion
or deterioration.
Figure E.1. Air Filter Box Assembly
2. At all connections
check for air leak while
unit is on low re so as not to burn yourself.
E.1.p. Examine Joint and Pipe Connections
(annually)
1. Check all water pipe connections for leaks while unit is
on low re.
2. If a leak is present around a tting attempt to tighten
the tting.
3. If a leak is present in the middle of the pipe, contact
factory.
E.1q. Corrosion Check (annually)
1. Check all gas, water, and air pipes to for corrosion and
deterioration.
2. If any corrosion or deterioration is present, please
contact factory.
Adjustments should be made to the gas valve until all readings are within these recommended values.
Condition
Value
Acceptable Range
Carbon Monoxide:
ppm
Less Than 100 ppm
Carbon Dioxide:
%
Between 7- 9%
Excess Air:
%
30-45%
NOx:
ppm
Less Than 20 ppm
Comb. Chamber
Pressure:
WC
Under 0.5” WC
E 28
Triton High Efficiency Boiler
Annual Maintenance Log
E.2. MAINTENANCE LOG
Daily Checks
Notes:
Inspect Boiler Area
Check Op. Temp & Pres.
Verify Normal Boiler Sound
Check Lockout Codes
Monthly Check
1
2
3
4
5
6
7
8
Check Operating Control
Check Pilot/ Main Flame Signal
Verify Normal Boiler Sound
Inspect/ Clean Condensate Drain
Observe Main Flame
Indicate “P” (pass) or “F” (fail) monthly for each category. Enter actions taken in the notes area below.
Notes:
Semiannual Tests
Result
Date
Initial
Notes
Result
Date
Initial
Notes
Gas Leak Test #1
Pilot Spark Test #1
Gas Leak Test #2
Pilot Spark Test #2
Annual Tests
Lubricate Pilot Blower
Clean Main Burner
Clean HX Tubes
Clean Gas Inlet Screen
Examine Vent System
Examine Connections
Corrosion Check
Combustion Test
9
10
11
12
E 29
E.3. ELECTICAL WIRING DIAGRAM
F 30
F. TROUBLESHOOTING
F.1. CONTROLLER LOCKOUT AND HOLD CODES.
!
NOTE:
To support the recommended Troubleshooting, the Honeywell SOLA controller has an Alert File. Review the Alert
history for possible trends that may have been occurring
prior to the actual Lockout.
Note Column: H= Hold message; L=Lockout message;
H or L= either Hold or Lockout depending on Parameter
Conguration
Code
Recommended Troubleshooting of Lockout
Codes
Description
Note
Safety Data Faults
1
Uncongured safety data
1.
2.
2
Waiting for safety data verication
1.
2.
3.
New Device, complete device conguration and safety
verication.
If fault repeats, replace module.
L
Device in Conguration mode and safety parameters need
verication and a device needs reset to complete verication.
Conguration ended without verication, re enter conguration, verify safety parameters and reset device to complete
verication.
If fault repeats, replace module.
L
Internal Operation Errors
3
Internal fault: Hardware fault
H
4
Internal fault: Safety Relay key feedback error
H
5
Internal fault: Unstable power (DCDC) output
H
6
Internal fault: Invalid processor clock
H
7
Internal fault: Safety relay drive error
H
8
nternal fault: Zero crossing not detected
H
9
Internal fault: Flame bias out of range
H
10
Internal fault: Invalid Burner control state
11
Internal fault: Invalid Burner control state ag
H
12
Internal fault: Safety relay drive cap short
13
Internal fault: PII shorted to ILK
H or L
14
Internal fault: HFS shorted to LCI
H or L
15
Internal fault: Safety relay test failed due to feedback ON
L
16
Internal fault: Safety relay test failed due to
safety relay OFF
L
17
Internal fault: Safety relay test failed due to
safety relay not OFF
L
18
Internal fault: Safety relay test failed due to
feedback not ON
L
19
Internal fault: Safety RAM write
L
20
Internal fault: Flame ripple and overow
H
21
Internal fault: Flame number of sample
mismatch
Internal Fault.
1. Reset Module.
2. f fault repeats, replace module.
H
H
H
Internal Fault.
1. Reset Module.
2. f fault repeats, replace module.
22
Internal fault: Flame bias out of range
23
Internal fault: Bias changed since heating cycle starts
H
24
Internal fault: Spark voltage stuck low or high
H
25
Internal fault: Spark voltage changed too much during ame
sensing time
H
H
F 31
Code
Recommended Troubleshooting of Lockout
Codes
Description
Note
26
Internal fault: Static ame ripple
H
27
27 Internal fault: Flame rod shorted to ground detected
H
28
Internal fault: A/D linearity test fails
29
Internal fault: Flame bias cannot be set in range
30
Internal fault: Flame bias shorted to adjacent pin
31
32-46
Internal Fault.
1. Reset Module.
2. f fault repeats, replace module.
H
H
H
Internal fault: SLO electronics unknown error
H
Internal fault: Safety Key 0 through 14
L
System Errors
47
Flame Rod to ground leakage
48
Static ame (not ickering)
49
24VAC voltage low/high
50
Modulation fault
51
Pump fault
52
Motor tachometer fault
53
AC inputs phase reversed
Internal Fault.
1. Reset Module.
2. If fault repeats, replace module.
H
1.
2.
H
Internal sub-system fault.
1. Review alert messages for possible trends.
2. Correct possible problems.
3. If fault persists, replace module.
1.
2.
3.
54-57
Internal fault: HFS shorted to IAS
59
Internal Fault: Mux pin shorted
60
Internal Fault: HFS shorted to LFS
61
Anti short cycle
62
Fan speed not proved
63
LCI OFF
PII OFF
65
Interrupted Airow Switch OFF
66
Interrupted Airow Switch ON
67
ILK OFF
68
ILK ON
Internal Fault.
1. Reset Module.
2. If fault repeats, replace module.
70
71-77
Wait for leakage test completion
RESERVED
H
H
L
L
L
L
Will not be a lockout fault. Hold Only.
1.
2.
H
H
Check wiring and correct any faults.
Check Interlocks connected to the LCI to assure proper
function.
Reset and sequence the module; monitor the LCI status.
If code persists, replace the module.
H
3.
4.
5.
Check wiring and correct any faults.
Check Preignition Interlock switches to assure proper functioning.
Check the valve operation.
Reset and sequence the module; monitor the PII status.
If code persists, replace the module.
H or L
1.
2.
3.
4.
5.
Check wiring and correct any possible shorts.
Check airow switches to assure proper functioning.
Check the fan/blower operation.
Reset and sequence the module; monitor the airow status.
If code persists, replace the module.
H or L
1.
2.
3.
Check wiring and correct any possible shorts.
Check Interlock (ILK) switches to assure proper function.
Verify voltage through the interlock string to the interlock
input with a voltmeter.
If steps 1-3 are correct and the fault persists, replace the
module
H or L
1.
2.
4.
Pilot test hold
H
L
3.
4.
69
Check the Module and display connections.
Check the Module power supply and make sure that both
frequency and voltage meet the specications.
On 24Vac applications, assure that J4-10 and J8-2 are connected together.
RESERVED
58
64
Check the Module and display connections.
Check the Module power supply and make sure that oth
frequency, voltage and VA meet the specications.
H
H or L
H or L
1.
2.
3.
Verify Run/Test is changed to Run.
Reset Module.
If fault repeats, replace module.
H
1.
2.
Internal Fault. Reset Module.
If fault repeats, replace module.
H
F 32
Code
78
79
80
81
Recommended Troubleshooting of Lockout
Codes
Description
Demand Lost in Run
Outlet high limit
DHW high limit
Delta T limit
1.
2.
Check wiring and correct any possible errors.
If previous steps are correct and fault persists, replace the
module.
H
1.
2.
3.
Check wiring and correct any possible errors.
Replace the Outlet high limit.
If previous steps are correct and fault persists, replace the
module.
H or L
1.
2.
3.
Check wiring and correct any possible errors.
Replace the DHW high limit.
If previous steps are correct and fault persists, replace the
module.
H or L
1.
Check Inlet and Outlet sensors and pump circuits for proper
operation.
Recheck the Delta T Limit to conrm proper setting.
If previous steps are correct and fault persists, replace the
module.
H or L
Check wiring and correct any possible errors.
Replace the Stack high limit.
If previous steps are correct and fault persists, replace the
module.
H or L
2.
3.
82
83-90
Stack limit
Note
1.
2.
3.
RESERVED
H or L
Sensor Faults
91
92
93
94
95
96
Inlet sensor fault
Outlet sensor fault
DHW sensor fault
Header sensor fault
Stack sensor fault
Outdoor sensor fault
97
Internal Fault: A2D mismatch.
98
Internal Fault: Exceeded VSNSR voltage
99
100
101
-104
1.
2.
3.
Check wiring and correct any possible errors.
Replace the Inlet sensor.
If previous steps are correct and fault persists, replace the
module.
H
1.
2.
3.
Check wiring and correct any possible errors.
Replace the Outlet sensor.
If previous steps are correct and fault persists, replace the
module.
H
1.
2.
3.
Check wiring and correct any possible errors.
Replace the DHW sensor.
If previous steps are correct and fault persists, replace the
module.
1.
2.
3.
Check wiring and correct any possible errors.
Replace the header sensor.
If previous steps are correct and fault persists, replace the
module.
H
1.
2.
3.
Check wiring and correct any possible errors.
Replace the stack sensor.
If previous steps are correct and fault persists, replace the
module.
H
1.
2.
3.
Check wiring and correct any possible errors.
Replace the outdoor sensor.
If previous steps are correct and fault persists, replace the
module.
H
Internal Fault.
1. Reset Module.
2. If fault repeats, replace module.
Internal Fault: Exceeded 28V voltage tolerance
Pressure Sensor Fault
H
L
L
L
1.
2.
3.
4.
5.
Verify the Pressure Sensor is a 4-20ma source.
Check wiring and correct any possible errors.
Test Pressure Sensor for correct operation.
Replace the pressure sensor.
If previous steps are correct and fault persists, replace the
module.
RESERVED
Flame Operation Faults
H
F 33
Code
105
Recommended Troubleshooting of Lockout
Codes
Description
Flame detected out of sequence
1.
2.
3.
4.
5.
106
Flame lost in MFEP
107
Flame lost early in run
108
Flame lost in run
109
Ignition failed
1.
2.
3.
4.
5.
Check that ame is not present in the combustion chamber.
Correct any errors.
Make sure that the ame detector is wired to the correct
terminal.
Make sure the F & G wires are protected from stray noise
pickup.
Reset and sequence the module, if code reappears, replace
the ame detector.
Reset and sequence the module, if code reappears, replace
the module.
Check pilot valve (Main Valve for DSI) wiring and operation correct any errors.
Check the fuel supply.
Check fuel pressure and repeat turndown tests.
Check ignition transformer electrode, ame detector, ame
detector siting or ame rod position.
If steps 1 through 4 are correct and the fault persists, replace
the module.
H or L
L
L
L
L
110
Ignition failure occurred
111
Flame current lower than WEAK threshold
112
Pilot test ame timeout
L
113
Flame circuit timeout
L
114
-121
Hold time of recycle and hold option. Will not be a lockout fault.
Hold Only. Internal hardware test. Not a lockout.
Note
RESERVED
H
H
L
Rate Proving Faults
122
Lightoff rate proving failed
123
Purge rate proving failed
124
High re switch OFF
125
High re switch stuck ON
1.
2.
3.
4.
Check wiring and correct any potential wiring errors.
Check VFDs ability to change speeds.
Change the VFD
If the fault persists, replace the module.
L
1.
2.
Check wiring and correct any potential wiring errors.
Check High Fire Switch to assure proper function (not
welded or jumpered).
Manually drive the motor to the High Fire position and adjust
the HF switch while in this position and verify voltage through
the switch to the HFS input with a voltmeter.
If steps 1-3 are correct and the fault persists, replace the
module.
H
Check wiring and correct any potential wiring errors.
Check Low Fire Switch to assure proper function (not welded
or jumpered).
Manually drive the motor to the High Fire position and adjust
the LF switch while in this position and verify voltage through
the switch to the LFS input with a voltmeter.
If steps 1-3 are correct and the fault persists, replace the
module.
H
Check wiring and correct any potential wiring errors.
Check VFDs ability to change speeds.
Change the VFD
If the fault persists, replace the module.
H or L
3.
4.
126
Low re switch OFF
127
Low re switch stuck ON
1.
2.
3.
4.
H
H or L
128
Fan speed failed during prepurge
129
Fan speed failed during preignition
130
Fan speed failed during ignition
131
Fan movement detected during standby
H
132
Fan speed failed during run
H
133
-135
1.
2.
3.
4.
L
H or L
H or L
RESERVED
Start Check Faults
136
Interrupted Airow Switch failed to close
1.
2.
3.
4.
Check wiring and correct any possible wiring errors.
Check Interrupted Airow switch(es) to assure proper function.
Verify voltage through the airow switch to the IAS input with
a voltmeter.
If steps 1-3 are correct and the fault persists, replace the
module.
H
F 34
Code
137
Recommended Troubleshooting of Lockout
Codes
Description
ILK failed to close
1.
2.
3.
4.
138
-148
Check wiring and correct any possible wiring errors.
Check Interrupted Airow switch(es) to assure proper function.
Verify voltage through the airow switch to the IAS input with
a voltmeter.
If steps 1-3 are correct and the fault persists, replace the
module.
Note
H
RESERVED
FAULT CODES 149 THROUGH 165 ARE OEM SPECIFIC FAULT CODES.
149
Flame detected
OEM Specic
1. Holds if ame detected during Safe Start check up to Flame
Establishing period.
H or L
150
Flame not detected
OEM Specic
1. Sequence returns to standby and restarts sequence at the
H
beginning of Purge after the HF switch opens. if ame detected during Safe Start check up to Flame Establishing period.
151
High re switch ON
OEM Specic
1. Check wiring and correct any potential wiring errors.
2. Check High Fire Switch to assure proper function (not
welded or jumpered).
3. Manually drive the motor to the High Fire position and adjust
the HF switch while in this position and verify voltage through
the switch to the HFS input with a voltmeter.
4. If steps 1-3 are correct and the fault persists, replace the
module.
152
Combustion pressure ON
153
Combustion Pressure Off
154
Purge Fan switch On
155
Purge Fan switch Off
156
Combustion pressure and Flame ON
157
Combustion pressure and Flame OFF
158
Main valve ON
159
Main valve OFF
160
Ignition ON
161
Ignition OFF
162
Pilot valve ON
163
Pilot valve OFF
H or L
OEM Specic
1. Check wiring and correct any errors.
2. Inspect the Combustion Pressure Switch to make sure it is
working correctly.
3. Reset and sequence the relay module.
4. During STANDBY and PREPURGE, measure the voltage
between Terminal J6-5 and L2 (N). Supply voltage should
be present. If not, the lockout switch is defective and needs
replacing.
5. If the fault persists, replace the relay module.
H or L
OEM Specic
1. Purge fan switch is on when it should be off.
2. Check wiring and correct any errors.
3. Inspect the Purge Fan switch J6 terminal 3 and its connections.
Make sure the switch is working correctly and is not jumpered or
welded.
4. Reset and sequence the relay module.
5. If the fault persists, replace the relay module.
H or L
OEM Specic
1. Check that ame is not present in the combustion chamber.
Correct any errors.
2. Make sure that the ame detector is wired to the correct
terminal.
3. Make sure the F & G wires are protected from stray noise
pickup.
4. Reset and sequence the module, if code reappears, replace
the ame detector.
H or L
OEM Specic
1. Check Main Valve terminal wiring and correct any errors.
2. Reset and sequence the module. If fault persist, replace the
module.
L
OEM Specic
1. Check Ignition terminal wiring and correct any errors.
2. Reset and sequence the module. If fault persist, replace the
module.
L
OEM Specic
1. Check Pilot Valve terminal wiring and correct any errors.
2. Reset and sequence the module. If fault persist, replace the
module.
L
H or L
H or L
L
L
L
L
F 35
Code
164
Block intake ON
165
Block intake OFF
166
-171
Recommended Troubleshooting of Lockout
Codes
Description
OEM Specic
1. Check wiring and correct any errors.
2. Inspect the Block Intake Switch to make sure it is working
correctly.
3. Reset and sequence the module.
4. During Standby and Purge, measure the voltage across the
switch. Supply voltage should be present. If not, the Block
Intake Switch is defective and needs replacing.
5. If the fault persists, replace the relay module.
Note
L
L
RESERVED
Feedback
172
Main relay feedback incorrect
173
Pilot relay feedback incorrect
174
Safety relay feedback incorrect
L
175
Safety relay open
L
176
Main relay ON at safe start check
L
177
Pilot relay ON at safe start check
L
178
Safety relay ON at safe start check
L
179
-183
Internal Fault.
1. Reset Module.
2. If fault repeats, replace module.
RESERVED
L
L
L
Parameter Faults
184
Invalid BLOWER/HSI output setting
185
Invalid Delta T limit enable setting
1.
186
Invalid Delta T limit response setting
187
Invalid DHW high limit enable setting
L
188
Invalid DHW high limit response setting
L
189
Invalid Flame sensor type setting
L
190
Invalid interrupted air switch enable setting
L
191
Invalid interrupted air switch start check
enable setting
L
192
Invalid igniter on during setting
L
193
Invalid ignite failure delay setting
L
194
Invalid ignite failure response setting
L
195
Invalid ignite failure retries setting
L
196
Invalid ignition source setting
L
197
Invalid interlock open response setting
L
198
Invalid interlock start check setting
L
199
Invalid LCI enable setting
L
200
Invalid lightoff rate setting
L
201
Invalid lightoff rate proving setting
L
202
Invalid Main Flame Establishing Period time
L
203
Invalid MFEP ame failure response setting
L
204
Invalid NTC sensor type setting
L
205
Invalid Outlet high limit response setting
L
206
Invalid Pilot Flame Establishing Period setting
L
207
Invalid PII enable setting
L
208
Invalid pilot test hold setting
L
209
Invalid Pilot type setting
L
210
Invalid Postpurge time setting
L
211
Invalid Power up with lockout setting
L
212
Invalid Preignition time setting
L
2.
3.
Return to Conguration mode and recheck selected parameters, reverify and reset module.
If fault repeats, verify electrical grounding.
If fault repeats, replace module.
L
L
L
F 36
Code
Description
Recommended Troubleshooting of Lockout
Codes
Note
213
Invalid Prepurge rate setting
L
214
Invalid Prepurge time setting
L
215
Invalid Purge rate proving setting
L
216
Invalid Run ame failure response setting
L
217
Invalid Run stabilization time setting
L
218
Invalid Stack limit enable setting
L
219
Invalid Stack limit response setting
L
220
Uncongured Delta T limit setpoint setting
L
221
Uncongured DHW high limit setpoint setting
L
222
Uncongured Outlet high limit setpoint setting
L
223
Uncongured Stack limit setpoint setting
L
224
Invalid DHW demand source setting
L
225
Invalid Flame threshold setting
L
226
Invalid Outlet high limit setpoint setting
L
227
Invalid DHW high limit setpoint setting
L
228
Invalid Stack limit setpoint setting
L
229
Invalid Modulation output setting
L
230
Invalid CH demand source setting
L
231
Invalid Delta T limit delay setting
L
232
Invalid Pressure sensor type setting
L
233
Invalid IAS closed response setting
L
234
Invalid Outlet high limit enable setting
L
235
Invalid Outlet connector type setting
L
236
Invalid Inlet connector type setting
L
237
Invalid DHW connector type setting
L
238
Invalid Stack connector type setting
L
239
Invalid Header connector type setting
L
240
Invalid Outdoor connector type setting
L
241
-255
RESERVED
Table F.1. Lockout and Hold Codes
F.2. CONTROLLER ALERT CODES.
Code
Description
Code
EE Management Faults
14
Safety group verication table was restored from factory
defaults
Description
0
None (No alert)
1
Alert PCB was restored from factory defaults
15
Safety group verication table was updated
Safety conguration parameters were restored from factory
defaults
16
Invalid Parameter PCB was detected
17
Invalid Range PCB was detected
18
Alarm silence time exceeded maximum
2
3
Conguration parameters were restored from factory defaults
4
Invalid Factory Invisibility PCB was detected
5
Invalid Factory Range PCB was detected
6
Invalid range PCB record has been dropped
7
EEPROM lockout history was initialized
27
Safety processor was reset
8
Switched application annunciation data blocks
28
Application processor was reset
9
Switched application conguration data blocks
29
Burner switch was turned OFF
10
Conguration was restored from factory defaults
30
Burner switch was turned ON
11
Backup conguration settings was restored from active conguration
31
Program Module (PM) was inserted into socket
32
Program Module (PM) was removed from socket
33
Alert PCB was congured
12
Annunciation conguration was restored from factory defaults
13
Annunciation conguration was restored from backup
System Parameter Errors
19
20-26
Invalid safety group verication table was detected
RESERVED
F 37
Code
34
Description
Parameter PCB was congured
35
Range PCB was congured
36
Program Module (PM) incompatible with product was inserted
into socket
37
Program Module application parameter revision differs from
application processor
38
Program Module safety parameter revision differs from application processor
Code
81
82-89
Description
Fan PWM frequency was invalid
RESERVED
90
Modulation output type was invalid
91
Firing rate control parameter was invalid
92
Forced rate was out of range vs. min/max modulation
93
Forced rate was invalid, % vs. RPM
94
Slow start ramp value was invalid
39
PCB incompatible with product contained in Program Module
95
Slow start degrees value was invalid
40
Parameter PCB in Program Module is too large for product
96
Slow start was ended due to outlet sensor fault
41
Range PCB in Program Module was too large for product
97
Slow start was end due to reference setpoint fault
42
Alert PCB in Program Module was too large for product
98
CH max modulation rate was invalid, % vs. RPM
IAS start check was forced on due to IAS enabled
99
CH max modulation rate was > absolute max rate
43
System Operation Faults
44
Low voltage was detected in safety processor
45
High line frequency occurred
46
Low line frequency occurred
47
Invalid subsystem reset request occurred
48
Write large enumerated Modbus register value was not allowed
49
Maximum cycle count was reached
50
Maximum hours count was reached
51
Illegal Modbus write was attempted
52
Modbus write attempt was rejected (NOT
ALLOWED)
53
Illegal Modbus read was attempted
54
Safety processor brown-out reset occurred
55
Application processor watchdog reset occurred
56
Application processor brown-out reset occurred
57
Safety processor watchdog reset occurred
58
Alarm was reset by the user at the control
Demand/Rate Command Faults
59
Burner control ring rate was > absolute max rate
60
Burner control ring rate was < absolute min rate
61
Burner control ring rate was invalid, % vs. RPM
62
Burner control was ring with no fan request
63
Burner control rate (nonring) was > absolute max rate
64
Burner control rate (nonring) was < absolute min rate
65
Burner control rate (nonring) was absent
66
Burner control rate (nonring) was invalid, % vs. RPM
67
Fan off cycle rate was invalid, % vs. RPM
68
Setpoint was overridden due to sensor fault
69
Modulation was overridden due to sensor fault
70-74
RESERVED
Fan Parameter Errors
100
CH modulation range (max minus min) was too small (< 4%
or 40 RPM)
101
DHW max modulation rate was invalid, % vs. RPM
102
DHW max modulation rate was > absolute max rate
103
DHW modulation range (max minus min) was too small (< 4%
or 40 RPM)
104
Min modulation rate was < absolute min rate
105
Min modulation rate was invalid, % vs. RPM
106
Manual rate was invalid, % vs. RPM
107
Slow start enabled, but forced rate was invalid
108
Analog output hysteresis was invalid
109
Analog modulation output type was invalid
110
IAS open rate differential was invalid
111
IAS open step rate was invalid
112
-114
RESERVED
Modulation Operation Faults
115
Fan was limited to its minimum duty cycle
116
Manual rate was > CH max modulation rate
117
Manual rate was > DHW max modulation rate
118
Manual rate was < min modulation rate
119
Manual rate in Standby was > absolute max rate
120
Modulation commanded rate was > CH max modulation rate
121
Modulation commanded rate was > DHW max modulation
rate
122
Modulation commanded rate was < min modulation rate
123
Modulation rate was limited due to outlet limit
124
Modulation rate was limited due to Delta-T limit
125
Modulation rate was limited due to stack limit
126
Modulation rate was limited due to anticondensation
127
Fan Speed out of range in RUN
128
Modulation rate was limited due to IAS was open
129
Slow start ramp setting of zero will result in no modulation
rate change
130
RESERVED
75
Absolute max fan speed was out of range
76
Absolute min fan speed was out of range
77
Fan gain down was invalid
78
Fan gain up was invalid
131
CH demand source was invalid
79
Fan minimum duty cycle was invalid
132
CH P-gain was invalid
80
Fan pulses per revolution was invalid
133
CH I-gain was invalid
CH parameter Errors
F 38
Code
Description
Code
Description
134
CH D-gain was invalid
207
Lead Lag was suspended due to no enabled
135
CH OFF hysteresis was invalid
208
Lead Lag slave session has timed out
136
CH ON hysteresis was invalid
137
CH sensor type was invalid
209
-221
138
CH hysteresis step time was invalid
139
CH remote control parameter was invalid
140
141
-145
CH ODR not allowed with remote control
RESERVED
CH Operation Faults
146
CH control was suspended due to fault
147
CH header temperature was invalid
148
CH outlet temperature was invalid
149
CH steam pressure was invalid
CH Parameter errors (continued)
150
-156
RESERVED
DHW Parameter Errors
RESERVED
Frost Protection Faults
220
Lead Lag frost protection rate was invalid
221
Lead Lag drop stage method setting was invalid
222
CH frost protection temperature was invalid
223
CH frost protection inlet temperature was invalid
224
DHW frost protection temperature was invalid
225
-230
RESERVED
231
LL setpoint was invalid
232
LL time of day setpoint was invalid
233
LL outdoor temperature was invalid
234
LL ODR time of day setpoint was invalid
235
LL ODR time of day setpoint exceeded normal setpoint
236
LL max outdoor temperature was
157
DHW demand source was invalid
237
LL min outdoor temperature was
158
DHW P-gain was invalid
238
LL low water temperature was
159
DHW I-gain was invalid
239
160
DHW D-gain was invalid
LL outdoor temperature range was too small
(minimum 12 C / 22 F)
161
DHW OFF hysteresis was invalid
240
LL water temperature range was too too small
(minimum 12 C / 22 F)
162
DHW ON hysteresis was invalid
163
DHW hysteresis step time was invalid
164
DHW sensor type was invalid
246
CH setpoint was invalid
165
Inlet sensor type was invalid for DHW
247
CH time of day setpoint was invalid
166
Outlet sensor type was invalid for DHW
248
CH outdoor temperature was invalid
RESERVED
249
CH ODR time of day setpoint was invalid
250
CH ODR time of day setpoint exceeds normal setpoint
251
CH max outdoor setpoint was invalid
252
CH min outdoor setpoint was invalid
253
CH min water setpoint was invalid
254
CH outdoor temperature range was too small (minimum 12 C
/ 22 F)
255
CH water temperature range was too small (minimum 12 C /
22 F)
167
-170
DHW Operation Faults
171
DHW control was suspended due to fault
172
DHW temperature was invalid
173
DHW inlet temperature was invalid
174
DHW outlet temperature was invalid
175
-182
RESERVED
Lead Lag Parameter errors
241
-245
RESERVED
183
Lead Lag P-gain was invalid
256
-260
184
Lead Lag I-gain was invalid
261
DHW setpoint was invalid
185
Lead Lag D-gain was invalid
262
DHW time of day setpoint was invalid
186
Lead Lag OFF hysteresis was invalid
187
Lead Lag ON hysteresis was invalid
188
Lead Lag slave enable was invalid
189
Lead Lag hysteresis step time was invalid
190
-203
RESERVED
Lead Lag Operation Faults
204
Lead Lag master was suspended due to fault
205
Lead Lag slave was suspended due to fault
206
Lead Lag header temperature was invalid
263
-271
RESERVED
RESERVED
272
Abnormal Recycle: Pressure sensor fault
273
Abnormal Recycle: Safety relay drive test failed
274
Abnormal Recycle: Demand off during Pilot
Flame Establishing Period
275
Abnormal Recycle: LCI off during Drive to Purge
Rate
276
Abnormal Recycle: LCI off during Measured
Purge Time
F 39
Code
Description
277
Abnormal Recycle: LCI off during Drive to Lightoff
Rate
278
Abnormal Recycle: LCI off during Pre-Ignition test
279
280
Code
Description
313
Run was terminated due to fan failure
314
Abnormal Recycle: Fan failed during Drive to Purge Rate
315
Abnormal Recycle: Fan failed during Measured Purge Time
Abnormal Recycle: LCI off during Pre-Ignition
time
316
Abnormal Recycle: Fan failed during Drive to
Lightoff Rate
Abnormal Recycle: LCI off during Main Flame
Establishing Period
317
Abnormal Recycle: Fan failed during Pre-Ignition test
318
Abnormal Recycle: Fan failed during Pre-Ignition time
319
Abnormal Recycle: Fan failed during Ignition period
320
Abnormal Recycle: Fan failed during Main Flame Establishing
Period
321
Abnormal Recycle: Main Valve off after 10 seconds of RUN
322
Abnormal Recycle: Pilot Valve off after 10 seconds of RUN
Abnormal Recycle: Demand off during PreIgnition test
323
Abnormal Recycle: Safety Relay off after 10 seconds of RUN
324
Abnormal Recycle: Hardware ame bias
Abnormal Recycle: Demand off during PreIgnition time
325
Abnormal Recycle: Hardware static ame
Abnormal Recycle: Flame was on during Safe
Start check
326
Abnormal Recycle: Hardware ame current invalid
327
Abnormal Recycle: Hardware ame rod short
Abnormal Recycle: Flame was on during Drive to Purge Rate
328
Abnormal Recycle: Hardware invalid power
289
Abnormal Recycle: Flame was on during Measured Purge
Time
329
Abnormal Recycle: Hardware invalid AC line
330
Abnormal Recycle: Hardware SLO ame ripple
290
Abnormal Recycle: Flame was on during Drive to Lightoff
Rate
331
Abnormal Recycle: Hardware SLO ame sample
332
Abnormal Recycle: Hardware SLO ame bias range
291
Abnormal Recycle: Flame was not on at end of Ignition period
333
Abnormal Recycle: Hardware SLO ame bias heat
292
Abnormal Recycle: Flame was lost during Main Flame Establishing Period
334
Abnormal Recycle: Hardware SLO spark stuck
293
Abnormal Recycle: Flame was lost early in Run
335
Abnormal Recycle: Hardware SLO spark changed
294
Abnormal Recycle: Flame was lost during Run
336
Abnormal Recycle: Hardware SLO static ame
295
Abnormal Recycle: Leakage test failed
337
Abnormal Recycle: Hardware SLO rod shorted
296
Abnormal Recycle: Interrupted air ow switch was off during
Drive to Purge Rate
338
Abnormal Recycle: Hardware SLO AD linearity
339
Abnormal Recycle: Hardware SLO bias not set
Abnormal Recycle: Interrupted air ow switch was off during
Measured Purge Time
340
Abnormal Recycle: Hardware SLO bias shorted
341
Abnormal Recycle: Hardware SLO electronics
342
Abnormal Recycle: Hardware processor clock
343
Abnormal Recycle: Hardware AC phase
344
Abnormal Recycle: Hardware A2D mismatch
Abnormal Recycle: Interrupted air ow switch was off during
Pre-Ignition time
345
Abnormal Recycle: Hardware VSNSR A2D
346
Abnormal Recycle: Hardware 28V A2D
Abnormal Recycle: Interrupted air ow switch was off during
Main Flame Establishing Period
347
Abnormal Recycle: Hardware HFS IAS shorted
348
Abnormal Recycle: Hardware PII INTLK shorted
281
Abnormal Recycle: LCI off during Ignition period
282
Abnormal Recycle: Demand off during Drive to Purge Rate
283
Abnormal Recycle: Demand off during Measured
Purge Time
284
Abnormal Recycle: Demand off during Drive to
Lightoff Rate
285
286
287
288
297
298
Abnormal Recycle: Interrupted air ow switch was off during
Drive to Lightoff Rate
299
Abnormal Recycle: Interrupted air ow switch was off during
Pre-Ignition test
300
301
302
Abnormal Recycle: Ignition failed due to interrupted air ow
switch was off
349
Abnormal Recycle: Hardware HFS LCI shorted
303
Abnormal Recycle: ILK off during Drive to Purge Rate
350
Abnormal Recycle: Hardware HFS LFS shorted
304
Abnormal Recycle: ILK off during Measured Purge Time
351
Abnormal Recycle: Invalid zero crossing
305
Abnormal Recycle: ILK off during Drive to Lightoff Rate
352
Abnormal Recycle: fault stack sensor
306
Abnormal Recycle: ILK off during Pre-Ignition test
353
Abnormal Recycle: stack limit
307
Abnormal Recycle: ILK off during Pre-Ignition time
354
Abnormal Recycle: delta T limit
308
Abnormal Recycle: ILK off during Main Flame Establishing
Period
355
Abnormal Recycle: fault outlet sensor
356
Abnormal Recycle: outlet high limit
309
Abnormal Recycle: ILK off during Ignition period
357
Abnormal Recycle: fault DHW sensor
310
Run was terminated due to ILK was off
358
Abnormal Recycle: DHW high limit
311
Run was terminated due to interrupted air ow switch was off
359
Abnormal Recycle: fault inlet sensor
312
Stuck reset switch
360
Abnormal Recycle: Check Parameters Failed
F 40
Code
Description
Internal Errors
361
Internal error: No factory parameters were were
detected in control
362
Internal error: PID iteration frequency was invalid
363
Internal error: Demand-Rate interval time was invalid
364
Internal error: Factory calibration parameter for modulation
was invalid
365
Internal error: CH PID P-scaler was invalid
366
Internal error: CH PID I-scaler was invalid
367
Internal error: CH PID D-scaler was invalid
368
Internal error: DHW PID P-scaler was invalid
369
Internal error: DHW PID I-scaler was invalid
370
Internal error: DHW PID D-scaler was invalid
371
Internal error: Lead Lag master PID P-scaler was invalid
372
Internal error: Lead Lag master PID I-scaler was invalid
373
Internal error: Lead Lag master PID D-scaler was invalid
374
-359
RESERVED
Debug Faults
460
LCI lost in run
461
Demand lost in run
462
STAT demand lost in run
463
Demand lost in run due to no ame
464
-466
RESERVED
Internal Data Faults
467
Internal error: EEPROM write was attempted
before EEPROM was initialized
468
Internal error: EEPROM cycle count address was
invalid
469
Internal error: EEPROM days count address was
invalid
470
Internal error: EEPROM hours count address was
invalid
471
Internal error: Lockout record EEPROM index was
invalid
472
Internal error: Request to write PM status was
invalid
473
Internal error: PM parameter address was invalid
474
Internal error: PM safety parameter address was
invalid
475
Internal error: Invalid record in lockout history was removed
476
Internal error: EEPROM write buffer was full
477
Internal error: Data too large was not written to EEPROM
478
Internal error: Safety key bit 0 was incorrect
479
Internal error: Safety key bit 1 was incorrect
480
Internal error: Safety key bit 2 was incorrect
481
Internal error: Safety key bit 3 was incorrect
482
Internal error: Safety key bit 4 was incorrect
483
Internal error: Safety key bit 5 was incorrect
484
Internal error: Safety key bit 6 was incorrect
485
Internal error: Safety key bit 7 was incorrect
486
Internal error: Safety key bit 8 was incorrect
Code
Description
487
Internal error: Safety key bit 9 was incorrect
488
Internal error: Safety key bit 10 was incorrect
489
Internal error: Safety key bit 11 was incorrect
490
Internal error: Safety key bit 12 was incorrect
491
Internal error: Safety key bit 13 was incorrect
492
Internal error: Safety key bit 14 was incorrect
493
Internal error: Safety key bit 15 was incorrect
494
Internal error: Safety relay timeout
495
Internal error: Safety relay commanded off
496
Internal error: Unknown safety error occurred
497
Internal error: Safety timer was corrupt
498
Internal error: Safety timer was expired
499
Internal error: Safety timings
500
Internal error: Safety shutdown
Table F.2. Controller Alert Codes
F 41
F 42
F 43
F 44
Notes:
F 45
G. WARRANTY
LIMITED WARRANTY
Ace Heating
Solutions,
LLC (AHS),
warrants
the original
Ajax
Boiler Inc.
(ABI), warrants
to the
original to
owner
and
owner
and
at
the
original
installation
site
subject
the
at the original installation site subject to the termstoand
terms and conditions
that allmanufactured
products manufactured
conditions
herein that herein
all products
by ABI
by
AHS
(“Products”)
comply,
at
the
time
of manufacture,
(“Products”) comply, at the time of manufacture,
with recogwith recognized
hydronics
industry regulatory
agency and
nized
hydronics industry
regulatory
agency standards
standards
and
requirements
then
in
effect
and
be free
requirements then in effect and will be free fromwill
defects
in
from
defects
in
materials
and
workmanship
for
a
period
materials and workmanship for a period of 12 years fromof
12 years
from date(the
of shipment.
“Warranty
Period”).
date
of shipment.
“Warranty(the
Period”).
The burner
is
The
burner
is
also
covered
under
the
limited
warranty
for 5
also covered under the limited warranty for 5 years from
yearsoffrom
date of(the
shipment
(the Period).
“Warranty”
For
date
shipment
“Warranty”
ForPeriod).
products
or
products
or
parts
not
manufactured
by
ABI,
the
warranty
parts not manufactured by ABI, the warranty obligations of
obligations
shall, in
respects,
be limited to 2
ABI
shall, inofallAHS
respects,
beall
limited
to 2 years.
years.
I. REMEDY
G. Equipment furnished by the owner, either mounted or
unmounted, or when contracted for by the owner to
be installed or handled.
H. Leakage or other malfunction caused by:
1. Defective installations in general and specically,
any installation which is made:
a. in violation of applicable state or local plumbing housing or building codes;
b. without a certied ASME, pressure relief
valve, or;
c. contrary to the written instructions furnished
with the unit.
2. Adverse local conditions in general and, speci
cally, sediment or lime precipitation in the tubes
and/or headers or corrosive elements in the
atmosphere.
3. Misuse in general and, speci cally, operation
and maintenance contrary to the written instructions furnished with the unit, disconnection,
alteration or addition of components or apparatus, not approved by seller, operation with fuels
or settings other than those set forth on the rating
plate or accidental or exterior damage.
I. Production of noise, odors, discoloration or rusty
water.
J. Damage to surrounding area or property caused by
leakage or malfunction. Costs associated with the
replacement and/or repair of the unit including: any
freight, shipping or delivery charges, any removal,
installation or reinstallation charges, any material
and/or permits required for installation, reinstallation
or repair, charges to return the boiler and or components.
A.
A. Should
ShouldananAtlas
AtlasTriton
TritonSeries™
Series™Boiler
Boilerfail
faildue
duetoto dedefects
in in
materials
oror
workmanship
within
the
Warranty
fects
materials
workmanship
within
the
Warranty
Period,
AHSABI
will will
repair
or replace,
at AHS’s
sole
Period,
repair
or replace,
at ABI’s
sole discrediscretion,
anypart
partfound
foundtotobebedefective
defectiveunder
underconditions
tion, any
conditions
of normal
use. Labor,
transportation,
orexpensother
of normal
use. Labor,
transportation,
or other
expenses
removal
and/or
installation
included.
es for for
removal
and/or
installation
areare
notnot
included.
B.
B. Warranty
Warranty- The
- Theowner
ownermust
mustnotify
notifythe
theoriginal
originalInstaller
Installer
of the
and and
AHSABI
in writing,
within
the the
Warranty
ofProduct
the Product
in writing,
within
Warranty
Period,
providing
a detailed
description
of allofclaimed
Period,
providing
a detailed
description
all claimed
defects.
Transportation
to a to
factory
or other
designated
defects.
Transportation
a factory
or other
designatfacility
repairs
of any products
or itemsoralleged
edfor
facility
for repairs
of any products
items alleged
defective
shall,shall,
in allinevents,
be the
and and
defective
all events,
beresponsibility
the responsibility
at the
of the
atcost
the cost
ofowner.
the owner.
II. EXCLUSIONS
shall
have
liability
warranty
does
AHSABI
shall
have
no no
liability
forfor
andand
thisthis
warranty
does
notnot
cover:
cover:
A. Incidental, special or consequential damages, such
Incidental,
or consequential
asA.loss
of the usespecial
of products,
facilities or damages,
production,such
as
loss
of
the
use
of
products,
facilities
production,
inconvenience, loss of time or labor expense or
involved
inconvenience,
loss
of
time
or
labor
expense
involved
in repairing or replacing the alleged defective Product.
in
repairing
or
replacing
the
alleged
defective
B. The performance of any Product under conditionsProduct.
varying
materially from those under which such Product
B.
The tested
performance
of any Product
under
is usually
under industry
standards
as conditions
of
varying
materially
from
those
under
which
such Prodthe time of shipment.
uct
is
usually
tested
under
industry
standards
as of
C. Any damage to the Product due to abrasion, erosion,
the
time
of
shipment.
corrosion, deterioration, abnormal temperatures or
C.influence
Any damage
to the
Product
due to abrasion, erosion,
the
of foreign
matter
or energy.
corrosion,
deterioration,
abnormal
temperatures
or
D. The design or operation of owner’s plant
or equipment
the
inuence
of
foreign
matter
or
energy.
or of any facility or system of which any Product
D. be
The
design
or operation of owner’s plant or equipmay
made
a part.
ment
or
of
any
facility
or system
ofparticular
which any Product
E. The suitability of any
Product
for any
may
be
made
a
part.
application.
suitability
of any
any particular
F.E.
AnyThe
failure
resulting
fromProduct
misuse,for
modification
not application.
authorized by AHS in writing, improper installation or
F. of,
Any
resulting
from misuse, modication not
lack
or failure
improper
maintenance
authorized by ABI in writing, improper installation or
lack of, or improper maintenance.
Seller’s liability under this warranty shall not in any case
exceed the amount paid for the Product found to be defective.
III. THIRD-PARTY WARRANTIES
For goods or components not manufactured by Seller,
the warranty obligations of Seller shall, in all respects,
conform and be limited to one year from the date of
shipment.
IV. SEVERABILITY
To the extent that any provision of this warranty would
be void or prohibited under applicable law, such provisions shall be limited in effect to the minimum extent
necessary to render the remaining provisions hereof
enforceable.
V.
“Quality,
“
“Qu
Q alit
ali
lity, valu
value
lue
lu
ue aand service since 1919”
“Quality,
value, andSolutions,
service since 1919”LLC
Ace
Heating
OMT-1114
© OMT-1113
2014 Ace Heating
Solutions,
LLC BOILER INC.
© 2013 AJAX
PRINTED
PRINTEDIN
INU.S.A.
U.S.A.
2701 South Harbor Blvd., Santa Ana, CA 92704
AJAX
BOILER
INC.
(714)
540-2230
• (714) 540-2239
fax
2701 South
Harbor Blvd., Santa Ana, CA 92704
www.aceheatingllc.com
(714) 437-9050 • (714) 437-9060 fax • [email protected]
www.ajaxboiler.com
Made With Pride In The USA.