1
Symantec Mail Security™ for
Microsoft® Exchange
Implementation Guide
Symantec Mail Security™ for Microsoft® Exchange
Implementation Guide
The software described in this book is furnished under a license agreement and may be
used only in accordance with the terms of the agreement.
Documentation version 4.5
PN: 10216645
Copyright Notice
Copyright © 2004 Symantec Corporation.
All Rights Reserved.
Any technical documentation that is made available by Symantec Corporation is the
copyrighted work of Symantec Corporation and is owned by Symantec Corporation.
NO WARRANTY. The technical documentation is being delivered to you AS-IS, and
Symantec Corporation makes no warranty as to its accuracy or use. Any use of the
technical documentation or the information contained therein is at the risk of the user.
Documentation may include technical or other inaccuracies or typographical errors.
Symantec reserves the right to make changes without prior notice.
No part of this publication may be copied without the express written permission of
Symantec Corporation, 20330 Stevens Creek Blvd., Cupertino, CA 95014.
Trademarks
Symantec, the Symantec logo, and LiveUpdate are U.S. registered trademarks of Symantec
Corporation. Symantec AntiVirus, Symantec Mail Security, and Symantec Security
Response are trademarks of Symantec Corporation. Microsoft, Microsoft Exchange
Server, and Windows are registered trademarks of Microsoft Corporation, in the U.S. and
other countries.
Other brands and product names mentioned in this manual may be trademarks or
registered trademarks of their respective companies and are hereby acknowledged.
Printed in the United States of America.
10 9 8 7 6 5 4 3 2 1
3
Technical support
As part of Symantec Security Response, the Symantec global Technical Support
group maintains support centers throughout the world. The Technical Support
group’s primary role is to respond to specific questions on product feature/
function, installation, and configuration, as well as to author content for our
Web-accessible Knowledge Base. The Technical Support group works
collaboratively with the other functional areas within Symantec to answer your
questions in a timely fashion. For example, the Technical Support group works
with Product Engineering as well as Symantec Security Response to provide
Alerting Services and Virus Definition Updates for virus outbreaks and security
alerts.
Symantec technical support offerings include:
■
A range of support options that give you the flexibility to select the right
amount of service for any size organization
■
Telephone and Web support components that provide rapid response and
up-to-the-minute information
■
Upgrade insurance that delivers automatic software upgrade protection
■
Content Updates for virus definitions and security signatures that ensure
the highest level of protection
■
Global support from Symantec Security Response experts, which is
available 24 hours a day, 7 days a week worldwide in a variety of languages
for those customers enrolled in the Platinum Support Program
Advanced features, such as the Symantec Alerting Service and Technical
Account Manager role, offer enhanced response and proactive security
support
Please visit our Web site for current information on Support Programs. The
specific features available may vary based on the level of support purchased and
the specific product that you are using.
■
Licensing and registration
If the product that you are implementing requires registration and/or a license
key, the fastest and easiest way to register your service is to access the
Symantec licensing and registration site at www.symantec.com/certificate.
Alternatively, you may go to www.symantec.com/techsupp/ent/enterprise.html,
select the product that you wish to register, and from the Product Home Page,
select the Licensing and Registration link.
Contacting Technical Support
Customers with a current support agreement may contact the Technical
Support group via phone or online at www.symantec.com/techsupp.
Customers with Platinum support agreements may contact Platinum Technical
Support via the Platinum Web site at www-secure.symantec.com/platinum/.
4
When contacting the Technical Support group, please have the following:
■
Product release level
■
Hardware information
■
Available memory, disk space, NIC information
■
Operating system
■
Version and patch level
■
Network topology
■
Router, gateway, and IP address information
■
Problem description
■
Error messages/log files
■
Troubleshooting performed prior to contacting Symantec
■
Recent software configuration changes and/or network changes
Customer Service
To contact Enterprise Customer Service online, go to www.symantec.com, select
the appropriate Global Site for your country, then choose Service and Support.
Customer Service is available to assist with the following types of issues:
■
Questions regarding product licensing or serialization
■
Product registration updates such as address or name changes
■
General product information (features, language availability, local dealers)
■
Latest information on product updates and upgrades
■
Information on upgrade insurance and maintenance contracts
■
Information on Symantec Value License Program
■
Advice on Symantec's technical support options
■
Nontechnical presales questions
■
Missing or defective CD-ROMs or manuals
Symantec Corporation Software License Agreement
SYMANTEC CORPORATION AND/OR ITS
SUBSIDIARIES ("SYMANTEC") IS WILLING TO
LICENSE THE SOFTWARE TO YOU AS AN
INDIVIDUAL, THE COMPANY, OR THE LEGAL ENTITY
THAT WILL BE UTILIZING THE SOFTWARE
(REFERENCED BELOW AS "YOU" OR "YOUR") ONLY
ON THE CONDITION THAT YOU ACCEPT ALL OF THE
TERMS OF THIS LICENSE AGREEMENT. READ THE
TERMS AND CONDITIONS OF THIS LICENSE
AGREEMENT CAREFULLY BEFORE USING THE
SOFTWARE. THIS IS A LEGAL AND ENFORCEABLE
CONTRACT BETWEEN YOU AND SYMANTEC. BY
OPENING THIS PACKAGE, BREAKING THE SEAL,
CLICKING THE "AGREE" OR "YES" BUTTON OR
OTHERWISE INDICATING ASSENT
ELECTRONICALLY, OR LOADING THE SOFTWARE,
YOU AGREE TO THE TERMS AND CONDITIONS OF
THIS AGREEMENT. IF YOU DO NOT AGREE TO THESE
TERMS AND CONDITIONS, CLICK THE "I DO NOT
AGREE" OR "NO" BUTTON OR OTHERWISE INDICATE
REFUSAL AND MAKE NO FURTHER USE OF THE
SOFTWARE.
1. License:
The software and documentation that accompanies
this license (collectively the "Software") is the
proprietary property of Symantec or its licensors and
is protected by copyright law. While Symantec
continues to own the Software, You will have certain
rights to use the Software after Your acceptance of this
license. This license governs any releases, revisions, or
enhancements to the Software that the Licensor may
furnish to You. Except as may be modified by an
applicable Symantec license certificate, license
coupon, or license key (each a "License Module") that
accompanies, precedes, or follows this license, and as
may be further defined in the user documentation
accompanying the Software, Your rights and
obligations with respect to the use of this Software are
as follows.
You may:
A. use the number of copies of the Software as have
been licensed to You by Symantec under a License
Module. If the Software is part of a suite containing
multiple Software titles, the number of copies You may
use may not exceed the aggregate number of copies
indicated in the License Module, as calculated by any
combination of licensed Software titles. Your License
Module shall constitute proof of Your right to make
such copies. If no License Module accompanies,
precedes, or follows this license, You may make one
copy of the Software You are authorized to use on a
single computer;
B. make one copy of the Software for archival
purposes, or copy the Software onto the hard disk of
Your computer and retain the original for archival
purposes;
C. use the Software on a network, provided that You
have a licensed copy of the Software for each computer
that can access the Software over that network;
D. use the Software in accordance with any written
agreement between You and Symantec; and
E. after written consent from Symantec, transfer the
Software on a permanent basis to another person or
entity, provided that You retain no copies of the
Software and the transferee agrees in writing to the
terms of this license.
You may not:
A. copy the printed documentation that accompanies
the Software;
B. sublicense, rent, or lease any portion of the
Software; reverse engineer, decompile, disassemble,
modify, translate, make any attempt to discover the
source code of the Software, or create derivative works
from the Software;
C. use the Software as part of a facility management,
timesharing, service provider, or service bureau
arrangement;
D. use a previous version or copy of the Software after
You have received and installed a disk replacement set
or an upgraded version. Upon upgrading the Software,
all copies of the prior version must be destroyed;
E. use a later version of the Software than is provided
herewith unless You have purchased corresponding
maintenance and/or upgrade insurance or have
otherwise separately acquired the right to use such
later version;
F. use, if You received the software distributed on
media containing multiple Symantec products, any
Symantec software on the media for which You have
not received permission in a License Module; nor
G. use the Software in any manner not authorized by
this license.
2. Content Updates:
Certain Software utilize content that is updated from
time to time (including but not limited to the following
Software: antivirus software utilize updated virus
definitions; content filtering software utilize updated
URL lists; some firewall software utilize updated
firewall rules; and vulnerability assessment products
utilize updated vulnerability data; these updates are
collectively referred to as "Content Updates"). You
shall have the right to obtain Content Updates for any
period for which You have purchased maintenance,
except for those Content Updates that Symantec elects
to make available by separate paid subscription, or for
any period for which You have otherwise separately
acquired the right to obtain Content Updates.
Symantec reserves the right to designate specified
Content Updates as requiring purchase of a separate
subscription at any time and without notice to You;
provided, however, that if You purchase maintenance
hereunder that includes particular Content Updates on
the date of purchase, You will not have to pay an
additional fee to continue receiving such Content
Updates through the term of such maintenance even if
Symantec designates such Content Updates as
requiring separate purchase. This License does not
otherwise permit the licensee to obtain and use
Content Updates.
3. Limited Warranty:
Symantec warrants that the media on which the
Software is distributed will be free from defects for a
period of sixty (60) days from the date of delivery of the
Software to You. Your sole remedy in the event of a
breach of this warranty will be that Symantec will, at
its option, replace any defective media returned to
Symantec within the warranty period or refund the
money You paid for the Software. Symantec does not
warrant that the Software will meet Your requirements
or that operation of the Software will be uninterrupted
or that the Software will be error-free.
TO THE MAXIMUM EXTENT PERMITTED BY
APPLICABLE LAW, THE ABOVE WARRANTY IS
EXCLUSIVE AND IN LIEU OF ALL OTHER
WARRANTIES, WHETHER EXPRESS OR IMPLIED,
INCLUDING THE IMPLIED WARRANTIES OF
MERCHANTABILITY, FITNESS FOR A PARTICULAR
PURPOSE, AND NONINFRINGEMENT OF
INTELLECTUAL PROPERTY RIGHTS. THIS
WARRANTY GIVES YOU SPECIFIC LEGAL RIGHTS.
YOU MAY HAVE OTHER RIGHTS, WHICH VARY
FROM STATE TO STATE AND COUNTRY TO
COUNTRY.
4. Disclaimer of Damages:
SOME STATES AND COUNTRIES, INCLUDING
MEMBER COUNTRIES OF THE EUROPEAN
ECONOMIC AREA, DO NOT ALLOW THE LIMITATION
OR EXCLUSION OF LIABILITY FOR INCIDENTAL OR
CONSEQUENTIAL DAMAGES, SO THE BELOW
LIMITATION OR EXCLUSION MAY NOT APPLY TO
YOU.
TO THE MAXIMUM EXTENT PERMITTED BY
APPLICABLE LAW AND REGARDLESS OF WHETHER
ANY REMEDY SET FORTH HEREIN FAILS OF ITS
ESSENTIAL PURPOSE, IN NO EVENT WILL
SYMANTEC BE LIABLE TO YOU FOR ANY SPECIAL,
CONSEQUENTIAL, INDIRECT, OR SIMILAR
DAMAGES, INCLUDING ANY LOST PROFITS OR LOST
DATA ARISING OUT OF THE USE OR INABILITY TO
USE THE SOFTWARE EVEN IF SYMANTEC HAS BEEN
ADVISED OF THE POSSIBILITY OF SUCH DAMAGES.
IN NO CASE SHALL SYMANTEC'S LIABILITY EXCEED
THE PURCHASE PRICE FOR THE SOFTWARE. The
disclaimers and limitations set forth above will apply
regardless of whether or not You accept the Software.
5. U.S. Government Restricted Rights:
RESTRICTED RIGHTS LEGEND. All Symantec products
and documentation are commercial in nature. The
software and software documentation are "Commercial
Items," as that term is defined in 48 C.F.R. section
2.101, consisting of "Commercial Computer Software"
and "Commercial Computer Software Documentation,"
as such terms are defined in 48 C.F.R. section 252.2277014(a)(5) and 48 C.F.R. section 252.227-7014(a)(1),
and used in 48 C.F.R. section 12.212 and 48 C.F.R.
section 227.7202, as applicable. Consistent with 48
C.F.R. section 12.212, 48 C.F.R. section 252.227-7015,
48 C.F.R. section 227.7202 through 227.7202-4, 48
C.F.R. section 52.227-14, and other relevant sections of
the Code of Federal Regulations, as applicable,
Symantec's computer software and computer software
documentation are licensed to United States
Government end users with only those rights as
granted to all other end users, according to the terms
and conditions contained in this license agreement.
Manufacturer is Symantec Corporation, 20330 Stevens
Creek Blvd., Cupertino, CA 95014, United States of
America.
6. Export Regulation:
Certain Symantec products are subject to export
controls by the U.S. Department of Commerce (DOC),
under the Export Administration Regulations (EAR)
(see www.bxa.doc.gov). Violation of U.S. law is strictly
prohibited. You agree to comply with the requirements
of the EAR and all applicable international, national,
state, regional and local laws, and regulations,
including any applicable import and use restrictions.
Symantec products are currently prohibited for export
or re-export to Cuba, North Korea, Iran, Iraq, Libya,
Syria and Sudan or to any country subject to applicable
trade sanctions. Licensee agrees not to export, or reexport, directly or indirectly, any product to any
country outlined in the EAR, nor to any person or
entity on the DOC Denied Persons, Entities and
Unverified Lists, the U.S. Department of State's
Debarred List, or on the U.S. Department of Treasury's
lists of Specially Designated Nationals, Specially
Designated Narcotics Traffickers, or Specially
Designated Terrorists. Furthermore, Licensee agrees
not to export, or re-export, Symantec products to any
military entity not approved under the EAR, or to any
other entity for any military purpose, nor will it sell
any Symantec product for use in connection with
chemical, biological, or nuclear weapons or missiles
capable of delivering such weapons.
7. General:
If You are located in North America or Latin America,
this Agreement will be governed by the laws of the
State of California, United States of America.
Otherwise, this Agreement will be governed by the
laws of England and Wales. This Agreement and any
related License Module is the entire agreement
between You and Symantec relating to the Software
and: (i) supersedes all prior or contemporaneous oral
or written communications, proposals, and
representations with respect to its subject matter; and
(ii) prevails over any conflicting or additional terms of
any quote, order, acknowledgment, or similar
communications between the parties. This Agreement
shall terminate upon Your breach of any term
contained herein and You shall cease use of and
destroy all copies of the Software. The disclaimers of
warranties and damages and limitations on liability
shall survive termination. Software and
documentation is delivered Ex Works California, U.S.A.
or Dublin, Ireland respectively (ICC INCOTERMS 2000).
This Agreement may only be modified by a License
Module that accompanies this license or by a written
document that has been signed by both You and
Symantec. Should You have any questions concerning
this Agreement, or if You desire to contact Symantec
for any reason, please write to: (i) Symantec Customer
Service, 555 International Way, Springfield, OR 97477,
U.S.A., (ii) Symantec Enterprise Customer Service, PO
BOX 5689, Dublin 15, Ireland, or (iii) Symantec
Customer Service, 1 Julius Ave, North Ryde, NSW 2113,
Australia.
8. Additional Restrictions for Specified
Software:
A. If the Software You have licensed is a specified
Symantec AntiVirus(tm) for a corresponding third
party product or platform, You may only use that
specified Software with the corresponding product or
platform. You may not allow any computer to access
the Software other than a computer using the specified
product or platform. In the event that You wish to use
the Software with a certain product or platform for
which there is no specified Software, You may use
Symantec AntiVirus Scan Engine.
B. If the Software you have licensed is Symantec
AntiVirus utilizing Web Server optional licensing as
set forth in the License Module, the following
additional use(s) and restriction(s) apply:
i) You may use the Software only with files that are
received from third parties through a web server;
ii) You may use the Software only with files received
from less than 10,000 unique third parties per month;
and
iii) You may not charge or assess a fee for use of the
Software for Your internal business.
C. If the Software You have licensed is Symantec
AntiVirus Corporate Edition, You may not use the
Software on or with devices on Your network running
embedded operating systems specifically supporting
network attached storage functionality without
separately licensing a version of such Software
specifically licensed for a specific type of network
attached storage device under a License Module.
D. If the Software You have licensed is Symantec Mail
Security for a corresponding third party product or
platform, You may only use that Software for the
corresponding product or platform. You may only use
the Software for the number of units (e.g., desktops,
mailboxes, nodes, servers, etc.) specified in the License
Module.
E. If the Software You have licensed is Symantec Client
Security, this Software utilizes the Standard Template
Library, a C++ library of container classes, algorithms,
and iterators. Copyright (c) 1996-1999. Silicon
Graphics Computer Systems, Inc. Copyright (c) 1994.
Hewlett-Packard Company.
8
Contents
Chapter 1
Introducing Symantec Mail Security for Microsoft Exchange
About Symantec Mail Security for Microsoft Exchange ............................... 15
Understanding mail security threats ....................................................... 16
What’s new in Symantec Mail Security ............................................................ 18
Components of Symantec Mail Security .......................................................... 19
How Symantec Mail Security works ................................................................. 19
What happens during a scan ...................................................................... 19
How Symantec Mail Security monitors events ....................................... 20
Types of scanning ........................................................................................ 21
Policies and subpolicies .............................................................................. 21
Filtering features ......................................................................................... 22
What you can do with Symantec Mail Security .............................................. 23
Protect against computer viruses ............................................................. 23
Filter undesirable message content and spam ........................................ 24
Safeguard the email security system ........................................................ 25
Manage virus outbreaks .............................................................................. 25
Isolate infected attachments ..................................................................... 25
Keep virus protection up-to-date .............................................................. 26
Gather and report data ............................................................................... 26
Send notifications when a threat or violation is detected ..................... 27
Manage single and multiple Exchange servers ....................................... 27
Using Symantec Mail Security with other Symantec products .................... 28
Where to get more information about Symantec Mail Security .................. 29
Chapter 2
Installing Symantec Mail Security for Microsoft Exchange
Before you install ................................................................................................. 31
Before installing on an Exchange server .................................................. 33
Before you install the multiserver console .............................................. 33
Server component locations ...................................................................... 34
Console component locations .................................................................... 34
Start menu shortcuts .................................................................................. 35
System requirements .......................................................................................... 36
Security and access permissions ....................................................................... 36
User group assignments and setup ........................................................... 37
10 Contents
Installing on a single server ............................................................................... 37
Installing or renewing a license file .......................................................... 39
Installing on multiple servers ........................................................................... 40
Installing the Symantec Mail Security for Microsoft Exchange
console ................................................................................................... 40
Installing Symantec Mail Security on remote servers ........................... 42
Installing or renewing a license file to remote servers ......................... 44
Customizing the installation of remote servers ..................................... 46
Upgrading from a previous version .......................................................... 47
Installing to Exchange servers with Microsoft Clustering Service ...... 48
Uninstalling Symantec Mail Security ....................................................... 48
Implementing SSL ............................................................................................... 49
Enabling event forwarding to SESA ................................................................. 50
SESA components ........................................................................................ 50
Installing the SESA Integration Package on the SESA Manager ......... 51
Verifying the SESA installation ................................................................ 53
Installing the SESA Agent manually ........................................................ 54
Uninstalling the SESA Agent ..................................................................... 56
Uninstalling the SESA Integration Package ............................................ 57
After you install ................................................................................................... 58
Accessing the single-server user interface ...................................................... 59
Single-server panel components ............................................................... 59
About the Symantec Mail Security for Microsoft Exchange console user
interface ........................................................................................................ 60
Making selections in the multiserver console ......................................... 61
Displaying individual servers .................................................................... 62
Configuring and running scans ................................................................. 62
Chapter 3
Managing multiple server installations
About the multiserver console .......................................................................... 65
Global server group ..................................................................................... 66
User-defined server groups ........................................................................ 66
Reconfiguring settings ................................................................................ 67
Contents
Managing servers and server groups ............................................................... 67
Creating a server group .............................................................................. 67
Adding servers to a group .......................................................................... 68
Moving a server to another group ............................................................. 69
Changing the TCP port and using SSL ...................................................... 70
Sending group settings to a server ........................................................... 70
Restoring default settings to a server group ........................................... 71
Restoring default settings to a server ...................................................... 71
Deleting a server group ............................................................................... 71
Updating servers in a server group ........................................................... 72
Removing a server from console management ....................................... 72
Installing Symantec Mail Security to remote servers .................................... 73
Updating and distributing virus definitions ................................................... 74
Running a manual scan on a server group ...................................................... 75
Viewing status information ............................................................................... 76
Chapter 4
Configuring Symantec Mail Security for Microsoft Exchange
About configuring Symantec Mail Security .................................................... 79
Configuration settings ................................................................................ 80
Securing your network ....................................................................................... 82
Protecting against denial-of-service attacks ........................................... 82
Determining inbound/outbound settings ................................................ 83
Using Bloodhound heuristics technology ................................................ 83
Maximizing bandwidth for scanning ........................................................ 84
Protecting your system from spam ................................................................... 85
Blocking by real-time blacklists ................................................................ 85
Identifying suspected spam messages using the heuristic anti-spam
engine .................................................................................................... 86
Understanding SCL values ......................................................................... 86
Bypassing RBL blocking and heuristic detection for sender and
recipient white lists ............................................................................. 88
Configuring settings to handle an outbreak .................................................... 89
Monitoring Symantec Mail Security functionality ........................................ 94
Configuring the HeartBeat settings .......................................................... 94
Configuring notifications and alerts ................................................................ 95
Configuring automatic virus protection .......................................................... 97
Isolating email messages that contain viruses ............................................... 97
Configuring report data settings .....................................................................100
11
12 Contents
Chapter 5
Establishing policies
About policies ..................................................................................................... 103
How policies work with scan jobs .................................................................... 104
Policy settings and scanning ................................................................... 105
Switching policies ...................................................................................... 105
Understanding the Standard Policy and custom policies ........................... 106
Using the Standard Policy ........................................................................ 106
Customizing policies ................................................................................. 107
Working with subpolicies ................................................................................. 109
How subpolicy rules work ........................................................................ 111
Working with virus subpolicies ............................................................... 112
Working with filtering subpolicies ......................................................... 115
Elements of a filtering rule ...................................................................... 117
DOS wildcard style expressions .............................................................. 119
Regular expressions .................................................................................. 120
Examples of regular expressions that filter mail ................................. 122
Setting an Exception subpolicy ............................................................... 124
Unscannable file rule ................................................................................ 124
Unrepairable file rule ................................................................................ 125
Encrypted file rule ..................................................................................... 125
Working with Match List settings ................................................................... 125
Outbreak Triggered Attachment Names and Subject Lines Match List
options ......................................................................................................... 127
Chapter 6
Using content filtering dictionaries
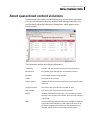
About dictionary-based content filtering ...................................................... 129
How content filtering dictionaries work ........................................................ 130
Content dictionaries .................................................................................. 130
Symantec dictionary categories .............................................................. 131
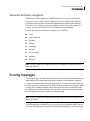
Scoring messages ............................................................................................... 131
Matching words and evaluating content ............................................... 132
Base and bonus scores ............................................................................... 132
Building custom categories and words ................................................... 133
Selecting and configuring content filtering dictionaries ............................ 134
About quarantined content violations ........................................................... 137
Chapter 7
Using Symantec Mail Security for Microsoft Exchange data
Viewing Auto-Protect statistics ....................................................................... 139
Single-server and multiserver statistics ................................................ 141
Viewing spam statistics .................................................................................... 141
Working with event data .................................................................................. 142
Contents
Working with report data .................................................................................143
Working with report templates ...............................................................143
Generating and viewing reports ..............................................................144
Saving report data .....................................................................................145
Viewing events in the Windows Event Log ....................................................146
Chapter 8
Maintaining virus protection
How Symantec Mail Security detects and prevents viruses .......................147
About virus definitions files .....................................................................148
About LiveUpdate ......................................................................................148
Configuring your Internet connection for virus definitions updates ........149
Keeping your virus protection current ...........................................................149
Updating virus definitions for a single server ......................................149
Updating virus definitions for multiple servers ...................................150
Setting up your own LiveUpdate server .........................................................152
Chapter 9
Managing virus outbreaks
About outbreak management ..........................................................................153
Defining outbreak triggers ...............................................................................153
Creating a virus outbreak trigger ............................................................154
Creating a heuristic outbreak trigger .....................................................156
Enabling Outbreak Management .............................................................158
Clearing outbreak notifications ...............................................................158
Frequency of outbreak item .............................................................................159
Index
13
14 Contents
Chapter
1
Introducing Symantec Mail
Security for Microsoft
Exchange
This chapter includes the following topics:
■
About Symantec Mail Security for Microsoft Exchange
■
What’s new in Symantec Mail Security
■
Components of Symantec Mail Security
■
How Symantec Mail Security works
■
What you can do with Symantec Mail Security
■
Using Symantec Mail Security with other Symantec products
■
Where to get more information about Symantec Mail Security
About Symantec Mail Security for Microsoft
Exchange
Symantec Mail Security for Microsoft® Exchange protects your Exchange mail
servers from viruses, messages that overload the system, inappropriate
Symantec Mail Security for Microsoft Exchange message content, spam, and
denial-of-service attacks. It lets you create and save multiple sets of criteria to
identify threats and violations, and it lets you specify the actions to take (and
notifications and alerts to issue) when a threat or violation is detected. You can
configure the Symantec Mail Security console to manage one or more Exchange
servers.
16 Introducing Symantec Mail Security for Microsoft Exchange
About Symantec Mail Security for Microsoft Exchange
The Exchange environment is only one avenue by which a virus can penetrate a
network. For complete virus protection, ensure that every computer and
workstation is protected by an antivirus solution.
Understanding mail security threats
Mail security is the protection of email servers from threats that originate from
various sources, including the following:
■
Computer viruses, Trojan horses, and mass-mailers
■
Messages that overload the system
■
Inappropriate message content
■
Spam
■
Denial-of-service attacks
Computer viruses, Trojan horses, and mass-mailers
A computer virus is a program that, when run, attaches a copy of itself to
another computer program or document. Whenever the infected program is run
or the document is opened, the attached virus program is activated and attaches
itself to other programs and documents.
In addition to replicating, a virus is generally programmed to deliver a payload
(a destructive action performed on the infected computer). Most viruses display
a message on a trigger date. Some, however, are programmed to damage data by
corrupting programs, deleting files, or reformatting disks.
The following classes of viruses present the greatest threats in the email
environment:
■
Macro viruses: Infect word processing and spreadsheet documents
■
Program viruses: Infect executable files
The viruses spread as email attachments that are routed through the mail
servers.
Trojan horses are malicious programs that are disguised as useful programs,
such as utilities or games. An important distinction between Trojan horses and
viruses is that Trojan horses do not replicate themselves. When you install and
run a Trojan horse, it appears to be performing a helpful function, while it is
actually damaging your computer’s operating system.
Mass-mailers are programs that propagate from computer to computer, often by
placing copies of themselves in each computer’s memory. Macro viruses usually
exist inside of other files, such as Microsoft Word or Excel documents. A mass-
Introducing Symantec Mail Security for Microsoft Exchange
About Symantec Mail Security for Microsoft Exchange
mailer can replicate itself many times on one computer, which causes the
computer to crash.
Messages that overload the system
Some viruses and types of email messages can overload the mail system, which
causes severe degradation of system performance. For example, some viruses
are designed to replicate a message to all of the entries in an address book.
Messages with large attachments can also overload the mail system.
Inappropriate message content
Some types of email messages can be legal liabilities, contain offensive content,
or be a nuisance, such as the following:
■
Inappropriate content, such as gambling Web sites or sites of an explicit
sexual nature
■
Confidential company information or trade secrets, for example, the use of
project code words and technology names to recipients outside of the
company
■
References to topics that are currently in litigation that should not be
discussed, or messages with potential legal liabilities
You can create rules to filter messages for inappropriate content.
See “Working with filtering subpolicies” on page 115.
Spam
Spam is unsolicited bulk email, most often advertising messages for a product or
service. It wastes productivity time and network bandwidth. Symantec Mail
Security handles spam in the following ways:
■
Block by real-time blacklists (RBLs)
■
Identify suspected spam using the heuristic anti-spam engine
■
Create spam content filtering rules to identify spam
See “Protecting your system from spam” on page 85.
Denial-of-service attacks
Threats to your Microsoft Exchange servers can include attacks that hamper or
disable the ability to send or receive email messages and, in some cases,
completely disable the email server. These attacks are called denial-of-service
attacks.
17
18 Introducing Symantec Mail Security for Microsoft Exchange
What’s new in Symantec Mail Security
Denial-of-service attacks can occur in many ways, including the following:
■
A very large number of messages from one or many locations
■
Messages that are designed to attack the buffer characteristics of the email
program by exploiting program weaknesses
■
Files that are designed to fill disk space on the mail servers
■
Messages with huge attachments that are distributed to everyone in the
organization.
This type of attack can be intentional or unintentional (such as an employee
sending a message with large graphics attachments to a large distribution
list).
What’s new in Symantec Mail Security
Syamantec Mail Security for Microsoft Exchange has the following new and
enhanced features:
■
Heuristic anti-spam detection: The heuristic anti-spam component
examines all incoming email messages for key spam characteristics, weighs
the findings against key characteristics of legitimate email, and assigns a
spam confidence level (SCL).
■
Multiple spam disposition options: Based on the SCL, email messages can be
handled in a variety of ways to give maximum flexibility in handling a
message.
■
Spam statistics: Spam statistics can be presented in a variety of ways (such
as messages sent by domain) to let you analyze data to better manage your
environment.
For example, you can use the information from the statistics to populate the
blacklist in Exchange and the whitelist in Symantec Mail Security.
■
Real-time blacklist (RBL) support (known in previous versions as DNSBL
blocking): RBL blocking works by denying mail servers access to your system
if those servers have been identified as allowing spam to originate or relay
through them. Symantec Mail Security refuses the connection attempt of
mail servers that are identified on RBLs that you have configured the
product to recognize. You must subscribe to the third-party real-time
blacklist providers before configuring Symantec Mail Security to perform
RBL blocking.
■
Sender white listing: Sender whitelisting lets you set up a list of senders
whose messages do not undergo RBL or heuristic anti-spam processing,
which minimizes processing time.
Introducing Symantec Mail Security for Microsoft Exchange
Components of Symantec Mail Security
■
Recipient whitelisting: Recipient whitelisting lets you set up a list of
recipients to whom messages that are sent do not undergo RBL or heuristic
anti-spam processing. This minimizes processing time and eliminates false
positives for the specified recipients.
■
Enhanced Exchange 2003 support: This version supports the recently
enhanced features of Exchange 2003, including the new VSAPI 2.5 and the
new SCL method of categorizing spam messages.
Components of Symantec Mail Security
Table 1-1 lists the components of Symantec Mail Security for Microsoft
Exchange.
Table 1-1
Software components
Component
Description
Symantec Mail
Security for
Microsoft Exchange
This is the software that you install to protect your Exchange
servers. It protects your servers from viruses, messages that
overload the system, inappropriate message content, spam, and
denial-of-service attacks.
Adobe® Acrobat®
Reader®
This is the software that makes it possible to read documentation
in Portable Document Format (.pdf).
How Symantec Mail Security works
In a typical configuration, Symantec Mail Security for Microsoft Exchange scans
documents (message headers, bodies, and attachments) that are sent to
mailboxes and public folders on Exchange servers. It scans first for spam (when
heuristic settings are configured), and then for content filtering rules and
viruses based on configuration settings. When a violation is detected or if a scan
error occurs, Symantec Mail Security stops scanning and handles the document
based on the scanning configuration settings. When you create a Filtering
subpolicy and apply it to a scan, items that you specify are matched against
message contents and attributes. Attributes include the sender, subject,
attachment file name, and attachment file size.
What happens during a scan
When you perform standard scans, Symantec Mail Security first decodes and
decompresses files, and then scans them for viruses using a virus definitions file
of known virus signatures. The virus definitions file contains nonmalicious bits
of code, or virus definitions, for thousands of viruses. If Symantec Mail Security
19
20 Introducing Symantec Mail Security for Microsoft Exchange
How Symantec Mail Security works
finds a match, the file is considered infected, and the document is handled
according to the scanning configuration settings (repair, delete, quarantine, or
log and deliver).
Symantec Mail Security also uses Symantec Bloodhound heuristics technology
to scan for viruses for which no known definitions exist. Bloodhound heuristics
technology scans for unusual file behaviors, such as self-replication, to target
potentially infected files.
How Symantec Mail Security monitors events
Symantec Mail Security uses a heartbeat function (optional setting) that
monitors scan threads to ensure that they are working. When problems occur,
Symantec Mail Security posts the events to the Windows Event Log. You can
also configure Symantec Mail Security to post events to the Symantec
Enterprise Security Architecture (SESA) DataStore, an event management
system that uses data collection services for events that Symantec and
supported third-party products generate.
Symantec Mail Security sends a subset of security and application events to
SESA. The events that Symantec Mail Security generates include failed virus
definitions updates and unscannable files.
See “Enabling event forwarding to SESA” on page 50.
For more information about SESA, see the Symantec Enterprise Security
Architecture Installation Guide and the Symantec Enterprise Security
Architecture Administrator’s Guide.
Introducing Symantec Mail Security for Microsoft Exchange
How Symantec Mail Security works
Types of scanning
Table 1-2 lists the categories of scans, which are referred to as scan jobs
Table 1-2
Categories of scans
Category
Description
Auto-Protect scan
Viruses and other items that trigger violations are detected in
real time as messages are routed through the Exchange server.
Only one Auto-Protect scan job can run at a time.
Scheduled scan
Scans that run automatically according to a schedule. You can
run many scheduled scan jobs.
Manual scan
On-demand scans that administrators can run at any time. Only
one manual scan job can run at a time.
You must link a scan job to a policy in order for that policy to be implemented.
See “How policies work with scan jobs” on page 104.
Policies and subpolicies
A policy is comprised of rules for detecting and resolving security threats to
your Microsoft Exchange mail system. Policy rules belong to categories called
subpolicies. Each policy contains the following subpolicies:
Virus subpolicy
Contains rules for detecting known viruses and messages
and attachments with virus-like characteristics
Filtering subpolicy
Contains rules for specifying violations based on message
body content, attachment name, attachment size, sender
subject lines, and attachment and body content scores
Exception subpolicy
Contains rules for handling unscannable, unrepairable, and
encrypted files
Policies and scan jobs
A policy, which is assigned to a scan job, determines the types of threats that the
scan job identifies, the actions to take when a threat is detected, and how to
manage the email notifications about the threat.
Any Symantec Mail Security for Microsoft Exchange scan job can use one of the
following policies:
■
The Standard policy (default), which is designed to address the most
common email security threats
21
22 Introducing Symantec Mail Security for Microsoft Exchange
How Symantec Mail Security works
■
A custom policy, which covers unique situations, such as the following:
■
Scanning message archives during off-hours
■
Filtering content to protect confidential information
■
Detecting messages that contain a specific subject line
■
Taking action against messages that contain encrypted attachments
You can also change the policy that a scan job uses and apply a policy to more
than one scan job.
See “Understanding the Standard Policy and custom policies” on page 106.
Filtering features
The filtering features of Symantec Mail Security for Microsoft Exchange let you
do the following:
■
Use content dictionaries to search email messages and some types of
attachments for offensive language, confidential information, and content
with potential legal consequences.
Each message is scanned, and a score is calculated for the message based on
the number of target words that are detected. If the score exceeds a
threshold value, a rule violation is triggered. Symantec Mail Security
includes a default content dictionary, but you can supply your own
categories and words, for example, for confidential technologies.
The Symantec-supplied dictionary contains proprietary information and
cannot be viewed. However, you can create your own dictionary to ensure
that the words that you want to include (and the weight of those words) are
used for processing.
■
Identify spam messages to take action on.
■
Filter email messages based on attributes such as sender, subject,
attachment size, attachment name, and attachment and body content
scores.
■
Filter suspicious email attachments.
■
Create filtering rules that apply to SMTP inbound and SMTP outbound mail,
in addition to the Exchange Information Store.
■
Create match lists to use in filtering content. A filtering rule can refer to one
or more match lists. Match lists can consist of literal strings to match,
regular expressions, or DOS wildcard expressions.
Introducing Symantec Mail Security for Microsoft Exchange
What you can do with Symantec Mail Security
What you can do with Symantec Mail Security
Symantec Mail Security for Microsoft Exchange secures your Exchange servers
in the following ways:
■
Protect against computer viruses
■
Filter undesirable message content and spam
■
Safeguard the email security system
■
Manage virus outbreaks
■
Isolate infected attachments
■
Keep virus protection up-to-date
■
Gather and report data
■
Send notifications when a threat or violation is detected
■
Manage single and multiple Exchange servers
Protect against computer viruses
Symantec Mail Security for Microsoft Exchange scans message bodies and
attachments that are sent to mailboxes and public folders on Exchange servers,
including files in compressed and encoded formats, such as MIME and Zip.
The Auto-Protect feature detects viruses in real time as email messages are
routed through the Exchange server.
You can configure Symantec Mail Security to handle viruses as follows:
■
Repair infected attachments to eliminate viruses automatically on
detection.
■
Quarantine infected attachments for administrator review.
■
Delete message bodies and attachments and replace with text.
■
Deliver the email message, but log the virus detection.
■
Delete the entire message.
■
Log the detection, and make the message unavailable.
23
24 Introducing Symantec Mail Security for Microsoft Exchange
What you can do with Symantec Mail Security
Filter undesirable message content and spam
Symantec Mail Security for Microsoft Exchange lets you filter undesirable
content and spam with the following:
■
Match lists
To filter content that applies to a specific situation, you can create a match
list that includes words and phrases that are standard for or particular to
your company or industry, and for which you may want to filter content.
After you create a Match List, you can define a filtering rule that specifies
the Match List. A filtering rule can refer to one or more match lists. Match
lists can consist of literal strings to match, regular expressions, or DOS
wildcard expressions.
See “Working with Match List settings” on page 125.
■
Content filtering rules
Create filtering rules that apply to SMTP inbound and SMTP outbound mail,
in addition to the Exchange Information Store. The Filtering subpolicy
contains rules that let you filter messages for specific words, phrases,
subject lines, and senders, and take action when the specified content is
found.
See “Working with filtering subpolicies” on page 115.
■
Dictionary-based content filtering
Use content dictionaries to search email messages and some types of
attachments for offensive language, confidential information, and content
with potential legal consequences.
Each message is scanned, and a score is calculated for the message based on
the number of target words that are detected. If the score exceeds a
threshold value, a rule violation is triggered. Symantec Mail Security
includes a default content dictionary, but you can supply your own
categories and words, for example, for confidential technologies.
The Symantec-supplied dictionary contains proprietary information and
cannot be viewed. However, you can create your own dictionary to ensure
that the words that you want to include (and the weight of those words) are
used for processing.
See “Content dictionaries” on page 130.
Introducing Symantec Mail Security for Microsoft Exchange
What you can do with Symantec Mail Security
Safeguard the email security system
Symantec Mail Security for Microsoft Exchange protects against denial-ofservice attacks by isolating the scanning process and running it separately. If a
scan is unsuccessful more than once or takes longer than a specified time limit,
the scan quits and the file is considered unscannable.
See “Unscannable file rule” on page 124.
Manage virus outbreaks
A virus outbreak occurs when the number of threats to the Microsoft Exchange
system that are detected over a period of time exceeds a specified limit.
Symantec Mail Security for Microsoft Exchange lets you manage outbreaks
quickly and effectively by setting outbreak rules and sending notifications and
alerts when an outbreak is detected. You can also select an action to take when
an outbreak is detected, such as delete the entire message, log the event, or
quarantine the attachment or message body.
You can set rules to define an outbreak based on event (same virus occurs a
specified number of times, total number of viruses, or number of unrepairable
viruses), occurrences (the number of times that the event occurs), attachment
name and subject line, and time period (the number of minutes, hours, or days
within which the event and occurrences happen). You can configure Symantec
Mail Security to send notifications and alerts in the case of an outbreak.
Once an outbreak based on subject line or attachment name is detected, a rule
can be created to prevent the same mail from clogging the system.
See “About outbreak management” on page 153.
Isolate infected attachments
Symantec Mail Security for Microsoft Exchange includes a Quarantine that
stores infected attachments that are detected during scans.
Attachments are placed in the Quarantine under the following circumstances:
■
A virus is detected in an attachment and your scan is configured to withhold
delivery of the attachment rather than let Symantec Mail Security for
Microsoft Exchange repair or delete the infected attachment.
■
Your scan is configured to let Symantec Mail Security for Microsoft
Exchange repair infected attachments, and Quarantine is selected for the
attachments that cannot be repaired. Sometimes attachments cannot be
properly repaired because they are corrupted or damaged by a virus that
causes irreversible damage.
25
26 Introducing Symantec Mail Security for Microsoft Exchange
What you can do with Symantec Mail Security
■
If an item cannot be scanned, it is quarantined by default. For example,
some highly compressed files are designed to defeat mail security by
overwhelming the scanner.
Quarantined items can also be forwarded to the Symantec Central Quarantine if
it is installed. The Symantec Central Quarantine setup program is available on
the Symantec Mail Security for Microsoft Exchange CD.
See “Isolating email messages that contain viruses” on page 97.
For more information, see the Symantec Central Quarantine documentation.
Keep virus protection up-to-date
Symantec Mail Security for Microsoft Exchange relies on up-to-date
information to detect and eliminate viruses. One of the most common reasons
that virus problems occur is that virus definitions files are not updated
regularly. Symantec regularly supplies updated virus definitions files that
contain information about all newly discovered viruses.
Note: Virus definitions are shared with Symantec AntiVirus Corporate Edition.
Using LiveUpdate, Symantec Mail Security for Microsoft Exchange connects to
the LiveUpdate server and automatically determines if virus definitions need
updating. If they do, the files are downloaded to the proper location and
installed.
See “Updating virus definitions for a single server” on page 149.
See “Updating virus definitions for multiple servers” on page 150.
Gather and report data
Symantec Mail Security for Microsoft Exchange gathers and reports on the
following types of data:
■
Statistics and report data
■
Event log data
■
Server request information
Statistics and report data
Symantec Mail Security for Microsoft Exchange collects and saves scan data on
your Exchange servers. You can create reports from the data, which gives you a
history of virus activity and rule violations. You can download the raw data files
Introducing Symantec Mail Security for Microsoft Exchange
What you can do with Symantec Mail Security
that are generated by Symantec Mail Security for Microsoft Exchange for use
with third-party reporting tools.
See “Working with report data” on page 143.
Event log data
Symantec Mail Security for Microsoft Exchange logs virus, configuration, and
server events. It also logs content violations, spam violations (if enabled), and
outbreaks. You can customize the event log by specifying date ranges and
classes of events.
See “Working with event data” on page 142.
Server request information
For multiserver installations, the Symantec Mail Security for Microsoft
Exchange console reports on the status of requests made to Symantec Mail
Security for Microsoft Exchange managed servers. This lets administrators
track server communications and isolate the source of a server communication
problem.
See “Viewing status information” on page 76.
Send notifications when a threat or violation is detected
Symantec Mail Security for Microsoft Exchange supplies several options for
notifying administrators and email senders of threats and for issuing alerts. You
can send alerts to the Windows 2000 Server/2003 Server Event Log and to the
Symantec Alert Management System (AMS) server (if Symantec AntiVirus
Corporate Edition is installed). AMS is a Symantec AntiVirus Corporate Edition
component that supports SNMP alerts from computers that are running AMS
server and client. The Symantec AMS server is included on the Symantec Mail
Security for Microsoft Exchange CD.
You can also create secondary, follow-up notifications.
See “Configuring notifications and alerts” on page 95.
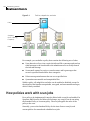
Manage single and multiple Exchange servers
Symantec Mail Security for Microsoft Exchange can protect one or more
Exchange servers.
If your organization has multiple Exchange servers, you can manage the servers
individually from the single-server interface that is installed on each computer,
27
28 Introducing Symantec Mail Security for Microsoft Exchange
Using Symantec Mail Security with other Symantec products
or you can manage all of the servers centrally from a multiserver console. You
can also access each server interface from the console.
Single-server user interface
The single-server user interface is hosted by IIS (Internet Information Server).
Every Microsoft Exchange server on which Symantec Mail Security for
Microsoft Exchange is installed contains an instance of the single-server user
interface. You can access the single-server user interface from the local server,
from the console, or from any remote server that is running Internet Explorer
and has external access and a firewall that is configured to provide access.
Multiserver console
The Symantec Mail Security for Microsoft Exchange console, or multiserver
console, provides central management of multiple Exchange servers that are
running Symantec Mail Security for Microsoft Exchange. You can manage
remote servers if the following conditions are met:
■
You can access the server by HTTP or HTTPS across the network, including
through any firewall or router that exists on the network. The default port
number is 8081.
■
The computer satisfies all of the operating system and service pack
requirements.
Using the Symantec Mail Security for Microsoft Exchange console reduces
administrative overhead because you change the settings for groups of servers
at once rather than making individual settings changes at each server. You can
organize servers into administrative groups based on organizational categories
or mail functions.
Base your decision of whether to use the console on an assessment of the
benefits that it provides.
See “About the multiserver console” on page 65.
Using Symantec Mail Security with other Symantec
products
If the Symantec AntiVirus Corporate Edition client is installed on a server that is
running Symantec Mail Security for Microsoft Exchange, you can share virus
definitions between products. You can also roll out virus definitions to
individual servers that are running Symantec Mail Security (provided that both
Introducing Symantec Mail Security for Microsoft Exchange
Where to get more information about Symantec Mail Security
products have current licenses). This eliminates the overhead of making
multiple connections to update virus definitions.
If your organization has the Symantec Central Quarantine Server installed on
the same network as Symantec Mail Security for Microsoft Exchange, you can
forward items that were quarantined by Symantec Mail Security for Microsoft
Exchange to the Symantec Central Quarantine Server. Quarantine Server Setup
is available on the Symantec Mail Security for Microsoft Exchange CD. Install
the Symantec Central Quarantine Server separately.
For more information about usage and installation, see the Symantec Central
Quarantine Server documentation.
See “Isolating email messages that contain viruses” on page 97.
Where to get more information about Symantec
Mail Security
Symantec Mail Security for Microsoft Exchange includes a comprehensive Help
system that contains conceptual, procedural, and context-sensitive information.
Use the Help button at the bottom of the right pane to access information about
the pane in which you are working. If you want more information about features
that are associated with the pane, select a Related Topics link in the Help pane,
or use the Table of Contents, Index, or Search tabs in the Help viewer to locate a
topic.
If there are procedures that are associated with a feature or topic, the How To
folder for the Help topic is displayed. Click that folder to display the procedures.
If you are connected to the Internet, you can visit the Symantec Security
Response Web site to view the Virus Encyclopedia, which contains information
about all known viruses; find out about virus hoaxes; and read white papers
about viruses and virus threats in general.
To access the Symantec Security Response Web site
◆
On the Internet, go to www.securityresponse.symantec.com
29
30 Introducing Symantec Mail Security for Microsoft Exchange
Where to get more information about Symantec Mail Security
Chapter
2
Installing Symantec Mail
Security for Microsoft
Exchange
This chapter includes the following topics:
■
Before you install
■
System requirements
■
Security and access permissions
■
Installing on a single server
■
Installing on multiple servers
■
Implementing SSL
■
Enabling event forwarding to SESA
■
After you install
■
Accessing the single-server user interface
■
About the Symantec Mail Security for Microsoft Exchange console user
interface
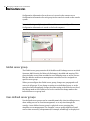
Before you install
You can use Symantec Mail Security for Microsoft Exchange to monitor mail
security on one or more Exchange servers.
Before installing Symantec Mail Security, ensure that all preinstallation and
system requirements are satisfied. Review the information that describes where
32 Installing Symantec Mail Security for Microsoft Exchange
Before you install
key files are located and how security is set up. In addition, ensure that you have
an installation plan that best matches your organization’s needs.
See “System requirements” on page 36.
See “Server component locations” on page 34.
See “Security and access permissions” on page 36.
If you are installing Symantec Mail Security on a single Exchange server, follow
the instructions for a single-server installation. You do not need to install a
separate console application.
See “Installing on a single server” on page 37.
If your organization is running multiple Exchange servers, you can manage
Symantec Mail Security from the Symantec Mail Security for Microsoft
Exchange console. To do so, install the multiserver console, which is a separate
component, and then use the console to roll out the product installations to your
Exchange servers.
See “Installing on multiple servers” on page 40.
If your organization has only one Exchange server, use the single-server user
interface to manage Symantec Mail Security.
If your organization has several servers that are running Symantec Mail
Security, you should evaluate whether to manage each installation of Symantec
Mail Security individually, using the single-server user interface, or whether to
manage installations of Symantec Mail Security at a group level, using the
multiserver console.
Consider the guidelines in Table 2-1 when deciding whether to use the
multiserver console or the single-server user interface.
Table 2-1
Guidelines for managing installations
Network environment
Recommendation
Manage the servers individually using the single-server
A small number (1-3) of
user interface.
Exchange servers, and mail
server growth is not expected
An Exchange cluster that
runs under Microsoft
Clustering Service
Use the multiserver console.
A small number of Exchange
servers, but future mail
server growth is expected
You can install and use the multiserver management
console at a later date. However, because you expect
future mail server growth, you could begin using the
multiserver console now, and add servers and server
groups as they are installed and activated.
Installing Symantec Mail Security for Microsoft Exchange
Before you install
Table 2-1
Guidelines for managing installations
Network environment
Recommendation
Many Exchange servers, or
Exchange servers at several
locations
Install and use the multiserver management console,
which will simplify the management of mail security
across the enterprise. Create administrative groups for
the Exchange servers, so that mail servers for a particular
organizational or mail function can be managed together.
Before installing on an Exchange server
Review the following information before you install Symantec Mail Security for
Microsoft Exchange on a Microsoft Exchange server:
■
Verify that Microsoft Exchange 2000 with Service Pack 3 or Microsoft
Exchange 2003 is installed.
■
Verify the IP address and port number of the Symantec Mail Security Web
site for all servers on which you install the product.
Note: To install Symantec Mail Security components correctly, you must be
logged on as a Windows domain administrator.
Before you install the multiserver console
If your organization is using multiple Microsoft Exchange servers and you want
to manage mail security from the Symantec Mail Security for Microsoft
Exchange console (multiserver console), you should have an implementation
plan that includes the following information:
■
The server names and total number of Exchange servers on which you plan
to install Symantec Mail Security.
■
The number of servers on which you plan to add future installations of
Symantec Mail Security.
■
How you plan to group your Exchange servers for email security
management by the multiserver console.
One way to group servers and manage them is by location. For example, if
your Exchange servers are located in Chicago, New York City, and San
Francisco, you could create a Chicago server group, a New York server
group, and a San Francisco server group.
33
34 Installing Symantec Mail Security for Microsoft Exchange
Before you install
Server component locations
By default, Symantec Mail Security for Microsoft Exchange server components
are installed in the following locations:
■
C:\Program Files\Symantec\SMSMSE\4.5\Server
Symantec Mail Security program files
■
C:\Program Files\Symantec\SMSMSE\4.5\Server\AMS
AMS alert files
■
C:\Program Files\Symantec\SMSMSE\4.5\Server\Downloads
Symantec Mail Security report files in comma-delimited file (.csv) format
■
C:\Program Files\Symantec\SMSMSE\4.5\Server\Quarantine
Quarantined items in encrypted format
■
C:\Program Files\Symantec\SMSMSE\4.5\Server\Reports
Reporting data
■
C:\Program Files\Symantec\SMSMSE\4.5\Server\root
User interface files
■
C:\Program Files\Symantec\SMSMSE4.5\Server\temp
Location where Symantec Mail Security scans items
Note: You should configure all antivirus file system scanners to exclude
scanning of the temp directory. Those system scanners may try to scan and
delete Symantec Mail Security files that are placed in the temporary
directory during its scanning process.
■
C:\Program Files\Symantec\LiveUpdate
Component to update virus definitions
■
C:\Program Files\Common Files\Symantec Shared\VirusDefs
Symantec directory to which new virus definitions are installed
■
C:\Program Files\Common Files\Symantec Shared\License
Symantec directory in which license files are stored
Console component locations
By default, Symantec Mail Security for Microsoft Exchange multiserver console
components are installed in the following locations:
■
C:\Program Files\Symantec\SMSMSE\4.5\Console
Multiserver console program files
Installing Symantec Mail Security for Microsoft Exchange
Before you install
■
C:\Program Files\Symantec\SMSMSE\4.5\Console\EventLogs
Symantec Mail Security Event Log files and data
■
C:\Program Files\Symantec\SMSMSE\4.5\Console\Remote Install Files
Files used for rolling out Symantec Mail Security to remote servers;
contains the remote install Setup.iss file used for rolling out custom
installations of Symantec Mail Security
■
C:\Program Files\Symantec\SMSMSE\4.5\Console\ReportDownloads
Downloaded console report data files
■
C:\Program Files\Symantec\LiveUpdate
Component to update virus definitions
■
C:\Program Files\CommonFiles\Symantec Shared\VirusDefs
Symantec directory to which new virus definitions are installed
■
C:\Program Files\Symantec\License
Symantec directory to which license files are installed
■
C:\Documents and Settings\All Users\Application
Data\Symantec\SMSMSE\4.5\Console
Directory for user interface files
Start menu shortcuts
Shortcuts are placed in the following Windows Start menu groups:
■
Symantec MS for Microsoft Exchange
Symantec Mail Security for Exchange: Launch the Symantec Mail Security
single-server user interface. The single-server user interface is also
available from a desktop shortcut.
Run LiveUpdate: Update virus definitions on the local server immediately.
■
Symantec MS Console for Exchange
Symantec MS 4.5 Console for Exchange: Launch the Symantec Mail Security
multiserver console (if the Symantec Mail Security for Microsoft Exchange
console is installed). The multiserver console is also available from a
desktop shortcut.
In addition, a LiveUpdate properties control panel is placed in the Windows
Control Panel group to manually configure the LiveUpdate connection method,
if necessary.
35
36 Installing Symantec Mail Security for Microsoft Exchange
System requirements
System requirements
Symantec Mail Security for Microsoft Exchange runs on Microsoft Windows
2000 and 2003 on the Intel platform. You must have domain administrator-level
privileges to install Symantec Mail Security.
The server system requirements are as follows:
Operating system
Exchange platform
Minimum system requirements
■
Windows 2000 Server/Advanced Server (SP4)
■
Windows Server 2003 Standard/Enterprise
■
Exchange 2000 (SP3) Server/Enterprise Server
■
Exchange 2003 Server/Enterprise Server
■
Intel® Server class 32-bit processor
■
512 MB RAM
■
190 MB available disk space for installation
■
260 MB available disk space for remote
installation
■
Microsoft Internet Explorer 6.0
The multiserver console system requirements are as follows:
■
Windows 2000 (SP4)/XP/2003
■
140 MB available disk space for Mail Security Console installation
■
Microsoft Management Console (MMC) 1.2
■
Microsoft Internet Explorer 6.0
Note: To manage Symantec Mail Security using the multiserver console, all
Symantec Mail Security servers must be in the same domain as the console. You
should use the multiserver console whenever more than one server has the same
settings.
Security and access permissions
By default, Symantec Mail Security for Microsoft Exchange creates the following
user groups and assigns them access rights:
■
SMSMSE Admins: Read and write access to all Symantec Mail Security
components and features.
Users in this group can change settings for Symantec Mail Security through
the user interface. A Windows 2000 Server/2003 Server administrator-level
account is not necessary for an SMSMSE Admin account.
Installing Symantec Mail Security for Microsoft Exchange
Installing on a single server
■
SMSMSE Viewers: Read-only access to Symantec Mail Security components
and features.
Users in this group cannot change settings for Symantec Mail Security, but
can run reports, view event logs, and view settings through the user
interface.
These user groups are domain-wide for Active Directory. Use the Active
Directory Users and Computers MMC snap-in to change membership in these
groups.
During the security set-up process, security is set for the Symantec Mail
Security registry key and file folders.
Note: For the security setup to succeed, you must have administrator access to
the local servers and domain administrator rights.
User group assignments and setup
You are automatically added to the SMSMSE Admins group when you set up a
single Symantec Mail Security server. If you do not already belong to the
SMSMSE Admins group, you are not automatically added to SMSMSE Admins
when you install remote servers using the multiserver management console.
Use the Active Directory Users and Computers MMC snap-in to verify and add
membership to SMSMSE Admins if necessary.
Installing on a single server
You can install Symantec Mail Security for Microsoft Exchange on a single
Microsoft Exchange server. If you plan to install Symantec Mail Security on
multiple servers, use the Symantec Mail Security for Microsoft Exchange
console instead.
See “Installing on multiple servers” on page 40.
Before you begin, you should review the preinstallation information.
See “Before installing on an Exchange server” on page 33.
To install on a single server
1
Start the Symantec Mail Security for Microsoft Exchange Setup program
(Setup.exe).
This file is located in the SMSMSE\Server folder on the product CD.
2
In the Symantec Mail Security for Microsoft Exchange Setup panel, click
Next.
37
38 Installing Symantec Mail Security for Microsoft Exchange
Installing on a single server
3
In the Setup Preview panel, click Next.
4
In the next Setup Preview panel, click Next.
5
In the Software License Agreement panel, click Yes.
6
In the Component Location panel, do one of the following, and then click
Next:
7
■
Verify that the default destination directory is appropriate (C:\Program
Files\Symantec\SMSMSE\4.5\Server).
■
Click Browse, and then select a different destination directory.
In the User Interface Server panel, verify or change the following values,
and then click Next:
■
IP/Name: By default, the computer name resolves to the primary
external network identification card (NIC). Alternatively, an IP address
can be used.
The IP address can be used to validate the availability of the port. The
user interface can be accessed through any IP address that is assigned
to the computer.
Port #: Port 8081 is the default port number for the Web site that is
used by Symantec Mail Security for Microsoft Exchange. If port 8081 is
being used by another application, a different default port number
appears.
If you change the port number, do not use a port number that is used by
another application, and do not use port 80. Port 80 is the port number
that is used by the default Web site, which is hosted by Microsoft
Internet Information Services (IIS).
After installation, instruct your administrators to point their browsers to
the computer or IP address and port to access Symantec Mail Security.
■
8
In the Notification Email Address panel, verify or change the address that is
used to send (not receive) notifications, and then click Next.
Type a valid Active Directory display name only.
9
In the Symantec Enterprise Security Architecture panel, do one of the
following, and then click Next:
■
If you do not want to log events to SESA, click No.
■
If you do want to log events to SESA, click Yes, and then type the IP
address of a SESA server.
10 In the Setup Summary panel, click Next.
The setup program installs and configures the software.
Installing Symantec Mail Security for Microsoft Exchange
Installing on a single server
11 In the Install Content License File panel, do one of the following:
■
Type the fully qualified path to the license file, and then click Next.
If the license file is located on another computer, you can specify a
mapped drive or UNC path.
■
Click Browse, select the license file, and then click Next.
If the license file is located on another computer, you can locate the file
using My Network Places.
■
Click Next to skip file selection and add the license information later
from the console.
See “Installing or renewing a license file” on page 39.
12 In the Setup Complete panel, select whether to view the Readme file and
Settings Summary, and then click Finish.
The Readme file contains information that is not available in the product
documentation. You can print the Settings Summary file, which lists the
Symantec Mail Security application settings.
Installing or renewing a license file
You must install a license file on each server that is running Symantec Mail
Security for Microsoft Exchange in order to activate a content license (to receive
the latest virus definition updates). To install a content license, you must have
the serial number that is required for activation. The serial number is listed on
your purchase certificate. The purchase certificate is mailed separately (or
emailed, if you requested that method when you purchased your software) and
arrives in the same time frame as your software. The serial number is used to
request a license file and to register for support. The format of a serial number is
a letter followed by 10 digits, for example: F2430482013.
After the license file is installed, content updating is enabled for the duration of
your maintenance contract. When a content license expires, a new license must
be installed to renew the subscription. When no license is installed, virus
definitions that are needed to keep protection current are not downloaded.
If you have questions about licensing, contact Symantec Customer Service at
800-721-3934 or your reseller to check the status of your order.
To install or renew a license file on a single server
1
Open Symantec Mail Security.
2
Expand Tasks.
3
Click Install/Renew License.
39
40 Installing Symantec Mail Security for Microsoft Exchange
Installing on multiple servers
4
If necessary, follow steps 1 and 2 of the Install/Renew Licenses panel to
request a license file from Symantec.
5
In step 3 of the Install/Renew Licenses panel, do one of the following:
6
■
Type the fully qualified path to the license file, and then click Next.
If the license file does not reside on the same computer, you can specify
a mapped drive or UNC path to the file.
■
Click Browse, select the license file, and then click Next.
If the License File does not reside on the same computer, you can locate
the file using My Network Places.
Click Install to install the license file to the server.
Installing on multiple servers
You can install Symantec Mail Security for Microsoft Exchange on multiple
Exchange servers by doing the following:
■
Installing the Symantec Mail Security for Microsoft Exchange console
■
Installing Symantec Mail Security on remote servers
■
Customizing the installation of remote servers
See “About the multiserver console” on page 65.
Note: You will be asked whether to save previous settings or to use default
settings when upgrading Symantec AntiVirus/Filtering 3.0 or Symantec Mail
Security for Microsoft Exchange 4.0 to the Symantec Mail Security for Microsoft
Exchange 4.5 console.
Installing the Symantec Mail Security for Microsoft Exchange console
The Symantec Mail Security for Microsoft Exchange console is a Microsoft
Management Console (MMC) snap-in application that lets you manage local and
remote installations of Symantec Mail Security from a single computer.
You can use the management console user interface to roll out installations of
Symantec Mail Security to other Exchange servers.
Installing Symantec Mail Security for Microsoft Exchange
Installing on multiple servers
Before you install the console, you should fully understand its purpose and have
an implementation plan.
Note: Symantec Mail Security supports upgrades from Symantec AntiVirus for
Microsoft Exchange 3.0 and Symantec Mail Security for Microsoft Exchange 4.0.
If you are upgrading the console from a previous version, to retain the previous
settings and to update and migrate servers to the new console, you must install
the new version on the same computer on which the previous installation
resides.
Before you begin, you should review the preinstallation requirements.
See “Before you install the multiserver console” on page 33.
To install the Symantec Mail Security for Microsoft Exchange console
1
Start the Symantec Mail Security for Microsoft Exchange console Setup
program (Setup.exe).
This file is located in the SMSMSE\Console folder on the product CD.
2
In the License Agreement panel, check I accept the Terms in the license
agreement, and then click Next.
3
(Optional) If you are upgrading the console from a previous version, in the
Upgrade Options panel, check one of the following, and then click Next:
4
■
Transfer settings from previous installation
■
Install using Factory default settings
See “Upgrading from a previous version” on page 47.
Do one of the following:
■
In the Setup Type panel, click Complete to install to the default
location, and then click Next.
■
Click Custom to specify a different location.
5
In the Notification Email Address panel, verify or change the address that is
used to send (not receive) notifications, and then click Next.
Type a valid Active Directory display name only.
6
In the Ready to Install the Program panel, click Install.
The installation may take several minutes.
7
Click Finish.
41
42 Installing Symantec Mail Security for Microsoft Exchange
Installing on multiple servers
Installing Symantec Mail Security on remote servers
You can install the Symantec Mail Security for Microsoft Exchange server
component on remote servers.
Remote servers are installed with default installation settings. (By default,
Setup.iss retains settings if Symantec Mail Security is already installed on a
remote server). If you want to customize the installation settings and apply
them to a remote server, create a customized server installation response file
and run the response file.
See “Customizing the installation of remote servers” on page 46.
Before you begin the installation, you must successfully complete the steps for
installing the Symantec Mail Security for Microsoft Exchange console.
See “Installing the Symantec Mail Security for Microsoft Exchange console” on
page 40.
You must be logged on as a member of the administrator group on the local
computer and have domain administrator privileges on all remote computers on
which you want to install Symantec Mail Security.
See “About the multiserver console” on page 65.
To install Symantec Mail Security on remote servers
1
Review preinstallation information.
See “System requirements” on page 36.
See “Server component locations” on page 34.
See “Before installing on an Exchange server” on page 33.
See “Before you install the multiserver console” on page 33.
2
Do one of the following:
3
■
On the desktop, double-click Symantec MS 4.5 Console for Exchange.
■
On the Windows task bar, click Start > Programs > Symantec MS
Console for Exchange > Symantec MS 4.5 Console for Exchange.
In the management console, in the left pane, do one of the following:
■
Right-click Global.
■
Right-click a user-defined server group.
■
Right-click the Servers node under any server group.
4
Click All Tasks > Add Servers.
5
In the Add Servers panel, click Next.
Installing Symantec Mail Security for Microsoft Exchange
Installing on multiple servers
6
In the Choose Server Group panel, do one of the following:
■
Click the Global group.
■
Select a user-defined server group.
Type a name to create a new user-defined server group.
You will be adding remote servers to the group that you select. All servers
are always added to the Global group in addition to a specified user-defined
server group.
■
7
Click Next.
8
In the Select Servers panel, in the left pane, select the remote Exchange
server to which you want to install the product, and then click Add.
Alternatively, in the Server Name text box, type the server name or IP
address. You can also select a server group or domain of Exchange servers
instead of individual computers. When you click Add, all computers are
selected for the installation.
Repeat this step for each server that you want to add to the group.
9
Check Install SMSMSE to server(s).
10 Optionally check the following:
■
Send group settings to these servers: If checked and the server group is
already configured through the console, the group settings are applied
to the server. If this option is unchecked, the servers are installed with
default settings.
■
Keep installation files on servers: If this option is unchecked, the
installation files are removed from the servers after installation.
11 Click Finish.
12 Complete the logon prompt, and then click OK.
The Status of Remote Server Installation(s) panel indicates the progress of
the remote installation.
13 Do one of the following:
■
If an error occurs during the installation, click Errors for more
information.
■
When all remote installations are complete, click Done.
14 Repeat steps 1-13 to remotely install Symantec Mail Security to servers in
other administrative groups.
If the option to send group settings to servers is selected, do not close the
console after the remote installation completes until the settings have been
propagated to the servers. Check the Comm Status panel to verify that the
console to server communications have succeeded.
43
44 Installing Symantec Mail Security for Microsoft Exchange
Installing on multiple servers
Installing or renewing a license file to remote servers
You must install a license file on each server that is running Symantec Mail
Security for Microsoft Exchange in order to activate a content license (to receive
the latest virus definition updates). To install a content license, you must have
the serial number that is required for activation. The serial number is listed on
your purchase certificate. The purchase certificate is mailed separately (or
emailed, if you requested that method when you purchased your software) and
arrives in the same time frame as your software. The serial number is used to
request a license file and to register for support. The format of a serial number is
a letter followed by 10 digits, for example: F2430482013.
After the license file is installed, content updating is enabled for the duration of
your maintenance contract. When a content license expires, a new license must
be installed to renew the subscription. When no license is installed, virus
definitions that are needed to keep protection current are not downloaded.
If you have questions about licensing, contact Symantec Customer Service at
800-721-3934 or your reseller to check the status of your order.
You must install the license file on each server on which Symantec Mail Security
for Microsoft Exchange is installed, regardless of whether the computer is
partitioned or is a cluster member. The same license file supports all servers
that are covered by the content license.
For example, if the computer has multiple partitioned Exchange servers, you
only need to install one license file on the computer. You must install one license
file on each member of an Exchange cluster. You cannot replicate a license file
like you can virus definitions updates.
Install licenses to remote servers
You can install the license file for a remote server group or for a remote single
server.
To install the license file for a remote server group
1
In the left pane of the Symantec Mail Security for Microsoft Exchange
console, expand Global or a server group.
2
Expand Tasks.
3
Click Install Licenses.
Installing Symantec Mail Security for Microsoft Exchange
Installing on multiple servers
4
If necessary, follow steps 1 and 2 of the Install/Renew Licenses panel to
request a license file from Symantec.
5
In step 3 of the Install/Renew Licenses panel, do one of the following:
6
■
Type the fully qualified path to the license file, and then click Next.
If the license file does not reside on the same computer as the
Symantec Mail Security for Microsoft Exchange console, you can
specify a mapped drive or UNC path to the file.
■
Click Browse, select the license file, and then click Next.
If the license file does not reside on the same computer as the
Symantec Mail Security for Microsoft Exchange console, you can locate
the file using My Network Places.
Click Install to install the license file to the server group.
If a server within the server group is already licensed, the license file is
reapplied. The license file with the latest expiration date is applied.
To install the license file for a remote single server
1
In the left pane of the Symantec Mail Security for Microsoft Exchange
console, expand Global or a server group.
2
Do one of the following:
■
In the Global group, expand All Servers.
■
In a server group, expand Servers.
3
In the right pane, select the server to display the single-server user
interface.
4
For the single server, expand Tasks.
5
Click Install License.
6
If necessary, follow steps 1 and 2 of the Install/Renew Licenses panel to
request a license file from Symantec.
7
In step 3 of the Install/Renew Licenses panel, do one of the following:
8
■
Type the fully qualified path to the license file, and then click Next.
If the license file does not reside on the same computer as the
Symantec Mail Security for Microsoft Exchange console, you can
specify a mapped drive or UNC path to the file.
■
Click Browse, select the license file, and then click Next.
If the license file does not reside on the same computer as the
Symantec Mail Security for Microsoft Exchange console, you can locate
the file using My Network Places.
Click Install to install the license file to the server group.
45
46 Installing Symantec Mail Security for Microsoft Exchange
Installing on multiple servers
Customizing the installation of remote servers
There may be cases in which you want to customize the installation of Symantec
Mail Security for Microsoft Exchange on a remote Exchange server. For
example, you may need to change the following settings:
■
Installation location
■
Default HTTP port
■
Default email address for notifications
■
How to handle previous installations of Symantec Mail Security
Installation settings are contained in the Setup.iss response file, which is
located in the SMSMSE\Server folder.
To create a customized Setup.iss file, you can edit an existing Setup.iss file or
generate a new Setup.iss file interactively. Before performing a custom
installation on remote servers, save a copy of the original Setup.iss file.
After the customized Setup.iss is created and placed on the Symantec Mail
Security for Microsoft Exchange console (in the Remote Install folder), you can
perform a custom installation to the remote Exchange servers on which you
want the custom settings.
See “Installing Symantec Mail Security on remote servers” on page 42.
Customize the response file
You can use the following methods to create a customized Setup.iss file:
■
Edit an existing Setup.iss file.
■
Generate a new Setup.iss file interactively.
To edit an existing Setup.iss file
1
Using a text editor (such as Notepad), open the Setup.iss file.
2
Review the Setup.iss file to find which values can be changed and how to
enter new values.
3
Copy the modified Setup.iss file to the \Program Files\SMSMSE
Management Console\Remote Install Files folder on the management
console computer.
Installing Symantec Mail Security for Microsoft Exchange
Installing on multiple servers
To generate a new Setup.iss file interactively
1
In the Run box, type the following command, using the full directory path of
Symantec Mail Security for Microsoft Exchange Setup in the Run box or
change to that location at the command prompt:
Setup -r
This records the installation selections in a response file.
2
Respond to the Install Wizard prompts and options with the selections that
you want for the custom installation.
Do not press the Back button during the creation of the response file, as this
records the keystroke and causes the installation process to fail.
3
When Setup completes, copy the file Setup.iss from the WINNT directory on
the Microsoft Exchange Server to the \Program Files\SMSMSE\4.5\
Console\Remote Install Files or to the directory where the console was
installed.
Upgrading from a previous version
If you are upgrading from a previous version and you transferred settings
during the console installation, the new console has the same groups and
settings as the previous console. However, the version 4.5 groups do not contain
servers until they are migrated.
See “Installing the Symantec Mail Security for Microsoft Exchange console” on
page 40.
To upgrade from a previous version
1
2
3
Do one of the following:
■
On the desktop, double-click Symantec MS 4.5 Console for Exchange.
■
On the Windows taskbar, click Start > Programs > Symantec MS
Console for Exchange > Symantec MS 4.5 Console for Exchange.
In the management console, in the left pane, do one of the following:
■
Right-click Global.
Selecting Global migrates servers that exist only in the Global group. A
server that also exists in a user-defined server group will be migrated
only when that user-defined server group is migrated.
■
Right-click a user-defined server group.
Click All Tasks > Migrate Version 3.0 (or 4.0) Servers.
47
48 Installing Symantec Mail Security for Microsoft Exchange
Installing on multiple servers
4
In the Select Servers panel, the list of servers from the equivalent 3.0 or 4.0
group appears, and you are prompted to confirm the upgrade.
By default, the servers retain the previous settings during the migration.
After migration, new server group settings can be sent to a server, or the
entire server group can be reset to factory defaults.
See “Sending group settings to a server” on page 70.
See “Restoring default settings to a server group” on page 71.
5
Click Finish.
The success or failure of the upgrade is displayed. Servers that are
successfully upgraded are added to the 4.5 group and removed from the
previous group.
Once all of the servers are upgraded, you may uninstall the previous console
using the Add/Remove Programs control panel.
Installing to Exchange servers with Microsoft Clustering Service
You can install Symantec Mail Security for Microsoft Exchange to Exchange
servers with Microsoft Clustering Service. Note the following:
■
You should create a cluster resource for the Symantec Mail Security service
and add the resource as a dependency for the System Attendant on all active
nodes of the cluster.
■
You must install Symantec Mail Security to all nodes of a cluster.
■
You should always start and run the Symantec Mail Security service on both
active and passive nodes.
■
Typically, the name of the server is used when installing to a cluster, but you
can use an IP address to specify the computer. If you are using IP addresses,
use the IP address of the computer and not the IP address of the cluster or
virtual server.
Note: Use the Symantec Mail Security console to manage settings for each
server in the cluster.
Uninstalling Symantec Mail Security
You can uninstall Symantec Mail Security for Microsoft Exchange through Add/
Remove programs.
Installing Symantec Mail Security for Microsoft Exchange
Implementing SSL
Implementing SSL
You can configure Symantec Mail Security for Microsoft Exchange to use Secure
Sockets Layer (SSL) communications, which requires a server certificate. You
can create your own server certificate using Microsoft Certificate Services 2.0 or
request one from a Certificate Authority.
To implement SSL, you complete the following tasks:
■
Install Symantec Mail Security so that the Web site is created and available
for modification.
■
Apply a server certificate to the Web site and require SSL.
■
Open the Symantec Mail Security multiserver console to specify SSL
communications and the SSL port.
To implement SSL
1
On the computer on which Symantec Mail Security is installed, open
Internet Services Manager.
2
In the server list, expand the folder for the server that is hosting Symantec
Mail Security.
3
Right-click Symantec Mail Security for Exchange, and then click
Properties.
4
On the Directory Security tab, under Secure communications, click Server
Certificate.
5
Follow the instructions in the Web Server Certificate Wizard to install the
certificate.
6
After the certificate is installed, on the Directory Security tab, under Secure
communications, click Edit.
7
In the Secure Communications dialog box, check Require secure channel
(SSL).
8
Click OK.
9
On the Web Site tab, under Web Site Identification, in the IP Address text
box, type the IP address of the Symantec Mail Security server.
10 In the SSL Port text box, type the port to use for SSL communications.
The default port for SSL communications is 636.
49
50 Installing Symantec Mail Security for Microsoft Exchange
Enabling event forwarding to SESA
11 Click OK to close the Symantec Mail Security for Microsoft Exchange
Properties window.
12 After SSL is implemented, you must enable SSL and specify the SSL port for
each server from the Symantec Mail Security multiserver console.
See “Changing the TCP port and using SSL” on page 70.
Note: To access the Symantec Mail Security single server interface after SSL is
implemented, you must use https and the SSL port in your browser URL (for
example, https://<IP Address>:Port).
Enabling event forwarding to SESA
Symantec Mail Security for Microsoft Exchange supports event forwarding to
Symantec Enterprise Security Architecture (SESA). SESA is an event
management system that employs data collection services for events that
Symantec security products generate.
When a product is SESA-enabled, you can use the SESA Console to view the
events that it forwards to SESA. The SESA Console provides a central location
from which to view and manage the reporting of event data across multiple
SESA-enabled security products.
For more information on SESA, see the Symantec Enterprise Security
Architecture Installation Guide and the Symantec Enterprise Security
Architecture Administrator’s Guide.
SESA components
The following components are required to enable event forwarding to SESA:
■
SESA Agent
The SESA Agent must be installed on the same computer as Symantec Mail
Security for Microsoft Exchange. The SESA Agent installation includes the
Java Runtime Environment (JRE).
■
SESA Integration Package
The SESA Integration Package must be installed on the same computer as
the SESA Manager.
Installing Symantec Mail Security for Microsoft Exchange
Enabling event forwarding to SESA
SESA Agent
A SESA Agent must be installed and configured on each computer on which
Symantec Mail Security for Microsoft Exchange is installed. The SESA Agent
handles the communication between Symantec Mail Security and SESA.
If you have more than one SESA-enabled product installed on a single computer,
these products can share a SESA Agent. However, each product must register
with the Agent. If an Agent has already been installed on the computer for
another SESA-enabled security product, you must install the SESA Agent
specifically for Symantec Mail Security to register it correctly.
The SESA Agent is preconfigured to listen on IP address 127.0.0.1 and port
number 8086. Symantec Mail Security uses this information to communicate
with the Agent. If you must change the IP address or port number for the Agent,
you must do so through the SESA Console. (Once an Agent is installed, it is
controlled through the SESA Console, even though it is running on the computer
that is running the security product.)
Generally, the SESA Agent is installed as a setup option during Symantec Mail
Security installation.
See “Installing on a single server” on page 37.
See “Customizing the installation of remote servers” on page 46.
If Symantec Mail Security is already installed, the SESA Agent can be installed
manually.
See “Installing the SESA Agent manually” on page 54.
SESA Integration Package
A SESA Integration Package (SIP) for Symantec Mail Security for Microsoft
Exchange must be installed on each computer that runs a SESA Manager. The
SIP extends SESA functionality to include Symantec Mail Security event data.
See “Installing the SESA Integration Package on the SESA Manager” on page 51.
Installing the SESA Integration Package on the SESA Manager
To enable Symantec Mail Security for Microsoft Exchange to send events to
SESA, run the SESA Integration Wizard on the computer on which the SESA
Manager is installed. You must run the SESA Integration Wizard on each SESA
Manager computer to which Symantec Mail Security events are forwarded.
51
52 Installing Symantec Mail Security for Microsoft Exchange
Enabling event forwarding to SESA
To install the SESA Integration Package on the SESA Manager
1
On the computer on which the SESA Manager is installed, insert the
Symantec Mail Security for Microsoft Exchange CD into the CD-ROM drive.
2
At the command prompt, change directories to
\ADMTOOLS\SESA_SIPI_for_SMSMSE
3
At the command prompt, type java -jar setup.jar
The SESA Integration Wizard starts.
4
Follow the on-screen instructions until you see the SESA Domain
Administrator Information window.
5
In the SESA Domain Administrator Information window, do the following:
SESA Domain Administrator
Name
Type the name of the SESA Domain Administrator
account.
SESA Domain Administrator
Password
Type the password for the SESA Domain
Administrator account.
Host Name or IP Address of
SESA Directory
Type one of the following:
■
If SESA is using default, anonymous SSL
communications, the IP address of the
computer on which the SESA Directory is
installed (may be the same as the SESA
Manager IP address if they are both installed
on the same computer)
■
If SESA is using authenticated SSL
communication, the host name of the SESA
Directory computer (for example,
mycomputer.com)
For more information on the SESA default,
anonymous SSL and upgrading to authenticated
SSL, see the Symantec Enterprise Security
Architecture Installation Guide.
Secure Directory Port
Type the number of the SESA Directory SSL port
(by default, 636).
6
Follow the on-screen instructions to install the SESA Integration Package
and complete the SESA Integration Wizard.
7
Repeat steps 1 through 6 on each SESA Manager computer to which you are
forwarding Symantec Mail Security events.
Installing Symantec Mail Security for Microsoft Exchange
Enabling event forwarding to SESA
Verifying the SESA installation
After installation, you can verify that the appropriate components are installed
and working properly.
Verify the installation
To verify the installation, you do the following:
■
Verify that the SESA AgentStart Service has started.
■
Verify that Symantec Mail Security for Microsoft Exchange is shown on, and
sending events to, the SESA Console.
■
Examine the SESA Agent log as necessary.
To verify that the SESA AgentStart Service has started
◆
On the computer on which you installed the SESA Agent, open the Services
Control Panel and verify that the SESA AgentStart Service is installed.
To verify that Symantec Mail Security for Microsoft Exchange is sending
events to the SESA Console
1
On the SESA Manager computer, on the Windows taskbar, click Start >
Programs > Symantec Enterprise Security > SESA Console.
2
Log on to the SESA Console using a SESA Domain Administrator account.
The SESA user must belong to a Manager role that has rights to the SESAenabled Symantec Mail Security product.
3
On the SESA Console, on the Events view tab, in the left pane, expand
[DomainName.SES]> SESA DataStore > Global Reports > All events.
You named the SESA administrative domain when you installed SESA. The
domain is appended with .SES.
4
In the right pane, verify that Symantec Mail Security events are shown.
53
54 Installing Symantec Mail Security for Microsoft Exchange
Enabling event forwarding to SESA
5
On the Configurations view tab, in the left pane, expand the SESA
administrative domain.
6
Verify that Symantec Mail Security for Microsoft Exchange is listed.
To examine the SESA Agent log
1
On the computer on which the SESA Agent is installed, navigate to the
location in which the SESA Agent files reside (by default, C:\SESA\Agent).
2
In a text editor, open Sesa-agent.log.
3
Verify that the log contains the following entry:
SESA Agent ***Bootstrap successful
Installing the SESA Agent manually
Generally, the SESA Agent is installed as a setup option during Symantec Mail
Security installation, but to install it manually, you must install and configure it
on the computer on which Symantec Mail Security for Microsoft Exchange is
installed. For the SESA Agent to run, the Java Runtime Environment (JRE) must
also be installed on the same computer. JRE versions 1.2.2 and later are
supported.
Installing Symantec Mail Security for Microsoft Exchange
Enabling event forwarding to SESA
Install the SESA Agent manually
To install the SESA Agent, you do the following:
■
Install the JRE on the target computer, if necessary.
■
Install the SESA Agent.
■
Start the SESA AgentStart Service.
■
Enable event forwarding to SESA.
To install the JRE
1
On the computer that is running Symantec Mail Security, in the AgtInst
folder, double-click j2re-1_3_1_02-win-i.exe.
By default, the file is located in the following folder:
C:\Program Files\Symantec\SMSMSE\4.5\Server\AgtInst
2
Follow the on-screen instructions.
To install the SESA Agent
1
On the computer on which Symantec Mail Security is installed, at a
command prompt, change to the AgtInst folder.
By default, C:\Program Files\Symantec\SMSMSE\4.5\Server\AgtInst
2
At the command prompt, type the following:
java -jar agentinst.jar -a3009
Optionally, you can append any of the following parameters:
-debug
Writes logging information to the screen
-log
Turns off the installation log and instructs the SESA Agent to
write logging information to the Agntinst.log file in the local
Temp directory
To start the SESA AgentStart Service
1
On the computer on which you installed the SESA Agent, on the Windows
taskbar, click Start > Settings > Control Panel.
2
In the Control Panel window, double-click Administrative Tools.
3
In the Administrative Tools window, double-click Services.
4
In the Services dialog box, right-click SESA AgentStart Service, and then
click Start.
55
56 Installing Symantec Mail Security for Microsoft Exchange
Enabling event forwarding to SESA
To enable event forwarding to SESA
1
On the computer on which you installed the SESA Agent, open Symantec
Mail Security.
2
Click Configuration > Notifications/Alert Settings.
3
In the right pane, under SESA alerts, check Enable Logging and Alerting to
SESA server.
4
In the IP address of SESA server box, enter the IP address of the SESA
Manager on which the SESA Integration Package (SIP) is installed.
See “Installing the SESA Integration Package on the SESA Manager” on
page 51.
5
Click Save.
Note: You can configure the Enable Logging and Alerting to SESA server
and IP address of SESA server options for a single server or a server group
from the multiserver console.
Uninstalling the SESA Agent
The SESA Agent for Symantec Mail Security for Microsoft Exchange is
uninstalled from a command prompt.
Uninstall the SESA Agent
To uninstall the SESA Agent, you do the following:
■
Stop the SESA AgentStart Service.
■
Uninstall the SESA Agent for Symantec Mail Security.
To stop the SESA AgentStart Service
1
On the computer on which you installed the SESA Agent, on the Windows
taskbar, click Start > Settings > Control Panel.
2
In the Control Panel window, double-click Administrative Tools.
3
In the Administrative Tools window, double-click Services.
4
In the Services dialog box, right-click SESA AgentStart Service, and then
click Stop.
Installing Symantec Mail Security for Microsoft Exchange
Enabling event forwarding to SESA
To uninstall the SESA Agent for Symantec Mail Security
1
On the computer on which you installed the SESA Agent, at a command
prompt, change to the folder in which the SESA Agent files reside (by
default, C:\SESA\Agent).
2
At the command prompt, type the following:
java -jar agentinst.jar -u -a3009
Optionally, you can append any of the following parameters:
-debug
Writes logging information to the screen
-log
Turns off the installation log and instructs the SESA Agent to
write logging information to the Agntinst.log file in the local
Temp directory
Uninstalling the SESA Integration Package
To uninstall the SESA Integration Package for Symantec Mail Security for
Microsoft Exchange, run the SESA Integration Wizard for Symantec Mail
Security on the SESA Manager.
To uninstall the SESA Integration Package
1
On the SESA Manager computer, insert the Symantec Mail Security for
Microsoft Exchange CD into the CD-ROM drive.
2
At the command prompt, change directories to
\ADMTOOLS\SESA_SIPI_for_SMSMSE.
3
Type the following command to launch the SESA Integration Wizard:
java –jar setup.jar –uninstall
4
Follow the on-screen instructions until you see the SESA Domain
Administrator Information window.
57
58 Installing Symantec Mail Security for Microsoft Exchange
After you install
5
In the SESA Domain Administrator Information window, do the following:
SESA Domain Administrator
Name
Type the name of the SESA Domain Administrator
account.
SESA Domain Administrator
Password
Type the password for the SESA Domain
Administrator account.
Host Name or IP Address of
SESA Directory
Type one of the following:
■
If SESA is using default, anonymous SSL
communications, the IP address of the
computer on which the SESA Directory is
installed (may be the same as the SESA
Manager IP address if they are both installed
on the same computer).
■
If SESA is using authenticated SSL
communication, the host name of the SESA
Directory computer. For example,
mycomputer.com.
For more information on the SESA default,
anonymous SSL, and upgrading to authenticated
SSL, see the Symantec Enterprise Security
Architecture Installation Guide.
Secure Directory Port
Type the number of the SESA Directory SSL port
(by default, 636).
The SESA Integration Wizard removes the SESA Integration Package for
Symantec Mail Security.
After you install
After you install Symantec Mail Security for Microsoft Exchange, you should
perform the following basic administrative tasks:
■
Install the license file if it was not installed during setup.
See “Installing or renewing a license file” on page 39.
■
Update virus definitions.
See “Keeping your virus protection current” on page 149.
■
Configure notification and alert recipients.
See “Configuring notifications and alerts” on page 95.
Installing Symantec Mail Security for Microsoft Exchange
Accessing the single-server user interface
■
Schedule a scan.
See “Scheduling and deleting scans” on page 63.
■
Run a manual scan.
See “Running a manual scan” on page 63.
Some additional tasks are required if you are managing multiple servers using
the Symantec Mail Security for Microsoft Exchange console.
See “Managing multiple server installations” on page 65.
Accessing the single-server user interface
The management of single installations of Symantec Mail Security for Microsoft
Exchange is done for three or less servers through a user interface that works
with Microsoft Internet Explorer.
To access the single-server user interface
◆
Do one of the following:
■
On the desktop, double-click Symantec Mail Security for MS
Exchange.
■
On the Windows taskbar, click Start > Programs > Symantec MS for
Microsoft Exchange > Symantec Mail Security for Exchange.
■
Open a Web browser to http://<server_name>:8081.
Single-server panel components
The single-server user interface consists of the following:
■
A left pane, which contains a standard tree view. The topmost or main node
is the name of the monitored server. You select management operations
from the nodes beneath the top node.
59
60 Installing Symantec Mail Security for Microsoft Exchange
About the Symantec Mail Security for Microsoft Exchange console user interface
■
A right pane, which consists of an information pane with settings, actions,
and information about the operation that is selected in the tree view.
Management operations are grouped into the following categories, which are
represented by the following main nodes in the tree view:
■
Scan Jobs: Used to create, schedule, and implement scans
■
Policies: Used to create and configure sets of rules to be implemented by
specific scan jobs
■
Tasks: Includes actions to update virus definitions and quarantine problem
messages
■
Configuration: Lets you configure global product settings
■
Statistics and Reports: Lets you use data that is collected by Symantec Mail
Security
About the Symantec Mail Security for Microsoft
Exchange console user interface
The Symantec Mail Security for Microsoft Exchange console is similar to the
single-server user interface that is used to manage single instances of Symantec
Mail Security. The left pane of the console contains a standard tree view with
nodes for server groups, and the right pane contains settings. You access most
actions with the right-click menu in the left-pane tree. The nodes common to
Installing Symantec Mail Security for Microsoft Exchange
About the Symantec Mail Security for Microsoft Exchange console user interface
both the single-server user interface and the console are Scan Jobs, Policies,
Tasks, Configuration, and Statistics and Reports.
The Symantec Mail Security for Microsoft Exchange console includes a parent
layer of group nodes for each named server group, and a root node called Global
that consists of all server groups.
Each group contains a Servers node. (The Global group node contains an All
Servers node.) The All Servers node is located on the console in the left pane
(Global > All Servers). When you expand the All Servers node, all servers that
belong to the selected group are displayed. You can click each group to see data
for that group.
Making selections in the multiserver console
In the Symantec Mail Security for Microsoft Exchange console, the actions that
add or delete items from the tree are available by right-clicking the appropriate
node. You can also delete items such as groups, policies, scan jobs, and triggers
from the tree by selecting the item, and then pressing Delete.
61
62 Installing Symantec Mail Security for Microsoft Exchange
About the Symantec Mail Security for Microsoft Exchange console user interface
Displaying individual servers
If you expand an individual server node in the Symantec Mail Security for
Microsoft Exchange console, the single-server user interface for that server
appears in the center and right panes of the snap-in. You can then manage the
server individually.
Configuring and running scans
Scans examine messages on your Microsoft Exchange servers for known viruses,
prohibited content, and files that exhibit behaviors that are associated with
viruses.
Scans can belong to one of the following categories:
■
Auto-Protect scans: Monitor incoming messages in real time and provide
continuous protection against threats.
The Auto-Protect scan job applies to everything on the Exchange server,
including items in all public folders and mailboxes. You can run only one
Auto-Protect scan job on Symantec Mail Security at a time. You should
always keep Auto-Protect scanning enabled.
■
Manual scans: Runs scans on an as-needed basis.
You can run a manual scan in response to an immediate threat, such as the
suspected presence of a new virus, or during times when no scan jobs are
scheduled. A manual scan job applies only to folders and mailboxes that are
selected when you define the scan. You can only run one manual scan job on
Symantec Mail Security at a time.
■
Scheduled scans: Runs scan jobs at specific days and times.
A scheduled scan job applies only to those folders and mailboxes that are
selected when you define the scan. You can run several scheduled scans on
Symantec Mail Security at a time.
Scan jobs must be linked to policies, or sets of rules, before they can be run. The
Standard Policy is the default rule setting; however, custom policies can also be
configured to run with a particular scan.
See “Understanding the Standard Policy and custom policies” on page 106.
See “Scheduling and deleting scans” on page 63.
See “Running a manual scan” on page 63.
Installing Symantec Mail Security for Microsoft Exchange
About the Symantec Mail Security for Microsoft Exchange console user interface
Scheduling and deleting scans
In addition to Auto-Protect scanning, which is set to run by default, you can
schedule additional scans to look for different types of rule violations than those
that are covered by the Auto-Protect scan.
Rule violations are configured through policy settings, which are linked to each
scan job. In most cases, you modify the Standard Policy or create a custom policy
to use with a scheduled scan.
See “Customizing policies” on page 107.
Schedule or delete a scan
You can create and delete scheduled scans.
To schedule a scan
1
In the Symantec Mail Security for Microsoft Exchange console, in the left
pane, expand Scan Jobs.
2
Right-click Scheduled Scans, and then click All Tasks > Add Scheduled
Scan.
3
In the Add Scheduled Scan pane, type a scan job name, and then click OK.
4
In the right pane under Scheduled Scan Jobs, select a policy to use with the
new scan (either the Standard Policy or a custom policy that was created).
5
Select the time of day for the scheduled scan (in 24-hour format), days of the
week, dates of the month, and any additional options.
6
Click Save.
To delete a scheduled scan
1
In the Symantec Mail Security for Microsoft Exchange console, in the left
pane, expand Scan Jobs > Scheduled Scan.
2
Right-click the scan that you want to delete, and then click Delete.
Running a manual scan
Manual scans are useful in situations in which you want to scan messages for
specific purposes. For example, you could create a policy to flag a particular
category of subject line violations that associated with a new virus, and then run
the scan immediately.
See “Customizing policies” on page 107.
63
64 Installing Symantec Mail Security for Microsoft Exchange
About the Symantec Mail Security for Microsoft Exchange console user interface
To run a manual scan
1
In the left pane of the Symantec Mail Security for Microsoft Exchange
console, expand Scan Jobs.
2
Click Manual Scan.
3
In the right pane, under Manual Scan, in the Policy in use box, select the
policy to link to the manual scan job (either the Standard Policy or a custom
policy).
4
Configure the remaining options, if necessary.
5
Click Save.
6
Click Run Manual Scan.
Chapter
3
Managing multiple server
installations
This chapter includes the following topics:
■
About the multiserver console
■
Managing servers and server groups
■
Installing Symantec Mail Security to remote servers
■
Updating and distributing virus definitions
■
Running a manual scan on a server group
■
Viewing status information
About the multiserver console
Symantec Mail Security for Microsoft Exchange includes a console application
for managing installations of Symantec Mail Security on multiple Exchange
servers. The Symantec Mail Security for Microsoft Exchange console is installed
separately from the server component of Symantec Mail Security and is
typically installed on a separate computer that is used for administration. The
Symantec Mail Security for Microsoft Exchange console is a Microsoft
Management Console (MMC) snap-in.
66 Managing multiple server installations
About the multiserver console
Configuration information for each server is stored on the remote server.
Configuration information for each group in the console is stored on the console
system.
Note: Avoid using multiple copies of the multiserver console if possible.
Configuration information is stored on the local computer.
Global server group
The Global server group contains all of the Microsoft Exchange servers on which
Symantec Mail Security for Microsoft Exchange is installed and running. This
group includes servers that are added to user-defined groups as well as servers
that are added to multiserver management control but are not assigned to a
specific server group.
When you reconfigure the Global server group, changes are propagated to all
servers in all groups. If you change a setting on an individual server or at the
group level and subsequently change the same setting at the Global server level,
the change made at the Global server level overrides the change made at the
individual server or group level.
User-defined server groups
User-defined server groups can be created dynamically when installing servers,
when adding servers to console management, or at any time through the
console. A user-defined server group is a physical server grouping that
simplifies server management. For example, a server group might be all mail
servers that are used by a department (for example, marketing) or the physical
Managing multiple server installations
Managing servers and server groups
location of a group of mail servers (for example, third floor servers in Building
A).
A managed server can only belong to one user-defined group.
See “Moving a server to another group” on page 69.
Reconfiguring settings
When you reconfigure a user-defined server group, any changes that you make
are propagated to all servers that belong to that group. The reverse is not true. If
you change the settings for an individual server, the changes are not recognized
at the server group level or at the Global level. In that case, the information that
is displayed by the console does not reflect the changes to the individual server.
Note: Use the Communication Status pane to verify that requests made to
servers have completed before closing the multiserver console. Closing the
multiserver console before a server request is completed can cause errors.
See “Viewing status information” on page 76.
Managing servers and server groups
You can perform the following basic administration tasks with the Symantec
Mail Security for Microsoft Exchange console:
■
Creating a server group
■
Adding servers to a group
■
Moving a server to another group
■
Changing the TCP port and enabling SSL for a server
■
Sending group settings to a server
■
Deleting a server group
■
Removing servers from console management
Creating a server group
There are two general categories of server groups: the Global group and userdefined groups.
The Global group is the default server group. You can keep all of your Microsoft
Exchange servers that run Symantec Mail Security for Microsoft Exchange in
the Global group. If your network contains a large number of Exchange servers,
67
68 Managing multiple server installations
Managing servers and server groups
you can create server groups in addition to the Global group, add servers to
these groups, and administer all of your servers that run Symantec Mail
Security on a group basis.
To create a server group
1
In the left pane of the Symantec Mail Security for Microsoft Exchange
console, right-click Global or any server group node.
2
Click All Tasks, and then click Add group.
3
In the Add Group dialog box, type a name for the server group.
Adding servers to a group
If an installation of Symantec Mail Security for Microsoft Exchange is not under
management control, you may want to add the server to the console. For
example, your organization might have run a single-server installation of
Symantec Mail Security on several Exchange servers that you now want to
manage through the console, along with your other managed servers.
You can add servers that run Symantec Mail Security to a managed group in the
following ways:
■
Add one or more servers to an existing group.
■
Create a new server group during the Add process.
Note: All servers are always added to the Global group in addition to any
specified server group.
To add servers to a group
1
In the left pane of the Symantec Mail Security for Microsoft Exchange
console, right-click Global or a server group, and then click All Tasks > Add
Servers.
2
In the Add Servers pane, click Next.
3
In the Choose Server Group pane, select an existing server group (for
example, Global).
You can also type a name to create a new group.
4
Type the TCP port number for the server or group of servers that you want
to add.
The port number must be the same for all servers that you want to add. Port
8081 is the default.
5
Click Next.
Managing multiple server installations
Managing servers and server groups
6
In the Select Servers pane, under Available Servers, select the server that
you want to add or select a domain of servers.
Alternatively, in the Server Name text box, type the server name or IP
address.
7
Click Add.
8
Repeat steps 6-7 for each server that you want to add to the group.
9
Check Send group settings to server(s).
If checked, the group settings are applied to a newly added server. If
unchecked, server settings are retained. Future changes that are made to
the server group, however, will be applied to the server.
10 Click Finish.
Note: If you add a server that is not running Symantec Mail Security for
Microsoft Exchange 4.5 or that is running Symantec AntiVirus/Filtering for
Microsoft Exchange 3.0 or Symantec Mail Security for Microsoft Exchange 4.0,
the server is added to the group without warning. After a minute or so, an error
message appears that says the server is not responding to communications. In
the case of a 3.0 or 4.0 server, although the server may be visible in the right
pane, it cannot be managed. In either case, delete the server from the console,
then install or upgrade the server as appropriate.
Moving a server to another group
A server that is going to be moved from one server group to another can be
selected either from the Global group, which contains all managed servers, or
from a server group.
Unless Send group settings to server is checked, moving a server to another
group does not affect the current server settings even if its settings differ from
those of its new group. Future changes made to the server group, however, will
be applied to the server.
To move a server to another group
1
In the left pane of the Symantec Mail Security for Microsoft Exchange
console, expand Global or a server group.
2
Do one of the following:
3
■
In the Global group, expand All Servers.
■
In a server group, expand Servers.
Right-click a server, and then click All Tasks > Move Server.
69
70 Managing multiple server installations
Managing servers and server groups
4
Select the target server group or create a new server group.
5
To apply the settings of the new server group to the server, check Send
group settings to server.
6
Click OK.
Changing the TCP port and using SSL
After a server is added to management control, you can change the TCP port and
specify whether to use Secure Sockets Layer (SSL) for communication between
the console and a server.
See “Implementing SSL” on page 49.
To change the TCP port and use SSL
1
In the left pane of the Symantec Mail Security for Microsoft Exchange
console, expand Global or a server group.
2
Do one of the following:
■
In the Global group, expand All Servers.
■
In a server group, expand Servers.
3
Right-click a server, and then click All Tasks > Properties.
4
Type the new TCP port number for the server.
5
To enable SSL, check Use SSL for communication.
If SSL communication is enabled, a different TCP port must be specified.
The same port cannot be used for non-secure and SSL communications.
Usually, the default port for SSL is 636.
6
Click OK.
Sending group settings to a server
Settings on a particular server might not be synchronized with its server group
settings. This can occur, for example, if a server is configured both from its
single-server user interface and the console.
Note: If a server is added to a server group but the group settings are not yet
applied to the new server, changes to custom policy settings that are applied to
the server group may result in a Comm Status report of application failure for
the new server until the server group settings are applied to the new server.
Managing multiple server installations
Managing servers and server groups
To send group settings to a server
1
2
In the left pane of the Symantec Mail Security for Microsoft Exchange
console, do one of the following:
■
For the Global group, expand All Servers.
■
For a server group, expand Servers.
Right-click the server, and then click All Tasks > Send Group Settings.
The settings of the server group are sent to the selected server.
Restoring default settings to a server group
You can restore all settings for a server group to their initial, default states.
To restore default settings to a server group
◆
In the left pane of the Symantec Mail Security for Microsoft Exchange
console, right-click a server group, and then click All Tasks > Restore to
Factory Defaults.
Restoring default settings to a server
You can restore the default settings for Symantec Mail Security for Microsoft
Exchange on a server by running the SAVFMSEReset.exe utility that is installed
in the Server folder. This causes the Symantec Mail Security service to stop and
restart, which can take a minute or more in some situations.
To restore default settings to a server
◆
On the computer that is running Symantec Mail Security, in the Server
folder, double-click SAVFMSEReset.exe.
By default, the file is located in the following folder:
C:\Program Files\Symantec\SMSMSE\4.0\Server
Deleting a server group
If a user-defined server group is no longer needed, you can delete it.
If you delete a user-defined server group that contains managed servers, the
servers that belong to the group are not deleted from management control. The
servers still exist in and can be managed through the Global group. The server
group settings, however, are retained on the servers until they are updated or
new settings are pushed out.
Note: You cannot delete the Global server group.
71
72 Managing multiple server installations
Managing servers and server groups
To delete a server group
1
In the left pane of the Symantec Mail Security for Microsoft Exchange
console, right-click the server group to delete, and then click Delete.
2
Click OK to confirm the deletion.
Updating servers in a server group
If an update of Symantec Mail Security for Microsoft Exchange is released, you
can update all previous installations in a server group.
To update servers in a server group
1
In the left pane of the Symantec Mail Security for Microsoft Exchange
console, right-click Global or a server group, and then click All Tasks >
Update Servers.
2
In the Add Servers pane, click Next.
The Select Servers pane lists the servers in the server group.
3
Check Send group settings to server(s).
If checked, the group settings are applied to the updated servers. If
unchecked, default settings are applied to the updated servers.
4
Click Finish.
5
When the update completes, do one of the following:
■
If an error occurs, click Errors for more information.
■
Click Done.
Removing a server from console management
When a server is deleted from the Symantec Mail Security for Microsoft
Exchange console, it is removed from group management. Symantec Mail
Security protection, however, remains operational on the server itself.
To remove a server from console management
1
In the left pane of the Symantec Mail Security for Microsoft Exchange
console, expand Global or a server group.
2
Do one of the following:
■
In the Global group, expand All Servers.
■
In a server group, expand Servers.
3
Right-click a server, and then click Delete.
4
In the confirmation dialog box, click OK.
Managing multiple server installations
Installing Symantec Mail Security to remote servers
Installing Symantec Mail Security to remote servers
From the Symantec Mail Security for Microsoft Exchange console, you can
install Symantec Mail Security to remote servers that run Exchange 2000.
There may be cases in which you want to customize the installation of Symantec
Mail Security to one or more remote Exchange servers. To customize and roll
out the Symantec Mail Security installation to one or more remote servers,
create a response file that contains the custom installation steps.
See “Customizing the installation of remote servers” on page 46.
You can also upgrade existing version 3.0 or 4.0 installations to Symantec Mail
Security for Microsoft Exchange 4.5 using the Symantec Mail Security for
Microsoft Exchange console.
See “Upgrading from a previous version” on page 47.
To install Symantec Mail Security to remote servers
1
In the left pane of the Symantec Mail Security for Microsoft Exchange
console, right-click Global or any server group node, and then click All
Tasks > Add Servers.
2
In the Add Servers pane, click Next.
3
In the Choose Server Group dialog box, select a server group.
4
Type the TCP port number of the server.
Port 8081 is the default.
5
Click Next.
6
In the Choose Servers pane, under Available Servers, select the Exchange
server that you want to add to the group.
Alternatively, in the Server Name text box, type the server name or IP
address.
7
Click Add.
8
Repeat steps 6-7 for each Microsoft Exchange server to which you want to
install Symantec Mail Security.
9
Check Install SMSMSE to these servers.
10 Check Send group settings to server(s).
If checked, group settings are applied to the newly installed server. If
unchecked, the server is installed with default settings. Future changes
made to the server group, however, will be applied to the server.
73
74 Managing multiple server installations
Updating and distributing virus definitions
11 Click Finish.
The Status of Remote Server Installation pane displays the installation
status for each server.
12 If any installation errors occurred, click Errors for more information.
13 When the server installation completes, in the Status of Remote Server
Installation pane, click Done.
14 Install the Symantec content license file on the server.
Updating and distributing virus definitions
An important Symantec Mail Security for Microsoft Exchange administrative
function is centrally administering virus definitions updates. You can update
virus definitions by doing the following:
■
Connecting to the LiveUpdate site and updating virus definitions on the
management console
■
Distributing updated definitions to all Exchange servers, or to a group of
managed servers
You can also schedule virus definition updates for managed servers.
See “Updating virus definitions for multiple servers” on page 150.
Update and distribute virus definitions
You can manually update virus definitions on the Symantec Mail Security for
Microsoft Exchange console, and you can manually distribute virus definitions
from the console to servers. The LiveUpdate virus definitions update applies to
the console, not to a server group.
To manually update virus definitions on the Symantec Mail Security for
Microsoft Exchange console
1
In the left pane of the Symantec Mail Security for Microsoft Exchange
console, expand Global or a server group.
2
Expand Tasks.
3
Click Run LiveUpdate.
4
In the right pane, click LiveUpdate.
Managing multiple server installations
Running a manual scan on a server group
To manually distribute virus definitions from the console to servers
1
In the left pane of the Symantec Mail Security for Microsoft Exchange
console, do one of the following:
■
To distribute virus definitions to all managed servers, expand Global.
■
To distribute virus definitions to servers in a server group, expand the
server group.
2
Expand Tasks.
3
Click Run LiveUpdate.
4
In the right pane, click Update Servers.
Running a manual scan on a server group
Manual scans are useful when you want to conduct scans of mail stores for
specific purposes. For example, you can run a manual scan to filter rule
violations against messages on a group of servers, where message stores of
those servers are not normally examined for content violations during AutoProtect scanning or scheduled scans.
To run a manual scan on a server group
1
In the left pane of the Symantec Mail Security for Microsoft Exchange
console, do one of the following:
■
To scan all managed servers, expand Global.
■
To scan servers in a server group, expand the server group.
2
Expand Scan Jobs.
3
Click Manual Scan.
4
In the right pane, in the Policy in use field, select the policy to link to the
manual scan job.
5
If necessary, configure the remaining options, and then click Save if changes
are made.
If options are changed and not saved, they are lost and will not be used for
the scan. Instead, local server settings will be used.
6
Click Run Manual Scan.
75
76 Managing multiple server installations
Viewing status information
Viewing status information
Requests are issued to servers from the Symantec Mail Security for Microsoft
Exchange console through HTTP. Therefore, you may find it useful to have
information about the status of a request. For example, if an attempt is made to
collect statistics from a server on which Symantec Mail Security is not running,
you may want to receive status information immediately.
The Symantec Mail Security for Microsoft Exchange console displays the
Communication Status pane after a request is made. You can also display the
pane at any time from the Symantec Mail Security for Microsoft Exchange
console.
The pane lists all recent requests to servers and identifies the target server, the
type of request made, and the status of the request (for example, Success or
Comm Error).
View status information
You can display the Communication Status pane using the Comm Status button
or from the menu.
To display the Communication Status pane (button method)
◆
At the bottom of the right pane, click Comm Status.
Managing multiple server installations
Viewing status information
To display the Communication Status panel (menu method)
1
In the left pane of the Symantec Mail Security for Microsoft Exchange
console, expand a group.
2
Select any task-oriented node (Scan Jobs, Policies, Tasks, Configuration, or
Statistics and Reports), and then do one of the following:
■
On the console View menu, click View Server Comm Status.
■
Right-click the task-oriented node, and then click View > View Server
Comm Status.
77
78 Managing multiple server installations
Viewing status information
Chapter
4
Configuring Symantec
Mail Security for Microsoft
Exchange
This chapter includes the following topics:
■
About configuring Symantec Mail Security
■
Securing your network
■
Protecting your system from spam
■
Configuring settings to handle an outbreak
■
Monitoring Symantec Mail Security functionality
■
Configuring notifications and alerts
■
Configuring automatic virus protection
■
Isolating email messages that contain viruses
■
Configuring report data settings
About configuring Symantec Mail Security
When you configure Symantec Mail Security for Microsoft Exchange, you set
product-wide values that apply to all users and across all sessions. They are
unlike settings for a specific policy, which are in effect only when that policy is
enabled.
See “How policies work with scan jobs” on page 104.
80 Configuring Symantec Mail Security for Microsoft Exchange
About configuring Symantec Mail Security
Although you can configure or reconfigure Symantec Mail Security at any time,
you generally configure the product immediately after installation, customizing
settings with values that work best for your environment.
Configuration settings
Symantec Mail Security for Microsoft Exchange supplies a basic set of product
defaults that are designed to eliminate the need for regular maintenance and to
minimize configuration time. These defaults are set at the individual server
level. For many installations, these values do not have to be reset.
Table 4-1 lists the default configuration settings.
Table 4-1
Default configuration settings
Feature
Default setting
General
■
Maximum scan time per file is 300 seconds.
■
Maximum archive scan depth (number of levels) is 10.
■
Inbound/Outbound setting is disabled.
■
Degree of Bloodhound heuristic detection is medium.
■
Number of VSAPI scanning threads is figured using the
equation 2xPx1 (where P is the number of processors).
■
Number of scan processes is figured using the equation
2xPx1 (where P is the number of processors).
■
RBL blacklist blocking is disabled.
■
Heuristic anti-spam engine is disabled.
■
All SCL boxes are set to > (greater than) 8.
■
Text to prepend to subject line to tag spam is Spam: (colon).
■
Sender whitelisting is disabled.
■
Recipient whitelisting is disabled.
■
Outbreak management is enabled (no active default
triggers).
■
Outbreaks are checked for every 2 minutes.
Spam prevention
Outbreak
Configuring Symantec Mail Security for Microsoft Exchange
About configuring Symantec Mail Security
Table 4-1
Default configuration settings
Feature
Default setting
HeartBeat
■
HeartBeat system is disabled.
■
Frequency is 60 minutes.
■
Timeout is 5 minutes.
■
HeartBeat logging is disabled.
■
Messenger service alerts on failed HeartBeat is enabled.
■
Messenger service alert text is Symantec Mail Security
HeartBeat Error: <error> See the event log for details.
■
Administrator email notification on failed HeartBeat is
enabled.
■
Administrator email notification text is Administrator
Alert: Symantec Mail Security detected a HeartBeat error.
■
Exchange administrators specify recipients and computers
to notify when a rule is violated.
■
SESA alerting is disabled.
■
LiveUpdate is enabled and set to run at a specific time
(default varies according to time of installation).
■
Decomposer update is enabled.
■
Dictionaries to use is set to Both (Symantec and user).
■
Type of dictionary defaults to User.
Match Lists
■
Sample match lists are created by default.
Quarantine
■
No actions are set by default.
■
Maximum number of items is set to 1000.
■
Maximum size of quarantine is set to 500 MB.
■
Retain items in quarantine is set to 90 days.
■
Notify Administrator is selected for when a threshold is met.
■
Delete oldest items is selected.
■
Email notification subject line text is Administrator Alert:
The Symantec Mail Security Quarantine has exceeded a set
limit.
■
Email notification message body text is You should manage
the Quarantine to remove files or change the Quarantine
settings.
■
Store data for 12 months is enabled.
Notification/Alerts
LiveUpdate
Content Dictionary
Report
81
82 Configuring Symantec Mail Security for Microsoft Exchange
Securing your network
Securing your network
The general settings in Symantec Mail Security for Microsoft Exchange help
ensure the best security for your network.
Protecting against denial-of-service attacks
Denial-of-service attacks are associated with overly large container files that
take a long time to decompose and with files that contain multiple compressed
files. To protect your network from denial-of-service attacks, configure
Symantec Mail Security to limit processing of large files by setting a maximum
scan time and depth.
The scan time setting fixes the maximum amount of time that Symantec Mail
Security scans a file. By default, the setting is 300 seconds. (You can choose to
change this default to a value between 10 and 500,000 seconds.) If you have a
large volume of mail and many mailboxes on your Exchange system, you can
adjust this setting upward. However, in most cases, the default settings are
sufficient.
If the maximum scan time is reached for an item, the item is treated according to
the settings of the Unscannable File Rule.
The scan depth refers to the number of levels within an archive for which
Symantec Mail Security completes a scan. The default value is 10 levels. If a file
contains over 10 levels of archiving, the file is categorized as unscannable, and
an unscannable file rule violation is triggered.
To configure maximum scan time and depth
1
Do one of the following:
■
Open Symantec Mail Security for the single server.
■
In the Symantec Mail Security for Microsoft Exchange console, in the
left pane, select a server group.
2
In the left pane, expand Configuration.
3
Click General Settings.
4
In the right pane, under Maximum Scan Time (in seconds), type the number
of seconds to run all scans.
5
Under Maximum Archive Scan Depth (number of levels), type the number of
levels to use when archiving scans.
Click Save.
Configuring Symantec Mail Security for Microsoft Exchange
Securing your network
Determining inbound/outbound settings
Inbound and outbound email is defined by whether each recipient has a mailbox
in the Exchange organization. As an alternative, you can specify a list of
domains to determine if mail is inbound or outbound. If a recipient’s domain is
in the list, the message is considered to be inbound. If a recipient’s domain is not
in the list, the message is considered to be outbound.
Note: A single message can be considered both inbound and outbound. In this
case, inbound and outbound rules are applied to the message.
To configure inbound and outbound settings
1
Do one of the following:
■
Open Symantec Mail Security for the single server.
■
In the Symantec Mail Security for Microsoft Exchange console, in the
left pane, select a server group.
2
In the left pane, expand Configuration.
3
Click General Settings.
4
In the right pane, under Inbound/Outbound Settings, check Use List to
Determine Inbound/Outbound.
5
Type the domain to use to determine if email messages are inbound or
outbound.
If you type multiple domains, separate the values with commas.
6
Click Save.
Using Bloodhound heuristics technology
The standard method of detecting a virus is to scan a file and match it against
existing virus definitions. For known viruses, this methodology works well.
However, the standard method cannot detect unknown viruses for which
definitions do not exist.
To detect unknown viruses, Symantec Mail Security uses Bloodhound heuristics
technology. Heuristic methods of virus detection are designed to detect viruses
for which no known definitions exist, by matching file behaviors against the
behaviors that are usually exhibited by infected files.
Symantec Mail Security lets you customize your level of protection against
unknown viruses. If you select a high level of protection, Symantec Mail
Security alerts you to executable files that exhibit the behaviors of infected files.
This increases protection of your Exchange system; however, system
83
84 Configuring Symantec Mail Security for Microsoft Exchange
Securing your network
performance may be affected. At lower levels of protection, the possibility that
an unknown virus may escape detection increases, but the trade-off for system
performance decreases.
Symantec Bloodhound heuristics technology copies a suspicious executable file
into its own virtual computer. It then runs the file, probing for and assessing
suspicious behavior, such as whether the file has replicated itself a number of
times in a specified period of time. Because the problem file runs within a
separate virtual computer that replicates the operating system environment,
the potentially infected file cannot harm other files on the computer. Based on
occurrences of suspect behaviors, the heuristic scanner assigns a score to the
problem file, which indicates the probability of infection.
To configure Bloodhound scanning options
1
Do one of the following:
■
Open Symantec Mail Security for the single server.
■
In the Symantec Mail Security for Microsoft Exchange console, in the
left pane, select a server group.
2
In the left pane, expand Configuration.
3
Click General Settings.
4
Under Bloodhound Detection, select a level of protection.
5
Click Save.
Maximizing bandwidth for scanning
To ensure that your network has adequate bandwidth for scanning, Symantec
Mail Security lets you set the number of VSAPI scanning threads and the
number of scan processes. The default is configured using the following
formula: (number of processors) x 2 + 1. You should accept the default, unless
you have a compelling reason to do otherwise.
To configure scanning threads and number of scan processes
1
Do one of the following:
■
Open Symantec Mail Security for the single server.
■
In the Symantec Mail Security for Microsoft Exchange console, in the
left pane, select a server group.
2
In the left pane, expand Configuration.
3
Click General Settings.
Configuring Symantec Mail Security for Microsoft Exchange
Protecting your system from spam
4
In the right pane, in the Number of VSAPI Scanning Threads box, type the
number of threads to use for VSAPI scanning
5
In the Number of Scan Processes box, accept the default or type the number
of scan processes.
The default is configured during installation using the formula 2 times the
number of processors plus 1.
6
Click Save.
Protecting your system from spam
Symantec Mail Security for Microsoft Exchange can protect your system from
spam in the following ways:
■
Block by real-time blacklists (RBLs)
■
Identify suspected spam using the heuristic anti-spam engine
■
Create spam content filtering rules to identify spam
You can configure Symantec Mail Security to bypass RBL blocking and heuristic
spam detection for sender and recipient white lists.
See “Blocking by real-time blacklists” on page 85.
See “Identifying suspected spam messages using the heuristic anti-spam
engine” on page 86.
See “Working with filtering subpolicies” on page 115.
See “Bypassing RBL blocking and heuristic detection for sender and recipient
white lists” on page 88.
Blocking by real-time blacklists
One way of preventing spam is to reject email messages that come from mail
servers known or believed to send spam. To limit potential spam, Symantec Mail
Security for Microsoft Exchange supports real-time blacklist (RBL) blocking.
RBL blocking works by denying mail servers access to your system if those
servers have been identified as allowing spam to originate or relay through
them. Symantec Mail Security refuses the connection attempt of mail servers
that are identified on RBLs that you have configured the product to recognize.
You must subscribe to the third-party real-time blacklist providers before
configuring Symantec Mail Security to perform RBL blocking.
Note: Symantec does not provide a list of RBL providers.
85
86 Configuring Symantec Mail Security for Microsoft Exchange
Protecting your system from spam
To block by real-time blacklists
1
Do one of the following:
■
Open Symantec Mail Security for the single server.
■
In the Symantec Mail Security for Microsoft Exchange console, in the
left pane, select a server group.
2
In the left pane, expand Configuration.
3
Click Spam Prevention Settings.
4
In the right pane, under Real-time Blacklist Blocking, in the Domains of
providers supporting IP-based lookup box, type the domains of the RBL
providers.
Separate domains with commas with no spaces between entries.
RBL providers are queried in the order in which you list them. The first RBL
provider to return a match during an SMTP connection results in the
message being rejected, and no other RBL providers are queried.
5
Click Save.
Identifying suspected spam messages using the heuristic anti-spam
engine
The heuristic anti-spam engine is not activated by default. When activated, the
engine performs an analysis of incoming email messages, looking for key
characteristics of spam. It weighs its findings against characteristics of
legitimate email messages to determine a confidence level (that the message is,
in fact, spam). The confidence level is used to determine actions to take for
accepted messages.
The anti-spam filter engine assigns an spam confidence level (SCL) to each
message. An SCL is a normalized value that indicates the likelihood that the
message is spam based on the message’s characteristics (such as the content and
message header).
Once the SCL is set, the anti-spam engine takes action based on the SCL to block
messages with an SCL that is above the set threshold from entering the mail
system.
Understanding SCL values
There are 11 SCL values. The anti-spam engine assigns a value of 0 to messages
that are not spam. Messages that are determined to be spam are assigned a value
in the range of 1 (extremely low likelihood that the message is spam) to 9
(extremely high likelihood that the message is spam).
Configuring Symantec Mail Security for Microsoft Exchange
Protecting your system from spam
Some messages are exceptions to the rule and fall under the N/A category.
A message will be put under the N/A category under the following
circumstances:
■
The message is an internal Microsoft Exchange message that has already
been assigned a special reserved SCL value of -1.
■
The message was whitelisted by Symantec Mail Security on this server.
■
The message was whitelisted by some other entity (either another anti-spam
product or Symantec Mail Security running on a different server).
■
The message was delivered by an authenticated SMTP session, and the
DoAntiSpamOnAuthSessionsBool registry key is either missing or set to
non-zero.
■
An internal error occurred. This can happen if the SPAM.NET or SPAM.DAT
files are missing or corrupt.
Configure anti-spam protection
Symantec Mail Security can be configured to use the heuristic anti-spam engine
to detect spam.
To configure the heuristic anti-spam engine settings
1
Do one of the following:
■
Open Symantec Mail Security for the single server.
■
In the Symantec Mail Security for Microsoft Exchange console, in the
left pane, select a server group.
2
In the left pane, expand Configuration.
3
Click Spam Prevention Settings.
4
In the right pane, under Heuristic Anti-Spam Engine Settings, check Enable
heuristic spam detection.
5
Check Reject message if SCL is ___ and choose an appropriate value.
6
Check Log rejected messages.
To configure actions to take for accepted messages
1
Under Action(s) to take for accepted messages, check Prevent delivery to
original recipient(s) if SCL is ___ and choose an appropriate value.
2
Check Deliver to alternative recipient(s) if SCL is ___ and choose an
appropriate value.
3
In the Alternative recipient(s) box, type one or more addresses (separated by
commas) to which messages that meet the SCL criterion will be delivered.
87
88 Configuring Symantec Mail Security for Microsoft Exchange
Protecting your system from spam
4
Check Add subject tag if SCL is ___.
5
In Text to prepend on subject box, type text to be prepended in the subject
line of messages that are suspected of being spam.
6
Check Add custom X-header if SCL is ___ and choose an appropriate value.
7
Check Log if SCL is ___ and choose an appropriate value.
8
Click Save.
Bypassing RBL blocking and heuristic detection for sender and
recipient white lists
You can set up a list of sender domains that will not undergo heuristic and RBL
evaluations to minimize false positives. You can also specify domains of
recipients so that email messages that are sent to the specified recipients are not
evaluated by the real-time blacklist or the heuristic anti-spam engine. If both
RBL processing and sender white list processing are activated, the white list
takes precedence, and all domains that are included in the list are allowed.
White lists
Email messages from domains that are included in the white list are still
processed for content violations and viruses.
To configure a sender white list
1
Do one of the following:
■
Open Symantec Mail Security for the single server.
■
In the Symantec Mail Security for Microsoft Exchange console, in the
left pane, select a server group.
2
In the left pane, expand Configuration.
3
Click Spam Prevention Settings.
4
In the right pane, under Sender White List, type the domains and email
addresses (one per line) for which spam processing will be bypassed.
Domain names must begin with either @ (at symbol) or an asterisk before
the at symbol (for example, @mail.com or *@mail.com). You can also type
domains (for example, mail.com.
You can use DOS wildcard characters.
5
Click Save.
Configuring Symantec Mail Security for Microsoft Exchange
Configuring settings to handle an outbreak
To configure a recipient white list
1
Do one of the following:
■
Open Symantec Mail Security for the single server.
■
In the Symantec Mail Security for Microsoft Exchange console, in the
left pane, select a server group.
2
In the left pane, expand Configuration.
3
Click Spam Prevention Settings.
4
In the right pane, under Recipient White List, type the fully qualified email
addresses (one per line) for which spam processing will be bypassed.
You can list up to 50 email addresses.
5
Click Save.
Configuring settings to handle an outbreak
Symantec Mail Security for Microsoft Exchange lets you define thresholds for
virus and heuristic outbreaks on your Exchange servers and configure the
notifications and alerts to issue when an outbreak is detected. An event is
considered a virus outbreak when the number of infected files on a system
exceeds a specified threshold value within a specified amount of time. For
example, if 10 occurrences of the same virus are detected during a two-minute
interval, an outbreak is triggered.
You can configure different settings for different outbreak situations. For
example, you can create one virus outbreak trigger for the total number of
viruses detected and another virus outbreak trigger for occurrences of a specific
virus.
You can also create and configure heuristic triggers for managing outbreaks.
Rather than identifying known viruses, heuristic triggers identify message
attributes or events in your server environment that are frequently associated
with an outbreak, such as the number of occurrences of a specific subject line.
Note: The following procedures apply to the single-server user interface,
although in most cases, the multiple server console uses the same steps. The
options that you configure are the same, regardless. For procedures that require
you to add or delete items, you access configuration options differently. In the
multiple server console, you must right-click an item in the left pane (rather
than clicking it) to access the configuration options for the node.
89
90 Configuring Symantec Mail Security for Microsoft Exchange
Configuring settings to handle an outbreak
Configure outbreak settings
You can configure the global outbreak management settings and add and delete
virus and heuristic triggers. (You must enable a filtering subpolicy for a
heuristic trigger to work). You can end outbreak notifications at any time.
Otherwise, the notifications will continue until the outbreak situation is no
longer in effect.
To configure the global outbreak management settings
1
Do one of the following:
■
Open Symantec Mail Security for the single server.
■
In the Symantec Mail Security for Microsoft Exchange console, in the
left pane, select a server group.
2
In the left pane, expand Configuration.
3
Click Outbreak Settings.
4
In the right pane, check Enable Outbreak Management.
5
Type the interval in minutes to wait between checks for viruses or
occurrences of a specified file behavior.
6
Click Save.
To clear Outbreak notifications
1
Do one of the following:
■
Open Symantec Mail Security for the single server.
■
In the Symantec Mail Security for Microsoft Exchange console, in the
left pane, select a server group.
2
In the left pane, expand Configuration > Outbreak Settings.
3
Click Clear Outbreak.
To add a virus trigger
1
2
Do one of the following:
■
Open Symantec Mail Security for the single server.
■
In the Symantec Mail Security for Microsoft Exchange console, in the
left pane, select a server group.
In the left pane, expand Configuration > Outbreak Settings > Virus
Triggers.
Configuring Symantec Mail Security for Microsoft Exchange
Configuring settings to handle an outbreak
3
4
Do one of the following:
■
In the single-server user interface, click Add/Delete Virus Trigger, and
then in the right pane, click Add a virus outbreak trigger, and then
click Next.
■
In the console user interface, right-click Virus Triggers, and then click
All Tasks > Add Trigger.
Do one of the following:
■
In the single-server user interface, in the right pane, type a name for
the virus trigger.
■
In the console user interface, in the Add Trigger dialog box, type a
name for the virus trigger, and then click OK.
5
Check Enable trigger if you want the rule that you are about to create to go
into effect.
6
In the Event list, select whether the trigger is activated by occurrences of the
same virus, the total number of viruses, or unrepairable viruses.
7
In the Occurrences field, type the number of occurrences of the selected
event that defines an outbreak.
8
In the Time period field, select the unit of time, and then type the number of
minutes, hours, or days over which Symantec Mail Security should detect
the outbreak before starting the process again.
9
Under Administrator email notifications, check Enable to notify
administrators upon activation of the virus outbreak trigger.
For administrators to receive email notifications during an outbreak, the
notification email address must be a valid Active Directory email account.
10 Change the Subject Line and Message Body text to be used in the
administrator notification, if necessary.
11 Enter a Subject Line and Message Body text to be used for subsequent
notifications.
12 Under Alerts, check Enable to send a Messenger Service Alert upon
activation of the virus outbreak trigger.
If you enable this alert, type the alert and subsequent alert text.
13 Under Alerts, check Enable to send an AMS Alert upon activation of the
virus outbreak trigger.
14 Click Save.
91
92 Configuring Symantec Mail Security for Microsoft Exchange
Configuring settings to handle an outbreak
To add a heuristic trigger
1
Do one of the following:
■
Open Symantec Mail Security for the single server.
■
In the Symantec Mail Security for Microsoft Exchange console, in the
left pane, select a server group.
2
In the left pane, expand Configuration > Outbreak Settings > Heuristic
Triggers.
3
Do one of the following:
4
■
In the single-server user interface, click Add/Delete Heuristic
Triggers, and then in the right pane, click Add a heuristic outbreak
trigger, and then click Next.
■
In the console user interface, right-click Heuristic Triggers, and then
click All Tasks > Add Trigger.
Do one of the following:
■
In the single-server user interface, in the right pane, type a name for
the heuristic trigger.
■
In the console user interface, in the Add Trigger dialog box, type a
name for the heuristic trigger, and then click OK.
5
Check Enable trigger if you want the rule that you are about to create to go
into effect.
6
In the Event list, select whether the trigger is activated by occurrences of the
same virus, the total number of viruses, or unrepairable viruses.
7
In the Occurrences field, type the number of occurrences of the selected
event that define an outbreak.
8
In the Time period field, select the unit of time, and then type the number of
minutes, hours, or days over which Symantec Mail Security should detect
the outbreak before starting the process again.
9
Under Actions to take, check Add Subject/Attachment name to Triggered
Match List.
10 Under Administrator email notifications, check Enable to notify
administrators upon activation of the virus trigger.
For administrators to receive email notifications during an outbreak, the
notification email address must be a valid Active Directory email account.
11 Under Initial Notifications, type the Subject Line and Message Body text to
be used in the administrator notification.
12 Under Subsequent Notifications, type the Subject Line and Message Body
text to be used for follow-up notifications.
Configuring Symantec Mail Security for Microsoft Exchange
Configuring settings to handle an outbreak
13 Under Alerts, check Enable to send a Messenger Service Alert upon
activation of the virus outbreak trigger.
If you enable this alert, type the alert and subsequent alert text.
14 Under Alerts, check Enable to send an AMS Alert upon activation of the
virus outbreak trigger.
15 Click Save.
To delete a virus trigger for a single server
1
In Symantec Mail Security, in the left pane, expand Configuration >
Outbreak Settings > Virus Triggers > Add/Delete Virus Triggers.
2
In the right pane, click Delete a virus outbreak trigger.
3
Click Next.
4
In the right pane, under Virus trigger name, select the virus trigger that you
want to delete.
5
Click Delete.
To delete a virus trigger in the console
1
In the Symantec Mail Security for Microsoft Exchange console, in the left
pane, select a server group.
2
In the left pane, expand Configuration > Outbreak Settings > Virus
Triggers.
3
Right-click a trigger, and then click Delete.
To delete a heuristic trigger for a single server
1
In Symantec Mail Security, in the left pane, expand Configuration >
Outbreak Settings > Heuristic Triggers > Add/Delete Heuristic Triggers.
2
In the right pane, click Delete a heuristic outbreak trigger.
3
Click Next.
4
In the right pane, under Heuristic trigger name, select the heuristic trigger
that you want to delete.
5
Click Delete.
93
94 Configuring Symantec Mail Security for Microsoft Exchange
Monitoring Symantec Mail Security functionality
To delete a heuristic trigger in the console
1
In the Symantec Mail Security for Microsoft Exchange console, in the left
pane, select a server group.
2
In the left pane, expand Configuration > Outbreak Settings > Heuristic
Triggers.
3
Right-click a trigger, and then click Delete.
Monitoring Symantec Mail Security functionality
When enabled, the Symantec Mail Security for Microsoft Exchange HeartBeat
feature verifies, at regular intervals, the functioning of the application across
each Exchange server on which it is installed. HeartBeat settings can only be
enabled for an Auto-Protect scan job.
You must use the single-server user interface to configure and enable the
HeartBeat for each instance of Symantec Mail Security that you want to test.
At the start of each HeartBeat, a series of preliminary system checks are
performed, which includes the sending of mail, detecting the VSAPI that is used
by Exchange 2000/2003, and testing whether the SMSMSE service is running.
After the preliminary tests are completed, a test message is passed through the
system and sent to a mailbox that was specified by an administrator.
Once the test message has completed:
■
If the message successfully passes through the system, the HeartBeat is
considered successful.
■
If the message never arrives or the attachment contents are incorrect, an
error results, and the system has failed the HeartBeat.
Configuring the HeartBeat settings
By default, the HeartBeat settings are not enabled. If you elect to use the
HeartBeat feature, in most cases, you should not need to change the frequency
and timeout settings. You should either select or create a mailbox for the
HeartBeat feature that is a special account that is only accessible by
administrators.
HeartBeat will run only when Auto-Protect is enabled.
To configure the HeartBeat settings
1
In Symantec Mail Security, in the left pane, expand Configuration.
2
Click Heartbeat Settings.
Configuring Symantec Mail Security for Microsoft Exchange
Configuring notifications and alerts
3
In the right pane, check Enable Heartbeat System.
4
Optionally, change the HeartBeat frequency and HeartBeat timeout settings.
5
Optionally, check Log Heartbeat Success.
Checking Log Heartbeat Success creates extra Event Log entries.
6
Under Administrator Alerts, do the following, as necessary:
7
8
■
Check Send Message Service Alerts on failed HeartBeat to send an
alert to the administrator upon a HeartBeat failure.
■
Type the Messenger Service alert text.
Under Administrator email Notification, do the following, as necessary:
■
Check Send Administrator email on failed HeartBeat to send email
notification to the administrator upon a HeartBeat failure.
■
Type the Message subject text.
Click Save.
Configuring notifications and alerts
When you configure notifications and alerts, you specify the administrators,
users, and computers that receive email notifications, Windows 2000/2003
alerts, and AMS alerts when a rule violation occurs, when an outbreak trigger is
activated, or when a critical service failure occurs.
Note: Email notifications are sent only to names and addresses that can be
resolved against Active Directory objects.
When defining a policy, you specify the actual text of the message and alerts
that are sent to the list of administrators, users, and computers that are
specified in the notification and alerts configuration settings for when a rule is
violated.
See “How subpolicy rules work” on page 111.
Symantec Mail Security for Microsoft Exchange provides the following
mechanisms for issuing alerts to administrators:
■
Messenger Service alerts, which are issued by Microsoft Windows 2000/
2003/XP
■
The Alert Management System2 (AMS2), which is managed and configured
through Symantec AntiVirus Corporate Edition
■
Symantec Enterprise Security Architecture alerts
95
96 Configuring Symantec Mail Security for Microsoft Exchange
Configuring notifications and alerts
You should restrict the issuing of alerts to a small list of interested
administrators or specific computers to avoid unnecessary interruptions.
Although AMS alerts are generally managed through Symantec AntiVirus
Corporate Edition, you can install the AMS Administration Utility to manage
alerts directly for Symantec Mail Security. The setup program resides in
\Admtools\DIS\AMS on the Symantec Mail Security distribution media. After
installation, you can configure AMS alerts, which include broadcasts, email
messages, message boxes, pages, and SNMP traps. For more information, see the
AMS online Help.
If you have installed Symantec Enterprise Security Architecture (SESA), you can
enable SESA alerts. Although SESA is not part of Symantec Mail Security, it
allows security information such as virus detection and content filtering
violations to be logged and analyzed across an entire organization. Selecting
Enable SESA Logging enables the reporting of security events to the SESA
Manager, where the events are sent to the SESA DataStore.
When Enable SESA Logging is selected, you specify the IP address of the SESA
server, which sends events to a designated SESA Manager computer.
To configure notifications and alerts
1
Do one of the following:
■
Open Symantec Mail Security for the single server.
■
In the Symantec Mail Security for Microsoft Exchange console, in the
left pane, select a server group.
2
In the left pane, expand Configuration.
3
Click Notification/Alerts Settings.
4
In the right pane, under Email notifications, do the following:
■
Under Address of sender to use in email notification, type the email
address of the sender that you want to use for email notifications.
■
Under Administrators or others to notify, type the email addresses of
administrators and users to notify.
Separate each entry by commas. If you are including an email address
that is not within your domain, type the fully qualified email address
(for example, [email protected]).
5
Under Messenger Service Alerts, type the computers and users that will
receive Messenger Service alerts when a rule is violated.
Separate each entry by commas.
6
Under AMS Alerts, type the name of the AMS2 server that will receive alerts
from the AMS2 agent that is on the server when a rule is violated.
Configuring Symantec Mail Security for Microsoft Exchange
Configuring automatic virus protection
7
Under SESA alerts, check Enable Logging and Alerting to SESA server.
If you enable this setting, type the IP address for the SESA server.
8
Click Save.
Configuring automatic virus protection
LiveUpdate automatically updates virus definitions from the Symantec Web
site.
By default, LiveUpdate is enabled with a recommended schedule. However, you
can reconfigure LiveUpdate at any time.
If you are using the Symantec Mail Security for Microsoft Exchange console
(multiserver console) along with Symantec Mail Security, each managed server
in a selected group runs LiveUpdate at the scheduled date and time.
See “How Symantec Mail Security detects and prevents viruses” on page 147.
See “Updating virus definitions for multiple servers” on page 150.
Isolating email messages that contain viruses
Symantec Mail Security for Microsoft Exchange lets you isolate problem
messages by sending them to a quarantine directory on the local server. Usually,
quarantined files are those that are either unscannable or unrepairable due to
viruses.
Symantec Mail Security also lets you forward quarantined files to the
Quarantine Server if one has been set up on your network. Quarantine Server, a
component of Central Quarantine, is included with Symantec Mail Security and
is installed separately. Files that are unscannable are not forwarded to the
Quarantine server. They remain in the local quarantine. By forwarding the
quarantined files to the Quarantine Server, you can take advantage of its
features, which allow the sending of the problem files to Symantec for analysis
and subsequent issuing of new virus definitions.
You can configure the Quarantine settings to do the following:
■
Forward quarantined files to the Quarantine Server.
■
Delete local quarantined items after forwarding them to the Quarantine
Server.
■
Set the Quarantine thresholds.
97
98 Configuring Symantec Mail Security for Microsoft Exchange
Isolating email messages that contain viruses
■
Specify an action to take when a Quarantine threshold is met.
■
Add notification text to the email message that is sent when a Quarantine
threshold is met.
Configure Quarantine settings
You can forward quarantined files to the Quarantine Server and configure
thresholds for the local Quarantine.
To forward quarantined files to the Quarantine Server
1
Do one of the following:
■
Open Symantec Mail Security for the single server.
■
In the Symantec Mail Security for Microsoft Exchange console, in the
left pane, select a server group.
2
In the left pane, expand Configuration.
3
Click Quarantine Settings.
4
In the right pane, under Quarantine Server, check Send quarantined items
to Quarantine Server.
5
Check Delete local quarantined items after forwarding to Quarantine
Server (optional).
6
In the Server Address box, type the IP address of the Quarantine server.
7
In the Server Port box, type the port number for the Quarantine server.
Configuring Symantec Mail Security for Microsoft Exchange
Isolating email messages that contain viruses
8
Select which network protocol to use.
9
Click Save.
To set thresholds for the local Quarantine
1
Do one of the following:
■
Open Symantec Mail Security for the single server.
■
In the Symantec Mail Security for Microsoft Exchange console, in the
left pane, select a server group.
2
In the left pane, expand Configuration.
3
Click Quarantine Settings.
4
To limit the number of quarantined items, check Maximum number of
items, and then type a number in the field.
5
To limit the maximum size of the Quarantine, check Maximum size of
quarantine, type a number in the field, and then select MB or GB from the
list.
6
To limit how long an item may be quarantined, check Retain items in
quarantine, and then type the number of days in the field.
7
Click Save.
To specify an action to take when a Quarantine threshold is met
1
Do one of the following:
■
Open Symantec Mail Security for the single server.
■
In the Symantec Mail Security for Microsoft Exchange console, in the
left pane, select a server group.
2
In the left pane, expand Configuration.
3
Click Quarantine Settings.
4
Check Notify Administrator to send notification messages to an
administrator list.
5
Check Notify others to send notification messages to a list.
6
Check Delete oldest items to remove items that have reached a specified
quarantine threshold from the server.
If Delete oldest items is not checked and a Quarantine size threshold is
reached, the event is logged and a notification is sent to the recipients that
are specified in the Quarantine Settings page.
7
Click Save.
99
100 Configuring Symantec Mail Security for Microsoft Exchange
Configuring report data settings
To add notification text to the email message that is sent when a Quarantine
threshold is met
1
Do one of the following:
■
Open Symantec Mail Security for the single server.
■
In the Symantec Mail Security for Microsoft Exchange console, in the
left pane, select a server group.
2
In the left pane, expand Configuration.
3
Click Quarantine Settings.
4
Do one of the following:
■
In the single-server user interface, under Email Notification, in the
Subject Line field, use the default text, or type your own subject line
text.
■
In the console user interface, under Administrator Notification, in the
Subject Line field, use the default text, or type your own subject line
text.
5
In the Message Body field, use the default text, or type a message to send to
an administrator list.
6
Click Save.
Configuring report data settings
Symantec Mail Security for Microsoft Exchange generates various types of data
on virus scanning, virus definitions, viruses detected, and virus-related events
on a system. In addition, Symantec Mail Security generates data about
violations for the different rules. You have the option of creating and saving
custom reports that include subsets of this data.
You can configure Symantec Mail Security so that this data is retained for
different periods of time. You can also manually clear all report data on an asneeded basis, if the amount of report data saved is too large or if it is no longer
needed.
Symantec Mail Security lets you save report data in a comma-delimited file (.csv)
for use with external applications and reporting tools.
See “Working with report data” on page 143.
Configuring Symantec Mail Security for Microsoft Exchange
Configuring report data settings
To configure data report settings
1
Do one of the following:
■
Open Symantec Mail Security for the single server.
■
In the Symantec Mail Security for Microsoft Exchange console, in the
left pane, select a server group.
2
In the left pane, expand Configuration.
3
Click Report Settings.
4
In the right pane, select one of the following:
5
■
Store all data: Keep all data indefinitely.
■
Store no data: Retain no data; reports cannot be run.
■
Store data for a specified number of months: The data is cleared after
the specified time period. If you choose to retain the data for a specified
time period, in the box, type the number of months of data to store.
Click Save.
101
102 Configuring Symantec Mail Security for Microsoft Exchange
Configuring report data settings
Chapter
5
Establishing policies
This chapter includes the following topics:
■
About policies
■
How policies work with scan jobs
■
Understanding the Standard Policy and custom policies
■
Working with subpolicies
■
Working with Match List settings
■
Outbreak Triggered Attachment Names and Subject Lines Match List
options
About policies
Policies are solutions for detecting and resolving security threats to your
Exchange servers. Symantec Mail Security for Microsoft Exchange provides a
default Standard Policy that includes the most frequently used rules for
protecting your Exchange servers. You can also configure and save custom
policies that address the unique security needs of your organization.
A policy consists of a set of subpolicies. Each subpolicy represents a security
category and a set of rules that belong to that category (for example, the Macro
Virus Rule belongs to the Virus subpolicy). Each subpolicy rule specifies an
action to take and the notifications and alerts to issue when the rule is violated.
The relationship between policies, subpolicies, and rules in Symantec Mail
Security is shown in Figure 5-1.
104 Establishing policies
How policies work with scan jobs
Figure 5-1
Policies, subpolicies, and rules
Policy
Subpolicy
(Virus, Filtering,
Exception)
Rules
For example, you can define a policy that contains the following sets of rules:
■
Upon detection of any virus, repair the infected file or message and send an
email message to the sender and to the administrator list to notify them of
the infected message.
■
Screen mail content for racist or sexual content, and log messages that
exceed a specified threshold for these categories.
■
Delete message attachments that are over a specified size.
■
Quarantine unscannable and unrepairable files.
Within a policy, all subpolicies and rules can be enabled or disabled, except for
the subpolicy that handles unrepairable, encrypted, and unscannable messages,
which is always enabled.
How policies work with scan jobs
For a policy to be implemented, it must be linked with a scan job and enabled. In
Symantec Mail Security for Microsoft Exchange, any scan job can be run using
the Standard Policy or a custom policy. The scan job applies the rules of the
policy to the scan.
Generally, you use the Standard Policy for the Auto-Protect scan job, and
custom policies for manual and scheduled scan jobs.
Establishing policies
How policies work with scan jobs
Every scan job that runs on Symantec Mail Security belongs to one of the
following categories:
Auto-Protect scanning
In this mode, violations are scanned and detected in real time.
The policy that is linked to the Auto-Protect scan job applies to
everything on the Exchange server (items in all public folders
and mailboxes and messages that are processed by the
Microsoft Exchange SMTP service).
Manual scanning
A manual scan is an on-demand scan of public folders and
mailboxes. The policy that is linked to a manual scan job
applies only to folders and mailboxes that are selected when
you define the scan.
Scheduled scanning
Scheduled scans are scans that run unattended, usually at offpeak periods. The policy that is linked to a scheduled scan job
applies only to folders and mailboxes that are selected when
you define the scan.
Policy settings and scanning
When a scan job detects a mail security violation, the rule settings of the policy
that is in effect for the scan determine which events will be triggered. For
example, if a macro virus is detected, and a Macro Virus rule setting is enabled
for the current policy, a specific action (such as sending the message attachment
to the Quarantine or deleting the whole message), notifications, and alerts (such
as an alert sent to the administrator’s main computer) are triggered upon
detection of the macro virus.
You can create your own policies, enable and disable subpolicies and rules,
modify the rules for a policy, and link a policy to any scan job.
Note: Only one policy can be in effect for a scan job.
Switching policies
You can reuse policies for different scan jobs and switch between policies. Each
scan job can share a policy or have its own sets of policies.
For example, a company might use scan jobs and policies as follows:
105
106 Establishing policies
Understanding the Standard Policy and custom policies
■
A manual scan job is linked to a new custom policy that only searches for
attachment files with *.vbs, *.js, and *.exe file extensions. The manual scan is
run immediately. Scheduled Scan Job #1, which was run every Monday and
Friday evening using a different custom policy, is linked to this new custom
policy, and is run on the same schedule.
■
Scheduled Scan Job #2 and Scheduled Scan Job #3 use the same custom
policy. This policy searches for content violations in all public folders. The
scans are run at midnight on a weekly basis with minimal notifications and
alerts.
Understanding the Standard Policy and custom
policies
Symantec Mail Security for Microsoft Exchange includes a default policy called
the Standard Policy and lets you create custom policies.
Each policy (the Standard Policy and any custom policy) consists of the
following subpolicies:
Virus
Contains rules for detecting a virus and the actions to take when
one is detected
Filtering
Contains rules for message body content filtering, flagging mail
according to words in the subject line and filtering spam
Exception
Contains rules for handling unscannable and unrepairable files
and encrypted files
Using the Standard Policy
The Standard Policy contains default settings to protect your Microsoft
Exchange servers. You may alter these settings depending on the needs of your
organization. Auto-Protect scanning is installed using the Standard Policy.
(That is, when Auto-Protect scanning starts for the first time, it follows the
Standard Policy rule settings.)
You cannot delete the Standard Policy, but you can set all of your scan jobs to
use a custom policy instead. You can restore the default Standard Policy settings
if necessary.
Note: Restoring the default settings will not delete any custom Filtering Rules
that you have created.
Establishing policies
Understanding the Standard Policy and custom policies
To restore the default Standard Policy settings
1
Do one of the following:
■
Open Symantec Mail Security for a single server.
■
In the Symantec Mail Security console, in the left pane, select a server
group.
2
In the left pane, expand Policies.
3
Click Standard Policy.
4
In the lower right pane, click Restore Defaults.
Customizing policies
Symantec Mail Security for Microsoft Exchange lets you create custom policies.
When you create a custom policy, you use an existing policy as a template, save
the policy under a new name, and then modify the settings. To use a custom
policy, you must link it to a scan job, enable it, and run the scan.
If you delete a custom policy, all scan jobs that use that custom policy revert to
the Standard Policy.
Work with custom policies
You can create, edit, and delete custom policies.
For more information on editing custom policies, see “Working with filtering
subpolicies” on page 115.
To create a custom policy in the multiserver console
1
In the Symantec Mail Security for Microsoft Exchange console, in the left
pane, expand Policies.
2
Right-click Custom Policies, and then click All Tasks > Add Policy.
3
In the Add Custom Policy dialog box, under Policy Name, type the name of
the custom policy.
4
Under Policy Template, select a policy to use as a template for the new
policy.
5
Click OK.
6
In the left pane, select the new custom policy.
7
In the right pane, customize the new policy by enabling or disabling its
subpolicies and changing the settings for the subpolicy rules.
8
Save every rule and subpolicy that you modify.
Rules in the multiserver console are enabled by default.
107
108 Establishing policies
Understanding the Standard Policy and custom policies
9
Click Save.
To delete a policy in the multiserver console
◆
In the Symantec Mail Security for Microsoft Exchange console, in the left
pane, right-click the policy that you want to delete, and then click Delete.
To create a custom policy in the single-server user interface
1
In Symantec Mail Security for Exchange, in the left pane, expand Policies.
2
Click Custom Policies.
3
In the right pane, click Add/Delete Custom Policy.
4
Click Add a Custom Policy.
5
Click Next.
6
Under Policy name, type a name for the new policy.
7
Under Policy Template, select a policy (either the Standard Policy or an
existing custom policy) to use as a template for the new policy.
8
Click Save Policy.
9
Customize the policy by enabling or disabling its subpolicies and changing
the settings for the subpolicy rules.
10 Click Save.
To delete a policy in the single-server user interface
1
In Symantec Mail Security, in the left pane, expand Policies > Custom
Policies > Add/Delete Custom Policy.
2
In the right pane, click Delete a custom policy.
3
Click Next.
4
In the Policy list, select the policy to delete.
5
Click Delete Policy.
General guidelines for custom policies
You can apply custom policies in a wide range of situations. For example,
custom policies are useful when a limited number of notifications need to be
issued. If manual scanning of the information store is taking place at night, and
messages in the store have already been checked with an Auto-Protect scan, you
might want to issue a minimal number of notifications and alerts.
You can create as many custom policies as your site needs.
Establishing policies
Working with subpolicies
The following are examples of business scenarios for custom policies:
■
A message with a particular attachment name is associated with a known
problem. A custom policy whose only rule is to locate the attachment is
linked with a manual scan and run immediately.
■
To save overhead, the Auto-Protect scan logs encrypted archives as they
come into the Exchange store from the Internet but does not take any other
actions. A separate custom policy that searches for these encrypted
messages and deletes them is run off-hours.
■
A custom policy that filters out spam mail for company executives is run on
a scheduled basis.
Working with subpolicies
A subpolicy is a collection of rules that addresses a type of malicious content. A
rule is an element of a subpolicy, which is an element of a policy. When you
make changes to a subpolicy, you are changing the settings that are associated
with one or more subpolicy rules.
Symantec Mail Security for Microsoft Exchange uses the following subpolicies:
■
Virus subpolicy: Contains the Basic Virus rule, Macro Virus rule,
Bloodhound Virus rule, and Mass-Mailer Virus rule
■
Filtering subpolicy: Can contain any number of user-defined filtering rules
Note: Filtering subpolicy rules do not appear by default in the multiserver
console. They must be added.
■
Exception subpolicy: Contains the Unscannable File rule, Unrepairable File
rule, and Encrypted File rule
Work with subpolicies
You can enable and edit subpolicies.
To enable a subpolicy
1
2
Do one of the following:
■
Open Symantec Mail Security for a single server.
■
In the Symantec Mail Security console, in the left pane, select a server
group.
In the left pane, expand Policies.
109
110 Establishing policies
Working with subpolicies
3
Do one of the following:
■
Click Standard Policy.
■
Expand Custom Policies, and then expand a policy.
4
In the right pane, check the subpolicies to enable.
The Exception Subpolicy is always enabled.
5
Click Save.
To edit a subpolicy
1
Do one of the following:
■
Open Symantec Mail Security for a single server.
■
In the Symantec Mail Security console, in the left pane, select a server
group.
2
In the left pane, expand Policies.
3
Do one of the following:
■
Click Standard Policy.
■
Expand Custom Policies, and then expand a policy.
4
In the right pane, click Edit for the subpolicy that you want to edit.
5
Click Edit for the rule that you want to edit.
6
In the rule pane, modify the rule settings.
By default, rules are disabled in the single-server interface. You must enable
the rule after it has been modified.
7
Click Save.
Establishing policies
Working with subpolicies
How subpolicy rules work
In Symantec Mail Security for Microsoft Exchange, rules determine scanning
behavior and consist of one or more settings. Rules can be enabled or disabled
for a subpolicy (except for the Exception subpolicy rules, which are always
enabled). For a rule to become operational, its subpolicy must also be enabled.
All rules have the following settings:
■
Action to take when the rule applies
■
Notifications to send, including the enabling of the notification and the
notification text
■
Alerts to send, including enabling the alert and specifying the alert text
■
Replacement text to use when an item is quarantined or deleted
In addition, filtering rules can be applied to the following types of scanning:
■
Store scanning: All internal mail for an organization; used to enforce
internal mail policies
■
SMTP inbound scanning: Mail coming into an organization; used for things
such as spam reduction
■
SMTP outbound scanning: Mail that is leaving an organization; used to
enforce mail policy for external communications
SMTP inbound and outbound rules should be applied on a gateway computer if
possible. SMTP Inbound rules should be used to detect or mark spam, block mail
with unwanted senders and subjects, block forbidden file types, and prevent
undesirable mail from entering the system. SMTP outbound rules can be used to
enforce external mail policies.
Store filter rules should be run with virus rules on mailbox/public folder servers
to enforce internal mail policies.
Some policy rules specify general behavior while other rules are more
specialized. For example, the basic rule for virus detection applies to all viruses,
while the macro virus rule applies only to macro viruses.
Note: When adding replacement text to use when an item is quarantined or
deleted, do not use any words that violate your current filtering policies.
111
112 Establishing policies
Working with subpolicies
Working with virus subpolicies
The Virus subpolicy specifies the action to take and the notifications and alerts
to issue when a virus is detected. It consists of the following rules:
Basic Virus
Specifies the actions to take when any virus threat is detected. You
should always enable the Virus subpolicy and Basic Virus rule for
virus protection. The policy used by the Auto-Protect scan job
should have the Virus subpolicy and Basic Virus rule enabled.
Macro Virus
Specifies the individual handling of macro viruses.
Bloodhound Virus
Specifies the individual handling of unknown viruses that are
detected with Symantec Bloodhound heuristics technology.
Mass-Mailer Virus
Specifies what to do when a mail-generating virus is found.
The Macro Virus, Bloodhound Virus, and Mass-Mailer Virus rules are override
rules, which means if you enable either or both of these rules, Symantec Mail
Security for Microsoft Exchange uses the Basic Virus rule for handling all
viruses except those that are specified by the Override rule.
Work with virus subpolicies
You can enable and edit Virus subpolicies.
To enable a virus subpolicy
1
Do one of the following:
■
Open Symantec Mail Security for a single server.
■
In the Symantec Mail Security console, in the left pane, select a server
group.
2
In the left pane, expand Policies.
3
Do one of the following:
■
Click Standard Policy.
■
Expand Custom Policies, and then expand a policy.
4
Click Virus Subpolicy.
5
In the right pane, check the rules that you want to enable.
6
Click Save.
Establishing policies
Working with subpolicies
To edit a virus subpolicy
1
Do one of the following:
■
Open Symantec Mail Security for a single server.
■
In the Symantec Mail Security console, in the left pane, select a server
group.
2
In the left pane, expand Policies.
3
Do one of the following:
■
Click Standard Policy.
■
Expand Custom Policies, and then expand a policy.
4
Click Virus Subpolicy.
5
In the right pane, click Edit for the rule that you want to edit.
6
Modify the rule settings, and then click Save.
7
In the left pane, click Virus subpolicy.
8
Check the rule that you edited to enable it.
9
Click Save.
Basic Virus rule
The Basic Virus rule contains settings that determine which actions to take
when a virus is detected. You can use the Basic Virus rule for coverage against
all viruses, but it is most often used to find messages that contain known
viruses.
Note: If Log and make message unavailable with Auto-protect is selected for
virus handling, and an email message with a repairable virus attached is sent,
the message does not leave the outbox of the sender.
To edit the Basic Virus rule
1
Do one of the following:
■
Open Symantec Mail Security for a single server.
■
In the Symantec Mail Security console, in the left pane, select a server
group.
2
In the left pane, expand Policies.
3
Do one of the following:
■
Click Standard Policy.
■
Expand Custom Policies, and then expand a policy.
113
114 Establishing policies
Working with subpolicies
4
Click Virus Subpolicy.
5
In the right pane, for the Basic Virus rule, click Edit.
6
Edit the settings for the rule.
7
Click Save.
Macro Virus rule
A macro is an instruction that carries out program commands automatically.
Many common applications (for example, word processing, spreadsheet, and
slide presentation applications) make use of macros. Macro viruses are macros
that self-replicate. If a user accesses a document that contains a viral macro and
unwittingly executes this macro virus, the virus can then copy itself into that
application’s startup files. The computer is infected, and a copy of the macro
virus resides on the computer.
You can set up different rules for handling macro viruses. For example, you
might want to repair the file and send the complete message to the recipient
rather than delete the message that is carrying the virus or send the attachment
to the Quarantine.
Bloodhound Virus rule
Bloodhound viruses are detected with Symantec Bloodhound heuristics
technology. The standard method of detecting a virus is to scan a file and match
a virus against an existing virus definition. Bloodhound heuristics technology
copies the suspicious executable program into its own virtual computer. It then
tests the program and assesses suspicious file behavior, such as whether the file
has replicated itself in a period of time. For cases such as these, you can set the
Bloodhound Virus rule to send files to the Quarantine for further examination
and possible repair at a later date.
See “Securing your network” on page 82.
Mass-Mailer Virus rule
Because email mass-mailer viruses do not need to attach to a host file to
infiltrate a network, they can spread very quickly. The Mass-Mailer Virus rule
specifies what to do when an email mass-mailer virus is detected. By default, the
entire message is deleted.
Establishing policies
Working with subpolicies
Working with filtering subpolicies
The Filtering subpolicy contains rules that let you filter messages for specific
words, phrases, subject lines, and senders, and take action when the specified
content is found.
Symantec Mail Security for Microsoft Exchange lets you create filtering rules to
apply to Auto-Protect scans, on-demand scans, and scheduled scans. The rules
provide a front-end defense in real time against spam email messages and new
or unidentified viruses. These rules expand the control that administrators have
to block objectionable email messages and attachments.
You can set up, edit, or delete as many filtering rules as needed. Each rule
specifies the email attributes to search (subject line, sender, or attachment size,
for example), and defines the condition that will trigger a content violation.
For example, you can set up a rule to filter email messages with attachments
that exceed 3 MB in size. Symantec Mail Security would then catch any email
messages that exceed 3 MB and, like other scans, would process the email
messages according to your configuration settings. You can enable or disable
filtering at any time.
Note: When message body scanning takes place for the filtering rule and a
violation occurs, in some cases, more than one rule violation may be triggered
for a single message. This occurs if the mail client from which the message
originated used RTF or HTML encoding. In that case, both the plain text and
formatted versions of the message body are sent by the mail client to the
Exchange server. The plain text and formatted versions of the message body are
scanned as separate message bodies by Symantec Mail Security.
To edit a filtering subpolicy
1
Do one of the following:
■
Open Symantec Mail Security for a single server.
■
In the Symantec Mail Security console, in the left pane, select a server
group.
2
In the left pane, expand Policies.
3
Do one of the following:
■
Click Standard Policy.
■
Expand Custom Policies, and then expand a policy.
4
Click Filtering Subpolicy.
5
In the right pane, click Edit for the rule that you want to edit.
115
116 Establishing policies
Working with subpolicies
6
Modify the rule settings, and then click Save.
7
In the left pane, click Filtering Subpolicy.
8
In the right pane, check the rule that you edited if you want to enable it.
Rules are enabled by default in the multiserver console.
9
Under Order in which the filtering rules should be applied, move the rule by
selecting it and then clicking Up or Down as necessary.
10 Click Save.
See “Customizing policies” on page 107.
Content evaluation
Email or scanned content that matches an expression in a filtering rule might
violate that rule, depending on whether the rule contains AND expressions or
OR expressions. Specifically, if the rule contains AND expressions, then all
expressions must evaluate to true to trigger a content violation for the entire
rule. However, if the rule contains OR expressions, only one expression must
evaluate to true to trigger a content violation for the rule.
See “Elements of a filtering rule” on page 117.
You can specify a filtering rule to apply to Store scanning, SMTP inbound
scanning, or to SMTP outbound scanning.
Symantec Mail Security for Microsoft Exchange handles content violations
according to the action that you configure for the rule.
You can select any of the following actions (one action per rule):
■
Quarantine attachment/message body, replace with text description
■
Delete attachment/message body, replace with text description
■
Delete entire message
■
Log and make message unavailable with Auto-Protect enabled
■
Log Only (attachment/message body available)
■
Add tag to beginning of subject (option valid only for SMTP inbound rules)
Administrators can also notify senders and others of content filtering violations
using messages with customizable text. To set up notifications, administrators
must configure an alert.
See “Configuring notifications and alerts” on page 95.
Establishing policies
Working with subpolicies
Elements of a filtering rule
A filtering rule consists of one or more expressions that you define. For
example, the following filtering rule contains three expressions:
If Body Content Score Greater Than 50 using categories [sex;drugs;alcoholism]
OR Message Body Contains a member of Spam_Subject
UNLESS Sender Equals [email protected]
This filtering rule blocks messages that have a content score higher than 50 in
the dictionary categories of sex, drugs, and alcoholism. The rule also blocks
message bodies that contain items that are members of the Spam_Subject match
list. If the sender is [email protected], however, the messages are not
blocked.
An expression consists of one or more expression phrases. Expression phrases
can be IF, OR, and AND phrases. The rule above consists of an IF, an OR, and an
UNLESS phrase.
Symantec Mail Security for Microsoft Exchange evaluates a rule logically as
either an OR or AND rule, but not in combination. You can have a rule that
contains an IF phrase, any number of AND phrases, and any number of UNLESS
phrases, but it cannot contain an OR phrase if it already has an AND phrase.
Likewise, if you start with an OR phrase, you can add more OR phrases or
UNLESS phrases, but you cannot include an AND phrase.
An expression phrase consists of the following elements:
Attribute
The part or characteristic of the email message that you want to
scrutinize for violations.
Comparison
The comparison that you want to make between the Attribute and
the value that, when matched to the Attribute, constitutes a
content violation.
Value
The numeric value or alphanumeric text string that you enter as
the criteria to match. The Attachment Size and Content Score are
numeric values. The Suspicious Attachment Name is a Boolean
True or False value, while the rest are alphanumeric text strings.
117
118 Establishing policies
Working with subpolicies
The Attributes with their corresponding Comparisons and Values are shown in
Table 5-1.
Table 5-1
Attributes, Comparisons, and Values
Attributes
Comparisons
Values
Options
Message Body
Contains
Does Not Contain
Text value
Ignore case
Whole words only
Message Body
Content Score
Greater Than
Less Than
Numerical value
Sender
Contains
Does Not Contain
Equals
Does Not Equal
Text value
A member of Match
List
Contains
Does Not Contain
Equals
Does Not Equal
Text value
Ignore case
Whole words only
A member of Match
List
Match List
Attachment Content
Score
Greater Than
Less Than
Numerical value
Categories
Attachment Name
Contains
Does Not Contain
Equals
Does Not Equal
Text value
A member of Match
List
Match List
Attachment Size
Greater Than
Less Than
Equals
Does Not Equal
Numeric Value
Bytes, KB or MB
Suspicious
Attachment Name
Equals
True or False
Subject
A member of Match
List
Categories
Match List
The attribute that you select determines which comparisons you can use. Some
attributes have more comparisons than others. For example, if you select sender
as the attribute, then the available comparisons are Contains, Does not contain,
Equals, and Does not equal. The Sender Attribute also recognizes DOS wildcard
characters in its value field. However, if you choose Suspicious Attachment
Name, then only the Equals comparison is available. If you select Message Body
or Subject, you can select whether to ignore the case and whether to use whole
words only.
Establishing policies
Working with subpolicies
The Suspicious Attachment Name comparison is used to compare the extension
of an attachment to its detected type.
The flag is true if the extension and type do not match. The flag is false if the
extension and type match or if they cannot be compared.
The supported file types include the following:
.ace, .amg, .ani, .arc, .arj, .avi, .bag, .bmp, .cab, .exe, .dll, .gho, .gif, .gz, .gzip, .hqx,
.jpeg, .lha, .lzh, .lz, .doc, .xls, .ppt, .shs, .rar, .rtf, .tar, .tga, .uue, .wav, .zip, .zoo,
.txt, .669, .aif, .aiff, .amd, .amm, .ams, .au, .far, .gdm, .it, .mid, .midi, .mod, .mtm,
.med, .png, .rmi, .stm, .stx, .s3m, .xm.
Note: Symantec Mail Security only scores attachments that consist of text (.txt)
and structured storage files (.doc, .xls, .ppt, and .shs).
The Message body, Subject, and Attachment Name attributes interpret their
value fields as regular expressions. This means that even if you typed a number
in the value field, Symantec Mail Security would consider it text, not a number.
Text strings, because they allow for regular expressions, give you flexibility in
extending your text searches to find more than just a direct match. Regular
expressions include metacharacters to help you broaden the search capabilities
of a given rule.
See “Regular expressions” on page 120.
Selecting Body Content Score or Attachment Content Score as the Attribute
instructs Symantec Mail Security to use its Dynamic Document Review
technology to analyze the content based on a score and one or more dictionary
content categories that you specify for that rule. Symantec Mail Security
considers any message with a score that exceeds your specified threshold value
to be a content violation and takes the action that you have specified for the
rule. The threshold for a content violation may be a single word, phrase, or name
that might appear in the subject line or body of a message, or it may be multiple
occurrences, as determined by the content score engine.
See “Scoring messages” on page 131.
DOS wildcard style expressions
DOS wildcard style expressions (“*”, “.”, and “?”) provide you with a convenient
way to specify file names, similar to the way in which DOS wildcard characters
are used. For example, Match Lists of type DOS wildcard are typically used with
the Attachment Name Attribute to specify file names such as *.exe. In addition, a
DOS wildcard expression allows you to easily specify files without extensions.
119
120 Establishing policies
Working with subpolicies
DOS wildcard style expressions are similar to Regular expressions with some
exceptions, as shown in Table 5-2.
Table 5-2
DOS wildcard expressions
DOS wildcard
expression
Equivalent regular Description
expression
*
.*
Zero or more of any character
?
[^\.]
Any one character except the period (.)
.
\.
Literal period character
*.
[^\.]+\.?
Does not contain a period, but can end with
one
Regular expressions
A regular expression is a set of symbols and syntactic elements that is used to
match patterns of text. Symantec Mail Security for Microsoft Exchange
performs matching on a line-by-line basis. It does not evaluate the line feed
(newline) character at the end of each input expression phrase.
You can build regular expressions using a combination of normal alphanumeric
characters and metacharacters. Regular expressions give you a powerful way of
performing pattern matching in text. For example, many spam email messages
contain a trailing number at the end of the subject line text, as in the following
sample subject line:
Here’s a hot stock pick!43234
To write a rule to match email subject lines that have trailing numbers, compare
the subject against the following regular expression:
^.+![0-9]+$
This regular expression contains the normal alphanumeric characters 0-9 and
the metacharacters ^, ., +, and []. By using the subject attribute, the = operator,
and the regular expression as the value, you can build a content filtering rule to
catch any email messages whose subject lines end with a trailing number. This is
a possible sign that the message is spam.
See “Metacharacters” on page 121.
Note: For filtering only, first-level attachments refer to the outer-most file
attachment. The filtering engine does not evaluate any file extension names
inside the outer attachment, for example, the compressed files in a .zip file.
Establishing policies
Working with subpolicies
Metacharacters
Table 5-3 lists the metacharacters that you can use in regular expressions to
build filtering rules. Some characters are not considered special unless you use
them in combination with other characters.
Note: You can use metacharacters in regular expressions to search for both
single-byte and multi-byte character patterns.
Table 5-3
Metacharacter descriptions
Metacharacte Description
r
.
Period: Matches any single character of the input sequence.
^
Circumflex: Represents the beginning of the input line. For example,
^A is a regular expression that matches the letter A at the beginning of
a line. The ^ character is only special at the beginning of a regular
expression, or after the ( or | characters.
$
Dollar sign: Represents the end of the input line. For example, A$ is a
regular expression that matches the letter A at the end of a line. The $
character is only special at the end of a regular expression or before
the ) or | characters.
*
Asterisk: Matches zero or more instances of the string to the
immediate left of the asterisk. For example, A* matches A, AA, AAA,
and so on. It also matches the null string (zero occurrences of A).
?
Question mark: Matches zero or one instance of the string to the
immediate left of the question mark.
+
Plus sign: Matches one or more instances of the string to the
immediate left of the plus sign.
\
Escape: Turns on or off the special meaning of metacharacters. For
example, \. only matches a dot character. \$ matches a literal dollar
sign character. Note that \\ matches a literal \ character.
|
Pipe: Matches either expression on either side of the pipe. For example,
exe|com|zip matches exe, com, or zip.
121
122 Establishing policies
Working with subpolicies
Table 5-3
Metacharacter descriptions
Metacharacte Description
r
[string]
Brackets: Inside the brackets, matches a single character or collating
element, as in a list. The string inside the brackets is evaluated
literally, as if an escape character (\) were placed before each character
in the string.
If the initial character in the bracket is a circumflex (^), then the
expression matches any character or collating element except those
inside the bracket expression.
If the first character after any potential circumflex (^) is a dash (-) or a
closing bracket (]), then that character matches only a literal dash or
closing bracket.
(string)
\(string\)
Parentheses: Groups parts of regular expressions, which gives the
string inside the parentheses precedence over the rest.
The order of metacharacters, from highest to lowest precedence, is as follows:
()
Precedence override
|
OR
[]
List
\
Escape
^
Start with
Examples of regular expressions that filter mail
You can link several regular expressions to form a larger one to match certain
content in email. Table 5-4 lists examples of regular expressions that show how
Establishing policies
Working with subpolicies
pattern matching is accomplished with the use of metacharacters and
alphanumeric characters.
Table 5-4
Regular expressions
Regular expression
Description
abc
Matches any line of text that contains the three letters
abc in that order.
Your results may differ depending on the comparison
that you use to create the filtering rule. For example, if
you build a rule to match the word Free and use the
Contains comparison, then the filtering engine will
detect all words that contain the word Free instead of an
exact match (for example, Freedom). However, if you use
the Equal comparison, then the Filtering engine will
detect only exact matches of the word Free with no
other surrounding text. If you use the Contains
comparison with Whole words only, then the Filtering
engine will detect Free as a stand-alone word, even if
there are other words present in the text that is being
searched.
a.c
Matches any string that begins with the letter a,
followed by any character, followed by the letter c.
^.$
Matches any line that contains exactly one character.
(The newline character is not counted.)
a(b*|c*)d
Matches any string beginning with the letter a, followed
by either zero or more instances of the letter b, or zero
or more instances of the letter c, followed by the letter d.
.+\....\....
Matches any file name that has two, three-letter
extensions (for example, Filename.gif.exe).
This regular expression is helpful in blocking email
attachments with double extensions. For example:
If Attachment Name = .+\....\....
[0-9a-zA-Z]+<!--.*-->[0-9a-zAZ]+
Matches an embedded comment in the middle of
meaningful HTML text. Embedding comments within
HTML text is a trick that spam senders use to bypass
some pattern-matching software.
123
124 Establishing policies
Working with subpolicies
Setting an Exception subpolicy
The Exception subpolicy, which is always enabled, consists of the following rules
for handling files that cannot be scanned or repaired:
Unscannable File
Specifies which actions to take when a message or
attachment cannot be scanned for viruses
Unrepairable File
Specifies which actions to take when an infected message
or attachment cannot be repaired
Encrypted File
Specifies what to do when a file is unscannable due to
encryption or password protection
To set an Exception subpolicy
1
Do one of the following:
■
Open Symantec Mail Security for a single server.
■
In the Symantec Mail Security console, in the left pane, select a server
group.
2
In the left pane, expand Policies.
3
Do one of the following:
■
Click Standard Policy.
■
Expand Custom Policies, and then select a policy.
4
In the right pane, click Edit for the Exception subpolicy, the Unscannable
File rule, or the Unrepairable File rule.
5
Modify the rule settings, and then click Save.
Unscannable file rule
An email message or attachment may be unscannable for the following reasons:
■
The item contains too many levels of compression or embedding.
■
The item takes too long to scan.
■
The item is too large to scan.
The default (Standard Policy) setting for an unscannable message or attachment
is to quarantine the item and replace it with a text description.
Establishing policies
Working with Match List settings
Unrepairable file rule
If the Basic Virus rule cannot repair an item and the Basic Virus rule is set to
“Repair the infected attachment,” then the item is passed to the Unrepairable
Virus rule, and the appropriate action will be taken.
An email message or attachment may be unrepairable for the following reasons:
■
The virus definitions that were in use at the time the file was attacked were
out-of-date.
■
Too much damage has been done to the item by a virus.
If the problem was caused by out-of-date virus definitions and the unrepairable
message or attachment is important, it may be possible to restore the item from
a backup and rescan using up-to-date virus definitions. Once that is done, it may
be possible to repair the file.
If a file has been severely compromised (for example, by a virus that attacks the
file allocation table), it may be unrepairable. The default (Standard Policy)
setting for an unrepairable message or attachment is to quarantine the item and
replace it with a text description.
Encrypted file rule
An attachment may not be scannable due to encryption or password protection.
These files may contain viruses or other malicious content. The Encrypted File
rule lets you implement your organization’s policy on allowing encrypted files
into the email system.
An encrypted file may be a legitimate means of securing confidentiality between
the sender and recipient, or it could contain malicious code that was designed to
harm your email servers or overwhelm your mail security system. Symantec
Mail Security for Microsoft Exchange handles encrypted attachments according
to the actions and notifications that you specify.
The default (Standard Policy) setting for an encrypted file is to log only
(attachment/message body available).
Working with Match List settings
You can create a Match List that includes words and phrases that are particular
to your company or industry, and for which you want to filter content.
After you create a Match List, you can define a filtering rule that uses the Match
List. The rule will catch any word or phrase that is in the Match List. Match Lists
provide a way to filter content that applies to a specific situation.
125
126 Establishing policies
Working with Match List settings
Outbreak triggers are used to add a subject line or an attachment name of a
possible virus to a triggered Match List on the server. This lets you create a rule
that automatically blocks suspicious subjects and file names.
See “Defining outbreak triggers” on page 153.
If you want to filter a specific set of extensions, you can create a Match List of
those extensions and then reference the list from the filtering rules. You can add
more extensions to the Match List and all of the filtering rules will be updated
automatically.
You can create new Match Lists, add to an existing Match List, or delete or edit
words in a Match List. After you create a Match List, you can define a filtering
rule that specifies the Match List.
To create or add to a Match List
1
2
3
Do one of the following:
■
Open Symantec Mail Security for a single server.
■
In the Symantec Mail Security console, in the left pane, select a server
group.
Do one of the following:
■
In the single-server user interface, in the left pane, click Configuration.
■
In the console user interface, double-click Configuration.
Do one of the following:
■
In the single-server user interface, in the left pane, expand Match Lists,
and then click Add/Delete Match Lists. In the right pane, click Add a
Match List, and then click Next.
■
In the console user interface, in the left pane, right-click Match List
Settings, and then click All Tasks > Add Match List.
4
Type a name for the Match List or select an existing Match List.
When you apply a Match List to a filtering rule, you can also specify whether
to ignore the case and specify whether to use whole words only.
5
In the Match List Description box, type a description for the Match List.
6
Under This List Contains, select one of the following:
■
Literal strings
■
Regular expressions
■
DOS wildcard-style expressions
Establishing policies
Outbreak Triggered Attachment Names and Subject Lines Match List options
7
In the Match List filter box, type a literal string, regular expression, or DOS
wildcard-style expression.
See “Examples of regular expressions that filter mail” on page 122.
8
Click Save.
Outbreak Triggered Attachment Names and Subject
Lines Match List options
The Outbreak Triggered Attachment Names and Outbreak Triggered Subject
Lines display names and subjects that are generated from Outbreak Heuristic
Triggers. Triggered Attachment Names are added to the Outbreak Triggered
Attachment Names Match List, and Triggered Subject Lines are added to the
Outbreak Triggered Subject Lines Match List.
You can edit the text that is displayed under Match List Filter at any time, but
you should leave these as literal strings.
See “Creating a heuristic outbreak trigger” on page 156.
After you configure an outbreak trigger, you can define a filtering rule that
specifies the triggered Match List.
See “Working with Match List settings” on page 125.
The options for Outbreak Triggered Attachment Names and Outbreak Triggered
Subject Lines are the same, and are described in Table 5-5.
Table 5-5
Match list
description
This list contains
Match list filter
Outbreak Trigger Match List options
This specifies where the Outbreak Triggered Match List was
generated:
■
Outbreak Triggered Attachment Names
■
Outbreak Triggered Subject Lines
■
Literal strings: This is the default. You should leave these as
literal strings.
■
Regular expressions
■
DOS wildcard style expressions
This lists the Attachment Names or Subject Lines that are added by
the heuristic trigger.
127
128 Establishing policies
Outbreak Triggered Attachment Names and Subject Lines Match List options
Chapter
6
Using content filtering
dictionaries
This chapter includes the following topics:
■
About dictionary-based content filtering
■
How content filtering dictionaries work
■
Scoring messages
■
Selecting and configuring content filtering dictionaries
■
About quarantined content violations
About dictionary-based content filtering
Content filtering is typically used to monitor the mail system and block
messages that contain specific types of content. Dictionary-based content
filtering lets you filter messages by comparing their message-body content
against words that belong to dictionary categories.
For example, in most organizations, sending messages with explicit sexual or
violent content would not be considered an appropriate use of the mail system,
and may violate corporate conduct guidelines. Dictionary categories such as
Violence and Sex/Acts are designed to flag these types of messages by matching
words in the message against words in the dictionary.
In addition, an organization may want to prevent the spread of confidential
legal information outside the organization. Creating custom categories that
include the confidential terms and monitoring messages for words in those
categories helps ensure confidentiality and reduce possible legal liability.
130 Using content filtering dictionaries
How content filtering dictionaries work
You can also filter messages based on subject line (as an indicator of a virus) and
filter spam (unwanted) email messages.
See “Working with subpolicies” on page 109.
How content filtering dictionaries work
When enabled, the Symantec Mail Security for Microsoft Exchange content
filtering feature matches text in Exchange message bodies against words that
belong to a set of selected categories from a content dictionary. These words
have predefined scores. The more strongly representative the word or phrase is
of a particular category, the higher the score.
When the content filtering option is turned on, each message is assigned a score.
The score is based on the total number of target words found and their weights.
If the score exceeds a specified threshold setting, the message is flagged as
violating a filtering rule. An automated action is then taken, based on the
settings supplied by the administrator for the disposition of flagged messages.
Content dictionaries
A content dictionary is a repository for categories of words or phrases to be
filtered. Symantec Mail Security for Microsoft Exchange uses the following
types of dictionaries:
■
Symantec: This content dictionary is generated by Symantec and contains
commonly filtered words and phrases, which are organized into categories.
■
User-supplied: This dictionary consists of all words and phrases that are
added by the user. The user-supplied dictionary lets an administrator
supersede words and phrases in the Symantec dictionary or add words and
phrases. The user-supplied dictionary always takes precedence over the
Symantec dictionary if the same words and phrases are used in both
dictionaries.
The Symantec dictionary is part of Symantec Mail Security and does not require
a separate installation. The user-supplied dictionary is also installed with
Symantec Mail Security, but the words and phrases must be added by a user with
the proper credentials. All customizing of the user-supplied dictionary is
accomplished through the Symantec Mail Security single-server interface.
Before adding words to the user-supplied dictionary, the Content Dictionary
Settings must be configured so that the dictionaries to use for content filtering
are set to User Dictionary or Both.
See “Selecting and configuring content filtering dictionaries” on page 134.
Using content filtering dictionaries
Scoring messages
Symantec dictionary categories
Whether you use the Symantec-supplied categories or your own words and
categories, you can select which categories of words to enable and disable for
scoring in a filtering rule. If Symantec Mail Security for Microsoft Exchange
finds a word in a category that is not enabled, it ignores it for the purposes of
scoring. A custom word cannot exist in multiple custom categories.
Some of the Symantec dictionary categories are as follows:
■
Crime
■
Drugs/Advocacy
■
E/Games
■
Finance
■
Gambling
■
Sex/Acts
■
Sex/Personals
■
Violence
■
Weapons
Note: You can create user categories and words using hi-ascii and double-byte
character format.
Scoring messages
To score messages, Symantec Mail Security for Microsoft Exchange matches the
individual words of a message body against entries in the Symantec-supplied
content dictionaries and the custom dictionary, if a custom dictionary has been
set up. If a match is found, points are added to the message score. Symantec Mail
Security for Exchange examines successive words for use of contextual words
and adjusts the score accordingly. The sum total of points for the matches and
surrounding words is the score for the email message.
Note: You can create user categories and words using hi-ascii and double-byte
character format.
If the filtering rule is enabled for the scan job in effect, Symantec Mail Security
compares the message score against the threshold setting that you specify in the
131
132 Using content filtering dictionaries
Scoring messages
rule. If the message score is equal to or exceeds the threshold setting, the
expression in the rule is violated.
Matching words and evaluating content
After the content filtering engine divides the text block into words, it compares
the extracted words in successive order to words in the Symantec-supplied or
custom categories.
Whenever a match with a dictionary entry (Symantec-supplied or custom)
occurs, a new process begins. The content filtering engine builds a word chain,
starting with the word that matches the dictionary entry. The purpose of
building a word chain is to further evaluate the meaning of a matched word by
examining its context. For example, if the word cancer succeeds breast in a word
chain, it is likely that the message is about a medical condition and is not
inappropriate. By creating and evaluating word chain structures, the content
filtering engine catches these differences in meaning and adjust scoring
accordingly.
Each word that follows the matched word is added to a chain until the following
occurs:
■
Two successive nondictionary words are found. At that point, the
comparison process continues with the next word in the text block.
■
The end of the block is reached. At that point, the processing of the next text
block begins.
Base and bonus scores
After Symantec Mail Security for Microsoft Exchange processes the message
text, it calculates the total score for the message. This total score is cumulative
across all enabled categories. The content filtering feature does not produce
scores for individual dictionary categories.
Symantec Mail Security uses the following categories of scores when assigning
values:
■
Base score: The primary value that is assigned to a word or phrase. Base
scores can be positive or negative integers. The severity of a word’s base
score should be relative to the scores of the other words in the category.
■
Bonus score: A secondary value that is assigned to a word or phrase. A bonus
score can be positive or negative. Bonus scoring is used for word context and
for adjustments to the total score.
Only Symantec-supplied words and phrases use bonus scores. When you add a
custom word or phrase to a custom category, Symantec Mail Security requires
Using content filtering dictionaries
Scoring messages
that you assign a base score to the entry. It does not require a bonus score for
custom entries, however.
Building custom categories and words
Symantec Mail Security for Microsoft Exchange lets you build custom categories
of words to supplement the Symantec dictionary.
You build custom categories of words by adding new words, their scores, and the
categories to which the words belong. You can either assign words to a new
category or to an existing, Symantec-supplied category. New words that are
assigned to a Symantec-supplied category are considered part of the custom
dictionary and are stored separately from the Symantec dictionary. In cases in
which the same word is found in both dictionaries, the custom dictionary always
takes precedence.
Assigning scores to custom categories
Part of the process of building custom categories involves assigning scores to
words. If you use custom categories of words, you need to do the following:
■
Assign scores that accurately reflect the extent to which the word is
representative of the category.
A negative score can be used to offset the value of a prohibited word that is
used in an appropriate context. For example, a negative score for the word
cancer can offset the positive score of the word breast.
■
Ensure that the threshold value for the filtering rule being applied is set
appropriately.
You can use the following suggestions in choosing scores for custom words:
■
When establishing a score for a word, begin by searching for the word on
several Internet search engines. Examine each of the results to determine
which ones match the expected category.
■
Based on the search results, consider assigning a score of 25 to 50 if you are
certain the results will be found in the expected category, where 50
represents absolute certainty. Assign a score of between 0 and 25 based on
the likelihood that a word will appear in the correct context.
■
Test the words and categories against different threshold values in the
filtering rule, and adjust the new dictionary term scores or threshold values
accordingly.
If the default value of 50 is never attained and you are aware of several
content violations in a message that were passed over, consider lowering
the threshold until the message is triggered, adding or rescoring the custom
133
134 Using content filtering dictionaries
Selecting and configuring content filtering dictionaries
words, or removing existing words. Investigate which words set off the
filtering rule and their scores. Use this investigative work to fine-tune the
filtering rule settings so that the rule is reliably triggered when the targeted
content is passed through the message store.
Selecting and configuring content filtering
dictionaries
Symantec Mail Security for Microsoft Exchange supplies a default content
dictionary for message body filtering. This default dictionary filters message
body content on categories such as sex, gambling, violence, and crime.
You can also create your own content dictionary to use with Symantec Mail
Security by adding your own categories, words, and scores. When you add a
user-supplied dictionary, the content categories that are covered by that
dictionary become available.
Note: User dictionaries are created only in the single-server user interface.
When you configure the content dictionary setting, you instruct Symantec Mail
Security whether to use the Symantec dictionary, the user dictionary that you
created, or both.
Enabling and disabling dictionary-based message body filtering and choosing
the categories on which to filter message content is done through the filtering
rule, for a specific policy. For message body filtering to work, the scan job that is
associated with that policy must be configured to scan message bodies.
Select and configure content dictionary settings
You can select a content dictionary and add and delete words and categories in
the user dictionary.
To select a content dictionary
1
In Symantec Mail Security for the single server, in the left pane, expand
Configuration.
2
Click Content Dictionary Settings.
Using content filtering dictionaries
Selecting and configuring content filtering dictionaries
3
4
In the right pane, select one of the following:
■
Symantec Dictionary
■
User Dictionary
■
Both
Click Save.
To add words and categories to the user dictionary
1
In Symantec Mail Security for the single server, in the left pane, expand
Configuration.
2
Click Content Dictionary Settings.
3
(Optional) In the right pane, under Add user category, type a new category,
and then click Add.
Commas are not allowed in the text that is entered for new categories.
4
Under Add new word, select a language from the Language list.
5
6
Under Type, do one of the following:
■
To place the new word into your user-defined category, click User, and
then select a category from the Category list.
■
To place the new word into your selected Symantec-supplied category,
click Symantec, and then select a category from the Category list.
Under Word, type the new word to enter in the selected category.
Commas are not allowed in the text that is entered for new words.
135
136 Using content filtering dictionaries
Selecting and configuring content filtering dictionaries
7
Under Score, type a score to represent the percentage weight that Symantec
Mail Security should apply to the word as it filters content.
When you add a word to a Symantec-supplied category that is also included
in a user-defined category, Symantec Mail Security always uses the score of
the duplicate word in the user-defined category.
8
Click Add.
Symantec Mail Security displays the word and its category, score, and
language in the Word List.
9
Click Save.
To delete categories and words from the user dictionary
1
In Symantec Mail Security for the single server, in the left pane, expand
Configuration.
2
Click Content Dictionary Settings.
3
In the right pane, under Delete user category, select a category, and then
click Delete.
4
Under Word List, select the word to delete, and then click Delete.
5
Click Save.
See “Content dictionaries” on page 130.
See “Elements of a filtering rule” on page 117.
See “Building custom categories and words” on page 133.
See “Assigning scores to custom categories” on page 133.
Using content filtering dictionaries
About quarantined content violations
About quarantined content violations
When messages that violate content filtering rules are sent to the Quarantine,
you can view information about the violation under Manage Quarantine. You
can find details about the violation by clicking More, which appears in the
Details column.
The Quarantine displays the following information:
Timestamp
The time and date when the item arrived at the mail server.
Message Part
The portion of the message that contained the violation.
Recipient
The intended recipient of the message.
Sender
The sender of the message.
Sent to QServer
Whether the file has been forwarded to the Quarantine Server (if
installed).
Original Location
The name of the server that first received the item.
Rule Violated
The name of the rule that detected the violation.
Details
Additional information on the item, if it is available. If content
filtering is used to detect the violation, the score of the violation
is displayed.
More
If a content filtering violation is detected, click More to open the
Quarantine Details dialog box, which contains the name of the
file that is assigned by the Quarantine, the violation that was
detected, and the context in which the violation appears.
137
138 Using content filtering dictionaries
About quarantined content violations
Chapter
7
Using Symantec Mail
Security for Microsoft
Exchange data
This chapter includes the following topics:
■
Viewing Auto-Protect statistics
■
Viewing spam statistics
■
Working with event data
■
Working with report data
■
Viewing events in the Windows Event Log
Viewing Auto-Protect statistics
Symantec Mail Security for Microsoft Exchange collects usage and event
information while your system is running. Symantec Mail Security lets you use
this information in several ways. You can view auto-protect statistics and event
log data, and generate reports.
140 Using Symantec Mail Security for Microsoft Exchange data
Viewing Auto-Protect statistics
When Auto-Protect scanning is enabled, Symantec Mail Security generates
statistics, which are described in Table 7-1.
Table 7-1
Category
Auto-protect statistics
Information
Status (single-server ■
user interface only) ■
Virus definitions
License
Scan data
Server name
Service start date and time
■
Exchange store state (Started or Stopped)
■
Auto-protect status (Started or Stopped)
■
Auto-protect policy in use (Standard or Custom/Enabled or
Disabled)
■
Heartbeat (Enabled or Disabled)
■
Virus scanning (Enabled or Disabled)
■
Date of virus definitions being used
■
Number of virus definitions
■
License feature (Virus definitions)
■
License status (Active, Not Licensed, Expired)
■
Expiration date
■
Days left before expiration date
■
Number of files scanned by VSAPI
■
Number of messages scanned by SMTP
■
Number of files scanned by SMTP
■
Total number of violations
■
Number of virus infection violations
■
Number of filtering violations
■
Number of encrypted items
■
Number of unscannable items
For each total, the count for the last day, the peak day, the last
hour, and the peak hour is available.
RBL data
Last virus detected
(single-server user
interface only)
■
Number of RBL provider lists checked
■
Number of rejected connections based on RBL match
■
Name of the last virus that was detected on the server
■
Time that the last virus was detected on the server
■
Specific locations of the last virus that was detected on the
server
■
Refresh status
(multiserver console
only)
Data about the last time the statistics were refreshed
Using Symantec Mail Security for Microsoft Exchange data
Viewing spam statistics
To view Auto-Protect statistics
1
In Symantec Mail Security, in the left pane, expand Statistics and Reports.
2
Click Auto-Protect Statistics.
Single-server and multiserver statistics
Statistics about Symantec Mail Security for Microsoft Exchange that are
displayed on the single-server user interface are different than statistics that
are displayed on the multiserver console.
Statistics that are displayed in the single-server user interface (browser hosted)
are only for the server that is being monitored.
Statistics that are displayed in the multiserver console (MMC hosted) are
calculated across all Exchange servers that belong to the selected group. The
multiserver console also includes server status information.
Viewing spam statistics
Symantec Mail Security for Microsoft Exchange lets you display spam statistics
by the domain from which spam messages were received and by SCL.
To view spam statistics by domain from which spam was received
1
In Symantec Mail Security for Exchange, in the left pane, expand Statistics
and Reports.
2
Expand Spam Statistics.
3
Click By Domain.
4
In the right pane, under Display Settings, in the Number of rows to display
per page box, type the number of rows that you wish to display per page.
The default is 10.
5
In the Messages with SCL values equal or larger to this value are considered
Spam list, select an SCL value.
6
Click Save.
To display spam statistics by SCL
1
In Symantec Mail Security, in the left pane, expand Statistics and Reports.
2
Expand Spam Statistics.
3
Click By SCL.
141
142 Using Symantec Mail Security for Microsoft Exchange data
Working with event data
Working with event data
The Symantec Mail Security for Microsoft Exchange event log records all virus,
configuration, rule violation, and server events. The log lists entries in
chronological order that begin with the most current event at the top. The event
log displays information, warning, and error events.
You can filter event data by categories such as rule violation, virus, LiveUpdate,
and Quarantine. You can also select a start date from which to begin displaying
event data.
To work with event data
The Symantec Mail Security for Microsoft Exchange event log lets you view and
sort event data that is generated by Symantec Mail Security for Exchange and
written to the Windows Event Log.
You can also filter the Symantec Mail Security for event log to view only the
events in which you are interested.
To view the event log
1
2
Do one of the following:
■
Open Symantec Mail Security for Microsoft Exchange for the single
server.
■
In the Symantec Mail Security for Microsoft Exchange console, in the
left pane, select a server group.
Click Event Log.
To filter the Symantec Mail Security event log
1
Do one of the following:
■
Open Symantec Mail Security for Microsoft Exchange for the single
server.
■
In the Symantec Mail Security for Microsoft Exchange console, in the
left pane, select a server group.
2
Click Event Log.
3
In the List field, select a category on which to filter the event data.
4
Select a start date from which to begin displaying event data.
5
Click Display to show the filtered data.
Using Symantec Mail Security for Microsoft Exchange data
Working with report data
Working with report data
Symantec Mail Security for Microsoft Exchange collects extensive report data
on policy rule violations. You can use this data to do the following:
■
Generate summary reports based on different subsets of the data. When you
define a report, you specify criteria such as the time span of the collected
data and whether to show virus rule violations or all violations.
■
View or print report data in a third-party reporting application such as
Microsoft Excel or Crystal Reports.
Working with report templates
Report templates let you define a subset of the raw report data that is collected
by Symantec Mail Security for Microsoft Exchange for a single server. The goal
of creating a template is to describe a set of data that summarizes rule violations
and scanning information, which can be saved and generated on demand.
Report templates can include different categories or combinations of securityrelated statistics, and are useful for summarizing virus, rule violation, and
scanning information on a regular basis.
Work with report templates
You can create different report templates to describe different subsets of the
raw report data. Once a report template is created, the template is saved in the
single-server user interface and can be accessed at any time to generate reports.
Report templates are only available through the single-server user interface for
individual servers. You cannot create report templates for group data using the
multiserver console.
To create a report template
1
In Symantec Mail Security for the single server, in the left pane, expand
Statistics and Reports.
2
Click Report Templates.
3
In the right pane, click Add/Delete Report Templates.
4
Click Add a report template.
5
Click Next.
6
Type a name for the report template.
7
Select the data options that you want for the report template.
8
Click Save.
143
144 Using Symantec Mail Security for Microsoft Exchange data
Working with report data
To delete a report template
1
In Symantec Mail Security, in the left pane, expand Statistics and Reports.
2
Click Add/Delete Report Templates.
3
Click Delete a report template.
4
Select the report template to delete from the list.
5
Click Delete.
Generating and viewing reports
After you create a report template, you can use it to generate reports of policy
violation information for a single server. Report templates are saved by
Symantec Mail Security for Microsoft Exchange in the single-server user
interface for an individual server and can be used multiple times. Symantec Mail
Security automatically appends the current date and time to the name of your
report template when naming the report. This lets you run the same report on
different dates and compare the data.
The multiserver console cannot display reports. Instead, you collect the report
data and save it as a comma-delimited (.csv) file which can then be used with
third-party reporting applications.
See “Saving report data” on page 145.
Generate and view reports
Once a report is generated, you can view it through the Symantec Mail Security
for Microsoft Exchange single-server user interface.
Note: You should print reports in landscape mode to prevent the data from being
cut off at the right margin.
To generate a report
1
In Symantec Mail Security for the single server, in the left pane, expand
Statistics and Reports.
2
In the right pane, click Report Templates.
3
Select the name of a saved report template.
4
Click Generate Report.
Using Symantec Mail Security for Microsoft Exchange data
Working with report data
To view an existing report
1
In Symantec Mail Security for the single server, in the left pane, expand
Statistics and Reports.
2
In the right pane, click Reports.
3
Select the name of a saved report.
Saving report data
The generated reports include only a subset of the report data available.
However, you can save the entire set of available data as a comma-delimited
(.csv) file. You can use the raw data files to do the following:
■
View or print the complete report data in an application such as Microsoft
Excel.
■
Import the data into a third-party reporting application to generate custom
charts and reports.
If you are using the multiserver console, you can view a list of the report data
from all of the servers in a selected group. After you collect the report data, you
can access the .csv files that contain the data.
Save report data for use with other applications
Report data can be saved for a single server, or you can generate a commadelimited (.csv) file for a server group using the multiserver console. A separate
csv file is generated for each server in the server group.
To save report data in the single-server user interface
1
In Symantec Mail Security for the single server, in the left pane, expand
Statistics and Reports.
2
Click Reports.
3
In the right pane, click Generate CSV File.
4
Right-click Generated CSV File, and then click Save Target As.
5
Type a file name, and then click Save.
To save report data in the multiserver console
1
In the left pane of the Symantec Mail Security console, click Global or a
server group.
2
Expand Statistics and Reports.
3
Click Collect Report Data.
145
146 Using Symantec Mail Security for Microsoft Exchange data
Viewing events in the Windows Event Log
4
In the right pane, click Collect Report Data.
A separate file is generated for each server.
5
Right-click the file name, and then click Save Target As.
6
Type a file name, and then click Save.
Viewing events in the Windows Event Log
Symantec Mail Security for Microsoft Exchange server events are also reported
in the Windows Event Log. The Event Log is accessed on the computer on which
Symantec Mail Security or the Symantec Mail Security console is installed.
To view events in the Windows Event Log
1
On the computer on which Symantec Mail Security for Exchange or the
Symantec Mail Security console is installed, in Administrative Tools, click
Event Viewer.
2
Under Application Log, in the Sources column, view events for the following:
■
Server: Symantec Mail Security
■
Console: Symantec Mail Security Console
Chapter
8
Maintaining virus
protection
This chapter includes the following topics:
■
How Symantec Mail Security detects and prevents viruses
■
Configuring your Internet connection for virus definitions updates
■
Keeping your virus protection current
■
Setting up your own LiveUpdate server
How Symantec Mail Security detects and prevents
viruses
The Digital Immune System is Symantec’s unique technology for automatic
detection and repair of security threats. The Digital Immune System lets a
computer network instantly identify potentially harmful agents or abnormal
conditions and take protective measures as needed. The Digital Immune System
automates the submission of potential threats and automatically delivers
repairs to the problem computer or the entire enterprise.
Symantec Mail Security works with the Digital Immune System to do the
following:
■
Allow submission of unrepairable, new, and user-specified files to Symantec
for analysis.
■
Automate and strip submitted messages of non-viral content (in the case of
Microsoft Word and Excel).
148 Maintaining virus protection
How Symantec Mail Security detects and prevents viruses
■
Track submissions in real time using HTTPS communications between the
Quarantine Server and the Digital Immune System.
■
Automatically distribute repairs (new virus definitions) to the Quarantine
Server as soon as possible.
The Quarantine Server is available with Symantec Mail Security and is
installed separately. If installed, virus quarantined messages can be
forwarded to the central Quarantine Server for use with the Digital Immune
System. For more information, see Symantec Quarantine Server
documentation.
If the Norton AntiVirus Corporate Edition 7.5 or later client resides on an
Exchange server, repairs can automatically be sent back to the originating
Exchange server as well as all other servers that are configured in the
Quarantine server.
Note: Messages that are non-viral in nature and that violate policies or rules are
not sent to Central Quarantine.
About virus definitions files
Symantec Mail Security for Microsoft Exchange relies on up-to-date
information to detect and eliminate viruses. One of the most common reasons
that virus problems occur is that virus definitions files are not updated after
installation. Symantec regularly supplies updated virus definitions files that
contain the necessary information about all newly discovered viruses. Regular
updates of that information maximize security and guard your organization’s
Exchange mail system against virus infections and the downtime that is
associated with a virus outbreak.
About LiveUpdate
LiveUpdate is a feature that automatically delivers the most up-to-date virus
protection for your Microsoft Exchange mail servers. With LiveUpdate, which is
integrated into Symantec Mail Security, you connect automatically to a
Symantec Web site that determines if the virus definitions on your Symantec
products need updating. If so, LiveUpdate downloads the proper files and
installs them.
Maintaining virus protection
Configuring your Internet connection for virus definitions updates
Configuring your Internet connection for virus
definitions updates
LiveUpdate operation requires an Internet connection. If you need to configure
an Internet connection for LiveUpdate, use the Symantec LiveUpdate option in
the Windows 2000 or 2003 Control Panel.
To configure your Internet connection for virus definitions updates
1
In the Windows 2000 or 2003 Control Panel, double-click Symantec
LiveUpdate.
2
Modify your Internet connection settings, if necessary.
Keeping your virus protection current
LiveUpdate is available for both single and multiple server installations of
Symantec Mail Security for Microsoft Exchange.
If Symantec Mail Security is installed on only one Microsoft Exchange server,
use the single-server user interface to update virus definitions.
If Symantec Mail Security is installed on several Exchange servers and you are
using the Symantec Mail Security console, configure LiveUpdate and update
virus definitions on all of your managed servers from the Symantec Mail
Security console.
Updating virus definitions for a single server
The following LiveUpdate options are available through the single-server user
interface for updating virus definitions on a single server:
■
Manually start a LiveUpdate session: Connect to the Symantec LiveUpdate
Internet site and download the virus updates when the session is started.
■
Schedule automatic LiveUpdates for the Exchange server: Schedule days of
the week and a time to run LiveUpdate. During installation of Symantec
Mail Security, a default LiveUpdate schedule is set. You can reconfigure
LiveUpdate if a different LiveUpdate schedule is preferable. Once this option
is saved, LiveUpdate sessions take place automatically, at the specified
times, without administrator intervention.
149
150 Maintaining virus protection
Keeping your virus protection current
Update virus definitions for a single server
You can manually update virus definitions, and you can schedule virus
definitions updates for the single-server installation of Symantec Mail Security
for Exchange.
To manually update virus definitions for a single server
1
In Symantec Mail Security, in the left pane, expand Tasks.
2
Click Run LiveUpdate.
3
In the right pane, click Run LiveUpdate.
To schedule virus definitions updates for a single server
1
In Symantec Mail Security, in the left pane, expand Tasks.
2
Click Run LiveUpdate.
3
In the right pane, click LiveUpdate Settings.
4
Check Enable Automatic LiveUpdate.
5
Select one of the following:
■
Run every hours: Select the interval in hours that you want to run
LiveUpdate.
■
Run at a Specific Time: Type the time of day and the day of the week
that you want LiveUpdate to run.
6
Click Enable Decomposer Update to have LiveUpdate check for decomposer
engine updates.
The decomposer engine is used to scan compressed files.
7
Click Save.
Updating virus definitions for multiple servers
Using the management console lets you update virus definitions across all of
your Exchange servers efficiently.
You can run LiveUpdate immediately from the management console if you are
between scheduled LiveUpdate sessions. For example, you may learn of a new
virus that attacks mail servers and want to manually distribute the latest virus
definitions as soon as possible.
Maintaining virus protection
Keeping your virus protection current
When virus definitions are distributed from the management console to servers,
the virus definitions are always copied to the server. The server selects the latest
definitions, whether they are distributed from the management console or
whether they already exist on the server.
See “Configuring automatic virus protection” on page 97.
Update virus definitions for multiple servers
You can use the Symantec Mail Security console to update virus definitions
across all managed servers as follows:
■
Configure the scheduling of LiveUpdates for all managed servers or only for
servers in a specific administrative group.
Each server in the group will connect to the LiveUpdate site and make a
LiveUpdate connection according to the schedule to download the latest
virus definitions.
Note: When using the management console to configure the schedule for
multiple Exchange servers, LiveUpdate will run at the specified time in the
local time zone of each server. For example, if you schedule a LiveUpdate
session for every Saturday at 10 P.M. and push that setting from a console
in Sydney to an Exchange server in Manila and to one in San Francisco,
LiveUpdate will run for the Manila server every Saturday at 10 P.M., their
local time, and LiveUpdate will run for the San Francisco server every
Saturday at 10 P.M., their local time.
■
Manually update virus definitions on the console and push the updated
definitions to the managed servers.
You can use the console to immediately download the latest definitions to
the management console, and then distribute those updates to a server
group.
Note: When pushing out definitions to managed servers, the license file must be
current or the definitions will not be applied to the servers. See “Installing or
renewing a license file” on page 39.
To schedule virus definitions updates for all servers or servers in a group
1
In the Symantec Mail Security console, in the left pane, expand
Configuration for the Global group or for a server group.
2
Click LiveUpdate Settings.
3
In the right pane, check Enable automatic LiveUpdate operation.
151
152 Maintaining virus protection
Setting up your own LiveUpdate server
4
Select one of the following:
■
Run every n hours: Select the interval in hours that you want to run
LiveUpdate.
■
Run at a Specific Time: Type the time of day and the day of the week
that you want LiveUpdate to run.
5
Click Enable Decomposer Update to have LiveUpdate check for decomposer
engine updates.
The decomposer engine is used to scan compressed files.
6
Click Save.
To manually update virus definitions in the multiserver console
1
In the Symantec Mail Security console, in the left pane, expand Global >
Tasks.
2
Click Run LiveUpdate.
3
In the right pane, click LiveUpdate.
The Console virus definitions box displays information about the latest
virus definitions.
To manually update virus definitions for a group of managed servers
1
In the Symantec Mail Security console, in the left pane, expand Global, and
select a server group.
2
Click Tasks.
3
Click Run LiveUpdate.
4
In the right pane, click Update Servers.
The Group virus definitions box displays information about the latest virus
definitions that are distributed to the current group.
Setting up your own LiveUpdate server
The LiveUpdate Administration Utility, which is available on the Symantec Mail
Security for Microsoft Exchange CD, lets you set up an intranet HTTP, FTP, or
LAN server, or a directory on a standard file server to handle LiveUpdate
operations for your network.
For more information, see the LiveUpdate Administrator’s Guide on the
Symantec Mail Security CD.
If you set up your own LiveUpdate server, you will need to edit the LiveUpdate
configuration for Symantec Mail Security to point to the local LiveUpdate
server. For more information, contact Symantec Service and Support.
Chapter
9
Managing virus outbreaks
This chapter includes the following topics:
■
About outbreak management
■
Defining outbreak triggers
■
Frequency of outbreak item
About outbreak management
An outbreak situation occurs when an excessive number of viruses or events
that exhibit virus-like behavior occur on a network. When an outbreak is
imminent, prompt identification of the situation and notification of
administrative staff is critical.
Symantec Mail Security for Microsoft Exchange lets you manage outbreaks by
doing the following:
■
Specify the criteria for an outbreak. These criteria consist of the event being
monitored and the number of times that the event must occur during a
specified time interval.
■
Define the email notifications and alerts to send to administrators when the
criteria for an outbreak are met.
■
End the outbreak event once the situation has been managed.
Defining outbreak triggers
The set of defining criteria for an outbreak is called an outbreak trigger. Each
outbreak trigger only monitors one event and defines an outbreak as the
frequency of the specified event within a given time period. If you want to use
different events as outbreak indicators, you need to create a separate outbreak
154 Managing virus outbreaks
Defining outbreak triggers
trigger for each event. You can create as many outbreak triggers as you need to
ensure the safety of your system.
For example, one outbreak trigger could be defined as the occurrence of 50 or
more unscannable files within one hour. Another outbreak trigger could be
defined as 30 or more filtering rule violations within 15 minutes.
If you have configured multiple outbreak triggers and a message is received that
violates more than one of them, Symantec Mail Security for Microsoft Exchange
goes into outbreak mode and stops looking for additional outbreaks. Only one
outbreak rule will be triggered.
Outbreak triggers apply only to Auto-Protect. They are configured and enabled
independently of policies.
The event that is used by an outbreak trigger can belong to one of the following
categories:
■
Virus events: Same virus, total viruses, or unrepairable viruses that are
detected within a specified time period
■
Heuristic events: Same subject, same attachment name, filtering violations,
or unscannable files that are detected within a specified time period
Creating a virus outbreak trigger
Virus events are those directly related to the presence of a virus. When
specifying a virus as an outbreak item, only known virus signatures are used.
You can use the following virus-related events to detect an outbreak:
■
Occurrences of the same virus
■
Total number of viruses
■
Unrepairable viruses
To create a virus outbreak trigger
1
2
Do one of the following:
■
Open Symantec Mail Security for the single server.
■
In the Symantec Mail Security console, in the left pane, select a server
group.
In the left pane, expand Configuration > Outbreak Settings > Virus
Triggers.
Managing virus outbreaks
Defining outbreak triggers
3
Do one of the following:
■
In the single-server user interface, click Add/Delete Virus Trigger. In
the right pane, click Add a virus outbreak trigger, and then click Next.
■
In the console user interface, right-click Virus Triggers, and then click
All Tasks > Add Trigger.
4
Type a name for the virus trigger, and then click OK.
5
Check Enable trigger.
6
In the Event list, select a virus event to use for the trigger.
7
In the Occurrences box, type the number of occurrences of the virus event
that are required for an outbreak.
8
In the Time Period box, type the amount of time that must elapse between
each occurrence of the virus event before declaring an outbreak.
9
Under Administrator email notifications, do the following:
■
Click Enable to select whether to enable email notifications to the
specified administrator list when the outbreak trigger is activated.
■
In the Subject line box, type the subject line for the email message that
notifies administrators of the outbreak.
■
In the Message body box, type the message body for the email message
that notifies administrators of the outbreak.
Variables are specified by the percent sign (%) and the text that follows
it, and are automatically filled in when the message is sent.
■
Under Subsequent Notifications, in the Subject Line box, type the
subject line for the follow-up email message that notifies
administrators of the outbreak.
■
In the Message Body box, type the follow-up message.
10 Under Alerts, do the following:
■
Enable the Messenger Service Alert.
■
Under Initial Alert, specify the text that is displayed when the
Messenger Service Alert is triggered.
■
Under Subsequent Alert, specify the text that is displayed for any
follow-up messages.
11 Enable the AMS Alert.
This will send an AMS Alert (if AMS is available) when the outbreak trigger
is activated.
12 Click Save.
155
156 Managing virus outbreaks
Defining outbreak triggers
Creating a heuristic outbreak trigger
Heuristic events are events that are related to the presence of a virus and are
used to help detect viruses for which no known definition exists. For example,
inappropriate and obscene language is sometimes associated with the presence
of a virus. Therefore, you could use a filtering rule violation as a heuristic
indicator for an outbreak condition, if these types of messages begin to occur
with greater frequency.
You can use the following heuristic events to specify an outbreak:
Same Subject
Counts repetitions of the same subject line.
Same Attachment Name
Counts repetitions of the same attachment name.
Filtering Violations
Counts messages in which the filtering subpolicy has been
violated. To use this event, the filtering rule for the policy
in effect must be enabled.
Unscannable Files
Counts the number of file attachments that cannot be
scanned.
Note: Using heuristic triggers that monitor string type values (attachment
names or subject lines) can place large demands on server memory. These
demands are caused by the fact that each unique string (and the count of its
occurrences) is retained in memory for at least the time period for which the
trigger is defined. For example, if a heuristic trigger is defined as 50 occurrences
of the same subject line in an hour, the server stores each unique subject line
and the number of occurrences of the subject lines for an hour. If the Microsoft
Exchange server runs with high loads, minimize the time span for Subject Line
and Attachment Name outbreak triggers.
To create a heuristic outbreak trigger
1
2
Do one of the following:
■
Open Symantec Mail Security for the single server.
■
In the Symantec Mail Security console, in the left pane, select a server
group.
In the left pane, expand Configuration > Outbreak Settings > Heuristic
Triggers.
Managing virus outbreaks
Defining outbreak triggers
3
Do one of the following:
■
In the single-server user interface, click Add/Delete Heuristic
Triggers, and then in the right pane, click Add a heuristic outbreak
trigger, and then click Next.
■
In the console user interface, right-click Heuristic Triggers, and then
click All Tasks > Add Trigger.
4
Type a name for the heuristic trigger, and then click OK.
5
Check Enable trigger.
6
In the Event list, select a heuristic event to use for the trigger.
7
In the Occurrences box, type the number of occurrences of the heuristic
event that is required for an outbreak.
8
In the Time Period box, type the amount of time that must elapse between
each occurrence before an outbreak is declared.
9
Under Administrator email notifications, do the following:
■
Click Enable to select whether to enable email notifications to the
specified administrator list when the outbreak trigger is activated.
■
In the Subject line box, type the subject line for the email message that
notifies administrators of the outbreak.
■
In the Message body box, type the message body for the email message
that notifies administrators of the outbreak.
Variables are specified by the percent sign (%) and the text that follows
it and are automatically filled in when the message is sent.
■
Under Subsequent Notifications, in the Subject Line box, type the
subject line for the follow-up email message that notifies
administrators of the outbreak.
■
In the Message Body box, type the follow-up message.
10 Under Alerts, do the following:
■
Enable the Messenger Service Alert to send a Messenger Service Alert
when the outbreak trigger is activated.
■
Under Initial Alert, specify the text that is displayed when the
Messenger Service Alert is triggered.
■
Under Subsequent Alert, specify the text that is displayed for any
follow-up messages.
11 Enable the AMS Alert.
This will send an AMS Alert (if AMS is available) when the outbreak trigger
is activated.
157
158 Managing virus outbreaks
Defining outbreak triggers
12 Click Save.
See “Working with subpolicies” on page 109.
Enabling Outbreak Management
After you have created virus and heuristic triggers (and have ensured that
associated content filtering rules are enabled), you can enable Outbreak
Management and specify the interval during which you want to check for
Outbreaks. By default, the interval is set to every two minutes.
To enable Outbreak Management
1
Do one of the following:
■
Open Symantec Mail Security for the single server.
■
In the Symantec Mail Security console, in the left pane, select a server
group.
2
In the left pane, expand Configuration.
3
Click Outbreak Settings.
4
In the right pane, check Enable Outbreak Management.
5
Type the interval in minutes that Symantec Mail Security should wait
between checks for viruses or occurrences of a specified file behavior.
6
Click Save.
Clearing outbreak notifications
You can end outbreak notifications at any time. Otherwise, the notifications will
continue until the outbreak is no longer in effect.
To clear outbreak notifications
1
Do one of the following:
■
Open Symantec Mail Security for the single server.
■
In the Symantec Mail Security console, in the left pane, select a server
group.
2
In the left pane, expand Configuration > Outbreak Settings.
3
Click Clear Outbreak.
Managing virus outbreaks
Frequency of outbreak item
Frequency of outbreak item
When defining an outbreak, you need to specify the number of occurrences of
the monitored item that are necessary to trigger the outbreak and the time span
within which the occurrences can take place.
Although there are no standard numbers to use when specifying frequencies,
you should take into consideration the threat potential of the event category
that is being monitored, the size of your mail system, the amount of mail that is
typically processed, and the stringency with which you want to define an
outbreak. As your outbreak triggers are tested, you should fine-tune the values
that you use. Notifications and alerts are issued whenever an outbreak trigger is
triggered. The notifications and alerts are re-issued every two minutes, or
whatever interval you have chosen, while the outbreak condition remains.
Therefore, you should strike a balance between catching outbreaks and issuing
notifications based on incorrect identification of an outbreak.
If a string property such as an attachment name is selected as a monitored item
for an outbreak, Symantec Mail Security stores in memory every attachment
name that it scans for the specified time span. Once the time span elapses, the
attachment names (or other specified string property) are no longer held in
memory.
159
160 Managing virus outbreaks
Frequency of outbreak item
Index
A
Alert Management System. See AMS
alerts 95, 97
AMS 27, 95
anti-spam engine 86
archived files 82
attachments
and outbreak triggers 127
Attachment Name attribute 118
Attachment Size attribute 118
Auto-Protect scans 23
B
Basic Virus rule 109, 112, 113
Bloodhound heuristics technology 20, 114
Bloodhound Virus rule 109, 112, 114
bootstrap, SESA Agent 54
C
categories, Symantec dictionary 131
clusters 32, 48
Comm Status. See Communication Status pane
Communication Status pane 67, 70, 76
component locations 34
compressed files 23, 26, 120, 124
configuration
alerts 95, 97
archive scan depth 82
content dictionary settings 134
HeartBeat settings 94
LiveUpdate 97
notifications 95
outbreak settings 89
report data 100
console. See multiserver console 40
content dictionaries
filtering content 22, 24
settings 134
content filtering
dictionary settings 134
content filtering (continued)
dictionary-based filtering 129
scoring messages 131
content license file 39, 58
control panel 35
csv files 100, 145
custom policies
about 22
configuration 62
error 70
versus the Standard Policy 106
D
data collection 26, 139
denial-of-service attack 17
dictionaries
adding words 134
categories 131
content filtering 129
custom categories 134
Filtering Rule 134
scoring messages 131
Symantec 130, 134
user 130
Digital Immune System 147
E
Encrypted File rule 109
event log data 27, 142
Exception subpolicy 21, 109
expressions, and filtering rules 117
F
filtering
features 22
in policies 106
Filtering Rule 130, 133
Filtering subpolicy 21, 109, 115
162 Index
G
M
Global server group 66
Macro Virus rule 109, 112, 114
manual scans 75
Mass-Mailer Virus rule 109, 112, 114
Match List
and outbreak triggers 127
creating 126
filtering content with 22
settings 125
message scoring. See scoring, message
Messenger Service alerts 95
Microsoft Clustering Service 32, 48
Microsoft Excel 145
Microsoft Internet Information Services 38
Microsoft Management Console (MMC) 40
Microsoft Windows 2000 36
MIME format 23
multiserver console
adding servers 68
administration 67
creating server groups 67
deleting server groups 71
Global server group 66, 67, 71
installation 40
reconfiguring groups 67
H
HeartBeat settings 94
Help system 29
heuristic anti-spam engine 86
HTML encoding 115
I
installation
about 31
component locations 34
customizing 46
guidelines 32
Internet Explorer 36
IP address 33, 38
Microsoft Clustering Service 32, 48
Microsoft Internet Information Services 38
Microsoft Management Console (MMC) 40
multiple servers 40, 46
multiserver console 40, 41
port number 38
remote servers 42, 46
requirements 36
response file 46
setup.iss file 46, 47
single server 37
Internet connection 149
Internet Explorer 36, 59
IP address 33, 38
J
JRE (Java Runtime Environment), installing 55
L
licensing 39, 58
LiveUpdate
configuration 97
connection 149
multiple servers 150
settings 97
single server 149
Start menu shortcuts 35
logs, SESA Agent 54
N
notifications, configuring 95, 97
O
outbreak management
about 25, 89, 153, 159
defining outbreak triggers 127, 153, 154
heuristic events 156
virus events 154
Override rule 112
P
policies
custom 22, 106
establishing 103
filtering 106
scan jobs, and 104
Standard Policy 21, 106
versus configuration settings 79
port number 38
Index
Q
Quarantine Server 26, 29, 97, 100
Quarantine, about 25, 97
R
RAM requirements 36
remote servers 42
report data
Auto-Protect statistics 139, 140
creating 143
event log 142
Microsoft Excel 145
multiserver console 145
printing 144
saving 145
settings 100
templates 143
third-party tools 27, 145
response file 46
RTF encoding 115
rules
Basic Virus 109, 112, 113
Bloodhound Virus 109, 112, 114
Encrypted File 109
examples of 104
Macro Virus 109, 112, 114
Mass-Mailer Virus 109, 112, 114
Override 112
Unrepairable File 109, 125
Unscannable File 109, 124
S
scans
Auto-Protect 23
depth 82
policies, and 104
scheduled 63
standard 19
scheduled scans 63
SCL value 86
scoring, message 132, 133
Secure Sockets Layer (SSL) 52, 58
server groups
adding servers to 68
creating 67
deleting 71
managing 67
manual scans for 75
server groups (continued)
moving a server to another group 69
reconfiguring 67
removing from console management 72
restoring default settings 71
sending group settings to a server 70
updating servers in 72
user-defined 66
SESA Agent
installing 55
log, examining 54
startup verification 53
uninstalling, Symantec Mail Security for
Microsoft Exchange 56
SESA Console 53, 54
SESA Integration Package 52, 57
SESA Integration Wizard 51
settings failure from console 70
setup.iss file 46, 47
shortcuts, Start menu 35
single-server user interface
about 28
basics 59
components 59
installation 37
spam 85
Standard Policy 21, 62, 106
Start menu shortcuts 35
statistics
Auto-Protect data 141
categories 140
status information 76
subpolicies
Exception 21, 109, 124
Filtering 21, 109, 115
Virus 21, 109, 112, 113
Symantec AntiVirus Corporate Edition 28
Symantec dictionary 130
Symantec System Center 27, 95
system requirements 36
T
templates, report 143
triggers 127
Trojan horses 16
163
164 Index
U
uninstalling
SESA Agent, Symantec Mail Security for
Microsoft Exchange 56
SESA Integration Package 57
unrepairable files, Unrepairable File rule 109, 125
unscannable files
about 25
Unscannable File rule 82, 109, 124
user dictionary 130
user-defined server groups 66
V
verification, of SESA install 53
virus definitions files
about 148
distributing 74
scheduling updates for multiple servers 151
sharing 28
updating regularly 26
Virus subpolicy 21, 109, 112
viruses
about 16
macro 16
outbreaks 25, 153, 159
payloads 16
program 16
unknown 20
W
wildcards 119
Windows 2000 36
Windows Control Panel 35
Windows Start menu 35
Z
ZIP format 23