1
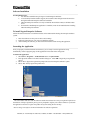
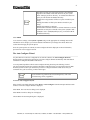
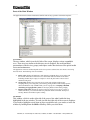
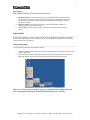
PowerFile
Enterprise Software
Powered by ArchiveXtenderTM
Quick Start Guide
2
Software Installation
Pre-Installation Notes:
1. You must have administrator privileges to install Enterprise Software.
2. To successfully install PowerFile support, the PowerFile C200 changer MUST be turned on
during the LEGATO Enterprise Software installation.
3. LEGATO Enterprise Software can only be installed onto Windows 2000, or Windows 2000
server.
4. If PowerFile’s MediaExplorer application is installed, it must be de-installed before installing
LEGATO Enterprise Software.
To install Legato Enterprise Software:
Follow the instructions below to install the software on the 2000 machine hosting the Enterprise Software
system.
1.
2.
3.
Insert the software CD into your CD drive and run Setup.
Follow the instructions on your screen to install the software.
After installing the software, you must reboot the machine before running the application.
Launching the Application
Once you properly install the hardware and software, you are ready to use the application. Setup
automatically created a program group for the application in the Start menu's "Programs"
To launch the application:
1. Select Start > Programs > ArchiveXtender Vx.x > Archivextender.
2. Enter the serial number in the Serial Number dialog box1. Select OK to begin the pre-registration
period2.
3. Select ‘No’ to bypass the registration prompt and access the Enterprise Software system.
4. Select ‘Yes’ to fully register the product now.
1
The serial number that came with the software enables the software for a brief pre-registration period. For
the duration of the pre-registration period, you are prompted to register your software whenever you launch
the application. Feel free to register the product at any time during the next 30 days
2
See Licensing Your Software for more information on software registration.
Powerfile, Inc. 718 University Ave. Suite 100, Los Gatos, CA 95032 • 408-354-6300 • www.powerfile.com
3
Configuring the System
When you launch the application for the first time, the System Options Wizard is displayed. This wizard
helps you to configure your system.
Make sure and select the file system mode that you are going to use (Aggregate or Pushdown) before you
bulk-load media into your device. For more information on File System Modes, please see Comparison:
Aggregate Vs. Pushdown in Appendix A.
To configure the system:
In the System Options Wizard, choose the file system that you want to use, and whether you want to enable
Macintosh client support.
File System Mode. The default is a Pushdown file system. If you want to use an Aggregate file system,
select the Aggregate radio button before adding any media. If you change this setting after adding media,
all database information is deleted.
The Directories dialog box is displayed.
File System Database Directory. If you want to choose a location other than the default where Enterprise
Software will store system directories, you should do so now. This directory stores all near-line media file
system information and also caches files copied to the file system using Direct Write.
Powerfile, Inc. 718 University Ave. Suite 100, Los Gatos, CA 95032 • 408-354-6300 • www.powerfile.com
4
The amount of disk space required for the file system database
depends on the number of files and directories in your system.
Allow 700 bytes per file or directory. To calculate the amount of
space you will need for the database directory:
Estimate the average number of files on a piece of media in your
library.
Multiply the number of files by the number of media in your
library.
Multiply this number by 700 bytes.
The PowerFile C200 has 200 slots. You know that there are around
30,000 files on each piece of media in the system. (30,000 x 200 =
6,000,000 x 700 = 4,200,000,000 bytes) So, you need 4.2 GB for
the database directory.
Select Finish.
To review these settings, select System > Options and go to the appropriate tab. Although most of this
information can be changed, you will lose database information if you change some fields. Please use
caution when changing the system options.
Once the system options are entered, the Auto-Configure Wizard is displayed. For more information,
proceed to The Auto-Configure Wizard.
The Auto-Configure Wizard
Any time there are no devices configured for use with the software, the Auto-Configure Wizard is
displayed when you launch the application. The Auto-Configure Wizard automatically finds and adds all
connected un-configured PowerFile C200 devices.
To avoid potential problems with the Auto-Configure Wizard, please keep the following in mind:
The Auto-Configure Wizard can't configure PowerFile C200 devices that you connected to the NT/2000
machine after the last time you rebooted. If you want to configure PowerFile C200 devices that you
connected since your last reboot, you must reboot again.
If you encounter any problems due to associating drives, refer to the
Troubleshooting section, Appendix C
To use the Auto-Configure Wizard:
If the wizard is not already launched, select Device > Auto-Configure from the Enterprise Software main
window. The Auto-Configure Wizard is displayed.
Select Next. The New Devices dialog box is displayed.
Select Next. The Drives dialog box is displayed.
Choose Next. The Next Step dialog box is displayed.
Powerfile, Inc. 718 University Ave. Suite 100, Los Gatos, CA 95032 • 408-354-6300 • www.powerfile.com
5
Select whether you want to reboot the system now or later.
You will not be able to use any of the devices you have just configured until you reboot the system.
Select Finish.
Powerfile, Inc. 718 University Ave. Suite 100, Los Gatos, CA 95032 • 408-354-6300 • www.powerfile.com
6
Parts of the Main Window
The application's main window simulates the familiar look and easy operation of Windows Explorer.
Tree Window
The tree window, which is on the left side of the screen, displays various expandable
trees. These trees are similar to the directory tree in Explorer, but are hierarchical
presentations of the devices, groups, and express cache directories used for optical media
access and maintenance.
The appearance of the tree window depends on the view you have selected. You can choose a view using
the View menu. The following views are available:
A. Device View. Displays all jukeboxes, mini-changers, and SCSI drives you are using with
the software. Each device in the device tree has a folder that lists all slots in the device,
indicating whether they're empty or occupied. A slot is the place where a device stores
media not being used.
B. Group View. Displays the group tree used to create and configure media groups.
Grouping allows you to categorize your media by placing them in folders. Group-specific
menu commands are only available while you are in group view. Grouping is disabled
when using an Aggregate file system. See Grouping Media to learn about grouping.
C. Express Cache View. Displays an express cache tree used to set up express caching, a
feature that allows you to cache all data on a particular media to hard disk. See Express
Caching Media to learn about express caching.
List Window
This window, which is on the right side of the screen, lists what's inside the item
highlighted in the tree window. It works just like the right side of the screen in Explorer.
If you need to highlight several items at once to perform a task, you can do so in the list
window by holding down the Shift or Ctrl key while you select them.
Powerfile, Inc. 718 University Ave. Suite 100, Los Gatos, CA 95032 • 408-354-6300 • www.powerfile.com
7
Status Window
This window has three tabs that are described below.
A. Job Status Tab. This tab shows all the activity associated with any action taken through
the job queue. Activity for currently running jobs is displayed at the bottom of the screen.
If a job fails, the information displayed on the Job Status tab can be helpful in figuring
out why it has failed.
B. Inventory Status. This tab shows the activity associated with media, whether it is
adding, removing or inventorying media.
C. Server Status. This tab displays activity associated with the Direct Write recording
option.
Adding Media
With Enterprise Software, you have a couple of different options about how to add media to the system.
You can either add multiple pieces of media at once, or you can add media individually. The following
sections explain these two methods.
Adding Multiple Media
You can bulk-load media into the PowerFile C200 by:
1.
2.
Shutdown Windows 2000 and use the PowerFile C200 front panel to bulk load media (Press the
‘Load’ button twice)
Exit the Enterprise Software Management Interface and Stop the Enterprise Software Service.
Bulk load media as in item 1 above and then restart the Enterprise Software Service.
Make sure you select the file system mode (Aggregate or Pushdown) before adding media to the
device. Changing this setting deletes database information and requires re-inventory.
Powerfile, Inc. 718 University Ave. Suite 100, Los Gatos, CA 95032 • 408-354-6300 • www.powerfile.com
8
Adding Media One By One
You can add media to your device one by one according to device specifications. Make sure that you
have selected the file system mode that you are going to use before adding media.
To add individual media:
Right-click on the empty slot(s) and select New > Media.
The Adding Media dialog box is displayed.
You may want to change options on the File System Type tab.
On the Media Type tab, select the media type that you are adding.
The default option is Auto-Determine, which causes the system to try the media in every drive in your
device until it is recognized. If you know what type of media you are adding, it is quickest to choose the
media type rather than use Auto-Determine.
Powerfile, Inc. 718 University Ave. Suite 100, Los Gatos, CA 95032 • 408-354-6300 • www.powerfile.com
9
Select OK to continue.
The Add Media dialog box is displayed.
Place media in the mail slot and enter an alias if you would like to assign an alternate name to the media.
Select OK.
The working icon now shows the media being added to the system. When it has finished, the media is
displayed in the tree and list windows, and it is inventoried and ready for use by the system.
The PowerFile C200 mailbox slot will open on an Add Media function. Just
insert the media and the C200 will accept it. Once the media has been
imported into the changer, Enterprise Software will inventory the media.
Inventorying Media
When you inventory media, the application reads the media and saves the directory structure information in
the Enterprise Software database. This structure is built into the file system and is immediately accessible
over the network.
If you added media one-by-one to the system after it was configured, then your media is already
inventoried. If you bulk-loaded media into your device, you will need to inventory the media.
Some devices may display <unknown> for all slots after an inventory. In this
case, you need to scan the device. Please see Scanning Devices in the LEGATO
Enterprise Software Manual.
To inventory media:
There are several ways to inventory media. Select the choice below that best suits your needs.
Right-click on the slot that contains media (slots marked <unknown>) and select Inventory from the menu
that is displayed. To select multiple slots in the list window, hold down the Shift or Ctrl key while clicking
with the mouse.
Right-click on a device and select Inventory to mount and read all slots in the device.
Select Inventory All from the Device menu to mount and read all slots in all devices.
The Inventory dialog box is displayed.
Powerfile, Inc. 718 University Ave. Suite 100, Los Gatos, CA 95032 • 408-354-6300 • www.powerfile.com
10
If you chose to inventory selected slots, then the Inventory dialog box is displayed with an Inventory
Selected tab. If you chose to inventory all slots in all devices, the tab reads Inventory All.
On the Inventory tab, check the Fast Inventory check box to preserve the settings for the media that have
already been built into the file system.
On the File System Type tab, choose which directory structure on the media to include in the file system.
You should use the File System Type tab under the following circumstances:
If the media you are using has more than one file system, you may need to tell the software which partition
on the media to include in the file system.
If you are adding an HFS, Rockridge, or UDF media, you need to check the appropriate check box.
If the media and its contents do not display the way you want them to over the network, you should remove
the media then read it to the system checking the correct file system on the File System Type tab.
Since most media contain an ISO or Joliet partition, the default should be fine in most cases.
If you check more than one file system on this tab, Enterprise Software will include the first checked
partition it finds. However, because it takes some time to read the media and check for the selected
partition, you should only check the file system(s) you want to include
If the status window displays the message "No recognized volume found on
media", then the media might contain a file system other than what you have
checked on the File System Type tab. Try to check a different file system and
inventory again. When you change any setting in this dialog box, the new
setting becomes the default. If you are adding an HFS media, for example, you
need to check the HFS check box. Since HFS now becomes checked by
default, you should uncheck this box when adding the next media if it does not
contain an HFS partition.
On the Media Type tab, choose the type of media contained in your environment.
The default is Auto-Determine, which causes the system to try the media in every drive in the device until
it is recognized. If you know what type of media you are adding, it is quickest to choose the media type
rather than allow Auto-Determine.
Select OK.
You are prompted to inventory for each slot you selected. Enter an Alias if you wish, then click OK.
The Alias serves as the media's title and replaces the volume label in the application as well as over the
network.
Powerfile, Inc. 718 University Ave. Suite 100, Los Gatos, CA 95032 • 408-354-6300 • www.powerfile.com
11
Media may also be renamed at a later time if needed. Please see Media Properties.
The media is now inserted and inventoried by the Enterprise Software system.
Removing Media
You may want to remove media from your system in order to make room for additional blanks or use the
media in another system.
To remove media:
Right-click on the media you want to remove and select Remove.
The system gives you a warning message to let you know that removing the media cannot be undone.
Choose Yes.
You are prompted to remove the media.
Remove the media according to device specifications, and then select OK.
The media can now be stored or used in a different system.
Powerfile, Inc. 718 University Ave. Suite 100, Los Gatos, CA 95032 • 408-354-6300 • www.powerfile.com
12
R200 Support (DVD-RAM / DVD-R)
For the PowerFile R200, which supports DVD-RAM or DVD-R media, there will be an additional setup
screen to enable support for this type of media. If you have the R200S, only DVD-RAM media is
supported.
Note: Only one media type can be selected for writing. You can select either DVD-RAM or DVD-R,
but not both.
First, select System the options
Next, Select the Recording tab. Depending on which media you intend to use, select DVD-RAM or DVDR, then enable Direct Write, Allow file system modifications.
Powerfile, Inc. 718 University Ave. Suite 100, Los Gatos, CA 95032 • 408-354-6300 • www.powerfile.com
13
Write Thresholds (Watermark)
Writes can occur in two ways, by Threshold or by scheduling. PowerFile recommends using the Schedule,
allowing real-time read-writes during the day and migration of data during the night.
Threshold
Data is written to the local hard drive until it reaches the capacity level indicated in the Threshold
watermark. Once this level has been reached, writing to DVD-RAM or DVD-R will occur.
Schedule
This can be set for time and threshold. Writes will occur at a time specified by the administrator and when
a threshold has been reached.
Media Allocation with DVD-RAM or DVD-R
Media allocation with DVD-RAM is different depending on the file system that is used.
Push Down
With the push down file system the administrator has two options. Under the Systems, Options, Recording
Tab, the administrator has an option of allowing clients to allocate media. If this tab is selected each
directory that is created will allocate a piece of media.
It is recommended that the administrator create the directory structure and then turn this option off. Clients
will only be able to write to these directories and not create their own.
Aggregate
With the aggregate file system, the Powerfile R200 changer is nothing but a large hard disk. Media is
allocated dynamically when needed, starting with slot 1.
Inventorying DVD-RAM / DVD-R Media
Powerfile, Inc. 718 University Ave. Suite 100, Los Gatos, CA 95032 • 408-354-6300 • www.powerfile.com
14
This is accomplished in a two-step process.
Identify
The media must first be inventoried before any operation can occur. If the media is being ‘added’ as “New”
the media will be inventoried automatically, if the media was present in the PowerFile R200 before
Enterprise Software was installed, it must be inventoried first.
Erase (DVD-RAM Only)
Once the media has been inventoried, it must be erased before it can be used. Once the media has been
erased, it will show as Blank-Media.
There are two types of Erase.
Quick Erase
This takes about 10 seconds and will prepare the media for use. It is the same as a DOS quick-format, it
does not certify the media.
Erase (recommended)
This is a certification of the media, which takes about one hour to complete.
Powerfile, Inc. 718 University Ave. Suite 100, Los Gatos, CA 95032 • 408-354-6300 • www.powerfile.com
15
Appendix A
Aggregate & Pushdown File Systems
The goal of Enterprise Software is to create a file system from all of the media in your storage devices, and
to make this file system available to networked clients as a single drive letter. This makes a jukebox full of
media look like a very large networked hard drive.
Before adding media to the system, you need to decide which type of directory structure to use. You can
build the Enterprise Software directory tree in one of two ways: Aggregate or Pushdown.
Comparison: Aggregate Vs. Pushdown
The difference between the Aggregate and Pushdown file system structures is whether or not the media's
volume label, or title, is displayed in the pathname. With an Aggregate file system, the volume label is
eliminated from the path. With a Pushdown file system, the volume label becomes the main directory for
the contents of the media, and all files and directories appear under that volume label.
Pushdown
Ideal for published media distribution, the Pushdown directory structure presents all directories on each
media as subdirectories of the volume label. When media are added to the file system using a Pushdown
directory structure, you can expand the Enterprise Software drive letter and see a list of all media in the file
system. The main directories are the volume labels, or titles, of media that were added to the device. For
each media, the subdirectories and files appear exactly as they would on a local drive.
Advantages
All files on all media are accessible even if there are multiple copies. Since the media's volume label is
treated as the main directory for the media, clients can see which media contains the information they need.
Use the Alias feature to rename any media with a volume label that does not adequately identify it, thus
making it easier to identify that media over the network. With grouping, you can organize media into
categories to make it easier for clients to find the information they need.
Disadvantages
The disadvantage of the Pushdown file system is that clients need to know which piece of media a file
resides on before they can access it. Additionally, the Pushdown file system cannot be used if your files
need to be at the root level, which is the case with some third party software.
Aggregate
Ideal for archiving data, Enterprise Software's Aggregate directory structure presents all data on all media
as a single volume, regardless of which media the data is physically located on. When media are added to
the file system, the expanded Enterprise Software drive letter shows all directories and files on your media
directly at the root of the file system. The volume label is eliminated from the path.
Advantages
Since all files on all media are attached directly to the Enterprise Software drive letter, clients do not need
to know a media's volume label to access files. A single directory in the file system can contain information
that is physically located on several different pieces of media. If there are multiple copies of a file, only the
file with the latest timestamp is displayed. This provides a way to update files on the directory without
removing the older file.
Disadvantages
The Aggregate file system is not good for instances where there might be duplicate file names on several
pieces of media. Enterprise Software assumes that files with the same name are duplicates, and therefore
only the file with the latest timestamp is kept in the system. Also, grouping cannot be used with the
Aggregate file system.
Powerfile, Inc. 718 University Ave. Suite 100, Los Gatos, CA 95032 • 408-354-6300 • www.powerfile.com
16
Appendix B
Troubleshooting
The Powerfile hardware is only recognized on the IEEE 1394 bus and it will only work under Windows
2000. IEEE 1394 is not supported under Windows NT.
To successfully install Powerfile support, the device MUST be turned on during the installation.
If for any reasons you need to install support for the Powerfile manually, please follow these steps
1.
2.
3.
4.
5.
6.
Right click on the "My Computer" icon and select Properties.
On the System Properties window, select the "Hardware" tab then "Device Manager". This should
open the “Device Manager” window.
Double click on Medium Changers. The entry for Powerfile C200 will be listed.
Double click on "Powerfile C200". The "Powerfile C200 Properties" window appears.
Select the Driver tab and choose Update Driver. The Upgrade Device Driver window appears.
Follow the steps instructed by the wizard. When prompted for the location of the C200.INF file,
located on your PowerFile Driver Floppy Diskette.
Technical Support
LEGATO Technical Support:
For support related questions regarding Enterprise Software, visit the LEGATO online at
http://www.legato.com, or contact LEGATO directly at:
North America
Tel: 800-579-3647
Email: [email protected].
Europe
Tel: 49-221-272-91-0
Email: [email protected]
PowerFile Technical Support:
For support related questions regarding PowerFile changers, contact PowerFile directly at:
Tel: 1-877-8 DVD NOW (1-877-838-3669) (PST)
Fax: 1-877-6 DVD FAX (1-877-638-3329) (PST)
Email: [email protected]
Powerfile, Inc. 718 University Ave. Suite 100, Los Gatos, CA 95032 • 408-354-6300 • www.powerfile.com