1
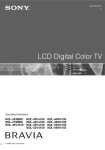
Operating
KDL-26M3000
KDL-32M3000
KDL-37M3000
KDL-26ML130
KDL-32ML130
RAVIA
© 2007 Sony Corporation
Instructions
NOTIFICATION
Owner's Record
The model mid serial numbers are located at
lfie rear of tile TV. Record these numbers ill
the spaces provided below. Reler to them
whenever you call upon your Sony dealer
regarding lids TV,
Model
Name
Serial No.
WARNING
To reduce tile risk oI Ih'c or electric shock, do
no[ expose [his WV [O rilhl or nlOiStUrC,
This equipment has b_n tested and Iound to
colnply with tile limits lot a Class B digital
device, pursuant to P;ul 15 of the FCC Rules.
The_ limits air designed tit provide reusonable
protection ugainsl harmlul inleHcmnce in a
ivsidenflal inslallaflon. This equipment generales,
u_s _uadcan radiale radio lrcquency energy and.
if nol inslalled and used in accordance wilh lhe
instructions, may cau_ harlllfill inlerlcrence tit
radio conlll//inicaflons. However, there is no
guarantee dial interlcrcnce will noI occur in a
p_Jrticular installation. If this equipmem does
cau_ harmfifl imeHcrence to r_Jdio or lelevision
ivcepflon, which call be determined by turning lhe
equipment oll and on. file user is encouraged 1o
tr) 1o con'ect file intcrlcrence by one or morn of
lhe lollowing measures:
[]
Reorient or relocale lhe receiving
antenna.
[]
lncre_se the separation between lhe
equipment and receiver.
Connect lhe equipment hllo an ouflet on a
circuil dfllcrenI lrOlll that 1o which lhe
receiver is connected.
[]
[]
voltage"
within the
This symbol is intended
to
product's
enclostlre
fllat nlay
be of sufficienl
nmgnimde
conqitute
a risk of electric
shock
to
Safety
[]
[]
to persons.
alert¸ the user to the presence
of important
operating
and
[]
maintenance
(servicing)
This symbol illis tile
intended
instructions
literatureto
accolnpanying
The
TV must
splashing.
lktuids,
not be exposed
Do nol place
such
as vases
the appliance.
to dripping
objects
filled
or
[]
with
on the TV,
CAUTION
To pre_ enl electric shock, do not use this
polarized AC plug with an extension cord.
receptacle or other outlel unless tile blades call
be fully inserted 1o prcvenl blade exposure.
[]
[]
Declaration of Conformity
Trade Name: SONY
Model: KDL-26M3000/KDL-26ML
130/
KDL- 32M3000/KDL- 32ML 13fi/
KDL-37M3000
Responsible Party: Sony Eleclronics Inc.
Address: 16531t Via Esprillo
San Diego, CA 92127 U.S.A.
Telephone Nmnber: 858-942-2230
This device complies with part 15 of the FCC
rules. Operation is subject to the lollowing
two condilions: ( 1) This device may not cause
harmful interlemncc, and (2) this device musl
accept any interl?rence received, including
intcHcrence lhal may cause undesired
operaflon.
2
[]
Operate tile TV only on 120 V AC,
Use the AC power coM specified by Sony
and suilable lot lhe voltage where you use it.
The plug is designed, lor salhly purposes,
to fil into lhe wall outlet only one way. If
you are unable to insert the plug fully into
the outlet, conlacl your dealer.
If any liquid or solid object should fdl
inskle the cabinet, unplug tile TV
inlmediatcly and have il checked by
qualified _rvice personnel belbrc
operating it flmher.
If you will not be using tile TV lot several
days, disconnect the power by pulling the
plug itself. Never pull on the cord.
When disconnecting AC power cord, tile
power cord should easily accessible lor
disconnection.
For details concerning salPty precautions.
see "hnportant Salcty Instructions" on
page 4.
Installing
[]
[]
[]
[]
If tile TV is transported
cold to a W_ll'nl location,
temperature
[]
Tile TV should be installed near an easily
accessible power ouflet.
To prevent internal heat buildup, do not
block the ventilation openings.
Do not install tile TV in a hot or humid
place, or in a place subjecl to excessive
dusl or mechanical vibration.
Avoid operating lhe TV al tenlperalurcs
below 41 °F (5°C).
changes
directly
from a
or if tile room
suddenly,
the picture
nlay be blurred
or show
nloislurc
condensation,
poor color due to
In lhis case,
please
1o lel the moislurc
wait
a lew hours
evaporale
belore
To obtain
the semen
tile best picture,
do not expose
to direct ilhmlination
or direct
sunlight.
turning
It is reconmlended
on the TV.
to use spot
lighting directed
down from the ceiling or
to cover die windows
that luce tile screen
with opaque drapery.
It is desirable
to
install the TV in a room where the floor
and walls
are not of a reflective
materiah
CAUTION
Use tile fi)llowing Sony TV's only with tile
lollowing WALL-MOUNT BRACKET.
KDL-26M3000
KDL-32M3000
KDL-26ML130
KDL-32ML130
KDL-37M3000
SU-WL100
Consult tile dealer or an experienced
radio/TV technician Ior help.
Pursuant to FCC regulations, you am
cautioned lhal any changes or modifications
nol expressly approved in this lnanual could
void your authority lo opelale this
equipmenl.
01erl the user to the pre_nce
of uninsuklted
"dangerous
[]
SU-WL500
Use with other WALL-MOUNT BRACKET
may cause instability and possibly result ill
iJ_iulT (see page 12),
To Customers
Sufficient expertise is required Rir instidling tile
specifed TV. Be sure to subcontract the
installation to Sony dealer or licensed
contractors and pay adequate allenlion to gaiety
during lhe inslallalion.
Note
This television inchldes a QAM denlodulator
which should allow you to recei_ e unsclaufltled
digital cable telexision progranuning _i_l
subscription sel'_ice to a cane _r_ice prm kler.
Avail_dqlity of digital cable television
progranmfing in your area depends on tile type
ol programmhlg and signal provided by your
cable _lvice provider.
For Customers in Canada
This Class B digitld apparatus
Cmladian ICES-riO3.
complies with
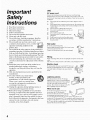
Important Safety Instructions
.............................
4
The Four Steps to Stunning HD Experience:
Set, Sound, Source, and Setup ................ 9
Picture Quality and Aspect Ratio .................. 9
Remote Control and TV
Controls/Indicators .................................
21
Inserting Batteries into the
Remote control ...................................
21
Remote Control
21
Indicators
1. Installing the TV .......................................
................... 12
2. Locating outputs and inputs ................... 13
Left side .....................................................
13
Rear ...........................................................
14
3. Connecting the TV ...................................
...................................................
24
11
Preventing the TV from Toppling Over ...... 11
Bundling the Connecting Cables ............... 11
Preparation for Wall-Mounting
.........................................
16
Cable system and/or VHF/UHF ................. 16
HD Cable Box/HD Satellite Box ................. 16
PC ...................................................................
18
Other Equipment ...........................................
19
4. Setting Up the Channel List Initial Setup .............................................
20
Navigating through TV Menus ..................... 25
Menu Descriptions ........................................
Using the Applications
25
Menu ....................... 26
Using the Picture Menu ................................
28
Using the Sound Menu .................................
28
Using the Screen Menu ................................
29
Using the Channel Menu ..............................
30
Using the Parental Lock ...............................
31
Using the Setup Menu ..................................
35
Troubleshooting
............................................
38
Specifications ................................................
Index ..............................................................
41
42
Trademark Information
Macintosh
_Lll_I otJler
is a mldemark
Manulucmred
doubl¢-D
licensed
to Apple,
Inc., rcgisteled
in tile U.S.A.
H;:3m|
countries.
under license fiom Dolby Laboratories.
symbol
are h'adcmarks
of Dolby
"Dolby ' and
DIGITAL
Laboratories.
This TV incorporates High-Delinition Multimedia Interlace (HDMI ]M)
technology. HDMI, the HDMI logo and High-Definition Multimedia
Interlace are trademarks or registered trademarks of HDMI Licensing
LLC.
Blu-ray is _ltrademark.
trademarks
or registered
"BRAVIA"
and BRAVIA,
n]arks of Sony
[[_, und PS3 urc
Corporation.
Quick Setup Guide (separate volume)
Provides a variety of optional equipment
connection diagrams.
Customer Support
http://www.sony.com/tvs
upport
On-line Registration
United States
http://p roductregistration
Canada
.sony.com
http://www.SonyStyle.ca/registration
3
USE
Important
AC power cord
ObseJ ve tile K_llowings
Safety
aamageo,
electric
Read these
m prevent
AC power
shock.
exchange
Instructions
1,
lfthe
tile AC
cord
Stop using
power
is damaged,
it and ask your
cord
it may
dealer
or Sony
the TV where
the power
cord
Do not pinch, bend_ or twist the cord excessively.
The core lines ma}
be bared and CLI{=ant1 c_using a shor t-cil_uit_ resulting
in _ tire or all
[]
Do not allow anyaling
ine power
cord.
to resT Oll or roll over
[]
Do not pull
curl.
5)
6,
7"
[]
Do not move
pmgged
in.
[]
Keep
[]
Be sure to grasp
[ne power carol.
or {larllage
the power
Tile power
the TV with tile
the power
cord
_way
tram
with one wider than the other. A grounding type plug
has two blades and a third grounding prong The wide
blade or the third prong are provided for your safety.
If the provided plug does not fit into your ontlet.
consult an electrician for replacement
of the obsolete
outlet.
10_ Protect the power cord from being walked on or
pinched particularly
at plugs, convenience
receptacles,
and the point where they exit from the
by the
121 Use only with the cart. stand, tripod,
bracket, or table specified by the
manufacturer,
or sold with the apparatus.
When a cart is used. use caution when
moving the cart/apparatus
combination
to
avoid injury from tip-over.
13) Unplug this apparatus during lightning storms or
when unused for long periods of time.
14_ Refer all servicing to qualified service personnel.
Servicing is required when the apparatus has been
damaged in any way-, such as power-supply
cord or
plug is damaged, liquid has been spilled or objects
have fallen into the apparatus, the apparatus has been
exposed to rain or moisture,
does not operate
4
or has been dropped,
curl
heat
sources.
disconnecUng
<,,
Do not defeat the safety purpose of the polarized or
grounding-type
plug. A polarized plug has two blades
normally,
taro.
power
tile pLug when
as radiators, heat registers, stoves, or other 2_'_[_]._
Wall outlet
apparatus (including amplifiers) that
_
Do not use _,poor fitting outlet.
produce heat.
JlMIIIIII[IIII[ lnsert the plug tkllly into the outlet,
specified
or
shock.
Do nOT converl
apparatus.
1 1) Onl_ use attachments!accessories
manufacturer.
is sul_iect
to wear
[]
eleclric
,,,,,_,s
{o
Do not place
abuse.
[]
such
center
it.
2) Keep these instructions.
3 J Heed all warnings.
4) Follow allinstructions.
Do not install near an} heat sources
in a tire or an
Service
[]
instructions.
Do not use this apparatus near water.
Clean only with dry cloth.
Do not block any ventilation
openings, install in
accordance
with the manufacturer'.,
instructions.
tram being
l_sult
cause arcing and result
Contac_ your electrician
_
lfit
is 1.....
.
it m;,y
_L.%-
in s fire.
ro n_ve me outlet
changed.
Wiring
When connecting
satet 3
Take
cables,
care nor TO catch
he sure to unplug
your
t)et
tile AC power
on tile caDles,
cord
it lnity _10n/age
t_r your
the TV
Electric shock
set.
_ _-_
(7
hD°']°;;_hpltt_,g/anCp°g_l_ea
_d;_wthe_TVdWi_.'o'_t'_l_
__
_
wall
outlet
will ....
t hand.
shock
it may
......
lectric
_
Lightning storms
For
added
tbr this TV during
protection
lightninN
Slol]n.
or when
and unused tar long
fi'om the wall outlet
antenna.
This
due to lightning
will
a
it is lett unattended
periods of time.
and disconnect
prevent
unplug
rile
damage
and power
ir
to tile TV
line surges
When not in use
If you will
several
not be using
disconnectvd
set fin"
be
fi'om tile AC power
environlnental
;InCl
set is not disconnected
switched
tile TV
clays, the TV set should
bat_ry
t¥om
0% To disconnect
outlet
reasons.
tar
Tile TV
the AC
powel
me TV
_t
source
completely,
when
the TV set L'
pull tile plug
tram
the
AC power
outlet. However.
_ome TV sets nmy have tkatures
which neea
the TV set to be left in standby to work correctly.
The instructions
in this
mmlual will inlbrm
you if this applies.
Overloading
::_::,
:_
:
This TV set is designed
to opera[e
on
120 V AC supply o1115 Take care no_ It
connect
power
elecmc
rOd many
appliances
OUHel as this
shock.
could
_
to tile same
result
Cleaning the AC power plug
and/or
optional
Unplug tile AC power
plu_ and clean it regularly.
file plug is covered
with dust and it picks up
in a fire oi _111
moisture,
a tire.
noisy
sound
eq ulplnent
ma> occur
m any equlpln_nF
elnitting
too close
to tile TV set. Picture
if tile TV set is positioned
electromagnetic
distortion
in close proximity
radiation.
accessories
its insufiltion
TV.
out atchildren's
reacb.
Knot,
stains
lIdld
oumoor
power
antenna
anreuna
lines
ill contact
WHEN
or other
with
should
electric
Sllcn power
INSTALLING
EXTREME
CARE
CONTACTING
WITH
is installed.
system
THEM
SUCH
lines
system
voltage
surges
Section
810 of the NationM
soa F and warm
Electrical
Code
of tile lead-in
grounding
conouciors,
groundhlg
electrodes,
some
wire
ro an antenna
at antenna
ana l_qalrell/ents
provides
discharge
wittl
structure,
size of
unit= connection
tar tile grounding
Never
If using
WITh a soil
ClOrll. Stubborn
oanlpened
wifll a solution
use strong
a chenficahy
over
time.
To ensure
the dust periodically
solvents
cloth,
The ventilation
proper
(once
using
please
boles
ventilation,
a month)
of
Stlch as thinner
preheated
on tile package.
field.
a strong
Keep
lllagnet
any
It a snappnlg
items
or poppnlg
to
electrode.
sional
snapping
when
being
or
tbllow
call
we recommena
a vacuum
cmaner.
ill tile speaker
susceptible
unit that generafes
w magnetic
fields
a
away
tram
these
wire
lead-in
--
(NEC Section 810-201
_Grounding
conductors
(NEC Section
810-21_
Aetennadiseharge
Ground
from
tile TV JS con-
turned
sounfls,
'_
, 7
_ r'_''_-_
"
_l/'_v'3
particularly
on or ott.
VENTILATION
To ensure
Antenna
sound
or popping
Tile slots and openings
unit
reliable
slots
in tile TV are provided
operution
g.lna openings
of the TV.
IliUM never
tar necessar
and to protect
be blocked
it tram
Do uot install
[]
Never
[]
()tiler materials
Do notinstalltileTV
cover
tile TV Ihce up or down
-:.2'*'._:3'
or sideways.
the slots and openingswithaclotil
..................
overheating.
or covered
Unless proper
ventilation
is provided,
tile TV may garner
dust mid get dirty. For proper ventilation,
observe vile
[]
3 ventilation.
or
psid ........
clamps
Power
service
grounding
electrode
sysTeF
NEe: National Electncal Code
To
unplug tile TV and consult
your dealer or service
technician. or frequent
It is normal
to make occatinuous
whileIbr tilesome
TV TVs
is operating,
Antenna grounding according to the National
Electrical Code, ANSI/NFPA 70
_j---
cloth.
it gently
protection
inlbrmation
unto
discharge
_¢
wipe
in tile USA and Section
anti supporting
location
dust
a m'y soft
_LJ
SOUND
NECI
in Canada
of tile mast
Clean
tile speg-_er.
so as to provide
Code
shock.
water.
provided
TV contains
magnetic
AS CONTACT
sin fie ctlarge_
Electrical
in electric
MAGNETIC INFLUENCE
FATAL.
is grounded
this
witil a cloti1 slightly
tbr cleaning.
removing
This
FROM
OR CIRCUITS
cleaning
tile screen,
may be removed
_.B
_
when
it call come
SYSTEM
TO KEEP
l_sult
tram
accumulate
All
of overhead
or where
ANTENNA
LINES
and built-up
grounding
circuits,
INVARIABLY
grounding
below.
in tile vicinity
or circuits.
POWER
against
to proper
or power
BE TAKEN
1S ALMOST
Be sure tile antenna
respect
tile precautions
AN OUTDOOR
SHOULD
54 of the Canadian
IPllow
cord
of tile TV with
tile instruction
not be localed
hgtlr
it ma_
dust
benzine
Outdoor antenna grounding
P_ql k fz-_
and result in
_-
tile cabinet
ANTENNAS
It"
Cleaning the screen surface/
cabinet of the TV set
re.move
If an outdoor
nlay deter [orale
UnplLIg the AC power
Small accessories
Kee l" slnall
_v_
AC
Optional equipment
Do not install
CLEANING
[]
Never block tile slots and openings
by placing tile
TV on a bed. soth, rug or diner similar
surtace.
(NEC Art 25C Part H)
BATTER IES
[]
Do not
[]
Do not _hort circuit
dispose
of batteries
disassemble
[]
Danger
it battery
of e_plosion
wlrn rile same
or equivalent
in a fire.
or overheat
is mcon_cuy
tile batteries
replaced.
Replace
only
type.
Disposal of used batteries
To preserve
our environlnenr,
local lows or regulations
dispose
Of used batteries
according
To your
5
_cave some soace around the TV set as snown Below.
Otherwise air-circulation may be inadequate and cause
overheating, which may cause a fire or damage to the TV set.
[]
[]
[]
[]
Do not let fills TV get wet. Never spill liquid at
an3 kind on the T'_ lfmlyliquidorsolidobject
does t,,ll mrougn, co not operate the TV. It ]nay
///_
J'_
_
result ill electric shock or tlamage to the TV.
}_J_//_ "'_'=" _
Have it checked immediately by qu dified
personnel.
To prevent fire. keep flammable objects or open name (e,g. candles)
awa_ from rile TV
Do not place any objects on the TV.
The TV must not be exposed to dripping or
splashing. Do nor place objects filled widl
liquids, such as vases, on the TV.
CARRYING THE TV
___
Installed
Leave at least this much space
around the set.
with stand
To avoid dropping the TV and causing serious n_jury, be sure to tollo,_
these guidelines:
.......................... ___?_inc_ ........
_[130
Carry the TV in the specified manner
crn/
2 % lcnes
I6 era)
[]
Betbre carryin_ the TV set. disconnect
[]
Carrying tile lm'ge size (39-/37 inches) TV
requires iwo or lnore people.
When you carry rile TV, place your natm as
illustrated mid hold it securely. Do not put stress
on tile LCD pmml mid the trame around tile
screen.
[]
[]
Leave at least tNs much seaee
around the SeT.
[]
Never install the TV as follows:
Air circulation
is blocked.
all cables.
"_
/-3
When lit}ing tim TV set or moving tile panel, hold it firmly Irom the
bottoln. Place your pahn directly under tim panel
When carrying tile TV 5el. do nor
subject it to shocks or vibration, or
excessive torce.
Air circ= m on is blocked
INSTALLATION
Wall mount installation
Wall-
Mount
Bracket.
requires tile o_ at a
When
installing
or renloving
the TV. using the Wall-Mount BrackeT. be sure fi
ase qualified contractors, lfnot property securec
ourln_o
Never push objects at any kind rata the TV tilrough the
or short out parts that could result ill a tire or all electric
shock
any obiects
on die TVvoltage points
cabinet Do
slotsnotasplace
they may
touch dangerous
_
Optional
_'_
[]
MOISTURE
kitchen
sink,
or laundry
[]
[]
objects
Do nor use power-nne operated TV sets near
water -- tar example, near a bathtub.
washbowL
tub,
c
_:_/_
i
wet basement, or near a swimming pool, etc. I1 _
may result ill a tire or an electric shock.
_
6
tall
train
tile
_
_Z_
wall mount
and
--,_' #-._c
/ _" "-,-
cr.luse
injury.
Be sure to tbllow tile operating instructions supplied
witIl
Moisture and flammable
or relnovM
Observe tim ti_llowing when inst_lling tile TV using a
wall-mount bracket. If the TV is nol secm'ed property, it
lIlay
[]
installation
Wall-Mount Bracket. the TV may t_dl and cause
serious injury.
Objects and ventilation holes
me
wall-mount
orglcket
when
instMling
rile
TV
Be sm'e re attach rile brackets supplied with tile wall-nlounr bracket.
Do not hang rile TV ti'om the ceiling, lr lnay fidl and cause serious
ltliury
"
•
Placement for viewing
,tis
rooom.,e.,ed
towatch
the .t0dist
.......
t - rimestil.,,lthe
_creen height, and ill moderate brightness. Watching the TV tbr too long
or in a dark"room may CaLISeeye f_ltigue. To obtain a clear picture, do hal
expose the screen to direct illumination or direct sunlighL If F )ssible. use
spot lighting directed down _i'oln tile ceiling.
Tile TV should be installed near an easiI) accessible AC power ourlei.
Observe tile t_fllowing in placing file TV. Otherwise tile
_
Do not ilse attachments not recolllmended
mmmtacturer, as mey may cause hazards.
Placement
TV
may tall tram tile stand or wall mount, causing
Attachments
J_-_,
,,W-"_-_f
dmnage
or serious
[]
Ph,ce
tile TVinjury.
....
table= level surtboc.
[]
\\
\_,
Do not hang anything on the TV. Do not allow
children to climb oil file TV
__
[_--_'
_,
_
[]
TO extreme
ielnpelYlture,
tile
WV
lnay
overheat
and
cause
detktrlnation
Although
[]
Never place tile TV ill hot, oily, hunlid or
excessively dusty places.
[]
[]
_'_
Do not install the TV where it may be
exposea to nlechallical x ibration.
Do not install tile TV in a location wtleI_ it may proTruae, sucn as on
or behind a pillar, or where you migllt bump your head on it
Otherwi_. [t lilly result ill injury.
[]
[]
Outdoor use
[]
Do not install this TV outdoors. It" tile TV is exposeo ro
rain, it may result ill a tire or all electric shock. Do nol
expose the TV to direct sunlight_ it Allay heat up and
become aamageo.
_
_9': itS_
[]
[]
Vehicle, ships and other vessels
_"_:_
Do not install fllis TV in a ship or vessel. If tile TV is
exposed to seawater, it lila} cause a tire c
TV mid also sllorien the lid of tile TV.
Corrosion
It'you use this TV near file seashore, salt lna} corrode metal parts of tile
TV and cause internal damage or tire; it may also shorten the lil_ of the TV.
Oils
vapors occur. Dusr
Medical institution
equ pmentisi
.....Irma,
.........*f nctionof
Do nol place this TV in a place where medical
tile
LCD
screen
is m_=de
with
hign-precision
technology
and has ettective pixels of 99.99t3 or marc black clots or bright
points of light (red, blue, or green may appear constanny on me
LCD screen. This is a srrucrurm proper_y of tile LCD panel andis not
a maltunction.
Tile LCD screen is made with high-precision technology ana m
achieve a higll level of pertbm/ance and picture quality, this TV's
backlight setting is set to lnaxinlize file brightness of the TV.
However uneven t_ngnmess ma 3 be observed when tile LCD TV is
viewed ill a dark ambient without an input source or blmlk screen.
This ccmdition is normal and not a malfunction of the TV. Changing
the Picture mode. Backligllt setting, or enabling tile Light SensoL
will improve this condition.
Do not expose file LCD screen sur race to direct sun tight. Doing so
may damage tile LCD paneh
Do not pusn or scratch the LCD screen_ ol place objects on top of file
TV. The inlage ma 3 oe uneven or the LCD panel may be dmnageo
If file TV is used in a cold pmce. a smear may occur in the pictui_ or
me picture may oecome lark. This does not indicate a tailure. These
phenolllenon improve as the telnperaRIre ri_es.
Ghosdng may occur when still pictm'es are displayed continuously
It should disappear arm" a tew moments.
Tile screen and cabinet get warm when tile TV [s in use. This is no1
a lnaltunction.
Do not install this TV in a vehicle. Bumping of file
(f
----_
vehicle may cause tile TV to f_dl down ano cause il!jury. [ 't _ ]_' _._---')5
Do not instldl this TV in restaurants where oily
at_sor bing oil may enter ano oamage the TV.
Adj usl tile _ 3lunle so as not to trouble yam neighbors. Sound CalTie_,
very easny ar night. TheretO,re, closing the windows or using
headphones is suggesTea
When using headphones, adjusl file volume so as to avoid excessive
levels, as hearing damage l]tlayresulL
LCD SCREEN
of tile
enclosure or cause me TV to malthnction. Do not install file TV in a pmce
exposed to direct air conditioning. If the TV is installed in sucn a tocati m.
nlolslure lnay conoense inside and lnay cause a lnaltunction.
[]
'
_,<_
VOLUME ADJUSTMENT
[]
Do not install the TV in places subjec_ Toexumne remperamres, such as in
dil_ct sunhgllt, near a radiator or near a heating vent. If the TV is exposed
by rile
,_:_]
[]
[]
Avoid spraying insect repellent with volatile material on tile screen.
Avoid prolonged contact with rubber or plastic made materiah
Broken pieces
Do Ilot throw anything
at tile TV.
The screen glass may break by tile impact and cause
serious injury,
lfthe surtace otthe TV cracks, do not touch it until
you have unplugged the AC power corm
Otherwise electric shock ma} result.
-a
[J [_7-_,q_
_'5"_a_
L_ _
_"
Handling of broken glass and liquid crystal
leakage
If the LCD panel gets dalnaged, crysialline liquid leakzge ilia} occur, or
_cattered broken glass lnay result. Do not toUCll t_rol_en gtass or cr) _talline
liquid (which is toxic, with bare hands as cuts, poisoning or skin irritati m
may occur. Also. do not let glass tragments or leaked crystalline liquid ger
into your eyes or mourn. Should either contacr your eyes or mouth, rinse
tile
contacted
area
thorougllly
with
water
and
consult
your
docror.
medical equipment.
SERVICING
Preventing the TV from toppling over
Take measures to prevent tile TV fi'onl toppling over and causing
injury.
To prevent tile TV I}om toppling over. secure tile TV to a wall or stand
Do
attempt
serviceyou
tiletoTV
yourselt voltage
sin_, opening
file not
cabinet
amy toexpose
dangerous
or other _._/_2)_
hazards. Rethr all servicing to qualified service personnel.tY_*_a:_
7
Replacement
parts
When replacement parts are required, be surc tile service
technician certities in writing that he!she has uscd
replacement parts specified by tile manufacturer that
have the salfte characteristics as tile origina
Unauthorized substitutions may result in a fire. an
electric shock or D[ller nalJlras.
Safety check
Upon conlp[etion of any service or repairs to tile TV. ask
me servicc technician to pertorm routine satety cllecks
as specified by file manulklcturel to determine that tile
TV is in sat_ operating conditiom and to so ccrtily
Should tile TV not be repaira _lc, ask a qualitied sclwice technician to
dispose of tile TV
For Customers in the United States
Lamp in this product contains mercury. Disposal of
these materials may be regulated due to environmental
considerations. For disposal or recycling information.
please contacl your local authorities op the Electronic
Industries Alliance www.eiae.opg).
8
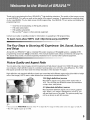
Thank you for purchasing this Sony B RAVIA
T,_high-definition television. The quality of the image you see
on your BRAVlA TV is only as good as the quality of the signal it receives. To experience the stunning detail
of your new BRAVlA TV, you need access to HD programming. Your BRAVlA TV can receive and display HD
programming from:
•
•
•
•
Over-the-air broadcasting via HD-quality antenna
HD cable subscription
HD satellite subscription
Blu-ray Disc TM player or other external equipment
Contact your cable or satellite provider for information on upgrading to HD programming.
To learn more about HDTV, visit: http://www.sony.com/HDTV
The Four Steps
and Setup
to Stunning
HD Experience:
Set, Sound, Source,
Along with your BRAVIA TV set, a complete HD system requires an HD sound system, a source of HD
programming and proper setup connections. This manual explains basic setup connections (see page 16).
The Quick Setup Guide, enclosed separately, illustrates how to connect other optional equipment.
Picture Quality and Aspect Ratio
You can enjoy crisp, clear images, smooth movement and high-impact visuals from 1080i HD signals. When
you compare a high-definition signal to a standard analog signal, you will notice a big difference. The 1080i
HD signals provide more than twice the vertical resolution of the standard TV signal.
High-definition and standard-definition signals are transmitted with different aspect ratios (the width-to-height
ratio of the image). HDTV uses a wider screen than conventional standard-definition TV.
16:9 (high-definition)
source
Most HDTV signals use a wide screen aspect ratio of
16:9. The 16:9 fills your BRAVlA screen and maintains
a crisp, clear, vivid picture.
4:3 (standard-definition)
source
Most standard-definition signals use a boxy 4:3 aspect
ratio. When a 4:3 image is displayed on an HDTV, you
will see black bars on the sides. The picture quality may
not be as sharp as with HD sources.
• You can use the Wide
• This TV supports
Mode
fimction of the TV to adjust the 4:3 image to fit the entire screen (see pages 23 and 29).
signals up to 1080i.
9
1. Installing
the TV
• The Table-Top
for this product
Stand
is packaged
separately
(for models
KDL-37M3000).
To install the TV unit to the Table-Top Stand
Table-Top Stand instructions
(supplied with the TV set).
before
KDL-26M3000/KDL-2(,MLI30/
the connection
You can bundle
below.
and setup, refer to the
the connecting
I1.
cables as illustrated
2
1
Screw the support belt (supplied) to the TV
stand (not supplied) with a wood screw
(supplied).
2
Attach
the support
belt to the Table-Top
with the securing
coin, etc.
screw
Adjust
the length
by pulling
toward
Stand.
you
holding
while
• Be sure to take measures
(supplied)
using
the suppoll
Stand
a
belt
the Table-Top
to prevent
the TV from
toppling over and causing ir_iury.
• The supplied wood screw may not be used depending
on the type of TV stand. In this case, or when the
• Do not bundle the AC power cord with other
connecting
cables.
securing strength is not enough, use commercial
screws
I/s to 3/1(_ inch (3 to 4 ram) diameter to fit to the TV
stand.
Consult
your dealer about the types of screw(s).
11
• Be sure to store the removed
This TV can be installed on a wall by using a Wall-
Stand
Mount
Table-Top
children.
Bracket
(sold
separately).
the TV on a wall, the Table-Top
removed
from the TV.
Before
Stand
mounting
must
be
• Do not remove the Table-Top Stand for any reason
other than to wall-mount
the TV.
Stand.
• For bracket
steps below to remove
tile Table-
installation,
Disconnect
all tile cables from tile TV.
2
Gently lay the TV, face down, onto a level and
stable surface covered with a thick and soft
cloth. Make sure the Table-Top
provided
by the Wall-Mount
TV. Sufl]cient
expertise
TV. especially
to determine
3
hanging
over the edge.
Remove
the screws as shown in the illustration
for your model and pull the Table-Top
out.
4
the TV's
• For product
protection
strongly
recommends
model
mounting
Stand is
and Table-Top
designed
of your
Sony dealer
Bracket
is required
model
guide
for your
in installing
the strength
weight.
and safety reasons, Sony
that you use the Wall-Mount
for your
TV and the wall-
be performed
Stand
KDL-26M3000
KDL-32M3000
KDL-26ML130
_KDL-32ML130
KDL-37M3000
SU-WLIO0
instability
SU-WL500
and possibly
BRACKET
result in ir_iury.
f
3 designated
Level surface
covered with a
soft cloth
12
Model: KDL-37M3000
Remove 4 designated screws only.
screws
only.
Table-Top
Stand
by a
contractor.
• Use with other WALL-MOUNT
Remove
this
of the wall for
Use the following Sony TV's only with the
following WALL-MOUNT
BRACKET.
Do not remove any other screws from tile TV.
Model: KDL-26M3000
KDL-26ML130
KDL-32M3000
KDL-32ML130
insert
and the instruction
TV should
or licensed
the
away from small
refer to the Wall-Mount
in the accesories)
Bracket
1
Keep the screws
(supplied
withstanding
Follow tile simple
Top Stand:
screws
in a safe place until you are ready to reattach
Level surface
covered with a
soft cloth
Table-Top
Stand
may cause
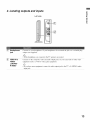
2. Locating outputs and inputs
Left side
o
[]
Headphones
jack
Connects to your headphones. If your headphones do not match the.jack, use a suitable plug
adapter (not supplied).
• While headphones are connected, the TV speakers are muted.
[]
VIDEO IN 2
VIDEO/
Connects to the composite video and audio output.jacks on your camcorder or other video
equipment such as a VCR or video game equipment.
L (MONO)R AUDIO
,_
• If you have mono equipment, connect its audio output jack to the TV's L (MONO) audio
input jack.
13
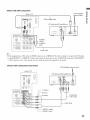
Rear
I
]
............................................................................................................................
R-AUDIO-L
[]
[]
%
[]
HDMI IN 1/2
R-AUDIO-L
v&F,t
CABLE
HDMI (High-Definition Multimedia Interface) provides an uncompressed, all-digital
audio/video interface between this TV and any HDMI-eqnipped audio/video equipment, such
as DVD player, a set-top box, A/V receiver and Bin-ray disc player as well as PC. HDMI
supports enhanced or high definition video plus digital audio.
• If the equipment has a DVI and not a HDMI connector, use a HDMI to DVI cable or adapter
to connect the DVI output to either HDMI IN 1 or HDMI IN 2 input, and connect the audio
jacks to the AUDIO (L/R) jacks below the HDMI IN 2. (DVI connector is for video signals
only, the Audio jacks provide support for the audio.)
HDMI-to-DVI
cable
HDMI-to-DVI
adapter
Audio cable
• For better PC view, use the PC IN (RGB IN) input.
• HDMI connection is necessary to view 480i, 480p, 720p, and 1080i formats. Note that this
TV displays all video input signals in a resolution of 1,366 dots x 768 lines.
[]
VIDEO IN 1
S VIDEO
Connects to the S VIDEO output jack of your VCR or other video equipment that has
S VIDEO. S VIDEO provides better picture quality than composite video ([_). S VIDEO
does not provide sound, yon need to connect the audio cables.
[]
VIDEO IN 1/3
VIDEO/
L(MONO)AUDIO-R
Connect to the composite video and audio output jacks on your A/V equipment such as a VCR
or other video equipment. A third composite video and audio (VIDEO IN 2) input is located
on the left side panel of the TV.
14
[]
[]
[]
[]
COMPONENT
Connect
IN (1080i/720p1
(L/R) jacks.
to your DVD player's
480p/480i)/
L-AUDIO-R
composite
AUDIO OUT
Connect
(FIX)
these outputs
video ([_)
DIGITAL AUDIO
Connects
compatible.
or digital
set-top
provides
better
to the coaxial
Connect
(RGB/AUDIO)
RGB, not supplied).
to a personal
Input Signal
box's component
picture quality
video (YPBPR)
than the S V]DEO
and audio
([_)
or the
connections.
to listen to your TV's
PC IN
See PC
video
to tile left and right audio input jacks
OUT
(COAXIAL)
Component
audio
input of a digital
computer's
Reference
of your audio or video equipnlent.
audio through
video output
Chart
You can use
your stereo system.
audio
equipment
connector
that is PCM/Dolby
using HDI5-HDI5
cable
Digital
(analog
on page 18 for the signals that can be displayed.
SJ
• For some
Apple Macintosh
If this is the case, connect
cable.
[]
SERVICE
[]
VHF/UHF/
CABLE
ONLY
This USB port is for service
RF input that connects
computers,
the adapter
it may be necessary
to the computer
to use an adapter
before connecting
(not supplied).
the HD 15-HD 15
only.
to your Cable or VHF/UHF
antenna.
• Component video (YPBPR) or HDMI connection are necessary to view 480i, 480p, 720p, and 1080i formats. Note
that this TV displays all fonnat types of picture in its native resolution of 1,366 dots x 768 lines.
15
o.
3. Connecting
the TV
You can also enjoy high definition programming by
subscribing to high definition cable service or high
Cable or VHF/UHF (or VHF only)
_
Rear of TV
VHF/UHF/
CABLE input
75-ohm coaxial cable
(not supplied) __
definition satellite service. For the best possible
picture, connect these components to your TV via the
HDMI or component video (with audio) input on the
back of your TV.
Shown
with HDMI Connection
• It is strongly recommended that you connect the
antenna/cable input using a 75-ohm coaxial cable (not
supplied) to receive optilnum picture quality. A
300-ohm twin lead cable can be easily affected by radio
frequency interference, resulting in signal degradation.
Rear of TV
Cable and VHF/UHF (or VHF only)
If you want to watch both cable and antenna (overthe-air) programming,
you will need to use an
optional A-B RF Switch (not supplied) to switch
between the cable and over-the air antenna
programming,
Cable
as shown.
A-B RF
Switch
Rear of TV
VHF/UHF/CABLE
input_
Antenna
--
HDMI cable
• Be sure to set Cable setting to Cable On or Cable
Off in Channel menu for the type of ilrlpnt signal you
choose (see page 30 for more details.).
i
,?
,,2
HD cable box/
HD satellite box
16
Shown with DVI Connection
CATV/Satellite
Rear of TV
antenna cable
DVI-to-HDMI
_4_
cable
HD cable box/HD satellite box
I 5i
IUDIO-L
(white)
/:'_?;
_
AUD,O-L
,_:;J
AUDIO-R
(red)
?
.............................................
• If the equipment
to either
HDMI
2. (DV] connector
Audi
has a DVI and not a HDMI
IN 1 or HDMI
connector,
IN 2 input, and connect
is for video signals
J
cable
use a HDMI
to DVI cable or adapter
the audio jacks
only, the Audio jacks
provide
to the AUDIO
support
to connect
(L/R) jacks
the DV] output
below the HDMI
IN
for the audio)
Shown with Component Connection
CATV/Satellite
antenna cable
/
Rear of TV
HD cable box/HD satellite box
i
i
,/_
[L4
K,y,*
i **
;
,_!::_ili!
......
l
!
_-__
Component
video cable
Audio cable
AUDIO-L (white)
AUDIO-R (red)
17
Use tile TV as a monitor for your PC.
Shown below with the HDI 5 to HDI5 connection. This TV can also be connected to a PC with DVI or
HDM[ output. (Refer to the supplied Quick Setup Guide.)
Rear of TV
cable (analog
RGB)
Audio cable (stereo mini plugs)
• Connect
(page
the PC IN jack to the PC nsing the HDI5-HDI5
cable with ferrite core (analog
RGB)
and audio cable
15).
PC Input Signal Reference Chart
After connecting the PC to the TV, set the output signal from the PC according to the chart below.
VG A
SVGA
XGA
640
x
480
31.5
60
VG A
640
_<
480
37.9
73
VESA
640
×
480
37.5
75
VESA
800
×
6(X)
35,2
56
VESA
800
x
6(10
37.9
60
800
x
600
46.9
75
1024
x
768
48.4
(_l
1024
×
768
56,5
70
• This TV's
PC input does not support
• This TV's
PC VGA input does not support
• For the best picture
frequency
automatically.
18
quality,
from a personal
(PC reboot
Sync on Green or Composite
it is recommended
computer.
interlaced
Guidelines
VESA
VESA
Guidelines
VESA
Sync.
signals.
to use the signals
In plug and play, signals
may be necessary.)
VESA
(boMfaced)
in the above chart
with a 60 Hz vertical
frequency
with a 60 Hz vertical
will be detected
Blu-ray
Disc Player/
"PS3"
DVD
player
J
Digital
satellite
receiver
J
Digital
cable box
J
!
Audio
system
Personal
computer
Headphones
Camcorder
J
Y
VHF/UHF/CABLE
VCR
Game system
• Refer to the Quick Setup
Digit!l audio
Digi
recorder
Guide (supplied)
Analog audio equipment
(A/V Receiver/Home Theater
equipment
when connecting
to your TV.
other equipment
19
4. Setting Up the Channel
List - Initial Setup
After you finish connecting your TV. you need to run Initial Setup, which autolnatically
sets up available
channels. The Initial Setup screen appears when you turn on your TV for the first time. If you do not want to
set up the channels at this time, you can do it later by selecting the Auto Program option in the Channel
menu (see page 30).
POWER
1
Press
@
to turn on the TV.
The Initial Setup
screen appears.
2
Press ,i,/,!, to highlight
then press @.
3
The message
or antenna"
the desired
language,
"First please connect cable
and "Start auto program
now?" appears, make sure you aheady
connected Cable or Antenna, then select Yes
to start Auto Program.
If you want to start
Auto Program later press No.
• If yon have Cable and Antenna
available, please connect Cable first.
4
The scanning of channels will start. If you
want to stop and run Auto Program later
press Cancel.
5
When Auto
to continue
Program
is complete, press @
If the Initial Setup programming found
Cable channels, you will be able to scan
Antenna channels as well. Connect the
Antenna, you can use an A-B RF switch (not
supplied) and change the switch to Antenna,
then start Auto Program to search antenna
channels. If the Initial Setup programming
found Antenna channels, the Auto
Program process will finish. If you want to
scan Cable channels, you can do it later
using the Channel menu (see page 30).
To run Auto Program again at a later time
[]
Use the Auto
Program feature as described
on page 30.
To Display the Picture in your Preferred Aspect Ratio
[]
Select the proper Wide Mode as described
on pages 23 and 29.
• You may want to set up convenient features such as Favorites (see page 26), Show/Hide
(see page 30), Label Channels (see page 30) when Auto Program is completed.
20
Channels
Remote Control
and TV Controls/Indicators
==
(n
Slide to open
Insert two size AA batteries (supplied) by matching
O and 1} on the batteries to the diagram inside the
battery compartment
[]
TV/VIDEO
Press to display the External
and select the desired input.
[]
SLEEP
Press repeatedly
• See page 26 on
o
(n
of the remote control.
Inputs
Applications
list, go through
menu the External
until the TV displays
the list
Inputs.
the time in minutes
(Off, 15, 30, 60 or 120) that you want the TV to remain on
before shutting off. To cancel Sleep, press _k_"repeatedly until
Sleep
[]
PICTURE
Off appears.
Press repeatedly
modes: Vivid,
be also accessed
to cycle through
Standard,
the available
picture
Cinema.
The picture lnodes
in the Picture
menn (see page 28).
can
"_° The 5 and CH + buttons have
a tactile dot. Use them as a
reference when operating the
TV.
21
[]
GUIDE
(For all
channels
including
Digital/Analog
channels)
Press to display the Guide when you are watching digital
channels (if it is available from the station).
Using the Guide
Tile Guide allows you to select tile channels l'mm a channel
list; also provides information about the current program
being shown on each channel.
Information
banner
Channel
list
• Program
information
broadcasters.
the channel
in the guide is provided
As a result,
number,
it may sometimes
without
a program
by the
include
only
title or
description.
[]
RETURN
Press to go back to the previous
MENU
[]
MENU
Press to display
See Using
22
screen
when displaying
items and settings.
the MENU
the TV Menus
with TV functions
and settings.
on page 25.
[]
O
Use with @-@
and @ buttons to select digital channels.
For example, to enter 2.1, press @, O, @ and @.
[]
VOL +/-
Press to adjust the volume.
[]
MUTING
Press to mute the sound.
restore the sonnd.
[]
POWER
Press to tnrn On and Off the TV.
Press again or press VOL + to
[]
WIDE
Press repeatedly to step through the Wide Mode settings:
Wide Zoom, Normal, Full, Zoom. The Wide Mode
settings can be also accessed in the Screen menu (see page 29).
Changing
the Wide Screen
Mode (see page 29 for details)
Wide Mode .....
4:3
480i/480p
Standard definition source
==
Wide Mode
16:9
1080i/720p
High definition source
o
(n
Wide Zoom........
Wide Zoom
N;rmai
N;rniai
Not Applicable
................
Full
Fu|l .........
.....................
Zoom
ZS6m
• When the TV receives
cannot be selected.
a 720p or 1080i signal,
Normal
[]
DISPLAY
Press once to display the current channel number, channel
label, remaining time, Wide Mode and current time. The on
screen display (OSD) will turn off alter a few seconds.
[]
t/!l./_,/._/@
Press t/l!./_,t*
select/confirm
to move the on-screen cursor. Press @
to
an item. You can also use this button to see
your Favorites
channels
list.
[]
TOOLS
TJ_!s function is only available when PC; input is active. Press
Q) to view a channel at the same time as a Picture in Picture
screen. (see page 27 for details)
[]
JUMP
Press to alternate
alternate between
between two channels. The TV will
the current channel and the last channel
tuned to with the buttons
control.
[]
0 - 9lENT
Press
@
CH +/-
- @
- @ to select a channel:
few seconds.
[]
@
Press @
Press to scan through
• The CHANNEL
reference
to change
and C) on the remote
the channel
channels
changes
alter
immediately.
channels.
+ button
when operating
has a tactile dot. Use it as a
the TV.
23
_#############################################################J_
[]
MENU
Press to display
the MENU
with TV functions
and settings
(see Using
the TV Menus
on
page 25).
]
[]
[]
7 f i
[ I ,
-_-i
Press to display
INPUT
In the MENU
i,O
- VOLUME
Inputs
the External
screen,
this button
Press to adjust the volume.
]n the MENU
Press to scan through
channels.
PowER
Press iO iuri_ oi_ iiliii off ihe TVI
[]
TIMERLED
Lights
may indicate
(IR) Infrared
these buttons
LED
In the MENU screen,
up in amber when the timer is set. When
if the TV is turned
POWER
screen,
the selection
your desired
input.
or setting.
serve
as left/right
buttons.
these buttons
serve as rip/down
buttons.
the timer is set, this LED will remain
lit even
+
[]
[]
the list and select
as confirming
+
4_,t_
- CHANNEL
[]
list, go through
serves
Lights
off. For details,
the TV needs
see page 36. If the LED blinks in red continuously,
servicing
(see contacting
up in green when the TV is turned
Receives
IR signals
from the remote
Sony information
this
on the back cover).
on.
control.
Receiver/
Light
Sensor
Senses room light level and adjusts
details).
Do not put anything
• Make
sure that the TV is turned
the screen
near the sensor,
off before
power cord while the TV is turned
seconds
24
brightness
accordingly
as its function
unplugging
the power cord. Unplugging
on may cause the Power
or may cause the TV to malflmction.
(see page 37 for
may be affected.
LED to remain
the
lit tbr up to 20
MENU
provides
a control
one button
access
panel on the screen
Navigating
for controlling
your TV. It enables
rather than a variety
of remote
control
you to perform
button
a variety
of tasks intuitively
with
presses.
through TV Menus
1
Press @
on the remote control
to display
options.
2
on screen the Menu
To highlight
a Menu option
press _,,
then press t_/,1!,to go through
menus.
_o=,,,2,3"
45
2
the
3
4
To select an option press @ or*.
Press t_/,1!,to select or adjust your
5
desired option, then press @.
To exit press (_.
"d
Menu Descriptions
The Applications
menu
select:
and
haveExternal
shortcuts
Applications
lets you
Inputs,
to Wide Favorites,
Mode,
Clock/Timers,
Parental Lock and
Closed Captions
(CC); also you can
select
PC-PIP
function
_
The Channel
_]
maintenance
select
t_om menu:
to the Favorite
channel options;
Channel
Channels,
Cable, Add Channels,
Auto Program, Show/Hide
from this menu.
Channels,
menu
Label
is used to provide
Channels
or
Diagnostics.
The Picture
Picture
Menu
The Sound
Menu allows
tune and change
menu: Treble,
Sound
_j
Screen
is used to fine rune
the inaage quality, allows you to
customize several parameters for
optimal viewing, select from menu:
Picture Mode, Reset, Backlight,
Picture, Brightness, Color, Hue,
Color Temp. (Color Temperature),
Noise Reduction or Sharpness.
Speaker,
Reset.
MTS,
audio;
Bass,
The Parental
Parental
password
The
from
Audio
levels; use @-@
on the remote control
password.
time you create a password,
by entering
Setup Menu
The first
confirm
the
it again.
provides you additional
features like: Closed
Balance,
Alternate
Lock
to enter a four-digit
you to fine
select
Lock feature allows you
to set up the TV to block programs
according to their content and rating
Captions (CC),
Info Banner, Label Video Inputs,
or
Setup
Clock/Timers,
Sensor.
Language
or Light
the proportions
of the screen, select:
he Screen
allows youAuto
to change
Wide
Mode, menu
4:3 Default,
Wide,
Vertical
Size or Phase.
Center.
Vertical
25
Using the Applications
External inputs
This feature
Menu
lets you select
]
Press
tl./4 to choose
2
To select press
3
To exit from External
the external
a external
inputs connected
@.
inputs list, press (_.
• To change external inputs again, repeat steps 1-2.
• To go back to channels,
press CH +[- to go through
select TV: or press @
to select a channel
• You can also select directly the external
navigate through the Menu.
Favorites
This feature
]
Press
lets you create and choose
tl4!, to select
Favorites
2
.............
Wide
Parenial Lock
This optioi_ is a shortcut
is a shortcut
block channels
26
button
This option is a direct shortcut
Mode option (see page 29).
This option
Captions (CC)
Add
the channels;
from your
Favorites
inputs list by pressing
a list of up to 8 favorite
to
Favorites,
repeat steps
1-2 and
list.
'i! ° without
having
to
channels.
to add the current
channel
to your
@.
To exit press (_
Clock/Timers
Closed
the option
list, and press
• You cau also use @
Mode
to your TV.
input from the list of 9 inputs.
This option
of th e remot e control
to the Screen
the picture
channel
list.
size in the Wide
Setup menu (see page
Parenial Lock menu, it allows you to enter
to adjust Clock/Timers
to the
t ° see your Fa),orites
menu for adiust
on
36).
a password
to
(see page 31).
is a shortcnt
to Closed
Captions (CC)
screen
on Setup
menu
(see page 35).
PC-PIP
This PiP (Picture In Picture) feature provides PC input signal and TV channels;
allows you to view two pictures simultaneously. When you select this feature from
Applications
menu, the PC-PIP will appear with a Sub Window to see TV channels
at the same time.
Main Window
(PC)
Sub Window
(TV Channel)
TOOLS
• To turn Offor
On the Sub Window
on the screen
press
(..) from the remote
control,
when you select PC input.
• You can also select PC input from the External
Inputs list. Press (_,
External
Inputs, the External inputs list will appe_r, then select PC input.
To change
channels
To Exit from PC-PIP
Press (_
2
From External
the channels
Inputs
number
using
the _-o_-(_
External
Inputs
you can also select
the PC input signal
on Applications
menu.
list, select TV input to return to TV Channels.
channels list and select the channel
Favorites
channels list.
Channels,
• Closed
_"
the channel
(PC input)
and select
• To exit from PC-PIR
• When
or enter
is selected
from Applications
of your preference;
menu, the Favorites
or just press @
with the Sub Window
to view your
active, you can just see TV
other external
Captions
• Parental Lock feature
channels.
2
._
"'1
select
in the Sub Window
Press CH +/- to change
numeric buttons.
1
only
inputs are not available for this view (like VCR/DVD).
(CC) is not available in the Sub Window.
will work in the Sub Window,
a padlock
will appear on the blocked
27
Using the Picture Menu
Picture Mode
Customized
picture
Select a mode: Vivid (for enhanced picture contrast and sharpness),
Standard
(for standard
picture settings, is recommended
for home entertainment);
or Cinema (for viewing fihn-
viewing
based
Reset
Resets the current
Bac_!ig_!
Piciure
Most suitable
Picture
to ncrease
Press .!.to
Select an option:
Noise
Sharpens
Medium
Reduction
Sharpness
Mode setting
or decrease
colors a neutral
or decrease
Cool
environment).
defuult
picture
contrast,
values.
then press @
then press
picture definition
or High.
@
the green tone s, the!? press
(to give the white colors a bluish
1, 2
tint) or Warm
Press _./* to sharpen
to factory
or decrease cole r intensity,
increase
Temp. (Color
Temperature)
in a theater-like
!tie _,c_!!_'l!i !heii
......................................
Press _./.I. to increase
Color
for viewing
_!_ !° _i!_t'!e"
Press ;/;
Co!e r.........................
Hue
content.
or soften tile picture,
t ° set.
@
........................................
!o set. ...........................
tint), Neutral
(to give the white colors
to give every object a sharp,
to set.
clean edge.
then press Q
(to give the white
a reddish
tint).
Select from Off, Low,
to set.
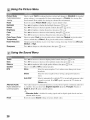
Using the Sound Menu
Treble ...................................................
Press <'(* to increase
or decrease
higher-pitched
sounds,
Bass
Press 4./* to increase
or decrease
lower-pitched
sounds,
Speaker
Select to turn
MTS
Mono
Select for mouo receptiou.
broadcasts.
Use to reduce
noise during
Stereo
Select t_r stereo reception
stereo.
when viewing
a program
Auto
On or Off the
SAP
internal
to set. ...............
to set.
speakers.
Select to automatically
a signal
then press @
then press @
is received.
switch
the TV to second
If no SAP
signal
is present,
weak stereo
broadcast
in
audio programs
when
the TV remains
in
Stereo mode.
Alternate
Audio
(Audio selection
for
current
program)
This Audio feature for current program lets you select
is available).
You can select from English,
Espa_ol
Audio
4, 5, 6, 7, 8 audio available options.
• Alternate
Audio is disabled
altenate audio streams.
Reset
28
t¥om 8 options of alternate audio (if it
(Spanish), Frangais
(French) or
Resets the current
Sound
settings
for analog
to factory
signals
default
aud for digital
values.
signals
that do riot have
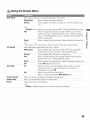
Using the Screen Menu
Wide Mode
These
options
Wide
Zoom
allow you to change
Normal
• Normal
Full
the proportion
of the screen.
Select to enlarge
the picture
unit_rmly.
Select to display
is 4:3.
4:3 pictures
in original
size when the original
source
is not available when yo u are watching 1080i or 720p in High Definition source.
Select to enlarge the picture horizontally
to fill the screen when the
original
source
is 4:3 (standard
definition
source is 16:9 (High definition
picture
Zoom
in original
Select to enlarge
source),
source).
When
the original
select this mode to display
16:9
size.
the original
picture
without
distorting
the aspect
ratio.
WiDE
• If you press
4:3 Default
Select the default
[ZEZ_of the remote
Wide Zoom
Select to enlarge
original
Auto Wide
control
you can also select
the 4:3 picture
image as much
to fill the 16:9 screen,
as possible,
with minimal
keeping
Select to display
Full
Select to enlarge the picture horizontally
to fill the screen
original source is 4:3 (standard definition source).
the 4:3 picture
Zoom
Select to enlarge
Off
To turn Off automatic
On
the original
disturbing
Off
program's
to you, select
a screen
the aspect
ratio.
to the screen
screen changes
mode
are
Wide option.
Allows
you to move the position
of the picture
Vertical
Size
Allows
you to adjust
size of the picture.
Adjust
to fine tune overall
is disabled
change
If frequent
mode from the Wide
Center
• Phase
distorting
when the
Off.
Vertical
the vertical
without
automatically
content.
Select to turn off the Auto
Choose
picture
size.
size for 4:3.
Select to have the screen
upon
in its original
the
distortion.
Normal
based
Phase
these modes directly.
Screen Mode to use for 4:3 sources.
Mode
option.
up and down.
sharpness.
when the TV is receiving
a different
video input
29
"'1
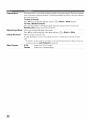
Using the Channel
Favorite Channels
Menu
Lets you set up a list of up to 8 of your favorite
]
Press
tt/4 to select
2
Favorites
list and press
To exit press (_.
To select a favorite
the channel.
° To access
screen.
Cable
channel
quickly
Add Channels
Program
Add
channels.
to Favorites
to add the current
channel
to yonr
@.
from the list, press tt/!l, to go through
to Favorites
On: Select if you are receMng
Off: Select
Auto
the option
channel
list, press @
cable channels
the list and @
to select
when there is no menu
on the
via Cable TV provider.
if yon are using an antenna.
Select to acid channels
antenna installations.
Automatically
without
replacing
sets up the channel
the original
channel
list. This option
list on the TV for all receivable
channels
is useful for
(Digital
and
Analogs).
• Before start Auto Program, be sure to change to On or Off on Cable
Channel
menu. When it is On, the TV will search Cable
channels;
Off, the TV will search
air signals
• If you are using an A-B RF switch
connection,
be sure to select
Channel
Menu.
Show/Hide
Channels
1
Select Auto Program.
2
Select OK to start Auto
with an Antenna
(not supplied)
the correct
Program.
Cable
When
connection.
to switch
option
Auto
option in the
and when it is
between
to Cable
Program
Cable
On or Cable
is done,
or Antenna
Off in the
select OK.
Allows you to show or hide channels that appear when you use the CH +1- button.
1
Press tt/,l, to scroll through the channels until you find the channel you want to show or
hide.
2
Press
@
to determine
if the channel
To show or hide more channels,
Label Channels
Allows
you to assign
repeat
labels to channel
Press tt/,l, to scroll through the channel numbers.
number that you want to assign a label.
2
Press l./*/tt/!l,
to move through
it. To move to the next character
• To delete
a character
................................................................
, To exi ! press
Allows
to confirm
O
Then
press @
to select the channel
the label characters
(A-Z, 0-9) and press @
to select
press _./._/tt/l!,. Repeat to add up to 7 characters
to the
to set it. To assign labels to more channels,
press
• To have a space between
3O
numbers.
1
label. Then select
Diagnostics
will be shown or hidden.
steps 1-2.
repeat steps 1-2.
_.
characters
press
_.
......................................................................................................................................................................
the current
channel
performance
indicator.
..........
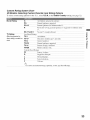
Using the Parental Lock
The
Parental
block
Lock
channels
the remote
by entering
feature
allows
(regardless
control
you
to block
of the programs).
to enter
a foul
digit
programs
Password
password.
according
to their
is necessary
The first
time
content
in setting
you create
and rating
up blocking.
a password,
levels
Use
confirm
and
@-@
on
the password
it again.
To View Blocked Programs
Press @ when tuned to a blocked pro_am,
settings, mm offand on the T"_
Rating
Off
then enter the password. To reactive the Parental Lock
Turn Parental
Lock Off. No programs
are blocked
from viewing
based on
their rating.
Child
Maximum
ratings permitted
are:
U.S: TV-Y. TV-G, G
Canada:
C. TV-Y
Youth
Maximum
ratings permited
U.S: TV-PG, PG
Canada:
Young
""1
,<
Adult
C8+, PG, 8 ans+, TV-PG
Maximum
ratings permitted
U.S: TV-14,
Canada:
Custom
are:
are:
PG-13
14+, 13 ans+, TV-14
Select to set ratings manually:
U.S: See page 33 for details.
Canada:
See page 34 for details.
• If you are not familiar
Child,
Youth
ratings,
Digital Rating
(Available
Off
only in
where
Adult
Block programs
movies that are
broadcast
without
rating,
or
a
rating system,
you should
the rating selection.
Turn Digital Rating off. No programs containing
select
To set more specific
ratings are
digital
from viewing.
................
Select to customize
the Parental
Lock with downloadable
digital
ratings.
select in cie;ir ihe do;;uio.ciedr_;ii,@ ..................................................................
To cancel .just select
Unrated
Guideline
to help simplify
Custom.
blocked
Custom
advanced ratings exist) Ciear
U.B.A.
select
with the Parental
or Young
Allow
Allows
programs
Block
Blocks
£il progralns
Cancel.
and movies
that are broadcast
and toni'los
without
that are broadcast
a rating.
without
a r;;ting. ....
2_._
• If you block unrated TV programs, be aware that the following
blocked: programs
broadcast from another country, emergency
programs,
sports,
news, public
service
announcements,
religious
types of programs may be
broadcasts,
political
programs
and weather.
31
Channel
Block
This option allows you to block channels regardless of program ratings. The password needs
to be set up prior to blocking channels. The blocked channel can only be viewed by entering
the correct password.
To block a Channel
Press tl./4 to go through the channels
To View a Blocked Channel
and press
@
to Block o1"Allow
Press @ when tuned to a blocked program,
then enter the password.
Parental
Lock settings, mrn off and on the TV.
External Input Block
Allows
...................
Press tI'/!F"to scroll through
Change
Password
you to block individual
Select to change
Use @-@
buttons
your password,
32
Country
To reactive
the
video inputs.
the video inputs and press
@
to Block
or Allow.
your password.
to select a four digit password;
• You need your password
Select
channels.
see Lost
for any future
Password
access
to confirnl
into the Parental
on page 40.
U.S.A
Select to use U.S.A. ratings.
Canada
Select to use Canadian
ratings.
password
enter
lock settings.
it again.
If you lose
Custom Rating System Chart
US Models: Selecting Custom Parental Lock Rating Options
To select custom rating options for tile U.S., select U.S.A. in tile Select Country setting (see page 32).
Movie
Rating
G
All children
PG
Parental
guidance
suggested.
PG-13
Parental
guidance
for children
R
Restricted
17.
NC-17
TV Rating
Block programs by
their rating,
both
content
or
and X
and general
viewing,
audience.
parental
No one 17 or under
13.
is suggested
for children
under
allowed.
Age-Based Ratings
TV-Y
All children.
TV_Y7 ...............................
Birc_i_i io _hii_i_u @_na
TV:G
General
_mdiencel
TV-PG
Parental
guidance
TV-14
Parents
strongly
cautioned.
TV-MA
Mature
audience
only.
Content-Based
under
guidance
oia_r:.............................................................................................
"d
,<
suggested.
Ratings
FV
Fantasy
D
Suggestive
L
Strong
language.
S
Sexual
situations.
V
Violence.
violence.
dialogue.
S&
• To ensure
maximum
blocking
capability,
set the Age-Based
Ratings.
33
Canadian Models: Selecting Custom Parental Lock Rating Options
To select custom rating options for Canada, select Canada in tile Select Country setting (see page 32).
English
French
U.S.A.
34
Rating
Rating
Rating
C
All children.
C8+
Children
G
General
programming.
PG
Parental
guidance.
14+
Viewers
14 and older.
18+
Adult programming.
G
General
8 ans+
Not recommended
for young
13 ans+
Not recommended
for ages under
13.
16 ans+
Not recommended
for ages under
16.
18 ans+
Programming
See TV
Rating under
U.S.A.
8 years and older.
programming.
restricted
for details
children.
to adults.
on page 33.
Using the Setup Menu
Closed
Captions
(CC)
Allows
you to select
from several
closed
captions
modes
(tbr programs
with closed captioniug).
Select: Off (to turn off Closed
Captions), On (to turn
Program (to program Closed Captions).
Programming
Closed
If you select
the Program
following
that are broadcast
Captions),
on Closed
or
Captions
option
under
Closed
Captions,
you can change
the
settings:
Basic
Allows
CC1,
you to select basic closed
CC2,
Displays
CC3, CC4
souud
caption
options
(EIA-608).
a printed
version
of the dialog
effects
of a program
(should
or
be set to
r_
"d
CC1 for most programs).
Text1, Text2,
Text3, Text4
Digital
CC
Allows
Allows
Advanced
Allows
settings
captions
(digital
closed
captioning
digital
Select from the available
you to make additional
to Basic
(digital
presented
(if
EIA-608)
(ElA-708)
closed
captiou
options.
settings
Select from As
options.
If you want to customize
@
information
(EIA-708).
you to select advanced
options.
network/station
using either half of the whole screen
available).
you to set digital
or Advanced
Advanced
Displays
for digital
Broadcast or
the following
settings,
(EIA-708)
closed
you can customize.
select
an option
with
with ___"button.
and returu
Style
Character Color
Select from 7 available
Character
Small, Standard,
Character
Size
styles.
35 available colors.
Large.
Edge color
35 available colors.
Background Color 35 available colors.
Window
Color
Opacity
Align
Character
Character
Edge Type
35 available
Solid, Translucent,
Left, Right,
None,
Transparent,
Flashing.
Center.
Raised,
Shadow,
Background
colors.
Depressed,
Uniform,
Left
Right Shadow.
Solid, Transluceut.
Trausparent,
Flashing.
Solid, Translucent,
Transpareut,
Flashing
Opacity
Window
Info
Banner
Opacity
Set On or Off. Wheu On: displays the program name mad the remaiuing
time (it" the
broadcaster
offers this service). Displays for a few seconds when the channel is changed.
you don't
want to display
the Into
Banner
select
If
Otf.
35
Label Video Inputs
Allows you to identify A/V equipment you connected to the TV, such as a VCR, DVD, etc.
For example, if you have a DVD player connected to the VIDEO 1 input, you can select the
label DVD for the VIDEO 1 input. Then when you press T_,!0to change inputs, the Video
Label you assigned to that input appears on screen.
1
Press t1.11!,
to highlight the input (from 1 to 8) to which you want to assign a label, then
press @
2
to select it.
Press t1.14to highlight one of the displayed labels, then press @
to select it.
You can select from the following labels for each input:
DVD, VCR, Bin-Ray, Cable Box, Satellite, DVR, Game, Camcorder, Skip (your TV skips
the input you selected when you press the _ i!!!!
_ button on the remote control).
• The skip label is nsefid for inputs to which no equipment
Clock/Timers
is connected.
Sleep
Set the time in minutes (Oft', 15, 30, 60 or 120 minutes)
the TV to remain on before shutting off automatically.
Timer
You can use the Timer to tune to a specific
Select Off (Select
saved);
to turn off the timer;
channel
that you want
at a scheduled
your previous
settings
time.
are
On (to turn on the timer: your previous settings are saved);
by Time, Days, Duration, Channel
Program (to set the timer
Volume
Setup
scheduled
that you want to tune to a specific
channel
or
and
at
time).
If you select Program, press 11411.(change the values)
through the options) to set the hour, minutes, AM/PM,
and volume
or I./* (move
clays, duration
setup.
To set a channel press @-@
(numeric values)
channel is digital) on the remote control.
and @
(if the
To replace a channel press * on the remote control, then press I. to go
back to the channel selection and enter a new channel number.
You can program
External
T,J.I!_I°
on the remote
the desired
•
Current
Language
Time
Select to display
to go through
inputs
Press
and select
input that you want to program.
feature
will be not available
until yon set the
time (clay, hour, minutes
Current
1
Press @
2
Press tl./,1!./I./,_ to set clay, hour, minutes
3
Press
(French).
of a channel.
the external
Select to set the current
all on-screen
(Spanish), Fran_ais
36
Timer
inputs as well instead
control
_
settings
to select
Current time.
and AM/PM).
Time.
and AM/PM.
to exit.
in your language
of choice:
English, Espafiol
Light Sensor
Select On to enable the automatic picture (screen) brightness control. The light sensor
measures the room brightness
which allows the TV to automatically
adjust the backlight
brightness
based
on the picture
settings
and the ambient
room light conditions.
• Be sure not to put anything around the sensor, as its flmction may be affected.
• In low light the range of the backlight control is reduced when Light Sensor is set to
On.
2
"..I
37
Troubleshooting
If you have additional questions, service needs,
or required technical assistance related to the use
of your Sony TV, please visit our website or call
one of the following numbers:
htt p://www.sony.com/tvsu
1-800-222-SONY(7669)
1-877-899-SONY(7669)
pport
for US Support
for Canadian Support
No picture.
No picture.
[]
Confirm your external inputs list and make sure you select TV
(Cable/Antenna
channels). See page 26 for more details.
[]
Perform Auto program
to acid receivable
the TV's memory (page 30).
[]
[]
[]
Make sure tire power cord is connected
Turn on tire power of the TV.
Check antenna/cable connections.
[]
Perform Auto Program
to add receivable
TV's memory (page 30).
channels
thai are not presently
in the
TV is locked to one channeh
[]
Perform Auto
TV's memory
channels
thai are not presently
in the
Calmot receive or select channels.
[]
To receive or select cable channels, make sure that Cable in Channel
settings
is set to On. To receive or select UHF channels over an antemra, make sure
Cannot receive any channels.
channels
that are not presently
securely.
Program
to add receivable
(page 30).
Cable is set to Off. Perl\)rm Auto Program
to add receivable
not presently in the TV's memory (page 30).
The TV turns off automatically.
No picture from sonm video
sources.
in
[]
Check if Sleep
36).
is activated, or confirm tire Duration
[]
If there is no signal, the TV will turn off automatically.
[]
[]
Check the connection between the optional video equipment
v w_
Press _ on the remote control (page 21).
[]
Press _
Inputs list.
[]
[]
Check antenna/cable connections.
Check the antenna location and direction.
channels
that are
setting of Timer. (page
and the TV.
on the remote controh Select your desired input f'rom the External
Poor picture.
Double images or ghosts.
Only snow and noise appear on the []
screen.
[]
Check if the antenna is broken or bent.
Check if the antenna has reached the end of its serviceable
normal use, I-2 years at the seaside.)
Dotted lines or stripes.
[]
Keep the TV away from noise sources
[]
If using 300 ohm twin lead, move the excess lead away from the TV or try using
75 ohm coaxial cable instead.
[]
[]
Press {ZZ53to selecl tire desired picture mode (page ,1).
Adjust the Picture Mode options in the Picture menu (page 28).
No color/Dark picture/Color is not
correctfFhe picture is too bright.
38
PICTURE
lili:. (3-5 years in
such as cars, motorcycles,
or hair-dryers.
Noisy
picture.
No sound/Noisy
[]
[]
Make sure that the antenna is connected
using a 75-ohm coaxial cable (not
supplied).
Keep the antenna cable away from other connecting cords.
To avoid TV interference,
make sure to use an tmdamaged antenna cable.
[]
Check
[]
[]
[]
Press C) or VOL + so that "Muting"
disappears from the screen (page 22).
Disconnect
your headphones.
Set SpeaRer
to On in the Sound
menu (page 28). If it is set to Off, sound
is not output from the TV's speakers regardless of the TV's volume control.
[]
[]
[]
Make sure that the antenna is connected
using a 75-ohm coaxial cable (not
supplied).
Keep the antenna cable away from other connecting cords.
To avoid TV interference,
make sure to use an undamaged
antenna cable.
[]
If you connected
[]
Confirm the PC is correctly
HDI5 cable).
[]
Ensure
[]
Turn the PC Off. Confirm the PC connection
and restart the PC. Plug and
play will auto-detect
the TV and correctly set up PC timing.
[]
Adjust
the resolution
[]
Adjust
Phase (see page 29).
[]
The current Wide Mode setting is automatically
replaced with the 4:3
Default
setting when you change the channel or video input, if 4:3 Default
in the Screen
menu is set to other than Oil. If you want to lock in Wide
Mode selected with
. CZI5
w_oEon the remote control, set 4:3 Default to Off in
sound
Good picture,
Audio
[]
no sound.
noise.
No sound
PC Input
No Picture/No
Signal.
Poor picture.
the volume
control.
MUTING
an audio device,
the output
signal
it is necessary
connected
to have a video connection.
to the TV in the PC IN (not supplied
from the PC is one of the formats
listed on page
18.
[]
Suddenly
smaller,
"Black
the picture
gets
box" on screen.
Black bands appear
and bottom
:_
at the top
the Screen
menn (page 29).
Turn off the Auto Wide option
[]
You have selected a text option and no text is available. (See page 35.) To
turn off this feature, set the Closed
Captions option to Oil. If you were
trying to select closed captioning,
select COl instead of Text1-4.
[]
Some wide screen
programs
16:9 (this is especially
For more details,
contact
other digital
on DVD or
sources
display
a
loss of detail, especially during
fast-motion
or dark scenes.
are fihned
common
your program
releases).
than
Your TV will
with black bands at the top and bottom
of the screen.
that came with your DVD (or
provider).
Programs
[]
The compression
used by certain
your TV's
to display
in 4:3 aspect ratio will have bands on left and right sides of the
to select
screen
full size see page 29.
blocks or dots, pixelations)
TV's
in aspect ratios that are greater
with theatrical
check the documentation
[]
screen,
programs
menu (page 29).
The picture gets smaller during the commercials,
this is due to the method
the provider broadcasts their contents. When HD content channels switch to
SD definition content (commercials),
the picture may be small with a black
border.
show these programs
Certain
in the Semen
[]
of the screen.
large screen
certain digitally
__
_,
(see page 18).
General
Wide Mode changes
automatically.
0
,_
to appear
and ability
recorded
digital
broadcasts
and DVDs
may cause
less detail than usual, or cause artifacts
on your screen.
to show very fine detail,
(small
This is due to your
and is normal
for
programs.
39
Remote control does not operate. []
[]
[]
[]
Some digital cable channels are
not being displayed.
[]
[]
40
Lost password.
[]
How to reset the TV to factory
settings.
[]
Check the polarity of the batteries or replace the batteries.
Point the remote control at the remote control sensor of the TV.
Fluorescent lamps can interfere with your remote control operation; try
turning off the fluorescent lamps.
Keep the remote control sensor area clear from obstacles.
Certain cable companies have limitations on the broadcast of digital cable
channels. Check with your cable company for more information.
The digital cable channel may be set to Hidden in the Show/Hide
Channels setting (see page 30).
Select the Parental Lock menu, then enter the following master password:
4357. The master password clears your previous password and allows you to
enter a new password (page 31).
Turn on the TV. While holding clown the tF button on the remote control,
press the POWER button on the TV. Release the tF button.
WARNING: The Reset will clear all of your customized settings including
Parental Lock setting.
Specifications
System
Television
system
NTSC: Amelicm_
TV standard
ATSC (8VSB tel"rCsll"iid): ATSC
QAM
Chailne]
Panel
coverage
on cable:
Analog
Analog
system
LCD (Lkluid
Clystal
10W + 10 w
Antenna
75-ohm
VIDEO IN 1/2/3
S VIDEO
IN 112
compliant
external
Display)
not include
CableCARD
fimctionalily)
lel'lllilla]
(4-pin
Panel
|klr VHF/UHF
nfini DIN)(VIDEO
C: 0.286
VIDEO:
Vp-p (Bursl signal), 75 ollms
1 Vp-p, 75 oluns unbalanced,
AUDIO:
500
YPBPR
8VSB
07 2(XX)/Does
terrestrial:
2-69 / Digital terrestriah
2-69
Cable:
I- 125 / Digilal Ctlble: 1- 135
Speaker output
Input/Output jacks
COMPONENT
ANSI/SCTE
illVrnls
(Componenl
I only):
sync
Y: 1,0 Vp-p,
75 ohms
unbalanced,
sync negalive
/
negalive
/ 100%
moduhaion)/hnpedance:
Video):
Y: 1.0 Vp-p,
47 kilohms
75 ohlns
unbalanced,
sync
negalive
/ PB: 0,7 Vl>p,
75 ollms
/
PR: 0,7 Vp-p, 75 ohms / Signal lormat: 480i, 48015, 72015, 1080i
AUDIO:
5IX) mVrms ( 100% modulalion)/Impedance:
47 kilohms
HDMI IN 1/2
HDMI: Video: 480i,
AUDIO:
500 inVrnls
AUDIO
500 mVrms
Ol JT
(100%
480p, 720p, 1080i / Audio:
( ]00% moduhaion)/hnpedance:
modulation)/More
than
Two
500 mVrms
PC IN
D-sub 15-pin, analog
RGB, 0.7 Vp-p, 75 ohms, positive
See the PC Input Signal Relcrence
Cllarl on page 1g.
PC AUDIO INPUT
Headphones
Power and others
Stereo mini jack, 500 mVrms, 47 kilohms
Power requirelnent
Power consumption
120 V AC. 60 Hz
Stereo
mini jack
ill use
135 W
ill standby
All models
Screen size (inches
/ hnpedance:
less titan
channel lineal
47 kilohnls
o
PCM
32, 44,1
and 48 kHz,
16, 20 and 24bils
(Fixed)
>_ 16 olmls
170 W
180 W
31.5
37
1W
26
132 class)
measured diagonally)
Display resohttion
horizontal x vertical)
1,366 dots
Speaker/Full range 12)
146 × 35 aim
5 //4 x 1 3/a hlcbes
x 768 lines
Dimensions (W x H x D)
with stand (ram)
/inches)
662 × 515 × 214
796 × 590 x 214
-) I
31 3/8 x -3 / 4 x 8 I/2
918
26 I/g x 2(13/s x 8 I/2
without stand (ram)
(inches)
wall-mount hole
pattern (ram)
Mass
662 × 468 × 108
796 × 544 × 100
918 x 609 x 108
261/8xl81/2×43/8
313/8x21112
36 I14 x 24×
200 x 100
200 x 200
300 x 200
stand
13 kg
29 lb.
16 kg
36 lb.
22 kg
49 lb.
without stand
I 1 kg
25 lb,
14 kg
31 lb.
18.5 kg
41 lb.
with
x4
x 655 x 265
36 I/4 x 25 7/8 x 10 I/2
4 3/,_
Supplied
accessories
Remotc control
RM-YD021
(1) / Size AA batteries
(2) / Supporl
belt ( 1) / Securing
screw (1) / Wk_od screw (1) /
Cable holder (1 attached
to the Tiible-Top
Stand) / Operating
[nstruclions
( 1) / Quick Setup Guide (1) / Warranty
Card
(1) / Online Rcgistralion
Card (U.S.A.
and Ctmada only) (1) / WldI-Mounl
[nstallatkm
[nstl uclkms
(1)
Optional
accessories
Headphones
SU-WL500
• Design
and specifications
plug adapter / Connecting
cables / Wall-Mount
Bracket:
SU-WLI00
(KDL-26M31)t)0
and KDL-26ML130).
( KDL-32M
3000. KDL-32ML
130, and KDL-37M
3lit)l)) / 75-ollm
coaxial cable ! 1) / HD 15-HD 15 cable ! 1)
are subject
to change
without
notice.
41
4:3 Default 29
I
A
hffrared Receiver (IR)
T
AUDIO OUT .jack. described 15
Auto Program 30
Auto Wide 29
Installing the TV on a vxall
B
JUMP button 23
INPUT24
Balance28
Bass28
12
U
30
U.S.A. Rating 34
1dnrated 31
US Models 33
Described24
C
M
(!able 30
Cable holder 11
Caoadian Models 34
CH+_ button 23
Change Password 32
Channel Block 32
Clock/Timer 26
Closed Caption (CC)
Color Temp./Color Temperature) 28
COMPONENT IN .jack ( 1080i1720p1
4811p/480i), described 1 5
Menu
Applications 2(3
Channel :30
Parental Lock :31
Picture 28
Screen 29
Setup 35
Sound 28
MENU button 22, 24
Movie Rating 33
MTS 28
MUTING button 22
D
Diagnostics30
Noise Reduction
26
DIGITAL AUDIO OUT (Coaxial),
described 15
Digital Rating 31
DISPLAY button 23
E
English Raling 34
ENT button 23
External Input Block 32
External inputs 26
F
Favorite Channels 30
Favorites26
French Rating 34
G
Vertical Center 29
Vertical Size 29
VHF/UHF input, described 15
VIDEO/AUDIO (L/R) jacks, described
1:3, 14
VOL+_ button 22, 24
W
WIDE button 23
Wide Mode 26, 29
28
P
PCIN 15
31
PC-PIP 27
Ph,se 29
Picture28
PICTURE button 21
Picture Mode 28
POWER button 22, 24
POWER LED 24
R
Rating:31
Reset 28, 40
RETURN button 22
GUIDE button 22
S
H
S VIDEO jack, described
Select Country 32
SERVICE ONLY 15
Setting up channels 20
Sharpness 28
Show/Hide Channels 30
SLEEP button 21
Speaker 28
HDMI IN jack, described 14
Headphones jack. described 13
Hue 28
V
N
Parental Lock 26,
Treble28
Troubleshooting 38, 39, 40
Turning on/off the TV 24
TV Rating 33
TV/VIDEO button 21
J
Label Channels
Light Sensor
Brightness 28
42
TIMER LED 24
TOOLS button 23
L
Backlight 28
Color28
24
14
Please contact Sony directly
if you:
=Have questions on the use of your television after reading your operating instruction
and Quick Setup Guide
manual
= Experience difficulty operating your television
Contact Sony Customer
Support
at:
,ttp:,www:sOny.com t s,PpOrt
or to speak with a support
representative:
United States
1-800-222-SONY
Canada
(7669)
Sony will work to resolve your questions
1-877-899-SONY
(7669)
more quickly than your retailer or place of purchase.
Please Do Not Return the Product to the Store
3213437141
http://www.sony.net/
Printed in U.S.A.