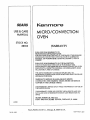
1
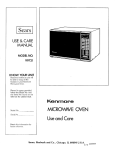
USE & CARE
MANUAL
't
STOCK NO.
88963
KNOW YOUR UNIT
Read this booklet so
you will be able to
enjoy all the features in
your Kenmore
Micro!Convection
Oven.
Record in space
provided below the
Model Noo and the
Serial No. found
on the labels on
the inner left side
of control panel
Kenmore
d
MICRO/CONVECTION
OVEN
Model No,
Use and Care
Serial No,
Retain this information
for future reference_
14846
Sears,
Roebuck
and Co., Chicaqo,
IL 60684.
U_S.A.
YOUR SAFETY FIRST
The Sears Kenmore Microwave/Convection
Oven, though simple to use, is not a toy° Respect
cooking appliance, Become familiar with microwave energy, its uses, and limitations,
PRECAUTIONS
TO AVOID POSSIBLE
it as an electric
EXPOSURE
TO EXCESSIVE MICROWAVE ENERGY
(a) DO NOT ATTEMPT to operate this oven with the door open since open-door operation can result in
harmful exposure to microwave energy, It is important not to defeat or tamper with the safety
interlocks,
(b) DO NOT PLACE any object between the oven front face and the door or allow soil or cleaner residue
to accumulate on sealing surfaces.
(c) DO NOT OPERATE the oven if it is damaged. It is particularly important that the oven door close
properly and that there is no damage to the:
(1) DOOR (bent)
(2) HINGES AND LATCHES (broken or loosenedJ
(3) DOOR SEALS AND SEALING SURFACES:
(d) THE OVEN SHOULD NOT BE ADJUSTED OR REPAIRED BY ANYONE EXCEPT PROPERLY
QU_
SERVICE PERSOr,_,_EL
IMPORTANT--FOR
PROPER
AND SAFE
USE OF YOUR
OVEN
o The oven must be level
• The electrical power cord must be kept dry and must not be pinctled or crushed in any way°
• The ceramic tray must be in the oven for the microwave or mic_o/convec cookingo However, the ceramic
must be removed from oven for the convection cooking. (See Page 8 for detailed insb-uctions.)
tra}/
• The metal rack must be removed from oven when rack is not used for cooking,
o Place the cookware gently on the ceramic tray and hand.le the tray carefully to avoid breakage.
,, When a brov_nin9 dish is used, the browning dish bottom must be at least 3/I6 in. above cooking tray_ Carefully
read and follow the instructions for the browning dish. incorrect usage may cause the ceramic tray to break.
o The oven should be thoroughly
it is operated again.
checked by a trained service technician, should it be dropped or damaged, before
,, The oven has several built4n safety switches
try to defeat these su,itches.
to make sure the power
remains
off when the door is open. DO NOT
DON'TS
o DO NOT attempt to operate this oven with the door open.
Q DO NOT run the oven empty _thout food in it.
* DO NOI operate the oven empty with the temperature probe plugged in.
o DO NOT let the temperature
probe touch the side walls, ceramic tray or door of the cavity when in us_.
• DO NOT plug the pointed end of the temperature probe into the socket inside the cavity.
• DO NOT use the temperature'probe
only.
, DO NOT use met_
baking
in a regular oven° This probe is designed for microwave/convection
pan for microwave
or micro/convec
oven
cooking,
• DO NOT cook bacon directly on the ceramic tray to avoid excessive local heating on the ceramic
• DO NOT store burnable material, such as food, in your microvave/convection
tray..
oven.
, DO NOT heat any types of baby bottles or baby food Uneven heating may occur and possibly cause personal
iniu_.
,, DO NOT heat smalI..necked containers,
such as syrup bottles, in the microwave
oven.
• DO NOT use this microwave/convection
oven for comercia] purposes_ This Sears Kenmore
Microwave!Convection
Oden is made for household use onty._
SAFETY
CERTIFICATION
The Se_rs Kenmore Microwave/Convection
Oven is designed and throughly tested to meet exacting safety
standards.. It meets UI and FCC requirements
and complies ufith sa[eb} perjormance
standards
of the U.S.
Department
of Health and Human Serulces,,
b
IMPORTANT SAFETY INSTRUCTIONS
When using electrical appliances basic safety precautions
WARNING-To
reduce
the
risk
' burns, electric shock, fire, injury to persons
exposure to excessive microwave energy:
!
of
5_,Install
or
Read all instructions before using the appliance°
2_,
should be followed, includin.q the following:
Read and follow the specific "PRECAUTIONS
TO AVOID POSSIBLE EXPOSURE TO EXCESSIVE MICROWAVE ENERGY" found on
NOTE: If a fire should start:
*KEE.P THE OVEN DOOR CLOSED
*TURN THE OVEN OFF
*AND DISCONNECT
THE POWER CORD
OR SHUT OFF POWER AT THE FUSE OR
CIRCUIT BRE_V_.R PANEL.
C_
with
this
the
appliance
provided
only
Do NOT grossly overcook foods. As many
grossly overcooked foods will cause fires in
the oven cavity, carefully attend the oven;
especially, if paper, plastic, or other combustibles are placed inside the oven:
Do NOT store combustible items such as,
bread, cookies, etcoinside the oven because if
lightening strikes the power lines it may cause
the oven tO turn ON.
Do NOT use wire twist-ties in the oven. Be
sure to inspect purchased
items for wire
twist-ties and remove them before the item is
placed in the oven.
4o This appliance must be grounded. Connect only
to properly grounded outlet. See "GROUNDING INSTRUCTIONS"
found on page 6.
SAVE THESE
in
installation
6. Some products such as whole eggs, water with
oil or fat, sealed containers and closed glassjars
for example may explode and should not be
heated in this oven.
3. As with most cooking
appliances,
close
supervision is necessary to reduce the risk of a
fire in the oven cavity
b,
locate
7. Use this appliance only for its intended
described in this manual.,
page 2.
a.
or
accordance
instructions.
.
9.
use as
As with any appliance,
close supervision
necessary
when used by children.
is
Do not operate this appliance if it has a damaged
cord or plug, if it is not working properly or if it
has been damaged or dropped.
10. This appliance should be serviced
only by
qualified service personnel.,
Contact nearest
authorized
service facility for examination,
repair or adjustment,
I1. Do not cover or block
appliance.
any openings on the
12. Do not use outdoors,
t3. Do not immerse
14. Keep
cord or plug in water.,
cord away from heated
15. Do not
counter.
let cord
hang
over
surfaces.
edge
of table
or
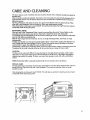
16 When cleaning surfaces oi door and oven that
comes together
on dosing the door, use only
mild, non-abrasive
soaps or detergents applied
with a sponge
or soft cloth {See "'Care and
Cleaning" instructions on page 47)
INSTRUCTIONS
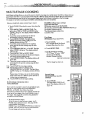
TABLE OF CONTENTS
General
Inst_ctionso
m Location
of Model
Number
m IMPORTANT--Electrical
N Installation
Label ..................................................................................................................
Grounding
5
..........................................................................................
Instructions
.............................................................................................................
6
, ..........................
7
m Setting"Time of Day" ,.................................................................................................
m Names of Oven Parts ................................................ ."..........................................
7
; ................................
8
s Oven Control Panel ..............................................................................................
9--10
m How
The Microwave/Convection Oven Works .......................................................................
II
User Instructions
m Easy Use Chart .......................................................................................................................................
!2--14
BI Recalland Change of Settings.....................................................................................
15
m Pause between Stages ...........................................................................................................................
m Regular Timer
m Hold
.......................................
;................................................................................................
Warm ................................................................................................................................
m Child Lock-Out
15
16
o_
........
16
.............................................................................................................................
16
l
Detailed
Directions
A Microwave Cooking
, Quick-start
" Cooking
.............. : .............................................................................................................................
Cooking
Guide
..................... ,.................................................................................................................
for Multi-Power
" "'Hl-Power"l-'Multi-Power"
= "Temperature
Settings/Wattage
Power
t7--18
....................................
I9
Cooking ..............................................................................
20
Controlled"Cooking
= Temperature
of Output
17--29
........................................................................................
Controlled"HPPower"/"Multi-Power"
2t--23
Cooking ............................................................
o Automatic Defrost .........................................................................................................................
24
25--26
* Multi-StageCooking ...........................................................................................
27--28
, Whole
Meal Cooking ...........................................................................................
29
m Convection Cooking .............................................................................................
30_38
o Convection
Cooking
, Temperature
* Cooking
with Automatic Preheat ......................................................................
31
Probe Convection
Guide for Convection
Cooking
Cooking
...................................................................................................
..........................................................................
32
33
= Micro/Convec Cooking .........................................................................................
34
, Temperature
Probe HicrolConvec
, Temperature
" Multi-Stage
Controlled
Cooking
Cooking
...............................................................................
for MicrotConvec
3
Cooking
....................................................
5
36
Cooking ...........................................................................................
37--38
m Delay StartCooking .............................................................................................
39
m Preset
Redpe Cooking
" Use of Quantity
key ..................................................................................................................
= Preset Recipes List .......................................
lltProgramming
.',,, 40--41
..........................................................................................................
40
,........................................................................
41
New Recipes .....................................................................................................................
42--45
Oven Utensils Guide ........................................ :....................................................................................
46
Care and Cleaning
47
......... _.................................................................................................................
Questions and Answers ...........................................................................................................
Sears Service
Sears Warranty
...............................................................................................................................................
...........................................................................................................
: ....................
48--49
50
Back Cover
SEARS KENMORE
MICROWAVE/CONVECTION
USE AND CARE MANUAL-MICROWAVE/CONVECTION
OVEN
OVEN USE INSTRUCTIONS
Enjoy a new cooking experience
from Sears_ Please read this booklet.
It takes only a few minutes -- time well spent to learn how to use all of the
features.
Advice on the use and care of Sears appliances
is always available at
your nearest Sears store. Vtlhen seeking information,
be sure you have
the complete model number which is located on the plastic label.
See below for its Ioca_'on.
MODEL NUMBER
To make a request for sentice, information or replacement of parts, Sears will require the complete model
number of your microwave/convection oven.The number is on the inner leftside of thecontrolpanel.(You
mu_t open thedoortoseethenumber),
The number will look like this: 564 8000000,
Model Number Label
IMPORTANT-ELECTRICALGROUNDING
INSTRUCTIONS
This appliance must be grounded. In the event of an electrical short circuit, grounding reduces the i'isk
of electric shock by providing and escape wire for the electric current. This appliance is e_tuipped with
a cord having a grounding wire with a grounding plug. The plug must be plugged into an outlet that is
properly installed and grounded.
WARNING
-
Improper
use of the grounding
plug can result in a risk of electric
shock°
Consult a qualified electrician or Sears Service Department if the 9rounding instructions are not
completely understood, or if doubt exists as to whether the appliance is properly grounded°
A short power-supply cord is provided to reduce the risks resulting from becoming entangled in or
tripping over a longer cord°
Longer cord sets or extension
cords are available and may be used if care is exercised in their use.
If a long cord or extension cord is used, (1) the marked electrical rating of the cord set or extension
cord should be at least as great as the electric_ rating of the appliance _',(2) the extension cord must
be a grounding,type
3 wire cord, and (3) the longer cord should be arranged so that it will not drape
over the countertop
or tabletop where it can be pulled on b,v children or tripped over accidentally. The
electrical power cord must be kept dry and must not be pinched or crushed in any way°
°NOTE:
This oven draws a 13,8-ampere
electrical current on 120 volts.
PROPERLY POLARIZED AND
GROUNDED OUTLET
Three-Pronged
(Grounding)
Plug
INSTALLATION
Install your oven by following these four simple steps:
Step I:
Remove all packing material and accessor_es_ Then remove the protection sheet on wrapper.
Step 2:
Place the oven in the level location of your choice, but make sure there is at least one inch of
space on the top and at the rear for proper ventilation, Top ot the oven should be kept clear and
the plastic feet must be kept on the oven so there is air flowventilation. The exhaust vem._ are
at the mar and top of the oven. "DO NOT place any objects such as books, papers, or
cooking accessories over the top of the exhaust vents.;' Blocking the veins can damage {he
oven..
Step 3: Plug your oven into a Standard
15 amperes
Step 4:
120volt household
outlet. Be sure the electrical circuit is at least
and that your microwave/convection
oven is the only appliance on the circuit.
When your microwave/convection
oven is plugged in for the first time or when power resumes
after a power interruption, the numbers in the display w_ndow will show "0-00" plus the hours and
minutes that have elapsed since the oven wets plugged in or the power was restored., This means
that t_ e TIME OF DAY clock must be set, Refer to "Setting TLme of Day" below.
NOTE: ' If your oven does not operate properly,
then plug it back in..
This unit is not designed
unplug the oven from the 120-volt household
for 50 Hz or any circuit
other
than a 120 volt/60 Hz AC circuit.
SETTING TIME OF DAY
° Touch CLEAR,
*, Touch TIME OF DAY_
° "i'ouch numbers indicating
thecorrect
time.
, Touch TIME OF DAY°
(Thi_ is also explained in the "Easy Use Chart" Time of Day Section on Page IZ)
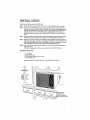
DIMENSIONS
t hl
Height:
Width:
Depth:
15-3/4"
24"
21 _
Weight: 68 lbs_
i:
li
outlet and
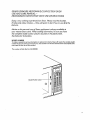
NAMES OF OVEN PARTS
Exhaust
vents
Easy-clean
stainless steel cavity
See-through
door
,,
interlock
Oven
--
Remove your Sears Kenmore Microwave/Convectipn
will be packed with the following items:
Metal
system
control
rack
Oven arid all items from the shippin9 carton,. Your oven
Ceramic Tray ................................................................................................................
Metal Rack ....................................................................................................................................
Temperature Probe,, ..._.
................................................................................................
"Use and Care Manual". ........................................................................................................
"Easy Use Chart" Card ............................................................................................................
Cook Book ............................................................................................................................
I each
I each
1 each
1 each
1 each
I each
*The ceramic tray should always be in the oven when either the microwave or micro!convec
cookin9 is used.
Microwaves pass throuyh the tray and are reflected by the oven bottom back up to the underside o[ the food°
As a result, the food receives microwave eneryy on the bottom, top, and sides a}l at the same time. However,
the tray should be removed for convection cooking to allow for the most even heating
*Do not use this Sears Kenmore Microwave/Convection
convection oven is made for household use only-
8
Oven for Commercial
purposes.
'This microwave/
panel
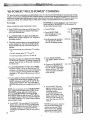
OVEN CONTROL PANEL
Indicator
Lig
Micro. Convec.
Delay Start
Auto Defrost lights indicate
which cooking operation is
being used.,
cookang
stages are set, lights will go on
indicating the stage in which
your oven is cooking_
Display Window--Used
show:
= Time of Day
to
,, Cooking Time
Recipe #--Used
cooking..
in preset
- Microwave Cooking Power
Level
- Cooking Probe Temperature°
- Oven Temperature
Auto Defrost (dEF1, dEF2,
dEF3)
Recipe it, QuantiW If
= Hold, End, PAUS (Pause),
Prob (Probe),
It also functionsas countdown
timer or temperature indicator
when cooking_
Pause Light--Shows
Oven has
been set to pause between the
Cooking Stages.
Recipe--Used
in
programming new recipes.
in settin_ auto defrost
Auto-Defrost
Selectlon--Used
Micro Power Guide--Lists the
Types of Cooking that most
often occur at theseMicrowave
Cooking Power Levels
in multiplying
base quantity of preset recipes.
Dven Temp Guide--Lists
examples of Oven Temperature
for Convection Cooking.
"Micro Temp Guide--Lists
examples of food that are best
cooked to these Microwave
Cooking Temperatures with
Temperature Probe,
OVEN CONTROl.
PANEL
,MicroiConvec Time--Usedin
Micro/Convec Cooking
Time.
Convec Time--Used
in setting
Convection Cooking T_e._
O_)en Temp/Preheat--Used
setting the desired Oven
Temperature or Prehea_
Temperature.
in x
\\,
[
x
Temp-Used
setting the desired probe
temperature
during Micro/
Convec Cooking
Stop Time--Used
in semng a
Delay Start Cooking.. Cooking
can be finished at a preset stop
time..
in
Convec Temp--Used
in setting
the desired probe temperature
duringConvection Cooking
Quick-On--Used
in setting flrsl
start cooking at high power
Time of Day--Used in :-.el
Time of Day and Child Lock-Out_
se--Used to stop Oven
the Cooking Stages,
Micro Time--Used in settin
Microwave Cooking Time..
/
Numbers--Used
to enter the
Time of Day, Delay Start Time,
Cooking Times, Cookin_ Powers
and Cooking Temperatures.
!!I13!i!
in
setting Cooking Time, Power
Level and Temperature for Multi_
StageCooking. Also usedto
recall
eachmemo_ stageina
multipte stage prosramo
Warm--Used in setting a
Hold Warm. Cooked food can
be kept warm.
Micro Power--Used
in
Microwave Cooking Power
Levels.
Micro Temp--Used insetting
the desired probe temperature
during Microwave Cooking.
Temperature Controlled
Cookingcan be done only when the
Temperature Probe is plugged
into the socket inside the oven,,
Clear--Clears
all entries except
Time of Day. Once cooking has
begun, however, CLEAR vail
function only after
STOP has
been touched
Stop--Stops
Start--Starts
NOTE:
10
A "beep tone" sounds when a "pad" on
the control panel is louched, to indicate a
settin_
has been entered
Oven.
Oven.
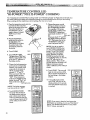
HOW THE MICROWAVE/CONVECTION
WORKS
OVEN
Stirrer Fan
Microwave Cooking
Using the energy of microwaves only, food is cooked quickly without
altering the color or shape.Microwaves generated by a magnetron are
uniformly distributed by the fan so that the food in the oven heats and
is cooked, Microwave power in 99 steps implies it takes 99 steps, enabling the various kinds of foods to cook at the most desirable cooking
power for the best resultsr
/
-,( j
!
!
Convection
Convection
CooPing
\
Fan
Heater
A way of cooking with hot air alone that heats and cooks food from the
outside- This method allows food to be browned evenly without losing
any of the juices_ Air heated by the heater is uniformly circulated in the
oven by a fan to enable the heating and cooking of food. Since hot air
remains in the oven as it circulates,cooking is very efficienL 'The temperature inside the oven can be controlled according to the type of food
being cooke&
Stirrer Fan
Micro/Convec
Cooking
With both microwave energy and hot air utilized, this method cooks food
much more quickly than any conventional method. The solid state control alternates cooking energy between microwave and hot air cycles to
provide efficient cooking fully utilizing the advantages of both microwave
and hot air cooking systems,
When foods with high moisture content are cooked by the micro/convec method, beads of water may accumulate on the top and/or sides of
the oven door, but will dissipate after use..
Convection
k_.\
Fan
Heater
l
tl
MICROWAVE
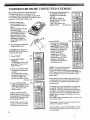
EASY USE CHART--MICROWAVE
Your new Solid Stare
Control
allows you to use your microwave/c0nvectton
TIME OF DAY "
To Set
L Touch
2. Touch
3_ Touch
day,
4. Touch
COOKING
:
oven
TIMER
ToSet
L Touch CLEAR.,
2,, Touch MICRO TIMEo
3., Touch correctnumbers [or the
T/ME OF DAY,"
4,,TouchMICRO POWER.
5,_Touch"0"(powerl_el0).
6. TouchSTART
time,
I
+'
{See Page 16 for more detailed
instructions..}
NOTE: It is not necessaryto touch
MICRO POWER when cooking with
the highest power ("HI"). To set"HIPOWER" Cooking, skip steps 4 and S
above,
(See Page 20 for more
instructions.}
!
I
:
To Set
1+ Plug in Temperature Probe.
2o Touch CLEAR.
3, Touch MICROTEMP.
4- Touch numbi_Tsfor desired food
temperature,
S.. Touch MICRO POWER.
6, Touch numbersfor desired cooking
power level.
7, Touch START+
!
'.
+
i
I
t
(See Page24for more detailed
instructions
}
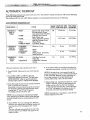
AUTOMATIC DEFROST
To Set
1., Touch CLEAR,
2+ Touch DEF1, DEF2, or DEF3 to
t
_iectthe appropriate Auto
Defrosting
Sequence.,
3. Enter the weightof your foodin
decimalincrementsfrom 01 to 99
pounds.
4, Touch STUd:iT,
S, At pause, follow the cookbook
instructions for rearranging, turning
food over, etc,
6.. To resume defrosting, touch
START,
3 Touch numbers for desked cooking
time or temperature.
4. Touch MICRO POWER,
5, Touch numbers fordesized cooking
power level
6.. Touch MEMORY/RECALL or
PAUSE and repeat steps 2+5 to set
2nd cookingstage.
7o Touch MEMORY/RECALL or
PAUSE and reEeat steps2-5 to set
3rd cookingstage+
8, Touch START.
CHILD LOCK-OEI'
1
t
;
(Time of Day v,41]return to the
display window)
+
(See Page 16 for moredetailed
i
instructions
)
QUICK-S'_J:{T COOKING
(See Pages 17 and 18 for more detailed
instructions=)
! To Set
I.. Touch CLEAR.
2. Touch T1MEOF DAY.,
i
3 Touch "9"four times.
I
4,. Touch START.
t
i
I To Clear
L Touch CLEAR,
2. Touch TIME OF DAY,
3 Touch _7" fourtimes,
I+
4. TouchSTART.,
!
(SeePage,25 and 26 for more detailed :
instructions.}
12
T P.
I
detailed
To Set
I,,Touch CLEAR.
2. Touch QUICK-ON
3. Touch number (single digit, I ~ 9)
for desiredcooking time
[See Pages 27 and 28 for more detailed
instructions.)
r
t
I
+ To Set
i
1. Touch CLEAR.
!
2, TouchMICRO TIME or MICRO
NOTE: It is not necess_ to touch
MICRO POWER when cooking with
the higher-1 power ("HI"). To set"HI,
POWER" Coo_'Jng, skipsteps 5 and 5
above,
l
MULTI-STAGE COOKING
!
:
To Set
L Touch CLEAR
2, Touch MICRO TIME,
3. Touch numbers for desired cooking
time,
4., Touch MICRO POWER.
S, Touch numbers for desired cooking
power Mud.
6,, Touch START',
!
TEMPERATURE CONTROLLED
"H I-POWER"/"MULTI-POWF.,W'
COOKING
ways,
"Ht,POWER"/"MULTI,POWER"
COOKING
CLEAR.
TIMEOF DAY.,
numbers for correct time of
"This "locks" inthe time and starts the
dock running.
in many
+
I
=
!
i
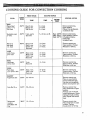
EASY USE CHAtTr--CONVECTION
CONVECTION COOKING
l
ToSet
L TouchCLEAR.
2 TouchOVEN TEMP/PREHEAT
3., Touchnumbersfor desiredoven
Iemperatme.
4, TouchPAUSE.
5 TouchCONVEC TIME
6. Touchnumbers fordesired
cooking lime.
7, TouchSTART_
COOKING
AUTOMATIC PREHEAT
TEMPERATURE PROBE
COMVECTION COOKING
To Set
I Touch CLEAR,
2 Touch OVF.aNTEMP/PREHEATo
3, Touch numbers for desired oven
temperature.,
4, Touch START,
To Set
I,,
PluginTemperature
Probe,,
2,. TouchCLFJ_R.
3, TouchOVEN TEHP/PREH£J_T,
4, Touch numbersfordesired
oven
temperature.
5. TouchCONVEC TEMP.
6, Touchnumbersfordesired
food
temperature.
7,, Touch START.
(See Page 31 for more detailed
instructions_)
(SeePage31 formoredetailed
(See Page33 formore detailed
insb'_rtions.)
|ns_acflons,)
MICROICONVEC
TEMPERATURE
MICRO/CONVEC
COOKING
PROBE
COOKING
To Set
Io PluginTemperatureProbe_
2_ Touch CLEAR.
3 TouchOVEH TEMP/PREHEAT,
4. Touch numbersfordesired oven
temper_tme,
5, TouchMICRO/COWVEC TEMP.
6o Touch numbers fordesired food
tempe_tum,
7_ TouchSTART
To Set
1, Touch CLEAR.
2 Touch OVEN TF.aMP/PREHEAT.
3, Touch numbers for desired oven
temperature.
4. Touch HICROiCONVEC
TIME
5, Touch numbers {or desired
cdoking time.
6 Touch START,
{See Page 34 for more detailed
instructions
}
{See Page 36 lot more detailed
instructions )
1
t
I
MULTI-ST.AGECOOKING
TOSet
1. Touch CLEAR.
2,,Touch OVEN TF.MP/PREHEAT,
3 Touch numbers for desired oven
temperature.
4, Touch PAUSE.
5, Touch CONVEC TIME,
6,Touch numbers for desired
cookingtime.
7 Touch PAUSE.
8,"TouchMICRO/COI'_VEC TIMEL
9., Touch numbers for desired
cooking
Lime.
10. TouchSTART
NOTE: Any combination is possible in
multi-stage cooking
Duringconvection
cooking, theoven
keepsthe same temperaturein second
stageas for preheating if, however.
third stageis used, and a temperature
othe_than 350°F isdesired, the oven
temperaturemust be setin third stage,
(See Pages37 and 38 for more
detailed instructions.)
I3
DELAY START COOKING
For those times when you must be a@_y from the kitchen,,but want dinner ready when you return, cooking
can be started and finished at the time of day selecte& The directions belowshow Microwave Cooking only. Also Convection and Micro/Convec Cooking can be set in Delay Start Cooking. See page
39 for detailed directions.
EASY USE CHART
DELAY START COOKING
To Set
I. Touch CLEAR.
2. Touch STOP TIME.
3. Touch numbers for time of day to
finish cooking.
*4. Touch MICRO TIME.
5. Touch numbers for desired
cooking time_
6,, Touch MICRO POWER°
7. Touch numbers for desired
cooking power level,,
8., Touch START.,
* Multi-Stage Cooking can be used
with Delay,Start,,
After step3 above,follow
instructions for Multi-Stage Cooking
beginning with step2.
(See Page 39 for more detailed
instructions,)
PRESET
RECIPE COOKING
You can set the oven to cook 28 recipes automatically
Recipes 1-25 are preprogrammed,
26-28 can be programmed by you for 55 of your fovorite recipes, Simply touch RECIPE
bers corresponding
with the desired preset recipes, then START.
See pages 40 thru 42 for detailed directions_
To store the desired recipes in the oven, follow these steps:
EASY
USE CHART
PRESET RECIPE COOFdNG
To Set
1o Touch
CLEAR,
2. Touch Recipe =.
3o Touch numbers for correct Preset
Recipe ft.
4. Touch START,,
(See Pages 40 and 41 formore
detailed instructions
)
14
PROGRAMMING
NEW RECIPES
To Set
L Touch CLEAR.
2, Touch NEW RECIPE,
3o Touch RECIPE If,.
4o Touch numbers for New Recipe If,,
5. Program Recipe following suitable
operating instructions°
6. Touch NEW RECIPE.
(See Page 42 for more detailed
instzuctions,)
and recipes
#, the num-
RECALL AND CHANGE OF SETTINGS
To Recall aSett!ng
To recall (check) a setting befori_ you start the oven, follow the directions below°
o To check the Setting for a g_ven stage, touch MEMORY/RECALL once or more until the correct Stage
Light and Indicator Light lure on° The set T_e, Temperature or Ov,,_nTemperature for that stage will
show in the display window.
o To check the Microwave Cooking Power level, touch MICRO POWER.
_, To check the Oven Temperature, touch OVF.N TF24P!PREHF_.AT.
• To cheek Probe Temperature. touch Micro Temp. Convec Temp and Micro/Convec Temp_
o To check TIME, touch Micro Time, C6nvee Time, and Micro/Convec Time.
To recall (check) a setting while the oven is operating,
follow the directions below.
• To check settings while the oven is operating, touch the desired pad to recall the setting for the operating
stage.
• To recall a future stage, touch STOP, follow the directions above for rc_alling (checking) a setting before
starting the oven,and then touchSTART to continuecooking.
o To recall TIME OF DAY while the oven is running, touch TIME OF DAY. It will show momentarily in the
display window°
• To recall Recipe number(s) while the oven is running, touch RECIPE _, and it will show momentarily in
' the disptay window..
• To check the cooking power level during cooking, touch MICRO POWER
Power level will show momentarily in the display window.
To Change a Setting
Recall the Setting to be changed by following directions above and make the change as follows:
TIME ........................................................................
Touch "0" until only one "0" shows in
(MICRO TIME, CONVEC TIME, Iv[ICRO/CONVEC TIME)
the Display Window° Set Cooking
Time.
TEMPERATURE CONTROL .................................................
(MICRO TEMP, COI_JEC TEMP, M]CRO/CONVEC TEMP)
Set Cooking Probe Temperature.
MICRO POWER .................................................................................
Set Microwave Cooking Power Level.
To reset to "HI", set "99".,
OVEN TFJ4P!PREHL_,T ............................................................... Set Oven Temperature.
PAUSE BETWEEN
STAGES
Some recipes require separating, turning and adding or removing foods between stages° To set the oven
1o stop between stages, touch PAUSE rather than MEMORY/RECALL
when setting the oven, ff pause is
set, th.e oven will automatically stop and the word "PAUS" will flash in lhe display window_. To restart the
oven after the pause, touch START
t5
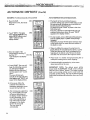
REGULAR
TIMER
Your Oven also has a timer that can be used for non,cooking functions,_ When used as a regular timer, the
Oven is not running. The timer is simply counting down in seconds.
For detailed instructions on using this timer, see below,,
To use the Regular
Timer
feature:
L Touch CLF__.
2. Touch MICRO "lIME.
3. Touch numbers for the time,
4. Touch MICRO POWER.
5. Touch "0" (power level 0)
6. Touch START. The time will begin counting down in the display window with no cooking or heating in
theoven.
A tone will soundand the word "End" willshow in the display window for 2 seconds when the time is
OVeI'.
"HOLD WARM"
Your oven has "Hold Warm" feature thatkeepsfo6d warm_er the cooking is done.
To use the "Hold Warm"
feature:
1. Touch CLEAR_
2. Touch HOLD WARM,
3. Set the desired cooking cycle following suitable operating instructions on pages 17 through 42 in this
manual
4. Touch START_
Wq_enthe cooking cycle is over, the oven will switch into "Hold Warm" to keep the food warm. "Hold"
show in the display window. The cook control setting changes to Power Level 1.
The "Hold Warm" will continue for up to I00minutes or until the door hasbeenopened or STOP has
been touched.
If you want to keep your cooked food warm, the "Hold Warm" feature can be used independently without
setting the cookingcycle.
To use the "Hold Warm" feature independently:
I. Touch CLEAR.
2. Touch HOLD WARM°
3. Touch START.
The oven will begin to keep the food warm with microwave power level 1 for up to 100 minutes or until the
door has been opened or STOP has been touched,
NOTE: Do not use metal utensils when operating with "Hold Warm" feature since arcing may happen and
damage to the oven may result.
CHILD LOCK-OUT
"Youroven has a "Child Lock-Out" feature to prevent a playful or accidental running of the oven by a
child,
Aher this feature is set, the display will return to the Time of Day. If the oven is accidentally
programmed to cook, the oven may appear to be cooking, but no cooking can occur after this feature
is set.
To set:
I Touch CLEAR.
2, Touch TIME OF DAY.
3. Touch "9" four times
4,Touch START
16
(Time of Day .willreturn
to the display window,)
To clear:
1 Touch
2. Touch
3, Touch
4. Touch
CLEAR.
TIME OF DAY,
"7" four times
START.
_ime of Day will return
to the display window,)
QUICK-START
COOKING
(HI-power only)
This feature was designed for simple setting of the oven with convenience cooking and/or reheating in mind To
set, simply touch the "QUICK-ON" pad. and touch a number pad from 1 to 9o The oven starts instantly
1. Touch CLEAR, and a beep tone will sound° The
CLEAR erases all previous settings. Place food in
oven, then close the door°
2, Touch QUICK-ON,
The lights above TIME and below COOK 1 wil! go
on. ("0" will show in the display window.)
3. Touch a number (single digit,
cooking time in minutes.
1-9)
for desired
EXAMPLE: To reheat I cup of coffee,you would use
HI-power for 1 minute.
To do this, follow these steps:
1. Touch CLEAR.=
Place coffee in oven, then
close the door_
2. Touch QUICK-ON.
3_
The oven will be_n to cook on HI-power
display window will show the time counting
minutes and seconds_,
and the
down in
Touch "1",
The oven begins to cook and
the time will begin to count
down in the display w_ndowo
4. A tone will soundand the word "End" willshow in the
display window for two seconds when the cooking
time is completed, The oven will automatically shut
off.
NOTE: To stir or rearrange food during cooking, simply
open the door; stir or rearrange
and close the door.
Touch "START",,
The oven will automatically continue to count down the
remaining amount of time left in the display window
4. A tone will sound and the word
"End" will show in the display
window for two seconds when
the 1 minute is over° The oven
will automatically shut off.
17
'
QUICK-STAKr
REHEATING
GUIDE
Thisguide shows the food items and some special notes for reheating with "Quick-start" feature.,
Touch CLEAR, touch QUICK-ON, touch numbers from I to 9 for minutes of heating..
Food
BEVERAGES
WaterBased
Special Notes
I cup
2 cups
1-2 rain
3-4 rain
Milk Based
I cup
2 cups
2 rain
3 min
Broth-based soups
Cream-based soups
Sandwich
10¾ oz, can
10¾ oz.can
1-2
3-4 rain
4-5 min
1 rain
Cooked pizza,
!0 inches,
cut in 8 portions
2 wedges
4 wedges
whole
2 rain
2-3 rain
4.5 rain
Casseroles
I qL (4 cups)
5-7 rain
MEAT
Sliced thin
3-5 oz.
1 min
i
2 rain
,
-.z-thick
Sliced thick
Heat uncovered° Use 6-8 ounce cup.
Use l_quart
casserole-, Cover..
!
l Use i _quart casserole..Cover.
i
Place on paper plate or towels.,
I
Place on paper towels or paper plate or
i
leave
uncovered cardboard box, points
towardincenter°
t
Cover, Stir once,,
Heat
on microproof
plate, covered
with
waxed paper,,
16 oz. can
Hamburgers, Meat loaf
slices, Sausagepatties
1 serving
2 servings
4 servings
1 rain
} Place on micropmof plate Cover with
2-3 rain
4-5 rain
i
;
paper towel Turn over once_
1
2
4
6
1 rain
I-2rain
2-3rain
4-6 rain
i
:
!
Heat on microproof plate.. Cover with
waxed paper, if fned, cover with paper
towel,,
I0½ oz._can
3-4 min
"
Cover. Stir once,
Chicken, turkey, sliced
3-5 oz,
!-2 min
SEAFOOD
Shrimp, crab,
or scallops
in sauce,frozen
6_
4-6rain
Creamed
chicken
Seafood or fish
casseroles, frozen
SIDE DISHES
Rice, Pasta
Vegetables, frozen in
pouch
Mashed
potatoes,
instant
Canned vegetables
Pudding and pie filling
mix
4-5 rain
;
Barbecued beef, chili,
stews,hash, etc.
POULTRY
Chicken pieces
18
Time
Amount
'= Place in microproof
way through cooking
OZ,,
dish. Cover,
time°
Stir half-
Heat on microproof pl_te,Cover
waxed paper,,
t
with
Slit pouch and place on mictoproof plate°
Flex pouch to mix halfway through cooking
timer
16 oz.
5-7 rain
Remove from package to l-quart microproof
casserole, Cover° Stir once during cooking,
cup
1-2 cups
1 rain
2 rain
Heat in microproof
casserole,
tightly with plastic wrap,
t0-12 oz.
5-8 rain
Slit pouch. Place on microproof platen Flex
half way through cooking time to mix_
5-7 min
Follow package directions. Reduce liquid
by 1 tablespoon..
15 oz.,
17 oz,
1-2 rain
2-3rain
3-4rain
Use 4-cup microproo( casserole, covered.
Stir once..
31/4 OZ.,
8-7 rain
Follow package directions. Stir once
U_e 4-cup glass measure
4 servings
13_ oz.. packet)
8 oz.,
i
l
covered
COOKING
GUIDE
FOR
"MULTI-POWER"
SE:FI'INGS
The "Multi-Power" feature lets you cook at the best power level for the food being cooked
can be found in the'cookbooko
POWER
LEVEL
POWER
SETTINGS
!
10
WARM
• €, Softening cream cheese..
: * Keeping casseroles and main dishes warm,
20
LOW
MICROWAVE
EXAMPLES
;
a
o
o
•
-
3O
DEFROST
MED LOW
Cooking directions
OUTPUT
Softening chocolate,
Heating breads,
rolls, pancakes,
and French toast.
Clarifying butter..
Taking the chili out of fruit.
Heating small amounts of food.
230
tacos,
tortillas
295
o T,hawing meat, poultry and seafood.
o Completing the cooking cycleof casseroles,
stews and some sauces_
small quantities
POWER"
165
t
r
-
Cooking
of food.
o
Cooking less tender cuts of meat in liquid or
slow cooking dishes.
Completing
the cooking cycle of less tender roasts.
40
BRAISE
50
SI_
o Cooking stews and soups after bringing to a boil
• Cooking baked custards and pasta.
425
60
B#JZJ_
• Cooking
o Cooking
scrambled
cakes.
eggs.
490
70
ROAST
IviED HIGH
o
o
,
•,
rump roast, ham, veal and lamb,.
cheese dishes,
eggs and milk.
quick breads and cere_I products.
8O
REHEAT
o Reheating precooked
o Heating sandwiches.
9O
SAUT#
o Cooking onions, celery and 9Teen peppers quickly.
• Reheatingmeat slicesquickly.
I00
(k_)
MAX
POWER
HIGH
o
Cooking
Cooking
Cooking
Cooking
555
62O
food quickly,.
a Preheating
the browning
Boiling water.
Thickening some
watts as measured
68,5
750
. a Cooking tender cuts of meat.
' * Cooking pouttry, fish, vegetables
and most casseroles.
•
,,
*Approximate
or prepared
36O
dish.
sauces.
by 2-liter method°
As you get to know your microwave
the results you desire.
oven, you may find that a particular
setting
is too low or too high for
Multiple-l_wer
control gives you the means to obtain greater precision in setting power levels. For instance,
if you want a power level between ROAST and REHEAT, you would set the time as usual: touch MICRO
POWER, and then touch "7" and "5"r The display window will show "75", indicating that your oven is set to
pan at power level 7S--halfway
between ROAST and REHEAT_
l
FAST DEFROST
Your oven is equipped with an Auto Defrost system which is the best defrost method for this oven
FAST DEFROST is explained in order to show other defrosting posslbilities_
To speed up the defrosting of dense food items over I lb. start on "HI", then reduce to the 30 (DEFROST)
setting
I. Microwave on "HI'" for I-2 minutes per pound of dense food items
2o Then Microwave on 30 (DEFROST) for 3 minutes per pound or until food is thawed
will be greatly reduced
Defrosting
time
19
"HI-POWER"/"MULTI-POWER"
COOKING
"HI" gives the highest cooking power possible with your oven,+It is the recommended setting for cooking foods with high
mols tqre content or for cooking foods that need fast cooking to maintain their natural flavor and texture+ Many foods
need slower cooking (at less than full power) in order to give you the best results. In addition to"HI" there are ninety-nine
multi-power settings+ The cookbook tells you which power setting is recommended
for the food being cooked,
To Cook
EXAMPLE: To warm 4 doughnuts, you would cook at
power level 80 or "80 (REHEAT)" for 35 seconds. To
(Remove metal rack. place ceramic tray in oven.)
do this, follow these six steps.
1. Touch CLEAR, and a beep tone will be heard. The
CLEAR erases all previous settings, Place food in
oven, then dose the door.
1. Touch
2, Touch MICRO TIME. The lights above TIME and
MICRO, below COOK 1 _l! 9o on+("0" _[l show in
the display window+)
3+ Touch the correct numbers on the control panel to
set the cooking time_ The time set wgl show in the
display window at the top oithe control panel For
example:
CLEAR,
2. Touch MICRO TIME,
Place doughnuts in oven,
then close the door,
3_ Set 35 secondsby touching
"3" and then "5". "35" will
show in the display window.
__
o To set 30 seconds, you woutd touch "3" and then
. To set 3 minutes, touch "3", "0" and "0".
= To sat 3-1/2 minutes, touch "3", "3" and "0"+
Remember, the timer is a digital clock that is divided
into 60 seconds Therefore,
I/2 minute is equal to 30
seconds. Touch 30 and not 50 (as with a catcutator_
to indicate 1/2
4. Touch MICRO POtArER. The lights above MICRO
and below COOK 1 will go on. Also, the word "Hi"
will show in the display window until a lower setting
is entered This is to tell you that the oven will be
operating on "HI" unless a different power setting is
chosen,
5° Touch numbers for desired cooking power level. For
example, if the recipe calls for cooking at the "20
(LOW)" setting, you would touch"2" and "0". The
display' window_IIshow "20': Th_smeans that
the LOW setting, the oven is cooking at power level
20
NOTE: It is not necessary to touch MICRO POWER
when cooking with the highest power ("Hi")+ To set
"HI-POWER" cooking,
skipsteps4 and5 above,
However, if MICRO POWER is touched, thelight
above MICRO wfflgo on and the word "HI" _ show
in the display window+This is to let you know that the
oven will
be operatingon "HI" power unlessa different
power setting is chosen,
6+ Touch START., The oven begins to cook and the
display window will show the time counting down.
A tone will sound and the word "End" will show in
the display window for two seconds when the
cooking time is completed+ Then the oven _ shut
itself off.
20
4. Touch MICRO POWER.
'The display window will show
5. Choose the "B0 (REHEAT)"
setting by touching the numbers "8" and "0"o The display
window will show "80". This
means the oven is cooking at
power level80+
6, Touch START. The oven
begins to cook and the time
will begin to count down in
the display window,,
A tone will sound and the
word "End" will show in the
display window for 2 seconds
when the 1-1/2 minutes are
over,, Then the oven v_ll shut
itself off,.
NOTE: If you want to keep the
food warm after finishing the
cooking,you can use "Hold
Warm" feature. For detaged
instructions on using "Hold
Warm" feature,
see page 16,
'_--.___.-.
_
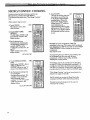
"TEMPERATURE
CONTROLLED"
The temperature probeis used to judge doneness
when cooking or reheating food. Set the desired food
temperature with the MICRO TEMP, and the desired
power level with the MICRO POWER.
When "Hold Warm" is set, after completing the
cooking cycle the oven unl] hold the food warm up to
100 minutes,,
TEMPERATURE
SET'rING & DISPLAY TEMPERATURE
Temperatures from l15°F to 185°F can be chosen
and set in the oven. The temperatureshould be set in
five-degree increments° The display window wiU show
the rise in food temperature in five-degree increments.,
For example, when a temperature of 125°F is set, the
display window will show the temperature as it rises
from 115°F to 120°F and then to !25°E The lowest
temperature number that can be displayed is 1IS°F,
Therefore, even though the food may be less than
115°F, the display Will remain at 115°F until the food
is heated to above 115°E
Plug
(_-=_---Socket
Sensitive
Area
COOKING
MEATS
111Choose only fresh, completely thawed meat.
ti PLace meat fat side down on the microwave
roasting rack in a microproof baldng dish,,
IN Microwave cook on the first "multi-power"
setting
for half of the total cooking time. (See "Temperature
Controlled" Meat Cooking Guide on Page 22)
tm Turn meat to fat side up and:
1. Place the temperature probe sensor into the meat
with the first inch of the sensor in the center of
the meat° The sensor should not touch the bone
or fat pocket. The sensor should be put in from
the side or from the front -- it should not be put
in from :the top of the meat.
2, Plug the temperature probe into the socket on
the side of the oven wall.
3. Choose the doneness temperature from the
chart on Page 2Z Set the temperature with the
MICRO TEMP.
4. Microwave cook the meat on the second "multi.
power" setting. The microwave oven will turn
itself oft" when the preset temperature is reached°
Take the food out of the oven as soon as the
display window shows "End".,
5. Remove the temperature probe sensor. Let the
meat stand, covered with foil for about 10
minutes before serving. The temperature wili rise
about 15: F during standing time..
Wash probe immediately for easy clean-up
NOTE: It is normal for meats to become slightly over.
cooked in a small circular area in the immediate vicinity
of the hole made by the meat probe.,
Temperature
Probe
Temperature
Probe
Sensor
:;
Microwave
Roasting Rack
Temperature Probe
DEFINITIONS
TEMPERATURE
PROBE SENSOR: The pointed
metal portion of the probe which is placed ipto the
food..
SENSITIVE
AREA OF SENSOR:
The first inch, or
tip, of the temperature probe sensor._
PLUG: The end of the temperature
plugged into the oven socket.
probe that is
SOCKET:
The outlet on the side of the oven wall.
CAUTION:
Do not plug the pointed end of the
temperature
probe into the socket,,
DISPLAY WINDOW:
Shows the cooking
temperature rising as the food is cooking. Chosen
temperature may be seen during cooking by touchin 9
MICRO TEMP., When "Hold Warm" is set, after
the cycle has been completed the display will show
"Hold'" for 100 minutes or until the door is opened or
Microproof
Baking Dish
STOP is touched,
21
"TEMPERATURE
CON-FROL"
POINTS
DO
= Place the temperature probe sensor into the thickest
part of the meat or in the center of the food to be
reheated. Avoid touching bone or fat.
o Check that the first inch of the sensor is in the densest
part of the food to be cooked,
=, Remove the temperature probe from the oven after
use°
"
=, Besure to turn meat between first and second settings..
= Refer to cookbook for other information,
"TEMPERATURE
Refer to "Heats"
CONTROLLED"
TO REMEMBER
DO NOT
e Do not or_trate the oven empty with the temperature
probe plu99ed in,
e Do not leave the temperature probe tmp|ugged in the
cavity when operatingthe oven.
® Do not lee _he temperature probe touch the side walls,
ceramic tray or door of the cavity when in use,
= Do not plug the pointed end of the temperature probe
into the socket inside the cavity.
* Do not use the temperature probe in a regular oven.
This probe is designedfor micro/convectionoven only.
MEAT COOKLNG
section on Page 21.
FIRST SETTING
MEAT'
|
!
SECOND
I
L
TIME
f
BEEF
Meat Loaf
2 lbs.
STANDING
TIME
TEMPERATURE
PROBE
,
5--10rain,
HI (Max. Power)
160° F
R_ Roast, boneless
HI (Max. Power)
Rare 4--5 mln. per Ibm
Medium 5---6 mitt, per lb.
! 70 (Roast)
: Rare 3--4 m_n, per tb,,
" Medium 5---6 rain, per lb.
Rib Roast, with bone
HI (Max._Power)
Rare 3--4 rnin, per Ib,
Medium 4--,5 rnln. per lb,
Well done 5---6 min, per lb.
70 (Roast)
70 {Roast)
Rare 3--4 mir_ per lb.
{ _0_F
Medium 3--5 rain, per lb.
i
t30°F
Well done 5-L6 rain. per lb. i
140°F
;
i
HI (Max. Power)
3--4 mira per lb.
• HI (Max,. Power)
4--5rnJmperlb.
Chicken,pieces
2.1/2--4 Ibso
HI (Max. Power)
10 mino
HI (Max: Power)
• 4--5 rain. per lb..
HI (Max.Power)
170°F
Ducklln9
4--5lbs,,
70 (Roast)
4 rain.
per lb.
; 70 (Roast)
70 (Roast)
I70 ° F
8--10mln.
i 4 minoper lb..
Turkey, whole
10--12 Pos.
HI (Max., Power)
5--6min. per lb.,
70 (Roast)
4 min_per lb.
70(Roast)
170°F
10--15 rain.
Turkey breast
3-4 lbs.
HI (Max.,
Power)
7 rain. per I'o
70 (Roast)
" 5 min. per lb
70 (Roast)
170°
PORK
Pork LoinRoast.bondess
4--5 Ibso
H1(Max.Power)
5--7mln. perIbo
: 70 (Roast)
' 5---6 rain., per lb,
70 (Roast)
I65=P
IC_--IS
rain,
Pork Loin, center cut
4--5 lbso
H] (Max. Power)
5--7 rain,, per tbo
70 (Roast)
* 4--5 mitt per lb,
70 (Roast)
165°F
10--15 m_
70 (Roost)
130_F
5--10 mira
5--6 mire per lb,.
70 (Roast)
5--7 min.•per Ibm
70 (Roast)
4--5 rnin.
perlb,.
70 (Roast)
5--,6 rain, per ib,
70 (Roast)
130° F
5 mln.
70 (Roast)
5--6 mip. per lb.
70 (Roast)
5--6 rain. per lb.
70 (Roast)
130=F
10 mira
Center Cut Ham Slice
1--1-U2 Ibs.
Canned Ham
3--5 lbs.
22
I
OR
[
[
f Ham, boneless, precooked
t
!
SEITING
HI (Max. Power)
12--14 rrdn.,
:_ POULTRY
, Chicken, whole
3-U2--5 lbs.
t
GUIDE
70 (Roast)
i
70(Roast)
:
IL_°F
130°F
i HI (Max.Power)
, 180°F
I0mino
10 _n,
10 min,
10 mitt,
10 rain.
5 rain.,
t
5 rain,
a
'
REHEATING
FOODS
o Place the temperature probe sensor into the food to
be reheated with the first inch of the sensor in the
center of the food°
o Plug the temperature
probe into the socket
sideof the oven v_IL
o Cover
o Select
on the
of the desired
doneness.
setting
as shown below.
= Remove the temperature probe from the oven after
use.
the food if desired°
= Set the temperature
"mu!ti-power"
+ The microwave oven will stop cooI,Jng when the
set temperature is reached and then it will "Hold
Warm", wl_n "Hold Warm" is set,
(See
chart below..)
"TEMPERATURE
FOOD
r
Beverages
CONTROLLED"
SETTING
HI (MAX POWER)
. DONF.NESS
150° F
REHEATING
_
GUIDE
INSTRUCTIONS
Place the temperature probe sensor inthe center of the
beverage glass.
1
!
I
i Soups
(
I
80 (REHEAT)
150° F
Place the temperature probe sensor into the center of the
soup_ Cover with casserole lid, waxed paper, or plastic
wrap.
Precooked
Casseroles
8,0 (REHEAT)
150 ° F
Place the temperature probe sensor in the center of the
food Cover with a casserole lid, w_e_t paper, or plastic
wrap.
Canned
, Vegetables
)
80 (REHEAT)
IS0°F
Place the temperature probe sensor into the center of the
food to be reheated:
The sensitive area of the sensor
should rest in the middle of the food.
•i Leftovers
;
80 (REHEAT)
150°F
Place the temperature probe sensor inthe densest or
tersest amount of food.
; Meat Sandwiches
_!(Thick)
!:
t
80 (REHEAT)
120° F
Place the temperature probe sensor into the thickest part
of the sandwich to be warmed. The sensitive area of the
sensor should be located in the sandwich fillinso
80 (REHEAT)
120°F
Place the temperature probe sensor into the center of the
food to be reheated. The sensitive area of the sensor
I
Baked Foods
should rest in the middle of the food°
)
i
Syrup
"
"70 (ROAST)
150 _ F
l
CAUTION: From time to time, the same kind of foods
may vary in shape, form and density, and, therefore _I1
not produce the same results each time. For this
reason, we do not recommendusingthe temperature
controlled settings for thin food items cJr for foods that
Place the temperature
container,.
probe sensor into the centerof the
require tenderizing by simmering. _so, in some cases
the microwave oven may shut off prematurely., This
means that either the temperature probe is not placed
properly or that it should not be used with this type of
food.
23
TEMPERATURE CONTROLLED
"HI-POWER'y"MULTI-POWER"
COOKING
Tl_e "Temperature.Controlled
Meat Cooking Guide" and ""Reheating Guide" on Pages
you which multi.power setting and temperature setting are recommended
for the food
When cooking with the temperature control settings, the timer is not used_
1. Place the temperature probe into the
food with the first inch of the
sensor in ihe center of the food..
The probe should be in a
level direction or on an
angleasshown° ItshouM
NOT be put in from
the top°
4. Touch MICRO TEMP.
The lights above TEMP and
M]CRO, below COOK t will
go on, and "F" wi_[tshow in
the display window.
6. Touch MICRO POWER.
The word "H!" wil!show in
the display window until you
enter a lower power setting.
This is to remind you that the
oven will always operate at full
power unless you set a lower
power
24
tZZXl__
_
NOTE: You do not need to
touch MICRO POWER when
you ate cooldng with H] (max
power)° To set "HI..POWER"
Cooking, skip steps 6 and 7
above. However,
if MICRO
POWER is touched, the light
above MICRO will 9o on and the
word "HI" wi_] show in the
display winddw. This is to teU
you that the oven willwork at HI
(highest microwave Power)
unless a different power setting is
chosen.
3.Touch CLEAR.
NOTE: The highest tempera*
ture that can be set is 185°E
Choose the power control
setting you desire and touch
the corresponding 9umbers_
For examgte, if the recipe
should _ for cooking at the
"70 (ROAST)" setting, you
would touch numbers "7" and
7_
When you touch "7" and "0",
the displax? window will show
"70". This!means that in the
"70 (ROAST)" setting, the
oven is at power level 70_
2. Plug the temperature
probe into the socket on
the side of the oven,
CAUTION: Do not plug
the pointedend of the
temperature probe into
the sockeL
5. Choose the food temperature
and touch the corresponding
numbers. For exam#e, if the
recipecalls for doneness at
165° F, you would touch
numbers "1" "6" and "5".
When you touch "165", the
display windowwillshow
"t65F"., If the temperature
probe is not plugged into the
socket, the word "Prob" will
flash and the oven willnot
work.
_
_
22 and 23 will show
you are cooking.
Touch STiM_T_The oven will
begin to cook and you will be
able to see the"
temperature of
the food rising in the display
v_ndow,
8+
,
C]Z3
A tone wilI sound and the
word "End" will show in the
display wipdow for 2 seconds
when the desired temperature
is reached.
L----._-- ''_
:_L____
.,.==..=-
NOTE:
finishing
feature,.
Warm"
2
if you want to keep the food warm after
the :set cooking, you can use "Hold Warm"
For detailed instructions on using "Hold
feature, see page 16.
_
AUTOMATIC
DEFROST
Three defrosting sequences are preset in the oven. The ""Auto Defrost" feature provides you with the best defrosting
method for most frozeff foods,
The cookbook will show you which defrost sequence is recommended
for the food you are defrosting
AUTO
DEFROST
SEQUENCE
SEQUENCE
LIST
FOOD
#
i • BEEF
DEFROST 1
(DEF l)
MEAT
...............
................
• PORK
................
DEFR'OST3
o FISH .............
(DEF 3)
FISH
=SEAFOOD
rack.
place
.........
ceramic
.
9-I/4
rain.
i 0,1/3.9
]bs,
•
i
14-1/4 mira
1
Fish fillets, Fish steak.
Whole fish
Lobster tafls_Crabmeat,
Shrimp
tray in oven,,)
I
1 lb.
4.0/9.9
l'_.
15 min,
0,1/6,9
lbs,
11 rain,
70/9.9
]bs.
!4 mira
0.1/9.9 los.
'
I
1 Ib
5. At the pause, follow the cookbook instructions
for
separating, rearranging, covering and turning over_
Place food in oven, then close the
Touch DEF1, DEF2,. or DEF3 to
appropriate defrosting sequence,
AUTO DEFROST will go on and
selected (dEF1, dEF2, or dEF3I,
2_
1 ib
Cubed for stew. Ground
lamb, Chops. Leg
Chops. Spareribs,Country-, ,
style ribs, Sausage, Roast
Chops, Roast
I
_.. Liver slices, Tongue
1
oCHICKEN ..........
Whole or Cut up
. CORNISH
HENS ..............
Whole
,DUCKLING
........
Whole
, TURKEY ...........
Whole. Breast. Drumsticks,
Roast (boneless)
1o Touch CLEAR
door.,
i
I PER
DEFROST
BASE TIME
QTY" I,MIN./M_
QUANTITY
roast.
Chuck roast,
Stew beef
° LAMB
DEFROST 2
(DEF 2)
POULTRY
metal
Ground beef., Round steak,
Rib roast (rolled), Rump
'
,'VEAL
...........
, VARIETY' MEAT
(Remove
i BASE
Q'TY
select the
The light below
the sequence
will be displayed.,
Enter the weight of your food in decimal increments
from O! pounds to 9 9 pounds
Remember to convert ounces to tenths of a pound.,
For example to defrost 2 pounds 8 ounces, touch
number keys "2"' and "5" for 2.5 pounds_
The display window will show "2,5"_
NO_E: tt is not necessary to enter the food weight
when defrosting one pound of food,, Unless changed.
the Auto Defrost feature is automatically
set for one
pound.
NOr'E: If the oven door is not opened during the
pause time segment, the oven will restart automatically after 5 minutes. Because turning, separating, etc,
are usually necessary for proper defrosting and
cooking, follow steps I thru 6 for best results,,
6. After turning:over,
separating the food, etc. touch
START., The oven will resume defrosting and the
display window will show the time remaining°
At the end of the required time, a tone will sound
and "End" will appear in the display window for
2 seconds. The oven shuts off automatically.,
NOTE: Standing time is calculated as
Defrost sequence in the oven,
a part
of
Auto
4. Touch START. 'The oven will begin the defrosting
sequence you selected and the display window wilt
show the time of the first segment as it "counts
down"_
The oven will stop automatically
at the end of the
first time segment
and "PAUS" will appear in the
display window
25
AUTOMATIC
DEFROST
(Cont'd)
EXAMPLE: To defrost 2 pounds of Ground Beef
AUTO DEFROSTING
1. Touch CLEAR,
Place beef in oven, then close
the door.
o The b_nefit of this Auto Defrost feature is
automatic setting and control of defrosting, but just
like cdnventional defrosting, you must check the
foods during the defrosting time..
To check the foods "Pause" is preset in this Auto
Defrosting cycle.
Turn over, separate or rearrange food items per
cookbook instructions when the word "'PAUS"
appears in the display window.
2. Touch "DEF 1". The lights
below AUTO DEFROST and
above MICRO will 90 on and
"dEFI" will show in the
display window°
INSTRUCTIONS.
For best results, remove fish/seafood/meat/poultry
from its original paper or plastic closed package
(wrapper).
OtherMse, the wrap will hold steam and juice close
to the foods which can cause the outer surface of
the foods to cook_
o
3. Enter the weight of the
ground beef by touching "2"
and then "0".
_
"2°0"will show in the display
window.
Whenit is difficult to remove the wrap from the
,foods_ defrost the wrapped food for about a quarter
of the ::total defrost time, which is displayed at the
beginhing of the defrost cycle_ Remove the foods
from theoven and remove thewrap fromfoods.
• Place foods in a shallow microproof baking dish or
microwave roasting rack to catch drippings,
- Food Ishould still be somewhat icy in the center
when removed from the oven.
4. Touch START. The oven will
begin the defrosting sequence
you selected and display
window wi_ show the time of
the first segment as it "counts
down",
'The oven will stop automatically at the end of the first
time segrnent and "PAUS" _nll
appear inthe display window..
IMPORTANT
NOTE:
The defrost power setting
(power level 30 DEFROST) should not be confused
with this "Auto Defrost" feature_ The defrost cooking
level is a low-energy setting used to cook foods that
need slow, gentle cooking. Also use the defrost cook!ng
level to thaw small ground beef patties, bacon andbread
items.
5.. At the pause, follow the
cookbook instructions for
separating,
rearranging,
covering and turning food over
.
26
After turning over, selSarating
etc., touch START_ The oven
will resume defrosting and
the display window wilt show
the time remaining, At the
end of the required time, a
tone wil! sound and "End"
wil! appear in the display
window for 2 seconds
The oven shuts off
automatically.
CEE3
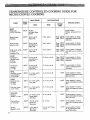
MULTI-STAGE COOKING
Multi-Stage cooking allows you to set the oven to cook in one stage at a certain power level for a chosen time or
temperature and then in a second and a third stageat a different power level for a chosen time or temperature_
The cooking process can b'e set for four memory stages when Auto Defrost is included as the first stage_
"The stage are set before cooking and will [{)]Iow automatically
when oven is started.
(Remove metal rack, place ceramic tray inoven.)
1. Touch CLEAR,. Place food in oven, then close the
door,
2o Touch MICRO TIME or MICRO TEMP. "me
lights above TIME or TEMP and MICRO, below
COOK I will 9o ono The display window will show
"0" or "F"_
3. "Touch the correct numbers for the time or
temperature of the first cooking stage.
4. Touch MICRO POWER. The lights above
MICRO and below COOK I will go on_ The
display window will show "HI".
5. Touch the correct numbers for the cooking
power level of the first cooking stage (if other
than "HI").
6o Touch MF..MORYiRECAI.£ or PAUSE. The light
below COOK 2 vn31go on, The display window
will show "0".
7+ Touch MICRO TIME or MICRO TEMP.
8. Touch the correct numbers for the time or temperature of the second cooking stafle_
9, Touch MICRO POWER° The displaywindow will
show "HI",
10. Touch the correct numbers for the cooking
power level in the second cooking stage (if other
than "HI"}.
llA. Touch START forb.vo,,stage
cooking.
lIB. If three-stage cooking is desired, touch
MEMORY/RECALL
or PAUSE. The light below
COOK 3 will :go on. The display window will show
EXAMPLE: (Three-stage cooking)
EnglishBeef Rib Broth
(30 minutes, power level HI) (PAUSE)
(60 minutes, power level 50) (MEMORY/RECALL)
(15minutes, power level 20)
The foll(:r,
vingstepsexplain
how
to set the over,..
First Sta_e
(30 minutes; Power level "HI")
1. Touch CLEAR.
Place English Beef Rib Broth
in oven, then close the door.
2,, Touch MICRO TEMP.
3. Set 30 minutes by touching
"3", "0" then "0" twice. "3000"
wi!lshow in the display
window, (Power is on HI.)
_
CZZ3C3Z3_
The first stage has been set.
a=0*l"
Repeat steps 7-I0 above to set the third cooking
stage at the same or a different power level for a
chosen time or temperature,,
12. Touch START for three-stage cooking.
MUI'TI.STAGE COOKING
AUTO DEFROST
WITH
Second Stage
(60 minutes; Power level 50
SLM ER)
4_Touch PAUSE.
CEIZ3
The light below COOK 2 will
go on, The display window will
show "0"..
If you want to cook after using the Auto Defrost cycle,
first set the Auto Defrost and touch MEMORY/
RECALL or PAUSE, then follow Ihe above
instructions numbered 2-12.The cooking processcan
be set up to [our stages when Auto Defrost is one of
the stages,See pages 25 and 26 for the detailed instructions on Auto Defrost°
•
To pause between stages
To set the oven to stop between stages, touch
PAUSE when seltingthe ovem See page 15 for
more derailed information
NOTE: tf you touch MEMORY/RECALL
instead of
PAUSE the oven will not stop but ,.rill remember
the next stage and continue cooking,
27
MULTI-STAGE
COOKING
5_ T._uch MICRO T1MEo
------
10. Touch MICRO TIME.
6. S_: 60 minmes by touching
"°i"then "0'_then "0" twice°
"_-'_30"Mll show in the display
aLndowo
_
_
_
110 Set 15 minutesby touching
"1", "5" then "0" twice.
"1500" will show in the display
window,,
7. Touch MICRO POWER.
"I-3" will show in the display
w_dow to remind you that
tee. oven will operate at
hi_aest power unless you
er.zer a lower power setting,
12. Touch MICRO POWER and
1
9. Touch MEMORY/RECALL. _.
Tr,e light below COOK 3 will
go on, The display window
S_-,ow "0"_
will
_.
13_ Touch START. The first stage
stage has been
Third S ta.,.q.q
(15 r::Jnutes; Power level 20 LOW)
-'-"--Z
numbers "2" and "0".
_
"20" will show in the display
window,
The third stage has been get°
Touch numbers"5" and "0"_
"53" will show in the display
a'hdow (indicating that you
have set the oven to operate
a_ power level 50)_
_
T.3e second
2S
(Cont'd)
....
u,,
,,
will begin. "3000" will show in
the display window. The oven
willbegin to cook (power level
HI) and the time can be seen
counting down in the display
wihdow. When the 30 minutes
are up, a tone will sound and
the oven "_ll stop automatically at the end of the first
stage and "PAUS" w_JJappear
in the display window. At the
pause, stir the food and touch
START again.. The oven will
proceed into the second
stage. The oven will begin
cooking at "50" power level
and the time will be counting
down in the display window.
When the 60 minutes are up,
a tone will sound and the
oven will proceed into the
third stage_ When the t5
minutes are over, a tone will
sound and the word "End"
will show in the display
window and the oven will
automatically
shut off..
The oven will have finished
all stages.
,_____
lldl, :I_*;=,W
NOTE: if you want to keep the food warm after
finishing the cooking cycle, you can use "Hold Warm"
feaiure., For detailed instructions on using "Hold
Warm" feature, see page 16
WHOLE
(See
MEAL COOKING
Cookhook
for detailed
explanation)
Whole Meal cooking lets you cook two or more different foods at the same time. Foods need not be placed
in the oven at the same time° riot be removed at the same time., unless needed°
By using PAUSE rather
than MEMORY/RECAI.J.,
the oven wh_lstop between stages for time to add or remove food°
L Place the Metal Rack in guides on the side wall of oven cavity as shown°
To change rack from lower to upper position, simply turn it over°
2. Place food into the oven°
3. Set the oven following the instructions
Metal
The
ceramic
Rack
at Upper
tray
should
given in the cookbook,.
bIetal Rack at Lower Position
Position
always
be in the oven
for the Microwave
or Micro/Convec
methods.
METAL RACK CARE
[] Remove Metal Rack from oven when not being used for whole meal cooking_
la Do not run the oven empty} with the Metal Rack in it excepting for Preheat.
[] Do not place the Metal Rack directly on the oven floor when using the Microwave or Micro!Convec
methods for cooking
[] The Metal Rack may get hot during cooking. Pot holders may be needed to remove Rack after cooking.
ill Do not use browning dishes on Mete1 Rack.
II Do not use foil or metal containers on the Metal Rack when using the Microwave or MicroiConvec
methods for cooking.
Metal Rack
29
CONVECTION
COOKING
The convection cooking will be best used for items like souffles, breads, angel food cakes, pizza; and also
for meat and fish.
No special techniques _ze required to adapt your favorite oven recipes to convection cooking.
You may
need to use lower teml:_raturesby 25°F-35°F
than in a conventional oven, because the convection
cooking method is identical to a conventional oven except for the increased efficiency of fan-circulated
hot air.
When bakJng cakes, cookies,breads, rolls or other baked foods, most recipes call for preheating. Preheat
the empty oven just as you do the convention!l oven° Heavier dense foods such as meats, casseroles,
poultry can be started _ithout preheating..
All heatproof cookware or metal utensils may be used in convection cooking.
CERAMIC
TRAY
The ceramic tray should
heating.
be removed
from oven prior
to convection
cooking
to allow for the most even
METAl. RACK
The metal rack has two positions; upper and lower, As conventional cooking, the distance of the food
from heat source affects cooking results. Always consider the cooking method and desired results when
deciding
which cooking position to use°
There is no standard ruie for rack position for every food type, therefore, please refer to your cookbook
food charts in each chapter of the book. Also, finding a similar recipe in the cookbook index and referring to
the recipe's suggested position will be helpful
e
Cooking Position
Upper
!
i
Lower
Recipe
Smak. Hamburger Patty, Pork Chops, Chicken Pieces, Cookies,
Brownies, Biscuits
i Beef Roast, Leg of Lamb, Whole Chicken, Pie Crust, Angel Food Cake,
! Apple Pie, Souffle
To change Metal Rack from upper to lower position, simply turn it over_
The ceramic ta'ay must always be removed for convection cooking_
Lower Position
t
NOTE: The ceramic tray must always be in the oven for microwave or micro/convec cooking.
BAKING PANiME-['AL
UIENSILS
Any Baking Pan Jess than 13" x 13" can be used with this oven,, The Baking Pan or metal utensils should
be placed on the Metal Rack for convection
cooking
METAL UTENSILS
should only be used in convection
cooking.
Metal utensils
should be placed on
the metal rack or oven floor. Never use metal utensils
for microwave
or micro/convec
cooking.
3O
CONVECTION
COOKING
An Aulomatic preheating temperature of 350 ° F for
convection cooking has be_n factory set into the oven,
(See step 3 below_)
1o Remove ceramic tray from
oven, Set the metal rack in
the desired cooking position;
upper or lower.
2, Touch CLEAR then touch
OVEN TEMPiPREHEAT.
The tight below COOK 1 w_l
go on and "F" shows in the
displaywindow.
3. If you do not touch the
numbers for the oven
temperature,the oven starts
preheating to the 350° F _ hen
START is touched.
If you want to preheatthe
oven to the temperatureother
than the 350° F, touch the
desired numbers For example,
to preheat the oven to 400°E
touch 4, 0 and 0. The "400F"
will show in the display window.
4,Touch PAUSE,
Light below COOK 2 will 9o
on and "0" shows in _e
display window.
5. Touch CONVEC TIME,
Lights above TIME and
CONVEC wilt 9o on and "0"
shows in thedisplay window_
6.Settheconvection
cooking
time by touching the
corresponding numbers as
o instructed in the Cookbook,
For example, set 4-5minutes
by touching the numbers for
"4". "5","0" and "0". Then
"4500"shows in the display
window.
_
_
_
NOTE: During convection
cooking, the oven keeps the
same temperature in second
stage as for preheating,, If,
however, third stage is used, and
a temperature other tkan 350°F
is desired, the oven temperature
must be set in third stage_
7, Touch START.,
The oven is working when the
oven light is om Lights below
COOK i, above PAUSE and
CONVEC
will 90 on,and
"200F" is shown in the display
wlndow_
As theoven temperature rises
above 200 ° F, the (:fisplay
temperature
increase in
10°F step (210E 220E 230F etc.).
WITH AUTOMATIC
PREHEAT
When the temperature in the
oven reaches the preheat
temperature, "350F" or the
set temperature is displayed
and a pulsating beep tonewill
sound to tell that the
preheating is over.,
8, WARNING:
The temperature in the oven is quite
high. Never touch the metal rack or oven walls with
bare hands. Open the door, the beep sound will stop
and the temperature display will change to "PAUS':
Place the food inside _e oven as quickly as possible.
While the door is open, the heated air will escape
from the oven and the oven temperature will drop.
9. Touch START again,,
The oven restarts, the oven
light and the lights below
COOK
2, above TIME and
.....
CO]N%"EC areon The
....
"PAUS" display switches to
the time display, The time in
_
i2_12_E]
the display window counts
down
A tone will sound and the
word "End" will show in the
display window for 2 seconds
when the 45 minutes are over,.
"Then the oven will automatically shut off.
NOTES: To display the
temperature
of the oven
during cooking,touch OVEN
TEMP/PREHEAT.
After preheating
is over, the beep tone will sound until
either the door is opened or 30 minules have elapsed,
The oven temperature shouldbe chosenin ten-degree
steps. For example, if a temperature of 325°F is
programmed, the oven will stop at the temperature
of 320°E
Avoid opening the door often during cooking,,
air will escape from the oven and the oven
temperature will drop very quickly, adversely
affecting the cooking results,
Hot
Use Pot holders to remove the Metal Rack after cook..
ing as the Rack will be hot during cooking
31
d
TEMPERATURE
PROBE CONVECTION
_.;ore starting Temperatu:'e Probe Convection
Cooking, choose the correct temperature by
consulting with tl{_ "Coo'.._ng Guide" on page 33 in
thL_manual or in the Coc_kbook
The following direc,tions show "One-Stage Cooking" only,,
.
Remove ceramictray.
Set the metal rack in tke
desired positions;upper or
lower,,
Before placing thefood into
the oven, put the
Temperature Probe in food,
with the first inch of the
Sensor in center of food,
Probe should be in a level
direction or an angle as
shown. Place food on ",he
metal rack.
.
8_
CALFFION: Do not plug ",.he
Pointed End of the Temperature
Probe into the socket,.
3o Touch CLEAR.
Touch OVEN TEM_P/
PREHEAT.
The light below COOK 1 will
go on and "F" shows it. the
display window..
Set the oven
touching the
numbers.
For example
touching the
"9" and "0",
shows in the
5_
,,
Touch START°
The oven is working when the
oven light is on, and the lights
below COOK I, above TE_P
and CONVEC _II 90 on. The
temperature of the food _nll
be shown in the display
_ndow. When the
temperature of the food
reaches 185°F a tonewill
sound and the word "End"
wilt show in the display
window for 2 seconds and
the _:ooking
is over
NOTES: The oven temperature of
3S0°F is memorized in the oven.
This means that if the desired oven temperature is
350°I:, you need not_touch OVEN TEMP/PREHEAT
or the numbersto set an oven temperature. Skip
steps 4 and 5
temperav._re by
corresponding
390° is set by
numbers for "3",
"390F" then
display window,
E3E3r'-€" --_'n
Touch COI_JEC TE]vlP.
Lights below COOK 1, above
TEMP and CO[_v'EC will go
on and "F" shows in t_
displaywindow.
J
_.
r'_-'_,
NOTES: CONVEC TEMP
means that the cooking L_done
by measuring and controlling the
internal food temperature with
the Temperature
Probe,
OVEN TEMP means tha: the
cooking is done by contzolling
the interior oven tempera:ure,
Set the desired food temperature
for Temperature Probe by
touching the corresponding
numbers.
For instance, if 185 _ F is
desired touch the numbers
"1", "8" and "5".
"185F" then shows in the
display window.
_
CIIZ]
g
2. Plug Temperature Pro-_ into
socket on side of oven.,
4_
COOKING
'• --
_ 7_7,.""--
¸
Avoid opening the door often during cooking Hot
air will escape from the oven and the oven tempera°
ture will drop very quickly, adversel_ affecting the
cooking results,,
"Preheating" can be set according to the directions
on page 31. Follow the instructions
numbered 1--4
on page 31, then follow the instructions beginning
with step 4 on this page, During pause after preheating, place food in the oven and plug temperature
probe in as shown steps I and 2 above, then touch
START again.
(Be careful to plug temperature probe in, because the
oven inferior
iS hot )
"Multi-Stage Cooking" can be set according to the
directions on pages 37 and 38,
Use Pot holders to remove the Metal Rack or Probe
after cooking as the Rack and/or Probe will be hot
during cooking.
32
COOKING
GUIDE
FOR CONVECTION
FroST STAGE
SECOND
FOOD
STAGE
[ PROBE
TIME
BEEF
Ground beef
patties, 1--4,
4 oz,, each
COOKING
TIME
450°F
Rare: 6 min.
Med: 7 min.
Welh 8 mino
2--3 rain,
3--4 rain.
4--5 min,
Tenderloin roast,
2--3 Ibs,
450°F
5 mino per lb.
Turn over
5--10 rain, per lh
Rib eye or
strip steak
1 in thick
450°F
Rare:
Med:
Welt:
Turn
3--6
4--7
5--8
4 min,
5 min.
6 mino
over
or
SPECIAL NOTES
TEMP
Remove ceramic flay,
Upper position.
Preheat., Use broiling pan
or aluminum tray.
Rare: 120°1:
Med: 130°F
Well: 140°F
Remove ceramic tray°
Upper position° Preheat°
In heatproof shallow
baking dish,
Let stand S min.
rain.
rain.
min,,
Remove ceramic tray.,
Upper position. Preheat.
Metal pan or foil tray.
3--5 mira
4--6 rain,,
4--6 rain.
Remove ceramic tray.
Upper position, Preheat.,
Metal pan or foil tray,
3--4
Remove ceramictray_
Upper position., Preheat°
Metal pan or foil tray
t
tAMB
Lamb chops,
3/4" thick
{
450°F
|
LRare: 4 min,
Med: 5 min,.
, VJelh 7 rain0
! Turn over
t
VEAL
Veal chops
1/2 in. thick
i
z
450°F
!
1
i4
min,over
. Turn
1
min.,
i
PORK
Pork chops
1/2--3/4
in. thick
t
450°F
4--6 rain,
5--7 rain
I Med: 7 rain,
' Well: 9 mino
I Turn over
Remove ceramic tray,,
Upper position, Preheat,
Metal pan or foil tray_
BAKERY
Angel food cake
350°F
35--40 mino
Remove ceramic tray.
Place on oven bottom.
t0 inch metal tube pan.
Let cake cool completely
before removing
from pan
Cake Mix 18 oz.
350°F
28--30 mira
Remove ceramic tra%
Place metal rack in upper
position°
Preheat,
Use two 8qnch
round baking pans. Rotate
halfway through
cooking
time,, Repeat with second
layer.
10--13rain.
Remove ceramic tray.
Place metal rack in upper
positiom Preheat
Cookie sheet or foil tray.,
t
380°F
Refrigerated
, crescent,
Butterflake
8 oz
rolls
I
I
!
1
33
MICRO/CONVEC
COOKING
Cooking is done by both microwave
and hot air°
Micro/Convec
cooking is fast and efficient.
The following directions show "One-Stage Cooking"
only.
(Placeceramic tray in ovem)
1. Touch CLEAR.
Place food in oven, then
close the door.
2_ Touch OVEN T'£MP/
PREHEAT.
6_
1-ouch START.
The oven is working when the
oven light is on and the time
in the display window begins
counting down. When the
figure in the display window
counts down to "0" while the
oven temperature is
programmed for 400° F a tone
will sound arid the word "End"
will show in the display window
for 2 seconds and the cooking
isover°
!::o ]
The light below COOK 1 will
90 on and "F" shows in the
display window°
3. Set the desired oven
temperature by touching the
corresponding numbers. For
exampte, 4000F is set by
touching the numbers "4", "0"
and "0".
"40OF" willthen show in the
displaywindow_
NOTES: The oven temperature of 350°F is
memorized in the oven. This means that if the desired
oven temperature is 350°F, y6u need not touch OVEN
TEMP/PREHEAT or the numbers to set an oven
temlberature_
Skip steps4 and 5.
Avoid opening the door often during cooking.. Hot
air wiUescape from the oven and the oven
temperature will drop very quickly, adversely
affecting the cooking results_
4. Touch M1CRO/CONVEC
TIME
Lights below COOK 1, above
TIME and MICRO and
COl'4%/EC will go on, and "0"
shows in the display window
5 Set the desired cooking time
by touching the
corresponding
numbers° For
example, to set 16 minutes
and 30 seconds, touch
numbers "1","6","3" and "0"o
"1630" then shows inthe
display window_
c"_-1C3E3 FZX__-Z
34
"Preheating"
can be set according
to the directions
on page 31, Follow the instructions
numbered i--4
on page 31, then followthe instructions
beginning
with step 2 on this page, During pause after preheating.. place food in the oven, then touch START again
"Multi-Stage
Cooking"
can be set according
directions
on pages 37 and 38_
to the
Use Pot holders to remove the Metal Rack after
cooking as the Rack will be hot during cooking,.
Ceramic tray should always be in the oven for
micro/convec cooking
TEMPERATURE
PROBE MICRO/CONVEC
8. Touch START°
The oven is working when the
oven light is on. Lights below
COOK I,aboveTEMP and
MICRO and CONWEC will go
on and the food temperature
is shownin the display window.
When the temperature of the
food reaches I85°F while the
oven temperature is
programmed for390°F,a
tone wil}sound and the word
"End" will show in the display
window for 2 seconds and the
cooking is over.
Consultthe"Temperature
controlled
Cooking
Guide"on page 36 beforeyou start
Temperature
ProbeMicro/ConvecCooking°The following
directions show "One-Stage Cooking" only,
1o Put the Temperature Probe in
food, with the first inch of the
Sensor in center of food,
Probe should be in a level
direction or on an angle as
shown.
_m-_'=_
"_'_"
,,
2. Plug Temperature Probe into
socketon side of oven°
CAUTION: Do notplug the
Pointed End of the Temperature
Probe into' the socket.
t ,_'_2_1_
//
_/_.-"_-'Y,x.,,,x,_
4. Touch OVEN TEMP!
PREHEAT.
The light
belowCOOK i will
go on and "F" shows in the
disp]ay window,
Set the oven temperature
by
touching the corresponding
numbers.
For example, set 390°F by
touching numbers "3", "9"
and "0"_
"390F" then shows in the
display window.
_{ZZ3
C3E3
54
.
Touch MICROiCONVEC
TEMP..
Lightsbelow COOK I, above
TEM_P and Iv[ICRO and
COFTv'EC win 90 on and "F"
shows in the display window.,
7.
(_
/"/I_ _
\
J__, "---J \,,,
Touch CLEAR.
.
COOKING
NOTES:
The oven temperature of 350=F is
memorized
in the oven,, T;his means that ff the desired
oven temperature is 350° F, you need not touch OVEN
TEMP/PREHEAT
or the numbers to set an oven
temperah_re. Skip steps 4 and 5.
Avoid opening the door oftenduring cooking.. Hot
airwillescape from the oven and theoven
temperature willdrop very quickly,adversely
affecting
the cooking results.
"Preheating"
can be set according to the d,:rections
on page 31, Follow the instructions numbered
t--4
on page 31, then follow the instructions beginning
with step4 on thispage. During pause afterpreheating,place food in the oven and plug temperature
probe in as shown steps 1 and 2 above, then touch
START again_
(Be careful to plug temperature probe in, because the
oven interior is hot,,)
"Multi-Stage Cooking" can be set according to the
directions on pages37 and 38
Use Pot holders to remove the Metal Rack or Probe
after cooking as the Rack and/or Probe will be hot
during cooking.
Ceramic trav should always be in the oven for
micro/convec
cooking
Set the desired food
temperature for Temperature
Probe by touching the
correspondingnumbers., If
185°F is desired, for example,
touch numbers "1'; "8" and
"5", "185F' will shows in the
display window,
35
TEMPERATURE
CONTROLLED
MICRO/CONVEC
FIRST STAGE
BEEF
Meat
1-1/2--1-3/4
GUIDE FOR
COOKING
OVEN
TEMP
FOOD
COOKING
SEcoND
STAGE
,
TIME
TIME
[
or
PROBE
TEMP
SPECIAL NOTES
Lower Position.
Preheat lint stand 5--10
min,
400OF
25 min.
orProbeTemp
160°F
Beef fib mast,
boneless
330°F
6 minperlb.
Turn over
6 rain. per lb.
Rare: 120°F
Med: 130°F
Lower position. In microproof and heatproof
dish
with trivet
Beef ribmast,
bone in. 5 lbs_
330°F
8 rain. per lb.
Fat side down
Turn over
8 rain. perIb,,
Rare: 120°F
Med: 130°F
Well: 140°F
Lower position. In microproof and heatproof dish°
7 min, perl_
Turnover
7 min. per lbo '
Med: 130°F
Welt: 140°F
Lower position, Casserole
with tight cover or cooking
bag.
5--6 rain, per lh,
Rare: 145QF
Med: 155°F
V/ell: 165°F
Lower position., In miczoproof and heatproof
dish
with trivet.
lbso
330°F
Beef round, vamp,
or chuck.
boneless, 3 Ibs.
'
LAMB
Lamp le_ or
shoulder, roast,
' bone ino
6-1/2 1_.
330°F
i Turn over
330°F
Lamb roast,
boneless.,
3--4 Ibs.
PORK
Pork loin roast,
boneless.
4--5 tbs.
Pork loin. center
cut, 4--5 Ibs
Cornish
1--1q/2
[ 4 min. per lb.
4--5
min. per lb,
I50°F
Lower position, In microproof and hear'proof dish
with trivet,
I Turn
Fat side
overdown
VEAL
Shoutd_ or rump
roast, boneless,
3--3-1/2 lbs,
POULTRY
Chicken,
Whole, 3--4 Ibs _
i 3 rain. per lb.
Fat side down
330°F
3--5 rain per lb.
Turn over
4--5
min, per lb.
155°F
Lower position, In microproof and heatproof
baking
dish with trivet.
320°F
5--7 mino per lb,
Turn over
5--7 rain. per lb.
165°F
Lower position. In microproof and heatproof
baking
dish,
320°F
5--7 mira per Ibo
Turn over
5--7
mira per Ib,,
I65°F
Lower position, In microproof and heatproof baking
dish,,
400°F
5--6 rain. per lb,
6 rain per Ib.
180°F
Lower position° In microproof and heaPproof baking
dish with t_vet,
6--9 min.
180°F
Lower position. In microproof and heatproof
baking
dish,,
170°F
Lower position, Preheat
In microproof and heatproof baring dish,
1
Breast down
350OF
Hens
Ibs.
t0 minx per lb.
Turn
Breastover
up
• Turn
over
i
Turkey
i Breast 3--4 lbs,
36
,350OF
! 4 rain. per Ib.
I
i Skin down
' Turn over
3-I/2--4-I/2mino
, per ib.
t
MULTI-STAGE
COOKING
in three-stage cooking, different modes of cooking can be combined for sequential cooking_ To make Party
Cake, for example, Preheating is the Ist stage, Convection Cooking isthe 2nd stage and Micro/Convec
Cooking is the 3rd stage°
First Stage
I. Touch CLEAR.
.
2. Touch OVEN TF2,ff'/
PREHEAT. Light below
COOK I wilt 9o on and "F"
shows in the displaywindow.
NOTE: Since the oven
temperature is 350°F in this
case, the temperature need not
be pre-set since this temperature
is memorized in the oven.
7. Touch MICRO/CONX/EC
TIME.
Lights belowCOOK3, above
TIME, MICRO and CONVEC
will go on and "0" shows in
the display window_
.
Second
Touch PAUSE
Light below COOK 3 and "0"
shows in the display window.
Set the desired time for 3rd
stagecooking, 6 minutes, by
touching numbers"6", "0"
and "0", "600" willshows in
the display window°
NOTE: During convection
cooking, the oven keeps the
same temperature in second
sta_e as for preheating If,
however, third stage is used, and
a temperature other than 350° F
is desired, the oven temperature
must be set in third stage.
Stage
3. Touch PAUSE.
Light below COOK 2 will go
on and "0" shows in the
display window.
4. Touch CONVEC TIME.
Light below COOK 2, above
TIME and CONVEC will 90
on and "0" shows in the
display window,,
5o Set the desired time for 2nd
stage cookin 9, 25 minutes, by
touching numbers "2", "5",
"0" and "0"° "2500" will shows
in the display window°
II
C3E3Ci3
_
_
37
MULTI-STAGE
,
COOKING
(Cont'd)
Remove ceramic tray from
oven,, Place the metal rack in
the desired cooking position;
upper or lower.
Touch START,
C5E3
The oven is working when the
oven light is om
Lightsbelow COOK
I,above
PAUSE and CONVEC
will
go
on and theoven temperature
isshown inthe display
window. As the oven
temperature rises, the
increasing temperature Will be
shown in the display window,
When the temperature
reaches 350 ° F, "350F" shows
in the display window and a
beep tone will sound to indicate that the preheating time
is over,
NOTE: If you want to keep the food warm after
finishing the set cooking, you can use "Hold Warm"
feature. Metal utensils can not be used for "Hold
Warm" operation
since arcing may happen
and
damage to the oven may result,
For detailed instructions
on using "Hold Warm _"
features,
See page l&
When Auto Defrost is used in the 1st stage, up to 4
stage cooking is possible,.
Use Pot holders to remove the food and/or the Metal
Rack after cooking as the utensil and the Rack may get
hot during cooking,
"Standing
time" allows the food to finish cooking and
the heat to be uniform througJ_out.
See the cookbook
for detailed explanation.
10. The beep sound stops when
the door is opened. Place the
food in the oven and close the
door quickly. The word
"PAROS" flashes in the display
window,
%
2s
11o Touch START,
The oven starts working when
the oven light is on,. Lights
below COOK 2, above TIME
and CONVEC
and PAUSE
will go on and the time in the
display window counts down
to "0" and the 2nd cooking
stage is over., The beep tone
sounds then the oven will
stop and the word "PAUS"
will flash in the display window, At pause, peace theceramic tray into the oven
C:EE3
12o Touch S_fART,
Lights below COOK 3, above
TIME and MICRO and
CONVEC wilt9o on and the
time in the display window
counts to "0" and the 3rd
stage of cooking is over. The
beep tone will sound and the
word "End" will show in the
display window for 2 seconds The oven will have
finished three stages.,
38
_C2N_C!ND
J
1MPORTAN'T NOTE:
The ceramic _ay should be always in the oven when
either the microwave or micro/convec cooking is
uged, even when you are planning to place the food
on the metal rack°
Microwaves pass through the tray and are reflected by
the oven bottom back up to the under-side of the
food. As a result, the food receives microwave energy
on the bottom, top, and sides all at the same time.
However, remove the tray for convec_on cooking
DELAY START COOKING
Delay Start cooking can be programmed to start the
cooking automatically and finish at a preset delay
time. Choose cooking time for Microwave, Convection and Micro/Convec
or any combination cooking
1. Touch CLEAR.
CEE_
2. Touch STOP TIME
The light below DELAY
START goes on. A display
window will read "0:00"°
3. Touch numbers for the time
of day to finish cooking. For
example, touch numbers "7",
"3" then "0" for the cooking
to be finished at "7:30".
"7:30" will show in the display
window,.
E3_ _---'j r"_-I
6, Touch MICRO POWER.
_
7. Touch numbers for cooking.,
power level.
For example,touch numbers
%" then "0", "50" Ell show in
the displaywindow_
EZZ_
_um_
.
4 Touch MICRO TIME.
5. Touch numbers for cooking
time.
For example, set 12 minutes
by touching "1" and "2" then
"0" twice. "1200" will show
the display window°
Touch START°
The time of day will show in
the display window and the
light below DELAY START
goes on. As soon as the clock
shows the Cook.Start Time
which has been subtracted
from the Cook_Finish Time,
the oven _11 start cooking,
The cooking time counts
down in the display window,
When the Cook-Finish Time
(or "7:30") arrives, the oven
will shut itself off
ww
NOTE: A preset delay time
must be no more than 12 hours
*Multi-StageCooking can be used
with Delay Start. After step 3
above, followinstructionsfor
Multi-Stage Cooking beginning
with step 2.
The disphy sl3ows
lhetime of day,
For exampte:
a hairpasttwo,,
*The Delay Start cooking is controlled by time°
When "Temperature
Controlled"
cooking is set in a
stage, cooking may be finished at the stop time with
a slight time difference.
*Fresh food should not stand at room temperature
four hours prior to cooking.
"Auto Defrost cooking cannot
Start,
be used _ith
over
Delay
39
PRESET RECIPE COOKING
You can set theoven for cooking 80 recipes by simply
touching RECIPE #, the numbers corresponding with
the desired preset recipe, then START,
The preset controlsystem in the oven contains25
recipes that have been preset. The Times or
Temperatures and Power Levelsfor these recipes
cannotbe changed.However the amountof food
cooked in preset recipes#1 through 17 can be
increased up to 5.9 timesthe preset quantity, and up to
2;9 times in recipes #18 and 19oTo increasethe
quantity in these recipes,follow the directionon this
page_Refer to the cookbook for detailed instructions
on the 25 preset recipes.
To cook one of the 25 preset recipes, simply follow
the steps below.
1. Touch CLEAR,
2, Touch RECIPE #_
"0" will show in the display window.
3, Touch number(s) for Preset Recipes, Refer to
PresetRecipes List on page 41.
EXAMPLE:
When you cook Brownie Mix of
Recipe # 19,touch "1" then "9"."19" willshow in
the display window.
4. Touch START,,
Time of the first cooking stage will show in the display window and you can see thetime counting
down° As soon as the first cooking stage is over,
the second cooking stagebegins.When the second cooking stageis over,a tone will sound and
the oven wiU automatically shut off_
You can program favorite
recipesoften used.These
can be assignedas Recipes # 26--80..
1 stage recipesshouldbe stored in # 26--40
2 stage recipes should be stored in # 41--70o
3 stage reciPes should be stored in # 71--80_
Directions for programming new recipes are on page
42
Ifyou have not storeda recipein Recipe # 26 to
Recipe # 80, the displaywindow willflashand tell
you that no preset recipe has been stored in the oven
for that recipe numbeL
40
USE OF QUANTITY
To Increase Quantity
KEY
of Recipes #1--#I9
1. Touch CLEAR,
2. "Touch RECIPE 0°
3. Touch numbers for the Preset Recipe,
4:Touch QUANTITY.
"0.0" wlJ show in the displaywindow.
5. Touch numbers for the multiplication factor.
To double the recipe, touch "2" and "0".
To triple the recipe, touch "3" and "0"o
6. Touch START_
NOTES:The range of multiplication is 1.1 times to 59
times (Recipes #1--17) and to 2.9 times
(Rm:ipes#18 and 19) of the Base Quantity
which is preset in the oven. The increments
within the above range is 0..1. Multiplication
can be used in Recipes # 1--_!9o When you
set the multiplication of Base Quantity be"
yond therange of 1.1--5.9(Recipes
#I--17)or 1,1--2_9(Recipes#18 and 19),
the oven will not start even if you touch
START.
EXAMPLE: To cook three hot dogs per Recipe #4°
1o Touch CLEAR.
2. Touch RECIPE #,
3. Touch "4".
4. Touch QUANTITY.
5,, Touch "3" and "0".
6 Touch START..
PRESET
RECIPES LIST (RECIPES
#1--#25)
25 recipes have been stored in this oven.
To cook one of the-2S preset recipes, touch the recipe number correspondingto preset recipe,,These 25 recipes
have been preset,so you cari not erase or substitutethem_
Refer to the cookbook for detailed instructioris on the 25 presetreeipes,_
Recipe#
Ingredients
Base Q'ty
Directions
1.
Cup oICoffee...............................
I cup (8oz.)
2.
Bacon ....................................
2 slices
(2 oz)
3.
Baked Potato
4.
...............................
1 potato (6 oz,,) ....................
Turn Potatoes over at Pause_
Hot Dog ......................................
1 hot do<3(3 oz.) ....................
Place Hot Dog in bun at Pause.
5.
Scrambled E99s .............................
2 eggs (5-I/2 oz.) .................
Stir Eg_qsat Pause.
6o
Fresh Corn-on.The
1 ear (7 oz..)
7.
Basic White Rice (long 9rain) ............... 1/2 cup
8.
Frozen Vegetables
..........................
10 oz. pkg
9.
Defrosting
Beef .....................
1 lb ................................
Cob ....................
Ground
...................................
10.
Melte_] Butter
11.
Hamburger
12o
Fish Steaks
13.
Chicken
14.
Pork Chop, 3/4" thick
15.
Scalloped
16.
Basic White Sauce
17.
Pudding Mix
18.
Cake Mix
19.
Brownie
20.
Patty
.............................
..................................
Pieces
.............................
.......................
Removed thawed
Return unthawed
1 patty (1/4 Ibs.) ................
Turn Patty over at Pause.
2 steaks,
Turn
(8 oz. each)
..........
Fish over at Pause.
I/2 lb ..................................
Rearrange
l chop (8 oz.) .....................
Turn Chops over at Pause.
oz. pkg (2 Ibso) .............
.....................................
1 cup (10 oz.) ......................
':
............................................
at Pause.
2 tablespoons
Potatoes .....................................
5-1/4
....7................................
portions.
portions
3-1/4 ozo pkg (21 oz.)
.............
Pieces
at Pause.
Combine package ingredients with
wet and dry ingredients listed on box.
At pause, stir or follow package
directions,.
Melt butter. At 1st pause, stir flour
intobutter, blending well. Add pepper
and nutmeg,
whisk in Milk, At 2nd
pause, stir until smooth,
Stir Pudding
Mix at Pause.
t layer, 9 oz. pkg. (19 oz.) ......
Rotate 1/4 turn at Pause,,
Mix ...............................
16 oz. pkg
Rotate
Mu_ns
;: ............................................
6 muffins ..............................
Repeat three times to cook
2 I.
Canned
Entree ...........................
i can, 16 oz .........................
Plug in Temperature
Probe.
22.
Canned Soup ......................................
I can (10 3/4 oz.) ....................
Plug in Temperature
Probe.
23,
Meat Loaf ............................................
1.,1/2 lb. 9round beef ...............
(3 ibs.)
Plug in Temperature
Probe.
24.
Precooked Ham ............................
3--5 lbs.........................................
Plug in Temperature Probe,, Turn
Ham over at Pause.
25,
Reheating Casserole
(I.1/3
............. '. ........... 4--6 servings
(
Ibs.). ...........
......................
I/4
turn
at Pause.
Plug in Temperature
) shows total weight including
18 muffins.
Probe.
all ingredients
inthe recipe,
NOTE: Temperature affects cooking time,, The preset recipe times are based on food at its normal storage
temperature, For example, meats and dairy products are re/rigerator temperature., Canned goods are room
temperature°
41
PROGRAMMING
NEW RECIPES
In addition t0_the 25 preset recipes, you can program
55 more favorite recipes. To store the desired recipes
in the oven, follow these steps:
I. Touch CLEAR,
2. 'Touch NEW RECIPE.
The display window reads "0",
3. Touch RECIPE #.
4. Touch suitable number from 26 to 80 according to
the number of cooking stages of your recipe as
shown below:
-Store One-stage Cooking
RECIPE #26 and 40.
between
,Store'TWo-stage Cooking between
RECIPE #41 and 70°
o Store Three-stage Cooking between
RECIPE #71 and 80.
EXAMPLE: Touch "T' then "3".
The display window reads "73".
5. Program
your new recipe cooking
instructions_
6. Touch NEW PJ_Cil:'E.
New recipe is now programmed and Time of Day
t._jlappear in the display uAndowo
42
NOTES:
A recipe which has been stored in this
manner can be changed to a new recipe.
If you want to changeto a new recipe, the
previously stored recipeis erasedwhen a
new recipe is entered over the old recipe.
The Back-up Energizer (Capacitor) buitt
into this oven protects the customer
Programmed Recipes for about 24 hours
If power failure lasts longer than 24 hours,
the 55 customerProgrammed Recipes
may be erased,
Make a list of the recipe numbers and their
recipes which are stored in this manner so
that you can have easy referencefor a later
time.,
Pages 43--45 areprinted for this
purpose,,
NEW RECIPES
Recipe g
Name
Directions
Recipe
26
36
27
37
28
38
29
39
3O
4O
31
41
32
42
33
43
34
44
35
45
Name
Directions
43
NEW RECIPES
Recipe g
44
Name
Directions
Recipe
46
56
4?
57
48
, o 58
49
59
50
6O
5!
61
52
62
53
63
54
64
55
65
Name
Directions
NEW RECIPES
Recipe #
Name-
Directions
Recipe #
66
76
67
77
68
78
69
79
7O
8O
Name
Directions
71
72
73
74
75
45
OVEN UTENSILS
GUIDE
A variety of Utensils and Materials may be used lot cooking in your microwave/convection
oven. For your
safety and to prevent damaging
utensils and pour oven, choose appropriate
utensils and materia!s for each
cooking method+ The list below is a general guide for you to select utensils and materials.
Material
Ceramic & Glass
Microwave
Cooking
Utensils
Micro/Conuec
Coold.g
OK
OK
OK
NO
NO
"Kenmore Ceramic Tray
Coming Ware
Heal resistant Glass Ware
Glass Ware with metal decoration
Lead Glass
j
OK+
OK
OK
NO
NO
NO
OK
OK
NO
NO
OK
[
oK
P +tte_
OK
OK
1
oK
P_tic
OK
OK
OK
NO
I
NO
"'OK
OK
I
OK
1
[
t
No
No
No
Wilhoul me_ decoration
China
OK
Regular Oven Heat+proof Ware
Plastic Wrap
Metal
NO
""OK
Metal Baking Pan
Alumlm_
Foil
Paper
Cups, Plates, Towels
t
Waxed Paper
t
Wood
I
*
OK
t
No
OK
[
No
NO
[
No
OK: Utensils to use
NO: Utensils to avoid
NOTE: METAL RACK is provided for Whole Meal, Convection or Micro/Convec
Rack from oven when not being used for cooking.,
cooking. Remove Metal
" Ceramic Tray
The ceramic tray should be removed for Convection cooking, only,, However the tray should
always be in the oven wheri either the Microwave or Micro/Convec cooking is used,
"" Metal BakingPan
Limited use on the ceramic tray only for Micro/Convec cooking°
"*Aluminum Foil
For shielding
purposesonlywhen Microwavecooking is used
46
oK
CARE AND CLEANING
The oven cavity is made of stainless steel and should be cleaned with a detergent specialJy formulated for
stainless steel..
After convection cooking in particular, the interior of the oven tends to be stained with spauered oil It is
recommended that the oven be cleaned each time after use before the oil spatters harden and become
difficult to remove,
For best performance and safety, the inner door panel should be free of food or grease build-up, Wipe
often with a mild detergent, rinse, and wipe dry° Never use rough powders or pads,
After cleaning the contro! panel, touch CLEAR_ This will clear anyentries that might have been entered
accidentally while cleaning the panel
REMOVABLE PARTS
After each use of the Temperature Probe, it must be removed from the socket Use pot holder, as the
wire, plug and sensor sections may be hot, Wipe food or liquid from sensor,with damp cloth_
The Ceramic Tray and Metal Rack can be removed for cleaning at the sink_ Wipe up spiliovers with paper
towel or cloth before removal the tray.
Wash in warm soapy water and wipe dry, Do not use rough cleaningpowders, steelwood, or rough
cleaning pads.
The fan cover (inside oven top) can be gently wiped in place or removed for washingwith detergentin a
sink, Handle with care when washing in a sink., The fan cover can be removed by taking out the screw
used to hold it in place, then slide the cover carefully to the right.
Avoid hitting or bending the metal stirrerblade, as this may causeuneven cookingor microwave power loss,
To replace, set the cover in the tab at the top of the oven and secure it using the screwat right.
CAUTION:
The fan cover is coated with Teflon _' for easy cleaning. Do not apply abrasivepowders, metal or nylon
wash pads, nor any metal objects such as knives and forks to the fan cover. Hard objects and abrasive
cleaners may scratch the coating. To clean, use only a foam sponge or wash clothwith a mild kitchen
cleaner.
NOTE: Should the Teflon" coating be scratched
off, the oven fun_on will not be affected.,
SPECIAL CARE
For best performance and safety, the inner door panel and the oven front frame should be free of food or
grease build-up. Wipe both often with a mild detergent. Then rinse and wipe dry, Never use rough
powders or pads
":
After cleaning the contro! panel, touch CLEAR. This will clear any entries that might have been entered
accidentallywhile cleaning the panel
o
Q
47
QUESTIONS AND ANSWERS
OPERATION
QoWhat is W_ong when the oven light will not glow'during cooking or when the oven door is open?
A_ There mm_ be several reasons why the oven light wilt not glow,, Perhaps:
a Door is not dosed and locked. Push doorfirrnly to be sure that door is locked properly.
a The light bulb has burned out°
Q.Why does steam come out of the air exhaust vent?
A, Steam is normally produced during cooking The microwave/convection
vent this steam out of th_ rear and top vent.
oven has been designed to
Q. Why does the oven not work or stop during cooking?
A. Objects that block the exhaust vents cause the oven thermostat to shut off the oven power unitl the
interior components hove cooled.
DO NOT PLACE ANY OBJECTS SUCH AS BOOKS, PAPER, OR COOKING ACCESSORIES
OVER THE TOP OF THE EXHAUST VENTS.
Q, Will the microwave oven be damaged if it operates empty?
A, Yes° Never run it empty and without the ceramic fray for microwave or micro/convec
Q_ Does microwave
energy
pass through
the viewing
screen
in the door?
A No, The metal screen bounces the energy back into the _ven cavity_ The holes (orports)
allow light to pass through° They do not let microwave energy pass through_
Q_ Why does the "beep
tone"
A, The "'heap tone"5ounds
Q Why does
sound
when a "pad"
cooking,
on the control
are mode to
panel is touched?
to assure that the setting is being properly entered_
the Display Window
flash?
A. Flashing numbers indicate there has been a loss of electrical power to the Oven and the Time of Day
must be reset.
Prolonged loss of power can also result in loss of programmable
recipes Be sure they are recordel
Q,.Why does smoke come out of the exhaust vent at the top and back of the oven?
A,It is normal ,for smoke to come out of the v'ent during convection
cooking,
The smoke will be produced
when the food is over,cooked,
and will be through
the vent,
Q Why does it take solong
to preheat sometimes?
A. When the oven door is opened during the preheating,
the hot air will escape f_am the oven and the
oven temperature will drop, making the preheating time longer.
Avoid opening the oven door during preheating, convection cooking or micro/convec
cooking, whe n..
e vet possible,
Q Why do I see light reflection around the outer case?
A. This light is from the oven light which is located outside the oven cavity,
Q. Is the moisture accumulation on the top and/or sides of the oven door normal when cooking using the
Micro/Convection method?
A. Yes, when foods with high moisture content are cooked, water beads may form on the top andZor sides
of the oven door, but will dissipate after use.
Q,Why does my oven show time counting down in the display window but no cooking is occuring?
A. The microcomputer in your oven has caused this Simply unplug the oven and then plug it back in
48
QUESTIONS
AND ANSWERS
(Cont;d)
FOODS
QoWhat is wrongwhen baked"foods have a hard, dry, brown spot?
A. A hard, dr?, broum spot shows ouercooking, Shorten the cookingor reheating time..
Q_Why do eggs sometimes pop?
A. When baking,,fr!_ngorpoachingeggs, theyolk may pop due to steambuild.up inside the yolk membrane°
To prevent this,simply pierce the yolk with a toothpickbefore cookingit.
CAUTION: Never microwave cook eggs in the shell
Q.Why are scrambled eggs sometimes a little dry after cooking?
A_Eggsdr9 outif theyare overcooked,Though the same recipe is used each time, one may need to vary the
cooking timefor one of thesereasons:
o Eggs var9 in size_
e Eggsare at room temperature one timeand at refrigerator lemperabareanother time.
.-'o The shapesof uler_Js uarg, therebymaking/2"necessary to vary the cooking time.
_=_ Eggscontinuecoo!dng duringstandingtime.
Q.Is it poss_le to popcam in a microwave oven?
A. Yes, if using one of the two methods described beJow,
(I) Micro_popping
devices designedspec_,6callyfor this type of m_crowaue cooking or
(2) Prepackaged commercial mlcrowa_e popcorn that contains specific times and power outputs
neededfor an acceptable final product°
FOLLOW EXACT DIRECTIONS GWEN BY EACH MANUFACTURER FOR THEIR POPCORN
POPPING PRODUCT AND DO NOT LEAVE TH_ OVEN UNATTENDED WHILE THE COPJ,I IS
BEING POPPED.
12:CORN FAgS TO POP AFTER TIlE SUGGESTED TI?_S, DISCONTINUE COOKING.
OV!_/COOK/NG COULD RESU_.T IN AN OVE]XlFIRE.
CA[}TION:/'_
USE A BROWN PAPER BAG FOR POPPING CORN_
Q.What is wrong when three potatoes bake thoroughly and the fourth one is still not cooked?
A. Thefourth potato may be slightly heauier than the othersand shouldbe cooked30 to 60 seconds longer.
Remembertoallow spacearound eachpotato when bekingoAlso, for more evencoo/dng, put potatoes in
a circle.
Q.Why do baked applessometimes burst during cooking?
A. The'peermghasnot been remouedfrom the top halfof eachapple to altowfor expansion of the interior of
the appleduring cooking.,As in regular cooking methods, the interior of the apple expands during the
cooking process.
Q.How e_eboiJ.ouersavoided?.
A. When cooking,roodsthat tend to boil over, use a larger utensil than usuatfor cooking..If you open the
oven door or touch STOP, the Jood will stop boiling. (Remember to touch START agQin after closing the
door to restart the cookingcycle,)
Q.Why is a standingtime recommended after microwave cooking is over?
A, Standing time allows foods to continue cooking evenly throughout for a few moments after the
actual microwave oven coq_ingcycle, The amount of standing time depends upon the density of the
food.
Q Why is an additional
time required for cooking food stored in refrigeretor?
A.,As tn conventional cooking, the initial temperature of food affects total cooking time. More time is
needed to cook food just taken out of a refrigerator versus food at a room temperature_
49
SERVICE
"WE SERVICE WHAT WE SELL"
"We Service What We Sell" is our assuranceto you that you can depend on Sears for servicebecause
Searsservice is nationwide.
Your Kenmore Microwave/Convection Oven has added value when you considerthat Searshas a serviceunit
near you, staffedby Sears Trained Technicians .-- professional techniciansspecificallytrained on Kenmore
Microwave!ConvectionOvens, having theparts, toolsand equipment to insure that we meet our pledgeto you
-- "We Service What We SeU!"
TO FURTHER ADD TO THE VALUE OF YOUR MICROWAVE/CONVECTION
SEARS MAINTENANCE
AGREEMENT.
Sears l_crowave/Convection Ovens are designed,
manufactured, _nd testedfor years of dependable operatiorr.
Yet any modem, appliancemay require service from time to
time. A Sears Maintenance Affreemem is more than an
extensionof the Warranty.
It provides complete protection from unexpected repair bills
and undue inconvenience- It assures you of maximum
efficiencyfrom your Microwave/Convection Oven..
Here'sa comparative
Warranb;and Maintenance
Agreement chart showingyou the benefits o[ a Sears
Microwave/Convection Oven Maintenance Agreement,,
OVEN, BUY A
YEARS OF OWNERSHIP
COVERAGE
r
¸2o,Y;
lstYr_
I
thru
..........
!
I,. Replacement of __J'eclive
parts other than
n_¢tron
2, Replzcem_t of
maffnetron
3, A_u_ preventative
maintenance ¢._eck at
your request
W--W/_J_TY
t,_A-,_4AJNT_..NANCE
AGREFJVdENT
Contact yot_r Sears salesperson or Iocal Sears Service Center today and purchase a Sears Maintenance
Agreement.
50
....
Kenmor
USE & CARE
MANUAL
MICRO/CO NVECTIO N
OVEN
STOCK NO.
88963
WARRANTY
t
FULL ONE YEAR WARRANTY ON
MICROWAVE/CONVECTION
OVEN
FOR ONE YEAR FROM THE DATE OF PURCHASE, IF THIS KENMORE
MICROWAVE/CONVECTION
OVEN FAILS DUE TO A DEFECT IN
MATERIAL OR WORKMANSHIP, SEARS WILL REPAIR IT, FREE OF
CH_GE.
FULL FIVE YEAR WARRANTY ON THE IVIAGNETRON
FOR FIVE YEARS FROM THE DATE OF PURCHASE, IF THE
MAGNETRON IN THIS F_JqMORE MICROWAVE/CONVECTION
OVEN
FAILS DUE TO A DEFECT IN MATERIAL OR WORKMANSHIP, SEARS
WILL REPAIR IT, FREE OF CHARGE
THE ABOVE WARRANTY COVERAGE £_PPLIES ONLY TO
MICROWAVE/CONVECTION
OVENS WH]CH ARE USED FOR PRIVATE
HOUSHOLD PURPOSES.
WARRANTY
SERVICE
IS AVAILABLE
CONTACTING
THENEAREST
SEARS
CENTER
IN THE UNITED
STATES.
BY SIMPLY
STORE OR SERVICE
THIS WARRANTY APPLIES ONLY WHILE THIS PRODUCT IS IN USE IN
THE UNITED STATES.
THIS WARRANTY GIVES YOU SPECIFIC LEGAL RIGHTS, AND YOU
MAY ALSO HAVE OTHER RIGHTS WHICH VARY FROM STATE TO
STATE.
SEARS, ROEBUCK
AND COo
DEPT_ 698/731A,
SEARS TOWER,
CHICAGO,
IL 60684
14846
Sears, Roebuck
Pa_ No, t,¢846
T
and Coo, Chicago,
|L 60684 UoS.A.
t0/"87 Prmle_ in .Japa_