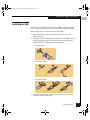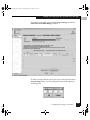
1
QLogic_Windows.book Page i Thursday, March 10, 2005 10:31 AM
EMC Fibre Channel with
QLogic Host Bus Adapters in the
Windows Environment
P/N 300-001-164
REV A07
EMC Corporation
Corporate Headquarters:
Hopkinton, MA 01748 -9103
1-508 -435 -1000
www.emc.com
QLogic_Windows.book Page ii Thursday, March 10, 2005 10:31 AM
Copyright © 2001–2005 EMC Corporation. All rights reserved.
Updated March 2005
EMC believes the information in this publication is accurate as of its publication date. The
information is subject to change without notice.
THE INFORMATION IN THIS PUBLICATION IS PROVIDED "AS IS." EMC CORPORATION
MAKES NO REPRESENTATIONS OR WARRANTIES OF ANY KIND WITH RESPECT TO THE
INFORMATION IN THIS PUBLICATION, AND SPECIFICALLY DISCLAIMS IMPLIED
WARRANTIES OF MERCHANTABILITY OR FITNESS FOR A PARTICULAR PURPOSE.
Use, copying, and distribution of any EMC software described in this publication requires an
applicable software license.
Trademark Information
ii
EMC Fibre Channel with QLogic HBAs in the Windows Environment
QLogic_Windows.book Page iii Thursday, March 10, 2005 10:31 AM
Contents
Preface........................................................................................................................... vii
Chapter 1
Introduction
Understanding Persistent Binding in a Fabric Environment .... 1-2
Chapter 2
Installing and Configuring the HBA Driver
Introduction ...................................................................................... 2-2
Downloading QLogic Drivers and Firmware ...................... 2-2
Verifying and Downloading the Documentation ................ 2-2
Installing an HBA ............................................................................ 2-3
Special Installation Sequence for Stratus ftServers and
EMC CLARiiON Arrays .......................................................... 2-4
Special Instructions for CLARiiON CX200-Series
Direct-Connect Dual-Host Clustering Configurations ....... 2-4
EMC HBA Settings .......................................................................... 2-8
Pre-Configured Settings........................................................... 2-8
Configuring NVRAM for Stratus ftServers .......................... 2-9
Fibre-Down Servers with Embedded QLogic HBAs......... 2-10
Updating Firmware/BIOS and Applying NVRAM
Settings ..................................................................................... 2-10
Manually Setting the HBA Data Rate .................................. 2-12
Setting the Topology for QLA22xx/23xx and Windows .. 2-13
Installing the HBA Driver............................................................. 2-14
Driver Revision History......................................................... 2-14
Where to Find the Driver....................................................... 2-14
Windows 2003 STORPort Updates ...................................... 2-15
Extended Error Logging by QLogic Drivers ...................... 2-15
Installation Procedure for Windows NT Hosts.................. 2-15
EMC Fibre Channel with QLogic HBAs in the Windows Environment
iii
QLogic_Windows.book Page iv Thursday, March 10, 2005 10:31 AM
Contents
Installation Procedure for Windows 2000 and
Windows 2003 Hosts.............................................................. 2-16
Updating the HBA Driver in a Windows 2000 or
Windows 2003 Host....................................................................... 2-18
Upgrading to Windows 2003 from Windows 2000 or
Windows NT 4.0 ............................................................................ 2-20
Replacing an HBA ......................................................................... 2-21
Procedure for Replacing a QLogic HBA in Stratus
ftServers without Rebooting ................................................. 2-21
Chapter 3
Configuring an EMC Boot Device
Introduction ...................................................................................... 3-2
Boot-from-SAN Configuration Restrictions ......................... 3-2
Risks of Booting from the Storage Array .............................. 3-2
How to Determine I/O Latency and Load on
the Boot LUN ............................................................................ 3-3
Boot Crashdump Save to Disk Behavior............................... 3-4
Boot-from-SAN with MSCS .................................................... 3-4
Configuring a Symmetrix Boot Device......................................... 3-5
Configuring the Boot BIOS ..................................................... 3-5
Installing the Windows OS onto the Boot Device................ 3-7
Installing EFI boot code onto the HBA.................................. 3-8
Configuring QLogic EFI boot code to boot from an
External Array......................................................................... 3-10
Procedure to Install Windows Server 2003 on a Fibre
Channel Disk (Only for system with floppy disk drive). . 3-13
Configuring a CLARiiON Boot Device ...................................... 3-14
Procedure Flowchart .............................................................. 3-14
Requirements .......................................................................... 3-16
Preparing the Storage System............................................... 3-17
Setting Up the HBA BIOS...................................................... 3-18
Preparing the Fabric............................................................... 3-19
Preparing the Server .............................................................. 3-22
Configuring the HBA Boot BIOS.......................................... 3-23
Installing Windows ................................................................ 3-25
Verifying HBA Driver and Digital Signature Installation 3-28
Assigning a Permanent Boot Drive Letter for
Windows NT ........................................................................... 3-29
Installing Multipath and Failover Software ....................... 3-29
Installing Additional Navisphere Host Agent Software .. 3-30
Configuring Additional Boot Port Name Entries
in the Boot BIOS...................................................................... 3-31
iv
EMC Fibre Channel with QLogic HBAs in the Windows Environment
QLogic_Windows.book Page v Thursday, March 10, 2005 10:31 AM
Contents
Starting a Fresh Installation..................................................
Boot Time and LUN Availability ................................................
Replacing a Boot HBA ..................................................................
EMC Symmetrix .....................................................................
EMC CLARiiON.....................................................................
How a Server Responds to Failure in the Boot LUN Path ......
Known Issues.................................................................................
Chapter 4
3-34
3-35
3-36
3-36
3-36
3-37
3-38
Installing and Configuring the QLogic QLA4010 iSCSI
HBA (TOE)
Installing the HBA Driver.............................................................. 4-2
Windows 2003 STORPort Updates ............................................... 4-2
Installation Procedure for Windows 2000 and
Windows 2003 Hosts ............................................................... 4-2
Updating the HBA Driver in a Windows 2000 or
Windows 2003 Host ........................................................................ 4-4
Using the QLogic iSCSI SANSurfer Application to Configure
iSCSI Devices ................................................................................... 4-6
Configuring iSNS settings for QLA4010...................................... 4-8
Installing and Configuring the QLA4010 iSCSI HBA to
boot from an EMC Storage Array ............................................... 4-14
Installing Boot BIOS on the QLA4010 iSCSI HBA
from DOS ................................................................................ 4-14
Setting Up the HBA BIOS ..................................................... 4-14
Installing the Windows OS onto the Boot Device ............. 4-16
Appendix A
Third-Party Software
QLogic SANSurfer SANBlade Manager ....................................
SANSurfer Version History ...................................................
VERITAS Volume Manager 3.x for Windows 2000 ..................
VERITAS Volume Manager 3.0.............................................
VERITAS Volume Manager 3.1 and VERITAS DMP ........
VERITAS Foundation Suite 4.1 .............................................
VERITAS Foundation Suite 4.2 .............................................
Appendix B
A-2
A-3
A-4
A-4
A-5
A-5
A-5
Troubleshooting
Problems and Solutions .................................................................
Problem 1...................................................................................
Problem 2...................................................................................
Problem 3...................................................................................
Problem 4...................................................................................
EMC Fibre Channel with QLogic HBAs in the Windows Environment
B-2
B-2
B-2
B-2
B-3
v
QLogic_Windows.book Page vi Thursday, March 10, 2005 10:31 AM
Contents
Problem 5 ..................................................................................
Problem 6 ..................................................................................
Problem 7 ..................................................................................
Problem 8 ..................................................................................
B-3
B-3
B-4
B-4
Index ................................................................................................................................ i-1
vi
EMC Fibre Channel with QLogic HBAs in the Windows Environment
QLogic_Windows.book Page vii Thursday, March 10, 2005 10:31 AM
Preface
Conventions Used in
This Guide
EMC uses the following conventions for notes, cautions, and
warnings.
A note presents information that is important, but not hazard-related.
!
CAUTION
A caution contains information essential to avoid data loss or
damage to the system or equipment. The caution may apply to
hardware or software.
WARNING
A warning contains information essential to avoid a hazard that can
cause severe personal injury, death, or substantial property damage
if you ignore the warning.
EMC Fibre Channel with QLogic HBAs in the Windows Environment
vii
QLogic_Windows.book Page viii Thursday, March 10, 2005 10:31 AM
Preface
Typographical Conventions
EMC uses the following type style conventions in this guide:
AVANT GARDE
Keystrokes
Palatino,
bold
◆
Palatino,
italic
◆
◆
◆
◆
Dialog box, button, icon, and menu items in text
Selections you can make from the user interface,
including buttons, icons, options, and field
names
New terms or unique word usage in text
Command line arguments when used in text
Book titles
Courier,
italic
Arguments used in examples of command line
syntax.
Courier
System prompts and displays and specific
filenames or complete paths. For example:
working root directory [/user/emc]:
c:\Program Files\EMC\Symapi\db
Courier,
bold
◆
symmpoll -p
◆
Related
Documentation
viii
User entry. For example:
Options in command line syntax
◆
EMC Host Connectivity Guide for Windows 2000 and Windows NT,
P/N 300-000-603
◆
EMC Navisphere Manager 5.X Administrator’s Guide, P/N
069001143
◆
EMC Navisphere Manager 6.X Administrator’s Guide, P/N
069001125
◆
EMC ControlCenter Navisphere Host Agent and CLI for Windows
2000 and NT Version 6.X Installation Guide, P/N 069001151
◆
EMC Navisphere Application Transparent Failover (ATF) for Windows
2000 and NT Administrator's Guide, P/N 069001164
◆
Storage-System Host Utilities for Windows 2000 and NT
Administrator's Guide, P/N 069001141
◆
PowerPath Installation And Administration Guide for Windows, P/N
300-000-512
EMC Fibre Channel with QLogic HBAs in the Windows Environment
QLogic_Windows.book Page 1 Thursday, March 10, 2005 10:31 AM
1
Invisible Body Tag
Introduction
This document describes the procedures for installing an
EMC-approved QLogic host bus adapter (HBA) into a Windows NT,
Windows 2000, or Windows 2003 host environment and configuring
the Windows host for connection to an EMC storage array over Fibre
Channel.
Review the EMC Support Matrix for the latest information on
approved HBAs and drivers.
◆
Understanding Persistent Binding in a Fabric Environment ......1-2
Introduction
1-1
QLogic_Windows.book Page 2 Thursday, March 10, 2005 10:31 AM
Introduction
1
Understanding Persistent Binding in a Fabric Environment
Persistent binding is the mechanism to create a continuous logical
route from a storage device object in the Windows host to a volume in
the EMC® storage array across the fabric.
Without a persistent binding mechanism, the host cannot maintain
persistent logical routing of the communication from a storage device
object across the fabric to an EMC storage array volume. If the
physical configuration of the switch is changed (for example, the
cable is swapped or the host is rebooted), the logical route becomes
inconsistent, causing possible data corruption if the user application
is modifying data through inconsistent logical routing of the
communication from the driver entry point to a volume in an EMC
storage array across the fabric.
The Windows NT/Windows 2000/Windows 2003 operating system
(OS) does not provide a satisfactory means to allow persistent
binding. Most software applications access storage using file systems
that are managed by the Windows OS. (File systems are represented
by drive letters: C:, D:, and so forth.) For storage devices containing
file systems, Windows NT/Windows 2000 writes a disk signature to
the disk device. The OS can then identify and associate with a
particular drive letter and file system.
Because the disk signature resides on the disk device, changes can
occur on the storage end (a cable swap, for example) that can cause a
disk device to be visible to the host server in a new location.
However, the OS looks for the disk signature and, providing that
nothing on the disk changed, associates the signature with the correct
drive letter and file system. This mechanism is strictly an OS feature
and is not influenced by the Fibre Channel device driver.
Some software applications, however, do not use the Windows file
systems or drive letters for their storage requirements. Instead they
access storage drives directly, using their own built-in “file systems.”
Devices that are accessed in this way are referred to as raw devices and
are known as physical drives in Windows terminology.
The naming convention for physical drives is simple and is always
the same for software applications using them. A raw device under
Windows NT/Windows 2000/Windows 2003 is accessed by the name
\\PHYSICALDRIVEXXX, where XXX is the drive number. For
example, a system with three hard disks attached using a QLogic
Fibre Channel controller assigns the disks the names
1-2
EMC Fibre Channel with QLogic HBAs in the Windows Environment
QLogic_Windows.book Page 3 Thursday, March 10, 2005 10:31 AM
Introduction
\\PHYSICALDRIVE0, \\PHYSICALDRIVE1, and
\\PHYSICALDRIVE2. The number is assigned during the disk
discovery part of the Windows boot process.
During boot-up, the Windows OS loads the driver for the storage
HBAs. After loaded, the OS performs a SCSI Inquiry command to get
information about all of the attached storage devices. Each disk drive
that it discovers is assigned a number in a semi-biased first come, first
serve fashion based on HBA. (Semi-biased means that the Windows
system always begins with the controller in the lowest-numbered PCI
slot where a storage controller resides. After the driver for the storage
controller is loaded, the OS selects the adapter in the
lowest-numbered PCI slot to begin the drive discovery process.)
It is this naming convention and the process by which drives are
discovered that makes persistent binding (by definition) impossible
for Windows NT/Windows 2000/Windows 2003. Persistent binding
requires a continuous logical route from a storage device object in the
Windows host to a volume in an EMC storage array across the fabric.
As mentioned above, each disk drive is assigned a number in a first
come, first serve basis. This is where faults can occur.
Example
Imagine this scenario—A host system contains controllers in slots 0,
1, and 2. Someone removes a cable from the QLogic controller in host
PCI slot 0, then reboots the host.
During reboot, the Windows OS loads the QLogic driver during
reboot and begins disk discovery. Under the scenario presented
above, there are no devices discovered on controller 0, so the OS
moves to the controller in slot 1 and begins naming the disks it finds,
starting with \\PHYSICALDRIVE0. Any software applications that
were accessing \\PHSYICALDRIVE0 before the reboot will be
unable to locate their data on the device, because it has changed.
The following figure shows the original configuration before the
reboot. HBA0 is in PCI slot 0 of the Windows host. Each HBA has
four disk devices connected to it, so Windows has assigned the name
\\PHYSICALDRIVE0 to the first disk on HBA0. Each disk after that
is assigned a number in sequence as shown in the figure.
Understanding Persistent Binding in a Fabric Environment
1-3
1
QLogic_Windows.book Page 4 Thursday, March 10, 2005 10:31 AM
Introduction
1
PHYSICALDRIVE0
HBA 0
Windows
Host
PHYSICALDRIVE4
HBA 1
HBA 2
PHYSICALDRIVE8
The next figure shows the same host after the cable attached to HBA0
has been removed and the host rebooted. Because Windows was not
able to do a discovery on HBA0, it assigned \\PHYSICALDRIVE0
to the first device it discovered. In this case, that first device is
connected to HBA1. Due to the shift, any software application
accessing \\PHYSICALDRIVE0 will not find data previously
written on the original \\PHYSICALDRIVE0.
HBA 0
Windows
Host
PHYSICALDRIVE0
HBA 1
HBA 2
PHYSICALDRIVE4
The default driver behavior does not store target bindings between
host reboots. The bindings are dynamically generated by the HBA
when new target devices are detected.
Tape devices are treated the same as disk devices in Windows with respect to
persistent binding. Refer to your tape device documentation for more
information.
1-4
EMC Fibre Channel with QLogic HBAs in the Windows Environment
QLogic_Windows.book Page 1 Thursday, March 10, 2005 10:31 AM
2
Invisible Body Tag
Installing and
Configuring the HBA
Driver
This chapter describes the procedures for installing an
EMC-approved QLogic host bus adapter (HBA) into a Windows NT,
Windows 2000, or Windows 2003 host environment and configuring
the Windows host for connection to an EMC storage array over Fibre
Channel.
◆
◆
◆
◆
◆
◆
◆
Introduction ........................................................................................2-2
Installing an HBA...............................................................................2-3
EMC HBA Settings.............................................................................2-8
Installing the HBA Driver...............................................................2-14
Updating the HBA Driver in a Windows 2000 or Windows 2003
Host ....................................................................................................2-18
Upgrading to Windows 2003 from Windows 2000 or
Windows NT 4.0...............................................................................2-20
Replacing an HBA............................................................................2-21
Installing and Configuring the HBA Driver
2-1
QLogic_Windows.book Page 2 Thursday, March 10, 2005 10:31 AM
Installing and Configuring the HBA Driver
2
Introduction
The procedure described here was written specifically for the
QLA22xx and QLA23xx families of Fibre Channel HBAs; however,
the procedures for installing the adapter BIOS and Windows drivers
are identical for QLA21xx, QLA22xx, and QLA23xx.
When installing or upgrading the BIOS and drivers, be sure to use the
latest versions supported by EMC. Review the EMC Support Matrix
for the latest information on approved HBAs and drivers.
Also refer to the EMC Host Connectivity Guide for Windows 2000 and
Windows NT, available on Powerlink, for related information.
Downloading
QLogic Drivers and
Firmware
If you need to download the latest HBA driver or firmware:
1. Access www.qlogic.com.
2. Click Downloads at the left side of the screen.
3. Click the EMC link to the right of OEM-approved
Drivers/Firmware.
4. Find the description of your HBA driver in the Name column of
the table for your HBA model. Then click the Download link in
the associated Download column.
Verifying and
Downloading the
Documentation
To check for the latest revision of this document (and download it if
necessary):
1. Access www.qlogic.com.
2. Click Downloads at the left side of the screen.
3. Click the EMC link to the right of OEM-approved
Drivers/Firmware.
4. Find the description of your HBA driver in the Name column of
the table for your HBA model. Then click the Readme link in the
associated Description column.
2-2
EMC Fibre Channel with QLogic HBAs in the Windows Environment
QLogic_Windows.book Page 3 Thursday, March 10, 2005 10:31 AM
Installing and Configuring the HBA Driver
Installing an HBA
Follow the instructions included with your HBA. The HBA installs
into a single slot, and has no user-configurable jumpers or switches.
Follow these steps to connect the cable to the HBA:
1. (Optical cable only) Remove the protective covers on each
fiber-optic cable.
2. Plug one end of the cable into the connector on the HBA as shown
in the appropriate figure. (The hardware might be rotated 90
degrees clockwise from the orientation shown.)
• Copper Cable:
• LC Optical Cable:
1
2
3
2
3
• SC Optical Cable:
1
3. Plug the other end of the cable into a connector on the storage
system or a hub/switch port.
Installing an HBA
2-3
2
QLogic_Windows.book Page 4 Thursday, March 10, 2005 10:31 AM
Installing and Configuring the HBA Driver
2
4. Label each cable to identify the HBA and the storage/switch/hub
port to which it connects.
5. After connecting all HBAs in the server, power up the server.
Special Installation Sequence for Stratus ftServers and EMC CLARiiON Arrays
A specific installation sequence is required when installing QLogic
HBAs with the Stratus ftServers and EMC CLARiiON® storage.
Failure to follow this sequence may result in a STOP: 0X0000007B
bugcheck error when booting the Stratus server for the first time
when connected to EMC CLARiiON storage.
With the Stratus ftServer, if the HBA detects EMC CLARiiON array
targets but no accessible LUNs, it prevents the Stratus server from
booting. In this configuration, the Stratus ftServer attempts to boot
from the array, instead of booting from the internal boot drive.
To avoid this issue before storage is correctly assigned, either boot the
Stratus ftServer before connecting the fibre cables to the HBAs or, if
connected to a fabric, disable the HBA ports on the switch before
booting the ftServer.
After the system has booted, connect the cables or reenable the switch
ports. Verify that the HBAs are logged in to the EMC CLARiiON
array; then stop and restart the Navisphere agent on the ftServer host.
This will register the HBAs with the CLARiiON array and allow the
HBA to properly detect the available LUNs.
Special Instructions for CLARiiON CX200-Series Direct-Connect Dual-Host
Clustering Configurations
For CLARiiON CX200-Series direct-connect dual-host cluster
configurations only with QLA234x HBAs, you must follow all
procedures described in this section.
Check for an Updated
HBA Driver
For CLARiiON CX200-Series direct-connect dual-host cluster
configurations with only QLA234x HBAs, you may need a separate
driver and firmware download. The EMC Support Matrix notes
whether separate driver and firmware files are required.
For each HBA that is determined to require updated firmware and
drivers, follow the instructions under Downloading QLogic Drivers and
Firmware on page 2-2. Be sure to reference the Name and Description
2-4
EMC Fibre Channel with QLogic HBAs in the Windows Environment
QLogic_Windows.book Page 5 Thursday, March 10, 2005 10:31 AM
Installing and Configuring the HBA Driver
fields to select the correct CX200-Series direct-connect dual-host
cluster-compatible files.
Reconfigure the HBA
Jumper
!
For CLARiiON CX200-Series direct-connect dual-host cluster
configurations with only QLA234x HBAs, you must change the
default HBA optic jumper position:
CAUTION
Modifying the jumper setting without using the recommended
firmware/drivers can cause the HBA to lose connectivity.
1. Remove the HBA from the server as instructed by your server
guide.
2. Locate jumper(s) J3 (QLA2340) or J3 and J4 (QLA2342), shown in
the following figure:
LED
J3
1
3
J1
QLA2340
LED1 J3
1
3
J1
QLA2342
J2
LED2 J4
1
3
3. Move the jumper(s), onto pins 1–2 (if not already there).
Installing an HBA
2-5
2
QLogic_Windows.book Page 6 Thursday, March 10, 2005 10:31 AM
Installing and Configuring the HBA Driver
2
If later you wish to return the jumper(s) to the default factory position, repeat
step 2, returning the jumper to pins 2–3.
Set the HBA FC-AL
Loop ID
While configuring a QLA234x HBA for Windows NT or Windows
2000 and connection to EMC CLARiiON CX200-Series for
direct-connect cluster configurations, you must manually set the
HBA FC-AL Loop ID. Follow these steps to enable loop hard
addressing and set the loop ID on each HBA:
Perform this procedure on all nodes in the cluster connected to the
CX200-Series array.
1. Boot the Windows host; press CTRL-Q when prompted to Press
<CTRL-Q> for Fast!UTIL. (This prompt appears with the
QLogic startup banner.)
2. After the Fast!UTIL program loads, the initial display depends on
whether there are multiple QLogic HBAs installed in the server:
• If there is only one QLogic HBA, the Fast!UTIL Options menu
appears.
• If there are multiple QLogic HBAs, a list of memory addresses
occupied by those HBAs appears.
Using the arrow keys, select the desired HBA and press ENTER.
The Fast!UTIL Options menu appears.
3. Select Configuration Settings from the Fast!UTIL Options menu,
and press ENTER.
4. Select Host Adapter Settings from the Configuration Settings
menu.
5. Select Adapter Hard Loop ID from the Host Adapter Settings
menu and press ENTER until the value is Enabled.
6. Select Hard Loop ID and press ENTER.
The loop ID value entered here is the decimal representation of
the FC-AL loop ID. You do not need to perform any FC-AL
AL_PA hexadecimal translation.
HBAs connected to the same SP should all have unique hard loop IDs.
Select 0 for all HBAs on one node, select 1 for all HBAs on the next node,
and so on.
2-6
EMC Fibre Channel with QLogic HBAs in the Windows Environment
QLogic_Windows.book Page 7 Thursday, March 10, 2005 10:31 AM
Installing and Configuring the HBA Driver
7. Enter a value for the loop ID and press ENTER.
8. Press ESC to return to the Configuration Settings menu.
9. Press ESC to return to the Fast!UTIL Options menu.
10. When prompted to save changes made to the current adapter,
select Save Changes and press ENTER.
11. If there are more adapters to configure, choose Select Host
Adapter, and repeat steps 3 through 11 for each adapter.
12. Press ESC to exit Fast!UTIL.
13. Reboot the host.
14. Repeat this procedure on all nodes in the cluster connected to the
CX200-Series array.
15. While you are in the BIOS, you can verify that the topology is set
correctly for direct connect (FC-AL). Follow the instructions
under Setting the Topology for QLA22xx/23xx and Windows on
page 2-13.
!
CAUTION
Future use of the firmware NVRAM file to apply settings will
overwrite and possibly invalidate the changes made above. If you
will later update using a firmware NVRAM file, be sure it is listed
and supports this CX200-Series direct-connect cluster
configuration.
To restore EMC default HBA settings, either reload the approved EMC
NVRAM file, or return to step 5 and ensure that Adapter Hard Loop ID is set
to Disabled.
Installing an HBA
2-7
2
QLogic_Windows.book Page 8 Thursday, March 10, 2005 10:31 AM
Installing and Configuring the HBA Driver
2
EMC HBA Settings
EMC requires configuring the QLogic BIOS settings with the
EMC-approved NVRAM settings file. This file contains all of the
BIOS settings for the QLogic adapters that have been tested and
approved for connection to the EMC storage array.
The QLogic CD-ROM contains the latest EMC-approved BIOS and
NVRAM settings files at the time of creation of the CD-ROM. If more
recent files exist, you can find them on the QLogic website. Refer to
Downloading QLogic Drivers and Firmware on page 2-2.
Pre-Configured
Settings
The following parameters are preconfigured in the EMC-approved
NVRAM settings file. They are also configurable in the Host Adapter
Settings menus.
These menus and selections, when viewed in SANSurfer v2.0.25 and later,
may appear under different headings.
These settings apply to PowerPath®/ATF and non-HA connections.
2-8
Parameter
QLogic Default Setting
EMC-Approved Setting
Data Rate
0 (1 Gb/s)
2 (Auto Select)
Execution Throttle
16
256
Connection options (topology)
2 (Loop preferred,
otherwise point-to-point)
2 (Loop preferred,
otherwise point-to-point)
Enable LIP Full Login
Yes
Yes
Enable Target Reset
No
Yes
Port Down Retry Count
8
45
Luns Per Target
8
256
Adapter Hard Loop ID
Enabled
Disabled
Hard Loop ID
125
0
Descending Search LoopID
0
1
EMC Fibre Channel with QLogic HBAs in the Windows Environment
QLogic_Windows.book Page 9 Thursday, March 10, 2005 10:31 AM
Installing and Configuring the HBA Driver
Configuring NVRAM
for Stratus ftServers
If you have not received QLogic HBAs with the EMC configurations
pre-loaded, you may have to perform the following procedure. If your HBAs
have been pre-configured, proceed to Installing the HBA Driver on page 2-14.
During POST, Stratus ftServers present only one HBA for
configuration in a multiple-HBA system. This is the way the ftServer
manages HBA failover. In order to successfully configure multiple
HBAs, each HBA must be part of an enabled Core PCI chassis at some
point. The following procedure explains how this can be done for
each chassis.
On Stratus ftServer 5200 systems, the HBA must be in a Core Chassis. Cards
in an Expansion Chassis must be moved to a Core Chassis to be available for
configuration.
1. To set the first HBA, follow these procedures:
• Updating Firmware/BIOS and Applying NVRAM Settings on
page 2-10
• Manually Setting the HBA Data Rate on page 2-12
• Setting the Topology for QLA22xx/23xx and Windows on
page 2-13
Ignore any steps that pertain to multiple adapters.
Note the Core PCI Chassis that is powered up while changing the
settings. After completing the changes, power down the system
and prepare to configure the alternate chassis.
2. Noting the PCI Chassis that was powered up in the previous step:
• For Stratus ftServer 3200 systems, loosen the Phillips-head
screw on the top right of the chassis, effectively removing
power from that chassis.
• For Stratus ftServer 5200 systems, leave the chassis powered
down.
3. Power up the system using the alternate PCI Chassis and set the
second HBA by following these procedures:
• Updating Firmware/BIOS and Applying NVRAM Settings on
page 2-10
• Manually Setting the HBA Data Rate on page 2-12
• Setting the Topology for QLA22xx/23xx and Windows on
page 2-13
EMC HBA Settings
2-9
2
QLogic_Windows.book Page 10 Thursday, March 10, 2005 10:31 AM
Installing and Configuring the HBA Driver
2
Ignore any steps that pertain to multiple adapters.
4. Shut down the server.
5. Before powering up the server, restore power to the PCI Chassis:
• For Stratus ftServer 3200 systems, tighten the Phillips-head
screw that you loosened on the top right of the chassis.
• For Stratus ftServer 5200 systems, power up the chassis.
6. Power up the server and proceed to Installing the HBA Driver on
page 2-14.
Fibre-Down Servers
with Embedded
QLogic HBAs
Fibre-Down servers have a vendor-specific firmware utility and
package that is posted on the QLogic website, in the EMC section. Be
sure to use the firmware utility and package that matches your server
model. You can check for updated firmware on the QLogic website.
Follow the steps under Downloading QLogic Drivers and Firmware on
page 2-2.
Updating
Firmware/BIOS and
Applying NVRAM
Settings
You can update the HBA firmware/BIOS and NVRAM settings either
from within a running Windows installation or by booting the server
to a DOS command prompt and running the procedure described in
this section.
Current 64-bit systems can be updated only from within Windows 2003 using
the SANSurfer SANBlade Manager. Refer to QLogic SANSurfer SANBlade
Manager on page A-2 for instructions.
SANSurfer 2.0.25 cannot be used to upgrade to BIOS 1.4x. Until a later
SANSurfer is available, you need to use the procedure Updating Using a DOS
Boot Diskette on page 2-11 to perform this upgrade.
!
CAUTION
Do not flash embedded HBAs using the HBA utilities noted in this
section. (Refer to Fibre-Down Servers with Embedded QLogic
HBAs).
2-10
EMC Fibre Channel with QLogic HBAs in the Windows Environment
QLogic_Windows.book Page 11 Thursday, March 10, 2005 10:31 AM
Installing and Configuring the HBA Driver
Updating While
Running Windows
To update while running Windows, refer to QLogic SANSurfer
SANBlade Manager on page A-2.
Stratus ftServers are not supported using the qLogic SANSurfer SANBlade
Manager Software or Agents, and should only be updated using the DOS
boot diskette. Refer to Updating Using a DOS Boot Diskette.
Updating Using a DOS
Boot Diskette
To update using a DOS boot diskette, follow these steps:
The QLogic CD-ROM contains the latest EMC-approved BIOS and NVRAM
settings files at the time of creation of the CD-ROM. If more recent files exist,
you can find them on the QLogic website. Refer to Downloading QLogic
Drivers and Firmware on page 2-2.
1. Format a 3.5-inch diskette and extract the BIOS and NVRAM files
from the archive file (.zip or self-extracting .exe) onto the
diskette.
2. Reboot your Windows host system using a DOS diskette.
3. At the A:\> prompt, insert the diskette that contains the QLogic
BIOS files (created in step 1).
4. This step depends on what you want to load:
!
CAUTION
Do not attempt to run this procedure from a command prompt
window.
• To load firmware/BIOS and NVRAM settings, type
FLASUTIL.EXE /L /F and press ENTER:
• To load NVRAM settings only, type FLASUTIL.EXE /L (or
QL2XUTIL.EXE /L) and press ENTER. (Some BIOS archives
have QL2XUTIL.EXE instead of FLASUTIL.EXE; both are run
the same.)
Refer to the readme.txt file in the firmware package for complete
instructions on the use of the FLASUTIL.EXE utility
Use the above commands if all NVRAM files are EMC defaults
(QLA23xx = NVRAM23.dat, QLA2200 = NVRAM22.dat) as included
in the EMC firmware kits. If you have a non-standard NVRAM
EMC HBA Settings
2-11
2
QLogic_Windows.book Page 12 Thursday, March 10, 2005 10:31 AM
Installing and Configuring the HBA Driver
2
file name, note that some BIOS versions might require the /N
parameter (which allows an alternate NVRAM filename to be
specified) to load the NVRAM file correctly
Example: FLASUTIL /L /F /N NVRAM2xx.DAT
where NVRAN2xx.DAT is the non-standard NVRAM file name.
5. When the procedure has finished, remove the diskette and reboot
the host.
Manually Setting the
HBA Data Rate
The HBA driver for a QLA2310 has a data rate setting that lets you
specify 1 Gb, 2 Gb, or Auto Select mode. (The EMC default setting is
Auto Select mode.)
For any device connected to the HBA, set the device data rate (if applicable)
before setting the HBA data rate.
Current 64-bit systems can be updated only from within Windows 2003 using
the SANSurfer SANBlade Manager. Refer to QLogic SANSurfer SANBlade
Manager on page A-2 for instructions.
For every HBA on which you want to manually set the HBA data
rate, follow these steps.
1. Reboot the system.
2. At startup, watch for the QLogic BIOS screen and when
prompted to enter Fast!Util, press CTRL-Q.
3. Select host adapter.
4. Select Configuration Settings.
5. Select Extended Firmware Settings.
6. Press the Down Arrow until you select Data Rate; then press
ENTER.
7. Select the appropriate speed for the device to which the HBA
connects. EMC recommends using the default setting of option 2,
Auto Select.
8. Press ESC repeatedly until you reach the Save Changes prompt,
and save the changes for this adapter.
9. Repeat steps 3 through 8 for each adapter.
2-12
EMC Fibre Channel with QLogic HBAs in the Windows Environment
QLogic_Windows.book Page 13 Thursday, March 10, 2005 10:31 AM
Installing and Configuring the HBA Driver
Setting the Topology
for QLA22xx/23xx
and Windows
While using a QLA22xx or QLA23xx HBA for Windows NT,
Windows 2000, or Windows 2003, the default EMC configured
topology is set for “loop preferred, otherwise point to point.” If you
want to change this value, you can manually set the adapter topology.
Follow these steps to set the topology:
Current 64-bit systems can be updated only from within Windows 2003 using
the SANSurfer SANBlade Manager. Refer to QLogic SANSurfer SANBlade
Manager on page A-2 for further instructions.
1. Boot the Windows host and press CTRL-Q when prompted to
Press <CTRL-Q> for Fast!UTIL. (This prompt appears with the
QLogic startup banner.)
2. After the Fast!UTIL program loads, the initial display will depend
on whether there are multiple QLogic HBAs installed in the
server:
• If there is only one QLogic HBA, the Fast!UTIL Options menu
appears.
• If there are multiple QLogic HBAs, a list of memory addresses
occupied by those HBAs appears. Using the arrow keys, select
the desired HBA and press ENTER. The Fast!UTIL Options
menu appears.
3. Select Configuration Settings from the Fast!UTIL Options menu
and press ENTER.
4. Select Extended Firmware Settings from the Configuration
Settings menu and press ENTER.
5. Select Connection Options and press ENTER.
6. Select the topology desired for your configuration.
7. Press ESC to return to the Configuration Settings menu.
8. Press ESC to return to the Fast!UTIL Options menu.
9. When prompted to save changes made to the current adapter,
select Save Changes and press ENTER.
10. If there are more adapters to configure, choose Select Host
Adapter and repeat steps 3 through 9 for each adapter.
11. Press ESC to exit Fast!UTIL.
12. Reboot the host.
EMC HBA Settings
2-13
2
QLogic_Windows.book Page 14 Thursday, March 10, 2005 10:31 AM
Installing and Configuring the HBA Driver
2
Installing the HBA Driver
To use EMC storage array disks with a Windows host, you need an
EMC-qualified Fibre Channel HBA driver. The HBA kit includes an
EMC-approved driver, which must be installed and configured prior
to partitioning the storage array disks. You should also check the
QLogic website for the latest EMC-approved version. (Refer to
Downloading QLogic Drivers and Firmware on page 2-2.)
Driver Revision
History
Where to Find the
Driver
Driver support is as follows:
◆
Version 8.1.5.20 — QLA22xx, QLA23xx (no CX200-Series
direct-connect dual host cluster), Windows NT, Windows 2000
◆
Version 8.1.5.21 — QLA23xx, Windows NT, Windows 2000
◆
Version 8.2.1.20 — QLA23xx, Windows 2000
◆
Version 8.2.2.20 — QLA23xx STORPort, Windows 2003 only
◆
Version 8.2.2.25 — QLA23xx, Windows 2000 and Windows 2003
◆
STORPort 8.2.3.26 and SCSIPort 8.2.3.21 — QL23xx, Windows
2003 (SCSI and STOR) and Windows 2000 (SCSI only)
◆
STORPort Version 8.2.3.27 — QLA23xx, Windows 2003 only
◆
STORPort 9.0.0.17 and SCSIPort 9.0.0.12 — QL23xx, Windows
2003 (SCSI and STOR) and Windows 2000 (SCSI only)
◆
STORPort 9.0.1.17 and SCSIPort 9.0.1.12 — QL23xx, Windows
2003 (SCSI and STOR) and Windows 2000 (SCSI only)
You can find the Fibre Channel HBA driver:
◆
on the QLogic CD-ROM that accompanied the HBA. Copy the
driver from the OS-specific directory:\WindowsNT4 or
\Windows2000.
◆
on the QLogic website. Refer to Downloading QLogic Drivers and
Firmware on page 2-2.
To ease installation of the driver, unzip the driver file onto a blank
diskette.
2-14
EMC Fibre Channel with QLogic HBAs in the Windows Environment
QLogic_Windows.book Page 15 Thursday, March 10, 2005 10:31 AM
Installing and Configuring the HBA Driver
Windows 2003 STORPort Updates
Currently the shipping version of Windows 2003 requires post-RTM
hotfixes to resolve some known issues. For all Windows 2003
STORPort installations, you should obtain the current Microsoft QFE
hotfix listed in the EMC Support Matrix with the HBA driver
revisions.
Install this patch before installing the HBA driver.
Extended Error Logging by QLogic Drivers
In driver versions prior to the 9.X family, additional messages were
logged in the system event log when the "extended error logging"
parameter was enabled in the HBA BIOS. The messages were
primarily informational, but often confused users by appearing to be
legitimate error messages.
Driver family 9.X and beyond will no longer log these additional
messages in the event log even if the “extended error logging”
parameter is enabled. New tools have been developed for developers
and engineers troubleshooting customer problems without the need
for these messages. Visit the website
http://www.qlogic.com/support/logs/event_log.asp for
information about QLogic event messages.”
Installation Procedure for Windows NT Hosts
To install the driver on a Windows NT host, follow these steps:
1. Boot the host with Windows NT 4.0.
2. Open the Control Panel, and double-click the SCSI Adapter icon.
3. Select the Drivers tab.
4. Click the Add button to display the SCSI Adapter Drivers
database.
5. Select HAVE DISK.
6. Locate the disk with the OEMSETUP.INF file for the QLogic driver,
and click OK.
Installing the HBA Driver
2-15
2
QLogic_Windows.book Page 16 Thursday, March 10, 2005 10:31 AM
Installing and Configuring the HBA Driver
2
7. Select QLogic QLA2300 (or QLA2200) PCI Fibre Channel
Adapter, and click OK to install it.
8. Reboot the host. It should recognize all new host adapter cards.
9. After rebooting, verify that the driver is installed and has started
by checking the Control Panel, SCSI Adapter, Drivers window
for a statement similar to the following:
QLogic QLA2300 PCI-Fibre Channel Adapter (Started)
The driver is now loaded, and the adapter is available to the
system.
Installation
Procedure for
Windows 2000 and
Windows 2003 Hosts
To install the driver into a Windows 2000 or Windows 2003 host,
follow these steps:
1. Boot the host with Windows 2000 or Windows 2003.
2. From the Windows taskbar, select Start, Programs,
Administrative Tools, Computer Management
3. In the left pane of the Computer Management window, click the
Device Manager icon.
4. If Windows Plug-n-Play does not detect your QLA23xx HBA
model, it will be listed as Unknown or as a Fibre Channel
Controller under the Other Devices icon in the right pane.
Windows 2000 configurations with Service Pack 1 or higher and
Windows 2003 configurations may be able to detect QLA23xx HBAs. If
this occurs, the HBA will already be listed under SCSI Devices; instead
of proceeding with these installation steps, follow the instructions under
Updating the HBA Driver in a Windows 2000 or Windows 2003 Host on
page 2-18.
5. Double-click the first instance of SCSI Controller under Other
Devices.
6. In the next window, click ReInstall Driver, then Next.
7. Select Display a list of the known drivers for this device so that
I can choose a specific driver, then click Next.
8. Select SCSI and RAID Controllers, then click Next.
9. Click Have Disk.
2-16
EMC Fibre Channel with QLogic HBAs in the Windows Environment
QLogic_Windows.book Page 17 Thursday, March 10, 2005 10:31 AM
Installing and Configuring the HBA Driver
10. Enter the path to the diskette containing the driver (for example,
A:\), then click OK.
11. Select the appropriate QLogic HBA from the list of drivers that
appears; then click Next.
12. Click Next in the next window.
13. Click YES to continue the installation.
14. Click Finish to complete the driver installation.
15. The system requests that you reboot the system. Select NO and
click Close.
16. The system again requests that you reboot the system. Select NO
again.
17. If there are other QLogic HBAs installed, repeat steps 5 through
16 until all adapters have been installed.
18. Reboot the host.
Installing the HBA Driver
2-17
2
QLogic_Windows.book Page 18 Thursday, March 10, 2005 10:31 AM
Installing and Configuring the HBA Driver
2
Updating the HBA Driver in a Windows 2000 or Windows 2003
Host
On Windows 2000 and Windows 2003 systems where the QLogic
HBA has been detected automatically or a driver is already installed,
it might be necessary to update the current driver to the latest
EMC-qualified driver, as described in this section.
The following procedure assumes that you have already copied the
latest driver from the QLogic CD-ROM or downloaded it from the
QLogic website and put it onto a diskette.
Refer to the release notes provided with the driver for information that might
be unique to new driver revisions.
To install the driver into a Windows 2000 or Windows 2003 host:
1. Boot the host (if necessary) with Windows 2000 or Windows 2003.
2. From the Windows taskbar, click Start, Programs, Administrative
Tools, Computer Management.
3. In the left pane of the Computer Management window, click the
Device Manager icon.
4. Double-click the SCSI & RAID Controllers icon.
5. Under SCSI & RAID Controllers, double-click the adapter you
wish to upgrade.
6. In the next window, click the Driver tab; then click Update
Driver.
7. Follow the update wizard until you are given the choice to
Display a list of the unknown drivers for this device so that I
can choose a specific driver.
Click the button next to this choice; then click Next.
8. In the Select a Driver window, click Have Disk.
9. Enter the path to the diskette containing the driver (A:\, for
example), or use the browse function to locate the driver; then
click OK.
10. Select the driver that is discovered and click Next.
11. In the next window, click Next.
2-18
EMC Fibre Channel with QLogic HBAs in the Windows Environment
QLogic_Windows.book Page 19 Thursday, March 10, 2005 10:31 AM
Installing and Configuring the HBA Driver
12. If prompted, click Yes to continue the installation.
13. Click Finish to complete the installation.
14. If the system requests that you reboot the system and you have
other adapters to update, select NO; then click Close.
15. If the system again requests that you reboot the system and you
have other adapters to update, select NO; then click Close.
16. If you have other adapters to update, select the next adapter
under SCSI & RAID Controllers and repeat steps 6 through 15.
When all adapters have had their drivers updated, select Yes to
the reboot prompt.
Updating the HBA Driver in a Windows 2000 or Windows 2003 Host
2-19
2
QLogic_Windows.book Page 20 Thursday, March 10, 2005 10:31 AM
Installing and Configuring the HBA Driver
2
Upgrading to Windows 2003 from Windows 2000 or
Windows NT 4.0
Note the following if upgrading to Windows 2003:
◆
Upgrading from Windows NT 4.0 — The Windows NT4 drivers
will not be preserved while upgrading to Windows 2003. You
should obtain the correct Windows 2003 drivers (refer to
Downloading QLogic Drivers and Firmware on page 2-2) and
reinstall the drivers after the upgrade is complete.
◆
Upgrading from Windows 2000 — The Windows 2000 drivers
may be preserved while upgrading to Windows 2003. These
SCSIPort drivers (including the native Windows 2003 SCSIPort
drivers) are not supported by EMC for Windows 2003. You
should obtain the correct Windows 2003 drivers (refer to
Downloading QLogic Drivers and Firmware on page 2-2) and
reinstall the drivers after the upgrade is complete.
◆
Currently, to upgrade from Windows NT or Windows 2000 to
Windows 2003, you must first uninstall PowerPath. After
upgrading the host, you can reinstall an approved Windows 2003
version. Please refer to the EMC PowerPath documentation for
further details.
You may wish to disconnect your storage during the Windows upgrade, and
reconnect it after the approved Windows 2003 drivers have been installed.
2-20
EMC Fibre Channel with QLogic HBAs in the Windows Environment
QLogic_Windows.book Page 21 Thursday, March 10, 2005 10:31 AM
Installing and Configuring the HBA Driver
Replacing an HBA
Procedure for Replacing a QLogic HBA in Stratus ftServers without Rebooting
EMC CLARiiON
Storage arrays
Use of this procedure requires NAVICLI installed on the host system.
1. Remove the IO slice that contains the defective QLogic HBA.
2. Replace the defective HBA with a new HBA of same Stratus part
number (that is, U525 or U526). The HBA should be inserted into
the same PCI slot from which the defective HBA was removed.
(Inserting the replacement HBA into another PCI slot requires a
driver to be loaded for the HBA)
3. Re-insert IO slice with the new HBA, and re-connect all cables.
4. Power up the ftServer, and let the IO Slice come on-line and
duplex, as shown in the Stratus ftServer Management tool.
5. Change the FC switch zoning to add the WWN of the replaced
HBA to the appropriate zones.
6. Restart the Navisphere Agent using the Service Control Manager
applet.
7. In the CLARiiON Navisphere Manager, use connectivity status to
verify the new HBA is present and logged in. Alternately, use the
port ‘list’ command in navicli.
8. Using navicli, connect the HBA to the storage group with the
following command:
navicli –h <Clariion IP Addr> storagegroup –connecthost
–host <host-name> -gname <Storage-group-name>
This command will give the user the following prompt:
Connect host <host-name>to storage group
<Storage-group-name> (y/n)?
Respond with y.
9. Scan for hardware changes from the Windows device manager.
Replacing an HBA
2-21
2
QLogic_Windows.book Page 22 Thursday, March 10, 2005 10:31 AM
Installing and Configuring the HBA Driver
2
10. Execute the following commands from a command window:
powermt restore
powermt display
At this point, two HBA’s should be present in the display and the
FC HBA’s should be duplexed in the ftSMC. It may be necessary
to repeat steps 9 and 10.
EMC Symmetrix
Arrays with Device
Masking Enabled1
Use of this procedure requires SYMCLI installed on the host system.
Alternatively, EMC ControlCenter can be used to perform the HBA
replacement.
1. Using SYMCLI, run symmask list logins to view the old
WWN/iSCSI HBAs.
2. Remove all cables to the IO slice with the defective HBA, and
remove the IO slice.
3. Replace the defective QLogic HBA with the new HBA of same
Stratus part number (that is, U525 or U526). The HBA should be
inserted into same PCI slot from which the defective HBA was
removed. (Inserting the replacement HBA into another PCI slot
requires a driver to be loaded for the HBA)
4. Re-insert the IO slice with the new HBA, and re-connect all
cables.
5. Let the IO Slice come on-line and duplex, as shown in the Stratus
ftServer Management tool.
6. Change the FC switch zoning to add the WWN of the replaced
HBA to the appropriate zones.
7. Run symmask list hba or discover to view the new initiator
(for example, WWN).
8. Run symmask replace to substitute a new WWN for all
occurrences in the database of the old WWN.
9. Run symmask discover to establish the new names in the history
table, or run symmask rename to assign a WWN to the new HBA
in both the database and the history table.
1. Symmetrix Arrays without device masking enabled do not require this procedure; Symmetrix Arrays
with device masking enabled only require replacing the HBA WWN used in switch zoning.
2-22
EMC Fibre Channel with QLogic HBAs in the Windows Environment
QLogic_Windows.book Page 23 Thursday, March 10, 2005 10:31 AM
Installing and Configuring the HBA Driver
10. Run symmask refresh to update the director profile tables (in
cache) from the database.
11. Scan for hardware changes from the Windows device manager.
12. Execute the following commands from a command window:
powermt restore
powermt display
At this point, two HBA’s should be present in the display and the
FC HBA’s should be duplexed in the ftSMC. It may be necessary
to repeat steps 9 and 10.
Replacing an HBA
2-23
2
QLogic_Windows.book Page 24 Thursday, March 10, 2005 10:31 AM
Installing and Configuring the HBA Driver
2
2-24
EMC Fibre Channel with QLogic HBAs in the Windows Environment
QLogic_Windows.book Page 1 Thursday, March 10, 2005 10:31 AM
3
Invisible Body Tag
Configuring an EMC
Boot Device
Windows hosts have been qualified for booting from EMC storage
array devices interfaced through Fibre Channel as described in the
EMC Support Matrix. This chapter describes the process to configure a
storage array device as a boot device.
◆
◆
◆
◆
◆
◆
◆
Introduction ........................................................................................3-2
Configuring a Symmetrix Boot Device ...........................................3-5
Configuring a CLARiiON Boot Device.........................................3-14
Boot Time and LUN Availability ...................................................3-35
Replacing a Boot HBA .....................................................................3-36
How a Server Responds to Failure in the Boot LUN Path .........3-37
Known Issues....................................................................................3-38
Configuring an EMC Boot Device
3-1
QLogic_Windows.book Page 2 Thursday, March 10, 2005 10:31 AM
Configuring an EMC Boot Device
3
Introduction
Windows hosts have been qualified for booting from EMC array
devices interfaced through Fibre Channel as described under Boot
Device Support in the EMC Support Matrix.
Boot-from-SAN Configuration Restrictions
Refer to the EMC Support Matrix for any specific boot-from-SAN
restrictions. This guide no longer contains restriction information,
and the information in the EMC Support Matrix supersedes any
restriction references found in previous HBA Installation guides.
Risks of Booting from the Storage Array
EMC recommends that you do not boot a Windows host from the
storage array. However, if it is necessary to use the storage array as a
boot disk, EMC recommends shutting down the host server during
any maintenance procedures that could make the boot disk
unavailable to the host.
!
CAUTION
Microsoft Windows NT 4.0 and Windows 2000 use virtual memory
paging files that reside on the boot disk. If the paging file becomes
unavailable to the memory management system when it is needed,
the operating system will crash with a blue screen.
Any of these events could crash a system booting from the storage
array:
3-2
◆
Lost connection to array (pulled or damaged cable connection)
◆
Array service/upgrade procedures, such as on-line microcode
upgrades and/or configuration changes
◆
Array failures, including failed lasers on Fibre Channel ports
◆
Array power failure
◆
Storage Area Network failures, such as Fibre Channel switches,
switch components, or switch power failures
EMC Fibre Channel with QLogic HBAs in the Windows Environment
QLogic_Windows.book Page 3 Thursday, March 10, 2005 10:31 AM
Configuring an EMC Boot Device
◆
Storage Area Network service/upgrade procedures, such as
firmware upgrades or hardware replacements
EMC recommends moving the Windows virtual memory paging file to a
local disk when booting from the storage array. Consult your Windows
manual for instructions on how to move the paging file.
How to Determine I/O Latency and Load on the Boot LUN
The current restrictions for boot-from-array configurations listed in
the EMC Support Matrix represent the maximum configuration that is
allowed using typical configurations. There are cases where your
applications, host, array, or SAN may already be utilized to a point
when these maximum values may not be achieved. Under these
conditions, you may wish to reduce the configuration from the
maximums listed in the EMC Support Matrix for improved
performance and functionality.
Here are some general measurements than can be used to determine
if your environment may not support the maximum allowed
boot-from-array configurations:
◆
Using the Windows Performance Monitor, capture and analyze
the Physical Disk and Paging File counters for your boot LUN. (For
Windows NT 4.0, you might have to enable disk performance
counters manually; refer to Microsoft support for the description
and use of the Windows Performance Monitor.) If response time
(sec/operation), or disk queue depth seem to be increasing over
time, you should review any additional loading that may be
affecting the boot LUN performance (HBA/SAN saturation,
failovers, ISL usage, and so forth).
◆
Use available Array Performance Management tools to determine
that the array configuration, LUN configuration and access is
configured optimally for each host.
Possible ways to reduce the load on the boot LUN include:
◆
Move application data away from the boot LUN.
◆
Reduce the number of LUNs bound to the same physical disks.
◆
Select an improved performance RAID type.
◆
Contact your EMC support representative for additional
information.
Introduction
3-3
3
QLogic_Windows.book Page 4 Thursday, March 10, 2005 10:31 AM
Configuring an EMC Boot Device
3
Boot Crashdump Save to Disk Behavior
If you system is configured to write crashdumps after system failures,
and the host is configured to boot from the array, you will be able to
successfully save the crashdump only on the original available boot
device path on which the system started. This is a Windows
limitation, and installing PowerPath will not affect this behavior. At
the time a system crash is to be written to disk, Windows has already
saved the original boot path, and PowerPath cannot redirect the
crashdump file (MEMORY.DMP) to an alternative available device. If
you have a configuration for which you want to capture a
crashdump, you should ensure that the original primary boot path is
available at the time of the crash.
Boot-from-SAN with MSCS
The current installation, configuration and limitation information for
boot-from-SAN with Microsoft Clustering (MSCS) configurations can
be found in the latest EMC Host Connectivity Guide for Windows.
Please also refer to the EMC Support Matrix for approved
boot-from-SAN MSCS configurations.
3-4
EMC Fibre Channel with QLogic HBAs in the Windows Environment
QLogic_Windows.book Page 5 Thursday, March 10, 2005 10:31 AM
Configuring an EMC Boot Device
Configuring a Symmetrix Boot Device
This section describes how to install the Windows NT or
Windows 2000 operating system onto an EMC Symmetrix® storage
system connected to an Intel-based x86 class server. You can then
boot Windows from the storage system.
Configuring the Boot BIOS
The procedure below describes how to configure the boot BIOS. The
procedure assumes that the boot BIOS has been installed to the
adapters already.
1. Connect the EMC storage array boot port to the adapter in the
lowest-numbered PCI slot in the server. For example, if you have
three adapters in the system in slots 2, 4, and 5, connect the cable
to the adapter in slot 2. Do not connect cables to the other
adapters at this time.
2. Boot the server, and press CTRL-Q when you see the QLogic
banner:
Different HBA models may display different banners. Be sure to select
CTRL-Q for the HBA you wish to configure.
QLogic Corporation
QLA2300 PCI Fibre Channel ROM BIOS Version 1.17
Copyright © Qlogic Corporation 1993-1999 All rights reserved
Press <CTRL - Q> for Fast!UTIL
www.qlogic.com
3. After Fast!UTIL loads, the display depends on whether there are
multiple QLogic HBAs installed:
• If there is only one QLogic HBA, the Fast!UTIL Options
menu appears.
• If there are multiple QLogic HBAs, a list of addresses occupied
by those HBAs appears. Since the EMC storage array is
attached to the lowest-numbered PCI slot, select the first
adapter from the list; then press ENTER. The Fast!UTIL
Options menu appears.
4. From the FastUTIL Options menu, select Configuration Settings
and press ENTER.
Configuring a Symmetrix Boot Device
3-5
3
QLogic_Windows.book Page 6 Thursday, March 10, 2005 10:31 AM
Configuring an EMC Boot Device
3
5. From the Configuration Settings menu, select Host Adapter
Settings and press ENTER.
6. From the Host Adapter Settings menu, select Host Adapter
BIOS and press ENTER to enable it if it is not already enabled.
Refer to EMC HBA Settings on page 2-8 for a table of EMC-approved
NVRAM settings.
7. Press ESC to exit the Configuration Settings menu.
8. From the Configuration Settings menu, select Selectable Boot
Settings and press ENTER.
9. From the Selectable Boot Settings menu, select Selectable Boot
Device and press ENTER to enable it if it is not already enabled.
10. Select Current Boot Node Name and press ENTER.
The adapter scans for attached storage devices, and displays them
on the screen.
11. Choose the storage array port from which you wish to boot. Its
entry will be similar to the following:
ID
VENDOR
PRODUCT
REV
NODE NAME
Port ID
12
EMC
SYMMETRIX
5566
50060482BFD06C02 0000E4
Select your boot device and press ENTER.
A list of LUNs will appear in a new window. Select the LUN from
which you wish to boot and press ENTER.
12. Press ESC at the Selectable Boot Settings menu to return to the
Configuration Settings menu.
13. Press ESC at the Configuration Settings menu to return to the
Fast!UTIL Options menu.
Select Save Changes and press ENTER.
14. Press ESC to exit Fast!UTIL.
15. Reboot the host.
3-6
EMC Fibre Channel with QLogic HBAs in the Windows Environment
QLogic_Windows.book Page 7 Thursday, March 10, 2005 10:31 AM
Configuring an EMC Boot Device
Installing the Windows OS onto the Boot Device
Follow the appropriate steps below to install the Windows operating
system onto the EMC boot device.
Windows NT
Microsoft does not provide a driver for the QLogic controllers on the
Windows NT installation CD-ROM. In order to properly install Windows NT
on a the EMC storage array boot device connected to a QLogic controller, the
Windows installation diskettes must be used with the CD-ROM.
1. Boot the server with Windows NT installation diskette 1. The
server displays the following message, followed by a blank blue
screen. Press F6 as soon as the blue screen appears:
Setup is inspecting your computer's hardware configuration --Pressing F6 tells the Windows installer that you want to load a
third-party driver before proceeding with the installation.
2. Follow the prompts to insert the necessary diskettes until the
setup stops to allow you to add additional devices.
A dialog message will tell you that the setup program cannot
determine the type of one or more mass storage devices.
From this point, press S to specify additional devices. You will need to select
Other and press ENTER.
3. Insert the QLogic driver disk into the diskette drive and press
ENTER.
4. You are prompted to select one of four driver choices. Select
QLogic QLA2300 (or QLA2200) PCI Fibre Channel Adapter and
press ENTER.
The driver loads and you are brought back to the Additional
Devices dialog.
5. You must now load the driver for your CD-ROM drive. The
Windows NT installer assumes that you want to specify all
storage drivers now. If the CD-ROM is not selected, installation
will fail later in the process.
Press S to specify an additional device.
6. From the list, scroll up to select IDE CD-ROM (ATAPI 1.2)/PCI
IDE Controller and press ENTER.
Configuring a Symmetrix Boot Device
3-7
3
QLogic_Windows.book Page 8 Thursday, March 10, 2005 10:31 AM
Configuring an EMC Boot Device
3
7. Some servers use SCSI CD-ROM drives. If your server has a SCSI
CD-ROM, repeat steps 5 and 6 to select the driver for the SCSI
controller. If your controller is not on the list, obtain the driver on
diskette from the vendor.
8. If you want to specify drivers for other devices installed in your
system, do so; otherwise press ENTER at the Additional Devices
dialog to continue with Windows installation.
9. After completing Windows installation, reinstall the QLogic
driver using the steps under Installation Procedure for Windows NT
Hosts on page 2-15.
Windows 2000
For detailed installation instructions on the HP ProLiant BL20p G2
and BL40p, refer to HP ProLiant BL p-Class server blades Booting
Windows systems from 3rd party Storage Array Network (SAN), How To,
located here:
ftp://ftp.compaq.com/pub/supportinformation/techpubs/
other/5982-3248en_rev1_us.pdf
After completing Windows installation, reinstall the QLogic driver
using the steps under Installation Procedure for Windows 2000 and
Windows 2003 Hosts on page 2-16.
Installing EFI boot code onto the HBA
To boot from a Symmetrix device via a QLogic fibre controller under
the Extensible Firmware Interface (EFI) shell, QLogic EFI boot code
must be loaded to the HBA. EFI boot code provides the ability to boot
from an attached device over Fibre Channel.
Check the EMC Support Matrix for the minimum required EFI boot
code revision.
The CD-ROM contains the latest EMC-approved EFI boot code at the
time of this document’s release. Update EFI boot code files, if
available, can be found on the qLogic website
http://www.qlogic.com.
NOTE: If your system does not have a floppy disk driver, a USB pen drive
can be used to run utilities and store files for this procedure. Check with your
server vendor to determine whether a USB pen drive is supported for your
system.
3-8
EMC Fibre Channel with QLogic HBAs in the Windows Environment
QLogic_Windows.book Page 9 Thursday, March 10, 2005 10:31 AM
Configuring an EMC Boot Device
If a system contains of mixture of detected and undetected adapters,
any existing
EFI drivers loaded by EFI should be unloaded using the EFI Shell
drivers, and unload commands. If you have not previously
installed EFI boot code to your QLogic HBA, skip this section.
1. Type drivers at the EFI shell prompt to display the list of loaded
EFI drivers. You will see an entry (or entries) similar to the
following:
5D 0000011E B X X
5D 00000140 D X X
1 HP 2 Gb Fibre Channel Driver
1 - Qlogic Fibre Channel Driver
PciRom Seg=00000000
PciRom Seg=00000000
2. The first column (in this example, 5D) is the driver handle for the
HBA. To unload the EFI boot code driver, use the unload
command:
unload 5D
3. After all instances of the QLogic EFI boot code driver are
unloaded, proceed to the next section.
To flash the HBA with the latest EFI boot code, copy the files from the
EFI boot code package to a floppy disk. If your system does not have
a floppy drive, a USB pen drive can be used instead. If your system is
already booted to the EFI shell, insert the floppy or USB pen drive
and type exit to exit the EFI shell. From the boot options menu,
select EFI Shell [Built-in] to go back into the EFI shell. This will
cause the EFI shell to re-discover disk devices and will locate the
floppy or pen drive.
When you enter the EFI shell, the device map should be displayed. If
it does not display, type map at the shell> prompt to display the list
of detected devices. Disk devices that are accessible by the EFI shell
are listed as FS devices. Switch to the device containing the EFI boot
code. This is accomplished by typing the name of the device and a
colon. For example, if the EFI boot code is on fs1, type fs1: and
press ENTER to switch to that device. If your HBA does not have EFI
boot code already installed, you must use the EFIUTIL.EFI driver
utility in order to flash the board. At the command prompt, type
EFIUTIL and press ENTER. This will load the QLogic EFI utility and
display a efiutil> prompt. The following commands assume that the
EFI boot package files are all located in the same directory as the
EFIUTIL.EFI program.
Configuring a Symmetrix Boot Device
3-9
3
QLogic_Windows.book Page 10 Thursday, March 10, 2005 10:31 AM
Configuring an EMC Boot Device
3
1. To load the EFI driver onto the HBA, type ew and press ENTER.
The driver image binary filename, by default, is ql2312ef.bin.
The EFIUTIL program will prompt for the filename, and pressing
ENTER selects the default. Confirm that the version being installed
is correct by typing Y and pressing ENTER. The driver will begin
flashing to the HBA. The efiutil> prompt will reappear when the
load is complete.
2. To load the HBA risc code onto the HBA, type rw and press
ENTER. The firmware image binary filename, by default, is
ql2312fw.bin. The EFIUTIL program will prompt for the
filename, but pressing ENTER will select the default. Confirm
that the version being installed is correct by typing Y and pressing
ENTER. The firmware will begin flashing to the HBA. The
efituil> prompt will reappear when the load is complete.
3. To load the EMC NVRAM settings to the HBA, type nw and press
ENTER. The NVRAM data filename provided on the HBA kit is
NVRAM23.DAT. The EFITUIL program will prompt for the
filename. Type NVRAM23.DAT at the prompt and press ENTER.
The EFITUIL program will load the NVRAM settings to the HBA
and the efituil> prompt will reappear.
4. Type quit to exit the EFIUTIL program and return to the EFI
shell.
5. Type reset at the EFI prompt to reboot the server.
Configuring QLogic EFI boot code to boot from an External Array
QLogic EFI boot code configuration is text-based. It involves running
a command line utility to setup the HBA for boot. The following
procedure should be conducted after you have done the following:
1. Write down the world wide name for the port that you will be
booting from on the storage array. Consult your documentation
or EMC customer service rep. to determine this number for your
array.
2. Determine and note the LUN on the array that you will be
booting from.
To configure the EFI boot code, you must start the EFI driver utility
for the HBA. To do this, you must determine the driver handle and
driver control number for the HBA you will be booting from:
1. Enter the EFI shell on the system
3-10
EMC Fibre Channel with QLogic HBAs in the Windows Environment
QLogic_Windows.book Page 11 Thursday, March 10, 2005 10:31 AM
Configuring an EMC Boot Device
2. At the shell> prompt, type drivers and press ENTER. The list of
currently loaded drivers will be displayed. The QLogic EFI driver
should appear on a line that is similar to that shown below:
5D 0000011E B X X
5D 00000140 D X X
1 HP 2 Gb Fibre Channel Driver PciRom Seg=00000000
1 - Qlogic Fibre Channel Driver PciRom Seg=00000000
3. The first two hex digits are the driver handle. To determine the
control number, type drvcfg <handle> and press ENTER. You will
see both the handle and control numbers displayed for that HBA:
Configurable Components
Drv[5D]Ctrl[60]Lang[eng]
4. To start the EFI command line utility, type drvcfg –s <handle>
<control> and press ENTER. (for example, drvcfg –s 5d 60)
5. At the selection prompt, select menu choice 8 (info) and press
ENTER. This will display the HBA information, which includes the
world wide number of the HBA. Write the WWN down to aid in
fabric zoning.
6. At the selection prompt, select menu choice 3 (edit_database) and
press ENTER.
7. At the Entry in WWN database to edit prompt, type 0.
8. At the Entry 0 Port WWN prompt, enter the 16 digit WWN of
your storage array boot port recorded earlier. Do not enter the
HBA WWN that was noted in step 5.
9. At the Node WWN prompt, retype the storage array WWN again.
10. At the LUN (hex) prompt, type the LUN number that you will be
booting from.
11. Once entered, the Entry in WWN database to edit prompt will
re-appear. This gives you the chance to configure a secondary
boot LUN. Repeat steps 7 through 10 for up to 4 alternate boot
LUNs. Simply type in the database number (1-4) to configure
them. If you are finished with configuring boot LUNs, press
ENTER at this prompt to return to the eficfg> prompt.
12. At this point, edit the HBA settings to make sure the topology
and other parameters are correct for boot. Select menu choice 1
(edit_adapter_settings) at the selection prompt and enter values
for the following parameters:
1. Enable Hard Loop Id? = Y (Note: Only necessary for
direct-connect configurations)
Configuring a Symmetrix Boot Device
3-11
3
QLogic_Windows.book Page 12 Thursday, March 10, 2005 10:31 AM
Configuring an EMC Boot Device
3
2. Hard Loop Id (hex) = 255 (Note: Only direct-connect
configurations also.)
3. Reset Delay (dec) = 5 (default)
4. Enable FC Tape = Y (default)
5. Frame Size = 2048 (default)
6. Select the topology for your configuration. In most cases, the
default setting will work for all configurations.
7. Data Rate = 2 (default)
Type 0 at the selection prompt to return to the main menu.
13. Next, we will ensure the HBA advanced settings are correct for
boot. Select menu choice 2 (edit_advanced_settings) at the
selection prompt and enter values for the following parameters:
1. Operation Mode = 0 (default)
2. Interrupt Delay Timer (dec) = 0 (default)
3. Execution Throttle (dec) = 256
4. Login Retry Count (dec) = 8 (default)
5. Port Down Retry Count (dec) = 45
6. Link Down Timeout (dec) = 0
7. Luns Per Target (dec) = 256
8. Enable Extended Logging = N (default)
9. Enable LIP Reset = N (default)
10. Enable LIP full login = Y (default)
11. Enable target reset = Y (default)
Type 0 at the selection prompt to return to the main menu.
14. After all the settings are correct, select menu choice 11 (write) at
the selection prompt to save them to the HBA.
15. After saving the changes, select menu choice 12 (quit) to exit the
EFI command line utility.
16. Reboot the server (reset at the Shell> prompt) to cause changes to
take effect.
At this point, the HBA is ready to boot from the assigned LUN. Your
fabric may not be configured with the correct zoning information to
allow the HBA to see the storage array. After the server boots up, you
will be able to view the WWN of the HBA in the fabric utility. From
3-12
EMC Fibre Channel with QLogic HBAs in the Windows Environment
QLogic_Windows.book Page 13 Thursday, March 10, 2005 10:31 AM
Configuring an EMC Boot Device
there, you can configure your zone(s) on the fabric to allow the HBA
to connect to the array properly.
Procedure to Install Windows Server 2003 on a Fibre Channel Disk (Only for system
with floppy disk drive).
1. Boot with Windows Server 2003 Setup Media (See Microsoft
Documentation for details).
2. Monitor the white bar on the bottom of the screen.
3. Press F6 within 5 seconds when the ress F6 if you need to
install a third party SCSI or RAID driver message is
displayed.
4. When the message Setup could not determine the type of
one or more mass storage devices installed in your
system, or you have chosen to manually specify an
adapter. is displayed, insert the QLogic driver diskette.
5. Follow the remaining instructions as displayed to complete the
Windows Server 2003 installation.
Configuring a Symmetrix Boot Device
3-13
3
QLogic_Windows.book Page 14 Thursday, March 10, 2005 10:31 AM
Configuring an EMC Boot Device
3
Configuring a CLARiiON Boot Device
This section describes how to install a boot device onto an EMC
CLARiiON® storage system connected to an Intel-based x86 class
server. You can then boot Windows from the storage system.
This section assumes that EMC did not prepare the server or the
storage system to boot Windows from the storage system.
SCSI hard disks are allowed in configurations that boot over Fibre
Channel. However, the BIOS for a SCSI disk’s SCSI adapters must be
disabled. You should also disconnect any SCSI disks before installing
Windows.
Procedure
Flowchart
3-14
The installation procedure includes steps you must follow in a
specific order. The following flowchart outlines the major steps.
EMC Fibre Channel with QLogic HBAs in the Windows Environment
QLogic_Windows.book Page 15 Thursday, March 10, 2005 10:31 AM
Configuring an EMC Boot Device
Start
Unsatisfied
Requirements
Complete
Requirements
Satisfied
Need boot LUN and Storage Group
Prepare Storage
System
Create boot LUN and
Storage Group
Boot LUN and
Storage Group
exist
Create HBA
Driver Diskettes
Need to update
firmware and NVRAM
Gather Data
and Set Up
HBA BIOS
Update firmware
Need to update
NVRAM only
Update NVRAM
By WWPN
Soft Zoning
By Port Number
Prepare Switch
Fabric
Hard Zoning
Prepare Server
Install Additional Software
A
Configure HBA Boot BIOS
Install Windows
Multiple HBA
Single HBA
Failover
Software
PowerPath/ATF
PowerPath/CDE
Verify Driver Installation
A
Navisphere Agent
Configuring a CLARiiON Boot Device
3-15
3
QLogic_Windows.book Page 16 Thursday, March 10, 2005 10:31 AM
Configuring an EMC Boot Device
3
Requirements
Topologies,
Configurations, and
Revisions
Hardware and
Software
Requirements
This section lists supported configurations, hardware and software
requirements, and related documentation.
Refer to the EMC Support Matrix.
Refer to the EMC Support Matrix for specific support information.
Some general requirements are:
◆
Boot server with a CD-ROM and diskette drives, and support for
the Windows version you will install. Refer to the EMC Support
Matrix for supported servers.
◆
Latest HBA firmware and drivers for your operating system.
Refer to Downloading QLogic Drivers and Firmware on page 2-2.
◆
One or more PCI Fibre Channel host bus adapters, installed in the
lowest numbered PCI slot(s), which are the slots first scanned at
startup, in the boot server.
◆
If installing in a fabric environment, Fibre Channel switch
configured for IP, and with an available zone configuration utility
(Telnet-based or Web-based).
◆
If required by the EMC Support Matrix, CLARiiON storage system
with Access Logix™ and Access Control enabled (using EMC
ControlCenter Navisphere Management software).
Until Windows is fully installed, you must connect only the
storage system onto which the operating system will be loaded.
Later, you can connect other storage systems.
3-16
◆
Cable connections as appropriate for server between server Fibre
Channel HBA, switch (FC-SW only), and storage system SPs.
◆
Navisphere Management station with EMC ControlCenter
Navisphere Management software or CLI. The station must be
separate from the boot server but networked to the storage
system (FC4700 and later array models) or connected to the
storage system (models earlier than FC4700).
◆
The host system for Windows NT 4 must have less than 4.0 GB of
physical RAM. (MSKB Q160392).
EMC Fibre Channel with QLogic HBAs in the Windows Environment
QLogic_Windows.book Page 17 Thursday, March 10, 2005 10:31 AM
Configuring an EMC Boot Device
Media Requirements
Required media includes the following:
Refer to Downloading QLogic Drivers and Firmware on page 2-2.
◆
Latest EMC-approved Fibre Channel PCI HBA Driver Kit for
Windows
◆
Latest EMC-approved Fibre Channel PCI HBA firmware
◆
MS-DOS boot diskette.
Preparing the Storage System
Boot device support requires a Navisphere Management station with
Navisphere Manager or CLI. The station must be separate from the boot
server but networked to the storage system (FC4700 and later model arrays)
or connected to the storage system (models earlier than FC4700).
Before you can install Windows onto a storage system, the storage
system must have at least one bound LUN in a Storage Group for the
boot server. The LUN must be owned by the SP connected to the boot
HBA.
For Windows NT 4.0, the host system boot LUN must be assigned Host LUN
ID 0 by the EMC storage array. (MSKB Q218974)
During this installation procedure, you should have only one LUN in
the boot Storage Group, so that you can easily identify the boot LUN.
Later, you can add other LUNs to this Storage Group.
If you need to create a LUN, refer to the EMC ControlCenter Navisphere
Management software documentation for your array type.
Configuring a CLARiiON Boot Device
3-17
3
QLogic_Windows.book Page 18 Thursday, March 10, 2005 10:31 AM
Configuring an EMC Boot Device
3
Setting Up the HBA BIOS
After the HBA is installed in the host and the EMC array is connected
to the fabric (FC-SW) or directly connected to the HBA (FC-AL), you
can configure an EMC-qualified QLogic HBA for boot support using
Fast!UTIL, as described below:
1. Boot the server, and press CTRL-Q when you see the QLogic
banner:
Different HBA models may display different banners. Be sure to select
CTRL-Q for the HBA you wish to configure.
QLogic Corporation
QLA2300 PCI Fibre Channel ROM BIOS Version 1.17
Copyright © Qlogic Corporation 1993-1999 All rights reserved
Press <CTRL - Q> for Fast!UTIL
www.qlogic.com
2. After Fast!UTIL loads, the display depends on whether there are
multiple QLogic HBAs installed:
• If there is only one QLogic HBA, the Fast!UTIL Options
menu appears.
• If there are multiple QLogic HBAs, a list of addresses occupies
by those HBAs appears. Use the arrow keys to select the
desired HBA; then press ENTER. The Fast!UTIL Options menu
appears.
3. Select Configuration Settings from the menu.
4. Select Host Adapter Settings, and enable Host Adapter BIOS.
Refer to EMC HBA Settings on page 2-8 for a table of EMC-configured
NVRAM settings.
5. Press ESC to return to the previous menu.
6. Select Selectable Boot Settings, and enable Selectable Boot
Device.
7. For any entry that is not blank (all zeros), highlight the entry, and
press C to clear any previous values.
8. When all parameters are set correctly, press ESC to return to the
Fast!UTIL Options menu; then select Save Changes to save the
changes you made to the current adapter.
3-18
EMC Fibre Channel with QLogic HBAs in the Windows Environment
QLogic_Windows.book Page 19 Thursday, March 10, 2005 10:31 AM
Configuring an EMC Boot Device
9. Press ESC to exit the Fast!UTIL Options menu.
10. Reboot the host.
What Next?
The next step depends on the topology:
◆
FC-AL: Proceed to Preparing the Server on page 3-22.
◆
FC-SW: Proceed to Preparing the Fabric on page 3-19.
Preparing the Fabric
You can configure a switched fabric to support multiple hosts and
multiple storage systems. For this setup, we will describe only the
minimum configuration required for the boot LUN and server.
EMC recommends that you use switch zoning in all configurations to
ensure consistency if your fabric grows.
The configuration below requires an existing knowledge of zoning and
switch fabric concepts. The procedure explains the necessary steps to enable
boot functionality for the storage system. This configuration does not cover
the impact of zoning changes to other devices that will use the same
connections. You should confirm your overall topology requirements and
configuration before implementing any zoning changes.
Other devices on the fabric may introduce load and demand on the interlink
components and storage system that can affect boot LUN performance and
correct functionality.
The switch fabric must be configured initially so that the boot HBA is
visible only to a single port on the storage system. That is, there must
be only one zone containing the boot HBA and one SP port until
installation is complete, even if you will install failover software later.
This can be accomplished in one of three ways (described following
this list):
◆
Switch fabric soft zoning (by WWPN)
◆
Switch fabric hard zoning (by switch port)
◆
Physical connection of only one SP port to the fabric
Configuring a CLARiiON Boot Device
3-19
3
QLogic_Windows.book Page 20 Thursday, March 10, 2005 10:31 AM
Configuring an EMC Boot Device
3
Soft Zoning
These instructions let you configure the soft zoning as this setup
requires. They are not a complete explanation of zoning. Refer to the
documentation that is available for your switches for a complete
guide.
1. Ensure that the server and storage system are cabled properly
and powered on.
For the HBA’s WWPN to appear in the Name Server database, the
server must be in the boot BIOS menu. If the server is not in the
boot BIOS menu:
a. Reboot the server. When the QLogic BIOS banner (shown
below) appears, press CTRL–Q:
Different HBA models may display different banners. Be sure to
select CTRL-Q for the HBA you wish to configure.
QLogic Corporation
QLA2300 PCI Fibre Channel ROM BIOS Version 1.17
Copyright © Qlogic Corporation 1993-1999 All rights reserved
Press <CTRL - Q> for Fast!UTIL
www.qlogic.com
b. After Fast!UTIL loads, the display depends on whether there
are multiple QLogic HBAs installed:
• If there is only one QLogic HBA, the Fast!UTIL
Options menu appears.
• If there are multiple QLogic HBAs, a list of
addresses occupies by those HBAs appears. Use the
arrow keys to select the desired HBA; then press
ENTER. The Fast!UTIL Options menu appears.
c. Select Configuration Settings from the menu.
d. Select Selectable Boot Settings from the Host Adapter
Settings menu; then select the first Boot Port Name entry.
The HBA will scan for available target ports. The HBA might
not find any target ports, but this step allows the HBA to
register with the switch database.
e. Leave the server, and continue to step 2.
2. Start a switch web-based or Telnet-based configuration session.
3-20
EMC Fibre Channel with QLogic HBAs in the Windows Environment
QLogic_Windows.book Page 21 Thursday, March 10, 2005 10:31 AM
Configuring an EMC Boot Device
3. Create a member alias for the boot HBA WWPN. Make sure it is a
member alias and that you use the 21... Port Name, not the 20...
Node Name.
4. Create a member alias for one storage system SP port that you
connected earlier and to which you bound the boot LUN. You can
choose either Port 0 or Port 1 of the SP if both ports are connected
to the switch. EMC recommends using Port 0 for consistency.
5. Create a zone and include the HBA alias and SP port alias created
in steps 3 and 4.
6. Create a new zone configuration or select an existing zone
configuration, and add the zone created in step 5.
7. Enable the zone configuration chosen in the previous step, and
click Apply.
8. Ensure that any ports, aliases or zones composed of the HBA
connection referenced above do not appear in any other zones or
configurations that are enabled.
Important: If you have previously soft-zoned servers, they will not adhere
to the new configuration unless they are restarted. Refer to the switch
zoning manual for further information.
What Next?
Continue to Preparing the Server on page 3-22.
Hard Zoning
To use hard zoning:
1. Start a switch web-based or Telnet-based configuration session.
2. Create a zone and include the boot HBA port and one SP port.
You can choose either Port 0 or Port 1 of the SP if both are
connected to the switch. EMC recommends using Port 0 for
consistency.
3. Create a new zone configuration or select an existing zone
configuration, and add this zone.
4. Enable the zone configuration chosen in the previous step.
5. Ensure that any ports, aliases or zones composed of the HBA
connection referenced above do not appear in any other zones or
configurations that are enabled.
What Next?
Continue to Preparing the Server on page 3-22.
Configuring a CLARiiON Boot Device
3-21
3
QLogic_Windows.book Page 22 Thursday, March 10, 2005 10:31 AM
Configuring an EMC Boot Device
3
Physical Connection
of Only One SP Port to
the Fabric
If the SP that owns the boot LUN has only one port connected to the
switch, and no other target devices are on the fabric, then zoning for
the boot configuration is not necessary. You should make sure any
existing zones still allow the HBA-to-SP connection.
Refer to the switch documentation for possible restrictions.
What Next?
Continue to Preparing the Server.
Preparing the Server
You must adhere to the configuration rules for your server when you
install and set up the PCI cards. See the server installation and
operation manual. All servers must meet the following requirements:
◆
The PCI Fibre Channel HBA must be the first HBA adapter
scanned for boot.
◆
SCSI hard disks are allowed in configurations that boot from
Fibre Channel. However, the BIOS for the disk’s SCSI adapters
must be disabled. You should also disconnect any SCSI disks before
installing Windows. Reconnect or add SCSI hard disks when the
installation is complete.
◆
You must have at least one EMC-qualified QLogic Fibre Channel
HBA. Depending on your configuration, you can install
additional Fibre Channel HBAs according to the topology rules in
the EMC Support Matrix.
Perform the following steps:
1. Press ESC to exit the Fast!UTIL Options menu; then reboot the
system.
You may receive a non-system disk error message; this is normal
at this stage.
2. If any SCSI hard disk drives are connected, continue with step 3.
You might not be able to install Windows on the storage system if the
server has a SCSI hard disk connected. The Windows Setup program
may automatically assign the SCSI disk as drive C and install the
operating system on that disk.
If no SCSI hard disk drives are connected to the server, go to
step 4.
3-22
EMC Fibre Channel with QLogic HBAs in the Windows Environment
QLogic_Windows.book Page 23 Thursday, March 10, 2005 10:31 AM
Configuring an EMC Boot Device
3. To disconnect all SCSI hard disk drives, unplug the power and
SCSI bus cables connected to a SCSI adapter or controller. For
details, see the installation and operation manual for your server.
4. To prepare your system to boot Windows over a Fibre Channel
connection, you must do the following:
For detailed installation instructions on the HP ProLiant BL20p G2 and
BL40p, refer to HP ProLiant BL p-Class server blades Booting Windows
systems from 3 rd party Storage Array Network (SAN), How To, located here:
ftp://ftp.compaq.com/pub/supportinformation/techpubs
/other/5982-3248en_rev1_us.pdf
Following this installation proceed to Verifying HBA Driver and Digital
Signature Installation on page 3-28. For other detailed instructions, refer to
the manufacturer’s documentation available for each adapter.
• For any server with IDE CD-ROM drives, you should disable
BIOS on any of the server’s integrated SCSI adapter(s) because
SCSI BIOS is not required to boot from CD-ROM.
• Disable or remove any IDE HDD drives.
• For servers with SCSI CD-ROM drives, enable BIOS on the
SCSI channel that includes the CD-ROM; disable BIOS on any
other integrated SCSI channels. Remove any SCSI hard disks
on the same bus as the CD-ROM drive.
If the CD-ROM is on a SCSI controller and the BIOS is disabled for
that controller, then you will not be able to boot from the CD-ROM.
To boot from CD-ROM in the future, you will need to re-enable the
BIOS for the CD-ROM controller.
• Disable BIOS on any other HBA BIOS in your system other
than the QLogic HBA(s) designated for booting. See the
documentation that accompanied the HBA for instructions.
What Next?
Configuring the HBA
Boot BIOS
Configure the HBA Boot BIOS as described in the next section.
Follow these steps to configure the storage system LUN for the HBA
Boot BIOS:
1. Reboot the server.
When the QLogic BIOS banner (shown below) appears, press
CTRL–Q.
Configuring a CLARiiON Boot Device
3-23
3
QLogic_Windows.book Page 24 Thursday, March 10, 2005 10:31 AM
Configuring an EMC Boot Device
3
Different HBA models may display different banners. Be sure to select
CTRL-Q for the HBA you wish to configure.
QLogic Corporation
QLA2300 PCI Fibre Channel ROM BIOS Version 1.17
Copyright © Qlogic Corporation 1993-1999 All rights reserved
Press <CTRL - Q> for Fast!UTIL
www.qlogic.com
2. After Fast!UTIL loads, the display depends on whether there are
multiple QLogic HBAs installed:
• If there is only one QLogic HBA, the Fast!UTIL Options
menu appears.
• If there are multiple QLogic HBAs, a list of addresses occupies
by those HBAs appears. Use the arrow keys to select the
desired HBA; then press ENTER. The Fast!UTIL Options menu
appears.
3. Select Configuration Settings from the menu.
4. Select Selectable Boot Settings from the Configuration Settings
menu.
Select the first Boot Port Name entry, and in the Device window
scroll to select the CLARiiON port WWN from which you want to
boot.
Depending on the array model, the HBA may not yet detect any LUNs,
or it may detect a LUNZ labeled disk. This is normal behavior.
Leave the server here so the HBA will remain active while you
configure the storage array groups.
5. Using EMC ControlCenter Navisphere Management software,
you must add the HBA to the storage group you created earlier.
Depending on the array model, you may have to first manually
register the HBA connection. If you will later install PowerPath or
ATF, be sure to select the corresponding parameters during the
registration procedure. Refer to your EMC ControlCenter
Navisphere Management software, ATF, or PowerPath
documentation for detailed instructions.
6. Press ESC until you exit the Fast!UTIL Options menu. You do not
need to save any changes if prompted.
7. Reboot the server.
3-24
EMC Fibre Channel with QLogic HBAs in the Windows Environment
QLogic_Windows.book Page 25 Thursday, March 10, 2005 10:31 AM
Configuring an EMC Boot Device
When the QLogic BIOS banner (shown in step 1) appears, press
CTRL–Q.
Different HBA models may display different banners. Be sure to select
CTRL-Q for the HBA you wish to configure.
8. After Fast!UTIL loads, the display depends on whether there are
multiple QLogic HBAs installed:
• If there is only one QLogic HBA, the Fast!UTIL Options
menu appears.
• If there are multiple QLogic HBAs, a list of addresses occupies
by those HBAs appears. Use the arrow keys to select the
desired HBA; then press ENTER. The Fast!UTIL Options menu
appears.
9. Select Configuration Settings from the menu.
10. Select Selectable Boot Settings from the Configuration Settings
menu.
Select the first Boot Port Name entry, and in the Device window
select the CLARiiON port WWN from which you want to boot.
After you select the WWN, if there is more than one LUN
detected, select the boot LUN number from the next window.
11. When all parameters are set correctly, press ESC to return to the
Fast!UTIL Options menu; then select Save Changes to save the
changes you made to the current adapter.
12. Press ESC to exit the Fast!UTIL Options menu.
13. Reboot the server.
What Next?
Installing Windows
Install Windows as described in the next section.
You are ready to install the Windows operating system files. To install
Windows, you need the following materials:
◆
Windows CD-ROM for the Windows version you wish to install.
◆
EMC-approved QLogic HBA driver diskette for Windows.
If you bound a new LUN to serve as your boot disk, ensure that the
bind procedure is complete (EMC ControlCenter Navisphere
Management software, LUN Properties tab Percent Bound).
Configuring a CLARiiON Boot Device
3-25
3
QLogic_Windows.book Page 26 Thursday, March 10, 2005 10:31 AM
Configuring an EMC Boot Device
3
1. Insert a bootable Windows CD-ROM in the drive and reboot the
system.
If your system has a bootable disk already configured from a
previous installation, the software will prompt you to press any
key to boot from CD-ROM. If the bootable disk is not the storage
array disk on which you want to install Windows, then you
should disable that disk’s SCSI BIOS as described under Preparing
the Server on page 3-22.
2. Immediately after the Windows installation begins, press F6 when
directed or when the blue screen appears following this banner:
Setup is inspecting your computer's hardware configuration --Pressing F6 tells the Windows installer that you want to load a
third-party driver before proceeding with the installation.
If you do not press F6 in time to add the drivers, restart the server to try
again.
3. When prompted for additional drivers, select S.
4. Insert the EMC HBA Drivers diskette for your OS. Then press
ENTER to continue.
5.
Select the appropriate QLogic boot HBA from the next menu.
Depending on the version of Windows, you may receive an error
message that the default driver is newer than the provided one. Ignore
this message, and select F6 to continue and use the driver you have
provided.
6. Press ENTER to continue.
Setup continues to load files. The Welcome to Setup dialog
appears.
7. Press ENTER to begin the setup procedure.
If you are installing Windows on a newly created LUN, you may
receive a message that your boot disk is new or erased. You can
press C to continue.
The Windows Licensing Agreement appears.
8. Press PG DN to scroll through and read the license agreement; to
accept it, press F8.
3-26
EMC Fibre Channel with QLogic HBAs in the Windows Environment
QLogic_Windows.book Page 27 Thursday, March 10, 2005 10:31 AM
Configuring an EMC Boot Device
The Windows Server Setup dialog displays disk partition
information (if your system already contains partitions), or lets
you create a new hard disk partition.
The Windows 2000 boot LUN can be larger than 8 GB (Refer to Microsoft
Knowledge Base article Q240672.) Windows NT 4.0 is bound by a Boot
BIOS 8 GB limit. (Refer to Microsoft Knowledge Base article Q224526.)
9. If you are installing an operating system for the first time,
highlight Unpartitioned Space on the qL2xxx adapter; then:
• press ENTER to use the entire disk as one partition, or
• press C to create a custom partition, and then specify the
partition size.
If the new disk is displayed as Unformatted or Damaged you
must delete the partition before continuing. To do this, press D,
then follow the on-screen delete instructions. After you delete the
partition, the space will then appear as Unpartitioned Space
mentioned above.
If you are reinstalling Windows, the Setup software prompts you
to overwrite or upgrade:
• To overwrite, press ESC and follow instructions.
• To upgrade, press ENTER.
• If you want to create a new hard disk partition, you must first
delete the existing partition, and then create a new one. To do
so, select the partition you want to delete, press D, and then
follow the on-screen instructions to complete the deletion of
the partition. Once the system deletes the partition, you can
press C to create a new one.)
10. The setup software prompts you to specify the file system format
for the partition.
Select NTFS file system format, which is suitable for most sites
unless you have other specific requirements. Then press ENTER.
(For background information on the choice of the NTFS file
system, refer to Microsoft Knowledge Base Article 0184006.)
Setup now formats the partition, copies the Windows system files
to the partition, and starts rebooting the server.
11. When prompted, remove the diskette and CD-ROM.
Configuring a CLARiiON Boot Device
3-27
3
QLogic_Windows.book Page 28 Thursday, March 10, 2005 10:31 AM
Configuring an EMC Boot Device
3
If your system prompts you to press any key to boot from CD-ROM,
do not press a key; allow the system to boot from the HBA adapter.
After booting, the system continues installation, displays the
Windows banner, and begins autodetection of mass-storage
devices and adapters.
12. Follow the on-screen instructions to complete the installation.
When the Completing the Windows Setup Wizard dialog
appears, click Finish.
13. If you plan to add SCSI disks in the future, you should disable the
BIOS for the managing SCSI controller so that the system does not
attempt to boot from those disks. For information, refer to
Preparing the Server on page 3-22.
14. Install the latest EMC-approved Windows Service Pack as
explained in the Microsoft documentation.
What Next?
Verify that the Fibre Channel HBA drivers and (Windows 2000 only)
digital signatures are installed and started, as described in the next
section.
Verifying HBA Driver and Digital Signature Installation
You should install the HBA driver again here to ensure that the
EMC-required settings are implemented. From the desktop, perform
the appropriate steps:
◆
Windows NT: Follow the procedure under Installation Procedure
for Windows NT Hosts on page 2-15.
◆
Windows 2000: Follow the procedure under Updating the HBA
Driver in a Windows 2000 or Windows 2003 Host on page 2-18.
If duplicate devices appear in the Disk Drives section or Disk
Administrator display, you have made errors in the switch fabric
zoning configuration. Refer to refer to Preparing the Fabric on
page 3-19 for the correct configuration procedure.
If you do not have a driver for Windows 2000 that is digitally signed, check
the EMC section of the QLogic website for an updated driver. (Refer to Where
to Find the Driver on page 2-14.)
3-28
EMC Fibre Channel with QLogic HBAs in the Windows Environment
QLogic_Windows.book Page 29 Thursday, March 10, 2005 10:31 AM
Configuring an EMC Boot Device
What Next?
From here:
◆
If you need to install multipath and failover software, refer to
Installing Multipath and Failover Software.
◆
If you need to start the installation again, refer to Starting a Fresh
Installation.
◆
Otherwise, installation and setup are complete.
Assigning a Permanent Boot Drive Letter for Windows NT
If you have installed failover software into a Windows NT 4.0 server,
it is good practice to hard-code the boot volume letter so that it does
not change when rebooting after a LUN trespass. This can be done by
using the following procedure (from MSKB Q153619):
1. Reassign all drive letters (including C: and the CD-ROM drive) to
higher available letters. (You must do this or C: will be taken once
it becomes available. After reassigning C:, you should receive a
message requiring you to reboot for the new assignment to take
effect.
2. Reboot the server.
On system restart you may receive virtual memory errors; this is normal.
3. Rename all drives to their original letters.
4. Reboot and make an ERD of the new configuration.
Installing Multipath and Failover Software
Multipath and failover software on the host can transfer control of
storage system LUNs on a hardware failure in a LUN path.
Important: If the Navisphere Host Agent is installed, you must
remove it before installing multipath and failover software. (Refer to
the documentation that came with your failover software.) Reinstall
the host agent after installing the multipath and failover software.
Follow these steps to set up the multipath and failover software:
1. Install the software as described in the your EMC ControlCenter
Navisphere Management software, ATF, or PowerPath
documentation.
Configuring a CLARiiON Boot Device
3-29
3
QLogic_Windows.book Page 30 Thursday, March 10, 2005 10:31 AM
Configuring an EMC Boot Device
3
2. Create and enable a zone for each additional HBA and SP port
that will be supported by the multipath and failover software.
Refer to Known Issues on page 3-38 for any additional information.
Installing Additional Navisphere Host Agent Software
The EMC ControlCenter Navisphere Host Agent should be used to
automatically register host connections with the array. PowerPath
and ATF require different registration types and the Navisphere Host
Agent is the preferred method over manual registrations.
You should install the Navisphere Host Agent software to ensure the
HBA connections are all registered correctly. For instructions on how
to perform this operation refer to the EMC ControlCenter Navisphere
Host Agent software documentation for your array type.
After the host agent has started and registered the new HBA paths,
you should refresh the host connections in the storage group to
ensure all available paths are assigned. To do this, you have two
options, depending on whether you want to disrupt the connectivity
of the host:
◆
Without disrupting Host Connectivity (more complex procedure
using Navisphere CLI):
Note: You must have Navisphere CLI installed. Refer to product notes for
complete usage instructions.
RR:1.Using a command prompt, browse to the Navisphere CLI
directory (typically C:\Program Files\EMC\Navisphere
CLI>
6. Enter command navicli -h <sp_IP> storagegroup
-connecthost -host <hostname> -gname
<storagegroupname>
where <sp_IP> is the IP address of either array SP; <hostname>
is the hostname of the host connection to update; and
<storagegroupname> is the name of the storage group of the
host connection to update.
7. When prompted, verify the <hostname> and
<storagegroupname> are correct as follows:
3-30
EMC Fibre Channel with QLogic HBAs in the Windows Environment
QLogic_Windows.book Page 31 Thursday, March 10, 2005 10:31 AM
Configuring an EMC Boot Device
Connect host <hostname> to storage group
<storagegroupname> (y/n)?"
Enter Y to proceed.
8. Perform a device rescan on your host, and verify the
additional device paths are present.
◆
With brief disruption of Host Connectivity (simpler procedure
using Navisphere GUI):
RR:1.Shut down the host.
9. Remove the host from the storage group.
10. Apply the change.
11. Add the host back into the storage group.
12. Restart the host.
13. Check the array connectivity status to ensure all connections
you require are active.
Configuring Additional Boot Port Name Entries in the Boot BIOS
To take advantage of the high-availability features of the HBA boot
BIOS, you must configure additional Boot Port Name entries in the
BIOS for any additional SP ports from which you want the BIOS to
attempt to boot during system startup. Depending on the failover
software installed, follow the appropriate steps:
1. Reboot the host
When the QLogic BIOS banner (shown below) appears, press
CTRL–Q.
Different HBA models may display different banners. Be sure to select
CTRL-Q for the HBA you wish to configure.
QLogic Corporation
QLA2300 PCI Fibre Channel ROM BIOS Version 1.17
Copyright © Qlogic Corporation 1993-1999 All rights reserved
Press <CTRL - Q> for Fast!UTIL
www.qlogic.com
2. After Fast!UTIL loads, the display depends on whether there are
multiple QLogic HBAs installed:
• If there is only one QLogic HBA, the Fast!UTIL Options menu
appears.
Configuring a CLARiiON Boot Device
3-31
3
QLogic_Windows.book Page 32 Thursday, March 10, 2005 10:31 AM
Configuring an EMC Boot Device
3
• If there are multiple QLogic HBAs, a list of addresses occupies
by those HBAs appears. Use the arrow keys to select the
desired HBA; then press ENTER. The Fast!UTIL Options menu
appears.
3. Select Configuration Settings from the menu.
4. Select Selectable Boot Settings from the Configuration Settings
menu.
The first Boot Port Name entry should already be configured (as
described under Configuring the HBA Boot BIOS on page 3-23).
If you want another SP port to be accessible as a potential boot
path to the current owner SP, select the next Boot Port Name
entry, and in the Device window select the CLARiiON port
WWN from which you want to boot.
5. If you have other HBAs for which you want to assign Boot Port
Name entries, you can press ESC to go back to the main menu,
save changes, and select another HBA as shown in step 2. If the
other HBA you wish to configure has its own CTRL-Q BIOS
prompt, reboot the server and configure that HBA's Boot Port
Name entries as you have done here.
6. Trespass the LUN and repeat steps 1 through 5 to configure any
paths over which you want to be able to boot the LUN from the
other SP.
To trespass the LUN, follow the instructions in the EMC
ControlCenter Navisphere Management software documentation
for your array type. The process depends on the failover software
installed:
• With PowerPath configurations, this can usually be done from
the EMC ControlCenter Navisphere Management software
GUI by right-clicking the desired LUN and selecting trespass.
Confirm in the LUN properties that the LUN has trespassed
before you return to configure the remaining Boot Port Name
entries.
• With ATF configurations:
– With FC-series array core code 8.45.x, this can usually be
done from the EMC ControlCenter Navisphere
Management software GUI by right-clicking on the desired
LUN and selecting trespass. Confirm in the LUN
properties that the LUN has trespassed before you return
to configure the remaining Boot Port Name entries.
3-32
EMC Fibre Channel with QLogic HBAs in the Windows Environment
QLogic_Windows.book Page 33 Thursday, March 10, 2005 10:31 AM
Configuring an EMC Boot Device
– With FC-series array core code 8.44.x and earlier, you will
use the atf_trespass command to trespass the boot LUN.
To do this, follow the steps under Trespassing the Boot LUN
Using atf_trespass on page 3-33.
Each HBA can support multiple entries; you should configure Boot Port
Name entries connecting to multiple ports on both SPs for maximum
redundancy in booting after a boot LUN trespass or other link failures.
Refer to Table 3-1 on page 3-37 to determine your high-availability
requirements.
7. When all parameters are set correctly and you have added Boot
Port Name entries for all the SP ports from which you would like
to attempt to boot, press ESC to return to the Fast!UTIL Options
menu; then select Save Changes to save the changes you made to
the current adapter.
8. Press ESC to exit the Fast!UTIL Options menu.
9. Reboot the server.
Trespassing the Boot
LUN Using atf_trespass
Follow these steps to use the atf_trespass command to trespass the
boot LUN:
1. Boot the host and log in to Windows.
2. Windows NT 4.0 will have the boot LUN configured for ID 0 as
described under Preparing the Storage System on page 3-17.
For Windows 2000, follow these steps to determine the LUN ID of
the boot LUN as seen by the host:
a. From the Windows task bar, select Start, Programs,
Administrative Tools, Computer Management.
b. On the Computer Management window, click Disk
Management.
c. Locate the System disk in the list. This is typically Drive C:\
and will be noted with (System).
d. Select the Disk X description area, and from the Action menu,
select Properties.
A display appears with a line similar to the following:
Device Type: SCSI (Port: 3, Target ID: 1, LUN:0)
Configuring a CLARiiON Boot Device
3-33
3
QLogic_Windows.book Page 34 Thursday, March 10, 2005 10:31 AM
Configuring an EMC Boot Device
3
e. Find this Device Type line and note the LUN value. In this
example, the LUN value is 0. This is the Host LUN ID you will
need in the next step.
3. Open a command window and direct the multipath and failover
software to trespass the LUN. If you are using ATF, open a
command prompt and change to the multipath and failover
software directory; then enter the atf_trespass command:
• If the boot LUN is owned by SP A, enter commands in the
following form to transfer it to SP B:
cd
Program Files\emc\atf
atf_trespass atf_sp0
1:1:n
where n is the Host LUN ID you discovered in step 2.
• If the boot LUN is owned by SP B, enter commands in the
following form to transfer it to SP A:
cd
Program Files\emc\atf
atf_trespass atf_sp0 0:1:n
These commands transfer the boot LUN to the other SP so you
can configure it for failover in the HBA BIOS.
4. Reboot the server.
Starting a Fresh Installation
To start a fresh installation:
◆
Using EMC ControlCenter Navisphere Management software,
remove the old boot Storage Group.
◆
Using Manager, unbind the old boot LUN.
◆
Remove any old boot zoning from the previous installation.
◆
Repeat the installation instructions.
Boot Time and LUN Availability
Boot time is the amount of time a storage system requires to boot.
This time is a function of the number and types of LUNs in the
storage system, and is typically less than five minutes.
If you power up a server and storage system at the same time (cold
start), the server’s extended BIOS might scan the Fibre Channel bus
3-34
EMC Fibre Channel with QLogic HBAs in the Windows Environment
QLogic_Windows.book Page 35 Thursday, March 10, 2005 10:31 AM
Configuring an EMC Boot Device
before the storage system is ready to respond. If this occurs, the
server will not be able to find the boot LUN or Windows operating
system. To avoid this problem, either power up the storage system
and fabric before the server, or if the server is so equipped, set it to
delay the scan until the storage system is ready.
Boot Time and LUN Availability
3-35
3
QLogic_Windows.book Page 36 Thursday, March 10, 2005 10:31 AM
Configuring an EMC Boot Device
3
Replacing a Boot HBA
If a boot HBA fails, you can replace it with a new one as described in
this section.
3-36
EMC Symmetrix
Follow the procedure under Configuring a Symmetrix Boot Device.
EMC CLARiiON
◆
Shut down and power off the server.
◆
Replace the HBA in the identical location and reconnect cabling.
◆
(Fabric configuration only) Repeat the procedure under Preparing
the Fabric on page 3-19, and replace the old HBA’s WWPN with
the new HBA’s WWPN.
◆
Repeat the procedure under Verifying HBA Driver and Digital
Signature Installation on page 3-28.
EMC Fibre Channel with QLogic HBAs in the Windows Environment
QLogic_Windows.book Page 37 Thursday, March 10, 2005 10:31 AM
Configuring an EMC Boot Device
How a Server Responds to Failure in the Boot LUN Path
Failure in the path to a SAN-based boot LUN can halt Windows in a
fatal error condition. Depending on the failure, Windows may be able
to transfer control to another path and continue.
Table 3-1 shows server reactions to failures in different components.
Table 3-1
Configuration
Server Response to Failure in the Boot LUN Path (Single Fault)
HBA Failure
Boot
SP/Director
Switch Failure Port Failure
Boot
SP/Director
Failure
Catastrophic
Storage
System Failure
Multipath
STOP error a
Multipath
Trespass b
STOP error
Halt
Halt
Halt
Halt
Halt
Power up
Multipath
No Boot a
Multipath
Manual
No Boot
Windows running
STOP error
STOP error
Trespass
Trespass b
STOP error
Windows booting
Halt
Halt
Halt
Halt
Halt
Power up
No boot
No boot
Manual
Manual
No boot
STOP error
STOP error
STOP error
STOP error
STOP error
Halt
Halt
Halt
Halt
Halt
No boot
No boot
No boot
No boot
No boot
Server State
2 or more HBAs, Windows running
failover software
Windows booting
1 HBA, failover
software
1 HBA, no
Windows running
failover software
Windows booting
Power up
a. Depending on the fabric configuration, if multiple switches are used, then this behavior would
qualify under the Multipath category.
b. CLARiiON only.
Explanations of Entries
◆
STOP Error (fatal blue screen) — Indicates host failure and
chance of data corruption.
◆
No boot — Cannot boot Windows.
◆
Halt — Windows cannot recover before system has completed
startup. (You must reboot and follow the power-up scenario.)
◆
Manual — Manual intervention is required to continue.
(Typically, initiate a LUN trespass using CLI or Manager. With
Manager, enable LUN Auto-Assignment in LUN properties.)
◆
Multipath or Trespass — This automatic operation allows no
disruption of service. (The delay caused by this operation may
affect Windows stability.)
How a Server Responds to Failure in the Boot LUN Path
3-37
3
QLogic_Windows.book Page 38 Thursday, March 10, 2005 10:31 AM
Configuring an EMC Boot Device
3
Known Issues
Be aware of these issues:
3-38
◆
QLogic BIOS 1.26 and later for QLA23xx and BIOS 1.79 and later
for QLA22xx HBAs allow for multiple Boot Port Name entries to
be configured for high-availability booting after path failures.
Previous BIOS versions do not support this functionality, will
boot only from a single storage array port, and cannot provide
boot capability with path failures.
◆
NTOSKNL BSOD (blue screen) during a link down event can
cause filesystem corruption to mounted filesystems.
◆
HBA boot BIOS does not support high availability while the OS is
booting. It can handle path failures at boot initialization time, and
after the OS has loaded. Path failures while the OS is loading will
require the host to reboot before successfully completing the boot
process. Refer to How a Server Responds to Failure in the Boot LUN
Path on page 3-37 for additional information.
◆
Degraded response time as the I/O load approaches storage
system capacity can make the OS appear hung or result in a
NTOSKNL BSOD.
◆
Boot files, Windows system files, and swap space should all be on
the boot LUN. With certain server models, you can use an internal
disk for the page file for stability; however, this might not
increase fault tolerance and might reduce system recovery
options.
◆
Swap space must be available on %SYSTEMROOT% or core dump
will fail.
◆
For Windows 2003 on 64-bit IA64-2 servers, the system no longer
uses an x86-compatible BIOS; therefore, enabling boot-from-array
support with the HBA requires a separate firmware EFI
download.
EMC Fibre Channel with QLogic HBAs in the Windows Environment
QLogic_Windows.book Page 1 Thursday, March 10, 2005 10:31 AM
4
Invisible Body Tag
Installing and
Configuring the
QLogic QLA4010 iSCSI
HBA (TOE)
The QLA4010/4010C is an iSCSI HBA that provides PCI connectivity
to SCSI using the iSCSI protocol. iSCSI enables IP-based SANs,
which are similar to Fibre Channel SANs. The QLA4010/4010C HBA
implements TCP/IP protocol on the HBA and off-loads the host of
any I/O protocol processing. This type of adapter also is called a
TCP/IP Offload Engine (TOE) adapter. Off-loading the host frees the
system to perform other tasks and optimizes system performance.
◆
◆
◆
◆
◆
◆
◆
Installing the HBA Driver.................................................................4-2
Windows 2003 STORPort Updates ..................................................4-2
Updating the HBA Driver in a Windows 2000 or Windows 2003
Host ......................................................................................................4-4
Using the QLogic iSCSI SANSurfer Application to Configure
iSCSI Devices ......................................................................................4-6
Using the QLogic iSCSI SANSurfer Application to Configure
iSCSI Devices ......................................................................................4-6
Configuring iSNS settings for QLA4010.........................................4-8
Installing and Configuring the QLA4010 iSCSI HBA to boot from
an EMC Storage Array ....................................................................4-14
Installing and Configuring the QLogic QLA4010 iSCSI HBA (TOE)
4-1
QLogic_Windows.book Page 2 Thursday, March 10, 2005 10:31 AM
Installing and Configuring the QLogic QLA4010 iSCSI HBA (TOE)
4
Installing the HBA Driver
To use EMC storage array disks with a Windows host, you need an
EMC-qualified HBA driver. The HBA kit includes an EMC-approved
driver, which must be installed and configured prior to partitioning
the storage array disks. You should also check the QLogic website for
the latest EMC-approved version. To ease installation of the driver,
unzip the driver file onto a blank diskette or temporary folder on the
hard disk.
Windows 2003 STORPort Updates
Installation Procedure for Windows 2000 and Windows 2003 Hosts
Currently, the shipping version of Windows 2003 requires post-RTM
hotfixes to resolve some known issues. For all Windows 2003 STORPort installations, you should obtain the current Microsoft QFE hotfix
listed in the EMC Support Matrix with the HBA driver revisions.
Install this hotfix before installing the HBA driver.
To install the driver into a Windows 2000 or Windows 2003 host, follow these steps:
1. Boot the host with Windows 2000 or Windows 2003.
2. From the Windows taskbar, select Start, Programs,
Administrative Tools, Computer Management.
3. In the left pane of the Computer Management dialog, click the
Device Manager icon.
4. If Windows Plug-n-Play does not detect your QLA4010 HBA
model, it will be listed as Unknown or as a Network Controller
under the Other Devices icon in the right pane.
Windows 2000 configurations with Service Pack 4 or higher and
Windows 2003 configurations may be able to detect QLA4010
HBAs. If this occurs, the HBA will already be listed under SCSI
Devices; instead of proceeding with these installation steps,
follow the instructions under Updating the HBA Driver in a
Windows 2000 or Windows 2003 Host on page ?
5. Double-click the first instance of Unknown or Network
Controller under Other Devices.
4-2
EMC Fibre Channel with QLogic HBAs in the Windows Environment
QLogic_Windows.book Page 3 Thursday, March 10, 2005 10:31 AM
Installing and Configuring the QLogic QLA4010 iSCSI HBA (TOE)
6. In the next dialog, click ReInstall Driver, and then, click Next.
7. Select Display a list of the known drivers for this device so that
you can choose a specific driver, and then click Next.
8. Select SCSI and RAID Controllers, and then click Next.
9. Click Have Disk.
10. Enter the path to the diskette containing the driver (for example,
A:\), then click OK.
11. Select the appropriate QLogic HBA from the list of drivers that
appears; then click Next.
12. Click Next in the next dialog.
13. Click YES to continue the installation.
14. Click Finish to complete the driver installation.
15. The system requests that you reboot the system. Select No and
click Close.
16. The system again requests that you reboot the system. Select NO
again.
17. If other QLogic HBAs are installed, repeat steps 5 through 16 until
all adapters are installed.
18. Reboot the host.
Windows 2003 STORPort Updates
4-3
4
QLogic_Windows.book Page 4 Thursday, March 10, 2005 10:31 AM
Installing and Configuring the QLogic QLA4010 iSCSI HBA (TOE)
4
Updating the HBA Driver in a Windows 2000 or Windows 2003
Host
On Windows 2000 and Windows 2003 systems where the QLogic
HBA is detected automatically or a driver already is installed, it
might be necessary to update the current driver to the latest
EMC-qualified driver as described in this section. The following procedure assumes that you have already copied the latest driver from
the QLogic CD-ROM or downloaded it from the QLogic website and
put it onto a diskette or temporary folder on the hard disk. Refer to
the release notes provided with the driver for information that might
be unique to new driver revisions.
To install the driver into a Windows 2000 or Windows 2003 host:
1. Boot the host (if necessary) with Windows 2000 or Windows 2003.
2. From the Windows taskbar, click Start, Programs, Administrative
Tools, Computer Management.
3. In the left pane of the Computer Management dialog, click the
Device Manager icon.
4. Double-click the SCSI & RAID Controllers icon.
5. Under SCSI & RAID Controllers, double-click the adapter you
wish to upgrade.
6. In the next dialog, click the Driver tab; then click Update Driver.
7. Follow the update wizard until you are given the choice to
Display a list of the unknown drivers for this device so that I can
choose a specific driver. Click the button next to this choice; then
click Next.
8. In the Select a Driver dialog, click Have Disk.
9. Enter the path to the diskette containing the driver (A:\, for
example), or use the browse function to locate the driver; then
click OK.
10. Select the driver that is discovered, and click Next.
11. In the next dialog, click Next.
12. If prompted, click Yes to continue the installation.
13. Click Finish to complete the installation.
4-4
EMC Fibre Channel with QLogic HBAs in the Windows Environment
QLogic_Windows.book Page 5 Thursday, March 10, 2005 10:31 AM
Installing and Configuring the QLogic QLA4010 iSCSI HBA (TOE)
14. If the system requests that you reboot the system and you have
other adapters to update, select NO; then click Close.
15. If the system again requests that you reboot the system and you
have other adapters to update, select NO; then click Close.
16. If you have other adapters to update, select the next adapter
under SCSI & RAID Controllers and repeat steps 6 through 15.
When all adapters have had their drivers updated, select Yes
when prompted to reboot.
Updating the HBA Driver in a Windows 2000 or Windows 2003 Host
4-5
4
QLogic_Windows.book Page 6 Thursday, March 10, 2005 10:31 AM
Installing and Configuring the QLogic QLA4010 iSCSI HBA (TOE)
4
Using the QLogic iSCSI SANSurfer Application to Configure iSCSI
Devices
QLogic provides a minimal version of their SANSurfer software that
is used to configure settings for the QLA4010 iSCSI HBA. For configurations not using Microsoft’s iSCSI Initiator, the SANSurfer iSCSI
HBA Manager should be used to configure your iSCSI HBAs.
Install the SANSurfer iSCSI HBA Manager on your server using the
self-extracting executable installation package (available in the EMC
QLA4010 CD-ROM kit or from the qLogic website
http://www.qlogic.com.) During installation, you may choose
whether to install both the GUI and Agent, or just the GUI. If you are
installing on the system that has the QLA4010 HBA(s) installed,
install both the GUI and Agent.
After SANSurfer is installed, it can be started from the Start menu, or
from the desktop icon if you choose to create one. Start the software,
and you will reach the connection dialog shown below:
Click Connect in the upper left corner of the SANsurfer iSCSI HBA
Manager window to get the Connect to Host dialog. You are asked
4-6
EMC Fibre Channel with QLogic HBAs in the Windows Environment
QLogic_Windows.book Page 7 Thursday, March 10, 2005 10:31 AM
Installing and Configuring the QLogic QLA4010 iSCSI HBA (TOE)
which host to connect to. Assuming you are running the software on
the server with the HBA(s) installed, keep the default name of “localhost” as the host name, and click Connect.
On the GUI, the left pane displays discovered iSCSI HBAs. Click on
the desired HBA in order to change its settings. The GUI defaults to
the HBA Options dialog selected with the row of tabs at the top.
From the HBA Options dialog, you can set the iSCSI HBA parameters including IP address, subnet mask, and gateway. If an iSNS
server is being used for your iSCSI configuration follow the procedure for setting up iSNS later in Configuring iSNS settings for QLA4010
on page 4-8.
Using the QLogic iSCSI SANSurfer Application to Configure iSCSI Devices
4-7
4
QLogic_Windows.book Page 8 Thursday, March 10, 2005 10:31 AM
Installing and Configuring the QLogic QLA4010 iSCSI HBA (TOE)
4
Configuring iSNS settings for QLA4010
For iSNS support, the QLA4010 must be running the correct driver
(see the EMC Support Matrix for latest version.)
Targets must register with the iSNS server. To register, enable the
iSNS server and enter the IP address using the SANsurfer GUI. Click
Save HBA under the Network dialog box in the GUI. The target
should be detected by SANsurfer in the Target Settings dialog. Click
SAVE Settings to bind the targets.
If the targets are not detected, follow these steps:
1. Ping successfully to the iSNS server using Diagnostics tab from
SANsurfer iSCSI HBA Manager window.
2. Go to iSNS server and iSNS server icon in the control panel or
desktop
3. Open Discovery Domain and confirm that both the QLA4010
and target ports are registered with the domain.
4-8
EMC Fibre Channel with QLogic HBAs in the Windows Environment
QLogic_Windows.book Page 9 Thursday, March 10, 2005 10:31 AM
Installing and Configuring the QLogic QLA4010 iSCSI HBA (TOE)
To update firmware on your iSCSI HBA, click the Firmware tab on
the HBA Options dialog.
Click Select Firmware to Download. In the window that appears,
type in the path to the firmware file that you wish to load to the HBA
and click Save.
Configuring iSNS settings for QLA4010
4-9
4
QLogic_Windows.book Page 10 Thursday, March 10, 2005 10:31 AM
Installing and Configuring the QLogic QLA4010 iSCSI HBA (TOE)
4
The firmware will be loaded to the specified HBA. Once loaded,
SANsurfer will reset the HBA so that the new firmware will take
effect.
Boot BIOS for the iSCSI HBA can be loaded in a similar fashion.
From the SANsurfer iSCSI HBA Manager, HBA Option dialog, click
the BIOS tab.
4-10
EMC Fibre Channel with QLogic HBAs in the Windows Environment
QLogic_Windows.book Page 11 Thursday, March 10, 2005 10:31 AM
Installing and Configuring the QLogic QLA4010 iSCSI HBA (TOE)
To configure your iSCSI targets, click the Target Settings tab from the
SANsurfer iSCSI HBA Manager window.
To add your target, click the green “plus sign” on the right side of the
Target Settings dialog. You are prompted to enter the IP address of
your target port
.
Configuring iSNS settings for QLA4010
4-11
4
QLogic_Windows.book Page 12 Thursday, March 10, 2005 10:31 AM
Installing and Configuring the QLogic QLA4010 iSCSI HBA (TOE)
4
You may add as many targets as you need to here. If you need to
enter CHAP security for any of the targets, click Config Authentication at the bottom of the dialog.
You can set a default name and secret for all targets, or click the individual target and enter unique name and secret settings for that target. Note that initiator CHAP settings do not get masked and could
be compromised if an unauthorized user accesses the SANsurfer
workstation.
After CHAP settings are made, click OK. To save all target settings,
click the Save button. You will be prompted for the SANsurfer secu4-12
EMC Fibre Channel with QLogic HBAs in the Windows Environment
QLogic_Windows.book Page 13 Thursday, March 10, 2005 10:31 AM
Installing and Configuring the QLogic QLA4010 iSCSI HBA (TOE)
rity password. The default password is “config” but may be
changed.
When settings have been saved, SANsurfer will reset the HBA and if
target information has been discovered properly, you will see active
connections under the Target Information dialog. Also, you can few
active targets under the HBA in the left pane as shown in this diagram.
SANsurfer has other features that are useful in managing your iSCSI
storage configuration. Please refer to QLogic’s SANsurfer documentation for more information about these extra features.
Configuring iSNS settings for QLA4010
4-13
4
QLogic_Windows.book Page 14 Thursday, March 10, 2005 10:31 AM
Installing and Configuring the QLogic QLA4010 iSCSI HBA (TOE)
4
Installing and Configuring the QLA4010 iSCSI HBA to boot from
an EMC Storage Array
The procedure below describes how to install and configure the boot
BIOS.
Installing Boot BIOS on the QLA4010 iSCSI HBA from DOS
By default, the QLA4010 iSCSI HBA does not ship with Boot BIOS
installed. Without Boot BIOS, the HBA cannot be configured to boot
from an external storage array. Follow these steps to install Boot
BIOS from DOS.
Note: Boot BIOS also can be installed using the SANSurfer utility.
1. Create a DOS-bootable floppy disk.
2. Copy the Boot BIOS .BIN file and QLogic flash utility onto the
floppy. For the latest version of Boot BIOS refer to the EMC
support matrix. The necessary files are: ql4010rm.bin,
iFLASH.exe, and dos4gw.exe.
3. Boot the server with the floppy.
4. At the DOS prompt, type iFLASH /fb (this will program BIOS to
all detected HBAs in the server.)
5. The iFLASH utility will display a message if the update was
successful.
Setting Up the HBA BIOS
After the HBA is installed in the host and the EMC array is connected
to iSCSI network, you can configure an EMC-qualified QLogic iSCSI
HBA for boot support using Fast!UTIL, as described below:
1. Boot the server, and press CTRL-Q when you see the QLogic
banner.
Different HBA models may display different banners. Be sure to
select CTRL-Q for the HBA you wish to configure.
4-14
EMC Fibre Channel with QLogic HBAs in the Windows Environment
QLogic_Windows.book Page 15 Thursday, March 10, 2005 10:31 AM
Installing and Configuring the QLogic QLA4010 iSCSI HBA (TOE)
2. After Fast!UTIL loads, the display depends on whether there are
multiple QLogic HBAs installed:
• If there is only one QLogic HBA, the Fast!UTIL Options menu
appears.
• If there are multiple QLogic HBAs, a list of addresses occupies
by those HBAs appears. Use the arrow keys to select the
desired HBA; then press ENTER. The Fast!UTIL Options menu
appears.
3. Select Configuration Settings from the menu.
4. Select Host Adapter Settings, and enable Host Adapter BIOS.
5. Set the LUNs per target to 256.
6. Set the Initiator IP address (EMC does not currently support
DHCP for iSCSI HBAs.)
7. Set the subnet mask for the iSCSI HBA.
8. Set the network gateway IP address.
9. Select the Initiator iSCSI name, and press ENTER. This will display
the complete IQN (iSCSI Qualified Name) for the iSCSI HBA.
This is similar to the WWN for a fibre-channel HBA. Make a note
of the IQN for LUN masking purposes if LUN masking is in use
on your storage array.
10. If you are using CHAP security for your iSCSI network, enter the
CHAP name and CHAP secret in the appropriate locations in the
setting menu.
11. Press ESC to return to the previous menu.
12. Select iSCSI Boot Settings.
13. Select iSCSI Boot, and set it to enabled.
14. Select Primary Boot Device Settings, and press ENTER. Under the
Primary Boot Device Settings dialog that appears, enter the
security settings (if necessary), target (array port) IP address, and
the target port (default of 3260 is the default port number for
Symmetrix and CLARiiON iSCSI ports.) Boot LUN and iSCSI
Name can be left blank.
15. Press ESC to return to the iSCSI Boot Settings dialog.
16. If you have a alternate boot port that you wish to use, select the
Alternate Boot Settings, and repeat the steps in 14 above to set the
second port.
Installing and Configuring the QLA4010 iSCSI HBA to boot from an EMC Storage Array
4-15
4
QLogic_Windows.book Page 16 Thursday, March 10, 2005 10:31 AM
Installing and Configuring the QLogic QLA4010 iSCSI HBA (TOE)
4
17. Press ESC to return to the Configuration Settings dialog.
18. Press ESC again, and you will be prompted to save changes.
Select Save changes, and press ENTER.
19. Select Configuration Settings again, and press ENTER.
20. Select iSCSI Boot Settings, and press ENTER.
21. To scan for your boot port, you can press enter on the primary
boot device at the top of the Boot Settings dialog. The HBA will
scan for targets and display them. If more than one target port is
located, it will be displayed. It is helpful to know the IQN of your
target port in order to select the correct target at this point. Select
the target IQN of your target, and press ENTER.
22. The HBA will display the available LUNs under the selected
target port. Select the LUN that you wish to boot from, and press
ENTER. You may need to use the PAGE DOWN button to locate your
boot LUN.
23. If you have an alternate boot target configured, repeat steps
above to select the boot LUN for the alternate boot device.
24. When all boot LUNs have been selected, press ESC until you are
prompted to save your changes. Once saved, the iSCSI HBA is
ready to boot from the external array. Press ESC at the Fast!UTIL
Options menu to reboot the host.
Installing the Windows OS onto the Boot Device
Follow the appropriate steps below to install the Windows operating
copy the latest QLA4010 driver to a floppy disk for use during the
installation procedure.
1. Boot the server with Windows 2000/2003 installation CD-ROM.
The server displays the following message, followed by a blank
blue screen.
Setup is inspecting your computer’s hardware configuration…
Press F6 as soon as the blue screen appears. Pressing F6 tells the
Windows installer that you want to load a third-party driver
before proceeding with the installation.
2. Setup will begin loading necessary drivers for installation.
Eventually, a dialog message will tell you that the setup program
cannot determine the type of one or more mass storage devices.
4-16
EMC Fibre Channel with QLogic HBAs in the Windows Environment
QLogic_Windows.book Page 17 Thursday, March 10, 2005 10:31 AM
Installing and Configuring the QLogic QLA4010 iSCSI HBA (TOE)
From this point, press S to specify additional devices. You will
need to select Other and press ENTER.
3. Insert the diskette with the QLogic driver into the diskette drive,
and press ENTER.
4. Select the driver by pressing ENTER. The driver loads and you are
brought back to the Additional Devices dialog.
5. If you want to specify drivers for other devices installed in your
system, do so; otherwise press ENTER at the Additional Devices
dialog to continue with Windows installation.
6. Continue the installation procedure as though you were installing
to an internal hard disk. Choose the correct boot disk for your
iSCSI HBA from the list of discovered LUNs.
Windows 2000
For detailed installation instructions on the HP ProLiant BL20p G2
and BL40p, refer to HP ProLiant BL p-Class server blades Booting Windows systems from 3rd party Storage Array Network (SAN), How To,
located here:
ftp://ftp.compaq.com/pub/supportinformation/techpubs/
other/5982-3248en_rev1_us.pdf
After completing Windows installation, reinstall the QLogic driver
using the steps under Installation Procedure for Windows 2000 and Windows 2003 Hosts on page 2-16.
NOTE: For Windows 2003 installations using the QLogic STORPort driver, it
will be necessary to install the latest supported Microsoft STORPort hotfix
(QFE). Refer to the EMC Support Matrix for the current hotfix version.
Installing and Configuring the QLA4010 iSCSI HBA to boot from an EMC Storage Array
4-17
4
QLogic_Windows.book Page 18 Thursday, March 10, 2005 10:31 AM
Installing and Configuring the QLogic QLA4010 iSCSI HBA (TOE)
4
4-18
EMC Fibre Channel with QLogic HBAs in the Windows Environment
QLogic_Windows.book Page 1 Thursday, March 10, 2005 10:31 AM
A
Invisible Body Tag
Third-Party Software
This appendix contains additional information about third-party
software used with Windows hosts.
◆
◆
QLogic SANSurfer SANBlade Manager........................................A-2
VERITAS Volume Manager 3.x for Windows 2000 ......................A-4
Third-Party Software
A-1
QLogic_Windows.book Page 2 Thursday, March 10, 2005 10:31 AM
Third-Party Software
A
QLogic SANSurfer SANBlade Manager
Stratus ftServers are not supported using the qLogic SANSurfer SANBlade
Manager Software or Agents.
EMC has approved the use of a specialized version of the QLogic
SANSurfer SANBlade Manager for use with attached EMC
Symmetrix and CLARiiON storage arrays. Only the versions listed
below should be used; these versions are posted in the EMC section on
the QLogic website.
This Windows utility provides information on the installed QLogic
HBAs, driver versions, mapped targets, statistics, and configuration
settings. It also has a feature to update the HBA firmware/BIOS and
NVRAM. (You should obtain the latest EMC-approved
firmware/BIOS and NVRAM files from the QLogic website. Refer to
Downloading QLogic Drivers and Firmware on page 2-2 for
instructions.)
For information on the use and features of the QLogic SANSurfer
SANBlade Manager utility, refer to the documentation posted with
this utility.
A-2
EMC Fibre Channel with QLogic HBAs in the Windows Environment
QLogic_Windows.book Page 3 Thursday, March 10, 2005 10:31 AM
Third-Party Software
A
SANSurfer Version
History
SANSurfer versions include:
◆
2.0.21 — Initial Release
The SANSurfer software is not multipath-aware, and as such may
misreport HBA targets that are configured in multipath. This does not
affect the use of the tool; however, it will accurately report targets only on
ports that own an active LUN0.
◆
2.0.25 — Added target persistent binding capability and display
correction for LUNs on non-owning SP. (This functionality is
supported by QLogic; all usage questions and support issues
should be directed to QLogic.)
SANSurfer 2.0.25 cannot be used to upgrade to BIOS 1.4x. Until a later
SANSurfer is available, you will need to use the procedureUpdating
Using a DOS Boot Diskette on page 2-11 to perform this upgrade.
This version of SANSurfer may display HBA options under different
menu names than appear in the HBA CTRL-Q menu, as well as in
previous SANSurfer versions. All user-configurable options are still
accessible.
QLogic SANSurfer SANBlade Manager
A-3
QLogic_Windows.book Page 4 Thursday, March 10, 2005 10:31 AM
Third-Party Software
A
VERITAS Volume Manager 3.x for Windows 2000
Refer to the latest EMC Support Matrix to determine which VERITAS Volume
Manager 3.x configurations are supported, and what service packs may be
required.
!
CAUTION
Configuring large numbers of device paths with VERITAS Volume
Manager can cause a Windows system to boot very slowly, and in
some cases overrun the NTLDR boot-time registry size and halt.
Systems that are configured with more than 512 device paths (total
paths to all LUNs) should check with EMC Customer Service
before installing VERITAS Volume Manager 3.x.
The C-bit is required on Symmetrix director ports connected to systems
running VERITAS DMP. Users of EMC ControlCenter 5.1 and greater should
consult their ControlCenter documentation for directions on making this
change. Other users must contact their EMC representative to make this
change.
VERITAS Volume Manager 3.0
If using PowerPath with VERITAS Volume Manager 3.0 with Service
Pack 1, you must also make the following registry modifications
before PowerPath devices will be available to the VERITAS
Enterprise Manager:
Use regedt32.exe to set the registry as follows:
HKEY_LOCAL_MACHINE\SOFTWARE\VERITAS\VxSvc\CurrentVersion\VolumeManager
value name = ShowGateKeeperDevices
data type = REG_DWORD
value = 0x1
HKEY_LOCAL_MACHINE\SOFTWARE\VERITAS\VxSvc\CurrentVersion\VolumeManager
value name = ShowEmcHiddenDevices
data type = REG_DWORD
value = 0x1
After completing these changes, reboot the host system.
A-4
EMC Fibre Channel with QLogic HBAs in the Windows Environment
QLogic_Windows.book Page 5 Thursday, March 10, 2005 10:31 AM
Third-Party Software
A
VERITAS Volume Manager 3.1 and VERITAS DMP
If using PowerPath with VERITAS Volume Manager 3.1, you also
need VERITAS Volume Manager Service Pack 1.
EMC and VERITAS now provide a Dynamic Multipathing (DMP)
Driver Update for VERITAS DMP to interface with CLARiiON CX
series arrays, providing DMP high-availability capability. Refer to the
EMC Support Matrix for the minimum supported revisions of VxVM
and DMP, as well as the CLARiiON Dynamic Multipathing Driver
update.
VERITAS Foundation Suite 4.1
Foundation suite encompasses VERITAS Volume Manager as well as
other available volume management software utilities. Refer to the
EMC Support Matrix for supported features of Foundation Suite.
For version 4.1, Volume Manager and DMP are supported with
SCSIPort drivers only. VERITAS does not support STORPort drivers
for Windows 2003 configurations.
VERITAS Foundation Suite 4.2
Foundation suite encompasses VERITAS Volume Manager as well as
other available volume management software utilities. Refer to the
EMC Support Matrix for supported features of Foundation Suite.
For version 4.2, Volume Manager and DMP are supported with both
SCSIPort and STORPort drivers. For Windows 2003 STORPort driver
configurations, the Microsoft STORPort hotfix is necessary. Refer to
the EMC Support Matrix for current STORPort hotfix versions.
Foundation Suite encompasses VERITAS Volume Manager as well as other
available volume management software utilities. Refer to the EMC Support
Matrix for supported configurations and features of Foundation Suite. For
version 4.2, Volume Manager and DMP are supported with both SCSIPort
and STORPort drivers. For Windows 2003 STORPort driver configurations,
the Microsoft STORPort hotfix is necessary. Refer to the EMC Support Matrix
for current supported VERITAS versions, configurations and driver versions.
VERITAS Volume Manager 3.x for Windows 2000
A-5
QLogic_Windows.book Page 6 Thursday, March 10, 2005 10:31 AM
Third-Party Software
A
A-6
EMC Fibre Channel with QLogic HBAs in the Windows Environment
QLogic_Windows.book Page 1 Thursday, March 10, 2005 10:31 AM
B
Invisible Body Tag
Troubleshooting
This appendix contains information on troubleshooting problems.
◆
Problems and Solutions.................................................................... B-2
Troubleshooting
B-1
QLogic_Windows.book Page 2 Thursday, March 10, 2005 10:31 AM
Troubleshooting
B
Problems and Solutions
Problem 1
Error Message ID: 51 in event viewer when attempting to install
multiple host access (for clustering) to the same EMC CLARiiON
array storage group. The text of the message is:
An Error was detected on device \Device\Harddisk<x>\DR<x>
during a paging operation
Solution
Problem 2
EMC Primus case emc29097 — If using HBAs connected to both
CLARiiON SPs, without PowerPath installed, duplicate LUNs will be
visible in the Device Manager and Disk Manager. Only one instance
of the LUN will be accessible, and all other matching mappings will
be listed as Unknown, Unreadable and Unallocated.
Solution
Problem 3
Until host cluster software is installed, only a single host should
access a storage group at a time. Refer to the EMC Support Matrix for
supported host configurations.
This is normal behavior when multiple paths are available,
PowerPath is not installed, and the initiator type is registered in
PowerPath mode (array default depending on core code revision).
EMC Primus case emc69307 — When using QLogic HBAs in a
Brocade fabric environment, after upgrading Brocade 3900-series
switch firmware to 3.0.2m, the HBAs report repeated link errors, and
intermittently lose fabric connectivity.
PowerPath may report paths lost and then found in quick succession,
and repeated Windows 2000 event log error entries for Link
Down/Link Up events similar to the following:
Event ID: 11
Source: ql2300
Description: The driver detected a controller error on \Device\Scsi\ql2300x.
Data (words): offset 34 = 80120000 [ErrorCode: Link down error]
Event ID: 11
Source: ql2300
Description: The driver detected a controller error on \Device\Scsi\ql2300x.
Data (words): offset 34 = 80110000 [ErrorCode: Link up]
B-2
EMC Fibre Channel with QLogic HBAs in the Windows Environment
QLogic_Windows.book Page 3 Thursday, March 10, 2005 10:31 AM
Troubleshooting
B
Solution
Problem 4
Upgrade to the latest HBA driver. This was corrected for Windows
2000 in 8.2.2.25 and later drivers. Windows 2003 driver 8.2.2.20 and
later already contain this correction.
EMC Primus case emc69308 — Direct-connect to EMC CLARiiON
CX200 reports incorrect queue full error messages. Even under light
I/O, a host may log a message noting that disk has reached a
queue-full state similar to the following in the Windows event
viewer:
Event ID: 11
Source: ql2300
Description: The driver detected a controller error on \Device\Scsi\ql2300x.
Data (words): offset 34 = F003001C [ErrorCode: Target device queue full].
Solution
Problem 5
Upgrade to the latest HBA driver. This was corrected in version
8.2.2.25 and later drivers.
Windows 2000 Hosts running less than SP4 could be susceptible to
data loss during LUN expansion operations.
Solution
Problem 6
This issue is corrected by Microsoft in SP4, or by applying hotfix
327020. Refer to EMC Solution IS emc73538 and Microsoft
Knowledge Base article 327020 for more information.
For Windows 2003, the STORPort drivers 8.2.3.26 with Microsoft
hotfix Q823728 and earlier do not yet fully support all Microsoft VSS
functions.
Solution
This was first corrected in Microsoft QFE hotfix Q837413 and to be
used with minimum 8.2.3.27 driver. You should also use minimum
Microsoft VSS QFE 833167.
Problems and Solutions
B-3
QLogic_Windows.book Page 4 Thursday, March 10, 2005 10:31 AM
Troubleshooting
B
Problem 7
When using SANSurfer 2.0.25 to update to BIOS 1.4x, you receive the
message as follows:
Incorrect BIOS file selected.
The selected BIOS file does not match the selected HBA type.
Check your file and try again.
Solution
Problem 8
IBM eServer BladeCenter HS20 Fibre Channel Expansion Card
48P7061 may not update all HBA BIOS in the system when using
FLASUTIL.
Solution
B-4
SANSurfer 2.0.25 does not support flashing the 1.4x BIOS, you need
to use the DOS FLASUTIL utility. This will be corrected in a future
SANSurfer release.
You may need to run FLASUTIL multiple times, and use /F to specify
specific HBAs to update. Refer to the FLASUTIL instructions for
further information.
EMC Fibre Channel with QLogic HBAs in the Windows Environment
QLogic_Windows.book Page 1 Thursday, March 10, 2005 10:31 AM
Index
A
adapter BIOS 2-2
adapter topology 2-13
B
binding, persistent 1-2, 1-3
BIOS
adapter 2-2
file 2-11
updating 2-10
boot BIOS, configure 3-5
boot code, QLogic EFI 3-8
boot device, configuring
CLARiiON 3-14
overview 3-2
Symmetrix 3-5
boot LUN 3-3
boot process, Windows 1-3
boot time and LUN availability 3-35
boot-from-SAN 3-4
discovery, disk 1-3
disk discovery 1-3
disk performance counters 3-3
disk signature 1-2
driver, HBA
downloading 2-2
installing
in Windows 2000 host 2-16
in Windows 2003 host 2-16
in Windows NT host 2-15
overview 2-14
revision history 2-14
updating
in Windows 2000 host 2-18
in Windows 2003 host 2-18
drives, physical 1-2
E
Extensible Firmware Interface (EFI) 3-8
F
C
CLARiiON storage 2-4
configurations, valid 3-16
crashdumps 3-4
D
data rate setting 2-12
data rate, HBA, setting manually 2-12
devices
raw 1-2
storage 1-3
failure in boot LUN path, server response to 3-37
Fast!UTIL 3-5
Fibre Channel HBA driver 2-14
Fibre-Down servers 2-10
file
BIOS 2-11
NVRAM 2-8, 2-11
firmware, HBA
downloading 2-2
updating 2-10
ftServers, Stratus 2-4, 2-9
EMC Fibre Channel with QLogic HBAs in the Windows Environment
i-1
QLogic_Windows.book Page 2 Thursday, March 10, 2005 10:31 AM
Index
H
T
hard zoning (switch) 3-21
HBA driver 2-14
HBA, boot, replacing 3-36
HBA, installing 2-3
topology requirements 3-16
topology, HBA, setting 2-13
troubleshooting B-1
V
I
VERITAS Volume Manager 3.0 A-4
issues with boot support 3-38
W
L
logical routing 1-2
LUN availability and boot time 3-35
N
NVRAM
file 2-8, 2-11
settings 2-8, 2-10
P
persistent binding 1-2, 1-3
physical drives 1-2
Windows 2003 STORPort installations 2-15
Windows boot process 1-3
Windows drivers 2-2
Windows OS, installing onto a CLARiiON boot
device 3-25
Windows Performance Monitor 3-3
Z
zoning
hard 3-21
soft 3-20
Q
QLogic EFI boot code 3-8
R
raw devices 1-2
routing, logical 1-2
S
SANSurfer SANBlade Manager A-2
server response to failure in boot LUN path 3-37
servers
Fibre-Down 2-10
Stratus ftServers 2-9
settings, NVRAM 2-8, 2-10
soft zoning (switch) 3-20
storage devices 1-3
STORPort installations, Windows 2003 2-15
Stratus ftServers 2-4, 2-9
i-2
EMC Fibre Channel with QLogic HBAs in the Windows Environment