1
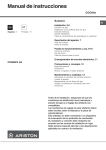
T
ReflexPro DVD User Guide
Version 1.1
1-800-237-6666
www.discmakers.com
T
01
COPYRIGHT
Copyright 2003 by Disc Makers. All rights reserved. This item and the information contained herein are the property of Disc Makers. No part of this document
may be reproduced, transmitted, transcribed, stored in a retrieval system, or
translated into any language or computer language in any form or by any
means, electronic, mechanical, magnetic, optical, chemical, manual, or otherwise, without the express written permission of Disc Makers.
DISCLAIMER
Disc Makers makes no representation or warranties with respect to the contents of this document and specifically disclaims any implied warranties of
merchantability or fitness for any particular purpose. Further, Disc Makers
reserves the right to revise this publication without obligation of Disc Makers
to notify any person or organization of such revision or changes.
REVISION HISTORY
Revision
1.0
Date
10/31/2003
Description
Updates by Disc Makers Technical Staff
CONTACTING DISC MAKERS, USA
Disc Makers
7905 North Route 130
Pennsauken, NJ 08110-1402
(856) 663-9030
TRADEMARK NOTICES
All product names are trademarks or registered trademarks of their respective
owners. Disc Makers and the Disc Makers logo © Disc Makers
1-800-237-6666
www.discmakers.com
T
02
WELCOME
WARRANTY REPAIR
Congratulations on the purchase of your Disc Makers Reflex duplication system. This sturdy unit has been professionally designed and manufactured
under strict quality guidelines to provide you with years of dependable and
trouble-free operation. Please be sure to read this instruction guide thoroughly
before operating the unit.
Any item that needs to be returned for a warranty repair must be returned in
original packaging. You must call Disc Makers for a return authorization number
(RMA) before returning any product. In the event that the original packaging
has been discarded, you can purchase replacement packaging from Disc
Makers. The sender will be responsible for any damage incurred if product is
not returned in original or replacement packaging. To obtain replacement packaging, call Disc Makers technical support at 1-888-800-4041 with the model of
your duplicator.
TECHNICAL SUPPORT
Disc Makers backs your duplicator purchase with free lifetime technical support. Tech support hours are from 9:00 a.m. to 6:00 p.m. EST Monday through
Friday at 1-888-800-4041. Or you can email our tech support team at:
[email protected]. For FAQs, downloadable manuals, product
updates, and warranty registration, go to: www.discmakers.com/support.
WARRANTY
PLEASE NOTE:
The copying of audio, video, or software without the permission of the copyright holder is illegal. Disc Makers accepts no responsibility for the copyright
use or misuse of this equipment. It is the sole responsibility of the user to
ensure that the legal rights of the copyright owners are respected.
Disc Makers warrants to the original purchaser that the duplication equipment
you have purchased is free from defects in materials and workmanship for a
period of one year. This warranty is applicable when the warranty registration
has been completed and returned to Disc Makers within a reasonable period of
time following the purchase. This warranty is not transferable.
This warranty does not apply to malfunctions caused by misuse, negligence,
accident, or alteration. Disc Makers is not responsible for or liable for consequential damages related to the use or misuse of this equipment. Disc Makers’
liability under this warranty extends solely to the obligation to repair or replace
a covered product. Disc Makers’ liability under this warranty shall not exceed
the cost of the covered product.
1-800-237-6666
www.discmakers.com
T
03
NEED BLANK MEDIA OR SUPPLIES?
Disc Makers offers a range of top-quality blank CD-Rs and DVD-Rs at unbeatable prices, including our own Disc Makers Premium brand. We also have an
extensive line of packaging and mailing supplies, as well as inkjet cartridges
and other peripherals for your duplication and printing system. For the latest
products and lowest prices, shop securely online at www.discmarket.com, or
call 1-888-800-4041.
CUSTOM PRINTING ON BLANK CD-RS
AND DVD-RS — IN JUST 5 DAYS!
Disc Makers gives you the same high-quality silk screen
technology on your blank media that we use on our professionally replicated discs. Call 1-888-800-4041, or go
to www.discmakers.com/CDR105 for details and pricing.
1-800-237-6666
HAVE A CD OR DVD PROJECT THAT’S TOO BIG
FOR DUPLICATION?
With our state-of-the-art replication and printing facilities, no order is too small
or too large. Our turnkey packages make shopping for the right CD-ROM or DVD
package a snap. We offer hard-to-find packaging options in small or large quantities, or we’ll create a custom package to fit your needs. And fast turn times
are our specialty. Many of our complete CD-ROM packages are ready in just 7
working days! No one does it faster. Call your Disc Makers product specialist at
1-800-CD-ROM-NOW, or go to www.discmakers.com/rom for complete information and package pricing.
www.discmakers.com
T
04
TABLE OF CONTENTS
Warranty . . . . . . . . . . . . . . . . . . . . . . . . . . . . . . . . . . . . . . . . . . . . . . . . . . . . . . . . . . . .2
Description and Getting Started . . . . . . . . . . . . . . . . . . . . . . . . . . . . . . . . . . . . . . .5
Modes and Copying . . . . . . . . . . . . . . . . . . . . . . . . . . . . . . . . . . . . . . . . . . . . . . . . . .5
Functions . . . . . . . . . . . . . . . . . . . . . . . . . . . . . . . . . . . . . . . . . . . . . . . . . . . . . . . . . . .7
Copy and Test . . . . . . . . . . . . . . . . . . . . . . . . . . . . . . . . . . . . . . . . . . . . . . . . . . . . . . .7
Test and Verify . . . . . . . . . . . . . . . . . . . . . . . . . . . . . . . . . . . . . . . . . . . . . . . . . . . . . . .8
Compare . . . . . . . . . . . . . . . . . . . . . . . . . . . . . . . . . . . . . . . . . . . . . . . . . . . . . . . . . . . .8
Prescan, Disc Info, and Select Source . . . . . . . . . . . . . . . . . . . . . . . . . . . . . . . . .9
Images and Handling Images . . . . . . . . . . . . . . . . . . . . . . . . . . . . . . . . . . . . . . . . .9
CD Compilations, Edit Track . . . . . . . . . . . . . . . . . . . . . . . . . . . . . . . . . . . . . . . . . .10
Setup and Defaults . . . . . . . . . . . . . . . . . . . . . . . . . . . . . . . . . . . . . . . . . . . . . . . . . .12
Glossary . . . . . . . . . . . . . . . . . . . . . . . . . . . . . . . . . . . . . . . . . . . . . . . . . . . . . . . . . . .13
1-800-237-6666
www.discmakers.com
T
05
The ReflexPro DVD is a high performance DVD disc duplicator designed for both
the novice and professional user. It is designed for a variety of applications
that require the exchange of audio, video or data content. The following is a
User Guide that outlines the menu commands of the unit and immediate functions of the unit. For additional technical support please call 888-800-4041.
GETTING STARTED
Carefully remove the DVD duplicator from its shipping container. Please inspect
the contents and verify them against the packing slip. Be sure to report any
errors in shipping immediately to Disc Makers.
Packing materials: Please save the original box and packaging in the event the
unit requires future service or you need to move the unit from one location to
another. This will help reduce the possibility of damage in transit.
Please Note: Any item that needs to be returned for a warranty repair must be
returned in original packaging.
INSTALLATION AND SETUP
1. Unpack the ReflexPro DVD to a clean and cool work area. Keep the external
packaging for future storage and transportation.
2. Place the ReflexPro DVD on a flat, clean and dust free surface.
3. Connect the power cord from the back of the unit to an electrical outlet. Do
not bypass the Ground.
4. The Front panel should appear as below.
MODES AND COPYING
MODES
The ReflexPro DVD is able to duplicate in two different modes: hard drive to disc
and disc to disc. The unit is factory preset to hard drive to disc. This mode is
efficient for duplicating large numbers of discs. The hard drive to disc copies
the master to the hard drive and then copies the data to each of the drives. This
insures an exact copy of the original master to every disc.
The disc to disc mode will copy whatever is in the source (Src) drive to blank
media in the other drives in the unit. This mode is most effective for making
quantities of discs less than the number of drives in the unit. For the
ReflexPro4 DVD if the need is for three discs or less, use the disc to disc mode.
For the ReflexPro7 DVD if the need is for six discs or less, use the disc to disc
mode.
Only slight changes will occur in the functions of the unit when the different
modes are chosen. When the unit is in the hard drive to disc mode ‘P: A’ will
appear at the right side of the first line of the LED. ‘P’ indicates the master disc
will be written to the hard drive and the next letter indicates which partition will
be written to.
HARD DRIVE TO DISC COPYING
Upon powering up the ReflexPro DVD the LCD screen should appear as below:
1. Copy
1-800-237-6666
www.discmakers.com
P:A
T
06
1. Copy the master to the hard drive by using the ‘Image’ function. Press the
down arrow until you see “9. Image” then press the ‘ENT’ button you should
see:
9-01. Image
Load
SRC: hard drive
00 IDE0 Master
P:A
2. Load the top drive with the master disc and press the ‘ENT’ button. The master disc will be copied to the hard drive and the display will read “Image Load
OK”
3. Press the ‘ESC’ key two times until “9. Image” appears in the LCD display and
then use the up arrow to return to “1. Copy.”
4. Load the drives with high quality optical media and press the “ENT” button.
The duplication process will begin and when completed the ReflexPro DVD
will eject the successfully copied discs. When the copy is complete the LCD
will read:
1. Copy
OK: 04
2. Press the ‘ENT’ button and the following window will appear:
P:A
Appearing next to OK will be the number of successful copies. In the this
example 4 copies were successfully created.
3. Press the down arrow once for “Src: DVD-RW Ø1 IDE1 Slave” press the ‘ENT’
key and the new source will be the top DVD recorder drive. The LCD will display “DVD-RW selected!”
4. Press the up arrow to return to “1. Copy”, notice that “P: A” is no longer displayed in this screen. This is how to tell if your unit is operating in the disc to
disc copy mode or the hard drive to disc mode. The hard drive to disc mode
will always show the “P:..” at the right side of the screen and what partition
of the drive is being used.
5. To begin the duplication operation, load the top drive (the Src drive) with the
master disc. Load the other recorders, one or as many as needed, with high
quality DVD-R media.
6. Press the “ENT” button to begin duplicating. The unit will automatically analyze the master disc, and begin duplicating at the maximum recording
speed.
9. The LCD will show the progress and display OK when the duplication is complete. Upon successful duplication, all copied discs will be ejected, if any disc
fails the duplication it will remain in the bottom drive.
The LCD will display:
DISC TO DISC COPYING
The ReflexPro DVD is factory preset to do hard drive to disc copying. The unit
can be changed to disc to disc mode relatively easily.
1. From the “1. Copy” screen press the down arrow until “8. Select Source”
appears in the LED window.
1. Copy
OK: 03
In this example three discs were successfully copied.
1-800-237-6666
www.discmakers.com
T
07
The same duplication job may be continued by reloading the recorder drives
and pressing ‘ENT’ button.
To start a new job, place a new master disc in the top drive, the SRC drive.
Then load as many recorders as needed.
FUNCTIONS
1. COPY
The copy function is the primary place to duplicate optical media.
In the Hard drive to disc mode (the default setting) the LCD will display:
1. Copy
media and press the ‘ENT’ button to start the process. The unit will
analyze the master on the hard drive, and then any disc in the recorder
drives. A message will be displayed regarding the results.
3. In the disc to disc mode: Load the top drive (Src) with the master disc and
load the recorder drives with high quality blank DVD media. Press the ‘ENT’
button to start the process, the unit will analyze the master on the (Src)
drive, and then any disc in the recorder drives. A message will be displayed
regarding the results.
Upon successful testing the following will display on the LCD. In this example
three discs were successfully tested. Also, any disc that passed the test will
be ejected from the drives.
P:A
2. Test
OK: 03
The copy is being made from the hard drive and specifically from partition A.
In the Disc to disc mode the LCD will display:
If the target disc has already been written to, or is damaged and cannot be
written to, the disc will not be ejected. If the data on the master CD will not fit
on the target disc then the disc will not be ejected also.
1. Copy
3. TEST AND COPY
Notice there will be nothing to the right of “1. Copy.”
Pressing the ‘ENT’ button will initiate a copy operation.
2. TEST
The test function is used to check whether a disc will successfully copy. It simulates the copying process, when concluded no data will be written to the
writer drives. This function operates in both hard drive to disc and disc to disc
mode.
1. Select the function using the up and down arrows.
2. In the hard drive to disc mode: load the drives with high quality blank DVD
1-800-237-6666
The test and copy function incorporates the first two functions into one operation. It is used to check whether a disc will successfully copy and then goes on
to do the copy. First, the copy process is simulated and then the data is actually copied to the blank media.
1. Select the function using the up and down arrows.
2. In the hard drive to disc mode: load the drives with high quality blank DVD
media and press the ‘ENT’ button to start the process. The unit will analyze
the master on the hard drive, and then any disc in the recorder drives. The
LCD will display number of discs that passed the test and then go directly to
doing the copy.
3. In the disc to disc mode: Load the top drive (Src) with the master disc and
www.discmakers.com
T
08
load the recorder drives with high quality blank DVD media. Press the ‘ENT’
button to start the process, the unit will analyze the master on the (Src)
drive, and then any disc in the recorder drives.The LCD will display number of
discs that passed the test and then go directly to doing the copy. Upon doing
a successful test and copy the following will display on the LCD.
3. Test and Copy
OK: 02
In this example two discs were successfully tested and copied.
If the target DVD has already been written to, or is damaged and cannot be
written to, the drive for this disc will not open. Likewise, if the data on the
master DVD will not fit on the blank target DVD the drive will remain closed.
4. VERIFY
The verify function is used to confirm that the master and the copy read the
same. Again this function operates similarly in both the hard drive to disc and
the disc to disc mode.
1. Select the function using the up and down arrows.
2. In the hard drive to disc mode: load the drives with the copied discs. The unit
will analyze the master on the hard drive, and then compare that to any disc
loaded in the recorder drives. The LCD will display the number of discs that
verified correctly and the number that failed the verification. Those that verified correctly will be ejected from the recorders. All failures will remain in the
drives.
3. In the disc to disc mode: Load the top drive (Src) with the master disc and
load the recorder drives with the previously written media. Press the ‘ENT’
button to start the process, the unit will analyze the master in the (Src)
drive, and then any disc in the recorder drives.The LCD will display the number of discs that verified and the number that failed. Those that verified correctly will be ejected from the recorders. All failures will remain in the drives.
1-800-237-6666
4. Verify
OK: 03
F->
Fail: 01
In this example, three discs verified correctly and one disc failed the verification.
The “F->” indicates that by pressing the ‘ENT’ button the failed disc(s) will be
ejected from the recorders. Please be careful to remove the correctly verified
disc(s) before pressing ‘ENT again.
To verify more duplicated discs simply fill the recorders and press ‘ENT,
again.
5. COMPARE
The compare function takes the verify function one step farther, it gives details
about the master and copied disc. It also, ejects the disc upon a successful
comparison.
1. Select the function using the up and down arrows.
2. In the hard drive to disc mode: load the drives with the copied discs. The unit
will analyze the master on the hard drive, and then compare that to any disc
loaded in the recorder drives. The LCD will display the number of discs that
compared correctly and the number that failed. Those that passed the comparison will be ejected from the recorders. All failures will remain in the
drives.
3. In the disc to disc mode: Load the top drive (Src) with the master disc and
load the recorder drives with the previously written media. Press the ‘ENT’
button to start the process, the unit will analyze the master on the (Src)
drive, and then any disc in the recorder drives. The LCD will display the number of discs that compared correctly and the number that failed. Those that
passed the comparison will be ejected from the recorders. All failures will
remain in the drives.
www.discmakers.com
T
09
Upon completion of this test the following will display on the LCD.
Compare
Fail:1
display the session and tracks on the DVD, total time of the DVD and size
of the DVD.
1. Select the function using the up and down arrows.
2. Load the Src drive with the master disc.
3. Press the ‘ENT’ button to start the process. Pressing the up and down arrow
will scan through the information.
OK:3
Diff:1
In this example three discs compared successfully and 1 was different. The
successful disc will be ejected.
Pressing the ‘ENT’ button will identify the source for the comparison and the
size of the source in MB. Pressing ‘ENT’ again will display the first (topmost
recorder) drive and the condition of the comparison, “Identical” is any
passed disc. Pressing the ‘ENT’ button will cycle through all the recorder
drives and give the condition.
Press the ‘ESC’ key to return to the main menu.
The failed conditions are: TOC not match, Cannot read TOC, or Read disc error.
6. PRESCAN
The prescan function only looks at the master DVD. If the ReflexPro DVD is in
hard drive to disc mode the data in the partition is examined. If the disc to disc
mode is current any disc in the source (Src) drive will be examined. This is
used to verify that the master can be read correctly without errors
In the hard drive to disc mode: Select the loaded master to analyze and press
the ‘ENT’ button. The unit will analyze the master on the hard drive and a message will be displayed “Prescan OK!”
In the disc to disc mode: Load the top drive (Src) with the master disc press
the ‘ENT’ button to start the process, the unit will analyze the master on the
(Src) drive, and then a message will be displayed regarding the results.
7. DISC INFO
The disc info function only looks at the master DVD. To use this function it is
necessary to change to disc to disc mode, see Step 8 (Select Source). It will
1-800-237-6666
8. SELECT SOURCE
This function is used to select the mode the ReflexPro DVDwill operate under.
When the hard drive is chosen as the source (Src) the unit will be in hard drive
to disc mode. Choosing any recorder drive as the source (Src) will cause the
unit to copy in disc to disc mode.
1. Select the function using the up and down arrows.
2. Press the up and down arrow to cycle through the available sources.
Typically the sources are “Src: hard drive ØØ IDEØ Master” and “Src: DVDRW Ø1 IDE1 Slave” The DVD-RW drives are numbered from Ø1 to Ø7 with the
top drive being Ø1 and the bottom drive being Ø7.
3. Press the ‘ENT’ button to select the source in view on the LCD. The display
will say the source and “... selected!”
4. Press the arrow keys to move to another function.
9. IMAGE
This function is used to manipulate images on the hard drive. There are six sub
functions that can be done.
9.01 Load: use this sub-function to load an image of the DVD master onto the
hard drive
1. Press the down arrow until you see “9. Image” then press the ‘ENT’ button,
you should see “9-01. Image P: A Load”
2. Load the top drive with the master disc and press the ‘ENT’ button. The master disc will be copied to the hard drive and the display will read “Image Load
OK”
www.discmakers.com
T
10
9.02 Delete Image: use this sub-function to delete an image from the hard
drive
1. Press the down arrow until you see “9. Image” then press the ‘ENT’ button
you should see “9-01. Image P: A Load” Press the down arrow to display “902. Image P: A Delete Image”
2. Press the ‘ENT’ button and “Delete Image in Partition A?Yes” will display in
the LCD window. Pressing the ‘ENT’ button will delete the image in the A partition. The message will show “Partition : A Image is deleted” Press the ‘ESC’
key to return to the Image submenu.
05. Image P: A Select Image”.
2. Press the ‘ENT’ key and the LCD will display “Select Working Partition A”. Pressing the up and down arrows will cycle through the partitions on the
hard drive. At the desired partition press the ‘ENT’ key and “Set Partition to
...” will be displayed to confirm that the partition is selected.
9.03 Image Info: use this sub-function to show the number of sessions and
tracks on the currently selected partition of the hard drive.
1. Press the down arrow until you see “9. Image” then press the ‘ENT’ button
you should see “9-01. Image P: A Load” Press the down arrow to display “903. Image P: A Image info”
2. Press the ‘ENT’ key and the number of sessions and tracks will be displayed,
pressing the up and down arrow will display total time of the image, total MB
of the image, and the tracks and the track size. Note: data tracks will not display and time length.
9.06 Image Source Drive: use this sub-function to select which recorder is
used as the source reading a CD to the hard drive. The ReflexPro DVD is defaulted to use the top recorder drive in the unit.
1. Press the down arrow until you see “9. Image” then press the ‘ENT’ button
you should see “9-01. Image P: A Load”, press the down arrow to display “906. Image P: A Image Src Drive”.
2. Press the ‘ENT’ key and the LCD will display “Select Img Src: 01 IDE1 CD-RW
N”. Pressing the up and down arrows will cycle through the recorder drive
from 01 at the top to 04 at the bottom, 07 on ReflexPro7 DVD. At the desired
drive press the ‘ENT’ key and “Load image from Drive ID - 0...” will be displayed to confirm the change in source recorder.
9.04 Compare Image: use this sub-function to compare the image to a DVD in
the source recorder for the hard drive.
1. Press the down arrow until you see “9. Image” then press the ‘ENT’ button,
you should see “9-01. Image P: A Load”, press the down arrow to display “904. Image P: A Compare Image”.
2. Load the top drive (source recorder for the hard drive) with the disc to be
compared and press the ‘ENT’ button. When the process is finished the
same screens will be displayed as in the full function (5. Compare) but the
disc will not be ejected.
9.05 Select Image: use this sub-function to select which partition on the hard
drive will be used.
1. Press the down arrow until you see “9. Image” then press the ‘ENT’ button
you should see “9-01. Image P: A Load”, press the down arrow to display “91-800-237-6666
The ReflexPro DVDunit is equipped with an eighty GB hard drive. Each partition is approximately 1 GB. The partitions are arranged alphabetically, A
through Z, AA through AZ, and BA through BW
10. EDIT TRACK
The ReflexPro DVD can be used to create custom audio CDs. This function
allows the user to take audio tracks from different CDs and compile them to a
single CD. This function is only available in the disc to disc mode.
1. Set the ReflexPro DVDto disc to disc mode (see page 9), then select the
“Edit Track” function using the up and down arrows.
2. Load the top drive (Src) with the master disc. Press the “ENT” button once to
see the main screen for this function, “10-01 Edit Track CD to CD Edit.” Press
the ENT button again to see the following screen:
www.discmakers.com
Select Track:
1/31
2:41
T
11
3. Press the up or down arrow to change the track in view. To select a track to
copy to the blank disc press the ENT key, a + will appear next to the track in
view. In the following example track 3 is in view and is selected for copying.
TRACK IN VIEW
Select Track:
+3/31
3:18
TIME OF TRACK
1
TOTAL TRACKS ON DISC
7. When the copying ends the unit will display “Burn Complete! OK: 01”. Press
the ENT button. The LCD will display “Continue edit next Disc? NO”. To change
to another CD, Load the top recorder drive (Src) with another master disc,
press the up arrow to change the “No” to “Yes”and press ENT. This will take
you to the screen from step 3. Repeat steps 3 through 6 to add more tracks
on the compilation.
8. When there are no more tracks to write to the compilation leave the
“Continue edit next Disc? NO” set to “No” and press the ENT key again. The
following screen will appear:
More than one track can be chosen from a CD but they will be recorded to
the destination in the order in which they are on the original CD. To change
the order of play copy each track individually.
4. After selecting a track (or tracks) to copy press the up arrow until “End”
appears. In this example one track is selected and the time for this track is
2:41.
Close all discs
session?
YES
Press ENT and the ReflexPro DVD will close the CD.
Select Track:
End
1 Trk 2:41
The LCD will display “Close Complete OK: ... Fail: ...” the number of discs
closed successfully will be next to OK and they will be ejected, any failures
will remain in the recorder drives.
If four tracks were selected the screen would show “4 Trk” and give the total
time for all four tracks.
5. Load the other recorders, one or as many as needed, with high quality CD-R
media.
6. Press the ENT button and the ReflexPro DVDwill ask if all the selections are
made for this CD. Use the up or down arrow to change between Yes and No.
Pressing ENT with No on the LCD will take the user back to Select Track.
Pressing ENT with Yes on the screen will start the copying of the track (or
tracks) to the target CD.
End edit disc
and burn?
YES
1-800-237-6666
The ReflexPro DVD can compile to the hard drive as well, in step 2 use the
down arrow to to select “10-02. Edit Track DVD to hard drive Edit” and press
enter. Steps 3 and 4 will be the same to select the tracks to copy. It is not
necessary to load any media. Step 6 will load the selected track(s) to the
hard drive. The last few steps will be as follows:
7. When the copying ends the unit will display “Image load OK”, pressing ‘ENT
will display “Continue edit next Disc? NO” Leaving this set to “No” and pressing ‘ENT’ the screen will display “Burn or Move to partition? Burn”. Use the
down arrow to change the “Burn” to “Move” then press ‘ENT’. “Select Partition
A” will be displayed. Use the down arrow to select a partition to copy to and
www.discmakers.com
T
12
press ‘ENT’. You will see “Moving to P: ...” and then “OK!” to confirm the writing
to the hard drive. Pressing ‘ENT’ will return to the Edit Track main menu.
8. Press ‘ESC’ to return to the main menu and use the up arrow to change to “8
Select Source.” Change to the hard drive for the source (see page 9) and
then use the arrows to go to “9. Image”, press ‘ENT’ then use the down arrow
to get to “9-05 Select Image” to select the partition (see page 9) of the hard
drive that the compilation was moved to. Go to “1.Copy” and make the CD
from the hard drive.
11. Setup
This function allows the user to specify specific parameters for copying DVDs.
There are 16 sub items. From the main menu screen pressing “ENT” will show
the sub heading, pressing the up and down arrows allows the user to move
between the settings.
11.01 Language: allows the user to set English or Spanish as the display language.
11.02 Burn Speed: allows the user to change the speed at which the unit burns
a CD/DVD. By pressing the ‘ENT’ button the current setting will be displayed, the user can then press the up and down arrows to change to
the desired speed. Pressing the ‘ENT’ button will set the speed. Press
‘ESC’ to go back to the main menu.
11.03 Read Speed: allows the user to change the speed at which the unit reads
a master DVD. By pressing the ‘ENT’ button the current setting will be
displayed, the user can then press the up and down arrows to change to
the desired speed. Pressing the ‘ENT’ button will set the speed. Press
‘ESC’ to go back to the main menu.
11.04 Auto Start Drive set to ‘On’ will start a copy function as soon as blank
media is detected in the writer drive. The default setting is ‘Off”.
11.05 Startup Menu allows the user to have the ReflexPro DVD start up to any
of the first seven options in the main menu.The default setting is ‘Copy’.
11.06 Auto Verify set to ‘On’ will do a verify after every copy is made. The
default setting is ‘Off’.
11.07 Auto Compare set to ‘On’ will do a comparison after every copy is made.
The default setting is ‘Off’.
1-800-237-6666
11.08 Auto PreScan set to ‘On’ will do a prescan on every CD/DVD placed
in the reader drive. The default setting is ‘Off’.
11.09 Eject Disc allows the user to choose what will happen at the end of
function. The three choices are: Eject Good Only, Eject All Disc, and Do
Not Eject. The eject option is only available on the Copy, Test and Copy,
Verify, and Compare functions. The default setting is “Eject Good Only”.
11.10 Burn on the Fly allows the user to burn an image of the master to the
hard drive then to blank media. The difference between this and loading
an image is that with “Burn On The Fly” set to ‘off’ the image will be
immediately erased after the write to the blank media. Set to ‘On’ the
ReflexPro DVD will write directly from disc to disc without sending an
image to the hard drive first. With “Burn On The Fly” set to ‘off’ Safe will
appear in the upper right of the LCD display. The default setting is ‘On’.
11.11 Burn Mode allows the user to choose Disc at Once or Track at Once for
the burn function. The default setting is ‘DAO’ Disc at Once.
11.12 Button Sound set to ‘On’ will cause any pressing of the control buttons to
make a sound. The default setting is ‘On”.
11.13 Device Info has information on the writer and reader drives.
11.14 System Info has information on the controller of the ReflexPro.
11.15 Quick Erase erases the TOC of CD/DVD-RW discs.
11.16 Full Erase erases all the data on a CD/DVD-RW disc.
www.discmakers.com
T
13
GLOSSARY
CD: Short for compact disc, an optical disc storage format developed by Philips
and Sony.
CD Duplication: The process of making one or more copies of a compact disc.
CD+G: CD+Graphics. Audio, text and graphics used in the same application. This
type of disc is usually used for Karaoke machines.
CD-DA: Compact Disc-Digital Audio. A CD-DA disc contains tracks with audio sectors only. In 1982 Philips and Sony introduced the necessary technology
for storing digital audio signals on a compact disc, and introduced the CDDigital Audio.
CD-R [Disc]: An acronym for compact disc-recordable which is a type of media
that allows you to record information using a CD Recorder.
CD-Recordable: CD-Recordable technology allows production of CD-ROMs on
the desktop ('one-offs'). It requires a PC, a CD-R recorder or drive, appropriate software, and 'recordable' media. The reduction of prices for this hardware and software, and their ease of use, has helped the growth of CD-ROM
production in-house. The 'one-off' is very different from the mass- reproduced or 'hot-pressed' CDs. It is sold pre-grooved, in 63 or 74 minute capacities, and it involves a layered structure--with a sensitive chemical recording
layer, and almost always with a gold reflective layer. Once recorded, the CDR disc (one-off)performs in the same way as the mass-reproduced CDs.
CD-ROM: Compact Disc-Read Only Memory. A standard for compact disc to be
used as a digital memory medium for personal computers. The specifications for CD-ROM were first defined in the Yellow Book.
CD-ROM Disc: A CD-ROM disc contains only data sectors as defined in the
Yellow Book.
CD-ROM Drive: A peripheral device attached to a computer which allows it to
read/play a CD-ROM disc. All CD-ROM players can also play back audio CDs,
but you need external headphones or speakers to hear them.
Compact Disc: CD stands for compact disc which is a general term for all formats of CD media. CD formats available on the market now include CD
Audio, CD-ROM, CD-ROMXA, Video CD, CD-I and others.
1-800-237-6666
Compact Disc Formats: During the last two decades several Compact
Disc formats were developed to serve different purposes and uses.
Starting with the CD-DA format in 1980, as a way to distribute high quality
music in a compact and convenient format, the first compact disc standard was formulated. Then, the idea of storing computer data on the same
media, more than 10 years ago, lead to a new format: the CD-ROM (along
with CD). In the last few years, the desire to store a whole new generation
of multimedia contents(audio, video, games, pictures etc.) demanded new
formats: CD-I,CD-XA, Photo-CD, Video-CD, CD+ etc. were invented.
Digital Audio: Although digital audio can have a variety of sampling rates and
quantization, the Red Book specifies CD-Digital Audio as being sampled at
44.1KHz, and quantized at 16 bits/sample, for high quality stereo sound
(65,536 values).Therefore, sound of different quality, even if it is placed in
a CD, is not Red Book Digital Audio.
Digital Audio Extraction (DAE): The process of copying CD-DA audio tracks digitally from your CD-writer or another CD-ROM drive, to a hard disk or to a
recordable CD. Not all CD-ROM drives support this.
Disc Read Head-Disc Write Head: Storage drives (magnetic and optical) have a
head or heads that float over the recorded area to read and write. Obviously,
CD-ROM drives have only a read head, which involves a low-intensity red
laser diode (a.k.a. infrared laser diode), lenses that focus the laser on the
track, and others that redirect the reflections to one of the photodiodes for
appropriate decoding. Some Write-Once and Rewritable optical drives
involve two heads (to write and read), while other drives, including CDRecordable, use only one head to do both--using a high-intensity blue argon
laser for the write function. For mass replication of CD-Audio, CD-ROM, and
DVDs, the glass master is produced by encoders that have special recording
heads.
Disc-At-Once (DAO): A method of writing in which one or more tracks are written in a single operation. The laser will not stop until the whole disc recording is finished and the disc is closed - hence no no clicks between audio
tracks. Disc-at-Once has only been added/available with the recent generation of CD recorders and recent firmware upgrades.
www.discmakers.com
T
14
Emulate: To test the function of a disc on a computer after formatting a co
plete disc image.
Enhanced CD: A CD-ROM disc contains only data sectors as defined in the
Yellow Book.
Hard Drives: Originally known as Winchester drives, these magnetic storage
devices have one or more non-removable solid platters--as op-posed to the
floppy-disk drives. Hard drives come in various types, different capacities
and configurations--and are connected to the bus through a controller or
interface card. There are removable hard drives, which allow removal of the
component that contains the platters--a workable option for users with
security concerns.
HDCD: High-definition Compatible Digital. A proprietary method of enhancing
audio on CDs.
Hz: Hertz. A unit of frequency measurement. The number of cycles (repetitions) per second.
Karaoke: Literally, empty orchestra. The social sensation from Japan where
people sing along to a music track. Karaoke was largely responsible for the
success of laserdisc in Japan, thus supporting it elsewhere.
Master: The metal disc used to stamp replicas of optical discs. The tape used to
make additional recordings.
Mode: Under the ISO 9660, a CD-ROM sector can be Mode 1 or Mode 2.
Mode 1 allocates2048 bytes for user data, plus a third layer of error detection and error correction codes. This is the Mode that provides the highest
integrity for computer data.
Mode 2 allocates 2336 bytes for user data, and no third layer of error
detection and error correction. This mode is considered appropriate for segments of music, graphics and video, especially in CD-ROM-XA and CD-I
implementations.
PHILADELPHIA AREA
NEW YORK CITY
LOS ANGELES
SILICON VALLEY
SEATTLE
CARIBBEAN
Multimedia: Information in more than one form, such as text, still
images, sound, animation, and video. Usually implies that the information is presented by a computer.
Track-At-Once: With Track-at-Once writing mode, a CD-Recorder will record one
track at a time. In between every two tracks (unless you are only recording
a single track). The CD-Recorder laser will stop while the hard disc prepared
for the contents of the next track. Each time the laser is stopped, it writes
Run-Out blocks. When starting again, it writes Run-In blocks (a total of 7
blocks).These are ignored by CD-ROM readers and so do not disturb data
transmission, but in some audio players you might hear a click between
tracks. This is why disc-at-Once recording is preferable for audio discs.
Wave: A Wave file (.WAV) is a type of sound file which stores digitized analog
signals.
Yellow Book: The book which sets out the standard developed by Philips and
Sony for the physical format of compact discs to be used for information
storage (CD-ROM).
Plant & Main Office • 7905 N. Route 130, Pennsauken, NJ 08110-1402 • 1-888-800-4041 • Outside USA: 856-663-9030
11 West 17th Street, New York, NY 10011-5504 • 1-800-446-3470
3445 Cahuenga Blvd. W., Los Angeles, CA 90068-1329 • 1-800-731-8009
42650 Christy Street, Fremont, CA 94538-3135 • 1-800-869-0715
730 Andover Park West, Tukwila, WA 98188-3322 • 1-800-553-8906
Avenida Blvd., Arturo Cadilla EB18, Levittown, Toa Baja, PR 00949-2701 • 1-800-804-9588