1
Avaya
Reference Guide
AVAYA C460
MULTILAYER MODULAR SWITCH
SOFTWARE VERSION 2.0
May 2003
avaya.com
© 2003 Avaya Inc. All rights reserved. All trademarks identified by the ® or TM are registered trademarks
or trademarks, respectively, of Avaya Inc. All other trademarks are the property of their respective owners
Document no. 555-500-200
Contents
Chapter 1
Using the CLI ................................................................................................................. 1
CLI Architecture.................................................................................................... 1
Conventions Used ................................................................................................. 2
CLI Help ................................................................................................................. 2
Command Line Prompt........................................................................................ 2
Navigation, Cursor Movement and Shortcuts.................................................. 4
Command Syntax.................................................................................................. 4
Command Abbreviations ............................................................................ 4
Universal Commands ........................................................................................... 5
Retstatus command ...................................................................................... 5
Tree command .............................................................................................. 5
terminal width .............................................................................................. 6
terminal length .............................................................................................. 6
clear screen .................................................................................................... 7
Avaya C460 Sessions ............................................................................................ 8
Security Levels....................................................................................................... 9
Entering the Supervisor Level .................................................................... 9
Entering the CLI ......................................................................................... 10
Entering the Technician Level .................................................................. 10
Getting Help......................................................................................................... 10
Command Syntax................................................................................................ 10
Command Abbreviations .......................................................................... 10
Router Configuration Contexts ......................................................................... 11
Chapter 2
Avaya C460 CLI Commands ..................................................................................... 13
access list ...................................................................................................... 13
area ............................................................................................................... 13
arp ................................................................................................................. 14
arp timeout .................................................................................................. 14
banner login ................................................................................................ 15
banner login line ......................................................................................... 15
banner post-login ....................................................................................... 15
banner post-login line ................................................................................ 16
clear arp-cache ............................................................................................ 16
clear cam ...................................................................................................... 17
clear dot1x config ....................................................................................... 17
clear dynamic vlans ................................................................................... 17
clear event-log ............................................................................................. 18
Avaya C460 Reference Guide
i
Contents
clear fragment .............................................................................................18
clear interface ..............................................................................................19
clear ip route ................................................................................................19
clear ip route (Layer 3) ...............................................................................19
clear ip traffic ...............................................................................................20
clear log ........................................................................................................20
clear port mirror ..........................................................................................20
clear port static-vlan ...................................................................................21
clear radius authentication server ............................................................21
clear rmon2 statistics ..................................................................................22
clear screen ..................................................................................................22
clear snmp trap ...........................................................................................22
clear system-log ..........................................................................................23
clear timezone .............................................................................................23
clear vlan ......................................................................................................24
clear vlan (Layer 3) ....................................................................................24
configure ......................................................................................................25
copy l2-config tftp .......................................................................................25
copy running-config startup-config .........................................................25
copy startup-config tftp .............................................................................26
copy tftp EW_archive .................................................................................27
copy tftp l2-config .......................................................................................27
copy tftp startup-config .............................................................................28
copy tftp SW_imageA ................................................................................28
copy tftp SW_imageB .................................................................................29
default-metric ..............................................................................................30
default-metric (OSPF) ................................................................................30
default-metric (RIP) ....................................................................................31
disable interface ..........................................................................................31
enable interface ...........................................................................................32
enable vlan commands ..............................................................................32
erase startup-config ....................................................................................33
fragment chain ............................................................................................33
fragment size ...............................................................................................33
fragment timeout ........................................................................................34
get time .........................................................................................................34
hostname ......................................................................................................34
hostname (Layer 3) .....................................................................................35
interface ........................................................................................................36
ip access-default-action ..............................................................................37
ip access-group ............................................................................................37
ip access-list .................................................................................................38
ip access-list-cookie ....................................................................................39
ip access-list-copy .......................................................................................39
ii
Avaya C460 Reference Guide
Contents
ip access-list-dscp name ............................................................................ 40
ip access-list-dscp operation ..................................................................... 40
ip access-list-dscp precedence .................................................................. 41
ip access-list-dscp trust .............................................................................. 42
ip access-list-name ...................................................................................... 42
ip access-list-owner .................................................................................... 43
ip address .................................................................................................... 43
ip admin-state ............................................................................................. 44
ip bootp-dhcp network .............................................................................. 44
ip bootp-dhcp relay .................................................................................... 45
ip bootp-dhcp server .................................................................................. 46
ip broadcast-address .................................................................................. 46
ip default-gateway ..................................................................................... 47
ip directed-broadcast ................................................................................. 47
ip icmp-errors ............................................................................................. 48
ip max-arp-entries ...................................................................................... 48
ip max-route-entries ................................................................................... 49
ip netbios-rebroadcast ............................................................................... 49
ip netmask-format ...................................................................................... 50
ip ospf authentication-key ........................................................................ 51
ip ospf cost ................................................................................................... 51
ip ospf dead-interval .................................................................................. 52
ip ospf hello-interval .................................................................................. 52
ip ospf priority ............................................................................................ 53
ip ospf router-id .......................................................................................... 53
ip proxy-arp ................................................................................................ 54
ip redirects ................................................................................................... 54
ip rip authentication key ........................................................................... 54
ip rip authentication mode ....................................................................... 55
ip rip default-route-mode ......................................................................... 56
ip rip poison-reverse .................................................................................. 56
ip rip rip-version ........................................................................................ 57
ip rip send-receive-mode .......................................................................... 57
ip rip split-horizon ..................................................................................... 58
ip route ......................................................................................................... 59
ip routing ..................................................................................................... 59
ip routing-mode .......................................................................................... 60
ip simulate ................................................................................................... 61
ip vlan/ip vlan name ................................................................................. 61
ip vrrp .......................................................................................................... 62
ip vrrp address ............................................................................................ 62
ip vrrp auth-key .......................................................................................... 63
ip vrrp override addr owner ..................................................................... 63
ip vrrp preempt .......................................................................................... 64
Avaya C460 Reference Guide
iii
Contents
ip vrrp primary ...........................................................................................64
ip vrrp priority ............................................................................................65
ip vrrp timer ................................................................................................66
line .................................................................................................................66
network (RIP) ..............................................................................................67
network (OSPF) ...........................................................................................67
no rmon alarm .............................................................................................68
no rmon event .............................................................................................68
no rmon history ..........................................................................................69
no username ................................................................................................69
nvram initialize ...........................................................................................69
passive-interface .........................................................................................70
ping ...............................................................................................................71
ping (Layer 3) ..............................................................................................71
redistribute (OSPF) .....................................................................................72
redistribute (RIP) ........................................................................................72
reset ...............................................................................................................73
rmon alarm ..................................................................................................75
rmon event ...................................................................................................76
rmon history ................................................................................................76
rmon2 protocol-dir .....................................................................................77
rmon2 protocol-dist ....................................................................................77
router ospf ....................................................................................................78
router rip ......................................................................................................78
router vrrp ...................................................................................................79
session ..........................................................................................................79
set allowed managers .................................................................................80
set allowed managers ip ............................................................................80
set arp-aging-interval .................................................................................81
set arp-tx-interval .......................................................................................81
set boot bank ................................................................................................82
set broadcast storm control .......................................................................82
set broadcast storm control threshold .....................................................83
set device-mode ..........................................................................................83
set device-mode (Layer 3) .........................................................................84
set dot1x max-req ........................................................................................84
set dot1x quiet-period ................................................................................84
set dot1x re-authperiod ..............................................................................85
set dot1x server-timeout ............................................................................85
set dot1x supp-timeout ..............................................................................85
set dot1x system-auth-control disable .....................................................86
set dot1x system-auth-control enable ......................................................86
set dot1x tx-period ......................................................................................87
set icmp-redirect .........................................................................................87
iv
Avaya C460 Reference Guide
Contents
set inband vlan ............................................................................................ 88
set intelligent-multicast ............................................................................. 88
set intelligent-multicast client port pruning time .................................. 88
set intelligent-multicast group-filtering delay time .............................. 89
set intelligent-multicast router port pruning time ................................ 89
set interface inband .................................................................................... 90
set interface outband .................................................................................. 90
set interface ppp ......................................................................................... 91
set interface ppp enable/disable/off/reset ............................................ 91
set ip route ................................................................................................... 92
set license ..................................................................................................... 94
set logout ..................................................................................................... 94
set mac-aging .............................................................................................. 95
set mac-aging-time ..................................................................................... 95
set outband duplex ..................................................................................... 96
set outband negotiation ............................................................................. 96
set outband speed ....................................................................................... 97
set policy type ............................................................................................. 97
set port auto-negotiation-flowcontrol-advertisement .......................... 99
set port channel ........................................................................................... 99
set port classification ................................................................................ 100
set port disable .......................................................................................... 101
set port dot1x initialize ............................................................................ 101
set port dot1x max-req ............................................................................. 102
set port dot1x port-control ...................................................................... 102
set port dot1x quiet-period ..................................................................... 103
set port dot1x re-authenticate ................................................................. 103
set port dot1x re-authentication ............................................................. 103
set port dot1x re-authperiod ................................................................... 104
set port dot1x server-timeout ................................................................. 104
set port dot1x supp-timeout ................................................................... 105
set port dot1x tx-period ........................................................................... 105
set port duplex .......................................................................................... 106
set port edge admin state ........................................................................ 106
set port enable ........................................................................................... 107
set port flowcontrol .................................................................................. 109
set port level .............................................................................................. 110
set port mirror ........................................................................................... 110
set port name ............................................................................................. 111
set port negotiation .................................................................................. 111
set port point-to-point admin status ...................................................... 112
set port powerinline ................................................................................. 113
set port powerinline priority .................................................................. 113
set port redundancy ................................................................................. 114
Avaya C460 Reference Guide
v
Contents
set port redundancy on/off ....................................................................115
set port redundancy-intervals .................................................................115
set port spantree ........................................................................................116
set port spantree cost ................................................................................117
set port spantree force-protocol-migration ...........................................117
set port spantree priority .........................................................................118
set port speed ............................................................................................118
set port static-vlan ....................................................................................119
set port trap ...............................................................................................119
set port vlan ...............................................................................................120
set port vlan-binding-mode ....................................................................121
set power redundancy .............................................................................121
set powerinline budget ............................................................................122
set ppp authentication incoming ............................................................122
set ppp baud-rate ......................................................................................123
set ppp chap-secret ...................................................................................123
set ppp incoming timeout .......................................................................123
qset radius authentication enable/disable ............................................124
set radius authentication retry-number ................................................124
set radius authentication retry-time .......................................................125
set radius authentication secret ..............................................................125
set radius authentication server .............................................................125
set radius authentication udp-port ........................................................126
set slot power admin ................................................................................126
set slot power priority ..............................................................................127
set snmp community ................................................................................128
set snmp retries .........................................................................................128
set snmp timeout ......................................................................................129
set snmp trap .............................................................................................129
set snmp trap auth ....................................................................................130
set spantree default-path-cost .................................................................131
set spantree enable/disable ....................................................................131
set spantree forward-delay ......................................................................132
set spantree hello-time .............................................................................132
set spantree max-age ................................................................................132
set spantree priority .................................................................................133
set spantree tx-hold-count .......................................................................133
set spantree version ..................................................................................134
set system contact .....................................................................................134
set system location ....................................................................................135
set system name ........................................................................................135
set time client .............................................................................................136
set time protocol .......................................................................................136
set time server ...........................................................................................137
vi
Avaya C460 Reference Guide
Contents
set timezone .............................................................................................. 137
set trunk ..................................................................................................... 138
set vlan ....................................................................................................... 138
set vlan (Layer 3) ...................................................................................... 139
set web aux-files-url ................................................................................. 139
set welcome message ............................................................................... 140
show access lists ....................................................................................... 140
show allowed managers status .............................................................. 141
show allowed managers table ................................................................ 142
show arp-aging-interval .......................................................................... 143
show arp-tx-interval ................................................................................ 143
show banner login .................................................................................... 143
show banner post-login ........................................................................... 144
show boot bank ......................................................................................... 144
show broadcast storm control ................................................................ 144
show cam ................................................................................................... 145
show cam mac ........................................................................................... 147
show cam vlan .......................................................................................... 147
show chassis-identity ............................................................................... 148
show copy status ...................................................................................... 148
show cpu load ........................................................................................... 149
show cs ....................................................................................................... 149
show device-mode ................................................................................... 150
show dot1x ................................................................................................ 150
show dot1x statistics ................................................................................ 150
show dynamic vlans ................................................................................ 151
show environment fans ........................................................................... 151
show environment power ....................................................................... 152
show erase status ...................................................................................... 153
show event-log .......................................................................................... 153
show event-log (Layer 3) ......................................................................... 153
show fragment .......................................................................................... 153
show icmp-redirect .................................................................................. 154
show image version ................................................................................. 154
show intelligent-multicast ....................................................................... 154
show interface ........................................................................................... 155
show ip access-group ............................................................................... 155
show ip access-list-dscp .......................................................................... 156
show ip access-lists .................................................................................. 156
show ip access-list-summary .................................................................. 157
show ip arp ................................................................................................ 157
show ip icmp ............................................................................................. 158
show ip interface ...................................................................................... 159
show ip interface brief ............................................................................. 160
Avaya C460 Reference Guide
vii
Contents
show ip ospf ..............................................................................................160
show ip ospf database ..............................................................................161
show ip ospf interface ..............................................................................161
show ip ospf neighbor .............................................................................162
show ip protocols ......................................................................................162
show ip reverse-arp ..................................................................................163
show ip route .............................................................................................163
show ip route (Layer 3) ............................................................................163
show ip route best-match ........................................................................164
show ip route static ..................................................................................164
show ip route summary ...........................................................................165
show ip traffic ............................................................................................165
show ip unicast cache ...............................................................................167
show ip unicast cache networks .............................................................168
show ip unicast cache networks detailed ..............................................169
show ip unicast cache nextHop ..............................................................169
show ip unicast cache summary .............................................................170
show ip vrrp ..............................................................................................170
show ip vrrp detail ...................................................................................171
show l2-config ...........................................................................................173
show license ...............................................................................................183
show logout ...............................................................................................183
show mac-aging ........................................................................................183
show mac-aging-time ...............................................................................184
show module .............................................................................................185
show outband ............................................................................................186
show policy type .......................................................................................186
show port ...................................................................................................187
show port auto-negotiation-flowcontrol-advertisement ....................188
show port channel ....................................................................................188
show port classification ...........................................................................190
show port dot1x ........................................................................................191
show port dot1x statistics ........................................................................193
show port edge state ................................................................................194
show port flowcontrol ..............................................................................194
show port mirror ......................................................................................195
show port point-to-point status ..............................................................196
show port redundancy .............................................................................197
show port trap ...........................................................................................197
show port vlan-binding-mode ................................................................198
show powerinline .....................................................................................198
show powerinline budget ........................................................................199
show ppp authentication .........................................................................200
show ppp baud-rate .................................................................................200
viii
Avaya C460 Reference Guide
Contents
show ppp configuration .......................................................................... 201
show ppp incoming timeout .................................................................. 201
show ppp session ..................................................................................... 201
show radius authentication .................................................................... 202
show rmon alarm ..................................................................................... 202
show rmon event ...................................................................................... 203
show rmon history ................................................................................... 204
show rmon statistics ................................................................................ 204
show rmon2 dscp-stats ............................................................................ 205
show rmon2 protocol-dir ........................................................................ 206
show rmon2 protocol-dist ....................................................................... 206
show rmon2 state ..................................................................................... 208
show running-config ................................................................................ 209
show secure current ................................................................................. 210
show snmp ................................................................................................ 211
show snmp retries .................................................................................... 212
show snmp timeout ................................................................................. 212
show spantree ........................................................................................... 212
show spv .................................................................................................... 214
show startup-config ................................................................................. 216
show system .............................................................................................. 217
show system-log ....................................................................................... 217
show system-log (Layer 3) ...................................................................... 219
show tftp download software status ..................................................... 219
show tftp upload status ........................................................................... 219
show time .................................................................................................. 220
show time parameters ............................................................................. 220
show timezone .......................................................................................... 221
show trunk ................................................................................................ 221
show username ......................................................................................... 222
show vlan .................................................................................................. 222
show vlan (Layer 3) .................................................................................. 223
show web aux-files-url ............................................................................ 223
sync spv ..................................................................................................... 224
tech ............................................................................................................. 224
terminal length .......................................................................................... 225
terminal width .......................................................................................... 225
timers basic ................................................................................................ 225
timers ospf ................................................................................................. 227
traceroute ................................................................................................... 228
tree .............................................................................................................. 228
username ................................................................................................... 229
validate-group .......................................................................................... 230
validate policy-list .................................................................................... 231
Avaya C460 Reference Guide
ix
Contents
Layer 2 CLI Commands............................................................................................ 233
Layer 3 CLI Commands............................................................................................ 237
Glossary....................................................................................................................... 241
x
Avaya C460 Reference Guide
Chapter 1
Using the CLI
This chapter describes the Avaya C460 CLI architecture and conventions, and
provides instructions for accessing the Avaya C460 for configuration purposes.
The configuration procedure involves establishing a Telnet session or a serial
connection and then using the Avaya C460’s internal CLI. For details on
establishing a connection, see the User’s Guide that accompanies the switch.
The CLI is command-line driven and does not have any menus. To activate a
configuration option, you must type the desired command at the prompt and press
Enter.
You can also configure your Avaya C460 using the C460 Manager with its graphical
user interface. For details, see the "Device Manager" chapter in the User’s Guide that
accompanies the switch and the Avaya MSNM C460 Device Manager User’s Guide
on the Documentation and Utilities CD.
CLI Architecture
The C460 supports both Layer 2 switching and Layer 3 switching.
The C460 CLI includes two CLI entities to support this functionality.
•
The Switch CLI entity is used to manage Layer 2 switching.
•
The Router CLI entity is used to manage Layer 3 switching.
To switch between the entities, use the session command. For details, see
"Avaya C460 Sessions" below.
Configuration of the password commands and community commands in one
entity is automatically attributed to the other entity in the switch.
Avaya C460 Reference Guide
1
Chapter 1
Using the CLI
Conventions Used
•
•
•
•
•
•
•
Mandatory keywords are in the computer bold font.
Information displayed on screen is displayed in computer font.
Variables that you supply are in pointed brackets <>.
Optional keywords are in square brackets [].
Alternative but mandatory keywords are grouped in braces {} and separated by
a vertical bar |.
Lists of parameters from which you should choose are enclosed in square
brackets [ ] and separated by a vertical bar |.
If you enter an alphanumeric string of two words or more, enclose the string in
inverted commas.
CLI Help
•
•
•
•
To display all commands available in a context type a question mark.
To display all commands starting with a certain string, type the first few letters
followed by a question mark.
To get help containing all commands parameters with their legal values as well
as its syntax and an example:
— type a question mark at the end of command or at the stage where it is
unique, or
— type "help" followed by the command
Use the Tab key to complete an unambiguous command.
Command Line Prompt
Four factors affect the command line prompt:
• Host name of the CLI entity - the host name is used as the prefix of the
command prompt.
• Module Number - counting from the top and used as part of the prefix. In this
document the Module number in the prompt is generic and is represented by
“N”.
• Security level - used as the suffix of the prompt (Refer to "Security Levels" on
page 9.)
• Application context - used as body of the prompt, this part is not mandatory.
Example:
Host name of the router is London
Router is module number three
Application context is OSPF
2
Avaya C460 Reference Guide
Chapter 1
Using the CLI
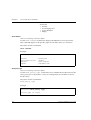
The command line prompt looks as follows:
London-1(configure router:ospf)#
The command prompt is not hierarchical in structure. If you wish to use several
commands, each beginning with the same keyword, you must retype all parts of the
command each time. For example, if after you want to set the system contact and the
system name you must type both set system contact and
set system name. However, you can use command abbreviations.
Avaya C460 Reference Guide
3
Chapter 1
Using the CLI
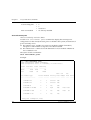
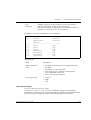
Navigation, Cursor Movement and Shortcuts
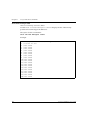
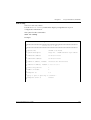
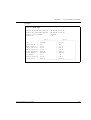
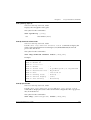
The CLI contains a simple text editor with these functions:
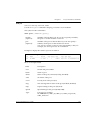
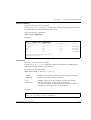
Table 1.1
Navigation, Cursor Movement and Shortcuts
Keyboard
Functions
Backspace
Deletes the previous character
Up arrow/Down arrow
Scrolls back and forward through the command
history buffer
Left arrow/Right arrow
Moves the cursor left or right
Tab
Completes the abbreviated command. Type the
minimum number of characters unique to the
command. An exception is the Reset System
command which you must type in full.
Enter
Executes a single-line command
““
If you type a name with quotation marks, the
marks are ignored.
Command Syntax
Commands are not case-sensitive. That is, uppercase and lowercase characters may
be interchanged freely.
Command Abbreviations
All commands and parameters in the CLI can be truncated to an abbreviation of any
length, as long as the abbreviation is not ambiguous. For example, version can
be abbreviated ver.
For ambiguous commands, type the beginning letters on the command line and
then use the Tab key to toggle through all the possible commands beginning with
these letters.
4
Avaya C460 Reference Guide
Chapter 1
Using the CLI
Universal Commands
Universal commands are commands that can be issued anywhere in the hierarchical
tree.
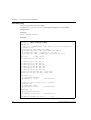
Retstatus command
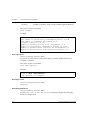
Use the retstatus command to show whether the last CLI command you
performed was successful. It displays the return status of the previous command.
The syntax for this command is: retstatus
Example::
C460-1# set port negotiation 2/4 disable
Link negotiation protocol disabled on port 2/4.
C460-1# retstatus
Succeeded
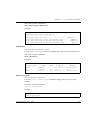
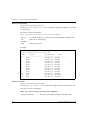
Tree command
The tree command displays the commands that are available at your current
location in the CLI hierarchy.
The syntax for this command is: tree
Output Example:
Example:
C460-1# tree
terminal
width
length
Avaya C460 Reference Guide
5
Chapter 1
Using the CLI
terminal width
Use the terminal width command to set the terminal width of the terminal
display.
The syntax for this command is:
terminal width [<character>]
character
none - Displays the current width in
characters.
number - Set the new
screen width in
characters
Example:
C460-1> terminal width 80
terminal width: 80
terminal length
Use the terminal length command to set the length of the terminal display.
The syntax for this command is:
terminal length [<screen-length>]
screen-length
none - Displays the current length in lines.
number - Set the new screen length in lines.
Example:
C460-1> terminal length 25
6
Avaya C460 Reference Guide
Chapter 1
Using the CLI
clear screen
Use the clear screen command to clear the current terminal display.
The syntax for this command is:
clear screen
Example:
C460-1> clear screen
Welcome to C460
SW version 1.0.0
C460-1>
Avaya C460 Reference Guide
7
Chapter 1
Using the CLI
Avaya C460 Sessions
You can use sessions to switch between C460 Supervisor modules or to switch
between Layer 2 and Layer 3 commands in the C460 CLI.
To switch between C460 modules use the command:
session [<mod_num>] <mode>.
The <mod_num> is the number of the module in the chassis, counting from the top
down. The <mode> can be either switch or router. When Module Number is not
specified, the command switches between the modes in the local module. Use
switch mode to configure layer 2 commands. Use router mode to configure routing
commands.
Example:
To configure router parameters in the module that you are currently logged into,
type the following command:
session router.
L When you use the session command the security level stays the same.
8
Avaya C460 Reference Guide
Chapter 1
Using the CLI
Security Levels
There are four security access levels (modes) – User, Privileged, Configure and
Supervisor.
• The User mode is a general access level used to show system parameter values.
• The Privileged mode is used by site personnel to access switch configuration
options.
• The Configure mode is used by site personnel for Layer 3 configuration.
• The Supervisor mode is used to define user names, passwords, and access levels
of up to 10 local users.
A login name and password are always required to access the CLI and the
commands. The login names and passwords, and security levels are established
using the username command.
Switching between the entities, does not effect the security level since security levels
are established specifically for each user. For example, if the operator with a
privileged security level in the Switch entity switches to the Router entity the
privileged security level is retained.
Entering the Supervisor Level
The Supervisor level is the level in which you first enter Cajun Campus CLI and
establish user names for up to 10 local users. When you enter the Supervisor level,
you are asked for a Login name. Type root as the Login name and the default
password root (in lowercase letters):
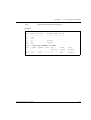
Welcome to C460
SW version 1.0.0
Login: root
Password:****
Password accepted.
C460-1(super)#
Defining new users
Define new users and access levels using the username command in Supervisor
Level.
Exiting the Supervisor Level
To exit the Supervisor level, type the command exit.
Avaya C460 Reference Guide
9
Chapter 1
Using the CLI
Entering the CLI
To enter the CLI, enter your username and password. Your access level is indicated
in the prompt as follows:
The User level prompt is shown below:
C460-1>
The Privileged level prompt is shown below:
C460-1#
The Configure level prompt for Layer 3 configuration is shown below:
C460(configure)#
The Supervisor level prompt is shown below:
C460(super)#
Entering the Technician Level
This level is can only be accessed from the Privileged and Supervisor levels not from
the User level.
L This feature is for use by Avaya Technical Support only.
Getting Help
On-line help may be obtained at any time by typing a question mark (?), or the
word help on the command line or by pressing the F1 key. To obtain help for a
specific command, type the command followed by a space and a question mark.
Example:
C460-1> show ?
C460-1> help show
Command Syntax
Commands are not case-sensitive. That is, uppercase and lowercase characters may
be interchanged freely.
Command Abbreviations
All commands and parameters in the CLI can be truncated to an abbreviation of any
length, as long as the abbreviation is not ambiguous. For example, version can
be abbreviated ver.
For ambiguous commands, type the beginning letters on the command line and
then use the TAB key to toggle through all the possible commands beginning with
these letters.
10
Avaya C460 Reference Guide
Chapter 1
Using the CLI
Router Configuration Contexts
You can either use the general C460 commands available from the
Router(configure)# prompt or you can enter one of two router configuration
context modes:
• Router interface context:
This allows you to define parameters individually for each interface. To enter
this context, type interface <interface_name>
The prompt changes to Router>(config-if:<interface_name>)#
• Router protocol context:
This allows you to define parameters for a specific routing protocol (RIP, OSPF,
and VRRP). To enter this context, type router <protocol_name>
The prompt changes to Router>(configure router:protocol_name)#
To exit these context modes, type the command exit.
Avaya C460 Reference Guide
11
Chapter 1
12
Using the CLI
Avaya C460 Reference Guide
Chapter 2
Avaya C460 CLI Commands
This chapter describes all the C460 CLI commands and parameters in alphabetical
order.
access list
See “ip access-list”
area
User level: read-write, admin.
L You can only access this command in Router-OSPF mode.
Type router ospf at the command prompt to enter Router -OSPF mode if
necessary.
Use the area command to configure the area ID of the router.
Use the no area command to delete the area ID of the router (set it to 0) and
remove the stub definition.
The default area is 0.0.0.0.
L You cannot define a stub area when OSPF is redistributing other protocols or
when the Area ID is 0.0.0.0.
The syntax for this command is:
[no] area <area id> [<stub>]
area id
IP address
stub
Stub
Example:
Router-1 (configure router:ospf) # area 192.168.49.1
Router-1 (configure router:ospf) # area 192.168.49.1 stub
Avaya C460 Reference Guide
13
Chapter 2
Avaya C460 CLI Commands
arp
User level: read-write, admin.
L If you are at the “read-write” user level, you can only access this command in
Configure mode.
Type configure at the command prompt to enter configure mode.
Use the arp command to add a permanent entry to the Address Resolution Protocol
(ARP) cache.
Use the no arp command to remove an entry, either static entry or dynamically
learned.
The syntax for this command is:
[no] arp <ip-address> <mac-address>
ip-address
IP address, in dotted decimal format, of the station
mac-address
MAC address of the local data link
Example:
To add a permanent entry for station 192.168.7.8 to the ARP cache:
C460-1(configure)# arp 192.168.7.8 00:40:0d:8c:2a:01
Example:
To remove an entry to the ARP cache for the station 192.168.13.76:
C460-1(configure)# no arp 192.168.13.76
arp timeout
User level: read-write, admin.
L If you are at the “read-write” user level, you can only access this command in
Configure mode.
Type configure at the command prompt to enter configure mode.
Use the arp timeout command to set the amount of time that an entry remains in
the ARP cache.
Use the no arp timeout command to restore the default value, 14,400.
14
Avaya C460 Reference Guide
Chapter 2
Avaya C460 CLI Commands
The syntax for this command is:
[no] arp timeout <seconds>
seconds
The amount of time, in seconds, that an entry remains
in the arp cache.
Example:
To set the arp timeout to one hour:
C460-1(configure)# arp timeout 3600
To restore the default arp timeout:
C460-1(configure)# no arp timeout
banner login
Use the banner login command to enter the login banner configuration mode.
Use the no banner login command to set the login banner to the default value.
L Delete the current banner using the no banner login command before
creating a new banner, .
The syntax for this command is:
[no] banner login
Example:
C460-1(super)# banner login
C460-1(super)#
banner login line
See “line”
banner post-login
Use the banner post-login command to enter the post-login configuration
mode.
Use the no banner post-login command to set the post-login banner to the
default value.
L Before creating a new banner, delete the current banner using the no banner
post-login command.
Avaya C460 Reference Guide
15
Chapter 2
Avaya C460 CLI Commands
The syntax for this command is:
[no] banner post-login
Example:
C460-1(super)# banner post-login
C460-1(super)#
banner post-login line
See “line”
clear arp-cache
User level: read-write, admin.
L If you are at the “read-write” user level, you can only access this command in
Configure mode.
Type configure at the command prompt to enter configure mode.
Use the clear arp-cache command to delete dynamic entries from the ARP
cache and the IP route cache.
The syntax for this command is:
clear arp cache[<vlan>|<ip addr>[<mask>]]
vlan
VLAN string (up to 16 characters
ip addr
IP address
mask
IP mask
Example:
C460-1(configure)# clear arp-cache
Flushing all arp entries
Flushed 100 ARP entries
Done!
16
Avaya C460 Reference Guide
Chapter 2
Avaya C460 CLI Commands
clear cam
User level: read-write, admin.
Use the clear cam command to delete all entries from the CAM table.
The syntax for this command is:
clear cam
Example:
C460-1# clear cam
CAM table cleared.
clear dot1x config
User level: privileged, supervisor.
Use the clear dot1x config command to disable dot1x on all ports and return
values to the default settings..
The syntax for this command is:
clear dot1x config
Example:
C460-1(super)# clear dot1x config
Original Configuration was Restored
clear dynamic vlans
User level: read-write, admin.
Use the clear dynamic vlans command to clear dynamically learned VLANs.
Only the VLANs learned by the switch from incoming traffic are cleared using this
command.
The syntax for this command is:
clear dynamic vlans
Avaya C460 Reference Guide
17
Chapter 2
Avaya C460 CLI Commands
Example:
C460-1# clear dynamic vlans
This command will delete all the vlans that were
dynamically learned by the device - do you want to continue
(Y/N)? y
Dynamic vlans were deleted from device tables
clear event-log
User level: read-write, admin.
Use the clear event-log command to delete the log file of a Supervisor module.
The syntax for this command is:
clear event-log [<module_number>]
spv_num
(Optional)
Number of Supervisor Module (1 to 2)
Example:
C460-1# clear event-log
*** Clearing the reset file ***
- do you want to continue (Y/N)? y
C460-1#
clear fragment
User level: read-write, admin.
Use the clear fragment command to restore fragment action database defaults
and free all waiting fragments.
The syntax for this command is:
clear fragment
Example:
Router-1# clear fragment
Done!
18
Avaya C460 Reference Guide
Chapter 2
Avaya C460 CLI Commands
clear interface
User level: read-write, admin.
Use the clear interface command to clear the inband or outband interface
from the NVRAM.
The syntax for this command is:
clear interface [outband | inband]
outband
Clears the outband interface
inband
Disables the inband interface
Example:
C460-1# clear interface outband
Interface outband Cleared.
You must reset the device in order for the change to take
effect.
clear ip route
User level: read-write, admin.
Use the clear ip route command to delete IP routing table entries.
The syntax for this command is:
clear ip route <destination> <mask>
destination
IP address of the network, or specific host to be added
mask
IP address of the router
Example:
C460-1# clear ip route 134.12.3.0 255.255.255.0
Route deleted.
clear ip route (Layer 3)
User level: read-write, admin.
L If you are at the “read-write” user level, you can only access this command in
Configure mode.
Type configure at the command prompt to enter configure mode.
Avaya C460 Reference Guide
19
Chapter 2
Avaya C460 CLI Commands
Use the clear ip route command to delete all the dynamic routing entries from the
Routing Table.
The syntax for this command is:
clear ip route * | <ip-addr> [<ip-mask>]
ip-addr
IP address
ip-mask
IP mask address
Example:
C460-1(configure)# clear ip route 192.168.49.1
255.255.255.0
clear ip traffic
User level: read-write, admin.
Use the clear ip traffic command to clear the ip traffic statistics counters.
The syntax for this command is:
clear ip traffic
Example:
Router-1# clear ip traffic
clear log
User level: read-write, admin.
Use the clear log command to
clear port mirror
User level: read-write, admin.
Use the clear port mirror command to cancel port mirroring.
The syntax for this command is:
clear port mirror <source module>/<source port>/<dest module>/
<dest port>
source module
20
Source module number
Avaya C460 Reference Guide
Chapter 2
source port
Source port number
dest module
Destination module number
dest port
Destination port number
Avaya C460 CLI Commands
Example:
C460-1# clear port mirror 9/2/10/4
this command will delete the port mirror entry
- do you want to continue (Y/N)? y
Mirroring packets from port 9/2 to port 10/4 is cleared
clear port static-vlan
User level: read-write, admin.
Use the clear port static-vlan command to delete VLANs statically
configured on a port.
The syntax for this command is:
clear port static-vlan [module/port range][vlan num]
module/port range
Port range
vlan num
The VLAN to unbind from the port
Example:
C460-1# clear port static-vlan 3/10 5
VLAN 5 is unbound from port 3/10
clear radius authentication server
User level: read-write, admin.
Removes a primary or secondary RADIUS authentication server.
The syntax for this command is:
clear radius authentication server[{primary|secondary}]
primary
Remove primary RADIUS server
secondary
Remove secondary RADIUS server
Avaya C460 Reference Guide
21
Chapter 2
Avaya C460 CLI Commands
Example:
C460-1(super)# clear radius authentication server secondary
clear rmon2 statistics
User level: read-write, admin.
Use the clear rmon2 statistics command to delete rmon2 (AnyLayer SMON)
statistics.
The syntax for this command is:
clear rmon2 statistics
Example:
Router-1# clear rmon2 statistics
Done!
clear screen
User level: read-only, read-write, admin.
Use the clear screen command to clear the screen.
The syntax for this command is:
clear screen
clear snmp trap
User level: read-write, admin.
Use the clear snmp trap command to clear an entry from the SNMP trap
receiver table.
The syntax for this command is:
clear snmp trap {<rcvr_addr>|all}
22
rcvr_addr
IP address or IP alias of the trap receiver (the SNMP management
station) to clear
all
Keyword that specifies every entry in the SNMP trap receiver
table
Avaya C460 Reference Guide
Chapter 2
Avaya C460 CLI Commands
Example:
C460-1# clear snmp trap 192.168.173.42
SNMP trap deleted.
clear system-log
User level: read-write, admin.
Use the clear system-log command to delete the log file of a Supervisor
Module.
The syntax for this command is:
clear system-log [<module_number>]
spv_num
(Optional)
Number of Supervisor Module (1 to 2)
Example:
C460-1# clear system-log
*** Clearing the reset file ***
- do you want to continue (Y/N)? y
C460-1#
clear timezone
User level: read-write, admin.
Use the clear timezone command to reset the time zone to its default value UTC
(Coordinated Universal Time)
The syntax for this command is:
clear timezone
Example:
C460-1# clear timezone
Timezone name and offset cleared.
Avaya C460 Reference Guide
23
Chapter 2
Avaya C460 CLI Commands
clear vlan
User level: read-write, admin.
Use the clear vlan command to delete an existing VLAN and return ports from
this VLAN to the default VLAN #1. When you clear a VLAN, all ports assigned to
that VLAN are assigned to the default VLAN #1.
The syntax for this command is:
clear vlan <vlan-id>[name <vlan_name>]
vlan_id
VLAN number
vlan_name
VLAN name
If you wish to enter a name which includes spaces, you must enclose the entire
name in quotation marks, for example “new york”.
Example:
C460-1# clear vlan 100
This command will assign all ports on vlan 100 to their
default in the entire management domain - do you want to
continue (Y/N)? y
VLAN 100 deletion successful
clear vlan (Layer 3)
User level: read-write, admin.
L If you are at the “read-write” user level, you can only access this command in
Configure mode.
Type configure at the command prompt to enter configure mode.
Use the clear vlan command to delete a Router layer 2 interface.
The syntax for this command is:
clear vlan [<ifIndex>] | [name <ifname>]
ifIndex
Interface Index
ifname
Interface name (used in layer 3 protocols)
Example:
C460-1(configure)# clear vlan 2 name vlan2
24
Avaya C460 Reference Guide
Chapter 2
Avaya C460 CLI Commands
If you wish to define a name which includes spaces, you must enclose the entire
name in quotation marks, for example “new york”.
configure
User level: read-write, admin.
Use the configure command to enter configure mode.
The syntax for this command is:
configure
Example:
C460-1(super)# configure
C460-1(configure)#
copy l2-config tftp
User level: read-write, admin.
Use the copy l2-config tftp command to upload the Layer 2 parameters from
the current NVRAM running configuration to a file via TFTP.
L To use this command, you need to have an active tftp server and to create a file
into which to download the data.
L If Avaya MultiService Network Manager is running, you do not require an
additional TFTP server.
The syntax for this command is:
copy l2-config tftp <filename> <ip>
filename
file name (including full path)
ip
IP address of the host
Example:
C460-1# copy l2-config tftp c:\C460\config 149.49.152.36
copy running-config startup-config
User level: privileged, supervisor.
Use the copy running-config startup-config command to copy the active
policy configuration to the startup configuration file in the NVRAM.
Avaya C460 Reference Guide
25
Chapter 2
Avaya C460 CLI Commands
The syntax for this command is:
copy running-config startup-config
Example:
C460-1# copy running-config startup-config
1
copy running-config tftp
User level: privileged, supervisor.
Use the copy running-config tftp command to upload the policy
configuration to a TFTP server.
The syntax for this command is:
copy running-config tftp <filename> <ip>
filename
Destination file name in the tftp server (full path).
ip
The ip address of the tftp server.
Example (for Windows):
C460-1# copy running-config tftp c:\c460\startup.cfg
149.49.100.41
Example: (for Unix):
C460-1# copy running-config tftp /folder/c460/startup.cfg
149.49.100.41
copy startup-config tftp
User level: privileged, supervisor.
Use the copy startup-config tftp command to download a policy
configuration from a TFTP server.
The syntax for this command is:
copy startup-config tftp <filename> <ip>
26
filename
Destination file name in the tftp server (full path).
ip
The ip address of the tftp server.
Avaya C460 Reference Guide
Chapter 2
Avaya C460 CLI Commands
Example (for Windows):
Router-1# copy startup-config tftp c:\c460\startup.cfg
149.49.100.41
Example: (for Unix):
C460-1# copy startup-config tftp /folder/c460/startup.cfg
149.49.100.41
copy tftp EW_archive
User level: read-write, admin.
Use the copy tftp EW-archive command to download the C460 Manager
application into the switch via TFTP.
L To use this command, you need to have an active TFTP server and to create a
file into which to download the data.
L If Avaya MultiService Network Manager is running, you do not require an
additional TFTP server..
The syntax for this command is:
copy tftp EW_archive <filename> <ip>
filename
C460 Manager image file name (full path)
ip
The IP address of the host
Example:
C460-1# copy tftp EW-archive c:\C460\switch1.cfg
192.168.49.10
copy tftp l2-config
User level: read-write, admin.
Use the copy tftp l2-config command to update the Layer 2 parameters in the
current NVRAM running configuration from a file via TFTP.
L To use this command, you need to have an active tftp server and to create a file
into which to download the data.
L If Avaya MultiService Network Manager is running, you do not require an
additional TFTP server.
Avaya C460 Reference Guide
27
Chapter 2
Avaya C460 CLI Commands
The syntax for this command is:
copy tftp l2-config <filename> <ip>
filename
file name (including full path)
ip
IP address of the host
Example:
C460-1# copy tftp l2-config c:\C460\backup 149.49.152.36
Beginning download operation ...
This operation may take a few minutes...
Please refrain from any other operation during this time.
*********************************************************************
* If you are currently running the C460 Device Manager application, *
* it is recommended to exit from it before performing configuration *
* download operations.
*
*********************************************************************
copy tftp startup-config
User level: read-write, admin.
Use the copy tftp startup-config command to copy the C460 configuration
from the saved TFTP file to the Startup Configuration NVRAM.
The syntax for this command is:
copy tftp startup-config <filename> <ip>
filename
file name (full path)
ip
The ip address of the host
Example:
Router-1> copy tftp startup-config c:\C460\router1.cfg
192.168.49.10
copy tftp SW_imageA
User level: read-write, admin.
Use the copy tftp SW_imageA command to update the software image in Bank
A of all the Supervisor Modules installed in the switch.
L To use this command, you need to have an active tftp server and to create a file
into which to download the data.
L If Avaya MultiService Network Manager is running, you do not require an
28
Avaya C460 Reference Guide
Chapter 2
Avaya C460 CLI Commands
additional TFTP server.
copy tftp SW_imageA <filename> <ip>
filename
file name (including full path)
ip
IP address of the host
Example:
C460-1# copy tftp SW_imageA c:\imgA.bin 149.49.36.200
Beginning download operation ...
This operation may take a few minutes...
Please refrain from any other operation during this time.
*********************************************************************
* If you are currently running the C460 Device Manager application, *
* it is recommended to exit from it before performing configuration *
* download operations.
*
*********************************************************************
copy tftp SW_imageB
User level: read-write, admin.
Use the copy tftp SW_imageB command to updates the software image in Bank
B of all the Supervisor Modules installed in the switch. To use this command, you
need to have an active TFTP server, and to create a file into which to download the
data. If MSNM is running, an additional tftp server is not required.
copy tftp SW_imageB <filename> <ip>
filename
file name (including full path)
ip
IP address of the host
Example:
C460-1# copy tftp SW_imageB c:\imgB.bin 149.49.36.200
Beginning download operation ...
This operation may take a few minutes...
Please refrain from any other operation during this time.
*********************************************************************
* If you are currently running the C460 Device Manager application, *
* it is recommended to exit from it before performing configuration *
* download operations.
*
*********************************************************************
Avaya C460 Reference Guide
29
Chapter 2
Avaya C460 CLI Commands
default-metric
User level: read-write, admin.
L You can only access this command in interface mode.
Type interface [name] at the command prompt to enter interface mode if
necessary.
Use the default metric command to set the interface RIP route metric.
Use the no default metric command to restore the default value.
The default metric is 1.
The syntax for this command is:
[no] default-metric <rip interface metric>
rip interface metric
The interface RIP route metric value. The range is 1 to 15.
Example:
Router-1(configure-if:marketing) # default metric 10
Done!
default-metric (OSPF)
User level: read-write, admin.
L You can only access this command in the OSPF context
Type router ospf at the command prompt to enter interface mode if
necessary.
Use the default metric command to set the interface OSPF route metric.
Use the no default metric command to restore the default value.
The default metric is 1.
The syntax for this command is:
[no] default-metric <number>
number
The interface RIP route metric value. The range is 1 to 15.
Example:
Router-1 (configure router:ospf) # default metric 10
Done!
30
Avaya C460 Reference Guide
Chapter 2
Avaya C460 CLI Commands
default-metric (RIP)
User level: read-write, admin.
L You can only access this command in the RIP context
Type router rip at the command prompt to enter interface mode if
necessary.
Use the default metric command to set the interface RIP route metric.
Use the no default metric command to restore the default value.
The default metric is 1.
The syntax for this command is:
[no] default-metric <number>
number
The interface RIP route metric value. The range is 1 to 15.
Example:
Router-1 (configure router:rip) # default metric 10
Done!
disable interface
User level: read-write, admin.
Use the disable interface command to disables the inband or outband
interface.
The syntax for this command is:
disable interface [outband | inband]
outband
Disables the outband interface
inband
Disables the inband interface
Example:
C460-1# disable interface outband
You must reset the device in order for the change to take
effect.
Avaya C460 Reference Guide
31
Chapter 2
Avaya C460 CLI Commands
enable interface
User level: read-write, admin.
Use the enable interface command to enable the inband and outband
interfaces.
The syntax for this command is:
en[able] interface {outband | inband}
outband
Enables the outband interface
inband
Enables the inband interface
Example:
C460-1# en interface inband
This command will RESET the device
*** Reset *** - do you want to continue (Y/N)? Y
Attaching network interface lo0... done.
Welcome to C460
SW version 1.0.1
Login:
enable vlan commands
User level: read-write, admin.
L You can only access this command in interface mode.
Type interface [name] at the command prompt to enter interface mode.
L Use the enable vlans commands command before configuring VLANoriented parameters, when there is more than one interface on the same VLAN.
The syntax for this command is:
enable vlan commands
Example:
Router-1(config-if:marketing)#enable vlan commands
32
Avaya C460 Reference Guide
Chapter 2
Avaya C460 CLI Commands
erase startup-config
User level: read-write, admin.
Use the erase startup-config command to clear the startup configuration.
The syntax for this command is:
erase startup-config
Example:
C460-1# erase startup-config
fragment chain
Use the fragment chain command to set the maximum number of fragments
that can comprise a single IP packet destined to the router.
Use the no fragment chain command to set the fragment chain to the default
value (64).
L The router does not perform reassembly of packets in transit.
The syntax for this command is:
[no] fragment chain <chain-limit>
chain-limit
The maximum number of fragments that can comprise a single IP
packet, from 2 to 2048. The default is 64.
Example:
C460-1# fragment chain 10
fragment size
Use the fragment size command to set the maximum number of fragmented IP
packets, destined to the router, to reassemble at any given time. Use the no form of
this command to set the fragment size to the default value (100).
L The router does not perform reassembly of packets in transit.
The syntax for this command is:
[no] fragment size <database-limit>
database-limit
Avaya C460 Reference Guide
The maximum number of packets undergoing re-assembly at
any given time, from 0 to 200. The default is 100.
33
Chapter 2
Avaya C460 CLI Commands
Example:
Router-1# fragment size 150
fragment timeout
Use the fragment timeout command to set the maximum number of seconds to
reassemble a fragmented IP packet destined to the router. Use the no form of this
command to set the fragment timeout to the default value (10).
L The router does not perform reassembly of packets in transit.
The syntax for this command is:
[no] fragment timeout <timeout>
timeout
The maximum number of seconds to re-assemble an IP packet,
from 5 to 120. The default is 10.
Example:
Router-1# fragment timeout 30
get time
Use the get time command to retrieve the time from the network.
The syntax for this command is:
get time
Example:
C460-1> get time
Time is being acquired from server 0.0.0.0
Time has been acquired from the network.
hostname
User level: read-write, admin.
Use the hostname command to change the Command Line Interface (CLI)
prompt. The current module number always appears at the end of the prompt.
Use the no hostname command to return the CLI prompt to its default.
34
Avaya C460 Reference Guide
Chapter 2
Avaya C460 CLI Commands
The syntax for this command is:
[no] hostname [<hostname_string>]
hostname_string
• none – displays current hostname
• string – the string to be used as the hostname (up to 20
characters).
Example:
C460-1# hostname
Session hostname is ‘C460’
C460-1# hostname “gregory”
C460-1(super)#
If you wish to enter a name which includes spaces, you must enclose the entire
name in quotation marks, for example “new york”.
hostname (Layer 3)
User level: read-write, admin.
Changes the system prompt used for the router. This command does not change the
system prompt of the switch.
To change the system prompt of the switch, use the host name command in the
Layer 2 tree.
The syntax for this command is:
[no] hostname [<hostname_string>]
hostname_string
The string to be used as the hostname (up to 20 characters).
If you do not enter a string, the current hostname is
displayed.
Example:
Router-1> hostname Marketing
Marketing-1 #
If you wish to define a name which includes spaces, you must enclose the entire
name in quotation marks, for example “new york”.
Avaya C460 Reference Guide
35
Chapter 2
Avaya C460 CLI Commands
interface
User level: read-write, admin.
L If you are at the “read-write” user level, you can only access this command in
Configure mode.
Type configure at the command prompt to enter configure mode.
Use the interface command to create and enter the Interface Configuration
Mode.
Use the no interface command to delete a specific IP interface.
The syntax for this command is:
[no] interface <interface name>
interface name
String (up to 32 characters)
Example:
C460-1(configure)# interface marketing
Done!
Router-1(config-if:marketing)#
If you wish to define a name which includes spaces, you must enclose the entire
name in quotation marks, for example “new york”.
36
Avaya C460 Reference Guide
Chapter 2
Avaya C460 CLI Commands
ip access-default-action
User level: read-write, admin.
L If you are at the ”read-write” user level, you can only access this command in
Configure mode.
Type configure at the command prompt to enter configure mode if necessary.
Use the ip access-default-action command to set the default action for a
specific policy list.
The syntax for this command is:
ip access-default-action <policy-list-number> <defaultaction>
<policy-list-number>
integer (100 to 149)
<default-action>
default-action-deny|default-action-permit
Example:
C460-1(configure)# access-default-action 101 defaultaction-deny
ip access-group
User level: read-write, admin.
L If you are at the ”read-write” user level, you can only access this command in
Configure mode.
Type configure at the command prompt to enter configure mode if necessary.
Use the ip access-group command to activate a specific policy list.
Use the no ip access-group command to deactivate the policy list.
The syntax for this command is:
[no] ip access-group <policy-list-number>[<default-action>]
<priority-list-number>
integer (100 to 149)
0 is the default list
<default-action>
default-action-deny|default-action-permit
Example:
C460-1(configure)# ip access-group 101
Avaya C460 Reference Guide
37
Chapter 2
Avaya C460 CLI Commands
ip access-list
User level: read-write, admin.
L If you are at the ”read-write” user level, you can only access this command in
Configure mode.
Type configure at the command prompt to enter configure mode if necessary.
Use the ip access list command to create a specific policy rule. The access list
contains several of these rules: each rule pertains to the source IP address, the
destination IP address, the protocol, the protocol ports (if relevant), and to the ACK
bit (if relevant).
Use the no ip access list command to delete a specific rule.
The syntax for this command is:
[no] ip access-list <policy-list-number> <access-list-index>
<action> <protocol> {<source-ip> <source-wildcard> | any |
host <source-ip>}[<operator> <port> [<port]]
{<destination-ip> <destination-wildcard> | any |
host <destination-ip>}[<operator> <port> [<port>]]
[established] [precedence]
38
<access-list-number>
integer (100 to 149)
0 is the default list
<access-list-index>
integer (1 to 254)
<command>
permit | deny | deny-and-notify | fwd0-7 |
composite op name
<protocol>
ip | tcp | udp | integer (1 to 255)
<source-ip>
ip network
<source-wildcard>
ip network wildcard
<operator>
eq | lt | gt | range
<port>
integer (1 to 65535)
<destination-ip>
ip network
<destination-wildcard>
ip network wildcard
<precedence>
mandatory | optional]
Avaya C460 Reference Guide
Chapter 2
Avaya C460 CLI Commands
Example:
C460-1(configure)# ip access-list 101 23 deny ip any
1.2.0.0 0.0.255.255
ip access-list-cookie
User level: read-write, admin.
L If you are at the ”read-write” user level, you can only access this command in
Configure mode.
Type configure at the command prompt to enter configure mode if necessary.
Use the ip access-list-cookie command to set the list cookie for a specific
policy list.
The syntax for this command is:
ip access-list-cookie <policy-list-number> <cookie>
<policy-list-number>
integer (100 to 149)
<cookie>
integer
Example:
C460-1(configure)# ip access-list-cookie 101 12345
ip access-list-copy
User level: read-write, admin.
L If you are at the ”read-write” user level, you can only access this command in
Configure mode.
Type configure at the command prompt to enter configure mode if necessary.
Use the ip access-list-copy command to copy a configured source policy list
to a destination policy list.
The syntax for this command is:
ip access-list-copy <source-list> <destination-list>
<source-list>
integer (100 to 149)
0 is the default list
<destination-list>
integer (100 to 149)
Avaya C460 Reference Guide
39
Chapter 2
Avaya C460 CLI Commands
Example:
C460-1(configure)# ip access-list-copy 100 101
ip access-list-dscp name
User level: read-write, admin.
L If you are at the ”read-write” user level, you can only access this command in
Configure mode.
Type configure at the command prompt to enter configure mode if necessary.
Use the ip access-list-dscp name command to set a name for a dscp entry.
The syntax for this command is:
ip access-list-dscp name <policy-list-number> <dscp> <name>
<policy-list-number>
integer (100 to 149)
dscp
DSCP entry (0 to 63)
<name>
entry name
Example:
C460-1(configure)# ip access-list-name 101 16 special
If you wish to define a name which includes spaces, you must enclose the entire
name in quotation marks, for example “new york”.
ip access-list-dscp operation
User level: read-write, admin.
L If you are at the ”read-write” user level, you can only access this command in
Configure mode.
Type configure at the command prompt to enter configure mode if necessary.
Use the ip access-list-dscp operation command to set a DSCP to CoS
mapping.
L The C460 performs the mapping for only those frames than match an ACL rule
with a “permit” action.
The syntax for this command is:
ip access-list-dscp operation <policy-list-number> <dscp>
40
Avaya C460 Reference Guide
Chapter 2
Avaya C460 CLI Commands
<action>
policylistnumber
A valid id number for a policy list currently defined for the module
(100 - 149)
dscp
Range of dscp. For example:
• 0 to 63
• <low-dscp>-<high-dscp> <low-dscp>-<low-dscp>: apply the
map to all packets with DSCP from <low-dscp> to <high-dscp>.
action
•
•
•
•
permit: do nothing, let the packet pass:
deny: drop the packet
deny-and-notify: drop the packet and send an SNMP trap
fwd0, fwd1fwd7: Set the frame COS field to 0,7
Example:
C460-1(configure)# ip access-list-dscp operation 101 0-63
permit
C460-1(configure)# ip access-list-dscp operation 101 62
fwd5
ip access-list-dscp precedence
User level: read-write, admin.
L If you are at the ”read-write” user level, you can only access this command in
Configure mode.
Type configure at the command prompt to enter configure mode if necessary.
Use the ip access-list-dscp precedence command to ?
The syntax for this command is:
ip access-list-dscp precedence <policy-list-number> <dscp>
<precendence>
policy-listnumber
A valid id number for a policy list currently defined for the
module (100 to 149)
dscp
DSCP entry (0 to 63)
precedence
????
mandatory
optional
Avaya C460 Reference Guide
41
Chapter 2
Avaya C460 CLI Commands
Example:
C460-1(configure)# ip access-list-dscp precedence
C460-1(configure)#
ip access-list-dscp trust
User level: read-write, admin.
Use the ip access-list-dscp trust command to decide which original
frame fields influence the selection of packet priority.
The syntax for this command is:
ip access-list-dscp trust <policy-list-number>
{untrusted|trust-cos |trust-dscp}
policy-listnumber
A valid id number for a policy list currently defined for the module
(100 to 149)
untrusted
Forward the packet with priority 0
trust-cos
Forward the packet with its original 802.1p priority (default)
trust-dscp
Forward the packet with the maximum priority between 802.1p and
the priority obtained from the DSCP-CoS mapping table
Example:
C460-1(configure)# ip access-list-dscp trust 100 trust-dscp
Done!
ip access-list-name
User level: read-write, admin.
L If you are at the “read-write” user level, you can only access this command in
Configure mode.
Type configure at the command prompt to enter configure mode.
Use the ip access-list-name command to set a name for a policy list.
The syntax for this command is:
ip access-list-name <policy-list-number> <name>
<policy-list-number>
42
integer (100 to 149)
Avaya C460 Reference Guide
Chapter 2
<name>
Avaya C460 CLI Commands
list name
Example:
C460-1(configure)# ip access-list-name 101 morning
If you wish to define a name which includes spaces, you must enclose the entire
name in quotation marks, for example “new york”.
ip access-list-owner
User level: read-write, admin.
L If you are at the “read-write” user level, you can only access this command in
Configure mode.
Type configure at the command prompt to enter configure mode.
Use the ip access-list-owner command to set the owner for a specific policy
list.
The syntax for this command is:
ip access-list-owner <policy-list-number> <owner>
<policy-list-number>
integer (100 to 149)
<owner>
list owner
Example:
Router-1> ip access-list-owner 101 admin
Done!
ip address
User level: read-write, admin.
L You can only access this command in interface mode.
Type interface [name] at the command prompt to enter interface mode.
Use the ip address command to assign an IP address and mask to an interface.
The syntax for this command is:
ip address <ip-address> <mask> [<admin-state>]
ip address
Avaya C460 Reference Guide
The IP address assigned to the interface.
43
Chapter 2
Avaya C460 CLI Commands
mask
Mask for the associated IP subnet
admin-state
The administration status – either Up or Down
Example:
To assign the IP address 192.168.22.33 with mask 255.255.255.0 to the interface
“marketing”:
Router-1(config-if:marketing)# ip address 192.168.22.33
255.255.255.0
Done!
ip admin-state
User level: read-write, admin.
L You can only access this command in interface mode.
Type interface [name] at the command prompt to enter interface mode.
Use the admin-state command to set the administrative state of an IP interface.
The default state is up.
The syntax for this command is:
ip admin-state <up/down>
up/down
Administrative state of the interface:
• up (active)
• down (inactive).
Example:
Router-1(config-if:marketing)# ip admin-state up
ip bootp-dhcp network
User level: read-write, admin.
L You can only access this command in Interface mode.
Type interface [name] at the command prompt to enter Interface mode if
necessary.
Use the ip bootp-dhcp network command to select the network from which
the bootp/dhcp server shall allocate an address. You only need to run this
command is required only when there are multiple interfaces over the VLAN.
Use the no ip bootp-dhcp network command to restore the default value.
44
Avaya C460 Reference Guide
Chapter 2
Avaya C460 CLI Commands
The syntax for this command is:
[no] ip bootp-dhcp network <ip-address>
ip-address
The IP address of the network.
Example:
To select the network 192.168.169.0 as the network from which an address shall be
allocated for bootp/dhcp requests:
Router-1(configure-if:marketing) # ip bootp-dhcp network
192.168.169.0
Done!
ip bootp-dhcp relay
User level: read-write, admin.
L If you are at the “read-write” user level, you can only access this command in
Configure mode.
Type configure at the command prompt to enter configure mode.
Use the ip bootp-dhcp command to enable relaying of bootp and dhcp requests
to the bootp/dhcp server.
Use the no ip bootp-dhcp command to disable bootp/dhcp relay.
The default state is disabled.
The syntax for this command is:
[no] ip bootp-dhcp relay
Example:
To enable relaying of BOOTP and DHCP requests:
C460-1(configure)# ip bootp-dhcp relay
Done!
To disable relaying of bootp and dhcp requests:
C460-1(configure)# no ip bootp-dhcp relay
Done!
Avaya C460 Reference Guide
45
Chapter 2
Avaya C460 CLI Commands
ip bootp-dhcp server
User level: read-write, admin.
L You can only access this command in Interface mode.
Type interface [name] at the command prompt to enter Interface mode if
necessary.
Use the ip bootp-dhcp server command to add a bootp/dhcp server to
handle bootp/dhcp requests received by this interface.
Use the no ip bootp-dhcp server command to remove the server. A
maximum of two servers can be added to a single interface.
The syntax for this command is:
ip bootp-dhcp server <ip-address>
ip-address
The IP address of the server.
Example:
To add station 192.168.37.46 as a bootp/dhcp server to handle bootp/dhcp requests
arriving at the interface “marketing”:
Router-1(configure-if:marketing) # ip bootp-dhcp server
192.168.37.46
Done!
ip broadcast-address
User level: read-write, admin.
L You can only access this command in interface mode.
Type interface [name] at the command prompt to enter interface mode.
Use the ip broadcast command to update the interface broadcast address. The
Broadcast address must be filled in with 0s or 1s.
The syntax for this command is:
ip broadcast-address <bc addr>
bc addr
The broadcast IP address
Example:
Router-1(config-if:marketing)#ip broadcast address
192.168.255.255
46
Avaya C460 Reference Guide
Chapter 2
Avaya C460 CLI Commands
ip default-gateway
User level: read-write, admin.
L If you are at the “read-write” user level, you can only access this command in
Configure mode.
Type configure at the command prompt to enter configure mode.
Use the ip default-gateway command to define a default gateway (router).
Use the no ip default gateway command to remove the default gateway.
The syntax for this command is:
[no] ip default-gateway <ip-address>[<cost>][<preference>]
ip-address
The IP address of the router.
cost
The path cost. The default is 1
preference
Preference, either High or Low. Default is Low.
Example:
To define the router at address 192.168.37.1 as the default gateway:
C460-1(configure)# ip default-gateway 192.168.37.1
ip directed-broadcast
User level: read-write, admin.
L You can only access this command in interface mode.
Type interface [name] at the command prompt to enter interface mode.
Use the ip directed-broadcast command to enable net-directed broadcast
forwarding.
Use the no ip directed-broadcast command to disables net-directed
broadcasts on an interface.
The syntax for this command is:
[no] ip directed-broadcast
Example:
Router-1(config-if:marketing)# ip directed broadcast
Avaya C460 Reference Guide
47
Chapter 2
Avaya C460 CLI Commands
ip icmp-errors
User level: read-write, admin.
L If you are at the “read-write” user level, you can only access this command in
Configure mode.
Type configure at the command prompt to enter configure mode.
Use the icmp-error command to turn ICMP error messages on.
Use the no icmp-error command to turn ICMP error messages off.
The syntax for this command is:
[no] ip icmp-errors
Example:
To turn the ICMP error messages on:
C460-1(configure)# ip icmp-errors
Done!
ip max-arp-entries
User level: read-write, admin.
L If you are at the “read-write” user level, you can only access this command in
Configure mode.
Type configure at the command prompt to enter configure mode.
Use the ip max-arp-entries command to set the maximum number of ARP
cache entries allowed in the ARP cache.
Use the no ip max-arp-entries command to restore the default value of 4096.
This command takes effect only after start-up.
The syntax for this command is:
[no] ip max-arp-entries <value>
value
The space available for the IP address table. When you decrease the
number of entries, it may cause the table to be relearned more
frequently. If you do not enter a value, then the current ARP Cache
size is shown.
Example:
To set the maximum number of ARP cache entries to 8000:
C460-1(configure)# ip max-arp-entries 8000
48
Avaya C460 Reference Guide
Chapter 2
Avaya C460 CLI Commands
To restore the maximum number of ARP cache entries to its default:
C460-1(configure)# no ip max-arp-entries
ip max-route-entries
User level: read-write, admin.
L If you are at the “read-write” user level, you can only access this command in
Configure mode.
Type configure at the command prompt to enter configure mode.
The ip max-route-entries command exists for compatibility with Avaya™
P580. There is no limitation on the size of the routing table, except for the amount of
available memory.
Use the no ip max-route-entries command to remove the limitation.
The syntax for this command is:
[no] ip max-route-entries <value>
value
number of entries
Example:
C460-1(configure)# ip max-route-entries 4000
ip netbios-rebroadcast
User level: read-write, admin.
L You can only access this command in interface mode.
Type interface [name] at the command prompt to enter interface mode.
Use the ip netbios-rebroadcast command to set the NETBIOS rebroadcasts
mode on an interface.
Use the no ip netbios-rebroadcast command to disable NETBIOS
rebroadcasts on an interface.
The syntax for this command is:
[no] ip netbios-rebroadcast <mode>
Avaya C460 Reference Guide
49
Chapter 2
Avaya C460 CLI Commands
The possible values of mode are:
both
Netbios packets received on the interface
rebroadcasted to other interfaces and netbios packets
received on other interfaces are rebroadcasted into
this interface.
disable
Netbios packets are not rebroadcasted into or out of
this interface.
Example:
To enable rebroadcasting of netbios packets received by and sent from the interface
“marketing”:
Router-1(config-if:marketing)# ip netbios-rebroadcast both
ip netmask-format
User level: read-write, admin.
L If you are at the “read-write” user level, you can only access this command in
Configure mode.
Type configure at the command prompt to enter configure mode.
Use the ip netmask-format command to specify the format of netmasks in the
show command output.
Use the no ip netmask-format command to restores the default format which is
a dotted decimal.
The syntax for this command is:
[no] ip netmask-format <mask-format>
The possible mask formats are:
50
bitcount
Addresses are followed by a slash and the total number of bits
in the netmask. For example 17
decimal
The network masks are in dotted decimal notation. For
example, 255.255.255.0.
hexadecimal
The network masks are in hexadecimal format as indicated by
the leading 0X. For example, 0XFFFFFF00.
Avaya C460 Reference Guide
Chapter 2
Avaya C460 CLI Commands
Example:
To display netmasks in decimal format:
C460-1(configure)# ip netmask-format bitcount decimal
Done!
ip ospf authentication-key
User level: read-write, admin.
L You can only access this command in Interface mode.
Type interface [name] at the command prompt to enter Interface mode if
necessary.
Use the ip ospf authentication-key command to configure the interface
authentication password.
Use the no ip ospf authentication-key command to remove the OSPF
password.
The syntax for this command is:
[no] ip ospf authentication-key <key>
key
string (up to 8 characters)
Example:
Router-1(configure-if:marketing) # ip ospf authenticationkey my_pass
ip ospf cost
User level: read-write, admin.
L You can only access this command in Interface mode.
Type interface [name] at the command prompt to enter Interface mode if
necessary.
Use the ip ospf command to configure interface metric.
Use the no ip ospf cost command to set the cost to its default. The default is 1.
The syntax for this command is:
[no] ip ospf cost <cost>
cost
Avaya C460 Reference Guide
integer
51
Chapter 2
Avaya C460 CLI Commands
Example:
Router-1(configure-if:marketing) # ip ospf cost 10
Done!
ip ospf dead-interval
User level: read-write, admin.
L You can only access this command in Interface mode.
Type interface [name] at the command prompt to enter Interface mode if
necessary.
Use the ip ospf dead-interval command to configure the interval before
declaring the neighbor as dead.
Use no ospf dead-interval to set the dead-interval to its default value of 40.
The syntax for this command is:
[no] ip ospf dead-interval <seconds>
seconds
Time in seconds (integer value)
Example:
Router-1(configure-if:marketing) # ip ospf dead-interval 15
ip ospf hello-interval
User level: read-write, admin.
L You can only access this command in Interface mode.
Type interface [name] at the command prompt to enter Interface mode if
necessary.
Use this command to specify the time interval between hello's the router sends.
Use no ip ospf hello-interval to set the hello-interval to its default.
The default is 10.
The syntax for this command is:
[no] ip ospf hello-interval <seconds>
seconds
52
integer
Avaya C460 Reference Guide
Chapter 2
Avaya C460 CLI Commands
Example:
Router-1(configure-if:marketing) # ip ospf hello-interval 5
Done!
ip ospf priority
User level: read-write, admin.
L You can only access this command in Interface mode.
Type interface [name] at the command prompt to enter Interface mode if
necessary.
Use the ip ospf priority command to configure interface priority used in DR
election.
Use the no ip ospf priority to set the OSPF priority to its default value.
The default is 1.
The syntax for this command is:
[no] ip ospf priority <priority>
priority
integer
Example:
Router-1(configure-if:marketing) # ip ospf priority 17
Done!
ip ospf router-id
User level: read-write, admin.
L You can only access this command in Router-OSPF mode.
Type router ospf at the command prompt to enter Router -OSPF mode if
necessary.
Use the ip ospf router-id command to configure the router identity.
Use the no ip ospf router-id command to return the router identity to its
default (lowest IP interface that exists).
The syntax for this command is:
[no] ip ospf router-id <router id>
router id
Avaya C460 Reference Guide
IP address
53
Chapter 2
Avaya C460 CLI Commands
Example:
Router-1> ip ospf router-id 192.168.49.1
ip proxy-arp
User level: read-write, admin.
L You can only access this command in interface mode.
Type interface [name] at the command prompt to enter interface mode.
Use the ip proxy-arp command to enables proxy ARP on an interface.
Use the no ip proxy-arp command to disable proxy ARP on an interface.
The syntax for this command is:
[no] ip proxy-arp
Example:
To disable proxy ARP on interface marketing:
Router-1(config-if:marketing)#no ip proxy arp
ip redirects
User level: read-write, admin.
L You can only access this command in interface mode.
Type interface [name] at the command prompt to enter interface mode if
necessary.
Use the ip redirects command to enables the sending of redirect messages on
the interface.
Use the no ip redirects command to disable the redirect messages. By default,
sending of redirect messages on the interface is enabled.
The syntax for this command is:
[no] ip redirects
Example:
Router-1(config-if:marketing)#ip redirects
ip rip authentication key
User level: read-write, admin.
L You can only access this command in interface mode.
54
Avaya C460 Reference Guide
Chapter 2
Avaya C460 CLI Commands
Type interface [name] at the command prompt to enter interface mode if
necessary.
Use the ip rip authentication key command to set the authentication
string used on the interface.
Use the no ip rip authentication key command to clear the password.
The syntax for this command is:
[no] ip rip authentication key <password>
password
The authentication string for the interface. Up to 16 characters are
allowed.
Example:
To set the authentication string used on the interface “marketing” to be “hushhush”.
Router-1(configure-if:marketing) # ip rip authentication
key hush-hush
ip rip authentication mode
User level: read-write, admin.
L You can only access this command in interface mode.
Type interface [name] at the command prompt to enter interface mode if
necessary.
Use the ip rip authentication command to specify the type of authentication
used in RIP Version 2 packets.
Use the no ip rip authentication command to restore the default value of
none.
The syntax for this command is: [no] ip rip authentication mode
[simple|none]
simple|none
The authentication type used in RIP Version 2 packets:
• simple - clear text authentication.
• none - no authentication.
Example:
To specify simple authentication to be used in RIP Version 2 packets on the interface
Avaya C460 Reference Guide
55
Chapter 2
Avaya C460 CLI Commands
“marketing”.
Router-1(configure-if:marketing) # ip rip authentication
mode simple
ip rip default-route-mode
User level: read-write, admin.
L You can only access this command in interface mode.
Type interface [name] at the command prompt to enter interface mode if
necessary.
Use the ip rip default-route-mode command to enable learning of the
default route received by the RIP protocol. The default state is talk-listen.
The syntax for this command is:
ip rip default-route-mode <mode>
The possible default route modes on an interface are:
talk-listen
Set RIP to send and receive default route updates on
the interface.
talk-only
Set RIP to send but not receive default route updates
on the interface.
Example:
Router-1(configure-if:marketing) # ip rip default-routemode talk listen
Done!
ip rip poison-reverse
User level: read-write, admin.
L You can only access this command in interface mode.
Type interface [name] at the command prompt to enter interface mode if
necessary.
Use the ip rip poison-reverse command to enable split-horizon with
poison-reverse on an interface.
Use the no ip poison-reverse command to disable the poison-reverse
mechanism.
The split-horizon technique prevents information about routes from exiting the
router interface through which the information was received. This prevents routing
56
Avaya C460 Reference Guide
Chapter 2
Avaya C460 CLI Commands
loops.
Poison reverse updates explicitly indicate that a network or subnet is unreachable
rather than implying they are not reachable. Poison reverse updates are sent to
defeat large routing loops.
The syntax for this command is:
[no] ip rip poison-reverse
Example:
Router-1(configure-if:marketing) # ip rip poison-reverse
Done!
ip rip rip-version
User level: read-write, admin.
L You can only access this command in interface mode.
Type interface [name] at the command prompt to enter interface mode if
necessary.
Use the ip rip rip-version command to specify the RIP version running on
the interface basis.
The syntax for this command is:
ip rip rip-version [1][2]
The possible versions of the RIP packets received and sent on an interface are:
[1]
RIP Version 1 packets
[2]
RIP Version 2 packets.
Example:
To specify that RIP version 2 should be running on the basis of the interface
“marketing”:
Router-1(configure-if:marketing) # ip rip rip-version 2
Done!
ip rip send-receive-mode
User level: read-write, admin.
L You can only access this command in interface mode.
Type interface [name] at the command prompt to enter interface mode if
Avaya C460 Reference Guide
57
Chapter 2
Avaya C460 CLI Commands
necessary.
Use the ip rip send-receive command to set the RIP Send and Receive mode
on an interface. The default state is talk-listen.
The syntax for this command is:
ip rip send-receive-mode <mode>[<default route metric>]
mode
talk-listen - Set RIP to receive and transmit
updates on the interface.
talkdefault-listen - Set RIP to receive
updates on the interface and send only a default
route.
default route metric
Integer value
Example:
To set the RIP Send and Receive mode on the interface “marketing” to be listen-only:
Router-1(configure-if:marketing) # ip rip send-receive-mode
talk listen
Done!
ip rip split-horizon
User level: read-write, admin.
L You can only access this command in interface mode.
Type interface [name] at the command prompt to enter interface mode if
necessary.
Use the ip rip split-horizon command to enable split-horizon mechanism.
Use the no ip rip split-horizon command to disable the split-horizon.
By default split-horizon is enabled.
The split-horizon technique prevents information about routes from exiting the
router interface through which the information was received. This prevents routing
loops.
The syntax for this command is:
[no] ip rip split-horizon
58
Avaya C460 Reference Guide
Chapter 2
Avaya C460 CLI Commands
Example:
Router-1(configure-if:marketing) # no ip rip split-horizon
Done!
ip route
User level: read-write, admin.
L If you are at the “read-write” user level, you can only access this command in
Configure mode.
Type configure at the command prompt to enter configure mode.
Use the ip route command to establish a static route.
Use the no ip route command to remove a static route.
The syntax for this command is:
[no] ip route <ip-address> <mask> <next-hop> [<next-hop>]
[<next-hop>] [<cost>] [<preference>]
ip-address
The IP address of the network
mask
Mask of the static route
next-hop
The next hop address in the network
cost
The path cost. The default is 1
preference
Preference, either High or Low. Default is Low.
Example:
To define the router 192.168.33.38 as the next hop for the network 192.168.33.0 with
mask 255.255.255.0:
C460-1(configure)# ip route 192.168.33.0 255.255.255.0
10.10.10.10
ip routing
User level: read-write, admin.
L You can only access this command in configure mode.
Type configure at the command prompt to enter configure mode.
Avaya C460 Reference Guide
59
Chapter 2
Avaya C460 CLI Commands
Use the ip routing command to enable IP routing.
Use the no ip routing command to disable the IP routing process in the device.
By default, IP routing is enabled.
The syntax for this command is:
[no] ip routing
Example:
C460-1(configure)# ip routing
Done!
ip routing-mode
User level: read-write, admin.
L You can only access this command in interface mode.
Type interface [name] at the command prompt to enter interface mode if
necessary.
Use the ip routing-mode command to set the IP routing mode of the interface. In
RT-MGMT mode, the interface functions as a routing interface. In
RT_PRIMARY_MGMT mode, the interface function as both a routing interface and
the primary management interface.
The IP address used in MSNM is the primary management interface IP address.
Only one interface can be in RT_PRIMARY_MGMT mode. If no interface is
configured to RT_PRIMARY_MGMT, the IP address used in MSNM is selected
randomly.
The syntax for this command is:
ip routing-mode <mode>
mode
RT_MGMT or RT_PRIMARY_MGMT mode
Example:
Router-1(config-if:marketing)#ip routing-mode
RT_PRIMARY_MGMT
60
Avaya C460 Reference Guide
Chapter 2
Avaya C460 CLI Commands
ip simulate
User level: read-write, admin.
L If you are at the “read-write” user level, you can only access this command in
Configure mode.
Type configure at the command prompt to enter configure mode.
Use the ip simulate command to check the policy for a simulated packet. The
command contains the addressed list number, and the packet parameters.
The syntax for this command is:
ip simulate <access-list-number> [<priority>] [<dscpvalue>]<source> <destination> [<protocol> [<source port>
<destination port> [<established>]]]
access-list-number
integer (100 to 149)
priority
fwd0 | fwd1 | ... | fwd7
dspc value
dscp0 | dscp1 | ... | dscp63
source
source ip address
destination
destination ip address
protocol
ip | tcp | udp | integer (1 to 255)
source port
integer (1 to 65535)
destination port
integer (1 to 65535)
established
value of TCP established bit
Example:
C460-1(configure)# ip simulate 100 192.67.85.12
193.76.54.25
ip vlan/ip vlan name
User level: read-write, admin.
L You can only access this command in interface mode.
Type interface [name] at the command prompt to enter interface mode.
Use the ip vlan and ip vlan name commands to specify the VLAN on which an
IP interface resides. You can specify either the VLAN ID using the ip vlan
command or the VLAN name using the ip vlan name command.
The no ip vlan or no ip vlan name command to reset the IP interface to the
Avaya C460 Reference Guide
61
Chapter 2
Avaya C460 CLI Commands
default VLAN.
The syntax for this command is:
[no] ip vlan <vlan-id>
Example:
To specify VLAN developmental as the VLAN used by interface “products”:
Router-1(config-if:marketing)# ip vlan name development
If you wish to define a name which includes spaces, you must enclose the entire
name in quotation marks, for example “new york”.
ip vrrp
User level: read-write, admin.
L You can only access this command in Interface mode.
Type interface [name] at the command prompt to enter Interface mode if
necessary.
Use the ip vrrp command to create a virtual router on the interface.
Use the no ip vrrp command to delete a virtual router.
The syntax for this command is:
[no] ip vrrp <vr-id>
vr-id
Virtual Router ID (1-255)
Example:
Router-1(configure-if:marketing) # ip vrrp 1
Done!
ip vrrp address
User level: read-write, admin.
L You can only access this command in Interface mode.
Type interface [name] at the command prompt to enter Interface mode if
necessary.
Use the ip vrrp address command to assign an IP address to the virtual
router.
Use the no ip vrrp address command to remove an IP address from a virtual
router.
62
Avaya C460 Reference Guide
Chapter 2
Avaya C460 CLI Commands
The syntax for this command is:
[no] ip vrrp <vr-id> address <ip-address>
vr-id
Virtual Router ID (1-255)
ip-address
The IP address to be assigned to the virtual router.
Example:
To assign address 10.0.1.2 to virtual router 1:
Router-1(configure-if:marketing) # ip vrrp 1 address
10.0.1.2
Done!
ip vrrp auth-key
User level: read-write, admin.
L You can only access this command in Interface mode.
Type interface [name] at the command prompt to enter Interface mode if
necessary.
Use the ip vrrp auth-key command to set the virtual router simple password
authentication for the virtual router ID.
Use the no ip vrrp auth-key command to disable simple password
authentication for the virtual router instance.
The syntax for this command is:
[no] ip vrrp <vr-id> auth-key <key-string>
vr-id
Virtual Router ID (1-255)
key-string
Simple password string.
ip vrrp override addr owner
User level: read-write, admin.
L You can only access this command in Interface mode.
Type interface [name] at the command prompt to enter Interface mode if
necessary.
Use the ip vrrp override addr owner command to accept packets
addressed to the IP address(es) associated with the virtual router, such as ICMP,
SNMP, and TELNET (if it is not the IP address owner).
Use the no ip vrrp override addr owner command to discard these packets.
Avaya C460 Reference Guide
63
Chapter 2
Avaya C460 CLI Commands
The syntax for this command is:
[no] ip vrrp <vr-id> override addr owner
vr-id
Virtual Router ID (1-255)
Example:
Router-1(configure-if:marketing) # ip vrrp 1 override addr
owner
Done!
ip vrrp preempt
User level: read-write, admin.
L You can only access this command in Interface mode.
Type interface [name] at the command prompt to enter Interface mode if
necessary.
Use the ip vrrp preempt command to configure the router to preempt a lower
priority master for the virtual router ID.
Use the no ip vrrp preempt command to disable preemption for the virtual
router instance.
By default, preemption is enabled.
The syntax for this command is:
[no] ip vrrp <vr-id> preempt
vr-id
Virtual Router ID (1-255)
Example:
Router-1(configure-if:marketing) # ip vrrp 1 preempt
Done!
ip vrrp primary
User level: read-write, admin.
L You can only access this command in Interface mode.
Type interface [name] at the command prompt to enter Interface mode if
necessary.
Use the ip vrrp primary command to set the primary address that shall be
used as the source address of VRRP packets for the virtual router ID.
Use the no ip vrrp primary command to return to the default primary address
64
Avaya C460 Reference Guide
Chapter 2
Avaya C460 CLI Commands
for the virtual router instance.
By default, the primary address is selected automatically by the device.
The syntax for this command is:
[no] ip vrrp <vr-id> primary <ip-address>
vr-id
Virtual Router ID (1-255)
ip-address
Primary IP address of the virtual router. This address
should be one of the router addresses on the VLAN.
Example:
Router-1(configure-if:marketing) # ip vrrp 1 primary
192.168.66.23
Done!
ip vrrp priority
User level: read-write, admin.
L You can only access this command in Interface mode.
Type interface [name] at the command prompt to enter Interface mode if
necessary.
Use the ip vrrp priority command to set the virtual router priority value
used when selecting a master router.
Use the no ip vrrp priority command to restore the default value.
The syntax for this command is:
[no] ip vrrp <vr-id> priority <pri-value>
vr-id
Virtual Router ID (1-255)
pri-value
The priority value. The range is 1-254.
Example:
To set the priority value for virtual router 1 to 10:
Router-1(configure-if:marketing) # ip vrrp 1 priority 10
Done!
Example:
Avaya C460 Reference Guide
65
Chapter 2
Avaya C460 CLI Commands
To set the virtual router simple password for virtual router 1 to abcd:
Router-1(configure-if:marketing) # ip vrrp 1 auth-key abcd
Done!
ip vrrp timer
User level: read-write, admin.
L You can only access this command in Interface mode.
Type interface [name] at the command prompt to enter Interface mode if
necessary.
Use the ip vrrp timer command to set the virtual router advertisement timer
value (in seconds) for the virtual router ID.
Use no ip vrrp timer command to restore the default value.
The syntax for this command is: [no] ip vrrp <vr-id> timer <value>
vr-id
Virtual Router ID (1-255)
value
The advertisement transmit time (seconds).
Example:
To set the virtual router advertisement timer value for virtual router 3 to 2:
Router-1(configure-if:marketing) # ip vrrp 3 timer 2
Done!
line
L You can only access this command from the banner or post-login banner
context.
Use the line command to add a line to the banner or post-login banner message.
The syntax for this command is:
line <number> [string]
66
number
Line number in the banner (1 to 24)
string
String to be displayed at the given line number (up to 80
characters)
Avaya C460 Reference Guide
Chapter 2
Avaya C460 CLI Commands
Example:
C460-1(super)# line 5 “C460 CLI”
Done!
network (RIP)
User level: read-write, admin.
L You can only access this command in router-RIP mode.
Type router rip at the command prompt to enter router-RIP mode if
necessary.
Use the network command to specify a list of networks on which the RIP is
running.
Use the no network command to remove an entry.
The syntax for this command is:
[no] network <ip-address> [<wildcard-mask>]
ip addr
The IP address of the network of directly connected networks
wildcard-mask
Wildcard mask address. Exists for compatibility with P550.
Example:
To specify that RIP will be used on all interfaces connected to the network
192.168.37.0:
Router-1 (configure router:rip) # network 192.168.37.0
Done!
network (OSPF)
User level: read-write, admin.
L You can only access this command in Router-OSPF mode.
Type router ospf at the command prompt to enter Router -OSPF mode if
necessary.
Use the network command to enable OSPF in this network.
Use the no network command to disable OSPF in this network.
The default is disabled.
Avaya C460 Reference Guide
67
Chapter 2
Avaya C460 CLI Commands
The syntax for this command is:
network <net addr> [<wildcard-mask> [area <area id>]]
net addr
IP address
wildcard-mask
Wildcard mask address
area id
Area ID. This parameter exists for compatibility with
P550.
Example:
Router-1 (configure router:ospf) # network 192.168.0.0
Router-1 (configure router:ospf) # area 192.168.0.0
0.0.255.255 area 0.0.0.0
no rmon alarm
User level: read-write, admin.
Use the no rmon history command to delete an existing RMON alarm entry.
The syntax for this command is:
no rmon alarm <Alarm Index>
Alarm Index
History index defined using rmon alarm command or C460
Manager.
C460-1# no rmon alarm 1026
no rmon event
User level: read-write, admin.
Use the no rmon event command to delete an existing RMON event entry.
The syntax for this command is:
no rmon event <Event Index>
Event Index
History index defined using rmon event command or C460
Manager.
C460-1# no rmon event 1054
68
Avaya C460 Reference Guide
Chapter 2
Avaya C460 CLI Commands
no rmon history
User level: read-write, admin.
Use the no rmon history command to delete an existing RMON history entry.
The syntax for this command is:
no rmon history <History Index>
History Index
User level: read-only, read-write, admin.History
index defined using rmon history command or
RMON management tool
Example:
C460-1# no rmon history 1026
no username
User level: admin.
Use the no username command to remove a local user account.
The syntax for this command is:
no username <name>
name
User name
Example:
C460-1(super)# no username john
User account removed.
If you wish to delete a name which includes spaces, you must enclose the entire
name in quotation marks, for example “new york”.
L You cannot delete the default user account “root”.
nvram initialize
User level: read-write, admin.
Use the nvram initialize command to reset the configuration parameters to
their factory defaults on the Active and Standby Supervisor modules.
The syntax for this command is:
Avaya C460 Reference Guide
69
Chapter 2
Avaya C460 CLI Commands
nvram initialize {switch | all}
switch
Resets all the switch information (Layer 2 only).
all
Resets all parameters including routing parameters in the
switch.
Example:
C460-1# nvram initialize
This command will restore factory defaults, and can
disconnect your telnet session
*** Reset *** - do you want to continue (Y/N)? y
Connection closed by foreign host
L The nvram initialize command does not alter the Active/Standby status of the
Supervisor modules.
passive-interface
User level: read-write, admin.
L You can only access this command in Router-OSPF mode.
Type router ospf at the command prompt to enter Router -OSPF mode if
necessary.
Use the passive interface command to allow interfaces to be flooded into the
OSPF domain as OSPF routes and not external routes.
Use the no passive interface command to disble the flooding.
L An interface becomes passive only if you use the network command to enable
OSPF to run on the interface.
The syntax for this command is:
passive-interface <interface-name/net addr>
interface-name /
net addr
Name of interface or IP address.
Example:
Router-1# passive-interface FastEthernet 1.10
70
Avaya C460 Reference Guide
Chapter 2
Avaya C460 CLI Commands
ping
User level: read-only, read-write, admin.
Use the ping command to send ICMP echo request packets to another node on the
network.
The syntax for this command is:
ping [host]
host
Host IP address/Internet address of route destination.
If you do not specify a host IP, then the last host IP is used.
Example: to ping the IP number 149.49.48.1:
C460-1> ping 149.49.48.1
149.49.48.1 is alive
ping (Layer 3)
User level: user, privileged, supervisor
Use the ping command to send ICMP echo request packets to another node on the
network.
The syntax for this command is:
ping <host> [<interval> [<size> [<timeout> [<source
address>]]]]]
host
Host IP address/Internet address of route destination. If missing
then the last host IP is used.
interval
Interval between ping commands in seconds (1 to 256)
size
Size of packet in bytes (22 to 66500)
timeout
Timeout in seconds (1 to 10)
source
address
IP address of one of the router interfaces
Avaya C460 Reference Guide
71
Chapter 2
Avaya C460 CLI Commands
Example: to ping the IP number 149.49.48.1 three times:
Router-1> ping 149.49.48.1 3
PING 149.49.48.1: 56 data bytes
64 bytes from 149.49.48.1: icmp_seq=0. time=0. ms
64 bytes from 149.49.48.1: icmp_seq=1. time=0. ms
64 bytes from 149.49.48.1: icmp_seq=2. time=0. ms
----149.49.48.1 PING Statistics---3 packets transmitted, 3 packets received, 0% packet loss
round-trip (ms) min/avg/max = 0/0/0
redistribute (OSPF)
User level: read-write, admin.
L You can only access this command in Router-OSPF mode.
Type router ospf at the command prompt to enter Router -OSPF mode if
necessary.
Use the redistribute command to redistribute routing information from other
protocols into OSPF.
Use the no redistribute command disables redistribution by OSPF.
The syntax for this command is:
[no] redistribute <protocol>
protocol
[static | ospf]
Example:
Router-1 (configure router:ospf) # redistribute static
redistribute (RIP)
User level: read-write, admin.
L You can only access this command in router-RIP mode.
Type router rip at the command prompt to enter router-RIP mode if
necessary.
Use the redistribute command to redistribute routing information from other
protocols into RIP.
Use the no redistribute command to disable redistribution by RIP.
72
Avaya C460 Reference Guide
Chapter 2
Avaya C460 CLI Commands
The default is disabled.
The syntax for this command is:
[no] redistribute <protocol>
protocol
Either Static or OSPF
Example:
Router-1 (configure router:rip) # redistribute ospf
Done!
reset
User level: read-only, read-write, admin.
Use the reset command to restart the system or an individual Supervisor module.
The syntax for this command is:
reset [chassis | spvs | 1 | 2]
chassis
• Reset the entire chassis, including the Supervisor and I/O
Modules
• Reset the hardware
• Causes disruption to traffic of 10 to 20 seconds
spvs
• Reset both the Supervisor modules
• Minimal disruption to the traffic
1
Reset Supervisor module in slot 1
2
Reset Supervisor module in slot 2
L If the Supervisor modules are in Active/Standby configuration, resetting the
active supervisor will cause the standby supervisor to take over and become
active.
L The reset command does not work during configuration saving.
C460-1# reset 1
This command will reset the Active SPV
*** Reset *** - do you want to continue (Y/N)? y
Reseting Active SPV...
Avaya C460 Reference Guide
73
Chapter 2
Avaya C460 CLI Commands
C460-1(super)# reset chassis
This command will reset the chassis
*** Reset *** - do you want to continue (Y/N)? y
Reseting chassis...
C460-1(super)#
Avaya C460 Boot
Creation date: Jan
6 2003, 18:29:57
Press any key to stop auto-boot...
0
auto-booting...
Bank B is OK.
SW runs from bank B
.....
..........................................................
......................
......................................................
Welcome to C460
SW version 1.0.5
Login:
74
Avaya C460 Reference Guide
Chapter 2
Avaya C460 CLI Commands
rmon alarm
User level: read-write, admin.
Use the rmon alarm command to create a new RMON alarm entry.
The syntax for this command is:
rmon alarm <Alarm Number> <variable> <interval> <sampletype>
rising-threshold <rising threshold> <rising event> fallingthreshold <falling threshold> <falling event> <startup alarm>
<owner>
alarm number
This is the alarm index number of this entry (it is advisable to
use the same interface number as your alarm index number.)
variable
This is the MIB variable which will be sampled by the alarm
entry.
interval
The interval between 2 samples.
sample type
This can be set to either delta (the difference between 2
samples) or an absolute value.
rising threshold
This sets the upper threshold for the alarm entry.
rising event
The RMON event entry that will be notified if the upper
threshold is passed.
falling
threshold
This sets the lower threshold for the alarm entry.
falling event
The RMON event entry that will be notified if the lower
threshold is passed.
startup alarm
The instances in which the alarm will be activated. The
possible parameters are: Rising, Falling, risingOrfalling.
owner
Owner name string.
Example:
C460-1# rmon alarm 1026 1.3.6.1.2.1.16.1.1.1.5.1026 60
delta rising-threshold 10000 1054 falling-threshold 10 1054
risingOrFalling gregory
alarm 1026 was created successfully
Avaya C460 Reference Guide
75
Chapter 2
Avaya C460 CLI Commands
rmon event
User level: read-write, admin.
Use the rmon event command to create an RMON event entry.
The syntax for this command is:
rmon event <Event Number> <type> description <description>
owner <owner>
event number
This is the event index number of this entry.
type
The type of the event. The possible parameters are:
• trap
• log
• logAndTrap
• none
description
A user description of this event
owner
Owner name string
Example:
C460-1# rmon event 1054 logAndTrap description "event for
monitoring gregory's computer" owner gregory
event 1054 was created successfully
rmon history
User level: read-write, admin.
Use the rmon history command to create an RMON history entry.
The syntax for this command is:
rmon history <history index> [<module>[</port>]] interval
<interval> buckets <number of buckets> owner <owner name>
76
history_index
This is the history index number of this entry (it is advisable to
use the same interface number as your history index number).
module/port
The switch number/the port number.
interval
The interval between two samples.
number of
buckets
The number of buckets defined.
Avaya C460 Reference Guide
Chapter 2
owner name
Avaya C460 CLI Commands
The owner name string.
Example:
C460-1# rmon history 1026 1026 3/2 30 buckets 20 owner amir
history 1026 was created successfully
If you wish to define a name which includes spaces, you must enclose the entire
name in quotation marks, for example “new york”.
rmon2 protocol-dir
User level: privileged, supervisor.
L If you are at the ”privileged” level, you can only access this command in
Configure mode.
Type configure at the command prompt to enter configure mode if necessary.
Use the rmon2 protocol-dir to add a protocol to the protocol directory.
Use the no rmon protocol-dir command to remove a protocol from the
protocol directory.
The syntax for this command is:
rmon2 protocol-dir UDP|TCP <Port #> [<description> [<owner>]]
Example:
Router-1# rmon2 protocol-dir UDP 345
Router-1# rmon2 protocol-dir UDP 345 "my description"
Router-1# rmon2 protocol-dir UDP 345 "description" "I am
the owner"
Done!
If you wish to enter a name which includes spaces, you must enclose the entire
name in quotation marks, for example “new york”.
rmon2 protocol-dist
User level: privileged, supervisor.
L If you are at the ”privileged” level, you can only access this command in
Configure mode.
Type configure at the command prompt to enter configure mode if necessary.
Use the rmon2 protocol-dist to enable the RMON2 Protocol Distribution
Avaya C460 Reference Guide
77
Chapter 2
Avaya C460 CLI Commands
application.
Use the no rmon2 protocol-dist command to disable the application.
The syntax for this command is:
[no] rmon2 protocol-dist
Example:
Router-1# rmon2 protocol-dist
Done!
router ospf
User level: read-write, admin.
Use the router ospf command to enable the OSPF protocol on the system.
Use the no router ospf command to disable the OSPF one the system.
The default is disabled.
The syntax for this command is:
[no] router ospf
Example:
Router-1 (super) # router ospf
Done!
router rip
User level: read-write, admin.
L If you are at the “read-write” user level, you can only access this command in
Configure mode.
Type configure at the command prompt to enter configure mode.
Use the router rip command to configure the Routing Information Protocol
(RIP). Use the no router rip command to disable RIP.
The default state is disabled.
The syntax for this command is:
[no] router rip
Example:
78
Avaya C460 Reference Guide
Chapter 2
Avaya C460 CLI Commands
To enable the RIP protocol:
C460-1(configure)# router rip
Done!
router vrrp
User level: read-write, admin.
L If you are at the “read-write” user level, you can only access this command in
Configure mode.
Type configure at the command prompt to enter configure mode.
Use the command to enable VRRP routing globally.
Use the no router vrrp command to disable VRRP routing.
The syntax for this command is:
[no] router vrrp
Example:
C460-1(configure)# router vrrp
Done!
session
User level: read-only, read-write, admin.
Displays existing sessions or to opens a session with a specific Supervisor Module in
the chassis.
The syntax for this command is:
session [[module_number>] {switch | router}]
module
The Supervisor module number (1 to 2).
switch|router
(Optional)
• The entity to which you want to open a
session.
• If you do not specify this parameter, you
will get the default entity of the specific
module:
• switch - Layer 2 entity of the module.
• router - Routing entity
Avaya C460 Reference Guide
79
Chapter 2
Avaya C460 CLI Commands
Example:
C460-1> session router
Router-1 (super) #
L The security level stays the same when you use the session command.
set allowed managers
User level: read-write, admin.
Use the set allowed managers command to enables or disable the Allowed
Managers feature.
When this feature is enabled, only those stations whose IP addresses are listed in the
Allowed Managers table can access the device over Telnet, SNMP, or HTTP.
The syntax for this command is:
set allowed managers [enabled|disabled]
Example:
C460-1(super)# set allowed managers enabled
Managers are enabled
set allowed managers ip
User level: read-write, admin.
Use the set allowed manager ip command to add or remove an IP address
from the Allowed Managers table. The Allowed Managers table can contain up to
twenty IP addresses.
The syntax for this command is:
set allowed managers ip [add | delete][IP address]
80
add
Add specified IP address to the Allowed Managers
table
delete
Deletes specified IP address from the Allowed
Managers table
IP address
IP address to be added or remove
Avaya C460 Reference Guide
Chapter 2
Avaya C460 CLI Commands
Example:
C460-1(super)# set allowed managers ip add 149.49.32.134
Ip was added to the table
set arp-aging-interval
User level: read-write, admin.
Use the set arp-aging interval command to set the ARP table aging interval
for gateways’ entries in the agent ARP table.
The MAC value for the default gateway of the agent in the ARP table, is deleted at
the end of every aging interval. The default value is 10 minutes.
The syntax for this command is:
set arp-aging-interval <value>
value
The number representing the interval, from 0-10 minutes.
Example:
C460-1# set arp-aging-interval 10
ARP table aging interval for gateways was set to 10
minutes.
set arp-tx-interval
User level: read-write, admin.
Sets the keep-alive frames sending interval. Setting the interval to 0 disables the
transmission of the keep-alive frames.
The syntax for this command is:
set arp-tx-interval <inband|outband> <value>
inband|outband
• Inband – inband interface
• Outband – outband interface
value
The interval in seconds. (0-3600)
Avaya C460 Reference Guide
81
Chapter 2
Avaya C460 CLI Commands
Example:
C460-1# set arp-tx-interval 15
ARP tx interval was set to 15 seconds.
set boot bank
User level: read-write, admin.
Use the set boot bank command to set the system boot bank (for the active
Supervisor Module).
The syntax for this command is:
set boot bank <value>
value
• bank-a – set the boot bank to A
• bank-b – set the boot bank to B
Example:
C460-1# set boot bank A
boot bank is A
set broadcast storm control
User level: read-write, admin.
Use the set broadcast storm control command to enable or disable
broadcast storm control.
The syntax for this command is:
set broadcast storm control <enable|disable>
enable
Enable broadcast storm control
disable
Disable broadcast storm control
Example:
C460-1# set broadcast storm enable
Done!
82
Avaya C460 Reference Guide
Chapter 2
Avaya C460 CLI Commands
set broadcast storm control threshold
User level: read-write, admin.
Use the set broadcast storm control threshold command to set the
broadcast storm control threshold.
The syntax for this command is:
set broadcast storm control threshold <threshold>
threshold
In pps (packets per second) from 10 to 144,000 pps
The default value is 500
Example:
C460-1# set broadcast storm control threshold 1000
Done!
set device-mode
User level: read-write, admin.
Use the set device-mode command to set the switch mode – Layer 2 or Router
(Layers 2 and 3).
The syntax for this command is:
set device-mode <mode>
mode
• Router – switch operates at Layers 2 and 3.
• layer2 – switch operates at Layer 2.
Example:
C460-1(super)# set device-mode Router
This command will RESET the switch****
Reset **** do you want to continue (Y/N) ?
Done!
L You need to install the appropriate license before you can set the device mode to
Router.
Avaya C460 Reference Guide
83
Chapter 2
Avaya C460 CLI Commands
set device-mode (Layer 3)
User level: read-write, admin.
Use the set device-mode command to change the basic mode of operation of the
C460 switch between Router and Layer 2 modes.
The syntax for this command is:
set device-mode <mode>
mode
Router | Layer2
Example:
Router-1> set device-mode Layer2
This command will RESET the device
*** Reset *** - do you want to continue (Y/N)? y
set dot1x max-req
User level: supervisor
Use the set dot1x max-req command to set maximum number of times the port
tries to retransmit requests to the Authenticated Station before the session is
terminated.
The syntax for this command is:
set dot1x max-req <count>
count
Number of attempts (1 to 10)
Example:
C460-1(super)# set dot1x max-req 3
set dot1x quiet-period
User level: supervisor
Use the set dot1x quiet-period command to set the minimal time between
authentication attempts.
The syntax for this command is:
set dot1x quiet-period <Seconds>
Seconds
84
Number of seconds – 0 to 65535
Avaya C460 Reference Guide
Chapter 2
Avaya C460 CLI Commands
Example:
C460-1(super)# set dot1x quiet-period 90
Done!
set dot1x re-authperiod
User level: supervisor
Use the set dot1x re-authperiod command to set the idle time between reauthentication attempts.
The syntax for this command is:
set dot1x re-authperiod <Seconds>
Seconds
Idle time in seconds ( 0 to 65535)
Example:
C460-1(super)# set dot1x re-authperiod 90
Done!
set dot1x server-timeout
User level: supervisor
Use the set dot1x server-timeout command to set the server retransmission
timeout period for all ports. This is the maximum time that the port will wait for a
reply from the Authentication Server.
The syntax for this command is:
set dot1x server-timeout <Seconds>
Seconds
Timeout in seconds (0 to 65535)
Example:
C460-1(super)# set dot1x server-timeout 90
set dot1x supp-timeout
User level: supervisor
Use the set dot1x supp-timeout command to set the maximum time that the
switch will wait for a reply from the Authenticated Station before the session is
terminated.
Avaya C460 Reference Guide
85
Chapter 2
Avaya C460 CLI Commands
The syntax for this command is:
set dot1x supp-timeout <Seconds>
Seconds
Timeout in seconds (0 to 65535)
Example:
C460-1(super)# set dot1x supp-timeout 90
set dot1x system-auth-control disable
User level: supervisor
Use the set dot1x system-auth-control disable command to globally
disable the PBNAC (802.1x) feature.
The syntax for this command is:
set dot1x system-auth-control disable
Example:
C460-1(super)# set dot1x system-auth-control disable
dot1x system-auth-control disabled
set dot1x system-auth-control enable
User level: supervisor
Use the set dot1x system-auth-control enable command to globally
enable the PBNAC (802.1x) feature.
The syntax for this command is:
set dot1x system-auth-control enable
Examples:
• When a RADIUS server is defined:
C460-1(super)# set dot1x system-auth-control enable
dot1x system-auth-control enabled
86
Avaya C460 Reference Guide
Chapter 2
•
Avaya C460 CLI Commands
When a RADIUS server is not defined:
C460-1(super)# set dot1x system-auth-control enable
*** Warning : Authentication server ( RADIUS ) is disabled/
not-exist and so,
*** no authentication can be made
dot1x system-auth-control enabled
set dot1x tx-period
User level: supervisor
Use the set dot1x tx-period command to set the time interval between
attempts to access the Authenticated Station.
The syntax for this command is:
Example:set dot1x tx-period <Seconds>
Seconds
Interval in seconds
C460-1(super)# set dot1x tx-period 90
Done!
set icmp-redirect
User level: read-write, admin.
Use the set icmp-redirect CLI command to accept or reject incoming ICMP-redirect
requests.
The syntax for this command is:
set icmp-redirect {accept|reject}
Accept
Accept inoming ICMP-redirect requests
Reject
Reject incoming ICMP-redirect requests
Example:
C460-1# set icmp-redirect accept
Done!
Avaya C460 Reference Guide
87
Chapter 2
Avaya C460 CLI Commands
set inband vlan
User level: read-write, admin.
Use the set inband vlan command to set the inband management VLAN.
The syntax for this command is:
set inband vlan <vlan_num>
vlan_num
The number of the VLAN.
Example:
C460-1# set inband vlan 1
Management VLAN number set to 1
set intelligent-multicast
User level: read-write, admin.
Use the set intelligent-multicast command to enable or disable the IPmulticast filtering application.
The syntax for this command is:
set intelligent-multicast {enable|disable}
Example:
C460-1# set intelligent-multicast enable
Done!
set intelligent-multicast client port pruning time
User level: read-write, admin.
Use the set intelligent-multicast client port pruning time
command to set the aging time for client ports.
The syntax for this command is:
set intelligent-multicast client-port-pruning time <time>
seconds
88
The time in seconds.
Avaya C460 Reference Guide
Chapter 2
Avaya C460 CLI Commands
Example:
C460-1# set intelligent-multicast client-port-pruning-time
40
Done!
set intelligent-multicast group-filtering delay time
User level: read-write, admin.
Use the set intelligent-multicast group-filtering delay time
command to set group filtering time delays.
The syntax for this command is:
set intelligent-multicast group-filtering-delay time <seconds>
seconds
The time in seconds.
Example:
C460-1# set intelligent-multicast group-filtering-delay
time 40
Done!
set intelligent-multicast router port pruning time
User level: read-write, admin.
Use the set intelligent-multicast router port pruning time
command to set aging time for router ports.
The syntax for this command is:
set intelligent-multicast router-port-pruning time <seconds>
seconds
The time in seconds.
Example:
C460-1# set intelligent-multicast router-port-pruning-time
40
Done!
Avaya C460 Reference Guide
89
Chapter 2
Avaya C460 CLI Commands
set interface inband
User level: read-write, admin.
Use the set interface inband command to configure the inband interface on
the Supervisor Module.
The syntax for this command is:
set interface inband <vlan> <ip_addr> <netmask>
vlan
The number of the VLAN to be assigned to the interface
ip_addr
IP address
netmask
Subnet mask
Example:
To configure the inband interface on VLAN 1, IP address 1.1.1.1 and netmask
255.255.255.0:
C460-1# set interface inband 1 1.1.1.1 255.255.255.0
This command will RESET the device
*** Reset *** - do you want to continue (Y/N)? y
set interface outband
User level: read-write, admin.
Use the set interface outband command to configure the outband interface
on the supervisor Module.
The syntax for this command is:
set interface outband <ip_addr> <netmask>
ip_addr
IP address
netmask
Subnet mask
Example:
90
Avaya C460 Reference Guide
Chapter 2
Avaya C460 CLI Commands
To configure the outband interface on VLAN 1, IP address 149.49.75.174 and
netmask 255.255.255.24
C460-1# set interface outband 149.49.75.174 24
Interface outband IP address set.
You must reset the device in order for the change to take
effect.
set interface ppp
User level: read-write, admin.
Use the set interface ppp command to configure the C460 Supervisor Module
PPP interface IP parameters, exit modem mode, disconnect the PPP session, or reset
the connected modem.
You must configure an IP address and net-mask for the C460 before you can
establish a PPP connection. The IP address is a dummy address that is shared
between two peers, and must be taken from a subnet that is different from the
agent’s IP sub-net.
The syntax for this command is:
set interface ppp <ip_addr> <net-mask>
ip_addr
IP address used by the C460 Supervisor Module to connect via
its PPP interface
net-mask
Subnet mask used by the C460 Supervisor Module to connect
via its PPP interface
Example:
C460-1# set interface ppp 149.49.34.125 24
Interface ppp ip address set
set interface ppp enable/disable/off/reset
User level: read-write, admin.
You can also use the set interface ppp command to enter modem mode, enter
terminal mode, disconnect the PPP session or to reset the connected modem.
The syntax for this command is:
Avaya C460 Reference Guide
91
Chapter 2
Avaya C460 CLI Commands
set interface ppp {enable|enable-always|disable|off|reset}
enable
Enable PPP and enter modem mode.
enable-always
Enter modem mode every time that the proprietary modem
cable is plugged into the console port.
disable
Disable PPP and enter terminal mode
off
Disconnect the active PPP session.
reset
Reset the connected modem.
Example:
C460-1# set interface ppp reset
PPP has reset the connected modem.
Example:
C460-1# set interface ppp enable
Entering the Modem mode within 60 seconds...
Please check that the proprietary modem cable is plugged
into the console port
Example:
C460-1# set interface ppp disable
Entering the Terminal mode immediately
set ip route
User level: read-write, admin.
Use the set ip route command to adds a route to the IP routing table. You can
configure from 1 to 10 default static gateways for a C460 switch.
The syntax for this command is:
set ip route <destination> <netmask> <gateway>
92
destination
IP address of the network, or specific host to be added
netmask
Subnet mask
gateway
IP address of the router
Avaya C460 Reference Guide
Chapter 2
Avaya C460 CLI Commands
Example:
This example shows how to add a default route to the IP routing table:
C460-1# set ip route 0.0.0.0 24 192.168.1.1
destination = 0.0.0.0
done!
Avaya C460 Reference Guide
mask = 255.255.255.0 gateway = 192.168.1.1
93
Chapter 2
Avaya C460 CLI Commands
set license
User level: read-write, admin.
Use the set license command to activate a licensed feature on a specific C460
chassis.
For a full description of the Feature License and the installation procedure please
refer to the Installation Guide provided with the Feature License.
The syntax for this command is:
set license [license] [featureName]
license
The license number
featureName
The name of the feature, currently either smon or routing.
The default feature is smon.
Example:
C460-1# set license 026
9b8
216
908
dea
f4d layer-3
Layer-3 Features had been enabled on this chassis.
set logout
User level: read-write, admin.
Use the set logout command to set the time in minutes until the system
automatically disconnects an idle session.
The syntax for this command is:
set logout [timeout in minutes]
timeout in
minutes
94
Time until the system automatically disconnects an idle
session.
• Setting the value to 0 disables the automatic disconnection
of idle sessions
• The default value is 15 minutes.
Avaya C460 Reference Guide
Chapter 2
Avaya C460 CLI Commands
Example:
To set the time until the system disconnects an idle session automatically to 20
minutes:
C460-1# set logout 20
Sessions will be automatically logged out after 20 minutes
of idle time.
set mac-aging
User level: privileged, supervisor.
L This command is available on the P330-ML switches only.
Use the set mac-aging command to enable or disable the MAC aging function.
The syntax for this command is:
set mac-aging <status>
status
enable / disable
Examples:
C460-1# set mac-aging enable
mac aging is enabled.
C460-1# set mac-aging disable
mac aging is disabled.
set mac-aging-time
User level: privileged, supervisor.
L This command is available on the P330-ML switches only.
Use the set mac-aging-time command to set the MAC aging time in minutes.
This is the time after which unused MAC addresses in the MAC table are erased.
The syntax for this command is:
Set mac-aging-time <aging-time>
agingtime
Avaya C460 Reference Guide
Aging time in minutes (1 to 3600; default =5).
95
Chapter 2
Avaya C460 CLI Commands
Example:
C460-1# set mac-aging-time 5
mac aging time is set to 5 minutes.
L The entered value is the aging-time lower bound. The actual aging-time might
be up to three minutes longer.
set outband duplex
User level: read-write, admin.
Use the set outband duplex command to configure the duplex type of the
Ethernet Console port.
You can configure the Ethernet Console interface to either full duplex or half
duplex.
The duplex status of a port in auto-negotiation mode is determined by autonegotiation and an error message is generated if you attempt to set the transmission
type of auto-negotiation Fast Ethernet ports to half- or full-duplex mode.
The syntax for this command is:
set outband duplex {full | half}
Full
Sets full-duplex transmission.
Half
Sets half-duplex transmission
Example:
C460-1# set outband duplex full
Ethernet Console interface set to full-duplex.
set outband negotiation
User level: read-write, admin.
Use the set outbound negotiation command to enable or disable the link
negotiation protocol on the Ethernet console port.
This command applies to the specific supervisor module where you execute it.
• When negotiation is enabled, the speed and duplex of the outband Ethernet
port is determined by auto-negotiation.
• If negotiation is disabled, you can set the speed and duplex of the outband
Ethernet port.
96
Avaya C460 Reference Guide
Chapter 2
Avaya C460 CLI Commands
The syntax for this command is:
set outband negotiation {enable | disable}
enable
Enable link negotiation protocol.
disable
Disable link negotiation protocol.
Example:
C460-1# set outband negotiation enable
Auto-negotiation for outband port set successfully
set outband speed
User level: read-write, admin.
Use the set outband speed command to configure the speed of Ethernet
Console port.
In auto negotiation mode, the port's speed is determined by auto negotiation. If you
attempt to set the speed when auto negotiation is enabled, the following message is
displayed “Auto negotiation is Enable, can not set the speed
mode.”
The syntax for this command is:
set outband speed <speed>
speed
• 10MB
• 100MB
Example:
C460-1# set outband speed 100MB
Speed for outband port set successfully
set policy type
User level: read-write, admin.
Use the set policy type command to set whether the C460 switch enforces the
active policy-list on all packets or only on routed packets (in “device-mode router”).
Avaya C460 Reference Guide
97
Chapter 2
Avaya C460 CLI Commands
The syntax for this command is:
set policy type
value
<value> all | router
all - apply policy to all packets entering the C460 through Fast
Ethernet ports
router - apply policy on routed packets only
Example:
Router-1# set policy type all
98
Avaya C460 Reference Guide
Chapter 2
Avaya C460 CLI Commands
set port auto-negotiation-flowcontrol-advertisement
User level: read-write, admin.
Use the set port auto-negotiation-flowcontrol-advertisement
command to set the flowcontrol advertisement for a Gigabit port when performing
autonegotiation.
The syntax for this command is:
set port auto-negotiation-flowcontrol-advertisement <module>/
<port> [mode]
module
Number of the module (3-6).
port
Number of the port on the module. If you do not specify a
number, all the ports on the module are set.
You can also specify a range of ports separated by a dash,
for example, 4/5-13 for ports 5 to 13 on module 4.
mode
• no-flowcontrol – the port will advertise no pause
capabilities.
• asym-tx-only – the port will advertise asymmetric Tx
pause capabilities only.
• sym-only – the port will advertise symmetric pause
capabilities only.
• sym-and-asym-rx – the port will advertise both
symmetric and asymmetric Rx pause capabilities.
Example:
C460-1# set port auto-negotiation-flowcontrol-advertisement
2/5 asym-tx-only
Port 2/5 pause capabilities was set
set port channel
User level: read-write, admin.
Enables or disables a Link Aggregation Group (LAG) interface on the switch. LAG
creation requires a LAG name to be specified. There is no default name.
You can also add or remove a port from an existing LAG. All ports in the LAG are
configured with the parameters of the first port that is added to the LAG. These
parameters include port administrative status, speed, duplex, autonegotiation
mode, VLAN ID, tagging mode, binding mode, and priority level. When adding a
port to an existing LAG, the user must type the same LAG-name (or no LAG-name),
Avaya C460 Reference Guide
99
Chapter 2
Avaya C460 CLI Commands
otherwise you will get an error message.
L When adding a port to an existing LAG, type the same LAG name, otherwise
you will create a new LAG.
The syntax for this command is:
set port channel <port_list> {value} [name]
port_list
A list of ports to be aggregated in the format module/port
value
• on – enable a channel for the specified module port
• off – disable a channel for the specified module port
name
(Optional)
channel name
If you wish to define a name which includes spaces, you must enclose the entire
name in quotation marks, for example “new york”.
Example:
C460-1# set port channel 4/6,18 on server2
Port 4/6 channel mode set to on
Port 4/18 was added to channel
set port classification
User level: read-write, admin.
Use the set port classification command to set the port classification to
either regular or valuable. Any change in the Spanning Tree state from Forwarding
for a valuable port will erase all learnt MAC addresses in the switch.
The syntax for this command is:
set port classification [module/port]
module port
module/port range
regular | valuable
port classification
{regular | valuable}
Example:
C460-1# set port classification 2/19 valuable
Port 2/19 classification has been changed.
100
Avaya C460 Reference Guide
Chapter 2
Avaya C460 CLI Commands
set port disable
User level: read-write, admin.
Use the set port disable command to disable a port or range of ports.
The syntax for this command is:
set port disable [module>/<port]
module
Number of the module (3-6). If you do not specify a number,
the ports on all the modules are shown.
port
Number of the port on the module. If you do not specify a
number, all the ports on the module are shown.
You can also specify a range of ports separated by a dash, for
example, 4/5-13 for ports 5 to 13 on module 4.
Example:
C460-1# set port disable 4/1
Port 4/1 disabled.
set port dot1x initialize
User level: admin.
Use the set port dot1x initialize command to initialize port dot1x.
The syntax for this command is:
set port dot1x initialize <module/port>
module/
port
Module and port number.
You can also specify a range of ports separated by a dash, for
example, 4/5-13 for ports 5 to 13 on module 4.
Example:
C460-1(super)# set port dot1x initialize 2/3
port 1/2 dot1x was initialized
Avaya C460 Reference Guide
101
Chapter 2
Avaya C460 CLI Commands
set port dot1x max-req
User level: admin.
Use the set port dot1x max-req command to set the maximal number of times
the port tries to retransmit requests to the Authenticated Station before the session is
terminated.
The syntax for this command is:
set port dot1x max-req <module/port> <count>
module/
port
Module and port number.
You can also specify a range of ports separated by a dash, for
example, 4/5-13 for ports 5 to 13 on module 4.
count
Number of attempts – 1 to 10
Example:
C460-1(super)# set port dot1x max-req 1/2 5
set port dot1x port-control
User level: admin.
Use the set port dot1x port-control command to set the dot1x parameter
per port.
The syntax for this command is:
set port dot1x port-control <module/port> <mode>
module/
port
Module and port number.
You can also specify a range of ports separated by a dash, for
example, 4/5-13 for ports 5 to 13 on module 4.
mode
• force-unauthorize - the port is always is blocking state
• auto - forwarding/blocking depends on authorization outcome
• force-authorize - the port is always in forwarding state
Example:
C460-1(super)# set port dot1x port-control 2/3 forceauthorize
port 1/2 control was set to force-authorize
102
Avaya C460 Reference Guide
Chapter 2
Avaya C460 CLI Commands
set port dot1x quiet-period
User level: admin.
Use the set port dot1x quiet-period command to set the 802.1x quiet period
per port.
The syntax for this command is:
set port dot1x quiet-period <module/port> <seconds>
module/
port
Module and port number.
You can also specify a range of ports separated by a dash, for
example, 4/5-13 for ports 5 to 13 on module 4.
seconds
Quiet period in seconds – 0 to 65535
Example:
C460-1(super)# set port dot1x quiet-period 4/2 300
set port dot1x re-authenticate
User level: admin.
Use the set port dot1x re-authenticate command to set the port to reauthenticate.
The syntax for this command is:
set port dot1x re-authenticate <module/port>
module/
port
Module and port number.
You can also specify a range of ports separated by a dash, for
example, 4/5-13 for ports 5 to 13 on module 4.
Example:
C460-1(super)# set port dot1x re-authenticate 1/2
port 1/2 is not in authenticating process
set port dot1x re-authentication
User level: admin.
Use the set port dot1x re-authentication command to set the reauthentication mode per port.
Avaya C460 Reference Guide
103
Chapter 2
Avaya C460 CLI Commands
The syntax for this command is:
set port dot1x re-authentication <module/port> <mode>
module/
port
Module and port number
You can also specify a range of ports separated by a dash, for
example, 4/5-13 for ports 5 to 13 on module 4.
mode
• enable
• disable
Example:
C460-1(super)# set port dot1x re-authentication 1/2 enable
port 1/2 re-authenticate was set to enable
set port dot1x re-authperiod
User level: admin.
Use the set port dot1x re-authperiod command to set the the idle time
between re-authentication attempts before the session is terminated.
The syntax for this command is:
set port dot1x re-authperiod <module/port> <seconds>
module/
port
Module and port number
You can also specify a range of ports separated by a dash, for
example, 4/5-13 for ports 5 to 13 on module 4.
seconds
Idle time in seconds – 0 to 65535
Example:
C460-1(super)# set port dot1x re-authperiod 1/2 400
set port dot1x server-timeout
User level: admin.
Use the set port dot1x server-timeout command to set the time to wait for
a reply from the Authentication Server before the session is terminated.
104
Avaya C460 Reference Guide
Chapter 2
Avaya C460 CLI Commands
The syntax for this command is:
set port dot1x server-timeout <module/port> <seconds>
module/
port
Module and port number
You can also specify a range of ports separated by a dash, for
example, 4/5-13 for ports 5 to 13 on module 4.
seconds
Timeout in seconds – 0 to 65535
Example:
C460-1(super)# set port dot1x server timeout 1/2 400
set port dot1x supp-timeout
User level: admin.
Use the set port dot1x supp-timeout command to set the time for the port to
wait for a reply from the Authentication Server before the session is terminated.
The syntax for this command is:
set port dot1x supp-timeout <module/port> <seconds>
module/
port
Module and port number.
You can also specify a range of ports separated by a dash, for
example, 4/5-13 for ports 5 to 13 on module 4.
seconds
Timeout in seconds – 0 to 65535
Example:
C460-1(super)# set port dot1x supp-timeout 1/2 400
set port dot1x tx-period
User level: admin.
Use the set port dot1x tx-period command to set the time interval between
attempts to access the Authenticated Station.
The syntax for this command is:
set port dot1x tx-period <module/port> <seconds>
module/
port
Avaya C460 Reference Guide
Module and port number
You can also specify a range of ports separated by a dash, for
example, 4/5-13 for ports 5 to 13 on module 4.
105
Chapter 2
Avaya C460 CLI Commands
seconds
Time interval in seconds — 0-65535
Example:
C460-1(super)# set port dot1x quiet-period 1/2 5000
set port duplex
User level: read-write, admin.
Use the set port duplex command to configure the duplex type of an Ethernet
or Fast Ethernet port or range of ports.You can configure Ethernet and Fast Ethernet
interfaces to either full duplex or half duplex.
The duplex status of a port in auto-negotiation mode is determined by autonegotiation. An error message is generated if you attempt to set the transmission
type of auto negotiation Fast Ethernet ports to half- or full-duplex mode.
The syntax for this command is:
set port duplex <module>/<port> [value]
module
Number of the module (3-6). If you do not specify a number,
the ports on all the modules are shown.
port
Number of the port on the module. If you do not specify a
number, all the ports on the module are shown.
You can also specify a range of ports separated by a dash, for
example, 4/5-13 for ports 5 to 13 on module 4.
value
• full – set full-duplex transmission
• half – set half-duplex transmission
Example:
To set port 1 on module 4 to full duplex:
C460-1# set port duplex 4/1 full
Port 4/1 set to full-duplex.
set port edge admin state
User level: read-write, admin.
Use the set port edge admin state command to set the port as an RSTP
edge-port or non-edge-port.
106
Avaya C460 Reference Guide
Chapter 2
Avaya C460 CLI Commands
The syntax for this command is:
set port edge admin state <module/port> <admin state>
module
Number of the module (3-6).
port
Number of the port on the module. If you do not specify a number,
all the the admin state for all ports on the module is set.
You can also specify a range of ports separated by a dash, for
example, 4/5-13 for ports 5 to 13 on module 4.
admin
state
You can set the port admin state to:
• edge-port
• non-edge-port.
Examples:
C460-1# set port edge admin state 3/1 edge-port
port 3/1 edge admin state is set to edge-port
C460-1# set port edge admin state 3/1 non-edge-port
port 3/1 edge admin state is set to non-edge-port
set port enable
User level: read-write, admin.
Use the set port enable command to enable a port or a range of ports.
The syntax for this command is:
set port enable [module/port]
module
Number of the module (3-6).
port
Number of the port on the module. If you do not specify a
number, all the ports on the module are enabled.
You can also specify a range of ports separated by a dash, for
example, 4/5-13 for ports 5 to 13 on module 4.
Avaya C460 Reference Guide
107
Chapter 2
Avaya C460 CLI Commands
Example:
C460-1# set port enable 4/1
Port 4/1 enabled.
108
Avaya C460 Reference Guide
Chapter 2
Avaya C460 CLI Commands
set port flowcontrol
User level: read-write, admin.
Use the set port flowcontrol command to set the send/receive mode for
flow-control frames (IEEE 802.3x or proprietary) for a full duplex port. Each
direction (send or receive) can be configured separately.
The syntax for this command is:
set port flowcontrol [direction] <module/port> [value]
direction
• receive – determines whether the port can receive
administrative status from a remote device.
Available only for Gigabit Ethernet modules with negotiation set to
off.
• send – determines whether the local port can send
administrative status to a remote device.
Available only for Gigabit Ethernet modules with negotiation set to
off.
• all – send and receive (symmetric flow control).
module
Number of the module.
port
Number of the port on the module.
value
• off – used with receive to turn off an attached device's ability
to send flow-control packets to a local port. Used with send
to turn off the local port's ability to send administrative
status to a remote device.
• on – used with receive to require that a local port receive
administrative status from a remote device. Used with send,
the local port sends administrative status to a remote device.
Example:
C460-1# set port flowcontrol receive 5/1 on
Port 5/1 flow control receive administration status set to on
(port will require far end to send flowcontrol)
C460-1# set port flowcontrol send 5/1 off
Port 5/1 flow control send administration status set to off
(port will send flowcontrol to far end)
Avaya C460 Reference Guide
109
Chapter 2
Avaya C460 CLI Commands
set port level
User level: read-write, admin.
Use the set port level command to set the priority level of a port or range of
ports on the switching bus. Packets traveling through a port set at normal priority
should be served only after packets traveling through a port set at high priority are
served.
The syntax for this command is:
set port level <module>/<port> [value]
module
Number of the module (3-6).
port
Number of the port on the module. If you do not specify a
number, the level for all the ports on the module is set.
You can also specify a range of ports separated by a dash, for
example, 4/5-13 for ports 5 to 13 on module 4.
value
Priority level (0-7)
Example:
C460-1# set port level 3/1 5
Port 3/1 level set to 5
set port mirror
User level: read-write, admin.
Use the set port mirror command to define a port mirroring pair in the switch.
The syntax for this command is:
set port mirror source-port <module>/<port> mirror-port <module>/
<port> direction {<direction>
110
module
Number of the module (3-6).
port
Number of the port on the module.
always
Keyword to activate the port mirroring entry
disable
Keyword to change the status of the port mirroring entry to “not
active”
direction
• rx – copy only incoming traffic
• both– copy both incoming and outgoing traffic
Avaya C460 Reference Guide
Chapter 2
Avaya C460 CLI Commands
Example:
C460-1# set port mirror source-port 3/9 mirror-port 4/10
direction both
Mirroring both Rx and Tx packets from port 3/9 to port 4/10
is enabled
set port name
User level: read-write, admin.
Use the set port name command to configure a name for a port. If you do not
specify a name, the port name remains blank.
The syntax for this command is:
set port name <module>/<port> [value]
module
Number of the module (3-6).
port
Number of the port on the module. If you do not specify a
number, the same name is set for all the ports on the module.
You can also specify a range of ports separated by a dash, for
example, 4/5-13 for ports 5 to 13 on module 4.
value
Name (up to 16 characters)
Example:
C460-1# set port name 4/21 arthur
Port 4/21 name set.
If you wish to define a name which includes spaces, you must enclose the entire
name in quotation marks, for example “new york”.
set port negotiation
User level: read-write, admin.
Use the set port negotiation command to enable or disable the link
negotiation protocol on the specified port. This command applies to Fast Ethernet or
Gigabit Ethernet ports.
When negotiation is enabled, the speed and duplex of the Fast Ethernet ports are
determined by auto-negotiation.
If negotiation is disabled, the user can set the speed and duplex of the Fast Ethernet
Avaya C460 Reference Guide
111
Chapter 2
Avaya C460 CLI Commands
ports.
The syntax for this command is:
set port negotiation <module>/<port> {enable|disable}
module
Number of the module (3-6). If you do not specify a number,
the ports on all the modules are configured.
port
Number of the port on the module. If you do not specify a
number, the negotiation is set for all the ports on the module.
You can also specify a range of ports separated by a dash, for
example, 4/5-13 for ports 5 to 13 on module 4.
enable
Enable port negotiation protocol
disable
Disable port negotiation protocol
Example:
To disable autonegotiation on port 1, module 4:
C460-1# set port negotiation 4/1 disable
Link negotiation protocol disabled on port 4/1.
set port point-to-point admin status
User level: read-write, admin.
Use the set port point-to-point admin status command to set the port
RSTP point-to-point admin status.
The syntax for this command is:
112
set port
status>
point-to-point admin status <module/port> <admin
module
Number of the module (3-6). If you do not specify a number, the
ports on all the modules are configured.
port
Number of the port on the module. If you do not specify a number,
the negotiation is set for all the ports on the module.
You can also specify a range of ports separated by a dash, for
example, 4/5-13 for ports 5 to 13 on module 4.
admin
status
force-true - treat this port as if it is connected point-to-point
force-false - treat this port as if it is connected to shared media
auto - try to automaticaly detect the connection type of the port
Avaya C460 Reference Guide
Chapter 2
Avaya C460 CLI Commands
Example:
C460-1# set port point-to-point admin status 1/1 force-true
port 1/1 point to point admin status is set to force-true
set port powerinline
User level: read-write, admin.
Use the set port powerinline command to enable or disable the load detection
process on the port.
The syntax for this command is:
set port powerinline <module_number/port_number> {enable |
disable}
module
Number of the module (3-6).
port
Number of the port on the module. If you do not specify a
number, all the ports on the module are shown.
You can also specify a range of ports separated by a dash, for
example, 4/5-13 for ports 5 to 13 on module 4.
enable
Enable load detection on the port
disable
Disable load detection on the port
Example:
To enable PoE on ports 1 to 3 of module three:
C460-1# set port powerinline 3/1-3 enable
Load detection process on ports 3/1-3 is enabled
set port powerinline priority
User level: read-write, admin.
Use the set port powerinline priority command to set the priority level
for powering the port.
The syntax for this command is:
set port powerinline <module_number/port_number> <priority>
module
Avaya C460 Reference Guide
Number of the module (3-6).
113
Chapter 2
Avaya C460 CLI Commands
port
Number of the port on the module. If you do not specify a
number, all the ports on the module are shown.
You can also specify a range of ports separated by a dash, for
example, 4/5-13 for ports 5 to 13 on module 4.
priority
The priority level for powering the port:
• Critical
• High
• Low
Example:
To enable PoE on ports 1 to 3 of module three to High:
C460-1# set port powerinline 3/1-3 high
Load detection process on ports 3/1-3 was set to High
set port redundancy
User level: read-write, admin.
Use the set port redundancy command to globally enables or disable the
redundancy pairs you have defined. Using this command will not delete existing
redundancy entries.
L Disable Spanning Tree before you can enable redundancy.
The syntax for this command is:
set port redundancy {enable|disable}
Example:
C460-1# set port redundancy enable
All redundancy schemes are now enabled
114
Avaya C460 Reference Guide
Chapter 2
Avaya C460 CLI Commands
set port redundancy on/off
User level: read-write, admin.
Use the set port redundancy command to defines or remove redundancy pairs. The
link can be any port that does not belong to a LAG, or a LAG interface. Ensure that
there is no redundancy scheme already defined on any of the links.
The syntax for this command is:
set port redundancy <module>/<prim_port> <module>/
<second_port> {on/off} [<redundancy_name>]
prim_port
Primary port of the redundancy scheme
second_port
Secondary port of the redundancy scheme
redundancy_name
(Optional)
Name for the redundancy scheme
Example:
C460-1# set port redundancy 3/7 4/12 on red1
red1: Port 2/12 is redundant to port 1/7.
Port redundancy is active - entry is effective immediately
If you wish to define a name which includes spaces, you must enclose the entire
name in quotation marks, for example “new york”.
set port redundancy-intervals
User level: read-write, admin.
Use the set port redundancy-intervals command to configures the two time
constants that determine redundancy switchover parameters:
• “Min Time-between-switchovers” is the minimum interval between switchover
of each pair.
• “Switchback-interval” is the period the primary port link has to be “up” before
the system switches back.
If the switchback interval is zero, the system never switches back. If it is one,
switchback occurs immediately after the primary port link returns.
Avaya C460 Reference Guide
115
Chapter 2
Avaya C460 CLI Commands
The syntax for this command is:
set port redundancy-intervals <min-time-between-switchovers>
<switchback-interval> | none
min-time-between-switchovers
The minimum time between redundancy
switchovers for each pair (in milliseconds).
switchback-interval
The period the primary port link has to be
“up” before the system switches back (in
milliseconds).
• If switchback interval is zero, the system
never switches back
• If it is one, switchback occurs immediately
after the primary port link returns
none
The system switches bank only if the
secondary link fails.
Example:
C460-1# set port redundancy-intervals 100 20
Done!
set port spantree
User level: read-write, admin.
Use the set port spantree command to enable or disable the spanning tree
mode for specific switch ports.
The syntax for this command is:
set port spantree {enable|disable} [module/port]
enable|disable
Enables or disables the spanning tree mode for the
specified ports.
Module
Module number
Port
Port number
Example:
C460-1# set port spantree enable 3/1
port 3/1 was enabled on spantree
116
Avaya C460 Reference Guide
Chapter 2
Avaya C460 CLI Commands
set port spantree cost
User level: read-write, admin.
Use the set port spantree cost command to set the cost of a port. This value
defines which port will be allowed to forward traffic if two ports with different costs
cause a loop.
The syntax for this command is:
set port spantree cost [module/port] [value]
module
Number of the module (3-6).
port
Number of the port on the module. If you do not specify a
number, the port spantree cost is set for all the ports on the
module.
You can also specify a range of ports separated by a dash,
for example, 4/5-13 for ports 5 to 13 on module 4.
value
Number representing the cost. The cost level is set from 1
to 65535. A lower cost (lower value) specifies precedence
of a port to forward traffic.
Example:
C460-1> set port spantree cost 4/2 4096
port 4/2 spantree cost is 4096
set port spantree force-protocol-migration
User level: read-write, admin.
Use the set port spantree force-protocol-migration command to set
the port as an RSTP port (and not as common STA port). It forces the port to send a
rapid spanning tree BPDU.
The syntax for this command is:
set port spantree force-protocol-migration <module/port>
module
Number of the module (3-6).
port
Number of the port on the module. If you do not specify a number,
the port spantree force protocol migration is set for all the ports on
the module.
You can also specify a range of ports separated by a dash, for
example, 4/5-13 for ports 5 to 13 on module 4.
Avaya C460 Reference Guide
117
Chapter 2
Avaya C460 CLI Commands
Example:
C460-1# set port spantree force-protocol-migration 1/1
port 1/1 is forced to send a Rapid spanning tree BPDU
set port spantree priority
User level: read-write, admin.
Use the set port spantree command to set the Spanning Tree priority level of a
port. This value defines the priority of a port to be blocked in case two ports with
the same costs cause a loop.
The syntax for this command is:
set port spantree priority [module/port] [value]
module/port
Module number/port number.
value
Number representing the priority of the port. The priority
level is from 0 to 255, with 0 indicating high priority and
255 indicating low priority. A port with a lower priority
will be blocked.
Example:
C460-1# set port spantree priority 3/4 128
port 3/4 spantree priority is 128
set port speed
User level: read-write, admin.
Use the set port speed command to configure the speed of a port or range of
ports.
In auto-negotiation mode, the port's speed is determined by auto negotiation. An
error message is generated if you attempt to set the speed when auto negotiation is
enabled
The syntax for this command is:
set port speed <module>/<port> <10MB|100MB|1GB>
module
118
Number of the module (3-6).
Avaya C460 Reference Guide
Chapter 2
port
Avaya C460 CLI Commands
Number of the port on the module. If you do not specify a
number, the speed is set for all the ports on the module.
You can also specify a range of ports separated by a dash, for
example, 4/5-13 for ports 5 to 13 on module 4.
Example:
To configure port 1 on module 4 to 100 Mbps
C460-1# set port speed 4/1 100MB
Port 4/1 speed set to 100Mbps.
set port static-vlan
User level: read-write, admin.
Use the set port static-vlan command to assign static VLANs to ports.
The syntax for this command is:
set port static-vlan [module/port range] [vlan num]
module
Number of the module (3-6).
port
Number of the port on the module.
You can also specify a range of ports separated by a dash, for
example, 4/5-13 for ports 5 to 13 on module 4.
vlan range
vlan to bind to port
Example:
C460-1# set port static-vlan 3/4-6 2
VLAN 2 is bound to port 3/4
VLAN 2 is bound to port 3/5
VLAN 2 is bound to port 3/6
set port trap
User level: read-write, admin.
Use the set port trap command to enable or disable generic SNMP uplink or
downlink traps from a port.
Avaya C460 Reference Guide
119
Chapter 2
Avaya C460 CLI Commands
The syntax for this command is:
set port trap <module>/<port> {enable|disable}
module
Number of the module (3-6).
port
Number of the port on the module.
You can also specify a range of ports separated by a dash, for
example, 4/5-13 for ports 5 to 13 on module 4.
enable
Enable uplink/downlink traps
disable
Disable uplink/downlink traps
Example:
C460-1# set port trap 3/2 enable
Port 3/2 up/down trap enabled.
set port vlan
User level: read-write, admin.
Use the set port vlan command to set the port VLAN ID (PVID). If adding a
new VLAN, the VLAN number must be within the range.
L You need to define a vlan before setting a port VLAN ID.
The syntax for this command is:
set port vlan <vlan_num> <module>/<port>
120
vlan_num
Number identifying the VLAN.
module
The module number
port
Number of the port on the module.
You can also specify a range of ports separated by a dash, for
example, 4/5-13 for ports 5 to 13 on module 4.
Avaya C460 Reference Guide
Chapter 2
Avaya C460 CLI Commands
Example:
C460-1# set port vlan 2 3/5
VLAN
VLAN
---2
2 modified.
Mod/Ports
--------------------------3/5
set port vlan-binding-mode
User level: read-write, admin.
Use the set port vlan-binding-mode command to define the binding method
used by ports.
The syntax for this command is:
set port vlan-binding-mode [port_list] [value]
port list
Switches and ports to bundle (format: module/port)
value
• static – the port supports only the VLAN as configured per
port
• bind-to-configured – the port supports the VLANs
configured on the device
• bind-to-all – the port support the whole range of VLANs
on the device
Example:
C460-1# set port vlan-binding-mode 5/5-9 static
Set Port vlan binding method:5/5
Set Port vlan binding method:5/6
Set Port vlan binding method:5/7
Set Port vlan binding method:5/8
Set Port vlan binding method:5/9
set power redundancy
User level: read-write, admin.
Use the set power redundancy command to enable or disable PSU (power
supply) redundancy.
Avaya C460 Reference Guide
121
Chapter 2
Avaya C460 CLI Commands
The syntax for this command is:
set power redundancy <mode>
enable
Enable power redundancy
disable
Disable power redundancy
Example:
C460-1# set power redundancy enable
set powerinline budget
User level: read-write, admin.
Use the the set powerinline budget command to recalculate and reapply the
PoE budget.
The syntax for this command is:
set powerinline budget
Example:
C460-1# set powerinline budget
Powerinline budget was reinitialized
set ppp authentication incoming
User level: read-write, admin.
Use the set ppp authentication command to define the authentication
method used for a PPP server or client session.
The syntax for this command is:
set ppp authentication incoming {pap|chap|none}
122
pap
PAP authentication method
chap
CHAP authentication method
none
No authentication
Avaya C460 Reference Guide
Chapter 2
Avaya C460 CLI Commands
Example:
C460-1# set ppp authentication incoming chap
PPP requires CHAP authentication for incoming sessions.
set ppp baud-rate
User level: read-write, admin.
Use the set ppp baud-rate command to define the baud rate used in PPP
sessions.
L You mujst set the peer baud rate to the same value as the host.
The syntax for this command is:
set ppp baud-rate <9600|19200|38400>
Example:
C460-1# set ppp baud-rate 38400
ppp baud rate was set to 38400
set ppp chap-secret
User level: admin.
Use the set ppp chap-secret command to configure the “shared secret” used
in PPP sessions with CHAP authentication. The chap-secret is not transferable via
the configuration upload/download mechanism.
The syntax for this command is:
set ppp chap-secret <chap-secret>
chap-secret
The shared secret, 4 to 32 characters.
Example:
C460-1(super)# set ppp chap secret hush
PPP shared secret for CHAP authentication is set
set ppp incoming timeout
User level: read-write, admin.
Use the set ppp incoming timeout command to set the number of minutes
until the system automatically disconnects an idle PPP incoming session.
Avaya C460 Reference Guide
123
Chapter 2
Avaya C460 CLI Commands
The syntax for this command is:
set ppp incoming timeout <time>
time
The timeout in minutes
Example:
C460-1# set ppp incoming timeout 15
PPP incoming session will automatically disconnect after 15
minutes of idle time
qset radius authentication enable/disable
User level: read-write, admin.
Enables or disables RADIUS authentication for the C460 switch.
The syntax for this command is:
set radius authentication {enable | disable}
enable
Enable RADIUS authentication
disable
Disable RADIUS authentication (default)
Example:
C460-1(super)# set radius authentication enable
set radius authentication retry-number
User level: read-write, admin.
Sets the number of times an access request is sent when there is no response.
The syntax for this command is:
set radius authentication retry-number <number>
number
Number of retries
Example:
C460-1(super)# set radius authentication retry-number 3
124
Avaya C460 Reference Guide
Chapter 2
Avaya C460 CLI Commands
set radius authentication retry-time
User level: read-write, admin.
Sets the time to wait before re-sending an access request.
The syntax for this command is:
set radius authentication retry-time <time>
time
Retry time in seconds
Example:
C460-1(super)# set radius authentication retry-time 5
set radius authentication secret
User level: read-write, admin.
Use the set radius authentication secret command to enable secret
authentication for the P330 unit.
The syntax for this command is:
set radius authentication secret <string>
string
text password
Example:
C460-1(super)# set radius authentication secret hush
set radius authentication server
User level: read-write, admin.
Sets the IP address (and shared secret) of the primary or secondary RADIUS
Authentication server.
The syntax for this command is:
set radius authentication server <ip-addr> {primary |
secondary}
ip-addr
IP address of the RADIUS authentication server
primary
default - Primary authentication server
Avaya C460 Reference Guide
125
Chapter 2
Avaya C460 CLI Commands
secondary
Secondary authentication server
Example:
C460-1(super)# set radius authentication server
192.40.12.36 primary
set radius authentication udp-port
User level: read-write, admin.
Sets the RFC 2138-approved UDP port number.
Normally, the UDP port number should be set to its default value of 1812. Some
early implementations of the RADIUS server used port number 1645.
The syntax for this command is:
set radius authentication udp-port <number>
Example:
C460-1(super)# set radius authentication udp-port number
1645
set slot power admin
User level: read-write, admin.
Use the set slot power command to power up or power down a slot. If there is
a module in the slot, then the command will reset the device.
The syntax for this command is:
set slot power admin <slot> <status>
126
Slot
Slot number
Status
• Up – power up the module
• Down – power down the nodule
Avaya C460 Reference Guide
Chapter 2
Avaya C460 CLI Commands
Example: 1 – if the slot is empty:
C460-1> set slot power admin 4 up
slot 4 power is enabled
C460-1> set slot power admin 4 down
slot 4 power is disabled
Example: 2 – if there is a module in the slot::
C460-1> set slot power admin 4 up
This command will RESET the device
*** Reset *** - do you want to continue (Y/N)? Y
Module in slot 4 is shutting down.
Attaching network interface lo0... done.
Welcome to C460
SW version 1.0.1
Login:
C460-1> set slot power admin 4 up
This command will RESET the device
*** Reset *** - do you want to continue (Y/N)? Y
Module in slot 4 is turning on
Welcome to C460
SW version 1.0.1
Login:
set slot power priority
User level: read-write, admin.
Use the set slot
for a slot.
Avaya C460 Reference Guide
power priority command to configure the power priority
127
Chapter 2
Avaya C460 CLI Commands
The syntax for this command is:
set slot power priority <slot> <level>
Slot
Slot number:
• 3 to 6
• all
level
• critical
• high
• low
Example:
C460-1# set slot power priority 3 high
Slot 3 is set to power priority high
set snmp community
User level: read-write, admin.
Use the set snmp community command to set or modify the switch’s SNMP
community strings.
The syntax for this command is:
set snmp community <read-only | read-write | trap> [community
string]
Example:
C460-1# set snmp community read-only read
SNMP read-only community string set
set snmp retries
User level: read-write, admin.
Use the set snmp retries command to set the number of retries initiated by the
C460 Manager when it tries to send SNMP messages to the switch.
The syntax for this command is:
set snmp retries <number>
number
128
Number of retries
Avaya C460 Reference Guide
Chapter 2
Avaya C460 CLI Commands
Example:
C460-1# set snmp retries 10
SNMP retries is set to 10
set snmp timeout
User level: read-write, admin.
Use the set snmp timeout command to set the SNMP timeout in seconds. This
command is useful for access using the C460 Manager.
The syntax for this command is:
set snmp timeout <number>
number
Timeout in seconds
Example:
C460-1# set snmp timeout 2000
the SNMP Timeout is set to 2000
set snmp trap
User level: read-write, admin.
Use the set snmp trap command to add an entry into the SNMP trap receiver
table and to enable or disable the different SNMP traps for a specific receiver.
First add the rcvr_addr and then enable/disable the different traps for it.
The syntax for this command is:
set snmp trap <rcvr_addr>
set snmp trap <rcvr_addr> {enable|disable} {all|config|fault|...}
enable
Activate SNMP traps
disable
Deactivate SNMP traps
all
(Optional) Specify all trap types
config
(Optional) Specify the ConfigChange trap from the TRAP-MIB.
fault
(Optional) Specify the Fault trap from the TRAP-MIB.
rcvr_addr
IP address or IP alias of the system to receive SNMP traps
Avaya C460 Reference Guide
129
Chapter 2
Avaya C460 CLI Commands
Example:
To enable SNMP ConfigChange traps to a specific manager:
C460-1# set snmp trap 192.168.173.42 enable config
SNMP config change traps enabled.
Example:
To enable all traps to a specific manager:
C460-1# set snmp trap 192.168.173.42 enable all
SNMP all traps enabled.
Example:
To disable SNMP config traps to a specific manager:
C460-1# set snmp trap 192.168.173.42 disable config
SNMP config traps disabled.
Example:
To add an entry in the SNMP trap receiver table with default:
C460-1# set snmp trap 192.168.173.42
SNMP trap receiver added.
set snmp trap auth
User level: read-write, admin.
Use the set snmp trap auth command to enables or disable the sending of
SNMP traps upon SNMP authentication failure.
The syntax for this command is:
set snmp trap {enable|disable} auth
Example:
C460-1# set snmp trap enable auth
Authentication trap enabled
130
Avaya C460 Reference Guide
Chapter 2
Avaya C460 CLI Commands
set spantree default-path-cost
User level: privileged, supervisor.
Use the set spantree default-path-cost command to set the version of the
spanning tree default path costs that are to be used by this bridge.
The syntax for this command is:
set spantree default-path-cost <path-cost>
path-cost
• common-spanning-tree - compatible with IEEE802.1D
standard
• rapid-spanning-tree - compatible with IEEE802.1W
standard
Example:
C460-1# set spantree default-path-cost rapid-spanning-tree
Spanning tree default path costs is set to rapid spanning
tree.
set spantree enable/disable
User level: read-write, admin.
Use the set spantree command to enable or disable the spanning-tree algorithm
for the switch.
L When you disable STP, blocking ports are disabled in order to prevent loops in
the network. As a result, you need to wait 30 seconds before disabling STP if
you reset the switch, enable STP, or insert a new station.
The syntax for this command is:
set spantree {enable|disable}
Example:
C460-1# set spantree enable
bridge spanning tree enabled.
C460-1# set spantree disable
bridge spanning tree disabled.
Avaya C460 Reference Guide
131
Chapter 2
Avaya C460 CLI Commands
set spantree forward-delay
User level: read-write, admin.
Use the set spantree forward-delay command to set the bridge forward
delay time parameter.
The syntax for this command is:
set spantree forward-delay <time>
forward delay
The time that is used when transferring the port to forwarding state.
Value range is 4-30 and must exceed Bridge Max Age/2.
Recomended value is 15 seconds.
Example:
C460-1# set spantree forward-delay 15
bridge forward delay set to 15.
set spantree hello-time
User level: read-write, admin.
Use the set spantree hello-time command to set the bridge hello time
parameter.
The syntax for this command is:
set spantree hello-time <time>
hellotime
The time interval (in seconds) between the generation of
configuration BPDUs by the Root. Value ranges between 1 to 10 and
must not exceed (Bridge-Max-Age/2) - 1.
The recommended value is 2 sec.
Example:
C460-1# set spantree hello-time 2
bridge hello time set to 2.
set spantree max-age
User level: read-write, admin.
Use the set spantree max-age command to set the bridge spanning tree max
age parameter.
132
Avaya C460 Reference Guide
Chapter 2
Avaya C460 CLI Commands
The syntax for this command is:
set spantree max-age <seconds>
max-age
The max age time in seconds to keep message information before it is
discarded. Value ranges between 6 to 40; value must be between 2 X
(Bridge-Hello-Time + 1) and 2 X (Bridge-Forward-Delay - 1).
Recommended value is 20 sec.
Example:
C460-1# set spantree max-age 20
bridge max age is set to 20.
set spantree priority
User level: read-write, admin.
Use the set spantree priority command to set the bridge priority for STP.
The syntax for this command is:
set spantree priority <bridge_priority>
bridge_priority
Number representing the priority of the bridge with a priority
level from 0 to 65535.
0 indicates high priority and 65535 indicates low priority.
Example:
C460-1# set spantree priority 4096
Bridge priority set to 4096.
set spantree tx-hold-count
User level: read-write, admin.
Use the set spantree tx-hold-count command to limit the maximum
number of BPDUs transmitted during a hello-time period.
The syntax for this command is:
set spantree tx-hold-count <rate>
rate
Avaya C460 Reference Guide
Value between 1 to 10; recommended value is 3
133
Chapter 2
Avaya C460 CLI Commands
Example:
C460-1# set spantree tx-hold-count 3
tx hold count is set to 3.
set spantree version
User level: read-write, admin.
Use the set spantree version command to set the rapid spanning tree state
machine to work as "STP compatible".
The syntax for this command is:
set spantree version <version>
version
common-spanning-tree — compatible with ieee802.1D standard.
rapid-spanning-tree — compatible with ieee802.1W standard
Example:
C460-1# set spantree version rapid-spanning-tree
Spanning tree version is set to rapid spanning tree.
set system contact
User level: read-only, read-write, admin.
Use the set system contact command to set the mib2 system contact MIB
variable.
The syntax for this command is:
set system contact [string]
string
• The contact name string should be typed inside inverted
commas.
• The name is cleared if you leave this field blank.
Example:
C460-1(super)# set system contact “gregory kohll”
*** Set system contact ***
system contact set
134
Avaya C460 Reference Guide
Chapter 2
Avaya C460 CLI Commands
set system location
User level: read-only, read-write, admin.
Use the set system location command to set the mib2 system location MIB
variable
The syntax for this command is:
set system location [string]
string
• The location name string should be typed inside inverted
commas.
• The location is cleared if you leave this field blank.
Example:
C460-1# set system location “tech-support”
*** Set system location ***
system location set
If you wish to enter a name which includes spaces, you must enclose the entire
name in quotation marks, for example “new york”.
set system name
User level: read-write, admin.
Use the set system name command to set the mib2 system name MIB variable.
The syntax for this command is:
set system name [string]
string
• The system name string should be typed inside inverted
commas.
• The name is cleared if you leave this field blank.
Example:
C460-1# set system name “C460-1”
*** Set system name ***
system name set
If you wish to enter a name which includes spaces, you must enclose the entire
name in quotation marks, for example “new york”.
Avaya C460 Reference Guide
135
Chapter 2
Avaya C460 CLI Commands
set time client
User level: read-write, admin.
Use the set time client command to enable or disable the periodic network
time acquisition by the switch from the network time server (SNTP or TIME
protocol).
The syntax for this command is:
set time client {enable|disable}
enable
Enable periodic network time acquisition
disable
Disable periodic network time acquisition
Example:
C460-1# set time client enable
Time client mode enabled
set time protocol
User level: read-write, admin.
Use the set time protocol command to set the protocol for use in the system as
either SNTP protocol or TIME protocol.
The syntax for this command is:
set time protocol
[sntp-protocol|time-protocol]
sntp-protocol
Use the SNTP protocol
time-protocol
Use the TIME protocol
Example:
C460-1> set time protocol sntp-protocol
The protocol has been set to SNTP protocol
C460-1> set time protocol time-protocol
The protocol has been set to TIME protocol
136
Avaya C460 Reference Guide
Chapter 2
Avaya C460 CLI Commands
set time server
User level: read-write, admin.
Use the set time server command to set the TIME server address.
The syntax for this command is:
set time server <ip address>
ip address
IP address of the TIME server.
Example:
C460-1# set time server 192.49.53.68
The Server Ip has been set to 192.49.53.68
set timezone
User level: read-write, admin.
Use the set timezone command to assign a timezone name and sets the time
difference of the device relative to the Coordinated Universal Time (UTC / GMT).
The minutes parameter can only be set to 30.
The syntax for this command is:
set timezone <zone-name> [-]<hours>[:30]
zone-name
Three-character name of time zone, for example, EST, GMT
hours
The difference between the time zone and GMT
Example:
C460-1# set timezone EST -5
Timezone set to “EST”, offset from UTC is -5 hours.
Avaya C460 Reference Guide
137
Chapter 2
Avaya C460 CLI Commands
set trunk
User level: read-write, admin.
Use the set trunk command to configure the VLAN tagging mode of a port.
set trunk <module/port> [value]
module
Number of the module (3-6).
port
Number of the port on the module. If you do not specify a
number, the vlan tagging mode is set for all the ports on the
module.
You can also specify a range of ports separated by a dash,
for example, 4/5-13 for ports 5 to 13 on module 4.
value
• off – forces the port to become a non-tagging port and
persuade the neighboring port to become a non-tagging
port. The port becomes a non-tagging port even if the
neighbor port does not agree to become a non-tagging
port.
• dot1q – specifies an IEEE 802.1Q tagging on a Fast
Ethernet or Gigabit Ethernet port.
Example:
C460-1# set trunk 3/3 dot1q
Dot1Q VLAN tagging set on port 3/3.
set vlan
User level: read-write, admin.
Use the set vlan command to configure VLANs.
The syntax for this command is:
set vlan <vlan-id> [name <vlan-name>]
vlan-id
vlan number
vlan-name
vlan name
Example:
C460-1# set vlan 3 name gregory
VLAN id 3, vlan-name gregory created.
138
Avaya C460 Reference Guide
Chapter 2
Avaya C460 CLI Commands
If you wish to define a name which includes spaces, you must enclose the entire
name in quotation marks, for example “new york”.
set vlan (Layer 3)
User level: read-write, admin.
L If you are at the “read-write” user level, you can only access this command in
Configure mode.
Type configure at the command prompt to enter configure mode.
Use the set vlan command to create a router Layer 2 interface.
The syntax for this command is:
set vlan <vlan-id> name <vlan-name>
vlan-id
Interface Index
vlan-name
Interface name (used in layer 3 protocols)
Example:
C460-1(configure)# set vlan 2 name vlan2
If you wish to define a name which includes spaces, you must enclose the entire
name in quotation marks, for example “new york”.
set web aux-files-url
User level: read-write, admin.
Use the set web aux-files-url command to allow the Device Manager to
automatically locate the URL of the Web server containing the Device Manager help
files and Java plug-in.
Tip: Ensure that the Web server is always accessible to prevent potential delays to
Web access to the device.
The syntax for this command is:
set web aux-files-url <//IP address/directory name>
Avaya C460 Reference Guide
139
Chapter 2
Avaya C460 CLI Commands
Example:
C460-1# set web aux-files-url //192.168.47.25/emweb-auxfiles
If you wish to define a directory name which includes spaces, you must enclose the
entire name in quotation marks, for example “new york”.
set welcome message
User level: read-write, admin.
Use the set welcome message command to set a welcome message to appear
after a reboot or after opening a new session (see session command) in the stack.
The syntax for this command is:
set welcome message [string]
string
• string - the string to be used as the welcome message.
• blank - Restores the default string.
Example:
C460-1# set welcome message avaya
The new welcome string is “avaya”
If you wish to define a string which includes spaces, you must enclose the entire
string in quotation marks, e.g. "new york".
show access lists
User level: user, privileged, supervisor
Use the show access lists command to display all the current policy lists.
The syntax for this command is:
show access-lists [<policy-list-number>]
policy-list-number
140
The policy list number (integer from 100 to 199; 0 is th
default list).
Avaya C460 Reference Guide
Chapter 2
Avaya C460 CLI Commands
Example:
Router-1> show access-lists
The current policy source is local
default List (0) parameters
List Owner : other
List 0 is valid
default action for list 0 is permit
show allowed managers status
User level: read-only, read-write, admin.
Use the show allowed managers status command to display the activation
status of the Allowed Managers feature.
The syntax for this command is:
show allowed managers status
Example:
C460-1(super)# show allowed managers status
Managers are disabled.
Avaya C460 Reference Guide
141
Chapter 2
Avaya C460 CLI Commands
show allowed managers table
User level: read-only, read-write, admin.
Use the show allowed managers table to display the list of the twenty
possible allowed managers IP addresses.
The syntax for this command is:
show allowed managers table
Example:
C460-1(super)# show allowed managers table
1 ) 149.49.32.134
2 ) Not Used
3 ) Not Used
4 ) Not Used
5 ) Not Used
6 ) Not Used
7 ) Not Used
8 ) Not Used
9 ) Not Used
10) Not Used
11) Not Used
12) Not Used
13) Not Used
14) Not Used
15) Not Used
16) Not Used
17) Not Used
18) Not Used
19) Not Used
20) Not Used
142
Avaya C460 Reference Guide
Chapter 2
Avaya C460 CLI Commands
show arp-aging-interval
User level: read-only, read-write, admin.
Use the show arp-aging-interval command to display the ARP table aging
interval for gateway entries.
The syntax for this command is:
show arp-aging-interval
Example:
C460-1> show arp-aging-interval
ARP table aging interval for gateways was set to 10
minutes.
show arp-tx-interval
User level: read-only, read-write, admin.
Use the show arp-tx-interval command to display the keep-alive frames
transmission interval.
The syntax for this command is:
show arp-tx-interval
Example:
C460-1> show arp-tx-interval
ARP tx interval for inband interface is set to 5 seconds.
ARP tx interval for outband interface is set to 5 seconds.
show banner login
User level: read-only, read-write, admin.
Use the show banner login command to display the message shown before a login.
The syntax for this command is:
show banner login
Avaya C460 Reference Guide
143
Chapter 2
Avaya C460 CLI Commands
Example:
C460-1> show banner login
Welcome to C460
SW version 2.0.2
show banner post-login
User level: read-only, read-write, admin.
Use the show banner login command to display the message shown after a
successful login.
The syntax for this command is:
show banner post-login
Example:
C460-1> show banner post-login
Welcome to C460
SW version 2.0.2
show boot bank
User level: read-only, read-write, admin.
Use the show boot bank command to display the system boot bank.
The syntax for this command is:
show boot bank
Example:
C460-1> show boot bank
SPV 1 boot bank is A
show broadcast storm control
User level: read-only, read-write, admin.
Use the broadcast storm control command to display broadcast storm status and
settings.
144
Avaya C460 Reference Guide
Chapter 2
Avaya C460 CLI Commands
The syntax for this command is:
show broadcast storm control
Example:
C460-1> show broadcast storm control
Broadcast
Threshold
Storm Control
---------------- -----------disable
500
show cam
User level: read-only, read-write, admin.
Use the show cam command to display the CAM table entries for a specific
module and port.
L MACs associated with LAGs appear under the LAG ID, not under the LAG
port.
By Module and Port
The syntax for this command is:
show cam [module[/port]]
mac-addr
MAC address
module
(Optional)
Number of the module (3-6). If you do not specify a number, all
modules are shown.
port
(Optional)
Number of the port on the module. If you do not specify a
number, all ports on the specified module are shown.
Avaya C460 Reference Guide
145
Chapter 2
Avaya C460 CLI Commands
Example:
C460-1> show cam
Total Matching CAM Entries Displayed = 128
Dest MAC/Route Dest
------------------08:00:20:c6:98:5f
08:00:20:c4:c8:51
00:00:3b:80:49:7c
00:00:5e:00:01:01
00:00:5e:00:01:02
00:01:02:de:96:2f
00:02:2d:47:18:67
00:02:2d:48:18:29
00:02:55:5b:b1:e1
00:02:b3:07:92:4f
00:02:b3:23:94:4d
00:02:b3:23:a0:d3
00:02:b3:23:ca:f2
00:02:b3:23:ce:02
00:02:b3:2d:2a:69
00:03:47:6d:e2:68
00:03:47:6d:e2:b9
00:04:0d:00:56:78
--type q to quit or
Dest MAC/Route Dest
------------------00:04:0d:00:56:85
00:04:0d:01:81:8c
00:04:0d:01:b0:00
...
146
vlan Destination Ports
---- ----------------1
3/33
1
3/33
1
3/33
1
3/33
1
3/33
1
3/33
1
3/33
1
3/33
1
3/33
1
3/33
1
3/33
1
3/33
1
3/33
1
3/33
1
3/33
1
3/33
1
3/33
1
3/33
space key to continue-vlan Destination Ports
---- ----------------1
3/33
1
3/33
1
3/33
Avaya C460 Reference Guide
Chapter 2
Avaya C460 CLI Commands
show cam mac
User level: read-only, read-write, admin.
Use the show cam mac command to display a specific mac/vlan in the CAM
CAM table.
The syntax for this command is:
show cam mac <mac> <vlan>
mac-addr
MAC address
vlan
VLAN identity
Example:
C460-1> show cam mac 00-00-81-01-23-45
Dest MAC/Route
Destination Ports
-----------------------------00-00-81-01-23-45
2/9
00-00-81-01-23-46
2/9
Total Matching CAM Entries = 2
vlan
----1
1
show cam vlan
User level: read-only, read-write, admin.
Use the show cam vlan command to display all MAC entries for a specific VLAN
in the CAM.
The syntax for this command is:
show cam vlan <vlan>
vlan
VLAN identity
Example:
C460-1> show cam vlan 3
Dest MAC/Route Dest vlan Destination Ports
------------------- ---- ----------------Total Matching CAM Entries = 2
Avaya C460 Reference Guide
147
Chapter 2
Avaya C460 CLI Commands
show chassis-identity
User level: read-only, read-write, admin.
Use the show module-identity command to display the identifier(s) required
for requesting license keys for this chassis.
The syntax for this command is:
show chassis-identity
Example:
C460-1> show chassis-identity
Chassis Identity
---------------53333335
show copy status
User level: read-only, read-write, admin.
Use the show copy status command to show the status of the local
configuration copy operation.
The syntax for this command is:
show copy status
Example:
C460-1> show copy status
Module #1
===========
Module
: 1
Source file
: .router-startup
Destination file : .router-running
Host
: Running state
: Idle
Failure display : (null)
Last warning
: No-warning
148
Avaya C460 Reference Guide
Chapter 2
Avaya C460 CLI Commands
show cpu load
User level: read-only, read-write, admin.
Use the show cpu load command to show the current CPU utilization.
The syntax for this command is:
show cpu load
Example:
C460-1> show cpu load
The current CPU utilization is 1%
show cs
User level: read-only, read-write, admin.
Use the show cs command to show the version numbers of the C460 chassis and
installed components.
The syntax for this command is:
show cs
Example:
C460-1> show cs
Chassis
Fans
Psu_1
Psu_2
Psu_3
Slot
---1
2
3
4
5
6
:
:
:
:
:
1.0
1.0
1.0
1.0
Type
------------------------M460ML-SPV
M460ML-SPV
M4612ML-G
M4648ML-T-2G-PWR
M4648ML-T-PWR
M4648ML-T-2G
Avaya C460 Reference Guide
C/S
-------1.0
1.0
1.0
1.0
1.0
1.0
149
Chapter 2
Avaya C460 CLI Commands
show device-mode
User level: read-only, read-write, admin.
Use this command to display the switch operational mode (Layer 2 or Layer 3).
The syntax for this command is:
show device-mode
Example:
C460-1> show device-mode
Device mode is Router
show dot1x
User level: user, privileged, supervisor
Use the show dot1x command to display the system dot1x capabilities, protocol
version, and timer values.
The syntax for this command is:
show dot1x
Example:
C460-1> show dot1x mode
PAE Capabilities
Authenticator Only
Protocol Version
1
system-auth-control
disabled
*** Warning : Authentication server ( RADIUS ) is disabled/not-exist and so
***
no authentication can be made
show dot1x statistics
User level: read-only, read-write, admin.
Use the show dot1x statistics command to display Rx and Tx EAPOL and
EAP statistics.
The syntax for this command is:
show dot1x statistics
150
Avaya C460 Reference Guide
Chapter 2
Avaya C460 CLI Commands
Example:
C460-1> show dot1x statistics
Rx: EAPOL
Total
-------0
EAPOL
Start
-------0
EAPOL
Logoff
-------0
Tx: EAPOL
Total
-------0
EAP
Req/Id
-------0
EAP
Req
-------0
EAPOL
Invalid
-------0
EAP
Resp/Id
-------0
EAP
Resp
-------0
EAP
LenError
-------0
show dynamic vlans
Use the show dynamic vlans command to display automatically learned
VLANs..
The syntax for this command is:
show dynamic vlans
Router-1> show dynamic vlans
VLAN NAME
VLAN ID VLAN MAC
---------------- ------- ----------------Default
1 02:e0:3b:1d:f9:01
show environment fans
User level: read-only, read-write, admin.
Use the show environment fans command to display the current fans status
for the switch.
The syntax for this command is:
show environment fans
Example:
C460-1> show environment fans
Mode: regular
Total working fans: 9
Mode
Avaya C460 Reference Guide
• Boost
• Regular
151
Chapter 2
Avaya C460 CLI Commands
Total working fans
• 9
• 8
• less than 8
Fans not installed
• No fan tray installed
show environment power
User level: read-only, read-write, admin.
Use the show environment power command to display the current power
configuration for the switch, the total power available to the system, and amount of
power currently in use.
L The “Main Power” includes two supervisor modules and the fan module,
irrespective of the number of supervisor modules installed.
L The “Main Draw” column shows the demand for an I/O module whether its
slot is enabled or not.
The syntax for this command is:
show environment power
Example:
C460 > show environment power
PSUs Configuration Admin: redundancy
PSUs Configuration State: no redundancy (2 active PSU(s))
Power
----Main
PoE
Available
--------411W
1589W
Drawn
----411W
0W
Remaining
--------0W
1489W
Slot Module Type
Main
Active Enabled Priority Draw
PoE
PoE
Budget Draw Fault
---- ---------------
------ ------- -------- ----
------ ---- -----
1 M460ML-SPV
Y
Y
critical
68W
2 M460ML-SPV
Y
Y
critical
68W
3 M4612ML-G
Y
Y
low
59W
4 M4648ML-T-2G-PWR
Y
Y
high
48W
720W 100W
5 M4648ML-T-PWR
Y
Y
low
48W
720W
6 M4648ML-T-2G
Y
Y
low
70W
0W
* Fans power consumption: 45(W)
152
Avaya C460 Reference Guide
Chapter 2
Avaya C460 CLI Commands
show erase status
User level: user, privileged, supervisor
Use the show erase status command to view the status of the erase
configuration operation.
The syntax for this command is:
show erase status
show event-log
User level: read-only, read-write, admin.
Displays the encrypted event log file.
The syntax for this command is:
show event-log
show event-log (Layer 3)
User level: read-only, read-write, admin.
Displays the encrypted event log file.
The syntax for this command is:
show event log
show fragment
User level: read-only, read-write, admin.
Use the show fragment command to display information regarding fragmented
IP packets that are destined to the router.
L The router does not perform reassambly of packets in transit.
This command displays the following information:
Size
Maximum number of packets set by the fragment size
command
Chain
Maximum number of fragments for a single packet set by the
fragment chain command.
Timeout
Maximum number of seconds set by the fragment timeout
command.
Queue
Number of packets currently awaiting reassembly.
Assemble
Number of packets successfully reassembled
Fail
Number of packets which failed to be reassembled
Avaya C460 Reference Guide
153
Chapter 2
Avaya C460 CLI Commands
Overflow
Number of packets which overflowed the fragment database.
The syntax for this command is:
show fragment
Example:
Router-1> show fragment
Max number of concurrently reassembled packets is 100
Max number of fragments per packet is 64
Fragment timeout is 10 sec
Number of packets waiting to be reassembled is 0
Number of successfully reassembled packets is 11954
Number of packets which failed to be reassembled is 0
Number of packets which overflowed the database is 0
show icmp-redirect
User level: read-only, read-write, admin.
Use the show icmp-redirect command to display whether ICMP-redirects are
accepted or rejected.
The syntax for this command is:
show icmp-redirect
Example:
C460-1> show icmp-redirect
icmp-redirect is accepted
show image version
User level: read-only, read-write, admin.
See show spv
show intelligent-multicast
User level: read-only, read-write, admin.
Use the show intelligent-multicast command to display the intelligent
multicast configuration.
154
Avaya C460 Reference Guide
Chapter 2
Avaya C460 CLI Commands
The syntax for this command is:
show intelligent-multicast
Example:
C460-1> show intelligent-multicast
Intelligent-multicast configuration:
-----------------------------------intelligent-multicast state ---------------------- Disabled
Intelligent-multicast client-port-pruning time --600[Sec]
Intelligent-multicast router-port-pruning time --1800[Sec]
intelligent-multicast group-filtering-delay time 10[Sec]
show interface
User level: read-only, read-write, admin.
Use the show interface command to display information on network interfaces.
The syntax for this command is:
show interface
Example:
C460-1> show interface
Interface Name
---------------inband
ppp
outband
Status
-------------disabled
disabled
enabled
VLAN
---1
N/A
N/A
IP address
--------------135.64.200.105
0.0.0.0
135.64.200.105
Netmask
--------------255.255.255.0
0.0.0.0
255.255.255.255
show ip access-group
User level: privileged, supervisor.
Use the show ip access-group command to display the active policy-list
number.
The syntax for this command is:
show ip access-group
Example:
C460-1# show ip access group
access-group 101
Avaya C460 Reference Guide
155
Chapter 2
Avaya C460 CLI Commands
show ip access-list-dscp
User level: user, privileged, supervisor
Use the show ip access-list-dscp command to display the DSCP to CoS map
of a policy-list.
The syntax for this command is:
show ip access-list-dscp <policy-list-number>
policylistnumber
A valid id number for a policy list currently defined for the module
(100..199, 0 - default list)
dscp
dscp entry (0 - 63)
Example:
C460-1> show ip access-list-dscp 101
Trust configuration is trust-cos
DSCP
Action
Precedence
---- -------------------- ---------0
fwd0
mandatory
1
fwd0
mandatory
2
fwd0
mandatory
3
fwd0
mandatory
4
fwd0
mandatory
5
fwd0
mandatory
6
fwd0
mandatory
7
fwd0
mandatory
8
fwd1
mandatory
9
fwd1
mandatory
10
fwd1
mandatory
11
fwd1
mandatory
Name
-----------DSCP#0
DSCP#1
DSCP#2
DSCP#3
DSCP#4
DSCP#5
DSCP#6
DSCP#7
DSCP#8
DSCP#9
DSCP#10
DSCP#11
show ip access-lists
User level: read-only, read-write, admin.
Use the show ip access lists command to display all the current policy lists.
The syntax for this command is:
show ip access-lists[<policy-list-number>]
policy-list-number
156
The policy list number (integer from 100 to 199)
Avaya C460 Reference Guide
Chapter 2
Avaya C460 CLI Commands
Example:
C460-1> show ip access-lists
ip access-list 100 10 deny-and-notify tcp
192.168.55.0
0.0.0.255
range
any range 7000 8000
ip access-list 100 30 deny udp
any
any
optional
ip access-list 100 35 deny ip
any
any
ip access-list 100 55 fwd7 tcp
host 192.168.3.4
eq
33333
host 10.6.7.8
default action for list 100 is permit
5000
6000
show ip access-list-summary
User level: user, privileged, supervisor
Use the show ip access-list-summary command to display a summary of
policy lists.
The syntax for this command is:
show ip access-list-summary
Example:
C460-1> show ip access-list-summary
The policy lists summary:
default List (0)
show ip arp
User level: read-only, read-write, admin.
Use the show ip arp command to display the Address Resolution Protocol (ARP)
cache.
The syntax for this command is:
show ip arp [<if-name> | <vlan> | <ip addr> | <ip-mask> static]
if-name
Avaya C460 Reference Guide
Interface name (string up to 32 chars)
157
Chapter 2
Avaya C460 CLI Commands
vlan
VLAN NAME (string up to 16 chars) or VLAN ID (number)
ip-addr
The IP address of the station(s)
ip-mask
The ip mask of the routes.
static
Display static ip ARP information.
Example:
show
show
show
show
show
show
ip
ip
ip
ip
ip
ip
arp
arp
arp
arp
arp
arp
Display all ARP mapping
marketing
Display interface ARP mapping
192.168.49.1
Display one host ARP mapping
192.168.49.1 255.255.255.0 Display range of ARP mapping
marketing_vlan
Display vlan ARP mapping
static
Display static ARP mapping
If you wish to define a name which includes spaces, you must enclose the entire
name in quotation marks, for example “new york”.
show ip icmp
User level: read-only, read-write, admin.
Use the show icmp ip command to display the status of ICMP error messages.
The syntax for this command is:
show ip icmp
Example:
Router-1> show ip icmp
ICMP error messages status is ENABLE
158
Avaya C460 Reference Guide
Chapter 2
Avaya C460 CLI Commands
show ip interface
User level: read-only, read-write, admin.
Use the show ip interface command to display information for an IP interface.
The syntax for this command is:
show ip interface [<interface-name>]|<ip-address>|<vlan>]
interface-name
The name of the interface whose information you
want to display.
ip-address
The IP address of the interface whose information
you want to display.
vlan
The name or ID of the VLAN over which there are
interfaces you want to display.
Example:
Router-1> show ip interface
Showing 2 Interfaces
mgmt is administratively up
On vlan Default
Internet address is 10.49.54.14
, subnet mask is
255.255.255.0
Broadcast address is 10.49.54.255
Directed broadcast forwarding is disabled
Proxy ARP is disabled
baba is administratively down
On vlan v2
Internet address is 192.168.0.14
, subnet mask is
255.255.0.0
Broadcast address is 192.168.255.255
Directed broadcast forwarding is disabled
Proxy ARP is disabled
If you wish to define a name which includes spaces, you must enclose the entire
name in quotation marks, for example “new york”.
Avaya C460 Reference Guide
159
Chapter 2
Avaya C460 CLI Commands
show ip interface brief
User level: read-only, read-write, admin.
Use the show ip interface brief command to display brief information for
an IP interface.
The syntax for this command is:
show ip interface brief [<interface> | <vlan> | <IP addr>]
interface
The name of the interface whose information you
want to display - a string of up to 32 characters.
vlan
The name or ID of the VLAN over which there are
interfaces you want to display - a string of up to 32
characters.
IP addr
The IP address of the interface whose information
you want to display.
Example:
Router-1> show ip interface brief
Showing 1 Interfaces
Interface
Address
Mask
Status
-------------------- --------------- --------------- -------------------net
149.49.54.56
255.255.255.0
up
show ip ospf
User level: read-only, read-write, admin.
Use the show ip opsf command to displays general information about OSPF
routing.
The syntax for this command is:
show ip ospf
Example:
Router-1> show ip ospf
160
Avaya C460 Reference Guide
Chapter 2
Avaya C460 CLI Commands
show ip ospf database
User level: read-only, read-write, admin.
Use the show ip ospf database command to display lists of information
related to the OSPF database for a specific router.
The syntax for this command is:
show ip ospf database
[{asbr-summary|router|network|network-summary|external}]
asbr-summary
Displays information only about the autonomous
system boundary router summary LSAs. Optional.
external
Displays information only about the external LSAa.
Optional.
network
Displays information only about the network LSAa.
Optional.
network-summary
Displays information only about the network LSAa
summary. Optional
router
Displays information only about the router LSAs.
Optional.
Example:
Router-1 (super) # show ip ospf interface
show ip ospf interface
User level: read-only, read-write, admin.
Displays the OSPF-related interface information.
The syntax for this command is:
show ip ospf interface [<interface-name>]
interface-name
The OSPF interface name.
Example:
Router-1> show ip ospf interface
Avaya C460 Reference Guide
161
Chapter 2
Avaya C460 CLI Commands
If you wish to define a name which includes spaces, you must enclose the entire
name in quotation marks, for example “new york”.
show ip ospf neighbor
User level: read-only, read-write, admin.
Displays OSPF-neighbor information on a per-interface basis.
The syntax for this command is: show ip ospf neighbor
[<interface-name>] [<neighbor-id>]
interface-name
The OSPF interface name.
neighbor-id
Neighbor ID.
Example:
Router-1> show ip ospf neighbor
If you wish to define a name which includes spaces, you must enclose the entire
name in quotation marks, for example “new york”.
show ip protocols
The syntax for this command is:
show ip protocols [<protocol>]
protocol
(Optional)
RIP | OSPF.
Example:
Router-1 (super) # show ip protocols
Routing Protocol is "rip"
Sending updates every 30 seconds, next due in 0 seconds
Invalid after 180 seconds, flushd after 300
Redistributing: rip
Default version control: rip version 1
Interface
Version
Key
Routing for Networks:
Routing Information Sources:
Gateway
Last Update
162
Avaya C460 Reference Guide
Chapter 2
Avaya C460 CLI Commands
show ip reverse-arp
User level: read-only, read-write, admin.
Use the show ip reverse-arp command to display the IP address of a host,
based on a known MAC address.
The syntax for this command is:
show ip reverse-arp <mac addr> [<match len>]
mac addr
MAC address
match len
The number of bytes in the address to match
Example:
Router-1> sh ip reverse-arp 00:10:a4:98:97:e0
Showing 1 rows
Address
MAC Address
I/F
Type
--------------- ----------------- ----------- ------149.49.70.68
00:10:a4:98:97:e0
e-70
Dynamic
TTL
-------14355
show ip route
User level: read-only, read-write, admin.
Use the show ip route command to display IP routing table entries.
The syntax for this command is:
show ip route
Example:
C460-1> show ip route
Network
---------------149.49.50.0
0.0.0.0
Mask
----------------
Next-Hop
----------------
Interface
-----------
Source
------
255.255.255.0
149.49.50.233
inband
LOCAL
0.0.0.0
149.49.50.1
inband
STATIC
show ip route (Layer 3)
User level: read-only, read-write, admin.
Use the show ip route command to display information about the IP unicast
Avaya C460 Reference Guide
163
Chapter 2
Avaya C460 CLI Commands
routing table.
The syntax for this command is:
show ip route
Router-1> show ip route
Network
---------------149.49.77.0
0.0.0.0
Mask
---------------255.255.255.0
0.0.0.0
Next-Hop
---------------149.49.77.70
Interface
----------inband
149.49.77.1
inband
Source
-----LOCAL
STATIC
show ip route best-match
User level: read-only, read-write, admin.
Use the show ip route best-match command to display a routing table for a
destination address.
The syntax for this command is:
show ip route best-match <dst addr>
dst addr
IP address
Example:
Router-1> show ip route best-match 199.93.0.0
Searching for: 199.93.0.0
Showing 1 rows
Network
Mask
Interface
Next-Hop
Cost TTL
--------------- -----------------------------------------------199.93.0.0
255.255.0.0
e-135new
135.64.76.1 1
n/a
Source
----STAT-HI
show ip route static
User level: read-write, admin.
Use the show ip static route command to display the static routes.
The syntax for this command is:
show ip route static [<ip addr> [<mask>] ]
164
ip-address
The IP address of the routes
mask
The ip mask of the routes.
Avaya C460 Reference Guide
Chapter 2
Avaya C460 CLI Commands
Example:
Router-1> sh ip route static
Showing 34 rows
Network
Mask
Interface
Next-Hop
Cost PrefActive
------------- ---------------------------------------------------10.0.8.0
255.255.255.0e-36
149.49.36.11 1
high Yes
135.0.0.0
255.0.0.0
e-135new
135.64.76.11
high Yes
135.64.0.0
255.255.0.0 e-135
135.87.164.1 1
high No
149.49.0.0
255.255.0.0 zevel10.10.254.2531lowYes
149.49.2.0
255.255.255.0n/av-Route-FW1highYes
show ip route summary
User level: read-only, read-write, admin.
Use the show ip route summary command to display the number of routes
known to the switch.
The syntax for this command is:
show ip route summary
Example:
Router-1> sh ip route summary
IP Route Summary:
Current number of routes: 69
show ip traffic
User level: read-only, read-write, admin.
Use the show ip traffic command to display the IP traffic statistics counters.
The syntax for this command is:
show ip traffic
Avaya C460 Reference Guide
165
Chapter 2
Avaya C460 CLI Commands
Example:
Router-1> show ip traffic
IP statistics:
Received:
1365359 total, 45659 local destination
0 bad hop count, 0 packet header errors
0 unknown protocol, 136786 address errors
1182914 discarded
Fragments:
0 reassembled, 0 timeouts
0 couldn't reassemble, 0 fragmented
Sent:
19442 generated, 0 forwarded
0 no route, 0 discarded
ICMP statistics:
Received:
881 total, 3 ICMP errors
0 unreachables, 0 time exceeded
0 parameter, 0 quench
861 echo, 17 echo reply
0 timestamps request, 0 timestamp reply
--type q to quit or space key to continue-0 mask requests, 0 mask replies
0 redirects
Sent:
1311 total, 0 ICMP errors
433 unreachables, 0 time exceeded
0 parameter, 0 quench
17 echo, 861 echo reply
0 timestamps request, 0 timestamp reply
0 mask requests, 0 mask replies
0 redirects
166
Avaya C460 Reference Guide
Chapter 2
Avaya C460 CLI Commands
OSPF statistics:
Received:
25783 total, 0 checksum errors
0 hello, 0 database desc
0 link state req, 0 link state updates
0 link state acks
Sent:
0 total
ARP statistics:
--type q to quit or space key to continue-Received:
2191321 requests, 778439 replies
Sent:
443 requests, 340 replies (0 proxy)
DHCP
statistics:
Requests: 0 , Replies: 0
BOOTP statistics:
Requests: 0 , Replies: 0
show ip unicast cache
User level: read-only, read-write, admin.
Use the show ip unicast cache command to list the entries in the hardware
unicast cache database.
The syntax for this command is:
show ip unicast cache [<ip addr>]
ip addr
Avaya C460 Reference Guide
IP address.
167
Chapter 2
Avaya C460 CLI Commands
Example:
Router-1> show ip unicast cache
Showing 6 Sessions.
IP Address
NH MAC
===========
========
192.168.1.1
29.2.1.1
192.168.2.1
29.2.2.1
192.168.2.2
29.2.2.2
192.168.2.3
29.2.2.3
192.168.2.4
29.2.2.4
192.168.2.5
29.2.2.5
NH VLAN
=======
5
5
5
5
5
5
show ip unicast cache networks
User level: read-only, read-write, admin.
Displays summary of networks handled by the hardware unicast cache database.
The syntax for this command is:
show ip unicast cache networks [<net addr> <net mask>]
net addr
The IP address of the network.
net mask
The mask IP address.
Example:
Router-1> show ip unicast cache networks
Showing 7 rows (5 networks)
Network
Mask Next Hop(s)
Total Hosts
=============== ==== =============== ===========
10.0.0.0
16 10.2.0.2
996
71.0.0.0
16 0.0.0.0
1
130.0.0.0
8 192.168.0.130
1124
190.0.0.0
24 10.2.0.2
250
192.168.0.130
191.0.0.0
24 10.2.0.2
250
192.168.0.130
----Total: 2621
168
Avaya C460 Reference Guide
Chapter 2
Avaya C460 CLI Commands
show ip unicast cache networks detailed
User level: read-only, read-write, admin.
Use the show ip unicast cache networks detailed command to list the
networks and hosts that are handled by the hardware unicast cache database.
The syntax for this command is:
show ip unicast cache networks detailed[<net addr> <net mask>]
net addr
The IP address of the network.
net mask
The mask IP address.
Example:
Router-1> show
192.168.6.0 24
Showing 3 rows
NetworkMask
============
192.168.6.0
ip unicast cache networks detailed
IP Address
===================
24 192.168.6.40
192.168.6.53
192.168.6.64
show ip unicast cache nextHop
User level: read-write, admin.
Use the show ip unicast cache nextHop command to list the routers that are
used as next-hop routers.
The syntax for this command is:
show ip unicast cache nextHop
Example:
Router-1> show ip unicast cache nextHop
Showing 2 rows
Next Hop
========
192.168.4.1
192.168.5.1
Avaya C460 Reference Guide
169
Chapter 2
Avaya C460 CLI Commands
show ip unicast cache summary
User level: read-only, read-write, admin.
Use the show command to display the number of host networks and next-hops in
the module’s unicast cache.
The syntax for this command is:
show ip unicast cache summary
Example:
Router-1> show ip unicast cache summary
Cache Summary
===============
Hosts
:
71
Networks :
24
Next-Hops :
37
show ip vrrp
User level: read-only, read-write, admin.
Use the show vrrp command to display VRRP information.
The syntax for this command is:
show ip vrrp [<vlan> [router-id <vr-id>]][detail]
vlan
Filter by VLAN.
router-id
Filter by virtual router ID (1-255)
vr-id
The virtual router ID.
detail
Provide detailed information.
Example:
Router-1> show ip vrrp
VRRP is globally enabled
VLAN
VRID IP Address
PriTimer
State
Since
------ ---------------------------------------------------1
1
192.168.66.23
255 1
MASTER 00:00:00
1
2
192.168.66.24
100 1
BACKUP 00:00:00
170
Avaya C460 Reference Guide
Chapter 2
Avaya C460 CLI Commands
show ip vrrp detail
User level: read-only, read-write, admin.
Use the show ip vrrp detail command to display full VRRP-related
information
The syntax for this command is:
show ip vrrp detail
detail
Avaya C460 Reference Guide
Show full detail information
171
Chapter 2
Avaya C460 CLI Commands
Example:
Router-1> show ip vrrp detail
VRRP is globally enabled
Virtual Router on VLAN:
Router-id:
State:
Priority:
Advertisement Interval:
Last State Change:
Override Address Ownership Rule: No
Authentication Type:
Authentication Key:
Master IP Address
Has 1 IP addresses
IP addresses:
192.168.66.23
Primary IP Address:
Primary IP Address was chosen by default
Preemption Mode:
enabled
# of times Master:
# of received Advertisements:
# of transmitted Advertisements:
# of received Advertisements with Security
Virtual Router on VLAN:
1
Router-id:
2
State:
BACKUP
Priority:
100
Advertisement Interval:
1
Last State Change:
00:00:00
Override Address Ownership Rule: No
Authentication Type:
None
Authentication Key:
""
Master IP Address
0.0.0.0
Has 1 IP addresses
IP addresses:
192.168.66.24
Primary IP Address:
192.168.66.23
Primary IP Address was chosen by default
Preemption Mode:
enabled
# of times Master:
# of received Advertisements:
# of transmitted Advertisements:
# of received Advertisements with Security
172
1
1
MASTER
255
1
00:00:00
None
""
192.168.66.23
192.168.66.23
2
0
20
Violations: 0
1
0
13
Violations: 0
Avaya C460 Reference Guide
Chapter 2
Avaya C460 CLI Commands
show l2-config
User level: read-write, admin.
Use the show l2-config command to display comprehensive Layer 2
configuration information.
The syntax for this command is:
show l2-config
Example:
C460-1> show l2-config
!#######################################################################
!#
C H A S S I S
I N F O
!#######################################################################
!#
!# Upload time:
UPTIME: 0:05:44.533
!#
!# System description:
Avaya Inc.- C460ML-SW Multi-layer Switch
!#
!# Inband MAC address:
00-04-0d-17-20-00
!#
!# Outband MAC address:
00-04-0d-17-20-fe
!#
!# Inband IP address, netmask: 149.49.50.233 255.255.255.0
!#
!# Outband IP address, netmask: 0.0.0.0 0.0.0.0
!#
!# Active SPV position:
1
!#
!# Number of blades:
2
!#
!# Backplane CS:
0.3
!#
--type q to quit or space key to continue-!# Backplane Serial #:
0000019
!#
Avaya C460 Reference Guide
173
Chapter 2
Avaya C460 CLI Commands
!#######################################################################
!#
S P V
I N F O
!#######################################################################
!#
!# Slot #:
1
!#
!# SPV state:
Active
!#
!# Blade type:
M460ML-SPV
!#
!# Blade-CS:
0.2
!#
!# Serial #:
0000009
!#
!# SW versions - bank A, B:
1.0.5, 1.0.5
!#
!# Embedded Web SW version:
1.0.10
!#
!#######################################################################
!#
S P V
I N F O
!#######################################################################
--type q to quit or space key to continue-!#
!# Slot #:
2
!#
!# SPV in slot # 2 is not present
!#######################################################################
!#
I O B L A D E
I N F O
!#######################################################################
!#
!# Slot # 3 is empty
!#
!#######################################################################
!#
I O B L A D E
I N F O
!#######################################################################
!#
!# Slot # 4 is empty
!#
!#
174
Avaya C460 Reference Guide
Chapter 2
Avaya C460 CLI Commands
!#######################################################################
!#
I O B L A D E
I N F O
!#######################################################################
!#
!# Slot #:
5
!#
!# Blade type:
M4612ML-G
--type q to quit or space key to continue-!#
!# Blade-CS:
0.1
!#
!# Serial #:
0000114
!#
!# Number of ports:
12
!#
!#######################################################################
!#
I O B L A D E
I N F O
!#######################################################################
!#
!# Slot # 6 is empty
!#
!#######################################################################
!#
!# set spanning tree mode.
!#
set spantree enable
set spantree priority 32768
!#
!# Set ARP-to-myself parameters
!#
set arp-tx-interval inband 5
--type q to quit or space key to continue-set arp-tx-interval outband 5
!#
!# The snmp community strings
!#
set snmp community read-only "public"
set snmp community read-write "public"
set snmp community trap "public"
set system location ""
set system name ""
set system contact ""
set logout 0
Avaya C460 Reference Guide
175
Chapter 2
Avaya C460 CLI Commands
!#
!#Set vlan table management parameters
!#
set vlan 1 name V1
!#
!# Set the interface of the device
!#
!# set interface inband 1
149.49.50.233
!#
!#Set PPP management parameters
!#
!#set interface ppp 0.0.0.0 0.0.0.0
--type q to quit or space key to continue--
255.255.255.0
!#set interface ppp disable
set ppp authentication incoming none
set ppp incoming timeout 0
set ppp baud-rate 38400
!#
!# Set Rmon History entries
!#
!#
!# Set Rmon Alarms
!#
!#
!# Set Rmon Events
!#
!#
!#Set embedded web management parameters
!#
set snmp retries 3
set snmp timeout 2000
set web aux-files-url "www.avaya.com"
!#
!#Set radius management parameters
!#
set radius authentication disable
--type q to quit or space key to continue-set radius authentication server 0.0.0.0 primary
set radius authentication server 0.0.0.0 secondary
set radius authentication retry-number 4
set radius authentication retry-time 5
set radius authentication udp-port 1812
!#
176
Avaya C460 Reference Guide
Chapter 2
Avaya C460 CLI Commands
!# set intelligent-multicast parameters
!#
set intelligent-multicast disable
set intelligent-multicast client-port-pruning time 600
set intelligent-multicast router-port-pruning time 1800
set intelligent-multicast group-filtering-delay time 10
!#******* broadcast storm configuration *********
set broadcast storm control threshold 0
set broadcast storm control disable
!#*********************************************************
!#
!#
LINK AGGREGATION GROUP.
!#
!#THERE IS NO LINK AGGREGATION GROUP.
!#
!#
!#
--type q to quit or space key to continue-!#
!#
set
set
set
set
set
set
set
set
set
set
set
set
!#
!#
SPANNING TREE PER PORT CONFIGURATION.
port
port
port
port
port
port
port
port
port
port
port
port
spantree
spantree
spantree
spantree
spantree
spantree
spantree
spantree
spantree
spantree
spantree
spantree
Avaya C460 Reference Guide
cost
cost
cost
cost
cost
cost
cost
cost
cost
cost
cost
cost
5/1 4
5/2 4
5/3 4
5/4 4
5/5 4
5/6 4
5/7 4
5/8 4
5/9 4
5/10 4
5/11 4
5/12 4
177
Chapter 2
Avaya C460 CLI Commands
!#*************** port 5/1 configuration *****************
!# Port type:
Tranceiver Not Present
!# Link status:
no link
!# STA status:
Disabled
!#**********************************************************
set port disable 5/1
set port auto-negotiation-flowcontrol-advertisement 5/1 no-flowcontrol
--type q to quit or space key to continue-set port negotiation 5/1 enable
set port level 5/1 0
set trunk 5/1 off
set port vlan 1 5/1
set port name 5/1 "NO NAME"
set port trap 5/1 enable
set port classuable
set port enable 5/1
!#*************** port 5/2 configuration *****************
!# Port type:
Tranceiver Not Present
!# Link status:
no link
!# STA status:
Disabled
!#**********************************************************
set port disable 5/2
set port auto-negotiation-flowcontrol-advertisement 5/2 no-flowcontrol
set port negotiation 5/2 enable
set port level 5/2 0
set trunk 5/2 off
set port vlan 1 5/2
set port name 5/2 "NO NAME"
set port trap 5/2 enable
set port classification 5/2 valuable
--type q to quit or space key to continue-set port enable 5/2
178
Avaya C460 Reference Guide
Chapter 2
Avaya C460 CLI Commands
!#*************** port 5/3 configuration *****************
!# Port type:
Tranceiver Not Present
!# Link status:
no link
!# STA status:
Disabled
!#**********************************************************
set port disable 5/3
set port auto-negotiation-flowcontrol-advertisement 5/3 no-flowcontrol
set port negotiation 5/3 enable
set port level 5/3 0
set trunk 5/3 off
set port vlan 1 5/3
set port name 5/3 "NO NAME"
set port trap 5/3 enable
set port classification 5/3 valuable
set port enable 5/3
!#*************** port 5/4 configuration *****************
!# Port type:
Tranceiver Not Present
!# Link status:
no link
!# STA status:
Disabled
!#**********************************************************
--type q to quit or space key to continue-set port disable 5/4
set port auto-negotiation-flowcontrol-advertisement 5/4 no-flowcontrol
set port negotiation 5/4 enable
set port level 5/4 0
set trunk 5/4 off
set port vlan 1 5/4
set port name 5/4 "NO NAME"
set port trap 5/4 enable
set port classification 5/4 valuable
set port enable 5/4
!#*************** port 5/5 configuration *****************
!# Port type:
Tranceiver Not Present
!# Link status:
no link
!# STA status:
Disabled
!#**********************************************************
set port disable 5/5
set port auto-negotiation-flowcontrol-advertisement 5/5 no-flowcontrol
set port negotiation 5/5 enable
set port level 5/5 0
set trunk 5/5 off
set port vlan 1 5/5
set port name 5/5 "NO NAME"
--type q to quit or space key to continue-set port trap 5/5 enable
set port classification 5/5 valuable
set port enable 5/5
Avaya C460 Reference Guide
179
Chapter 2
Avaya C460 CLI Commands
!#*************** port 5/6 configuration *****************
!# Port type:
Tranceiver Not Present
!# Link status:
no link
!# STA status:
Disabled
!#**********************************************************
set port disable 5/6
set port auto-negotiation-flowcontrol-advertisement 5/6 no-flowcontrol
set port negotiation 5/6 enable
set port level 5/6 0
set trunk 5/6 off
set port vlan 1 5/6
set port name 5/6 "NO NAME"
set port trap 5/6 enable
set port classification 5/6 valuable
set port enable 5/6
!#*************** port 5/7 configuration *****************
!# Port type:
Tranceiver Not Present
!# Link status:
no link
--type q to quit or space key to continue-!# STA status:
Disabled
!#**********************************************************
set port disable 5/7
set port auto-negotiation-flowcontrol-advertisement 5/7 no-flowcontrol
set port negotiation 5/7 enable
set port level 5/7 0
set trunk 5/7 off
set port vlan 1 5/7
set port name 5/7 "NO NAME"
set port trap 5/7 enable
set port classification 5/7 valuable
set port enable 5/7
!#*************** port 5/8 configuration *****************
!# Port type:
Tranceiver Not Present
!# Link status:
no link
!# STA status:
Disabled
!#**********************************************************
set port disable 5/8
set port auto-negotiation-flowcontrol-advertisement 5/8 no-flowcontrol
set port negotiation 5/8 enable
set port level 5/8 0
set trunk 5/8 off
--type q to quit or space key to continue-set port vlan 1 5/8
set port name 5/8 "NO NAME"
set port trap 5/8 enable
set port classification 5/8 valuable
set port enable 5/8
180
Avaya C460 Reference Guide
Chapter 2
Avaya C460 CLI Commands
!#*************** port 5/9 configuration *****************
!# Port type:
Tranceiver Not Present
!# Link status:
no link
!# STA status:
Disabled
!#**********************************************************
set port disable 5/9
set port auto-negotiation-flowcontrol-advertisement 5/9 no-flowcontrol
set port negotiation 5/9 enable
set port level 5/9 0
set trunk 5/9 off
set port vlan 1 5/9
set port name 5/9 "NO NAME"
set port trap 5/9 enable
set port classification 5/9 valuable
set port enable 5/9
!#*************** port 5/10 configuration *****************
--type q to quit or space key to continue-!# Port type:
Tranceiver Not Present
!# Link status:
no link
!# STA status:
Disabled
!#**********************************************************
set port disable 5/10
set port auto-negotiation-flowcontrol-advertisement 5/10 no-flowcontrol
set port negotiation 5/10 enable
set port level 5/10 0
set trunk 5/10 off
set port vlan 1 5/10
set port name 5/10 "NO NAME"
set port trap 5/10 enable
set port classification 5/10 valuable
set port enable 5/10
!#*************** port 5/11 configuration *****************
!# Port type:
Tranceiver Not Present
!# Link status:
no link
!# STA status:
Disabled
!#**********************************************************
set port disable 5/11
set port auto-negotiation-flowcontrol-advertisement 5/11 no-flowcontrol
set port negotiation 5/11 enable
--type q to quit or space key to continue-set port level 5/11 0
set trunk 5/11 off
set port vlan 1 5/11
set port name 5/11 "NO NAME"
set port trap 5/11 enable
set port classification 5/11 valuable
set port enable 5/11
Avaya C460 Reference Guide
181
Chapter 2
Avaya C460 CLI Commands
!#*************** port 5/12 configuration *****************
!# Port type:
Tranceiver Not Present
!# Link status:
no link
!# STA status:
Disabled
!#**********************************************************
set port disable 5/12
set port auto-negotiation-flowcontrol-advertisement 5/12 no-flowcontrol
set port negotiation 5/12 enable
set port level 5/12 0
set trunk 5/12 off
set port vlan 1 5/12
set port name 5/12 "NO NAME"
set port trap 5/12 enable
set port classification 5/12 valuable
set port enable 5/12
!#
!#Set port redundancy
!#
set port redundancy enable
set port redundancy-intervals 1 none
!#
!#Set vlan table management parameters
!#
set port vlan-binding-mode 5/1 static
set port vlan-binding-mode 5/2 static
set port vlan-binding-mode 5/3 static
set port vlan-binding-mode 5/4 static
set port vlan-binding-mode 5/5 static
set port vlan-binding-mode 5/6 static
set port vlan-binding-mode 5/7 static
set port vlan-binding-mode 5/8 static
set port vlan-binding-mode 5/9 static
set port vlan-binding-mode 5/10 static
set port vlan-binding-mode 5/11 static
set port vlan-binding-mode 5/12 static
C460-1#
182
Avaya C460 Reference Guide
Chapter 2
Avaya C460 CLI Commands
show license
User level: read-only, read-write, admin.
Use the show license command to display the current licenses installed on the
chassis
The syntax for this command is:
show license
Example:
C460-1> show license
Application
-------------smon
routing
License Key
State
level
----------------------------- ------------- ------0000 0000 0000 0000 0000 0000 unlicensed
0
000 000 000 000 000 000 licensed
10
show logout
User level: read-only, read-write, admin.
Use the show timeout command to display the amount of time the CLI remains
idle before timing out in minutes.
If the result is 0, there is no timeout limit. The default is 15 minutes.
The syntax for this command is:
show logout
Example:
C460-1> show logout
CLI timeout is 10 minutes
show mac-aging
User level: user, privileged, supervisor
Use the show mac-aging command to display the current status of the MAC
aging function.
The syntax for this command is:
show mac-aging
Avaya C460 Reference Guide
183
Chapter 2
Avaya C460 CLI Commands
Example:
C460-1> show mac-aging
mac aging application is disabled
show mac-aging-time
User level: user, privileged, supervisor
Use the show mac-aging-time command to display the MAC aging time in
minutes.
The syntax for this command is:
show mac-aging-time
Example:
C460-1> show mac-aging-time
MAC aging time is 5 (min.)
L The displayed value is the aging-time lower bound. The actual aging-time can
be up to 2 minutes longer.
184
Avaya C460 Reference Guide
Chapter 2
Avaya C460 CLI Commands
show module
User level: read-only, read-write, admin.
Use the show module command to display module status and information.
The syntax for this command is:
show module
Example:
C460-1> show module
Mod
Type
C/S
S/N
Status
---- ----------------- ---- -------- -----0
C460-CH
1.0
0000008 N/A
1
M460ML-SPV
1.0
0000003 Active
2
M460ML-SPV
1.0
0000017 Standby
3
M4612ML-G
1.0
0000004 Normal
4
M4648ML-T-2G-PWR
1.0
0000016 Normal
5
M4648ML-T-PWR
1.0
0000029 Normal
6
M4648ML-T-2G
1.0
0000797 Normal
PSU1 MPS4610-AC
Active
PSU2 MPS4610-AC
1/0
0000011 Active
PSU3
Empty
Fan M460-FAN
OK
Output Fields
Mod
Module (slot) number
Type
Module type
C/S
Hardware Configuration Symbol of the module
S/N
Serial number of the module
Status
Status of the module or slot:
Supervisor Module
• Active
• Standby
• Halted
• Unknown
• Empty
Avaya C460 Reference Guide
185
Chapter 2
Avaya C460 CLI Commands
I/O Module
• Normal
• Not enough power
• Power disabled
• Empty
show outband
User level: read-only, read-write, admin.
Use the show outband command to displays the Ethernet Console port status.
This command applies to the specific supervisor module where you execute it.
The syntax for this command is:
show outband
Example:
C460-1> show outband
Status:
Auto-negotiation:
Duplex:
Speed:
Connected
Enable
Half-Duplex
100 MBit/sec
show policy type
User level: read-only, read-write, admin.
Use the show policy type command to show whether the module enforces the
active policy-list on all packets or only on routed packets (for modules in 'devicemode router').
The syntax for this command is:
show policy type
Example:
Router-1# show policy type
Policy type is router
186
Avaya C460 Reference Guide
Chapter 2
Avaya C460 CLI Commands
show port
User level: read-only, read-write, admin.
Use the show port command to display port status on I/O modules.
The syntax for this command is:
show port [<module>[/port]]
module
(Optional)
Number of the module (3-6). If you do not specify a number,
the ports on all the modules are shown.
port
(Optional)
Number of the port on the module. If you do not specify a
number, all the ports on the module are shown.
You can also specify a range of ports separated by a dash, for
example, 4/5-13 for ports 5 to 13 on module 4.
Example to display the status for port 4 on switch 3:
C460-1> show port 3/4
Port
Name
Status
Vlan Level Neg
Dup. Spd. Type
------ --------------- --------- ---- ------ ------- ---- ---- ----------------3/4
NO NAME
no link
1
0
enable half 10M 10/100BaseTx Port
Show Port Output Fields
Field
Description
Port
Switch and port number
Name
Name of port
Status
Status of the port (connected, faulty, disabled)
Vlan
VLAN ID of the port
Level
Priority level of the port (0-7)
Neg
The autonegotiation status of the port (enabled, disabled)
Dup
Duplex setting for the port (full, half)
Speed
Speed setting for the port (10, 100, 1000)
Type
Port type, for example:
10/100BASE-TX, GBIC_SX, GBIC_LX, GBIC_not present,
GBIC_unknown
Avaya C460 Reference Guide
187
Chapter 2
Avaya C460 CLI Commands
show port auto-negotiation-flowcontrol-advertisement
User level: read-write, admin.
Use the show port auto-negotiation-flowcontrol-advertisement
command to display the flowcontrol advertisement for a Gigabit port used to
perform auto-negotiation.
The syntax for this command is:
set auto-negotiation-flowcontrol-advertisement [module/port]
[mode]
module
(Optional)
Number of the module (3-6). If you do not specify a number,
the ports on all the modules are shown.
port
(Optional)
Number of the port on the module. If you do not specify a
number, all the ports on the module are shown.
You can also specify a range of ports separated by a dash, for
example, 4/5-13 for ports 5 to 13 on module 4.
mode
no-flowcontrol, asym-tx-only, sym-only or sym-and-asym-rx
Example:
C460-1> show port auto-negotiation-flowcontroladvertisement 4/49
Port 4/49 pause capabilities was set
show port channel
User level: read-only, read-write, admin.
Use the show port channel command to display Link Aggregation Group
(LAG) information for a specific switch or port.
The syntax for this command is:
show port channel [<module>[/<port>]] [info]
188
module
(Optional)
Number of the module (3-6). If you do not specify a number,
the modules on all the switch are shown.
port
(Optional)
Number of the port on the module. If you do not specify a
number, all the ports on the module are shown.
You can also specify a range of ports separated by a dash, for
example, 4/5-13 for ports 5 to 13 on module 4.
Avaya C460 Reference Guide
Chapter 2
info
Avaya C460 CLI Commands
Displays full information on the port
Example:
C460-1> show port channel
Port Channel Status
Channel Name and Id
---- --------------------------------3/1
off
3/2
off
3/3
on
server1
3/4
on
server1
3/13 off
C460-1> show port channel 3/3 info
Port
Speed Duplex Vlan Port
Trunk
Priority status
------ ------ ------- ----- --------- -------3/3
10
half
1
0
off
Avaya C460 Reference Guide
Vlan
Binding
-------static
189
Chapter 2
Avaya C460 CLI Commands
show port classification
User level: read-write, admin.
Use the show port classification command to display a port’s
classification.
The syntax for this command is:
show port classification [module/[port]]
module
Number of the module (3-6). If you do not specify a
number, the ports on all the modules are shown.
port
(Optional)
Number of the port on the module. If you do not
specify a number, all the ports on the module are
shown.
You can also specify a range of ports separated by a
dash, for example, 4/5-13 for ports 5 to 13 on
module 4.
Example:
C460-1> show port classification 4/8
Port
Port Classification
------ --------------------4/8
regular
C460-1> show port classification 4/9
Port
Port Classification
------ --------------------4/9
valuable
190
Avaya C460 Reference Guide
Chapter 2
Avaya C460 CLI Commands
show port dot1x
User level: read-only, read-write, admin.
Use the show port dot1x command to display all the configurable values
associated with the authenticator port access entity (PAE) and backend
authenticator.
The syntax for this command is:
show dot1x [mod]/[port]
mod
(Optional)
Number of the module.
port
(Optional)
Number of the port on the module, or range of ports.
Example:
C460-1> show port dot1x 3/3
Port
Auth
BEnd
Port
Port
Re
Quiet ReAuth Server Supp
Tx
Max
Number State
State Control Status Auth Priod Priod Tmeout Tmeout Priod Req
------ -------- ------ -------- ------ ---- ----- ------ ------ ------ ----- --1/3
Init
Init
Auto
Unauth Disa
60
3600
30
30
30
2
module
Number of the module (3-6). If you do not
specify a number, the ports on all the modules
are shown.
port
(Optional)
Number of the port on the module. If you do
not specify a number, all the ports on the
module are shown.
You can also specify a range of ports
separated by a dash, for example, 4/5-13 for
ports 5 to 13 on module 4.
Auth State
The Port Access Entity state. Possible states
include:
• Initialize
• Disconnected
• Connecting
• Authenticating
• Authenticated
• Aborting
• Held
• ForceAuth
• ForceUnauth
Avaya C460 Reference Guide
191
Chapter 2
192
Avaya C460 CLI Commands
BEnd Stat
The current state od the Backend
Authentication state machine. Possible states
include:
• Request
• Response
• Success
• Fail
• Timeout
• Idle
• Init
Port Control
Port control type.
Valid values include:
• force-authorized
• force-unauthorized
• auto.
Port Status
The current value of the controlled port
status. Possible states include:
• Authorized
• Unauthorized
Re Auth
The state of reauthentication on the port.
Possible states include:
• Enabled - The port connection is
reauthenticated after the reAuthPeriod.
• Disabled - The port connection is not
reauthenticated. The reAuthPeriod is
ignored.
Quiet Period
The amount of time, in seconds, between
sending authentication requests.
ReAuth Period
The time, in seconds, after which the port
connection should be reauthenticated.
Server Tmout
The amount of time, in seconds, the P330
waits for a response from the RADIUS server.
Supp Tmeout
The amount of time, in seconds, before
resending authentication requests.
Tx Priod
The amount of time, in seconds, in which an
authentication request must be answered.
Avaya C460 Reference Guide
Chapter 2
Max Req
Avaya C460 CLI Commands
The maximum number of times a request for
authentication is sent before timing out.
show port dot1x statistics
User level: read-only, read-write, admin.
Use the show port dot1x statistics command to display all the port dot1x
statistics.
The syntax for this command is:
show dot1x statistics [mod]/[port]
module
Number of the module (3-6). If you do not specify a number, the
ports on all the modules are shown.
port
(Optional)
Number of the port on the module. If you do not specify a number,
all the ports on the module are shown.
You can also specify a range of ports separated by a dash, for
example, 4/5-13 for ports 5 to 13 on module 4.
Example:
C460-1> show port statistics 1/1
Port
-----1/1
Port
-----1/1
Tx_Req/Id Tx_Req
Tx_Total
Rx_Start Rx_Logff
--------- -------- --------- -------- -------2
5
0
0
0
Rx_Invalid Rx_Len_Err Rx_Total
Last_Rx_Frm_Ver
---------- ---------- --------- --------------0
0
0
0
Avaya C460 Reference Guide
Rx_Resp/Id Rx_Resp
---------- --------0
0
Last_Rx_Frm_Src_Mac
------------------1d-80-00-00-00-00
193
Chapter 2
Avaya C460 CLI Commands
show port edge state
User level: read-only, read-write, admin.
Use the show port edge state command to show a port’s edge admin and
operational RSTP state.
L A port can be set to admin state of edge port, but if a BPDU is received on this
port the oper state is changed to non-edge state.
The syntax for this command is:
show port edge state <module/port>
module
Number of the module (3-6). If you do not specify a number, the
ports on all the modules are shown.
port
(Optional)
Number of the port on the module. If you do not specify a number,
all the ports on the module are shown.
You can also specify a range of ports separated by a dash, for
example, 4/5-13 for ports 5 to 13 on module 4.
Example:
C460-1> show port edge state
Port
admin state
oper state
------------------------------1/1
edge-port
edge-port
1/2
non-edge-port
non-edge-port
show port flowcontrol
User level: read-only, read-write, admin.
Use the show port flowcontrol command to display per-port status
information related to flow control.
The syntax for this command is:
show port flowcontrol [<module>[/<port>]]
194
module
(Optional)
Number of the module (3-6). If you do not specify a number, all
modules are shown.
port
(Optional)
Number of the port on the module. If you do not specify a
number, all ports on the specified module are shown.
Avaya C460 Reference Guide
Chapter 2
Avaya C460 CLI Commands
Example:
C460-1> show port flowcontrol 3/4
Port
Send-Flowcontrol Receive-Flowcontrol
Admin Oper
Admin Oper
------ ----- -------- ---3/4
off
off
off
off
Output Fields
Field
Description
Port
Module and port number
SendFlowcontrolAdmin
Send flow-control administration. Possible settings:
• ON indicates that the local port is allowed to send flow
control frames to the far end.
• OFF indicates that the local port is not allowed to send flow
control frames to the far end.
SendFlowcontrolOper
Send flow-control operation mode. Possible modes:
• ON indicates that the local port will send flow control frames
to the far end.
• OFF indicates that the local port will not send flow control
frames to the far end.
ReceiveFlowcontrolAdmin
Receive flow-control administration. Possible settings:
• ON indicates that the local port will act upon flow control
indications if received from the far end.
• OFF indicates that the local port will discard flow control
frames if received from the far end.
ReceiveFlowcontrolOper
Receive flow-control operation mode. Possible modes:
• ON indicates that the local port will act upon flow control
indications received from the far end.
• OFF indicates that the local port will discard flow control
frames received from the far end.
show port mirror
User level: read-only, read-write, admin.
Use the show port mirror command to display mirroring information for the switch.
The syntax for this command is:
show port mirror
Avaya C460 Reference Guide
195
Chapter 2
Avaya C460 CLI Commands
Example:
C460-1> show port mirror
port mirroring
-------------Mirroring both Rx and Tx packets from port 3/2 to port 4/4
is enabled
C460-1> show port mirror
port mirroring
-------------No ports are mirrored
show port point-to-point status
User level: read-only, read-write, admin.
Use the show port point-to-point status command to show the port’s
point-to-point admin and operational RSTP status.
The syntax for this command is:
show port point-to-point status <module/port>
module
(Optional)
Number of the module (3-6). If you do not specify a number, all
modules are shown.
port
(Optional)
Number of the port on the module. If you do not specify a
number, all ports on the specified module are shown.
Example:
C460-1> show port point-to-point status
Port
------1/1
1/2
1/3
1/4
1/5
1/6
1/7
196
point-to-point admin state
---------------------------auto
auto
auto
auto
auto
auto
auto
point-to-point oper state
-------------------------point to point connection
point to point connection
point to point connection
point to point connection
point to point connection
point to point connection
point to point connection
Avaya C460 Reference Guide
Chapter 2
Avaya C460 CLI Commands
show port redundancy
User level: read-only, read-write, admin.
Use the show port redundancy command to display information about software
port redundancy schemes defined for the switch.
The syntax for this command is:
show port redundancy
Example:
C460-1> show port redundancy
Redundancy Name
----------------gregory
amir
lior
arie
Primary Port
-------------3/48
3/46
3/1
3/34
Secondary Port
---------------3/47
3/45
3/2
3/33
Status
-------secondary
secondary
primary
secondary
Minimum Time between Switchovers: 1
Switchback interval: 3
show port trap
User level: read-only, read-write, admin.
Use the show port trap command to display information on SNMP generic
link up/down traps sent for a specific port.
The syntax for this command is:
show port trap [<module>[/<port>]]
module
(Optional)
Number of the module (3-6). If you do not specify a number,
the ports on all the modules are shown.
port
(Optional)
Number of the port on the module. If you do not specify a
number, all the ports on the module are shown.
You can also specify a range of ports separated by a dash, for
example, 4/5-13 for ports 5 to 13 on module 4.
Example:
C460-1> show port trap 4/1
Port 4/1 up/down trap is disabled
Avaya C460 Reference Guide
197
Chapter 2
Avaya C460 CLI Commands
show port vlan-binding-mode
User level: read-only, read-write, admin.
Use the show port-vlan-binding command to display port vlan binding mode
information.
The syntax for this command is:
show port vlan-binding-mode [module[/port]]
module
Number of the module (3-6). If you do not specify a number,
the ports on all the modules are shown.
port
(Optional)
Number of the port on the module. If you do not specify a
number, all the ports on the module are shown.
You can also specify a range of ports separated by a dash, for
example, 4/5-13 for ports 5 to 13 on module 4.
Example:
C460-1> show port vlan-binding-mode
port 2/1 is statically bound
port 2/2 is statically bound
port 2/3 is statically bound
port 2/4 is statically bound
port 2/5 is statically bound
port 2/6 is statically bound
port 2/7 is statically bound
port 2/8 is statically bound
port 2/9 is statically bound
port 2/10 is statically bound
show powerinline
User level: read-only, read-write, admin.
Use the show powerinline command display the port powerinline configuration.
The syntax for this command is:
show powerinline <module_number [/port_number]>
module
(optional)
198
Number of the module (3-6). If you do not specify a number,
the ports on all the modules are configured.
Avaya C460 Reference Guide
Chapter 2
port
(optional)
Avaya C460 CLI Commands
Number of the port on the module. If you do not specify a
number, all the ports on the module are shown.
You can also specify a range of ports separated by a dash, for
example, 4/5-13 for ports 5 to 13 on module 4.
Example to show PoE configuration on I/O module 3:
C460-1> show powerinline 3
Port
Inline
Operational
Status
----------------------3/1
Fault
3/2
Fault
3/3
Fault
3/4
Searching
3/5
Searching
3/6
Searching
3/7
Searching
Powering
Priority
--------Low
Low
Low
Low
Low
Low
Low
Output fields:
Field
Description
Inline operational
status
• Disabled – Detection process in administratively
disabled
• Searching – No PD connected
• Delivering power – Valid PD connected and
power delivered on the port
• Fault – Invalid PD connected
Powering Priority
• Critical
• High
• Low
show powerinline budget
User level: read-only, read-write, admin.
Use the show powerinline budget command to display the PoE budget
distribution for modules in the switch. The budget assigned for the module includes
power for PoE ports and power required for module basic PoE operation.
Avaya C460 Reference Guide
199
Chapter 2
Avaya C460 CLI Commands
The syntax for this command is:
show powerinline budget
Example:
C460-1> show powerinline budget
Slot
---3
4
5
6
Module Type
--------------------------M4612ML-G
M4648ML-T-2G-PWR
M4648ML-T-PWR
M4648ML-T-2G
Budget
-----N/A
720W
720W
N/A
Demand
-----N/A
12W
156W
N/A
show ppp authentication
User level: read-only, read-write, admin.
Use the show ppp authentication command to display the authentication
method used for PPP sessions.
The syntax for this command is:
show ppp authentication
Example:
C460-1> show ppp authentication
PPP Authentication Parameters:
-----------------------------Incoming:
CHAP
show ppp baud-rate
User level: read-only, read-write, admin.
Use the show ppp baud-rate command to display the ppp baud-rate.
The syntax for this command is:
show ppp baud-rate
Example:
C460-1> show ppp baud-rate
PPP baud rate is 38400
200
Avaya C460 Reference Guide
Chapter 2
Avaya C460 CLI Commands
show ppp configuration
User level: read-only, read-write, admin.
Use the show ppp configuration command to display the ppp configuration.
The syntax for this command is:
show ppp configuration
Example:
C460-1> show ppp configuration
PPP baud rate is 38400
PPP incoming timeout is 15 minutes
PPP Authentication Parameters:
-----------------------------Incoming:
None
show ppp incoming timeout
User level: read-only, read-write, admin.
Use this show ppp incoming timeout command to display the amount of time
in minutes that a PPP session can remain idle before being automatically
disconnected.
The syntax for this command is:
show ppp incoming timeout
Example:
C460-1> show ppp incoming timeout
PPP incoming timeout is 15 minutes
show ppp session
User level: read-only, read-write, admin.
Use the show ppp session command to display PPP parameters and statistics of
an active PPP session.
The syntax for this command is:
show ppp session
Example:
C460-1> show ppp session
Avaya C460 Reference Guide
201
Chapter 2
Avaya C460 CLI Commands
show radius authentication
User level: read-only, read-write, admin.
Use the show radius authentication command to display all RADIUS
authentication configurations.
The syntax for this command is:
show radius authentication
Example:
C460-1> show radius authentication
RADIUS authentication parameters:
--------------------------------Mode:
Enabled
Primary-server:
192.168.42.252
Secondary-server:
192.168.48.134
Retry-number:
4
Retry-time:
5
UDP-port:
1645
Shared-secret:
sodot
show rmon alarm
User level: read-only, read-write, admin.
Use the show rmon alarm command to display the parameters set for a specific
alarm entry that was set using the rmon alarm command on Page 75 or using the
C460 Manager.
The syntax for this command is:
show rmon alarm [<Alarm Index>]
Alarm Index
202
History index defined using rmon alarm command or the
C460 Manager.
Avaya C460 Reference Guide
Chapter 2
Avaya C460 CLI Commands
Example:
C460-1> show rmon alarm 1026
alarm
alarm 1026 is active, owned by amir
Monitors ifEntry.1.1026 every 60 seconds
Taking delta samples, last value was 1712
Rising threshold is 10000, assigned to event # 1054
Falling threshold is 10, assigned to event # 1054
On startup enable rising or_falling alarms.
show rmon event
User level: read-only, read-write, admin.
Use the show rmon event command to show the parameters of an Event entry
defined by the rmon event command on Page 76 or using the C460 Manager.
The syntax for this command is:
show rmon event [<Event Index>]
Alarm Index
History index defined using rmon event command or the
C460 Manager
Example:
C460-1> show rmon event 1026
event
Event 1054 is active, owned by amir
Description is event for monitoring amir's co
Event firing causes log and trap to community public,last
fired 0:0:0
Avaya C460 Reference Guide
203
Chapter 2
Avaya C460 CLI Commands
show rmon history
User level: read-only, read-write, admin.
Use the show rmon history command to display the most recent RMON history
log for a given History Index. The history index is defined using the rmon
history command on 76 or using an RMON management tool.
The syntax for this command is:
show rmon history [<History Index>]
History Index
History index defined using rmon history command or
RMON management tool
Example:
C460-1> show rmon history 1026
history
Entry 1026 is active, owned by amir
Monitors ifEntry.1.1026 every 30 seconds
Requested # of time intervals, ie buckets, is 20
Granted # of time intervals, ie buckets, is 20
Sample # 1 began measuring at 2:53:9
Received 62545 octets, 642 packets,
391 broadcast and 145 multicast packets,
0 undersize and 0 oversize packets,
0 fragments and 0 jabbers,
0 CRC alignment errors and 0 collisions,
# of dropped packet events (due to a lack of resources): 0
Network utilization is estimated at 0
show rmon statistics
User level: read-only, read-write, admin.
Use the show rmon statistics command to show the Received Packet RMON
statistics counters for a certain interface number according to the MIB-2 interface
table numbering scheme.
The syntax for this command is:
show rmon statistics <module/port>
module/port
204
Range of ports
Avaya C460 Reference Guide
Chapter 2
Avaya C460 CLI Commands
Example:
C460-1> show rmon statistics
Statistics for switch is active,owned by Monitor
Monitors ifEntry.1.1026 which has
Received 26375085 octets, 222536 packets,
154821 broadcast and 53909 multicast packets,
0 undersize and 0 oversize packets,
0 fragments and 0 jabbers,
1 CRC alignment errors and 0 collisions,
# of dropped packet events (due to a lack of resources): 0
# of packets received of length (in octets):
64:94530, 65-127:85124, 128-255:25896,
256-511:10440, 512-1023:6057, 1024-1518:489
show rmon2 dscp-stats
User level: read-only, read-write, admin.
Use the show rmon2 dscp-stats command to display the DSCP distribution
(routed traffic only) for the RMON2 application.
The syntax for this command is:
show rmon2 dscp-stats
Example:
Router-1> show rmon2 dscp-stats
DSCP Value
---------3
7
---------Total
Avaya C460 Reference Guide
Total Packets
-------------7620262
5080185
-------------12700447
Total Octets
-------------487696768
325131840
-------------812828608
Utilization
----------59.99%
40.00%
----------99.99%
205
Chapter 2
Avaya C460 CLI Commands
show rmon2 protocol-dir
User level: read-only, read-write, admin.
Use the show rmon2 protocol-dir command to display the protocols in the
TCP/UDP protocols list.
The syntax for this command is:
show rmon2 protocol-dir [UDP|TCP <Port #>]
UDP
UDP protocol
TCP
TCP protocol
Port #
Port
Example:
Router-1> show rmon2 protocol-dir
Protocol Description
---------------------------------FTP-data over TCP/IP (Port 20)
Telnet over TCP/IP (Port 23)
SMTP over TCP/IP (Port 25)
HTTP over TCP/IP (Port 80)
1111 tcp
2222 tcp
SNMP-trap over UDP/IP (Port 162)
Owner
-----------------------------
CLI_User on local device
CLI_User on local device
show rmon2 protocol-dist
User level: read-only, read-write, admin.
Use the show rmon2 protocol-dist command to display the RMON2
protocol distribution information.
The syntax for this command is:
show rmon2 protocol-dist [UDP|TCP <Port #>]
206
UDP
UDP protocol
TCP
TCP protocol
Port #
Port
Avaya C460 Reference Guide
Chapter 2
Avaya C460 CLI Commands
Example:
Router-1> show rmon2 protocol-dist
Protocol
---------------------------------ICMP
OSPF
VRRP
RIP
Other
Total IP control
---------------------------------FTP-data over TCP/IP (Port 20)
Telnet over TCP/IP (Port 23)
SMTP over TCP/IP (Port 25)
HTTP over TCP/IP (Port 80)
1111 tcp
2222 tcp
SNMP-trap over UDP/IP (Port 162)
Other
Total IP routed
---------------------------------Total IP
ARP Protocol
Avaya C460 Reference Guide
Total Packets
-------------316
5033
0
0
176031
181380
-------------0
0
0
0
7587263
5058185
0
0
12645448
-------------12826828
530811
Total Octets
Utilization
-------------- ----------0.17%
2.77%
0.00%
0.00%
97.06%
100.00%
-------------- ----------0
0.00%
0
0.00%
0
0.00%
0
0.00%
485584832
59.99%
323723840
40.00%
0
0.00%
0
0.00%
809308672
100.00%
-------------- -----------
207
Chapter 2
Avaya C460 CLI Commands
show rmon2 state
User level: read-only, read-write, admin.
Use the show rmon2 state command to display the status of the rmon2
application.
The syntax for this command is:
show rmon2 state
Example:
Router-1> show rmon2 state
RMON2 15 in MATRIX state
208
Avaya C460 Reference Guide
Chapter 2
Avaya C460 CLI Commands
show running-config
User level: read-only, read-write, admin.
Use the show running-config command to display the current router configuration
information.
The syntax for this command is:
show running-config
Example:
Router-1> show running-config
Router-1>
! Avaya Inc.- C460ML Multi-layer Switch - Router configuration
! version 2.0.2
ip access-list-name 100 "list #100"
ip access-list-owner 100 "[email protected]"
ip access-list 100
1 permit ip
any any
ip access-list 100
2 fwd3 udp any eq 68 any eq 67
!
set vlan
2 name "vlan2"
no rmon2 protocol-dir TCP 20
no rmon2 protocol-dir TCP 23
no rmon2 protocol-dir TCP 25
no rmon2 protocol-dir TCP 80
no rmon2 protocol-dir TCP 110
no rmon2 protocol-dir UDP 161
no rmon2 protocol-dir UDP 162
rmon2 protocol-dir TCP 1111 "1111--TCP"
rmon2 protocol-dir TCP 2222 "2222--TCP"
!
interface "11"
ip vlan name "Default"
ip address 11.11.11.1
255.255.255.0
!
--type q to quit or space key to continue-interface "12"
ip vlan name "vlan2"
ip address 12.12.12.1
255.255.255.0
!
interface "78"
ip vlan name "Default"
ip address 149.49.78.71
255.255.255.0
!
ip default-gateway 149.49.78.1
1 low
Avaya C460 Reference Guide
209
Chapter 2
Avaya C460 CLI Commands
show secure current
User level: read-write, admin.
Use the show secure current command to list the IP addresses of managers
currently connected to the switch.
The syntax for this command is:
show secure current
Example:
C460-1# show secure current
IP Address
-------------135.64.100.205
149.49.77.13
149.49.77.7
Time Since Last Request(In Sec)
-----------------------------------7
13
2
C460-1#
210
Avaya C460 Reference Guide
Chapter 2
Avaya C460 CLI Commands
show snmp
User level: read-only, read-write, admin.
Use the show snmp command to display SNMP information.
The syntax for this command is:
show snmp
Example:
C460-1> show snmp
Authentication trap disabled
Community-Access
Community-String
------------------------------read-only
public
read-write
public
trap
public
Trap-Rec-Address
---------------192.138.40.59
Avaya C460 Reference Guide
Status
-------Enabled
Traps Configured
---------------config
fault
trafic_threshold
module_De-Enrollment
module_Enrollment
delete_SW_redundancy_entry
create_SW_redundancy_entry
temperature_warning
general_threshold
cam_change
duplicate_ip
ip_vlan_violation
link_aggregation_connection_fault
link_aggregation_connection_return
link_aggregation_partial_fault
link_aggregation_partial_return
link_aggregation_auto_neg_fault
link_aggregation_auto_neg_fault_return
delete_lag
create_new_lag
active_policy_list_change
policy_access_control_violation
PSU_module_fault
PSU_module_fault_return
fans_module_fault
fans_module_fault_return
211
Chapter 2
Avaya C460 CLI Commands
show snmp retries
User level: read-only, read-write, admin.
Use the show snmp retries command to display the number of retries initiated
by the C460 Manager when it tries to send SNMP messages to the device.
The syntax for this command is:
show snmp retries
Example:
C460-1> show snmp retries
the SNMP Retries Number is 3
show snmp timeout
User level: read-only, read-write, admin.
Use the show snmp timeout command to display the default SNMP timeout in
seconds.
L This command is useful for access using the Device Manager.
The syntax for this command is:
show snmp timeout
Example:
C460-1> show snmp timeout
the SNMP Timeout is 2000
show spantree
User level: read-only, read-write, admin.
Use then show spantree command to display spanning-tree information.
The syntax for this command is:
show spantree [<module>[/<port>]]
212
module
(Optional)
Number of the module. If you do not specify a number, all
modules are shown.
port
(Optional)
Number of the port on the module. If you do not specify a
number, all the ports on the module are shown.
You can also specify a range of ports separated by a dash, for
example, 4/5-13 for ports 5 to 13 on module 4
Avaya C460 Reference Guide
Chapter 2
Avaya C460 CLI Commands
Example:
C460-1> show spantree
Spanning tree enabled
Designated Root: 00-40-0d-88-06-c8
Designated Root Priority: 32768
Designated Root Cost: 20
Designated Root Port: 1/1
Root Max Age: 20
Hello Time: 2
Bridge ID MAC ADDR: 00-40-0d-92-04-b4
Bridge ID priority: 32768
Port
-----4 /1
4 /2
4 /3
4 /4
4 /5
4 /6
4 /8
4 /9
4 /10
4 /11
--type
4 /12
4 /13
4 /14
4 /15
4 /16
4 /17
4 /18
4 /19
4 /20
4 /21
4 /22
4 /23
4 /24
4/100
State
Cost
Priority
------------- ---------- -----------Forwarding
20
128
not-connected 20
128
LAG-member
20
128
LAG-member
20
128
not-connected 20
128
not-connected 20
128
not-connected 20
128
not-connected 20
128
not-connected 20
128
not-connected 20
128
q to quit or space key to continue-not-connected 20
128
not-connected 20
128
not-connected 20
128
not-connected 20
128
not-connected 20
128
not-connected 20
128
not-connected 20
128
not-connected 20
128
not-connected 20
128
not-connected 20
128
not-connected 20
128
not-connected 20
128
not-connected 20
128 ...
Avaya C460 Reference Guide
213
Chapter 2
Avaya C460 CLI Commands
Output fields:
Field
Description
Spanning tree
Spanning-Tree Protocol status (enabled or disabled).
Designated root
MAC address of the designated spanning-tree root
bridge
Designated Root
Priority
Priority of the designated root bridge.
Designated Root Cost
Total path cost to reach the root.
Designated Root Port
Port through which the root bridge can be reached
(shown only on non root bridges)
Root Max Age
Amount of time a BPDU packet should be considered
valid
Hello Time
Number of times the root bridge sends BPDUs
Bridge ID MAC ADDR
Bridge MAC address used in the sent BPDUs
Bridge ID Priority
Bridge Priority
Port
Port number
Port-State
Spanning-tree port state (disabled, inactive, notconnected, blocking, listening, learning, forwarding,
bridging, or type-pvid-inconsistent)
Cost
Cost associated with the port
Priority
Priority associated with the port
show spv
User level: read-only, read-write, admin.
Use the show spv command to display the following information about supervisor
modules:
•
•
•
•
Chassis MAC address
SPV status – active, standby, halted.
Indication whether the SPV’s are synchronized.
Software version of the two image banks.
The syntax for this command is:
show spv
214
Avaya C460 Reference Guide
Chapter 2
Avaya C460 CLI Commands
Example:
C460-1> show spv
Chassis
Chassis
Chassis
Chassis
In-band MAC address
Out-band MAC address
Serial number
CS
:
:
:
:
00.04.0D.17.A4.00
00.04.0D.17.A4.FE
4552086
1.0
SPV 1
SPV 2
----------------------------------------------Mode
| Standby
| Active
|
Synchronized
| Yes
| Yes
|
EmWeb version | 2.0.2
| 2.0.2
|
Bank A version | 2.0.2
| 2.0.2
|
Bank B version | 2.0.2
| 2.0.2
|
Preferred Bank | Bank A
| Bank A
|
Serial Number | 4559466
| 4559417
|
C/S Number
| 1.0
| 1.0
|
Running Version| 2.0.2
| 2.0.2
|
Booted From
| Bank A
| Bank A
|
-----------------------------------------------
Avaya C460 Reference Guide
215
Chapter 2
Avaya C460 CLI Commands
show startup-config
User level: read-only, read-write, admin.
Use the show startup-config command to display the router startup
configuration.
Example:
show startup-config
Example:
Router-1> show startup-config
Router-1>
! Avaya Inc.- C460ML Multi-layer Switch - Router configuration
! version 2.0.2
ip access-list-name 100 "list #100"
ip access-list-owner 100 "[email protected]"
ip access-list 100
1 permit ip
any any
ip access-list 100
2 fwd3 udp any eq 68 any eq 67
!
set vlan
2 name "vlan2"
no rmon2 protocol-dir TCP 20
no rmon2 protocol-dir TCP 23
no rmon2 protocol-dir TCP 25
no rmon2 protocol-dir TCP 80
no rmon2 protocol-dir TCP 110
no rmon2 protocol-dir UDP 161
no rmon2 protocol-dir UDP 162
rmon2 protocol-dir TCP 1111 "1111--TCP"
rmon2 protocol-dir TCP 2222 "2222--TCP"
!
interface "11"
ip vlan name "Default"
ip address 11.11.11.1
255.255.255.0
!
--type q to quit or space key to continue-interface "12"
ip vlan name "vlan2"
ip address 12.12.12.1
255.255.255.0
!
interface "78"
ip vlan name "Default"
ip address 149.49.78.71
255.255.255.0
!
ip default-gateway 149.49.78.1
1 low
216
Avaya C460 Reference Guide
Chapter 2
Avaya C460 CLI Commands
show system
User level: read-only, read-write, admin.
Use the show system command to display the uptime, system name, location,
contact person and MAC addresses.
The syntax for this command is:
show system
Example:
C460-1> show system
Uptime d,h:m:s
-----------------------0,2:40:55
System Name
--------------------C460_version-1.0.0
System Location
System Contact
-----------------------------------------------Technical Writing
Gregory Kohll
In-band MAC address
------------------02 e0 3b 1d f9 00
Out-band MAC address
-------------------02 e0 3b 1d fa 00
show system-log
User level: read-only, read-write, admin.
Displays the encrypted event log file.
The syntax for this command is:
show system log
The syntax for this command is:
show system-log [[slot]]
slot
Avaya C460 Reference Guide
Slot number (1 to 2)
217
Chapter 2
Avaya C460 CLI Commands
Example:
C460-1> show system-log
C460-1(super)# sh system-log
--type q to quit or space key to continue-*** UpTime : 0:37:19 ***
*** MODULE : 1 ***
System log file:
H+n.AgDwZZioHgDZZZZ.(ioHgD3D3wD"bZZ.onD<ZZ2oAgDN~N}ZZAojgD
3Z
gKgjiDZ!htllol ?glgi
H+n.AgDwZZioHgDZZZZ.([email protected]!hn95{s:
!ZZAojgDb@3Z
gKgjiDZoNs}E=ZH~YL{}Z?}s}=
H+n.AgDwZZioHgDZZZZ.(ioHgD0D0TD0<ZZ.onD3ZZ2oAgDt((9(~;}EHN
/:!ZZAojgD03Q3Z
gKgjiDZlWL=Z~''ZM~YL{}Z<Z?}s}=Z
H+n.AgDwZZioHgDZZZZ.(ioHgD3D33D33ZZ.onDwZZ2oAgDN~N}ZZAojgD
3Z
gKgjiDZ(+xg?.( ?glgi
H+n.AgDwZZioHgDZZZZ.(ioHgD3DwwD_TZZ.onD00@ZZ2oAgDsPsAzR:5Z
ZAojgD0"wTZ
gKgjiDZnY>z5YZRLEZj~Z?}^YOZnnKo!n9ojig??i(i9\t.ln)3PBP1Zng
Ko!g9g??+?9tnn?gll]3PQ
333330
H+n.AgDwZZioHgDZZZZ.(ioHgD3D"[email protected]__"ZZ2oAgDl(K9E}YLN
Y^N=:!ZZAojgD<b<Z
gKgjiDZj};Zl=^NYROZN}z/WR~E
H+n.AgDwZZioHgDZZZZ.(ioHgD3D33D33ZZ.onDwZZ2oAgDN~N}ZZAojgD
3Z
gKgjiDZ(+xg?.( ?glgi
H+n.AgDwZZioHgDZZZZ.(ioHgD3D33D"wZZ.onDQZZ2oAgD!Ao9E}s}=9s
Os=}M:!ZZAojgDw<_Z
gKgjiDZ!AoZE}s}=ZsOs=}MZ-Zs}=ZY}'^L{=s:
Neighbor SPV is not present
218
Avaya C460 Reference Guide
Chapter 2
Avaya C460 CLI Commands
show system-log (Layer 3)
User level: read-only, read-write, admin.
Displays the encrypted event log file.
The syntax for this command is:
show system-log [[slot]]
slot
Slot number (1 to 2)
show tftp download software status
User level: read-only, read-write, admin.
Use the show tftp download software status commands to display the
status of the current TFTP Device Manager S/W (Embedded Web) download
process into the device.
The syntax for this command is:
show tftp download software status [<mod_num>]
Example:
C460-1>
C460-1>
C460-1>
C460-1>
C460-1>
C460-1>
C460-1>
C460-1>
C460-1>
C460-1>
show tftp download
Module #1
===========
Module
:
Source file
:
Destination file :
Host
:
Running state
:
Failure display :
Last warning
:
software status
1
d:\p340sw\gt-ml\3.5.18\p340.web
EW_Archive
149.49.70.61
Writing ...
(null)
No-warning
show tftp upload status
User level: read-only, read-write, admin.
Use the show tftp download status and show tftp upload status
commands to display the status of the current TFTP configuration file copy process
into/from the device.
The syntax for this command is:
show tftp {download|upload} status [<mod_num>]
Avaya C460 Reference Guide
219
Chapter 2
Avaya C460 CLI Commands
Example:
C460-1> show tftp upload status 1
Module
: 1
Source file
: C460-config
Destination file : c:\conf.cfg
Host
: 149.49.36.200
Running state
: Executing
Failure display : (null)
Last warning
: No-warning
show time
User level: read-only, read-write, admin.
Use the show time command to display the current C460 time and timezone.
The syntax for this command is:
show time
Example:
C460-1> show time
10:32:34 27 JAN 2000 GMT
show time parameters
User level: read-only, read-write, admin.
Use the show time parameters command to display the time status and
parameters.
The syntax for this command is:
show time parameters
Example:
C460-1> show time parameters
Client status: Enabled
Current time : L:00:57:19 01 JAN 1970 GMT
Timezone set to 'GMT', offset from UTC is 0 hours
Time-Server : 0.0.0.0 (I.e. broadcast address)
Time acquired from Time-Server: 0.0.0.0
Time protocol set to
: TIME protcol
220
Avaya C460 Reference Guide
Chapter 2
Avaya C460 CLI Commands
show timezone
User level: read-only, read-write, admin.
Use the show timezone command to display the current C460 time zone.
The syntax for this command is:
show timezone
Example:
C460-1> show timezone
Timezone set to 'GMT', offset from UTC is 0 hours
show trunk
User level: read-only, read-write, admin.
Use the show trunk command to display VLAN tagging information for the
switch.
The syntax for this command is:
show trunk [<module>[/<port>-<port]]
module
(Optional)
Number of the module. If you do not specify a number, all
modules are shown.
port
(Optional)
Number of the port on the module. If you do not specify a
number, all the ports on the module are shown.
You can also specify a range of ports separated by a dash, for
example, 4/5-13 for ports 5 to 13 on module 4
Example:
C460-1> show trunk 4/1
Port
Mode
Binding mode
----- ----- -------------------41/1
off
statically bound
41/2
dot1q statically bound
Native vlan
----------1
2
Output Fields:
Field
Description
Port
Switch and port number(s)
Avaya C460 Reference Guide
221
Chapter 2
Avaya C460 CLI Commands
Mode
Tag status of the port (dot1q - dot1Q tagging mode,
off - clear mode).
Binding mode
Binding mode of the port
Native VLAN
Number of the Port VLAN ID (the VLAN to which received
untagged traffic will be assigned).
show username
User level: admin.
Use the show username command to display the local user accounts.
The syntax for this command is:
show username
Example:
C460-1(super)# show username
User account
password
accesstype
------------------------------- -------------------------------------root
*****
admin
gkohll
*****
read-only
readwrite
*****
read-write
show vlan
User level: read-only, read-write, admin.
Use the show vlan command to display the VLANs configured in the switch.
The syntax for this command is:
show vlan
222
Avaya C460 Reference Guide
Chapter 2
Avaya C460 CLI Commands
Example:
C460-1> show vlan
VLAN ID Vlan-name
------- -------------------------------1
v1
5
V5
10
V10
15
V15
20
V20
25
V25
show vlan (Layer 3)
User level: read-only, read-write, admin.
Use the show vlan command to display router Layer 2 interfaces.
The syntax for this command is:
show vlan
Example:
Router-1> show vlan
VLAN NAME
VLAN ID VLAN MAC
---------------- ------- ----------------Default
1 02:e0:3b:1d:f9:01
show web aux-files-url
User level: read-only, read-write, admin.
Displays the URL/directory from where the switch can access the Device
Management auxiliary files (for example help files).
The syntax for this command is:
show web aux-files-url
Example:
C460-1> show web aux-files-url
the web aux-files-url is 149.49.36.212/C460test
Avaya C460 Reference Guide
223
Chapter 2
Avaya C460 CLI Commands
sync spv
User level: read-write, admin.
Use the sync spv command to synchronize the following between an Active
Supervisor Module and Halted Supervisor Module:
• Boot bank
• Firmware images
• Device manager image
L You can only execute this command from the active Supervisor Module CLI.
The syntax for this command is:
sync spv
The synchronization may take up to 90 seconds to complete.
Example:
C460-1(super)# sync spv
This command may overwrite the neighbor SPV software and
reset it
*** Confirmation *** - do you want to continue (Y/N)? y
Copying Bank A to the neighbor SPV ...
Copying Bank A to the neighbor SPV done
Copying Bank B to the neighbor SPV ...
Copying Bank B to the neighbor SPV done
Copying Embedded Web image to the neighbor SPV ...
Copying Embedded Web image to the neighbor SPV done
Setting boot bank of the neighbor SPV ...
Setting boot bank of the neighbor SPV done
Setting chassis sync on for the neighbor SPV...
Setting chassis sync on for the neighbor SPV done
SPVs are resetting.
Please wait till the process is finished. The SPVs will be
synchronized after the reset is completed
L The configuration is synchronized after you perform a reset.
tech
Use the tech command to enter tech mode. This command is reserved for service
personnel use only.
224
Avaya C460 Reference Guide
Chapter 2
Avaya C460 CLI Commands
terminal length
User level: read-only, read-write, admin.
Use the terminal length command to set the length of the terminal display in
lines.
The syntax for this command is:
terminal length [<screen-length>]
screen-length
• Blank (no value) – display the current length of the screen.
• Number – set the screen length
Example:
C460-1> terminal
terminal length:
C460-1> terminal
C460-1> terminal
C460-1> terminal
length
25 (auto-detected)
length 40
length
width: 40 (user-configured)
terminal width
User level: read-only, read-write, admin.
Use the terminal width command to set the width of the terminal display in
characters.
The syntax for this command is:
terminal width [<characters>]
characters
• Blank (no value) – display the current width of the screen.
• Number – set the screen width
Example:
C460-1> terminal width
terminal width 80 (auto-detected)
C460-1> terminal width 60
C460-1> terminal width
terminal width 60 (user-configured)
timers basic
User level: privileged, supervisor.
Avaya C460 Reference Guide
225
Chapter 2
Avaya C460 CLI Commands
L You can only access these commands in the Router-RIP context.
Type router rip at the command prompt to enter the Router-RIP context if
necessary.
Use the timers basic command to configure the route timer.
Use the no timers basic command to restore the timers to their default values.
Example:
Router-N(configure router:rip)# timers basic 30 180
The syntax for this command is:
timers basic <update><invalid>
update
RIP update timer in seconds (minimum = 30;
default = 30)
invalid
RIP invalid route timer in seconds (minimum =30;
default = 180)
L The Invalid Route Timer value must be larger than the Update Timer value. It is
recommended that it be at least three times greater.
In any configuration all adjacent routers must have the same values for each of
the timer parameters. It is possible to have different values for the timers on two
adjacent routers, provided the Invalid Timer value is at least three times greater
on one of the routers than the Update Timer value on the other router.
Example:
Router-N(configure router:rip)# timers basic 30 180
Use the timers basic command to configure the route timer.
Use the no timers basic command to restore the timers to their default values.
The syntax for this command is:
timers basic <update><invalid>
update
226
RIP update timer in seconds (minimum = 30;
default = 30)
Avaya C460 Reference Guide
Chapter 2
invalid
Avaya C460 CLI Commands
RIP invalid route timer in seconds (minimum =30;
default = 180)
L The Invalid Route Timer value must be larger than the Update Timer value. It is
recommended that it be at least three times greater.
In any configuration all adjacent routers must have the same values for each of
the timer parameters. It is possible to have different values for the timers on two
adjacent routers, provided the Invalid Timer value is at least three times greater
on one of the routers than the Update Timer value on the other router.
Example:
Router-1 (configure router:rip) # timers basic 30 180
timers ospf
User level: read-write, admin.
L You can only access this command in Router-OSPF mode.
Type router ospf at the command prompt to enter Router-OSPF mode if
necessary.
Use the timers spf command to set the delay between runs of OSPF SPF
calculation.
Use the no timers spf command to restore the default (3 seconds).
The syntax for this command is:
[no] timers spf <spf-holdtime>
spf-holdtime
The time in seconds of the delay between runs of
OSPF’s SPF calculation.
Example:
Router-1 (configure router:ospf) # timers spf 5
Done!
Avaya C460 Reference Guide
227
Chapter 2
Avaya C460 CLI Commands
traceroute
User level: read-only, read-write, admin.
Provides a trace route utility.
The syntax for this command is:
traceroute <host>
host
IP address.
Example:
Router-1> traceroute 192.168.50.13
tree
User level: read-only, read-write, admin.
Use the tree command to display a list of CLI commands available at the current
user level.
The syntax for this command is:
tree [<depth>]
depth
228
Depth of CLI commands displayed
Avaya C460 Reference Guide
Chapter 2
Avaya C460 CLI Commands
Example:
C460-1> tree 1
session
terminal width
terminal length
clear screen
show logout
show time
show timezone
show snmp
show intelligent-multicast
show port
show trunk
show spantree
show vlan
show spv
show cam
show powerinline
show icmp-redirect
show interface
show outband
show device-mode
show access-lists
show system
show module
--type q to quit or space key to continue--
username
User level: admin.
Adds a local user account.
L By default there is only a single user account, named 'root', with password
'root', which access the administrator level. You cannot delete this basic user
account, nor modify its access level, but can modify its basic password.
The syntax for this command is:
username <name> password <passwd> access-type {read-only|readwrite|admin}
name
New user name (minimum four characters)
passwd
User’s password (minimum four characters)
Avaya C460 Reference Guide
229
Chapter 2
Avaya C460 CLI Commands
access-type
Access type definition - read only, read-write or
administrator
Example:
C460-1(super)# username john password johnny access-type
read-write
User account added.
C460-1(super)# username root password secret access-type
read-write
ERROR: User account root has always an administrator access
type.
C460-1(super)# username root password secret access-type
admin
User account modified.
If you wish to define a name which includes spaces, you must enclose the entire
name in quotation marks, for example “new york”.
validate-group
User level: read-write, admin.
Use the validate-group command to verify that all the rules in a policy list are
valid.
L If there is a configuration problem with a specific rule, or with a number of
rules, detailed error messages will be given.
The syntax for this command is:
validate-group <policy-list-number>[quiet]
quiet
does not display error messages
Example:
Router-1(configure)# validate-group 101
List 101 is valid
L The validation process may take some time to complete.
230
Avaya C460 Reference Guide
Chapter 2
Avaya C460 CLI Commands
validate policy-list
User level: read-write, admin.
L If you are at the “read-write” user level, you can only access this command in
Configure mode.
Type configure at the command prompt to enter configure mode.
Use the validate policy-list command to verify that all the rules in a priority
list are valid.
L If there is a configuration problem with a specific rule, or with a number of
rules, detailed error messages will be given.
The syntax for this command is:
validate policy-list <policy-list-number>[quiet]
quiet
does not display error messages
Example:
C460-1(configure)# validate policy-list 101
Avaya C460 Reference Guide
231
Chapter 2
232
Avaya C460 CLI Commands
Avaya C460 Reference Guide
Layer 2 CLI Commands
B
banner login 15
banner login line 15
banner post-login 15
banner post-login line 16
C
clear cam 17
clear dynamic vlans 17
clear event-log 18
clear interface 19
clear ip route 19
clear log 20
clear port mirror 20
clear port static-vlan 21
clear power history 21
clear radius authentication server 21
clear screen 7, 22
clear snmp trap 22
clear system-log 23
clear timezone 23
clear vlan 24
configure 25
copy l2-config tftp 25
copy running-config startup-config 25
copy running-config tftp 26
copy startup-config tftp 26
copy tftp EW_archive 27
copy tftp l2-config 27
copy tftp SW_image 28, 29
D
disable interface 31
E
enable interface 32
erase startup-config 33
F
fragment chain 33
Avaya C460 Reference Guide
G
get time 34
H
hostname 34
I
ip access-default-action 37
ip access-group 37
ip access-list 38
ip access-list-cookie 39
ip access-list-copy 39
ip access-list-dscp operation 40, 41
ip access-list-dscp precedence 41
ip access-list-dscp trust 42
ip access-list-dscp-name 40
ip access-list-name 42
ip access-list-owner 43
ip simulate 61
N
no banner login 15
no banner post-login 15
no hostname 34
no rmon alarm 68
no rmon event 68
no rmon history 69
no username 69
nvram initialize 69
P
ping 71, 193
R
reset 73
rmon alarm 75
rmon event 76
rmon history 76
S
session 79
set allowed managers 80
set allowed managers ip 80
233
Layer 2 CLI Commands
set arp-aging-interval 81
set arp-tx-interval 81
set boot bank 223
set broadcast storm control 82
set broadcast storm control threshold 83
set device-mode 83
set dot1x max-req 84
set dot1x quiet-period 84
set dot1x re-authperiod 85
set dot1x server-timeout 85
set dot1x supp-timeout 85
set dot1x system-auth-control disable 86
set dot1x system-auth-control enable 86
set dot1x tx-period 87
set inband vlan 88
set intelligent-multicast 88
set intelligent-multicast client port pruning
time 88
set intelligent-multicast group filtering delay
time 89
set intelligent-multicast router port pruning
time 89
set interface inband 90
set interface outband 90
set interface ppp 91
set interface ppp enable/disable/off/reset 91
set ip route 92
set license 94
set logout 94
set mac-aging 95
set mac-aging-time 95
set outband duplex 186
set outband negotiation 96
set outband speed 97
set port auto-negotiation-flowcontrol-advertisement 99
set port channel 99
set port classification 100
set port disable 101
set port dot1x initialize 101
set port duplex 106
set port flowcontrol 109
set port level 110
set port mirror 110
234
set port name 111
set port negotiation 111
set port powerinline 113
set port powerinline priority 113
set port redundancy 114
set port redundancy on/off 115
set port redundancy-intervals 116
set port spantree 116
set port spantree cost 117
set port spantree priority 118
set port speed 118
set port static-vlan 119
set port trap 119
set port vlan 120
set port vlan-binding-mode 121
set ppp authentication incoming 122
set ppp baud-rate 123
set ppp chap-secret 123
set ppp incoming timeout 123
set radius authentication enable/disable 124
set radius authentication retry-time 125
set radius authentication secret 125
set radius authentication server 125
set radius authentication udp-port 126
set slot power 126
set snmp community 128
set snmp retries 128
set snmp timeout 129
set snmp trap 129
set snmp trap auth 130
set spantree 131
set spantree priority 133
set system contact 134
set system location 135
set system name 135
set time client 136
set time protocol 136
set time server 137
set timezone 137
set trunk 138
set vlan 138
set web aux-files-url 139
set welcome message 140
show
Avaya C460 Reference Guide
Layer 2 CLI Commands
timezone 221
show access lists 140
show allowed managers status 141
show arp-aging-interval 142, 143
show arp-tx-interval 143
show banner login 143
show banner post-login 144
show boot bank 223
show broadcast storm control 144
show cam 145
show cam mac 147
show cam vlan 147
show copy status 148
show cpu load 149
show cs 149
show dev log file 153
show device-mode 150
show dot1x 150
show dot1x statistics 150
show dynamic vlans 151
show environment fans 151
show environment power 152
show erase status 153
show event-log 153
show icmp-redirect 154
show intelligent-multicast 154
show interface 155
show ip access lists 156
show ip access-group 155
show ip access-list-dscp 156
show ip access-list-summary 157
show ip route 163
show ip unicast cache host 168
show l2-config 173
show license 183
show log 227
show mac-aging 183
show mac-aging-time 184
show module 185
show module identity 148
show outband 186
show port 187
show port auto-negotiation-flowcontrol 188
show port channel 188
Avaya C460 Reference Guide
show port classification 190
show port dot1x 191
show port dot1x statistics 193
show port flowcontrol 194
show port mirror 195
show port point-to-point status 196
show port trap 197
show port vlan-binding-mode 198
show powerinline 198
show powerinline budget 199
show ppp authentication 200
show ppp baud-rate 200
show ppp configuration 201
show ppp incoming timeout 201
show ppp session 201
show radius authentication 202
show rmon alarm 202
show rmon event 203
show rmon history 204
show rmon statistics 204
show running config 209
show secure access 210
show snmp 211
show snmp retries 212
show snmp timeout 208, 212
show spantree 212
show spv 208, 214
show startup-config 216
show system 217
show system-log 208, 217
show tftp download software status 219
show tftp upload status 219
show time 220
show time parameters 220
show timeout 183
show trunk 221
show username 222
show vlan 222
show web aux-files-url 223
sync spv 224
T
tech 224
terminal 6
terminal length 225
235
Layer 2 CLI Commands
terminal width 225
tree 228
U
username 229
236
Avaya C460 Reference Guide
Layer 3 CLI Commands
A
access-list 13
arp 14
arp timeout 14
C
clear arp-cache 16
clear event-log 18
clear fragment 18
clear ip route 19
clear ip traffic 20
clear log 20
clear power history 21
clear rmon2 statistics 22
clear screen 22
clear system-log 23
clear vlan 24
configure 25
copy running-config startup-config 25
copy tftp startup-config 28
D
default-metric 30
default-metric (RIP) 30, 31
E
enable vlan commands 32
F
fragment size 33
fragment timeout 34
H
hostname 35
I
interface 36
ip access-default-action 37
ip access-list 38
ip access-list-cookie 39
ip access-list-copy 39
ip access-list-dscp name 40
ip access-list-dscp operation 40
Avaya C460 Reference Guide
ip access-list-dscp precedence 41
ip access-list-dscp trust 42
ip access-list-name 42
ip access-list-owner 43
ip address 43
ip admin-state 44
ip bootp-dhcp network 44
ip bootp-dhcp relay 45
ip bootp-dhcp server 46
ip broadcast-address 46
ip default-gateway 47
ip directed-broadcast 47
ip icmp-errors 48
ip max-arp-entries 48
ip max-route-entries 49
ip netbios-rebroadcast 49
ip netmask-format 50
ip ospf authentication-key 51
ip ospf cost 51
ip ospf dead-interval 52
ip ospf hello-interval 52
ip ospf priority 53
ip ospf router-id 53
ip proxy-arp 54
ip redirect 54
ip rip authentication mode 55
ip rip default-route-mode 56
ip rip poison-reverse 56
ip rip rip-version 57
ip rip send-receive 57
ip rip split-horizon 58
ip route 59
ip routing 59
ip routing-mode 60
ip simulate 61
ip vlan 61
ip vlan name 61
237
Layer 3 CLI Commands
ip vrrp 62
ip vrrp address 62
ip vrrp auth-key 63
ip vrrp override addr owner 63
ip vrrp preempt 64
ip vrrp primary 64
ip vrrp priority 65
ip vrrp timer 66
N
network 67
network (RIP) 67
no area 13
no arp 14
no arp timeout 14
no default metric 30, 31
no icmp-error 48
no interface 36
no ip access list 38
no ip access-group 37
no ip bootp-dhcp 45
no ip bootp-dhcp network 44
no ip bootp-dhcp server 46
no ip default 47
no ip directed-broadcast 47
no ip max-arp-entries 48
no ip max-route-entries 49
no ip netbios-rebroadcast 49
no ip netmask-format 50
no ip ospf authentication-key 51
no ip ospf cost 51
no ip ospf hello-interval 52
no ip ospf priority 53
no ip ospf router-id 53
no ip poison-reverse 56
no ip proxy-arp 54
no ip redirect 54
no ip rip authentication 55
no ip rip authentication key 55
no ip rip split-horizon 58
no ip route 59
no ip routing 60
no ip vlan 61
no ip vlan name 61
no ip vrrp 62
238
no ip vrrp address 62
no ip vrrp auth-key 63
no ip vrrp override addr owner 63
no ip vrrp priority 65
no ip vrrp timer 66
no network 67
no ospf dead-interval 52
no passive interface 70
no redistribute 72
no router ospf 78
no router rip 78
no router vrrp 79
no timers spf 227
P
passive-interface 70
ping (Layer 3) 71
R
redistribute 72
reset 73
rmon2 protocol-dir 77
rmon2 protocol-dist 77
router ospf 78
router rip 78
router vrrp 79
S
session 79
set boot bank 223
set device-mode 83, 84
set logout 94
set slot power 126
set system contact 134
set system location 135
set system name 135
set welcome message 140
show access lists 140
show boot bank 223
show copy status 148
show device-mode 150
show environment fans 151
show erase status 153
show event-log 153
show ip access-group 155
show ip access-list-dscp 156
show ip access-lists 156
Avaya C460 Reference Guide
Layer 3 CLI Commands
show ip access-list-summary 157
show ip arp 157
show ip icmp 158
show ip interface 159
show ip ospf 160
show ip ospf database 161
show ip ospf interface 161
show ip ospf neighbor 162
show ip protocols 162
show ip reverse-arp 163
show ip route 163
show ip route best-match 164
show ip route static 164
show ip route summary 165
show ip unicast cache 167
show ip unicast cache networks 168
show ip unicast cache networks detailed 169
show ip unicast cache summary 170
show ip unicast nextHop 169
show ip vrrp 170
show ip vrrp detail 171
show logout 183
show module 185
show rmon2 dscp-stats 205
show running-config 209
show snmp 211
show snmp retries 212
show snmp timeout 208, 212
show spv 208, 214
show startup-config 216
show system 217
show system-log 217
show tftp upload status 219
show time 220
show time parameters 220
show timezone 221
show vlan 223
show web aux-files-url 223
sync spv 224
T
terminal length 225
terminal width 225
timers basic 225
timers spf 227
Avaya C460 Reference Guide
traceroute 228
tree 228
V
validate-group 230, 231
239
Layer 3 CLI Commands
240
Avaya C460 Reference Guide
Glossary
100BASE-TX
100-Mbps baseband Fast Ethernet specification based on the IEEE 802.3 standard.
100BaseTX uses two pairs of either UTP (Unshielded Twisted Pair) or STP (Single
Twisted Pair) wiring. One pair is used to receive data; the other is used to transmit
data.
10BASE-T
10-Mbps baseband Ethernet specification based on the IEEE 802.3 standard. 10BaseT
uses two pairs of UTP (Unshielded Twisted Pair) wiring. One pair is used to receive
data; the other is used to transmit data.
Address Resolution
Conversion of an IP address into a corresponding physical address. This is usually
done using ARP (Address Resolution Protocol).
Agent (Network Agent)
A special control module that interfaces between the network manager and the
managed devices, using the MIB as a management terms dictionary. Network
Agents relay device events and execute instructions via embedded software.
Alarm
An audible or visible warning signal alerting designated management stations that
a significant event has occurred on the network.
ARP
Address Resolution Protocol. A TCP/IP protocol used to convert an IP address into
a physical address, such as an Ethernet address. The sender broadcasts an ARP
request onto the TCP/IP network. The host whose IP address matches the requested
address then replies with its physical hardware address.
Backbone
A high-bandwidth connection between switches. A backbone link normally
operates in Full Duplex Mode, sending packets in both directions simultaneously.
Beacon Frame
Refer to Beaconing.
Avaya C460 Reference Guide
241
Glossary
Beaconing
An error detection mechanism in Token Ring networks. When a station detects a
serious network problem, it sends a Beacon Frame. The Beacon Frame defines a
failure domain that includes the station reporting the failure, its nearest active
upstream neighbor, and everything in between. Beaconing initiates a process in
which the nodes in the failure domain perform diagnostics and attempt to
reconfigure the network around the failed areas.
BGP
Border Gateway Protocol. An Internet protocol that enables groups of routers to
share routing information so that efficient, loop-free routes can be established.
BOOTP
Bootstrap Protocol. An Internet protocol that enables a diskless workstation to
discover its own IP address, the IP address of a BOOTP server on the network, and a
file to be loaded into memory to boot the machine. This enables the workstation to
boot without a hard or floppy disk drive.
BPDU
Bridge Protocol Data Unit. A packet that is transmitted at configurable intervals to
exchange information among bridges in the network. Among other things, BPDUs
inform the bridges of the topology of the network and detect loops and topology
changes.
Broadcasting
A common method of information transmission in which a packet is sent to every
port on the network.
Bridge
A device connecting two networks using similar protocols. A bridge filters and
forwards data between the networks according to their destination addresses.
Burst
A transmission of data at a faster rate than normal. Data bursts can be carried out in
several ways. A burst is always limited in time and can take place only under
special conditions.
Bus
A transmission path or channel. A bus is typically an electrical connection with one
or more conductors, where all attached devices receive all transmissions at the same
time.
242
Avaya C460 Reference Guide
Glossary
BUS
Broadcast and Unknown Server. A multicast server used in ELANs that is used to
forward multicast and broadcast traffic to the appropriate clients.
CAM
Content Address Memory. A list kept by each port containing the addresses of all
network elements connected to the port. CAM is accessed according to its contents,
not its memory address.
Chassis View
Avaya Inc.’s Network Management System’s graphic depiction of a network device.
Client
A computer system or process that requests a service from another computer
system or process (a "server"). Typically, a client is an application that runs on a
personal computer or workstation and relies on a server to perform some
operations.
Collision
In Ethernet, a collision occurs as the result of two nodes transmitting
simultaneously. The frames from each device impact and are damaged from the
impact.
CRC
Cyclic Redundancy Check. A data transmission error-checking technique in which
the frame recipient calculates a remainder by dividing frame contents by a prime
binary divisor and compares the calculated remainder to a value stored in the frame
by the sending node.
CSMA/CD
Carrier Sense Multiple Access with Collision Detection. A multi-user network
allocation procedure in which every station can receive the transmissions of all
others. Each station waits for the network to be idle before transmitting and each
station can detect collisions by other stations.
Data Link Layer
Layer 2 of the OSI reference model. The Data Link Layer is responsible for physical
addressing, network topology, line discipline, error notification, ordered delivery of
frames, and flow control.
DHCP
Dynamic Host Configuration Protocol. A protocol for assigning dynamic IP
addresses to network devices. With dynamic addressing, a device can have a
Avaya C460 Reference Guide
243
Glossary
different IP address every time it connects to the network. In some systems, the
device's IP address can even change while it is still connected. DHCP also supports
a mix of static and dynamic IP addresses.
Domain
A group of computers and devices on a network that are administered as a unit with
common rules and procedures.
Dot1Q
Standard for VLAN tagging under the IEEE 802.1Q VLAN standard.
DRU
Domain Resource Unit. The unit of measure of resources available in a Avaya M770
Device DomainX.
Duplex Mode
The state of the device with regard to simultaneous transmission and reception of
information. In Full Duplex Mode, the device or circuit permits simultaneous
transmission and reception. (This is also known as bisynchronous communication.)
In Half Duplex Mode, the device or circuit does not permit simultaneous
transmission and reception. (This is also known as asynchronous communication.)
End System
An end-user device on a network. Also used to denote a non-routing host or node in
an OSI network.
ESI
End System Identifier. A portion of a network address that identifies the end
system.
Ethernet
One of the most widely implemented LAN standards, Ethernet is standardized as
IEEE 802.3. Ethernet uses the CSMA/CD access method to handle simultaneous
demands and supports data transfer rates of 10 Mbps. A newer version of Ethernet,
called 100Base-T (or Fast Ethernet), supports data transfer rates of 100 Mbps. The
newest version, Gigabit Ethernet, supports data rates of 1 Gigabit per second.
FCS
Frame Check Sequence. A field added to a frame for error-control purposes.
FDDI
Fiber Distributed Data Interface. A set of ANSI protocols for sending digital data
over fiber optic cable. FDDI networks are token-passing networks, and support data
rates of up to 100 Mbps. FDDI networks are typically used as backbones for wide244
Avaya C460 Reference Guide
Glossary
area networks.
FDX
Full Duplex. A circuit or device permitting simultaneous data transmission between
sending and receiving stations. For more information, refer to Duplex Mode on
page 244.
Flow Control
Avaya’s devices use a proprietary form of flow control that enables one endpoint to
inform another endpoint that it should refrain from sending additional packets. The
flow control mechanism avoids packet loss. Flow control is used in Full Duplex
Mode.
Fragment
Ethernet packet shorter than 576 bits (usually the result of a collision).
Frame
A logical grouping of information sent as a Data Link Layer unit over a transmission
medium. The word Frame often refers to the header and trailer, used for
synchronization and error control, that surround the user data contained in the unit.
FTP
File Transfer Protocol. An application protocol, part of the TCP/IP protocol stack,
used for transferring files between network nodes.
Full Duplex (FDX)
A circuit or device permitting simultaneous data transmission between sending and
receiving stations. Duplex Mode on page 244.
Half Duplex (HDX)
A circuit or device permitting data transmission in only one direction at a time
between sending and receiving stations. For more information, refer to Duplex
Mode on page 244.
HDX
Half Duplex. A circuit or device permitting data transmission in only one direction
at a time between sending and receiving stations. For more information, refer to
Duplex Mode on page 244.
Hop
Passage of a data packet between two network nodes (for example, between two
routers).
Avaya C460 Reference Guide
245
Glossary
Host
A computer, attached to a network, that provides services to another computer
beyond simply storing and forwarding information.
HTTP
Hyper Text Transmission Protocol. The protocol used between clients and servers
on the World Wide Web for transmission of HTML documents.
Hub
A common connection point for devices in a network. Hubs are commonly used to
connect segments of a LAN.
IANA
Internet Assigned Numbers Authority. The organization responsible for assigning
new Internet-wide IP addresses.
ICMP
Internet Control Message Protocol. An extension to the Internet Protocol (IP). ICMP
supports packets containing error, control, and informational messages.
IEEE
Institute of Electrical and Electronics Engineers. Among other things, the IEEE
develops standards for the computer and electronics industry. In particular, the
IEEE 802 LAN standards are widely followed.
IEEE 802.3
IEEE standard for Ethernet LANs.
IEEE 802.5
IEEE standard for Token Ring LANs.
IMAP
Internet Message Access Protocol. A protocol for retrieving E-mail messages. IMAP
uses SMTP for communication between the E-mail client and server.
In-Band
Transmission of auxiliary information, such as management messages, using the
same frequencies or channels normally used for information transfer.
Internet Protocol
Refer to IP on page 247 and TCP/IP on page 254.
246
Avaya C460 Reference Guide
Glossary
Internet
A collection of networks and gateways that use the TCP/IP suite of protocols. An
internet is two or more networks connected by an internal or external router. The
word “internet” is a generic term. “The Internet” is the world’s largest internet.
Interswitch Link (ISL)
Interswitch Link. An Avaya proprietary mechanism to tag packets with VLAN and
priority information across the backbone. This allows two Avaya devices to act as a
single logical entity.
IP
The protocol that governs packet forwarding within the TCP/IP standards
developed and used on the Internet. Refer to TCP/IP on page 254.
IP Address
A 32-bit address assigned to hosts using TCP/IP. An IP address is written as 4 octets
separated by periods (dotted decimal format). Each address consists of a network
number, an optional subnetwork number, and a host number. The network and
subnetwork numbers together are used for routing, while the host number is used
to address an individual host within the network or subnetwork. A subnet mask is
used to extract network and subnetwork information from the IP address.
IPX
Internetwork Packet Exchange. A network layer protocol used for transferring data
from servers to workstations. IPX is primarily used in Novell NetWare operating
systems.
ISL
Interswitch Link. An Avaya proprietary mechanism to tag packets with VLAN and
priority information across the backbone. This allows two Avaya devices to act as a
single logical entity.
ISO
International Standards Organization. A voluntary organization founded in 1946,
responsible for creating international standards in many areas, including computers
and communications.
Jabber
An error condition in which a network device continually transmits random,
meaningless data onto the network. In IEEE 802.3, Jabber refers to a data packet, the
length of which exceeds the maximum length prescribed in the standard.
Avaya C460 Reference Guide
247
Glossary
LAG
Link Aggregation Groups (LAGs) provide a method of creating a high-bandwidth
link. A LAG consists of a group of ports acting as a single logical port. All ports
participating must have the same configuration.
LAN
Local Area Network. A high-speed, low-error data network that spans a limited
area. LANs connect workstations, peripherals, terminals, and other devices in a
single building or other geographically limited area.
Link-State Protocols
A series of routing protocols, such as OSPF, which permit routers to exchange
information about the accessibility of other networks and the cost or metric to reach
the other networks.
LSA
Link-State Advertisement. A broadcast packet, used by Link-State Protocols, that
contains information about neighbors and path costs. LSAs are used by receiving
routers to maintain their routing tables.
MAC Address
Media Access Control Address. The MAC Address is a hardware address that
uniquely identifies each node of a network.
MAC Layer
In IEEE 802 networks, the MAC layer is a sublayer of the Data Link Control (DLC)
layer. The MAC layer interfaces directly with the network media. Each different
type of network media therefore requires a different MAC layer.
MAC List
A list of MAC Addresses of devices that are allowed to access the network through
the selected port. Each port can have a MAC List. If the port's security option is
enabled, no device can access the port unless the device's address is on the port's
MAC List.
MAN
Metropolitan Area Network. A data communications network designed for a town
or city. Usually characterized by high-speed connections using fiber optical cable or
other digital media.
MIB
Management Information Base. A database of network management information
that can be monitored by a Network Management System. Both SNMP and RMON
248
Avaya C460 Reference Guide
Glossary
use standardized MIB formats that enable any SNMP and RMON tool to monitor
any device defined by a MIB.
Module
A self-contained communications unit that may be used in combination with other
units. Examples include individual Avaya P330 units and cards that slot into the
Avaya P580/P882 Device.
Multicasting
A method of information transmission in which copies of the packet are delivered to
multiple ports, but only a subset of all possible destinations.
NAS
Network Access Server. A network device that allows access to a network (e.g., the
Avaya C460).
Netmask
A portion of an IP address that identifies the bits that denote the network number.
Network
A collection of computers, printers, routers, switches, and other devices that can
communicate with each other over some transmission medium. A network can
consist all or in part of subnetworks.
Network Agent
A special control module that interfaces between the network manager and the
managed devices, using the MIB as a management terms dictionary. Network
Agents relay device events and execute instructions via embedded software.
Network Mask
A portion of an IP address that identifies the bits that denote the network number.
NMS
Network Management Station. A station that is responsible for managing all or part
of a network. An NMS communicates with Network Agents to help keep track of
network statistics and resources.
Node
A point of interconnection to a network or a junction of two or more lines in a
network. A node can be a computer or some other device, such as a printer. Every
node has a unique network address.
NSAP
Network Service Access Point. An ISO-specified network address.
Avaya C460 Reference Guide
249
Glossary
OID
Object Identifier. Used in SNMP to identify managed objects. In the SNMP
Manager/Agent Network Management Paradigm, each managed object must be
identified by a unique OID.
OSI
Open Systems Interconnection reference model. A model for network
communications consisting of seven layers that describe what happens when
computers communicate with one another.
OSPF
Open Shortest Path First. A routing protocol featuring least-cost routing, multipath
routing, and load balancing.
Out-of-Band
Transmission of auxiliary information, such as management messages, using
frequencies or channels outside the frequencies or channels normally used for
information transfer. Out-of-band signaling is often used for error reporting in
situations in which in-band signaling can be affected by whatever problems the
network might be experiencing.
Packet
Logical grouping of information that includes a header containing control
information and usually user data. Packets are most often used to refer to
application layer data units.
PING
Packet Internet Groper. Determines whether a specific IP address is accessible by
sending a packet to the specified address and waiting for a reply.
Plus Tagging
A proprietary Avaya tagging mechanism that enables extended VLAN capabilities.
POP
Post Office Protocol. Used to retrieve E-mail from a mail server. Most E-mail
applications use the POP protocol, although some can use the newer IMAP (Internet
Message Access Protocol). POP3, unlike earlier versions, can be used with or
without SMTP.
Port
A physical port is a connecting component that allows a microprocessor to
communicate with a compatible peripheral. A port is identified by a port number.
250
Avaya C460 Reference Guide
Glossary
Protocol
A set of rules and conventions that governs how devices exchange data, especially
across a network. Low level protocols define the electrical and physical standards to
be observed, bit- and byte-ordering, the transmission, error detection, and
correction of the bit stream. High level protocols deal with data formatting,
including message syntax, terminal to computer dialogue, character sets, message
sequencing, etc.
Protocol Stack
A layered set of protocols which work together to provide a set of network
functions. Each intermediate layer uses the layer below it to provide a service to the
layer above.
PSTN
Public Switched Telephone Network. The collection of interconnected systems
operated by the various telephone companies and administrations around the
world.
PVC
Permanent Virtual Circuit. A permanent, virtual connection established by the
network management between an origin and a destination.
QoS
Quality of Service. A measure of performance for a transmission system that reflects
the system’s transmission quality and service availability.
Query
The process of extracting information from a database and presenting it for use.
RADIUS
Remote Authentication Dial-In User Service (RFC 2138). A protocol for carrying
authentication, authorization, and configuration information between a Network
Access Server and a shared Authentication Server.
Redundancy
A duplication of devices, services, or connections so that in the event of a failure, the
redundant device, service, or connection can take over for the one that failed.
Repeater
A device that automatically amplifies, restores, or reshapes signals distorted by
transmission loss.
Avaya C460 Reference Guide
251
Glossary
RIP
Routing Information Protocol. Specifies how routers exchange routing table
information. RIP is gradually being replaced by a newer protocol called OSPF
(Open Shortest Path First).
RMON
Remote Monitoring. A network management standard that allows network
information to be gathered at a single workstation. In contrast to the Standard MIB
which gathers network data from a single type of Management Information Base
(MIB), RMON defines nine additional MIBs that provide a much richer set of data
about network usage. For RMON to work, network devices, such as hubs and
switches, must be designed to support it.
For more information refer to .
Router
A software and hardware connection between two or more networks, usually of
similar design, that permits traffic to be routed from one network to another on the
basis of the intended destinations of that traffic. A router located in a server is called
an internal router; a router located in a workstation is called an external router.
Routing Table
A table stored in a router or other internetworking device that keeps track of routes
to particular network destinations and, in some cases, metrics associated with those
routes.
SAP
Service Advertising Protocol. A protocol used to identify the services and addresses
of servers attached to the network. The responses are used to update a table in the
router known as the Server Information Table. SAP is primarily used in Novell
NetWare operating systems in conjunction with IPX.
Segmentation
Segmentation is a common solution to LAN bandwidth limitations. The LAN is
divided into separate LAN segments using bridges and routers. If segmented
correctly, most network traffic will remain within a single segment, enjoying the full
10 Mbps bandwidth. Hubs and switches are used to connect each segment to the
rest of the LAN.
Side-Band
Transmission of auxiliary information, such as management messages, by means of
a direct connection that bypasses the frequencies and channels normally used for
information transfer. Unlike out-of-band transmission, side-band transmission does
not require a modem.
252
Avaya C460 Reference Guide
Glossary
SLIP
Serial Line Internet Protocol. SLIP is the standard protocol for point-to-point serial
connections, using a variation of TCP/IP.
SMON
Switch Monitoring, Avaya’s proprietary switch monitoring technology. SMON
extends the RMON standard to provide additional tools and features for monitoring
in the switch environment. SMON enables a global view of traffic for all switches on
the network, an overall view of traffic passing through a specific switch, detailed
data of the hosts transmitting packets or cells through a switch, an analysis of traffic
passing through each port connected to a switch, and a view of traffic between
various hosts connected to a switch.
SMTP
Simple Mail Transfer Protocol. Used to send E-mail messages between servers. Also
used to send messages from a mail client to a mail server.
SNAP
SubNetwork Access Protocol. Internet protocol that operates between a network
entity in the subnetwork and a network entity in the end system. SNAP specifies a
standard method of encapsulating IP datagrams and ARP messages on IEEE
networks.
SNMP
Simple Network Management Protocol. Protocol for communications between
remote network management stations (like a management umbrella console) and
managed network elements (such as Avaya Inc.’s devices). The management
umbrella uses SNMP for network management and can manage all SNMP devices.
Socket
An addressable entity within a node connected to an AppleTalk network. Sockets
are owned by software processes known as socket clients. An AppleTalk socket is
similar in concept to a TCP/IP port.
Spanning Tree Protocol
Refer to STA on page 253.
STA
Spanning Tree Algorithm. The algorithm used by the Spanning Tree Protocol to
create a spanning tree. The Spanning Tree Protocol (STP) is a bridge protocol that
uses the STA to enable a learning bridge to dynamically work around loops in a
network topology by creating a spanning tree. Bridges exchange BPDU messages
with other bridges to detect loops, and then remove the loops by shutting down
Avaya C460 Reference Guide
253
Glossary
selected bridge interfaces.
Stack
A layered set of protocols which work together to provide a set of network
functions. Each intermediate layer uses the layer below it to provide a service to the
layer above.
Standalone Mode
An option to separate a module from the other modules in a device so that its bus is
independent. This may be desirable, for example, if one module has exceptionally
heavy traffic that might affect other modules.
Subnet
Short for subnetwork. A subnet is a portion of a network that shares a common
address component. On TCP/IP networks, a subnet includes all devices whose IP
addresses have the same prefix. For example, all devices with IP addresses that start
with 133.100.100 are part of the same subnet.
Subnet Mask
A 32-bit address mask used in IP to indicate the bits of an IP address that are being
used for the subnet address.
Switch
A device that filters and forwards packets between LAN segments. Switches
operate at the Data Link Layer of the OSI reference model and support any packet
protocol.
Switch Monitoring
Refer to SMON on page 253.
TCP/IP
Transmission Control Protocol/Internet Protocol. Common name for the suite of
protocols used to connect hosts on the Internet. TCP/IP uses several protocols, of
which TCP and IP are the main ones.
Telnet
A terminal emulation protocol for TCP/IP networks. Telnet is used for remote
terminal connection, enabling users to log in to remote systems and use these
resources as if they were connected to a local system.
TFTP
Trivial File Transfer Protocol. A simple form of File Transfer Protocol, using User
Datagram Protocol (UDP) and providing no security features. TFTP is often used by
servers to boot diskless workstations, X-terminals, and routers.
254
Avaya C460 Reference Guide
Glossary
Transceiver
A device that both transmits and receives analog or digital signals. Usually used to
describe the LAN component that applies signals onto the network wire and detects
signals passing through the wire.
Trap
Message sent by an SNMP agent to an NMS, console, or terminal to indicate the
occurrence of a significant event, such as a specifically defined condition or a
threshold that was reached. Similar to an alarm.
Tree View
A resizeable window containing a hierarchical representation of the modules and
ports of the device.
UDP
User Datagram Protocol. Connectionless transport layer protocol in the TCP/IP
protocol stack. UDP is a simple protocol that exchanges datagrams without
acknowledgments or guaranteed delivery, requiring that error processing and
retransmission be handled by other protocols.
Unicast
A single packet sent to a single network destination.
Virtual Connection
A connection established between end-users (source and destination), where
packets are forwarded along the same path and bandwidth is not permanently
allocated until it is used.
Virtual Path
A group of virtual channels that can support multiple virtual circuits.
VSA
Vendor-Specific Attribute. RADIUS supports attributes of which one, the VSA,
supports vendor-specific attributes. This allows vendors to create custom RADIUS
attributes.
Avaya C460 Reference Guide
255
Glossary
256
Avaya C460 Reference Guide