1
DCS
DIGITAL COMMUNICATION SYSTEM
SYSTEM
ADMINISTRATION
AND
SPECIAL FEATURES
GUIDE
Page 1
Page 2
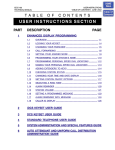
ABOUT THIS DOCUMENT
This book contains instructions for special features that every telephone user may not need to know.
The owner can decide who the System Administrator will be and who will have access to these
features. Station users can be trained on only the items that apply to them. This procedure will help
ensure your system and communications are managed effectively.
Several of the features listed in this book are specific to the system operator or attendant position. You
can have more than one operator or set your system up to be used without an operator.
The designated System Administrator can access specific programs and modify some functions to tailor
the DCS200, DCS 70, DCS 24 and DCS Compact telephone system to suit your needs. Instructions are
detailed and easy to follow. Where a feature is specific to one of the systems above it will be clearly
identified otherwise all features are applicable to all DCS systems.
When assistance is needed, contact your Samsung Communications Specialist.
Page 1
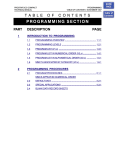
1. SPECIAL FEATURES
NOTE: Please note that features marked with an * may not be available on all models and software versions.
Please check with your Samsung DCS supplier.
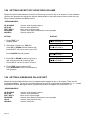
1.1
NIGHT SERVICE OPERATION
(AUTOMATIC OR MANUAL)
Your system is designed to have an alternate mode of operation generally designated as Night Service.
Night Service permits incoming calls to answered differently to normal day operation. Night Service is
available on an individual tenant basis and may be set manually or automatically. While in NIGHT
mode, stations will be limited to their individual night class of service dialling restrictions. You can put
the system in or out of Night Service at any time. For automatic Night Service, each tenant has an ontime and an off-time for each day. If no automatic timer is set, Night Service must be turned on and off
manually.
1.2
AUTOMATIC NIGHT SERVICE
Automatic Night Service is turned on or off according to the programmed on and off times. These
programmed times use the system clock as a reference, so the system clock must be set correctly.
Pressing the manual NIGHT key will override the automatic mode until the next programmed time in all
software versions prior to July 1998 (Version 5.0). In Version 5.0 software manual setting will have
priority over automatic night mode ie. the system once manually set will stay in night mode until
changed manually.
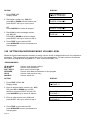
1.3
MANUAL NIGHT SERVICE
Press the NIGHT button on any keyset associated with the tenant group that wants to enter Night
service. Enter the Night service passcode and press 1 to enter Night Service. The NIGHT key on all
keysets in that tenant group will light red to indicate that Night Service has been set for that tenant.
To enter day service, press the NIGHT button, enter the night service passcode followed by the digit 0
to exit night service and enter day service.
1.4
HOLIDAY MODE *
This feature allows up to 120 holiday dates to be programmed into the system, so that when automatic
night service is selected the system will remain in night service for the programmed holiday. When
using the optional Automated Attendant or Digital Voice Mail system your callers will receive the night
greeting. This feature is programmable in later software releases.
1.5
CALLING THE SYSTEM OPERATOR
Any station that dials 9 will ring its assigned operator. (If tenant service is used, each tenant may have a
different operator or operator group.) Calls to the system or tenant operator are easily identified
because the CALL key will have a rapidly flashing red light. Station users will never receive a busy
signal when they dial 9 or the operator group number. The calls will continue ringing in queue until
answered.
Page 1
1.6
OPERATOR RECALLS *
Transferred calls that go unanswered will recall to the station that originated the transfer. Should the
station that originated the transfer not answer the recall, the call will be sent to the system or tenant
group operator as a transfer recall.
A call left on hold will recall the station that put it on hold. If the hold recall is unanswered at the station
that originated the hold, the call will be sent to the system or tenant group operator.
Both types of recalls will ring and have a slow flashing amber or red light on the LINE key or CALL key.
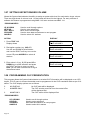
1.7
EXECUTIVE BARGE-IN
If you want to break into another station's conversation, you must be allowed to barge-in and the other
station must not be secure.
• Dial the desired extension number and listen for the busy signal.
• Press the BARGE-IN button and begin speaking after the tone.
• Hang up when you are finished.
The system must be programmed for this feature. Consult your Samsung Communication Specialist.
1.8
WALKING CLASS OF SERVICE
You can change a restricted station's class of service to the same class as your station is in, allowing
you to make calls or use features that would otherwise be restricted from that station.
• Lift the handset or press the SPEAKER key.
• Dial 59 and then your extension number.
• Dial your station passcode and receive internal dial tone.
• Dial an access code and then the telephone number - OR - use the desired feature as usual.
• Hang up. The station will be returned to its restricted status
NOTE: The default station passcode 1234 cannot be used to activate this feature.
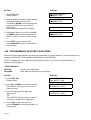
1.9
IN/OUT OF GROUP
Any station assigned to a station group can remove itself from that group and then re-enter the group at
a later time. When out of the group, a station can receive calls to its extension number but not to the
group. There are 30 groups and the access codes are 500 - 529.
To create a backup or relief operator position, assign the main operator and one or more backup
individuals to the operator group. All but the main operator should be out of the group. When it is
necessary to use a backup operator, put the desired backup station in the group and remove the main
operator. When incoming call traffic is heavy, you can have another station put itself in the operator
group along with the main operator to handle the extra call load.
If the station does not have an IN/OUT key:
• Lift the handset and dial 53.
• Dial the group number.
• Dial 0 to be out of the group - OR- dial 1 to be in the group.
• Receive confirmation tone and hang up.
If the station has an IN/OUT key assigned to it:
• Press the IN/OUT key. It will light red when the station is in the group.
• Press the IN/OUT key again. The light is off when the station is out of the group.
NOTE: A station can be in more than one group.
Page 2
1.10 DIRECT INWARD SYSTEM ACCESS (DISA)
DISA allows the use of an incoming line to gain access to system resources for the purpose of dialling
an intercom, accessing a outside line, internal paging or changing external forward setting.
From outside of the office, selected individuals can call into the DCS system on special DISA line(s). A
security code must be entered to gain access. Once these individuals are in the system, they can:
• Make outside calls using the office lines
• Call stations within the system
OR
• Access paging resources
• Set/reset their external forward database.
Individuals who use DISA must have their stations assigned for DISA access and they must
change their station passcodes. The default passcode 1234 cannot be used. To use DISA:
• Call in on the DISA line from any phone with tone dialling.
• When you hear the DISA dial tone, dial your security code (the extension number plus your station
passcode).
• If you are allowed access, you will receive system dial tone.
• Dial any line access code, receive outside dial tone and then dial a telephone number
- OR - dial any extension number to call a station in the system.
• To make a second intercom call press ¦R, receive dial tone and dial another extension number.
• Press # and hang up when finished.
NOTE: Outgoing DISA calls are controlled by the dialling class of the station identified by
the
security code. The DISA line must have disconnect supervision from the central office. Insist that this
condition be verified by your service company.
1.11 DISA SECURITY
A common practice among hackers is to repeatedly dial a known DISA access number (usually with a
computer) and try a different passcode each time. The hacker hopes to eventually chance upon the
correct passcode and thus gain access to your system. The SAMSUNG DCS' security
feature will count the number of sequential incorrect passcode attempts, and if a certain number is
reached, DISA will be disabled and the system will alert designated stations. The number of incorrect
passcodes and the disable duration are both programmable. In addition, the DCS system will print an
SMDR record (a customer-provided printer and a SIM are required) each time an incorrect passcode is
entered.
To clear the DISA alarm, follow the following procedure:
• Lift the handset and dial the access code 58.
• Enter the DISA alarm passcode (see your Samsung Communication Specialist for this number).
• Replace the handset.
Warning
As it is impossible to prevent unauthorised access to your telephone system by hackers, we
suggest that you do not turn the DISA feature on unless you intend to use it. If you do use this
feature, it is good practice to frequently change access passcodes and periodically review your
telephone records for unauthorised use.
Page 3
1.12 FORCED ACCOUNT CODES
Account codes are used to provide accountability for the calls that are made. These account codes can
be either forced or optional; if forced, they are always verified from a system list of up to 500 entries.
1.12.1 USING FORCED ACCOUNT CODES
• Lift the handset and press the ACCT CODE key or dial 47.
• Enter the account code.
• Press the account code button again, then press TRSF (or hookflash on an standard telephone).
If a correct code is entered, you will hear DCS dial tone and you can make an outside call in the usual
manner. If an incorrect code is entered, the station returns error tone.
For information on entering and changing forced account codes, see the System Administrator
programming section of this book.
1.13
AUTHORISATION CODES
Authorisation codes are used to validate a station user and give permission to make a call. These four
digit authorisation codes can be either forced or optional; if used, they are always verified from a
system list of up to 250 entries.
Each authorisation code has an associated class of service. When the code is entered, the class of
service is changed to the dialling class of the authorisation code.
1.13.1 USING AUTHORISATION CODES
After going off-hook, you must dial * followed by a four digit authorisation code. If you enter a correct
code, you will hear a confirmation tone and then receive DCS dial tone and you can make an outside
call in the usual manner. The station then follows the dialling class for that authorisation code. If you
enter an incorrect code, the station returns error tone. This code may or may not print on SMDR reports
depending on SMDR programming.
1.14 USING THE TIELINE
OUTGOING
Your office can be connected to another system with a tieline. Use this line to make calls to
stations in the other system. If programming allows, you can access lines in the other system to make
outside calls. Tieline calls can be put on hold, transferred and conferenced in the same manner as
other outside calls.
• Lift the handset or press the SPEAKER key.
• Dial the tie line access code or press the tie line key.
• When you receive dial tone from the other system, you can dial extension numbers or access
outside lines. You must know the extension numbers and the line access codes for the other system.
• Finish the call by replacing the handset or pressing ANS/RLS key.
•
NOTE: Outgoing calls are controlled by the station's dialling class.
Page 4
INCOMING
Station users in the other system can access the tieline and make intercom calls to stations in your
system.
Answer tieline calls ringing at your station as you would any other outside call. They can be put on hold,
transferred and conferenced in the same manner as other outside calls.
IN AND OUT ON TIELINE
Users accessing the tieline from the other system can get a line in your system and make outgoing
calls. These calls can be controlled by assigning a dialling class to the tieline. For further information,
see your Samsung Communication Consultant.
1.15 ALARM SENSOR OPERATION
Your system may be equipped with an alarm sensor. When this sensor is activated, the designated
stations will ring and will display a related message.
To clear the alarm:
• Lift the handset and dial 57.
• Enter the alarm clear passcode (must be obtained from your service company).
• Replace the handset.
Page 5
2. CLIP (Calling Line Identification
Presentation) SPECIAL FEATURES
2.1
INTRODUCTION
The Call Line identification Presentation (CLIP) feature requires that ISDN is connected to the system
or the network provider to supply the information via the analog network (PSTN). In both cases the
system requires the appropriate hardware and or software so please speak to your Samsung
Communication Specialist to ensure your system can support this feature. The DCS Compact can
support ISDN CLIP only.
2.2
INVESTIGATE
Investigate allows selected stations with a special class of service to investigate any call in progress. If
CLIP information is available for an incoming call, you will know to whom this station user is speaking.
For outgoing calls, you can see the number that was dialled. After investigating, you may barge-in on
the conversation, disconnect the call or hang up your phone to end the investigation.
• At your keyset, press the INVESTIGATE key.
• Enter your station passcode. (Default passcodes cannot be used).
• You can now press BARGE to barge-in on the conversation.
OR
You can press NND to view more information about the call.
OR
You can press DROP to disconnect the call.
NOTE:
1. If the call is an outgoing call, the NND key will not appear.
2.3
ABANDON CALL LIST (50)
The system has a system-wide abandoned calls list that stores CLIP information for the last 50 calls
that rang but were not answered and were accompanied with valid CLIP information. The abandoned
calls list is accessed using the System Administrator's passcode. When reviewing this list, you are
provided options to CLEAR the entry or DIAL the number. You can use the NND key to toggle between
the CLIP name, CLIP number and the date and time the call came in. To view the list of abandoned
incoming calls for which CLIP information has been received:
• Dial 64 and dial the System Administrator passcode.
• Scroll through the entries using the VOL keys.
2.4
NUMBER TO NAME TRANSLATION (250)
The system provides a translation table of 250 entries (200 entries for the DCS 70 and DCS 24) for
displaying names on your LCD instead of numbers. When the CLIP number is received, the table is
searched and when a match is found, the system displays the corresponding name from the table.
Page 1
3. SYSTEM ADMINISTRATOR PROGRAMMING
3.1
CUSTOMER-LEVEL ACCESS
Before any customer programs can be accessed, you must first open system programming using the
passcode you have been assigned. This must be done using an LCD 24B keyset. Should it become
necessary to change this passcode, see your Service company.
• While your handset is on-hook, press TRSF and then dial 200.
The display shows [ENABLE CUS. PROG. PASSCODE].
• Dial the four digit passcode.
The display shows [ENABLE CUS. PROG. - DISABLE].
• Dial 1 to enable.
The display shows [ENABLE CUS. PROG - ENABLE].
• Press TRSF. The keyset returns to its idle condition.
• Now press TRSF and the three digit program code you want to access. Follow the
instructions for that program.
NOTE: You must begin programming within 30 seconds. Once you are in programming, any
delay of more than 30 seconds between key strokes will cause the system to
automatically close programming.
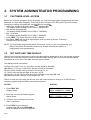
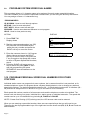
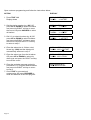
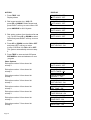
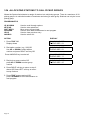
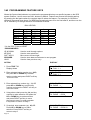
3.2
SET DATE AND TIME DISPLAY
Should it ever become necessary to correct the date and time displayed on all of the keysets, do so as
soon as you notice that they are incorrect. Automatic Night Service will not work correctly and SMDR
records will be of no value if the date and time are not correct.
The display format is as follows:
W (Day of the week, 0-6): eg., enter 0 for Sunday and 6 for Saturday.
MM (Month, 01-12): eg., enter 01 for January and 12 for December.
DD (Day of the month): enter a number in the range 01 - 31.
YY (Year): enter the last two digits of the year, eg. 95.
HH (Hours): use the 24-hour clock and enter a number in the range 00 - 24.
MM (Minutes): enter a number in the range of 00 - 59.
Failure to enter the time using the 24-hour clock will cause the date to change at 12:00 PM Open
customer programming and follow the instructions below.
ACTION
DISPLAY
1 Press TRSF 505
Display shows
OLD : 6010184 : 0047
NEW : WNNDDYY : HHMM
2. Enter the new time and date using the
above format
OLD : 6010184 : 0047
NEW : 3020994 : 1445
3. Verify the time and date and re-enter
them if necessary
4. Press TRSF to store and exit
programming OR press SPEAKER to
store and advance to the next program
Page 1
If you have entered invalid data, you will receive an [INVALID ENTRY] message for three
seconds. Re-enter the correct date and time. If the information you entered is incorrect, repeat the
procedure.
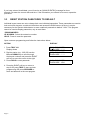
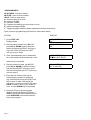
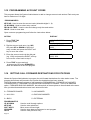
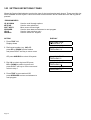
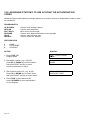
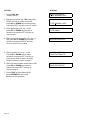
3.3
RESET STATION PASSCODES TO DEFAULT
Individual keyset users can set or change their own individual passcodes. These passcodes are used to
lock and unlock keysets, override toll restriction and access the DISA feature. At times, it may be
necessary for the System Administrator to reset a station's passcode to default "1234." This program
cannot be used to display passcodes, only to reset them.
PROGRAM KEYS
UP & DOWN - Select the extension number.
HOLD - Press to reset the passcode.
Open customer programming and follow the instructions below.
ACTION
DISPLAY
1 Press TRSF 101
Display shows
[201] PASSCODE
PASSCODE : * * * *
2. Dial the station (eg. : 205) OR use the
UP and DOWN keys to scroll through
the keyset numbers and press the RIGHT
soft key to move the cursor to the right
3. Press HOLD to reset passcode
[205] PASSCODE
PASSCODE : * * * *
4. Press the RIGHT soft key to return to
step 2 OR press TRSF to store and exit
programming OR press SPEAKER to
store and advance to the next program
Page 2
[205] PASSCODE
PASSCODE : 1234
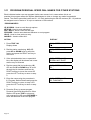
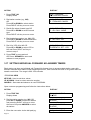
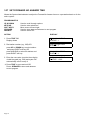
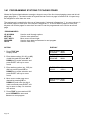
3.4
PROGRAM STATION ANSWER MODE
Allows a System Administrator to change the answer mode of any keyset or add-on module. Each
keyset or add-on module can have its answer mode set to one of the following options:
0. RING: The keyset will ring in one of eight custom ring patterns. Calls are answered by pressing the
ANS/RLS key or by lifting the handset.
1. AUTO: After giving a short attention tone, the keyset will automatically answer calls on the speaker
phone. When a CO line is transferred to a keyset in Auto Answer, the screened portion of the call will be
Auto Answer, but the keyset or add-on module (AOM) will ring when the transfer is made if the user has
not pressed the ANS/RLS key or lifted the handset.
2. VOICE: ANNOUNCE after a short attention tone, callers can make an announcement but the
ANS/RLS key or handset must be used to answer calls.
PROGRAM KEYS
UP & DOWN
KEYPAD
SOFT KEYS
SPEAKER
HOLD
ANS/RLS
Used to scroll through options
Used to enter selections
Move cursor left and right
Used to store data and advance to next program
Used to clear previous entry
Used to select ALL
ACTION
DISPLAY
1. Press TRSF 103
Display shows
[201] ANS MODE
RING MODE
2. Dial keyset number (eg., 205) OR
Press UP or DOWN to select keyset OR
[205] ANS MODE
RING MODE
Press ANS/RLS to select all Stations
Press RIGHT soft key to move cursor
[ALL] ANS MODE
?
3. Dial 0, 1 or 2 to change ring mode OR
press UP or DOWN to select ring mode
and press RIGHT soft key to return to
step 2above
4. Press TRSF to store and exit OR
press SPEAKER to store and advance
to next program
Page 3
[205] ANS MODE
VOICE ANNOUNCE
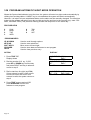
3.5
PROGRAM STATION NAMES
This program is used to add or replace a 11-character name or identification for each extension. You
may assign a name 11 characters long.
PROGRAM KEYS
UP & DOWN - Used to scroll and move cursor.
KEYPAD - Used to enter characters.
HOLD - Press to clear entry. Open customer programming and follow the instructions below.
ACTION
DISPLAY
1 Press TRSF 104
Display shows
[201] STN NAME
2. Dial the station (eg. : 205) OR use the
UP and DOWN keys to scroll through
the keyset numbers and press the RIGHT
soft key to move the cursor
[205] STN NAME
_
3. Enter the station name using the
procedure described on the next page
and press the RIGHT soft key to return
to step 2
[205] STN NAME
SAM SMITH
4. Press TRSF to store and exit
programming OR press SPEAKER to
store and advance to the next program
NOTE: Directory information cannot exceed 11 characters.
Names are written using the keypad. Each press of a key selects a character. Pressing the dial pad key
moves the cursor to the next position. For example: if the directory name is "SAM SMITH," press the
number "7" three times to get the letter "S." Now press the number "2" once to get the letter "A."
Continue selecting characters from the table below to complete your message. Pressing the "A" key
changes the letter from upper case to lower case.
NOTE: When the character you want appears on the same dial pad key as the previous character, press
the VOL UP key to move the cursor to the right.
COUNT
DIAL 0
DIAL 1
DIAL 2
DIAL 3
DIAL 4
DIAL 5
DIAL 6
DIAL 7
DIAL 8
DIAL 9
DIAL *
1
(
space
A
D
G
J
M
P
T
W
:
2
)
?
B
E
H
K
N
Q
U
X
=
3
.
,
C
F
I
L
O
R
V
Y
[
4
&
!
@
#
$
%
^
S
*
Z
]
5
0
1
2
3
4
5
6
7
8
9
*
The # key can be used for the following special characters: #, space, &, !, :, ?, ., %, $, -, /, =, [, ], @, ^, (,
), _, +, {, }, |, ;, \, " and ~.
Page 4
3.6
PROGRAM OUTSIDE LINE NAMES
This program is used to add or replace a 11-character name or identification for each outside line. You
may assign a name 11 characters long.
PROGRAM KEYS
UP & DOWN - Used to scroll and move cursor.
KEYPAD - Used to enter characters.
HOLD - Press to clear entry.
Open customer programming and follow the instructions below.
ACTION
DISPLAY
1 Press TRSF 404
Display shows
[701] TRUNK NAME
2. Dial the station (eg. : 704) OR use the
UP and DOWN keys to select a
trunk and press the RIGHT
soft key to move the cursor
[704] TRUNK NAME
_
3. Enter the station name using the
procedure described above
and press the RIGHT soft key to return
to step 2
[704] TRUNK NAME
SAMSUNG
4. Press TRSF to store and exit
programming OR press SPEAKER to
store and advance to the next program
Page 5
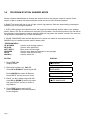
3.7
PROGRAM STATION GROUP NAMES
This program is used to assign a 11-character name or identification for each station group (501519/529). You may assign a name 11 characters long.
PROGRAM KEYS
UP & DOWN - Used to scroll and move cursor.
KEYPAD - Used to enter characters.
HOLD - Press to clear entry.
Open customer programming and follow the instructions below.
ACTION
DISPLAY
1. Press TRSF 602
Display shows
[501] SGR NAME
2. Dial the group number (eg. 505 ) OR
press the UP or DOWN key to make a
selection and press the LEFT or RIGHT
soft key to move the cursor
[505] SGR NAME
_
3. Enter in the name using the method
in 3.5 Program Station Names
[505] SGR NAME
SAMSUNG
4. Press the LEFT or RIGHT soft keys to
return to step 2 OR press TRSF to store
and exit programming OR press
SPEAKER to store and advance to the
next program
Page 6
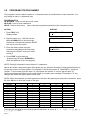
3.8
PROGRAM SYSTEM SPEED DIAL NUMBERS
The system list starts with 200 numbers (DCS Compact, DCS 24 & DCS 70) and 500 numbers (DCS)
and can be increased in blocks of 10. The maximum amount is 500 numbers if no more than 1000
station speed dial numbers are assigned on the DCS and no station speed dial numbers are assigned on
the DCS Compact. Speak to your Samsung Communications Specialist to increase or decrease the
system list.
Speed dial codes are 500 - 699 or 500 - 999. Each speed dial number consists of a line access code and
the telephone number to be dialled. The access code can be any line group, individual line, station group
or individual extension. The speed dial number can be up to 18 characters long including #, FLASH and
PAUSE.
NOTE: If Least Cost Routing (LCR) is being used, the LCR access code must be entered.
When you are entering a speed dial number, there are some special keys that you will need to use.
These are the last 6 programmable keys of the right hand row are known as A, B, C, D, E and F and are
defined below.
PROGRAM KEYS
UP & DOWN - Select the speed dial bin.
KEYPAD - Used to enter number.
HOLD - Press to clear entry.
ANS/RLS - Save data and advance to next program.
A - Does not have a function.
B - Inserts a FLASH.
C - Inserts a PAUSE.
D - Changes the dialling type from pulse to tone.
E - Hides and displays digits.
F - Toggles program between Station speed dial numbers and names
Open customer programming and follow the instructions below.
ACTION
DISPLAY
1. Press TRSF 705
Display shows
SYS SPEED DIAL
500 :
2. Dial the speed dial bin desired (eg. 505)
OR press UP or DOWN to make a
selection and press the RIGHT soft key
to move the cursor
SYS SPEED DIAL
505 :_
3. Enter the access code (eg. 0 - the
system automatically inserts a dash)
followed by the phone number (up to 18
digits long) and press the RIGHT soft to
return to step 2
SYS SPEED DIAL
505 :0-121223456789
4. Press the F key to toggle to program
System Speed Dial Names, step 3, to
enter the name
SYS SPEED NAME
500 :_
5. Press TRSF to store and exit
programming OR press SPEAKER to
store and advance to the next program
Page 7
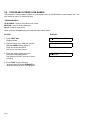
3.9
PROGRAM SYSTEM SPEED DIAL NAMES
This procedure allows a 11-character name to be assigned for each system speed dial location.
The name enables you to locate the speed dial number when you are using the directory dial feature.
You may assign a name a 11 characters long.
PROGRAM KEYS
UP & DOWN - Used to scroll through options.
KEYPAD - Used to enter selections.
SOFT KEYS - Move cursor left and right.
SPEAKER - Used to store data and advance to next program.
HOLD - Used to clear previous entry.
ACTION
DISPLAY
1. Press TRSF 706
Display shows
SYS SPEED NAME
500 :
2. Dial the system speed number (eg. 505)
OR press the UP and DOWN keys to
select the entry number and press the
RIGHT soft key to move the cursor
SYS SPEED NAME
505 :_
3. Enter the name as shown in 3.4 Program
Station Names and press the RIGHT
soft key to return to step 2 OR press the
F key to toggle to the speed dial number
to return to System Speed Dial Numbers,
step 4
4. Press the RIGHT soft key to return to
step 2 above OR press TRSF to store
and exit programming OR press
SPEAKER to store and advance to the
next program
SYS SPEED DIAL
505 : 0- 121223456789
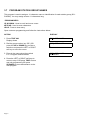
3.10 PROGRAM PERSONAL SPEED DIAL NUMBERS FOR OTHER
STATIONS
Individual station users can program their own numbers, but in cases where this is not practical, or for
standard telephone users, this program allows a System Administrator to view or change any station's
speed dial numbers. The station speed dial codes are 00 - 19. Each station begins with 10 numbers (00 09) and can be assigned more in blocks of 10 (up to a maximum of 50 numbers).
Each speed dial number consists of a line access code and the telephone number to be dialled. The
access code can be any line group, individual line, station group or individual extension. The speed dial
number can be up to 18 characters long including #, FLASH and PAUSE.
NOTE: If Least Cost Routing (LCR) is being used, the LCR access code must be entered.
When you are entering a speed dial number, there are some special keys that you will need to use.
These are the last 6 programmable keys of the right hand row are known as A, B, C, D, E and F and are
defined below.
Page 8
PROGRAM KEYS
UP & DOWN - Selects a station.
KEYPAD - Used to enter number.
HOLD - Press to clear entry.
A - Does not have a function.
B - Inserts a FLASH.
C - Inserts a PAUSE.
D - Changes the dialling type from pulse to tone.
E - Hides and displays digits.
F - Toggles program between Station speed dial numbers and names
Open customer programming and follow the instructions below.
ACTION
DISPLAY
1. Press TRSF 105
Display shows
[205] SPEED DIAL
00 :
2. Dial the station number (eg. 205) OR
press UP or DOWN keys to select the
station and press the RIGHT soft key to
move the cursor OR press the LEFT
soft key to go to step 4
[205] SPEED DIAL
00 :
3. If the selected station has no speed dial
bins, this display will be shown and a new
[205] SPEED DIAL
SPDBLK NOT EXIST
station may be selected
4. Dial the location number (eg, 05) OR
press UP or DOWN to select a location
and press the RIGHT soft key to move
the cursor OR press the LEFT soft key to
return to step 2
5. Enter the line access code (eg. 0)
followed by the number to be stored
(eg. 4264100) OR press the RIGHT soft
key to return to step 2 OR press the
Left soft key to return to step 3 OR press
HOLD to clear an entry (if you make an
error, use the DOWN key to step back)
6. Press the F key to access program
System Speed Dial Names OR press
TRSF to store and exit programming OR
press SPEAKER to save and advance
to the next program
Page 9
[205] SPEED DIAL
05 : 0-4264100_
3.11 PROGRAM PERSONAL SPEED DIAL NAMES FOR OTHER STATIONS
Each individual station user can program his/her own names, but in cases where this is not
practical, this program allows the System Administrator to view or change any station's speed dial
names. The station speed dial codes are 00 - 19. Each station begins with 20 numbers (00 - 19) and can
be assigned more in blocks of 10 up to a maximum of 50 numbers.
PROGRAM KEYS
UP & DOWN - Used to scroll through options.
KEYPAD - Used to enter selections.
SOFT KEYS - Move cursor left and right.
SPEAKER - Used to store data and advance to next program.
HOLD - Used to clear previous entry.
ANS/RLS - Used to select ALL.
ACTION
DISPLAY
1. Press TRSF 106
Display shows
[201] SPEED NAME
00 :
2. Dial the station number(eg. 205) OR
press UP or DOWN keys to select the
station and press the RIGHT soft key to
the cursor
[205] SPEED NAME
00 :
3. If the selected station has no speed dial
bins, this display will be shown and a new
station may be selected
[205] SPEED NAME
SPDBLK NOT EXIST
4. Dial the speed dial bin location(eg. 05)
OR use the UP or DOWN keys to scroll
through the bin locations and use the
RIGHT soft key to move the cursor OR
press the LEFT soft key to return to step
2
[205] SPEED NAME
05 :_
5. Enter the name using the procedure in
3.5 Program Station Names and press the
RIGHT soft key to return to step 2 OR
press the LEFT soft key to return to step
3
[205] SPEED NAME
05 : SAM SMITH
6. Press the F key to access program
Personal Speed Dial Numbers for Other
Stations OR press TRSF to store and
exit programming OR press SPEAKER to
store and advance to the next program
Page 10
3.12 CREATE PROGRAMMED STATION MESSAGES
Messages 1 - 10 are fixed and cannot be changed. However, you can create 10 additional 16 character
messages (11 - 20) that fit your company's needs. After programming these messages, inform other
employees so they can add the new messages to the list on the back of their user guides.
PROGRAM KEYS
UP & DOWN - Select the message number.
KEYPAD - Used to enter characters.
HOLD - Press to clear entry.
Open customer programming and follow the instructions below.
ACTION
DISPLAY
1. Press TRSF 715
Display shows
VAC. MESSAGE (01)
IN A MEETING
2. Dial the message number (eg, 11)
OR press the UP or DOWN key to make
the selection and press the RIGHT soft
VAC. MESSAGE (11)
_
3. Enter the message using the
procedure in 3.5 Program Station Names
and press the RIGHT soft key to return
to step 2 above
VAC. MESSAGE (11)
IN THE SHOWROOM_
4. Press TRSF to store and exit
programming OR press SPEAKER to
store and advance to the next program
3.13 SET ALARM/APPOINTMENT REMINDER WITH MESSAGE
Keyset users can set their own alarms but standard telephone users cannot. The System
Administrator can set alarm/appointment reminders for other stations in the system. Three alarms may
be set for each station and each alarm may be defined as a one time alarm or TODAY alarm or as a
DAILY alarm which rings everyday at the same time
PROGRAM KEYS
UP & DOWN - Select a station.
HOLD - Press to clear data.
KEYPAD - Used to enter data.
ANS/RLS - Used to select ALL stations
Entry
DIAL 1
DIAL 2
DIAL 3
Page 11
Alarm Type
NOTSET
TODAY
DAILY
Open customer programming and follow the instructions below.
ACTION
DISPLAY
1. Press TRSF 116
Display shows
[201] ALM REM (1)
HHMM : -> NOTSET
2. Dial the station number (eg. 205) OR
press UP or DOWN to select the station
and press the RIGHT soft key to move
the cursor OR press ANS/RLS to select
all stations
[205] ALM REM (1)
HHMM : -> NOTSET
3. Dial 1-3 to select the alarm (eg. 2) OR
press UP or DOWN to select the alarm
and press the RIGHT soft key to move
the cursor OR press the LEFT soft key
to return to step 2
[205] ALM REM (2)
HHMM :_ -> NOTSET
4. Enter the alarm time in 24 hour clock
format (eg. 1300) and the display will
automatically advance to step 5
[205] ALM REM (2)
HHMM :1300-> NOTSET
5. Enter the alarm type from the list above
OR press UP or DOWN to select the
alarm type and press the RIGHT soft key
to move the cursor
[205] ALM REM (2)
HHMM :1300-> DAILY
6. Enter the reminder message using the
procedure in 3.5 Program Station Names
and press the RIGHT soft key to return
to step 2
7. Press TRSF to store and exit
programming OR press SPEAKER to
store and advance to the next program
[205] ALM REM (2)
TAKE MEDICATION
Page 12
[ALL] ALM REM (1)
HHMM : -> NOTSET
3.14 MANAGING KEY ASSIGNMENTS
You can view station key assignments and add extenders to some of the programmable keys for easy
one-touch operation of frequently-used features. An extender is a number that makes an otherwise
general soft key very specific. Adding the digit 4 to a PAGE key defines this key for paging zone four.
Adding 225 to a directed pick-up key defines this key as pick-up for extension 225 only. The soft key
must already be assigned by the installing technician. Adding extenders allows one- touch operation for
that feature.
Use this program to assign extenders to the following soft keys:
KEY
BOSS
DIR
DP
DS
FWD
GPIK
IG
MMPG
PAGE
PMSG
SP
SPD
EXTENDER
Boss and Secretary (1 - 4)
PERS(1), SYS(2) or STN(3)
Direct Pick-up (station or group no.)
Direct Station Select (station or group no.)
Call Forward (0 - 5)
Group Pick-Up (01 - 20)
In/Out of Group (501- 519/529)
Meet Me Page (0 - 9, *)
Page (0 - 9, *)
Programmed Message (01 - 20)
UCD Supervise (UCD group no.)
Speed Dial (00 - 09, 500 - 999)
PROGRAM KEYS
UP & DOWN - Select the extension number.
KEYPAD - Used to enter extender codes.
HOLD - Used to clear the displayed data.
Open customer programming and follow the instructions below.
ACTION
DISPLAY
1. Press TRSF 107
Display shows
[201] KEY EXTEND
01 : CALL1
2. Dial the station number (eg. 205) OR
press UP or DOWN to select the station
and press the RIGHT soft key to move
[205] KEY EXTEND
01 : CALL1
3. Enter the key number (e.g. 18) OR use
UP or DOWN to scroll through the keys
and use the RIGHT soft key to move the
cursor OR press the key to be
programmed
[205] KEY EXTEND
18 : DS -> DS_
4. Dial the extender according to the list
above OR use UP or DOWN to scroll
through the keys and press the LEFT soft
key to return to step 3 OR the RIGHT soft
key to return to step 2
[205] KEY EXTEND
18 : DS -> DS207
5. Press TRSF to store and exit
programming OR press SPEAKER to
store and advance to the next program
Page 13
3.15 PROGRAMMING ACCOUNT CODES
This program allows the System Administrator to add or change account code entries. Each entry can
have a maximum of 12 digits
PROGRAM KEYS
KEYPAD - Used to enter the account code (allowable digits 0 - 9).
UP & DOWN - Used to select entry number.
RECALL & TRSF - Used to view and change only the used entries.
HOLD - Used to clear data.
Open customer programming and follow the instructions below.
ACTION
DISPLAY
1. Press TRSF 708
Display shows
ACCOUNT CODE
(001)
2. Dial the account code entry (eg. 005)
OR press UP or DOWN to select the
entry number and press the RIGHT soft
key to move the cursor
ACCOUNT CODE
(005) _
3. Enter the account code via the dial pad
(eg. 1234) and press the RIGHT soft key
to move the cursor back to step 2
ACCOUNT CODE
(005) 1234
4. Press TRSF to store and exit
programming OR press SPEAKER to
store and advance to the next program
3.16 SETTING CALL FORWARD DESTINATIONS FOR STATIONS
Allows the System Administrator to program the call forward destinations for other station users. The
program also allows call forward to be set after the destination has been entered.
The DCS system allows five types of call forwarding. FORWARD ALL, FORWARD NO ANSWER,
FORWARD BUSY, FORWARD FOLLOW ME and FORWARD EXTERNAL. There is an additional
option, FORWARD BUSY/NO ANSWER, that allows both of these options to be activated at the same
time, provided that destinations have been entered for both.
0 = FORWARD CANCEL
3 = NO ANSWER
1 = ALL CALL
4 = BUSY/NO ANSWER
2 = BUSY
5 = EXTERNAL
PROGRAM KEYS
UP & DOWN
KEYPAD
SOFT KEYS
SPEAKER
HOLD
Page 14
Used to scroll through options
Used to enter selections
Move cursor left and right
Used to store data and advance to next program
Used to clear previous entry
ACTION
DISPLAY
1. Press TRSF 102
Display shows
[201] FORWARD
0 : FORWARD CANCEL
2. Dial station number (eg., 205)
OR
Press UP or DOWN to select station
Press RIGHT soft key to move cursor
[205] FORWARD
0 : FORWARD CANCEL
3. Dial 0–5 to select forward type OR
Press UP or DOWN to select forward
type
Press RIGHT soft key to move cursor
[205] FORWARD
1 : ALL CALL : NONE
4. Dial destination number (eg., 201) OR
Press UP or DOWN to select destination
Press RIGHT soft key to move cursor
[205] FORWARD
1 : ALL CALL : 201
5. Dial 1 for YES, 0 for NO OR
Press UP or DOWN to select YES or
NO and Press RIGHT soft key to
return to step 2
[205] FORWARD
CURRENTLY SET : YES
6. Press TRSF to store and exit
OR Press SPEAKER to store and
advance to next program
3.17 SETTING INDIVIDUAL FORWARD NO ANSWER TIMERS
Each station can have an individual call Forward No Answer timer to accommodate station users with
different individual work habits. When adjusting this timer, take care that the value is not greater than the
transfer recall timer. The range is 000 - 250 seconds.
PROGRAM KEYS
KEYPAD - Used to set timer values.
UP & DOWN - Used to select extension number.
ANS/RLS - Save data and advance to next PROGRAM.
Open customer programming and follow the instructions below.
ACTION
DISPLAY
1. Press TRSF 502
Display shows
[201] NO ANS FWD
010 SEC
2. Dial the station number (eg. 205) OR
press UP or DOWN to select the station
and press the RIGHT soft key to move
the cursor OR press ANS/RLS to select
all stations
[205] NO ANS FWD
010 SEC_
3. Enter the new value via the dial pad (eg.
[205] NO ANS FWD
Page 15
[ALL] NO ANS FWD
010 SEC_
020) and the system will automatically
return to step 2
010 SEC 020
4. Press TRSF to store and exit
programming OR press SPEAKER to
store and advance to the next program
3.18 ADDING NAMES TO THE CLIP TRANSLATION TABLE
This program allows the System Administrator to associate a CLIP number received from the Telephone
Exchange with a name programmed in this translation table. If there is no match between a received
number and a name in this table, [no CLIP name] will be displayed. The translation table consists of 250
entries, each comprising a 10-digit telephone number and a 16-digit name.
CLIP names are programmed in accordance with the procedure in 3.5 Program Station Names.
PROGRAM KEYS
UP & DOWN - Used to scroll through options.
KEYPAD - Used to enter selections.
SOFT KEYS - Move cursor left and right.
SPEAKER - Used to store data and advance to next program.
HOLD - Used to clear previous entry.
Page 16
Open customer programming and follow the instructions below.
ACTION
DISPLAY
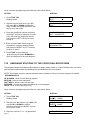
1. Press TRSF 728
Display shows
CLIP XLAT (001)
DGT :
2. Dial the account code entry (eg. 005)
OR press UP or DOWN to select the
entry number and press the RIGHT soft
key to move the cursor
CLIP XLAT (005)
DGT :_
3. Enter the telephone number and press
the RIGHT soft key to advance to name
entry OR enter the telephone number
and press the LEFT soft key to return
to step 2
CLIP XLAT (005)
DGT : 0399887755_
4. Enter the associated name using the
procedure in program Station Names
and press the RIGHT or LEFT soft key
to return to step 2
CLIP XLAT (005)
SAMSUNG TEL
5. Press TRSF to store and exit
programming OR press SPEAKER to
store and advance to the next program
3.19 ASSIGNING STATIONS TO THE VOICE DIALLER FEATURE
This program allows the System Administrator to assign station users to a Voice Diallerso they can dial a
personal speed dial number by speaking the recorded name into the handset.
NOTE: This feature requires optional software and/or hardware. Ask your Service company for details.
PROGRAM KEYS
UP & DOWN - Used to scroll through options.
KEYPAD - Used to enter selections.
SOFT KEYS - Move cursor left and right.
SPEAKER - Used to store data and advance to next program.
HOLD - Used to clear previous entry.
Open customer programming and follow the instructions below.
ACTION
DISPLAY
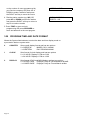
1. Press TRSF 216
Display shows
[3551] VOICE DIAL
USER 1 : NONE
2. Dial the voice dial number (eg. 3552) OR
use the UP or DOWN to make a
selection and press the RIGHT soft key
to move the cursor
[3552] VOICE DIAL
USER 1 : NONE
3. Dial user number(1-7 or 1-5) dependent
[3552] VOICE DIAL
Page 17
on the number of users programmed by
your Service company OR press UP or
DOWN to make a selection and press
the RIGHT soft key to move the cursor
4. Dial the station number (eg. 205) OR
press UP or DOWN to select the station
and press the RIGHT soft key to return to
step 3 to continue entries
USER 5 : NONE
[3552] VOICE DIAL
USER 5 : 205
5. Press TRSF to store and exit
programming OR press SPEAKER to
store and advance to the next program
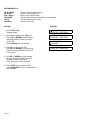
3.20 PROGRAM TIME AND DATE FORMAT
Allows the System Administrator to select the date and time display mode on
a per-station basis or system-wide.
0
COUNTRY
Sets overall display format and has two options
0 = ORIENTAL
MM/DD DAY HH:MM
1 = WESTERN
DAY DD MON HH:MM
1
CLOCK
Sets format of clock display and has two options
0 = 12 HOUR Displays 1 PM as 01:00
1 = 24 HOUR Displays 1 PM as 13:00
2
DISPLAY
Sets format of DAY and MON display and has two options
0 = UPPER CASE
Displays Friday as FRI and March as MAR
1 = LOWER CASE Displays Friday as Fri and March as Mar
Page 18
PROGRAM KEYS
UP & DOWN
KEYPAD
SOFT KEYS
SPEAKER
HOLD
ANS/RLS
Used to scroll through options
Used to enter selections
Move cursor left and right
Used to store data and advance to next program
Used to clear previous entry
Used to select ALL
ACTION
DISPLAY
1. Press TRSF 109
Display shows
[201] DAY FORMAT
COUNTRY : WESTERN
2. Dial station number (eg., 205) OR
Press UP or DOWN to select station
and press RIGHT soft key to move
cursor OR
Press ANS/RLS for all keysets
[205] DAY FORMAT
COUNTRY : WESTERN
3. Dial 0-2 to select mode OR
Use UP and DOWN to scroll through
modes and press RIGHT soft key to
move cursor
[205] DAY FORMAT
COUNTRY : ORIENTAL
4. Use UP or DOWN to scroll through
formats and press RIGHT soft key
to return to step 2 OR press
LEFT soft key to return to step3
5. Press TRSF to store and exit OR
press SPEAKER to store and advance to
next program
Page 19
[ALL] DAY FORMAT
COUNTRY : ?
3.21 SETTING DISPLAY LANGUAGE
Allows the System Administrator to program the language displayed on a keyset users LCD display. The
options available are English, German and Portuguese.
0:
1:
2:
English
German
Portuguese
PROGRAM KEYS
UP & DOWN
KEYPAD
SOFT KEYS
SPEAKER
HOLD
ANS/RLS
ACTION
Used to scroll through options
Used to enter selections
Move cursor left and right
Used to store data and advance to next MMC
Used to clear previous entry
Used to select ALL
DISPLAY
1. Press TRSF 121
Display shows
[201] LANGUAGE
ENGLISH
2. Dial station number (eg. 205) OR
Press UP or DOWN to select station
and press RIGHT soft key to move
cursor OR
Press ANS/RLS for all keysets
[205] LANGUAGE
ENGLISH
3. Dial 0-2 to select language (eg. 1) OR
Use UP and DOWN to scroll through
modes and press RIGHT soft key to
move cursor
[205] LANGUAGE
GERMAN
4. Press TRSF to store and exit OR
press SPEAKER to store and advance to
next program
Page 20
[ALL] LANGUAGE
?
3.22 PROGRAM KEYSET FEATURES
Allows the System Administrator to set any of the keyset features listed below.
0.
AUTO HOLD
Automatically places an existing outside call on hold if a CALL button,
line key or line group key is pressed during that call.
1.
AUTO TIMER
Automatically starts the stopwatch timer during a CO call.
2.
HEADSET
When on, this feature disables the hookswitch allowing a headset user
to answer all calls by pressing the ANS/RLS button.
3.
HOT KEYPAD When on, this feature allows the user to dial directory numbers without
having to first lift the handset or press the SPEAKER button.
4.
KEY TONE
5.
PAGE REJOIN Allows the user to hear the latter part of page announcements if
his/her becomes free during a page.
6.
RING PREF.
When off, requires the user to press the fast flashing button to answer
a ringing call after lifting the handset.
7.
CALL COST.
If enabled (ON), LCD shows real time call cost calculated based on
meter pulses sent by the local Telephone Exchange.
8.
AME BGM *.
This feature selects whether a station using Answer Machine Emulation will hear
their personal greeting or BGM while callers are listening to the personal greeting.
A BGM source must be selected for this to work. (Not applicable to DCS 24).
Allows the user to hear a slight tone when pressing buttons on his/her
set.
PROGRAM KEYS
UP & DOWN
KEYPAD
SOFT KEYS
SPEAKER
HOLD
ANS/RLS
Page 21
Used to scroll through options
Used to enter selections
Move cursor left and right
Used to store data and advance to next program
Used to clear previous entry
Used to select ALL
ACTION
DISPLAY
1. Press TRSF 110
Display shows
[201] STN ON/OFF
AUTO HOLD : OFF
2. Dial keyset number (eg., 205) OR
press UP or DOWN to select keyset and
press RIGHT soft key to move cursor OR
[205] STN ON/OFF
AUTO HOLD : OFF
press ANS/RLS for ALL Keysets
[ALL] STN ON/OFF
AUTO HOLD : OFF
3. Dial option number from the above list 0-8
( eg., 3) OR Press UP or DOWN to select
option and press RIGHT soft key to move
cursor
[205] STN ON/OFF
AUTO HOLD : OFF
4. Press UP or DOWN to select ON or OFF
and press LEFT soft key to return
to step 3 OR Dial 1 for ON or 0 for OFF.
The system automatically returns to step
3
[205] STN ON/OFF
HOT KEYPAD : ON
5. Press TRSF to store and exit OR press
SPEAKER to store and advance to next
program
Other Options
Dial option number 0 from above list
at step 3
[205] STN ON/OFF
AUTO HOLD : OFF
Dial option number 1 from above list
at step 3
[201] STN ON/OFF
AUTO TIMER : ON
Dial option number 2 from above list
at step 3
[205] STN ON/OFF
HEADSET : OFF
Dial option number 3 from above list
at step 3
[205] STN ON/OFF
HOT KEYPAD : ON
Dial option number 4 from above list
at step 3
[205] STN ON/OFF
KEY TONE : ON
Dial option number 5 from above list
at step 3
[205] STN ON/OFF
PAGE REJOIN : ON
Dial option number 6 from above list
at step 3
[205] STN ON/OFF
RING PREF : ON
Dial option number 7 from above list
at step 3
[205] STN ON/OFF
CALL COST : ON
Page 22
3.23 SETTING KEYSET RING TONES
Allows the System Administrator to select the type of ring tone heard at each keyset. There are eight ring
tones available at each keyset. A short tone burst of the selection will be heard when the dial key pad is
pressed.
PROGRAM KEYS
UP & DOWN
KEYPAD
SOFT KEYS
SPEAKER
HOLD
ANS/RLS
Used to scroll through options
Used to enter selections
Move cursor left and right
Used to store data and advance to next program
Used to clear previous entry
Used to select ALL keysets
ACTION
DISPLAY
1. Press TRSF 111
Display shows
[201] RING TONE
FREQUENCY 6
2. Dial keyset number (eg., 205) OR
press UP or DOWN to select station
and press RIGHT soft key to move cursor
[205] RING TONE
FREQUENCY 6
OR press ANS/RLS to select All keysets
3. Dial 1-8 to select ring tone OR press
UP or DOWN to select ring tone and
press RIGHT soft key to move cursor and
return to step 1
4. Press TRSF to store and exit OR
press SPEAKER to store and advance to
next program
Page 23
[ALL] RING TONE
FREQUENCY?
[205] RING TONE
FREQUENCY 6
[ALL] RING TONE
FREQUENCY 6
3.24 SETTING KEYSET OFF HOOK RING VOLUME
Allows the System Administrator to set the off-hook ring volume for any or all keysets. In later software
versions this program also allows the System Administrator to set other keyset volume levels such as;
Ring, handset, speaker and BGM volume.
PROGRAM KEYS
UP & DOWN
KEYPAD
SOFT KEYS
SPEAKER
ANS/RLS
Used to scroll through options
Used to enter selections
Move cursor left and right
Used to store data and advance to next program
Used to select ALL
ACTION
DISPLAY
1. Press TRSF 114
Display shows
[201] OFFRNG VOL
RING VOLUME 4
2. Dial station number (eg., 205) OR
press UP or DOWN to select station and
press RIGHT soft key to move cursor OR
[205] OFFRNG VOL
RING VOLUME 4
Press ANS/RLS for All keysets
3. Press UP or DOWN to select ring level or
dial volume level 1–8 on dial key pad
Press RIGHT soft key to return to step 2
[ALL] OFFRNG VOL
RING VOLUME ?
[205] OFFRNG VOL
RING VOLUME 3
4. Press TRSF to store and exit OR
press SPEAKER to store and advance to
next program
3.25 SETTING A MESSAGE ON A KEYSET
Allows the System Administrator to set a programmed message at any or all keysets. There are 20
messages available. Ten are pre- programmed and ten can be customised as described in 3.11 - Create
programmed Station Messages above. programmed station messages are numbered 01-20.
PROGRAM KEYS
UP & DOWN
KEYPAD
SOFT KEYS
SPEAKER
HOLD
ANS/RLS
Page 24
Used to scroll through options
Used to enter selections
Move cursor left and right
Used to store data and advance to next program
Used to clear previous entry
Used to select ALL
ACTION
DISPLAY
1. Press TRSF 115
Display shows
[201] PGMMSG (00)
CANCEL PGM MSG
2. Dial station number (eg., 205) OR
press UP or DOWN to select station and
press RIGHT soft key to move cursor
[205] PGMMSG (00)
CANCEL PGM MSG
OR
Press ANS/RLS to select All keysets
[ALL] PGMMSG (??)
CANCEL PGM MSG
3. Dial 01-20 to select message number,
(eg., 05) OR
Press UP or DOWN to select message
press RIGHT soft key to return to step 2
[205] PGMMSG (05)
PAGE ME
4. Press TRSF to store and exit OR
press SPEAKER to store and advance to
next program
3.26 SETTING BACKGROUND MUSIC VOLUME LEVEL
Allows the System Administrator the ability to assign volume levels for background music for individual or
all stations. This program will not change the level for the speakerphone. For early versions of software
this feature is programmed using MMC 117; later versions use MMC 114.
PROGRAM KEYS
UP & DOWN
KEYPAD
SOFT KEYS
SPEAKER
HOLD
ANS/RLS
Used to scroll through options
Used to enter selections
Move cursor left and right
Used to store data and advance to next program
Used to clear previous entry
Used to select ALL
ACTION
DISPLAY
1. Press TRSF 117 or 114
Display shows
[201] BGM VOLUME
VOLUME 13
2. Enter in desired station number (eg., 205)
OR press UP or DOWN key to make
selection and press RIGHT soft key OR
press ANS/RLS key to select all stations
[ALL] BGM VOLUME
VOLUME ??
3. Enter in valid volume level (1-16) and
press RIGHT soft key to return to step 2
[ALL] BGM VOLUME
VOLUME 06
4. Press TRSF to store and exit OR
press SPEAKER to store and advance to
next program
Page 25
3.27 SETTING KEYSET RINGER VOLUME
Allows the System Administrator the ability to assign a system-wide level for each station ringer volume..
There are eight levels of volume; level 1 is the lowest and level 8 is the highest. For early versions of
software this feature is programmed using MMC 118; later versions use MMC 114.
PROGRAM KEYS
UP & DOWN
KEYPAD
SOFT KEYS
SPEAKER
ANS/RLS
Used to scroll through options
Used to enter selections
Move cursor left and right
Used to store data and advance to next program
Used to select ALL stations
ACTION
DISPLAY
1. Press TRSF 118
Display shows
[201] RING VOL.
RING VOLUME 1
2. Dial station number (eg., 205) OR
Use UP and DOWN to select station
and use the RIGHT soft key to move the
[205] RING VOL.
RING VOLUME 1
cursor OR press ANS/RLS to select all
stations
[ALL] RING VOL.
RING VOLUME ?
3. Enter value 1-8 (eg., 5) OR press UP or
DOWN key to make selection and press
the RIGHT soft key to return to step 2
Note: you will hear a short burst of ring at
the selected value
[205] RING VOL.
RING VOLUME 5
3.28 PROGRAMMING CLIP PRESENTATION
This program allows the System Administrator to set what CLIP information will be displayed on an LCD
keyset. If CLIP name is chosen the details must be programmed in the CLIP translation table as per 3.18
above. The CLIP display options are as follows:
0
1
NO DISPLAY
NUMBER ONLY
2
NAME ONLY
No CLIP data will be displayed.
The CLIP number received from the central office
will be displayed first.
The CLIP name will be displayed first
PROGRAM KEYS
UP & DOWN
KEYPAD
SPEAKER
ANS/RLS
Page 26
Used to scroll through options
Used to enter selections
Save data and advance to next program
Used to select ALL stations
ACTION
DISPLAY
1. Press TRSF 119
Display shows
[201] CLIP DISPLAY
NUMBER FIRST
2. Display shows first station current display
mode enter Station number OR
Press UP or DOWN to scroll through and
press the RIGHT soft key to select a
station OR
press ANS/RLS to select ALL stations
[201] CLIP DISPLAY
NUMBER FIRST
3. Dial display option 0,1 or 2 OR press UP
or DOWN to select option and press the
RIGHT or LEFT soft key to return to step
2
[201] CLIP DISPLAY
NUMBER FIRST
[ALL] CLIP DISPLAY
?
4. Press TRSF to store and exit OR
press SPEAKER to store and advance to
next program
3.29 PROGRAMMING FEATURE PASSCODES
Allows the System Administrator to change the passcodes for several features. These features are the
following: DAY/NIGHT, DISA ALARM, ALARM CLR and AA RECORD.
NOTE: The passcode is four digits long. Each digit can be 0-9. The current (old) passcode is not
required for this program.
PROGRAM KEYS
KEYPAD
SPEAKER
Used to enter passcodes
Save data and advance to next program
ACTION
DISPLAY
1. Press TRSF 202
Display shows
CHANGE PASSCODE
DAY/NIGHT : 0000
2. Press UP or DOWN key to make selection
Press RIGHT soft key to move cursor to
passcode entry
CHANGE PASSCODE
ALARM CLR : 8765
3. Enter new passcode via digits from
dial key pad
OR
Press RIGHT soft key to return to step 2
Continue to change other passcodes
CHANGE PASSCODE
ALARM CLR : 9999
4. Press TRSF to store and exit OR
press SPEAKER to store and advance to
next program
Page 27
3.30 ASSIGNING DOOR PHONE RING
Allows the System Administrator to allocate ring when a door phone button is pressed and which ring
mode the station or station groups will follow.
The default station and station group numbers are listed below
Station
Station group
201-349
500-529
PROGRAM KEYS
UP & DOWN
KEYPAD
SOFT KEYS
SPEAKER
HOLD
ANS/RLS
Used to scroll through options
Used to enter selections
Move cursor left and right
Used to store data and advance to next program
Clears previous entry
Used to select ALL keysets
ACTION
DISPLAY
1. Press TRSF 211
Display shows first door phone
[201] DOOR RING
D : 500
N:500
2. Dial door phone number (eg., 230) OR
press UP or DOWN to scroll through
door phone numbers and use the RIGHT
soft key to move cursor OR
press ANS/RLS to select all door ring
[230] DOOR RING
D : 500
N:500
3. Enter new DAY/NIGHT selection via dial
key pad OR press UP or DOWN key to
make selection and press RIGHT soft key
[ALL] DOOR RING
D : 500
N:500
4. Press RIGHT soft key to return to step 2
above OR Press LEFT soft key
to return to step 3 above.
[250] DOOR RING
D : 500
N:500
5. Press TRSF to store and exit OR
press SPEAKER to store and advance
to next program
Page 28
3.31 ASSIGNING ALARM RING
Allows the System Administrator to determine what stations or station groups ring when an alarm sensor
is activated. The ring can be allocated as follows:
Station
Station group
201-349
500-529
The above stations or station groups will ring like a door phone and follow the door ring time-out. When
ringing, display keysets will show the display message programmed in 3.12 SET
ALARM/APPOINTMENT REMINDER MESSAGE above. The bottom line of the keyset display will give
an option to clear the alarm. Ringing initiated by an alarm sensor is answered by going off-hook and onhook again at a ringing keyset. If a device such as Ring Over Page or a common bell is the only device
assigned to ring, it may be answered by assigning a direct pickup key with this device as the extender. If
the alarm is unanswered by the door ring time-out, ringing will cease but the display will remain until
cleared by dialling the alarm clear feature code (57) and passcode (default 8765).
PROGRAM KEYS
UP & DOWN
KEYPAD
SOFT KEYS
SPEAKER
HOLD
Used to scroll through options
Used to enter selections
Move cursor left and right
Used to store data and advance to next program
Used to clear previous entry
ACTION
DISPLAY
1. Press TRSF 212
Display shows first sensor
[3501] ALARM RING
D : 500N : 500
2. Dial sensor number (eg., 3502 ) OR
Use UP or DOWN to scroll through
sensor numbers and press RIGHT soft
key to advance cursor
[3502] ALARM RING
D : 500N : 500
3. Enter valid ring destination (eg., 205) OR
press UP or DOWN key to make
selection and press RIGHT soft key to
advance cursor to night destination and
press RIGHT softkey
[3502] ALARM RING
D : 205N : 500
4. Press TRSF to store and exit OR
press SPEAKER to store and advance
to next program
Note: This program is not available on the DCS Compact and DCS24 Systems
Page 29
3.32 PROGRAM ALARM SENSOR NAME
Allows the System Administrator to assign a name to an alarm sensor. Names are written using the
using the procedure in 3.5 PROGRAM STATION NAMES.
PROGRAM KEYS
UP & DOWN
KEYPAD
SOFT KEYS
SPEAKER
HOLD
A
Used to scroll through options
Used to enter selections
Move cursor left and right
Used to store data and advance to next program
Used to clear previous entry
Key 19, acts as toggle between upper case and lower case
ACTION
DISPLAY
1. Press TRSF 213
Display shows
[3501] ALARM NAME
2. Dial ALARM number ( eg., 3502) OR
press UP or DOWN key to make
selection and press RIGHT soft key to
move cursor
[3502] ALARM NAME
_
3. Enter in name using above method and
table press RIGHT soft key to return to
step 2
[3502] ALARM NAME
FIRE!
4. Press TRSF to store and exit OR
press SPEAKER to store and advance to
next program
Note: This program is not applicable to DCS Compact and DCS 24 Systems.
Page 30
3.33 ASSIGNING DISA ALARM RING
Allows the System Administrator to assign the DISA alarm to ring at a specific phone(s). It is
recommended that the person who can clear the alarm receive the notification.. Both a day and a night
station can be selected. A valid destination can be either a station group (500-529) or an individual
station (201-349).
PROGRAM KEYS
UP & DOWN
KEYPAD
SOFT KEYS
SPEAKER
HOLD
Used to scroll through options
Used to enter selections
Move cursor left and right
Used to store data and advance to next PROGRAM
Used to clear previous entry
ACTION
DISPLAY
1. Press TRSF 214
Display shows
DISA ALARM RING
D : 500 N : 500
2. Enter in valid day destination number(eg.,
217) OR Press UP or DOWN key to
make selection and press RIGHT soft key
to advance cursor
DISA ALARM RING
D : 217 N : 500
3. Enter in valid night destination number
(eg., 249) OR press UP or DOWN key to
make selection and press RIGHT soft key
to return to step 2
DISA ALARM RING
D : 217
N : 249
4. Press TRSF to store and exit OR
press SPEAKER to store and advance to
next PROGRAM
NOTE:
Page 31
DISA ALARM is not available on the DCS Compact system.
3.34 ALLOCATING STATIONS TO CALL PICKUP GROUPS
Allows the System Aministrator to assign of stations into call pickup groups. There is a maximum of 20
pickup groups. An unlimited number of members can belong to each group. Stations can only be in one
pickup group.
PROGRAM KEYS
UP & DOWN
KEYPAD
SOFT KEYS
SPEAKER
HOLD
ANS/RLS
Used to scroll through options
Used to enter selections
Move cursor left and right
Used to store data and advance to next program
Used to clear previous entry
Used to select ALL
ACTION
DISPLAY
1. Press TRSF 302
Display shows
[201] PICKUP GRP
PICKUP GRP : 01
2. Dial station number ( eg., 205) OR
Use UP or DOWN to select station
number and press RIGHT soft key OR
[205] PICKUP GRP
PICKUP GRP : 01
Press ANS/RLS key to select all
3. Dial pick up group number OR
press UP or DOWN to select group
number
4. Press RIGHT soft key to return to step 2
above OR Press LEFT soft key to return
to step 3 above
5. Press TRSF to store and exit OR
press SPEAKER to store and advance to
next program
Page 32
[ALL] PICKUP GRP
PICKUP GRP : ??
[205] PICKUP GRP
PICKUP GRP : 05
3.35 ASSIGNING BOSS SECRETARY PAIRS
Allows the System Administrator to assign BOSS keysets to SECRETARY keysets. One BOSS station
can have up to four SECRETARY stations and one SECRETARY station can have up to four BOSS
stations. A dedicated BOSS button must be programmed on the SECRETARY keyset(s). A dedicated
BOSS button must be programmed on the BOSS keyset.
PROGRAM KEYS
UP & DOWN
KEYPAD
SOFT KEYS
SPEAKER
HOLD
ANS/RLS
F BUTTON
Used to scroll through options
Used to enter selections
Move cursor left and right
Used to store data and advance to next program
Used to clear previous entry
Used to select ALL
Used to toggle BOSS/SECRETARY field
ACTION
DISPLAY
1. Press TRSF 303
Display shows
BOSS STN : NONE
SECR 1 : NONE
2. Dial station number (eg., 205) OR
press UP or DOWN to selected station
and press RIGHT soft key, to advance
cursor to step 3
BOSS STN : 205
SECR 1 : NONE
BOSS STN : [205]
SECR 1 : NONE
3. Dial station numberfor secretary (eg.,
201) OR press UP or DOWN to
selected station and press RIGHT soft
key to return to step 3
BOSS STN : [205]
SECR 1 : [201]
4. Press LEFT soft key to return to step 2
and continue entries OR Press TRSF to
store and exit OR press SPEAKER to
store and advance to next program
BOSS STN : [205]
SECR 2 : [202]
Page 33
3.36 ASSIGNING STATIONS TO USE ACCOUNT OR AUTHORISATION
CODES
Allows the System Administrator to assign stations to use either account or authorisation codes to make
an outside call.
PROGRAM KEYS
UP & DOWN
KEYPAD
SOFT KEYS
SPEAKER
HOLD
ANS/RLS
Used to scroll through options
Used to enter selections
Move cursor left and right
Used to store data and advance to next program
Used to clear previous entry
Used to select ALL stations
FEATURE KEYS
0
1
2
NONE
AUTHORISE
ACCOUNT
ACTION
DISPLAY
1. Press TRSF 305
Display shows
[201] FORCD CODE
NONE
2. Dial station number ( eg., 205) OR
press UP or DOWN key to select station
and press RIGHT soft key to move
cursor and advance to step 3
[205] FORCD CODE
NONE
3. Dial a feature option 0-2, (eg., 2) OR
Press UP or DOWN key to select option
and press RIGHT soft key to return step 2
[205] FORCD CODE
ACCOUNT CODE
4. Press TRSF to store and exit OR
press SPEAKER to store and advance
to next program.
Page 34
3.37 SET FORWARD NO ANSWER TIME
Allows the System Administrator to adjust the Forward No Answer timer on a per-station basis or for the
entire system.
PROGRAM KEYS
UP & DOWN
KEYPAD
SOFT KEYS
SPEAKER
ANS/RLS
Used to scroll through options
Used to enter selections
Move cursor left and right
Used to store data and advance to next program
Used to select ALL
ACTION
DISPLAY
1. Press TRSF 502
Display shows
[201] NO ANS FWD
010 SEC →
2. Dial station number (eg., 205) OR
[205] NO ANS FWD
010 SEC →
press UP or DOWN key to select station
and press RIGHT soft key OR
press ANS/RLS to select all stations and
press RIGHT soft key
3. Enter the new value (must be three digits)
via dial key pad (eg., 020) and sytem will
automatically return to step 2
4. Press TRSF to store and exit OR
Press SPEAKER to store and advance
to next program
Page 35
[ALL] NO ANS FWD
010 SEC →
[205] NO ANS FWD
010 SEC → 020
3.38 PROGRAM AUTOMATIC NIGHT MODE OPERATION
Allows the System Administrator to set the time the system will enter into night mode automatically by
utilising time and day tables. A NIGHT key is not needed as the system will switch automatically.
However, it is helpful to have a dedicated button so the status can be manually changed. The start time
is the time the system will switch from day to night service the end time is the next day (eg., start 1730
WED, end 0800 THUR) This prevents entering of start and stop times on the same day.
FEATURE KEYS
0
1
2
3
SUN
MON
TUE
WED
4
5
6
THU
FRI
SAT
PROGRAM KEYS
UP & DOWN
KEYPAD
SOFT KEYS
SPEAKER
HOLD
Used to scroll through options
Used to enter selections
Move cursor left and right
Used to store data and advance to next program
Used to clear previous entry
ACTION
DISPLAY
1. Press TRSF 507
Display shows
NIGHT TIME (SUN)
ST : _
END :
2. Dial day number (0-6 eg., 3) OR
press UP or DOWN key to select day
and press RIGHT soft key to advance
cursor to step 3
NIGHT TIME (WED)
ST : _
END :
3. Dial in start time for night (eg.1730)
If time entered is valid, cursor moves
to end time enter end time If time
entered is valid, the system returns to
step 2
NIGHT TIME (WED)
ST : 1730
END : 0800
4. Press TRSF to store and exit OR
press SPEAKER to store and
advance to next program
Page 36
3.39 SET HOLIDAY DATES *
Allows the System Administrator to program up to 120 holiday into the system memory so that on the
days programmed, the system will remain in night mode.
The holiday date must be entered in MMDD format
PROGRAM KEYS
UP & DOWN
KEYPAD
SOFT KEYS
SPEAKER
HOLD
Used to scroll through options
Used to enter selections
Move cursor left and right
Used to store data and advance to next program
Used to clear previous entry
ACTION
DISPLAY
1. Press TRSF 512
Display shows
ASSIGN HOLIDAY
01:
2. Dial day number (01 - 60 eg. 05) OR
press UP or DOWN key to select number
and press RIGHT soft key to advance
cursor to step 3
ASSIGN HOLIDAY
05:_
3. Dial in date using 2 digits for month
followed by 2 digits for the day (eg. 1225)
entered is valid, the system returns to
step 2
ASSIGN HOLIDAY
05: 1225
4. Press TRSF to store and exit OR
press SPEAKER to store and
advance to next program
Page 37
3.40 ASSIGNING STATIONS TO STATION GROUPS
Allows the System Administrator to assign stations to station groups. A station, common bell, and
external amplifier can be in more than one group, but all groups must have the same ring type. There is
a maximum of 48 members per group on the DCS system, 30 members for the DCS 70 and DCS
Compact system and 16 members for the DCS 24.
NOTES:
1.
2.
3.
A device for announcement if used, must provide a hookflash and return the call back
to the group.
The DCS Compact and DCS 70 Systems have up to a maximum 30 of members in
each group. The DCS 24 system has a maximum of 16 members and the DCS system
has a maximum of 48 members.
The DCS 70 will only support a maximum of 10 stations in a group with unconditional
ring.
GROUP TYPES
0
1
2
3
NORMAL GROUP
VMAA GROUP
UCD GROUP
AA GROUP
This is the standard station group
Can only have distribute or sequential ringing.
Has a wrap up capability.
Can only have distribute or sequential ringing.
FEATURE KEY
0
1
2
3
4
5
6
TYPE
RING
OVERFLOW
GRP TRSF
WRAP-UP *
NEXT PORT
MEMBER
Group type (Normal, VM/AA, UCD)
Ring mode
Overflow time
Group transfer time
Wrap-up time (timer only valid in type = UCD)
Overflow port
Group member (eg., station 202)
* The Wrap timer is not available on the DCS 70 in the program.
RING MODES
0
SEQUENTIAL
The first idle station listed in the group will ring. If the first is busy, the
next idle station will ring.
1
DISTRIBUTE
The first call will ring the first station listed in the group. The next call
will ring the next station listed in the group.
2
UNCONDITION
All the stations listed in the group will ring, busy stations will receive
off-hook ring. MAXIMUM 32 STATIONS RINGING.
PROGRAM KEYS
UP & DOWN
KEYPAD
SOFT KEYS
SPEAKER
HOLD
Page 38
Used to scroll through options
Used to enter selections
Move cursor left and right
Used to store data and advance to next program
Used to clear previous entry
ACTION
DISPLAY
1. Press TRSF 601
Display shows
[501] STN.GROUP
TYPE:NORMAL GRP
2. Dial group number (eg., 505) and press
RIGHT soft key to move cursor OR
press UP or DOWN key to select group
and press LEFT soft key to move cursor
[505] STN.GROUP
3. DIAL group type (0–3, eg., 1) OR
press UP or DOWN key to make a
selection and press LEFT soft key to
move cursor
[505] STN GROUP
TYPE:VMAA
4. Dial Feature option number (0–6, eg., 1)
OR press UP or DOWN key to make
selection and press RIGHT soft key
to move cursor to ring value
[505] STN GROUP
RING:SEQUENTIAL
5. Dial ring option (0–2, eg., 1) OR
Press UP or DOWN key to make
selection and press LEFT soft key to
move cursor back to step 4 or press
RIGHT soft key to return to step 2
505] STN GROUP
[RING:DISTRIBUTE
6. Dial next feature option and continue OR
press UP or DOWN key to select
option OR Press LEFT soft key to
return to step 2
[505] STN GROUP
RING:DISTRIBUTE
7. Press TRSF to store and exit OR
press SPEAKER to store and
advance to next program
Page 39
TYPE:NORMAL GRP
3.41 PROGRAMMING STATIONS TO PAGING ZONES
Allows the System Administrator to assign a keyset to any of the four internal paging zones and all call
page (page plus ∗). The total number of keysets that can receive a page is limited to 80. A keyset may
be assigned to more than one zone.
The assignment is controlled by the use of class marks. If a keyset is flagged as “1” in a zone column, it
will receive pages for that zone. If the keyset is flagged as “0,” it will not receive pages for that zone.
Keysets can receive pages for more than one zone or can be programmed not to receive an all call
page.
PROGRAM KEYS
UP & DOWN
KEYPAD
SOFT KEYS
SPEAKER
HOLD
Used to scroll through options
Used to enter selections
Move cursor left and right
Used to store data and advance to next program
Used to clear entry
ACTION
DISPLAY
1. Press TRSF 604
Display shows
ENTRY:STN :1234∗
01:NONE:
00001
2. Enter index number (01–80, eg.,05)
via dial key pad OR press UP or
DOWN key to make selection and
press RIGHT soft key to move
cursor
ENTRY:STN :1234*
05:NONE:
00001
3. Enter station number (eg., 205) via
dial key pad OR press UP or
DOWN key to make selection and
press RIGHT soft key to move
cursor
ENTRY:STN :1234∗
05:205 :
00001
4. Move cursor under page zone
desired by pressing UP or
DOWN key and enter the digit 1
under zone and press RIGHT soft
key to return to step 2 to continue
with entries
ENTRY:STN :1234∗
05:205 : 01001
5. Press TRSF to store and exit OR
press SPEAKER to store and
advance to next program
Page 40
3.42 PROGRAMMING FEATURE KEYS
Allows the System Administrator to customise the programmable keys on specific keysets on the DCS
system. Buttons 1 and 2 are set as CALL buttons by default. Features are entered via the dial pad key
by pressing the dial pad number the required steps to select the feature. For example, for OHVA the
number 6 is pressed three times. If a BOSS key is required, press 2 for the first letter B, and then use the
UP or DOWN key to change selection from BARGE to BOSS.
DIAL KEYPAD
COUNT →
DIAL 2
DIAL 3
DIAL 4
DIAL 5
DIAL 6
DIAL 7
DIAL 8
1
AAPLAY
DICT
GPIK
LCR
MMPA
PAGE
TG
2
BARGE
DICT
HLDPK*
LCR
NEW
PAGE
UA
3
4
CALL
FAUTO
IG
LCR
OHVA
REJECT SETMG
VDIAL
* On the DCS 70 this is HDSET
PROGRAM KEYS
UP & DOWN
KEYPAD
SOFT KEYS
SPEAKER
HOLD
Used to scroll through options
Used to enter selections
Move cursor left and right
Used to store data and advance to next program
Used to clear previous entry
ACTION
DISPLAY
1. Press TRSF 722
Display shows
[201] KEY PROG.
01 : CALL 1 →
2. Enter selected station number (eg., 205)
OR press UP or DOWN key to select
station number and press RIGHT soft key
to move cursor
[205] KEY PROG.
01 : CALL 1 →
3. Enter selected key number (eg., 18) OR
press UP or DOWN key to select key
number and press the RIGHT soft key to
move the cursor
[205] KEY PROG.
18 : NONE → _
4. Using above chart press the dial pad key
number to make selection OR press the
UP or DOWN key to make selection
and press RIGHT soft key to move
the cursor to step 5 to enter extender
if required or to return to step 2
[201] KEY PROG.
18 : NONE → GPIK_
5. If required, enter extender (eg., 03) OR
Press UP or DOWN key to make
selection Press RIGHT soft key to
return to step 2
[201] KEY PROG.
18 : NONE → GPIK 03
Page 41
6. Press TRSF to store and exit OR
press SPEAKER to store and advance
to next program
Programmable Feature Keys
KCMMC
AAPLAY:
AAREC:
AB: *
ABAND *
ACCT: *
ALARM:
AN/RLS:
BARGE:
BLOCK:
BOSS:
CALL:
CAMP:
CANMG:
CBK:
CONF:
CLIP:
CR
CS: *
CNSR: *
DICT:
DIR:
DLOCK:
DND:
DP:
DROP:
DS:
DT:
EXTMIC
FAUTO
FLASH:
FWRD:
Page 42
Feature Description
Play Auto Attendant messages
Record Auto Attendant messages Default password is 4321
DCS 70 ONLY. Absent feature. When activated at a station display will read
ABSENT. DSS keys for that station programmed on other keysets will flash. It
is still possible to call stations in absent mode.
View abandoned call CLIP details Default password = 1234
Account code entry
Alarm ring answer key Passcode under TENANT/PASSCODES Alarm sensor
ring
DCS 70 ONLY. Answer / Release key
Executive Barge-in or Override.
OHVA block. Blocks OHVA to the station
Set up for BOSS or SEC. Allows intercom calls between parties, flashes on
SEC when BOSS sets DND and all calls to Boss extension divert to Sec.
Termination point for calls to keysets for C.O calls (if no DTS keys assigned),
st
nd
Intercom calls and Indial calls. – 1 & 2 keys are CALL keys by default and it
is suggested that these remain.
Camp On key. Useful on Non display keysets
Cancel Message. Cancels messages.
Call back. Allows you to set a callback on a busy station or outside line when it
becomes free.
Conference. Allows up to 4 other parties (with a maximum of 2 external) to join
in a conversation,.
Calling line identification presentation. Displays outside callers number when
available
Call Recording
UCD Call Waiting Status. Provides flashing indication when calls in UCD
queue reach the number as set in MMC 500 UCD CS level indication. This key
must be programmed with a group extender eg.510
CLIP Number Saved Redial. Whilst on an incoming call pressing this key will
save the CLIP number, pressing this key later will redial that CLIP number.
When on a call, allows you to leave up to 3 13 character messages or memos
on your LCD which can be recalled later.
Directory. Alpha search of numbers stored in Personal/System speed dials or
station directory. An extender may be added: 1=Personal 2=System 3=Station
Door Lock. Operates door unlock feature.
Do Not Disturb
Directed Call Pick up. A specific Station or group number can be specified.
Transfer Call Drop.
Direct Station Select. Station number must be specified.
Direct Trunk Select. External line number must be specified.
External microphone key when Full Duplex handsfree option is added to
Falcon 18 and 28 Button Keysets. Switches external microphone(s) in or out.
Forced answer. When dialling another Keyset, on hearing ring tone pressing
this key will auto answer the remote called station setting up an intercom
hands free call.
Flash. Sends hookflash to the outside line.
Forward. If only FWRD entered user will need to input forward option
presented on LCD activated via soft keys. An extender can be assigned to this
key 1=All 2=Busy 3=No Answer 4=Busy/No Answer 5=Follow Me 0=Cancell
call forward.
GPIK:
HDSET: *
HLDPK:
IG:
INQUIRE:
ISPY:
LCR:
LISTN:
LNR:
MMPA:
MMPG:
MSG:
MUTE:
NEW:
NIGHT:
NND:
NXT:
OHVA:
OPER:
PAGE:
PARK:
PAUSE:
PGPK:
PGMMSG:
REJECT:
RETRY:
REVW:
SETMG:
SG:
SNR:
SP:
SPD:
SPKR
STORE:
TG:
Page 43
Group Pick Up. Allows calls ringing at a group to be picked up. An extender
can be assigned eg. GPIK 501.
DCS 70 ONLY. Headset Mode. Toggles keyset between Headset & Handset
mode. Key will light when headset mode is set.
Hold Pick Up. Allows a call is on hold to be retrieved by pressing this key
followed by the station number that put the call on hold or the held trunk
number.
In / Out of group. If only IG is entered user must specify which group they wish
to log in/out of. An extender may be assigned to this key eg. IG 501
Inquire. By pressing this key then entering a trunk number the user can read
the CLIP data for a held call on that trunk.
I Spy. Allows station user to view the dialled external number of a busy
extension and gives options to either Barge in or Drop the call. Note: the
station passcode must be changed from the default 1234.
Lease Cost Route Calls will be made via the most cost effective route, if
programmed.
Listen. When on a call using the handset, pressing this key enables the
conversation to be heard through the speaker, the microphone remains muted.
Last Number Redial.
Meet Me Page Answer.
Meet Me Page.
Message Waiting Indication. NOTE: this key is not for SVM-800 message
indication.
Mute key. Mutes either the handset or microphone when on a call. The key will
light to indicate the mute condition.
New Call key:Terminates the existing call, allowing you to make another call.
Night. Allows access to night mode setting (note COS reliant) Lights steady
when system in night mode.
Name Number Display. Pressing this key whilst in conversation will toggle the
display between the CLIP name if any and the CLIP number.
Next. Displays the CLIP name/number of the waiting call at your station.
Off Hook Voice Announcement. Pressing this key after dialling a busy ext on
an external call allows you to communicate with the internal station without
intruding on the conversation.
Rings assigned operator group. Default 500.
Allows a Page call. A valid page zone can be assigned as an extender eg.
PAGE 1 (page zone 1)
DCS 70 only. Call park / retrieve. Pressing this key places a call on hold in a
park slot; park slot can either be entered after pressing Park key or
programmed as a key extender.
Pause. Inserts a pause (break) in dialled digit stream.
Page Pickup Allows a parked call to be picked up when announced via a
page. Pressing this key then a ext number which made the page or the line
number of the parked call will pick up that call
Program Message. An extender may be programmed to specify a specific
system message number.
Blocks an OHVA announcement at the keyset.
Retry on Busy. Only for PSTN TKs Retry is given as a soft key option on LCD.
CLIP Review. Review CLIP information of previous calls.
Set Message for ext.
Station Group . Calls a specific group when pressed. eg. SG 501
Saved Number Redial. Saves a number for dialling later
UCD Supervisor. Enter UCD Supervisor mode. Presents 3 options CALL,
ADMIN , AGENT A Specific group number must be programmed as an
extender eg. SP 510
Speed Dial. A specific speed dial can be assigned as a key extender eg. SPD
500
Speaker Key. For use with Falcon Keysets
Store Clip information in personal speed dial location (uses next free location)
Trunk Group. A specific trunk group can be assigned as a key extender eg. TG
81
TIMER:
TRSF
UA:
VDIAL:
VG:
VMSCMT:
VMSMSG:
VMSOUT:
VMSREC:
VMSVAC:
VREC:
VT
Page 44
Stopwatch. Activates a stopwatch feature when on hook.
Transfer key for use with Falcon Keysets.
Universal Answer Key
Voice dial access. Press key and speak name.
VMS Group message key. Message wait indication for group mailbox must
have group number assigned as a key extender eg. VG 501
VMS Comment. Allows a comment to an existing message and forwarded to
another mailbox.
Voicemail message indication. Lights when a message is left in that specific
exts mailbox
Allows user to select to be notified when a voicemail message has been left
Voicemail Record. Allows a user to record a message and send it to another
mailbox or if pressed whilst on a conversation the conversation will be
recorded.
VMS VACANT. Forwards all calls to Voice mail mailbox.
Voice Record. Access Voice Dial card for recording entries.
Voice Mail transfer
3.43 PROGRAMMING THE SMDR REPORT FORMAT
Allows the System Administrator to select the information printed on the SMDR report. The following
options may be selected to print on SMDR:
DCS70
DCS24
Later
DCS
DCS
Page 45
0.
PAGE HEADER
This option determines whether a page header will print at the
top of each page. This would normally be turned off if SMDR
is being sent to a call accounting machine.
1.
LINE PER PAGE
This option selects the length of each page to determine
when to print the SMDR header. The number of lines may be
in the range 01-99.
2.
INCOMING CALL
This option determines whether incoming calls will print on
SMDR.
3.
OUTGOING CALL
This option determines whether outgoing calls will print on
SMDR.
4.
AUTHORISE
CODE
This option determines whether authorisation codes will print
on SMDR.
5.
LESS START
TIME
This option determines whether valid calls will include the
minimum call time in total call duration.
6.
IN/OUT GROUP
This option allows a message, IN GROUP or OUT GROUP,
to be printed in the Digits Dialled column each time a station
enters or leaves a group.
7.
DND CALL
This option allows a message, IN DND or OUT DND, to be
printed in the Digits Dialled column each time a station enters
or leaves DND.
8.
WAKE-UP CALL
This option determines whether stations receiving an alarm
reminder call will print on SMDR.
9.
DIRECTORY
NAME
This option allows the System Administrator to enter a 16
character name which will appear on the SMDR header.
10.
CLIP
This option can be selected to print CLIP data received from
the CO on incoming ISDN calls. This option requires the use
of a 132 column printer or an 80 column printer set for
condensed print.
11.
ABANDON CALL
If this option is set to YES unanswered calls will print on
SMDR.
12.
NO. OF DIAL
MASK
Determines if number of masked dial digits print on SMDR
12
DID NUM/NAME
If this option is set to YES the DID number and name will print
on SMDR in the Outgoing call number field.
PROGRAM KEYS
UP & DOWN
KEYPAD
SOFT KEYS
SPEAKER
Used to scroll through options
Used to enter selections
Move cursor left and right
Used to store data and advance to next program
ACTION
DISPLAY
1. Press TRSF 725
Display shows
PAGE HEADER
PRINT
:YES
2. Dial the option number (eg. 1) OR
Use the UP and DOWN keys to scroll
through the options and press the RIGHT
soft key to select an option
LINE PER PAGE
66 LINE/PAGE
3. Enter the number of lines per page in the
range 01-99 (eg., 50) Use the UP
and DOWN keys to change the
number of lines and press the RIGHT soft
key to save the data and return to step 2
THEN
LINE PER PAGE
50 LINE/PAGE
LINE PER PAGE
50 LINE/PAGE
LINE PER PAGE
50 LINE/PAGE
4. If option 0 is selected at step 2
PAGE HEADER
PRINT
:YES
5. If option 2 is selected at step 2
INCOMING CALL
PRINT : YES
6. If option 3 is selected at step 2
OUTGOING CALL
PRINT : YES
7. If option 4 is selected at step 2
AUTHORISE CODE
PRINT : NO
8. If option 5 is selected at step 2
LESS START TIME
PRINT : YES
9. If option 6 is selected at step 2
IN/OUT GROUP
PRINT : YES
10. If option 7 is selected at step 2
DND CALL
PRINT : YES
11. If option 8 is selected at step 2
WAKE - UP CALL
PRINT : YES
12. If option 9 is selected at step 2
DIRECTORY NAME
_
12a. Enter the 16 character name as
Page 46
DIRECTORY NAME
described in the procedure for program
Station Names
SAMSUNG DCS
12b. Press RIGHT key to save name and
return to step 2
DIRECTORY NAME
SAMSUNG DCS
13. If option 10 is selected at step 2
CLIP DATA
PRINT : YES
14. If option 11 is selected at step 2
ABANDONED CALL
PRINT : YES
15. If option 12 is selected at step 2
DID NUM/NAME
PRINT : YES
16. After all desired options have been
selected, press TRSF to exit OR
press SPEAKER to exit and advance to
next program
Page 47
SYSTEM ACCESS CODES
The DCS telephone system has the following preset (default) feature access codes. These codes can be
used if a key is not available for the feature you want to use. Standard telephone users must always dial
these codes.
9
10 + xxx
11
12 + xxx
13
16 + xxx
17
18
19
2xx
3xx
400
401
41
42 + xxx
43
44
45
46
47
48
49
500
to
529
53+grp+0
53+grp+1
54+zone
55 + 0
Page 48
Call attendant or system
operator
Retrieve parked calls
Put calls on and take calls off
hold
Retrieve call on hold at
another station
Door lock release
Make speed dial calls
Save number and redial it
Recall dial tone for new call
Last number redial
Extension numbers
Extension numbers
Cancel Do Not Disturb
Set Do Not Disturb
Set Message No Ring
Cancel message
Set/Return messages
Busy station/ line callback
Busy station camp-on
Set up a conference
Enter an account code
Set programmed station
message
Send a flash to an outside line
Station hunt group
Station hunt group
Out of group
In group
Meet me page
Page all internal zones
55 + 1
Page Internal zone 1
55 + 2
55 + 3
Page Internal zone 2
Page Internal zone 3
55 + 4
Page Internal zone 4
55 + 5
55 + 6
55 + 7
55 + 8
55 + 9
55 + *
56
57
58
59
600
601 + xxx
602 + xxx
603 + xxx
604 + xxx
605 + xxx
65
Page external zone 1
Page external zone 2
Page external zone 3
Page external zone 4
Page all external zones
All page
Meet Me Answer
Alarm sensor clear
DISA alarm clear
Walking Class of Service
Cancel Call Forwarding
Set Forward All Calls
Set Forward Busy
Set Forward No Answer
Set Forward Busy/No Answer
Set Forward Follow Me
Directed call pick-up
66
67
681
682
7xx
8x
0
Group call pick-up
Universal Answer
Voice Dialler activate
Voice Dialler Record
Individual line numbers
Outside line groups
Line Group 0