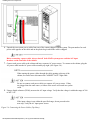
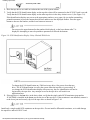
1
title
PA-8500 Continuum Series 400
Hardware Installation Guide (HP-UX systems)
(1/4/00)
Revision History
file:///H|/CSDoc/LEOIN~H4/title.htm [01/14/2000 3:49:57 PM]
notice
Notice
The information contained in this document is subject to change without notice.
STRATUS COMPUTER, INC. MAKES NO WARRANTY OF ANY KIND WITH REGARD TO THIS MATERIAL,
INCLUDING, BUT NOT LIMITED TO, THE IMPLIED WARRANTIES OF MERCHANTABILITY AND FITNESS
FOR A PARTICULAR PURPOSE. Stratus Computer, Inc., shall not be liable for errors contained herein or incidental or
consequential damages in connection with the furnishing, performance, or use of this material.
Software described in Stratus documents (a) is the property of Stratus Computer, Inc., or the third party, (b) is furnished
only under license, and (c) may be copied or used only as expressly permitted under the terms of the license.
This document is protected by copyright. All rights are reserved. No part of this document may be copied, reproduced, or
translated, either mechanically or electronically, without the prior written consent of Stratus Computer, Inc.
Stratus, Continuum, Continuous Processing, StrataNET, FTX, and the Stratus logo are registered trademarks ofStratus
Computer, Inc.
XA, XA/R, StrataLINK, RSN, SINAP, Isis, Isis Distributed, RADIO, and the SQL/2000 logo are trademarks of Stratus
Computer, Inc.
Hewlett-Packard and HP are registered trademarks of Hewlett-Packard.
IBM PC is a registered trademark of International Business Machines Corporation.
Sun is a registered trademark of Sun Microsystems, Inc.
UNIX is a registered trademark of X/Open Company, Ltd., in the U.S.A. and other countries.
PA/RISC is a trademark of Hewlett-Packard.
All trademarks are the property of their respective owners.
Manual Name: PA-8500 Continuum Series 400 Hardware Installation Guide
Stratus Computer, Incorporated
Customer Service Documentation Department
Warning
The equipment documented in this manual generates and uses radio frequency energy, which if not installed and used in
strict accordance with the instructions in this manual, may cause harmful interference to radio communications. The
equipment has been tested and found to comply with the limits for a Class A computing device pursuant to Subpart J of
Part 15 of FCC rules, which are designed to provide reasonable protection against such interference when operated in a
commercial environment.
Operation of this equipment in a residential area is likely to cause interference, in which case the user at his own expense
will be required to take whatever measures may be required to correct the interference.
This document contains Stratus Proprietary and Confidential Information. It is provided to you and its use is limited
by the terms of your contractual arrangement with Stratus regarding maintenance and diagnostic tools.
Copyright© 1999 by Stratus Computer, Inc. All rights reserved.
file:///H|/CSDoc/leoinstall/notice.htm [01/14/2000 3:50:24 PM]
toc
1. Preparing to Install the System
● Safety Considerations
● Required Tools
● System Description
● Status Lights
● System Peripherals
2. Installing the Core System Components
● Installing the Cabinet
● Installing the System Console
● Installing the C419/C619 Modem for RSN Use
● Installing the PCI Cards and Cables
3. Installing the Tape Drives
● Installing the Stand-Alone T800-Series Tape Drives
● Installing the Daisy-Chained T800-Series Tape Drives
● Completing the Installation of Tape Drives on a Running System
4. Booting the System
5. Configuring the RSN and C416/C619 Modem
● Preparing to Configure the RSN
● Configuring the RSN
● Configuring the C419/C619 Modem
● Completing and Verifying Configuration of the RSN
6. Sending the Installation Report
● Preparing an Installation Report
● Sending an Installation Report to CAC
● Sample Installation Report
Appendix A. Fault Isolation
● General LED Information
● System Component LEDs
❍ Power Supply LEDs
❍ Disk Shelf LEDs
❍ Suitcase LEDs
❍ PCI Card LEDs
● System Log and Status Messages
● Component Status
❍ Software State Information
❍ Hardware Status Information
● Fault Codes
● Troubleshooting Procedures
file:///H|/CSDoc/leoinstall/toc.htm [01/14/2000 3:50:30 PM]
Preparing to Install the System
+Chapter 1
Preparing to Install the System
This chapter contains important information to read before proceeding with the installation, such as a system description
and vital safety considerations. This chapter is divided into the following sections.
●
Safety Considerations
●
Required Tools
●
System Description
1.1 Safety Considerations
Before installing the system, be sure to take the following important precautions.
To ensure a safe and effective installation, follow the procedures exactly as they are
written in this manual
1. Do not attempt to install the system without the assistance of another able-bodied person. The size and weight of
the system do not allow it to be safely installed by one person.
2. The information in this manual assumes that the system site has been prepared, and the system unpacked,
according to the instructions in the Continuum Series 400 Site Planning Guide Release 1.0 (R454-01-ST) and the
PA-8500 Continuum Series 400 Unpacking Instructions. Refer to these manuals before proceeding with the
installation.
3.
4.
5.
6.
Observe all applicable industry safety standards.
Provide the necessary space and light to safely perform the installation.
Do not wear conducting objects, such as rings, bracelets, and keys.
Before installing the system, familiarize yourself with the system hardware and how to get help during the
installation by reading the remainder of this chapter.
1.2 Required Tools
To install the system, the following tools are necessary.
● Flat-blade screwdriver
● Phillips-head screwdriver
● Torque wrench
● Torx head wrench tool set
● Digital voltmeter
1.3 System Description
The PA-8500 Continuum Series 400 system combines the Hewlett-Packard PA-RISC PA-8500 microprocessor, system
features rapid symmetric multiprocessing and continuously available hardware. This system uses AC power . The
PA-8500 Continuum Series 400 system utilizes the HP-UX operating system.
file:///H|/CSDoc/leoinstall/chapt1.htm (1 of 7) [01/14/2000 3:50:35 PM]
Preparing to Install the System
The PA-8500 Continuum Series 400 achieves continuous availability by partnering, or duplexing, two identical online
components, so that if one fails, its partner continues to operate. Other system components ensure availability by operating
in standby mode , with one component online, while the other "stands by" to take over operation should its partner fail.
The PA-8500 Continuum Series 400 system must be installed by a qualified service technician, but most of the
components are customer-maintainable. Its data communications subsystem, based on a Peripheral Component
Interconnect (PCI) bus, utilizes state-of-the-art PCI cards. Peripherals include T800-series cartridge tape and D85X
CD-ROM drives, V105 terminals, and C419/C619 modems, which are described later in this chapter. See Figure 1-1 for
an illustration of the PA-8500 Continuum Series 400 system installed in a typical computer-room environment. The
sections that follow describe PA-8500 Continuum Series 400 components.
Figure 1-1. PA-8500 Continuum Series 400 System in a typical computer-room environment
1.3.1 Cabinet
Each PA-8500 Continuum Series 400 system consists of a single cabinet that houses all major system components. Two
sets of doors on the front and rear of the cabinet provide access to these components. The following sections describe the
cabinet components.
●
Cabinet: Front Components
●
Rear Components
●
System Ventilation
file:///H|/CSDoc/leoinstall/chapt1.htm (2 of 7) [01/14/2000 3:50:35 PM]
Preparing to Install the System
1.3.1.1 Cabinet: Front Components
For the components housed in the front of the cabinet, see Figure 1-2 which is also described in the following paragraphs.
Figure 1-2. Cabinet: Front View
The amber cabinet fault light, located at the top of the cabinet frame, above the doors, illuminates when one or more
components within the cabinet have failed. (For a more detailed explanation of system status lights, See Figure 1-9 Status
Lights later in this chapter.)
The power trays are located just below the cabinet fault light:
●
Power Tray 2 (on the top) includes two power supply units to power the PCI card cage bays. At the base of Power
Tray 2 are two Alarm Control Units (ACUs). The ACUs control the speed of the cabinet fans, monitor the status of
components within the cabinet, and control the component status lights. One ACU is online, while the other is in
standby mode.
●
Power Tray 1 (below Power Tray 2) includes two rectifiers to convert AC power to the necessary DC voltage for
the entire system.
Below the power trays are two disk shelves. Each disk shelf has nine slots, the two leftmost slots are reserved for two disk
power supply units, the other slots house up to seven 9-GB or 18-GB Small Computer System Interface (SCSI) disk
drives. Maximum duplexed storage capacity is 126 GB per disk shelf, 252 GB per cabinet (63 GB per disk shelf, 126 GB
per system logical storage).
file:///H|/CSDoc/leoinstall/chapt1.htm (3 of 7) [01/14/2000 3:50:35 PM]
Preparing to Install the System
Located at the bottom of the cabinet are duplexed logic suitcases. These suitcases house the system's central logic
functions: the Hewlett-Packard CPUs, memory modules, and console controller, which is the system's central collection
point for maintenance, diagnostic information and user interface.
If the logic suitcases have a vinyl protective covering on the front, remove the covering once the system cabinet is in place.
Optional air filters are located below the suitcases, on the front of the disk shelves, and on the front of the two power
trays. System air filters must be changed regularly. (Refer to HP-UX Operating System: Continuum Series 400 Operation
and Maintenance Guide Release 1.0 (R025H-01-ST) for preventive maintenance instructions.)
1.3.1.2 Cabinet: Rear Components
The rear of the cabinet has two doors that provide access to the components housed in the back of the cabinet. For an
illustration, See Figure 1-3, which is also described in the following paragraphs.
Figure 1-3. Cabinet: Rear View
The top of the cabinet has a cable opening that provides access for routing system power cables and communications
cables.
The top of the cabinet frame has an amber cabinet fault light that illuminates when a component within the cabinet has
failed. (For a more detailed explanation of system status lights, See Figure 1-9 Status Lights later in this chapter.)
The top region also contains the power input connectors/backplane. The power assembly contains the duplexed AC power
cables, and the alarm relay connector for remote alarm monitoring. Each power cable requires a separate AC electrical
source.
Below the power input region (AC power chassis) are two disk shelves which each contain three cooling fans, a SES
(SCSI Enclosure Services) unit, a SE-SE (single-ended to single-ended) I/O repeater module and a terminator module.
file:///H|/CSDoc/leoinstall/chapt1.htm (4 of 7) [01/14/2000 3:50:35 PM]
Preparing to Install the System
Below the disk shelves are two PCI card cages. Each card cage contains seven slots for PCI cards, for a total of 14 PCI
cards per system. Each PCI card cage has one bridge card that provides the interface between the logic suitcases and the
PCI cards. Each bridge card has a connector for a PC Memory Card International Association (PCMCIA) flash card, a
credit-card-sized EEPROM used to boot the operating system.
Beside each of the PCI card cages is a jack for attaching a grounding strap.
Four serial ports at the bottom of the cabinet are used to connect the system to the:
● CPU/memory motherboard within each logic suitcase
● System console
● Remote console
● Remote Service Network (RSN) modem (Not all systems are connected to the RSN. For an explanation of the
RSN, refer to HP-UX Operating System: Fault Tolerant System Administration (R1004H-04-ST)
The bottom of the cabinet also has a cable opening for routing power and communications cables.
1.3.1.3 System Ventilation
Ensure adequate air flow around the system during installation. The system requires two feet of clearance on the front and
rear of the cabinet, and a minimum of 18 inches of unobstructed area above the top of the cabinet. For cabinet ventilation
patterns and the required clearances to ensure proper cooling of internal components, see Figure 1-4.
Always ensure adequate air flow around the cabinet. Do not place objects on top of the
cabinet, or where they obstruct air vents. Obstructed air vents can cause the system to
overheat and parts within it to fail.
Figure 1-4. System Ventilation
1.4 Status Lights
file:///H|/CSDoc/leoinstall/chapt1.htm (5 of 7) [01/14/2000 3:50:35 PM]
Preparing to Install the System
Status lights on individual components enable customers to narrow down a problem to a single failed component. If a
problem occurs during the system installation, strategically-placed status lights provide assistance in diagnosing the
problem.
For more detailed information on system status lights (LEDs):
●
Check labels on the cabinet which explaining the meaning of the cabinet, power supply, PCI and disk lights
●
Refer to Appendix A in this manual
●
If a red, amber, or yellow light is illuminated and remains lit during the installation process, try reseating the
component and its partner. If the component still does not come online, refer to HP-UX Operating System:
Continuum Series 400 Operation and Maintenance Guide Release 1.0 (R025H-01-ST) for further status-light
information and component troubleshooting procedures.
1.5 System Peripherals
The PA-8500 Continuum Series 400 system can include the peripherals described in the following sections.
● V105 Terminal
●
C419/C619 Modem
●
Tape and CD-ROM Drives
V105 Terminal
The V105 terminal, which is shipped with most PA-8500 Continuum Series 400 systems, is an ASCII character-mode
terminal that can be configured to operate as a system console to display system error and status information. The V105
can also be used as a standard user terminal for communicating with system applications. It is available with either an
ANSI or PC keyboard. The V105 connects to either the Console (J315) or Auxiliary Console (J316) serial port on the rear
of the cabinet.
Figure 1-5. V105 Terminal
PA-8500 Continuum Series 400 systems can also support other terminals as long as they are properly defined within the
system. For instructions on defining terminal types, see HP-UX Operating System: Peripherals Configuration
(R1001H-04-ST).
file:///H|/CSDoc/leoinstall/chapt1.htm (6 of 7) [01/14/2000 3:50:35 PM]
Preparing to Install the System
C419/C619 Modem
PA-8500 Continuum Series 400 systems are connected to the Customer Assistance Center (CAC) through a C419/C619
modem and a dedicated telephone line. The C419/C619 modem is preconfigured for RSN operation and can transmit data
at 33,600 bps. For an explanation of the RSN, refer to HP-UX Operating System: Fault Tolerant System Administration
(R1004H-04-ST).
Figure 1-6. C419/C619 Modem
To troubleshoot and replace a failed C419/C619, see HP-UX Operating System: Continuum Series 400 Operation and
Maintenance Guide Release 1.0 (R025H-01-ST). For other information on the C419/C619 modem, see the vendor manual
shipped with the modem.
Tape and CD-ROM Drives
PA-8500 Continuum Series 400 systems support the T800-series tape and the D85X CD-ROM drives. For information
about tape drive operation and maintenance, refer to Continuum Series 400 Tape Drive Operation Guide Release 1.0
(R719-01-ST). For information about CD-ROM drive operation and maintenance, refer to HP-UX Operating System:
Continuum Series 400 Operation and Maintenance Guide Release 1.0 (R025H-01-ST).
file:///H|/CSDoc/leoinstall/chapt1.htm (7 of 7) [01/14/2000 3:50:35 PM]
Installing the Core Components
Chapter 2
Installing the Core System Components
After unpacking the system, follow the instructions in this chapter to install the core system components. The core system
components consist of the cabinet, V105 terminal, C419/C619 modem, and PCI cards. This chapter contains the following
sections:
●
Installing the Cabinet
●
Installing the System Console
●
Installing a C419/C619 Modem for RSN Use
●
Installing PCI Cards and Cables
The information in this chapter assumes that the system site has been prepared according to the instructions
in the Continuum Series 400 Site Planning Guide Release 1.0 (R454-01ST) and unpacked according to the
instructions in the PA-8500 Continuum Series 400 Unpacking Instructions.
2.1 Installing the Cabinet
Install the cabinet by performing the steps in the following sections:
●
If routing the power cables from the top of the cabinet, perform the following steps
(See Section 2.1.1 Installing the Power Cables (Top Entry).
●
If routing the power cables from the bottom of the cabinet, perform the following steps
(See Section 2.1.2 Installing the Power Cables (Bottom Entry).
2.1.1 Installing the Power Cables (Top Entry)
Perform the following steps to route the power cables from the top of the system.
1. Open the cabinet doors.
2. Verify that the cabinet ground wires are connected from the cabinet frame to the doors.
3. Make sure that the two MAIN power switches/AC Input breakers on the front of the cabinet are in the off (0)
position
as shown in Figure 2-1.
Figure 2-1. Cabinet Grounding Wires and MAIN Power Switches/AC Breaker
file:///H|/CSDoc/leoinstall/chapt2.htm (1 of 14) [01/14/2000 3:50:40 PM]
Installing the Core Components
4. Using a flat-blade screwdriver, remove the cable opening cover from the top of the cabinet
Figure 2-2. Removing the Cable Opening Cover
file:///H|/CSDoc/leoinstall/chapt2.htm (2 of 14) [01/14/2000 3:50:40 PM]
Installing the Core Components
5. Using the torque wrench, attach the ground cable that is shipped with the system to the back of the system cabinet
as shown in Figure 2-3, being careful not to apply more than 33 inch-pounds of torque.
The ground cable may be attached to the double ground lugs found on either the left or right
side of the cabinet.
Figure 2-3. Attaching the Ground Cable (Top of cabinet)
file:///H|/CSDoc/leoinstall/chapt2.htm (3 of 14) [01/14/2000 3:50:40 PM]
Installing the Core Components
6. Unpack the two system power cables from one of the cartons shipped with the system. The part number for each
power cable appears on the cable and on the plastic bag in which the cable is shipped.
Before connecting a power cable, always shut off both MAIN system power switches/AC input
breakers on the same side of the cabinet.
7. Connect each power cable to the cabinet and into a separate AC power source. To connect to the cabinet, plug the
AC power cable into the AC power cable assembly top right (See Figure 2-4) .
When routing the power cables through the cable opening at the top of the
cabinet, be careful not to disconnect the CABINET FAULT light cable.
Be sure to connect each power cable to a separate AC power source. If they
are plugged into the same source, a failure at the source will result in a system
crash.
8. Using a digital voltmeter (DVM), measure the AC input voltage. Verify that the voltage is within the range of 200
to 264 V AC.
If the input voltage is not within the specified range, do not proceed to the
next step. Verify the AC input power source.
Figure 2-4. Connecting the Power Cables (Top Entry)
file:///H|/CSDoc/leoinstall/chapt2.htm (4 of 14) [01/14/2000 3:50:40 PM]
Installing the Core Components
9. Since it is recommended that you limit the times the system is powered up and down, proceed to the system
console instructions (See Section 2.2 Installing the System Console later in this chapter) before completing Step 10.
10. Turn on the cabinet MAIN power switches. The cabinet power supply lights are illuminated, indicating that the
system is receiving power. If the LEDs do not illuminate , check the following:
●
●
Incoming power sources
Power cable connections to the power sources and cabinet
If the power cable or the power source is not the cause of the problem, refer to the Refer to HP-UX Operating System:
Continuum Series 400 Operation and Maintenance Guide Release 1.0 (R025H-01-ST) for further system troubleshooting.
2.1.2 Installing the Power Cables (Bottom Entry)
To route the power cables from the bottom of the system, follow the steps for top entry except:
● It is not necessary to open the cabinet top (Step 4)
● In Step 7, simply let the power cords drop downward in the cabinet rear and go through the bottom of the cabinet
doors.
2.2 Installing the System Console
If you are using a V105 terminal as the system console, connect it to the cabinet as described in the following procedure. If
you are using another terminal as the system console, be sure it is configured with the following parameters.
●
VT300/7 terminal emulation
file:///H|/CSDoc/leoinstall/chapt2.htm (5 of 14) [01/14/2000 3:50:40 PM]
Installing the Core Components
●
●
●
9600 EIA and auxiliary (Aux) baud rate
Odd parity
One stop bit
To install a V105, follow these steps.
1. Locate the terminal data cable (part number AW-B15201-25) in one of the cartons shipping with the system.
2. Connect the terminal data cable to the V105 terminal's SES1-EIA port and to the cabinet's Console port (J315),
(See Figure 2-5) . After the cable is connected, tighten its connector screws with a flat-blade screwdriver.
An additional terminal can be connected to the Auxiliary Console port (J316).
For additional information, see HP-UX Operating System: Peripherals
Configuration (R1001H-04-ST).
Figure 2-5. Connecting the V105 Data Cable
3. Connect the keyboard to the terminal as shown in Figure 2-6.
file:///H|/CSDoc/leoinstall/chapt2.htm (6 of 14) [01/14/2000 3:50:40 PM]
Installing the Core Components
Keyboard AA-V10501 is an ANSI keyboard and AA-V10502 is a PC keyboard.
Figure 2-6. Connecting the Keyboard to the V105
4. Connect the female end of the V105 power cord to the V105 power connector and the male end to an AC wall
outlet.
Figure 2-7 Connecting the V105 Power Cord
5. Power up the V105 by pressing the power switch on the front of the terminal to the ON position (See Figure 2-8) .
When the V105 passes its self-test, its screen displays PASS. If this does not occur, turn off the V105 power
switch, check its power cord connection, and then power it up again. If it still does not pass the self-test, refer to the
HP-UX Operating System: Continuum Series 400 Operation and Maintenance Guide Release 1.0 (R025H-01-ST)
for V105 troubleshooting information.
Figure 2-8 V105 Power Switch
file:///H|/CSDoc/leoinstall/chapt2.htm (7 of 14) [01/14/2000 3:50:40 PM]
Installing the Core Components
6. If needed, adjust the screen contrast and brightness using the dials.
Figure 2-9 V105 Operating Dials
7. To access the V105's configuration screens, press the <SETUP-F3> key (ANSI keyboard) or hold down the
<CTRL> key while pressing the <SCROLL-LOCK> key (PC keyboard).
8. When the V105 displays the setup screen keys, press the < F1 Quick> key. The V105 now displays the Quick
Setup screen as shown in Figure 2-10.
Figure 2-10 V105 Quick Setup Screen
file:///H|/CSDoc/leoinstall/chapt2.htm (8 of 14) [01/14/2000 3:50:40 PM]
Installing the Core Components
9. Set the values (See Figure 2-10) . To change the values, press the appropriate "arrow key" (up, down, left, right) to
select a field. Then, press the space bar to select the correct value.
10. Save these changes and exit the Quick Setup screen by pressing the <F14> key.
11. The V105 displays the prompt, Save all? (Y/N) . Press the <y> key to save the values selected or the <n> key to
exit without saving them.
Customize the V105 in other ways by again pressing the < SETUP-F3> or <CTRL-SCROLL-LOCK> key and then
selecting the appropriate screen by pressing the associated function key. Set and save the configuration values as described
in the preceding steps.
2.3 Installing a C419/C619 Modem for RSN Use
Install a C419/C619 modem for RSN use by performing the following steps.
1. Verify that the modem power switch is in the OFF (down) position, as shown in Figure 2-11.
Figure 2-11. Modem Power Switch
file:///H|/CSDoc/leoinstall/chapt2.htm (9 of 14) [01/14/2000 3:50:40 PM]
Installing the Core Components
2. Some CX19 modems have a dial-up/leased-line switch on the side. If the modem being used does, verify that the
switch is in the up position (See Figure 2-12) . If the modem does not have this switch, continue with step 3.
Figure 2-12. Modem Dial-Up/Leased-Line Switch
3. Locate the 16 DIP switches and verify that they are set CORRECTLY (See Figure 2-13). If necessary, use the end
of a paper clip, or similar pointed instrument, to change the switch settings.
Figure 2-13. Modem DIP Switch Settings
4. Connect one end of the telephone cable to the modem LINE connector and the other end to the telephone wall jack
as shown in Figure 2-14 .
Figure 2-14. Connecting the Modem Telephone Cable
file:///H|/CSDoc/leoinstall/chapt2.htm (10 of 14) [01/14/2000 3:50:40 PM]
Installing the Core Components
5. Connect the RS-232 cable (AW-B10102-25) to the modem EIA RS-232-C connector as shown in Figure 2-15.
Tighten the connector screws with a flat-blade screwdriver.
Figure 2-15. Connecting the RS-232 Cable to the Modem
6. Attach the adapter (part number JD-025PLG-07) to the RSN port (J317) on the cabinet, then connect the RS-232
cable to the adapter as shown in Figure 2-16.
Figure 2-16 Connecting the RS-232 Cable to the System
file:///H|/CSDoc/leoinstall/chapt2.htm (11 of 14) [01/14/2000 3:50:41 PM]
Installing the Core Components
7. Connect the power cord to the modem POWER connector and to an AC wall outlet as shown in Figure 2-17.
Figure 2-17. Connecting the Modem Power Cord
file:///H|/CSDoc/leoinstall/chapt2.htm (12 of 14) [01/14/2000 3:50:41 PM]
Installing the Core Components
8. Turn the modem power switch to ON (See Figure 2-18) .
Figure 2-18. Modem Power Switch
9. After it is powered on, the modem performs a self-test. During the modem self-test, the five speed indicators on the
front of the modem flash in sequence for approximately four seconds. Then the speed indicator light remains
steadily lit (the speed for C419 is 14.4; the speed for C619 is 33.6). If this does not happen, check that the AC
outlet is live. If the AC outlet is live and the modem still does not work, the modem may be faulty.
10. Verify the operation of the telephone line by plugging a telephone into the modem's PHONE port. Pick up the
telephone receiver and dial a known working number. If unable to get a connection, this phone line has not been
activated. Contact the telecommunications contractor or phone company to remedy the problem.
file:///H|/CSDoc/leoinstall/chapt2.htm (13 of 14) [01/14/2000 3:50:41 PM]
Installing the Core Components
2.4 Installing PCI Cards and Cables
The PCI cards ordered with the system are shipped installed in the PCI card cages. To install additional cards and to
connect cables to the PCI cards, refer to the PCI-card installation guides located in one of the cartons shipped with the
system.
file:///H|/CSDoc/leoinstall/chapt2.htm (14 of 14) [01/14/2000 3:50:41 PM]
Installing Tape Drives
Chapter 3
Installing Tape Drives
After the core system components are installed, tape drives can be installed. For each U501 SCSI PCI card in the system,
the following can be configured:
●
One stand-alone T800-Series tape or D85X CD-ROM drive (or)
●
Two daisy-chained T800-Series tape or D85X CD-ROM drives
This chapter explains how to install tape drives. It contains the following sections:
●
Installing a Stand-Alone T800-Series Tape Drive
●
Installing Daisy-Chained T800-Series Tape Drives
●
Completing the Installation of Tape Drive on a Running System
For more information about tape drives, refer to the Continuum Series 400 Tape Drive Operation Guide (R719-01-ST).
For CD-ROM installation See D859 CD-ROM Drive Installation and Operation Guide Release 1.0 (R720-01-ST)
3.1 Installing a Stand-Alone T800-Series Tape Drive
To install a stand-alone T800-Series tape drive, perform the following steps.
This procedure assumes that the system power is off or that the SCSI bus to which the tape drives will be attached has
been suspended.
1. Verify that the shipping cartons contain all the items included with Stand-Alone T800-Series Tape Drives.
Items Included with Stand-Alone T800-Series Tape Drives
Part Number
Description
AA-T80500
AA-T80600
T800-Series Tape Drive
AW-B12800- XX
Power Cord
AW-B21000-12
SCSI Cable
JC-005TRM
SCSI Terminator
AX-T60007
Data Cartridge (T805 and T806)
AX-T60006
Autoloader magazine (T806)
AX-T60002
Cleaning Cartridge (T805 and T806)
Parts included with the Stand-Alone T800-Series Tape Drive. (See Figure 3-1)
Figure 3-1. T800-Series Parts: Stand-Alone Tape Drive
file:///H|/CSDoc/leoinstall/chapt3.htm (1 of 12) [01/14/2000 3:50:46 PM]
Installing Tape Drives
2. Place the tape drive on a table or rack near the rear of the system cabinet.
3. Verify that the SCSI identification display on the tape drive is set to 0 (See Figure 3-2). If it is not, use a paper
clip (or similar nonmarking, pointed instrument) to press the buttons to increase or decrease the number. Press the
upper button to decrease the number and the lower button to increase it.
Do not press the upper button after the number 0 is displayed, or the lower button after 7 is displayed. Attempting to
move beyond these parameters will break the buttons.
Figure 3-2. SCSI Identification Display: Stand-Alone T800-Series
file:///H|/CSDoc/leoinstall/chapt3.htm (2 of 12) [01/14/2000 3:50:46 PM]
Installing Tape Drives
To change the SCSI identification on a T800-series tape drive, first power down the tape drive. The SCSI identification is
read by the system when the tape drive is powered up. If you change the SCSI identification display after power-up, the
new identification will not be registered by the tape drive. Any attempts to access the tape drive will result in an
application error.
4. Verify that the single-ended SCSI terminator (part number JC-005TRM) is installed in the lower port on the rear of
the tape drive. If it is not installed, connect it to the lower port and securely clip it to the tape drive (See Figure
3-3).
Install only a single-ended SCSI terminator on the tape drive. Do not install a differential terminator, as it
could damage the tape drive and/or SCSI PCI card.
Figure 3-3. SCSI Terminator: Stand-Alone T800-Series
file:///H|/CSDoc/leoinstall/chapt3.htm (3 of 12) [01/14/2000 3:50:46 PM]
Installing Tape Drives
5. Turn off the power switch on the tape drive.
Figure 3-4. Powering Down the T800-Series
6. Connect the SCSI cable (part number AW-B21000-12) to the rear of the tape drive and to the U501 SCSI card in
slot 7 of either PCI card cage as shown in Figure 3-5.
Figure 3-5. SCSI Cable: Stand-Alone T800-Series
file:///H|/CSDoc/leoinstall/chapt3.htm (4 of 12) [01/14/2000 3:50:46 PM]
Installing Tape Drives
7. Plug the power cord into the rear of the tape drive and into an AC wall outlet.
Figure 3-6. T800-Series Power Cord
file:///H|/CSDoc/leoinstall/chapt3.htm (5 of 12) [01/14/2000 3:50:46 PM]
Installing Tape Drives
8. Turn on the T800-Series power switch. The green power light is illuminated as long as the tape drive is receiving
power. If it is not illuminated, check to be sure the cables are securely connected.
Figure 3-7. Powering Up the T800-Series
9. When the system is booted, the tape drive will come online, as described in Chapter 4, "Booting the System."
3.2 Installing Daisy-Chained T800-Series Tape Drives
Two T800-series tape drives can be daisy-chained to each U501 SCSI PCI card in the system. To install daisy-chained tape
drives, perform the following steps.
This procedure assumes that the system power is off or that the SCSI bus to which the tape
drives will be attached has been suspended.
1. Verify that the shipping cartons contain the items included with Daisy- Chained T800-Series Tape Drives.
file:///H|/CSDoc/leoinstall/chapt3.htm (6 of 12) [01/14/2000 3:50:46 PM]
Installing Tape Drives
Items Included with Daisy-Chained T800-Series Tape Drives
Part Number
Description
AA-T80500
AA-T80600
T800-Series Tape Drive
AW-B12800- XX
Power Cord
AW-B21000-12
SCSI Cable
AW-B20000
SCSI Daisy-Chain Cable
JC-005TRM
SCSI Terminator
AX-T60007
Data Cartridge (T805 and T806)
AX-T60006
Autoloader magazine (T806)
AX-T60002
Cleaning Cartridge (T805 and T806)
Parts included with the Daisy-Chained T800-Series Tape Drive.
Figure 3-8. T800-Series Parts: Daisy-Chained Tape Drive
file:///H|/CSDoc/leoinstall/chapt3.htm (7 of 12) [01/14/2000 3:50:46 PM]
Installing Tape Drives
2. Place the tape drives on a table or rack near the rear of the system cabinet.
3. Verify that the SCSI identification display on the tape drive that will be connected to the SCSI PCI card is set to 0.
Verify that the SCSI identification display on the other tape drive in the daisy-chain is set to 1 (See Figure 3-9).
If the identification displays are not set to the appropriate numbers, use a paper clip (or similar nonmarking,
pointed instrument) to press the buttons that increase and decrease the displayed number. Press the upper
button to decrease the number, and the lower button to increase it.
Do not press the upper button after the number 0 is displayed, or the lower button after 7 is
displayed. Attempting to move beyond these parameters will break the buttons.
Figure 3-9. SCSI Identification Display: Daisy-Chained T800-Series
To change the SCSI identification on a T800-series tape drive, first power down the tape
drive. The SCSI identification is read by the system when the tape drive is powered up. If
you change the SCSI identification display after power-up, the new identification will not be
registered by the tape drive. Any attempts to access the tape drive will result in an
application error.
4. If the tape drive is the last drive in the daisy chain, verify that the single-ended SCSI terminator (part number
JC-005TRM) is installed in the lower port on the rear of the tape drive. If the terminator is not installed, connect it
to the lower port and securely clip it to the tape drive as shown in Figure 3-10.
Install only a single-ended SCSI terminator on the tape drive. Do not install a differential terminator, as it could damage
the tape drive and/or SCSI PCI card.
file:///H|/CSDoc/leoinstall/chapt3.htm (8 of 12) [01/14/2000 3:50:46 PM]
Installing Tape Drives
Figure 3-10. SCSI Terminator: Daisy-Chained T800-Series
If the tape drive is the first drive in the daisy chain and a terminator is connected to either tape-drive port, remove the
terminator.
5. Turn off (0) the power switch on each tape drive.
Figure 3-11. Powering Down the T800-Series( 2nd)
6. Connect the SCSI cables, (part number AW-B21000-12) to the rear of the tape drive and to the U501 SCSI card in
slot 7 of the PCI card cages as shown in Figure 3-12.
Figure 3-12. SCSI Cables: Daisy-Chained T800-Series
file:///H|/CSDoc/leoinstall/chapt3.htm (9 of 12) [01/14/2000 3:50:46 PM]
Installing Tape Drives
7. Plug the power cords into the rear of each tape drive and into AC wall outlets.
Figure 3-13. T800-SeriesPower Cord (2nd)
file:///H|/CSDoc/leoinstall/chapt3.htm (10 of 12) [01/14/2000 3:50:46 PM]
Installing Tape Drives
8. Turn on the power switch on the rear of each tape drive. The green power light on each tape drive is illuminated
and remains lit as long as the tape drive is receiving power. If the light does not illuminate, check to be sure that the
power cables are securely connected.
Figure 3-14. Powering Up the T800-Series (2nd)
To change the SCSI identification on a T800-Series tape drive, first power down the tape drive. The SCSI identification is
read by the system when the tape drive is powered up. If you change the SCSI identification display after power-up, the
new identification will not be registered by the tape drive. Any attempts to access the tape drive will result in an
application error.
9. If you installed the tape drives on an offline system, the tape drives will come online when you boot the system.
(See Chapter 4 Booting the System.)
file:///H|/CSDoc/leoinstall/chapt3.htm (11 of 12) [01/14/2000 3:50:46 PM]
Installing Tape Drives
3.3 Completing the Installation of Tape Drives on a Running System
To complete the installation of a tape drive on a running DNCP Series 400/400-CO (PA-8500) system, perform the
following steps.
1. Issue the addhardware command. This command causes the system to scan for new hardware such as tape
drives and to update the system file. The command creates the device special files required by the new tape drive in
the appropriate /dev directories.
#
addhardware-v
Running ioscan
Running ioinit
insf:Installing special files for stape instance 0 address
14/0/3.5.0
2. Verify the configuration by Issuing the ioscan command:
#
/ioscan -fn -C tape
Class
I
H/W Path
Driver
S/W State
H/W Type
Description
==================================================================
tape
0
14/0/3.5.0
stape
CLAIMED
DEVICE
HP
C1537A
/dev/rmt/0m
/dev/rmt/c3t5d0BESTn
/dev/rmt/0mb
/dev/rmt/c3t5d0BESTnb
/dev/rmt/0mn
/dev/rmt/c3t5d0DDS
/dev/rmt/0mnb
/dev/rmt/c3t5d0DDSb
/dev/rmt/c3t5d0BEST
/dev/rmt/c3t5d0DDSn
/dev/rmt/c3t5d0BESTb
/dev/rmt/c3t5d0DDSnb
The preceding example shows the device files available for tape class, as well as the location and type of the tape device.
For more information on the addhardware, ioscan , and other tape-drive operating commands, see the manual
HP-UX Operating System: Peripherals Configuration (R1001H-04-ST).
file:///H|/CSDoc/leoinstall/chapt3.htm (12 of 12) [01/14/2000 3:50:46 PM]
Booting the System
Chapter 4
Booting the System
This chapter describes how to boot the system.
Boot the system by performing the following steps.
1.
2.
3.
4.
Verify that cabinet components are seated properly by checking that their thumbscrews are fully tightened.
Verify that the flash cards are fully inserted in the bridge cards in slot 0 of each PCI card cage.
Power up the system console.
Initiate the automatic boot process by turning on the MAIN and PCI power switches as shown in Figure 4-1.
Figure 4-1. System Power Switches
Wait approximately 10 seconds for the system boot to begin. When the system begins to boot, the CABINET FAULT and
component lights flash on and off. As the booting progresses, the logic suitcase lights are illuminated in the sequence listed
below .
Logic Suitcase Power-Up Light Sequence
Power-Up
Stage
Color
State
file:///H|/CSDoc/leoinstall/chapt4.htm (1 of 3) [01/14/2000 3:50:48 PM]
Meaning
Booting the System
Red
1
Off
Yellow On
Green
Red
2
The logic suitcase is performing its self-test.
Off
Off
Yellow Flashing The master logic suitcase has passed its self-test and is being configured by the system.
Green
Red
3
Off
Off
Yellow Off
Green
The master logic suitcase and its partner are online and duplexed.
On
Stages 1 and 2 should last no longer than five minutes. If they last longer, turn off the system power switches and the system
console, wait about two minutes, and then turn on the power switches and system console to begin the boot process again. If
there is still a problem, refer to HP-UX Operating System: Fault Tolerant System Administration (R1004H-04-ST) for
instructions on how to perform a manual boot.
5. As the booting progresses, the system console displays a series of messages similar to the following sample output.
Continuum Firmware, Version xx.y (G2xx)
(copyright) 1995-1998 by Ascend Communications, Inc.
Built: Mon May 7 18:12:11 EST 1999
All Rights Reserved
Model type:
G262
Total Memory Size:
512Mb
Board Revision:
31
CPU Configuration:
CPUs in slots 0 and 1
Boot Status:
Booting
Hit any key to enter manual boot mode, else wait for auto boot.
If no messages are displayed on the system console, the console data cable may not be securely connected or the console may
not be properly configured. Check the cable connections and refer to Chapter 2 for information about system console
configuration. Then, power down the system, wait about two minutes, and begin the boot process again.
6. Although the system has now successfully booted, check that all of the system components are functioning properly.
To do this, make sure that:
●
All red and amber fault LEDs on the cabinet are off. (Illuminated yellow LEDs are permissible on the
PCI card cage with HP-UX)
●
Green lights are on.
If this is not the case, try reseating each red-lit component or refer to the troubleshooting chapter in HP-UX Operating System:
Continuum Series 400 Operation and Maintenance Guide Release 1.0 (R025H-01-ST) for more detailed troubleshooting
instruction.
The system console displays additional messages followed by the login prompt. Log in as root and enter a new password.
The system prompts you to reenter the new password and then to confirm the password. Record the password so it is available
the next time you log in.
file:///H|/CSDoc/leoinstall/chapt4.htm (2 of 3) [01/14/2000 3:50:48 PM]
Booting the System
GenericSysName (HP Release B.xx.00) (see /etc/issue)
Console Login: root
New password:
Re-enter new password:
The system displays additional messages followed by the command-line prompt. When this prompt is seen, the system has
successfully booted.
7. Close the cabinet doors.
Next, configure the RSN as described in Chapter 5, Configuring the RSN and C419/C619 Modem .
file:///H|/CSDoc/leoinstall/chapt4.htm (3 of 3) [01/14/2000 3:50:48 PM]
Configuring the RSN and C419/C619 Modem
Chapter 5
Configuring the RSN and C419/C619 Modem
This chapter describes how to configure the Remote Services Network (RSN). It contains the following sections.
● Preparing to Configure the RSN
●
Configuring the RSN
●
Configuring the C419/C619 Modem
●
Completing and Verifying Configuration of the RSN
For more information on how to configure the RSN, see HP-UX Operating System: Fault Tolerant System Administration
(R1004H-04-ST).
5.1 Preparing to Configure the RSN
After logging into the system as root (See Booting the System), perform the following steps to prepare to configure the
RSN.
1. Enter the following command to set the password for the user sracsx or sracs. The sracsx or sracs login
name enables CAC personnel to log in remotely to the system. In particular, the sracsx login enables the CAC to
examine and change values in your system. The sracs login provides a restricted shell that enables the CAC only
to examine values in this system.
passwd sracs
or
passwd sracsx
2. The system prompts you for a password. Enter a new password, and then confirm the password at the subsequent
prompt.
New password:
Re-enter new password:
3. Record the sracsx or sracs account password; you will enter the password in the installation report, as
described later in this chapter.
file:///H|/CSDoc/leoinstall/chapt5.htm (1 of 14) [01/14/2000 3:50:53 PM]
Configuring the RSN and C419/C619 Modem
5.2 Configuring the RSN
Perform the following steps to configure the RSN using the rsnadmin command.
1. Execute the rsnon script as shown in the following example. This script enables the RSN to work properly.
/usr/stratus/rsn/bin/rsnon
This script displays the following message and prompt. Press the <Return> key to continue.
1. Setting rsn_monitor, rsn_getty, rsndbs to respawn in /etc/inittab.
2. Enabling the rsntrans entry in /var/spool/cron/crontabs/rsn.
3. If any errors are encountered, no changes are committed.
Press return to continue or q to quit...
The script displays the RSN inittab settings and asks you if they are correct. The settings should be correct. Press y
followed by the <Return> key to continue.
**************************************************
**************************************************
CHANGING RSN INITTAB SETTINGS.
Changing settings to respawn
22,24c22,24
< rsnd:234:off:/usr/stratus/rsn/bin/rsndbs >/dev/null 2>&1
< rsng:234:off:/usr/stratus/rsn/bin/rsngetty -r >/dev/null 2>$1
< rsnm:234:off:/usr/stratus/rsn/bin/rsn_monitor >/dev/null 2>&1
--> rsnd:234:respawn:/usr/stratus/rsn/bin/rsndbs >/dev/null 2>&1
> rsng:234:respawn:/usr/stratus/rsn/bin/rsngetty -r >/dev/null 2>&1
> rsnm:234:respawn:/usr/stratus/rsn/bin/rsn_monitor >/dev/null 2>&1
file:///H|/CSDoc/leoinstall/chapt5.htm (2 of 14) [01/14/2000 3:50:53 PM]
Configuring the RSN and C419/C619 Modem
Are these the proper changes to be made (y/n): y
The script displays a commented-out line in the file /var/spool/cron/crontabs/sracs and asks you if this line
should be uncommented. Press y followed by the <Return> key to continue.
**************************************************
**************************************************
CHECKING /var/spool/cron/crontabs/sracs FOR RSNTRANS
#1,16,31,46 * * * * /usr/stratus/rsn/bin/rsntrans -r1 -s HUB -z >/dev/null
Is this the proper line in /var/spool/cron/crontabs/sracs to uncomment? (y/n): y
If the script completes execution successfully, it displays the following messages.
RSNTRANS HAS BEEN ENABLED
/etc/inittab SETTINGS ARE COMMITTED
RSN IS NOW ON.
**************************************************
**************************************************
#
2. Enter the /usr/stratus/rsn/bin/rsnadmin command to display the RSNADMIN MAIN MENU .
RSNADMIN MAIN MENU
1) list list all database info
2) local_info local_info menu
file:///H|/CSDoc/leoinstall/chapt5.htm (3 of 14) [01/14/2000 3:50:53 PM]
Configuring the RSN and C419/C619 Modem
3) port_info port info menu
4) site_info site info menu
5) notify_list notify_list menu
6) mask mask menu
7) modem_script modem script menu
8) periodic_call periodic call menu
Options: [#, command, ? command (help for command), 0 (parent menu),
/ (goto main menu), q (quit rsnadmin)]
Command:
At the Command: prompt at the end of the menu, enter the value 2 to select the local_info menu item. For example:
Command: 2
This displays the menu called LOCAL_INFO MENU .
3. At the Command: prompt at the end of LOCAL_INFO MENU , enter the value 4 to select the bridge_system_path
menu item. For example:
LOCAL_INFO MENU
1) list list all local info
2) protocol set rsn transfer protocol
3) site_id site_id menu
4) bridge_system_path bridge_system_path menu
5) demo_mode demo_mode menu
6) fault_time_limit fault time limit menu
Options: [#, command, ? command (help for command), 0 (parent menu),
/ (goto main menu), q (quit rsnadmin)]
Command: 4
file:///H|/CSDoc/leoinstall/chapt5.htm (4 of 14) [01/14/2000 3:50:53 PM]
Configuring the RSN and C419/C619 Modem
This displays the menu called BRIDGE SYSTEM PATH MENU .
4. At the Command: prompt at the end of BRIDGE SYSTEM PATH MENU , enter the value 2 to select the set menu
item in order to specify the bridge_system_path entry. For example:
BRIDGE SYSTEM PATH MENU
1) get get current bridge_system_path
2) set set current bridge_system_path
Options: [#, command, ?command (help for command), 0 (parent menu),
/ (goto main menu), q (quit rsnadmin)]
Command: 2
The bridge_system_path entry identifies the NFS mount path of the root directory on the bridge system. A bridge system
such as the PA-8500 Continuum Series 400 system is attached to an RSN modem. Enter a slash (/) at the next prompt. For
example:
Enter new bridge_system_path (enter / if this is the bridge): /
Database successfully updated
Hit Return to continue.
5. Press the <Return> key to save the current or new bridge system path and return to the BRIDGE SYSTEM PATH
MENU .
6. Press 0 followed by the <Return> key to return to LOCAL_INFO MENU .
7. At the Command: prompt at the end of LOCAL_INFO MENU , enter the value 3 to select the site_id menu item.
For example:
Command: 3
This displays the menu called SITE_ID MENU .
8. At the Command: prompt at the end of SITE_ID MENU , enter the value 2 to select the set menu item in order to
specify the current site ID. For example:
file:///H|/CSDoc/leoinstall/chapt5.htm (5 of 14) [01/14/2000 3:50:53 PM]
Configuring the RSN and C419/C619 Modem
SITE_ID MENU
1) get get current site_id
2) set set current site_id
Options: [#, command, ?command (help for command), 0 (parent menu),
/ (goto main menu), q (quit rsnadmin)]
Command: 2
Stratus recommends using the site ID specified on the Sales Order pick list which arrived with the shipping carton. See the
bolded portion of the example below:
Report Name: COP-3136
S.O. PICKLIST
Report Date: 05/15/97
Page: 1
=============
BILL OF MATERIAL EFFECTIVITY DATE: 05/15/97
ORDER NO.:
SHIP-TO:
US 113370
01923
BILL-TO: 01932
Company X
Company X
55 Main Blvd.
55 Main Blvd.
Boston, MA 02116
USA
SID TECH: J. Bond
SHIPPER: XXX Inc.
Boston, MA 02116
USA
CPU SER:60029 RA KIT:N
INSP BY:M.Jones
SITE SR: N/A___Y___N__
ATTN:PAM SMITH
PHONE:X2502
SITE-ID: comp_ux
ATTN:
PHONE:
ORDER STATUS: APPROVED
If necessary, a different site ID of up to 16 characters can be specified. For example:
file:///H|/CSDoc/leoinstall/chapt5.htm (6 of 14) [01/14/2000 3:50:53 PM]
Configuring the RSN and C419/C619 Modem
Enter new site_id: cac_ux
If the site ID is changed, immediately inform the CAC. The CAC needs the site ID to uniquely identify this site. If the
CAC does not know this site ID, the CAC hub will be unable to properly track communications from the site and may lose
the installation report for this site.
1. The letters _ux must end the site ID so that the CAC knows that this is a system running the HP-UX operating
system.
Record the site ID; enter the site ID in the installation report, as described later in this chapter. If a site ID, different from
the one listed in the pick list, was used, it may not be unique. If so, the CAC will contact this site and request a change.
Press the <Return> key to update the database. The command displays the following messages.
Database successfully updated.
Hit Return to continue.
Press the <Return> key to return to SITE_ID MENU . Enter a slash (/ ) and then press the <Return> key to return to the
RSNADMIN MAIN MENU .
9. At the Command: prompt at the end of RSNADMIN MAIN MENU , enter the value 4 to select the site_info menu
item. For example:
Command: 4
This displays the menu called SITE_INFO MENU .
10. At the Command: prompt at the end of SITE_INFO MENU , enter the value 2 to select the hub_phone_1 menu
item. For example:
SITE_INFO MENU
1) list list all site_info
2) hub_phone_1 hub_phone_1 menu
3) hub_phone_2 hub_phone_2 menu
4) rsn_password set rsn_password
5) nighttime nighttime menu
6) cleanup cleanup menu
7) scs_in_use scs_in_use
Options: [#, command, ?command (help for command), 0 (parent menu),
file:///H|/CSDoc/leoinstall/chapt5.htm (7 of 14) [01/14/2000 3:50:53 PM]
Configuring the RSN and C419/C619 Modem
/ (goto main menu), q (quit rsnadmin)]
Command: 2
This displays the menu called HUB_PHONE_1 MENU .
11. At the Command: prompt at the end of HUB_PHONE_1 MENU , enter the value 2 to select the set menu item in
order to specify the hub phone 1 entry. The hub phone 1 entry specifies the RSN phone number of the supporting
Stratus hub. If you enter a different hub number than the one which should be used, the CAC will contact the site
after it receives the installation report. In the following example, the North American hub number is specified.
HUB_PHONE_1 MENU
1) get get current hub phone 1 setting
2) set set hub phone 1
Options: [#, command, ?command (help for command), 0 (parent menu),
/ (goto main menu), q (quit rsnadmin)]
Command: 2
Enter new hub phone 1: 18008515125
Database successfully updated
Hit Return to continue.
If errors occur at this point, you did not start the RSN with the /usr/stratus/rsn/bin/rsnon command before
you started rsnadmin. You will exit RSNADMIN with the error below:
Command:4 "site_info" is not valid when rsndbs is
file:///H|/CSDoc/leoinstall/chapt5.htm (8 of 14) [01/14/2000 3:50:53 PM]
Configuring the RSN and C419/C619 Modem
not running.
rsnadmin: Unable to access rsn database server.
system error: No such file or directory
Exiting...rsnerrno: (313); errno: (2).
To recover from the error, start RSN by executing the /usr/stratus/rsn/bin/rsnon command at the operating
system # prompt. Then execute the /usr/stratus/rsn/bin/rsnadmin command to display the RSNADMIN
MAIN MENU . Enter 4 to display the SITE_INFO MENU . You can now set the hub phone number by entering 2 at the
Command: prompt.
If you do not have a direct outside telephone, have one installed as soon as possible. You can route hub calls through a
PBX, but this may cause the following problems:
●
Data loss
An unstable connection
●
Inability of your module to contact the hub with problem reports
●
Inability of the CAC to dial in to your system after you report problems
●
In order to send the installation report, you can route the RSN calls through PBX, but you risk all of the above problems
over the long term unless a direct line is installed. If you do route RSN calls through a PBX, set the hub number so that it
dials the proper prefix, followed by a comma and a numeral one (9,1; 99,1; or 8,1; etc.), to wait for an outside line dial
tone. For example:
Command: 2
Enter new hub phone 1: 9,18008515125
Database successfully updated
Hit Return to continue.
Press the <Return> key to save the new hub phone number. Press 0 followed by the <Return> key to return to
SITE_INFO MENU .
12. At the Command: prompt at the end of SITE_INFO MENU , enter the value 4 to select the RSN password menu
item. For example:
Command: 4
The system then prompts you to enter an RSN password. The rsn_password value enables the supporting hub to
remotely service your machine. Note that the RSN password can contain only numbers and letters.
Enter new rsn_password: rsn4321
file:///H|/CSDoc/leoinstall/chapt5.htm (9 of 14) [01/14/2000 3:50:53 PM]
Configuring the RSN and C419/C619 Modem
Database successfully updated
Hit Return to continue.
Record the RSN password; you will need to enter the password in the installation report, as described later in this chapter.
Press the <Return> key to save the new RSN password. Enter a slash (/ ) and then press the <Return> key to return to
RSNADMIN MAIN MENU .
13. At the Command: prompt at the end of RSNADMIN MAIN MENU , enter the value 5 to select the notify_list menu
item. The notify list enables you to specify who should receive mail or messages when the RSN encounters any
problems or if there is unsolicited incoming RSN modem traffic (for example, when a supporting hub calls your
site). For example:
Command: 5
This displays the menu called NOTIFY_LIST MENU .
14. At the Command: prompt at the end of NOTIFY_LIST MENU , enter the value 4 to select the add_both menu item
to add your login name or the system administrator's login name to the list. For example:
NOTIFY_LIST MENU
1) list list the notify list
2) add_mail add user for mail notify
3) add_message add user for message notify
4) add_both add user for both types of notification
5) remove_user remove user from list
Options: [#, command, ?command (help for command), 0 (parent menu),
/ (goto main menu), q (quit rsnadmin)]
Command: 4
If you do not know which users you want to add, you can change the notify list later.
file:///H|/CSDoc/leoinstall/chapt5.htm (10 of 14) [01/14/2000 3:50:53 PM]
Configuring the RSN and C419/C619 Modem
The system then prompts you to enter a user to the notify list. Specify a login name. The login name should not contain
any spaces.
Enter user: root
Press the <Return> key to save the login name in the notify list.
1. Enter q to exit the rsnadmin command.
5.3 Configuring the C419/C619 Modem
Perform the following steps to configure the C419/C619 modem.
1. If you did not initialize the C419/C619 modem when you installed the modem hardware, activate it now. (If the
modem is not connected to your system, See Installing a C419/C619 Modem for RSN Use.)
2. Before executing rsninitmodem , execute the rsnoff script as follows.
/usr/stratus/rsn/bin/rsnoff -qa
Press the <Return> key to continue. Using the -a option stops all RSN processes, including rsnd and rsn_monitor.
Using the -q option causes rsnoff not to prompt you.
3. Execute the following script to configure the C419/C619 modem. For more information on the rsninitmodem
script, see the rsninitmodem man page.
/usr/stratus/rsn/bin/rsninitmodem
The script displays the following messages as it configures the modem.
Wait ...
..............................................
Verifying ..................
Saving ....
/usr/stratus/bin/rsninitmodem: Done
5.4 Completing and Verifying Configuration of the RSN
Perform the following steps to complete and verify the configuration of the RSN
1. To complete the configuration of the modem, execute the rsn_setup script as shown in the following
example.
/usr/stratus/rsn/bin/rsn_setup
file:///H|/CSDoc/leoinstall/chapt5.htm (11 of 14) [01/14/2000 3:50:53 PM]
Configuring the RSN and C419/C619 Modem
This script verifies that the RSN setup is correct and displays the following message:
rsn_setup: completed successfully
If the script displays error messages, take corrective actions as indicated by the script.
2. To verify the configuration, you must first make sure the RSN is disabled by issuing the rsnoff script as shown
in the following example.
/usr/stratus/rsn/bin/rsnoff
Press the <Return> key to continue. The script displays the /etc/inittab settings and asks you if they are correct.
The settings should be correct. Press the letter y followed by the <Return> key to continue. The script displays a line from
the file /var/spool/cron/crontabs/rsn and asks you if this line should be commented out. Press the letter y
followed by the <Return> key to continue. If the script completes execution successfully, it displays the following
messages:
RSNTRANS HAS BEEN DISABLED
/etc/inittab SETTINGS ARE COMMITTED
RSN IS NOW OFF
3. To finish verifying the configuration, execute the rsnon script as shown in the following example. This script
enables the RSN to work properly.
/usr/stratus/rsn/bin/rsnon
This script displays the following message and prompt. Press the <Return> key to continue.
1. Setting rsn_monitor, rsn_getty, rsndbs to respawn in /etc/inittab.
2. Enabling the rsntrans entry in /var/spool/cron/crontabs/rsn.
3. If any errors are encountered, no changes are committed.
Press return to continue or q to quit...
The script displays the RSN inittab settings and asks you if they are correct. The settings should be
correct. Press y followed by the <Return> key to continue.
**************************************************
**************************************************
file:///H|/CSDoc/leoinstall/chapt5.htm (12 of 14) [01/14/2000 3:50:53 PM]
Configuring the RSN and C419/C619 Modem
CHECKING RSN INITTAB SETTINGS
Changing settings to respawn
22,24c22,24
< rsnd:234:off:/usr/stratus/rsn/bin/rsndbs >/dev/null 2>&1
< rsng:234:off:/usr/stratus/rsn/bin/rsngetty -r >/dev/null 2>&1
< rsnm:234:off:/usr/stratus/rsn/bin/rsn_monitor >/dev/null 2>&1
--> rsnd:234:respawn:/usr/stratus/rsn/bin/rsndbs >/dev/null 2>&1
> rsng:234:respawn:/usr/stratus/rsn/bin/rsngetty -r >/dev/null 2>&1
> rsnm:234:respawn:/usr/stratus/rsn/bin/rsn_monitor >/dev/null 2>&1
Are these the proper changes to be made (y/n): y
The script displays a commented-out line in the file /var/spool/cron/crontabs/sracs and asks you if this line
should be uncommented. Press y followed by the <Return> key to continue.
**************************************************
**************************************************
CHECKING /var/spool/cron/crontabs/sracs FOR RSNTRANS
#1,16,31,46 * * * * /usr/stratus/rsn/bin/rsntrans -r1 -s HUB -z >/dev/null
Is this the proper line in /var/spool/cron/crontabs/sracs to uncomment? (y/n): y
If the script completes execution successfully, it displays the following messages.
RSNTRANS HAS BEEN ENABLED
/etc/inittab SETTINGS ARE COMMITTED
file:///H|/CSDoc/leoinstall/chapt5.htm (13 of 14) [01/14/2000 3:50:53 PM]
Configuring the RSN and C419/C619 Modem
RSN IS NOW ON.
**************************************************
**************************************************
#
4. Execute the following script to make sure that you have connected to the hub.
/usr/stratus/rsn/bin/rsntry
The script calls the hub telephone number you specified with rsnadmin and attempts to verify the connection. If the
script concludes with a success message, the RSN is installed and configured correctly. The system then displays the root
prompt. You can now prepare and send the installation report.
/usr/stratus/rsn/bin/rsntrans -r1 -sHUB -z -f -x0
waiting for connect message.....
16:49:56 C connected after 1 attempt(s) ====================
16:49:57 T line_swap
16:49:58 R line_swap
16:49:58 T master done with conversation
16:49:58 Conversation Complete: SUCCEEDED
#
If the hub telephone number for your region does not work, first check to see if the phone line has a dial tone. Also check
the hub_phone_1 value in the RSNADMIN database and make sure that it is correctly entered.
file:///H|/CSDoc/leoinstall/chapt5.htm (14 of 14) [01/14/2000 3:50:53 PM]
Sending the Installation Report
Chapter 6
Sending the Installation Report
After the RSN is configured , an installation report must be prepared and sent to the CAC. The installation report provides
valuable information that enables the CAC to support the site and track product quality issues. This chapter contains the following
sections.
●
See Preparing an Installation Report
●
See Sending an Installation Report to the CAC
●
See Sample Installation Report
6.1 Preparing an Installation Report
Perform the following steps to prepare the installation report.
1. Execute the install_report script as shown in the following example.
/usr/stratus/rsn/bin/install_report
The script first displays general instructions for completing the installation report.
*** Please read the following completely before proceeding ***
It is important that you take a moment to fully complete the following install report
questions. The data will be used to update Customer Service databases in support of
your site and provide product quality information.
Once the report is complete options will be provided to send the report to Stratus or a
Distributor/VAR. An alternate option to save the report to a file for future use is
provided.
The options to send the report use either the Remote Service Network (RSN) or Internet
mail which require the following to work.
Options:
RSN - Hardware installed & configured. RSN operational.
Internet mail - Operational Internet connection.
- `sendmail' configured for Internetwork mail.
file:///H|/CSDoc/leoinstall/chapt6.htm (1 of 13) [01/14/2000 3:50:58 PM]
Sending the Installation Report
Note: abort program = ^C, character erase = ^H or backspace key,
line kill = ^U
2. The script then displays a prompt that asks if you want to continue with the installation report. Enter y and
press the <Return> key to complete the report, or enter n and press the <Return> key to exit the script.
Do you want to continue with the install report (yes/no)? y
3. If y is entered at the prompt in step 2, a prompt asks whether a system installation or a system upgrade has been
performed. Enter 1 for system installation. For example:
(UX Customer Installation Reporter - Rev 1.0)
Select the type of installation that was performed.
(1) System Installation.
(2) Upgrade to an existing system.
Enter Selection (1 2): 1
4. A prompt asks for verification of the system site ID. The default site ID is the same as the site ID on the S.O. (Sales Order)
pick list which arrived with the shipping carton (shown in bold in the example below).
Report Name: COP-3136
S.O. PICKLIST
Report Date: 05/15/99
Page: 1
=============
BILL OF MATERIAL EFFECTIVITY DATE: 05/15/99
ORDER NO.: US 113370
SHIP-TO:
01923
BILL-TO: 01932
Company X
Company X
55 Main Blvd.
55 Main Blvd.
Boston, MA 02116
USA
SID TECH: J. Bond
SHIPPER: XXX Inc.
Boston, MA 02116
USA
CPU SER:60029 RA KIT:N
INSP BY:M.Jones
SITE SR: N/A___Y___N__
ATTN:PAM SMITH
ATTN:
file:///H|/CSDoc/leoinstall/chapt6.htm (2 of 13) [01/14/2000 3:50:58 PM]
Sending the Installation Report
PHONE:X2502
PHONE:
SITE-ID: comp_ux
ORDER STATUS: APPROVED
Verify this site ID. If this is the same site ID value specified with the rsnadmin command, as described in the Configuring the
RSN section of Chapter 5, press the <Return> key.
(UX Customer Installation Reporter - Rev 1.0)
Installation of a Stratus Module
Verify the Site id & System node name currently set on the system.
(If correct, press <return> or enter correct name).
System site id = "cac_ux":
5. When the <Return> key is pressed, a prompt asks for verification of the system node name. The default node name is the
same as the site ID. To verify the node name, press the <Return> key. A different node name can be entered and saved by
pressing the <Return> key. If a different node name is entered, log in as superuser when completing the installation
report, and change the actual node name value with the uname -S command.
System nodename = "cac_ux":
6. When the <Return> key is pressed, prompting occurs, one field at a time, for additional information about the site. After a
field is completed, press the <Return> key to move to the next field.
Company:
Stratus Computer
Street address:
111 Powdermill Road
City:
Maynard
State or Country:
Zip:
MA
01754
The script then prompts you to enter the sales order number.
Sales Order Number: 113370
Find the order number (ORDER NO) on the picklist, as shown in bold below.
file:///H|/CSDoc/leoinstall/chapt6.htm (3 of 13) [01/14/2000 3:50:58 PM]
Sending the Installation Report
Report Name: COP-3136
Report Date: 05/15/99
S.O. PICKLIST
Page: 1
=============
BILL OF MATERIAL EFFECTIVITY DATE: 05/15/99
ORDER NO.: US 113370
SHIP-TO:
01923
BILL-TO:01932
Company X
Company X
55 Main Blvd.
55 Main Blvd.
Boston, MA 02116
USA
SID TECH: J. Bond
SHIPPER: XXX Inc.
Boston, MA 02116
USA
CPU SER:60029 RA KIT: N
7. The script then prompts you to enter the CPU (cabinet) serial number. Find the CPU serial number (CPU
SER) on the picklist (see this number bolded in sample picklist below) or on a bar code sticker on the rear
of the cabinet (See Figure 6-1).
Report Name: COP-3136
Report Date: 05/15/99
S.O. PICKLIST
Page: 1
=============
BILL OF MATERIAL EFFECTIVITY DATE: 05/15/99
ORDER NO.: US 113370
SHIP-TO:
01923
BILL-TO: 01932
Company X
Company X
55 Main Blvd.
55 Main Blvd.
Boston, MA 02116
USA
SID TECH: J. Bond
SHIPPER: XXX Inc.
Boston, MA 02116
USA
CPU SER:60029 RA KIT: N
Figure 6-1 Cabinet Part Number and Serial Number
file:///H|/CSDoc/leoinstall/chapt6.htm (4 of 13) [01/14/2000 3:50:58 PM]
Sending the Installation Report
8. The script also prompts you to enter the following information.
System Administrator:
Beth Smith
System Admin Phone No.:
1-508-999-9898
Installer:
Total Install Hours:
Beth Smith
5
Is the RSN installed (yes/no)? y
User Name for CAC Access:
beths
9. The script then prompts you to enter the password for the CAC user specified when the RSN was configured. For more
information, See Configuring the RSN and C419/C619 Modem.
Password for CAC User:
beths
10. The script then prompts you to enter the RSN password specified when the RSN was configured . For more information,
file:///H|/CSDoc/leoinstall/chapt6.htm (5 of 13) [01/14/2000 3:50:58 PM]
Sending the Installation Report
See Configuring the RSN and C419/C619 Modem.
RSN Password
(press <return>, if not set):
(your password)
Modem Phone Number
(Include area/country code):
(your modem phone number)
11. The script then asks seven yes/no questions about your experience with the installation process. After entering y (yes) or n
(no) in response to a question, press the <Return> key to move to the next question.
** Answer the following 7 yes/no questions to complete the data entry
portion of the install report. **
Was your Stratus system delivered when expected (yes/no)?
Did the hardware, software, and documentation received match
your order (yes/no)?
Were you able to properly prepare your environment using the Stratus
Preparation documentation (yes/no)?
supplied Site
Were you able to successfully install your system by utilizing the
Stratus supplied product Installation documentation (yes/no)?
Were there any hardware installation problems (yes/no)?
Were there any software installation problems (yes/no)?
Would you like to add any general comments (yes/no)?
12. If you answered y (yes) to the final question in step 11, the script prompts you for your comments. Please enter your name
after your comments so that Stratus can contact the site if necessary. After the final comment, press the <Return> key,
enter a period (. ) on the new line, and then press the <Return> key again.
Enter general comments now.
(To end input, enter a line containing just a `.', then <return>).
The installation went well.
(your name) <Return>
. <Return>
file:///H|/CSDoc/leoinstall/chapt6.htm (6 of 13) [01/14/2000 3:50:58 PM]
Sending the Installation Report
When you enter the period (.), the script indicates that the report is complete.
End of interactive data input.
Creating the Install Report ...
Report Complete!
13. The script then prompts you to specify where to send the installation report. After entering a selection (1, 2, or 3), press the
<Return> key.
The following are the options available for providing Stratus
or a Distributor/VAR with an install report.
(1) Send via RSN to regional support HUB.
(Note: RSN must be installed)
(2) Mail via Internet.
(Note: Access to the Internet is required)
(3) Save to file in /tmp.
Enter Selection (1 2 3):
14. After a method is chosen, refer to the next section, Sending an Installation Report to the CAC , for report-sending
instructions.
The script then prompts you to enter the sales order number.
Sales Order Number:
113370
6.2 Sending an Installation Report to the CAC
The following sections, Sending the Installation Report Via the RSN , Sending the Installation Report Via the Internet , and Saving
the Installation Report to a Temporary File, describe methods for sending the installation report to the CAC.
A version of the installation report is always automatically saved in the /tmp directory. The
contents of the /tmp directory are deleted by certain programs each time the system reboots. To
permanently save the installation report, move it to a secure directory; since the report contains
password information.
file:///H|/CSDoc/leoinstall/chapt6.htm (7 of 13) [01/14/2000 3:50:58 PM]
Sending the Installation Report
6.2.1 Sending the Installation Report Via the RSN
If the value 1 is specified on the install_report script to send the installation report to a Stratus CAC hub via the RSN, the script
displays the following information.
Enter Selection (1 2 3): 1
Queueing Install Report on RSN to be sent to Support HUB....
Queueing Complete!
Creating a permanent copy of the temporary install report /tmp/IRF2222 as
/tmp/INRP0123:0916.
** Install Report Process Finished **
The installation is now complete.
6.2.2 Sending the Installation Report Via the Internet
If the value 2 is specified on the install_report script to send the installation report to a Stratus CAC hub via the Internet, the script
displays the following prompt. Specify the number that corresponds to the site location. If 4 is specified , the script prompts for a
complete mail address and asks for verification.
Enter Selection (1 2 3): 3
Mail is based on location of system being installed.
Location options:
(1) Europe/Middle East/Africa
(2) Asia/Far East/Australia/Oceania
(3) North, Central, and South America
(4) User specified mail address
Enter Selection (1 2 3 4): 3
Sending Mail ....
Mailing Complete!
Creating a permanent copy of the temporary install report /tmp/IRF2232 as
/tmp/INRP0123:0925.
file:///H|/CSDoc/leoinstall/chapt6.htm (8 of 13) [01/14/2000 3:50:58 PM]
Sending the Installation Report
** Install Report Process Finished **
The installation is now complete.
6.2.3 Saving the Installation Report to a Temporary File
In situations where the installation report must be sent at a later date via the RSN or Internet, or if the contents of the report to
CAC personnel are read during a voice telephone call, specify the value 3 on the install_report script to save the installation
report to a temporary file. The script displays the following information.
A version of the installation report is always automatically saved in the /tmp directory. The
contents of the /tmp directory are deleted by certain programs each time the system reboots. To
permanently save the installation report, move it to a secure directory; since the report contains
password information.
Enter Selection (1 2 3): 3
Copying temporary install report /tmp/IRF2383 to /tmp/INRP0123:0930.
** Install Report Process Finished **
When the installation report is sent to the CAC, the installation is complete.
6.3 Sample Installation Report
This section provides a sample installation report generated by the install_report script.
(Page 1 of 3)
(HP-UX Customer_Installation_Reporter - Rev 1.0)
Installation of a Stratus Module at: Stratus Computer, Inc.
Date of Install Report:=========> Wed May 14 09:20:46 EST 1999
Type of Installation:===========> Installation
Product Installed:==============> Module
Site_Id:========================> cac_ux
System/Module Name:=============> cac_ux
Company:========================> Stratus Computer. Inc.
file:///H|/CSDoc/leoinstall/chapt6.htm (9 of 13) [01/14/2000 3:50:58 PM]
Sending the Installation Report
Address:========================> 101 Powdermill Road
City:===========================> Maynard
State or Country:===============> MA
Zip:============================> 01754
Sales Order Number:=============> 113370
Module Serial Number:===========> 60029
System Administrator:===========> Joe Smith
System Admin Phone No.:=========> 1-999-767-9898
Installed by:===================> Joe Smith
Total Install Time:=============> 5
HP-UX Release===================>11.00.01
Model Type:=====================> 412
Chassis Type:===================> 4 Slot
RSN Installed: =================> YES
User Name for CAC Access:=======> sracsx
(Page 2 of 3)
Password for CAC User:==========> cacpolo
RSN Password (`NONE'= Not Set):=> cacpolo
Modem Phone Number:=============> 1-999-767-5342
Was your Stratus system delivered when expected? ==> YES
Did the hardware, software, and documentation received match
your order? ==> YES
Were you able to properly prepare your environment using the
Stratus supplied Site Preparation documentation? ==> YES
Were you able to successfully install your system by utilizing
the Stratus supplied product Installation documentation? ==> YES
file:///H|/CSDoc/leoinstall/chapt6.htm (10 of 13) [01/14/2000 3:50:58 PM]
Sending the Installation Report
Were there any hardware installation problems? ==> NO
Were there any software installation problems? ==> NO
Additional Comments (optional):
We have a fairly simple configuration and the installation went
quite smoothly.
Joe Smith
System Hardware Configuration:
Modelx H/W Path Description State Serial# PRev Status FCode
==========================================================================
- CLAIM - - Online g82600 0 PMERC Nexus CLAIM 10030 38.0 Offline - 0/0 CPU Adapter CLAIM - - Online - 0/1 MEM Adapter CLAIM - - Online e59400 0/2 RECC Adapter CLAIM - 11.1 Online g82600 1 PMERC Nexus CLAIM 10002 38.0 Online - 1/0 CPU Adapter CLAIM - - Online - 1/1 MEM Adapter CLAIM - - Online e59400 1/2 RECC Adapter CLAIM - 13.0 Online k13800 2 PCI Nexus CLAIM 10064 0 Online - 2/0 SAM Interface CLAIM - - Online unknow 2/0/0 PCMCIA Bridge CLAIM - - Online e52500 2/0/0.0 FLASH Adapter CLAIM - - Online - 2/3 SAM Interface CLAIM - - Online - 2/3/0 PCI-PCI Bridge CLAIM - - Online - 2/3/0/4 LAN Adapter CLAIM - 1 Online -
file:///H|/CSDoc/leoinstall/chapt6.htm (11 of 13) [01/14/2000 3:50:58 PM]
Sending the Installation Report
- 2/3/0/5 LAN Adapter CLAIM - 1 Online - 2/3/0/6 LAN Adapter CLAIM - 1 Online - 2/3/0/7 LAN Adapter CLAIM - 1 Online -
(Page 3 of 3)
- 2/7 SAM Interface CLAIM - - Online u50100 2/7/0 SCSI Adapter CLAIM 42-000567 07G1 Online u50100 2/7/1 SCSI Adapter CLAIM 42-000567 07G1 Online u50100 2/7/2 SCSI Adapter CLAIM 42-000567 07G1 Online k13800 3 PCI Nexus CLAIM 10063 0 Online - 3/0 SAM Interface CLAIM - - Online unknow 3/0/0 PCMCIA Bridge CLAIM - - Online e52500 3/0/0.0 FLASH Adapter CLAIM - - Online - 3/7 SAM Interface CLAIM - - Online u50100 3/7/0 SCSI Adapter CLAIM 42-000832 07G1 Online u50100 3/7/1 SCSI Adapter CLAIM 42-000832 07G1 Online u50100 3/7/2 SCSI Adapter CLAIM 42-000832 07G1 Online - 14 LSM Nexus CLAIM - - Online - 14/0/0 LSM Adapter CLAIM 0 1107 Online - 14/0/0.0 CLAIM - - Online d80200 14/0/0.0.0 SEAGATE ST32550W CLAIM - - Online - 14/0/0.1 CLAIM - - Online d80310 14/0/0.1.0 SEAGATE ST15150W CLAIM - - Online - 14/0/0.2 CLAIM - - Online d80200 14/0/0.2.0 SEAGATE ST32550W CLAIM - - Online - 14/0/0.3 CLAIM - - Online d80200 14/0/0.3.0 SEAGATE ST32550W CLAIM - - Online - 14/0/1 LSM Adapter CLAIM 0 1107 Online - 14/0/1.0 CLAIM - - Online d80200 14/0/1.0.0 SEAGATE ST32550W CLAIM - - Online - 14/0/1.1 CLAIM - - Online -
file:///H|/CSDoc/leoinstall/chapt6.htm (12 of 13) [01/14/2000 3:50:58 PM]
Sending the Installation Report
d80100 14/0/1.1.0 SEAGATE ST31250W CLAIM - - Online - 14/0/1.2 CLAIM - - Online d80200 14/0/1.2.0 SEAGATE ST32550W CLAIM - - Online - 14/0/1.3 CLAIM - - Online d80310 14/0/1.3.0 SEAGATE ST15150W CLAIM - - Online - 14/0/2 LSM Adapter CLAIM 0 1107 Online - 14/0/3 LSM Adapter CLAIM 0 1107 Online - 15 LMERC Nexus CLAIM - - Online - 15/0/0 Processor CLAIM - - Online - 15/0/1 Processor CLAIM - - Online - 15/1/0 Memory CLAIM - - Online - 15/2/0 console CLAIM - - Online - 15/2/1 tty1 CLAIM - - Online - 15/2/2 tty2 CLAIM - - Online -
file:///H|/CSDoc/leoinstall/chapt6.htm (13 of 13) [01/14/2000 3:50:58 PM]
Appendix - Fault Isolation
Appendix A.
Fault Isolation
This section contains information used to troubleshoot faults in the system.
It contains the following subsections:
●
●
Component Status LEDs
System Error Log
A.1 Component Status LEDs
A.1.1 General LED information
LEDs can be in a three color arrangement, a two color arrangement or a single light.
General explanations or these categories follow
A.1.1.1 Three Color LED Arrangements
Most component status LEDs are grouped in threes, they are in a traffic-light configuration
(red on top, yellow in the middle, green on the bottom).
Generally, when a status light is illuminated, it indicates one of the following conditions*:
● A red light indicates that the component is not functioning properly. In most cases, the component is broken and needs to be
replaced.
●
A yellow light indicates that the component is simplexed--that is, operating without a partner. Do not remove this component. The
yellow light is illuminated when the component is in the process of configuring itself with its partner or when its partner has failed.
Yellow LEDs can also indicate that a component is performing a self-test.
In most cases, removing a yellow-lit part from the system causes its function to be suspended
(except in the PCI card cage on HP-UX systems).
●
A green light indicates that the component is operating properly
* For the DNCP Series 400 (PA-8500), the Tray 1 Rectifier LED configuration is green/green/red, as explained in section A.2.1.2a
A given status LED can also flash or remain steadily lit in combination with another status LED to indicate other operating conditions,
such as system power-up.
A.1.1.2 Two Color LED Arrangements
The disk drives and disk power supplies in the disk shelf (PSU0 and PSU1) have only two LEDS, red and green. When a status light is
illuminated, it indicates one of the following conditions:
●
●
●
●
a red and green light indicates a fault with the disk power supply.
a red light indicates a fault with the disk drive.
a green light on the PSU indicates that the system is operating properly.
a flashing green light on the disk drive indicates activity
A.1.1.3 Single LEDs
●
If the amber cabinet fault LED (at the very top of the cabinet-- front and rear) is illuminated, a CRU within the cabinet has
produced an error condition. [Both cabinet fault lights (one front and one rear) are lit when one or more components within the
cabinet has failed. ]
●
If the amber PCI fault status LED is lit, there is an error within the PCI card cage. The PCI Fault status LED is located on the front
of the cabinet, at the bottom of the disk shelves.
●
There are a number of red or green disk shelf LEDs in the disk shelf (rear), these are explained in section A.2.2.X
A.2. System Component LEDs
The following label, found on the cabinet, shows possible states for component LEDs and describes their meanings.
Figure A-1. Component Status Lights
file:///H|/CSDoc/leoinstall/appendix.html (1 of 9) [01/14/2000 3:51:07 PM]
Appendix - Fault Isolation
A.2.1 Power Supply LEDs
file:///H|/CSDoc/leoinstall/appendix.html (2 of 9) [01/14/2000 3:51:07 PM]
Appendix - Fault Isolation
A.2.1.2 -Tray 1 Rectifier status LEDs
LED State
Meaning
Green On
DC output power good.
Green On
AC input power good.
Red
Off
Green Off
Green On
AC input power good.
Red
On
Green Off
DC output power fault.
Green Off
Unit faulty and needs service.
Red
On
Green Off
Green Off
Red
Power is off.
Off
A.2.2 Disk Shelf LEDs
A.2.2.1 Disk Power Supply LEDs
A.2.2.3 SE/LVD Terminator Module
This unit is located above the three fan modules on the right of each of the two disk shelves (rear). Since the terminator should always be
in SE mode:
●
●
The green LED over "SE" on the right should be on
The green LED over "LVD" (Low Voltage Differential) should not be on.
A.2.2.4 SES Unit Module
This unit is located above the three fan modules at the top middle of each of the two disk shelves. There is a LED above the word "Temp",
this LED is not used and should not be on. Next to "Temp" there is a "Mute" knob, this also is not used and shouldn't be touched.
A.2.2.5 SE-SE I/O Repeater Module
This unit should be located above the three fan modules at the top left of each of the two disk shelves (rear). There are no LEDs to be
concerned with in the SE-SE I/O Repeater Module.
A.2.2.6 Fan Units (3)
Three fan units are located on the bottom part of each of the disk shelves (rear).
The red LEDs in the Fan units should not be illuminated. If a red LED is on in one of the fan units, that unit should be replaced as soon as
possible (the system is capable of running with only two fans but it is recommended that all three fans be operational at all times).
A.2.3 Suitcase LEDs
In this section, refer to Figure A-3 for an illustration of the suitcase LEDs.
Figure A-3. Suitcase with LEDs identified
file:///H|/CSDoc/leoinstall/appendix.html (3 of 9) [01/14/2000 3:51:07 PM]
Appendix - Fault Isolation
A.2.3.1 Suitcase Power-On LED Sequence
A.2.4 PCI Card LEDs
Figure A-4, the PCI card cage label, found on the PCI card cage (cabinet front), shows possible states for PCI LEDs and describes their
meanings.
Figure A-4. PCI Card Cage Label
A.3 System Log and Status Messages
System logs contain information concerning major system events and the time they occurred which can help detect and evaluate system
problems. Each time a significant event occurs, the syslog message logging facility enters an error message into the systemlog at
/var/adm/syslog/syslog.log. Depending upon the severity of the error and the phase of system operation, the same message
might also be displayed on the console.
System messages and fault codes are subject to change. For the most current system message information, please refer to the recent version
of the HP-UX Operating System: Fault Tolerant System Administration (R1004H-04-ST).
Several HP-UX commands provide status information about components or services. These commands are listed in the following table.
file:///H|/CSDoc/leoinstall/appendix.html (4 of 9) [01/14/2000 3:51:07 PM]
Appendix - Fault Isolation
Command
Type of Information
ftsmaint and ioscan
Hardware information
sar
System performance information
sysdef
Kernel parameter information
lp and lpstat
Print services information
ps
Process information
pwck and grpck
Password inconsistencies information
who and whodo
Current user information
ifconfig, netstat, ping, uustat, and
lanscan
Network services information
ypcat, ypmatch, yppoll, and ypwhich
Network Information Service (NIS) information
df and du
Disk and volume information
A.4 Component Status
The ftsmaint ls command lists the components in the system and identifies any components that have been removed from service.
The list serves as a simple troubleshooting tool to verify that all the components are present and shows their status (in/out of service). Refer
to PA-8500 Continuum Series 400 Technical Service Guide (HP-UX systems), Section 2.6.3 to view a sample ftsmaint ls output
screen.
A.4.1 Software State Information
The system creates a node for each hardware device that is either installed or listed in the /stand/ioconfig file.
The State field in the ftsmaint ls display can show a hardware component to be in any one of the software states shown in the
following table.
State
Meaning
UNCLAIMED Initialization state, or hardware exists, and no software is associated with the node.
CLAIMED
The driver recognizes the device.
ERROR
The device is recognized, but it is in an error state.
NO_HW
The device at this hardware path is no longer responding.
SCAN
Transitional state that indicates the device is locked. A device is temporarily put in
the SCAN state when it is being scanned by the ioscan or ftsmaint utilities.
The software state of a hardware component can change. For example, a component is initially created in the UNCLAIMED state when it is
detected at boot time. The component moves to the CLAIMED state when it is recognized and claimed by the appropriate driver. The
transitions between the various software states are controlled by the ioscan and ftsmaint utilities.
file:///H|/CSDoc/leoinstall/appendix.html (5 of 9) [01/14/2000 3:51:07 PM]
Appendix - Fault Isolation
A.4.2 Hardware Status Information
In addition to a software state, each hardware component has a particular hardware status. The Status field in the ftsmaint ls display
can have any of the values shown in the following table.
Status
Meaning
Online
The device is actively working.
Online Standby
The device is not logically active, but it is operational. Using the ftsmaint
switch or ftsmaint sync command can be used to change the device
status to Online.
Duplexed
The status is appended to the Online status to indicate that the device is
fully duplexed.
Duplexing
The status is appended to the Online or Online Standby status to
indicate that the device is in the process of duplexing. This transient status
is displayed after the ftsmaint sync or ftsmaint enable command
has been used on the CPU-Memory board.
Offline
The device is not functional or not being used.
Burning PROM
The ftsmaint burnprom command is in progress on the device. The
suitcase
stays in offline standby when burning PROM.
Offline Standby
The status of a hardware component can change. For example, a component could go from Online to Offline because of a hardware or
software error.
A.5 Fault Codes
The fault tolerant services return fault codes when certain events occur. Fault codes are displayed by the ftsmaint ls command in the
FCode field and by the ftsmaint ls -l command in the Fault Code field. The following table lists and describes the fault codes.
Short Format
ls Format
2FLT
ADROK
Long Format
Cabinet Address Frozen
Both ACUs are faulted.
The cabinet address is frozen.
BLINK
Cabinet Fault Light Blinking
The cabinet fault light is blinking.
BPPS
BP Power Supply
Faulted/Missing
The BP power supply is either faulted or missing.
ls -l Format
Both ACUs Faulted
Explanation
BRKOK
CABACU
CABADR
Cabinet Circuit Breaker(s) OK
ACU Card Faulted
Cabinet Address Not Frozen
The cabinet circuit breaker(s) are OK.
The ACU card is faulted.
The cabinet addresses are not frozen.
CABBFU
Cabinet Battery Fuse Unit Fault
The cabinet battery fuse unit fault occurred.
CABBRK
Cabinet Circuit Breaker Tripped
A circuit breaker in the cabinet was tripped.
CABCDC
Cabinet Data Collector Fault
The cabinet data collector faulted.
CABCEC
Central Equipment Cabinet Fault
A fault was recorded on the main cabinet bus.
CABCFG
Cabinet Configuration Incorrect
The cabinet contains an illegal configuration.
file:///H|/CSDoc/leoinstall/appendix.html (6 of 9) [01/14/2000 3:51:07 PM]
Appendix - Fault Isolation
CABFAN
Cabinet DC Distribution Unit
Fault
Broken Cabinet Fan
CABFLT
Cabinet Fault Detected
A component in the cabinet faulted.
CABFLT
Cabinet Fault Light On
The cabinet fault light is on.
CABLE
PCI Power Cable Missing
This PCI backpanel cable is not attached.
CABPCU
Cabinet Power Control Unit Fault
A power control unit faulted.
CABPSU
Cabinet Power Supply Unit Fault
A power supply unit faulted.
CABPWR
Broken Cabinet Power Controller
A cabinet power controller failed.
CABTMP
Cabinet Battery Temperature
Fault
A cabinet battery temperature above the safety
threshold was detected.
CABTMP
Cabinet Temperature Fault
A cabinet temperature above the safety threshold was
detected.
CDCREG
Cabinet Data Registers Invalid
The cabinet data collector is returning incorrect
register information. Upgrade the unit.
CHARGE
Charging Battery
A battery CRU/FRU is charging. To leave this state,
the battery needs to be permanently bad or fully
charged.
DSKFAN
Disk Fan Faulted/Missing
The disk fan either faulted or is missing.
ENC OK
SCSI Peripheral Enclosure OK
The SCSI peripheral enclosure is OK.
ENCFLT
SCSI Peripheral Enclosure Fault
A device in the tape/disk enclosure faulted.
FIBER
Cabinet Fiber-Optic Bus Fault
The cabinet fiber-optic bus faulted.
FIBER
Cabinet Fiber-Optic Bus OK
The cabinet fiber-optic bus is OK.
HARD
Hard Error
The driver reported a hard error. A hard error occurs
when a hardware fault occurs that the system is unable
to correct. Look at the syslog for related error
messages.
HWFLT
Hardware Fault
The hardware device reported a fault. Look at the
syslog for related error messages.
ILLBRK
Cabinet Illegal Breaker Status
The cabinet data collector reported an invalid breaker
status.
INVREG
Invalid ACU Register
Information
A read of the ACU registers resulted in invalid data.
IPS OK
IOA Chassis Power Supply OK
The IOA chassis power supply is OK.
IPSFlt
IS
LITEOK
IOA Chassis Power Supply Fault
In Service
An I/O Adapter power supply fault was detected.
The CRU/FRU is in service.
The cabinet fault light is OK.
MISSNG
Missing replaceable unit
MTBF
Below MTBF Threshold
NOPWR
No Power
The CRU/FRU’s rate of transient and hard failures
became too great.
The CRU/FRU lost power.
OVERRD
Cabinet Fan Speed Override
Active
The fan override (setting fans to full power from the
normal 70%) was activated.
PC Hi
Power Controller Over Voltage
An over-voltage condition was detected by the power
controller.
PCIOPN
PCI Card Bay Door Open
The PCI card-bay door is open.
CABDCD
Cabinet Fault Light OK
A DC distribution unit faulted.
A cabinet fan failed.
The ACU on the DNCP Series 400-CO (PA-8500) is
missing, electrically undetectable, removed, or deleted.
file:///H|/CSDoc/leoinstall/appendix.html (7 of 9) [01/14/2000 3:51:07 PM]
Appendix - Fault Isolation
PCLOW
Power Controller Under Voltage
An under-voltage condition was detected by the power
controller.
PCVOTE
Power Controller Voter Fault
A voter fault was detected by the power controller.
PSBAD
Invalid Power Supply Type
The power supply ID bits do not match that of any
supported unit.
PSU OK
Cabinet Power Supply Unit(s)
OK
The cabinet power supply unit(s) are OK.
PSUs
Multiple Power Supply Unit
Faults
Multiple power supply units faulted in a cabinet.
PWR
Breaker Tripped
The circuit breaker for the PCIB power supply tripped.
REGDIF
ACU Registers Differ
A comparison of the registers on both ACUs showed a
difference.
SOFT
Soft Error
The driver reported a transient error. A transient error
occurs when a hardware fault is detected, but the
problem is corrected by the system. Look at the
syslog for related error messages.
SPD OK
Cabinet Fan Speed Override
Completed
The cabinet-fan speed override completed.
SPR OK
Cabinet Spare (PCU) OK
The cabinet spare (PCU) is OK.
SPRPCU
TEMPOK
Cabinet Spare (PCU) Fault
Cabinet Temperature OK
The power control unit spare line faulted.
The cabinet temperature is OK.
USER
User Reported Error
A user issued ftsmaint disable to disable the
hardware device.
A.6 Troubleshooting Procedures
When a fault occurs, several things can happen. If it is a non-critical fault, the system will continue to process data. If it is a critical fault,
the system (or a subsystem) may be inoperative. When troubleshooting the system, determine the fault first by using the LEDs and screen
messages. Then, verify that the component(s) is out of service using the ftsmaint ls command (PA-8500 Continuum Series 400
Technical Service Guide (HP-UX systems, Section 2.6.3), error logs, and diagnostic tests. This flow is shown in the Troubleshooting Flow
below.
Troubleshooting Flow
When troubleshooting system faults, use the following process:
● Check the console terminal for fault information.
file:///H|/CSDoc/leoinstall/appendix.html (8 of 9) [01/14/2000 3:51:07 PM]
Appendix - Fault Isolation
●
●
●
●
Locate the failed component(s) using the LEDs.
Verify the component is bad by using software commands/error logs.
Remove and replace the failed component.
Check to make sure the problem is resolved.
file:///H|/CSDoc/leoinstall/appendix.html (9 of 9) [01/14/2000 3:51:07 PM]