1
MA'YIAL_
_lVlll_li'"'
LL,-,.., ,, ,L,_., , ,..,,,,..,
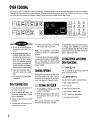
MER6870, MER6770, MER655
'__:TY
!!,
Installer:Pleaseleave this manualwith
this appliance.
Consumer: Please read and keep this
manualfor future reference.Keep sates
receiptand/orcancelledcheckasproofof
purchase.
...............
Pages 1-2
__ACE COOKIHG
.......
'*_"_ENCOOKING
........
Pages
Pages
3"4
5-1C
Model Number
Serial Number
_ffOR,E
YOU C_LL
........
Page I
Date of Purchase
J
TY............
Inourcontinuingeffor_toimprove
the quality and performanceof
our cookingproducts,it maybe
necessaryto make changesto
theappliancewithoutrevisingthis
guide.
Page 1 _
_U]DEDEL'UTILISATEUR
• Page I
,1
*__°_UJA
...........DEL
USUARIO
.......
If youhavequestions,call:
Page C
1-888-4MAYTAG
(1-888-462-9824)
1-800-688-2080
( U.S.TTYfor
hearingor speechimpaired)
(Mon.-Fri.,8 am-8pmEasternTime)
Internet: http://www.maytag.com
Forserviceinformation, seepage 15.
Form No. A/03/O0
Part No. 8113P257-60
,,?,.,,,_,,_,r,_'_-';_
h t t p : / / w w w. m a y t a g. c o m
74005366
Litho U.S.
IMPORTAHT
SAFETY
INSTRUCTIONS
Read and follow all instructionsbefore using this applianceto preventthepotentialrisk
of fire, electric shock, personal injury or damage to the appliance as a result of improper
usage of the appliance. Use appliance only
for its intended purpose as described in this
guide.
To ensure proper and safe operation: Appliance must be properly installed and
grounded by a qualified technician.
NEVER use aluminumfoil to line drip
GENERAL
IHsTrU(TIOHs
bowls or cover oven racks or oven bottom. This could result in risk of electric
wARNING: NEVER useappliancedoor(s),
or drawer, if equipped, as a step stool or
seat as this may result !n possible tipping
of the appliance,damage to the appliance,
and serious injuries,
if applianceis installed near a window,precautions should be taken to prevent curtains from blowingover surface elements.
NEVER use applianceto warm or heat the
room. Failure to follow this instruction can
lead to possibleburns, injury, fire, or damage to the appliance.
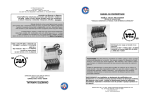
>" ALL RANGES CAN TIP AND
CAUSE INJURIES TO
PERSONS
>_ INSTALL ANTI-TIP DEVICE
PACKED WITH RANGE
> FOLLOW ALL INSTALLATION
INSTRUCTIONS
!
:
To reduce risk of tipping of the appli!
ance from abnormal usage or by excessive loading of the oven door,the appliance must be secure by a properly installed anti-tip device.
To check if device is properly installed, look
underneath range with a flashlight to make
sure one of the rear leveling legs is properly
engaged in the bracket slot. The anti-tip device secures the rear leveting legto the floor
when properlyengaged.Youshouldcheckthis
anytime the range has been moved.
IHCASE
OF
FIRE
To ensureproper operation and to avoid
damageto the applianceor possible injury,
do not adjust, service, repair or replaceany
part of the appliance unless specifically
recommended in this guide. Refer affother
servicing to a qualified technician.
NEVER store or use gasolineor other combustibleor flammablematerialsin the oven,
near surface units or in the vicinity of this
applianceas fumes could create a fire hazard or an explosion.
Topreventgrease fires, do not let cooking
grease or other flammable materials accumulate in or near the appliance.
Aerosol-typecans are EXPLOSIVEwhen
exposed to heat and may be highly flammable.Do not useor store nearappliance,
COOKTOP
NEVER leave surface units unattendec
especially when using high heat. An un
attended boilover could cause smokinc.
and a greasy spillover can cause a fire.
This appliance is equippedwith differen
size surface elements. Select pans witt"
flat bottoms large enough to cove
element. Fitting pan size to element wi!
improve cooking efficiency.
If pan is smaller than element, a portior
of the element will be exposed to direc
contact and could ignite clothing o
potholder.
Only certaintypes of glass,glass/ceramic
ceramic, earthenware, or other glazec
utensils are suitable for cooktop or over
service without breaking due to the sud
den change in temperature. Follow uter
sil manufacturer's instructions when us
ing glass.
This appliance has been tested for saf
performance using conventional coot
Use only dry potholders. Moist or damp
potholders on hot surfaces may result in a
steam burn. Do not let potholders touch
hot heating elements. Do not use a towel
ware. Do not use any devices or acce_
sories that are not specifically recorr
mended in this manual. Do not use eyeli
covers, stove top grills or add-on ove
convection systems. The use of device
>Cooktop: Smother fire or flame in a pan
with a lid or cookie sheet.
or other bulky cloth which could easily
touch hot heating elements and ignite.
or accessoriesthat are not expressly re(
ommendedin this manual can create sE
NEVER pick up or move a flaming pan.
Always turn off all controls when cooking
is completed.
Turnoff applianceand ventilatinghood to avoid
spreading the flame. Extinguish flame then
turn on hood to remove smoke and odor.
>Oven: Smother fire or flame by closing the
ovendoor.
Do not use wateron grease fires. Use baking
soda, a dry chemicalor foam-typeextinguisher
to smother fire or flame.
1
NEVER wear loose-fitting or hanging garments while using the appliance. Clothing
could catch utensil handles or ignite and
cause burns if garment comes in contact
with hot heating elements.
shock, fire, or damage to the appliance.
Use foil only as directed in this guide.
NEVER heat unopened containers on the
surface unit or in the oven. Pressure buildup in the container may cause container
to burst resulting in burns, injury or damage to the appliance.
rious safety hazards, result in perfo
mance problems, and reduce the life
the components of this appliance.
Turnpan handletoward center ofcookto.
not out into the room or overanother su
face element. This reduces the risk,
burns, ignition of flammable materials,,
spillage if pan is accidentty bumped,
reached by small children.
Toprevent
damage
toremovable
heating
elements,
donotimmerse,
soakorclean
inadishwasher
orself-clean
oven.
Adamagedelement
couldshortresulting
ina
fireor shock hazard.
Make sure drip bowls are in place as absence ofthese bowls duringcooking could
damagewiring.
Do not use oven cleaners. No commercial
oven cleaner or oven liner protective coating of any kind should be used in or around
any part of the oven.
Before self-cleaning the oven, remove
broiler pan, oven racks and other utensils
to prevent excessivesmoking, discoloration
of the oven racks or possible damage to
utensils.
Wipe up excessive spitlovers, especially
GLASS-CERAMIC
COOKTOP
NEVER cook on broken cooktop. If
cooktop should break, cleaning solutions
and spillovers may penetrate the broken
cooktopand create a risk of electricshock.
Contact a qualifiedtechnicianimmediately.
greasy spills, beforethe clean cycle to prevent smoking, flare-ups or flaming.
It is normal for the cooktop to become hot
during a cleancycle.Therefore,avoidtouching the cooktop, door, window or oven vent
during a clean cycle.
Clean cooktop with caution. Some cleaners can produce noxious fumes if applied
to a hot surface, If a wet sponge, cloth, or
paper towel is used on a hot cooking area,
be careful to avoid steam burn.
Use extreme caution when moving the
grease pan or disposing of hot grease.AIlow grease to coot before attempting to
move pan.
For proper oven operation and performance,do not block or obstruct oven vent
duct. When oven is in use, the area near
the vent may feel hot or warm to the touch.
Always place oven racks in desired locations while oven is cool. If rack must be
moved while oven is hot, do not let
potholder contact hot element in oven.
SELF-CLEANING
OVEF!
Cleanonly parts listed in this guide. Do not
clean door gasket.The gasket is essential
for a good seal. Do not rub, damage, or
move the gasket.
Children must be taught that the appliance
and utensils in or on it can be hot. Let hot
utensils cool in a safe place, out of reach of
small children. Childrenshould be taught that
an appliance is not a toy.Children should not
be allowedto playwith controls or other parts
of the unit.
VENTILATING
HOODS
Clean range hood and filters frequently to
prevent grease or other flammable materials
from accumulating on hood or filter and to
avoid grease fires.
Turnthe fan on when flambeing foods (such
as Cherries Jubilee) under the hood.
NEVER touch surface or oven heating
elements, areas near elements, or interior surfaces of oven,
IMPORTAHT
SAFETY
HOTICE
AND
WARF!IFIG
Heating elements may be hot even though
they are dark in color. Areas near surface
elements and interior surfaces of an oven
The California Safe DrinkingWater and Toxic
may become hot enough to cause burns.
During and after use, do not touch or let
clothing or other flammable materials contact heatingelements,areasnear elements,
or interior surfaces of oven until they have
had sufficient time to cool.
Use care whenopening door(s). Let hot air
or steamescapebeforeremovingor replacing food.
items could damage the appliance or be
burned or seriously injured.
Other potentially hot surfaces include:
Cooktop, areas facing the cooktop, oven
vent, and surfaces near the vent opening,
ovendoor(s), areas around the door(s) and
oven window(s).
SAFETY
NEVER leave children alone or unsupervised in area where appliance is in use or
is still hot.
NEVERallow children to sit or stand on any
part of the appliance as they could be injured or burned.
CAUTION: NEVER store items of interest
to children in cabinets above an appliance
or on backguard of a range.Childrenclimbing on appliance, door or drawer to reach
Enforcement Act of 1986 (Proposition 65)
requires the Governor of California to publish a list of substances known to the State
of California to cause cancer or reproductive
harm, and requires businesses to warn customers of potential exposures to such substances.
Users of this appliance are hereby warned
that when the oven is engaged in the selfclean cycle, there may be some low level
exposure to some of the listed substances,
including carbon monoxide. Exposure to
these substancescan be minimizedby properly venting the oven to the outdoors during
the self-cleancycle byopening a window and/
or door in the room where the appliance is
located.
IMPORTANT NOTICE REGARDING PET
BIRDS: Never keep pet birds in the kitchen
or in roomswhere the fumesfrom the kitchen
could reach. Birds have a very sensitive respiratory system. Fumes released during an
oven self-cleaning cycle may be harmful or
fatal to birds. Fumes released due to overheated cooking oil, fat, margarine and overheated non-stick cookware may be equally
harmful.
SURFACE
COOKING
i
IIIIIIIIIIIIII
SURFACE
CONTROLS
Before Cooking
Use to turn on the surface elements. An
Always place a pan on the surface
unit before you turn it on. To prevent
infinite choice of heat settings is available
from LOW to HIGH. The knobs can be set on
damage to range,never operate surface unit without a pan in place.
After Cooking
Clean up messy spills as soon as
possible.
Other Tips
or between any of the settings.
>
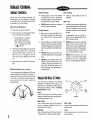
SETTINGTHE CONTROLS
1. Place pan on surface element.
2, Push in and turn the knob in either direction to the desired heat setting.
> The backguard is marked to
identify which element the
knob controls. For example,
O O indicates right front
O • element.
.
There is an indicator light by each pair of
control knobs. When one or both of the
surface control knobs is turned on, the
light will turn on. The light will turn off
when the surface element(s) is turned
off.
4. Aftercooking, turnknobto OFF.Remove
pan.
DUAL ELEMENT (SELECT
MODELS)
The cooking surfaceis equipped with a dual
elementlocated in the rightfront position. To
operate, push in on the control knob andturn
to the left to control the large element, or
push in and turn to the right to control the
small element.
NEVERusethecooktopas a storage
area for food or cookware,
During Cooking
Be sure you know which knob controls which surface unit. Make sure
you turned on the correct surface
unit.
Begin cooking on a higher heat setting then reduceto a lower setting to
complete the operation. Never use a
high heat setting for extended cooking.
NEVER allow a pan to boil dry. This
could damagethe pan and the appliance.
NEVER touch cooktop until it has
cooled. Expect some parts of the
cooktop, especially around the surface units, to become warm or hot
Ifcabinet storage isprovideddirectly
abovecookingsurface,limititto items
that are infrequently used and can
be safely stored in an area subjected
to heat,
Temperatures may be unsafe for
items such as volatile liquids, cleaners or aerosol sprays.
NEVER leave any items,especially
plastic items, on the cooktop. The
hot air from the ventmay igniteflammable items, melt or soften plastics,
or increasepressure in closed containers causing them to burst.
NEVER allow aluminum foil, meat
probes or any other metal object,
other than a pan on a surface element, to contact heating elements.
during cooking. Use potholders to
protect hands.
SUGGESTED
HEAT
SETTIFIGS
The size, type of cookware and cooking
operation will affect the heat setting. For
information on cookware and other factors
affecting heat settings, refer to "Cooking
Made Simple" booklet.
HIGH:
Use to bring liquid to a boil. Always reduce
settingto a lowerheatwhen liquids begin to
boil or foods begin to cook.
MEDIUM
MED. HIGH:
3
MED. LOW:
Use to brown meat, heat oi! for deep fat
frying or sauteing. Maintain fast boil for
large amounts of liquids.
Use to continue cooking covered foods or
steam foods.
MEDIUM:
LOW:
Use to maintain slow boil for large amounts
of liquids and for most frying operations.
Use to keep foods warm and melt chocolate and butter.
GLASS-CERAMIC
SURFACE
(SELECT
MODELS)
COIL
ELEMENT
SURFACE
(SELECT
MODElS)
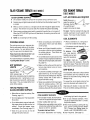
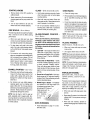
GLASS-CERAMIC SURFACE
LIFT-UPPORCELAINCOOKTOP
I
To lift: Whencool,
On Canadian models, the surface will not operate during a self-clean cycle.
II Cooktopmay emit light smokeand odor the firstfewtimes the cooktopis used. This
is normal.
II When a control is turned on, a red glow can be seen through the glass-ceramic
surface. The element will cycle on and off to maintain the preset heat setting.
II Glass-ceramiccooktops retain heatfor a period of time after the unit is turned off.
Whenthe HOT SURFACE light turns off (see below), the cooking area will be cool
enough to touch.
II NOTE: Do not attempt to lift the cooktop.
COOKINGAREAS
The cooking areason your range are identified by permanent patterns on the glassceramic surface. For most efficient cooking, fit the pan size to the element size.
Pans should not extend more than t/2to
l-inch beyond the cooking area.
For moreinformation on cookware, refer to
"Cooking Made Simple" booklet.
HOT SURFACE
_._
LIGHTS
/___
hasaHOTSUR- _..
FACE indicator light. A
light will be illuminatedwhen the matching
cooking area is hot. It will remain on, even
after the control is turned off, until the area
has cooled. They are located at the front
center of the cooktop.
TIPSTO PROTECTTHE
GLASS-CERAMICSURFACE
> Beforefirstuse, cleanthe cooktop. (See
Cleaning, page 12.)
Donotuseglass pans.Theymayscratch
the surface.
Do not allowplastic, sugar or foods with
high sugar content to melt onto the hot
cooktop. Should this happen, clean
immediately. (See Cleaning, page 12.)
>-Never let a pan boil dry as this will
damage the surface and pan.
grasp the cooktop
frontedge. Gently
lift up until the two
support rods snap into place.
I
SUPPORT
To lower: Hold the cooktop front edge and
carefully push back on each support rod to
release. Then lower the top into place.
COIL ELEMENTS
Never use cooktop as a work surface or
cutting board. Never cook food directly
on the surface.
Never use foil-type disposable containers or place a trivet or wok ring between
the surface and pan. These items can
mark or etch the top.
> Donot slide aluminum pans acrossa hot
surface.Thepans mayleavemarkswhich
needto be removedpromptly.(SeeCleaning, page 12.)
Make sure the surface and the pan bottom are clean before turning on to prevent scratches.
To prevent scratching or damage to the
glass-ceramic top, do not leave sugar,
salt or fats on the cooking area.Wipe the
cooktop surface with a clean cloth or
paper towel before using.
Never usea soileddishcloth or spongeto
clean the cooktop surface. A film will
remain which may cause stains on the
cooking surface after the area is heated.
When an element is on, it will cycle on
and off to maintain the heat setting.
Coil elements are self-cleaning. Do not
To remove: When
immerse in water. ____..
cool, raise element.
Carefully pull out and
away from receptacle.
TO replace: Insert ele- \_ER_,,ALS
ment terminals into receptacle. Guide the
element into place. Press down on the outer
edge of element until it sits levelon drip bowl.
DRIP BOWLS
The drip bowls under each surface element
catch boilovers and must always be used.
Absence of drip bowls during cooking may
damage wiring.
To prevent the risk of electric shock or fire,
never line drip bowls with aluminum foil.
Drip bowls will discolor or craze over time.
Thiswilt not affect cooking performance.
COIL ELEMENT SURFACE
avoid using high heat for long periods.
II On Canadianmodels, the two front eleI Do not use oversized cookware. Pans
mentswill not operateduring self-clean.
should not extend more than I-2 inches
! Clean cooktop after each use.
beyond the element.
II Wipe acid or sugar Spillsas soon as the II When home canning or cooking with big
cooktop has cooled as these spills may
pots, use the Canning Element (Model
discolor or etch the porcelain.
CE1). Contact your Maytag dealer for
details or call 1-800-688-8408 to order.
To protect drip bowl finish:
II To lessen discoloration and crazing,
I Cfean frequently. (See page !2.)
OVEN
(0OKING
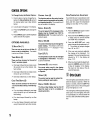
The electroniccontrol is designedfor ease in programming.The displaywindow on the control showstime of day, timer and ovenfunctions.
Messageswill scrollto promptyourprogrammingsteps.Thedisplayshowsthelowerovenset at375° FandTIMER1 set for45 minutes.Bracket
line (upper left side) coincideswith messagein display.Control panelshown includesConvectBake feature.
Upper
Oven
1
_4
i
Lower
Oven
2
3
$cro_lSpeed
5
DisplayDim
8
Oelau!t
12 HourOFF
TimerBeeps C_ T_rr_
Beeps
ControELock
7
Ternp O/F
L_ngua{Je
6
9
J
> Further instructionswill scroll in display
after function pads are pressed.
Be sure all packing material is
removedfrom oven beforeturning on.
> Prepared Food Warning: Followfood manufacturer'sinstructions. If a plasticfrozen food container and/or its cover distorts,
warps, or is otherwisedamaged
duringcooking,immediately discard the food and its container.
Thefoodcouldbe contaminated.
Follow themanufacturer'sdirections when using oven cooking
bags.
_'- Do not use oven for storing food
or cookware.
NOTE: The temperature or time will be
automatically entered four seconds after
selection.
If more than 30 seconds elapse between
pressinga function pad andthe AUTO SET
pad or number pads, the function will be
canceted and the display will return to the
previous display.
CONTROL
OPTIONS
Severalcontroloptions are indicatedunder
the number pads on the control. Factoryset options can be changedto your preferences, See page 9 for more information.
SETTING
THE
PressOLOCKpad, IndicatorwordTIME
will flash in the display.
lm
the upper or lower oven.
> A double beep will sound if a programming error occurs.
CANCELPAD
Use to cancel all programming except the
Clock and Timer functions.
AUTOSET PAD
Use with function pads to automatically set:
> 3500 F bake temperature
Press the desired function pad for
> A beep will sound when any pad is
pressed.
SETTING
UPPER
AND
LOWER
OVEN
FUNCTIONS
_
OVEN
CON PADS
> Press the AUTO SET pad or the
appropriate number pad(s) to enter
time or temperature.
To recallthetime ofday whenanother function
is showing, press CLOCK pad. Clock time
cannot be changed when the oven has been
programmedfor ctockcontrolled cooking,selfclean or delayed self-clean.
.
Press the appropriate number padsfor
the current time. (Time is in a 12-hour
format.)
After a power interruption, the tast clock
time before the interruption will flash.
HI or LO broil
> three hours of cleaning time
four minutes of toasting time
170° F keep warm temperature
to change control options
BAKEPAD
BAKING
Use for baking and roasting,
2. Press again for 3500 F or press the
AUTO SET pad. Each additional press
of AUTO SET will raisethe temperature
25° F. Or, pressthe appropriatenumber
pads for the desired temperature between 100° F and 5500 F.
3. When the oven turns on, a red preheat
indicator will light.
PREHEAT
OVEN
BRACKET
(SELECT MODELS)
If the TOASTING function is operating in the upper oven when lower
1. Press BAKE pad.
LOWER
CONVECTBAKING
BAKE
ICON
As a general rule, when convection
baking, set the oven temperature
25° F lower than the conventional
oven BAKE pad and temperature are
entered,thecontrolwilldisplay HEATING DELAYED X MIN followed by
WAIT. At the end of the delay the
lower oven will start automatically.
recipe or prepared mix directions.
Bakingtimewill bethesame to a few
minutes less than directions.
To recall the set temperature during
preheat press the BAKE pad.
When roasting meat using the convection setting, roasting times may
be up to 30% less. (Maintainconventional roasting temperatures.)
To change oven temperature during
cooking, press the BAKE pad and the
appropriate number pads.
See roasting chart in "Cooking Made
Simple" booklet for recommended
roasting temperature and times, and
additional bakingand convection cooking tips.
Allow 4-8 minutes for the upper oven to
preheat. Allow 10-16 minutes for the
lower oven to preheat,
I Allow at least 1h-inch between the
4. A single beep will indicate the oven is
preheated to the set temperature. The
preheat indicator will turn off.
5. When cooking iscomplete, press CANCEL pad. Remove food from oven.
baking pan or casserole and the top
element in the upper oven. Loaf,angel
foodor bundtpansare notrecommended
in the upper oven.
BROILING
if the TOASTINGfunction is operating in the upper oven when lower
oven BROILpad ispressed,a double
beepwillsound and display willread
TOASTING WAIT X MIN.
: I Do not use temperatures below I40 ° F
to keep food warm or below 200 ° F for
cooking. For food safety reasons, lower
temperatures are not recommended.
CONVECTBAKEPAD
(LOWEROVENONLY"
,
SELECT MODELS)
Press CONVECT BAKE pad.
2. Press again for 325° F or press the
AUTO SET pad. Each additional press
of AUTOSET will raisethe temperature
25° F. Or, press the appropriatenumber
pads for the desired temperature between 100° F and 550o F.
3. When the oven turns on a red preheat
indicator will light and the
convect icon will be displayed.
.
.
A single beep will indicate the oven is
preheated to the set temperature. The
preheat indicator will turn off.
When cooking is complete, press
CANCELpad. Removefoodfrom oven.
HI broil is used for most broiling. Use
LO broil when broiling longer cooking
foods toallow themto cookto welldone
The back part of the loweroven bake
element wil! NOT glow red during
baking. This is normal.
stage without excessive browning.
I When baking frozen, self-rise pizzas in
the upper oven, place the pizza on a
cookie sheet to avoid overbrowning.
i Never cover broiler pan insertwith aluminumfoil. This preventsfat fromdraining to the pan below.
II For additional baking and roasting tips,
refer to the "Cooking Made Simple"
booklet,
II Expect broil times to be longer and
browning to be slightly lighter if appliance is installed on a 208 volt circuit.
BROILPAD
Use for top browning or broiling. For best
results, use the broiler pan provided with
your range.
3. For optimal broiling, preheat three to
four rninutesor untilthe broil element is
red.
.
1. Press the BROIL pad.
2. Press the AUTO SET pad for HI broil,
press again for LO broil, or press the
appropriatenumberpads to set desired
broil temperature between 300° and
550o F.
Place food in oven leaving the oven
dooropentothe firststop position(about
four inches).
Follow broiling recommendations in
"Cooking Made Simple" booklet.
5.
.
When broiling is complete, press CANCELpad. Removefood and broiler pan
from oven.
Fortoasting
breadandproducts
thatare
toasted
inatoaster
ortoaster
oven.
Setting the Controls for Toasting:
1
Press the TOASTING pad.
2. Press the AUTO SET pad to set 4 minutes of toasting time. Each additional
press will increase the toasting time by
10seconds.TOASTINGwillbe displayed.
5. At the end of the set toasting time, the
displaywillreadTOASTINGCOMPLETE
and beep fourtimes. One reminderbeep
will sound every 30 seconds for 5 minutes or until CANCEL pad is pressed or
door is opened.
NOTE: For optimal results when toasting
4-5 pieces of bread or other similar items,
follow diagram below for food placement.
TheAUTO SET toastingtime(4minutes)
For safely keepingfoods warm or for warming breads and plates.
Press KEEPWARM pad.
1,
2. Press AUTO SET pad for 170° F or
press the appropriate number pads for
temperatures between I45 oand 190° F.
will be displayed.
NOTE: The AUTO SET time for TOASTING canbe set from 3 to 10 minutesor on
select models from 10 seconds to 10
minutes.
,
If the lower oven is operating when the
TOASTING pad is pressed,TOASTING
NOT AVAILABLE - LOWER OVEN IN
.
KEEP WARM and the temperature selected will be displayed when the function is active.
4. Whenwarming iscomplete, press CANCEL pad. Remove food from the oven.
USE will be displayed.
Food
Toast Time*/
Cold Start
Food
Sliced WhiteBread31/2- 41/2rain.
Tortillas(flour)
Waffles (frozen)
ToasterBreaks**,
Hot Pockets**
4- 4V2min.
Toaster Pastry
(unfrozen)
31/2- 4 min.
Toaster Pastry
(frozen)
41/2- 43/4min
Toast Time*/
Cold Start
21/2- 3 rain.
4- 5 rain
Bagels
41/2- 5 min.
EnglishMuffins
31/2- 4 rain.
CheeseSandwich 3t/2- 41/2min
* Toastingtimes areapproximateandshouldbe usedas a guideonly.
** Brandnamesare registeredtrademarksof the respectivemanufacturers,
7
For more even browning results,
preheatthe oven 3-4 minutes.
Toastingtimes will be shorter when
the oven is hot or when repeated
toasting functions are done.
I For optimal food quality and nutrition, oven cooked foods should be
kept warm for no longer than 1 to 2
hours.
Browningtime may vary, watch toasting carefully to avoid over-browning.
can be changed for your convenience.
To changethe AUTO SET toasting time,
press TOASTING pad,enter the desired
time, then press and hold AUTO SET
pad for several seconds. The control will
beep and NEW AUTO SET ENTERED
Toasting is based on time not temperature.
KEEPWARM
Or, pressthe appropriatenumberpads
to set the toastingtime in minutesand
seconds between 10 seconds and 10
minutes.
1
TOASTING
For optimal food quality and color,
foods cooked on the range top
should be kept warm for an hour or
less,
To keep foods from drying, cover
loosely with foil or a lid.
To warm dinner rolls:
- cover rolls loosely with foil and
place in upper oven.
- press KEEP WARM and AUTO
SET pads.
- warm for 12-15 minutes.
I To warm plates:
place2 stacks of up tofour plates
each in the upper oven.
press KEEP WARM and AUTO
SET pads.
warm for five minutes,turn off the
ovenand leaveplates inthe oven
for 15 minutes more.
useonly oven-safeplates, check
with the manufacturer.
don't set warm dishes on a cold
surface as rapid temperature
changes could cause crazing.
TIMERPADS
COOKTIME/STOPTIME PADS (CLOCKCONTROLLED
OVENCOOKING)
Use to programthe ovens to start and stop
automatically. Cook time may be set for up
to 11 hours and 59 minutes (11:59). The
clock must be functioning and correctly set
for this feature to work.
To Delay the Start of Cooking and Turn
Off Automatically:
,
Press COOK TIME pad. COOK TiME
will flash. Pressthe appropriatenumber
pads to enter cooking time in hours and
minutes.
Both ovens may be set for clock controlled cooking. To set both ovens:
,
1. Set COOK TiME and bake temperatures for both ovens.
2. Set STOP TIME for both ovens.
The words STOP TIME must be
Press the upper or lower oven BAKE or
CONVECT BAKE (select models) pad
and selectthe bake temperature. COOK
TIME will be displayed along with the
The timer(s) may be set for any time
period up to 99 hours and 59 minutes
(99:59).
The timer(s) operate independently of
any other function and can be set while
another oven function is operating. THE
TIMER DOES NOT CONTROL THE
OVEN.
.
temperature.
,
flashing in the display
to set STOP TIME.
Press STOP TIME pad. Display shows
when the oven will stop based on an
immediatestart.
will appear in the display,
=
=
To Start Immediately and Turn Off Automatically:
Press COOK TIME pad, COOK TIME
willflash. Presstheappropriate number
,
padsto entercooking time in hours and
minutes.
=
Press the upper or loweroven BAKE or
CONVECT BAKE (select models) pad
and selectthe baketemperature. COOK
TIME will be displayed along with the
=
Press STOP TIME pad again. STOP
TIME must be flashing to set the delay
start time.
8. Follow steps 3-5 in preceding section.
temperature.
.
One minute before the end of the programmed cook time, the light will turn
on,a beepwillsoundandCHECKFOOD
will be displayed. Light will turn off automaticallywhenCANCEL pad ispressed
or after ovendoor is opened andclosed.
4. At the end of cook time, the oven will
shut off automatically,"End"and COOK
TIME will be displayed and four beeps
will sound.
=
Press CANCEL pad. Remove food
from oven. If the program is not canceled, there will be I reminder beep
every minute for up to 30 minutes.
NOTE: The Cook Time/Stop Time reminder beeps may be changed. See
Control Options (Cook Time Beeps),
page 9.
TIMER 1 orTIMER 2 wilt be displayed.
If both timers are active TIMER 1 + 2
EXAMPLE: To set a timerfor 5 rainutes, press the TIMER 1 pad and the
number pad 5. The control will begin
countdown after a four second delay.
6. DELAY and BAKE will be displayed.
temperature.
Press the appropriatenumberpads to
enter desired time.
will be displayed.
5. Press the appropriate number pads to
enterthe time you want the oven to stop.
7, At the end of the delay period, COOK
TIME wilt be displayed along with the
Press the TIMER 1 or 2 pad. TIMER
1 or 2 will flash respectively. 0HR:00
,
The last minute of the countdown will
be displayed in seconds,
,
At the end of the set time, "END" will
be displayed and one four second
beep willsound followedbytwo beeps
every 30 seconds for up to five minutes. Press the corresponding
TIMER pad to cancel the beeps.
Highly perishable foods such as
dairy products, pork, poultry or seafood are not recommended for de-
NOTE: The Timer reminder beeps at
the end of a settime may be changed.
See Control Options (Timer Beeps),
page 9.
layed cooking.
Clock controlled baking is not recommended for baked items that
require a preheated oven, such as
cakes, cookies and breads.
To Cancel a Set Time:
Press and hold the correspondingTIMER
pad for several seconds. After a slight
delay the time of day will appear.
OR
Press the TIMER pad and the "0" number
pad. After a slight delay the timer will be
canceled.
CONTROL
OPTIONS
To
ChangeFactorySetDefaultOptions:
1. Control options may be changed by selecting the Setup Options (0) pad and
the desired option pad. (See Options
below.)
,
CONTROL
LOCK
(4)
OVENTEMPERATUREADJUSTMENT
The function pads on the control can be
lockedto preventunwantedusefor safety
and cleaning benefits. The currenttimeof
daywill remain inthe display.
If youthink the oven isoperating too cold
or hot, youcan adjust it. Bakeseveraltest
items and then adjust the temperature
setting not more than 10° F at a time.
SCROLL SPEED (5)
To Adjust:
Current optionwill appear in the display.
3. Pressthe AUTO SET pad to change the
option.
.
PressCANCEL padto set the displayed
option and exit the program.
OPTIONSAVAILABLE:
12 HOUR
OFF(1)
The oven may be set to turn off after 12
hours or stay on indefinitely. The default
is set to turn off after 12 hours.
TIMER
BEEPS
(2)
There are three choices for the end of
The scroll speed of the messages in the
display may be changed from FAST to
MEDIUMto SLOW. Thedefault issetfor the
fault setting).
One beep followed by two beeps every
minute for up to 30 minutes.
One beep followed by no other beeps.
COOK
TtMEBEEPS
(3)
There are three choices for the end of
"clock controlledcooking"remindersignals.
Four short beeps followed by one beep
every minute for up to 30 minutes (default setting).
Four short beeps followed by no other
beeps.
Four short beeps followed by one beep
every 30 secondsfor up to five minutes.
9
Press the BAKE pad (upper or lower
oven) and enter 550° F.
,
Press and hold the BAKE pad (upper
or lower oven) for several seconds
until TEMP ADJ isdisplayed.
mediumspeed.
DISPLAYDIM (6)
=
The controlintensity may be changed for
easier reading. The default is set for the
highest intensity ........ .The fewer ..... the
less the intensity.
TEMPC/F (7)
The temperature scale may be changed
to Centigrade or Fahrenheit. The default
is set for Fahrenheit.
.
LANGUAGE(8)
(select models)
The words which scroll in the display
may be changed from English to French
or Spanish.
DEFAULT
(9)
Press the AUTO SET pad - each
press changes the temperature by 5°
F. The control will accept changes
from -35° to +35° F.
If the oven was previously adjusted,
the change will be displayed. For
example, if theoven temperaturewas
reduced by 15° F, the display will
show -15° F.
it
"timer" reminder signals.
One beep followed by two beeps every
30 seconds for up to five minutes (de-
=
When you havemadetheadjustment,
press the CANCEL pad and the time
of day will reappear in the display.
The oven will now bake at the adjusted temperature.
OVEN
LIGHTS
The control can be reset to restore the
factory setting for each option.
DISPLAYON/OFF (CLOCK)
The time-of-day display may be shut off
when the oven is not in a cooking or
cleaning function.
The oven light(s) automaticallycomeson
when the door(s)is opened. When the
door(s) is closed, press the LIGHT Pad
(upper or lower oven)on the controlpanel
to turn the light(s) on or off.
The oven light(s) wilt notoperate during a
clean cycle. The oven light(s) will come
on automatically one minute before the
end of a clock controlled cooking operation.
OVEN
VEHT
To REMOVEOVENRACKS:
When the oven is in use, the area near
the vent may feel warm or hot to the
touch. NEVER block the vent opening.
RACK 1:
Pull rack straight out until it stops at the
lock-stop position; lift up on the front ofthe
rack and pull out.
OVEN VENT LOCATION
Use for roasting large cuts of meat
and poultry, frozen pies, dessert
souffles or angel food cake, and tworack baking.
> For RotlerGlideTM rack, pull both the rack
glide and rack base out together.
Multiple Rack Cooking:
Two rack: Use rack positions2 and 4,
or 1 and 4.
Three rack: (convection baking only,
selectmodels) Userack positions 1,3
and 5. (See illustration.)
When high moisture foods are cooked
in the upper oven,steam may be visible
coming from the oven vent. This is
normal.
OVEN
RACKS
All racks are designed with a lock-stop
edge.
To REPLACEOVENRACKS:
Place rackon the rack support inthe oven;
tilt the front end up slightly; slide rack back
until it clears the lock-stop position; lower
front and slide back into the oven.
RACKPOSITIONS
Is equipped with one rack and rack
position.
--
5
--
4
--
2
i
1
3
> When pulling the
upper oven rack
out to remove or
LOWEROVEN
Conventional: Is equipped with one
RollerGlideTM rack and one regularflat
rack.
> Convection (selectmodels):
Isequipped
with one RollerGIideTM rack and two
regular flat racks.
A half rack, to increase oven capacity, is
available as an accessory. It fits in the
left, upper portion of the oven and provides space for a vegetable dish when a
large roaster is on the lower rack. Contact your Maytag dealer for the
"HALFRACK" Accessory Kit or call
1-800-688-8408 to order.
UPPEROVEN
check food, grasp
thetopedgeofthe
rack.
HALFRACKACCESSORY
(LOWER
OVEN)
Three-rack Convection
Baking (Racks 1, 3 and 5)
RACK 4:
Use for two-rack baking and for broiling.
RACK 3:
Use for most baked goods on a cookie
sheet or jelly roll pan, layer cakes,
fruit pies, or frozen convenience foods,
and for broiling.
RACK 2:
Use for roasting small cuts of meat,casseroles, baking loaves of bread,bundt cakes
or custard pies, and two-rack baking.
CARE
&CLEAHIHG
CLEANPAD
Use to set a self-clean cycle. (Only one
oven may be cleaned at a time. Both
ovens will lock when either is being
cleaned,)
.
Clean oven
frame, door
frame (area
outsideofgasket)
around
and
the
To Delay the Start of a Self-Clean Cycle:
1. Follow steps 1-4 above.
2. Press the STOP TIME pad.
TIME will flash.
CLEANING
PROCEDUR
STOP
3. As STOP TIME flashes, press the appropriatenumber padsto enterthe time
you wish the oven to stop.
>
Be sure appliance is off and all
partsare coolbefore handlingor
cleaning, This is to avoid damage and possible burns.
>
To prevent staining or discoloration,cleanapplianceaftereachuse.
>
If a part is removed, be sure it is
correctly replaced.
4. DELAYCLN and LOCwill be displayed.
5. When the delay period is completed
and cleaning begins, CLEANING, LOC
and the clean time will be displayed,
opening in the door gasket with a nonabrasive cleaner such as Bon Ami*.
These areasare notexposed to cleaning
temperatures.
.
Remove oven racks. If racks are left in
during a clean cycle, it may impairfunction and they will discolor, Turn off the
oven light and close door.
1
Press CLEAN pad.
4. Press the AUTO SET pad for 3 hours of
cleaning time, press again for 4 hours
and again if 2 hours of clean time is
desired.
=
CLEANING and LOC plus the cleantime
will appear in the display and both ovens
will lock.
6. When the clean cycle is complete,
CLEANED will be displayed. LOC will
remain on until the oven has cooled
(approx. 1 hour).
7. Whenthe oven iscool, LOCwill no longer
bedisplayedand thedoormay beopened.
8. Wipe out the oven interior with a damp
cloth. If soil remains it indicatesthe cycle
was not long enough.
To Cancel Self-Clean Cycle:
1. Press CANCEL pad.
2. If LOC is NOT displayed, open oven
door. If LOC is displayed, allow oven to
cool.
To prevent damage to oven door, do
not attempt to open either oven door
when the LOC indicatorword isdisplayed.
During the cleaning process, the
kitchen should be well ventilated to
help eliminate normal odors associatedwith cleaning. Odorswill lessen
withuse.
It is normal for flare-ups, smoking or
flaming tooccur during cleaning ifthe
oven is heavily soiled. It is better to
clean the oven regularly rather than
towait untilthere is a heavy buildupof
soil.
Wipe up excess grease or spillovers
to prevent flare-ups. For ease in
cleaning, the bake element in the
upper or lower oven can be lifted
slightly (1 to 11/2inches).
Wipe up sugary and acid spillovers
such as sweet potatoes, tomato or
milk-based sauces prior to a selfclean cycle. Porcelainenamel isacid
resistant, not acid proof and may
discolor if spills are not wiped up
before a self-clean cycle.
A white discoloration may appear after cleaning if acid or sugary foods
are not wiped up before the clean
cycle. This discoloration is normal
and will NOT affect performance.
11
BROILER PAN AND INSERT
> Placesoapy cloth over insertand pan;
let soak to loosensoil.
> Wash in warmsoapy water. Usescouringpad to removestubbornsoil.
> Broilerpan and insertcan be cleanedin
dishwasher.
BRUSHED
CHROME
(SELECT MODELS)
> Whencool,washwith soapywater,rinse
and buff the surface.
> For heavier soil, use a mild abrasive
cleaner such as baking soda or Bon
Ami*, rubbing with the grain to avoid
streakingthe surface. Rinseand buff.
> To preventscratching,do not useabrasive cleaners.
To restore luster and removestreaks,
follow withStainlessSteelMagicSpray*
(Part #20000008)**.Chrome will permanentlydiscolorif softis allowedto
bake on.
CLOCK
AND CONTROL
PAD AREA
> To activate "ControlLock"for cleaning,
see page 9.
> Wipewith a dampcloth and dry.
> Glass cleanersmay be usedif sprayed
on a cloth first. DO NOTspray directly
on controlpad and displayarea.
CONTROL KNOBS
GLASS
> Remove knobs in the OFF position by
pullingforward.
> Avoid usingexcessiveamountsof water
which may seep under or behind glass
causingstaining.
> Wash,rinseanddry.Do notuseabrasive
cleaningagentsas they may scratchthe
finish.
- OVEN
WINDOWS & DOORS
> Turn on each element to be sure the
> Wash with soap and water. Rinse with
clearwateranddry, Glasscleanercanbe
used if sprayedon a ctothfirst.
knobs havebeen correctly replaced.
> Do not use abrasive materialssuch as
DRIP BOWLS - SELECT
MODELS
Porcelainmaydiscolororcrazeif overheated.
This is normal and will not affect cooking
performance.
> When cool, wash after each use, rinse
and dry to preventstainingor discoloration. May be washed in the dishwasher.
> To clean heavy soi!, soak in hot sudsy
water, then use a mild abrasivecleaner
such as Soft Scrub*and a plasticscouring pad.
> For burnedon soil, removefrom range,
placeon newspapersand carefullyspray
with commercial oven cleaner. (Do not
spray surroundingsurfaces.) Place in
plastic bag and allow to soak several
hours. Wearing rubber gloves, remove
from bag,wash, rinseand dry.
scouring pads, steel wool or powdered
cleanersas they will scratchglass.
GLASS-CERAMIC
SELECT
COOKTOP -
MODELS
Neveruseovencleaners,chlorinebleach,
ammonia or glass cleaners with ammonia. NOTE: Callan authorizedservicerif
theglass-ceramictopshouldcrack,break
orif metalor aluminumfoilshouldmelton
the cooktop.
> Light Soil - Use soap and water and a
cleancloth or paper towel, or non-abrasivecieanersuchas BonAmi*orCooktop
CleaningCreme** (Part No. 20000001).
Rinse and dry.
> Heavy Soils or Metal Marks - Gently
scrubwith CooktopCleaningCremeand
a plastic scrubber. Reappty cleaner.
Cover with damp paper towels to keep
moist, let stand 30 to 45 minutes.Scrub
ENAMEL (PAINTED)SIDEPANELS
again to remove remainingstain. Rinse
and dry.
> Whencoot,washwithwarmsoapywater,
rinseand dry. Neverwipea warm or hot
surface with a damp cloth as this may
damagethe surface and may cause a
steamburn.
> Burned-on or Crusty Soils- Holdrazor
blade scraper at 300angle and carefully
scrapeoff soit.Cleanremainingsoil with
method describedabove.
> For stubborn soil, use mildly abrasive
cleaning agents such as baking soda
pasteor Bon Ami*. Do not use abrasive
cleanerssuchas steelwoolpadsor oven
cleaners.Theseproductswill scratchor
permanentlydamagethe surface.
MeltedSugaror Plastic- Immediately
turn element to LOW and scrape from
hotsurfacetoa cootarea.Then
turnelementOFF andcoo!.
/
Cleanresiduewith ra/
NOTE: Use dry towel or cloth to wipe up
spills, especiallyacid or sugary spills. Surfacemaydiscoloror duffif soflis notimmediately removed. This is especiallyimportant
for white surfaces.
zorblade scraper
and Cooktop
Cleaning
Creme.
OVEN INTERIORS
> Follow instructionson page 11 to set a
self-cleancycle.
OVEN RACKS
Cleanwith soapy water.
Removestubbornsoilwithcleansingpowder or soap4illed scouring pad. Rinse
and dry.
If overtime,racksdo notslideout easily,
wipetherack edgeand rack supportwith
a smallamountof vegetableoil to restore
easeof movement,thenwipe off excess
oil. Likewise,placeonedrop ofvegetable
oil on rack roller.
NOTE: Removeoven racks during a clean
cycle. If racks are left in the oven, it may
impair functionand they will discolor.
PLASTIC FINISHESDOOR HANDLES,
TRiM & END CAPS
> When cool, clean with soap and water,
rinseand dry.
>- Use a glass cleanerand a soft cloth.
NOTE:Neveruseovencleaners,abrasiveor
causticliquidorpowderedcleansersonpfasticfinishes.Thesecleaningagentswillscratch
or mar finish.
NOTE: Toprevent stainingor discoloration,
wipe up fat, grease or acid (tomato,lemon,
vinegar,milk, fruit juice, marinade)immediately with a dry paper towel.
PORCELAIN ENAMELBACKGUARD
AREA, TRIM ON GLASS
CERAMIC SURFACE,
COOKTOP ON COIL
SURFACE
Porcelainenamelisglassfusedon metaland
may crack or chip with misuse. It is acid
resistant,notacid proof.All spiHovers,especially acid or sugar spillovers, should be
wipedup immediatelywitha dry cloth.
> Whencool,wash with soapywater,rinse
and dry.
> Neverwipeoff a warm or hotsurfacewith
a dampcloth.This maycausecrackingor
chipping.
> Never use oven cleaners, abrasive or
caustic cleaningagentson exteriorfinish
of range.
MAIHTEHAH(E
OVEN
DOOR(S)
OVEN
WtNOOW(S)
To REPLACEOVEN LIGHT BULB:
To protect the oven door window:
Do not place excessive weight on or
stand on an open oven door. This
could cause the range to tip over,
break the door, or injure the user.
Do notattempt toopen or close door
or operateoven untildoor is properly
replaced.
Never place fingers between hinge
and front ovenframe. Hingearms are
spring mounted, if accidentally hit,
the hinge will sfam shut against oven
frame and could injure your fingers.
1. Do not hit the glass with pots, pans,
furniture,toys, or other objects.
2
1. When oven is cool, use fingertips to
grasp edge of bulb cover, Pull out and
remove.
1
Carefully remove old bulb by pulling
straight out of ceramic base.
.
To avoid damaging or decreasing the
life of the new bulb, do not touch the
Do not close the oven door until the
oven racksare inplace.
Scratching,hitting,jarring or stressingthe
glass may weaken its structurecausingan
increasedrisk of breakageat a taterdate.
bulb with bare hands or fingers. Hold
with a cloth or paper towel, Push new
bulb prongsstraight into small holes
of ceramic base.
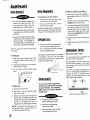
LEYELIH5
LEGS
4. Replace bulb cover by snapping into
place.
>
5, Reconnect power to the range. Reset
clock.
Be sure the anti4ip bracket secures
one of the rear leveling legs to the
Both the upper and lower oven doors are
removable.
To REMOVE:
1. When cool, open the oven door to the
broil stop position (opened about four
inches).
floor. This bracket prevents the range
from accidentally tipping.
The range should be leveled when installed.
If the range is not level, turn the plastic
leveling legs, located at each corner of the
range, until range is level.
COHYEHI[HCE
OUTLET
(CANADIAN
MOOELS
ONL',')
The convenienceoutlet is located on the
lower left side of the backguard.
Be sure appliancecords do not rest on or
near the surface element. If the surface
elementis turnedon,thecordandoutletwill
be damaged.
2. Graspdoor at each side. Do not use the
door handle to lift door.
3, Lift up evenly until door clears hinge
arms.
_TIP
__
_" LEVELING
BRACKET
LEG
OvlLiGHT(S)
N
Theconvenienceoutletcircuitbreakermay
trip if the small appliance plugged into it
exceeds 10 amps, To reset the circuit
breaker, press the switch located on the
loweredge of the backguard.
t_.L..,_L,j.,: ":_._,J.;°
4,5.6
To REPLACE:
1. Grasp door at each side,
2. Align slots in the door with the hinge
arms on the range.
To assure the proper replacement
bulb is used, order bulb from Maytag
Customer Service. Call 1-800-688-
*
6
.........
CIRCUIT BREAKER SWITCH
Disconnectpower to range
before replacing light bulb.
Allow oven to cool before
replacing light bulb.
>
Make sure bulb cover and bulb
are cool before touching.
1}
5
8408, ask for part number 74004458 halogen bulb.
3. Slide the door down onto the hingearms
untilthe door is completelyseated on the
hinges. Pushdownon the top corners of
the door to completely seat door on
hinges, Doorshouldnotappear crooked.
NOTE-:The oven door on a new range may
fee! "spongy" when it is closed.This is norreal and will decrease with use.
.... 1_
4.
BEFORE
YOU
CALl.
FOR
SERVICE
FOR MOST CONCERNS,TRY
THESE FIRST:
I
Checkif ovencontrolshave beenproperly set.
BAKINGRESULTS ARE NOTAS
EXPECTEDOR DIFFER FROM
PREVIOUSOVEN.
!
blocked. See pg. 10 for location.
I
Checkto make sure range is level,
I Checkorre-setcircuitbreaker.Checkor
I
Temperaturesoften vary between a new
oven and an old one. As ovens age, the
oven temperatureoften "drifts" and may
become hotter or cooler. See pg. 9 for
instructionson adjustingthe oventemperature. NOTE: It is not recommendedto
adjust the temperatureif only one or two
recipesare in question.
replacefuse.
I Checkpowersupply.
PART OR ALL OF APPLIANCE
DOESNOT WORK.
! Checkthat oventemperatureis decreased
by25° F when convectbaking.
I See "Cooking Made Simple"booklet for
moreinformationon bakewareand baking.
I Check if surface and/or oven controls
havebeen properlyset. See pgs. 3 & 5.
I Checkif ovendooris unlockedafter selfcleancycle. See pg. 11.
I Checkif ovenisset fora delayedcook or
cleanprogram.See pgs. 8 & !1.
I Upperovenmay be in a toastingoperation. Lowerovenwill operatewhen the
toastingoperationis completed.
I Check if coil element is properly installed or needs to be replaced, See
pg, 4.
I This is normal for a new range and will
disappearaftera fewuses. Initiatinga clean
cyclewilt "bum off" the odorsmore quickly.
I
Excessivefood soils on the oven bottom.
Use a self-cleancycle.
I
Broil elementwas not preheated.
I Aluminumfoil was incorrectlyused. Never
line the broiler insert with foil.
STEAM COMES FROM VENT AREA.
I Ovendoorwasclosedduringbroiling.Leave
the door open to the first stop position
(about4 inches).
I Whenhigh moisturefoods arecookedin the
upper oven, steam may be visible coming
from the vent area.This is normal.
Trim excessfat from meat before broiling.
OVENWILL NOT SELF-CLEAN.
5. Pitting or flaking.
I Sugaryboiloversthat were not
removedpromptly.See pg. 12,
THERE IS A STRONG ODOR OR
LIGHT SMOKE WHEN OVEN IS
TURNED ON.
I Check oven rack positions.Food may be
too close to element.
1. Tinyscratchesor abrasions,
I Cooktopand pan bottomare clean,
Do not slideglass or metal pans
across top. Make sure pan bottomis
not rough,Use the recommended
cleaningagents.See pg. 12,
I Mineraldepositsfromwater andfood.
II Excessivemoisturewas usedwhen cleaning the window.
Turningon a ventilationfanwil!help remove
the smokeand/orodor.
I A soiledbroiler pan was used.
4. Areaswith a metallicsheen.
I This is normalwhen cookingfoods high in
moisture.
I
GLASS-CERAMICSURFACE
SHOWS WEAR.
3, Brownstreaksand specks.
I Spills not removedpromptly,Wiping
with soiledcloth or sponge. Pan
bottom notclean.
MOISTURE COLLECTS ON OVEN
WINDOW OR STEAM COMES FROM
OVEN VENT.
FOOD IS NOT BROILING PROPERLY
OR SMOKES EXCESSIVELY.
i
2. Metal marks.
! Do not slidemetal pansacross top.
When cool, cleanwith Cooktop
CleaningCreme.See pg. !2.
Both ovens will lock when either oven is
cleaned.
Make sure the oven vent has not been
I Check to be sure plug is securely inserted into receptacle.
NOTE: On Canadian models during a
self-cleancycle- glass-ceramiccooking surfacewillnot operate,and thetwo
frontelements on coil element models
will not operate.
opened whentheLOC indicatorword is not
displayed.
I
Checkto make surethe cycleis notset for
a delayedstart. See pg. 11.
!
Checkif door is closed.
OVEN DID NOT CLEAN PROPERLY.
I
Longercleaningtime may be needed.
I Excessivespillovers,especiallysugaryand/
or acidfoods,werenot removedpriorto the
self-cleancycle.
OVEN DOORWILL NOT UNLOCK
AFTER SELF-CLEAN CYCLE.
I
Oven interioris still hot. Allow about one
hour for the oven to cool after the completion of a self-cleancycle. Thedoor can be
"F" PLUS A NUMBERAND THE
MESSAGE:"CALL AN AUTHORIZED
SERVICEROR 888-462-9824"*
This is called a fault code. If a fault code
appears in the display and beeps sound,
presstheCANCELpad. Ifthefaultcodeand
beeps continue, disconnect power to the
appliance.Wait a few minutes,then reconnect power. If fault code and beeps still
continue,disconnectpowertotheappliance
and call an authorizedservicer.
Ifthe ovenis heavilysoiled,excessiveflareupsmay resultin a fault codeduringa clean
cycle. Press CANCEL pad and allow the
oven to cool for one hour, then reset the
ctean cycle, if the fault code and beeps still
continue,disconnectpowerto theappliance
and calt an authorizedservicer.
* FORPRIORITYONE
SERVICE
CALL
TOLL-FREE
1-888-4MAYTAG (1-888-462-9824).
YTA6
WARRANTY WHAT
ISNOT
COVERED
BY[HESE
WARRANTIES:
I. Conditions and damages resulting from any of the following:
Full One Year Warranty - Parts and Labor
a. Improperinstallation, delivery, or maintenance.
For one (1) year from the original retai! purchase date, any part which fails in normal
home use witl be repaired or replaced free of
charge.
b. Any repair, modification, alteration, or adjustment not authorized by the
manufacturer or an authorized servicer.
c. Misuse, abuse, accidents, or unreasonable use.
Limited Warranties- Parts Only
d. Incorrect electric current, voltage, or supply.
Second Year - After the first year from the
original purchase date, parts which fail in normal home usewill be repaired or replacedfree
of charge for the part itself, with the owner
paying all other costs, including labor, miteage and transportation.
e. Improper setting of any control.
Third Through Fifth Year- From the original
purchase date, parts listedbelow which fail
in normal home use will be repaired or replaced free of charge for the part itself, with
the owner paying all other costs, including
labor, mileage and transportation.
2. Warranties are void if the original serial numbers have been removed,
altered, or cannot be readily determined,
3. Light bulbs.
4. Products purchased for commercial or industrialuse.
5. The cost of service or service call to:
a. Correct installationerrors.
b. Instruct the user on the proper use of the product.
c. Transport the appliance to the servicer.
6. Consequential or incidental damages sustained by any person as a resutt
of any breach of these warranties. Some states do not allow the exclusion or
limitation of consequential or incidental damages, so the above exclusion
may not apply.
> Electronic Controls
> Glass-ceramic Cooktop: due to thermal
breakage.
> Electric Heating Elements: surface, broil
and bake elements on electric cooking
app!iances.
Canadian Residents
The abovewarrantiesonly cover an appliance
installed in Canada that has been certified or
IFYOU
HEED
SERVICE
II Call the dealer from whom your appliance was purchased or call Maytag
Appliances Sales Company, Maytag Customer Assistance at 1-888-4629824, USA to locate an authorized servicer.
I
listed by appropriate test agencies for compliance to a National Standard of Canada
unlessthe appliancewas broughtinto Canada
due to transfer of residence from the United
States to Canada.
LimitedWarranty Outside the United States
and Canada - Parts Only
Fortwo(2) yearsfrom the date oforiginalretail purchase, any part which fails in norma!
home use will be repaired or replaced free of
charge for the part itself, with the owner paying all other costs, including labor, mileage
and transportation.
Be sure to retain proof of purchase to verify warranty status. Refer to
WARRANTY for further information on owner's responsibilities for warranty
service.
If the dealer or service company cannot resolve the problem, write to Maytag
Appliances Sales Company, Attn: CAIR®Center, P.O.Box 2370, Cleveland,
TN 37320-2370, or call 1-888-4Maytag for PriorityOne Service (1-888462-9824).
U.S. customers using TTY for deaf, hearing impaired or speech impaired,
call 1-800-688-2080.
NOTE: When writing or calling about a service problem, please include the
following information:
a, Your name, address and telephone number;
b. Model number and serial number;
Thespecific warranties expressed above are
the ONLY warranties provided by the manufacturer. These warranties give you specific
c. Name and address of your dealer or servicer;
legal rights, and you may also have other
rights which vary from state to state.
e. Proof of purchase (sales receipt).
d. A clear description of the problem you are having;
User's guides, service manuals and parts information are available from
Maytag Appliances Sales Company, Maytag Customer Assistance.
1S
MAYTAG
• 403 West Fourth Street
North
• P.O. Box 39 • Newton,
Iowa 50208