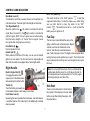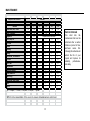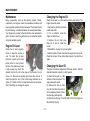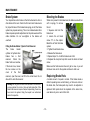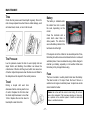
1
Owner’s Manual
TABLE OF CONTENTS
MODELS COVERED
Kick Starting……..….....….………………….………….…..… 7
Rear Foot Rest…….....………….……………….………….…..8
Helmet Hook.……....………….……………….………….…..… 8
Front Storage Compartment.………………….………….…..… 8
Under-seat Compartment………………………..……………….8
Rear Luggage Rack.……………………………..……………….8
This Owner’s Manual covers the following 49.5cc mopeds:
Agility, Adventure, Force, Raptor, Neo, and Victoria.
SAFETY
Safe Riding………….………………………………… 3
Protective Apparel……………………………….……………3
Modifications………………………………………………...…… 3
Loads and Accessories………………………………...…... 3
OPERATION
Parking your Moped…….………………….………….…..… 8
Gas oline and Engine Oil……………. …………. ….. …8
B r e a k - in Pe r i o d …… …. …. . …… … …. …… … …. …. . … 9
Pre-Ride Inspection….….………………….………….…..… 10
Starting the Engine.……..….……………….………….…..… 10
Riding…....…………………….………….………….…..… 11
Riding on a Slope...………………………….………….…..… 11
Braking and Parking.…..…………………….………….…..… 11
50-M30 MOPED (49.5cc)
Front View…….…………..……...…………………...…… 4
Left Side View …………...………………………………...…… 4
Right Side View…………..………..….….…………...…..… 4
Location of Identification Numbers.…...………….……...…..… 5
CONTROLS AND INDICATORS
Using this Manual……………………….………………...…..…
Ignition Switch……………………….……………….…...…..…
Key…………………….………………….……………….…..…
Instrument Panel……….………………….…………….…..…
Left Handle……………….………………….…………….…..…
Right Handle..……………….………………….………….…..…
Fuel Tank Cap....……….….………………….………….…..…
6
6
6
6
6
7
7
1
TABLE OF CONTENTS
MAINTENANCE
TROUBLESHOOTING
Service Schedule..………………………….………….…..… 12
Engine Oil ……..……….………………….………….…..… 13
Changing the Engine Oil...……….………….………….…..… 13
Changing the Gear Oil ……...……………….………….…..… 14
Carburetor………...……….………………….………….…..… 14
Throttle Cable Adjustment…....………………….…….…..… 14
Idle Speed Adjustment.…….…………….………….…..… 14
Spark Plug.……………..….………………….………….…..… 15
Air Filter..…..…………………………………………………15
Brake System……………………...….…………….……….…..16
Bleeding the Brakes……….…..……………….……….…..16
Replacing Brake Pads…………..…..…………….……….…..16
Tires……..………………………...….…………….……….…..17
Battery…..………………………...….…………….……….…...17
Fuse……..………………………...….…………….……….…..17
Lights…..………………………...….…..………….……….…..18
Mirrors…………………...….……….………….……….…..18
Storage…..………………………....……………….……….…..18
Tool Kit……………....…………...………………….……….…..18
General…..………………………...……………….……….…..19
Engine.…..……………………...….……………….……….…..19
Vibration...……………………...….……………….……….…..20
Lubrication System…………...….……………….……….…..20
Electrical System..……………...….……………….……….…..20
Transmission.…………………...….……………….……….…..20
Brakes……...…………………...….……………….……….…..20
TECHNICAL SPECIFICATIONS…..…….……….…..21
ELECTRICAL WIRING DIAGRAM.…….…..…….…..27
2
SAFETY
Your Moped and You
11. Ride with both hands on the handlebars and both feet on the
footrests. Passengers should hold onto the passenger handles
securely and keep both feet on the footrests.
Congratulations on your new Cruze moped! If you ride safely
and maintain your moped, you will enjoy many miles of happy
riding.
Protective Apparel
The operator should wear protective apparel, such as a
DOT-approved helmet, gloves, and eye protection. Passengers
should also wear a helmet. Refer to local regulations. Loose
clothing should not be worn. The exhaust system gets very hot
during operation - do not touch the exhaust pipe when hot. The
operator and passenger should wear trousers and shoes/boots
that protect ankles and feet.
Safety
1. Read this manual completely before operating your moped.
2. Inspect your moped before riding.
3. The rider should possess the type of license required by local
regulations.
4. Obey traffic regulations.
5. Ride defensively and maintain a safe distance from other
vehicles.
6. Wear bright clothing so other drivers can see you.
7. Don't cut into other lanes or weave. Don't exceed the speed
limit or ride faster than is safe for the road conditions. When it is
raining, the road surface may be slippery - reduce speed.
8. Be aware of the weather and road conditions. Wet roads can
be very slippery, especially painted lines. Braking distances will
be significantly longer.
9. Use turn signals or hand signals when turning or changing
lanes.
10. Use caution when riding through intersections and
entering/exiting parking lots
Loads and Accessories
1. The total weight of the operator, passenger and luggage
should not exceed the maximum load of the moped (See:
Specifications). The maximum load for the storage
compartment beneath the seat is 22 lbs. The maximum load for
the rear luggage rack or box is 10 lbs.
2. Items carried on the rear luggage rack should not block the
taillight. Keep the weight of items on the luggage rack low and
close to the centerline of the moped. This weight distribution will
make it easier to control the moped.
3. Adjust the tire pressure according to the weight of items
being carried and driving conditions.
4. Luggage should be secured to the moped and checked
frequently to ensure it has not shifted.
3
50-M30 MOPED
Front View
10 Headlight
11 Front Turn Signals
12 Bag Hook
13 Battery
18 Kick-start Lever
14 Air Filter
19 Main Stand
15 Seat
20 Side Stand
16 Seat Lock
17 Rear Luggage Rack
Right Side View
1 Side Mirrors
4 Instrument Panel 7 Right Handle Switches
2 Rear Brake Lever
5 Front Brake Lever 8 Ignition Switch
3 Left Handle Switches 6 Throttle
9 Front Storage Compartment
(On some models)
Left Side View
21 Exhaust (Muffler)
22 Tail-light/Rear Turn Signal
23 Fuel Tank Cap
24 Storage Compartment
25 Front Turn Signals
4
26 Parking Light
27 Front Brake
28 Front Tire
29 Oil Fill Port/Dipstick
30 Rear Brake
50-M30 MOPED
Locations of the Identification Numbers
Please write down the numbers in the following boxes for future
reference:
The frame number (VIN) and engine number may be needed for
registration. Depending on the model, the frame number is
stamped or engraved on the front frame tube under the frame
number cover and on a data plate. The engine number is
stamped or engraved on a data plate located on the lower right
side of the frame.
Frame Number (VIN):
Engine Number:
5
CONTROLS AND INDICATORS
(1) (2) (7) (5)
(4)
(3)
(6)
Using this Manual
Instrument Panel
Unless otherwise noted, illustrations and descriptions are
functionally representative of all 49.5cc Cruze mopeds.
Speedometer (1)
Indicates speed of the moped
Odometer (2)
Indicates distance traveled
Tachometer (3) (If equipped)
Indicates engine RPM
Turn Indicator (4)
This light will flash when the turn signals are activated.
Fuel Gauge (5)
The fuel gauge indicates approximately how much fuel is in the
tank. “F” indicates FULL. When the needle is in the red area, the
moped is low on fuel.
High Beam Indicator (6)
This indicator illuminates when the high beam is used.
Ignition Switch
The ignition switch has three positions:
ON: Ignition is on, engine can be
started, key cannot be removed.
NOTE: Leaving the ignition on
when the engine is not running
will drain the battery. This can
damage the battery.
OFF: Ignition is off, engine
cannot run, key can be removed.
“LOCK” STEERING LOCK: Locks the handlebars; key can only
be removed when handlebars are turned to the far left.
Left Handle
Keys
Headlight Switch (1)
The headlights are always on.
Move the switch up to the
high beam position to turn on
the high beam. Move the switch
down to the
low beam position
to use the low beam. Some mopeds
are equipped with a spring-loaded
high beam ‘flash’ switch.
Your moped comes with two ignition keys. The ignition key
unlocks the under-seat storage compartment on all mopeds. It
also unlocks the front storage compartment and external fuel tank
cap if your moped is so equipped.
6
CONTROLS AND INDICATORS
Run (“Kill”) Switch (5)
This switch must be in the “RUN” position
to start the
engine and while riding. To stop the engine safely while riding,
use your right thumb to move the switch to the “OFF”
position
. . This switch can be left on – it will not drain the
battery when the ignition is off.
Rear Brake Lever (2)
To activate the rear brake, squeeze the lever on the left side in a
controlled manner. The brake light in the taillight will illuminate.
Turn Signal Switch (3)
Move the switch to the
left position to activate the left turn
signal; Move the switch to the
right position to activate the
right turn signal. NOTE: The turn signals are not self-cancelling.
Push the button straight in to “Cancel” the turn signals. Cancel
turn signals after changing lanes or turning.
Horn Button (4)
Push to activate the horn.
Hazard Light (5)
When parked at the side of the road, you can use the hazard
lights to be more visible. The front and rear turn signal lights will
flash. Not all models are equipped with a hazard light switch.
Fuel Cap
The fuel cap is located behind the seat on the
Agility, under the seat on the Adventure, Raptor,
and Neo, and near the footboards on the
Victoria. Twist the cap counterclockwise to
open. Twist clockwise to close. The Agility comes equipped with a
locking fuel cap; use the ignition key to open it. The Victoria’s fuel
cap is located under a locking cover; use the ignition key to open
the cover.
Right Handle
Note: Do not over-fill the fuel tank. There is a flat metal tab
visible inside the filler neck. Do not fill above this tab. Do
not spill gasoline on the engine when hot. Turn the engine
off during fueling to avoid risk of fire.
Electric Engine Start (2)
To engage the electric start,
squeeze one of the brake levers
while pressing the starter button
.
Throttle (3)
Twist the throttle grip toward you
to accelerate; release or twist away to slow down.
Front Brake Lever (4)
Squeezing this lever operates the front brakes. Use the brakes in
a controlled manner. The brake light in the taillight will illuminate
when squeezed.
Kick Start
There is a kick-start pedal on the left side of
the moped. Put the moped on its main stand
before using. After starting the engine, fold
the pedal back in.
7
CONTROLS AND INDICATORS
Rear Passenger Footrest
Rear Luggage Rack
The passenger’s feet should be placed on
the rear footrests.
Small items or a box can be loaded on
the rear rack. The load limit is 10 lbs.
Helmet/Bag Hook
Stands
Swing the lower part of the hook out to use.
You can hang a helmet or light bag on this
hook.
The moped comes equipped with a
main stand and a side stand. To use the
main stand, place your foot on the pedal
extending from the stand, place your left
hand on the left handlebar grip, use
your right hand to hold the metal part of
the luggage rack; rock the moped up
and back by lifting from the luggage rack and stepping down on
the main stand at the same time. The moped will rock onto its
main stand.
To use the side stand, step on the foot
pad welded to the side stand and swing it
out into the down position. Gently lean
the moped to the left until it is resting on
its side stand. Cruze recommends using
the main stand whenever possible to
minimize the possibility that your moped
could fall over.
Front Storage Compartment
Some models have a front storage
compartment. Items should not exceed 3
pounds. Use the ignition key. To open, turn
counter-clockwise and pull the door out.
Turn and hold the key when closing.
Under-seat Storage Compartment
Items such as a lock or helmet can be
stored here. Use the ignition key; turn it
clockwise and lift the seat to open. This
compartment is close to the engine, so
do not place items that can be damaged
by heat here. Items should not exceed
20 lbs. Push the seat down firmly over
the latch until you hear it click.
Note: Make sure both stands are retracted before riding.
8
OPERATION
Gasoline and Engine Oil
Break-in Period
The break-in period is critical to extending the life of your moped
and achieving optimal performance.
Gasoline/Fuel
Your Cruze moped features a four-stroke engine. It is designed to
use unleaded gasoline with an octane rating of 93 or higher. Do
NOT mix the fuel with engine oil. If the engine makes a knocking
sound, the octane rating of the fuel may be too low. Most gasoline
available in the US is E10, which means it contains 10%
ethanol. Today’s gasoline can go bad in as little as two
weeks. Stale fuel can cause your moped to run poorly. Ethanol
can clog the carburetor and cause the engine to run poorly.
Ethanol attracts water, which can cause the engine to run poorly.
Cruze recommends using an ethanol additive to stabilize fuel
every time you fill up. If you are not going to ride your moped for a
while, drain all the fuel from your fuel tank and the carburetor.
Start the engine and allow it to run until it stops by itself.
Max Speed
Do not exceed the following speeds during the break-in period:
Break-in
Distance (Miles)
Speed (MPH)
0-100
101-200
201-500
501-1,000
18
22
25
30
Avoid Excessively Low Speeds and Low RPM
Lubrication is most effective at higher engine RPM. Vary the
engine RPM and avoid low speeds (below 18MPH). Within the
first 500 miles, do not twist the throttle to the WOT (Wide Open
Throttle) position, do not twist the throttle aggressively, and do not
ride for long periods of time at WOT.
Engine Oil
The engine holds 0.6 quarts of engine oil. Use high quality SAE
10W-30 or 10W-40 engine oil.
Warm Up
Allow the engine to idle until the oil has a chance to reach all parts
of the engine and come up to normal operating temperature. Do
not ride the moped or twist the throttle suddenly when the engine
is cold. You will hear the engine RPM decrease after a few
minutes. This indicates the automatic choke is operating properly.
Gear (Hub) Oil
Use GL3 or GL5 gear oil.
9
OPERATION
Pre-Ride Inspection (PRI)
Starting the Engine
Caution: Start the engine
in a well-ventilated area.
Item
What to Check for
Handlebars/
Steering
Turns smoothly lock to lock;
Not loose
Brakes
Front and rear brake firmness; they
should not feel soft or ‘spongy’
Tires
Air pressure;
Tire tread;
Cracks or cuts
Fuel
Quantity; not stale or contaminated
Lights
All lights: headlights, instrument panel
lights, taillight, brake light, license plate
light, turn signals, and parking lights
Mirrors
Adjust for best view
Horn & Brake
Proper operation
Oil level in ‘normal’ range when engine is
cold
Proper play in the throttle cable and grip;
Grip twists freely and returns to idle
when released
Engine Oil
Throttle
1. Using the Electric Start
(a) Insert the key into the ignition switch and turn it clockwise to
the “RUN” position
.
(b) Move the Run (aka “Kill”) switch to the “RUN” position
.
(c) Squeeze one of the brake levers (This is a safety interlock).
(d) Press the start button
. If you have not ridden your moped
recently, twist the throttle grip a few times first.
Note: Do not engage the starter for more than 5 seconds at a time.
Holding it longer will drain the battery and could damage the starter
motor. Release the start button once the engine starts. Do not press
it while the engine is running. Allow the starter to cool after each
use. If the engine does not start after multiple attempts, hold the
throttle at 1/8 to 1/4 of full throttle and press the start button again.
2. Kick Starting
(a) Put the moped up on the straight stand
(b) Turn the ignition switch to the “RUN” position
(c) Move the “RUN” switch to the “RUN” position
(d) Step down on the kick start pedal with your right foot smoothly
(e) It is not necessary to squeeze a brake lever when kick starting
Caution: Do not use excessive kicking force or stand on the
kick start lever. The kicking motion should be parallel to the
scooter. Do not let the engine idle for long periods of time.
Air-cooled engines can overheat when not moving. Once the
engine has reached normal operating temperature, ride it at
normal speeds.
10
OPERATION
Riding
Riding on a Slope
1. When riding up a steep slope, the moped may slow down,
particularly when carrying a passenger.
2. When riding down a steep slope, use the brakes to limit speed.
On long hills, pull over occasionally to allow the brakes to cool.
If this is your first time riding a moped, take a rider training course
or seek instruction from an experienced rider. A Rider Safety
Presentation can be downloaded from the Cruze website. Find a
safe, non-crowded area to practice. Become familiar with all
controls and their operation.
Braking
1. Twist the throttle away from yourself to the idle position to slow
down and stop.
2. Simultaneously apply the front and rear brakes. Apply the front
brake more than the rear in most circumstances.
3. Before stopping, consider the braking distance. Wet or slippery
conditions require significantly longer braking distances.
4. After coming to a stop, turn the ignition key to the “Off”
position to turn off the engine. To stop the engine while riding, use
your right thumb to move the “Kill” switch to the “Off” position. Do
not take your hand off the handlebars to touch the ignition switch.
It is the operator’s responsibility to know and obey all traffic
regulations. Riding with only one hand on the handlebars is
dangerous - keep both hands on the handlebars and both feet on
the footrests.
Do not brake when cornering. Slow to a safe speed before
entering a turn. Be aware of road conditions; reduce speed on
wet or sandy roads. Painted lines, such as cross-walks, and
manhole covers can be extremely slippery when wet.
Twist the throttle toward yourself smoothly and release the brake
lever at the same time. The moped will start moving forward. The
speed can be adjusted by twisting the throttle grip: twist it toward
yourself to accelerate. Twist away from yourself or release to
slow down. Always use the appropriate turn signal or hand signal
when riding on a road with other traffic.
Warning: The higher the speed, the longer the braking distance.
Maintain sufficient distance from the vehicle or object ahead of you.
Using only the front or rear brake is dangerous. This may result in a
skid and loss of control. It will also increase the braking distance
and cause rapid wear of the brake.
Parking
Turn the handlebars all the way to the left. Push the ignition key in
and turn it left to the “LOCK” position to lock the steering column.
Gently wiggle the handlebars until the lock engages. Remove the
ignition key.
Caution: Do not ride at speeds indicated by the red zone of the
speedometer or tachometer. Do not twist the throttle too quickly
– this could cause the tires to lose traction and result in the
moped slipping or skidding.
11
MAINTENANCE
Required Service Item
Interval
Miles
200
700
1,500
Months
1
3
6
12
24
36
I, A
I, A
I, A
I, A
I, A
I, A
Valve Clearance
--
I, A
--
I, A
--
I, A
Engine Oil
R
R
Gear (Hub) Oil
--
R
R
CVT Belt
--
I
Brakes
I
I
Steering
I
I, T
I
I
I
I
Battery
--
I
I
I
I
I
Carburetor, Idle, Cable
2,500
3,500
6,000
Replace every 500 miles
--
R
R
--
I
--
I
I
I
I
I
Nuts, Bolts, & Fasteners
I
T
I
T
I
T
Air Filter
--
C
C
R
C
R
R
Fuel Filter
--
--
R
--
R
Suspension
--
I
I
I
I
I
Clutch & Variator
--
I
I
I
I
I
Front Shock Oil
--
--
--
R
I
R
Spark Plug
--
I
I, C
I
R
I, C
Main Stand, Side Stand
--
I
I
I
I
I
Tires
--
I
I
I
I
I
Lights
--
I
I
I
I
I
Key: I = Inspect, C = Clean, R = Replace, A = Adjust, T = Tighten
NOTE: It is the responsibility of the ow ner to ensure all maintenance is performed.
12
Service Intervals
This
chart
lists
the
maintenance that must be
performed after a certain
distance or period of time,
whichever comes first.
Following this schedule will
extend the life of your
moped and improve its
reliability,
performance,
and safety.
MAINTENANCE
Maintenance
Changing the Engine Oil
Many components, such as the steering system, brakes,
suspension, and engine, should be maintained carefully and
require special equipment and procedures. These tasks should
be performed by a certified technician at an authorized dealer.
Your dealer can provide further information and replacement
parts. All service must be performed by an authorized dealer
during the warranty period.
Stand the moped on a flat surface on the main stand. The
engine should be warm.
1. Remove the dipstick and clean
it with clean cloth.
2. Put a container under the
engine to catch the oil.
3. Remove the oil drain plug.
Drain all of the oil. Clean the
screen.
3. Reinstall the oil plug. Do not over-tighten.
4. Add 0.6 quarts of fresh oil and run the engine for one minute.
Check the oil level. If low, add a small amount of oil and check
again
Engine Oil Level
Check the oil level regularly.
Check it when the engine is
cool. To check the oil level,
place the moped on the main
stand while on level ground.
Remove the dipstick and wipe
it with a clean rag. Insert the
dipstick into the fill port to the base of the threads. Do not
screw it in. Remove the dipstick and look at the oil level. It
should be near the top of the normal range indicated by a
series of 'X' marks. Add oil in small increments as necessary.
Note: Overfilling can damage the engine.
Changing the Gear Oil
The gear oil should be replaced at 700 miles and at 1,500 mile
intervals thereafter. Use GL3 or GL5 gear oil.
(1) Stand the moped on a flat
surface on the main stand. The
engine should be warm.
(2) Remove the hub oil drain
plug “B” and drain the used oil
into a suitable container. Clean
the drain plug and reinstall.
(3) Remove the fill plug “A” and fill with 110ml of fresh gear oil.
Re-install the fill plug.
- 13 -
MAINTENANCE
Idle Speed Adjustment
1. Start the engine and allow it
to reach normal operating
temperature.
2. Make sure the throttle grip is
at the idle position. Adjust the
idle speed screw “D” to
between
1,400rpm
and
1,600rpm, or so that the engine
idles smoothly and does not stall.
Note: Check the gear oil level before and after driving long
distances. Use the specified gear oil. Do not mix with other gear
oils. Make sure that the drain plug is securely tightened, but do
not over-tighten. Check the condition of the rubber O-ring. Be
careful when draining oil from a warm engine - it may be hot.
Carburetor
A clean and properly-adjusted carburetor is essential to engine
operation. The carburetor mixture has been set at the factory.
As the throttle cable stretches, it may be necessary to adjust it
for proper play. The idle speed should be adjusted periodically
depending on the ambient temperature, altitude, fuel, and
condition of the engine.
Note: After adjusting the throttle cable, check for proper throttle
grip movement. The throttle grip should return to the idle position
when you let go, with no increase in the idle speed of the engine.
Throttle Cable Adjustment
1. Loosen the lock screw “1”.
2. Turn the adjusting nut “2” to
so that the cable has between
0.5mm-1.0mm of free play.
3. Tighten the lock screw and
replace the rubber cover “3” to
protect the throttle adjusting
nut and lock screw.
- 14 -
MAINTENANCE
Spark Plug
To Remove the Filter:
1. Remove the plastic filter housing
cover
2. Remove the filter element
NGK CR7HSA
1. Inspect the spark plug every
1,500 miles. Remove any carbon
deposits with a wire brush or plug
cleaner. Use a gap gauge to set
the plug gap to 0.6-0.7mm.
2. When cleaning carbon deposits
on the spark plug, observe the
color on the porcelain tip. A light
gray or brown color indicates
proper operation.
Caution: Do not start engine when the air filter is not installed.
To Clean the Filter:
1. Blow air through the filter
core.
2. Pour a non-flammable
detergent into a properly-sized
container and immerse the
sponge in the detergent.
3. Squeeze the sponge to get as much of the detergent out as
possible. Do not wring it.
4. Immerse the sponge in engine oil. Then squeeze the oil out
of it. It should still be lightly soaked with oil.
5. Re-assemble the air filter. Make sure
there are no air leaks.
Note: The spark plug provided is suitable for normal operating
conditions. Using an incorrect spark plug can damage the engine.
Do not over-tighten the spark plug. Use your hand to insert the
spark plug and make sure the threads line up before using a
socket wrench. When removing the spark plug, do not allow any
dirt or foreign matter to fall into the engine through the plug hole.
Removing & Cleaning the Air Filter
The air filter is located in a plastic housing on the left side of
the moped. If it is dirty or clogged, it will reduce the amount of
air available to the engine, causing the engine to produce less
power. The filter core should be inspected and cleaned
according to the service schedule. Clean and replace the core
more frequently if the moped is used in a dusty environment.
A. Non-flammable detergent
B. Engine oil
Caution: If there is tear or hole in the core, it should be replaced.
Never use flammable solvents or gasoline to clean the filter.
- 15 -
MAINTENANCE
Brake System
Bleeding the Brakes
Your moped has a disc brake on the front wheel and a disc or
drum brake at the rear. Check the front and rear brake levers
for proper firmness. If the brakes feel spongy or soft, the brake
system may require servicing. The nut on cable-actuated drum
brakes requires periodic adjustment as the pads wear and the
cable stretches. Do not over-tighten or the brakes will
overheat.
When air is present in the brake lines, the brake levers will feel
soft or spongy. To remove
the air:
1. Squeeze and hold the
brake lever
2. Loosen the air bleed
screw “R” on the caliper.
Bleed the air from the brake
system.
3. Tighten the air bleed screw
4. Release the brake lever.
5. Repeat steps 1 to 4 until the brake lever is firm.
6. Replace the dust-proof cap that covers the drain air bleed
screw.
Make sure the fluid reservoir does not get too low, or you will
introduce more air into the system and have to start over.
Filling the Brake Master Cylinder Fluid Reservoir
The
brake
master
cylinder on hydraulic disc
brakes has a fluid
reservoir. Check the
brake fluid level window.
If the level is low, loosen
the two screws on the
cover
of
the
fluid
reservoir, open the cover, and fill to the correct level. Do not
allow dirt to enter the reservoir.
Replacing Brake Pads
A certain amount of squeal is normal. If the brakes make a
distinct squealing noise under braking, or there are nicks on
the brake disc, the brake pads may need to be adjusted or
replaced. Both pads should be replaced at the same time,
even when only one is worn to the limit.
Warning: Use the grade of brake fluid indicated on the reservoir
or slave cylinder. Do not mix. Only use fresh brake fluid. If the
brake fluid reservoir requires frequent replenishing, there may
be a leak in the system. Bring the moped to an authorized
dealer for inspection.
- 16 -
MAINTENANCE
Tires
Battery
Check the tire pressure and tread depth regularly. Check for
nails. Always replace tires when there is visible damage, such
as broken tread, cracks, or cuts in the tire wall.
The battery is installed under
the rubber floor mat or under
the seat, depending on the
model.
Clean the terminals with a
metal brush when there is
white powder. The bolts that
secure the battery cables to the
terminals should be tight.
If the moped will not be ridden for an extended period of time,
the battery should be removed and stored indoors in a and well
ventilated place. Cruze recommends using a trickle charger to
maintain your battery, especially in cold weather. Make sure
the battery is fully charged before using.
Tire Pressure
Low tire pressure causes the tires to wear rapidly and can
impair traction and handling. Over-inflation can reduce the
contact area of the tire with the ground, which can cause loss
of traction. Adjust tire pressure when the tires are cold. Refer to
the data plate on the moped for the correct pressure.
Fuse
The fuse is located in a white plastic holder near the battery.
The rated current is 15 amps. Check the fuse if there is a
sudden loss of engine or electrical power. A spare fuse can be
stored inside the holder.
Tread
Driving a moped with worn tires
decreases traction and may lead to loss
of control. Replace the front tire when
the tread depth decreases to less than
1.6mm. Replace the rear tire when its
tread depth is less than 2mm.
Caution: Use a fuse with the correct current rating. Do not use
wire or other materials. If the fuse keeps burning out, there may
be a problem in the electrical system. Contact an authorized
dealer or certified technician.
- 17 -
MAINTENANCE
moped and let it run until it stops by itself.
3. Remove the spark plug and pour 15-20ml of Marvel Mystery
oil into the cylinder. Turn the key to the
position. Use the
kick starter to gently turn the engine over several times. Do not
use the electric starter or start the engine. Replace the spark
plug.
4. Disconnect the battery and put it on a trickle charger.
5. Inflate the tires and place the moped on its main stand.
6. Clean the moped and cover it.
Lights
1. Turn the ignition switch on and squeeze the front/rear brake
levers to check that the rear brake light illuminates.
2. Push the turn signal switch in both directions and make sure
the front and rear turn signals are working properly. Push the
center of the switch to cancel.
3. Check the headlights and parking lights for proper operation.
NOTE: The headlights will not illuminate until the engine is
running. They will go out when the engine is turned off.
4. Check the instrument panel lighting.
5. Clean off any dirt on the lights and replace any broken parts.
Riding after Storage
1. Replace engine oil if the moped has been stored for more
than four months.
2. Charge the battery and install/connect it.
3. Put fresh fuel in the tank. Cruze recommends using an
ethanol additive.
4. Conduct a thorough pre-riding inspection and check
performance while riding at low speed.
Bulbs
Bulb ratings are listed in the Specifications section. Use bulbs
with the same rating when replacing. Different ratings may
overload the wiring system and cause premature failure.
Mirrors
When sitting on the seat, be sure objects to the rear and sides
can be seen clearly. Clean the mirrors and replace any broken
parts.
Tool Kit
Your moped comes equipped with a tool kit. It is located in the
storage compartment located under the seat.
Long-term Storage
1. Change the engine oil
2. Drain all the fuel from the fuel tank and carburetor. Start the
- 18 -
TROUBLESHOOTING
General
Hard Starting
1. Spark plug fouled or spark plug cable loose or shorting out
2. Battery not charged sufficiently
3. Loose wire or cable connection at battery terminal or coil
4. Stale or contaminated fuel (ethanol), dirt in carburetor
5. Carburetor not adjusted properly
6. Coil or CDI not operating properly
7. Engine oil too heavy (winter operation)
8. Ignition timing not correct
9. Engine idle speed not correct
10. Low engine compression
11. Valve gap needs adjustment
Refer to the following troubleshooting guide when you
experience difficulty with the operation of your moped. Many of
the steps required to resolve these issues should be performed
by your dealer or a certified technician at an authorized dealer.
Engine
Engine does not turn over when using electric start
1. Ignition switch not in
“Run” position
2. Kill switch not in
“Run” position
3. Brake lever not squeezed
4. Battery not charged sufficiently or connections loose
5. Fuse blown
6. Starter motor or bendix requires service
Starts but does not run smoothly, stalls
1. Spark plug fouled or gap incorrect
2. Spark plug cable loose or shorting out
3. Battery not charged sufficiently
4. Loose or corroded wire or cable connection at coil or battery
5. Intermittent short circuit due to damaged wire connection
6. Stale or contaminated fuel (ethanol), dirt in carburetor
7. Fuel return vent line pinched or check valve not level
8. Coil or CDI not operating properly
9. Air filter clogged
10. Exhaust clogged
12. Low engine compression
13. Valve gap needs adjustment
Engine turns over but does not start
1. Insufficient fuel or fuel filter clogged
2. Insufficient vacuum to actuate fuel petcock
3. Fuel tank vent line pinched or check valve not level
4. Battery not charged sufficiently
5. Spark plug cable loose or grounding out, spark plug fouled
6. Coil or CDI not operating properly
7. Loose or corroded connection at coil or battery
8. Engine flooded with fuel
9. Stale or contaminated fuel (ethanol), dirt in carburetor
11. Engine oil too heavy (winter operation)
- 19 -
TROUBLESHOOTING
Alternator charge rate low
1. Poor battery condition
2. Excessive electrical load (too many electric accessories)
3. Loose or corroded terminals
4. Excessive idling or low speed riding
Pre-ignition or Detonation (Knocking or Pinging)
1. Incorrect fuel (octane rating too low) or incorrect spark plug
2. Ignition timing not correct
Engine Overheating
1. Riding at low speeds for extended period
2. Letting engine idle while moped is sitting for extended period
2. Oil level low
4. Ignition timing not correct
5. Clutch or belt slipping
Transmission
1. Belt worn or broken
2. Clutch work or broken
3. Variator worn or broken
Vibration
Brakes
1. Suspension components worn or loose
2. Engine isolation mounts worn or loose
3. Frame or brackets broken
4. Wheels and/or tires damaged or not balanced
1. Brake lever is soft:
Brake fluid level low or air in system (Disc brakes)
Adjustment nut needs to be tightened (Drum brakes)
2. Brake fade: Air inside brake system or excessive heat
build-up from excessive braking or pads dragging
4. Brakes not effective: Pads worn out, rotor warped or out of
alignment
Lubrication
1. Engine oil low
2. Oil Leaks: Loose bolts or seals/gaskets need replacement
Note: While under warranty, all service must be performed by
the dealer.
Electrical System
Battery not charging
1. Regulator/Rectifier not grounded or functioning properly
2. Engine ground strap loose or broken
3. Loose or broken wires in charging circuit
4. Battery damaged (e.g., bad cell, acid level low)
- 20 -
SPECIFICATIONS
Model: Adventure 50-M30
Specifications
Model: Adventure 50-M30
Specifications
Size (L × W × H)
1890mm×680mm×1120mm
Lubrication System
Pressure & splash
Wheelbase
1350mm
Starting Method
Electrical start / kick start
Net Weight
200 lbs.
Spark Plug
CR7HSA
Max. Load
330 lbs.
Clutch Type
Dry and automatic
Max. Speed
30 m.p.h. (48 Km/h)
Max. Slope
≥21°
Tires
Front: 130/60-13
Rear: 130/60-13
Min Clearance
110mm
Max. Driving Noise
≤77 dB(A)
Fuel Tank Capacity
1.6 gal
Engine Oil Capacity
Engine Oil
Brake Type
Front: Disc; Rear: Drum
Suspension
Front: Spring liquid flex
Rear: Spring oil damp
0.6 qt
Headlight
12V 35W/35W
SAE 15W-40
Parking Light
12V 3W
Engine Model
YY49QMJ
Turn Signals
12V 5W / 21W
Engine Type
Single cylinder,
4-stroke
Taillight / Brake Light
12V 5W / 21W
Instrument Panel Light
12V 3W
air-cooled,
Bore × Stroke
39mm × 41.5mm
High Beam Indicator
12V 3W
Cylinder Displacement
49.6 ml
Turn Signal Indicator
12V 3W
Compression Ratio
10.5 : 1
Cell Phone Indicator
12V 3W
Max. Power / RPM
2.2 kw/7500 rpm
Fuse
15A
Max. Torque / RPM
3.2 Nm/6000 rpm
Horn
12V 3A 105dB(A)
Ignition
CDI
- 21 -
SPECIFICATIONS
Model: Agility 50-M30
Specifications
Model: Agility 50-M30
Specifications
Size (L × W × H)
1660mm×680mm×1070mm
Lubrication System
Pressure & splash
Wheelbase
1195mm
Starting Method
Electrical start / kick start
Net Weight
185 lbs.
Spark Plug
CR7HSA
Max. Load
220 lbs.
Clutch Type
Dry and automatic
Max. Speed
30 m.p.h. (48 Km/h)
Max. Slope
≥21°
Tires
Front: 3.00-10
Rear: 3.00-10
Min Clearance
110mm
Max. Driving Noise
≤77 dB(A)
Fuel Tank Capacity
1.1 gal
Engine Oil Capacity
Engine Oil
Brake Type
Front: Disc; Rear: Drum
Suspension
Front: Spring liquid flex
Rear: Spring oil damp
0.6 qt
Headlight
12V 35W/35W
SAE 15W-40
Parking Light
12V 3W
Engine Model
YY49QMJ
Turn Signals
12V 5W / 21W
Engine Type
Single cylinder,
4-stroke
Taillight / Brake Light
12V 5W / 21W
Instrument Panel Light
12V 3W
air-cooled,
Bore × Stroke
39mm × 41.5mm
High Beam Indicator
12V 3W
Cylinder Displacement
49.6 ml
Turn Signal Indicator
12V 3W
Compression Ratio
10.5 : 1
Cell Phone Indicator
12V 3W
Max. Power / RPM
2.2 kw/7500 rpm
Fuse
15A
Max. Torque / RPM
3.2 Nm/6000 rpm
Horn
12V 3A 105dB(A)
Ignition
CDI
- 22 -
SPECIFICATIONS
Model: Force 50-M30
Specifications
Model: Force 50-M30
Specifications
Size (L × W × H)
1810mm×725mm×1050mm
Lubrication System
Pressure & splash
Wheelbase
1330mm
Starting Method
Electrical start / kick start
Net Weight
200 lbs.
Spark Plug
CR7HSA
Max. Load
330 lbs.
Clutch Type
Dry and automatic
Max. Speed
30 m.p.h. (48 Km/h)
Max. Slope
≥21°
Tires
Front: 130/70-12
Rear: 130/70-12
Min Clearance
110mm
Max. Driving Noise
≤77 dB(A)
Fuel Tank Capacity
1.1 gal
Engine Oil Capacity
Engine Oil
Brake Type
Front: Disc; Rear: Drum
Suspension
Front: Spring liquid flex
Rear: Spring oil damp
0.6 qt
Headlight
12V 35W/35W
SAE 15W-40
Parking Light
12V 3W
Engine Model
YY49QMJ
Turn Signals
12V 5W / 21W
Engine Type
Single cylinder,
4-stroke
Taillight / Brake Light
12V 5W / 21W
Instrument Panel Light
12V 3W
air-cooled,
Bore × Stroke
39mm × 41.5mm
High Beam Indicator
12V 3W
Cylinder Displacement
49.6ml
Turn Signal Indicator
12V 3W
Compression Ratio
10.5 : 1
Cell Phone Indicator
12V 3W
Max. Power / RPM
2.2 kw/7500 rpm
Fuse
15A
Max. Torque / RPM
3.2 Nm/6000 rpm
Horn
12V 3A 105dB(A)
Ignition
CDI
- 23 -
SPECIFICATIONS
Model: Raptor 50-M30
Specifications
Model: Raptor 50-M30
Specifications
Size (L × W × H)
1890mm×670mm×1170mm
Lubrication System
Pressure & splash
Wheelbase
1330mm
Starting Method
Electrical start / kick start
Net Weight
210 lbs.
Spark Plug
CR7HSA
Max. Load
330 lbs.
Clutch Type
Dry and automatic
Max. Speed
30 m.p.h. (48Km/h)
Max. Slope
≥21°
Tires
Front: 130/70-12
Rear: 130/70-12
Min Clearance
110mm
Max. Driving Noise
≤77 dB(A)
Fuel Tank Capacity
1.1 gal
Engine Oil Capacity
Engine Oil
Brake Type
Front: Disc; Rear: Drum
Suspension
Front: Spring liquid flex
Rear: Spring oil damp
0.6 qt
Headlight
12V 35W/35W
SAE 15W-40
Parking Light
12V 3W
Engine Model
YY49QMJ
Turn Signals
12V 5W / 21W
Engine Type
Single cylinder,
4-stroke
Taillight / Brake Light
12V 5W / 21W
Instrument Panel Light
12V 3W
air-cooled,
Bore × Stroke
39mm × 41.5mm
High Beam Indicator
12V 3W
Cylinder Displacement
49.6ml
Turn Signal Indicator
12V 3W
Compression Ratio
10.5 : 1
Cell Phone Indicator
12V 3W
Max. Power / RPM
2.2 kw/7500 rpm
Fuse
15A
Max. Torque / RPM
3.2 Nm/6000 rpm
Horn
12V 3A 105dB(A)
Ignition
CDI
- 24 -
SPECIFICATIONS
Model: Victoria 50-M30
Specifications
Model: Victoria 50-M30
Specifications
Size (L × W × H)
1890mm×670mm×1170mm
Lubrication System
Pressure & splash
Wheelbase
1330mm
Starting Method
Electrical start / kick start
Net Weight
240 lbs.
Spark Plug
CR7HSA
Max. Load
330 lbs.
Clutch Type
Dry and automatic
Max. Speed
30 m.p.h. (48Km/h)
Max. Slope
≥21°
Tires
Front: 130/60-13
Rear: 130/60-13
Min Clearance
110mm
Brake Type
Front: Disc; Rear: Drum
Max. Driving Noise
≤77 dB(A)
Suspension
Fuel Tank Capacity
2.2 gal
Front: Spring liquid flex
Rear: Spring oil damp
Engine Oil Capacity
0.6 qt
Headlight
12V 35W/35W
Engine Oil
SAE 15W-40
Parking Light
12V 3W
Engine Model
YY49QMJ
Turn Signals
12V 5W / 21W
Engine Type
Single
cylinder,
4-stroke
Taillight / Brake Light
12V 5W / 21W
Instrument Panel Light
12V 3W
air-cooled,
Bore × Stroke
39mm × 41.5mm
High Beam Indicator
12V 3W
Cylinder Displacement
49.6ml
Turn Signal Indicator
12V 3W
Compression Ratio
10.5 : 1
Cell Phone Indicator
12V 3W
Max. Power / RPM
2.2 kw/7500 rpm
Fuse
15A
Max. Torque / RPM
3.2 Nm/6000 rpm
Horn
12V 3A 105dB(A)
Ignition
CDI
- 25 -
SPECIFICATIONS
Model: Neo 50-M30
Specifications
Model: Neo 50-M30
Specifications
Size (L × W × H)
1660mm×680mm×1070mm
Lubrication System
Pressure & splash
Wheelbase
1195mm
Starting Method
Electrical start / kick start
Net Weight
165 lbs.
Spark Plug
CR7HSA
Max. Load
220 lbs.
Clutch Type
Dry and automatic
Max. Speed
30 m.p.h. (48Km/h)
Max. Slope
≥21°
Tires
Front: 3.00-10
Rear: 3.00-10
Min Clearance
110mm
Brake Type
Front: Disc; Rear: Drum
Max. Driving Noise
≤77 dB(A)
Suspension
Fuel Tank Capacity
1.4 gal
Front: Spring liquid flex
Rear: Spring oil damp
Engine Oil Capacity
0.6 qt
Headlight
12V 35W/35W
Engine Oil
SAE 15W-40
Parking Light
12V 3W
Engine Model
YY49QMJ
Turn Signals
12V 5W / 21W
Engine Type
Single cyl., air-cooled, 4-stroke
Taillight / Brake Light
12V 5W / 21W
Bore × Stroke
39mm × 41.5mm
Instrument Panel Light
12V 3W
Cylinder Displacement
49.6ml
High Beam Indicator
12V 3W
Compression Ratio
10.5 : 1
Turn Signal Indicator
12V 3W
Max. Power / RPM
2.2 kw/7500 rpm
Cell Phone Indicator
12V 3W
Max. Torque / RPM
3.2 Nm/6000 rpm
Fuse
15A
Ignition
CDI
Horn
12V 3A 105dB(A)
- 26 -
WIRING DIAGRAM
- 27 -
Cruze Scooters
7 Market Street
Rockland, MA 02370
1-888-99-CRUZE (888-992-7893)
www.cruzescooters.com
[email protected]