1
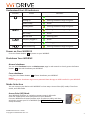
User’s Manual
DX-325
Wireless 802.11n Multi-functional Storage Router
WiDRIVE DX-325 User’s Guide
Copyright © 2010 EDSLAB Tech. Inc.
Version 0.4
Table of Contents
Declarations, disclaimers, instructions of guidings. . . . . . . . . . . . . . . . . . . . . . . . . . . . . . . . . . iii
Safety and care instructions. . . . . . . . . . . . . . . . . . . . . . . . . . . . . . . . . . . . . . . . . . . . . . . . . . . . iv
1 Understand Your WiDRIVE. . . . . . . . . . . . . . . . . . . . . . . . . . . 1
Overview of Your WiDRIVE DX-325 . . . . . . . . . . . . . . . . . . . . . . . . . . . . . . . . . . . . . . . . . . . . . . . . .
Package Content . . . . . . . . . . . . . . . . . . . . . . . . . . . . . . . . . . . . . . . . . . . . . . . . . . . . . . . . . . . . . . . .
The LED Status Indicators. . . . . . . . . . . . . . . . . . . . . . . . . . . . . . . . . . . . . . . . . . . . . . . . . . . . . . . . .
Understand the LED indicators. . . . . . . . . . . . . . . . . . . . . . . . . . . . . . . . . . . . . . . . . . . . . . . . . . . . .
Power on Your WiDRIVE. . . . . . . . . . . . . . . . . . . . . . . . . . . . . . . . . . . . . . . . . . . . . . . . . . . . . . . . . .
Shutdown Your WiDRIVE . . . . . . . . . . . . . . . . . . . . . . . . . . . . . . . . . . . . . . . . . . . . . . . . . . . . . . . . .
Mode Selection. . . . . . . . . . . . . . . . . . . . . . . . . . . . . . . . . . . . . . . . . . . . . . . . . . . . . . . . . . . . . . . . .
1
2
2
3
3
3
3
2 Setup Your WiDRIVE. . . . . . . . . . . . . . . . . . . . . . . . . . . . . . . . 5
HDD Installation. . . . . . . . . . . . . . . . . . . . . . . . . . . . . . . . . . . . . . . . . . . . . . . . . . . . . . . . . . . . . . . . .5
AP Mode Setup . . . . . . . . . . . . . . . . . . . . . . . . . . . . . . . . . . . . . . . . . . . . . . . . . . . . . . . . . . . . . . . . . 6
Client Scan Mode Setup . . . . . . . . . . . . . . . . . . . . . . . . . . . . . . . . . . . . . . . . . . . . . . . . . . . . . . . . . . 7
USB Mode Setup. . . . . . . . . . . . . . . . . . . . . . . . . . . . . . . . . . . . . . . . . . . . . . . . . . . . . . . . . . . . . . . . 8
3 WiDRIVE Utility . . . . . . . . . . . . . . . . . . . . . . . . . . . . . . . . . . . 9
Install your WiDRIVE Utility . . . . . . . . . . . . . . . . . . . . . . . . . . . . . . . . . . . . . . . . . . . . . . . . . . . . . . . 10
To search and operate your WiDRIVE through Utility. . . . . . . . . . . . . . . . . . . . . . . . . . . . . . . . . . . 10
4 WiDRIVE Web Control . . . . . . . . . . . . . . . . . . . . . . . . . . . . . 11
Login. . . . . . . . . . . . . . . . . . . . . . . . . . . . . . . . . . . . . . . . . . . . . . . . . . . . . . . . . . . . . . . . . . . . . . . . . .
Overview of WiDRIVE Web Control. . . . . . . . . . . . . . . . . . . . . . . . . . . . . . . . . . . . . . . . . . . . . . . . .
My Folder (Disk Management). . . . . . . . . . . . . . . . . . . . . . . . . . . . . . . . . . . . . . . . . . . . . . . . . . . . .
Working with Folders and Files . . . . . . . . . . . . . . . . . . . . . . . . . . . . . . . . . . . . . . . . . . . . . . . . . . . .
Quick Connection . . . . . . . . . . . . . . . . . . . . . . . . . . . . . . . . . . . . . . . . . . . . . . . . . . . . . . . . . . . . . . .
BitTorrent . . . . . . . . . . . . . . . . . . . . . . . . . . . . . . . . . . . . . . . . . . . . . . . . . . . . . . . . . . . . . . . . . . . . .
System Setting. . . . . . . . . . . . . . . . . . . . . . . . . . . . . . . . . . . . . . . . . . . . . . . . . . . . . . . . . . . . . . . . . .
Account Setting. . . . . . . . . . . . . . . . . . . . . . . . . . . . . . . . . . . . . . . . . . . . . . . . . . . . . . . . . . . . . . . . .
System Status. . . . . . . . . . . . . . . . . . . . . . . . . . . . . . . . . . . . . . . . . . . . . . . . . . . . . . . . . . . . . . . . . . .
Maintenance. . . . . . . . . . . . . . . . . . . . . . . . . . . . . . . . . . . . . . . . . . . . . . . . . . . . . . . . . . . . . . . . . . .
11
11
12
13
16
17
19
23
24
26
5 WiDRIVE Applications . . . . . . . . . . . . . . . . . . . . . . . . . . . . . 28
The Default Applications in your WiDRIVE . . . . . . . . . . . . . . . . . . . . . . . . . . . . . . . . . . . . . . . . . . . 28
6 Specification . . . . . . . . . . . . . . . . . . . . . . . . . . . . . . . . . . . . 30
7 Regulatory Information. . . . . . . . . . . . . . . . . . . . . . . . . . . . 31
FCC Compliance. . . . . . . . . . . . . . . . . . . . . . . . . . . . . . . . . . . . . . . . . . . . . . . . . . . . . . . . . . . . . . . . . 31
CE Compliance. . . . . . . . . . . . . . . . . . . . . . . . . . . . . . . . . . . . . . . . . . . . . . . . . . . . . . . . . . . . . . . . . . 31
8 Trouble Shooting. . . . . . . . . . . . . . . . . . . . . . . . . . . . . . . . . 33
9 Contact Information. . . . . . . . . . . . . . . . . . . . . . . . . . . . . . . 34
WiDRIVE DX-325 User’s Guide
Copyright © 2010 EDSLAB Tech. Inc.
ii
Declarations, disclaimers, instructions of guidings
Note, Notice, Caution symbols among the user manual
NOTE!
Provides extra information for better use of the products.
Notice!
Indicates behaviours that might cause a potential data loss on WiDRIVE or on the device that connects to it.
Caution!
Indicates behaviours that might cause damage on product, human injury, or death.
Declaration
Information in this document is subject to change without notice or obligation.
Copyright © 2010 EDSLAB Technologies Inc. All rights reserved.
Disclaimer
Any loss, corruption or destruction of data while using a WiDRIVE is the sole responsibility of the
user, and under no circumstances will EDSLAB be held liable for the recovery or restoration of this
data. To help prevent the loss of your data, EDSLAB highly recommends that you at least keep one
copy of your data. For example, you can save the copy either on your internal hard disk or portable
storage media.
WiDRIVE DX-325 User’s Guide
Copyright © 2010 EDSLAB Tech. Inc.
iii
Safety and care instructions
Please read the following safety information prior to using WiDRIVE.
•Only qualified personnel should service WiDRIVE. Faulty installation or service may be dangerous
and may invalidate any warranty applicable to WiDRIVE.
•WiDRIVE can cause interference to pacemakers, hearing aids, and medical equipment. Keep safe
distances from medical devices when operating in such environments.
•Do not store or carry flammable liquids, gases, or explosive materials in the same compartment as
WiDRIVE.
•Switch your WiDRIVE off when in any area with a potentially explosive atmosphere, and obey
all signs and instructions. Sparks can cause an explosion or fire resulting in bodily injury or even
death.
•Do not drop or knock WiDRIVE. Rough handling can damage the electronics board and hard drive
in WiDRIVE.
•Do not expose WiDRIVE to extreme temperature. Do not put WiDRIVE on heating devices such as
microwave oven, stove, or radiator. The device may explode when overheated.
•Clean WiDRIVE surface with soft damp cloth. Do not use any cleaning agent.
•Keep WiDRIVE dry. Any precipitation, humidity, and liquids can corrode electronic circuits in WiDRIVE.
WiDRIVE DX-325 User’s Guide
Copyright © 2010 EDSLAB Tech. Inc.
iv
1 Understand Your WiDRIVE
Overview of Your WiDRIVE DX-325
•Power button
•Antenna
•LED status indicators
•WAN port
•DC power input
•Mini USB port
•Reset
•AP /Client Scan mode switch
WiDRIVE DX-325 User’s Guide
Copyright © 2010 EDSLAB Tech. Inc.
1
Package Content
Your WiDRIVE DX325 has shipped along with the following content. Ensure you have all the
following items.
Quick Start Guide
Utility CD with Manual
5V 2A power adapter
Ethernet cable (40cm)
Mini USB to USB cable (40cm)
G
G
WiDRIVE DX-325
B
The LED Status Indicators
•System indicator
•WiFi indicator
•LAN indicator
•HDD indicator
WiDRIVE DX-325 User’s Guide
Copyright © 2010 EDSLAB Tech. Inc.
2
Understand the LED indicators
Indicator
Status
Indication
Power on
Green
Booting up
Flashing between orange and green
System ready
Green
Shutting down
Flashing between orange and green
Not ready
Flashing between orange and green
WiFi ready
Green
WiFi on work
Flashing green
LAN port plugged in
Green
Data transferring
Flashing green
Data transferring
Flashing between orange and green
Power on Your WiDRIVE
Press the Power button
to power on your WiDRIVE.
Shutdown Your WiDRIVE
Normal shutdown
You can click Shutdown button on Maintenance page in web control or shortly press the Power
button
to normal shutdown your WiDRIVE.
Force shutdown
Long press the Power button
to force shutdown your WiDRIVE.
Notice!
Performing force shutdown might cause potential data damage to HDD installed in your WiDRIVE.
Mode Selection
You can connect your device with WiDRIVE in three ways: Access Point (AP) mode, Client Scan
mode, and USB mode.
Access Point (AP) Mode
Your WiDRIVE performs as a wireless storage router in AP mode.
Slide the mode switch down and power on your WiDRIVE.
Connect WiDRIVE and router/modem with an ethernet cable, and then
wirelessly connect your PC to WiDRIVE (See “AP Mode Setup” on page 6 to
setup AP mode).
WiDRIVE DX-325 User’s Guide
Copyright © 2010 EDSLAB Tech. Inc.
3
Client Scan Mode
Your WiDRIVE performs as a driverless 802.11N wireless adapter in Client Scan
mode.
Slide the mode switch up and power on your WiDRIVE. Connect your computer
with WiDRIVE by an ethernet cable, and then wirelessly connect your WiDRIVE
to a router (See “Client Scan Mode Setup” on page 7 to setup Client Scan mode).
USB Mode
Connect WiDRIVE and your computer with an USB cable, your WiDRIVE is behaved as an external
storage device in USB mode.
WiDRIVE DX-325 User’s Guide
Copyright © 2010 EDSLAB Tech. Inc.
4
2 Setup Your WiDRIVE
HDD Installation
Please follow these 3 steps to install a HDD.
1. Dissemble the HDD side cover.
i.
Press the back of the middle frame to loosen the hook.
ii.
Take apart the HDD side cover.
2. Slide HDD into SATA connector (ensure HDD is fully inserted into connector).
3. Hook on and then push the side cover toward the middle frame until you hear a click.
WiDRIVE DX-325 User’s Guide
Copyright © 2010 EDSLAB Tech. Inc.
5
AP Mode Setup
In AP mode, your WiDRIVE connects to and shares the internet. Your devices connects to
WiDRIVE wirelessly:
Internet/modem/DSL
4
2
CLIENT SCAN
AP
1
3
1. Slide the mode switch to AP mode.
2. Connect your WiDRIVE with internet/DSL/modem with an ethernet cable.
3. Connect the power cable to your WiDRIVE and power on your WiDRIVE.
4. Now your WiDRIVE behaves like an wireless router. Connect your WiDRIVE by Windows XP.
i.
Open Windows Start Menu, select “Connect To”, left-click “Wireless Nerwork
Connection”.
WiDRIVE DX-325 User’s Guide
Copyright © 2010 EDSLAB Tech. Inc.
6
ii.
Left-click “View Wireless Networks“ button.
iii.
Select “WiDRIVE“ to connect.
5. Now you can open the web browser with WiDRIVE IP address (default: http://192.168.2.1). See
“WiDRIVE Web Control” on page 11 for operation guide.
Note!
See “WiDRIVE AP Mode Setting” on page 20 to configure AP mode.
Client Scan Mode Setup
4
2
Internet
CLIENT SCAN
AP
1
3
In Client Scan mode, your device connects to WiDRIVE with an ethernet cable. Your WiDRIVE performs
as a wireless adapter:
1. Slide the mode switch to Client Scan mode.
2. Connect your device to WiDRIVE with an ethernet cable.
3. Connect the power cable to your WiDRIVE and power on your WiDRIVE.
4. Open web browser with WiDRIVE IP address (default: http://192.168.2.1). See “WiDRIVE Web
Control” on page 11 for operation guide.
Note!
See “WiDRIVE Client Scan Mode Setting” on page 22 to configure Client Scan mode.
Note!
For connecting your WiDRIVE to a WiFi router, see “Quick Connection” on page 16 for operation guide.
WiDRIVE DX-325 User’s Guide
Copyright © 2010 EDSLAB Tech. Inc.
7
USB Mode Setup
Connect your device to WiDRIVE with an USB cable, your WiDRIVE automatically switches to USB
mode and performs as an external mass storage device.
1
CLIENT SCAN
AP
Note!
The network function switches off automatically once the USB cable connects to your WiDRIVE.
Notice!
Shutdown your WiDRIVE before switching to USB mode.
Notice!
Run Safely Remove Hardware process before you unplug WiDRIVE from computer to ensure the data
completeness.
WiDRIVE DX-325 User’s Guide
Copyright © 2010 EDSLAB Tech. Inc.
8
3 WiDRIVE Utility
The WiDRIVE Utility is a convenient Windows application to quickly search, connect, and control
your WiDRIVE.
Search WiDRIVE
Click to search the
WiDRIVE in your
network.
Searched Device Box
The searched devices
are listed here.
Current Wireless Signal
Connection
Shows the network
connection status
of your PC when
searching WiDRIVE.
Login
Click to login
the WiDRIVE
you selected in
Searched Device
Box.
Current WiDRIVE Connection
Shows the SSID and IP
address of the WiDRIVE
connected.
Logout
Logout your WiDRIVE.
Note!
The connection does not
terminated after you click on
Logout button.
Operation Buttons
Click to access the WiDRIVE
web page, Web Folder, and
connection settings.
Note!
The WiDRIVE Utility only works in Windows operation system with .Net Framework 2.0 support.
WiDRIVE DX-325 User’s Guide
Copyright © 2010 EDSLAB Tech. Inc.
9
Install your WiDRIVE Utility
The setup program can be found in Utility CD or official website. Double click on the setup icon
and follow the instructions to install the Utility.
To search and operate your WiDRIVE through Utility
Follow the instructions to search and operate your WiDRIVE.
1. Click on Search button, the WiDRIVE in your current network environment are listed down
for your selection.
2. Select and then login to use your WiDRIVE through the Utility.
Note:
The WiDRIVE Utility memorizes the latest WiDRIVE connection. You can check on “quick search: WiDRIVE
SSID” option to find the latest connected WiDRIVE quicklier.
WiDRIVE DX-325 User’s Guide
Copyright © 2010 EDSLAB Tech. Inc.
10
4 WiDRIVE Web Control
Login
Open web browser with WiDRIVE IP address (default: http://192.168.2.1) to enter WiDRIVE login page.
Enter your account and password to login WiDRIVE Web Control.
Note!
Default account and password
Account: Admin
Password: admin
Overview of WiDRIVE Web Control
When you log in as “Admin“, you will see a series of navigation links:
Icon
Go to page
Description
“My Folder”
My Folder is an ideal data center of your network.
You can easily share files by upload them to WiDRIVE, and manage them
(move, delete, rename, etc.) in My Folder.
“Quick
Connection”
“BitTorrent”
“System Setting”
You can quickly connect your WiDRIVE with a wireless signal in Quick
Connection page.
Note!
Quick Connection only available in Client Scan mode.
You can upload the torrent seed, and performs PC-less BitTorrent
download in BitTorrent page.
You can set network configurations in both AP mode and Client Scan
mode in System Setting page.
“Account Setting” •Modify admin account and password.
•Add, delete, modify user account and password.
•DDNS setting.
“System Status” System Status displays runtime status of your WiDRIVE.
“Maintenance”
WiDRIVE DX-325 User’s Guide
Copyright © 2010 EDSLAB Tech. Inc.
Upgrade firmware, reboot, shut down, factory reset, and format HDD on
your WiDRIVE.
11
My Folder (Disk Management)
My Folder page is displayed once you have logged in. The navigation menu is divided into four
main sections:
Status and Operation
This includes status of partition, volume,
and the file operations such as create
new folder, upload file, search file, and
the selected file pool of your WiDRIVE.
Links
List down the links to applications and
system management pages.
WiDRIVE DX-325 User’s Guide
Copyright © 2010 EDSLAB Tech. Inc.
Folder Operation Bar
You can operate file selection, copy,
move, delete on this bar. You can also
go to any allowed file location by typing
address directely.
File Menu
The file menu lists down all files and folders in the
folder you are navigating.
12
Working with Folders and Files
Check the storage status of the HDD installed
You can check the volume and used percentage of each partition on “Status
and Operation“.
Create Folder
1. Navigate to the path in which you want to create a new folder.
2. Click on New Folder icon
click on “Create“ button.
on “Status and Operation“, type the name of the folder, and then
Upload files
1. Navigate to the folder where you want to store the file.
2. Click the Upload File icon
the file in your computer.
in “Status and Operation“, and then click on Browse button to select
3. Click on the Upload File button to upload the files to the current path.
WiDRIVE DX-325 User’s Guide
Copyright © 2010 EDSLAB Tech. Inc.
13
Search File
Type the keyword and then click on Search button to find the file you required.
Download a file or open a folder
Simply click on the icon or file name/folder name on the “File Menu”, if you click on the file, the file
download process begins; else if you click on the folder, the folder is opened.
Rename file or folder
Click on Rename icon
on the “File Menu”, type the new name, and then click on “Rename“ button.
Copy/Move file/folder
1. Navigate to the parent folder of the files/folders you want to copy or move.
2. Select the files/folders and then click on Select icon
in “Folder Operation Bar” to add the selected
files/folders to Selected File Pool (represented as [number of selected files] files selected) on “Status
and Operation“. You can click on Selected File Pool to see files and folders selected. Click “Go back” to
return to the location you navigated.
3. Go to the location you want to paste the files/folders to in the Selected File Pool. Click Copy icon
or Move icon to place files to the current path.
Note!
“Copy” in this way duplicates the files/folders in the original location; “move” relocates their location.
WiDRIVE DX-325 User’s Guide
Copyright © 2010 EDSLAB Tech. Inc.
14
Delete files/folders
1. Navigate to the parent folder of the files/folders you want to delete.
2. Select the files/folders.
3. Click on Delete icon
to delete files/folders selected.
Managing Access to Folders
To change the folder permission of user accounts:
1. You may click the Access Rights icon on the right hand side of the folder.
2. Click on one of the colored icons (
change the access permission.
WiDRIVE DX-325 User’s Guide
Copyright © 2010 EDSLAB Tech. Inc.
for full access,
for readonly,
for restricted access) to
Notice!
Only administrator account has the authority of
changing the folder access permission.
15
Quick Connection
The Quick Connection page helps you to connect your WiDRIVE (in Client Scan mode) to a wireless
router.
1. Select one router in the wireless signal table in [STEP1> Select the signal by click], the
information of the router appears in the [STEP2> Connect the selected AP] section.
2. Enter the security key and then click on Connect button to start connection. The connection
status shows in the [WiDRIVE Current Status] section.
Notice!
Quick Connection page is available in
Client Scan mode only.
WiDRIVE DX-325 User’s Guide
Copyright © 2010 EDSLAB Tech. Inc.
16
BitTorrent
You can process PC-less BitTorrent download after enable Transmission BitTorrent Client in your
WiDRIVE. For more information about Transmission BitTorrent please go to http://www.transmissionbt.
com.
Filter Bar
You can filter the
torrent file shown in
the list via the Filter
Bar.
Torrent File List
All of your torrent
files and their status
are listed here.
Control Bar
You can upload and
manage the torrent
file on the Control
Bar.
Inspector
You can see
the detailed
information of the
selected torrent file.
Preference Setting
You can setup speed limit and basic configurations here.
Notice!
You have to install and enable the BitTorrent application to activate this function. See “WiDRIVE
Applications” on page 28 for operation guide.
WiDRIVE DX-325 User’s Guide
Copyright © 2010 EDSLAB Tech. Inc.
17
Upload a Torrent Seed and Start Download
Click on Open button to upload torrent seed for file download.
BitTorrent operations on the Control Bar
Button Function
Remove
Description
Click to remove the selected torrent files.
Pause
Click to pause the selected torrent files from downloading or seeding.
Resume
Click to resume the downloading or seeding for the selected torrent
files.
Pause All
Click to pause all torrent actions.
Resume All
Click to resume all torrent actions.
Filter
Click to hide/unhide the filter bar.
Inspector
Click to see the detailed information of the selected torrent file.
Configure BitTorrent Parameter Through Preference Setting
You can configure BitTorrent parameter such as download folder, port, rate, etc in Preference Setting at
the left bottom of the BitTorrent page.
WiDRIVE DX-325 User’s Guide
Copyright © 2010 EDSLAB Tech. Inc.
18
System Setting
You can configure your WiDRIVE in the System Setting. Click on “Complete“ botton to save the settings.
WiDRIVE IP Address
First, setup the IP address of your WiDRIVE in the entry page of System Setting:
•Basic LAN setting: setup the WiDRIVE IP address in the LAN.
WiDRIVE IP Address
Current IP Address
The default value is: 192.168.2.1, however you can always
manually assign the IP address to your WiDRIVE.
•Advanced LAN setting: click on Click Here link to extend the items from basic LAN settings. The [DHCP
Settings] pops up and you can define the range of IP.
WiDRIVE DX-325 User’s Guide
Copyright © 2010 EDSLAB Tech. Inc.
19
WiDRIVE IP Address
Current IP Address
Subnet Mask
The default value is: 192.168.2.1, however you can always
manually assign an IP address to your WiDRIVE.
You can manually assign the subnet mask of your WiDRIVE. We
strongly suggest you to use the default value: 255.255.255.0.
DHCP Settings
Define the IP range of DHCP server.
Starting IP
The start of the range of IP available for your WiDRIVE network.
Ending IP
The end of the range of IP available for your WiDRIVE network.
WiDRIVE AP Mode Setting
Your WiDRIVE performs as a wireless router in AP mode. Click on the AP Mode icon in the [Select
Setup Mode] section to enter AP Mode Setting page:
•Basic setting
WiDRIVE Wireless Setting:
Configure wireless network of WiDRIVE.
SSID
This is the wireless network name of your WiDRIVE. It must be identical on all
points of the wireless network and cannot exceed 32 characters.
Security
•If you select “None” from the dropdown bar, your wireless network
transfers data without safety encryption.
•Otherwise select a security rule and then enter the password to enable the
safety protection. The security capability from basic to strict:
WEP 64 bit WEP 128 bit WPA WPA2 WPA+WPA2
Channel
•Select “Auto” from dropdown bar, your WiDRIVE automatically switches to
the best channel available.
•Otherwise you can manually assign a channel to your WiDRIVE.
Wireless Mode •802.11 b/g mixed: select if your use 802.11 b and 802.11 g devices.
•802.11 b/g/n mixed: select if your use 802.11 b, 802.11 g, and 802.11 n
devices.
•802.11 n only: select if your devices are 802.11n.
WiDRIVE DX-325 User’s Guide
Copyright © 2010 EDSLAB Tech. Inc.
20
•Advanced setting
Click on “Click Here” for advanced settings. The [WiDRIVE WAN Setting] pops up.
WiDRIVE Wireless Setting:
Configure your wireless network of WiDRIVE.
SSID
This is the wireless network name of your WiDRIVE. It must be identical
on all points of the wireless network and cannot exceed 32 characters.
Security
•If you select “None” from the dropdown bar, your wireless network
transfers data without safety encryption.
•Otherwise select a security rule and then enter the password to enable
the security protection. The security capability from basic to strict:
WEP 64 bit WEP 128 bit WPA WPA2 WPA+WPA2
Channel
•Select Auto from dropdown bar, your WiDRIVE automatically switches
to the best channel available.
•Otherwise you can manually assign a channel to your WiDRIVE.
Wireless Mode
•802.11 b/g mixed: select if your use 802.11 b and 802.11 g devices.
•802.11 b/g/n mixed: select if your use 802.11 b, 802.11 g, and 802.11 n
devices.
•802.11 n only: select if your devices are 802.11n.
WiDRIVE Internet Setting:
Configure how your WiDRIVE connect with the internet.
Auto IP Assign
This is the default setting. Your WiDRIVE obtains IP from a DHCP server.
DSL (PPPoE)
Choose PPPoE (Point to Point Protocol over Ethernet) if your ISP uses a
PPPoE connection.
WiDRIVE DX-325 User’s Guide
Copyright © 2010 EDSLAB Tech. Inc.
21
Fixed IP Address
Fill these three entries if a static connection method is used.
WiDRIVE Client Scan Mode Setting
Click on the Client Scan mode icon in the [Select Setup Mode] section to enter the Client Scan Mode
Setting page.
You can setup up to 3 preferred wireless networks. When you connect your WiDRIVE in Client Scan
mode, it automatically connects to available networks in the order of your router setting.
1. If your WiDRVE is in Client Scan mode, it detects wireless signals around and list them down for
your selection. Simply click on the selected wireless signal. If your WiDRIVE is in AP Mode, skip this
step.
2. If your WiDRVE is in Client Scan mode and a wireless signal has been selected, click on Apply
button of the router, the information will be imported and all you have to do is to enter the security
key. Otherwise if your WiDRIVE is in AP Mode, type all required information for the setup.
WiDRIVE DX-325 User’s Guide
Copyright © 2010 EDSLAB Tech. Inc.
22
Account Setting
In the Account Setting page you can manage accounts and setup DDNS. Click on Save button to save
the changes.
User Account Settings
Admin account:
•1 account
•Password can be modified.
•Has the access right to all function pages and folders in your WiDRIVE.
User account:
•8 accounts
•Account and password can be modified.
•Has limited access right. Can only access My Folder page; and cannot see folders except “\Public”
and “\Account”.
DDNS Settings
You can register a DDNS account from http://www.dyndns.com so that you can connect and access
files in your WiDRIVE no matter where you are.
Host/Domain Name Type the host/domain name that you have registered with http://www.
dyndns.com.
User Name
Type the user name of your DDNS account.
Password
Type the password of your DDNS account.
External Port
Type the port of your DDNS service.
WiDRIVE DX-325 User’s Guide
Copyright © 2010 EDSLAB Tech. Inc.
23
System Status
You can see the runtime status and application status in System Status page.
WiDRIVE System Information
Model Name
Version
Current Mode
Time
Model name of your WiDRIVE.
Current loaded firmware version.
Current connection mode, AP mode or Client Scan mode.
Current system time.
Wired IP
AP mode: the IP address obtained from router/modem connected.
Client Scan mode: The IP address of your WiDRIVE in local network.
AP mode: The IP address of your WiDRIVE in local network.
Client Scan mode: The IP address obtained from wireless router
connected.
The range of addresses available for WiDRIVE to assign to your internal
network.
The MAC address of the wired network in your WiDRIVE.
The MAC address of the wireless network in your WiDRIVE.
Wireless IP
DHCP Server
Wired MAC
Wireless MAC
WiDRIVE DX-325 User’s Guide
Copyright © 2010 EDSLAB Tech. Inc.
24
WiDRIVE AP Information
This section appears only in AP mode to indicate the relevent configuration.
Application Status
Indicates the status of applications supported by your WiDRIVE.
Not installed
ON
Disabled
The application has been downloaded to your WiDRIVE but not yet
installed. Press “Install“ button to install the application.
The application has been installed and is activated. Press “Disable“
button to de-activate the application.
The application has been installed and is de-activated. Press “Enable“
button to activate the application.
WiDRIVE DX-325 User’s Guide
Copyright © 2010 EDSLAB Tech. Inc.
25
Maintenance
You can update the firmware to the latest version, upload the application package, and initialize your
WiDRIVE in the Maintenance page.
Firmware Upgrade
You can update your WiDRIVE to the latest firmware to improve the performance.
1. Before upgrading firmware please make sure you have the latest firmware downloaded to the
device your browser runs on.
2. Click on the “Browse” button to locate the firmware file on your device.
3. Click on the “Upgrade” button and wait for your WiDRIVE to reboot. The System LED indicator
blinks between green and orange during upgrade.
Note!
You can always check the latest firmware from our support site:
http://www.edslab.com/support_cat.php
Application Upgrade
You can uplaod the application package to expand the functionalities of your WiDRIVE.
1. Before uploading application please make sure you have the application package downloaded to
the device your browser runs on.
WiDRIVE DX-325 User’s Guide
Copyright © 2010 EDSLAB Tech. Inc.
26
2. Click on the “Browse” button to locate the file on your device.
3. Click on the “Upload” button. The system LED indicator blinks between green and orange
during the upgrade.
4. Go to System Status, press “install“ button to complete the application installation.
WiDRIVE Control
Click on the control buttons to proceed WiDRIVE control.
Button
Reset
Reboot
Shutdown
Format
HDD
Action
Reset your WiDRIVE to its factory default settings. You can also press
the Reset button in the back of the case for the same operation.
Reboot your WiDRIVE.
Shutdown your WiDRIVE.
Format the HDD installed in your WiDRIVE.
Step1. Press and drag the adjustment bar to set up the proportion of
C and D drives.
Step2. Click on “Format” button to format HDD.
Press to
Reset
Note!
The system LED indicator blinks between green and orange when processing reset, reboot,
shutdown, and HDD format.
Note!
The HDD LED indicator blinks between green and orange when processing HDD format.
WiDRIVE DX-325 User’s Guide
Copyright © 2010 EDSLAB Tech. Inc.
27
5 WiDRIVE Applications
You can visit our official website for the latest release.
Install the applications
1. Upload the application package downloaded. See “Application Upgrade” on page 26 for operation
guide.
2. Press the “Install“ button on System Status to install the application.
Enable/disable the applications
Press “Enable” button to enable the installed application. See “Application Status” on page 25 for
operation guide.
The Default Applications in your WiDRIVE
SAMBA Server
You can access data in your WiDRIVE via My Network Space in Windows operation system. Type
“//WiDRIVE IP“ in the address box of the File Manager in your Windows OS and then type your
WiDRIVE account and password to log on.
WiDRIVE DX-325 User’s Guide
Copyright © 2010 EDSLAB Tech. Inc.
28
FTP Server
You can access data in your WiDRIVE via File Transfer Protocol (FTP) directly. Type “ftp://WiDRIVE IP”
in the address box of the web browser or your FTP software and then type your WiDRIVE account and
password to log on. The port is set to 21.
BitTirrent Client
Enable BitTorrent Client to activate the BitTorrent page. Please refer to BitTorrent on page 17 for more
operation guide.
Media Center
You can stream media files from your WiDRIVE to a UPnP supported home entertainment device such
as SONY® PSP and XBOX® 360.
iTunes® Server
iTunes® on your computer automatically detects and add your WiDRIVE to the Shared list.
WiDRIVE DX-325 User’s Guide
Copyright © 2010 EDSLAB Tech. Inc.
29
6 Specification
Dimension
Size
147 x 93 x 31 mm
Wireless Interface
Standard Compliance
Frequency Range
TX x RX
Security
IEEE 802.11 b/g/n standards
2,412-2,462 GHz
2x2
128/64 bit WEP, WPA, WPA2, WPA+WPA2
LAN Port
Standard Compliance
Speed
Number of Ports
IEEE 802.3u (100 Base-TX), 802.3 (10 Base-T)
10/100 Mbps
1 WAN port
USB Interface
Standard Compliance
Connector
USB 2.0 high speed
Mini B type
Internal Storage Support
Form Factor
Interface
File Systems
Data Access
Web Control
File Operations
Applications
Management
2.5” HDD, Prevailing HDD capacity
SATA
FAT32, NTFS
Web Folder, Windows My Network Space,
FTP, Utility (.Net Framework 2.0 required
operation Utility), USB Mode
File management for copy, move, rename,
delete, search and sort the files
BitTorrent download, SAMBA, WiFi Signal
Scan, iTunes Server, Media Center
Account control, IP (DHCP, Static), DDNS,
firmware upgrade, application package upload, factory reset, reboot, HDD format
Others
Power
Regulatory
WiDRIVE DX-325 User’s Guide
Copyright © 2010 EDSLAB Tech. Inc.
AC 110/230V 50/60HZ,
DC 5V +- 5%, 2A
USB power in USB mode
FCC, CE
30
7 Regulatory Information
FCC Compliance
This device complies with Part 15 of the FCC Rules. Operation is subject to the following
two conditions: (1) this device may not cause harmful interference, and (2) this device must accept
any interference received, including interference that may cause undesired operation.
CAUTION:
1. To comply with FCC RF exposure compliance requirements, a separation distance of at least 20 cm
must be maintained between the antenna of this device and all persons.
2. This Transmitter must not be co-located or operating in conjunction with any other antenna or
transmitter.
NOTE:
This equipment has been tested and found to comply with the limits for a Class B digital device, pursuant to Part 15 of the FCC Rules. These limits are designed to provide reasonable protection against
harmful interference in a residential installation. This equipment generates, uses and can radiate radio
frequency energy and, if not installed and used in accordance with the instructions, may cause harmful
interference to radio communications.
However, there is no guarantee that interference will not occur in a particular installation. If this
equipment does cause harmful interference to radio or television reception, which can be determined
by turning the equipment off and on, the user is encouraged to try to correct the interference by one
or more of the following measures:
Reorient or relocate the receiving antenna.
Increase the separation between the equipment and receiver.
Connect the equipment into an outlet on a circuit different from that to which the receiver is
needed.
Consult the dealer or an experienced radio/TV technician for help.
FCC Warning:
Changes or modifications to this unit not expressly approved by the party responsible for compliance
could void the user authority to operate the equipment.
CE Compliance
This product is CE marked in accordance with the requirements of the applicable EU Directives. Responsible for CE marking is EDSLab Technologies Inc. A copy of the official Declaration of Conformity
can be obtained from following website: http://www.edslab.com
Working Environment
The Electromagnetic Compliance (EMC) of this product has been verified typically for this product
category for a so called Residential, Commercial & Light Industry Environment. Any other working environment has not been verified by EDSLab Technologies Inc. and the use of this product in these working environments is maybe restricted or cannot be recommended. Possible consequences of the use
of this product in non verified working environments can be: Disturbances of other products or of this
product in the nearby surrounding area with temporarily malfunction or data loss/corruption as result.
Example of non verified working environments and related advices:
Industrial environment (e.g. environments where a mains voltage of 380V three-phase is being used mainly):
Danger of disturbances of this product due to possible strong electromagnetic fields especially near to
WiDRIVE DX-325 User’s Guide
Copyright © 2010 EDSLAB Tech. Inc.
31
big machinery or power units.
Medical environment:
The compliance to the Medical Product Directive has not been verified byEDSLab; therefore this product cannot be used as a medical product without further verification. The use in usual office environments e.g. in hospitals should be no problem if there is no restriction by the responsible administration.
This product is not certified as a medical product according to the Medical Product Directive 93/42
EEC.
Automotive environment:
Please search the owner instructions of the related vehicle for advices regarding the use of this product (category).
Aviation environment:
Please follow the instructions of the flight personnel regarding restrictions of use. Additional environments not related to EMC
Outdoor use:
As a typical home/office equipment this product has no special resistance against ingress of moisture
and is not strong shock proofed.
WiDRIVE DX-325 User’s Guide
Copyright © 2010 EDSLAB Tech. Inc.
32
8 Trouble Shooting
Question
Answer
I cannot detect WiDRIVE on computer’s wireless network connection. What could be the
cause?
This could be due to a weak wireless signal or interference from other devices (radio, cordless phone,
microwave oven, etc).
Do check that the WiDRIVE is operating in AP mode.
A computer will not be able to detect if WiDRIVE is
switched to Client Scan mode.
To ensure a good wireless signal, you may place WiDRIVE closer to your computer and make sure no metalic obstruction is blocking the embedded antenna.
You may also try renewing the wireless network connection on your computer and start a new network
scan. This can be done by selecting [Repair] option
on the Windows’s Wireless Network Connection.
Restore WiDRIVE to its original factory condition by
powering up WiDRIVE and then pressing the reset
button using a paper clip.
Follow the instructions in “HDD Installation” on page
5. Please make sure you have installed your HDD correctly.
The UPnP service might be blocked by firewall installed in your computer. Please turn off the firewall
service on Windows as well as your antivirus application and then try again.
I forgot the Admin user name and password
for login WiDRIVE, what can I do?
I cannot access the HDD installed in the WiDRIVE.
I cannot find any WiDRIVE by using my WiDRIVE Utility, what can I do?
WiDRIVE DX-325 User’s Guide
Copyright © 2010 EDSLAB Tech. Inc.
33
9 Contact Information
For the latest utility, application, and support document downloads you can visit EDSLAB website:
Http://www.edslab.com/
For technical support please contact [email protected].
For general inquiries please contact [email protected].
WiDRIVE DX-325 User’s Guide
Copyright © 2010 EDSLAB Tech. Inc.
34