1
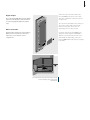
BeoSound 9000
Reference book
CAUTION: To reduce the risk of
electric shock, do not remove
cover (or back).
No User-serviceable parts inside.
Refer servicing to qualified
service personnel.
WARNING: To prevent fire or electric
shock, do not expose this appliance to
rain or moisture. Do not expose this
equipment to dripping or splashing
and ensure that no objects filled with
liquids, such as vases, are placed on
the equipment.
To completely disconnect this equipment from the AC Mains, disconnect
the power supply cord plug from the
AC receptacle.
This symbol indicates that a
dangerous voltage constituting
a risk of electric shock is
present within this unit.
This symbol indicates that there
are important operating and
maintenance instructions in the
literature accompanying this
unit.
BeoSound 9000 – The music entertainment centre
The BeoSound 9000 is an extraordinary
CD player with a built-in radio.
BeoSound 9000 gives you perfect
sound reproduction and changes tracks
and CDs at a formidable pace. You will
experience six Compact Discs as one
piece of music – virtually one CD.
The system can be placed anywhere you
want music – in traditional placements;
on a table, hanging on a wall, or on the
specially designed, vertical stand. The
choice is yours.
The BeoSound 9000 represents a new
and visual way of experiencing music.
3
Contents of the Reference book
4
To get to know your Bang & Olufsen product,
two guides are at your disposal.
The Guide
BeoVision Avant
BeoVision Avant
Guide
Reference book
The Reference
book
Before you start…
6 Cautions
Playing CDs
18 Loading CDs
19 CD playback
How to set up BeoSound 9000
Playing CDs in different ways
7 Placing your BeoSound 9000
9 Centering the CD drive mechanism
33 Option programming
The Guide provides information on daily use. The
Reference book gives a thorough overview of all
aspects.
To the right, you find the contents of this Reference
book, the main chapters of the Guide are listed
below:
• Your key to using BeoSound 9000, 4
Connect the cables
10
10
10
10
11
11
Aerial
Loudspeakers
Extra equipment
Master Link
Digital output
To the mains
20 Choosing a sequence of discs
20 Playing CDs and tracks in random order
Playing favourite CD tracks
21 Select and store a series of tracks
21 Enable or disable playback of a track
series
Name your CDs
• Using the CD player, 6
• Using the radio, 9
• Adjust the volume, 10
Getting started
22 Name a CD
22 See the list of CD names
12 Close-up operation panel
Positioning CDs
Set the time
23 Load and adjust a CD manually
23 Clear the positioning
13 Using the built-in clock
Display CD information
Make BeoSound 9000 start or stop
at a specific time
14
15
15
16
17
17
Set a Timer
Set a Timer for single date
Set a weekly Timer
Checking or clearing Timers
Switching the Timer function on or off
Choose location for the Timer function
24 Switching between displays
Playing other sources
25 Listen to external sources
5
Using the radio
26 Presetting radio stations
26 Clearing presets
Optimise radio sound
27 Fine tuning a radio station
27 Mono/stereo reception
Name radio stations
Looking after BeoSound 9000
34 Cleaning BeoSound 9000
35 Handling your CDs
The PIN-code system
36
36
37
37
Activate the PIN-code system
Change or delete a PIN-code
Using your PIN-code
Did you forget your PIN-code?
Key to using this guide
Use this key to identify what a button, source or
status display looks like in an instruction
sequence.
RADIO
CD
OK
CD
EDIT ?
28 Naming radio stations
28 Clear a name
CD
R ANDOM
Play your radio stations
29 Playing radio
29 Switching between displays
Adjust and store sound settings
30 Sound adjustments
Using the Beo4 remote control
31 Beo4 remote control operation
Use BeoSound 9000 with a video
system
32 A fully integrated setup
32 An AV integrated setup
33 Option programming
Buttons on the
BeoSound 9000 closeup operation panel or
on the Beo4 remote
control
Displays on the
BeoSound 9000
Displays on the Beo4
remote control
Before you start…
6
We recommend that you follow this
procedure when you set up your
BeoSound 9000:
– Place the BeoSound 9000 where
you want to use it.
– If you wish to mount
BeoSound 9000 on a wall bracket
or floor stand accessory, then
assemble the accessory according
to the folder enclosed with it.
– Set up your loudspeakers (or, if the
BeoSound 9000 is to be used in a
Bang & Olufsen AV system, set up
this system) following the
procedures described in the guides
enclosed with these products.
– Connect all cables to their sockets
on the rear panel of the
BeoSound 9000 – remember not
to connect it to the mains yet!
– Arrange the cables in the cable
cover grooves and attach the cover
to the rear of the BeoSound.
– Connect BeoSound 9000 to the
mains.
Cautions
■ Make sure that the BeoSound 9000 is set
up, placed and connected, in accordance with
the instructions in this guide.
■ The BeoSound 9000 is designed for indoor
use in dry, domestic environments only, and
for use within a temperature range of 10–40° C
(50–105° F).
■ Avoid placing the BeoSound 9000 in direct
sunlight or direct artificial light (e.g. a
spotlight), or near objects generating
electrical noise (e.g. dimmers), as this will
reduce the sensitivity of the remote control
receiver.
■ Place the BeoSound 9000 so that
ventilation will not be impeded, and
remember to leave enough space above or in
front of the BeoSound 9000 for the glass
door to open, and to facilitate close-up
operation.
■ If you are going to hang the
BeoSound 9000 on the wall, always use the
correct size and type of screws and wall plugs
to support the weight of the BeoSound 9000
(depending on the material and the
construction of the wall). If in doubt, consult
your Bang & Olufsen retailer.
■ Light partition walls are often constructed
of gypsum panels – known as drywall or wall
board – secured to vertical studs. Gypsum is
not a satisfactory material to support the
weight of the BeoSound 9000!
■ If you wish to hang your BeoSound 9000 on
a gypsum wall, using one of the brackets, we
recommend that at least one mounting screw
be a lag screw, which is screwed securely into
a vertical wall stud.
■ If you wish to hang BeoSound 9000 on the
wall we recommend that you conceal the
cables using the optional Cable Covers, as
shown on the opposite page.
■ When you are lifting the BeoSound 9000
out of the box we recommend that you, in
order to avoid fingermarks on the surfaces,
use the two foam packing shells placed at
each end of the BeoSound 9000.
How to set up BeoSound 9000
As illustrated in this section,
BeoSound 9000 is designed for a
variety of placements. It can be
placed on a special stand, on a shelf
or a table in various positions – or
hanging on the wall (using one of the
optional wall brackets).
7
Fig. 1: The BeoSound 9000 placed in a vertical
position. When BeoSound 9000 is placed like this,
the CD mechanism must be centred for a vertical
position. The Stand is supplied with two different
sets of feet:
– spikes for use on a carpeted floor
– rubber feet for use on a non-carpeted floor.
Do not lift or move the Stand around while the
BeoSound 9000 is mounted on it.
This section also describes how to
centre the CD mechanism for the
different setup situations mentioned
here – this is very important for the
proper functioning of the CD player!
The section Getting started describes
how to turn the close-up operation
panel (and the display) so it can be
read from your preferred angle.
Fig. 2: The BeoSound 9000 hung flat on the wall
in a high horizontal position. When
BeoSound 9000 is placed like this, the CD
mechanism must be centred for a horizontal
position.
Fig. 3: The BeoSound 9000 hung flat on the wall
in a vertical position. When BeoSound 9000 is
placed like this, the CD mechanism must be
centred for a vertical position.
NOTE! Depending on the placement you have
chosen for your BeoSound 9000, the carriage will
situate itself in various positions. If you choose to
place BeoSound 9000 vertically, the carriage will
move to the top end of BeoSound 9000. If you
choose to place the BeoSound 9000 horizontally,
the carriage will situate itself next to the operation
panel.
8
>> How to set up BeoSound 9000
Fig. 4: The BeoSound 9000 placed flat on a level
surface, e.g. a table or shelf. When
BeoSound 9000 is placed like this, the CD
mechanism must be centered for a flat position
(factory setting).
Fig. 5: The BeoSound 9000 placed in a slant
position on a level surface, e.g. a table or shelf.
When BeoSound 9000 is placed like this, the CD
mechanism must be centered as for a flat position
(factory setting).
Fig. 6: The BeoSound 9000 placed in a near
upright position on a level surface, e.g. a table or
shelf. When BeoSound 9000 is placed like this,
the CD mechanism must be centered for a
horizontal position.
Fig. 7: The BeoSound 9000 hung low on the wall
in a near upright position. When BeoSound 9000
is placed like this the CD mechanism must be
centered for a horizontal position.
9
Centering the CD drive mechanism
The CD mechanism is spring suspended in order
to make the BeoSound 9000 ‘party-safe’. By
centering the CD mechanism, you adjust the
tension of the spring suspension to allow for
different placements.
a
It is very important for the functioning of the CD
player that you adjust the spring suspension
correctly!
b
The spring suspension in the two adjustment
holes can be set to four different positions:
a) Use this setting when BeoSound 9000 is placed
in the Bracket as in figs 6 and 7.
b) Use this setting when BeoSound 9000 is placed
either on its Stand, or hung vertically on the wall
as in figs 1 and 3.
d
c) Use this setting when BeoSound 9000 is hung
horizontally on the wall as in fig 2.
d) Use this setting when BeoSound 9000 is placed
either flat on a table, or in the Bracket as in figs 4
and 5. This is the factory setting.
How to center the spring suspension
Enclosed with the Stand and the Brackets, you
will find a small plastic tool, which you must
use for this purpose:
> Locate the two adjustment holes in the bottom
plate of BeoSound 9000.
> Pry off the two small plastic plugs (using the
chisel-shaped end of the tool).
> Insert the other end of the tool (the arrowshaped end) and turn the tool so that the arrow
in each hole points into the correct direction.
> When finished put back the two plastic plugs
again.
In all but the flat and the near flat positions, both
arrows in the holes must point upwards when
finished. In the flat position (factory setting) they
must point towards the centre of BeoSound 9000.
c
Connect the cables
10
You can use your BeoSound 9000 in
a stand-alone setup or connected to
a Bang & Olufsen video system with
a Master Link cable. The Master Link
socket on the back of
BeoSound 9000 can also be used for
the distribution of sound to any room
you like.
Master Link
connection
AM
aerial
Extra
equipment
FM
aerial
Loudspeakers
Use the diagram and the label on the
socket panel for reference when
locating the sockets.
Do not connect the BeoSound 9000
to the mains until you have finished
connecting the cables.
Digital output
Aerial connections
Extra equipment
In order to obtain optimal reception of radio
stations it is essential to use the correct type
of aerial (FM and/or AM) or cable net
connection. Let your Bang & Olufsen retailer
advise you.
> Connect your FM signal to the socket marked
FM and your AM signal, if any, to the socket
marked AM.
> When using indoor aerials (either an FM dipole
or AM loop aerial), tune in to the radio station
you want and then turn the aerial horizontally
until optimum signal is received.
The AUX socket enables you to connect e.g. a
tape recorder or a record player (with built-in
preamplifier). However, as this socket does
not carry Data Link signals, you will not be
able to operate the connected equipment by
remote control. Just select A.AUX and then
operate the extra equipment close-up.
> Connect your extra equipment to the socket
marked AUX.
Loudspeakers
You may choose to loop the signals through
from speaker to speaker, as mentioned in the
User’s guide for your loudspeakers, or you
may connect one speaker to each of the two
sockets.
> Connect your active Bang & Olufsen
loudspeakers to the sockets marked PL.
Remember to set the L • R • LINE switch on your
active speakers to L and R (left and right channel),
respectively.
NOTE! For further information about a setup
other than the stand-alone option, please refer to
Use BeoSound 9000 with a video system.
Master Link connection
You can connect a video system or BeoLink
system to the Master Link socket, in order to
achieve an integrated AV system. The AV
system may be set up in one room, or split up
on two rooms.
The Master Link connection may also be used
to distribute sound to other rooms in the
house, in a BeoLink system. For further
information, please contact your retailer.
> Using a Master Link cable, connect one end to
the socket marked ML (Master Link) on the
BeoSound 9000 and the other end to the
corresponding socket on the TV.
11
Remove the cover in the bottom plate of the
BeoSound 9000 to gain access to the sockets.
The socket compartment contains the socket for
the mains cord.
Digital output
The socket marked DIG. OUT carry the digital
signals from the CD player, and is intended
for connecting digital equipment (output
only).
The cover has two perforated sections, which you
can pry off in order to make a hole through
which to run the cables. Select one in an
appropriate position to suit your setup.
Mains connection
Plug the mains lead into the socket marked ~.
When you have made all the connections,
replace the cover to hide the socket
compartment.
If you have set up the BeoSound 9000 on the
Stand, (see How to set up BeoSound 9000), a
different cover must be used. This new cover is
supplied with the Stand. Finally, connect the
BeoSound 9000 (and the other units in your system)
to the mains.
For safety reasons fasten the mains cord as shown,
before running it out from the socket
compartment.
Getting started
12
When you have finished the setting
up procedure, the BeoSound 9000 is
ready for use.
Keep BeoSound 9000 in stand-by
mode to facilitate easy access and to
ensure that Clock and Timer settings
are always available.
Close-up operation panel
In order to make reading easier in all
placement situations, you can rotate the
close-up operation panel (and thus the
display):
> Turn off the power.
> Open the lid to gain access to the close-up
operation panel.
> Lift off the operation panel by inserting a finger
where indicated, lift the panel out, rotate it,
and insert it again (connectors first).
When you turn on the BeoSound 9000 a tiny
red light appears in the display, indicating
that the system is in stand-by mode, ready to
be used.
> Press the load button to open the glass door.
> Remove the carton strip behind the CD clamp
and the foam packing (these items are for
protection of the CD drive and the glass door
during transport).
Lift here
1
2
You can rotate the CD clamper lid (with the Bang &
Olufsen name) in order to ensure that the name
always appears in a horizontal position (and not
upside down).
Set the time
The BeoSound 9000 has a built-in
clock indicating time, date and year.
If you want to make use of the Timer
function described on the following
pages, you must first make sure that
the built-in clock in the
BeoSound 9000 has been set
correctly.
You can check the clock on the
display to ensure that it is set
correctly. If this is not the case you
can change the setting in the process.
You can also set the BeoSound 9000
to show the clock permanently, even
when the system is in stand-by.
13
Using the built-in clock
When you want to make BeoSound 9000
display the correct time and be able to use
the different Timer functions, you must first
set the built-in clock.
CLOCK
Press to access the builtin clock
m
p
Press to set time, date
or year
OK
Press to accept the
changes and reveal the
next display – repeat
this setting procedure
for date and year
CLOCK OK?
When you have set or
changed the year, the
display reads CLOCK
OK?
OK
Press to store your new
clock setting
CLOCK
Press to show the time
CLOCK
Press to see the date
and year
To display the time permanently…
CLOCK
Press when Date and
Year is displayed, to
change the display to
14 : 40 ON
time and ON e.g. 14:40
ON
CLOCK
14 : 41 OFF
Press again to cancel
the permanent showing
of the clock e.g. 14:41
OFF.
If you should make a mistake or change your mind
while you are setting the clock, just press CHECK –
and start over.
When setting the clock, the display shows the
time, date and year for your settings. It has a 24
hour clock – and it shows…
…
JAN
FEB
MAR
APR
MAY
JUN
JUL
AUG
SEP
OCT
NOV
DEC
for
for
for
for
for
for
for
for
for
for
for
for
January
February
March
April
May
June
July
August
September
October
November
December
The time display will be interrupted by the
messages which follow other functions or
operations, but it will return to displaying the time.
Start or stop at a specific time
14
You can make BeoSound 9000 start
or stop playing at designated times
throughout the day and week.
The BeoSound 9000 can store up to
15 such Timer settings and you can
use it to e.g. wake you in the
morning to your favourite CD or
radio station.
If, for example, you want the
BeoSound 9000 to stop playing at a
specific time in the evening, simply
set a Timer with STANDBY as the
source.
When you set a Timer for Monday,
Tuesday and Thursday, the Timer will
be executed on these days, every
week.
If you use the BeoSound 9000 in a
fully integrated Bang & Olufsen setup
(see Use BeoSound 9000 with a
video system), you have to set the
Timer function to ON or OFF via the
TV. The display on the
BeoSound 9000 will read
TV OPERATED.
Set a Timer
For a Timer stand-by setting all the
BeoSound 9000 needs to know, is the time
you want it to stop playing, and how often.
As soon as you choose a stand-by Timer, a
display will prompt you to choose when the
Timer should stop.
TIMER
Press to start
programming settings
m
p
Press to choose a source
for your Timer or
choose a Timer
stand-by
OK
Press to accept the
source
Then program when
you want the Timer to
start and stop…
m
p
Press repeatedly until
you have found the
exact time for starting a
Timer play
OK
Press to accept Start
Timer
Repeat the procedure with the and OK buttons
to program the exact time for stopping a Timer.
If you should change your mind while you are
setting a Timer, simply press a source button, CD
or Radio, to exit the Timer programming function.
While you are setting a Timer, pressing the CHECK
button will take you back one step in the
sequence.
When you program a Timer for your available
sources, you will have to choose the station/channel
where you want to program a Timer play. When
you choose a station for RADIO, the station you
listened to last will appear. For TV and SAT channel
1 will appear as your first option.
From your available broadcasted sources e.g. TV
and RADIO, you can only choose stations/
channels that have already been stored.
Using your Beo4 remote control…
> Press the red button for more than 1.5 sec. until
the display reads TIMER?
> Press GO to continue. Use the GO button, the
buttons and and the number buttons 0 – 9
during the timing procedure to see options and
select between these.
15
Set a Timer for single date
Set a weekly Timer
When you want to program a Timer for a
single date, you must choose the ‘Single date’
option in the Timer menu.
When you want to program a weekly Timer
as a Timer play or Timer stand-by, you must
choose the ‘Days’ option in the Timer menu.
If you choose DAYS, the display will prompt
you to fill in the weekdays on which you want
the system to carry out the Timer.
m
p
SINGLE DATE?
m
p
DATE 15 NOV?
Choose the single date
option from the menu,
in the display – SINGLE
DATE? appears
DAYS?
The display shows the
date
Press to accept the
selection
OK
Press to store your
Timer programming and
return to normal source
operations
The display shows that
you have stored the
settings
If you choose SINGLE DATE, the cue DATE and
today’s date in the display prompts you to choose
a date within the next year.
Choose the Days option
from the menu, in the
display – DAYS? appears
OK
Press to access a display
where you can fill in the
days you want to
program the Timer for
m
Press to include a
weekday
Press to display the date
you want to program a
Timer for
m
p
TIMER STORED
m
p
FRI? M_W T
p
OK? M_W TF_ S
OK
TIMER STORED
When you set the BeoSound 9000 to carry out a
Timer on forthcoming, selected weekdays, these
days are presented as abbreviations:
MON for Monday
TUE for Tuesday
WED for Wednesday
THU for Thursday
FRI
for Friday
SAT for Saturday
SUN for Sunday
Press to exclude a
weekday
When you have gone
through the whole
week the display will
prompt you to store
your Timer entry
Press to store your
Timer entry
The display shows that
you have stored the
settings
The display for weekly programming entails the first
letters of the days you accepted (M, T, W, T, F, S, S)
and underscores (_ ) for the days you did not choose.
NOTE! The list of sources shown in the display
contains N.MUSIC (for music tracks stored on your
PC) and N.RADIO (for radio sites on the Internet).
These sources are available if you have connected
your BeoSound 9000 to BeoLink PC 2 and have
access to the Internet.
16
>>Start or stop at a specific time
Checking or clearing Timers
You can look up each Timer programming
entry to check its contents or cancel it
completely.
CHECK
m
p
Press to check your
Timers
Press to see Timer
programming number
and source for the
individual Timer entries
OK
Press repeatedly to
display the details of a
particular programming
OK?
When the display reads
OK?…
m
p
Press to display NEXT?
to see your next Timer
programming entry
NEX T?
OK
NO MORE
CLEAR
CLEARED
Press to see your next
entry – If there are no
more entries, NO
MORE, will appear in
the display
Press clear while
information regarding a
Timer programming is
displayed in the display
– CLEARED will appear
on the display
The first display shows Timer entries in numerical
order with source and station number, the second
shows the indication of time for starting and
stopping, and the third displays the days for
which the Timer is set. This is an on-off
programming. In all three instances, clearing of
the settings is possible.
17
Switching the Timer function on or
off
Choose location for the Timer
function
The Timers you have programmed into the
BeoSound 9000 can all be executed with or
without activating the loudspeakers which
are either directly connected to the
BeoSound 9000 or are connected to it via
BeoLink. The Timer ON/OFF function
determines whether a Timer Play can be
heard on the loudspeakers.
In order to hear your Timer play
programmings, you must activate the
loudspeakers in the room or rooms where
you want music by switching the Timer
function to ON. If you set the Timer function
to OFF, your speakers will be muted.
ON/OFF
TIMER ON
TIMER OFF
Press to cut in or press
again to cut out the
loudspeakers
When you first press
ON/OFF, TIMER ON or
TIMER OFF will appear
in the display, according
to the setting you have
previously made
If you therefore choose to set the speakers
next to your BeoSound 9000 to OFF, but set
your extra speakers in your bedroom to ON,
the Timer play will be carried out, and you
will hear it through your extra speakers in
your bedroom.
However, if all Timer functions for the speakers
connected to the BeoSound 9000 as well as on all
your connected systems are set to OFF, a Timer
will not be activated.
Playing CDs
18
When you have loaded your
BeoSound 9000 with 1–6 CDs, you
are ready to start playing your CDs.
When you press the CD button to
start playing, the CD where the
carriage is situated will start playing
from the beginning.
Loading CDs
When you want to have access to load or
remove your CDs, simply use the load button
on the front of BeoSound 9000.
Press to raise the glass
door
You can easily change between the
different CDs and the individual tracks,
to achieve the sequence of tracks you
prefer.
Press to lower the glass
door
CD
Press to lower the door
and start playing
When your first CD has finished
playing, the carriage automatically
moves to the next CD you have
loaded and starts playing this new
CD.
If you leave the glass door open, it will close
automatically after 5 minutes. If BeoSound 9000
is left paused or stopped for more than 30
minutes, it automatically switches to stand-by.
If you choose to hear another source,
the CD player switches off
automatically.
If the glass door is open and the carriage is placed
over a CD you want to remove, simply move the
carriage to another position by pressing the direct
CD selection button in front of a compartment.
The carriage registers whether the CD
compartments you ask for are empty or not, and
until the glass door is opened again, it will
remember the state of the compartments.
The CD must be loaded with the text side facing
you. Hold the CD by its edges and insert the CD
(top section). To unload the CD, hold it by its edges
and push the CD slightly forward to release it.
19
CD playback
When you want to play a specific CD, simply
press the direct CD selection button* placed
next to the CD compartment. The carriage
then moves to the CD you have chosen, and
playback starts.
CD
Press to play a CD
m
Press to play the next
track on a CD
p
Press to play the same
track again or press
twice to play the
previous track
PAUSE
Press to pause playback
CD
Press to resume playing
VOL r
Press to raise the
volume
VOL u
Press to lower the
volume
MUTE
Press to silence the
speakers
MUTE
Press again to recall the
sound
•
Press to switch to
stand-by
*The CD selection buttons can also be used to step
through the tracks of your CDs. Press the button
once – and you select the CD, press it continuosly
– and you step through the tracks of the chosen
CD.
When you are using your BeoSound 9000 CD
player, a tiny red indicator is lit beside all the
occupied compartments.
If, for example, you choose a sequence of discs to
be played, only the indicators next to the CDs you
have chosen will be lit, even though you have
loaded six CDs.
Playing CDs in different ways
20
Make BeoSound 9000 play your
favourite CDs in the particular
sequence you want, or play your CDs
in random order to vary your listening
experience.
Choosing a sequence of discs
The select option allows you to choose a
specific sequence of CDs you wish to listen to.
The CDs you have chosen will start playing in
numerical order.
Playing CDs and tracks in random
order
The random play function plays CDs and
tracks on individual CDs in a random order.
Also chosen CDs and track series can be
played in random order.
Every time a CD is included in a
sequence, the red indicator next to
the CD compartment lights up.
You can choose to combine the
RANDOM function with the EDIT
function and play your favourite
tracks in a random order. You can
also combine these two functions
with SELECT and choose to play only
your favourite tracks from for
instance two CDs in random order.
Refer to Playing favourite CD tracks
for further information about the
EDIT function.
CD
Press to start playback
of a CD
SELECT
Press to make SELECT
DISC appear
R ANDOM ON
Press the direct CD
selection buttons next
to the CDs you want to
include…
R ANDOM OFF
SELEC T DISC
SELECT
Press to start clearing a
sequence and play all
six CDs
CLEAR
Press to clear the
sequence
CD
Press to start playing a
CD
RANDOM
Press to display
RANDOM ON and cut
in the random play
function
RANDOM
Press twice to display
RANDOM OFF and
cancel the random play
function
To leave out a CD you have included in the
sequence…
SELECT
Press to be able to
remove a CD*, and…
…press the direct CD
selection button next to
the CD you want to
remove
To listen to a CD you have not included in your disc
sequence, simply press the direct CD selection
button next to the CD you want to hear, and
playback will start immediately.
*NOTE! The SELECT option lasts for 25 seconds
from when you pressed SELECT. If you press a
direct selection button after the SELECT option
has ended, the disc you chose will start playback
immediately and override your sequence. When it
has finished playing, BeoSound 9000 will continue
playing the sequence you chose before.
Playing favourite CD tracks
The edit function enables you to
program series of tracks for your
individual CDs and store them
permanently. Editing a CD means
that you include or exclude each track
on the CD while scanning it as
described to the right.
The first 15 seconds of each track on
the CD will be played. On the display
the track number you are currently
playing will appear. During this 15second playback, you must include
the particular track into the series or
exclude the track. As soon as you
press either button, the next track on
the CD starts playing*.
Select and store a series of tracks
Before making your own series of tracks you
must start playing the CD.
CD
Press to play CD
EDITING
Press to scan the CD
EDITING? appears on
the display
EDITING?
Enable or disable playback of a
track series
Whenever you load an edited CD, only the
selected tracks will be played. These are
played in numerical order. However, you can
choose to listen to the entire CD. You can also
delete the series of tracks you have made, to
always play the CD in full.
CD
EDIT
EDIT ON
OK
Press to start scanning
the tracks
EDIT
EDIT OFF
m
p
Press to include a track
number in the series,
or…
…Press to exclude a
track number from the
series
EDITING OK
EDITING OK appears
when you have included
or excluded the last
track
OK
Press to accept the track
series
To clear a track series…
Choose the CD which
track series you want to
clear…
EDITING
CLEAR
*NOTE! If you do not choose whether you want to
include or exclude a track within the 15 second
playback, the CD player will include the track
automatically. If you choose to leave EDITING
before you have scanned, accepted or excluded all
the tracks on the CD, the remaining tracks will be
regarded as excluded from the track series.
21
Press to access the
programming option
Press to clear the track
series altogether
Press to play a CD
Press to start edited
playback
EDIT ON appears
Press twice to play a CD
in full and cancel EDIT –
EDIT OFF appears
If you cancel the edit function while an edited CD
is playing, all tracks beyond the current track
number will be played. The EDIT function remains
ON until you cancel it – even in stand-by.
Name your CDs
22
To distinguish between your
individual CDs, you can name them.
The name will then be shown in the
display when you load the CD.
You can store a total of 200 names in
your BeoSound 9000. Each name
may contain up to 12 characters,
including numbers. If you have not
given a name to the CD, the track
number, track time or elapsed time
will appear in the display instead.
You can access a list of CD names in
the display.
Name a CD
See the list of CD names
The CD you are naming must be playing in
the BeoSound 9000. If the CD has already
been named, you can change the name or
delete it, or you can just leave the function
by pressing CD.
When the list is displayed, you can delete the
names and any stored series of tracks at the
same time.
CD
NAMING
A___________
Press to play CD
Press to access the
naming function. ‘A’ is
blinking in the first
character position
m
p
Press to reveal the
characters one by one
OK
Press to move to the
next character, press
repeatedly to store the
name, or…
CD
Press while you are
naming CDs or track
series in order to
automatically store the
name and exit the
naming function
CD
NAMING
CD LIST
GLENN MILLER
m
p
CLEAR
To clear a name…
> Press NAMING to access the naming function.
> Press CLEAR to clear the name.
> Press CD to return to normal source operation.
The naming function can also be accessed
from your Beo4 remote control…
> Press the blue button for more than 1.5 sec. to
call up NAMING? in the display.
> Press GO and use the and buttons to select
characters.
> When you have finished, press and hold the GO
button to move to the storing level.
> Press GO to accept and EXIT to leave the CD
naming procedure.
NOTE! It is only possible to name CDs with the Beo4
remote control if your BeoSound 9000 is in Option 1,
refer to page 33 for further information about Option
settings.
CD
Press to play CD
Press to access the
naming list, CD LIST
appears briefly, then
the name of the current
CD appears, for
example GLENN MILLER
Press to list the names
one by one and return
to names further up the
list
Press to clear a name
while the appropriate
name is displayed
Press to return to
normal source
operation
If the carriage is situated on a CD which has been
given a name or the CD has been edited, the
name or number of this CD will appear in the
display when you access the list. If the CD under
the carriage is unknown, the CD list will appear in
the display and you have to press the or
buttons to get a name or number displayed.
If you attempt to name or program track series for
more than 200 CDs the display will read CD LIST
FULL, and you will have to clear an entry before
you can add another.
Positioning CDs
For your aesthetic enjoyment you can
position your individual CD to make
the graphical design and text on the
CD present itself to your satisfaction.
When you store a position for each
CD, the BeoSound 9000 will
remember these positions. No matter
how many times you remove and
reload the CDs, the individual CDs
will be returned to these positions
every time they stop turning*.
Load and adjust a CD manually
Clear the positioning
When you have loaded a CD, you adjust the
position of the CD manually. Then you move
the carriage to this particular CD and access
the positioning function for CDs in order to
store the position you have chosen.
If you want to clear the position for a CD,
move the carriage to the CD in question.
Press the direct CD selection button next to
the CD to move the carriage…
SELECT
Press to select the CD
you want to position
SELECT
Press to save the
position for the CD
while it is playing
POSITION OK?
POSITION OK? appears
OK
Press to store the
position you chose for
the CD when it was
loaded
Repeat this procedure
for all the CDs you have
loaded…
*NOTE! Some CDs do not contain the information
required by the BeoSound 9000 in order to store
positions for CDs. Therefore, you may experience
that the position you have stored for a CD is not
adhered to by the BeoSound 9000. You will, of
course, still be able to play the CD in question.
23
SELECT
Press to select the CD
you want to clear
SELECT
Press to access the
positioning function to
clear the position
CLEAR
Press to clear the
position
Display CD information
24
The BeoSound 9000 display can give
you three different types of
information about the CD being
played:
– Name*
– Number of CD and track
– Number of CD and elapsed track
time
To switch from one display to the
other, you must press the OK button
repeatedly while the CD is playing.
Switching between displays
Your chosen display indication for the CD
player will remain in the display panel and
only disappear temporarily when you
undertake another operation on the
BeoSound 9000 operation panel. Then the
information which accompanies this
operation will appear in the display for a
short period of time.
CD
Press to play a CD
OK
Press repeatedly to
change the CD display
indication
The displays show the name of the CD, the number
and track number of the CD, and the number of
the CD along with the elapsed time of the current
track in minutes and seconds.
*NOTE! You have to name the CD before a name
appears in the display, please refer to Name your
CDs for further information about naming.
Playing other sources
Connecting extra equipment to your
BeoSound 9000 enables you to listen
to the sound of an external source
through the speakers connected to
your BeoSound 9000. However, all
control operations must be carried
out on the extra equipment you
connect.
You can record the source, CD or
radio, you are playing on the
BeoSound 9000 via the AUX-socket
onto Audio tape or another available
media. The recording function must
be carried out via the controls of the
extra equipment.
Listen to external sources
While you are playing an external source
through your BeoSound 9000, you can still
use the functions which relate to sound,
please refer to the chapter Adjust and store
sound settings.
A.AUX
Press to select extra
equipment
VOL r
Press to raise the
volume
VOL u
Press to lower the
volume
MUTE
Press to silence the
speakers immediately –
Press again to recall the
sound
Extra equipment must be connected to the AUXsocket on the back of the BeoSound 9000. You
will be able to record digital signals from the
BeoSound 9000 to a Digital Audio Recorder via
the digital output socket. Please refer to ‘Connect
the cables’ for further information.
NOTE!: Please contact you Bang & Olufsen retailer
for complete information about which Bang &
Olufsen or non-Bang & Olufsen products can be
used with the BeoSound 9000.
25
If you are recording from the BeoSound 9000
onto Audio tape, you will not be able to
listen to another source, CD or radio, other
than the one you are recording. If you
change source while recording, you will then
record this new source onto your Audio tape.
Connect Headphones to the socket placed in a
low position on the side of the BeoSound 9000
cabinet.
Using the radio
26
To be able to use the radio, you must
first tune in to the radio stations you
want to store and then store them on
programme numbers of their own.
You can change the programme
number of your radio station any
time – also without being in the
process of tuning.
You can store up to 60 radio stations
and if you like, you can give them a
short name which you choose
yourself. Please refer to Name radio
stations for further information.
Presetting radio stations
Clearing presets
Letting the BeoSound 9000 tune in your
radio stations, ensures that you get all
available stations. Once you have found a
radio station, you can fine tune it, if the
reception is poor.
If you want to cancel one of your radio
presets, you can do so using the CLEAR
function.
RADIO
Press to turn on the
radio
RADIO
Press to turn on the
radio
Press to search for a
programme number
TUNE
Press to start the tuning
function
m
p
AM/FM
Press to select AM or
FM, switches from one
to the other, check
display for an indication
of which one you have
chosen
CLEAR
m
p
Press to search for a
radio station up or
down the frequency
band
OK
Press to accept the
station you have found
P.NO.
Press to change the
displayed programme
number
m
p
Press to select a
programme number –
up or down
OK
Press to store your new
radio programme –
STORED appears in the
display
STORED
If a station needs fine tuning, or you wish to switch
between mono and stereo sound on radio programs,
please see ‘Optimise radio sound’.
OK
CLEARED
Press to clear the
programme
Press to confirm the
clearing of the radio
programme
CLEARED will appear in
the display
Optimise radio sound
If a radio station is not tuned in clearly
enough, it may be because the
programme needs to be fine tuned.
You can also choose to alter the sound
to your satisfaction by choosing
between mono or stereo reception.
27
Fine tuning a radio station
Mono/stereo reception
The fine tuning function enables you to move
slowly through the frequencies, or to detune
a programme slightly because of noisy
reception.
Your BeoSound 9000 automatically switches
to mono if the stereo signal is not strong
enough to produce an acceptable stereo
sound. You can overrule this automatic
function if you wish and select mono
manually.
RADIO
Press to turn on the
radio programme you
want to fine tune
R ADIO 11
The number of the last
played radio programme
is displayed, e.g. 11
TUNE
Press to make the
frequency appear in the
display, e.g. 88.4
P11
88.4
RADIO
Press to turn on the
relevant radio station
TUNE
Press to select the
tuning function and
press repeatedly until
you have reached the
settings for mono/
stereo reception
STEREO?
The display shows the
choices…
MONO?
TUNE
FINE
88.4
Press to access the fine
tuning function
The display indicates
that you can now fine
tune the station
m
p
Press to fine tune the
station towards a higher
or lower frequency
OK
Press to accept the fine
tuned station
OK
Press again to store
station and programme
number
Once you have fine tuned the station, you can
choose a different programme number if you like
before you store it. Please refer to ‘Presetting
radio stations’ for further information.
m
p
Press to select between
the mono or stereo
setting
OK
Press to store your new
tuning on the
programme number
Name radio stations
28
You can name all the radio stations
you have stored. Choosing a name is
completely up to you.
If you happen to make a mistake or
change your mind while you are
naming a radio station, simply press
the NAMING button again – and
start over.
If you want to clear the name after
you have keyed it in, press CLEAR
instead of OK and the name you
have keyed in will be erased.
Naming radio stations
Clear a name
Naming your radio stations can help you
remember a station not only by its number but
by a particular name. When you are listening
to a radio station, its name will appear in the
display*. Once you have completed entering
a name, you store the name and it will then
appear every time you choose this station
again.
If you have left the naming function and
want to clear the name, return to the naming
function and clear the name. If you do not
name your stations, the station’s own name
may appear instead, provided such a name is
being transmitted by the radio station itself*.
RADIO
Press to turn on the
radio station you want
to name
CLEAR
NAMING
A___________
Press to start the naming
function. The first of the
twelve character positions
blinks, indicating that
you can start entering a
name
m
Press to reveal the
characters one by one
p
Press to reveal previously
shown characters
OK
Press to move to the
next character position
OK
Press to store the name
of the radio station
NAMING OK
NAMING OK will appear
in the display
RADIO
Press to store he name
and exit the naming
function
You can press RADIO at any time to store and exit
the naming function…
*NOTE! Such a name can only be transmitted if
your BeoSound 9000 is equipped with the RDS
facility. The RDS facility is not a standard feature
in all BeoSound 9000, but it will be available as an
optional extra.
NAMING
Press to access the
naming function
Press to clear the name
Playing your radio stations
Having tuned in the radio stations
you want, as shown on the previous
pages, you are ready to listen to the
radio.
29
Playing radio
Switching between displays
When you turn on the radio, the station you
were last listening to starts playing, and it
will be indicated in the display, which radio
station is playing. If you have given a name to
the radio station, the display will read out
that name.
The display can give you four different types
of information about the radio station you
are listening to: Station name or RDS*,
station number and radio frequency. The
information you have chosen to display will
remain on the BeoSound 9000 display until
you choose another of the displays illustrated
below.
RADIO
Press to turn on the
radio
m
p
Press to step through
your radio stations
•
Press to switch to standby
RADIO
Press to turn on the
radio
OK
Press repeatedly to
change the radio display
indication, to show…
CL ASSIC
Station name indication
R ADIO 5
Programme number
indication
P5 FM 89.9
Radio frequency
indication
Adjust and store sound settings
30
All sound levels are set to neutral
values from the factory, but you can
make your own sound adjustments
and store them.
The treble and bass levels can be
raised or lowered as you like and you
can alter the balance, i.e. the
distribution of sound emerging from
the loudspeakers to suit your listening
position.
The BeoSound 9000 also features a
loudness function which you can
activate or deactivate as you like. The
loudness function makes the music
more dynamic. It compensates for
the human ear’s lack of sensitivity to
high and low frequencies when
listening to low music.
Sound adjustments
If you wish to alter the settings for sound,
simply access the relevant function, make
your adjustments and store the new setting.
TREBLE
BASS
BALANCE
Press to access the bass
adjustment function
Press to access the
balance adjustment
m
p
Press to raise or lower
the treble or bass levels;
or adjust the balance
between the left and
right speaker
LOUDNESS
Press to see the status
of the loudness
adjustment function –
LOUDNESS ON or
LOUDNESS OFF
Press LOUDNESS again
to change the setting
LOUDNESS ON
You can reset the sound levels to their
original settings at any time. If you
change your mind and do not wish
to store your adjustments, simply
press a source button on the
BeoSound 9000 control panel.
Press to access the
treble adjustment
function
LOUDNESS OFF
OK
SOUND OK?
Stored sound settings apply each
time you switch on BeoSound 9000.
OK
The first four displays are examples of levels that the
different sound functions can be set to. Volume
can be adjusted in steps of two within a range of
00 to 72, treble and bass levels can be adjusted
within a range of -4 to +4 and the balance setting
(here neutral) can be adjusted within a range of 8
to either side. The fifth example is a display,
which shows the setting for the loudness function
– ON if loudness is switched on, and OFF if
loudness is switched off. The SOUND OK? display
prompts you to store the current sound setting.
Press to accept all
sound levels – SOUND
OK? appears on the
display
Press to store all sound
levels
If you have not stored your sound
adjustments…
RESET
Press to reset the sound
levels to their previously
stored settings
NOTE! When BeoSound 9000 is used in a fully
integrated setup (see Use BeoSound 9000 with a
video system), sound must be adjusted as described
in the guide for your video system. The display on
the BeoSound 9000 will read TV OPERATED.
Using the Beo4 remote control
31
The BeoSound 9000 CD player is
operated from a distance via the
Beo4 remote control.
The Beo4 remote control operates all
the primary functions in the
BeoSound 9000 such as turning on
the radio or the CD player, changing
radio stations, CD tracks or CDs. It
also selects stations or CDs to be
played, adjusts sound functions,
pauses playback and finally switches
to stand-by.
The Beo4 remote control enables you
to select specific tracks on CDs, select
sequences of specific discs to be
played, search forward and backward
on CDs, switch on the random order
playback and edited order playback
functions as well as it selects extra
equipment.
RADIO
TV
LIGHT
RADIO
SAT
DVD
CD
V TAPE
RECORD
A TAPE
7
8
9
4
5
6
1
2
3
TEXT
0
MENU
CD
Press to switch on the CD player
m
p
Step through your radio stations, or tracks on a
CD. Press when RANDOM is shown in the
display, to activate the function, and press to
switch it off when the function is displayed
0–9
l
n
STOP
GO
LIST
EXIT
Press to switch on the radio
Use the number buttons to key in a radio station
number or CD number. To select a track, press LIST
until TRACK is shown in the display*, then use the
number buttons to key in the track number
Press to change to the previous or following CD
Press to pause playback any time
GO
Press to resume playback – The GO button equals
OK on the BeoSound 9000 operation panel
LIST
Press to display extra buttons or functions*, e.g.
RANDOM
R ANDOM
STOP
*NOTE! In order to display the relevant extra
buttons on the Beo4, you must add them to the
Beo4 list of functions. Please refer to Beo4’s own
User’s Guide for information about how to add
extra buttons to the Beo4.
GO
Press to activate the source or function in the
Beo4 display
r
u
To turn the volume up or down, press in the
middle to mute speakers, press again to recall
sound
•
Switch the BeoSound 9000 to stand-by
Use BeoSound 9000 with a video system
32
To use the BeoSound 9000 together
with a Bang & Olufsen video system
they must be connected by a Master
Link cable, this is a so-called Audio/
Video (AV) integrated setup.
If you choose to interconnect your
Bang & Olufsen products, you can
distribute the sound from your
sources throughout your home.
Many different setups are available,
please contact a Bang & Olufsen
retailer for further information.
Option programming is a prerequisite
for integrated setups. It is not
necessary if BeoSound 9000 is only
connected to speakers!
Using BeoSound 9000 with a video
system also requires that you use a
Beo4 remote control. Refer to Using
the Beo4 remote control, or the
Beo4’s own User’s guide.
A fully integrated setup
An AV integrated setup
When BeoSound 9000 is used in a fully
integrated setup, the speakers are connected
to the video system, and the video system
takes over some of the functions mentioned
in this guide. Furthermore, all remote control
operations (audio and video) must be
directed to the video system. Please refer to
the guide for the video system, for further
information.
In an AV integrated setup, a pair of active
speakers are connected to the
BeoSound 9000. You can hear any source you
like in the loudspeakers of either system. The
BeoSound 9000 and the video system do not
have to be placed in the same room.
To play a source in the AV system…
Press a source button
CD
on the Beo4, e.g. CD,
RADIO
RADIO, TV, etc.
TV
To play TV, video or satellite sound on the
BeoSound speakers…
LIST
Press until AV* appears
AV
in the Beo4 display
Simulcast radio/TV transmissions – to watch a
TV channel while listening to the sound from
a radio station…
TV
Press to switch on the
TV
LIST
AV
RADIO
Press repeatedly until
AV* appears in the
Beo4 display
Press to switch on the
radio and start
simulcast transmission
TV
V TAPE
SAT
Press to hear TV sound,
video sound, or a
satellite TV/radio
program
To play the radio or CD on the TV speakers…
LIST
Press until AV* appears
AV
in the Beo4 display
RADIO
Press to hear radio
sound, or…
CD
…press to hear a CD
*NOTE! In order to display AV on the Beo4, you
must add it to the list of functions. Please refer to
the Beo4’s own User’s guide for information on
how to add functions to the Beo4.
33
Option programming
Option 2
For BeoSound 9000 to be part of an AV setup,
you must make sure it is set up to function
with the other products you have connected.
This means that you must program the
BeoSound 9000 to the correct option.
BeoSound 9000 has five different option
settings:
Option 0. Used in a one-room AV setup. This
Option is selected automatically if no speakers
(or headphones) are connected directly to the
BeoSound 9000.
Option 1 (factory setting). Used when the
BeoSound 9000 is used on its own, or when it
is connected to active speakers in an AV
integrated setup.
Option 2. Used when the BeoSound 9000 is set
up in one room and connected to a video
system set up in another room.
Option 5. Used when the BeoSound 9000 is set
up in a link room which also comprises a
Bang & Olufsen television.
Option 6. Used when the BeoSound 9000 is set
up in a link room without a Bang & Olufsen
television.
Switch your entire Bang & Olufsen system to
stand-by, and then (using the Beo4 remote
control):
> Hold the • button
while pressing LIST.
> When the Beo4
display reads
OPTION?, press GO.
> Press LIST to display
A.OPT and then key
in the appropriate
number (0, 1, 2, 5
or 6).
Option 0
In a fully integrated system, your BeoSound 9000
acts as a mere audio source. The sound is
reproduced through the speakers in the
BeoVision TV – or, as shown here, through a set
of active speakers connected to the TV.
Option 1
Option 1
In a one-room AV integrated setup, a pair of
active speakers has been connected to the
BeoSound 9000.
Option 2
Option 2
In a two-room AV integrated setup, your
BeoSound 9000 has been set up with a set of
active speakers in one room, and the video
system in another.
Looking after BeoSound 9000
34
Normal maintenance, such as
cleaning the BeoSound 9000, is the
responsibility of the user. To achieve
the best result, please follow the
instructions.
Surfaces
Do not use alcohol or other solvents
to clean any part of BeoSound 9000!
Use a soft, dry cloth to wipe dust off the
BeoSound 9000. To clean the surfaces, we
recommend that you use a mild window cleaner.
Before you start cleaning BeoSound 9000, we
recommend that you open the glass door and
then switch off the mains. In this way all
surfaces are accessible for cleaning.
A
CD mechanism
The circuit controlling the movement of the
CD carriage has a built-in safety function
which protects your fingers, etc. from being
hit by the fast moving carriage. This circuit
depends on light/reflections, and works via
opto-coupling devices built into the two small
‘pegs’ (A). When the glass door is opened, or
if something interrupts the light-circuit, the
carriage slows down in speed, and finally
comes to a halt.
Over time dust may build up and thus reduce the
light emitted to and from the opto-coupling
devices. Dust particles on the inside of the glass
door may also cause extraordinary reflections
which may be interpreted by the safety function
in a wrong way.
So, in order to prevent malfunction of the safety
circuit, we recommend that you wipe dust off the
two pegs (A) on a regular basis. Likewise, when
cleaning the surfaces of BeoSound 9000,
remember also to clean the inner surface of the
glass door.
NOTE! Treat the glass door with great care! If it
cracks or chips, or if it is damaged in any other
way, it must be replaced immediately as it could
otherwise cause great bodily harm. If the glass
door should need to be replaced, please contact
your Bang & Olufsen retailer.
A
35
Handling your CDs
If dust builds up in the opto-coupling devices, the
CD carriage will slow down, and the cue
‘CLEANING REQUIRED’ appears in the
BeoSound 9000 display.
When the cue appears you must:
> Switch off the BeoSound 9000.
> Wipe dust off the two ‘pegs’ (A).
> Clean the inner surface of the glass door.
> Switch BeoSound 9000 on again.
IMPORTANT! If you experience any problems
when trying to play a particular CD always
check it for faults (scratches, fingerprints,
dust or dirt, etc.). Dust may build up on the
CDs, especially if you leave them sitting in the
BeoSound 9000 for a long time.
If there are no visible faults on the CD, please
contact your Bang & Olufsen retailer. Do not
attempt to clean the optics of the CD mechanism
yourself – this must be done by a qualified
technician only!
We do not recommend using special cleaning
CDs in BeoSound 9000!
The PIN-code system
36
You can protect your BeoSound 9000
by entering a four-digit PIN (Personal
Identification Number) code. Should
your BeoSound 9000 be
disconnected from the mains for
more than 30 minutes, only those
who know your PIN-code can gain
access to your BeoSound 9000.
If the PIN-code is not entered, the
BeoSound 9000 automatically
switches to standby after 3 minutes.
To activate the PIN-code system, to
change your code or to delete it
altogether, your BeoSound 9000
must be in stand-by mode.
If you should lose or forget your code,
contact your Bang & Olufsen retailer
for a master code that disables your
PIN-code and gives you access to
your BeoSound 9000.
Activate the PIN-code system
Change or delete your PIN-code
While the BeoSound 9000 is in stand-by
mode you can set up the PIN-code.
While the PIN-code function is turned on you
can always make changes to the PIN-code.
p
p
PAUSE
NEW PIN
Press twice followed
by PAUSE to activate
the PIN-code function.
The display shows
NEW PIN for 1.5 sec.…
p
p
PAUSE
PIN _ _ _ _
NEW PIN?
PIN _ _ _ _
…then you can enter a
PIN-code
m
p
Press to select a digit*
OK
Press to accept the digit
m
p
NEW PIN?
Enter the current PINcode. The display shows
NEW PIN?
Press to choose from
the two options
NEW PIN? or PIN OFF?
PIN OFF?
The digit is replaced by a and the next underscore blinks. Continue to enter the last three digits
in the same manner.
Select NEW PIN? to change your PIN-code
PIN _ _ _ _
Enter the new PIN-code
OK
CONFIRM
If you wish to change the entered digits…
RESET
Press to start entering
from the beginning
PIN _ _ _ _
When the PIN-code has been entered…
OK
Press to accept the PINcode. The display shows
CONFIRM
CONFIRM for 1.5 sec.…
PIN _ _ _ _
OK
STORED
…then re-enter the PINcode
Press to confirm the PINcode
The display shows that
your setting is stored
If an incorrect code is entered the second time
you must set up the PIN-code from the beginning.
*NOTE! It is also possible to enter the digits using
the number keys 0 – 9 on your Beo4 remote
control.
Press twice followed
by PAUSE to activate
the PIN-code function
OK
STORED
Press to accept the new
PIN-code. The display
shows CONFIRM for 1.5
sec.…
…then re-enter the new
PIN-code
Press to confirm the
new PIN-code
The display shows that
your new PIN-code is
stored
Select PIN OFF? to delete your PIN-code…
DELETED
The PIN-code function is
disabled and the display
shows DELETED for 3 sec.
For security reasons it is only possible to change or
verify the PIN-code five times within a period of 3
hours. If an incorrect code is entered five times,
BeoSound 9000 is turned off, and must be left in
stand-by mode for 3 hours, before you may try
again.
37
Using your PIN-code
Did you forget your PIN-code?
When a PIN-code has been programmed, and
the BeoSound 9000 has been disconnected
from the mains for more than 30 minutes,
you must enter the PIN-code when the
BeoSound 9000 is turned back on.
Should you forget your PIN-code you can
require a five-digit Master Code from your
Bang & Olufsen retailer.
PIN _ _ _ _
Enter the PIN-code
m
p
Press to select a digit
OK
Press to accept the digit
When you have received a Master Code…
PIN _ _ _ _
When the display is
open for PIN-code
input…
p
PIN _ _ _ _ _
R ADIO 1
When the PIN-code has
been entered the
display returns to the
relevant source display
e.g. RADIO 1
If an incorrect PIN-code is entered the display will
show ERROR and you may try again. After the
fifth try, the BeoSound 9000 is turned off, and
must be left in stand-by mode for 3 hours, before
you can try again.
PIN _ _ _ _ _
Press the button for
more than 3 seconds to
change the display to fit
5 digits
Enter the Master Code
m
p
Press to select a digit
OK
Press to accept the digit
DELETED
The display shows that
the PIN-code lock is off
When the Master Code is entered, the
BeoSound 9000 can be used without entering the
code again.
38
For your information…
Your needs as a user are given careful
consideration during the design and
development process of a Bang & Olufsen
product and we strive to make our products
easy and comfortable to operate.
Therefore, we hope that you will take the
time to tell us about your experience with
your Bang & Olufsen product. Anything
which you consider important – positive or
negative – may help us in our efforts to refine
our products.
Thank you!
Write to:
Bang & Olufsen a/s
Consumer Service dept.
7210 Peter Bangs Vej 15
DK–7600 Struer
or fax:
Bang & Olufsen
Consumer Service
+45 97 85 39 11 (fax.)
or e-mail:
[email protected]
Visit our Web-site on…
www.bang-olufsen.com
3507491
0505
Printed in Denmark by Bogtrykkergården a-s, Struer
NOTE: This equipment has been tested and found
to comply with the limits for a class B digital
device, pursuant to part 15 of the FCC Rules.
These limits are designed to provide reasonable
protection against harmful interference in a
residential installation.
This equipment generates, uses and can radiate
radio frequency energy and, if not installed and
used in accordance with the instructions, may
cause harmful interference to radio
communications. However, there is no guarantee
that interference will not occur in a particular
installation. If this equipment does cause harmful
interference to radio or television reception, which
can be determined by turning the equipment off
and on, the user is encouraged to try to correct
the interference by one or more of the following
measures:
– Reorient or relocate the receiving antenna.
– Increase the separation between the equipment
and receiver.
– Connect the equipment into an outlet on a
circuit different from that to which the receiver
is connected.
– Consult the retailer or an experienced radio/TV
technician for help.
This class B digital apparatus meets all requirements
of the Canadian Interference-Causing Equipment
Regulations.
This product fulfils the conditions stated in the EEU
directives 89/336 and 73/23.
CLASS 1
LASER PRODUCT
The black and yellow label on the compact disc
player serves as a warning that the apparatus
contains a laser system and is classified as a class 1
laser product. In case any difficulties arise with the
compact disc player, please contact a Bang &
Olufsen retailer. The apparatus must be opened by
qualified service personnel only.
CAUTION: The use of any controls, adjustments or
procedures other than those specified herein may
result in hazardous radiation exposure.
www.bang-olufsen.com