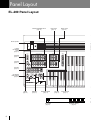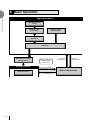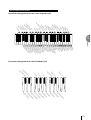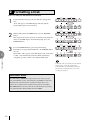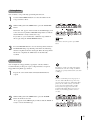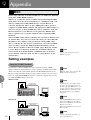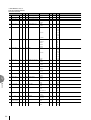
1
SPECIAL MESSAGE SECTION
PRODUCT SAFETY MARKINGS: Yamaha electronic
products may have either labels similar to the graphics
shown below or molded / stamped facsimiles of these
graphics on the enclosure. The explanation of these
graphics appears on this page.
Please observe all cautions indicated on this page and
those indicated in the safety instruction section.
CAUTION
RISK OF ELECTRIC SHOCK.
DO NOT OPEN
CAUTION: TO REDUCE THE RISK OF
ELECTRIC SHOCK, DO NOT REMOVE
COVER (OR BACK). NO USER-SERVICEABLE
PARTS INSIDE. REFER SERVICING TO
QUALIFIED SERVICE PERSONNEL.
See the name plate for graphic symbol markings.
The exclamation point within the
equilateral triangle is intended to alert
the user to the present of important
operating and maintenance
(servicing) instructions in the literature
accompanying the product.
The lightning flash with arrowhead
symbol within the equilateral triangle
is intended to alert the user to the
presence of uninsulated "dangerous
voltage" within the product's
enclosure that may be of sufficient
magnitude to constitute a risk of
electrical shock.
ENVIRONMENTAL ISSUES: Yamaha strives to produce
products that are both user safe and environmentally
friendly.
We sincerely believe that our products and the production
methods used to produce them, meet these goals. In
keeping with both the letter and the spirit of the law, we
want you to be aware of the following:
BATTERY NOTICE: This product MAY contain a small
nonrechargeable battery which (if applicable) is soldered
in place. The average life span of this type of battery is
approximately five years. When replacement becomes
necessary, contact a qualified service representative to
perform the replacement.
WARNING: Do not attempt to recharge, disassemble, or
incinerate this type of battery. Keep all batteries away from
children. Dispose of used batteries promptly and as
regulated by applicable laws. Note: In some areas, the
servicer is required by law to return the defective parts.
However, you do have the option of having the servicer
dispose of these parts for you.
DISPOSAL NOTICE: Should this product become
damaged beyond repair, or for some reason its useful life is
considered to be at an end, please observe all local, state,
and federal regulations that relate to the disposal of
products that contain lead, batteries, plastics, etc.
NOTICE: Service charges incurred due to lack of
knowledge relating to how a function or effect works (when
the unit is operating as designed) are not covered by the
manufacture's warranty, and are therefore the owner's
responsibility.
Please study this manual carefully and consult your dealer
before requesting service.
NAME PLATE LOCATION: The graphic below indicates
the location of the name plate. The model number, serial
number, power requirements, etc., are located on this
plate. You should record the model number, serial number,
and the date of purchase in the spaces provided below
and retain this manual as a permanent record of your
purchase.
IMPORTANT NOTICE: All Yamaha electronic products are
tested and approved by an independent safety testing
laboratory in order that you may be sure that when it is
properly installed and used in its normal and customary
manner, all foreseeable risks have been eliminated. DO
NOT modify this unit or commission others to do so unless
specifically authorized by Yamaha.
Product performance and/or safety standards may be
diminished. Claims filed under the expressed warranty may
be denied if the unit is/has been modified. Implied
warranties may also be affected.
SPECIFICATIONS SUBJECT TO CHANGE: The
information contained in this manual is believed to be
correct at the time of printing. However, Yamaha reserves
the right to change or modify any of the specifications
without notice or obligation to update existing units.
92-469-➀
Model
Serial No.
Purchase Date
PRECAUTIONS
PLEASE READ CAREFULLY BEFORE PROCEEDING
* Please keep these precautions in a safe place for future reference.
WARNING
Always follow the basic precautions listed below to avoid the possibility of serious injury or even death from electrical shock,
short-circuiting, damages, fire or other hazards. These precautions include, but are not limited to, the following:
• Do not open the instrument or attempt to disassemble the internal parts or
modify them in any way. The instrument contains no user-serviceable parts.
If it should appear to be malfunctioning, discontinue use immediately and
have it inspected by qualified Yamaha service personnel.
• Do not expose the instrument to rain, use it near water or in damp or wet
conditions, or place containers on it containing liquids which might spill
into any openings.
• If the power cord or plug becomes frayed or damaged, or if there is a sudden
loss of sound during use of the instrument, or if any unusual smells or
smoke should appear to be caused by it, immediately turn off the power
switch, disconnect the electric plug from the outlet, and have the instrument
inspected by qualified Yamaha service personnel.
• Only use the voltage specified as correct for the instrument. The required
voltage is printed on the name plate of the instrument.
• Before cleaning the instrument, always remove the electric plug from the
outlet. Never insert or remove an electric plug with wet hands.
• Check the electric plug periodically and remove any dirt or dust which may
have accumulated on it.
CAUTION
Always follow the basic precautions listed below to avoid the possibility of physical injury to you or others, or damage to the
instrument or other property. These precautions include, but are not limited to, the following:
• Do not place the power cord near heat sources such as heaters or radiators,
and do not excessively bend or otherwise damage the cord, place heavy
objects on it, or place it in a position where anyone could walk on, trip over,
or roll anything over it.
• Take care that the key cover does not pinch your fingers, and do not insert a
finger or hand in the key cover gap.
• When removing the electric plug from the instrument or an outlet, always
hold the plug itself and not the cord. Pulling by the cord can damage it.
• Never insert or drop paper or metallic or other objects between the slits of
the key cover and the keyboard. If this happens, immediately turn off the
power and remove the electric plug from the outlet and have the instrument
inspected by qualified Yamaha service personnel.
• Do not connect the instrument to an electrical outlet using a multipleconnector. Doing so can result in lower sound quality, or possibly cause
overheating in the outlet.
• Do not place the instrument against a wall (allow at least 3 cm/one-inch
from the wall), since this can cause inadequate air circulation, and possibly
result in the instrument overheating.
• Remove the electric plug from the outlet when the instrument is not to be
used for extended periods of time, or during electrical storms.
• Do not operate the instrument for a long period of time at a high or
uncomfortable volume level, since this can cause permanent hearing loss. If
you experience any hearing loss or ringing in the ears, consult a physician.
• Before connecting the instrument to other electronic components, turn off
the power for all components. Before turning the power on or off for all
components, set all volume levels to minimum. Also, be sure to set the
volumes of all components at their minimum levels and gradually raise the
volume controls while playing the instrument to set the desired listening
level.
• Do not expose the instrument to excessive dust or vibrations, or extreme
cold or heat (such as in direct sunlight, near a heater, or in a car during the
day) to prevent the possibility of panel disfiguration or damage to the internal
components.
• Do not use the instrument near other electrical products such as televisions,
radios, or speakers, since this might cause interference which can affect
proper operation of the other products.
• Do not place the instrument in an unstable position where it might accidentally
fall over.
• Before moving the instrument, remove all connected cables.
• When cleaning the instrument, use a soft, dry cloth. Do not use paint thinners,
solvents, cleaning fluids, or chemical-impregnated wiping cloths. Also, do
not place vinyl, plastic or rubber objects on the instrument, since this might
discolor the panel or keyboard.
• Do not rest your weight on, or place heavy objects on the instrument, and do
not use excessive force on the buttons, switches or connectors.
(1)B-6
■ USING THE BENCH
• Do not play carelessly with or stand on the bench. Using it as a tool or stepladder or for any other purpose might result in accident or injury.
• Only one person should sit on the bench at a time, in order to prevent the
possibility of accident or injury.
• If the bench screws become loose due to extensive long-term use, tighten
them periodically using the included tool.
■ SAVING USER DATA
• Always save data to a floppy disk frequently, in order to help prevent the loss
of important data due to a malfunction or user operating error.
Yamaha cannot be held responsible for damage caused by improper use or
modifications to the instrument, or data that is lost or destroyed.
Always turn the power off when the instrument is not in use.
Congratulations!
You are the proud owner of a fine electronic organ, Electone EL-200.
The Yamaha EL-200 Electone combines the most advanced AWM tone generation
technology with state-of-the-art digital electronics and features to give you stunning sound
quality with maximum musical enjoyment. Almost all functions are accessible through
systematic and intuitive panel operations.
In order to make the most of the Electone and extensive performance potential, we urge you
to read the manual thoroughly while trying out the various features described.
Even after reading through the manual, keep it in a safe place for later reference.
Included Items
Owner’s Manual
Song Sheet
3.5" Floppy Disk
FUN TO PLAY ELECTONE Disk
Turning the Electone off erases all panel settings you have made. When the Electone is turned on, Basic
Registration 1 is automatically selected. If you have made panel settings you wish to keep, save them to
Registration Memory before turning the Electone off.
GM (General MIDI System Level 1) is an addition to the MIDI standard that ensures that any GM-compatible
music data can be accurately played by any GM-compatible tone generator, regardless of maker.
The GM mark is affixed to all software and hardware products that support the General MIDI standard.
XG is a new MIDI format created by Yamaha, which significantly improves and expands upon the General MIDI
standard by providing a greater variety of high-quality voices plus considerably enhanced effect operation -- while
being fully compatible with GM.
• The screen displays and illustrations as shown in this owner’s manual are for instructional purposes only, and may appear somewhat different
from those on your instrument.
• Copying of the commercially available music sequence data is strictly prohibited except for your personal use.
• The company names and product names in this Owner’s manual are the trademarks or registered trademarks of their respective companies.
4
Table of Contents
Panel Layout ............................................................................................... 6
EL-200 Panel Layout .......................................................................................................................................... 6
Others ................................................................................................................................................................... 8
Main Features ............................................................................................. 9
1
Quick Introductory
Guide
2
Voice Sections
3
Voice Controls
and Effects
4
Rhythms
5
Registration Memory
6
Music Disk Recorder
(M.D.R.)
7
Footswitches,
Knee Lever
8
Accessory Jacks
and Controls
9
Appendix
1 Quick Introductory Guide ...................................................................... 10
1
2
3
Getting Started ............................................................................................................................................ 10
Basic Registrations ..................................................................................................................................... 11
Basic Operation ........................................................................................................................................... 12
2 Voice Sections ....................................................................................... 13
Selecting Voices from the Panel ....................................................................................................................... 13
3 Voice Controls and Effects ..................................................................... 17
1
2
4
Reverb .......................................................................................................................................................... 17
Sustain .......................................................................................................................................................... 17
Rhythms ............................................................................................... 18
1
2
3
Selecting Rhythms from the Panel ........................................................................................................... 18
Rhythms ....................................................................................................................................................... 21
Keyboard Percussion .................................................................................................................................. 22
5 Registration Memory ............................................................................ 25
1
2
3
4
Storing Registrations ..................................................................................................................................
Selecting Registrations ...............................................................................................................................
Saving the Registration Data to Disk .......................................................................................................
Registration Shift ........................................................................................................................................
25
25
26
27
6 Music Disk Recorder (M.D.R.) ................................................................ 28
1
2
3
4
5
6
7
8
Precautions on M.D.R. ...............................................................................................................................
Formatting a Disk .......................................................................................................................................
Recording .....................................................................................................................................................
Recording Registrations (and Bulk Data) ...............................................................................................
Recalling Recorded Registrations (and Bulk Data) ...............................................................................
Replacing Registrations .............................................................................................................................
Playback .......................................................................................................................................................
Other Functions ..........................................................................................................................................
28
30
31
37
38
38
39
41
7 Footswitches, Knee Lever ...................................................................... 49
1
2
Footswitch .................................................................................................................................................... 49
Knee Lever ................................................................................................................................................... 49
8 Accessory Jacks and Controls ............................................................... 51
9 Appendix .............................................................................................. 52
MIDI ...................................................................................................................................................................
MIDI Setting Examples ...................................................................................................................................
MIDI Data Format ............................................................................................................................................
MIDI Implementation Chart ...........................................................................................................................
Troubleshooting .................................................................................................................................................
Specifications .....................................................................................................................................................
Index ...................................................................................................................................................................
52
52
58
68
70
72
73
The Index on page 73 can be of your help in finding the functions and terms.
5
Panel Layout
EL-200 Panel Layout
UPPER KEYBOARD VOICE
(page 13)
LEAD VOICE
(page 13)
PEDAL VOICE
(page 13)
Monitor Speaker
LOWER
KEYBOARD
VOICE
(page 13)
MAX
REVERB
(page 17)
MAX
STRINGS
BRASS
CLARINET
SAXOPHONE
CHORUS
HARMONICA
1
ORGAN
PIANO
GUITAR
VIBRAPHONE
COSMIC
TUTTI
2
MIN
SUSTAIN
(page 17)
FLUTE
1
OBOE
TRUMPET
TO
LOWER
MIN
PEDAL VOICE
LOWER KEYBOARD VOICE
UPPER
(KNEE)
LOWER
(KNEE)
MAX
VIOLIN
MIN
SUSTAIN
PEDAL
BASIC
REGIST.
LEAD VOICE
UPPER KEYBOARD VOICE
REVERB
MAX
STRINGS
BRASS
CLARINET
SAXOPHONE
CHORUS
HORN
1
ORGAN
PIANO
GUITAR
VIBRAPHONE
COSMIC
TUTTI
2
MAX
CONTRA
BASS
ELEC.
BASS
1
ORGAN
BASS
TUBA
TO
LOWER
MIN
MIN
RHYTHM
RHYTHM
(page 18)
MAX
SEQ.
1
SEQ.
2
MARCH
WALTZ
SWING
BOUNCE
SLOW
ROCK
1
SEQ.
3
SEQ.
4
TANGO
LATIN
1
LATIN
2
8 BEAT
16 BEAT
2
MIN
KEYBOARD
PERCUSSION
KEYBOARD
PERCUSSION
(page 22)
RHYTHM
BAR BEAT
LOWER
INTRO.
ENDING
1
SYNCHRO
START
START
TEMPO
PEDAL
2
BAR
FILL IN
BEAT
TEMPO
(page 19)
BAR/BEAT
(page 19)
BAR/BEAT/TEMPO
(page 19)
M.
/TO DISK
M./TO DISK
(page 25)
6
RHYTHM
(page 18)
BASIC REGIST.
(page 11)
1
2
3
Registration Memory
(page 25)
4
Monitor Speaker
MASTER VOLUME
RECORD
SONG
REPEAT
PAUSE
PEDAL CONTROL
FROM
TO
SONG COPY
STOP
MUSIC DISK
RECORDER
(page 28)
PLAY
UPPER LOWER PEDAL CONTROL UPPER LOWER
PLAY
SHIFT
SONG DEL.
SONG SELECT
RECORD
TEMPO
FORMAT
MASTER VOLUME
(page 10)
CUSTOM PLAY
MUSIC DISK RECORDER
POWER
POWER
(page 10)
Floppy Disk Slot
LED (Lamp in-use)
5
6
7
8
Eject
D.
D. (Disable)
(page 25)
7
Others
Keyboard Cover/Music Stand
Monitor Speakers
Upper Keyboard
Lower Keyboard
MIDI Jacks (page 51)
Jacks (page 51)
Knee Lever (page 49)
Right-Footswitch (page 27)
Speaker Unit
Left-Footswitch (page 49)
Expression Pedal (page 10)
Pedalboard
8
Main Features
1
Astoundingly True-to-life Sounds
The new AWM (Advanced Wave Memory) and FM (Frequency Modulation) tone
generation technologies make this Electone a truly lifelike musical instrument.
You can enjoy playing a total of 21 AWM/FM voices using the touch response function.
2
Expressive Touch Tone
From fortissimo to pianissimo you can express strong emotion to subtle nuance of each
instrument.
3
High Quality Digital Effects
Sophisticated digital Reverb lets you create resonant and wide dimension to each voice
group. (page 17)
4
Dynamic Rhythm and Percussion sounds
The Rhythm section of the Electone features authentic drum and percussion sounds, used by
expert rhythm programmers in creating a total of 10 various rhythm patterns. (page 18)
Keyboard Percussion function lets you play 43 different drum and percussion sounds. (page
22)
5
Convenient Registration Functions
5 Basic Registrations help you to set up a variety of registrations covering all music
categories. (page 11)
6
Versatile Functions of the Music Disk Recorder
The Electone also features a Music Disk Recorder (MDR) for recording your
registrations and performances to a floppy disk. In addition, the MDR allows you to copy
a song from a disk to another, duplicate a disk, and play and save commercially available
XG song data. (page 28)
9
1 Quick Introductory Guide
1 Getting Started
1
Plug the power cord in to an appropriate electrical outlet.
2
Turn on the Electone by pressing the POWER switch.
POWER
When the Electone is turned on, Basic Registration 1 is automatically
selected.
3
Set the MASTER VOLUME control.
The MASTER VOLUME control is an overall control that affects the
volume of the entire instrument.
MASTER VOLUME
4
Press the Expression pedal down with your foot.
Once you have set the MASTER VOLUME control to a suitable level,
you can use the Expression pedal to change the volume with your foot
as you play.
Louder
10
Softer
Only use the voltage specified as correct
for the Electone. The required voltage is
printed on the name plate of the Electone.
Yamaha products are manufactured
specifically for the supply voltage in the
area where they are to be sold. If you
should move, or if any doubt exists about
the supply voltage, please consult with a
qualified technician.
BASIC
REGIST.
2 Basic Registrations
1
Quick Introductory Guide
The Basic Registration section has five factory preset registrations. Each of
which is preset with a different set of voices for the Upper/Lower
keyboards and Pedalboard, and each specially suited for playing in a
different music style.
To select Basic Registrations:
Press the BASIC REGIST. buttons to select each Basic Registration.
When you turn the power on, the Electone automatically selects Basic
Registration 1.
Basic
Basic
Basic
Basic
Basic
Registration 1 Registration 2 Registration 3 Registration 4 Registration 5
Upper Keyboard
Voice 1
Strings 1
Brass 1
Flute 1
Cosmic 1
Synth. Brass 1
Lower Keyboard
Voice 1
Strings 1
Horn1
Piano 1
Cosmic 2
Cosmic 3
Pedal Voice 1
Contra Bass1
Tuba
Contra Bass 1
Cosmic 2
Synth. Bass 1
If you have made panel settings you wish to keep, save them to
Registration Memory before turning the Electone off. (See page 25 for
more information.)
You can, however, restore the panel settings that were made before the
Electone was last turned off. (See page 27 for more information.)
NOTE:
Some of the voices, hidden voices, cannot
be accessible from the panel.
Turning the Electone off erases all panel
settings you have made. When the
Electone is turned on, Basic Registration 1
is automatically selected.
11
3 Basic Operation
1
Quick Introductory Guide
Registration Set-up
Select the keyboard
to play
Select the voice
(Voice Menu)
Select the rhythm
(Rhythm Menu)
Add effects
(Effect Set)
Add reverb
Adjust the total volume
(Master Volume)
Playing Electone
Setting Registration
Shift/Footswitch
/Knee Lever
Saving the
registration data
Recording the performance
Music Disk Recorder
Expression Pedal
Playing back
12
Loading the
registration data
2 Voice Sections
The EL-200 features 21 different high quality AWM/FM voices. All voices are divided in to four voice groups.
There are two voice groups on the Upper keyboard, one each on the Lower keyboard and Pedalboard. Each
voice section can, of course, have its own voice condition settings such as voice assignment and applying sustain
effect.
LEAD VOICE
UPPER KEYBOARD VOICE
MAX
2
MAX
BRASS
CLARINET
SAXOPHONE
CHORUS
HARMONICA
1
VIOLIN
FLUTE
1
ORGAN
PIANO
GUITAR
VIBRAPHONE
COSMIC
TUTTI
2
OBOE
TRUMPET
TO
LOWER
MIN
Voice Sections
STRINGS
MIN
PEDAL VOICE 1
LOWER KEYBOARD VOICE
MAX
MAX
STRINGS
BRASS
CLARINET
SAXOPHONE
CHORUS
HORN
1
CONTRA
BASS
ELEC.
BASS
1
ORGAN
PIANO
GUITAR
VIBRAPHONE
COSMIC
TUTTI
2
ORGAN
BASS
TUBA
TO
LOWER
MIN
MIN
Selecting Voices from the Panel
Selection of panel voices follows the same procedure throughout all four
voice groups. The procedure is explained with the selection of Upper
keyboard voice, as an example.
1
Select a voice from the Upper Keyboard Voice section by pressing one
of the Voice buttons in that section.
UPPER KEYBOARD VOICE
MAX
STRINGS
BRASS
CLARINET
SAXOPHONE
CHORUS
HARMONICA
1
ORGAN
PIANO
GUITAR
VIBRAPHONE
COSMIC
TUTTI
2
NOTE:
The lamps 1 and 2 at the right side of each
voice section may be lit when you load the
data created with one of the upper models,
EL-900/700/500/400, or when you have
selected the Basic Registration 3, 4 or 5.
See page 47 for more information.
MIN
If, for example, you have pressed the ORGAN voice button, Organ
voice is assigned to the Upper keyboard.
2
Now select voices for the Lead (Upper), Lower keyboard and
Pedalboard as you did for the Upper Keyboard Voice above. Also set
the volumes of the voices.
13
3
2
Set the volume for each voice section.
Use the VOLUME controls of each voice section on the panel to set the
desired level for each voice.
The controls have seven volume settings, from a minimum of 0, or no
sound, to a maximum of full volume.
UPPER KEYBOARD VOICE
STRINGS
Voice Sections
ORGAN
BRASS
CLARINET
PIANO
GUITAR
SAXOPHONE
VIBRAPHONE
CHORUS
HARMONICA
COSMIC
TUTTI
MAX
NOTE:
1
The Lead and Pedal Voices sound one note
at a time; when you simultaneously press
two or more keys, only the highest note
will sound.
2
MIN
Adjust the volume balance between each voice group as you play the
keyboards.
About TO LOWER - Playing (Upper) Lead Voice and Pedal Voice from the Lower keyboard:
The Electone has a special “To Lower” function that lets you assign Lead or
Bass voices to the Lower keyboard. Simply press the TO LOWER button
on the voice section you wish to assign, and that voice will be playable
from the Lower keyboard.
PEDAL VOICE 1
LEAD VOICE
VIOLIN
OBOE
FLUTE
TRUMPET
MAX
1
CONTRA
BASS
ORGAN
BASS
TO
LOWER
MIN
ELEC.
BASS
TUBA
MAX
1
When the TO LOWER button is turned
on, the Lead voices and Pedal voices
cannot be played on the Upper keyboard
and Pedalboard, respectively.
TO
LOWER
MIN
Turning the Electone off erases all panel settings you have made. When the Electone is turned on, Basic Registration 1 is automatically
selected.
If you have made panel settings you wish to keep, save them to Registration Memory before turning the Electone off. (See page 25 for more
information.)
You can, however, restore the panel settings that were made before the Electone was last turned off. (See page 27 for more information.)
14
Details on All Voices
The following chart lists the available voices on the EL-200.
Preset
Voice Name
Voice Group
Feet
Effect
Comments
STRINGS
Upper/Lower
8'
-
VIOLIN
Lead
8'
-
For multi purposes.
CONTRABASS
Pedal
8'
-
Standard type.
2
Large strings ensemble.
Upper/Lower
8'
-
Trumpet and Trombone ensemble. For classical music.
HORN
Lower
8'
-
Standard type. For classicals.
TRUMPET
Lead
8'
-
Standard type. For classical music.
TUBA
Pedal
16'
-
TUBA Also suited for solo playing.
Standard flute solo.
FLUTE
Lead
8'
-
OBOE
Lead
8'
-
Softer oboe.
CLARINET
Upper/Lower
8'
-
Standard clarinet.
SAXOPHONE
Upper/Lower
U16'/L8'
-
Standard type. Alto sax.
TUTTI
Upper/Lower
8'
-
Strings unison and wood winds ensemble.
CHORUS
Upper/Lower
8'
-
Female “Ah”.
HARMONICA
Upper
8'
-
Standard type.
ORGAN
Upper/Lower
8'
-
Small pipe organ. 8’.
ORGAN BASS
Pedal
8'
-
Combination organ bass.
PIANO
Upper/Lower
8'
-
For multi purposes.
GUITAR
Upper/Lower
U16'/L8'
-
Acoustic guitar. Steel string.
VIBRAPHONE
Upper/Lower
8'
-
Standard vibraphone.
ELECTRIC BASS
Pedal
8'
-
For multi purposes.
COSMIC
Upper/Lower
4'
-
Decay sounds for multi purposes. Used in the Basic Regist. 4; Upper Keyboard.
Voice Sections
BRASS
NOTE:
173 voices including the panel voices in
the list are built in the EL-200 for
playback. Accordingly, the EL-200 can
correspond to the song data created with
an upper model like EL-500/400 and
reproduce it precisely. See page 16 for the
information on the additional voices.
15
The Additional Voices
This table lists all the voices including panel voices that can be played back on the EL-200.
The voices not lead by a bullet indicate that they are only playable using the M.D.R. playback function.
Group
Upper/Lower
2
STRINGS
Voice Sections
Lead
VIOLIN
Pedal
CONTRABASS
Upper/Lower
BRASS
Lower
HORN
Lead
TRUMPET
Pedal
TUBA
Lead
FLUTE
Lead
OBOE
16
Voice Name
● Strings 1
Strings 2
Strings 3
Strings 4
Strings 5
Strings 6
Strings 7
Pizz. Strings
Trem. Strings
Synth. Strings 1
Synth. Strings 2
Synth. Strings 3
● Violin 1
Violin 2
Violin 3
Violin 4
Violin 5
Pizz. Violin
Cello
Kokyu
● Contrabass 1
Contrabass 2
Contrabass 3
Pizz. Bass
Upright Bass
● Brass 1
Brass 2
Brass 3
Brass 4
Brass 5
Synth. Brass 1
Synth. Brass 2
Synth. Brass 3
● Horn 1
Horn 2
Horn 3
Horn 4
Muted Horn
● Trumpet 1
Trumpet 2
Trumpet 3
Trumpet 4
Trumpet 5
Trumpet 6
Muted Trp.
Trombone 1
Trombone 2
Muted Trb.
Flugel Horn
Euphonium
● Tuba
Timpani
Timpani Roll
● Flute 1
Flute 2
Piccolo
Yokobue
Recorder
Ocarina
Pan Flute
Shakuhachi
Whistle
● Oboe 1
Oboe 2
English Horn
Bassoon 1
Bassoon 2
Group
Upper/Lower
CLARINET
Upper/Lower
SAXOPHONE
Upper/Lower
TUTTI
Upper/Lower
CHORUS
Upper
HARMONICA
Upper/Lower
ORGAN
Pedal
ORGAN BASS
Upper/Lower
PIANO
Voice Name
● Clarinet 1
Clarinet 2
Bass Cla.
Synth. Cla. 1
Synth. Cla. 2
● Saxophone 1
Saxophone 2
Sopra. Sax.
Sax. Ens. 1
Sax. Ens. 2
Synth. Sax.
Synth. Lead 1
Synth. Lead 2
Synth. Lead 3
Synth. Lead 4
Synth. Lead 5
● Tutti 1
Tutti 2
Tutti 3
Tutti 4
Tutti 5
Tutti 6
Tutti 7
● Chorus 1
Chorus 2
Chorus 3
Chorus 4
Chorus 5
Vocal
● Harmonica 1
Harmonica 2
● Organ 1
Organ 2
Organ 3
Organ 4
Jazz Organ 1
Jazz Organ 2
Jazz Organ 3
Jazz Organ 4
Pop Organ 1
Pop Organ 2
Theat. Organ 1
Theat. Organ 2
Accordion
Bandoneon
● Organ Bass 1
Organ Bass 2
Organ Bass 3
Organ Bass 4
● Piano 1
Piano 2
Honkytonk
Elec. Piano 1
Elec. Piano 2
Elec. Piano 3
Harpsichord
Clavi.
Clavichord
Group
Upper/Lower
GUITAR
Upper/Lower
VIBRAPHONE
Pedal
ELECTRIC BASS
Upper/Lower
COSMIC
Voice Name
● Guitar 1
Guitar 2
Guitar 3
12Str. Guitar
Banjo
Mandolin
Sitar
Shamisen
Elec. Guitar 1
Elec. Guitar 2
Muted Guitar
Dist. Guitar
Harp
Steel Guitar
Koto
Taisho Koto
● Vibraphone
Glocken
Celesta
Music Box
Marimba
Xylophone
Chime
Synth. Chime
Steel Drum
● Elec. Bass 1
Elec. Bass 2
Elec. Bass 3
Elec. Bass 4
Synth. Bass 1
Synth. Bass 2
Synth. Bass 3
● Cosmic 1
Cosmic 2
Cosmic 3
Cosmic 4
Cosmic 5
Cosmic 6
Cosmic 7
Cosmic 8
Cosmic 9
Cosmic 10
Cosmic 11
Cosmic 12
Cosmic 13
Cosmic 14
Cosmic 15
Cosmic 16
3 Voice Controls and Effects
You can add Reverb and Sustain effects to your selected voices.
1 Reverb
Reverb adds an echo-like effect to the sound, giving the impression of a
performance in a large room or concert hall. Reverb effect affects the entire
system at one time.
3
Voice Controls and Effects
You can control the amount of Reverb applied to the Electone by pressing one
of the Reverb buttons.
The controls have seven volume settings, from a minimum of 0, or no effect, to
a maximum of full Reverb.
REVERB
MAX
MIN
2 Sustain
The Sustain effect, selectable for the Upper, Lower and Pedal voices, causes
voices to gradually fade out when the keys are released. Each keyboard can
be turned on/off independently.
Pressing the Sustain buttons at the far left side of the panel lights up the lamps
of the buttons, which indicate that sustain is on. Press the buttons again to turn
sustain off.
SUSTAIN
UPPER
(KNEE)
LOWER
(KNEE)
NOTE:
Sustain cannot be applied to the Lead
voices.
NOTE:
If Knee Lever control of the Upper or
Lower sustain has been turned on (folded
down), pressing the Upper or Lower
buttons here will not add sustain unless the
Knee Lever is pushed. (See page 49 for
more information.)
PEDAL
NOTE:
Remember that the SUSTAIN buttons are
on/off switches. Remember to check
whether the sustain button lamps are on or
off before you start to play.
17
4 Rhythms
The Rhythm features of the Electone use actual drum and percussion sampled sounds to automatically play
various rhythms. In addition, the Electone has a Keyboard Percussion feature that allows you to play drum and
percussion sounds from the Lower keyboard and Pedalboard.
1 Selecting Rhythms from the Panel
Ten different rhythms in various styles can be instantly selected from the
front panel.
1) To select and play a rhythm:
1
4
Press to select any of the RHYTHM or METRONOME buttons.
RHYTHM
MAX
Rhythms
SEQ.
1
SEQ.
2
MARCH
WALTZ
SWING
BOUNCE
SLOW
ROCK
1
SEQ.
3
SEQ.
4
TANGO
LATIN
1
LATIN
2
8 BEAT
16 BEAT
2
MIN
2
Turn the rhythm on.
You can use one of three buttons to turn on the rhythm:
RHYTHM
INTRO.
ENDING
SYNCHRO
START
START
3
2
1
FILL IN
1 START
This button does as its name indicates; the rhythm begins as soon as
the button is pressed. To stop the rhythm, press this button again.
2 SYNCHRO START
This button puts the rhythm in “stand-by” status. The rhythm will
start when you press a note on the Lower keyboard or Pedalboard.
3 INTRO. ENDING
Pressing this button automatically adds a short introduction (of up to
eight measures) before starting the actual rhythm.
First, press the INTRO. ENDING button, then the START or
SYNCHRO START button to actually start the rhythm.
While the introduction is playing, the display shows the countdown
to the first measure of the pattern as shown in the illustration.
Pressing the INTRO. ENDING button again while the pattern is
being played will automatically add an ending phrase before
stopping the rhythm.
18
BAR BEAT
NOTE:
The Left Footswitch can also be used to
turn the rhythm on and off in the middle of
song. For more information on the
Footswitch rhythm control, see page 49.
LEAD IN
Pressing the START button while holding down the INTRO. ENDING
button automatically plays a special one-measure Lead In, with a click on
each beat, to cue you in to the beginning of the song.
3
Set the volume using the panel rhythm volume button.
The controls have seven volume settings, from a minimum of 0, or no
sound, to a maximum of full volume.
NOTE:
When the Electone is turned on, the
Rhythm Volume is automatically set to 0.
RHYTHM
MAX
SEQ.
1
SEQ.
2
MARCH
WALTZ
SWING
BOUNCE
SLOW
ROCK
1
SEQ.
3
SEQ.
4
TANGO
LATIN
1
LATIN
2
8 BEAT
16 BEAT
2
4
MIN
Rhythms
4
Set the rhythm tempo using the TEMPO dial.
BAR BEAT
2
(TEMPO Display:
shows current tempo)
TEMPO
BAR
1
BEAT
1 TEMPO Dial
For adjusting the speed of the rhythm. Turn the dial clockwise to
increase the tempo, and counterclockwise to decrease it.
2 TEMPO Display (BAR/BEAT Indicator)
Shows the current tempo. (Displayed values are given in beats per
minute, just as on a conventional metronome.)
NOTE:
When you turn the TEMPO Dial even
while the rhythm is playing, the display
momentarily changes to show the current
tempo.
Range: 40 - 240
When the rhythm begins playing, the TEMPO display changes
function to a Bar/Beat indicator.
BAR BEAT
The number on the left indicates the current bar
or measure and the one on the right indicates
the number of the beat in each bar.
The beat indicator lamp above the display also
indicates the beats.
(BAR/BEAT Indicator: shows the
current position in the measures)
19
2) To use the Fill In patterns:
Fill In patterns are designed to be used as temporary and regular rhythmic
breaks to spice up a repeating rhythm. Like the regular rhythms, all Fill In
patterns have been designed to perfectly match the bass and chord parts of the
Automatic Accompaniment feature.
1
2
Select and play a rhythm.
As you play the Electone along with the rhythm, occasionally press the
FILL IN button.
USING A FILL IN FOR THE START
OF A SONG:
Fill In patterns can also be used as
introductions; simply press the FILL IN
button before starting the rhythm with the
START or SYNCHRO START buttons.
RHYTHM
4
SYNCHRO
START
INTRO.
ENDING
NOTE:
START
Rhythms
FILL IN
NOTE:
PLAYING PARTIAL FILL IN
PATTERNS:
You can also start Fill In patterns within a
bar, in order to play only the final one or
two beats of the Fill In pattern and create
additional rhythmic interest. Since the Fill
In feature is very sensitive to bar/beat
boundaries, you should be very careful to
“play” the FILL IN button precisely on (or
just slightly before) the beat that you want
the Fill In pattern to begin.
About Metronome Function
In addition to 10 different rhythm styles, four types of metronome sounds,
simple metronome, two four, three four and four four, are assigned to the
SEQ 1 – 4 buttons, respectively, as the defaults. You can use one of them
by selecting a Metronome button and pressing the START button. Its tempo
and volume can be adjusted as you do for the normal panel rhythms.
Selecting any of the rhythm buttons changes the Metronome function to
normal rhythm play.
RHYTHM
MAX
SEQ.
1
SEQ.
2
MARCH
WALTZ
SWING
BOUNCE
SLOW
ROCK
1
SEQ.
3
SEQ.
4
TANGO
LATIN
1
LATIN
2
8 BEAT
16 BEAT
2
MIN
20
NOTE:
If you play back the song data containing rhythm sequences created with the
other Electones, the sequence data will
be loaded onto the four Metronome
(SEQ.) buttons and they will function as
SEQ. (Sequence) buttons. For more
information see page 24.
If you want to restore the Metronome
function, press one of the Basic Regist.
Buttons.
2 Rhythms
This chart lists all 10 of the rhythms available on the Electone.
■ March
■ Waltz
■ Tango
■ Latin 1
■ Swing
■ Bounce
■ Latin 2
■ 8 Beat
■ Slow Rock
■ 16 Beat
NOTE:
66 voices including the panel voices are
built in the EL-200 for playback.
Accordingly, the EL-200 can correspond
to the song data created with an upper
model like EL-500/400 and reproduce it
precisely. See the following table for the
information on the additional rhythms.
The Additional Rhythms
4
This table lists all the rhythms including panel voices that can be played back on
the EL-200.
Rhythms
The voices not lead by a bullet indicate that they are only playable using the M.D.R. playback function.
Category
MARCH
WALTZ
SWING
BOUNCE
Rhythm Name
● March1
March2
March3
Polka1
Polka2
Country1
Country2
Broadway
Baroque
● Waltz1
Waltz2
Waltz3
Waltz4
Waltz5
JazzWaltz1
JazzWaltz2
JazzWaltz3
Bolero
● Swing1
Swing2
Swing3
Swing4
Swing5
Swing6
JazzBallad
Dixieland1
Dixieland2
● Bounce1
Bounce2
Bounce3
Reggae1
Reggae2
Category
SLOW ROCK
TANGO
LATIN1
LATIN2
8 BEAT
16 BEAT
Rhythm Name
● SlowRock1
SlowRock2
SlowRock3
● Tango1
Tango2
Tango3
● ChaCha
Rhumba
Beguine
Mambo
Salsa
● Samba1
Samba2
Samba3
Bossanova1
Bossanova2
Bossanova3
● 8Beat1
8Beat2
8Beat3
8Beat4
8Beat5
DancePop1
DancePop2
DancePop3
DancePop4
● 16Beat1
16Beat2
16Beat3
16Beat4
16Beat5
Funk1
Funk2
Funk3
Category
USER RHYTHM
Rhythm Name
USER1-A
USER1-B
USER1-C
USER1-D
USER2-A
USER2-B
USER2-C
USER2-D
USER3-A
USER3-B
USER3-C
USER3-D
USER4-A
USER4-B
USER4-C
USER4-D
USER5-A
USER5-B
USER5-C
USER5-D
USER6-A
USER6-B
USER6-C
USER6-D
USER7-A
USER7-B
USER7-C
USER7-D
USER8-A
USER8-B
USER8-C
USER8-D
21
3 Keyboard Percussion
The keyboard Percussion function features a total of 43 different drum and
percussion sounds, playable from the keyboards and pedalboard.
1
2
Turn off the Lower and/or Pedal voices by setting each voice’s volume
to MIN.
Turn on the Keyboard Percussion function by pressing the LOWER/1
or PEDAL/2 button in the KEYBOARD PERCUSSION section.
KEYBOARD
PERCUSSION
LOWER
1
4
PEDAL
2
Rhythms
3
Set the volume.
The volume of the percussion sounds is set together with that of the
rhythm volume.
RHYTHM
MAX
SEQ.
1
SEQ.
2
MARCH
WALTZ
SWING
BOUNCE
SLOW
ROCK
1
SEQ.
3
SEQ.
4
TANGO
LATIN
1
LATIN
2
8 BEAT
16 BEAT
2
MIN
4
22
Play some instruments on the Lower keyboard and/or Pedalboard. The
43 percussion sounds have been assigned to the keyboards as shown in
the illustration below.
Preset Keyboard Percussion
Percussion Assignments for the Lower Keyboard (43)
p
la
C
d
an gh
H Hi
o
og ow
L
Ag
o
og
h
Ag
ig
H
k
oc w
o
Bl
L
d
oo ock
W
Bl
1
d
ll
oo
be
W
ow n
C pe
O
le
d
ng se
ia
lo
Tr e C
l
l
ng
ol
ia
R
Tr
m
ru
D rum
e
ar e D
Sn ar
1
Sn
m
ra
To
st
2
he
m
rc
O
To
3
m
To
1
ot
Sh l
h
l
us Ro
Br sh
e
ar Bru
1
Sn e
m
ar
To
Sn
2
h.
m
nt
Sy . To 3
h m
nt
o
Sy T
h.
nt
s
Sy
ve
la
C
4
Rhythms
er
ak igh
Sh a H
c
ui Low
C
ca igh
ui
C oH
ng ow
Bo o L h
ng ig
Bo ga H
w
on o h
C a L Hig
g
on 1
C ale Low
b 1
m
Ti le
ba
m t
Ti ane e al 2
t in b
as r
C bou Cym al 1
m ra mb
Ta est Cy
h
rc ra l 1
O st ba
he m
rc y 1
O h C al
b
s
ra m
C Cy n
e pe
id
R at O ed 1
s
i-h lo im
H tC R t
a m h 1
i-h ru ig
H e D L erb
m
ar ru ev
Sn e D R vy
ar rum ea
Sn e D m H avy
ar ru He
Sn re D m t
a ru gh
Sn e D Li vy
ar um ea
Sn Dr H um
ss um Dr
Ba Dr ss
ss Ba
Ba ert
c
on
C
Percussion Assignments for the Pedalboard (18)
e
ar
Sn
h.
nt
Sy
h.
nt
Sy
h.
nt
Sy
m
To
m
To
m
To
m
To
m
To
m
To
1
2
n
pe
O
vy
ea
H
b
er
ev
R
t
gh
Li
im
R
d
se
lo
C
m
ru
D
m
ru
D
m
ru
D
vy
ea
H
m
ru
D
m
ru
D
1
l1
ba
ym
C
ra
st
he
l1
rc
O
ba
ym
C
sh
ra
l1
C
ba
ym
C
at
i-h
H
3
e
id
R
1
e
ar
Sn
at
i-h
H
2
e
ar
Sn
ss
Ba
e
ar
Sn
e
ar
Sn
3
l
ol
R
1
ot
Sh
h
us
Br
h
us
Br
e
ar
Sn
1
23
About the Rhythm Sequence
Rhythm Sequence is built up with various different rhythm patterns, and
can be programmed by the other Electone such as EL-700 and EL-500.
The EL-200 doesn’t have Rhythm Sequence function, but it can read and
load the rhythm sequence data recorded on the MDR (a floppy disk) to its
four Metronome (SEQ.) buttons in the Rhythm section and play back them,
as follows:
1. Insert the floppy disk containing rhythm sequence data into the
EL-200’s MDR slot. The rhythm sequence data is recorded as a part of
registration data (explained on page 33).
4
Rhythms
2. Select the song number containing the registration data and press PLAY
button on the MDR to load the data. The rhythm sequence data has been
loaded to the Electone, or Metronome (SEQ.) button(s).
3. Press one of the Metronome (SEQ.) buttons. The SEQ button’s lamp
will be lit.
RHYTHM
MAX
SEQ.
1
SEQ.
2
MARCH
WALTZ
SWING
BOUNCE
SLOW
ROCK
1
SEQ.
3
SEQ.
4
TANGO
LATIN
1
LATIN
2
8 BEAT
16 BEAT
2
NOTE:
You can have up to all four rhythm
sequences play back automatically by
pressing the SEQ buttons.
MIN
4. Turn the START button on and play the rhythm sequence(s).
NOTE:
RHYTHM
INTRO.
ENDING
SYNCHRO
START
START
FILL IN
Four types of metronome sounds,
simple metronome, two four, three four
and four four, are assigned to the SEQ 1
– 4 buttons, respectively, as the
defaults. (page 20)
NOTE:
As soon as you load the sequence data
using MDR, the default settings on each
SEQ button, four types of metronome
sounds, will be overwritten, or lost.
Pressing any of the BASIC REGIST
buttons generates a short beep sound
and retrieves the metronome sounds.
24
5 Registration Memory
Registration Memory allows you to store virtually all the settings you make on the panel, providing a convenient
way to instantly change all voice settings and rhythms while you’re playing, with the simple touch of a single
button on the Registration Memory panel. The buttons are conveniently located between the Upper and Lower
keyboards for easy access while playing.
Almost all settings can be memorized.
M.
1
/TO DISK
2
3
4
5
6
7
8
D.
1 Storing Registrations
Newly created registrations you make can be stored to the Registration
Memory panel buttons. All registrations in Registration Memory can also
be saved to floppy disk for future recall.
5
While holding down the M (Memory) button in the Registration
Memory section, press the numbered button to which you wish to save
your registration.
1. While holding down M button..
Registration Memory
1
2
After creating your original registration, decide which numbered button
you wish to store.
2. ...Press desired numbered button.
M.
1
/TO DISK
2
3
4
5
6
7
8
When the registration is stored, the numbered button flashes
momentarily.
D.
NOTE:
Eight memory locations are available; 1
through 8. Additional eight locations, 9
through 16, are accessible when playing
back or using the data created with an
upper model like EL-900/700/500.
2 Selecting Registrations
Simply press the numbered button that corresponds to the registration you
wish to select.
Using the D (Disable) button:
Rhythm and automatic accompaniment patterns also change when you
select different Registration Memory buttons. Pressing the D (Disable)
button allows you to keep the same rhythm and accompaniment patterns
throughout all your registration changes, or make your own rhythm
selections if you want to.
5
6
7
8
D.
25
3 Saving the Registration Data
to Disk
5
1
Insert a formatted disk into the disk slot under the Music Disk Recorder
(M.D.R.). Make certain that the disk is either blank or has data you can
erase. If the disk is new and unformatted, you will have to format it.
Refer to the instructions how to format a disk (page 30).
2
Select a song number on the M.D.R. using the SONG SELECT buttons.
RECORD
Registration Memory
PAUSE
PEDAL CONTROL
FROM
TO
SONG COPY
STOP
See pages 37 and 38 for the details on
saving/recalling registrations to/from the
M.D.R.
PLAY
UPPER LOWER PEDAL CONTROL UPPER LOWER
SONG
REPEAT
NOTE:
PLAY
SHIFT
SONG DEL.
SONG SELECT
RECORD
TEMPO
FORMAT
CUSTOM PLAY
MUSIC DISK RECORDER
There are 40 songs, or memory locations, available on a single disk.
3
While holding down the RECORD button, press the M./TO DISK
(Memory) button on the Registration Memory panel.
RECORD
PLAY
UPPER LOWER PEDAL CONTROL UPPER LOWER
SONG
REPEAT
PAUSE
PEDAL CONTROL
FROM
TO
SONG COPY
STOP
PLAY
SHIFT
SONG DEL.
SONG SELECT
RECORD
TEMPO
FORMAT
CUSTOM PLAY
MUSIC DISK RECORDER
M.
/TO DISK
1
2
3
4
5
6
7
This operation saves all eight registrations in Registration Memory to
one song. The other 39 available songs on the disk can be used for
saving additional batches of 8 registrations.
26
8
D.
4 Registration Shift
The Registration Shift function allows you to change registrations, all the
settings you make on the panel, without taking your hands from the
keyboards. Each press of the Right Footswitch on the Expression pedal
selects the registrations in numerical order.
NOTE:
• Although the number of the Registration
Memory buttons of EL-200 is limited to
eight, from Registration Memory 1
through Registration Memory 8, you can
select the other eight Registration
Memory numbers, the Registration
Memory 9 through Registration Memory
16.
• After the last registration is reached, the
function “wraps around” to select the
first preset again.
Resetting the Electone to the Factory Preset (Power On Reset)
5
All current settings including Registration Memories can be deleted at once
by using the Power On Reset function.
2. While holding the PEDAL/2 button in the
Keyboard Percussion section,
turn the power back to on.
Registration Memory
Be careful when using this operation,
since it erases all your existing data.
Always save your important data to a
floppy disk using M.D.R. (page 28) in
advance.
1. Turn off the power.
KEYBOARD
PERCUSSION
LOWER
POWER
1
PEDAL
2
Restoring the Registrations Before Turning the Power off
Turning the Electone off erases all panel settings you have made. When the
Electone is turned on, Basic Registration 1 is automatically selected.
If you have made panel settings you wish to keep, save them to Registration
Memory before turning the Electone off.
You can, however, restore the panel settings that were made before the
Electone was last turned off.
1. Turn on the power.
2. In doing this, first be careful NOT to press any panel buttons (excepting
those in Basic Registration), then hold down the M (Memory) button in
the Registration Memory section and press D (Disable) button.
M.
/TO DISK
1
2
3
4
5
6
7
8
D.
The Electone restores the registration settings before turned off.
27
6 Music Disk Recorder (M.D.R.)
The Music Disk Recorder (M.D.R.) lets you store the registration data and load back to the Electone as well as
record your performance and play back the data. Moreover, the M.D.R. allows you to execute song copy
operation and play back commercially available XG song data.
1 Precautions on M.D.R.
Follow the important precautions below.
To eject a floppy disk:
Compatible Disk Type
3.5" 2DD and 2HD type floppy disks can be used.
A blank 2HD floppy disk has been included with
your Electone for you to record your performances.
Inserting/Ejecting Floppy Disks
■ To insert a flopp
y disk into the disk ve:
dri
Hold the disk so that the label of the disk is facing
upward and the sliding shutter is facing forward,
towards the disk slot. Carefully insert the disk into the
slot, slowly pushing it all the way in until it clicks into
place and the eject button pops out.
6
Music Disk Recorder
Eject button
NOTE:
When the EL-200 is turned on, the LED below the floppy disk
slot will be lit indicating that the M.D.R. is ready to use.
28
Press the eject button slowly as far as it will go;
the disk will automatically pop out. When the
disk is fully ejected, carefully remove it by
hand.
Never attempt to remove the disk or turn the
power off during recording, reading and
playing back. Doing so can damage the disk
and possibly the disk drive.
If the eject button is pressed too quickly, or if it
is not pressed in as far as it will go, the disk
may not eject properly. The eject button may
become stuck in a half-pressed position with the
disk extending from the drive slot by only a few
millimeters. If this happens, do not attempt to
pull out the partially ejected disk, since using
force in this situation can damage the disk drive
mechanism or the floppy disk.
Floppy disk slot
LED (Lamp in-use)
Be sure to confirm that the lamp of STOP
button on M.D.R. is turned off before ejecting a
floppy disk from the slot. Never eject the floppy
disk before the STOP lamp lights up.
To remove a partially ejected disk, try pressing
the eject button once again, or push the disk
back into the slot and then repeat the eject
procedure.
Be sure to remove the floppy disk from the
disk drive before turning off the power. A
floppy disk left in the drive for extended
periods can easily pick up dust and dirt that
can cause data read and write errors.
Cleaning the Disk Drive Read/Write Head
● The M.D.R. employs precise magnetic head to read
data. The magnetic head will pick up a layer of
magnetic particles from the disks for an extended
period of time. The stained magnetic head will
eventually cause read and write errors.
● To maintain the disk drive in optimum working
order Yamaha recommends that you use a
commercially available dry-type head cleaning disk
to clean the head about once a month.
■ To protect your data (Write-protect
Tab):
To prevent accidental erasure of important data, slide
the disk’s write-protect tab to the “protect” position
(tab open). If you attempt to modify the disk when
the write-protect tab is set to “on” position, “Prot
(Protected)” will appear on the LED display in the
M.D.R. section indicating that the operation is not
possible.
Also please check if the write-protect tab is set to
“off” position when you record data.
Protect Off
(tab closed: unlocked)
NOTE:
Rear side
Ask your Yamaha dealer about the availability of proper headcleaning disk.
Shutter
About the Floppy Disks
■ To handle flopp
y disks with care:
Do not place heavy objects on a disk or bend or
apply pressure to the disk in any way. Always
keep floppy disks in their protective cases when
they are not in use.
Do not open the sliding shutter and touch the
exposed surface of the floppy disk inside.
Do not expose the disk to magnetic fields, such
as those produced by televisions, speakers,
motors, etc., since magnetic fields can partially
or completely erase data on the disk, rendering
it unreadable.
Never use a floppy disk with a deformed shutter
or housing.
Do not attach anything other than the provided
labels to a floppy disk. Also make sure that
labels are attached in the proper location.
Protect On
(tab open: locked)
6
■ Data backup
Yamaha recommends that you keep two copies of
important data on separate floppy disks using Disk
copy function. To make a backup disk use the Disk
Copy function on page 45.
Music Disk Recorder
Do not expose the disk to direct sunlight,
extremely high or low temperatures, or
excessive humidity, dust or liquids.
Write-protect tab
Improved Potentiality of the M.D.R.
The M.D.R. of the EL-200 begins reading all data
as soon as you insert a disk into the floppy disk slot.
Thus, inserting a disk causes to produce a sound
(reading sound) indicating that the M.D.R. is in the
reading process.
You can start playback as soon as you insert the
disk.
NOTE:
Ejecting the disk will lose the data loaded from the disk except
for the currently selected and played back song.
NOTE:
The time reading sound is produced is in proportion to the
amount of data recorded in the disk. You can eject the disk
whenever you are not using the M.D.R. and don’t want to be
bothered with the reading sound.
29
2 Formatting a Disk
Before recording, the disk must first be formatted.
RECORD
1
PLAY
UPPER LOWER PEDAL CONTROL UPPER LOWER
Put the disk, label facing up, into the disk drive (floppy disk
slot).
“Fort” will appear on the LED display indicating that the
inserted disk requires to be formatted.
SONG
REPEAT
PAUSE
PEDAL CONTROL
FROM
TO
SONG COPY
STOP
PLAY
SHIFT
SONG DEL.
SONG SELECT
RECORD
TEMPO
FORMAT
CUSTOM PLAY
MUSIC DISK RECORDER
RECORD
2
PLAY
UPPER LOWER PEDAL CONTROL UPPER LOWER
While holding down the SHIFT button, press the FORMAT
button.
This step puts the format operation on stand-by, indicated by the
dashes on the LED display and the flashing lamp above the
FORMAT button.
SONG
REPEAT
PAUSE
PEDAL CONTROL
FROM
TO
SONG COPY
STOP
PLAY
SHIFT
SONG DEL.
SONG SELECT
RECORD
TEMPO
FORMAT
CUSTOM PLAY
MUSIC DISK RECORDER
RECORD
3
6
PLAY
UPPER LOWER PEDAL CONTROL UPPER LOWER
Press the FORMAT button again to begin formatting.
Formatting is engaged and the LED above the FORMAT button
stays lit.
The number “160” appears on the LED display and counts down
to “001” as the disk is being formatted. When formatting is
completed, operation returns to the original STOP status.
SONG
REPEAT
PAUSE
PEDAL CONTROL
FROM
TO
SONG COPY
STOP
PLAY
SHIFT
SONG DEL.
SONG SELECT
RECORD
TEMPO
FORMAT
CUSTOM PLAY
MUSIC DISK RECORDER
Music Disk Recorder
Formatting a disk erases all the data in the disk and
make it ready to record. The erased data by
formatting will be lost permanently. Check if the
disk contains your important data, or not, before
executing the operation.
About SHIFT Button
You will find the SHIFT button (printed in green) at the top right
side of the M.D.R. section. Some buttons in the M.D.R. section have
dual functions: the first function is printed in white above each
button; the second function is printed in green below each button.
The SHIFT button is used to select the second functions by pressing
each function button while holding down the SHIFT.
30
3 Recording
1) To record a song:
1
Set the desired registrations on the Electone. Make all the
Electone settings necessary for the song you will record. This
means entering the all registrations you will need for the entire
performance in the Registration Memory. Make sure also to
select the registration that you will use at the beginning of the
song.
2
3
Insert the formatted disk in to the disk slot.
NOTE:
The song numbers 01 through 40 are available and
up to 40 songs can be stored on a disk. However,
available song numbers may be reduced depending
on the amount of the song data you have recorded.
See page 46 for the information about the total
amount of memory left on a floppy disk.
RECORD
PLAY
UPPER LOWER PEDAL CONTROL UPPER LOWER
Use the SONG SELECT (G, H) buttons to select the song
number for recording.
SONG
REPEAT
PAUSE
PEDAL CONTROL
FROM
TO
SONG COPY
STOP
PLAY
SHIFT
SONG DEL.
SONG SELECT
RECORD
TEMPO
FORMAT
CUSTOM PLAY
MUSIC DISK RECORDER
RECORD
SONG
REPEAT
PAUSE
PEDAL CONTROL
FROM
TO
SONG COPY
STOP
PLAY
SHIFT
SONG DEL.
SONG SELECT
RECORD
TEMPO
FORMAT
Music Disk Recorder
4
Press the RECORD button.
The RECORD lamp lights up and the PLAY and CUSTOM
PLAY lamps begins blinking, indicating that the Music Disk
Recorder is ready to record.
6
PLAY
UPPER LOWER PEDAL CONTROL UPPER LOWER
CUSTOM PLAY
MUSIC DISK RECORDER
NOTE:
If the selected song number already contains
recorded data, small bars (“--”) appear at the left
part of LED display and flash along with the song
number, warning you that the selected song number
already contains recorded data. If you want to
execute recording operation over the song number,
press the RECORD button again. If you don’t want,
select another song number for recording or press
the STOP button to cancel recording.
RECORD
5
PLAY
UPPER LOWER PEDAL CONTROL UPPER LOWER
Press the PLAY button.
The PLAY lamp lights up and small bars flash across the LED
display from left to right. This indicates M.D.R. is reading the
registrations and other settings.
SONG
REPEAT
PAUSE
PEDAL CONTROL
FROM
TO
SONG COPY
STOP
PLAY
SHIFT
SONG DEL.
SONG SELECT
RECORD
TEMPO
FORMAT
CUSTOM PLAY
MUSIC DISK RECORDER
31
RECORD
6
PLAY
UPPER LOWER PEDAL CONTROL UPPER LOWER
After numbers appear on the LED display of the M.D.R., begin
playing.
Once the setup operation in step #5 is complete, a number will
appear on the LED display indicating that you can begin
recording your performance. The number also indicates the
amount of memory left on the disk.
SONG
REPEAT
PAUSE
PEDAL CONTROL
FROM
TO
SONG COPY
STOP
PLAY
SHIFT
SONG DEL.
SONG SELECT
RECORD
TEMPO
FORMAT
CUSTOM PLAY
MUSIC DISK RECORDER
NOTE:
The short time it takes to set up for recording is
recorded as well, causing a short pause before
playback of the song.
If you make a mistake during recording:
RECORD
PLAY
UPPER LOWER PEDAL CONTROL UPPER LOWER
1. Press the PLAY button while the M.D.R. is still running.
This stops the recording and returns you to the starting point of
the song.
The letters “rE” (retry) appear on the left side of the LED display
and the PLAY and CUSTOM PLAY LEDs start flashing,
indicating that you can re-record the song.
SONG
REPEAT
PEDAL CONTROL
FROM
TO
SONG COPY
PAUSE
STOP
PLAY
SHIFT
SONG DEL.
SONG SELECT
RECORD
TEMPO
FORMAT
CUSTOM PLAY
MUSIC DISK RECORDER
2. Press PLAY again to begin re-recording the song.
Re-recording starts from the beginning of the song and replaces
the previously recorded performance with the newly recorded
performance.
6
Music Disk Recorder
RECORD
7
PLAY
UPPER LOWER PEDAL CONTROL UPPER LOWER
When you finish playing, press the STOP button.
After the small bars flash to draw a square on the LED to
indicate the processing for stop, the STOP lamp lights up,
indicating the recording process is finished.
SONG
REPEAT
PAUSE
PEDAL CONTROL
FROM
TO
SONG COPY
STOP
PLAY
SHIFT
SONG DEL.
SONG SELECT
RECORD
TEMPO
FORMAT
CUSTOM PLAY
MUSIC DISK RECORDER
Indicates the M.D.R. is in the stop process.
Never eject the floppy disk before the STOP lamp
lights up.
NOTE:
When the available memory reaches “008” or less,
the numbers begin flashing to warn you. If this
happens, stop recording before the display reaches
“000.”
8
32
To hear your newly recorded performance, press the PLAY
button.
Play back will begin after a couple of seconds. For more
information on playback and other playback-related functions,
see page 39.
Never attempt to press the eject button or turn
the power off during recording, reading and
playing back. Doing so can damage the disk
and possibly the disk drive. Be sure to remove
the floppy disk from the disk drive before
turning off the power.
Outline of M.D.R. Operation
Though the M.D.R. is as easy to operate as a cassette tape recorder, it is far move versatile. Since it records all
Electone settings and control movements as well as the notes you play as digital data, it allows you much more
flexibility and control than even the most sophisticated tape recorder. Basically, the M.D.R. independently records
the following three types of data:
Registration data (including Bulk data)
All registrations stored to the Registration Memory numbered buttons as well as the registration currently set to
the panel, are recorded at the beginning of a song, before the actual recording of your performance.
Performance data
The M.D.R. records your performance on the keyboards and pedalboard of the Electone exactly as you play it,
even recording the strength at which you play the keys and how hard you press them down while playing. The
various types of performance data – Upper, Lower, Pedal, Lead and Keyboard Percussion – are recorded to
independent “tracks,” so that you can change any one of them without affecting the others.
Control data
All changes you make on the Electone during your performance are recorded in real time. These include
registration changes, the use of the expression pedals, footswitches and knee lever.
6
Music Disk Recorder
33
2) To record each part separately:
You can also record the parts of your performance independently; for
example, first recording the chords and bass to the song (using the Lower
and Pedalboard), and after that recording the melody (using the Upper
Keyboard). This function also lets you record the lead voice, keyboard
percussion and performance control data, such as registration changes
and expression pedal operation, separately from the other parts of the
song.
1
Set up the M.D.R. for recording, as you did in the section above.
The first steps in recording parts separately are the same as for
normal recording on page 31:
1. Memorize all the registrations needed for your performance
to the Registration Memory numbered buttons, and set the
registration that will be used at the beginning of the song.
2. Insert a formatted disk.
3. Select the song number to which you will record your
performance.
4. Press the RECORD button to make the Music Disk Recorder
ready to record.
6
RECORD
Music Disk Recorder
2
Select the parts for recording.
Pressing the RECORD button in the procedure 1-4. above turns
on the all parts’ LEDs in the upper left row indicating that each
part is ready to record.
Press the RECORD buttons for each part in the upper left row to
turn off the parts you don’t want to record. For this example,
press RECORD/UPPER, the PLAY/UPPER lamp in the upper
right row lights up.
■ RECORD/UPPER
Records the performance data of the Upper keyboard when
turned on. Recording is cancelled when turned off.
■ RECORD/LOWER
Records the performance data of the Lower keyboard when
turned on. Recording is cancelled when turned off.
■ RECORD/PEDAL
Records the performance data of the Pedalboard when turned
on. Recording is cancelled when turned off.
■ RECORD/CONTROL
Records the control data when turned on. Recording is
cancelled when turned off.
(see Outline of M.D.R. Operation on the previous page.)
This example operation disables recording of the Upper part.
34
PLAY
UPPER LOWER PEDAL CONTROL UPPER LOWER
SONG
REPEAT
PAUSE
PEDAL CONTROL
FROM
TO
SONG COPY
STOP
PLAY
MUSIC DISK RECORDER
SHIFT
SONG DEL.
SONG SELECT
RECORD
TEMPO
FORMAT
CUSTOM PLAY
Separate recording for Lead Voice and/or Keyboard Percussion parts:
RECORD
The Lead voice and the Keyboard Percussion can be recorded/played
back separately although they are not shown on the M.D.R. panel.
SHIFT
(LEAD)
Separate recording for Lead
Voice and/or eyboard
K
Percussion parts:
Hold down the SHIFT button and simultaneously press the
appropriate button in the top row in the procedure #2 above. The two
buttons (indicated in the illustration at the right) function as Lead
Voice and Keyboard Percussion selectors in the record mode.
■ RECORD/LEAD
Records the performance data of the Lead voice when turned on.
Recording is cancelled when turned off.
■ RECORD/K.PERC
Records the performance data of the Keyboard Percussion when
turned on. Recording is cancelled when turned off. Keyboard
percussion can be recorded/played back independently from
rhythm section.
(K.PERC.)
(LEAD)
PAUSE
REM.MEM.
NOTE:
If you don’t record the Lead Voice and Keyboard
Percussion parts separately, the Lead part will be
recorded as the Upper data and the Keyboard
Percussion part will be recorded as the Lower/
Pedal data.
6
Press the PLAY button, and start playing after numbers appear
in the display. For this example, play the lower keyboard and
pedalboard.
Press the STOP button when you are finished with your
performance to stop recording.
Now that you’ve recorded the first parts of your performance.
Press the RECORD button to set up recording of the next part,
Upper part in this case.
RECORD
5
PLAY
UPPER LOWER PEDAL CONTROL UPPER LOWER
Press the RECORD button.
In this case, the song (number) contains the performance data of
the Lower and Pedal in addition to the registration and setup
data. The small bars (“--”) appear at the left part of LED display
and flash along with the song number, warning you that the
selected song number already contains recorded data.
SONG
REPEAT
PAUSE
STOP
PLAY
SHIFT
SONG DEL.
SONG SELECT
RECORD
TEMPO
FORMAT
CUSTOM PLAY
MUSIC DISK RECORDER
PLAY
UPPER LOWER PEDAL CONTROL UPPER LOWER
Press the RECORD button again to record another part (Upper
part).
The RECORD lamp lights up and the PLAY and CUSTOM
PLAY lamps begins blinking, indicating that the Music Disk
Recorder is ready to record.
PEDAL CONTROL
FROM
TO
SONG COPY
RECORD
6
(K.PERC.)
Music Disk Recorder
3
4
PLAY
SONG
REPEAT
PAUSE
PEDAL CONTROL
FROM
TO
SONG COPY
STOP
PLAY
SHIFT
SONG DEL.
SONG SELECT
RECORD
TEMPO
FORMAT
CUSTOM PLAY
MUSIC DISK RECORDER
RECORD
7
PLAY
UPPER LOWER PEDAL CONTROL UPPER LOWER
Press the RECORD buttons for each part in the upper left row to
turn off the parts you have already recorded.
In this case, press RECORD/LOWER, RECORD/PEDAL and
RECORD/CONTROL to turn them off.
SONG
REPEAT
PAUSE
PEDAL CONTROL
FROM
TO
SONG COPY
STOP
PLAY
SHIFT
SONG DEL.
SONG SELECT
RECORD
TEMPO
FORMAT
CUSTOM PLAY
MUSIC DISK RECORDER
35
RECORD
8
PLAY
UPPER LOWER PEDAL CONTROL UPPER LOWER
Press the CUSTOM PLAY button to start recording of the new
part or parts (Upper part).
Playback of the previously recorded parts starts immediately.
The CUSTOM PLAY button is used here to record only the
parts that have been selected for recording, and play back only
those parts that have been selected for playback. While you
listen to the parts being played back, start playing the melody on
the Upper keyboard.
Since registration data has already been recorded with the first
parts of the song, recording begins immediately.
When the end of the recorded performance is reached, playback
is automatically stopped and the STOP status is resumed.
SONG
REPEAT
PAUSE
PEDAL CONTROL
FROM
TO
SONG COPY
STOP
PLAY
SHIFT
SONG DEL.
SONG SELECT
RECORD
TEMPO
FORMAT
CUSTOM PLAY
MUSIC DISK RECORDER
NOTE:
The CUSTOM PLAY button is used to record or
play back the parts and data other than the
registration data.
NOTE:
The length of a subsequently recorded part cannot
exceed the length of the previously recorded parts.
If you want to change the song length, first delete
the existing song (see Song Delete on page 45) and
record again.
Punch-in Recording
6
You can retry to change a specific measure(s)/part(s) which you
don’t want to use.
Music Disk Recorder
1. Press the PLAY button to start playback of the song containing
the part you want to change.
2. Press the PAUSE button at the point you want to execute punchin recording. The current song is stopped momentarily.
3. Press the RECORD button. The PLAY and CUSTOM PLAY
lamps begins blinking, indicating that the Music Disk Recorder is
ready to record.
4. Press the RECORD buttons for each part in the upper left row to
turn off the parts you want to keep as they are. (Only the part you
want to do punch-in recording should be turned on.)
5. Press the PLAY button to start punch-in recording. Play the
specified range you want to change.
6. Press the STOP button to quit the Punch-in recording function as
soon as you reach the end of the range.
36
4 Recording Registrations
(and Bulk Data)
You can also record registrations by themselves, without recording a
performance. Bulk data, including Registration Memory and
Registration Shift settings, Rhythm Pattern (User rhythms) Rhythm
Sequence data, and User voices, are also saved in the operation.
There are two ways to record the registrations and bulk data:
[1]
1
2
3
On the Electone, set the registrations and all other data you want
to record.
Select the song number to which you wish to record the
registrations.
RECORD
PLAY
UPPER LOWER PEDAL CONTROL UPPER LOWER
While holding down the RECORD button, press the M./TO
DISK (Memory) button on the Registration Memory panel.
Small bars flash across the LED display from left to right,
indicating that the M.D.R. is reading the registrations and other
settings. After recording, the M.D.R. is automatically stopped
and returns to STOP status.
SONG
REPEAT
PAUSE
PEDAL CONTROL
FROM
TO
SONG COPY
STOP
PLAY
SHIFT
SONG DEL.
SONG SELECT
RECORD
TEMPO
FORMAT
CUSTOM PLAY
6
MUSIC DISK RECORDER
1. While holding down the RECORD button...
Music Disk Recorder
2. Press the M./TO DISK (Memory) button.
M.
1
/TO DISK
[2]
1
2
Set up the registrations and select the song number as you did in
steps #1 and #2 above.
RECORD
PLAY
UPPER LOWER PEDAL CONTROL UPPER LOWER
PEDAL CONTROL
SHIFT
Press the RECORD button to make the M.D.R. ready to record.
SONG
REPEAT
PAUSE
FROM
TO
SONG COPY
STOP
PLAY
SONG DEL.
SONG SELECT
RECORD
TEMPO
FORMAT
CUSTOM PLAY
MUSIC DISK RECORDER
RECORD
3
PLAY
UPPER LOWER PEDAL CONTROL UPPER LOWER
Press the PLAY button to record the registrations, then press the
STOP button as soon as you see the small bars flash across the
LED display from left to right.
This is the same procedure as the one when you start recording.
The small bars that flash across the display indicate that the
M.D.R. is recording the registrations and being set up for normal
recording; pressing the STOP button interrupts this process.
SONG
REPEAT
PAUSE
PEDAL CONTROL
FROM
TO
SONG COPY
STOP
PLAY
SHIFT
SONG DEL.
SONG SELECT
RECORD
TEMPO
FORMAT
CUSTOM PLAY
MUSIC DISK RECORDER
37
5 Recalling Recorded
Registrations (and Bulk Data)
The registrations (and bulk data) recorded to song numbers in the
above operation can be loaded back to the Electone by simply
selecting the appropriate song number and pressing the PLAY
button. When the operation has been completed, the M.D.R. returns
to STOP status.
1
2
Insert the disk and select the song number you want to load back
to the Eelectone.
Press the PLAY button.
Using More Than 8 Registrations
The M.D.R. makes it possible to use more than 8 registrations (8
Registration Memory locations) in a performance. A disk can
accommodate 40 song numbers and each song number can contain 8
registrations.
6
Music Disk Recorder
To play a performance using more than 8 different registrations:
1. First record the registrations you need into several song numbers
on the M.D.R. before the performance. (You should also try to
record them in the order that you’ll use them, if possible.)
2. During the performance, after all 8 registrations from a certain
song number have been used, select the next song number and
press the PLAY button on the M.D.R. This replaces all 8
registrations in Registration Memory with the new ones from the
selected song number.
3. By repeating the above steps, you can run through an entire
performance without having to change the panel settings.
6 Replacing Registrations
The M.D.R. also lets you change the registrations of an existing song
without changing the performance data. The procedure is the same
as that of Recording Registrations mentioned in the previous page.
38
7 Playback
You can play back your recorded performance by simply pressing
the PLAY button. Registrations and other data will be recalled to the
Electone.
NOTE:
You can play back the commercially available XG
song (SMF format 0 or 1).
If the disk contains normal Electone song data and
XG data, it accommodates each data in the two
different locations separately. If you insert the disk
containing those two types data, you can access the
location of normal Electone song data as the
default.
However, you can exchange the location and access
the XG data. In doing this, press the STOP button
while holding down the SHIFT button.
Each press of the STOP button while holding down
the SHIFT button alternately selects Electone song
data and XG data.
In the case of
Electone song data
In the case of
XG data
STOP
SHIFT
Underline indicates
the LED shows XG
song number.
NOTE:
Although EL-200 itself doesn’t have the detailed
Registration Shift settings and sequence programming functions, you can load those data in EL-200
and use them using M.D.R. (See page 47 for more
information).
6
Music Disk Recorder
1) To play back a song:
RECORD
1
PLAY
UPPER LOWER PEDAL CONTROL UPPER LOWER
Select the number of the song you want to play back by using
the SONG SELECT buttons.
SONG
REPEAT
PAUSE
PEDAL CONTROL
FROM
TO
SONG COPY
STOP
PLAY
SHIFT
SONG DEL.
SONG SELECT
RECORD
TEMPO
FORMAT
CUSTOM PLAY
MUSIC DISK RECORDER
RECORD
2
PLAY
UPPER LOWER PEDAL CONTROL UPPER LOWER
Press the PLAY button.
The PLAY lamp lights up and small bars move across the
display, indicating that the M.D.R. is resetting registrations on
the Electone.
SONG
REPEAT
PAUSE
PEDAL CONTROL
FROM
TO
SONG COPY
STOP
PLAY
SHIFT
SONG DEL.
SONG SELECT
RECORD
TEMPO
FORMAT
CUSTOM PLAY
MUSIC DISK RECORDER
RECORD
3
PLAY
UPPER LOWER PEDAL CONTROL UPPER LOWER
Playback starts automatically after reading the song data. The
elapsed time will be displayed on the LED.
Playback automatically stops at the end of a song. You can,
however, stop playback in the middle of a song by pressing the
STOP button.
SONG
REPEAT
PAUSE
PEDAL CONTROL
FROM
TO
SONG COPY
STOP
PLAY
SHIFT
SONG DEL.
SONG SELECT
RECORD
TEMPO
FORMAT
CUSTOM PLAY
MUSIC DISK RECORDER
39
If you have recorded the Lead Voice/Keyboard Percussion part separately:
On the EL-200 the Lead/Keyboard Percussion part(s) you have
recorded separately will automatically set to on when you start
playback.
NOTE:
When you play back the data made with other
Electone models such as EL-90/87 and which
includes the separately recorded Lead/Keyboard
Percussion part(s), Lead part will be off and
Keyboard Percussion will be on as the defaults.
(To turn on the Lead part, press UPPER/PLAY
while holding down the SHIFT.)
2) To play back the selected part(s):
You can also play back the selected parts of your recorded performance,
while other parts are temporarily turned off. This function is especially
useful for playing a single part, such as the melody, over previously
recorded accompaniment parts.
1
2
6
Select the number of the song to be played back.
RECORD
PLAY
UPPER LOWER PEDAL CONTROL UPPER LOWER
Music Disk Recorder
Set the parts you wish to mute to off, by pressing the appropriate
PLAY button in the upper right row. The LED of the selected
part should be off.
Make sure to turn on the parts you wish to play back.
3
Press the PLAY button.
First the registration and other data are read, then playback of
the performance starts (excepting the parts that were turned off
in step #2).
4
Now perform your new part or parts over the playback parts.
When the end of the recorded performance is reached, playback
is automatically stopped and the STOP status is resumed.
SONG
REPEAT
PAUSE
PEDAL CONTROL
FROM
TO
SONG COPY
STOP
PLAY
SHIFT
SONG DEL.
SONG SELECT
RECORD
TEMPO
FORMAT
CUSTOM PLAY
MUSIC DISK RECORDER
3) To repeat playback of a song or songs:
This feature allows you to repeatedly play back either all songs on a disk
or only one specific song.
RECORD
PLAY
UPPER LOWER PEDAL CONTROL UPPER LOWER
1
Select the number of the song to be played back.
If you wish to play back all songs on a disk, select the first song
that will be played back. The others will follow in order.
SONG
REPEAT
PAUSE
PEDAL CONTROL
FROM
TO
SONG COPY
STOP
PLAY
SHIFT
SONG DEL.
SONG SELECT
RECORD
TEMPO
FORMAT
CUSTOM PLAY
MUSIC DISK RECORDER
RECORD
2
PLAY
UPPER LOWER PEDAL CONTROL UPPER LOWER
While holding down the SHIFT button, press the SONG
REPEAT button.
The lamps above SHIFT and SONG REPEAT light up, and
“ALL” appears on the LED display.
SONG
REPEAT
PAUSE
FROM
TO
SONG COPY
STOP
PLAY
MUSIC DISK RECORDER
40
PEDAL CONTROL
SHIFT
SONG DEL.
SONG SELECT
RECORD
TEMPO
FORMAT
CUSTOM PLAY
3
To repeatedly playback all songs starting with the
selected song:
Press the PLAY button.
Playback will begin from the song selected and repeat
indefinitely.
To repeatedly play back only the selected song:
1. While holding down the SHIFT button, press the SONG
REPEAT button again.
“SinG” appears on the LED display to indicate that a single
song will be repeatedly played back.
RECORD
PLAY
UPPER LOWER PEDAL CONTROL UPPER LOWER
SONG
REPEAT
PAUSE
PEDAL CONTROL
FROM
TO
SONG COPY
STOP
PLAY
SHIFT
SONG DEL.
SONG SELECT
RECORD
TEMPO
FORMAT
CUSTOM PLAY
MUSIC DISK RECORDER
RECORD
PLAY
UPPER LOWER PEDAL CONTROL UPPER LOWER
2. Press the PLAY button.
Playback of the selected song will begin and repeat
indefinitely.
SONG
REPEAT
PAUSE
PEDAL CONTROL
FROM
TO
SONG COPY
STOP
PLAY
SHIFT
SONG DEL.
SONG SELECT
RECORD
TEMPO
FORMAT
CUSTOM PLAY
To stop repeated playback, press the STOP button.
MUSIC DISK RECORDER
6
8 Other Functions
RECORD
PLAY
UPPER LOWER PEDAL CONTROL UPPER LOWER
If you want to play back the song without resetting the registrations and
other data, press the CUSTOM PLAY button.
This displays the song time and starts playback immediately.
SONG
REPEAT
PAUSE
PEDAL CONTROL
FROM
TO
SONG COPY
STOP
Music Disk Recorder
1) Custom Play
PLAY
SHIFT
SONG DEL.
SONG SELECT
RECORD
TEMPO
FORMAT
CUSTOM PLAY
MUSIC DISK RECORDER
NOTE:
If you hold down the SHIFT and press CUSTOM
PLAY or if you execute the following Read and
Auto Increment function, all data, except for that of
User rhythms, Rhythm Sequences, User voices and
Keyboard Percussion assignments, will be loaded
and played back. It is handy when you want to call
up the registrations only.
2) Read and Auto Increment
RECORD
PLAY
UPPER LOWER PEDAL CONTROL UPPER LOWER
There is another method for calling up only registration data, besides that
mentioned in the “NOTE” above.
Pressing the UPPER button in the RECORD section while M.D.R. is in
the stop status calls up the registration data and automatically select the
next song number.
This method is more convenient than the one mentioned above since the
M.D.R. automatically selects the next song number.
SONG
REPEAT
PAUSE
PEDAL CONTROL
FROM
TO
SONG COPY
STOP
PLAY
SHIFT
SONG DEL.
SONG SELECT
RECORD
TEMPO
FORMAT
CUSTOM PLAY
MUSIC DISK RECORDER
NOTE:
This function is not possible if the next song
contains no registration data.
41
3) Pause
RECORD
PLAY
UPPER LOWER PEDAL CONTROL UPPER LOWER
If you want to temporarily stop playback of the song or songs, press the
PAUSE button.
To resume playback from the point at which the song was paused, press
the PAUSE button again.
SONG
REPEAT
PAUSE
PEDAL CONTROL
FROM
TO
SONG COPY
STOP
PLAY
SHIFT
SONG DEL.
SONG SELECT
RECORD
TEMPO
FORMAT
CUSTOM PLAY
MUSIC DISK RECORDER
4) Fast Forward and Fast Reverse
During playback, these buttons function as fast forward and fast reverse
buttons, much like those of a tape recorder.
Press SONG SELECT H button to advance to a later point in the song
or press SONG SELECT G button to return to an earlier position.
While either of these buttons is held down, playback stops and the song
time is advanced or reversed accordingly.
Even when the button is released, playback is paused. To resume
playback from the point you’ve advanced or reversed to, press the PLAY
button.
NOTE:
It may take some time to search the point at which
you want to resume playback when you return to an
earlier position using the fast reverse function.
NOTE:
Fast Forward and Fast Reverse operate at five
times the normal playback speed.
5) Changing the Tempo
6
RECORD
PLAY
UPPER LOWER PEDAL CONTROL UPPER LOWER
PEDAL CONTROL
SHIFT
You can change the tempo of the song as the song is playing back.
Music Disk Recorder
While holding down the SHIFT button, press the TEMPO - or TEMPO +
button.
Each press of the button slows down or speeds up the tempo by a small
amount (not affecting the pitch).
Pressing TEMPO + causes the song faster and TEMPO – slower.
(The Tempo dial on the Electone panel cannot be used to change the
tempo on the Music Disk Recorder.)
To restore the original recording tempo of a song, hold down the SHIFT
button and simultaneously press both TEMPO buttons.
SONG
REPEAT
PAUSE
FROM
TO
SONG COPY
STOP
PLAY
SONG DEL.
SONG SELECT
RECORD
TEMPO
FORMAT
CUSTOM PLAY
MUSIC DISK RECORDER
NOTE:
When tempo is changed, the LED display indicates
the change as a percentage of the original recorded
tempo (100). Values less than 100 indicate a slower
tempo; values greater than 100 indicate a faster
tempo.
RECORD
PLAY
UPPER LOWER PEDAL CONTROL UPPER LOWER
PEDAL CONTROL
SHIFT
Indicates faster tempo
SONG
REPEAT
PAUSE
FROM
TO
SONG COPY
STOP
PLAY
SONG DEL.
SONG SELECT
RECORD
TEMPO
FORMAT
CUSTOM PLAY
Indicates original tempo
MUSIC DISK RECORDER
Indicates slower tempo
NOTE:
Tempo change remains in effect even when you
change songs. If you have changed the tempo in
one song, you should perform above step to restore
the original tempo before playing another song.
Turning the power switch off and on again also
restores the original tempo.
42
6) Song Copy
This function lets you copy the data recorded at one song number to
another song number. You can copy and exchange the data even between
two different disks.
To use the Song Cop
y function within a disk:
Select the song number to be copied (source) with the SONG
SELECT buttons.
1
2
NOTE:
This function is available with the Electone data
only, not with the XG data.
RECORD
SONG
REPEAT
PAUSE
While holding down the SHIFT button, press the SONG COPY
FROM button.
The song number to be copied from appears at the left of the
LED display.
PLAY
UPPER LOWER PEDAL CONTROL UPPER LOWER
PEDAL CONTROL
FROM
TO
SONG COPY
STOP
PLAY
SHIFT
SONG DEL.
SONG SELECT
RECORD
TEMPO
FORMAT
CUSTOM PLAY
MUSIC DISK RECORDER
NOTE:
If the specified song number has no recorded data,
the M.D.R. automatically searches for and selects
the next song that contains recorded data.
RECORD
3
PLAY
UPPER LOWER PEDAL CONTROL UPPER LOWER
SONG
REPEAT
PAUSE
PEDAL CONTROL
FROM
TO
SONG COPY
STOP
PLAY
SHIFT
SONG DEL.
SONG SELECT
RECORD
TEMPO
FORMAT
6
CUSTOM PLAY
MUSIC DISK RECORDER
Music Disk Recorder
Next, designate the destination song number. While holding
down the SHIFT button, press the SONG COPY TO button.
The M.D.R. automatically searches for an empty song number to
copy the data to, and displays that number at the right side of the
display. The RECORD lamp will start flashing indicating that
the M.D.R. is ready to copy. If all songs numbers contain
recorded data, “FULL” appears on the LED display. In this case,
you should erase one of the songs on the disk by using the Song
Delete function. (Refer to the Song Delete function, see page
45.)
NOTE:
The message “FULL” may appear when the
available memory is short.
NOTE:
If you want to abort the operation, press STOP
button.
4
Use the SONG SELECT buttons to select a destination song
number for copying. Follow this step if you wish to select a
different destination song number than the one displayed.
The M.D.R. will display only those song numbers that have no
data.
5
Press the RECORD button to execute the Song Copy function.
The RECORD lamp stops flashing and remains lit, indicating
that the Song Copy function is in process. The LED display
shows the “size” of the song in numbers, and counts down as the
data is being copied. When the display shows “000,” the song
has been completely copied.
RECORD
PLAY
UPPER LOWER PEDAL CONTROL UPPER LOWER
SONG
REPEAT
PAUSE
PEDAL CONTROL
FROM
TO
SONG COPY
STOP
PLAY
SHIFT
SONG DEL.
SONG SELECT
RECORD
TEMPO
FORMAT
CUSTOM PLAY
MUSIC DISK RECORDER
43
To use the Song Cop
y function between otwdifferent disks:
Insert the source disk that contains the song you want to copy
from.
1
2
RECORD
PLAY
UPPER LOWER PEDAL CONTROL UPPER LOWER
While holding down the SHIFT button, press the SONG COPY
FROM button.
The song number to be copied from appears at the left of the
LED display.
SONG
REPEAT
PAUSE
PEDAL CONTROL
FROM
TO
SONG COPY
STOP
PLAY
SHIFT
SONG DEL.
SONG SELECT
RECORD
TEMPO
FORMAT
CUSTOM PLAY
MUSIC DISK RECORDER
3
Use the SONG SELECT buttons to select a destination song
number for copying.
RECORD
4
6
PLAY
UPPER LOWER PEDAL CONTROL UPPER LOWER
Press the RECORD button.
The RECORD lamp lights up and the LED continues to indicate
“00.--” as shown at the right.
The RECORD lamp remains lit.
SONG
REPEAT
PAUSE
PEDAL CONTROL
FROM
TO
SONG COPY
STOP
PLAY
SHIFT
SONG DEL.
SONG SELECT
RECORD
TEMPO
FORMAT
CUSTOM PLAY
MUSIC DISK RECORDER
Music Disk Recorder
5
Press the Eject button to take out the source disk.
6
7
Insert the destination disk to which you want to copy.
NOTE:
The RECORD lamp remains lit. Although ejecting
the disk while the RECORD lamp is lit is prohibited, you are allowed to eject the disk in this case.
RECORD
PLAY
UPPER LOWER PEDAL CONTROL UPPER LOWER
While holding down the SHIFT button, press the SONG COPY
TO button.
The song number to be copied to appears at the right side of the
LED display. The M.D.R. automatically searches for an empty
song number to copy the data to.
SONG
REPEAT
PAUSE
FROM
TO
SONG COPY
STOP
PLAY
MUSIC DISK RECORDER
8
9
44
Use the SONG SELECT buttons to select a destination song
number for copying.
Press the RECORD button.
The LED display shows the “size” of the song in numbers, and
counts down as the data is being copied. When the display
shows “0000,” the song has been completely copied.
PEDAL CONTROL
SHIFT
SONG DEL.
SONG SELECT
RECORD
TEMPO
FORMAT
CUSTOM PLAY
7) Song Delete
You can delete a song on disk by performing this function.
1
2
Use the SONG SELECT buttons to select the number of the
song you wish to delete.
RECORD
While holding down the SHIFT button, press the SONG DEL.
button.
The letters “dL” appear on the left side of the LED display, next
to the selected song number. RECORD lamp flashes to indicate
that the M.D.R. is ready to delete the song.
If you wish to, you can still select a different song number in
this step by using the SONG SELECT buttons.
PLAY
UPPER LOWER PEDAL CONTROL UPPER LOWER
SONG
REPEAT
PAUSE
PEDAL CONTROL
FROM
TO
SONG COPY
STOP
PLAY
SHIFT
SONG DEL.
SONG SELECT
RECORD
TEMPO
FORMAT
CUSTOM PLAY
MUSIC DISK RECORDER
NOTE:
If you want to abort the operation, press STOP
button.
3
Press the RECORD button to execute the Song Delete function.
The RECORD lamp stops flashing and remains lit, indicating
that the Song Delete function has begun. When the Song Delete
function is completed, the STOP status is automatically
resumed.
6
Music Disk Recorder
8) Disk Copy
You can duplicate a floppy disk by copying the contents. Yamaha
recommends that you keep two copies of important data on separate
floppy disks using Disk copy function.
1
Prepare the source disk and the formatted blank disk to be
copied.
The disk type of both source disk and destination
disk must be the same. For example, use 2HD for
the disk to be copied (destination) if the source disk
is 2HD type.
Be sure to set the Write-protect tab (page 29) on
the source disk to ON. The message “Prot” may
appear if you insert the source disk with the Writeprotect tab “off.” On the contrary, set the Writeprotect tab on the destination disk to off. The
message “Prot” may appear if you insert the
destination disk with the Write-protect tab “on.”
In this case, the Disk Copy function cannot be
executed.
RECORD
2
PLAY
UPPER LOWER PEDAL CONTROL UPPER LOWER
While holding down the SHIFT button, press the LOWER
button in the Record section.
“In 1” appears on the LED display to indicate that the M.D.R. is
ready to execute the Disk Copy.
SONG
REPEAT
PAUSE
PEDAL CONTROL
FROM
TO
SONG COPY
STOP
PLAY
SHIFT
SONG DEL.
SONG SELECT
RECORD
TEMPO
FORMAT
CUSTOM PLAY
MUSIC DISK RECORDER
45
RECORD
3
PLAY
UPPER LOWER PEDAL CONTROL UPPER LOWER
Insert the source disk into the disk slot.
The M.D.R. starts reading the data in the source disk.
“out 1” appears on the LED display.
SONG
REPEAT
PAUSE
PEDAL CONTROL
FROM
TO
SONG COPY
STOP
PLAY
SHIFT
SONG DEL.
SONG SELECT
RECORD
TEMPO
FORMAT
CUSTOM PLAY
MUSIC DISK RECORDER
RECORD
4
PLAY
UPPER LOWER PEDAL CONTROL UPPER LOWER
Press the eject button to take out the source disk.
“In 2” appears on the LED display to urge you to insert the
destination disk.
SONG
REPEAT
PAUSE
PEDAL CONTROL
FROM
TO
SONG COPY
STOP
PLAY
SHIFT
SONG DEL.
SONG SELECT
RECORD
TEMPO
FORMAT
CUSTOM PLAY
MUSIC DISK RECORDER
RECORD
5
PLAY
UPPER LOWER PEDAL CONTROL UPPER LOWER
Insert the destination disk.
The number “160” appears on the LED display and counting
down is initiated as the disk is being copied.
SONG
REPEAT
PAUSE
When finished, “End” will appear on the LCD display for few
seconds.
FROM
TO
SONG COPY
STOP
PLAY
SHIFT
SONG DEL.
SONG SELECT
RECORD
TEMPO
FORMAT
CUSTOM PLAY
MUSIC DISK RECORDER
RECORD
6
PEDAL CONTROL
PLAY
UPPER LOWER PEDAL CONTROL UPPER LOWER
SONG
REPEAT
Music Disk Recorder
PAUSE
PEDAL CONTROL
FROM
TO
SONG COPY
STOP
PLAY
SHIFT
SONG DEL.
SONG SELECT
RECORD
TEMPO
FORMAT
CUSTOM PLAY
MUSIC DISK RECORDER
NOTE:
“Fort” or “bAd” may appear if an error occurs in
the middle of the operation. If this happens, please
retry formatting the destination disk and copying
disk.
Follow the M.D.R. direction to eject/insert the
disks during the operation. Do not eject/insert the
disks frivolously ignoring the M.D.R. direction.
Doing so can damage the disk and possibly the disk
drive.
9) Checking the Remaining Memory
RECORD
PLAY
SHIFT
You can check the amount of memory available for additional recording
in a disk by pressing PAUSE button while holding down SHIFT button.
The amount of available memory will be displayed on the LED.
The maximum amount of memory is ca.700 for 2DD disks and ca.1400
for 2HD disks.
(LEAD)
PAUSE
REM.MEM.
46
(K.PERC.)
(LEAD)
(K.PERC.)
10) Copy Protect
Some of the Disks available for the Electone are purposely protected
from being copied or erased. You cannot save the data to another floppy
disk.
If you try to load data from such a “copy-protected” disk to the Electone,
a “Protected Disk” (PrXX*) message will appear on the LED display.
The data cannot be saved to the disk.
*XX: song number
11) Loading the Data Created with an Upper Electone Model
The data created with an upper model such as EL-900/700/500/400 can
be reproduced with EL-200 even if EL-200 itself doesn’t have the
functions on those models.
The functions EL-200 can reproduce are:
● 173 voices and User* voices
NOTE:
If you want to restore the default settings (factory
preset), execute Power On Reset (page 27)
operation. If you want to restore only the Registration Memory function, press one of the Basic
Regist. Buttons.
● Upper Keyboard Voice 1, 2, Lower Keyboard Voice 1, 2, Pedal
Voice 1, 2 and Lead Voice
● 66 rhythms and User* rhythms
● Voice Control/Effect settings
Each Voice Group: Touch Tone, Feet, Pan, Brilliance,
Symphonic/Celeste, Delay, Flanger, Distortion, Vibrato,
Touch Vibrato, Reverb (Type*, Length, Depth), Sustain
Length, Tremolo/Chorus
•
Lead Voice: Slide, Tune
6
Music Disk Recorder
•
● Rhythm Control (volume, amount of reverb on rhythms)
● User* Keyboard Percussion settings (instrument assignments)
● Pan, Pitch, Reverb settings* for each instrument (percussion sound)
● Rhythm Sequence*
● Registration Shift settings*
● Left Footswitch settings (Off, Rhythm, Glide, Tremolo)
● Knee Lever control (Lead Slide)
● Transpose setting
The item marked with an asterisk indicates that it cannot be memorized in a Registration
setting.
47
Messages on the M.D.R. LED Display
Display
Description of the Messages
No disk is installed. Install a disk.
1) The installed disk is write-protected, so the Record, Song Copy, and Song Delete jobs cannot be
performed. Set the disk’s Write-protect tab (page 29) to OFF.
2) If you are using a copy-protected playback-only disk, this message may appear when you attempt
the Record, Song Copy, or Song Delete operations. Cancel the operation.
3) When executing Disk Copy, set the Write-protect tab on the source disk to “on.”
The installed disk is not formatted. Format the disk. (page 30)
1) The disk’s memory capacity is full, so the Record or Song Copy operation cannot be performed.
Use another formatted disk or delete unnecessary data.
2) All of the song numbers contain recorded data. Press the STOP button, then delete any
unnecessary data.
None of the song numbers contain recorded data, so the Song Copy operation cannot be performed.
Press the STOP button and abort the operation.
An error occurred because the disk was removed during recording or playback. Press the STOP
button, and replace the disk, then start the operation over again.
Incompatible disk has been inserted. Insert an appropriate disk.
Recording cannot be performed because too much data was received at one time. Press the STOP
button and retry recording.
6
The disk is defective and cannot be formatted. Use another disk.
Music Disk Recorder
An error occurred during the transmission or reception of data. Press the STOP button and retry the
operation over again.
You are trying to record to the song number that already contains recorded data. Stop the recording
and select the other blank song number by pressing the SONG SELECT buttons.
XX: song number
When you insert the “copy-protected” disk to the Electone, this message will appear on the LED
display. You cannot overwrite or save the changes.
XX: song number
This message indicates that an incompatible disk is inserted in the Voice Disk, Pattern Disk or
Registration Menu Disk operation. Insert an appropriate disk.
_XX
An under line (_) before the song number indicates that it is XG song data.
XX: song number
or
48
You have inserted a wrong type disk as the destination disk in the Disk Copy operation. Use the
same disk type as the source disk.
7 Footswitches and Knee Lever
These leg- and foot-operated controls allow you to turn on and execute some functions without taking your
hands from the keyboards.
1 Footswitch
The Electone has two Footswitches on the main expression pedal that can
be used to control Registration Shift and Rhythm On/Off functions. The
Right Footswitch is used for the Registration Shift function. See page 27 for
the details of the Registration Shift function.
The Left Footswitch is used for the Rhythm On/Off function.
NOTE:
Even the User Registration Shift setting,
not available on EL-200, created with an
upper model such as EL-900/700/500/400
and loaded to EL-200 can be reproduced
with EL-200’s Registration Shift function.
If you want to restore the original
Registration Shift function, press one of
the Basic Regist. Buttons.
2 Knee Lever
The Knee Lever, located on the underside of the keyboard panel, can be
used to turn on and off the Sustain effect.
1
Make sure that the Upper and/or Lower Sustain effect panel controls
have been turned on; otherwise the Knee Lever will have no effect.
7
SUSTAIN
UPPER
(KNEE)
2
Footswitches and Knee Lever
LOWER
(KNEE)
PEDAL
Fold the Knee Lever down.
Folding down
49
3
Press the Knee Lever to the right with your knee when you want to
have sustain.
Sustain effect is applied while the Knee Lever is pressed.
1
ON
3
ON
OFF
2
1 When the Knee Lever is folded up:
The sustain effect is on.
2 When the Knee Lever is vertical:
The sustain effect is cancelled.
3 When the Knee Lever is continuously pressed to the right:
The sustain effect is on.
7
Footswitches and Knee Lever
50
8 Accessory Jacks and Controls
Various input/output terminals and controls are equipped on the EL-200. On the underside of the Electone
keyboard is a separate panel equipped with various input/output terminals and controls, the functions of which
are described below.
2 -2
5
HOST SELECT
TO HOST
HEADPHONES
PC-1
Mac
4
PC-2
MIDI
2 -1
R
AUX. L
OUT
1
R
RHYTHM L
IN
MIDI
OUT
IN
3
1 Input Jack
RHYTHM IN (Phone, L/R)
This pair of phone jacks is for connection to an external rhythm machine.
The sound of the connected device is mixed with the sound of the Electone
and played through the Electone’s speaker system. The volume of the
rhythm machine can be controlled by the Expression pedal of the Electone.
2 Output Jacks
2 -1
AUX. OUT (RCA, L/R)
This pair of RCA jacks is for connection to an external amplifier/
speaker.
2 -2
8
Accessory Jacks and Controls
HEADPHONES (Phone)
For connection of a stereo headphone set. When headphones are
connected to this jack, sound to the Electone’s built-in speaker
system is automatically cut off, allowing you to play without
disturbing others.
3 MIDI IN/OUT
For connecting external devices such as synthesizer and rhythm machine
with MIDI cables. MIDI cables are required (page 53).
4 TO HOST
This terminal can be connected to the serial port of a personal computer
instead of using MIDI connection.
5 HOST SELECT
When you have connected the Electone and the personal computer using the
TO HOST terminal, you need to select the appropriate setting here
depending on the computer used.
NOTE:
See next page for the details of the
connection using the TO HOST terminal.
51
9 Appendix
MIDI
On the right underside of the Electoneeyboard
k
you will ifnd the MIDI IN/
OUT jacks andTO HOST terminal.
MIDI is an acron
ym that stands for Musical Instrument Digital Interf
ace,
which allows electronic musical instruments to communicate with each
other, by sending and recei
ving MIDI messages. If your Electone is
connected with external devices via these MIDI jacks (with a personal
computer via theTO HOST terminal) and appropriate MIDI settings are
done, you can play an xeternal MIDI de
vice such as synthesizer from your
Electone keyboard or your Electone can be played by anxternal
e
device
such as sequencer (by a personal computer with a sequencing softw
are
installed).
You need MIDI cable(s) when you xchange
e
the data between Electone and
an external device. Or you need a serial cable when you connect Electone’
s
TO HOST to the computer serial port instead of using MIDI cables.
Also, to exchange the data between your Electone and connected MIDI
device you have to match the MIDI transmit/recei
ve channels on both
devices. Receive channels of Electone are ixed.
f
Upper Keyboard: channel
1, Lower Keyboard: channel 2, Pedalboard: channelAccordingly
3
, you
need to match the transmit channels on thexternal
e
device to the fixed
receive channels of Electone when you w
ant to control Electone by the
external device.
NOTE:
See page 54 for the information on the
MIDI message types.
Setting examples
Using the TO HOST terminal
If you want to connect your Electone with a personal computer, a MIDI
interface will be necessary. However, using a separately available Serial Cable
allows you to directly connect them (between the TO HOST terminal of your
Electone and the Serial Port of the personal computer). In this case you need to
select one of the HOST SELECT switches to match the computer type you use.
No additional MIDI setting is necessary.
9
Windows 95/98
NOTE:
MIDI jacks will be inactive when the TO
HOST terminal is currently used.
NOTE:
Appendix
HOST SELECT
PC-2
MIDI
For Windows users: To actually exchange
the data via the Serial Cable you need to
install the appropriate MIDI driver to your
personal computer in advance. Download
the MIDI driver at the following web site
http://www.yamaha-xg.com/english/xg/
index.html.
8-pin MINI DIN to
D-SUB 9-pin Cable
PC-1
Mac
TO
HOST
RS-232C
(DB9)
EL-200
Windows 95(98)
(Computer)
Macintosh
Select the HOST SELECT switches as follows:
When you use MIDI connection: MIDI
When you use TO HOST connection with
Windows system: PC-2
When you use TO HOST connection with
Macintosh: Mac
HOST SELECT
PC-2
MIDI
Macintosh Peripheral
Cable (M0197)
PC-1
Mac
NOTE:
TO
HOST
NOTE:
52
EL-200
Macintosh
(Computer)
If you use a PC with USB terminal, you
need to use USB interface.
Using MIDI IN/OUT jacks
Controls an external device using
the EL-200 (as a master)
Controls the EL-200 using an external
device (as a slave)
Exchanges the data between EL-200 and
an external device
EL-200
EL-200
EL-200
MIDI OUT
MIDI IN
MIDI IN
HOST SELECT
PC-2
MIDI
PC-1
Mac
MIDI IN
MIDI OUT
HOST SELECT
PC-2
MIDI
HOST SELECT
PC-1
Mac
PC-2
MIDI
MIDI OUT
MIDI OUT
MUSIC SYNTHESIZER
REALTIME CONTROL
EXTENDED SYNTHESIS
PC-1
Mac
MIDI IN
MIDI
Interface
MU80 etc.
MIDI Keyboard
PC
1 Control an external device using the EL-200
Using an exter
nal MIDI k eyboard or MIDI tone generator
● Playing your Electone can cause the MIDI keyboard (or tone generator) to
be played using its own voices. You can produce thicker sound layers. (The
MIDI receive channels of the MIDI keyboard must match the transmit
channels on your Electone. The Electone performance data are transmitted
through the channel 1 for Upper Keyboard, channel 2 for Lower Keyboard
and channel 3 for Pedalboard.)
● Various messages including the values how far the expression pedal is
pressed down and how hard you play the Electone keyboard can be transmitted as digital data. However, how the external device responds depends on
the external device you have connected.
● The performance on your Electone can be recorded onto your PC using an
appropriate sequencing software. (You need a sequencing software in this
case.)
9
Using an exter
nal MIDI k eyboard
● Playing the external MIDI keyboard can cause your Electone to be played
using Electone’s voices. (The MIDI transmit channels of the MIDI keyboard
must match the (fixed) receive channels on your Electone. The channels 1, 2
and 3 for the Upper, Lower and pedal voices, respectively.)
Appendix
2 Control the EL-200 using an external device
NOTE:
You cannot use the M.D.R. and MIDI
function at one time since the M.D.R. is
also connected via MIDI internally.
● Also, the Keyboard Percussion on your Electone can be played by playing
the external MIDI keyboard. (The MIDI transmit channels of the MIDI
keyboard must be channel 15.)
● The MIDI data played back by the external PC (using a sequencing software) can be played using Electone’s voices. You can use the Electone as an
XG tone generator for computer-based music production. See page 57 for
the details to use the EL-200 as an XG tone generator.
53
The MIDI Messages of the EL-200
The MIDI messages can be divided into two groups: the Channel Messages and
System Messages. The Channel Messages are the data related to the
performance on the keyboard for a specific channel. Each time you play the
keyboard on the EL-200, the channel messages, which keys are played and how
hard the keys are pressed, will be transmitted via a specific channel. The System
Messages are the data that allows several MIDI devices communicate each
other. Below is an explanation of the various types of MIDI messages which the
EL-200 can receive/transmit.
Channel Messages
Key related messages
These are transmitted every time you play the keyboards on your Electone.
Reversely, the Electone can be played by receiving these data from an external
keyboard.
Note On
Generated when a key is played. The note range is
C-2 (0) – G8 (127), C3=60.
Velocity
Indicates how hard the key is held. The range is 1 - 127.
Note Off
Generated when a key is released.
Program Change
The Program Change messages allow you to change voices in the middle of a
song. With these messages you can change the registrations of the EL-200.
NOTE:
For more detailed information see MIDI
Data Format on page 58 and MIDI
Implementation Chart on page 68.
NOTE:
For more detailed information see MIDI
Data Format on page 58 and MIDI
Implementation Chart on page 68.
Control Change
The Control Change Messages let you select a voice bank, control volume,
panning, modulation, portamento time, brightness and various other control
parameters, through specific Control Change numbers.
9
NOTE:
For more detailed information on the
Control Change messages available for the
EL-200 see MIDI Data Format on page 58
and MIDI Implementation Chart on page
68.
Appendix
NOTE:
You can exchange the Expression Pedal
setting between Internal (Electone controls
the Expression Pedal function) and
External (an external device controls it,
instead) by turning on the Electone while
holding down the SHIFT button on the
M.D.R. When it is set to Internal, the
expression pedal lets you control Electone
volume even during M.D.R. playback.
Turning off the Electone restores the
default setting.
54
System Messages
System Exclusi
ve Messages
System Exclusive messages are used to exchange the system and voice/
registration data. These allow you to execute bulk dump operation, sending and
receiving all the data of the EL-200 including registrations to and from an
external device. This is especially useful for you to build up the library of the
registration data in a device like a hard disk.
Examples of Exchanging the Data
Use the following example to send (or receive) the registration data to (or
from) a personal computer (a sequencing software).
First, you need to connect your EL-200 with a personal computer (a
sequencing software) using a Serial Cable or a MIDI cable. (See page 53 for
more information.)
NOTE:
You also need a sequencing software,
which has been properly installed in the
personal computer, and which can send
and receive system exclusive messages.
Send the Registration Data
from the EL-200 to the Personal Computer (PC)
Preparation (Setting up registrations)
Set the Strings voice on the Upper Keyboard of the EL-200.
Select the String voice by pressing the STRINGS button in the Upper
Keyboard Voice.
1
2
Store the registration to the Registration Memory button 1.
While holding down the M. button Press the Registration Memory
button 1.
Sending the Registration Data
Send the Request-to-Send all RAM message, “F0, 43, 70, 70, 10, F7”
(Hexadecimal), from the EL-200 to the sequencing software (PC).
3
Once the EL-200 receives the Request-to-Send all RAM message, the
EL-200 automatically sends all registration data in the all registration
numbers to your PC.
You can store the registration data in a file on your PC.
NOTE:
Depending on the capacity of your
sequencing software, you may need to
divide the data into two and send them to
the PC separately. If you want to divide,
see page 61, “Data Code to Send” table.
For example,
by changing the message from
“F0,43,70,70,10,F7” (all data) to
“F0,43,70,70,17,F7,” the Electone will
send the Keyboard Percussion Assignment
data only.
9
Appendix
55
Send the Registration Data
from your PC to the EL-200 and
Change the Registration Memory Buttons
Send the data stored in the PC back to your Electone. Also select the registration
and play the Upper keyboard on the Electone using a PC.
Receiving the Registration Data
Send the Request-to-Receive all RAM message, “F0, 43, 70, 70, 20,
F7” and the stored registration data from the PC to EL-200.
1
Once the EL-200 receives the Request-to-Receive all RAM message, it
automatically receives all registration data and relocates them to the all
registration numbers.
Selecting the Registration Memory Button
Sending the Program Change messages from the PC to your EL-200 makes it
possible to change the registration on the Electone.
2
Send the Program Change message, “CF, 00” from the PC to EL-200.
Once the Program Change message is received, the EL-200
automatically turns the Registration Memory button 1 on.
Sending the Note-On Messages
Send the Note-On message, “90, 30, 7F” from the PC to EL-200.
3
EL-200 receives the note-on message and plays C2 key on the Upper
keyboard. It plays String voice you have set in the previous step.
Send the Note-Off message, “90, 30, 00” to the Electone.
All the above operations can also be done with the M.D.R. easily and
efficiently. However, using the PC/ hard disk allows you to build up a
large data library a single disk cannot deal with.
9
Appendix
56
Use the EL-200 as an XG Tone Generator
You can also use the EL-200 as an XG tone generator since the EL-200 is
compatible with the XG format. You can play back the commercially available
XG song data with the Electone’s M.D.R., and also play them using an external
sequencer (or sequencing software) and the internal XG tone generator.
The internal tone generator section of the EL-200 is normally set to EL Mode
for playing as an “Electone.”
Sending an appropriate system exclusive message from the sequencing software
(PC) to the EL-200 changes the mode to XG Mode, in which you can use the
Electone as an XG tone generator.
1
Send the XG System On message, “F0, 43, 1N*, 4C, 00, 00, 7E, 00,
F7” from the PC to EL-200.
*N: Device Number (“0” on EL-200)
Once the XG System On message is received, the internal tone
generator will be in the XG Mode allowing the EL-200 to receive all
the MIDI messages defined by the XG format such as NRPN and Bank
Select.
NOTE:
The EL-200 allows you to play
back the commercially available
XG song data using the M.D.R.
For more information on XG song
playback, see page 39.
NOTE:
When you create an XG song data
using a sequencing software, be
sure to insert the XG System On
message at the beginning of the
data. The internal tone generator
mode automatically changes to
XG when you start to play back
the data.
NOTE:
The internal tone generator mode
automatically changes to XG
when you play back commercially
available XG song data.
9
Appendix
57
MIDI Data Format
1. Channel Messages
1.1 EL Mode
Code (Hexadecimal)
Function
Transmit
Receive
8n,nn,00-7F
Note Off
˛
1ch
UK
Remarks
˛
2ch
LK
˛
3ch
˛
(4ch)*
LEAD
˛
5-14ch
XG
˛
15ch
Keyboard Percussion
PK
9n,nn,00
Note Off
(1ch)*
1ch
UK
9n,nn,01-7F
Note On
(2ch)*
2ch
LK
(3ch)*
3ch
˛
(4ch)*
LEAD
˛
5-14ch
XG
˛
15ch
Bank select
˛
5-14ch
XG
Bn,01,00-7F
Modulation
˛
5-14ch
XG
Bn,04,00-7F
2nd Expression
˛
16ch
˛
(4ch)*
LEAD
Bn,00,00-7F
PK (note on transmit velocity=50H)
Keyboard Percussion
Bn,20,00-7F
Control
Bn,05,00-7F
Portamento Time
˛
5-14ch
XG
Bn,06,00-7F
Data Entry
˛
5-14ch
XG
Bn,07,00-7F
Volume
˛
5-14ch
XG
Bn,0A,00-7F
Pan
˛
5-14ch
XG
Bn,0B,00-7F
Expression
16ch
16ch
Bn,26,00-7F
5-14ch
Control
XG
Bn,40,00-7F
Hold
˛
5-14ch
XG
Bn,41,00-7F
Portamento
˛
5-14ch
XG
Bn,42,00-7F
Sostenuto
˛
5-14ch
XG
Bn,43,00-7F
Soft Pedal
˛
5-14ch
XG
Bn,47,00-7F
Resonance
˛
5-14ch
XG
Bn,48,00-7F
Release Time
˛
5-14ch
XG
Bn,49,00-7F
Attack Time
˛
5-14ch
XG
Bn,4A,00-7F
Brightness
˛
5-14ch
XG
9
Bn,54,00-7F
Portamento Control
˛
5-14ch
XG
Bn,5B,00-7F
Reverb Send Level
˛
5-14ch
XG
Bn,5D,00-7F
Chorus Send Level
˛
5-14ch
XG
Bn,5E,00-7F
Variation Send Level
˛
5-14ch
XG
Appendix
Bn,60,00-7F
Data Increment
˛
5-14ch
XG
Bn,61,00-7F
Data Decrement
˛
5-14ch
XG
˛
5-14ch
XG
˛
5-14ch
XG
58
Bn,62,00-7F
NRPN LSB
Bn,63,00-7F
NRPN MSB
Bn,64,00-7F
RPN LSB
Bn,65,00-7F
RPN MSB
Bn,78,00
All Sounds Off
Bn,79,00
Reset All Controllers
Bn,7B,00
All Note Off
Bn,7C,00
Omni Off
Bn,7D,00
Omni On
Bn,7E,00
Mono
Bn,7F,00
Poly
Code (Hexadecimal)
Function
Cn,nn
Program Change
Dn,00-7F
After Touch
Transmit
Receive
˛
1ch
UK
˛
2ch
LK
˛
3ch
PK
˛
5-14ch
XG
16ch
16ch
Control
(1ch)*
1ch
UK
(2ch)*
2ch
LK
˛
3ch
(4ch)*
En,00-7F,00-7F
Pitch Bend
Remarks
PK
LEAD
5-14ch
XG
˛
5-14ch
XG
* Can be changed in the MIDI settings.
1.2 XG Mode
Code (Hexadecimal)
Function
Transmit
Receive
8n,nn,00-7F
Note Off
˛
1-16ch
Remarks
9n,nn,00
Note Off
(1ch)
UK
9n,nn,01-7F
Note On
(2ch)*
LK
(3ch)*
PK (note on transmit velocity=50H)
1-16ch
Bn,00,00-7F
Bank select
˛
1-16ch
Bn,01,00-7F
Modulation
˛
1-16ch
Bn,04,00-7F
2nd Expression
˛
˛
Control
˛
˛
LEAD
Bn,20,00-7F
Bn,05,00-7F
Portamento Time
˛
1-16ch
Bn,06,00-7F
Data Entry
˛
1-16ch
Bn,07,00-7F
Volume
˛
1-16ch
Bn,0A,00-7F
Pan
˛
1-16ch
Bn,0B,00-7F
Expression
Bn,40,00-7F
Bn,26,00-7F
1-16ch
Hold
˛
1-16ch
Bn,41,00-7F
Portamento
˛
1-16ch
Bn,42,00-7F
Sostenuto
˛
1-16ch
Bn,43,00-7F
Soft Pedal
˛
1-16ch
Bn,47,00-7F
Resonance
˛
1-16ch
Bn,48,00-7F
Release Time
˛
1-16ch
Bn,49,00-7F
Attack Time
˛
1-16ch
Bn,4A,00-7F
Brightness
˛
1-16ch
Bn,54,00-7F
Portamento Control
˛
1-16ch
Bn,5B,00-7F
Reverb Send Level
˛
1-16ch
Bn,5D,00-7F
Chorus Send Level
˛
1-16ch
Bn,5E,00-7F
Variation Send Level
˛
1-16ch
Bn,60,00-7F
Data Increment
˛
1-16ch
Bn,61,00-7F
Data Decrement
Bn,62,00-7F
NRPN LSB
˛
1-16ch
Bn,63,00-7F
NRPN MSB
˛
1-16ch
Bn,64,00-7F
RPN LSB
Bn,65,00-7F
RPN MSB
Control
9
Appendix
16ch
59
Code (Hexadecimal)
Function
Bn,78,00
All Sounds Off
Bn,79,00
Reset All Controllers
Bn,7B,00
All Note Off
Bn,7C,00
Omni Off
Bn,7D,00
Omni On
Bn,7E,00
Mono
Bn,7F,00
Poly
Cn,00-7F
Program Change
Transmit
Receive
˛
1-16ch
16ch
Control
Remarks
1-16ch
Dn,00-7F
After Touch
(1ch)*
UK
(2ch)*
LK
˛
PK
1-16ch
En,00-7F,00-7F
Pitch Bend
˛
1-16ch
Transmit
Receive
Ø
Ø*
* Can be changed in the MIDI settings.
2. Realtime Messages
Code (Hexadecimal)
Function
F8
Clock
FA
Start
Ø
Ø
FC
Stop
Ø
Ø
FE
Active Sensing
Ø
Ø
FF
Reset
˛
˛
Remarks
* Received only when in the Ext. mode
3. System Exclusive Messages
3.1 Format
Universal Realtime Messages
Code (Hexadecimal)
Message
F0,7F,7F,04,01,SS,TT,F7
XG Master Volume
Transmit
Receive
˛
Ø
Transmit
Receive
˛
Ø
Transmit
Receive
XN
Universal Non-Realtime Messages
9
Code (Hexadecimal)
Message
F0,7E,7F,09,01,F7
GM ON
XN
XG Native
Appendix
Code (Hexadecimal)
Message
F0,43,1N,4C,AH,AM,AL,..data..,F7
XG Parameter Change
˛
Ø
F0,43,0N,4C,BH,BL,AH,AM,AL,..data..,cc,F7
XG Bulk Dump
˛
Ø
F0,43,1N,27,30,00,00,MM,LL,cc,F7
XG Master Tuning
˛
Ø
F0,43,1N,4C,00,00,7E,00,F7
XG System On
˛
Ø
Transmit
Receive
Electone/Single Keyboard Common Messages
Code (Hexadecimal)
Message
F0,43,73,01,02,F7
Request for Internal Synch. Mode
˛
Ø
Request for External Synch. Mode
˛
Ø
03
60
Electone Exclusive
Code (Hexadecimal)
Message
F0,43,70,70,00,...(Data)...F7
Bulk Dump Data
78
ID
Transmit
Receive
˛
Ø
Ø
Ø
˛
Ø
F0,43,70,ID,00,F7
Model ID Data
Ø
˛
F0,43,70,70,nn(*1),F7
Request-to-Send Data
˛
Ø
78
˛
Ø
ID
˛
Ø
F0,43,70,70,nn(*2),F7
Request-to-Receive Data
78
ID
˛
Ø
˛
Ø
˛
Ø
˛
Ø
78
˛
Ø
ID
˛
Ø
˛
Ø
78
˛
Ø
ID
˛
Ø
F0,43,70,70,01,...(Data)...F7
Request-to-Send Voice parameter data
F0,43,70,70,02,...(Data)...F7
Request-to-Receive Voice parameter data
F0,43,70,70,30,F7
Request-to-Send Model ID data
˛
Ø
F0,43,70,70,38,7F,F7
Bulk Dump Acknowledge
˛
˛
˛
00
Bulk Dump Unacknowledge
Ø
Switch On
Ø
Ø
Switch Off
Ø
Ø
F0,43,70,70,40,50,TL,TH,F7
Tempo
Ø
Ø
F0,43,70,78,41,cd,dd,F7(*4)
Panel Switch Events
Ø
Ø
F0,43,70,78,42,...(Data)...F7
Current Registration Data
Ø
Ø
F0,43,70,78,44...(Data)...(*5),F7
EL MIDI Parameters
Ø
Ø
F0,43,70,70,40,nn(*3),7F,F7
00
F0,43,70,70,70,nn(*6),F7
External MDR
˛
Ø
F0,43,70,70,73,F7
EL ON
˛
Ø
Bar Signal
Ø
Ø
F0,43,70,70,78,SC,NC,F7
X : don't care
N : Device Number(“0” on EL-200)
ID=4A
*1 Data Codes to Send
nn
Data
10
All RAM
11
Registrations
12
14,15
Rhythm Sequences
9
User Patterns
16
User Voices
17
Keyboard Percussion Assignments
Appendix
*2 Data Codes to Receive
nn
Data
20
All RAM
21
Registrations
22
24,25
Rhythm Sequences
User Patterns
26
User Voices
27
Keyboard Percussion Assignments
*3 Switches
nn
Switch
45
Left Footswitch
Transmit Receive
Ø
47
Knee Lever
Ø
Ø
48
Fill In 1
Ø
Ø
4B
Intro./Ending
Ø
Ø
Ø
61
*4 Switch Codes
Selectors
Code
Switch
Transmit Tx Range
Receive Rx Range Remarks
02
UK Voice 1
Ø
[02-0D]
Ø
[00-0D]
03
LK Voice 1
Ø
[02-0D]
Ø
[00-0D]
Switch Number
04
UK Voice 2
˛
Ø
[00-0D]
Switch Number
05
LK Voice 2
˛
Ø
[00-0D]
Switch Number
06
LEAD Voice
Ø
[01-04]
Ø
[00-04]
Switch Number
07
Pedal Voice 1
Ø
[01-04]
Ø
[00-04]
Switch Number
08
Pedal Voice 2
˛
Ø
[00-04]
Switch Number
0B
Rhythm
Ø
Ø
[00-0B]
Switch Number
0F
Registration Memory
˛
Ø
[00-0F]
[02-0B]
Switch Number
Volume
Code
Switch
Transmit Tx Range
Receive Rx Range Remarks
12
UK Voice 1
Ø
[00-7F]
Ø
[00-7F]
13
LK Voice 1
Ø
[00-7F]
Ø
[00-7F]
Volume Data 00:MAX,7F:MIN
Volume Data; 00:MAX,7F:MIN
14
UK Voice 2
˛
Ø
[00-7F]
Volume Data; 00:MAX,7F:MIN
15
LK Voice 2
˛
16
LEAD Voice
Ø
[00-7F]
17
Pedal Voice 1
Ø
[00-7F]
18
Pedal Voice 2
˛
1A
Rhythm
Ø
[00-7F]
Ø
[00-7F]
Volume Data; 00:MAX,7F:MIN
1B
Reverb
Ø
[00-7F]
Ø
[00-7F]
Depth Data; 00:MAX,7F:MIN
Ø
[00-7F]
Volume Data; 00:MAX,7F:MIN
Ø
[00-7F]
Volume Data; 00:MAX,7F:MIN
Ø
[00-7F]
Volume Data; 00:MAX,7F:MIN
Ø
[00-7F]
Volume Data; 00:MAX,7F:MIN
To Lower
Code
Switch
Transmit Tx Range
Receive Rx Range Remarks
36
LEAD Voice
Ø
[00-01]
Ø
[00-01]
00:OFF,01:ON
37
Pedal Voice 1
Ø
[00-01]
Ø
[00-01]
00:OFF,01:ON
38
Pedal Voice 2
˛
Ø
[00-01]
00:OFF,01:ON
Brilliance
Code
9
Appendix
62
Switch
Transmit Tx Range
Receive Rx Range Remarks
42
UK Voice 1
˛
Ø
[00-06]
43
LK Voice 1
˛
Ø
[00-06]
00: Brilliant; 06: Mellow
00: Brilliant; 06: Mellow
44
UK Voice 2
˛
Ø
[00-06]
00: Brilliant; 06: Mellow
45
LK Voice 2
˛
Ø
[00-06]
00: Brilliant; 06: Mellow
46
LEAD Voice
˛
Ø
[00-06]
00: Brilliant; 06: Mellow
47
Pedal Voice 1
˛
Ø
[00-06]
00: Brilliant; 06: Mellow
48
UK Voice 2
˛
Ø
[00-06]
00: Brilliant; 06: Mellow
Sustain
Code
Switch
Transmit Tx Range
Receive Rx Range Remarks
50
Upper Keyboard
Ø
[00-01]
Ø
[00-01]
00:OFF,01:ON
51
Lower Keyboard
Ø
[00-01]
Ø
[00-01]
00:OFF,01:ON
52
Pedalboard
Ø
[00-01]
Ø
[00-01]
00:OFF,01:ON
Keyboard Percussion
Code
Switch
Transmit Tx Range
Receive Rx Range Remarks
5B
Lower Keyboard
Ø
[00-01]
Ø
[00-01]
00:OFF,01:ON
5C
Pedal Board
Ø
[00-01]
Ø
[00-01]
00:OFF,01:ON
Disable
Code
Switch
5F
Disable
Transmit Tx Range
Ø
[00-01]
Receive Rx Range Remarks
Ø
[00-01]
00:OFF,01:ON
Tremolo
Code
Switch
60
Tremolo
Transmit Tx Range
Ø
[00-01]
Receive Rx Range Remarks
Ø
[00-01]
00:SLOW,01:FAST
Rhythm Sequence
Code
Switch
Transmit Tx Range
Receive Rx Range Remarks
61
Sequence 1
Ø
[00-01]
Ø
[00-01]
00:OFF,01:ON
62
Sequence 2
Ø
[00-01]
Ø
[00-01]
00:OFF,01:ON
63
Sequence 3
Ø
[00-01]
Ø
[00-01]
00:OFF,01:ON
64
Sequence 4
Ø
[00-01]
Ø
[00-01]
00:OFF,01:ON
9
Appendix
63
*5 EL MIDI Parameters
Voice Section Parameters
Panel Voice Parameters
Address
00
00-04, 06, 07
00-0D
Parameter
Data
2
00-7F
Voice Assign Number H
˛
Ø
00-7F
Voice Assign Number L
˛
Ø
[00-7F]
˛
Ø
[00-0D]
˛
Ø
[00-7F]
˛
Ø
[00-7F]
˛
Ø
00
00-04, 06, 07
10
1
00-0D
Voice Selector Number
00
00-04, 06, 07
11
1
00-7F
Volume
Data
Transmit Receive Rx Range Remarks
Size
00:MIN
[00-7F]
7F:MAX
00
00-04, 06, 07
12
1
00-7F
Reverb Send Level
00:MIN
7F:MAX
00
00-04, 06, 07
13
1
00-7F
Brilliance
00:Brilliant
[00-0A]
[0B-1F]
[20-35]
40:Center
[36-4A]
[4B-5F]
[60-75]
7F:Mellow
00
00-04, 06, 07
14
1
00-04
Feet
00:Preset
[76-7F]
˛
Ø
[01]
02:8Fee
[02]
03:4Feet
[03]
[04]
04:2Feet
00
00-04, 06, 07
15
1
00-7F
Pan
[00][05-7F]
01:16Feet
00:Right
˛
Ø
[00-11]
[12-25]
[26-31]
[32-4E]
40:Center
[4F-5A]
[5B-6E]
[6F-7F]
7F:Left
00
00-04, 06, 07
16
1
00-7F
Initial Touch Sensitivity
00:MIN
˛
Ø
[00-7F]
˛
Ø
[00-7F]
˛
Ø
7F:MAX
00
00-04, 06, 07
17
1
00-7F
After Touch Sensitivity
00:MIN
7F:MAX
00
00-04, 06, 07
19
1
00-01
User Vibrato
00:PRESET
00
00-04, 06, 07
1A
1
02-1A
Vibrato Delay
00:Short
[00]
[01-7F]
01:USER
˛
Ø
[00-7F]
˛
Ø
[00-7F]
˛
Ø
[00-7F]
˛
Ø
7F:Long
00
00-04, 06, 07
1B
1
00-54
Vibrato Depth
00:MIN
7F:MAX
9
00
00-04, 06, 07
1C
1
3C-6C
Vibrato Speed
00:Slow
7F:Fast
00
00-04, 06, 07
1E
1
00-7F
Touch Vibrato On/Off
00:OFF
Appendix
00
04, 06, 07
1F
1
00-01
To Lower
00:OFF
˛
Ø
04
20
1
00-02
Slide
00:OFF
˛
Ø
[02]
02:KneeControl
04
21
1
02-7F
Slide Speed
00
04
22
1
00-24
Detune
02:Slow
[00]
[01]
01:ON
00
[00]
[01-7F]
01:ON
00
[00]
[01-7F]
01:ON
˛
Ø
[00-7F]
˛
Ø
[00-7F]
˛
Ø
7F:Fast
00:Normal
24:TuneUP
00
00-07
23
1
00-01
2nd Expression Pedal
00, 01, 04, 06, 07
00
00-04
00:OFF
24
1
00-01
Glide
00:OFF
01:ON
64
[00]
[01-7F]
01:ON
˛
Ø
[00]
[01-7F]
Effect Parameters (Voice Sections)
Address
00-01 00-04, 06, 07
3F
Size
Data
1
00-05
Parameter
Effect Select
Transmit Receive Rx Range
Content
˛
00:Preset
Ø
Remarks
[00][07-7F]
01:OFF
[01]
02:Tremolo
[02]
03:Symphonic
[03]
04:Delay
[04]
05:Flanger
[05]
[06]
06:Distortion
00-01 00-04, 06, 07
40-42
1
00-7F
Reverb
˛
Ø
[00-7F]
00-01 00-04, 06, 07
48-4A
1
00-7F
Tremolo
˛
Ø
[00-7F]
00-01 00-04, 06, 07
50
1
00-7F
Symphonic
˛
Ø
[00-7F]
00-01 00-04, 06, 07
58-5B
1,2
00-7F
Delay
˛
Ø
[00-7F]
00-01 00-04, 06, 07
60-62
1
00-7F
Flanger
˛
Ø
[00-7F]
00-01 00-04, 06, 07
68-69
1
00-7F
Distortion
˛
Ø
[00-7F]
Keyboard Parameters
Sustain Parameters
Size
Data
02
Address
00-02
00
1
00-01
Parameter
02
00-02
01
1
00-0C Length
Sustain On/Off
Content
00:OFF
Transmit Receive Rx Range
˛
Ø
˛
Ø
01:ON
00:Short
Remarks
[00]
[01-7F]
[00-7F]
0C:Long
Keyboard Percussion Parameters
Address
Parameter
Size
Data
02
01-02
10
1
00-01
Keyboard Percussion
02
01-02
11
1
00-08
Modes
Content
00:OFF
Transmit Receive Rx Range
˛
Ø
˛
Ø
01:ON
00:Preset
Remarks
[00]
[01-7F]
01-08:UserAssign1-8
[00]
[01-08]
Effect Parameters (Keyboard)
Address
Size
Data
Parameter
Content
Transmit Receive Rx Range
02
00-02
40-42
1
Reverb
˛
Ø
[00-7F]
02
00-02
48-4A
1
Tremolo
˛
Ø
[00-7F]
02
00-02
50
1
Symphonic
˛
Ø
[00-7F]
02
00-02
58-5B
1,2
Delay
˛
Ø
[00-7F]
02
00-02
60-62
1
Flanger
˛
Ø
[00-7F]
02
00-02
68-69
1
Distortion
˛
Ø
[00-7F]
Remarks
9
Rhythm
Rhythm Parameters
Data
Parameter
00
00-0B
1
00-65
Pattern Assign Number
Pattern Numbers
˛
Ø
[00-62]
03
00
10
1
00-0B
Pattern Select Number
Selector Switch Numbers
˛
Ø
[00-0B]
03
00
11
1
00-7F
Volume
00:MIN
˛
Ø
[00-7F]
˛
Ø
[00-7F]
˛
Ø
Content
Remarks
Appendix
Address
Transmit Receive Rx Range
Size
03
67-98
7F:MAX
03
00
12
1
00-7F
Reverb Send Level
00:MIN
7F:MAX
03
00
14
1
00-01
Auto Variation
00:OFF
01:ON
03
00
15
1
00-7F
Rhythm Balance
00:Cymbal
[00]
[01-7F]
˛
Ø
˛
Ø
[00-7F]
40:Center
7F:Drums
03
03
00
00
16
17
1
1
00-01
00-03
2nd Expression
00:OFF
Tempo Control
01:ON
Footswitch Rhythm Mode
00:OFF
01:RhythmStop
[00]
[01-7F]
˛
[00][04-7F]
Ø
[01]
02:Ending
[02]
03:FillIn
[03]
65
Rhythm Sequence Parameters
Address
03
01
00-03
Size
Data
1
00-01
Parameter
Rhythm Sequence
Content
00:OFF
Transmit Receive Rx Range
˛
Ø
01:ON
Remarks
[00]
[01-7F]
Accompaniment Parameters
Address
03
02
10
Size
Data
Parameter
1
00-03
Pattern Selector Number
Content
00:Type1
Transmit Receive Rx Range
˛
Ø
01:Type2
[01]
02:Type3
[02]
03:Type4
03
02
11
1
00-01
Volume Mute
00:OFF
[03]
˛
Ø
01:MUTE
03
02
12
1
00-7F
Volume
00:MIN
Remarks
[00]
[00]
[01-7F]
˛
Ø
[00-7F]
˛
Ø
[00-7F]
7F:MAX
03
02
13
1
00-7F
Reverb Send Level
00:MIN
7F:MAX
A.B.C. Parameters
Address
03
03
00
Size
Data
1
00-03
Parameter
A.B.C. Mode
Content
00:OFF
Transmit Receive Rx Range
˛
Ø
01:SingleFinger
[01]
02:Fingerd
[02]
03:CustomABC
03
03
01
1
00-01
Lower Memory
00:OFF
[03]
˛
Ø
01:ON
03
03
02
1
00-01
Pedal Memory
00:OFF
Remarks
[00][04-7F]
[00]
[01-7F]
˛
Ø
01:ON
[00]
[01-7F]
M.O.C. Parameters
Address
03
04
00
Size
Data
1
00-03
Parameter
M.O.C. Mode
Content
00:OFF
Transmit Receive Rx Range
˛
Ø
01:Close2Note
[01]
02:Close3Note
[02]
03:PassBOpen
03
04
01
1
00-01
M.O.C. Knee Cntrol
00:OFF
01:ON
9
Appendix
66
[00][04-7F]
[03]
˛
Ø
[00]
[01-7F]
Remarks
Overall
System Parameters
Size
Data
04
Address
00
00
1
00-01
Disable
Parameter
04
00
01
1
00-01
Flute Coupler Attack Mode
Transmit Receive Rx Range
Content
00:OFF
˛
Ø
˛
Ø
01:ON
[01-7F]
00:EachKey
01:FirstNewKey
04
00
02
1
3A-46
Transpose
˛
3A:KeyDown
Ø
03
1
00-0B
2nd Expression Range
[3A]
[40]
46:KeyUp
00
[00]
[01-7F]
40:Normal
04
Remarks
[00]
[46]
01:100 ¢
˛
Ø
[01-0C]
˛
Ø
[00][04-7F]
0C:1200 ¢
04
00
04
1
00-03
Footswitch Mode
00:OFF
01:Rhythm
[01]
02:Glide
[02]
03:Tremolo
04
00
05
1
3C-4F Pitch
[03]
3C:PitchDown
˛
Ø
[3C-4F]
˛
Ø
[00-7F]
˛
Ø
[00-7F]
˛
˛
[00]
˛
Ø
[00][02-7F]
40:Normal
4F:PitchUp
04
00
06
1
00-04
Glide Speed
01:Slow
05:Fast
04
00
07
1
34-4C
Manual Balance
34:Upper
40:Center
4C:Lower
04
00
09
1
00-01
L.I.T.
00:Mode1
01:Mode2
04
00
0A
1
00-01
Expression INT/EXT
[01]
00:Internal
01:External
[01]
Effect Parameters (Overall)
Address
Size
Parameter
Data
Transmit Receive Rx Range
Content
04
00
40-42
1
Reverb
˛
Ø
[00-7F]
04
00
48-4A
1
Tremolo
˛
Ø
[00-7F]
04
00
50
1
Symphonic
˛
Ø
[00-7F]
04
00
58-5B
1,2
Delay
˛
Ø
[00-7F]
04
00
60-62
1
Flanger
˛
Ø
[00-7F]
04
00
68-69
1
Distortion
˛
Ø
[00-7F]
Remarks
9
*6 External MDR
nn
Command
Transmit Receive
01
Play Start
˛
02
Play Stop
˛
Ø
03
Record Start
˛
Ø
04
Record Stop
˛
Ø
09
Rhythm Pointer Reset
˛
Ø
Ø
Appendix
67
MIDI Implementation Chart
Date: 1. Dec. 2000
Version: 1.00
YAMAHA [Electone-EL mode] / Model: EL-200
Function
Transmit
Default
Changed
1, 2, 3, 16 *1
1-16
1-3, 5-16 *2
4
Mode
Default
Messages
Altered
Mode 3
˛
************************
Mode 3
˛
˛
0-127 *4
True Voice
36-96 *3
************************
Ø 9nH, v=1-127
Ø 9nH, v=0
Ø 9nH, v=1-127
Ø 9nH, v=0, 8nH
Transmit with EL-200:
fixed to 80.
˛
Ø
˛
Ø
PK after touch with EL-200:
not transmit.
˛
Ø *6
˛
˛
Ø
˛
Ø *7
˛
˛
˛
˛
˛
˛
Ø *6
Ø *6
Ø *7
Ø *6
Ø *6, 7
Ø *6
Ø *6
Ø *6
Ø *6
Ø *6
Ø *6
Ø *9
************************
Ø *10
System Exclusive
Ø
Ø
System
Common
Song Position
Song Select
Tune
˛
˛
˛
˛
˛
˛
System
Real Time
Clock
Commands
Ø
Ø
Ø *8
Ø
Aux
Messages
Local ON/OFF
All Notes OFF
Active Sense
Reset
˛
˛
Ø
˛
˛
Ø (123-127) *6
Ø
˛
Note ON
Note OFF
Velocity
Key's
Ch's
After Touch
Pitch Bend
0, 32
1, 5, 7, 10
4
6, 38
11
96, 97
64-67
71-74
84, 91, 93, 94
98-99, 100-101
120, 121
Control Change
Program Change
Range
Appendix
Notes
Mode 1 : OMNI ON, POLY
Mode 3 : OMNI OFF, POLY
68
Remarks
Basic Channel
Note Number
9
Receive
*1
*2
*3
*4
*5
*6
*7
*8
*9
*10
Bank Select
2nd Expression Pedal
Data Entry
Expression Pedal
Data Entry SW
Sound Controller
NRPN, RPN
(FAH, FCH)
Ch 1: UK; Ch 2: LK; Ch 3: PK; Ch 16: Control
Ch 1: UK; Ch 2: LK; Ch 3: PK; Ch 4: LEAD 1; Chs 5 - 14: XG; Ch 15: Keyboard
UK: 48 - 96; LK: 36 - 84; PK: 36 - 55
UK, LK, PK, LEAD 1: 36 - 96; XG: 0 - 127; Keyboard Percussion: 3 - 127
UK: UK Horizontal Touch; LK: LK Horizontal Touch
XG only
Control only
External Mode only
Control: 0 - 15, 112 - 116
UK, LK, PK, Control: 0 - 15, 112 - 116; XG: 0 - 127
Mode 2 : OMNI ON, MONO
Mode 4 : OMNI OFF, MONO
Ø : YES
˛ : NO
Date: 1. Dec. 2000
Version: 1.00
YAMAHA [Electone-XG mode] / Model: EL-200
Transmit *11
Function
Receive
Default
Changed
1, 2, 3, 16
1-16
1-16
1-16
Mode
Default
Messages
Altered
Mode3
˛
************************
Mode 3
˛
˛
36-96
************************
0-127
True Voice
Ø 9nH, v=1-127
Ø 9nH, v=0
Ø 9nH, v=1-127
Ø 9nH, v=0, 8nH
˛
Ø
˛
Ø
˛
Ø
˛
˛
˛
˛
Ø
˛
˛
˛
˛
˛
˛
Ø
Ø
˛
Ø
Ø
Ø
Ø
Ø
Ø
Ø
Ø
Ø
Ø 0-15, 112-116
************************
Ø
System Exclusive
Ø
Ø
System
Common
Song Position
Song Select
Tune
˛
˛
˛
˛
˛
˛
System
Real Time
Clock
Commands
Ø
Ø
˛
˛
Aux
Messages
Local ON/OFF
All Notes OFF
Active Sense
Reset
˛
˛
Ø
˛
˛
Ø (123-127)
Ø
˛
Note Number
Note ON
Note OFF
Velocity
Key's
Ch's
After Touch
Pitch Bend
0, 32
1, 5, 7, 10
4
6, 38
11
96, 97
64-67
71-74
84, 91, 93, 94
98-99, 100-101
120, 121
Control Change
Program Change
Range
Notes
Mode 1 : OMNI ON, POLY
Mode 3 : OMNI OFF, POLY
Transmit with EL-200:
fixed to 80.
Bank Select
Data Entry
Expression Pedal
Data Entry SW
Sound Controller
NRPN, RPN
9
Appendix
Basic Channel
Remarks
*11 The same as the one in the EL Mode
Mode 2 : OMNI ON, MONO
Mode 4 : OMNI OFF, MONO
Ø : YES
˛ : NO
69
Troubleshooting
Problem
Possible Cause and Solution
GENERAL OPERATION
A cracking noise is sometimes heard.
Noise may be produced when either an electrical appliance is turned on or off,
or an electric power tool (such as drill) is used in the proximity of the Electone.
If this occurs, plug the Electone into an electrical outlet located as far as
possible from the device that seems to be the source of the problem.
Interference from radio, TV, or other sources occurs.
This is caused by the proximity of a high-power broadcasting station, an
amateur ham radio setup or a mobile phone.
Electone causes some noise.
A cell phone may be used in the proximity of Electone. Using a cell phone
beside the Electone may cause a noise. Turn off the power of the cell phone.
Radio/ or TV generates some noise.
Locating a radio/ or TV close to the Electone causes to produce a noise from it.
Relocate it farther from the Electone.
The sound of the Electone causes surrounding
objects to resonate.
Because the Electone is capable of producing powerful bass sounds, resonance
may be caused in surrounding objects, such as cabinets or glass windows.
To avoid this, relocate the objects or lower the Electone’s volume.
The sound is too small even when the volume is
set to its maximum.
● The Master Volume may be set around the minimum position. Turn it
clockwise.
● The Expression Pedal may not be pressed down. Press it down with your
toe.
The Electone panel does not function normally or
the content of the memorized data has changed.
This happens very rarely. Occasionally, power surges and spikes due to
electrical storms or other reasons may cause the Electone to malfunction and/or
alter the contents of memorized data. In this case, turn off the power switch and
then turn the power back to on while holding down the PEDAL/2 button in the
Keyboard Percussion section (Power-On Reset).
VOICES/RHYTHMS
9
Appendix
70
The pitch seems to be higher on the Pedalboard and
lower on the Upper and Lower keyboards.
You may feel it especially when playing piano voice. The temperament for the
acoustic piano is adjusted by listening to the overtones since the overtone
configuration of the piano voice is so complicated that the actual notes in the
higher and lower registers are difficult to be adjusted. On the contrary, the
Electone voices including piano voice are tuned by actual notes. Thus, the
tuning method itself in the higher and lower registers is different.
Some voices seems to contain crack or distorted noise.
You may feel it mainly with wind instrument voices. These are purposely built
in effects, which can faithfully reproduce the characteristics of each instrument.
You can enjoy more realistic sounds such as brass vibration and breath noise.
When too many keys are pressed, not all of
the notes sound.
Total polyphonic capacity (notes sounding for both Upper and Lower
Keyboards) is 12 notes. The notes exceeding this limit may not be produced.
Only a note will be produced when pressing two
keys or more on the Pedalboard and/or Lead voice.
The Lead and Pedal voices are designed to sound one note at a time. When you
simultaneously press two or more keys, only the highest note will sound.
Sound is produced even when the volume is set to
off on the specific keyboard.
The sound may not be adjustable when you play back the data created with an
upper model and not controllable with EL-200.
Problem
Possible Cause and Solution
VOICES/RHYTHMS
Pedalboard doesn’t sound, even when its volume
is properly set.
The TO LOWER button in the Pedal Voice is turned on. Turn it off.
When keys on the Lower keyboard or pedalboard are Keyboard Percussion function is set to on. Turn the Keyboard Percussion off.
pressed, the sounds of percussion instruments are
also heard.
Reverb
The Reverb effect does not operate, even when
Reverb volume is increased.
The Reverb setting of the targeted voice group is set to 0. When you load the
data of an upper model to EL-200 and the reverb volume for each voice group
is set to 0. In that data, you cannot get Reverb effect.
Registration Memory
Certain functions have not been memorized to
Registration Memory.
The following functions will not be memorized:
On/off functions such as Rhythm Start, Synchro Start, Fill-in, Intro./Ending.
MDR select buttons. See page 47 for more information.
An error occurs and the registration data is not
recorded to M.D.R., when executing To Disk
operation.
Your operation may be wrong or the Write-protect tab of the floppy disk is set
to on. Check your operation.
A simple beep sound is produced when I press the
Basic Regist. Button.
When the contents of the SEQ buttons are different from Electone’s default
settings (you may have loaded the sequence data from the upper models),
pressing one of the Basic Regist. buttons restores the original data and give a
simple beep sound to notify it.
MUSIC DISK RECORDER
The PLAY or RECORD section buttons for selecting parts may be turned off.
Turn on the appropriate PLAY or RECORD buttons.
A total of 40 songs cannot be recorded.
If some song numbers contain a large amount of recorded data, the disk may
not have enough available memory left to record the normal maximum of 40
songs. Check the remaining memory.
Recording is stopped before the performance is
finished, or the Song Copy function cannot be
executed.
● The amount of recorded data on the disk is close to the maximum limit.
Either use another disk or delete the data of any unnecessary song number.
● The length of a subsequently recorded part cannot exceed the length of the
previously recorded parts. If you want to change the song length, first delete
the existing song and record again.
The rhythm does not start at the beginning of a
recording, or stops in the middle of the performance.
The M.D.R. is designed so that the rhythm cannot be started at the very
beginning of a recording. If you wish to use the rhythm, start it after the
available memory display appears on the M.D.R. display.
The notes of the recording are “stuck” and sound
continuously.
During playback, you removed the disk by pressing the EJECT button.
Press the STOP button and abort the operation. Whenever you wish to stop
playback, always press the STOP button.
9
Appendix
Recording or playback cannot be performed.
71
EL-200 Specifications
KEYBOARD
Upper: 49 keys (C – C), Lower: 49 keys (C – C), Pedal: 20 keys (C – G)
TOUCH TONE
Upper, Lead, Lower, Pedal (Available only when it is played by external MIDI control)
VOICE
EFFECT/
CONDITION
RHYTHM
Tone Generation
AWM & FM
Upper Keyboard Voice
Strings; Brass; Clarinet; Saxophone; Chorus; Organ; Piano; Guitar; Vibraphone; Cosmic; Tutti;
Lower Keyboard Voice
[Upper] Harmonica; [Lower] Horn; Volume
Lead Voice
Violin; Flute; Oboe; Trumpet; To Lower; Volume
Pedalboard Voice
Contrabass; Elec. Bass; Organ Bass; Tuba; To Lower; Volume
Digital Reverb
Depth
Sustain
Upper (Knee), Lower (Knee), Pedal: On/Off
Rhythms
March; Waltz; Swing; Bounce; Slow Rock; Tango; Latin 1; Latin 2; 8Beat; 16Beat; Volume
Variations
Fill-In; Intro. Ending; Lead In; Auto Variation: On/Off
Others
Start; Synchro Start; Tempo; Bar/Beat LED
Rhythm Sequence
On/Off, Sequence 1 - 4
KEYBOARD PERCUSSION
Lower, Pedal On/Off
BASIC REGISTRATION
1-5
REGISTRATION MEMORY
M./To Disk, 1 - 8; Disable Button
MUSIC DISK RECORDER
Play/Record: Upper, Lower, Pedal, Lead, Keyboard Percussion, Control; Pause, Stop, Fast Forward/
Reverse, Song Select, Shift, Custom Play, Tempo; Format, Read & Auto Increment, Song Repeat; Song
Delete; Song Copy: From/To; Disk Copy, Punch in Recording, XG Song Playback, Remaining Memory;
LED Display; Eject
FOOT SWITCH
Left
Rhythm (Stop)
Right
Regist. Shift
KNEE LEVER
On/Off: Sustain (Upper, Lower)
OTHER CONTROLS
Power On/Off; Exp. Pedal (Right/Left Footswitches); Master Volume
OTHER FITTINGS
3.5" Floppy Disk; Song Sheet; FUN TO PLAY ELECTONE Disk; Keyboard Cover/Music Stand;
Headphone Jack; Rhythm In (Phone; R/L); Aux In/Out (RCA; R/L); MIDI In/Out; To Host; Host Select
9
Appendix
OPTIONAL ACCESSORIES
HPE-170 Headphones; 3.5" Floppy Disks
SOUND SYSTEM
Power Amplifiers
35W (Stereo)
Speakers
16cm; 5cm; Monitor x 2
DIMENSIONS (W x D x H)
107.7cm x 46.1cm x 94.7cm *With Keyboard Cover Closed
WEIGHT
53.5kg
Specifications and description in this Owner's Manual are information purposes only.
Yamaha Corp. reserves the right to change or modify products or specifications at any time without prior notice.
As specifications, equipment or options may not be the same in every locale, please check with Yamaha dealer.
72
Index
A
M
AUX. OUT ...................................................... 51
M./TO DISK ....................................................
M.D.R. ............................................................
MASTER VOLUME ........................................
Metronome ....................................................
MIDI ...............................................................
MIDI IN/OUT ..................................................
Music Disk Recorder (M.D.R.) ......................
B
BAR/BEAT ..................................................... 19
BASIC REGlST. ............................................. 11
C
Control ...........................................................
Control data ...................................................
Copy Protect .................................................
CUSTOM PLAY ..............................................
17
33
47
41
E
R
Effect .............................................................. 17
Eject ............................................................... 28
Expression Pedal .......................................... 10
HEADPHONES .............................................. 51
HOST SELECT ............................................... 51
Read and Auto Increment (M.D.R.) ..............
RECORD ........................................................
Recording ......................................................
Recording Registrations ...............................
Registration data ...........................................
Registration Memory .....................................
Registration Shift ...........................................
Remaining Memory (M.D.R.) ........................
Repeat playback ...........................................
Retry ..............................................................
Reverb ...........................................................
RHYTHM ........................................................
Rhythm (Footswitch) .....................................
RHYTHM IN ...................................................
Rhythm Sequence .........................................
Right Footswitch ............................................
I
S
INTRO. ENDING ............................................ 18
Saving the Registration Data to Disk ............
SHIFT .............................................................
Song Copy .....................................................
Song Delete ...................................................
SONG REPEAT ..............................................
SONG SELECT ..............................................
START ............................................................
STOP (M.D.R.) ...............................................
STOP (Rhythm) ..............................................
Sustain ...........................................................
SYNCHRO START .........................................
F
Fast Forward (M.D.R.) ...................................
Fast Reverse (M.D.R.) ...................................
Fill In ..............................................................
Floppy Disk ....................................................
Footswitch .....................................................
FORMAT ........................................................
42
42
20
28
49
30
H
K
KEYBOARD PERCUSSION ........................... 22
Knee Lever .................................................... 49
L
LEAD IN .........................................................
LEAD VOlCE ..................................................
LED Display ...................................................
Left Footswitch ..............................................
Loading the Data ..........................................
LOWER KEYBOARD VOlCE ..........................
19
13
30
49
47
13
19
42
19
51
14
U
42
13
33
31
39
10
27
36
V
Voice .............................................................. 13
Voice section ................................................. 13
W
Write-protect tab ........................................... 29
41
31
31
37
33
25
27
46
40
32
17
18
49
51
24
27
26
30
43
45
40
31
18
32
18
17
18
9
Appendix
D. (Disable) ................................................... 25
Details on All Voices ..................................... 15
Disk Copy ...................................................... 45
TEMPO ...........................................................
Tempo (M.D.R.) .............................................
Tempo (Rhythm) ............................................
TO HOST .......................................................
TO LOWER ....................................................
UPPER KEYBOARD VOlCE ........................... 13
P
PAUSE (M.D.R.) ............................................
PEDAL VOICE ...............................................
Performance data .........................................
PLAY ..............................................................
Playback (M.D.R.) .........................................
POWER ..........................................................
Power On Reset ............................................
Punch-in Recording ......................................
D
T
25
28
10
20
52
51
28
73
IMPORTANT NOTICE FOR THE UNITED KINGDOM
Connecting the Plug and Cord
IMPORTANT. The wires in this mains lead are coloured in
accordance with the following code:
BLUE
: NEUTRAL
BROWN : LIVE
As the colours of the wires in the mains lead of this apparatus
may not correspond with the coloured makings identifying the
terminals in your plug proceed as follows:
The wire which is coloured BLUE must be connected to the
terminal which is marked with the letter N or coloured BLACK.
The wire which is coloured BROWN must be connected to the
terminal which is marked with the letter L or coloured RED.
Making sure that neither core is connected to the earth terminal
of the three pin plug.
(2 wires)
• This applies only to products distributed by Yamaha-Kemble Music (U.K.) Ltd.
For details of products, please contact your nearest Yamaha or the authorized distributor listed below.
EUROPE
THE UNITED KINGDOM
Yamaha-Kemble Music (U.K.) Ltd.
Sherbourne Drive, Tilbrook, Milton Keynes,
MK7 8BL, England
Tel: 01908-366700
OTHER EUROPEAN COUNTRIES
Yamaha Corporation,
Pro Audio & Digital Musical Instrument Division
Nakazawa-cho 10-1, Hamamatsu, Japan 430-8650
Tel: 053-460-3273
CENTRAL & SOUTH AMERICA
MEXICO
Yamaha de Mexico S.A. De C.V.,
Departamento de ventas
Javier Rojo Gomez No.1149, Col. Gpe Del
Moral, Deleg. Iztapalapa, 09300 Mexico, D.F.
Tel: 686-00-33
BRAZIL
Yamaha Musical do Brasil LTDA.
Av. Rebouças 2636, São Paulo, Brasil
Tel: 011-853-1377
ARGENTINA
Yamaha Music Argentina S.A.
Viamonte 1145 Piso2-B 1053,
Buenos Aires, Argentina
Tel: 1-4371-7021
PANAMA AND OTHER LATIN
AMERICAN COUNTRIES/
CARIBBEAN COUNTRIES
Yamaha de Panama S.A.
Torre Banco General, Piso 7, Urbanización Marbella,
Calle 47 y Aquilino de la Guardia,
Ciudad de Panamá, Panamá
Tel: 507-269-5311
AFRICA
Yamaha Corporation,
Asia-Pacific Music Marketing Group
Nakazawa-cho 10-1, Hamamatsu, Japan 430-8650
Tel: 053-460-2312
MIDDLE EAST
* Except Turky and Cyprus
Yamaha Music Gulf FZE
LB21-128 Jebel Ali Freezone
P.O.Box 17328, Dubai, U.A.E.
Tel: 971-4-881-5868
ASIA
HONG KONG
Tom Lee Music Co., Ltd.
11/F., Silvercord Tower 1, 30 Canton Road,
Tsimshatsui, Kowloon, Hong Kong
Tel: 2737-7688
INDONESIA
PT. Yamaha Music Indonesia (Distributor)
PT. Nusantik
Gedung Yamaha Music Center, Jalan Jend. Gatot
Subroto Kav. 4, Jakarta 12930, Indonesia
Tel: 21-520-2577
KOREA
Cosmos Corporation
1461-9, Seocho Dong, Seocho Gu, Seoul, Korea
Tel: 02-3486-0011
MALAYSIA
Yamaha Music Malaysia, Sdn., Bhd.
Lot 8, Jalan Perbandaran, 47301 Kelana Jaya,
Petaling Jaya, Selangor, Malaysia
Tel: 3-703-0900
PHILIPPINES
Yupangco Music Corporation
339 Gil J. Puyat Avenue, P.O. Box 885 MCPO,
Makati, Metro Manila, Philippines
Tel: 819-7551
SINGAPORE
Yamaha Music Asia Pte., Ltd.
11 Ubi Road #06-00, Meiban Industrial Building,
Singapore
Tel: 65-747-4374
TAIWAN
Yamaha KHS Music Co., Ltd.
10F, 150, Tun-Hwa Northroad,
Taipei, Taiwan, R.O.C.
Tel: 02-2713-8999
THAILAND
Siam Music Yamaha Co., Ltd.
121/60-61 RS Tower 17th Floor,
Ratchadaphisek RD., Dindaeng,
Bangkok 10320, Thailand
Tel: 02-641-2951
THE PEOPLE’S REPUBLIC OF CHINA
AND OTHER ASIAN COUNTRIES
Yamaha Corporation,
Asia-Pacific Music Marketing Group
Nakazawa-cho 10-1, Hamamatsu, Japan 430-8650
Tel: 053-460-2317
HEAD OFFICE
EUROPE & OCEANIA
Yamaha Corporation, Pro Audio & Digital Musical Instrument Division
Nakazawa-cho 10-1, Hamamatsu, Japan 430-8650
Tel: 053-460-3273
CENTRAL & SOUTH AMERICA, AFRICA, MIDDLE EAST,
ASIA
Yamaha Corporation, Asia-Pacific Music Marketing Group
Nakazawa-cho 10-1, Hamamatsu, Japan 430-8650
Tel: 053-460-2317
OCEANIA
AUSTRALIA
Yamaha Music Australia Pty. Ltd.
Level 1, 99 Queensbridge Street, Southbank,
Victoria 3006, Australia
Tel: 3-9693-5111
NEW ZEALAND
Music Houses of N.Z. Ltd.
146/148 Captain Springs Road, Te Papapa,
Auckland, New Zealand
Tel: 9-634-0099
COUNTRIES AND TRUST
TERRITORIES IN PACIFIC OCEAN
Yamaha Corporation,
Asia-Pacific Music Marketing Group
Nakazawa-cho 10-1, Hamamatsu, Japan 430-8650
Tel: 053-460-2312
Yamaha Manual Library (English versions only)
http://www2.yamaha.co.jp/manual/english/
This document is printed on recycled chlorine free (ECF) paper with soy Ink.
V697020 011MWAP3.2-01A0
M.D.G., Pro Audio & Digital Musical Instrument Division, Yamaha Corporation
© 2000 Yamaha Corporation