1
OpenStage WL 3 / OpenStage WL 3 Plus
Wireless Service Gateway WSG
Administration Manual
A31003-M2000-M102-3-76A9
Our Quality and Environmental Management Systems are
implemented according to the requirements of the ISO9001 and
ISO14001 standards and are certified by an external certification
company.
Copyright © Unify GmbH & Co. KG 01/2014
Hofmannstr. 51, 81379 Munich/Germany
All rights reserved.
Reference No.: A31003-M2000-M102-3-76A9
The information provided in this document contains merely general descriptions or
characteristics of performance which in case of actual use do not always apply as
described or which may change as a result of further development of the products.
An obligation to provide the respective characteristics shall only exist if expressly agreed in
the terms of contract.
Availability and technical specifications are subject to change without notice.
Unify, OpenScape, OpenStage and HiPath are registered trademarks of Unify GmbH & Co. KG.
All other company, brand, product and service names are trademarks or registered trademarks
of their respective holders.
unify.com
Installation and Operation Manual
OpenStage WL3 Wireless Service Gateway - WSG
TD 92442EN
About this document
This document is used for installation and configuration of the product. It is also used
for administration, maintenance and troubleshooting. These activities require good
knowledge about functionality and limitations, both on module and system level, and
also knowledge about how systems, modules and parameters interact.
Cross-references in the document
Throughout this document you will find cross-references in the text which indicate
further details that can be found in other sections of this document. The crossreferences are colored blue and linked to the relevant place in the document (example:
see chapter 18. Document History on page 100). Positioning your cursor over the
cross-reference text and clicking the left mouse button will take you to the relevant
section.
To return to the original page after viewing a cross-referred page in Adobe Acrobat or
Adobe Reader, click on the “Previous View” arrow (
or
).
04 October 2013 / Ver. PB1
Installation and Operation Manual
OpenStage WL3 Wireless Service Gateway - WSG
TD 92442EN
Contents
1. Introduction......................................................................................................... 1
1.1 About the Product.......................................................................................... 1
1.2 Abbreviations and Glossary........................................................................... 1
1.3 How to Use this Document ............................................................................ 2
1.4 Included in the delivery.................................................................................. 3
1.5 Technical Solution.......................................................................................... 3
1.6 Requirements ................................................................................................ 3
2. Installation and Configuration Steps ................................................................ 4
2.1 Information required for the Setup................................................................. 4
2.2 Accessing the WSG....................................................................................... 4
2.3 Basic Configuration Steps ............................................................................. 4
2.4 Manage Central Phonebook Entries.............................................................. 5
2.5 Optional Settings ........................................................................................... 6
3.
General ............................................................................................................... 7
3.1 Graphical User Interfaces (GUI’s) ................................................................. 7
3.2 Authentication Levels and Default Password ................................................ 9
3.3 Password Settings....................................................................................... 10
3.4 System Security Settings............................................................................. 11
3.5 Proxy Settings ............................................................................................. 14
3.6 Demonstration Mode ................................................................................... 15
4. Basic Configuration.......................................................................................... 16
4.1 Manage Central Phonebook Entries............................................................ 16
4.2 Create Messaging Groups........................................................................... 18
4.3
Status........................................................................................................ 19
4.4 WSGBackup the Configuration.................................................................... 24
4.5 Restore the Configuration............................................................................ 24
5. Central Phonebook Configuration .................................................................. 26
5.1 Technical Specification ................................................................................ 26
5.2 Change the Phonebook Address................................................................. 26
5.3 Select Central Phonebook Database .......................................................... 26
5.4 LDAP Parameter Setup ............................................................................... 27
5.5 Digit Manipulation in Central Phonebook .................................................... 29
6. Device Manager ................................................................................................ 33
6.1 Description................................................................................................... 33
6.2 Logging On to the Device Manager............................................................. 38
6.3 Templates .................................................................................................... 38
6.4 Numbers ...................................................................................................... 42
04 October 2013 / Ver. PB1
Installation and Operation Manual
OpenStage WL3 Wireless Service Gateway - WSG
TD 92442EN
6.5 Devices........................................................................................................ 48
6.6 Licenses ...................................................................................................... 51
6.7 File management......................................................................................... 54
6.8 Import/Export Numbers and Templates ....................................................... 60
6.9 Other Settings.............................................................................................. 61
7. Device Configuration........................................................................................ 62
7.1 Device Management Setup ......................................................................... 62
7.2 Service Discovery........................................................................................ 63
8. Additional System Settings ............................................................................. 64
8.1 Unite Name Server (UNS) ........................................................................... 64
8.2 Logging........................................................................................................ 66
8.3 Time Settings............................................................................................... 66
8.4 Network Settings ......................................................................................... 68
8.5 Setting the License Number ........................................................................ 69
9. Remote Management........................................................................................ 70
9.1 Serial IP Server Protocol ............................................................................. 71
10. Absence Handling .......................................................................................... 73
10.1
Absence Handling in the VoWiFi System ................................................. 73
11. Open Access Protocol (OAP) ........................................................................ 74
11.1 Configuration ............................................................................................. 74
11.2 Importing a new OA-XML file ..................................................................... 74
12. WLAN Interface ............................................................................................... 76
12.1 Handset Registration ................................................................................. 76
12.2 Shared Phones.......................................................................................... 76
12.3 WLAN System ........................................................................................... 76
13.
Messaging Operation .................................................................................... 78
13.1 Create and Send Messages via the Messaging Tool ................................ 78
14. Administration of Language and User Interfaces........................................ 79
14.1 Customize the Language........................................................................... 79
14.2 Customize the User Interface (GUI) .......................................................... 83
14.3 Test the New User Interface ...................................................................... 85
14.4 Update the User Interface after a new Release ........................................ 86
15. Software Administration ................................................................................ 87
15.1 Add Device Software to the Device Manager ............................................ 87
15.2 Upgrade the Boot Software ....................................................................... 87
15.3 Software Information ................................................................................. 87
15.4 Switch Software......................................................................................... 87
15.5 Install New Software .................................................................................. 88
04 October 2013 / Ver. PB1
Installation and Operation Manual
OpenStage WL3 Wireless Service Gateway - WSG
TD 92442EN
16. Troubleshooting.............................................................................................. 89
16.1 General Troubleshooting ........................................................................... 89
16.2 Troubleshooting Guide .............................................................................. 89
16.3 Built-in tools ............................................................................................... 94
16.4 Advanced Troubleshooting ........................................................................ 95
16.5 What to consider when replacing a module............................................... 96
16.6 Technical Support ...................................................................................... 96
17. Related Documents ........................................................................................ 97
18. Document History........................................................................................... 98
04 October 2013 / Ver. PB1
Installation and Operation Manual
OpenStage WL3 Wireless Service
1.
1. Introduction
TD 92442EN
Introduction
1.1
About the Product
OpenStage WL3 Wireless Service Gateway (WSG) is a web-based tool. In combination
with WiFi systems it offers typical wireless services such as access to central
phonebook and centralized device management. It also offers basic messaging
services as web messaging, messaging handset to handset (SMS) and messaging
protocols.
NOTE: The software uses open-source components and the source code can be
downloaded from the web site: oss.ascom-ws.com
1.2
Abbreviations and Glossary
Central Phonebook
A Phonebook stored in a database in the control module or
reached from the control module.
Company Phonebook A Phonebook that is uploaded to a handset from the
Device Manager. The entries are locked for editing in the
handset.
Contacts
The name of the phonebook in a handset.
CSV file
Comma Separated Value:
A file with data, where values in each row are separated by
a delimiter, which can be a comma, a semicolon or a tab.
Device
A VoWiFi handset developed to work together with WSG
and the Device Manager application. Device is used as a
general term in this document.
DHCP
Dynamic Host Configuration Protocol
EAP
Extensible Authentication Protocol
FTP
File Transfer Protocol
GUI
Graphical User Interface
Language file
Language file for handset on WSG.
Language file for WSG uses XML (eXtensible Markup
Language.).
LDAP
Lightweight Directory Access Protocol
Number
Settings for the complete set of parameters of a single
device, tied to a specific identity.
OAP
Open Access Protocol:
Ascom defined XML based messaging and alarm protocol.
OA-XML
The Open Access-XML protocol defines messages in XML
format. WSG contains a OAP interface for sending and
receiving messages defined by the OA-XML protocol.
OTA
Over the Air
Parameter definition
file
Defines the parameters for a handset.
04 October 2013 / Ver. PB1
1
Installation and Operation Manual
OpenStage WL3 Wireless Service
1.3
1. Introduction
TD 92442EN
PDM
Portable Device Manager
PKCS#12
A cryptography standard, defining a file format used to
store keys and certificates.
RTLS
Real Time Location System
WSG
OpenStage WL3 Wireless Service Gateway.
TFTP
Trivial File Transfer Protocol, a simple protocol to transfer
files
Unite system
Unite is the Ascom name for the Ascom Professional
Messaging system.
The Unite communication protocol is used for
communication between WSGs in systems with more than
one WSG.
UNS
Unite Name Server:
Module component that holds the Unite number plan and
Unite destinations
VoWiFi
Voice over Wireless Fidelity:
is a wireless version of VoIP and refers to IEEE 802.11a,
802.11b, 802.11g, or 802.11n network.
WiFi
WiFi is a term developed by the Wi-Fi Alliance® to
describe wireless local area network (WLAN) products that
are based on the Institute of Electrical and Electronics
Engineers' (IEEE) 802.11 standards. Today, most people
use WiFi as a reference to wireless connectivity.
WLAN
Wireless LAN
How to Use this Document
This sub chapter includes references to other chapters/documents with more detailed
information regarding following activities:
•
•
•
•
Installation and basic configuration
Extended configuration
Central Phonebook administration
Daily operation
References for Installation and Basic Configuration
•
For installation and basic configuration, see the following chapters:
- 2. Installation and Configuration Steps on page 4
- 3. General on page 7
References for Extended Configuration
See chapters:
- 5.4 LDAP Parameter Setup on page 28
- 11. Open Access Protocol (OAP) on page 76
See also Function Description for Open Access Protocol (OAP).
04 October 2013 / Ver. PB1
2
Installation and Operation Manual
OpenStage WL3 Wireless Service
1. Introduction
TD 92442EN
Central Phonebook Administration
•
1.4
Included in the delivery
•
•
1.5
For administration of the central phonebook, refer to chapter 4.1 Manage Central
Phonebook Entries on page 17.
WSG hardware including a 230 V power cable
Getting started document
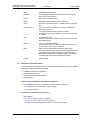
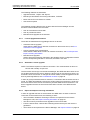
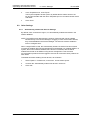
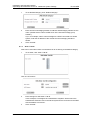
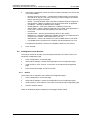
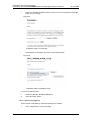
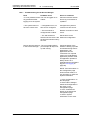
Technical Solution
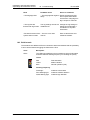
Figure 1. WSG in a system.
VoWiFi Handsets
AP
LAN
PDM
Client
WSG
The WSG runs on the hardware and is configured via a web interface using a
computer (client) connected to the Local Area Network (LAN).
1.6
Requirements
Refer to the Data Sheet for WSG.
04 October 2013 / Ver. PB1
3
Installation and Operation Manual
2. Installation and Configuration Steps
OpenStage WL3 Wireless Service
2.
TD 92442EN
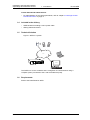
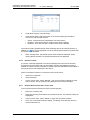
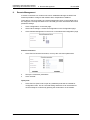
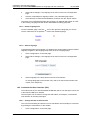
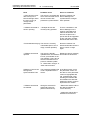
Installation and Configuration Steps
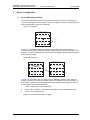
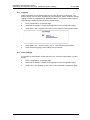
Figure 2. Initial installation and configuration.
Install the
hardware
Gather informatio
n
needed for the
basicconfi
guratio
n
Set ba
sic
configurati
on u
sing
the Se
tupWizard
Add Pho
nebook
entrie
s
Configure opt
ion
al
set
tin
gs
NOTE: The installation of the products hardware is described in the Installation Guide
for WSG.
After installing the hardware, the basic configuration is easily made using the Setup
Wizard. The setup wizard includes all basic settings needed to get the WSG up and
running.
2.1
Information required for the Setup
Make sure the following information is available:
•
•
•
•
•
•
2.2
MAC address – found on a label on the WSG’s rear side and in the application’s
GUI in the Setup Wizard.
The module key – found on the license certificate or on the WSG’s rear side
Network parameters – ask your network administrator
License number – found on the license certificate
IP address to connected system (if connected via IP)
LDAP properties, if an LDAP server is used for Central Phonebook requests
(optional)).
Accessing the WSG
2.2.1
Getting Started
When accessing the WSG the first time, follow the instructions in the Getting Started
and safety Leaflet PM000021, or the Installation Guide for WSG.
NOTE: The IP address must not change during operation because renew of IP address
via DHCP is not handled. Other equipment connected to this product also
expects a fixed IP address in some cases. If the IP plan is changed, this product
must be restarted to update the IP address. Otherwise the system will not
function properly.
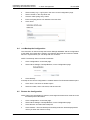
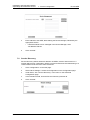
2.3
Basic Configuration Steps
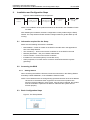
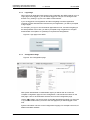
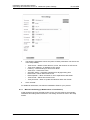
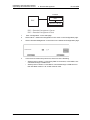
Figure 3. The Setup Wizard.
04 October 2013 / Ver. PB1
4
Installation and Operation Manual
2. Installation and Configuration Steps
OpenStage WL3 Wireless Service
TD 92442EN
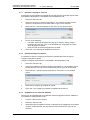
As long as the WSG is not configured, the Setup Wizard will start automatically when
logging on from a web browser.
1
Enter the address to the WSG in a web browser.
2
Click “Setup Wizard” on the Start Page.
3
Enter the appropriate login credentials.
User ID:
admin
sysadmin
Password:
changeme
setmeup
The default passwords can be changed later on.
The setup wizard will open and help you with the basic configuration. The setup
wizard includes the following settings:
•
•
•
•
•
•
•
2.4
Network setup – can be set manually or via DHCP
License number – the type of license determines the functionality
Date and time properties/settings – for time stamps on activities
Central Phonebook properties – database to use when searching (local
phonebook on the module, or LDAP server).
LDAP properties – (only visible if LDAP is selected in the Central Phonebook
properties)
Digit Manipulation Properties – information on how to convert telephone
numbers (only visible if LDAP is used as database)
Passwords – change from default to site specific passwords
Manage Central Phonebook Entries
NOTE: This section is only applicable if a local database was selected in the Setup
Wizard.
The phonebook entries can be added manually or by importing a CSV file. If the local
database Local - 2000 View only is to be used, the CSV file is required to add the
entries.
2.4.1
Add Entries to the Central Phonebook
The central phonebook supports entries with character encoding UTF-8 (for example
Russian characters and Swedish characters).
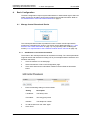
1
Click “Phonebook” on the start page.
2
Select Phonebook > Edit on the Configuration page.
3
Click “Add”.
1
Enter the following settings in the text fields:
Setting
04 October 2013 / Ver. PB1
Description
5
Installation and Operation Manual
2. Installation and Configuration Steps
OpenStage WL3 Wireless Service
Last Name:
The family name
First Name:
The first (given) name
Number:
The telephone number
2
To add additional rows click “Add” again.
3
Click “Save”.
2.4.2
TD 92442EN
Import entries from CSV file
The CSV file to be imported to the phonebook should have the following format with
either “;“ or “,“ as delimiter (as in the example below) or TAB:
First name 1;Last name 1;Phone number 1
First name 2,Last name 2,Phone number 2
NOTE: When importing a Central phonebook file in CSV format, existing entries are
deleted.
1
Click “Phonebook” on the start page.
2
Select Phonebook > Import/Export in the menu on the Configuration page.
3
Select separator for the CSV file.
Different separators may be used in a delimiter-separated file. Currently, the
module supports import of files with the separators semicolon, comma or TAB.
2.5
4
Click “Browse” to locate the CSV file in the system.
5
Click “Import”.
Optional Settings
•
•
•
Set Language – it is possible to translate the user interface language, refer to
chapter 14.1 Customize the Language on page 81.
Open Access Protocol (OAP) – makes it possible to communicate with other
systems that is connected to the module. Refer to chapter 11. Open Access
Protocol (OAP) on page 76.
Digit Manipulation – makes it possible to set the way telephone numbers are
converted in telephone number lists. See 5.5 Digit Manipulation in Central
Phonebook on page 30.
04 October 2013 / Ver. PB1
6
Installation and Operation Manual
OpenStage WL3 Wireless Service
3.
3. General
TD 92442EN
General
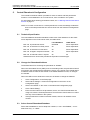
3.1
Graphical User Interfaces (GUI’s)
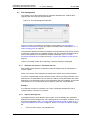
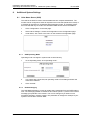
3.1.1
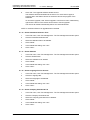
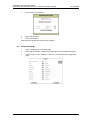
Start Page
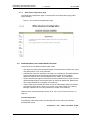
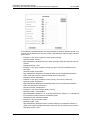
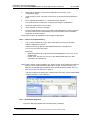
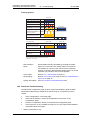
Figure 4. The Start Page
The start page has entrances to different applications. Different applications also
requires different authentication levels as shown in table 1 on page 7.
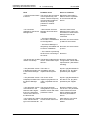
Table 1.
Applications
Authentication levels
(user name/password)
Phonebook, see 4.1 Manage Central
Phonebook Entries on page 17.
Describes how to handle phonebook entries.
user/password
admin/changeme
sysadmin/setmetup
Device Manager, see 6. Device Manager on
page 34.
Describes device management.
user/password
admin/changeme
sysadmin/setmetup
Configuration, see 3.1.3 Configuration Page on admin/changeme
page 8.
sysadmin/setmetup
Setup page for the module settings.
Setup Wizard, see 2.3 Basic Configuration
admin/changeme
Steps on page 4.
sysadmin/setmetup
The first time and as long as the module is not
configured, the Setup wizard will start
automatically.
The default authentication levels and passwords can be changed, see 3.2
Authentication Levels and Default Password on page 9.
04 October 2013 / Ver. PB1
7
Installation and Operation Manual
OpenStage WL3 Wireless Service
3.1.2
3. General
TD 92442EN
Login Page
When clicking an application that requires login credentials, the WSG redirects you to a
Login page. Once logged in, you will remain logged in until you are closing the web
browser or by clicking "Log out" in the WSG´s web interface.
If you are logged in to an application and then navigating to another application
requiring a higher authentication level than the prior application, you will be prompted
to log in again.
For example; you log in to the Phonebook application as user, and then navigating to
the Setup Wizard. In this case, you will be prompted to log in again due to a higher
authentication level (admin or sysadmin) is required for that application.
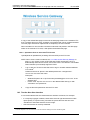
Figure 5. Login page in the WSG
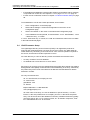
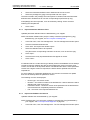
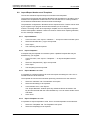
3.1.3
Configuration Page
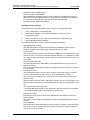
Figure 6. The Configuration page
With system administrator or administrator rights you will be able to access the
complete configuration page from the Configuration- and Phonebook buttons on the
start page. Links to documentation are also found on the Configuration page.
Use the
symbol if you want to return to the start page without logging out. Using the
“Log out” link will also send you back to the start page but you will be logged out as
well.
System information is shown on the Configuration top page, for example host name, IP
address and MAC Address.
04 October 2013 / Ver. PB1
8
Installation and Operation Manual
OpenStage WL3 Wireless Service
3.1.4
3. General
TD 92442EN
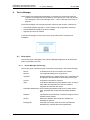
Advanced Configuration page
The Advanced Configuration page is reached from the Configuration page (under
Other Settings).
Figure 7. The Advanced Configuration Page
3.2
Authentication Levels and Default Password
The product has five different authentication levels:
•
•
•
•
User rights are required for the administration of the phonebook. Default user name
and password are “user” and “password”.
Administrator rights are required for the setup, the configuration and administration,
simple troubleshooting and changing passwords (except for the sysadmin
password). Default user name and password are “admin” and “changeme”.
System Administrator rights is used for advanced troubleshooting. It gives access to
all administration pages and the permission to change all passwords. Default user
name and password are “sysadmin” and “setmeup”.
Auditor rights gives basically the same access as Administrator rights, but without
permission to alter values. There is no access to the setup wizard or the Device
Manager. Default user name and password is “auditor” and “readonly”.
Different levels of password policy can be set in, see 3.3.2 Set Password Policy on
page 10.
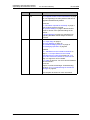
Functionality matrix
The following matrix shows which functionality that can be used by the different
authentication levels.
anonymous user admin sysadmin audito
r
04 October 2013 / Ver. PB1
9
Installation and Operation Manual
OpenStage WL3 Wireless Service
3. General
TD 92442EN
Phonebook administration
No
Yes
Yes
Yes
No
View configuration settings
No
No
Yes
Yes
Yes
Configuration
Access to the setup wizard
No
No
Yes
Yes
No
Access to the Device Manager.
No
Yes
Yes
Yes
No
No
Yesa
Yes
No
Change passwords
No
a.Admin cannot change password for sysadmin.
3.3
Password Settings
The default passwords for the different type of users; sysadmin, admin etc., can be
changed and it is also possible to specify the password complexity, such as length and
number of character types. Passwords can be changed in both the Setup Wizard and
on the Advanced Configuration page, but the password complexity (password policy)
can only be changed on the Advanced Configuration page.
3.3.1
Change Passwords
Different passwords can be set for different users.
1
Click “Configuration” on the start page.
2
Select Other Settings > Advanced Configuration in the menu in the on the
Configuration page.
3
Under Security, click “Change Passwords” in the menu on the Advanced
Configuration page.
4
Click the user to change password for.
5
Enter your user name and password. Enter the new password and confirm the
password.
6
Click “Ch. Passwd”.
3.3.2
Set Password Policy
The required password complexity can be set.
1
Click “Configuration” on the start page.
04 October 2013 / Ver. PB1
10
Installation and Operation Manual
OpenStage WL3 Wireless Service
3. General
TD 92442EN
2
Select Other Settings > Advanced Configuration in the menu in the on the
Configuration page.
3
Select “Password Policy” under Security in the menu on the Advanced
Configuration page.
4
Select password policy.
5
Click “Activate”.
It is also possible to select previous or factory default settings.
3.4
System Security Settings
Security settings, such as not allowing HTTP and FTP access, disabling NETBIOS and
increasing the security by using Certificates might be needed if required by the
customer.
3.4.1
Web Access Security Settings
You can determine if the WSG only should be accessed via HTTPS and FTPES to
establish a secure connection between your client and the WSG. Information sent
between the client and the WSG cannot be seen by any third-party. The HTTPS and
FTPES require a certificate.
1
Click “Configuration” on the start page.
2
Select Other Settings > Advanced Configuration in the menu in the on the
Configuration page.
3
Select “Web Access” under Security in the menu on the Advanced Configuration
page.
4
Select if Secure Mode shall be enabled or not.
5
Click “Activate”
It is also possible to select previous or factory default settings.
04 October 2013 / Ver. PB1
11
Installation and Operation Manual
OpenStage WL3 Wireless Service
3.4.2
3. General
TD 92442EN
NetBIOS Port
You can determine if the NETBIOS port (UDP 137) shall be open or closed. The
NETBIOS makes it possible to access the WSG with the NetBIOS name “eliseXXXXXXXX”, where XXXXXXXX is the module key number. If the port is closed, only
the WSG’s IP address can be used to access the WSG.
The NetBIOS port is default enabled but can be disabled if needed for security
reasons.
6
Click “Configuration” on the start page.
7
Select Other Settings > Advanced Configuration in the menu on the
Configuration page.
8
Select “IP Ports” under Security in the menu on the Advanced Configuration
page.
9
Select if the port should be closed (disabled) or open (enabled) in the NetBIOS
(UDP Port 137) drop-down list.
10
Click “Activate”.
3.4.3
Fragmented TCP Packets
You can determine if the module shall allow that IP packets is broken into several
smaller packets, which then can be transmitted an reassembled at the final destination.
If the IP network only allows packets with 1500 bytes, the packets will be dropped if not
fragmenting is allowed. If fragmentation is allowed in the IP network, the parameter
needs to be enabled in module.
1
Click “Configuration” on the start page.
2
Select Other Settings > Advanced Configuration in the menu on the
Configuration page.
3
Select “IP Ports” under Security in the menu on the Advanced Configuration
page.
04 October 2013 / Ver. PB1
12
Installation and Operation Manual
OpenStage WL3 Wireless Service
3. General
TD 92442EN
4
Select “Enabled” in the Fragmented TCP packets (Caution advised) drop down
list.
5
Click “Activate”.
04 October 2013 / Ver. PB1
13
Installation and Operation Manual
OpenStage WL3 Wireless Service
3.4.4
3. General
TD 92442EN
FTP Port
You can determine if it shall be possible to access the FTP area or not. The FTP area
can only be accessed when the FTP port is open.
1
Click “Configuration” on the start page.
2
Select Other Settings > Advanced Configuration.Select “IP Ports” under Security
in the menu on the Advanced Configuration page.
3
Select if the FTP port shall be open (enabled) or not (disabled) in the FTP (TCP
Port 21) drop-down list.
4
Click “Activate”.
3.4.5
Certificates
Certificates are used to increase security by encryption. A self-signed digital certificate
is created during the first start-up. This certificate is issued for the module’s MAC
address. A certificate can also be imported or created in the module.
Import certificates
Certificates can be imported to the WSG. These certificates may be created by a
system administrator with IT security responsibility. The WSG uses PKCS#12 files,
which include keys and certificates. Consult your IT responsible to obtain the PKCS#12
file.
1
Click “Configuration” on the start page.
2
Select Other Settings > Advanced Configuration in the menu in the on the
Configuration page.
3
Click “Import” under Certificates in the menu.
4
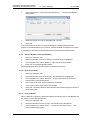
In the Certificates Import window, you can locate a certificate file. Enter file name
and a valid password. The certificate is tied to a specific password which should
be delivered with the file.
04 October 2013 / Ver. PB1
14
Installation and Operation Manual
OpenStage WL3 Wireless Service
3. General
5
Click “Import file”. The file is imported to the module.
6
Click “Close”.
TD 92442EN
When starting, there may be a warning about the security certificate. This warning can
be ignored.
Create certificate
It is possible to create certificates in the module. For instructions on how to create a
PKCS#12 file, follow this instruction:
1
Click “Configuration” on the start page.
2
Select Other Settings > Advanced Configuration in the menu in the on the
Configuration page.
3
Click “Create” under Certificates in the menu.
4
Enter valid parameters for your certificate file in the Create Self Signed
Certificate window. “Validity” and “Common name” are mandatory.
Due to security reasons, some characters in the ASCII-table are not allowed to
use
in the fields “Common Name”, “Organization Unit”, “Organization”, “Locality”,
“State or Province” and “Country” when creating a certificate.
Among these are: [, ], (, ), {, }, $, &, \, |, *, ", `, ', ?, ~, >, <, ^, \n, \r.
5
3.5
Click “Create Certificate”.
Proxy Settings
If your corporate network is using a proxy server, the WSG must send all outgoing
requests through the proxy server to be able to send the requests outside the corporate
network.
1
Click “Configuration” on the start page.
2
Select Other Settings > Advanced Configuration.
3
Select “Proxy” under Security in the menu on the Advanced Configuration page.
04 October 2013 / Ver. PB1
15
Installation and Operation Manual
OpenStage WL3 Wireless Service
4
3.6
3. General
TD 92442EN
Enter/Select the following:
Proxy:
Determines if the proxy settings below is to be used
HTTP Proxy
Address:
The address to the proxy server
HTTP Proxy Port:
The port the proxy server is listening at
Demonstration Mode
Demonstration Mode makes it possible to run the product for two hours with almost full
functionality of the application.
The Demonstration Mode can be set from the application’s Configuration page or
manually by using the Mode button. The module will automatically return to previous
license and parameters (without restart) after 2 hours.
Demonstration Mode is indicated by the Status LED with yellow slow flashing light. If
any application encounters problems during Demonstration Mode, the Status LED will
however show red slow flashing light instead. The Mode button LED shows blue fixed
light.
From the application’s Configuration page:
1
Click “Configuration” on the start page.
2
Select Other Settings > Demonstration Mode in the menu on the Configuration
page.
3
Click “Activate”.
4
Exiting before the 2 hours have passed, is done by clicking “Deactivate”.
Using the Mode button:
1
Press and hold the Mode button for 10 seconds.
04 October 2013 / Ver. PB1
16
Installation and Operation Manual
OpenStage WL3 Wireless Service
4.
4. Basic Configuration
TD 92442EN
Basic Configuration
The basic configuration requires system administrator or administrator rights. With user
rights you will only be able to access and configure the Central Phonebook. Refer to
3.2 Authentication Levels and Default Password on page 9.
4.1
Manage Central Phonebook Entries
The central phonebook makes it possible for users to search and find phonebook
entries from a handset in the system. The entries can be added manually (4.1.1 Add
Entries to the Central Phonebook on page 17) or by importing a file containing the
entries (4.1.3 Import Entries to the Central Phonebook from a CSV File on page 18).
4.1.1
Add Entries to the Central Phonebook
The entries in the central phonebook can be filled in manually. The central phonebook
supports entries with character encoding UTF-8 (for example Russian characters and
Swedish characters).
1
Click “Phonebook” on the start page.
2
Select Phonebook > Edit on the Configuration page.
3
Click “Add” and enter the information needed in the text fields as described
below.
1
Enter the following settings in the text fields:
Setting
Description
Last Name:
The family name
First Name:
The first (given) name
Number:
The telephone number
2
To add several rows click “Add” again.
3
Click “Save”.
04 October 2013 / Ver. PB1
17
Installation and Operation Manual
OpenStage WL3 Wireless Service
4. Basic Configuration
TD 92442EN
Sorting Entries in the Central Phonebook
The entries in the Central phonebook can be sorted on Last Name, First Name or
Number by clicking the arrows in the list’s title bar.
4.1.2
Delete Entries
1
Click “Phonebook” on the start page.
2
Select Phonebook > Edit in the menu on the Configuration page.
A) Delete a single Entry:
1
Locate the entry to be deleted and click the
2
Click “Save”. The entry is deleted.
button in the same row.
B) Delete several Entries:
1
Click “Delete All”.
All entries in the list will be crossed over and the
icon will be displayed to the
right of each entry. If you want to keep an entry just click the
icon and the
changes will be discarded for that entry.
2
4.1.3
Click “Save”. All entries marked with a blue arrow are deleted.
Import Entries to the Central Phonebook from a CSV File
The CSV file to be imported to the Central phonebook shall have the following format:
First name;Last name 1;Telephone number
Different separators may be used, see below:
NOTE: When importing a Central phonebook file in CSV format, existing entries are
deleted.
1
Click “Phonebook” on the start page.
2
Select Phonebook > Import/Export in the menu on the Configuration page.
3
Select the character encoding of the file in the Character encoding drop-down
list. NOTE: It is important that you select the same character encoding that the
file is saved as. If not, the entries will be corrupted after the file has been
imported.
4
Select separator for the CSV file.
Different separators may be used in a delimiter-separated file. Currently, the
module supports import of files with the separators semicolon, comma or TAB.
5
Click “Browse” to locate the CSV file in the system.
6
Click “Import”.
04 October 2013 / Ver. PB1
18
Installation and Operation Manual
OpenStage WL3 Wireless Service
4.1.4
4. Basic Configuration
TD 92442EN
Export the Central Phonebook to a CSV File
The complete Central phonebook can be exported to a CSV file for backup reasons.
The exported file will be saved with the character encoding UTF-8.
4.2
1
Click “Phonebook” on the start page.
2
Select Phonebook > Import/Export in the menu on the Configuration page.
3
Click “Export”.
4
Click “Save” in the window that opens.
5
Enter a name of the file, and select in which folder the file should be saved.
6
Click “Save”.
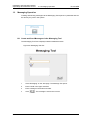
Create Messaging Groups
Messaging Groups in the WSG makes it possible to send one message to several
handsets. 30 groups with 15 handsets in each group, and one group with 50 handsets
can be created. Messaging Groups can also be used to send Push-to-talk (PTT)
messages to a group of handsets. In this case, PTT parameters must also be set in the
handset that shall initiate the PTT message. Refer to the handset’s Configuration
Manual for more information about the parameters.
Each group is given an address, either a name or a number, and a description. Then
the addresses of the handsets, that should be included in the group, are added.
1
Click “Configuration” on the Start page.
2
Select Messaging Groups > Edit in the menu on the Configuration page.
3
Open the group to be configured by clicking on its name (default EMPTY).
4
Enter the following settings:
Setting
Description
Group address:
ID for the group, can be a namea or a number
04 October 2013 / Ver. PB1
19
Installation and Operation Manual
OpenStage WL3 Wireless Service
4. Basic Configuration
Group description:
Description of the group.
Members:
Add members/handsets to the group
TD 92442EN
a.If it should be possible to send messages from a handset in the Cordless Telephone System,
the address has to be a number.
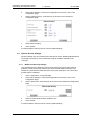
4.3
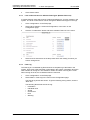
Status
On these pages, information on active faults or stored faults can be shown.
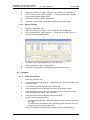
4.3.1
Active Faults
Active Faults page is where the last 100 received active persistent fault logs are listed.
For more information about the fault log, refer to 4.3.4 Fault Log on page 21.
1
Click “Configuration” on the Start page.
2
Select Status > Active Faults, in the menu on the Configuration page.
The following information is shown for each fault:
•
•
•
•
•
Time when the fault occurred
Level of the fault:
- Critical error
- Error
- Warning
Description of the fault, as defined in the module
Type of module
IP address and host name of the module that generated the fault
By expanding the fault in the list, additional information about the fault is shown
containing:
•
•
•
•
•
Fault ID
This is used to reference a persistent fault when it later is reset
Fault code
Description of the fault code
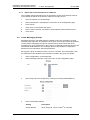
Extended address information showing the system, bus type and module
address
• In the figure below the system is 00, the bus type is 1 and the module
address is 0A.
Persistent faults will remain in the list until the module sends a status message
confirming that the module is working properly again. It is also possible to delete the
fault in the list by clicking the icon .
NOTE: If the IP address or license is changed in the module, the faults reported for the
previous IP address/license will remain since no confirmation can be received.
These faults must be manually deleted.
The active faults list page has to be manually updated by clicking the “Update Page”
link uppermost on the page.
4.3.2
Reset the Error Relay
The error relay can be reset manually from the Active Faults page.
1
Click “Configuration” on the start page.
2
Select Status > Active Faults in the menu on the Configuration page.
04 October 2013 / Ver. PB1
20
Installation and Operation Manual
OpenStage WL3 Wireless Service
3
4.3.3
4. Basic Configuration
TD 92442EN
Click “Reset” button.
Level of Seriousness for different Fault Types (Module Fault List)
A module fault list exists which shows codes and statuses etc. for each module in the
system. The level of seriousness can be changed for different fault types in the logs.
1
Click “Configuration” on the Start page.
2
Select Other Settings > Advanced Configuration, in the menu on the
Configuration page.
3
Click the “Troubleshoot” button and select “Module Fault List” in the menu.
4
Select level of seriousness in the drop-down list for the code(s) for which you
want to change level.
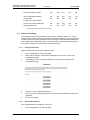
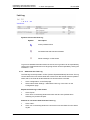
4.3.4
Fault Log
The fault log is a centralized log file and shows a complete log of the faults in the
system. Every time a fault message is generated in the system, information about the
fault is written to the log file. The maximum number of entries in the log file is 1050.
When the log file is full, the 50 oldest entries are removed.
1
Click “Configuration” on the Start page.
2
Select Status > Fault Log in the menu on the Configuration page.
The first 25 log entries are shown. To get the following 25 log entries, click the
“Next” link.
The following fault levels exist in the log:
•
•
•
•
•
•
Information
Individual reset
All OK
Critical error
Error
Warning
04 October 2013 / Ver. PB1
21
Installation and Operation Manual
OpenStage WL3 Wireless Service
4. Basic Configuration
TD 92442EN
Symbols used in the Fault Log
Symbol
Description
Active persistent fault
Persistent fault that has been handled
Reset message, no fault exists
To get more detailed information about the events, the log entries can be expanded by
clicking the “Expand all entries” link. Single log entries can be expanded by clicking the
individual “+” icon.
4.3.5
Administer the Fault Log
The Fault log can be exported in a CSV (Comma Separated Values) file format. The log
can be cleared from non-active faults and a timeout can also be set to block repeated
faults, that is, the fault will be discarded and no actions will be executed.
1
Click “Configuration” on the Start page.
2
Select select Other Settings > Administer Fault Log, in the menu on the
Configuration page.
Export the Fault Log in CSV format
1
Click “Export”.
2
Click “Save” in the dialog window and enter the file name (default name
statuslog.csv) and the file path.
Remove all non-active faults from the Fault Log
1
Click “Clear”.
2
Click “Yes” in the dialog window to remove all non-active faults from the status
log file.
04 October 2013 / Ver. PB1
22
Installation and Operation Manual
OpenStage WL3 Wireless Service
4. Basic Configuration
TD 92442EN
Set a Timeout to block the Fault log from repeated faults
1
Enter the timeout in minutes (0-1000 minutes), the default value is 10 minutes.
If no Status Logs should be blocked, set the timeout to 0.
2
Click “Set timeout” to save the setting.
An incoming fault will now be handled the first time it is received and then
blocked during the set timeout.
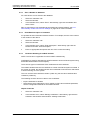
4.3.6
WLAN Handsets
Handset Administration gives you the possibility to list all handsets that are registered
in the system, search for a specific handset, or a range of handsets.This is intended to
facilitate troubleshooting.
The pages can be customized by changing the number of handsets shown on the
search result list.
Show all Registered VoWiFi Handsets
1
Select “Configuration” on the Start page.
2
Click “WLAN Portables” in the menu on the Configuration page.
3
Do one of the following:
4
•
Click “Search” to search for registered VoWiFi handsets based on different
search criterias. For example Address/Number, IP address, Hardware ID
(often the MAC address) or the Status of the handset. The Search page
opens.
•
Click “List all” to show all registered VoWiFi handsets.
The search result can be sorted by address/number, IP address, status or last
login. Click the name of the column to be sorted.
04 October 2013 / Ver. PB1
23
Installation and Operation Manual
OpenStage WL3 Wireless Service
4. Basic Configuration
TD 92442EN
Save a list with all Registered VoWiFi Handsets
The search result list can be exported to a comma separated file.
1
Click the “Export Result” button.
2
Select “Save”. Enter a file name and the location where the file shall be stored,
and click “Save”.
Remove IP Address, Force a Relogin, or Delete a VoWiFi Handset
1
Select the handset(s) check box in the search result list.
2
Click “Remove IP Address”, “Force Relogin” or “Delete Selected”.
• Remove IP Address
Used for refreshing the address of a handset.
• Force Relogin
Used for checking the connection with a handset.
• Delete Selected
Used for removing numbers not in use.
Show Handset Details
Click the icon
4.3.7
in the search result list. All details of the chosen handset are viewed.
Change the Handset Absent Status
It is possible to change the Manual Absent status of the VoWiFi handsets.
1
View all handsets, refer to Show all Registered VoWiFi Handsets on page 23.
2
Click the icon to view handset details, see Show Handset Details above.
3
In the Manual Absent drop-down list, select “On” or “Off”.
4.3.8
Export Activity Logs to a Syslog Server
Activities in the module are logged and can be exported to a Syslog Server where the
logs can be managed and analyzed. Messages are sent to the syslog server every time
an activity occur in the module. Example of activities are: An SMS has been sent to a
handset, an alarm has been received from a handset, an error has occurred in the
module etc. Syslog is a simple protocol (SYStem LOG protocol) for transmitting event
messages and alerts text across an IP network. The activities are sent as text
messages from the module to the Syslog Server. The IP address to the Syslog Server
must be set in the module. The activities can be exported to 5 syslog servers in parallel.
1
Click “Configuration” on the Start page.
04 October 2013 / Ver. PB1
24
Installation and Operation Manual
OpenStage WL3 Wireless Service
4. Basic Configuration
TD 92442EN
2
Select Activity Log > Log Export in the menu on the Configuration page.
3
Select “Enable” in the drop-down list.
4
Click the “Add Syslog entry” button.
5
Enter the Syslog Server’s IP address in the text field.
6
Click “Save”.
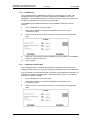
•
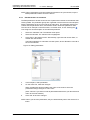
4.4
WSGBackup the Configuration
This instruction is used to backup the Device Manager database and the configuration
of the WSG. The backup file is saved in a proprietary file format and cannot be edited.
Save it in a place where you can easily find it for a restore.
NOTE: The backup does not include certificates.
1
Click “Configuration” on the start page.
2
Select Other Settings > Backup/Restore, on the Configuration page.
3
Click “Backup”.
A backup of the current configuration is created and the File Download window opens.
4.5
4
Click “Save”. The Save As window opens.
5
Select a location, enter a file name, and save the file.
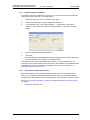
Restore the Configuration
NOTE: When the configuration is restored, all changes that have been made since the
last backup will be discarded.
1
Click “Configuration” on the start page.
2
Select Other Settings > Backup/Restore, on the Configuration page.
3
Click “Browse” and select the backup file.
4
Click “Restore”. The text “Backup successfully restored!“ will be displayed and
inform you when the restore is ready.
04 October 2013 / Ver. PB1
25
Installation and Operation Manual
OpenStage WL3 Wireless Service
5
4. Basic Configuration
TD 92442EN
Click “Restart Now” to reboot, else click “Restart Later”. If the IP address has
been changed, the module needs to be restarted for the settings to take effect.
A restart will take a couple of minutes and during that time the module cannot be
reached. When the restart is completed, the window will refresh to the
Configuration page overview.
04 October 2013 / Ver. PB1
26
Installation and Operation Manual
5. Central Phonebook Configuration
OpenStage WL3 Wireless Service
5.
TD 92442EN
Central Phonebook Configuration
The Central Phonebook makes it possible for users to search and find phonebook
entries in a local database or in an LDAP server, from a handset in the system.
For information about entering phonebook entries, see 4.1 Manage Central Phonebook
Entries on page 17.
NOTE: If an LDAP connection to a central phonebook is used, all settings needed are
done in the setup wizard but can also be done from the Advanced Configuration
page.
5.1
Technical Specification
The local database has defined limitations while most of the limitations for the LDAP
server depends on the LDAP server used, see table below.
Local Database
LDAP Server
Max. No. of phonebook entries:
500/2000
Server dependent
Max. No. of characters in family name:
20
Server dependent
Max. No. of characters in first name:
20
Server dependent
Max. No. of digits in telephone number:
20
Server dependent
Max. No. of returned entries / request:
25
25
Handsets that can access the phonebook: Depends on handset type.
5.2
Change the Phonebook Address
The default Call ID for accessing the phonebook is “999999”.
When the Unite Name Server (UNS) is set to forwarding mode, the phonebook Call ID
must exist in the module that the requests are sent to. Any change of the Call ID and/or
IP address must be made in that module. If the default address is used, no changes
are needed.
When the UNS is set to stand-alone mode, do as follows to change the address:
5.3
1
Click “Configuration” on the Start page.
2
Select Other Settings > Advanced Configuration in the menu on the
Configuration page.
3
Select “Phonebook” in the menu on the Advanced Configuration page.
4
Click “Call ID Setting”.
5
Enter the new Call ID for the phonebook, that is, the Call ID the handsets are
using to access the Central phonebook. Check that the Call ID does not conflict
with any of the handsets in the system.
6
If the phonebook is located on another module, enter the IP address to that
module.
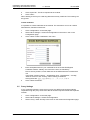
Select Central Phonebook Database
Select which database to use for telephone numbers; “Local - 500 Editable”, “Local 2000 View only”, or “LDAP”.
04 October 2013 / Ver. PB1
27
Installation and Operation Manual
5. Central Phonebook Configuration
OpenStage WL3 Wireless Service
•
•
TD 92442EN
If the default local database is selected the entries must be added, either manually
or imported from a CSV file, see chapters 4.1.3 on page 17 or 4.1.4 on page 18.
If LDAP server is selected, continue in chapter 5.4 LDAP Parameter Setup on page
28.
To set database to use for the Central phonebook, do as follows:
1
Click “Configuration” on the Start page.
2
Select Other Settings > Advanced Configuration in the menu on the
Configuration page.
3
Select “Phonebook” in the menu on the Advanced Configuration page.
4
In the Database for lookups field, choose between “Local - 500 Editable”, “Local
- 2000 View only”, or “LDAP”.
If “Local - 2000 View only” is chosen, the “Add” and “Delete all” buttons are not visible
in the Edit Phonebook pages.
5.4
LDAP Parameter Setup
The Lightweight Directory Access Protocol (LDAP) is an application protocol for
querying and modifying directory services running over TCP/IP. The WSG starts an
LDAP session by connecting to an LDAP server. Then it sends operation requests to
the server, and the server sends responses in return.
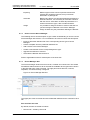
An LDAP directory is a tree of directory entries and follows the structure below:
•
•
An entry consists of a set of attributes.
An attribute has a name and one or more values.
Each entry has a unique name; the distinguished name (DN). DN consists of its relative
distinguished name (RDN) constructed from some attribute(s) in the entry, followed by
the parent entry's DN. Think of the DN as a full filename and the RDN as a relative
filename in a folder.
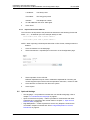
An entry can look like this:
dn: cn=John Ericson,dc=company,dc=com
cn: John Ericson
givenName: John
sn: Ericson
telephoneNumber: +1 888 555 6789
mail: [email protected]
dn is the name of the entry; it is not an attribute nor part of the entry. “cn=John
Ericson” is the entry's RDN, and “dc=company, dc=com” is the DN of the parent
entry. The other lines show the attributes in the entry. Attribute names are typically
mnemonic strings, like “cn” for common name, “dc” for domain component, “mail”
for e-mail address and “sn” for surname. .
04 October 2013 / Ver. PB1
28
Installation and Operation Manual
5. Central Phonebook Configuration
OpenStage WL3 Wireless Service
TD 92442EN
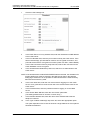
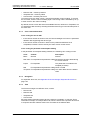
1
Click the LDAP settings link.
2
In the LDAP Server or Proxy Address field, enter the IP address or DNS address
to the LDAP server.
3
In the Port Number field, enter the port number used by the LDAP server. If the
field is leaved empty, port 389 will be used for non-encrypted connection, and
port 636 will be used for encrypted connection (LDAP over SSL, called LDAPS).
4
In the LDAP Connection Security drop-down list, select if the connection to the
LDAP database is to be encrypted.
5
In the Authentication Method drop down list, select how to authenticate to the
LDAP server.
NOTE: If the authentication method SASL/DIGEST-MD5 is selected, the IP address for
primary DNS server must be entered in the DNS server field on the Network
setup page. Otherwise it is not possible to authenticate with the LDAP directory
Microsoft Active Directory 2003.
6
In the User name field, enter the user name used for logging on to the LDAP
server. It is a good idea to create a new user in the domain with access for the
LDAP server.
7
In the Password field, enter the password used for logging on to the LDAP
server.
8
In the Search Base DN field, enter the user entries' parent DN.
(The distinguished name for all users common entry.)
9
In the Number attribute field, enter the name of the attribute that holds the
telephone numbers.
10
In the Type of Name Attribute(s) drop down list, select the appropriate option.
The option depends on if the name is stored in a single attribute or if it is split into
two different attributes.
04 October 2013 / Ver. PB1
29
Installation and Operation Manual
5. Central Phonebook Configuration
OpenStage WL3 Wireless Service
11
5.5
TD 92442EN
In the Name Attribute(s) field, enter name(s) of the attribute(s) containing first
name and family name. If two attributes are used, enter the first name on the first
line and the family name on the second line.
Digit Manipulation in Central Phonebook
When importing telephone numbers it is sometimes necessary to automatically change
the way a number is written according to preset conditions.
Depending on where a number is situated, the module can alter the number that is
returned in a phonebook query. If, for example, the queried number is situated within
the same local exchange, the telephone number is considered to be an internal number
and the number is stripped from superfluous international prefixes, etc.
Telephone number standards
There are several standardized ways of writing telephone numbers.
The following formats are currently supported:
Format
Comment
+4631559300
E.164 international standard, and E.123
(031)-559300
E.123 local number
+46(031)559300
National prefix + national destination code in parentheses
+46(0)31559300
National prefix in parentheses
+46(31)559300
Canonical address format
4631551234
Digits only. Conversion is controlled by setting maximum
lengths of internal and national numbers.
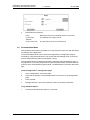
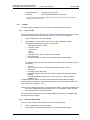
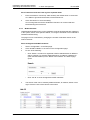
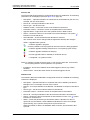
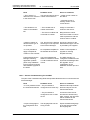
Examples
The following figure shows the elements of a telephone number, +46(31)551234 (in
canonical format), used in the parameter descriptions below.¨
Figure 8.
46 31 55 1234
Country Code
Extension
PBX
Prefix
581
National
Destination
Code
Example of how a telephone number is built up from different prefixes and
extensions.
Figure 9. Example of Digit Manipulation Settings
04 October 2013 / Ver. PB1
30
Installation and Operation Manual
5. Central Phonebook Configuration
OpenStage WL3 Wireless Service
TD 92442EN
The following examples illustrate how digit manipulation works in different queries. The
queries are considered to be done from within +463155xxxx (local exchange), see also
figure above.
•
•
•
•
•
Example 1: The query is within the same local exchange.
Queried number: 551234
Digit manipulation identifies 55 as the local exchange prefix and strips 55 from the
number.
Resulting number: 1234
Example 2: The query is within the same city (area code), but outside the local
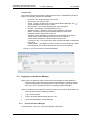
exchange.
Queried number: 031612500
Digit manipulation identifies 0 as National Prefix and 31 as National Destination
Code, strips 031 from the number and adds 00 for external line.
Resulting number: 00612500
Example 3: The query is within the same country, but not in the same city.
Queried number: 035158115
Digit manipulation identifies 0 as National Prefix and 35 as National Destination
Code and adds 00 for external line.
Resulting number: 00035158115
Example 4: The query is within another country.
Queried number: +4781530555
Digit manipulation identifies “+47” as an international call, skips the “+”, and adds 00
for external line prefix and 00 for international prefix.
Resulting number: 00004781530555
Example 5: Size of internal number.
Queried number: 1234
Digit manipulation identifies that the number of digits in the telephone number is
equal to the number of digits entered as “maximum size of internal phone numbers”.
Resulting number: 1234
04 October 2013 / Ver. PB1
31
Installation and Operation Manual
5. Central Phonebook Configuration
OpenStage WL3 Wireless Service
•
TD 92442EN
Example 6: Size of global number.
Queried number: 47815305555
Digit manipulation identifies that the number of digits in the telephone number is
equal to the number of digits entered as “minimum size of global phone numbers”,
then adds 00 for external line prefix and 00 for international prefix.
Resulting number: 000047815305555
Digit Manipulation Settings
The parameters for digit manipulation can be set via the Configuration page.
1
Click “Configuration” on the Start page.
2
Select Other Settings > Advanced Configuration in the menu on the
Configuration page.
3
Select “Phonebook” in the menu on the Advanced Configuration page.
4
Click "Digit Manipulation Settings".
The following parameters can be configured for digit manipulation:
•
•
•
•
•
Digit Manipulation Enabled
The digit manipulation function can be enabled and disabled. If the function is
enabled, the parameters below apply, otherwise they do not apply.
Country Code
The Country Code is the prefix to be used when dialling to a particular country from
another country. The country code is what follows after the + in a telephone number.
The value is used to identify the country code in the number and remove it when it is
not needed.
National Destination Code
The National Destination Code (NDC) is what follows after the country code in a
telephone number.
The value is used to identify the NDC in the telephone number and remove it when
it is not needed.
International Prefix
The International Prefix is used to dial a call from a particular country to another
country. This is followed by the country code for the destination country.
This value is used to replace the + character when an international call is made.
National Prefix
National Prefix is used to make a call within a country from one city to another. The
national prefix is followed by the national destination code for the destination of the
call.
This value is used for two purposes:
- To identify the national prefix in the number and remove it when it is not needed.
- To change a number when the destination is another city.
•
•
External Line Prefix
External Line Prefix is what needs to be dialled before the number to reach the
public network.
The value is used to change the telephone number if it is identified as an external
number.
PBX First Prefix
PBX First Prefix is what precedes an internal number to create an external number.
This value is used to compare with the phonebook number to decide whether the
number is internal or external.
04 October 2013 / Ver. PB1
32
Installation and Operation Manual
5. Central Phonebook Configuration
OpenStage WL3 Wireless Service
•
•
•
TD 92442EN
PBX Second Prefix
Points out an additional prefix to be handled in the same way as “PBX First prefix”.
Maximum size of internal telephone numbers
Used for numbers that starts with a digit instead of “+” or “(“. If the number is longer
than this value, it is considered to be an external number.
Minimum size of global telephone numbers
Used for numbers that starts with a digit instead of “+” or “(“. If the number is equal
to or longer than this value, it is considered to be a global number.
04 October 2013 / Ver. PB1
33
Installation and Operation Manual
OpenStage WL3 Wireless Service
6.
6. Device Manager
TD 92442EN
Device Manager
NOTE: Make sure that the Device Manager is configured to communicate with the
interface (for example WLAN) the devices are connected to. If not, the devices
will not appear in the Device Manager. See 7.1 Device Management Setup on
page 64.
The Device Manager can manage large sets of devices and contains a solution for:
•
•
•
Centralized software upgrade on a set of devices and configuration of devices
Central database storage for all device settings
Upgrade of license for handset
In the Device Manager, much of the work is done with Devices, Numbers and
Templates.
6.1
Description
This section gives a description of the Device Manager application in the WSG and
how it is intended to be used.
6.1.1
Device Manager terminology
This section gives a brief description of the basic terminology in the Device Manager.
Device
A handset that can be connected to the module.
Number
The complete settings for a single device.
Template
General settings for a specific device type. A template can
be applied to several Numbers of the same device type.
License
Licensed functionality for a device.
Tabs
In the Device Manager there are different views, or tabs. In
these tabs, the information for devices, Numbers,
templates and licenses are shown.
Parameter definition file A file including all possible settings for a certain device
type. Templates are created from parameter definition
files.
Software
The software used in devices. The device software can be
updated via the module.
Version
Parameter definition files and device software are
indicated by versions.
Package file
A file that can contain other files, such as parameter
definition files, software files and template files.
04 October 2013 / Ver. PB1
34
Installation and Operation Manual
OpenStage WL3 Wireless Service
6.1.2
6. Device Manager
TD 92442EN
Importing
Different types of files can be imported. Note that if a
software file should be imported, it may have been
delivered in a package file.
Associate
Before being able to synchronize parameters between the
WSG and devices, it is necessary to associate a Number
with the device. Association includes all parameters. If it
exists on that device type, it also includes Contacts.
Assign
It is possible to assign a Number to a device that has not
yet been assigned a Number in the Device Manager.
Assign includes only the parameters defining the Number.
How to use the Device Manager
The following list is a short description to give a basic understanding on how to use the
Device Manager with devices. It is not intended to be used as a work flow description.
•
•
•
•
•
•
Import a parameter definition file of the corresponding device type to Device
Manager.
Create a template from the parameter definition file.
Add a device to the Device Manager.
Create a new Number for the corresponding device type.
Upgrade the software of a device
Associate the Number with the device.
Refer to applicable manual for a description of the work flow.
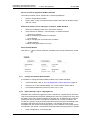
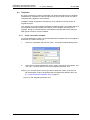
6.1.3
Device Manager GUI
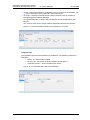
The Device Manager window has a menu bar, a toolbar and a work area. The toolbar
has different tabs and when a tab is selected the available device types will be shown
in the left hand pane of the work area. The right pane shows devices, numbers,
templates, or licenses already configured.
Figure 10. Device Manager Window
The upper part of the work area has search fields with different search criterias for each
tab.
Sort and Filter the Lists
By default, the lists are sorted as follows:
•
Devices tab – sorted by Device ID
04 October 2013 / Ver. PB1
35
Installation and Operation Manual
OpenStage WL3 Wireless Service
6. Device Manager
TD 92442EN
• Numbers tab – sorted by Number
• Templates tab – sorted by Name
• Licenses tab – sorted by Device ID
To sort the list by any other column, click the appropriate column heading. To reverse
the sort order, click the column heading again. The sorting order is indicated by an up
or down arrow in the column heading.
By default, the list in each tab shows all available Devices, Numbers or Templates, but
it is possible to filter the list by selecting the desired device type in the left hand pane of
the work area.
6.1.4
Color coded Information
Color coding for lists in tabs
•
•
If the version number is shown in red, the Device Manager has found no parameter
definition files supporting that device type.
If the version number is shown in dark red, the parameter definition file is
compatible, but does not have exactly the same version as the device.
Color coding for parameter and template editing
In the parameter and template editing windows, the following color coding is used:
Color
Context
Description
Black
General
Normal
Dark blue For templates and parameter editing Parameter has been edited during
the current session
Purple
For templates
The parameter is included in the
template (checked)
Red
For templates and parameter editing Value not valid
Turquoise For templates and parameter editing The value differs from the default
value
6.1.5
Navigation
For keyboard short-cuts, see Appendix B: Device Manager Keyboard Shortcuts on
page 103.
6.1.6
Tabs
The Device manager has different views, or tabs:
• Devices tab
• Numbers tab
• Templates tab
• Licenses tab
Each tab shows information about devices, Numbers, templates, or licenses. Some
information overlaps, for example Device ID, which is tied to both a specific device and
to a specific Number. Different menus are accessible in the different tabs.
04 October 2013 / Ver. PB1
36
Installation and Operation Manual
OpenStage WL3 Wireless Service
6. Device Manager
TD 92442EN
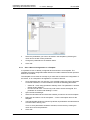
Devices Tab
The Devices tab shows all devices configured at the site in a detailed list. The following
information can be displayed (see also figure 10 on page 35):
•
•
•
•
•
•
•
•
Description – .optional information of a Number that can be added by the user. For
example, the user of the device.
Device ID – the unique identifier of the device.
Device type – the device model.
Software version – shows the version of the software in the device.
Parameter version – shows the version of the parameters in the Number.
Upgrade status – might show one of the symbols shown in table 2 below.
Online – shows if the device is connected to the Device Manager. The symbol
indicates a connected device.
Latest Number – shows the latest known Number for a device.
The columns order can be changed and the application will keep the changes.
Table 2. Upgrade status symbols
– software upgrade in progress.
It is also possible to see a progress bar when the device is being upgraded.
– software upgrade Pending, Request sent, or Accepted (a green arrow).
– software upgrade Scheduled or Retrying.
– the last upgrade Failed or Aborted (a red broken arrow).
– “Completed”, no symbol is shown
NOTE: A software upgrade should be done on one device to start with. If successful,
the remaining devices can be updated in one operation.
•
•
IP address - shows the IP address of the latest logged in device (e.g VoWiFi
handset).
Serial number - shows the serial number of the latest logged in device.
Numbers Tab
The Numbers tab shows all Numbers configured at the site in a detailed list. Following
columns are displayed:
•
•
•
•
•
•
•
Description – optional information of a Number that can be added by the Device
Manager user. For example, the user of the number.
Number – the unique identifier of the Number. The identifier is unique for that device
type.
Device type – the device model the Number is intended for
Parameter version – shows the version of the parameters in the Number
Device ID – the unique identifier of the device that the Number is associated to
Online – shows if the device the Number is associated to is online. The
symbol
indicates an online device
Status – shows the parameter synchronization status. A Number can also be
queued for synchronization. Several different indications are used, for example
Synchronizing, Sync queued, Save queued, Synchronized, etc.
When the Number is offline, the database status is shown; Synchronized or Not
synched.
04 October 2013 / Ver. PB1
37
Installation and Operation Manual
OpenStage WL3 Wireless Service
•
•
•
6. Device Manager
TD 92442EN
Saved – shows if the Number’s parameters have been stored in the database. The
symbol indicates that the parameters have been stored
Last login – shows the date and time the device was last online in the Device
Manager/logged in to Device Manager.
Last applied template – indicates which template that was last applied for that
Number
The columns order can be changed and the application will keep the changes.
Figure 11. The Numbers tab showing a list of Numbers in a system.
Templates Tab
The Templates tab shows all templates in a detailed list. The following columns are
displayed:
•
•
•
Name – the name of the template
Device type – the device model the template is intended for
Parameter Version – shows the parameter version
Figure 12. The Templates tab in the Device Manager
04 October 2013 / Ver. PB1
38
Installation and Operation Manual
OpenStage WL3 Wireless Service
6. Device Manager
TD 92442EN
Licenses Tab
The Licenses tab shows all devices configured at the site in a detailed list (see figure
below). The following columns are displayed:
•
•
•
•
•
•
•
Device ID – the unique identifier of the device.
Device type – the device model.
Online – shows if the device is connected to the Device Manager. The
symbol indicates that the device is online
Serial number – the number identifying the device hardware
Number – The Number associated with the device.
Software version – shows the version of the software in the device
Status – shows the license synchronization status for the devices.
Examples of status that can be shown are:
“Sending” means that WSG is sending license information to the device.
“Server failure” means that there is some kind of error with the
communication between the WSG and the license server.
“License too old” – The device has a newer license than WSG. A refresh has
to be done.
“Needs update” – An attempt to move a license from one handset to another
has been made, but the latest license does not exist in the handset.
Figure 13. The Licenses tab in the Device Manager.
6.2
Logging On to the Device Manager
NOTE: When an attempt is made to start the Device Manager, a dialog window is
displayed with a warning that the program’s digital signature cannot be verified.
The text is displayed in the language used in the computer’s operating system.
Click “Run” (or the equivalent term in the operating system language).
NOTE: Ten clients can be logged in at the same time, but to avoid conflicts make sure
that only one at a time is updating Numbers.
1
Log on to the module.
1
Enter User name and Password and click “OK”.
2
Click “Device Manager” on the start page.
6.2.1
Closing the Device Manager
In the File menu, click “Exit”. The Device Manager shuts down.
04 October 2013 / Ver. PB1
39
Installation and Operation Manual
OpenStage WL3 Wireless Service
6.3
6. Device Manager
TD 92442EN
Templates
By using a template, the same configuration can easily be applied to many handsets
simultaneously. Templates are also an efficient way to give good control over which
changes that are applied to each handset.
Templates enable configuration of all aspects of a handset from sound volume to
keypad shortcuts.
Your supplier can provide example templates for different PBXs. The handset will have
full functionality towards the PBX even without such a template. By using such a
template, though, the handset will be customized for that PBX with menu options for
PBX specific functions such as Callback.
6.3.1
Create a Parameter Template
It is usually desirable to create a customized parameter template that can be applied to
all devices of a certain device type.
1
Select the “Templates” tab and click “New”. The Create template dialog opens.
2
Select device type and parameter version, type in a name for the template, and
click “OK”. The view switches to the Edit Template parameter view.
NOTE: If you cannot find your device type and/or parameter version in the list, the
Device Manager needs to be updated with new parameter definition files, see
6.7.3 Import Parameter Definition Files on page 57.
Figure 14. Edit Template parameter view.
04 October 2013 / Ver. PB1
40
Installation and Operation Manual
OpenStage WL3 Wireless Service
6. Device Manager
TD 92442EN
3
Select the parameters you want to be saved in the template by selecting the
check box to the left of each parameter.
4
Change the parameters to the desired values.
5
Click “OK”.
6.3.2
Save a Device Configuration as a Template
It is possible to use an already configured device and save it as a template. The
template will contain configuration data and will not include contacts and other personal
data if it is a handset.
This template can be used as a backup if you later want to restore the configuration of
the device, or as a template to be applied on a number of devices.
1
Some parameters are user specific. If it is decided to apply this type of template
to several handsets, it is recommended to exclude the following parameters:
•
2
Owner ID - A text string specified in standby mode. The parameter is located
directly under “Settings”.
• Phone lock PIN code - The security code used to unlock the keypad. The
parameter is located under Settings > Locks.
Open the Device Manager.
3
Select the Numbers tab and select the handset you want to save as a template.
4
Right-click and select “Use as a template...”. Enter a descriptive name for the
template.
5
The Edit template window is opened. By default, all parameters are selected and
are saved when clicking “OK”.
If one or more parameters should be excluded, remove them by clearing the
check box next to the parameter.
6
Click “OK”.
04 October 2013 / Ver. PB1
41
Installation and Operation Manual
OpenStage WL3 Wireless Service
6. Device Manager
TD 92442EN
NOTE: When the Edit template window is opened from the “Use as template”
command, an extra drop-down list is shown in the bottom left corner. This setting
decides which parameters that shall be copied from the Number. If “All
parameters” is selected, the synchronization time will be longer.
It is also possible to create a template from a handset that is online but not stored in the
database. The template will contain all parameters for the device except for those that
are Number specific.
6.3.3
Rename a template
1
Select the “Templates” tab.
2
Select the template you want to rename. The selected row is highlighted.
3
In the Template menu, select “Rename...” or right-click and select “Rename...”.
The Rename template dialog opens.
4
In the Rename template dialog, enter a new name in the New name text field.
5
Click “OK”. The dialog window closes and the new name appears in the list.
6.3.4
Copy a template
1
Select the “Templates” tab.
2
Select the template you want to copy. The selected row is highlighted.
3
In the Template menu, select “Copy...” or right-click and select “Copy...”. The
Copy template dialog opens.
4
In the dialog window, enter a new name in the New name text field.
5
Click “OK”. The dialog window closes and the new template appears in the list.
6.3.5
Edit a template
1
Select the “Templates” tab.
2
Select the template you want to edit. The selected row is highlighted.
3
In the Template menu, select “Edit...” or right-click and select “Edit...”. The Edit
template window opens.
4
In the Edit template window, edit the parameters that shall be edited.
5
Click “OK”.
6.3.6
Delete a template
1
Select the “Templates” tab.
2
Select the template you want to delete. The selected row is highlighted.
3
In the Template menu, select “Delete”, or right-click and select “Delete”, or press
the Delete button. The Delete template dialog opens.
4
Click “Yes”. The dialog window closes and the template is deleted.
6.3.7
Upgrade a template
NOTE: In order to upgrade a template, the new parameter version must have the same
major version as the old parameter version. For example, upgrading from 25.8 to
25.9 works, but not upgrading from 25.8 to 26.x.
1
Select the “Templates” tab.
04 October 2013 / Ver. PB1
42
Installation and Operation Manual
OpenStage WL3 Wireless Service
TD 92442EN
2
Select the template you want to upgrade. The selected row is highlighted.
3
In the Template menu, select “Upgrade...” or right-click and select “Upgrade...”.
The Upgrade template dialog opens.
4
Select the parameter version to upgrade to.
5
Click “OK”. The template is upgraded and the dialog window closes
6.3.8
6.4
6. Device Manager
Apply a template
1
Select the “Templates” tab.
2
Select the template you want to use. The selected row is highlighted.
3
In the Template menu, select “Apply to...” or right-click and select “Apply to...”.
The Apply template window opens.
4
If needed, select search parameters or click “Show all”.
5
Select Number(s) to apply the template on.
6
Click “OK”. The template is applied and the dialog window closes.
Numbers
6.4.1
Create New Numbers
1
Select the “Numbers” tab.
2
In the Number menu, select “New...”. Alternatively, right-click in the Numbers list
and select “New...”.
3
In the Device type drop-down list, select device type.
4
In the Parameter version drop-down list, select the parameter version.
5
In the Template drop-down list, select template to run on the Number. This is
optional and therefore “None” can be selected.
6
In the Prefix field, enter the Number’s prefix (if needed).
7
Select one of the following options:
•
To create a single Number, select the Single option and enter the call number.
Click “OK”.
• To create a range of Numbers, select the Range option. Enter the start call
number, end call number, and click “OK”.
Note: The maximum range that can be added at a time is 100 Numbers.
04 October 2013 / Ver. PB1
43
Installation and Operation Manual
OpenStage WL3 Wireless Service
6.4.2
6. Device Manager
TD 92442EN
Save a Number to Database
An online device can be saved to the database.
1
Select the “Numbers” tab.
2
Select the Number.
3
In the Number menu, select “Save”. Alternatively, right-click the Number and
select “Save”
Tip: An online device can automatically be enabled and saved (default), see 6.9.1
Automatically enable new Devices Settings on page 63 for more information.
6.4.3
Enter/Edit Description of a Number
It is possible to enter information about a Number. For example, the user of the number
or the location of the device.
1
Select the “Numbers” tab.
2
Select the Number.
3
In the Number menu, select “Enter description”. Alternatively, right-click the
Number and select “Enter description”.
4
Enter an appropriate description and click "OK" to save the setting.
6.4.4
Certificate Handling for VoWiFi Handset
NOTE: This function is applicable for some VoWiFi handsets only.
Certificate(s) is used for authorizing a VoWiFi handset to access a WLAN system using
Extensible Authentication Protocol (EAP).
There are two types of certificates: Root certificate and client certificate.
The VoWiFi handset uses the root certificate to control if the WLAN system is trusted. If
the system is trusted, the handset send its client certificate to show that it is authorized
to access and log on to the system.
The root- and the client certificate contain a public key, but the client certificate also
contains a private key.
The following must be done to be able to use certificates:
•
•
Import certificates to handset
Select which client certificate to use by setting an EAP client certificate parameter,
see the Configuration Manual for the VoWiFi handset.
Import Certificate
1
Select the “Numbers” tab.
2
In the Number menu, select “Manage certificates”. Alternatively, right-click the
handset in the Numbers list and select “Manage certificates”.
04 October 2013 / Ver. PB1
44
Installation and Operation Manual
OpenStage WL3 Wireless Service
6. Device Manager
TD 92442EN
3
Click the Root- or the Client certificate tab depending on which certificate to be
managed.
4
Click “Browse“ and locate the certificate file to be imported.
5
If the certificate is passport protected, an Enter Password dialog opens. Enter
the password and then click “OK”.
A Confirm Certificate window opens showing the details of the certificate.
6
Import the certificate to the handset by clicking “Yes“.
If needed, repeat step 3 - 5 for importing additional certificates.
View Certificate Details
1
Select the “Numbers” tab.
2
In the Number menu, select “Manage certificates”. Alternatively, right-click the
handset in the Numbers list and select “Manage certificates”.
3
Click the “Root” tab or the “Client” tab depending on which certificated to be
viewed.
4
Select the certificate to view by clicking the corresponding “Details“ button.
A Certificate details window appears showing the details of the certificate.
Remove Certificate
1
Select the “Numbers” tab.
2
In the Number menu, select “Manage certificates”. Alternatively, right-click in the
handset in the Numbers list and select “Manage certificates”.
3
Click the “Root” tab or the “Client” tab depending on which certificated to be
removed.
4
Select the certificate to remove by clicking the corresponding “Remove“ button.
5
Click “Yes“ to confirm the deletion.
The certificate is now removed from the handset.
6.4.5
Parameter Transfer between a Device and the Device Manager
When a device is connected, it is synchronized with the associated Number in the
Device Manager, see 6.5.2 Synchronize a Device on page 50.
04 October 2013 / Ver. PB1
45
Installation and Operation Manual
OpenStage WL3 Wireless Service
6. Device Manager
TD 92442EN
NOTE: When parameters have been edited and the device is synchronized, only the
edited parameters will be sent to the device.
6.4.6
Edit Parameters for a Number
The Edit parameters window shows the set of parameters relevant to the Number that
is being edited. The parameter groups are organized in a tree structure in the left pane,
with the parameters in the current node in the right pane. The parameter list has one
column with the parameter name, and another column shows the parameter value.
This can be for example a numerical value, a boolean value, or text. Clicking the
icon will give a short description of the selected parameter.
1
Select the “Numbers” tab. The Number view opens.
2
Select the Number. The selected row is highlighted.
3
Click “Edit” in the Number menu. Alternatively, right-click and choose “Edit”, or
double-click the Number.
The Edit Parameters for <Number> window opens, where <Number> is the ID of
the current Number.
Figure 15. Editing parameters
4
In the left pane, select parameter.
5
On the Value row, make the changes.
When a parameter has been edited, the name of the node to which the
parameter belongs changes to a blue color.
(Click “Cancel” if you want to undo all parameters edited since your last save and
return to the main window.)
6
Click “OK” to save the changes.
NOTE: When you save the parameters, they are automatically sent to the device if it is
online.
04 October 2013 / Ver. PB1
46
Installation and Operation Manual
OpenStage WL3 Wireless Service
6.4.7
6. Device Manager
TD 92442EN
Apply Template to Numbers
If a template has been created for a device type, it can be used to set the parameter
values for a range of devices, or a single device.
1
Select the “Numbers” tab. The Number view opens.
2
Select the Number(s) you wish to apply the template on.
3
In the Number menu, click “Apply template...”. Alternatively, right-click the
Number in the Number list and select “Apply template...” from the menu that
opens.
4
Select a template from the Template list.
5
Click “OK”.
If the parameters in the database have been edited but not yet sent to the device
it is indicated with “Not synched” or “Update queued”.
If the Number has not been associated with a device, it is now possible to do so.
Connect a device and associate it with a Number in the database. The parameters will
automatically be sent from the Device Manager to the device. See chapter 6.4.8
Associate a Number with a Device .
6.4.8
Associate a Number with a Device
Before being able to synchronize parameters between the Device Manager and a
device, it is necessary to associate a Number with the device. It is possible to enter
several Device IDs in advance and to associate them with a Number at a later moment.
See also 6.5.6 Assign a Number to a device on page 52 and 6.5.5 Add a new Device
on page 51.
1
Select the “Numbers” tab.
04 October 2013 / Ver. PB1
47
Installation and Operation Manual
OpenStage WL3 Wireless Service
6. Device Manager
TD 92442EN
2
In the Number menu, select “Associate with device...”. The Associate Number
dialog opens.
3
Select the device you want to associate with in the list.
4
Click “OK”.
If the selected device is online, it will immediately be updated with the selected
Number. If the selected device is not online, it will be updated the next time it is online.
It is possible to associate several Numbers with several devices simultaneously.
6.4.9
Delete a Number in the Site Database
1
Select the “Numbers” tab.
2
Select the Number you want to delete. The selected row is highlighted.
3
In the Number menu, select “Delete” or right-click and select “Delete”.
4
Click “Yes” in the Delete Number dialog.
The dialog window closes and the Number is deleted from the list.
6.4.10 Rename a Number
1
Select the “Numbers” tab.
2
Select the Number you want to rename. The selected row is highlighted.
3
In the Number menu, select “Rename...” or right-click and select “Rename...”.
The Rename number dialog opens.
4
In the “New prefix” field, enter a new prefix (if needed)
5
In the “New number” field, enter a new Number.
6
Click “OK”. The dialog window closes and the new Number appears in the list in
the Numbers tab.
6.4.11 Copy a Number
When a Number is copied, the parameter settings and device type for that Number will
be copied to a new specified Number.
1
Select the “Numbers” tab.
2
Select the Number you want to copy. The selected row is highlighted.
3
In the Number menu, select “Copy...”, or right-click and select “Copy...”. The
Copy Number dialog opens.
04 October 2013 / Ver. PB1
48
Installation and Operation Manual
OpenStage WL3 Wireless Service
6. Device Manager
TD 92442EN
4
In the “New prefix” field, enter a new prefix (if needed).
5
In the “New number” field, enter a new Number.
6
Click “OK”. The dialog window closes and the new Number appears in the list in
the Numbers tab.
6.4.12 Import Contacts
NOTE: The number for the handset must be saved, see 6.4.2 Save a Number to
Database on page 44.
Import Contacts From File
A file containing contacts can be imported to Device Manager and synchronized with a
device. This can for example be useful when you want to transfer contacts from legacy
devices to newer devices.
NOTE: When importing the file, the entries (if any) in the device will be replaced by the
entries in the file. Additionally, the import works only if the receiving device can
store all entries included in the file.
1
In the Device Manager, select the Numbers tab.
2
Select a number.
3
In the Number menu, select Import contacts > From file. Alternatively, right-click
the device and select Import contacts > From file from the menu that opens.
4
Find and select a file containing contacts ( .txt or .csv. Click “Open”.
The contacts in the imported file are synchronized with the handsets.
Import Contacts From Number
You can make a copy of a device’s contact list and paste it to another device’s contact
list directly. This means that you do not need to save the contact list temporarily on for
example your computer.
NOTE: The import works only if the receiving device can store the entire contact list of
the device you are importing from. Additionally, the Company phonebook
contacts included in the Call contact list are not transferred to the other handset
using this feature. To upload the Company phonebook, see 6.7.8 Upload
Company Phonebook on page 59.
1
In Device Manager, select the Numbers tab.
2
Select a number.
3
In the Number menu, select “Import contacts” > “From number”. Alternatively,
right-click the Number in the Number list and select “Import contacts”> “From
number” from the menu that opens.
4
Select a number.
5
Click “OK”. The contacts are now imported to the handset.
6.4.13 Export Contacts to a File
Contacts can be exported from a handset to a csv-file. The contacts can then be
transferred to another handset by importing the file, as described in chapter 6.4.12
Import Contacts on page 49.
04 October 2013 / Ver. PB1
49
Installation and Operation Manual
OpenStage WL3 Wireless Service
6. Device Manager
TD 92442EN
1
In the Numbers tab, select the handset whose contacts you want to export.
2
In the Number menu, select "Export contacts". Alternatively, right-click the
handset and select "Export contacts" from the menu that appears.
An Export contacts window opens.
3
6.5
Enter a descriptive file name and click "Save".
Devices
A device is a handset developed to work together with the Device Manager. See the
manual for respective device.
All work with devices is performed from the Devices view.
•
•
•
•
6.5.1
Devices can be added by connecting the device to the system, or use the “Add
device” function.
The information for a Number from one device can be transferred to a new device.
Devices can be reset to factory settings.
Devices can be updated with new software.
Add Devices
NOTE: Before connecting a device to the Device Manager, make sure the connection
is set up according to the instructions in the device´s User Manual.
If a range of new devices are to be added, the easiest way is to:
1
Create a template with all common parameter settings. See 6.3.1 Create a
Parameter Template on page 40.
2
Add a range of Numbers and run the template. See 6.4.1 Create New Numbers
on page 43 and 6.4.7 Apply Template to Numbers.
3
Edit the parameters and change individual settings. See 6.4.6 Edit Parameters
for a Number on page 46.
4
Connect the devices and associate them with the Numbers in the database. See
6.4.8 Associate a Number with a Device on page 47.
A single device can be added in the same way.
6.5.2
Synchronize a Device
When parameters have been changed in a device, the device is synchronized with the
Number saved in the database. During the synchronization, changed parameters in the
device are uploaded to the Device Manager, and parameters changed in the Device
Manager are sent to the device.
If a parameter has been changed in both the device and the Device Manager, the
setting made in the Device Manager will take precedence.
1
When a device is connected to the system running the Device Manager, and if
the Number is saved, and it has a parameter definition, the device is
automatically synchronized.
While synchronizing, a progress bar and a text is shown in the Numbers view.
6.5.3
1
Delete a Device
Select the “Devices” tab.
04 October 2013 / Ver. PB1
50
Installation and Operation Manual
OpenStage WL3 Wireless Service
6. Device Manager
TD 92442EN
2
Select the device you want to delete. The selected row is highlighted.
3
In the Devices menu, select “Delete” or right-click and select “Delete”.
4
Click “Yes” in the Delete Device dialog.
The dialog closes and the device is deleted from the list.
NOTE: A device that is online cannot be deleted.
6.5.4
Replace a Device
If a device shall be replaced with a new device, it is possible to transfer its associated
Number including settings to the new device. The new device must be of the same
device type as the old one.
1
If the device to be replaced is still working, make sure that it is synchronized.
2
Shut off the old device or make a factory reset.
3
Connect the new device to the Device Manager.
4
Associate the new device to the Number associated to the old device according
to the instructions in 6.4.8 Associate a Number with a Device on page 47. The
Number will no longer be associated with the old device.
6.5.5
Add a new Device
It is possible to enter several new Device IDs in advance into the Device Manager for
later association.
In order to simplify input when handling many devices a bar code reader can be used.
The bar code reader should send a carriage return after each item, but it is not
necessary. If carriage return is not sent, it is necessary to click “Create” after each read
item.
1
Select the “Devices” tab.
2
In the Device menu, select “Add device”. The Create devices dialog opens.
3
Select Device type and Parameter Version.
4
Enter a Device ID for the device, manually or by using a bar code reader.
5
The “Continuous registration” box can be used to select whether the “Create
devices” dialog shall close after clicking “Create” or if it shall still be open.
6
If the bar code reader does not send carriage return, click “Create”.
7
Repeat 4 to 6 if more devices are to be created, otherwise click “Close”.
04 October 2013 / Ver. PB1
51
Installation and Operation Manual
OpenStage WL3 Wireless Service
6.5.6
6. Device Manager
TD 92442EN
Assign a Number to a device
It is possible to assign a Number to a device that has not yet been assigned a Number
in the Device Manager. This feature can be used if parameters have been changed on
the device prior to connection to the Device Manager.
NOTE: Assign shall not be done on a device that already has a Number.
1
Select the “Devices” tab.
2
Select the device you want to assign a Number for.
3
Select Device >Assign number in the menu. A new window opens.
4
Enter a new number in the New number field. New prefix is optional. Click “OK”.
The new Number appears in the list in the Numbers tab.
NOTE: Some devices need to be restarted for the new numbers to be shown.
6.5.7
Enter/Edit Description of a Device
It is possible to enter information of a device. For example, the description can be used
to describe a location of a device.
1
Select the “Device” tab.
2
Select the device.
3
In the Device menu, select “Enter description”. Alternatively, right-click the
device and select “Enter description”.
4
Enter an appropriate description and click "OK" to save the setting.
6.5.8
Factory Reset
Factory reset means that the device parameters will be reset to factory settings. The
Number in the database that is associated with the device will not be affected.
NOTE: The device must be online.
6.6
1
Select the “Devices” tab.
2
Select the device(s) to be reset.
3
Click “Factory reset” in the Device menu. Alternatively, right-click on the device
and select “Factory reset”.
4
A message saying “Do you want to reset the selected device(s) to factory
defaults?” will appear.
5
Click “Yes”.
Licenses
Device licensing offers a possibility to view, manage and upgrade licenses of devices.
In the Licenses tab, devices are listed. If a device is selected in the list, the status of the
license options for the selected device is displayed.
Note that some tasks include using the license web and the details of how to work with
the license web are not described here.
04 October 2013 / Ver. PB1
52
Installation and Operation Manual
OpenStage WL3 Wireless Service
6. Device Manager
TD 92442EN
The following features are described:
•
•
•
•
Upgrade licenses, “Import” and “Export”
Manual synchronization of licensing information, “Refresh”
Move license from one device to another
View license options
The following licensing features are not done with the Device Manager and are
therefore not described in this document:
•
•
•
6.6.1
How to work with the license web
How to purchase licenses
Manual license upgrade in the handset
License Upgrade alternatives
These are the alternatives for upgrading licenses on devices:
•
•
•
6.6.2
Automatic license upgrade
Used when the WSG has an Internet connection to the license server, see 6.6.2
Automatic License upgrade.
License upgrade using export/import
Used when the WSG does not have an Internet connection, see 6.6.3 Export and
Import Licensing information.
Manual license upgrade
Used to enter the license key manually in the handset, see the configuration manual
for the corresponding handset. In this case, the WSG is not used.
Automatic License upgrade
NOTE: This feature requires an Internet connection. The communication is done via
HTTPS and normally via port 443.
The first time a device logs in to the Device Manager, the WSG asks the license server
for the latest license for the device. When the device logs in at a later time, there is no
automatic check for licenses. If changes have been made, a manual upgrade must be
done by selecting Refresh, see 6.6.6 Refresh License on page 55.
In order to get a purchased license for a device, a connection with the license server is
made. The WSG automatically receives the serial number from the device, sends it to
the license server which returns a license key that the WSG sends to the device. The
device upgrades and the correct license information is shown in the WSG and the
device.
6.6.3
Export and Import Licensing information
In order to upgrade licenses on devices when the WSG does not have an internet
connection to the license server, the following is done:
•
•
•
•
The information needed for licensing of a device is exported from the Device
Manager to a file, see Export Licensing information on page 54.
The file is used to purchase license upgrades on the license web.
From the license web, a license file containing the license keys for the device is
generated
The license file is imported to the Device Manager, see Import Licenses on page 54
04 October 2013 / Ver. PB1
53
Installation and Operation Manual
OpenStage WL3 Wireless Service
•
•
6. Device Manager
TD 92442EN
The Device Manager communicates the license key (included in the license file) to
the device
The device upgrades according to the license options
Export Licensing information
The information needed for licensing of a device can be exported to a file. This file can
be used to generate licenses for the device.
1
Select the licenses tab.
2
Select the device(s) that shall be licensed.
3
In the License menu, select “Export”. The Export devices for licensing window
opens. Select a proper name for the file and click “Save” to save the file.
Import Licenses
After a license has been purchased, a file containing the license information can be
generated from the license web. This license file can be imported to the Device
Manager.
1
In the File menu, select Import > “Licenses...”. A File Browser window opens.
2
Select the license file(s) to be imported (*.xml).
3
Click “Open”.
The license file(s) are imported.
6.6.4
View License options
It is possible to view which license options that exist on a device.
1
Select the License tab.
2
Select a device.
In the bottom of the work area, the available license options of the device are
listed and whether the options are enabled or not.
6.6.5
Filter License options
It is possible to search and select devices which have same license options. The
selected devices can be upgraded with additional licenses by exporting a product
information file to the License Web (see Export Licensing information on page 54). The
advantage to select devices with same license options is that additional licenses can
be applied for the devices simultaneously.
1
Select the License tab.
2
Click “Advanced find“. A dialog window opens.
04 October 2013 / Ver. PB1
54
Installation and Operation Manual
OpenStage WL3 Wireless Service
6. Device Manager
TD 92442EN
3
Under Device types, select device(s).
4
Under Option filters, select the status of the license option(s) that shall be
common for the selected devices.
•
•
•
Ignore - show all devices independent of license options.
Enabled - show devices with a certain license option enabled.
Disabled - show devices with a certain license option disabled.
The search result is updated directly when selecting devices and license options. In
addition, the
icon is also displayed next to the Advanced find button to indicate that
the search result is filtered.
5
6.6.6
When clicking Close, the filtered search result will still be displayed. When
clicking Reset, the filter is removed and all devices are displayed.
Refresh License
If a device is already registered in the Device Manager and new license has been
purchased from the license web, the information needs to be updated. By doing a
Refresh, the device license information in WSG is synchronized with the information in
the license server and transferred to the device.
NOTE: This feature requires a connection to the license server.
1
Select the License tab.
2
Select device(s).
3
In the License menu, select “Refresh”. The correct license is fetched from the
license server, sent to the device and displayed in the Device Manager.
6.6.7
Remove Devices from the License View
This command removes devices from the Licenses tab view.
1
Select the “Licenses” tab.
2
Select the device(s) that shall be removed from the list. The selected row(s) are
highlighted.
3
In the License menu, select “Delete” or right-click and select “Delete”.
4
Click “Yes” in the Remove device dialog. The dialog closes and the device is
removed from the list.
04 October 2013 / Ver. PB1
55
Installation and Operation Manual
OpenStage WL3 Wireless Service
6.7
6. Device Manager
TD 92442EN
File management
This chapter covers file management for parameter definition files, software files,
language files and company phonebook files.
Figure 16. The File Management Window
Import and export of templates and Numbers is described in 6.8 Import/Export
Numbers and Templates on page 62. Import of translation files is described in 14.1.4
Import Language File on page 84.
The parameter definition file holds the definitions of all parameters for a specific version
of a Number’s parameter set. Updated software and new parameter definition files for
devices and Numbers can be added to the Device Manager, see 6.7.3 Import
Parameter Definition Files on page 57 and 6.7.4 Import new Software for Devices on
page 57.
If there is a naming conflict when importing, a warning message is displayed.
6.7.1
Definition File Version – Parameter Version
Both definition files and device software include parameters and are indicated by a
version number.
NOTE: The version of the definition file matches the version of the device software.
If a device is updated with a new parameter version it does not always demand a new
definition file. An old definition file can often be used but if new parameters have been
added in the new parameter version, these parameters will not be editable. The release
note will tell you if a new definition file is needed to match the new parameters.
Example
If a parameter version for a Number is 2.5, then a parameter definition file with a
version between 2.0 and 2.5 is required.
6.7.2
Import a Package File
A package file may include different types of files, such as software files, parameter
definition files and/or template files. If the package does not include a certain file, it can
be imported separately. See 6.7.3 Import Parameter Definition Files on page 57, 6.7.4
Import new Software for Devices on page 57, and/or 6.8.2 Import Templates on page
62.
1
In the File menu, select “File management”.
04 October 2013 / Ver. PB1
56
Installation and Operation Manual
OpenStage WL3 Wireless Service
6. Device Manager
2
Select the Parameter definition tab or Software tab and click “Add”.
3
Select the package file (.pkg) to be imported and click “Open”.
TD 92442EN
The files included in the package are now imported. If needed, select the Parameter
definition tab or Software tab to view the corresponding imported files (if any).
If template(s) has been imported, it can be viewed by clicking “Close“ and then
selecting the Template tab.
4
6.7.3
Click “Close”.
Import Parameter Definition Files
Updated parameter definition files are distributed by your supplier.
NOTE: Parameter definition files (.def) are mainly included in package files (.pkg)
distributed by your supplier, see 6.7.2 Import a Package File.
1
In the File menu, click “File management”. The File management window opens.
2
Click the Parameter definition tab.
3
Click “Add”. The Import files window opens.
4
Select the definition files to be imported.
Only files with a corresponding extension are shown, such as .def and .pkg.
5
Click “Open”.
6
Check that the newly imported definition files appear in the list.
7
Click “Close”.
If a definition file for a certain device type already exists in the database and an attempt
is made to import a definition file with the same parameter version but with a lower
revision, the file will not be imported. But if a new definition file with the same parameter
version with a higher revision is imported, the old file will be replaced with the new
imported file.
For each update of a parameter definition file, the revision is increased. An update
does not necessarily affect the parameter version.
The following columns are displayed:
•
•
•
•
6.7.4
Device type – the device model.
Revision – the revision number of the definition file. Used to determine which
definition file is the most recent.
Parameter version – shows the version of the parameters in the definition file.
Used to determine compatibility with device software.
File – the name of the imported definition file.
Import new Software for Devices
Updated software files are distributed by your supplier.
NOTE: Software files (.bin) are mainly included in package files (.pkg) distributed by
your supplier, see 6.7.2 Import a Package File on page 56.
1
In the File menu, click “File management”. The File management window opens.
04 October 2013 / Ver. PB1
57
Installation and Operation Manual
OpenStage WL3 Wireless Service
2
6. Device Manager
TD 92442EN
Click the “Software” tab.
The following columns are displayed:
NOTE: Some information will only be displayed when the parameter definition file (.def)
has been imported. The .def is normally imported when importing a .pkg file.
•
•
•
•
Device type – the device model.
Version – the version number of the software file. Used to determine which
software file is the most recent.
Parameter version – shows the version of the parameters in the definition file.
Used to determine compatibility with device software.
File – the name of the imported software file.
3
Click “Add”. The Import files window opens.
4
Select the software files to be imported.
Only files with a corresponding extension are shown, such as .bin and .pkg.
5
Click “Open”.
6
Check that the newly imported software files appear in the list.
7
Click “Close”.
6.7.5
Import Language files for Devices
For adding a new language to a device, a language file (.lng) distributed by your
supplier must be imported to the Device Manager and then uploaded to the device.
1
In the File menu, click “File management”. The File management window opens.
2
Click the “Language” tab.
3
Click “Add”. The Import files dialog opens.
4
Select the language files to be imported.
5
Click “Open”.
6
Check that the newly imported language files appear in the list.
7
Click “Close”.
To apply the language for a device, see 6.7.7 Upload a Language to a Device on page
59.
6.7.6
Import Company Phonebook files
It is possible to import a phonebook file for later use.
1
Select File > File management, in the menu. A new window opens.
2
Click the “Company Phonebook” tab.
3
Click “Add”. The Import files dialog opens.
4
Select the company phonebook files to be imported.
5
Click “Open”.
6
Check that the newly imported company phonebook files appear in the list.
7
Click “Close”.
04 October 2013 / Ver. PB1
58
Installation and Operation Manual
OpenStage WL3 Wireless Service
6.7.7
6. Device Manager
TD 92442EN
Upload a Language to a Device
A language can be uploaded to portable devices that support Language Upload. Note
that upload of languages is not available in demonstration mode.
1
Select the “Devices” tab.
2
Select the device(s) to upload a language to. It is possible to select several
devices, but only devices of the same Device Type can be selected.
3
Select Device > Upload Language, in the menu. A new window opens.
4
Do one of the following:
•
5
6.7.8
If needed; import the language file (.lng) to be used by clicking “Import...”,
locate the file, and click “OK”. In the Available files: drop-down list, select
which language to upload.
• Enter the URL where the language file is located.
Click “OK”. The language is uploaded to the device.
Upload Company Phonebook
It is possible to upload a company phonebook to portable devices that support
Company Phonebook Upload.
Upload of Company Phonebook is not available in Demonstration mode.
1
Select the “Devices” tab.
2
Select the handsets to upload a company phonebook to. It is possible to select
several devices, but only devices of the same Device Type can be selected.
3
Select Device > Upload company phonebook, in the menu. A new window
opens.
4
Select which company phonebook to upload.
5
Click “OK”. The company phonebook is uploaded to the device.
6.7.9
Upgrade a Device with new Software
Devices can be upgraded with new software. Note that upgrade of device software is
not available in demonstration mode.
1
Connect a device to the system.
2
Select the “Devices” tab.
3
Select device(s) to upgrade in the list. A selected row is highlighted. It is possible
to select several devices, but only devices of the same Device Type can be
selected.
04 October 2013 / Ver. PB1
59
Installation and Operation Manual
OpenStage WL3 Wireless Service
6. Device Manager
TD 92442EN
NOTE: A software upgrade should be done on one device to start with. If successful,
the remaining devices can be updated in one operation.
Tip: By using Ctrl and/or Shift several devices can be selected simultaneously.
4
Select Device > Upgrade software, in the menu. Alternatively, right-click and
choose “Upgrade”, double-click the desired device, or click the “Upgrade” button
in the toolbar. The Upgrade software window opens.
5
In the Upgrade software window the following fields are shown:
•
•
Device type – shows the model of your device.
Imported area:
– Available files contains previously imported software files (see 6.7.4 Import
new Software for Devices on page 57); the latest used software file is
selected by default.
– Enter URL text field gives you a possibility to enter a path to a URL.
– Import... is used to import new software.
NOTE: When upgrading devices with imported software, up to 10 devices can be
upgraded simultaneously. When upgrading devices with software obtained via
URL, up to 20 devices can be upgraded simultaneously.
•
•
6
Upgrade area:
– Immediately will start upgrade immediately
– Later will start a scheduled upgrade on the specified date and time
Activate new software area:
– different selections depending on when the new software shall be activated
(Immediately, When idle, When idle in charger or After manual restart).
If the software to be used for software upgrade is not available, it needs to be
imported. If so, click “Import...”. The Import software dialog opens. Locate the file
and click “Open”. The file is imported to the Device Manager.
It is recommended to use Enter URL:1 if the software is stored on an external
server and should not be imported to the Device Manager.
7
Select software to be used in the upgrade in the Available files text box.
1.It is recommended to open a web browser and enter the URL (for example http://myserver/kathy_v1.5.7.bin).
Make sure that the web browser asks you to save or open the correct file. Copy the URL and paste it in the Upgrade
software dialog.
04 October 2013 / Ver. PB1
60
Installation and Operation Manual
OpenStage WL3 Wireless Service
8
6. Device Manager
TD 92442EN
Click “OK”. The Upgrade software window closes.
The software will be downloaded to the device. For some device types, a
progress bar in the Status column for the device shows the progress of the
download.
To cancel the upgrade, click “Cancel upgrade” in the Device menu. Alternatively,
right-click the device in the device list and select “Cancel upgrade”.
The device will restart automatically after a successful download.
NOTE: A switched off device is upgraded when restarted.
6.7.10 Delete Parameter Definition Files
1
In the File menu, click “File management”. The File management window opens.
2
Click the Parameter definition tab.
3
Select the definition files to be deleted.
4
Click “Delete”.
5
In the Delete files dialog, click “Yes”.
6
Click “Close”.
6.7.11 Delete Software
1
In the File menu, click “File management”. The File management window opens.
2
Click the Software tab.
3
Select the software to be deleted.
4
Click “Delete”.
5
In the Delete files dialog, click “Yes”.
6
Click “Close”.
6.7.12 Delete Language File for Devices
1
In the File menu, click “File management”. The File management window opens.
2
Click the Language tab.
3
Select the language to be deleted.
4
Click “Delete”.
5
In the Delete files dialog, click “Yes”.
6
Click “Close”.
6.7.13 Delete Company Phonebook File
1
In the File menu, click “File management”. The File management window opens.
2
Click the Company Phonebook tab.
3
Select the company phonebook to be deleted.
4
Click “Delete”.
5
In the Delete files dialog, click “Yes”.
6
Click “Close”.
04 October 2013 / Ver. PB1
61
Installation and Operation Manual
OpenStage WL3 Wireless Service
6.8
6. Device Manager
TD 92442EN
Import/Export Numbers and Templates
This section describes import and export of Numbers and templates.
The purpose of importing and exporting Numbers and Templates is to be able to move
Numbers and Templates to another site or to use at a later time. It is also possible to
move between PDM Windows Version and Device Manager.
The parameter configuration in Numbers can be exported to a file. This file can be used
by the supplier to pre-program devices before delivery to the customer.
If there is a naming conflict when importing a template, the new template is imported
and the old template is deleted. If there is a Number conflict when importing Numbers,
an error message is displayed.
6.8.1
Import Numbers
1
In the File menu, click “Import > Numbers...”. An Import numbers window opens.
2
Select the Number files (*.xcp) to be imported.
3
Click “Open”.
4
The number(s) will be imported.
6.8.2
Import Templates
A template may be imported from another system. Updated Template files may be
distributed by your supplier.
1
In the File menu, click “Import > Templates...”. An Import templates window
opens.
2
Select the Template files (*.tpl) to be imported.
3
Click “Open”.
4
The template(s) will be imported.
6.8.3
Export Numbers to a File
It is possible to configure Numbers for a site and export the settings to a file. One or
several Numbers can be selected.
The exported file can then be used when producing new devices for the customer.
1
Select the “Numbers” tab. The Numbers view opens.
2
Select the Number(s) to be exported.
3
In the Number menu, click “Export”.
The “Export Numbers” window opens. By default the file will be saved in the
My documents folder with the name EliseSite.xcp. You can select another name
and folder.
4
6.8.4
Click “Save”.
Export Templates to a File
It is possible to export templates to a file. One or several templates can be selected.
1
Select the “Templates” tab. The Templates view opens.
2
Select the template(s) to be exported.
04 October 2013 / Ver. PB1
62
Installation and Operation Manual
OpenStage WL3 Wireless Service
3
6. Device Manager
TD 92442EN
In the Template menu, click “Export”.
The Export templates window opens. By default the file will be saved in the
My documents folder with the name Templates.tpl. You can select another name
and folder.
4
6.9
Click “Save”.
Other Settings
6.9.1
Automatically enable new Devices Settings
By default, when a new device logs in, it is automatically enabled and saved in the
WSG’s database.
NOTE: The WSG license determines the number of devices that can be enabled
simultaneously in the Device Manager. If logging in more devices than allowed,
they will be disabled in the Device Manager. The devices must be enabled in
order to configure them.
When a single WSG is used, the Automatically enable new devices function should
normally be enabled. But if Device Management is distributed over multiple WSGs in a
system, the function shall be disabled; if the function is enabled, devices will be
enabled and saved on all WSGs running device management. This will cause
synchronization problems and the logged in devices will consume license positions on
each WSG.
To disable automatic enabling of new devices, do as follows:
1
Select Options > Preferences, in the menu. A new window opens.
2
Uncheck the “Automatically enable new devices” check box.
3
Click “OK”.
04 October 2013 / Ver. PB1
63
Installation and Operation Manual
OpenStage WL3 Wireless Service
7.
7. Device Configuration
TD 92442EN
Device Configuration
7.1
Device Management Setup
This setting determines which Device Handler interface the devices should logon to.
The Device Manager will then ask the interface for logged in devices, meaning that the
devices will appear in the Device Manager.
Figure 17. Example 1
Module 10.30.1.1
Device Manager
“listening”
127.0.0.1
or
10.30.1.1
Device Handler
Interface
In figure 17, the Device Manger is enabled in the WSG. In this case the WSG is
pointing to its local Device Handler interface meaning that the devices will logon to that
interface. The Device Manager asks the interface for logged in devices that will appear
in the Device Manager.
Figure 18. Example 2
Module A 10.30.1.1
Module B 10.30.1.2
Device Manager
Device Manager
“listening”
Device Handler
Interface
Device Handler
Interface
In figure 18, the WSG A does not have a Device Manager enabled. In this case the
WSG A is pointing to the Device Handler interface in WSG B. All devices will logon to
that interface, and the Device Manager will ask the interface about logged in devices
that will appear in the Device Manager.
1
Click “Configuration” on the start page.
2
Select Other Settings > Advanced Configuration, on the Configuration page.
3
Click “Device Management”.
Figure 19. The Device Management page.
04 October 2013 / Ver. PB1
64
Installation and Operation Manual
OpenStage WL3 Wireless Service
4
7.2
TD 92442EN
Enter address to the WSG, that handling the Device Manager, followed by the
appropriate service.
•
5
7. Device Configuration
If WLAN handset is to be managed in the Device Manager, enter
<IP address>/WLAN
Click “Activate”.
Service Discovery
Service Discovery allows automatic detection of WSGs, devices and services on a
network without prior configuration. WSGs, services and devices that shall belong to a
certain WSG must be set to the same domain ID.
1
Click “Configuration” on the start page.
2
Select Other Settings > Advanced Configuration on the Configuration page.
3
Under Other, click “Service Discovery” in the menu on the Advanced
Configuration page.
4
In the Domain ID field, enter the Service Discovery Domain ID.
5
Click “Activate”.
04 October 2013 / Ver. PB1
65
Installation and Operation Manual
OpenStage WL3 Wireless Service 8. Additional System Settings
8.
TD 92442EN
Additional System Settings
8.1
Unite Name Server (UNS)
The UNS in the WSG is used to resolve addresses into complete destinations. The
module can be configured to send all requests to the local UNS (stand-alone mode) or
to forward all requests to a centralized UNS (forwarding mode). In forwarding mode,
the local UNS will only be used if the centralized UNS cannot resolve the address.
1
Click “Configuration” on the start page.
2
Select Other Settings > Advanced Configuration on the Configuration page.
3
Under Other, click “UNS” in the menu on the Advanced Configuration page.
8.1.1
UNS Operating Mode
Operating mode is changed in systems with a Unite CM only.
1
To set Operating mode, click “Operating mode”.
2
In a system with a Unite CM, set operating mode to Forwarding and enter the
Unite CM IP address.
3
Click “Activate”.
8.1.2
Default Category
The UNS Default Category is used to decide where messages from the WSG shall be
sent. The messaging handler is default set to localhost (127.0.0.1) which is the internal
message group handler in the module. This can be changed if you want to use a
messaging handler in another module. This parameter is changed for example if your
system is connected to another WSG.
04 October 2013 / Ver. PB1
66
Installation and Operation Manual
OpenStage WL3 Wireless Service 8. Additional System Settings
TD 92442EN
1
To set Default Category, click “Default Category”.
2
Enter values for Messaging handler IP address and Messaging handler service
name. (Default service name is DGH which is the internal message group
handler.)
If you, for example, want to send messages to a WSG connected to a WLAN
system, enter the IP address of the module and set messaging handler to
WLAN.
3
8.1.3
Click “Activate”.
Alias / Call ID
Alias can be used when there are numbers that do not belong to the default category.
1
To set Alias, click “Alias / Call ID”.
Click one of the links.
2
Enter settings for UNS Alias / Call ID.
In this example, a message that is addressed to “MyAlias” will be sent to the
handset with extension 1234 in the WLAN system that is connected to the WSG
with the address 192.168.0.1.
3
Click “Activate”.
04 October 2013 / Ver. PB1
67
Installation and Operation Manual
OpenStage WL3 Wireless Service 8. Additional System Settings
8.2
TD 92442EN
Logging
Status information can be stored locally, but can also be sent to a central log. The
System Activity Log can store “activities” such as messages, alarms, faults etc. Activity
logging is useful for troubleshooting. Default the Status- and System Activity logs are
stored locally but they can also be sent to another WSG.
8.3
1
Click “Configuration” on the start page.
2
Select Other Settings > Advanced Configuration on the Configuration page.
3
Under Other, click “Logging” in the menu on the Advanced Configuration page.
4
Click “Status Log”, “System Activity Log” or “View Advanced parameters”.
5
In the selected log page, enter settings. Click “Activate”.
Time Settings
It is possible to select where to fetch the time from, such as a web browser or a time
server.
1
Click “Configuration” on the start page.
2
Select Other Settings > Advanced Configuration on the Configuration page.
3
Under Time, click “Settings” in the menu on the Advanced Configuration page.
04 October 2013 / Ver. PB1
68
Installation and Operation Manual
OpenStage WL3 Wireless Service 8. Additional System Settings
4
The following parameters can be set (some of these parameters can also be set
in the setup wizard):
•
•
•
•
•
•
•
•
•
5
TD 92442EN
Time source – Where to fetch the time; A-bus, web browser or NTP server
Time server address – IP address to NTP server
Fault log – Create fault log for time server faults
Time zone – Current time zone
Auto DST adjust – Automatic adjustment for daylight saving time
Date format – Which date format to use
Date separator – Which character to use to separate the date fields
Time Format – Which time format to use
Time push time – When to update all interfaces within the module
Click “Activate”.
For additional information, see also the Installation Guide for your product.
8.3.1
Manual Time Setting (if Web browser is Time Source)
If Web browser has been selected as time source, the time must be set manually.
Otherwise this setting shall not be done. The setting can also be done in the setup
wizard.
04 October 2013 / Ver. PB1
69
Installation and Operation Manual
OpenStage WL3 Wireless Service 8. Additional System Settings
1
Under Time, click “Set time”.
2
Enter date and time.
3
Click “Submit time”.
TD 92442EN
Date and time can also be set in the setup wizard.
8.4
Network Settings
1
Click “Configuration” on the start page.
2
Select Other Settings > Advanced Configuration on the Configuration page.
1
Under Common, click “Network” in the menu on the Advanced Configuration
page.
04 October 2013 / Ver. PB1
70
Installation and Operation Manual
OpenStage WL3 Wireless Service 8. Additional System Settings
2
TD 92442EN
The following parameters can be set (some of these parameters can also be set
in the setup wizard):
•
•
•
•
•
•
•
•
•
•
Require network connection – Controls if the module needs a connection to
the network to start up. This can be useful if you want configure the module
before connecting it to a network.
DHCP – Controls whether static or dynamic IP address shall be assigned to
this hardware. If DHCP is enabled, only the host name below is applicable.
IP address – Sets the IP address for the module
Default gateway – Sets the IP address to a Gateway on the LAN
Subnet mask – sets the network mask that is to be used. If this parameter is
set to 0.0.0.0 it means that the Gateway never will be used.
Host name
Domain name – Sets the desired domain name for the module
DNS Server – Sets the IP address to a DNS if one exists. If no DNS Server is
present on the network, set this parameter to 0.0.0.0.
WINS Server – sets the IP address to a Primary WINS Server if one exists.
If no WINS Server is present on the network, set this parameter to 0.0.0.0.
For additional information, see also the Installation Guide for your product.
3
8.5
Click “Activate”.
Setting the License Number
The license number is normally set in the setup wizard but it can also be set on the
Advanced Configuration page.
1
Click “Configuration” on the start page.
2
Select Other Settings > Advanced Configuration on the Configuration page.
3
Under Common, click “License” in the menu on the Advanced Configuration
page
4
Enter the license number and click “Activate”.
8.5.1
Reboot
The module can be rebooted on the Advanced Configuration page.
1
Click “Configuration” on the start page.
2
Select Other Settings > Advanced Configuration on the Configuration page.
3
Under Common, click “Reboot” in the menu on the Advanced Configuration page
4
Click the “Reboot” button.
NOTE: If the Reboot page is reloaded, this will trigger another reboot.
04 October 2013 / Ver. PB1
71
Installation and Operation Manual
OpenStage WL3 Wireless Service
9.
9. Remote Management
TD 92442EN
Remote Management
A remote connection to a customer site can be established through the WSG. This
makes it possible to configure and maintain sites, independent of distance.
To be able to connect remotely, the remote management server in the module has to
be configured. The help text buttons in the GUI will give more information about each
parameter settings.
1
Click “Configuration” on the start page.
2
Select Other Settings > Advanced Configuration on the Configuration page.
3
Click “Remote Management” in the menu on the Advanced Configuration page
Remote connection
1
Click “Edit” for Remote Connection, to set up the connection parameters.
2
Set up the connection parameters.
3
Click “Activate”.
Open ports
1
Click “Edit” for Open Ports to open any additional ports that are needed for
configuration tools. This is a secured setting and before it can be activated it
must manually be confirmed by pressing the mode button on the module.
04 October 2013 / Ver. PB1
72
Installation and Operation Manual
OpenStage WL3 Wireless Service
9. Remote Management
TD 92442EN
For TCP, port 10101 has to be open.
2
Set up the port parameters.
3
Click “Activate”.
You will be prompt to confirm the change by pressing the mode button.
4
Press the mode button on the module.
5
Click “Activate” to save the changes.
6
Click the mode button to return to normal mode immediately or wait 10 minutes
for the module to return automatically. Any secured setting can be activated
within the 10 minutes period.
The module needs to be restarted for the changes to take effect.
Serial port channel
1
Click one of the “NOT USED” links for Serial port channel to set up a new
channel.
One serial port channel for each tool has to be set up. Web based configuration
tools do not require serial port channels.
2
9.1
Set up the channel and click “Activate”.
Serial IP Server Protocol
This parameter determines the version of Serial IP Server protocol to be used to
establish a serial port channel from the RMC to the Serial IP Server. The Serial IP
Server is a service that communicates with the WSG’s COM-ports.
04 October 2013 / Ver. PB1
73
Installation and Operation Manual
OpenStage WL3 Wireless Service
9. Remote Management
TD 92442EN
Module
RMS
RMC
Serial IP Server
RMS = Remote Management Server
RMC = Remote Management Client
1
Click “Configuration” on the start page.
2
Select Other > Advanced Configuration in the menu on the Configuration page.
3
Select “Remote Management” in the menu on the Advanced Configuration page.
4
In the Protocol Version drop-down list, select one of the following:
•
•
Select protocol version 1.0 if a legacy RMC is connected, or if a RMC is not
connected through a VPN tunnel.
Select protocol version 2.0 if a RMC is connected through a VPN tunnel. In
this case RMC version 1.32 or later must be used.
04 October 2013 / Ver. PB1
74
Installation and Operation Manual
OpenStage WL3 Wireless Service
10. Absence Handling
TD 92442EN
10. Absence Handling
10.1 Absence Handling in the VoWiFi System
See also 4.3.6 WLAN Handsets on page 23.
10.1.1 Sort on Handset Status
A list with all handsets can be created.
1
Click “Configuration” on the start page.
2
Select WLAN Portables > List All on the Configuration page.
3
Click the name of the column (in this case, "Status") to sort the list on handset
status.
10.1.2 Search on Handset Status
It is possible to search for handsets with selected status.
1
Click “Configuration” on the start page.
2
Select WLAN Portables > Search in the menu on the Configuration page.
3
Enter the optional search parameters Address/Number, IP Address, Hardware
ID and Status. To view absent portables, select “All absent” or “Manual Absent”.
04 October 2013 / Ver. PB1
75
Installation and Operation Manual
OpenStage WL3 Wireless Service11. Open Access Protocol (OAP)
11.
TD 92442EN
Open Access Protocol (OAP)
This function makes it possible for customer applications to communicate with other
connected systems, for example the Cordless Telephone System. The protocol that is
used for communication is called Open Access Protocol (OAP).
Refer to the Function Description for Open Access Protocol (OAP) for more information
about the protocol and when it can be used.
11.1 Configuration
The Message Distribution lists for the different interfaces have to be configured to send
the information to the OAP Server, in order to give the client access to the information.
The address of the OAP Server is xxx.xxx.xxx.xxx/OAP.
Configuration Example
The WLAN Interface should be configured to send User Data to the OAP Server.
1
Click “Configuration” on the start page.
2
Select Other Settings > Advanced Configuration in the menu on the
Configuration page.
3
Under WLAN Interface, click “Message Distribution” in the menu on the
Advanced Configuration page.
4
Select “Alarm”.
5
Enter the address xxx.xxx.xxx.xxx/OAP in one of the address fields.
6
Click “Activate”.
11.2 Importing a new OA-XML file
It is possible to import new services, and update existing services, by importing a new
OA-XML file to the module. The OA-XML description and OA-XML schema documents
will also be updated when a new file is imported.
1
Select “OA-XML” in the menu on the System Setup page. The Import OA-XML
file opens.
04 October 2013 / Ver. PB1
76
Installation and Operation Manual
OpenStage WL3 Wireless Service11. Open Access Protocol (OAP)
2
Click “Browse” and locate the file.
3
Click “Submit File”.
TD 92442EN
New services are added to the OAP list on the System Information page. The Protocol
version in the list shows the currently installed OA-XML version.
NOTE: The new service will only be shown in System Information if there is a valid
license for the service.
04 October 2013 / Ver. PB1
77
Installation and Operation Manual
OpenStage WL3 Wireless Service
12. WLAN Interface
TD 92442EN
12. WLAN Interface
12.1 Handset Registration
To be able to register, each VoWiFi handset must be programmed with the IP address
of the WSG used, refer to the Configuration Manual for respective VoWiFi handset.
12.2 Shared Phones
When using shared phones all VoWiFi handsets authenticates with passwords. The
password can be a common password for all users or the call number.
12.3 WLAN System
WLAN system handles the VoWiFi handset relogin time and authentication. A handset
is considered to be logged out if it has not made a relogin within a certain time. Call
diversion display text, Extended activity logging are also enabled in this view.
To find settings for WLAN System, do as follows:
1
Click “Configuration” on the start page.
2
Select Other Settings > Advanced Configuration in the menu in the on the
Configuration page.
3
Select “WLAN System” under WLAN Interface in the menu in the on the
Advanced Configuration page.
•
•
•
•
•
•
Handset relogin time
The time before a handset must relogin is set in minutes and when this time is
exceeded the handset will be considered unreachable. This is the maximum time it
takes for a handset to reconnect after installing a new or updating the WSG.
Note that a short relogin time implies a higher service/security but it also loads the
system.
Call Diversion Display Text
Text specified in the “Call Diversion Display Text” text field is, if enabled, added to
the display text when a call diversion takes place. By entering the character “%”, the
original call ID will be included in the display text on the place where the character is
entered. Note that some characters are special characters that are not visible.
Enable Extended Activity Log
Enable Extended Activity Log for intermediate logs, for more information see the
Function Description, Activity logging in Unite document.
Authentication Method
The very first time a VoWiFi handset logs in, it must authenticate itself with a
password. The password is then stored in the handset for future authentication. The
WSG Server has two authentication alternatives; “Common password” and
“Number as password”.
Common Password
A common password can be specified in the WSG, and this password is then used
for all VoWiFi handsets in the system. If the common password field is left empty,
the handset must send an empty password for authentication.
Allow Force Login
04 October 2013 / Ver. PB1
78
Installation and Operation Manual
OpenStage WL3 Wireless Service
12. WLAN Interface
TD 92442EN
NOTE: The function is only valid when the authentication method is set to “Common
password” or to “Number as password”. See • Authentication Method on page
78.
Forced login allows a user to login with a call number that already is in use. The
handset that already is logged in will then be unregistered.
04 October 2013 / Ver. PB1
79
Installation and Operation Manual
OpenStage WL3 Wireless Service
13.
13. Messaging Operation
TD 92442EN
Messaging Operation
Creating and sending messages via the Messaging Tool requires no password and can
be done by any user in the system.
13.1 Create and Send Messages via the Messaging Tool
The Messaging Tool GUI is displayed without additional license.
Figure 20. Messaging Tool GUI.
1
Click “Messaging” on the start page. The Message Tool opens.
2
Enter Call ID in the upper text field.
3
Enter message in the bottom text field.
4
Click
04 October 2013 / Ver. PB1
. The message is sent to the receiver.
80
Installation and Operation Manual
14.Service
Administration of Language and User Interfaces
OpenStage WL3 Wireless
TD 92442EN
14. Administration of Language and User Interfaces
All text shown in the user interface is default in English, but a copy of the language can
be translated and imported to the module. Several languages can be added. The
default English language is not possible to edit or remove. The supplied user interface
can also be modified to suit the individual customer requirements concerning
functionality.
Basic changes that can be made are:
•
•
Translate or adapt text (refer to 14.1.2 Translate/Edit the Language on page 82)
Modify the user interface to suit the customer’s image (refer to 14.2 Customize the
User Interface (GUI) on page 85)
- Limit the number of characters included in the message text.
- Add company logo and/or modify the GUI to suit the customer’s image
NOTE: The user interface only supports the Latin-1 character set.
For the best screen appearance
Windows standard screen settings, using normal font size, are recommended. The
recommended screen resolution is 1024 x 768.
How to edit
The code is thoroughly commented to make it easy to understand, and can be edited
with a simple text or HTML editor. Basic HTML, Java Script, and CSS knowledge is
recommended.
NOTE: Do not use an intelligent html editor like Frontpage or Dreamweaver, as it might
corrupt the html code.
14.1 Customize the Language
14.1.1 Export a Language for Translation/Editing
1
Click “Configuration” on the start page.
2
Select Other Settings > Set language in the menu in the on the Configuration
page.
04 October 2013 / Ver. PB1
81
Installation and Operation Manual
14.Service
Administration of Language and User Interfaces
OpenStage WL3 Wireless
TD 92442EN
3
Click the “Import/Export Language” button. The Translation page opens.
4
Click an existing language link to create or update languages. An XML file is
generated and the File Download window opens.
5
Save the file for translation or editing purposes. The file can be saved in any
name during the translation.
14.1.2 Translate/Edit the Language
In the downloaded language file, there are numerous tags but only the translation of
two tags and one attribute are mandatory:
•
•
•
<language id=”English”>
The “id” attribute is the text that appears in the drop-down list. Change “English” to
the name of your translated language here.
<translation>
Text displayed in menus, on buttons, tabs etc. Translated text can be added inside
the tags.
<helptext>
On-line help text. Translated text can be added inside the tags.
04 October 2013 / Ver. PB1
82
Installation and Operation Manual
14.Service
Administration of Language and User Interfaces
OpenStage WL3 Wireless
TD 92442EN
Below is an example of a language file (just showing two buttons with help text, for
simplicity).
<?xml version="1.0" encoding="ISO-8859-1"?>
<translations>
<language id="English" type="complete">
<app id="Alarm Manager">
<text id="ACTION_TYPE_SELECTOR">
<translation>Action Type</translation>
<helptext>Select which type of action to take.</helptext>
</text>
<text id="ACTIVATE_EHCONF_OK">
<translation>Activation of configuration OK.</translation>
</text>
<text id="ALARM_TYPE_SELECTOR">
<translation>Alarm Type</translation>
<helptext>The alarm type that should be triggered. </helptext>
</text
</app>
</language>
</translations>
079
Figure 21.
Example of a language file (.xml).
14.1.3 Show Pages in Translation Mode
All texts, buttons, menus etc. are identified with labels (for example
TEXT_TRANSLATION_TITLE). With the translation mode function it is possible to view
the label for each button, menu etc. This can be helpful when translating the language
file. For not losing one´s bearings during the translation it is a help to open two
windows and view one of them in translation mode and the other in normal mode.
04 October 2013 / Ver. PB1
83
Installation and Operation Manual
14.Service
Administration of Language and User Interfaces
OpenStage WL3 Wireless
1
TD 92442EN
Select the “Enable translation mode” check box in the Import/Export Language
page, and click “Apply”.
Figure 22.
Translation page in normal view
All the labels on the pages are shown, see example below.
Figure 23.
Translation page in translation mode
To return to standard view:
1
Clear the OPTION_DESIGN_MODE box.
2
Click “BUTTON_SAVE”.
14.1.4 Import Language File
When the file is translated, it must be imported to the module.
1
Click “Configuration” on the start page.
04 October 2013 / Ver. PB1
84
Installation and Operation Manual
14.Service
Administration of Language and User Interfaces
OpenStage WL3 Wireless
TD 92442EN
2
Select Other Settings > Set language in the menu in the on the Configuration
page.
3
Click the “Import/Export Language” button. The Translation page opens
4
Click “Browse” to locate the translated file, and then click the “Import” button.
The name of the translated language (the language “id” attribute) will appear as a link
in the Existing Language list and can be downloaded for editing purposes.
14.1.5 Delete Language File
On the Translation page, click the
icon to the right of the language you want to
remove. Note that it is not possible to remove the default language.
14.1.6 Select Language
Translated languages (the language “id” attribute) are shown together with the default
language “English” in the language drop-down list in the Language page.
1
Click “Configuration” on the start page.
2
Select Other Settings > Set language in the menu in the on the Configuration
page.
3
Select language in the drop-down list and click “Permanent”.
To change language for this session only, that is, for this browser window until
closed, click “Temporary”.
14.2 Customize the User Interface (GUI)
The module has an FTP area with default 50 MB disk space. The disk space can be set
in the interval 5 MB up to 150 MB.
The free space can be used for storing files and folders, for example, a customized
user interface for sending messages.
14.2.1 Change the Size of the FTP Area
This is a secured setting and before it can be activated it must manually be confirmed
by pressing the mode button on the module.
1
Click “Configuration” on the start page.
04 October 2013 / Ver. PB1
85
Installation and Operation Manual
14.Service
Administration of Language and User Interfaces
OpenStage WL3 Wireless
TD 92442EN
2
Select Other Settings > Advanced Configuration in the menu on the
Configuration page.
3
Under Common, click “FTP area” in the menu on the Advanced Configuration
page.
4
Fill in required size between 5 – 150 MB and click “Activate”.
You will be prompt to confirm the change by pressing the mode button.
5
Press the mode button on the module.
6
Click “Activate” to save the changes.
7
Click the mode button to return to normal mode immediately or wait 10 minutes
for the module to return automatically. Any secured setting can be activated
within the 10 minutes period.
The module needs to be restarted for the changes to take effect.
14.2.2 Files for Translation/Editing
1
Log on to the module via an FTP client. Note that how to log on can differ
between different FTP clients.1
Default username is “ftpuser” and default password is “changemetoo”.
xxx.xxx.xxx.xxx is the host name.
Examples:
•
•
Windows Explorer: fill in “ftp://username:[email protected]” in the
address field.
Firefox: fill in “ftp://xxx.xxx.xxx.xxx” in the address field and log on with
“username” and “password”.
NOTE: When secure mode is enabled, only secure access via HTTPS and FTPES are
allowed. HTTP is automatically redirected to HTTPS, and FTP access is not
allowed. The FileZilla Client freeware (not included) supports FTPES. See 3.4.1
Web Access Security Settings on page 11.
The files located in the Start page, including GIFs and CSS, can be downloaded/
copied to a folder on your hard disc.
14.2.3 Default Start Page GUI
Figure 24. Start page default user interface (index_template)
1.Internet Explorer is not an FTP client. It can be used for viewing but not for transferring files.
04 October 2013 / Ver. PB1
86
Installation and Operation Manual
14.Service
Administration of Language and User Interfaces
OpenStage WL3 Wireless
TD 92442EN
A copy of the default Start page is stored in the start page folder on the module’s FTP
area. The start page copy index_template, is an html file that can be copied and edited.
The start page can also be replaced with a completely new user interface.
When the edited or new html file is saved as index.html and placed in the Start page
folder on the module’s FTP area, it will replace the default start page.
14.2.4 Upload the Files to the module’s FTP Area
Upload/paste all updated files (including GIFs and CSS) to the FTP area.
NOTE: When secure mode is enabled, see 3.4.1 Web Access Security Settings on
page 11, only secure access via HTTPS and FTPES are allowed. HTTP is
automatically redirected to HTTPS, and FTP access is not allowed. The FileZilla
Client freeware (not included) supports FTPES.
1
Log on with an FTP client. Note that how to log on can differ between different
FTP clients.1
Default username is “ftpuser” and default password is “changemetoo”.
xxx.xxx.xxx.xxx is the host name.
Examples:
•
•
2
Windows Explorer: fill in “ftp://username:[email protected]” in the
address field.
Firefox: fill in “ftp://xxx.xxx.xxx.xxx” in the address field and log on with
“username” and “password”.
Copy the files and paste them into the FTP area.
14.3 Test the New User Interface
It is recommended to test the customized user interface as follows, for example:
•
•
If a company logotype is added, check that it looks all right and that the module
opens quickly. If it opens slowly, minimize the picture file size and save it as
“interlaced” to decrease wait time for the image.
Check that all text is correctly translated.
1.Internet Explorer is not an FTP client. It can be used for viewing but not for transferring files.
04 October 2013 / Ver. PB1
87
Installation and Operation Manual
14.Service
Administration of Language and User Interfaces
OpenStage WL3 Wireless
•
•
•
TD 92442EN
Check that the phonebook opens and that the entries are correct.
Send a message.
Check that the “message history status” is received and displayed.
14.4 Update the User Interface after a new Release
When a new version of the module’s software is released, there might be changes in
the user interface that need to be translated.
1
Import your old translated file to the module that has been updated with new
software. New text and buttons in the user interface are shown in English.
2
Click the language file link and save it.
3
Open the file. All tags that are not translated are marked with the comment:
<!-- The text identifier below couldn't be translated -->
4
Translate the new text and import the translated file again.
04 October 2013 / Ver. PB1
88
Installation and Operation Manual
OpenStage WL3 Wireless Service 15. Software Administration
TD 92442EN
15. Software Administration
Besides the software administration via the WSG’s Configuration page, it is also
possible to administer the software via the module’s Boot Mode GUI. This is described
in the Installation Guide for WSG. The Boot Mode GUI is typically used if no software is
installed on the module or if it is not possible to access the software.
Adding software for devices is done from the Device Manager application.
15.1 Add Device Software to the Device Manager
1
Click “Device Manager” on the start page.
2
Upload definition files. The definition files are usually included in a package file.
See 6.7.3 Import Parameter Definition Files on page 57 for more information.
The package files may also contain software for the devices (.bin) and templates
(.tpl). You may have to contact your supplier for the latest updates.
How to work with Numbers is described in chapter 6.4 Numbers on page 43.
15.2 Upgrade the Boot Software
For instruction on how to upgrade the WSG hardware with new Boot software
(autoupdate.bin) refer to the Installation Guide for WSG.
15.3 Software Information
All information about the installed software is shown in this view. Two software versions
can be installed on the module.
1
Click “Configuration” on the start page.
2
Select Software > Information in the menu on the Configuration page.
The software name, versions, the date they were installed and also which
version that currently is running are shown.
15.4 Switch Software
If two software versions are installed on the module you can switch between them.
1
Click “Configuration” on the start page.
2
Select Software > Switch in the menu on the Configuration page.
3
Under Select settings, select one of the following:
•
•
•
4
Keep previous settings — means that the settings last used for the software
is activated again after the switch. This option is only available if the software
has been used at least one time before.
Copy Current settings — means that you copy the configuration from the
software you are currently using and is only available if both software are of
the same type.
Use factory default settings — means that you apply the default settings that
were delivered from the factory.
NOTE: The active software’s current network settings will be kept and will
also be applied to the software you want to switch to.
Click “Switch”.
04 October 2013 / Ver. PB1
89
Installation and Operation Manual
OpenStage WL3 Wireless Service 15. Software Administration
TD 92442EN
15.5 Install New Software
It is recommended to always perform a backup before installing new software, see
15.5.1 Create a Software Backup. After the software installation see also 14.4 Update
the User Interface after a new Release on page 88.
Make sure that no Device Manager client is open and it is also important that no ftp
client is logged in to the module.
The information stored in the database will not be overwritten when new software is
installed.
NOTE: It is not recommended to use the module’s Management port when installing
software.
1
Click “Configuration” on the start page.
2
Select Software > Installation in the menu on the Configuration page.
3
Select software (.pkg) to upload. The software will replace the not running
software.
4
Select “Switch immediately” if you want to run the new software.
5
Select “Copy current settings” if you want the new software to inherit the settings
currently used. This selection will have no effect if the software type is different
than the currently used software. The module will always start up using factory
settings if the software type differs.
6
Click the “Start Installation” button.
15.5.1 Create a Software Backup
It is recommended to now and then create a backup of the software configuration.
1
Click “Configuration” on the start page.
2
Select Software > Installation in the menu on the Configuration page.
3
Click the “Backup” button.
Note that the backup will contain configuration for the running software only.
04 October 2013 / Ver. PB1
90
Installation and Operation Manual
OpenStage WL3 Wireless Service
16. Troubleshooting
TD 92442EN
16. Troubleshooting
16.1 General Troubleshooting
16.1.1 Log files
When troubleshooting it is always a good idea to examine the log files, since they
provide additional information that may prove useful. The first log to examine is the
Fault log found under Status on the Configuration page, but when reporting an error to
your supplier more advanced logs might be needed. Always include the appropriate log
file.
To find Info log and Error log:
4
Click “Configuration” on the start page.
5
Select Other Settings > Advanced Configuration in the menu on the
Configuration page.
6
Click the “Troubleshoot” button on the Advanced Configuration page.
7
Click “View Info Log” or “View Error Log”.
16.1.2 The Module does not Start
To use the module’s GUI, the computer must confirm to the requirements listed in 1.6
Requirements on page 3. If you do not have the correct software versions installed,
contact your system administrator.
16.1.3 Firewall Issues, or No Indication of Connected Device
If there is a firewall between the module and any devices, the firewall may need some
configuration to allow communication. See Appendix A for a description of used ports.
16.1.4 Unable to Access FTP Area
Make sure the client is set in active mode.
Example for Internet Explorer:
In the menu, select Tools -> Internet Options... -> Advanced. Under “Browsing”,
uncheck the “Use Passive FTP (for firewall and DSL modem compatibility)” check box.
When secure mode is enabled, see 3.4.1 Web Access Security Settings on page 11,
only secure access via HTTPS and FTPES is allowed. HTTP is automatically
redirected to HTTPS and FTP access is not allowed. The FileZilla Client freeware (not
included) supports FTPES.
16.2 Troubleshooting Guide
This section lists a number of possible faults, probable causes and suggested actions.
04 October 2013 / Ver. PB1
91
Installation and Operation Manual
OpenStage WL3 Wireless Service
16. Troubleshooting
TD 92442EN
16.2.1 Troubleshooting for the Device Manager
Fault
Probable cause
Action or comment
• It is not possible to edit The user is logged on as
any parameters after
auditor.
logging on to the system.
Close the browser session
and re-log on as admin or
sysadmin.
• The system does not
have the correct time.
– Configuration error, no
time server configured.
Configure the system to
connect to a time server.
– The time server is
configured but is offline.
Restore connection to time
server.
– The web browser is
Set the time via the
selected as time source but advanced configuration.
the time has not been set by
the user.
Device does not show up -The connected interface
in the Device Manager (for example WLAN) is not
up and running
Check the status of the
interface. Starting up mode
is indicated during start of
applications. If an
application has lost
connection to a required
resource it is indicated as
application problem mode.
An Application problem is
always shown as a
persistent fault in the Status
log (see 8.2 Logging on
page 68).
NOTE: If the information on
the Configuration page
shows Normal mode, it is
not necessary to check the
System information.
1. Click “Configuration” on
the start page.
2. Select Other Settings >
Advanced Configuration in
the menu on the
Configuration page.
3. Click “Troubleshoot”
button on the Advanced
Configuration page.
4. Select “System
information” in the menu.
04 October 2013 / Ver. PB1
92
Installation and Operation Manual
OpenStage WL3 Wireless Service
16. Troubleshooting
TD 92442EN
Fault
Probable cause
Action or comment
• Some devices report
device busy in the
Device Manager when
the user is trying to
change device
parameters.
The device is occupied with
some action that the device
cannot combine with
parameter synchronisation.
No action needed. The
Device Manager will
synchronize the changes
when possible.
• Software download is
stuck in pending.
– Multiple devices are
currently being updated.
There is a limitation in the
Device Manager on the
number of simultaneous
software downloads. All
devices are placed in a
queue and will be upgraded
in time. No action needed.
Download will start in time.
• File downloads retrying. The device is currently
unavailable (device out of
range, network problem)
No action needed. The
download will start when the
device comes in range
again.
• Software downloads
rejected.
The device is already
Restart the device manually
updated with a new software and restart the download.
but not yet restarted on the
new software. This is due to
selected activation time in
previous software update
i.e. “When idle in charger” or
“After manual restart“.
Software in Device Not
Recognized/
Synchronization Fails
The parameter definition file In the Devices tab, check
is not compatible with the
the parameter version for
device.
the device. If the parameter
version is highlighted with
red, a package file (.pkg)
including the software file
and definition file with that
parameter version, must be
imported to the module.
• Software downloads
are aborted.
Wrong file selected for
download to devices
(External web server).
– Make sure that the URL to
the desired software is
correct and retry.
– Make sure that the file is
intended for that device.
04 October 2013 / Ver. PB1
93
Installation and Operation Manual
OpenStage WL3 Wireless Service
16. Troubleshooting
Fault
Probable cause
TD 92442EN
Action or comment
• Communication failure The device did not respond
to device.
in an expected way. The
reason could be temporary
communication problems
caused by coverage
problems or network
problems.
Repeat the action after a
while to see if it is possible
to communicate with the
device.
• No connection
– Max number of Device
available for the Device Manager GUI’s has been
Manager GUI.
reached.
Close the other Device
Manager GUI to open new.
A maximum of three Device
Manager GUIs can be
connected.
– The Device Manager
server side is restarted due No Action, the server will be
to reconfiguration.
up within a few minutes.
– The Device Manager is
temporarily unavailable due No Action, the server will be
to restore of database.
up soon.
– The network is preventing
the GUI from connecting to No action.
the server.
• All devices log out after The backup is older than the No action. All devices will
restore of a backup.
device “online status report re-login within “online status
timeout.”
report timeout.” (See device
handling).
• The parameter version There are no
is displayed in bright red compatible .pkg files
in the Device Manager imported to the system.
GUI.
Import a .pkg file suitable for
the device. The .pkg file is
provided by the supplier.
• The parameter version
is displayed in dark red in
the Device Manager
GUI.
The version of the
imported .pkg files are not
100% compatible with the
device.
Import a .pkg file suitable for
the device. The .pkg file is
provided by the supplier.
• The parameter version
of the Number in the
Numbers tab is higher
than in the parameter
version of the device in
the Devices tab.
The device has been
downgraded to a previous
software version with lower
parameter version.
No action needed. This is
not an error. The parameter
version will be the same
after a software upgrade
has been performed on
device.
• No numbers are visible The search field is red.
of the selected device
Current search returns no
type in the Number tab. hit.
04 October 2013 / Ver. PB1
Alter search or use "show
all" to reset search to
default.
94
Installation and Operation Manual
OpenStage WL3 Wireless Service
16. Troubleshooting
Fault
Probable cause
TD 92442EN
Action or comment
• "Go to device" is
The selected device has no – Assign a new number to
dimmed out for a device number associated to it.
the device.
in the device view.
– Associate a new or
existing number to the
current device.
• The handset is not
visible in the Number
tab.
• Number creation of
desired device type is
not possible.
– The handset has no
number associated.
Assign or associate a
number to the device.
– The device is offline and
not saved as number.
Bring the device online.
Save the number in order to
make it possible to edit the
number when it is offline.
The .pkg file for the desired Import the .pkg file for the
device type is not imported desired device type. The file
to the Device Manager.
is provided by the supplier.
• It is not possible to
No compatible template for Create a new template or
apply a template at
the desired device exists.
upgrade an existing
creation of new number.
template and retry.
Fault message Device
Manager: Runningapplication problem
(Error relay: Database
init in progress) is shown
after software upgrade of
the WSG.
You have upgraded the
WSG from software version
3.31-B to software version
3.60-A.
The WSG needs to reconfigure the database used
by the Device Manager after
the upgrade. The reconfiguration of the
database can take up to one
hour.
16.2.2 General Troubleshooting for the WSG
This part of the Troubleshooting Guide lists possible faults that are not connected to the
Device Manager
Fault
Probable cause
Action or comment
• It is not possible to edit – The phonebook is
Edit the external phonebook
the Central Phonebook. configured to be read-only. file and re-import it to the
Central Phonebook.
• Import of language to
the configuration GUI
fails.
04 October 2013 / Ver. PB1
– The phonebook is
configured to use a LDAP
server
Access the LDAP server
and alter the desired entry.
After “commit”, the new data
will be available for the
Central Phonebook.
The language file has the
wrong format.
Export the default language
to set the format and edit
the language file.
95
Installation and Operation Manual
OpenStage WL3 Wireless Service
16. Troubleshooting
TD 92442EN
Fault
Probable cause
Action or comment
• Set language fails.
– The language file might be Export the language files
faulty.
and compare hem. Make
sure that the <language id=
tag is unique for each file
• The log files are
The log settings are set to a Change the log settings in
flooded with log entries. detailed level.
Advanced configuration >
Troubleshoot > System
information.
• Several functions of the – There is not a valid
system does not start.
license.
Enter a valid license and
restart the module.
16.3 Built-in tools
The hardware has different LEDs to indicate the status and besides that the possibility
to show active faults and logging the faults via the GUI.
Tools
Description
LEDs
The LEDs show different colors to determine type of information
and have different flashing frequency for showing the priority
colors
Red
Fault indication
Yellow
Mode indication
Blue
Normal operation (OK)
Flashing frequency
04 October 2013 / Ver. PB1
Fixed light
indicates normal state
Slow flashing light
indicates medium attention
Quick flashing light
indicates high attention
96
Installation and Operation Manual
OpenStage WL3 Wireless Service
16. Troubleshooting
TD 92442EN
Flashing patterns
Status LED
Status OK
Blue
Starting up/ shutting down Blue
Feedback (1 second)
Blue
Error/fault
Red
Mode LED
Warning
Red
Boot mode
Yellow
Blue
Demonstration mode
Yellow
Blue
Waiting for automatic
startup (1 minute)
Yellow
Troubleshoot mode and
during firmware upgrade
Yellow
Blue
Mass storage mode
Secured settings
Status LED
Indicates that manual confirmation is required
Confirmation is done and
setting can be activated
Blue
Yellow
Power
Mode LED
Blue
Power LED
Power OK
Closing down caused by
low voltage
Low voltage*
Blue
Red
Red
* also used if the Power parameter conflicts
with the actual setup.
Demonstration
Mode:
Demonstration Mode is activated by pressing the Mode
button for 10 seconds. The module will then run with full
functionality for 2 hours, it then returns to the configured
license! If it works in Demonstration Mode and not in normal
operation you probably have a license problem.
Active faults:
Refer to 4.3.1 Active Faults on page 20.
Fault logging:
Refer to 4.3.4 Fault Log on page 21 and 4.3.5 Administer the
Fault Log on page 22.
System Information: See 16.4 Advanced Troubleshooting below.
16.4 Advanced Troubleshooting
The Advanced Configuration page (requires system administrator rights) includes
advanced troubleshooting. Snapshots of selected logs or a complete log can be
viewed.
1
Click “Configuration” on the start page.
2
Select Other Settings > Advanced Configuration in the menu on the
Configuration page.
3
Click the “Troubleshoot” button on the Advanced Configuration page.
4
In the left menu on the Troubleshoot page you can view logs and find detailed
information about the system.
•
Specify Information to Log
04 October 2013 / Ver. PB1
97
Installation and Operation Manual
OpenStage WL3 Wireless Service
16. Troubleshooting
TD 92442EN
Standard debug is set by default but this can be extended and show more details.
1
Click “System Information” in the left menu.
2
Enable desired logs and click “Activate”.
• Send Test Message
The Troubleshoot page also includes the possibility to send test messages.
1
Click “Send Test Message” in the left menu.
2
Enter Call ID and click “Send Message”.
16.5 What to consider when replacing a module
•
•
•
•
IP Address
License
Module key
Remember where cables were connected
16.6 Technical Support
For technical support please contact your local representative.
04 October 2013 / Ver. PB1
98
Installation and Operation Manual
OpenStage WL3 Wireless Service
17. Related Documents
TD 92442EN
17. Related Documents
Data Sheet, Elise3
TD 92678GB
Installation Guide, WSG
TD 93041EN
Data Sheet, OpenStage WL3 Wireless Service Gateway - WSG
TD 92972EN
Function Description, Open Access Protocol (OAP)
TD 92978EN
04 October 2013 / Ver. PB1
99
Installation and Operation Manual
OpenStage WL3 Wireless Service
18. Document History
TD 92442EN
18. Document History
For details in the latest version, see change bars in the document.
Version
Date
Description
PA1
01 June 2012
First release of document (draft).
PA2
25 June 2012
Updated:
1.2 How to Use this Document on page 2
1.4 Technical Solution on page 3
6. Device Manager on page 30: figures have been
added.
Appendix A: Used IP Ports on page 93. Port used
by
DECT interface and NetPage removed. Other ports
have been added.
Removed:
"Chargers" and "NetPage" has been removed in
the
entire document,
6.6.1 License Upgrade alternatives on page 48:
References to Product Licensing Overview
document
have been removed.
Chapter 6.6.6 Move License has been removed.
15.3.2 General Troubleshooting for the Unite
module
on page 87: DECT related issues have been
removed.
Added:
6.9 Other Settings on page 57
12.2 Shared Phones on page 71
14.1 Add Device Software to the Device Manager
on
page 81
See change bars for more information.
PA3
08 October June
2012
Updated:
3.1.1 Start Page on page 7: new screen shot.
Removed:
Customize the Search Result Text on page 75
removed
12.2 Shared Phones on page 78: "User Server"
requirement removed.
12.3 WLAN System on page 78: Removed "User
Server" as Authentication Method.
"Netpage" removed throughout the entire
document.
04 October 2013 / Ver. PB1
100
Installation and Operation Manual
OpenStage WL3 Wireless Service
18. Document History
Version
Date
Description
A
22 November
2012
Updated:
6.7.9 Upgrade a Device with new Software on page
59: note regarding how many devices that can be
upgraded simultaneously added.
TD 92442EN
Removed:
2.1 Information required for the Setup on page 4:
Type of phone system removed.
2.5 Optional Settings on page 6: Removed first
sentence: Some of the optional settings in the
module....
6. Device Manager on page 34: Important note
regarding that WSG server always must be on
removed
PB1
04 October 2013
Added:
3.1.2 Login Page on page 8
3.5 Proxy Settings on page 15
4.2 Create Messaging Groups on page 19
13. Messaging Operation on page 80
Updated:
2.4.1 Add Entries to the Central Phonebook on
page 5, 4.1.3 Import Entries to the Central
Phonebook from a CSV File on page 18, 4.1.4
Export the Central Phonebook to a CSV File on
page 19: support for UTF-8 added.
6.1.6 Tabs on page 36: Two new columns added in
the Devices tab.
Removed:
Chapter 19.2 Device Manager Troubleshooting
moved to 16.2.1 Troubleshooting for the Device
Manager on page 92.
See compare document for more information.
04 October 2013 / Ver. PB1
101
Installation and Operation Manual
OpenStage WL3 Wireless Service
Appendix A: Used IP Ports
TD 92442EN
Appendix A: Used IP Ports
NOTE: If additional equipment (for example firewall) is used between the WSG and the
application/unit, the corresponding ports might also be opened in the equipment.
Port
Application or unit
Transport
protocol
20–21
FTP
TCP
53
Domain Name Server (DNS)
License Web Server communication
UDP
68
DHCP
UDP
80
Web traffic (HTTP)
License Web Server communication
TCP
113
Authentication
TCP
123
Network Time Protocol (NTP)
UDP
443
HTTPS
License Web Server communication
TCP
514
Syslog
Syslog messages
UDP
1321–1322
OAP Server
TCP
8080
HTTP
TCP
33000–33001 VoWiFi handset Communication
04 October 2013 / Ver. PB1
TCP
102
Installation and Operation Manual
OpenStage WL3 WirelessAppendix
Service B: Device Manager Keyboard Shortcuts
TD 92442EN
Appendix B: Device Manager Keyboard Shortcuts
The following table shows the shortcuts that can be used in the Device Manager.
B.1
Genera
l
B.2
B.3
B.4
Short-cut
Description
Ctrl + H
Open the File management window
Ctrl + Tab
Switch tab
Alt + F4
Close the application
Devices
Shortcut
Description
Ctrl + N
Add a new device
Enter
Upgrade the selected device(s)
Delete
Delete the selected device(s)
Ctrl + F
Find a device
Ctrl + Enter
Open the Properties window for the selected device
Numbers
Shortcut
Description
Ctrl + N
Add a new Number
Enter
Edit the selected Number
Ctrl + C
Copy the selected Number
F2
Rename the selected Number
Ctrl + S
Save the selected Number to the database
Delete
Delete the selected Number from the database
Ctrl + F
Find a Number
Templates
Shortcut
Description
Ctrl + N
Add a new template
Enter
Edit the selected template
Ctrl + C
Copy the selected template
04 October 2013 / Ver. PB1
103
Installation and Operation Manual
OpenStage WL3 WirelessAppendix
Service B: Device Manager Keyboard Shortcuts
B.5
F2
Rename the selected template
Delete
Delete the selected template
Ctrl + F
Find a template
TD 92442EN
Licenses
Shortcut
Description
Delete
Remove the selected device(s) from the license view
Ctrl + F
Find a device
04 October 2013 / Ver. PB1
104
Installation and Operation Manual
OpenStage WL3 Wireless Service
Appendix C: File types
TD 92442EN
Appendix C: File types
In this appendix, the different file extensions that are used in the module are explained.
System files are not described.
File type
Extension Description
Software file
bin
Software for devices
Company Phonebook file cpb
Company Phonebook file for handsets.
Parameter Definition file def
Including all possible settings for a certain
device type for a certain version.
Language file
lng, or xml
Language file for handsets or the WSG.
Language file for the module uses XML
(eXtensible Markup Language.).
Package file
pkg
Archive that can include different file types
such as parameter definition files (.def),
software files (.bin) and template files (.tpl).
Template file
tpl
Contains one or more exported templates.
Number file
xcp
Exported Numbers.
04 October 2013 / Ver. PB1
105