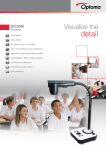
1
NCTE PROFESSIONAL DEVELOPMENT
GETTING STARTED
MODULE
Getting Started Module 3 Digital Presentations .indd 1
3 DIGITAL PRESENTATIONS
15/03/2012 14:21:31
Getting Started Module 3 Digital Presentations .indd 2
15/03/2012 14:21:53
Module 3
Digital Presentations
Getting Started Module 3 Digital Presentations .indd 3
15/03/2012 14:21:53
Getting Started Module 3 Digital Presentations .indd 4
15/03/2012 14:21:54
Published by
The National Centre for Technology in Education
National Centre for Technology in Education (NCTE)
Dublin City University
Glasnevin
Dublin 9
Tel: +353 1 700 8200
Email: [email protected]
Web: www.ncte.ie / www.scoilnet.ie
Copyright © National Centre for Technology in Education 2012
Permission granted to reproduce for educational use providing the source is acknowledged.
Copying for any other purposes prohibited without the prior permission of the publisher.
Please note:
•
Screenshots used in this manual may appear different to those on computer
screens used by participants. Variations in versions of the software and differing
operating systems may be in use.
•
The World Wide Web is constantly evolving and content and URLs (Universal
Resource Locators – website addresses) change over time. It is possible that the
content located at some of the URLs listed throughout the manual may change
over time.
Throughout this module, reference may be made to software titles and suppliers of Internet
services. These references are made purely to illustrate or expound course content. Any such
reference does not imply any endorsement by the NCTE of a product or company. The reader
should be aware that typically there are many products and companies providing similar
services in areas related to ICT. Participants should be as informed as possible before making
decisions on purchases of ICT products or services. Please refer to www.ncte.ie for details of
purchasing frameworks available to schools.
Getting Started Module 3 Digital Presentations .indd 5
15/03/2012 14:21:54
GETTING STARTED MODULE 3 DIGITAL PRESENTATIONS
INTRODUCTION
This is a 7.5 hour course, designed by the NCTE, and aimed at equipping primary and post
primary teachers with little or no experience of ICT with the basic skills required to effectively use
ICT as a teaching and learning tool.
The basic principles covered in this course can be applied to any area of the primary or post
primary curriculum.
Time is allocated in each module to discussion on how the skills learnt can be used to enhance
teaching and learning, with particular reference to:
•
Literacy
•
Numeracy
•
Special Educational Needs
Traditionally we have thought about literacy as the skills of reading and writing; but today our
understanding of literacy encompasses much more than that. Literacy includes the capacity to read,
understand and critically appreciate various forms of communication including spoken language,
print, broadcast media, and digital media.
(DES 2010 – Better Literacy and Numeracy for Children and Young People)
COURSE OVERVIEW
The course consists of three modules.
Module 1
- Creating and editing a document; using files and folders
Module 2
– The Internet & Email
Module 3 – Digital Presentations
Appendix
- Connecting a Digital Projector to a Laptop
This is the third module of the above course. This module may also be delivered as a standalone
course.
1
Getting Started Module 3 Digital Presentations .indd P1
15/03/2012 14:21:54
GETTING STARTED MODULE 3 DIGITAL PRESENTATIONS
NCTE
The NCTE provides a wide range of supports to schools in the area of ICT integration. When you
have completed this course, take some time to explore the NCTE website (www.ncte.ie), especially
the videos contained in the Good Practice section, to see how some teachers are integrating ICT
in their own classrooms.
Please note that this NCTE course manual contains some additional content which your course
tutor may not have time to cover as part of the 3 module course. It is intended that course tutors
will prioritise the basic skills required for you to use ICT as a teaching and learning tool. The
manual should provide you with a step-by-step guide to enable you to reinforce these skills when
you are back in the classroom, as well as providing you with additional content and information
which may be of use to you in the future
2
Getting Started Module 3 Digital Presentations .indd P2
15/03/2012 14:21:54
Getting Started Module 3 Digital Presentations .indd P3
15/03/2012 14:21:54
MODULE 3
DIGITAL PRESENTATIONS
SUGGESTED DURATION OF MODULE
2.5 hours
OBJECTIVES
This module will enable the participant to:
•
Use presentation software to enhance teaching and learning
•
Use the tools available in PowerPoint 2007 to create classroom resources that may be saved,
reused and re-purposed in the future.
•
Recognise how presentation software may be used by students to present projects, create
digital objects and resources.
•
Apply best practice in relation to copyright in the use of images, text and photos used in
presentations.
•
Become familiar with other technologies, including visualisers, scanners and digital projectors
Getting Started Module 3 Digital Presentations .indd P4
15/03/2012 14:21:54
GETTING STARTED MODULE 3 DIGITAL PRESENTATIONS
DIGITAL PRESENTATIONS
A digital presentation is a collection of electronic slides which can contain text, tables, graphics,
pictures, sound and video. The manner and sequence in which the elements appear on the slide
can be controlled and the presentation can run automatically or be presented by a presenter. One
program for the creation of digital presentations is Microsoft PowerPoint. Others such as Impress
with the Open Office Suite offer similar facilities.
Teachers find presentation software useful in many areas of classroom practice.
•
Presentation software is an excellent resource that can introduce, enrich or encapsulate
the material you present in the classroom.
•
Resources created in PowerPoint or other software can be shared with others and used
again in the future.
•
A digital presentation can be enhanced by incorporating text, images, audio and video.
•
The teacher is enabled to cater for the different learning styles in the classroom and
provide for the visual and auditory senses of the learners.
•
Students are engaged and motivated by a dynamic, well structured presentation.
•
Using presentation software presents opportunities to students with special educational
needs to create resources of a very high standard.
•
The teacher can show a video on a slide as part of a presentation without requiring
students to look at a video sharing site that is not classroom suitable.
Students can use presentation software for a range of learning purposes.
•
Creating digital learning objects for other classes using presentation software. Students
can create slideshows for younger classes and present them. Post-primary students
could revise a topic they find difficult and present their slideshow to the class, thus
helping others revise a variety of topics. In primary school a senior class could create a
presentation on the alphabet for the junior classes. The presentations may be added to a
school’s digital library for sharing with other classes.
•
Developing note taking and summarising skills by extracting key points from their research
and presenting them in bulleted points.
•
Publishing their work on the school website to help them learn about writing for an
audience, copyright, citing sources and being responsible digital and web publishers.
•
My School Years project where students present their years in the school by creating a
slideshow with photographs from each year as well as images of their work and other
school activities.
•
Projects which develop slide shows to present projects by individual or groups.
•
Science Presentations can be made by students to teach processes and how things work.
Teachers or students can add additional items to a diagram to illustrate how a process
grows and changes.
•
Student e-Portfolios can showcase students’ best slideshows.
•
Class Yearbook-type presentations with collections of photos; information about special
events; examples of class and pupil projects, etc. throughout the year can be made by
students as a group work project.
5
Getting Started Module 3 Digital Presentations .indd P5
15/03/2012 14:21:54
GETTING STARTED MODULE 3 DIGITAL PRESENTATIONS
With PowerPoint ‘less is more’, and often the teacher need only create a slide or two to produce
an effective teaching tool. When used with the digital projector you will have a whole class multimedia learning object.
Activity
Tips
Links
Tutor Demo
One or two slide activities
•
A PowerPoint might contain one picture as a stimulus to oral or written activity in any
topic.
•
The PowerPoint might contain contrasting or conflicting photography (two slides,
one photograph each) so that students are encouraged to consider their responses to different
visual stimuli.
•
A PowerPoint might contain one sentence (controversial, inspiring, etc.) which the
students react to in writing, as to its sentiment. The pieces of writing might then be
read to the class to see how and if students reacted in different ways. This could be
used as a stimulus for visual arts or music also.
•
The teacher might have a student make notes / keep a record on PowerPoint as the
class discuss an issue. This could be saved and revisited for revision later.
•
The teacher might write five sentences on a slide and ask students to continue with
five more in their copies. Students can then read out these alternate continuations to
each other.
•
The teacher might build up a bank of the most commonly misspelled words in a
subject or topic and return to them once every four weeks.
•
Two slides might be prepared about a major news event: one slide with three
sentences from the Irish Times leading article, the other slide with three sentences
from the Irish Sun. Students are encouraged to reflect on different styles of writing.
•
Key quotations from a novel, play or poem can be reinforced using PowerPoint.
PRESENTATION SOFTWARE AND LITERACY SKILLS
Presentation software is an ideal learning tool to help students’ oral presenting and writing skills.
Students will actively use all four language skills, reading, writing, listening and speaking as they
research, create and deliver their presentations. As they read source materials, discuss their
ideas with their peers and teacher, draft their points, condense and refine their writing, and then
deliver their presentations to their peers they will learn actively.
As part of the writing process in presentation software, the facility of rewriting and the fact that
text needs to be concise and brief encourages students to learn to clarify and summarise their
points. This greatly aids students in clarifying concepts and writing concisely.
The added media elements such as colour, images and animation are very motivational and
stimulating. Students can choose the design, layout, and graphics for each slide and personalise
their presentations. The flexibility of the tool allows different types of learners to express themselves
in ways they feel comfortable with and for others being able to create well laid out work reduces
pressure on those with motor or learning difficulties.
6
Getting Started Module 3 Digital Presentations .indd P6
15/03/2012 14:21:55
GETTING STARTED MODULE 3 DIGITAL PRESENTATIONS
Activity
Tips
Links
Tutor Demo
Literacy
Sample Literacy Activities
•
‘Flashcard presentations’ can be created with presentation software. Topics may
include: - -
•
o
practising parts of speech
o
extending vocabulary,
o
practising spelling,
o
reinforcing themes and concepts,
o
reinforcing numbers, letters, or colours,
o
emphasing quotations and definitions,
Students can present their own projects to the class when they have researched
their assigned portions of the topic and developed slides to serve as a part of a group
presentation. This develops communication skills, oral language skills, presentation skills and
critical analysis skills as well.
•
Digital presentations can provide a way for students with oral language difficulties to
express themselves confidently.
•
Digital story telling presentations can be created with images and accompanying
narration.
•
Autobiographical stories can be created by students to present short autobiographical stories
about themselves. Scanned photos can be inserted for interest.
•
Poetry Readings can be accompanied with appropriate images. Students could also
create a slideshow with a voice recording accompanying the images.
Take a moment to consider ways in which you could use presentation software to support literacy
in your classroom.
Share your ideas with the other participants on your course.
Learning seems to occur most effectively when students have opportunities to use language for
real purposes. The process of preparing and giving oral presentations is a purposeful activity
that involves finding information, reflecting upon that information, interpreting it and creating
something new. Sharing the created product with others provides an audience for the student
and acts as a springboard for discussion and interaction.
7
Getting Started Module 3 Digital Presentations .indd P7
15/03/2012 14:21:55
GETTING STARTED MODULE 3 DIGITAL PRESENTATIONS
Activity
Tips
Links
Discussion Activity
Consider a student with special educational needs in your school or classroom. Discuss the benefits
of using presentation software with this student and some ideas of specific uses which may particularly
support this student’s learning.
Using images and graphics of everyday situations in one’s teaching slideshows will aid students
understanding. Project Maths calls for understanding contexts and applications that will enable
students to relate mathematics to everyday experience.
For any subject including Maths the
slideshows prepared by the teacher should not replicate the textbook or worksheet but contain
extra resources that contextualise the subject in the students’ everyday experience.
Activity
Tips
Links
Tutor Demo
Numeracy
Numeracy Activities for Teachers
•
•
Use architectural photographs and varying shapes, dimensions etc. from Google
Images. Do remember not to infringe copyright law and to acknowledge your sources.
Images of bridges, lighthouses, skyscrapers, barrels, football-pitches can be used on slides to
enhance mathematical context.
Find PowerPoints created by teachers in Irish secondary schools at Project Maths
www. projectmaths.ie > Strands > Material created by teachers.
Activity
Tips
Links
Tutor Demo
Numeracy
Numeracy Sample Activity for Transition Year Students
Use some the following terms listed in the Geometry section of the Leaving Certificate Maths
Syllabus with students.
Acute angle, alternate angles, angle bisector, arc, area of a disc, base and corresponding apex
and height of triangle or parallelogram, chord, circle, circumcentre, circumcircle, circumference
of a circle, circumradius, collinear points, concurrent lines, convex quadrilateral, corresponding
angles, diameter, disc, distance, equilateral triangle, exterior angles of a triangle, full angle,
hypotenuse, in-centre, incircle, inradius, interior opposite angles, isosceles triangle, median
lines, midpoint of a segment, null angle, obtuse angle, perpendicular bisector of a segment,
perpendicular lines, point of contact of a tangent:
• Students are divided into groups of five, given a digital camera and told to identify and
photograph any six such features around the school.
• Students create twelve PowerPoint slides in total, one with the photograph and the name of the
mathematical term, the other with a simple explanation of the term.
• Students present their work to the class using the digital projector.
Their Maths Trail slideshows can be saved on the server and shared with other classes and
re-used in other years.
This activity can be adapted for use at Primary level also, focussing on 2-d and 3-d shapes and
their characteristics. Junior classes could photograph 2-d shapes on a maths trail and label these
as part of a PowerPoint presentation. Senior classes could photograph 3-d shapes and label them
in terms of sides, corners, edges and so on.
Note: Digital photography is dealt with in the NCTE Creating ICT Resources Course
8
Getting Started Module 3 Digital Presentations .indd P8
15/03/2012 14:21:55
GETTING STARTED MODULE 3 DIGITAL PRESENTATIONS
OPENING POWERPOINT 2007
For the purposes of this course, we have chosen Microsoft PowerPoint 2007. There are many
other types of presentation software with similar functionality, including Star Office and Open
Office (for Kids).
If there is a PowerPoint 2007 icon on the Desktop double-clicking it will open the program.
Otherwise:
1.
Click the Start Button.
2.
Click All Programs
3.
Click Microsoft Office in the drop down menu
4.
Click on Microsoft Office PowerPoint 2007.
Overview of PowerPoint 2007
PowerPoint like any presentation software has two modes so to speak, editing and delivering. To
create your presentation you will work in edit mode.
Editing your Presentation
There are a number of views in edit mode that will enable you to create a professional presentation.
To move between edit views:
1.
Select the View tab on the Ribbon.
2.
Click on Slide Sorter view in the Presentations View group.
Normal view is the main editing view, where you write and design your presentations.
Slide Sorter view provides you with a view of your slides in thumbnail form. This view makes it
easy for you to sort and organize the sequence of your slides as you create your presentation, and
then also as you prepare your presentation for printing.
The Notes pane is located just below the Slide pane. You can type notes that apply to the current
slide. Later, you can print your notes and refer to them when you give your presentation. You can
also print notes to hand out to your audience or include the notes in a presentation that you send
to the audience or post on a Web page
The Master views include, Slide, Handout, and Notes view. They are the main slides that store
information about the presentation, including background, colour, fonts, effects, placeholder
sizes and positions. The key benefit to working in a master view is that on the slide master, notes
master, or handout master, you can make universal style changes to every slide, notes page, or
handout associated with your presentation.
9
Getting Started Module 3 Digital Presentations .indd P9
15/03/2012 14:21:55
GETTING STARTED MODULE 3 DIGITAL PRESENTATIONS
Editing Tools
The tools for Microsoft Office PowerPoint 2007 appear on the Ribbon as in Microsoft Word
2007. Above the Ribbon you will find the Tabs.
The Home tab opens by default and when you click on the name of a tab you wish to use, the
tab name is highlighted and everything associated with the tab you pick will appear, while the
previous one becomes hidden. These tabs are the equivalent of the old Menu Bar.
The Home tab
Groups of commands in a ribbon
When a tab is chosen, groups of commands associated with the tab are shown in the ribbon.
The groups associated with the Home tab are Clipboard, Slides, Font, Paragraph, Drawing and
Editing.
Within each subtask there are more controls. For example,
there are four commands to choose from in Slides: New Slide,
Layout, Reset and Delete
Each command becomes highlighted as you move the mouse
around in any group, such as Slides. Click on the command you
wish to use.
The command will either execute, or you will be presented with
options to select from first before the command is carried out.
10
Getting Started Module 3 Digital Presentations .indd P10
15/03/2012 14:21:55
GETTING STARTED MODULE 3 DIGITAL PRESENTATIONS
Becoming Familiar with the PowerPoint Window
Minimizing, Maximizing and Closing a window
•
The Minimize button reduces the window to the Taskbar
•
The Maximize button makes the window fill the entire
screen. If you click it again it will reduce the window to
its original size.
•
After maximizing a window, click to restore the window
to its previous size
•
The X button closes the window
11
Getting Started Module 3 Digital Presentations .indd P11
15/03/2012 14:21:56
GETTING STARTED MODULE 3 DIGITAL PRESENTATIONS
CREATING A PRESENTATION
To Open a New Blank Presentation
1.
Click on the Office Button and choose New.
2.
Select Blank Presentation and click Create.
The first slide is always the Title Slide
1.
Click inside the Click to add title box to add text.
2.
Type Bia – Do not press the Enter Key or a blank line will
be added.
3.
Click once in the Click to add subtitle box.
4.
Type le Rang a Dó.
The first slide is now created.
Adding a New Slide
1.
Click on the arrow on the New Slide icon
2.
Click on the Title and Content slide layout
Note: You can change the layout of an existing slide at any time by
clicking on Layout in the Slides group and selecting the desired
layout.
12
Getting Started Module 3 Digital Presentations .indd P12
15/03/2012 14:21:56
GETTING STARTED MODULE 3 DIGITAL PRESENTATIONS
Adding Text and Clip Art
1.
Click on the Title space and type Arán.
2.
Click on Clip Art icon.
3.
Type Bread into the Search for box.
4.
Click Go.
5.
Click on the image you wish to insert
or
Click on the arrow to the right of your chosen image
and click Insert
To adjust the size of the image click and drag the ‘handles’
at the corners.
Activity
Tips
Links
Tutor Demo
Copyright and Clip Art
All Clip Art and SmartArt in PowerPoint 2007 is copyright free and suitable for insertion in your
classroom resources. You and your students can freely use the Clip Art without acknowledging the
source as you paid for its use when you purchased your Microsoft PowerPoint 2007 licence and it
has been copyright cleared for you.
It is important to note that other clip art and images found online will be copyright protected and
permission to use should be sought and in sometimes the images may have to be purchased.
When using work that is not your own it is best practice to always acknowledge the copyright
holder. Teaching students that the images and art work they find online are protected by copyright
or trademark and must always be credited and cited is a key digital literacy skill.
13
Getting Started Module 3 Digital Presentations .indd P13
15/03/2012 14:21:57
GETTING STARTED MODULE 3 DIGITAL PRESENTATIONS
The Insert Tab
Using the Insert tab to insert Clip Art
1.
Click on the Insert tab.
2.
Click Clip Art on the Illustrations group.
3.
The clip art menu appears.
4.
Type your requirement in the Search for field and click Go.
5.
Select the image and click the Insert button.
6.
Resize and position the image as required.
Activity
Tips
Links
Tutor Demo
There are many PowerPoint resources available online. Remember that while they may have been
uploaded and shared they are the property of others and you must comply with copyright law.
•
You can search for almost any subject area under your topic and .ppt or powerpoint. These
may be good for ideas but never use them in class without fully viewing them from beginning
to end in order to ensure that content is appropriate for age and indeed culture e.g. spelling
colour and colour or political point of view. PowerPoints for Martin Luther King always require
careful vetting. Some presentations may also be out of date.
•
Slide Share www.slideshare.net is a slideshow sharing website. It is great for ideas and may
be useful in class. Some slideshows may also be downloaded but the same proviso as above
applies. If you get to the stage that you want to upload your PowerPoint slideshow to share
with other teachers make sure all your work is your own and that you are not breaching
anyone else’s copyright.
•
Open the Scoilnet website www.scoilnet.ie and enter the key word ‘powerpoint’ into the
search box. You may find a PowerPoint that suits your needs.
Teachnet.ie is an Irish website that encourages quality indigenous curriculum content. Many of their
webpages contain slideshows e.g. Leaving Certificate Higher Algebra http://resources.teachnet.ie/
pkavanagh/2006/.
•
Primary teachers can look at Seomra Ranga http://www.seomraranga.com where there are
some PowerPoints for use in the classroom.
•
The INTO website (http://www.into.ie) contains many useful classroom resources including
PowerPoint presentations for INTO members.
To insert a picture or photo from your computer
Using the Insert tab to insert Clip Art
1.
Click Picture on the Illustrations group on the Insert tab.
2.
Browse to the folder containing the required image.
3.
Select the image and click the Insert button.
4.
Resize and position the image as required.
14
Getting Started Module 3 Digital Presentations .indd P14
15/03/2012 14:21:57
GETTING STARTED MODULE 3 DIGITAL PRESENTATIONS
Activity
Tips
Links
Tutor Demo
Using pictures and photos with care
Using and publishing images of students in a slideshow can be very motivating and encouraging
for the students. You should consult your school’s ICT Acceptable Use Policies which will inform
you as to how digital and video images are to be captured and stored within the school, and
on your computer. The AUP will also outline how images of students are to be published in a
presentation for classroom use or published for the public on the school website as the Data
Protection Act (2003 and 1988) might apply.
Note: Digital photography is covered in NCTE’s course Creating ICT Resources
To insert a Shape
1.
To insert a Shape, click Shapes on the Illustrations
group in the Insert tab.
2.
Select a shape from the drop-down and drag its size
out on the slide.
3.
Resize and position the image as required.
To insert an image from the Internet
1.
Locate an image on the Internet.
2.
Right click over the image and select Copy.
Note: Remember to also copy the copyright holder’s details to
paste into your Acknowledgements slide.
3.
Select the minimised PowerPoint on the Taskbar.
4.
Select New Slide from the Slides group to create a
space to place the picture.
5.
Choose your Slide Layout.
6.
Right click and select Paste to insert the image.
15
Getting Started Module 3 Digital Presentations .indd P15
15/03/2012 14:21:57
GETTING STARTED MODULE 3 DIGITAL PRESENTATIONS
Adding copyright details
1.
Click in the slide under the photo where you want to insert
the text box.
2.
Click on the Insert tab.
3.
Click the Text Box button in the Text group.
4.
Copy the copyright holder’s details from their webpage
and Paste into the text box.
5.
Position and resize the text box under the photo.
Activity
Tips
Links
Tutor Demo
Using an Acknowledgements Slide
Find two contrasting photographs on the theme of emigration online and incorporate them
into a presentation for a class preparing to do the essay/composition –
“You’re a new neighbour, aren’t you?”
Add a Title Only slide and place ‘Acknowledgements’ as the title and copy and paste the
copyright holders details underneath the title.
Or
Find a series of sports photographs e.g. rugby or high-jump (using Google Image search)
that illustrate the parabolic curve. Incorporate the photographs as two or three PowerPoint
slides into an existing Maths class. Add an Acknowledgements slide as above.
Inserting a Hyperlink
A hyperlink is a connection from one slide to another slide in the same presentation to a Webpage
or another presentation, an email address or a file. In PowerPoint you can create a hyperlink
from text or from an object, such as a picture, graph, shape, or WordArt.
To create a hyperlink to a website.
Select the text or the object on your slide that you want to use as a hyperlink.
On the Insert tab, in the Links group, click Hyperlink.
Under Link to, click Existing File or Web Page, and then click Browse the Web.
Locate and select the page that you want to link to, and then click OK.
16
Getting Started Module 3 Digital Presentations .indd P16
15/03/2012 14:21:58
GETTING STARTED MODULE 3 DIGITAL PRESENTATIONS
Activity
Tips
Links
Tutor Demo
Copyright and website linking
You do not need permission for a regular word link to another website’s home page.
Adding hyperlinks to your slides will offer connections in class to webpages in the click of
a button. In this activity we’ll see how to add a hyperlink to http://www.webwise.ie to a
suitable piece of clip art.
Note: When typing in a web address, rather than selecting the webpage as in No. 4
above, you must type in http:// in front of the web address.
1.
Click on the Insert tab.
2.
Click Clip Art on the Illustrations group.
3.
Search for ‘wise’ and select any image you will to insert it on your slide.
4.
Select the image and in the Links group click Hyperlink.
5.
In the Insert Hyperlink Address box type in http://www.webwise.ie
6.
Click OK.
7.
Click on the Slide Show tab and click From Current Slide to view.
8.
Click on the image when the slide plays to open Webwise.
9.
Click the ESC (Escape) button to return to Edit Mode.
BECOMING FAMILIAR WITH THE RIBBON AND TABS
The eight main tabs in the Ribbon give you everything you need to make your presentation. Other
tabs may be added.
The Home tab, as shown above, has many of the common tools we need to create a presentation.
The Insert tab is where you go to add in objects to a slide as well as edit any objects you add.
Objects include tables, images, clip art, shapes, WordArt, video clips, and audio clips. You can
even import items from other programs like Microsoft Excel.
Locate and select the page that you want to link to, and then click OK.
The Design tab is where you go to control how your entire presentation will look: its theme,
colours, fonts, style and even add in theme effects.
17
Getting Started Module 3 Digital Presentations .indd P17
15/03/2012 14:21:58
GETTING STARTED MODULE 3 DIGITAL PRESENTATIONS
The Animations tab is where you go to add animation to any object as well as add transition
effects to the slides.
The Slide Show tab is where you go when you want to test how your presentation will run. From
this tab you can alter the timing of the slides, record narration, specify what slides get used in a
show, and pick what mode it will run in.
The Review tab is where you go when your presentation is about finished, but you may want to
do some final checks like spelling or use the thesaurus to replace some words. You can also add
in comments to slides to provide some additional documentation.
The View tab is where you go when you want to switch between PowerPoint's views: Normal,
Slide Sorter and Slide Show.
The Quick Access Toolbar (QAT) is the only toolbar in
PowerPoint 2007. This toolbar can be customised to suit and
gives quick access to frequently used tools such as Save, Quick
Print etc.
18
Getting Started Module 3 Digital Presentations .indd P18
15/03/2012 14:21:59
GETTING STARTED MODULE 3 DIGITAL PRESENTATIONS
THE VIEW TAB AND SLIDE SORTER VIEW
Other When you go to Slide Sorter view, in the View tab in the Presentations View group,
you see miniatures of all the slides in the presentation, complete with text and graphics. This view
is useful for rearranging slides, and for adding transitions to slides.
There are two ways of changing Views:
Method 1
•
Select the View tab on the Ribbon.
•
Click on Slide Sorter view in the Presentations View group.
Method 2:
•
Click on the Slide Sorter View Button on very bottom right of the screen
Rearranging slides
Using Slide Sorter View you can move your slides to change the order they appear in the
presentation.
1.
Click and hold down the mouse button on the slide you wish to move.
2.
A small grey rectangle appears on the pointer as well
as an orange vertical line to the right of the slide.
3.
Drag the pointer to the slide's new position.
4.
The vertical line has now moved to before Slide 2. The
line indicates where the slide will be moved to.
5.
Release the mouse button.
6.
The slide is now moved.
The number of the slide also changes.
19
Getting Started Module 3 Digital Presentations .indd P19
15/03/2012 14:21:59
GETTING STARTED MODULE 3 DIGITAL PRESENTATIONS
ADDING TRANSITIONS
A transition is a special effect used to introduce a slide during a slide show.
1.
Select Normal Slide View,
2.
Click the slide you want to add the transition to.
3.
Click on the Animations tab.
4.
In the Transition to This Slide Group on the
left side, you are given some common Transition Effects
to choose from.
5.
To see all the possible Transition Effects, click on the
downwards pointing arrow and a drop-down window
will appear.
6.
Hold your mouse over a Transition Effect and you will
get an instant preview of it on the slide.
7.
Click on the Transition Effect you wish to use
8.
Click on Apply to All. All transitions in the presentation
will now be the same.
9.
A slide transition icon appears beside the slide.
On the right side of the Transition to This Slide, there are
some options for the Transition Effect.
You can adjust to determine the:
•
Speed of the transition: To re-set the slide transition
speed, click the arrow next to Transition Speed, and
then select the speed that you want.
•
Sound to accompany the transition: Choose a sound
from the Transition Sound drop down menu.
Activity
Tips
Links
Tutor Demo
Less is More
Our main recommendation when using PowerPoint is that “less is more”. Consider how to use
as few slides as possible, as effectively as you can with as few distracting transitions or needless
animations. Consider the best use of images so as to elicit a reaction from the students and
always keep text to a minimum with a 50 – 70 word per slide maximum.
20
Getting Started Module 3 Digital Presentations .indd P20
15/03/2012 14:22:00
GETTING STARTED MODULE 3 DIGITAL PRESENTATIONS
To remove all Transitions
In the pane that contains the Outline and Slides tabs, click the Slides tab.
1.
On the Home tab, click a slide thumbnail.
2.
On the Animations tab, in the Transition To This Slide group, click No Transition.
3.
In the Transition To This Slide group, click Apply to All.
Timing a Transition
If you want your slide show to run automatically, you must add
timing to the slides. When you add timing to a slide, you specify
the number of seconds to remain on each slide.
1.
Select the slide you want to add timing to by clicking it.
2.
In Slide Sorter or Normal View, click on the Animations
tab.
3.
In the Transition to This Slide Group go to the area
labeled Advance Slide.
4.
Under Advance Slide, uncheck the box
On Mouse Click
5.
Click the check box next to Automatically After.
6.
In the seconds box type the number of seconds you wish
to allocate for each slide.
Adding Animations
To provide additional emphasis or show your information in
phases, you can add an animation to your presentation. For
example, you can make an image or text enter your slide quickly
from one side of your screen or slowly fade in.
Adding Animation to Images
The following steps will show you how to animate an image
while working in Slide View.
1.
Select the Normal View button in the View tab.
2.
On the slide, click on the image to select it.
3.
From the Animations group in the Animations tab, click
on the Custom Animation button.
4.
The Custom Animation task pane will appear.
5.
From the Custom Animation task pane, click the Add
Effect button.
6.
Select Entrance.
7.
Select from the options e.g. Blinds.
21
Getting Started Module 3 Digital Presentations .indd P21
15/03/2012 14:22:00
GETTING STARTED MODULE 3 DIGITAL PRESENTATIONS
Effect Options
1.
Click on the name of the image in the Custom
Animation box
2.
From the drop down menu you have options:
o as to when the animation is to start,
o for effects and timing of the animation,
o to remove the animation.
Animating SmartArt or Chart
You can also add an animation effect to a SmartArt graphic or
chart.
1.
Follow the same steps used above to add an animation
effect to a chart.
2.
Animation effect can be applied to the whole SmartArt
graphic, or "bit by bit". These options are in the SmartArt
Animation tab found in the Effect Options dialog box.
Animating text
1.
Select the text you wish to animate.
2.
Follow the same steps used for images above.
Previewing an Animation
PowerPoint allows you preview animation settings for your
current slide without running the entire slide show.
Method 1
•
In Slide View, click on the slide you want to preview.
•
From the Animations Group in the Animations tab, click
on the Custom Animation button.
Method 2
•
In the Animations tab, click on the Preview button in
the Preview Group.
•
You will see the animation effect that has been applied
to the selected slide as well as any transition effects.
Activity
Tips
Links
Tutor Demo
Using Animations
•
Animations should be used sparingly.
•
Think carefully about what the animation tells your audience.
•
Use relevant animations that add to rather than detract from your presentation.
•
Avoid using too many different varieties of animation within the same presentation.
•
Some animations can be extremely distracting, especially when set with sounds
•
Be consistent with how you set up your animations
22
Getting Started Module 3 Digital Presentations .indd P22
15/03/2012 14:22:01
GETTING STARTED MODULE 3 DIGITAL PRESENTATIONS
Delivering a Slide Show
The Slide Show tab is used to control the playing of a show.
It can be played from the Beginning or from the Current slide.
1.
Choose From Beginning.
2.
In order to advance to the next slide press any key on
the keyboard or click the mouse.
3.
When you come to the end of the Slide Show click on the
mouse and it will return to normal view
4.
To end a Slide Show before the end, press ESC key on
the keyboard
Saving a PowerPoint File
1.
Click on the Office Button.
2.
Choose Save or Save As.
Note: You can save as a PDF from a 2007 Microsoft Office
program only after you install an add-in.
This may be downloaded free from Microsoft.
To save in Other Formats
To save in other formats:
1.
Click on Save as
2.
Select Other Formats
You can choose from various formats e.g. jpeg, gifs, html.
Activity
Tips
Links
Tutor Demo
Using PowerPoint to create resources
Here are some sample activities, choose a few and remember to cite your sources and
acknowledge copyright.
•
Geography: Create a “Countries of the World” slideshow by inserting an image of one
country per slide. Animate the text so that it enters the slide ‘on mouse click’ after the
image. To source maps you could use the CIA Factbook
https://www.cia.gov/library/publications/the-world-factbook/geos/br.html
•
Maths: Create a slideshow to teach shape. Insert the shapes, the titles and the characteristics
of each shape. Animate the slides so that the shape appears first, followed by the image of
the shape and finally the characteristics of the shape.
•
Create a slide show as a teaching resource to teach ‘Éadaí’ in the classroom. Put the name in
the title bar e.g. cóta and put in a clipart image for each slide. Save the presentation.
•
Create a slide for each of the new words in the class reader. Save and run as slide show.
•
Insert images of native Irish birds from ImageBank.ie and add title and details on each slide.
•
Find historical images from ImageBank.ie and insert one image per slide. Add a caption for
each slide.
23
Getting Started Module 3 Digital Presentations .indd P23
15/03/2012 14:22:01
GETTING STARTED MODULE 3 DIGITAL PRESENTATIONS
Printing a PowerPoint File
In PowerPoint you have the options of printing
•
Slides in colour, grey scale or black and white.
•
Handouts – you can choose from 1 to 9 slides per page
•
Notes Pages: includes speaker notes and the slide
•
Outline View
Activity
Tips
Links
Tutor Demo
Using the features you have learned in Powerpoint, create a short presentation which you could
use to support literacy or numeracy development in your classroom.
Activity
Tips
Links
Tutor Demo
Free PowerPoint Viewer
If you wish to share a PowerPoint with a student who does not have PowerPoint on a home
computer they may download a free viewer from http://office.microsoft.com/en-gb/downloads/
Insert PowerPoint Viewer in the Search box.
Getting Help
Screentips
When you hold the cursor over any Command button, a small
window appears with text telling you about the command and
what it does. This is a Screen Tip.
PowerPoint Help
To access PowerPoint Help
Press F1 or
Click on the question mark button on the top right of the
screen and the PowerPoint Help window will appear.
To Search within Help
1.
Search for assistance by entering a key word or phrase
into the search bar and a sub-menu of options will open.
2.
Click on a topic and it will expand to show you sub-topics.
3.
Click on a sub-topic and detailed information on the
subject will be displayed.
You may also search online in the Bing box for Microsoft Office
tutorials and help videos.
24
Getting Started Module 3 Digital Presentations .indd P24
15/03/2012 14:22:01
GETTING STARTED MODULE 3 DIGITAL PRESENTATIONS
PRESENTATION SOFTWARE AND ASSESSMENT FOR LEARNING
Assessment is an essential element of the teaching and learning process. When teaching and
learning with ICT you can enhance learning and develop students’ critical thinking when you
provide opportunities for them to peer review one another’s work and to critically evaluate their
own digital work. The reflection process is important as a higher order learning skill and will
guide students in improving their work.
Peer assessment and self assessment are ideal learning tools that can be used with presentation
software and other multi-media digital tools.. Students can reflect on and assess their own learning
having created and delivered their presentations with the help of a rubric created by the teacher.
Activity
Tips
Links
Tutor Demo
Creating a Student Self Assessment Rubric for Presentations
Open www.ncte.ie/upload/cpd/WikisPlusforLearning/Student_Peer_Assessment.pdf and view the
sample peer assessment rubric.
Primary teachers
Shorten and simplify the wording of the assessment/evaluation rubric for younger students.
Post-primary teachers
Create an assessment rubric, by adapting this assessment/evaluation rubric, to use in grading
your students’ presentation work.
USEFUL LINKS
There are many websites that will help you effectively use presentation software in teaching and
learning. Here are some that we think you’ll find useful.
Activity
Tips
Links
Tutor Demo
PowerPoint sites
Resources for Teachers www.mrsmhoward.com/teachers_only.cfm?subpage=312119
Mathematics and Numeracy www.icteachers.co.uk/resources/resources_numeracy.htm
Elementary PowerPoint Presentations www.pasadenaisd.org/teachertoolbox/PPts/ppt_elem.htm
Slideshare www.slideshare.net
Activity
Tips
Links
Tutor Demo
Images and Audio Sources
Copyright friendly images www.imagebank.ie
www.scoilnet.ie/ >Britannica Online
National Library Digital Photos www.nli.ie/digital-photographs.aspx
Images & Sound http://copyrightfriendly.wikispaces.com/
Wiki Commons http://commons.wikimedia.org/wiki/Main_Page
Free sound effects www.partnersinrhyme.com/
Royalty free music and sound effects www.royaltyfreemusicclips.com
25
Getting Started Module 3 Digital Presentations .indd P25
15/03/2012 14:22:02
GETTING STARTED MODULE 3 DIGITAL PRESENTATIONS
Activity
Tips
Links
Tutor Demo
Acceptable and Responsible Use
Each school should develop its own AUP guidelines for the protection of both students and staff in
relation to digital video and images of students and these notes will be a starting point.
Using photos of students http://support.scoilnet.ie/wiki/Good_Practice_Note
Acceptable Use Policy advice www.webwise.ie
Internet Safety http://www.ncte.ie/InternetSafety/
Activity
Tips
Links
Tutor Demo
Copyright
Video explaining copyright using Disney clips.
http://www.cartoonbrew.com/disney/a-fairy-use tale.html
Fun copyright interactive http://www.cyberbee.com/cb_copyright.swf
Copyright for teachers http://homepage.mac.com/prr/copyright.html
Activity
Tips
Links
Tutor Demo
Curriculum and Assessment
NCCA www.ncca.ie
ICT Framework www.action.ncca.ie
Rubrics http://edorigami.wikispaces.com
Sample rubric www.ncte.ie/upload/cpd/WikisPlusforLearning/Student_Peer_Assessment.pdf
USING A SCANNER
A scanner provides some of the functionality of a visualiser, allowing you to convert hard copy files
into electronic files for use on the computer. Many schools have scanners and they are generally
easy to operate and a very useful tool for the classroom.
While each scanner will have its own operating software and accompanying instructions, most
will operate as follows:
1.
Turn on the scanner.
2.
Put the page/picture to be copied onto the scanner glass.
3.
Click on My Computer – go to scanner & camera (at bottom of screen) and you will see
scanner name - click on this.
4.
Scroll down to scanner & camera wizard – click OK.
5.
Follow NEXT steps and make sure to give a name to your picture.
6.
Click FINISH.
To find your scanned item:
1.
Go to My Pictures and you should see the file saved in this folder.
26
Getting Started Module 3 Digital Presentations .indd P26
15/03/2012 14:22:02
GETTING STARTED MODULE 3 DIGITAL PRESENTATIONS
Activity
Tips
Links
Tutor Demo
The Photoalbum feature in Powerpoint allows you to insert scanned pictures seamlessly into a
Powerpoint presentation
OTHER TECHNOLOGIES
Visualisers
A visualiser (also referred to as document camera) is a tool that
enables teachers to show any physical object to their students,
via a digital projector. The digital video camera is fixed to an
arm on a base. The computer and visualiser may be connected
to the data projector simultaneously. The teacher chooses which
is to be displayed by the press of a button.
The teacher can demonstrate to the whole class at once, something previously only possible on
a group or one-to-one basis. Documents such as books, copies, papers, magazines or maps
can be placed underneath the visualiser lens so that they can be projected onto a screen. 3D
items such as coins, leaves, insects or other artefacts can be displayed to the whole class. Most
visualisers have a zoom facility allowing the teacher to display the smallest of details. Any nondigital material can be instantly shared by all.
Unlike the overhead projector, specially prepared transparencies are not required. Visualisers can
show documents, books, art work and 3D objects directly. Entire pages can be shown or minute
details zoomed into. A still image can be captured of the object and saved in the visualiser. The
image quality depends on the camera resolution but is generally very good. Detail zooming gives
you great flexibility, and really help push the boundaries of how to use technology in a whole
class teaching environment. It opens up many more ways of promoting effective teaching within
whole class / group contexts
Visualisers are a simple yet very powerful technology to use in the classroom. They can be used
across the entire curriculum, in a number of different ways. It is a simple to use technology that
appeals to both teachers and students.
The visualiser is an effective and efficient tool for collecting and collating students’ writing and art
work for recording and assessment purposes. It is engaging, interactive and simple to use. Time
and money is saved in photocopying, access is instant and presentation is in colour.
27
Getting Started Module 3 Digital Presentations .indd P27
15/03/2012 14:22:02
GETTING STARTED MODULE 3 DIGITAL PRESENTATIONS
Why use Visualisers in the Classroom?
•
Students’ work can be displayed to the rest of the class instantly.
•
Artefacts – even the smallest and most fragile - can be viewed by the entire class.
•
The visualiser gives access to scarce resources, such as where the school has only one
copy of a book or a student brings in a photograph to show the class.
•
The teacher may use it to demonstrate the correct way to hold a pen and how to form
letters using a joined script.
•
Science experiments can be demonstrated to the class as a whole.
•
Immediate feedback may be given on written work by projecting and reading it as a
written text which then leads to whole class evaluation.
•
By using the zoom facility students can see illustrations clearly.
Activity
Tips
Links
Tutor Demo
NCTE Advice Sheets:
http://www.ncte.ie/AdviceSheets/
What is a visualiser?
http://www.ncte.ie/media/InTouchJanFeb11.pdf
Useful Links
Visualisers in the classroom: http://www.stjosephsterenure.ie/visualisers.htm
50 ways to use a visualiser: http://www.edtechnetwork.com/document_cameras.html
Videos on the visualiser in the classroom
Classroom Example:
http://media.scoilnet.ie/NCTE/CPD/Visualiser_new_book1.wmv
POCKET VIDEO CAMERA
What is a pocket video camera?
Pocket video cameras are small devices that record at the touch of a button. They have a USB
connection built into the camera so require no additional cords or software to work, they simply
plug directly into the PC or laptop.
A few suggestions for uses of these video cameras to enhance literacy
•
Students create an instructional video showing ‘how to’ complete a task. This may be
used to illustrate procedural writing
•
Students can record a task or experiment and use this to illustrate a written report of the
event
•
Students can record a class event or trip
•
Students can dramatise written work, stories or poetry using the flip camera to illustrate
the text
•
Students can evaluate tasks and experiences
•
Students can interview a classmate or an expert on a chosen topic
•
Students can explore outside world – record changes in seasons etc
•
Students can video what they have been doing and add explanations
•
Students can create an ad for a favourite book
•
Students can create a storyboard and enact the story using puppets or themselves
28
Getting Started Module 3 Digital Presentations .indd P28
15/03/2012 14:22:02
GETTING STARTED MODULE 3 DIGITAL PRESENTATIONS
Activity
Tips
Links
Tutor Demo
Links
Pocket Video Camera Links
•
Several links to presentations and additional sites relating to pocket video cameras
http://www.robinstechtips.com/?p=373
•
Useful overview of flip cameras, their advantages and disadvantages
http://cnx.org/content/m32297/latest/
•
Collaborative presentation on how to use flip camera in the classroom
http://www.freetech4teachers.com/2010/03/20-ways-to-use-flip-cameras-in.html
•
Useful overview
http://www.wbrschools.net/technology/summer2009/Movie%20Making/Using%20FLIP%20
Cameras%20in%20Your%20Classroomx.pdf
•
Resource sites for using pocket video cameras
http://theteachershub.com/2009/10/5-resource-sites-for-using-flip-cameras/
29
Getting Started Module 3 Digital Presentations .indd P29
15/03/2012 14:22:02
GETTING STARTED MODULE 3 DIGITAL PRESENTATIONS
NOTES
30
Getting Started Module 3 Digital Presentations .indd P30
15/03/2012 14:22:02
GETTING STARTED MODULE 3 DIGITAL PRESENTATIONS
NOTES
31
Getting Started Module 3 Digital Presentations .indd P31
15/03/2012 14:22:03
APPENDIX 1
USING A DIGITAL PROJECTOR WITH A LAPTOP
OBJECTIVES
This document aims to enable the participant to:
•
Use a digital projector in the classroom.
•
Attach a laptop to a digital projector or interactive whiteboard.
•
Troubleshoot problems connecting a laptop to a digital projector or interactive whiteboard.
Getting Started Module 3 Digital Presentations .indd P32
15/03/2012 14:22:03
GETTING STARTED MODULE 3
DIGITAL PROJECTORS
WHY USE A DIGITAL PROJECTOR IN THE CLASSROOM
The digital projector is highly effective as a means of instruction or demonstration in classrooms,
computer rooms, staff training, or parents’ groups. Its many uses include:
•
Presenting student work to the whole class.
•
Projecting images in conjunction with wireless mouse/keyboard, wireless slate, a visualiser
or an interactive whiteboard.
•
Displaying and browsing Web sites in a controlled and collaborative manner.
•
Demonstrating or using educational software in a whole class context.
•
Presenting video to student/parent audiences in conjunction with a TV, video or Internet
source.
•
Facilitating whole class teaching by display resources and materials to the class.
•
Providing multimedia content for students with special needs who can particularly benefit
from material being presented visually as it can aid in both information processing and
retention.
•
Enhancing professional development with staff groups via large screen projection.
•
Facilitating video conferencing via large screen group participation.
•
Focusing and engaging the students in the content being displayed.
Activity
Tips
Links
Tutor Demo
Watch the NCTE video Connecting a Fixed Digital Projector to a Laptop at www.ncte.ie/
GoodPractice/Videos. A video Connecting a Portable Digital Projector to a Laptop is also
available. Both videos have sub-titled versions.
For more information on digital projectors see the NCTE Advice Sheet at
www.ncte.ie/ICTAdviceSupport/AdviceSheets/
33
Getting Started Module 3 Digital Presentations .indd P33
15/03/2012 14:22:03
GETTING STARTED MODULE 3
APPENDIX
CONNECTING A DIGITAL PROJECTOR TO A LAPTOP
Note: An interactive whiteboard is connected in a similar
manner.
Step 1: Connecting the VGA cable to the laptop
Ensure that the laptop and digital projector are off before
commencing.
The VGA cable, pictured here, has 15 pins.
1.
Locate the VGA connector / port, on the back of your
laptop.
2.
Insert the VGA cable into the VGA Connection on the
laptop as in the image below.
Note: The wider part of the connection is at the top.
3.
Do not exert too much force or you may bend the pins on the connection.
4.
Hand-tighten the screws on each side of the connector. A poor connection can result in an
intermittent or distorted picture.
Step 2: Digital Projector VGA connector / port
If your digital projector is already mounted on the ceiling, wall or to an interactive whiteboard
you can ignore this step.
If the VGA cable is not already connected to the digital projector then:
1.
Locate the VGA connector/port on the back of the Digital Projector.
2.
Insert the VGA cable into the computer input e.g. Input 1
34
Getting Started Module 3 Digital Presentations .indd P34
15/03/2012 14:22:03
GETTING STARTED MODULE 3
Step 3: Establishing a connection
Once the VGA cable is in place you can turn on the digital projector and then the laptop.
1.
Turn on the projector.
2.
Turn on the laptop.
If you do not have the image of your laptop screen on the digital projector screen when the
laptop has booted up then you will need to press the following key combination to activate a
connection. You will need to press and hold down the Fn (Function) key while pressing and
holding down the appropriate CRT/LCD function key.
Typically, it is a combination of the Fn key and one of the function keys (F1 through F12) on your
keyboard. Depending on your laptop model either, the letters CRT/LCD or an illustration of a
monitor and a laptop, will be on the appropriate function key. Moving between two screens like
this is known as “to toggle”.
Some examples of key combinations:
DELL
Fn & F8
IBM
Fn &F7
Toshiba Fn +F5
Consult your laptop’s documentation for specific information regarding your laptop.
35
Getting Started Module 3 Digital Presentations .indd P35
15/03/2012 14:22:04
GETTING STARTED MODULE 3
3.
Press and hold the Fn key.
4.
Press the CRT/LCD function key.
APPENDIX
• Release both keys. (This may make your laptop display go black. You can get your
laptop screen back by pressing those keys again.)
• Most laptops have three possible display combinations:
o
laptop screen only
o
laptop screen and projector
o
projector only
You cycle through these by pressing the Fn and the CRT/LCD
until you get to the desired
display combination.
Activity
Tips
Links
Tutor Demo
Function Key Combinations
The function key combinations vary by computer manufacturer. Some models have a monitor icon
on the key. You may have to consult your user manual or the Internet for the combination on a
particular make and model of laptop.
www.aitech.com/support/newlapt.html may be of assistance.
THE REMOTE CONTROL
Most digital projectors come equipped with a remote control.
Many of the same functions on the control panel of the digital
projector are also on the remote control.
The most commonly used features on the remote are:
•
Inputs: Choose the same input that your VGA cable is
plugged into in the back of the projector. Input 1 and 2
are usually for connecting to the computer.
•
Volume Control lets you adjust the volume on the digital
projector. VGA cables transmit video only.
•
Standby button when pressed once puts the digital
projector into standby mode. Press the standby button
again if you wish to turn off the projector.
Note: This is the correct way to turn off the projector. The fan
continues to run for some time after turning off the projector in
this way. The fan continues to run to cool down the bulb. Do not
unplug the projector until the fan has stopped.
•
Menu allows access to various controls on the projector.
Most projectors have an ‘eco mode’ and a ‘bright mode’.
Running a projector in ‘eco mode’ reduces the brightness
slightly but it reduces the fan noise and increases the
bulb life.
36
Getting Started Module 3 Digital Presentations .indd P36
15/03/2012 14:22:05
GETTING STARTED MODULE 3
Manually Configure Display
Sometimes it may be necessary to manually configure multiple
displays. This will often vary from laptop to laptop, depending on
the graphics chip and software installed.
Method 1
a)
Navigate to the Control Panel.
b)
Click on Display, and then on Settings.
On this screen you should see two numbered boxes,
labelled 1 and 2.
d)
Clicking "Identify" should flash a number on the screen to
indicate which monitor is which.
e)
Below this is a slider that sets the resolution and colour depth of the output.
f)
Click the monitor (1 or 2) then make changes to the resolution and colour depth.
g)
Click on the Apply button after changes are made.
h)
On the Settings tab, click the monitor icon that represents the monitor you want to use in
addition to your primary monitor.
i)
Select the Extend my Windows desktop onto this monitor check box.
Method 2
a)
Right click on the Desktop.
b)
Select Graphics Options > Output To > (see example below). The options will vary from
laptop to laptop.
CONNECTIONS ON A LAPTOP
Most laptops have the following connections:
37
Getting Started Module 3 Digital Presentations .indd P37
15/03/2012 14:22:05
GETTING STARTED MODULE 3
APPENDIX
USB 2.0
Most laptops come with three to four USB 2.0 ports. They are the easiest means of connecting a
peripheral (mouse, scanner, printer, digital camera) to your laptop. USB ports can also distribute
electrical power and charge many peripherals, including mobile phones.
FireWire (IEEE 1394)
FireWire (IEEE 1394) ports are mostly used to transfer video to and from a video
camera or to connect to a hard drive.
Ethernet Port
This port allows you to connect your laptop to a wired computer
network (LAN) or Broadband high speed Internet connection
via a standard Ethernet network cable.
HDMI Connector
With an HDMI (High Definition Multimedia Interface) port you
can connect your laptop to any HD TV or Digital Projector. The
HDMI cable will carry both video and audio.
eSATA
Used for attaching an external hard drive, eSATA (external
serial ATA) ports are found on a number of business and
multimedia laptops. Portable hard drives are most commonly
used in the eSATA drive but it may also be used as a USB port.
USB Flash Drives
A flash drive may be also called a pen drive, thumb drive, or
memory stick. It is a small storage device that can be used to
transport files from one computer to another.
Flash drives are popular because they can hold a considerable
amount of digital content and are fast, reliable, and portable.
Insert the drive into any USB port on the computer and after a
few seconds the computer will detect it.
Usually an AutoPlay dialogue window opens automatically
offering you options or various actions you may take with the
USB drive.
38
Getting Started Module 3 Digital Presentations .indd P38
15/03/2012 14:22:06
GETTING STARTED MODULE 3
The drive may also be opened by going to My Computer and
clicking on the USB drive.
Activity
Tips
Links
Tutor Demo
Troubleshooting Checklist
If there is no image from the projector:
•
Check that the VGA cable is firmly connected to the digital projector and the laptop
•
Check that the digital projector is turned on and that the bulb is lighting. You will see light
coming from the bulb even if there is no image.
•
Check that you have chosen the correct input on the digital projector. The inputs / source may
be changed by using a remote control or on the control panel.
•
Press and hold down the Function Key, Fn, and press the LCD/CRT function key. Check
for an image on the whiteboard. If no image appears repeat the process twice again.
This usually cycles you through three video output modes, which are "Video to monitor
only", "Video to both monitor and digital projector" and "Video to digital projector only".
39
Getting Started Module 3 Digital Presentations .indd P39
15/03/2012 14:22:07
Getting Started Module 3 Digital Presentations .indd P40
15/03/2012 14:22:07
GETTING STARTED MODULE 3 DIGITAL PRESENTATIONS
This course is part of a range of continuing professional
development options for teachers, developed and delivered
41
by NCTE, in collaboration with educational partners.
www.ncte.ie/courses
Getting Started Module 3 Digital Presentations .indd P41
15/03/2012 14:22:07