1
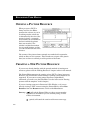
THE PICTURE EDITOR
THE PICTURE EDITOR
INTRODUCTION
The Picture Editor lets you view and replace the contents of picture (‘PICT’)
resources. Both Version 1 (Black & White) and Version 2 (Color) pictures
are supported. The Editor also supports ‘bmap’ (BitMap) resources.
This chapter also contains information on using Resorcerer’s picturedisassembling template. The Picture Editor itself does not let you edit the
individual commands that make up the resource data. To do this, you need
to open the ‘PICT’ resource with the Data Editor, which uses Resorcerer’s
‘PICT’ template to parse the data structure into its constituent opcodes.
What this Editor does support is simple copying, pasting, viewing, and
replacing of the contents of the ‘PICT’ resource. The Editor supports a
screen-copying mechanism that makes it easy to change ‘PICT’ resources
while maintaining the original picture frame bounds. This is important for
‘PICT’ resources that are referenced by Picture items in Dialogs.
If you are not already familiar with general resource editing, you may want
to read the “Editing Resources” chapter earlier in this manual. You can also
create special text-only ‘PICT’ resources using the Text Editor.
TOPICS COVERED
•
•
•
•
•
•
•
•
•
•
•
•
•
Opening a picture resource
Creating a new picture resource
Importing a picture from the clipboard
Viewing options
Hiding compressed or corrupted pictures
Changing the picture bounds
Copying and pasting pictures
Looking at a ‘PICT’ data file
Decompiling a picture
Editing picture opcodes
Copying a picture from the screen
Finding all dialog item references
Closing an open picture
289
RESORCERER USER MANUAL
OPENING A PICTURE RESOURCE
When you open a ‘PICT’ or
‘bmap’ resource, the Editor
presents the resource to you in
an editing window whose size
is determined by the size of the
resource’s frame, a rectangle
that contains the coordinates of
the box in which the picture
data was recorded. The
window is widened somewhat
for very small pictures, so that
you can read the full title of the
resource.
The corners of the picture frame rectangle are marked with cropmarks,
which are blue on color systems. These marks are not part of the picture
data, but are there to remind you of the position of the frame.
CREATING A NEW PICTURE RESOURCE
If you are not already familiar with the general methods of creating new
resources, please read the “Editing Resources” chapter earlier in the manual.
The Picture Editor supports the creation of new ‘PICT’ or ‘bmap’ resources.
However, only ‘PICT’s that contain bitmap or pixmap screen snapshots are
supported. If you want to create general sequences of QuickDraw
commands, you need to use the Data Editor (see the later section “Parsing
pictures with the template” in this chapter).
If you are viewing resources in Resorcerer’s File Window, or if you are
already viewing a ‘PICT’ resource using the Picture Editor, choose New
Resource from the Resource menu or click on the New button.
Sorcery:
scP will ask the Picture Editor to take a screen snapshot
regardless of what Editor you are currently using, or what
window is frontmost.
c . (period) will cancel the creation of the new screen copy.
290
THE PICTURE EDITOR
When you ask the Picture
Editor to create a new
resource, it changes the
cursor to a small animated
(“marching ants”) selection
rectangle. This rectangle
follows your mouse as you
move it around on the
screen, and is 1 pixel
larger on all sides than the
candidate frame rectangle
for the eventual new
resource. In the example
here, we’ll take a snapshot
of the buttons in the lower right of Resorcerer’s File Window
Note:
Pixels directly underneath the marching ants are not candidates
for copying; only pixels within the rectangle will be copied.
Initially the frame rectangle contains a small, 32 by 32 pixel square. You
should drag it until the upper left corner is positioned at the correct spot for
the picture frame you want. Press and hold the mouse button to anchor it at
that point on your screen, then drag the mouse down and to the right to
extend and reshape the frame
rectangle until the lower right
corner is positioned at the lower
right of the picture frame you
want. When you let go of the
mouse button to take the
picture, the Editor creates a
screen snapshot of the pixels
enclosed by the selection
rectangle.
If you are working on a color
Mac system, the Editor
creates two screen snapshots.
One is a Black & White
(‘PICT’ Version 1) snapshot,
the other is a Color (‘PICT’
Version 2) snapshot. After creating the two snapshots, the Editor asks you
which one you want to keep, and throws the other away. It does not ask you
first because putting up a dialog with which to ask might cover or otherwise
affect the area of the screen you want a snapshot of.
291
RESORCERER USER MANUAL
Note:
Large color screen snapshots can use up vast amounts of memory,
which you may or may not have available. If you don’t have
enough memory, the Editor will not be able to create the
snapshot.
Once the new resource data is created, the Editor then opens it in its own
window so that you can view it.
Sorcery: During the time that the selection rectangle is attached to the
mouse, but prior to any mouse click to stretch the rectangle, you
can tap the Space Bar to double the dimensions of the rectangle.
Doubling will continue each time you tap the Space Bar until
some maximum size is reached, at which time the selection
rectangle is reset to a 4 x 4 tiny rectangle.
IMPORTING A PICTURE FROM THE CLIPBOARD
When you cut a graphic from another application or desk accessory, the
graphic is entered as a ‘PICT’ into the Macintosh clipboard, where it
becomes available to paste into other programs and desk accessories.
If Resorcerer sees that a new ‘PICT’ is available, it imports the ‘PICT’ into
Resorcerer’s Resource Scrap file. To convert it from just a piece of scrap into
an actual resource, Resorcerer assigns it the next free ‘PICT’ resource ID,
and gives it the resource name “(from Desk Scrap)”. You can then paste the
‘PICT’ into whatever resource file you want and open it from there with the
Picture Editor.
For more on using Resorcerer’s Resource Scrap file, see the “Editing Files”
chapter earlier in this manual.
VIEWING OPTIONS
When a ‘PICT’ or ‘bmap’ is open for viewing, the window in which it is
displayed initially shows you crop marks at the four corners of the picture’s
frame rectangle. You can turn these marks on or off by choosing the Show
Picture Corners command from the Picture menu. The command in the
menu will be checked when they are visible.
You can also get the Editor to show or hide the entire frame for the picture
292
THE PICTURE EDITOR
when you choose Show Picture Frame from
the Picture menu. The rectangle is displayed
in blue, and its lines are 1 pixel outside the
border of the actual frame data, so that it
doesn’t interfere with any part of the picture or
bitmap being viewed.
It is possible for the window that a picture is
being displayed within to be larger than your Mac screen. This means that
you might not be able to view the bottom of the picture, since you cannot
drag the window’s title bar outside the screen bounds.
To solve this, the Picture Editor lets you drag an editing window from any
point in its content area. Simply click and hold the mouse button until the
mouse changes into a hand, and then drag the window where you want it.
HIDING COMPRESSED OR CORRUPTED PICTURES
Various parts of Resorcerer present ‘PICT’ resources to you by passing the
‘PICT’ data to the Mac toolbox routine DrawPicture. If the ‘PICT’ resource
data is corrupted or compressed, the toolbox routine is very likely to crash
(in a crumpled heap!).
Many third-party disk-space-saving products compress resources in
application resource files while leaving the resource type the same, and they
do so without leaving any indication that the resource is compressed. This
unfortunately means that Resorcerer, which edits application resources
outside of the running application, cannot know before it passes a
compressed ‘PICT’ to DrawPicture whether the data is good or not.
Note:
This is not a problem for Apple’s own compressed resources,
which are specially marked and therefore always delivered
uncompressed by the Resource Manager.
When you click on the ‘PICT’ resource type in file’s Types List, the Resources
List immediately starts passing the ‘PICT’ resources to DrawPicture. If you
are experiencing a crash due to a compressed/corrupted ‘PICT’, you can hide
the contents of the resources. For more on this, see the “Hiding the Display
of Resource data” section in the earlier “Editing Files” chapter.
293
RESORCERER USER MANUAL
CHANGING THE PICTURE BOUNDS
When you choose Picture Info…
from the Picture menu, or when
you double-click anywhere on the
picture itself, the Editor opens a
window that shows you the
coordinates of the picture’s frame.
The bounds of the picture define
the local coordinate system in
which the picture’s other drawing
commands are recorded.
To add some extra margin to the picture, lower the left or top bounds, or
increase the right or bottom bounds.
COPYING AND PASTING PICTURES
The Picture Editor will let you paste a ‘PICT’ from the Macintosh clipboard
directly into any open picture resource, bypassing Resorcerer’s Resource
Scrap file. The data currently showing is completely replaced by the data
from the pasted ‘PICT’. Only the PICT data is replaced; the resource’s ID,
name, and attributes will all remain the same. To do this, choose Paste
from the Edit menu after copying a picture to the clipboard.
You can also copy the picture being displayed into the Macintosh clipboard.
Simply choose Copy from the Edit menu while the picture’s window is
frontmost. Once a copy is in the Mac clipboard, you can paste it, for
instance, into a favorite paint program for touching up. When you’re
finished there, copy the touched up version back into the clipboard, and
paste it into the original open picture resource, where it replaces what was
just there. The window is resized as necessary to display the new data.
If you want to guarantee that the dimensions of the picture frame stay the
same, however, then you should use the Editor’s screen copy feature,
described later in this chapter.
294
THE PICTURE EDITOR
EDITING A ‘PICT’ DATA FILE
Many applications create picture data files, where the picture information is
stored in the file’s data fork rather than in a resource. The format of the
data in the file is exactly the same as the format of a ‘PICT’ resource, except
that the data fork version has a block of 512 bytes of application-specific
header information inserted prior to the start of the ‘PICT’ data.
To view the picture in the data fork, you need to convert it to a resource by
following these steps:
Set Resorcerer’s Edit data fork as resource preference if it is not
already set (this is in the File Preferences section of the dialog).
Open the ‘PICT’ data file, and click in the File Window’s zoom box to
ensure that its file type is indeed ‘PICT’. If it is not, do not proceed unless
you know that the data is in fact the same as a ‘PICT’ file would contain.
Select the data fork pseudo-resource (usually of type ‘<DF>’) and click on
the Hex button to open it with the Hex Editor.
Select the first 512 bytes ($200 hex) of data and tap the Delete key to get
rid of them. Close the data fork pseudo-resource. This does not make
any changes to the data fork on disk.
Click on the Info button in the File Window and change the type of the
data fork resource to ‘PICT’. A moment after you do this, Resorcerer’s
File Window will redraw the resource data as a ‘PICT’ resource. Close
the Info dialog.
You can now copy the ‘PICT’ to the clipboard, open it for viewing, or open
it with the Data button to parse it with a template.
Note:
If you save the file after doing the above, the new ‘PICT’ resource
will be created, and the data fork will be emptied. To leave the
data fork alone, make an initial copy of the data fork resource
first and then change the copy into a ‘PICT’ resource.
To convert a ‘PICT’ resource into a picture data file, delete the data fork
resource, change the type of the ‘PICT’ to your data fork resource type, open
it with the Hex Editor and insert 512 bytes of initial zero bytes at the
beginning. Make sure the file type is set to ‘PICT’, and save the file.
295
RESORCERER USER MANUAL
DECOMPILING A PICTURE
Unlike most other Resorcerer Editors, which can place DeRez’ed text into
the clipboard when you choose Copy, the Picture Editor only copies the
‘PICT’ to the clipboard when you choose Copy. This is because some
applications give preference to ‘TEXT’ scraps over ‘PICT’ scraps, thereby
making it impossible to export the ‘PICT’ in the usual manner.
To DeRez the ‘PICT’ to the clipboard as text, you must hold the Option key
down while choosing Copy from the Edit menu. You can then switch to
your development system text editor and paste the declaration directly into
any Rez source file from which you compile your resources.
Note:
The DeRez’ed text is hex data only.
EDITING PICTURE OPCODES
If you need to see what colors a picture's
color lookup table has in it, or you want to
rearrange opcodes to optimize the stream in
some way by hand-tuning it, you can use the
Data Editor to do so (for more on how to
operate the Data Editor, see the “Data
Editor” chapter)
Resorcerer contains a filtered template that
describes the complete ‘PICT’ data structure.
You can use this template to view and edit
the ‘PICT’ data by opening the resource with
the Data button from the File Window.
Each picture consists of an initial header,
followed by a sequence of variable-length
opcode blocks. Each opcode is either a byte
or a word (depending on whether the ‘PICT’
uses the older version 1 opcodes, or the newer version 2 format). Each
opcode is in turn followed by 0 or more bytes of opcode-specific data.
Typically, opcodes correspond to the various QuickDraw toolbox commands
that were used to draw the picture when it was recorded. The toolbox’s
DrawPicture executes the opcodes in sequence until it comes to the special
End-of-Picture opcode.
296
THE PICTURE EDITOR
The complete set of available opcodes is documented in Apple’s Inside Mac
manuals.
The best way to create picture resources safely is to use QuickDraw from a
program. However, you can create your own ‘PICT’ resource directly using
the Data Editor if you know what you are doing. We strongly discourage
this due to the many documented and undocumented constraints that ‘PICT’
resources must have in their opcode streams. For instance, certain opcode
fields contain data structures, such as regions or PixMaps, that cannot be
easily or safely edited even in the Data Editor. Even worse, if you create
your own ‘PICT’ resource opcode stream, there is no guarantee that, if you do
something wrong, the File Window’s eventual call to DrawPicture (when
you close the new resource) won’t cause a crash.
Nonetheless, if you are feeling intrepid, remember that the first opcode
should usually be a rectangular clipping region set to something less than all
of QuickDraw’s coordinate space. You can then add simple opcodes for
erasing, drawing lines, placing text, setting pen sizes, setting colors, etc. As
soon as you close the ‘PICT’ resource, the File Window may try to draw it.
Note:
The filter for the template automatically adds an End-of-Picture
opcode (regardless of picture version) if you forget.
COPYING A PICTURE FROM THE SCREEN
When a ‘PICT’ or ‘bmap’ is displayed in the frontmost window, you can copy
any area from the screen as a screen snapshot into the resource data,
replacing the existing data while maintaining the same frame size.
Maintaining the same size is often important if the ‘PICT’ is referenced by a
Picture item in a dialog or alert’s item list (‘DITL’) resource, where the item’s
own bounding box needs to be the same size as the picture frame in order to
avoid any stretching when the dialog is eventually displayed.
To replace the current picture data with a black & white or color screen
snapshot of the same size, choose Copy from Screen (Version 1) or Copy
from Screen (Version 2), respectively, from the Picture menu.
After you choose either of these commands, the cursor turns into the
animated (“marching ants”) selection rectangle whose dimensions are 1 pixel
larger on all sides than the current picture frame, so that only those pixels
within the selection rectangle are copied. As you move the mouse, the
297
RESORCERER USER MANUAL
selection rectangle moves with it; the original picture window constantly
shows you the snapshot you might take. When you have placed the selection
rectangle around the pixels you want to snapshot, click the mouse to do the
final screen copy.
If you make a mistake, Undo in the Edit menu will restore the old data.
This screen copy capability is useful when you are running Resorcerer iwth
other applications. You can launch your favorite paint program in a
background layer, where you can touch up your ‘PICT’s. Then, instead of
using the paint program’s selection rectangle (which has no knowledge of the
size you are interested in) and the Mac clipboard, you can copy directly from
the paint program’s background window back into the Picture Editor’s
foreground window without having to worry about any size changes.
Sorcery: To keep any File Windows from interfering with your paint
program’s window in the background layer, choose Hide File
Windows from the File menu to get them out of the way.
c . (period) will cancel the current screen copy.
FINDING ALL DIALOG ITEM REFERENCES
Before you delete a ‘PICT’ resource, or change its ID, it may be necessary to
ensure that you don’t leave a dangling resource ID reference in a dialog or
alert’s item list (‘DITL’) resource.
The Find Dialog Item References in the Picture menu opens all dialog
item lists in the same file as an open ‘PICT’ that contain such a reference.
You can then change the Picture item’s resource ID, or delete the item
depending on what you are doing with the picture.
CLOSING AN OPEN PICTURE
When you’ve finished viewing and possibly changing an open picture’s data,
click in the Editor window’s GoAway box to close the open resource. Any
changes are saved and kept in memory. The changed picture will be saved
to your open resource file when you close or save the file later.
If you want to discard any changes you’ve made to your ‘PICT’, choose
Cancel Edit Session from the Resource menu.
298