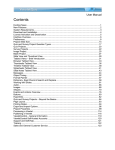
Download User`s Help Manual
Transcript
Lepide Software Asset Management User’s Help Manual Lepide Software Asset Management © Lepide Software Private Limited Page 1 Lepide Software Asset Management User’s Help Manual for Lepide Software Asset Management Table of Contents 1. Introduction ...................................................................................................................................................................... 8 1.1 Brief about this user manual ........................................................................................................................................ 8 1.2 What is Software Asset Management .......................................................................................................................... 8 1.3 Why do we need Software Asset Management Tools ................................................................................................... 9 1.4 What is Lepide Software Asset Management Software ................................................................................................ 9 1.4 Pre-requisites for Lepide Software Asset Management Software ............................................................................... 10 2. Installation and Un-installation ........................................................................................................................................ 11 2.1 Install Lepide Software Asset Management................................................................................................................ 11 2.2 Un-install Lepide Software Asset Management Software ........................................................................................... 11 3. Understanding the User Interface .................................................................................................................................... 12 3.1 Launching screen of Lepide Software Asset Management .......................................................................................... 12 3.2 Menu bar ................................................................................................................................................................... 12 3.3 Tool Bar ..................................................................................................................................................................... 15 3.4 Left Panel ................................................................................................................................................................... 16 3.5 Right Panel................................................................................................................................................................. 17 3.6 Buttons Used ............................................................................................................................................................. 17 3.7 Status bar .................................................................................................................................................................. 18 3.8 Customizing the User Interface .................................................................................................................................. 18 4. Getting Started with Lepide Software Asset Management ............................................................................................... 20 4.1 Define Database Location .......................................................................................................................................... 20 4.1.1 Define Custom Database Location ....................................................................................................................... 20 4.1.2 Copy Database to New Location .......................................................................................................................... 20 4.2 Creating Group(s)....................................................................................................................................................... 21 4.2.1 Create a Group .................................................................................................................................................... 21 4.2.2 Adding Network Computer(s) to Group(s) ........................................................................................................... 22 4.2.3 Manage Computer/Group/Server Options .......................................................................................................... 25 4.2.4 Scanning Network Computers for Software Assets .............................................................................................. 28 4.2.4.1 Scan a Computer .......................................................................................................................................... 28 4.2.4.2 Scan a Group ................................................................................................................................................ 29 4.2.4.3 Scan a Server ................................................................................................................................................ 29 4.2.4.4 Scan Entire Network ..................................................................................................................................... 29 © Lepide Software Private Limited Page 2 Lepide Software Asset Management 4.3 Configuring Licenses .................................................................................................................................................. 30 4.3.1 View Tracked Licenses ......................................................................................................................................... 30 4.3.2 Manage New License Information ....................................................................................................................... 31 4.3.2.1 Manage license information for free software .............................................................................................. 31 4.3.2.2 Manage license information for licensed software........................................................................................ 32 4.3.2.3 Customize Record View ................................................................................................................................ 34 4.3.3 Other License Management options .................................................................................................................... 35 4.3.3.1 Hide Record.................................................................................................................................................. 36 4.3.3.2 Unhide Record ............................................................................................................................................. 36 4.3.3.3 View Query .................................................................................................................................................. 37 4.3.3.4 Save License Record ..................................................................................................................................... 37 4.3.3.5 Print License record ...................................................................................................................................... 38 4.4 Assigning Licenses ...................................................................................................................................................... 38 4.4.1 View list of Installed Licenses .............................................................................................................................. 38 4.4.2 Assign License to a computer .............................................................................................................................. 39 4.4.2.1 Customize assignment list view .................................................................................................................... 40 4.4.2.2 Save assignment list view ............................................................................................................................. 40 4.4.2.3 Print assignment list view ............................................................................................................................. 41 4.4.2.4 Delete selected computer from the group .................................................................................................... 41 4.5 Reports ...................................................................................................................................................................... 41 4.5.1 About Lepide Software Asset Management Reports ............................................................................................ 41 4.5.2 View Graphical compliance ................................................................................................................................. 42 4.5.2.1 Compliance report for entire network .......................................................................................................... 43 4.5.2.2 Compliance report for Server ....................................................................................................................... 43 4.5.2.3 Compliance report for group ........................................................................................................................ 44 4.5.2.4 Compliance report for a computer ............................................................................................................... 45 4.5.3 View installed license reporT ............................................................................................................................... 46 4.5.4 View Software Location report ............................................................................................................................ 47 4.5.5 View software validity report .............................................................................................................................. 48 4.5.6 View Detail Report .............................................................................................................................................. 49 4.5.7 Exporting reports to different formats................................................................................................................. 50 4.5.8 Print Reports ....................................................................................................................................................... 51 4.5.9 View settings....................................................................................................................................................... 51 5. SUPPORT Information ...................................................................................................................................................... 52 © Lepide Software Private Limited Page 3 Lepide Software Asset Management 5.1 Trouble shooting ........................................................................................................................................................ 52 5.2 Technical support ...................................................................................................................................................... 53 6. Purchase.......................................................................................................................................................................... 54 6.1 About Free Trial Version ............................................................................................................................................ 54 6.2 Purchasing Licenses for Full Version ........................................................................................................................... 54 7. Legal Notices ................................................................................................................................................................... 56 7.1 Copyright Notice ........................................................................................................................................................ 56 7.2 Disclaimer .................................................................................................................................................................. 56 7.3 Trademarks................................................................................................................................................................ 56 7.4 License Agreement .................................................................................................................................................... 56 © Lepide Software Private Limited Page 4 Lepide Software Asset Management Table of Figures Figure 3.1: Launching Screen of Lepide Software Asset Management .................................................................................. 12 Figure 3.2: File Menu ........................................................................................................................................................... 13 Figure 3.3: View Menu......................................................................................................................................................... 13 Figure.3.4: License Menu ..................................................................................................................................................... 14 Figure.3.5: Database Menu .................................................................................................................................................. 14 Figure.3.6: Help Menu ......................................................................................................................................................... 15 Figure.3.7: Left Panel of Reports Section ............................................................................................................................. 17 Figure.3.8: Left Panel of License Management Section ........................................................................................................ 17 Figure 3.9: Status Bar........................................................................................................................................................... 18 Figure 3.10: Hide or Unhide Tool bar ................................................................................................................................... 19 Figure 4.1: Select Custom Database Location ....................................................................................................................... 20 Figure 4.2: Add a New Group ............................................................................................................................................... 21 Figure 4.3: Type Group Name .............................................................................................................................................. 21 Figure 4.4: Group added to Computer Network ................................................................................................................... 22 Figure 4.5: Select Computers from Network ........................................................................................................................ 23 Figure 4.6: Authenticate UserName and Password .............................................................................................................. 24 Figure 4.7: Log on Successful ............................................................................................................................................... 24 Figure 4.8: Log on Failure..................................................................................................................................................... 25 Figure 4.9: Selected Computers added to Group .................................................................................................................. 25 Figure 4.10:User Property.................................................................................................................................................... 26 Figure 4.11:Delete Computer............................................................................................................................................... 27 Figure 4.12: View Tracked Software Licenses ....................................................................................................................... 30 Figure 4.13: Manage License Record for Free Software’s ..................................................................................................... 32 Figure 4.14: Select License Type .......................................................................................................................................... 32 Figure 4.15: Manage License Record for Licensed software’s ............................................................................................... 33 Figure 4.16: Add/Modify Licensed software information ..................................................................................................... 34 Figure 4.17: Filter View ........................................................................................................................................................ 35 Figure 4.18: Apply Filter and Customize Records.................................................................................................................. 35 Figure 4.19: Hide Record ..................................................................................................................................................... 36 Figure 4.20: Unhide Hidden Records .................................................................................................................................... 36 Figure 4.21: View Query Used to Customize Record............................................................................................................. 37 Figure 4.22: View Installed Software License Information .................................................................................................... 39 Figure: 4.23: Assign License to Specific Computer ................................................................................................................ 40 Figure 4.24: Compliance Report ........................................................................................................................................... 42 Figure 4:25: Graphical Compliance Report for Entire Network ............................................................................................. 43 Figure 4.26: Graphical Compliance Report for Server ........................................................................................................... 44 Figure 4.27: Graphical Compliance Report for Group ........................................................................................................... 45 Figure 4:28: Graphical Compliance Report for Computer ..................................................................................................... 46 Figure 4.29: Report of Installed Licenses .............................................................................................................................. 47 Figure 4.30: Report of Software Location ............................................................................................................................. 48 Figure 4:31: Software Validity Report .................................................................................................................................. 49 Figure 4:32: Detailed Report ................................................................................................................................................ 50 Figure 4:33: View Settings ................................................................................................................................................... 51 © Lepide Software Private Limited Page 5 Lepide Software Asset Management Figure 6.1: Activate Software ............................................................................................................................................... 54 Figure 6.2: Get Authentication Code .................................................................................................................................... 55 Figure 6.3: Enter Authentication Code ................................................................................................................................. 55 © Lepide Software Private Limited Page 6 Lepide Software Asset Management Table of Tables Table 3.1: File Menu ............................................................................................................................................................ 13 Table 3.2: View Menu .......................................................................................................................................................... 14 Table 3.3: License Menu ...................................................................................................................................................... 14 Table 3.4: Database Menu ................................................................................................................................................... 14 Table 3.5: Help Menu .......................................................................................................................................................... 15 Table 3.6: Tool-Bar Options ................................................................................................................................................. 16 Table 3.7: Buttons Used....................................................................................................................................................... 18 Table 4.1: Computer Options ............................................................................................................................................... 26 Table 4.2: Group Options ..................................................................................................................................................... 27 Table 4.3: Server Options .................................................................................................................................................... 28 Table 4.4: License Management Tab Description ................................................................................................................. 31 Table 4.5: License Assignment Fields Description ................................................................................................................. 39 © Lepide Software Private Limited Page 7 Lepide Software Asset Management User’s Help Manual for Software Asset Management 1. I NTRODUCTION Welcome to the user manual of Lepide Software Asset Management, the most trusted software asset management tool that helps to monitor and track software licenses across an organization. This user manual comprises step by step guidelines on using Lepide Software Asset Management software. 1.1 BRIEF ABOUT THIS USER MANUAL This guide has been developed to help organizations understand the fundamentals of Software Asset Management, to equip an organization with the essential information, tools and tips to ensure that organization has a secure and robust software asset management system in place. Moving towards the requirement of software asset management, this guide explains the Lepide Software Asset Management- a software asset management tool. This user manual is indented to pave every user’s way to successful functioning of Lepide Software Asset Management tool. It contains step by step instructions on using Lepide Software Asset Management, so that the users, who are using this software for the first time, can successfully manage and track software licenses without facing any problem. Below are the sections that this user manual includes for guiding its user throughout the software asset management process. Introduction section: This section explains you the need of software asset management tools, overview of Lepide Software Asset Management tool and its benefits. Moreover, it also includes basic software and hardware pre-requisites for installing and running the software. Install and uninstall section: This section is incorporated for providing the user with installation and un-installation help. Understanding the user interface section: This section gives you a brief idea about the menus and buttons that are used for performing various functions with the software. Moreover, it also includes the customization options that are used to customize the user interface of the software. Getting started section: This section explains the working of the Lepide Software Asset Management software. In this section, you will find the tasks related to defining the database location, creation of groups, addition of network computers to a specific group, license management, license assignment Moreover this section also covers report generation which help in meeting various software compliance requirements. Support Information section: This section is all about support information and queries related to Lepide Software Asset Management. Purchase: With the information contained in this section, one can know how and from where the software can be downloaded and purchased. Legal Notices: This section is all about legal documents and notices concerned with Lepide Software Asset Management. 1.2 WHAT IS SOFTWARE ASSET MANAGEMENT Software Asset Management is practiced in organizations where it involves managing and optimizing the purchase, maintenance, utilization and disposal of software applications within an organization. Software Asset Management protects organization's software and helps to recognize what software’s are there and © Lepide Software Private Limited Page 8 Lepide Software Asset Management where it's running. In other words, Software Asset Management is defined as the set of policies and rules necessary for the effective management and control of software assets. With the practice of Software Asset Management in business, you can easily know what you have, acquiring only what you need, and using your software assets effectively and efficiently at every stage to achieve great benefits in business. The goal of the Software Asset Management is to make a quick evaluation of organization’s current Software Asset Management needs that includes installed licenses; knowing use of legal software’s and number of unused licenses to optimize the return on software investment. 1.3 WHY DO WE NEED SOFTWARE ASSET MANAGEMENT TOOLS Software is a valuable IT asset that provides strong financial and productivity benefits. These software assets have also ongoing expenses such as license renewal, version upgrades. Like any other asset, software assets need to be maintained and monitored to increase the productivity benefits of the organizations. Unlike other assets, Software assets are more difficult to track and manage properly. Software Asset Management tools are helpful in tracking and viewing installed licenses across your organization. Software Asset Management helps your organization to identify its software needs, avoid condition of under-utilized licenses and ensure proper technology to meet business goals. Lack of up-to-date information of software assets can lead to numerous problems including failure to identify expired software’s, unauthorized use of software licenses and underutilization of software licenses. Software Asset Management tools resolve this problem by scanning the software assets to provide the up to date information of software inventory and its usage. These requirements signify the implementation of Software Asset Management in organizations. Software Asset Management tools are helpful in the following areas: To balance number of license purchased with the number of actual software installations to prevent software piracy. Control software costs by determining the number of available licenses. Ensure software compliance by comparing total number of licenses purchased with the actual software installations. Identify opportunities to reduce software costs by removing under-utilized software. 1.4 WHAT IS LEPIDE SOFTWARE ASSET MANAGEMENT SOF TWARE Lepide Software Asset Management is enterprise level inventory management software that offers visibility and control to manage all your software assets. Lepide Software Asset Management is one of the software asset management tools that play an important role in tracking and managing software licenses in an organization. Organizations that are striving to manage and control software assets to meet compliance requirements, can find Lepide Software Asset Management an efficient and effective solution. Lepide Software Asset Management helps the network administrators to configure and monitor the licenses for all the software application installed on computers on a network. This software ensures license compliance and eliminates software overspending by matching the installed licenses with the available licenses. Lepide Software Asset Management software enables you to locate non-compliant computers on a network by searching for software with expired licenses and providing an overview of the compliance percentage. Moreover, you can use this software to configure new licenses for software applications and assign those licenses to copies of the software installed on the computers on a network. © Lepide Software Private Limited Page 9 Lepide Software Asset Management It keeps track of your software assets and generates the inventory reports in a tabular or graphical form. After every scan, an updated detail of the installed software such as physical location, installed licenses, software validity is generated that helps network administrators to take effective and strategic decisions. These generated reports can be saved in some other standard formats such as .xls, .rtf, .html, .pdf for further analyzes. Moreover, it also enables you to view compliance reports specific to computers, servers, groups, and entire network. 1.4 PRE-REQUISITES FOR LEPIDE SOFTWARE ASSET MANAGEMENT SOFTWARE Lepide Software Asset Management Software requires following system configuration: Minimum System Requirements: 256 MB RAM (512 MB RAM recommended) 20 MB free hard disk space for installation and database Supported Platform: Windows Server 2003 family with sp1 Windows XP Windows Vista User Access Privilege User should have administrative rights to access the network computers. A proper logon credentials (username and password) is required for each system in the network to have access. Properly logged on computer will be scanned properly later on. An administrator can have access to computers in different domain or workgroup hence, with admin rights all system in the network (Domain/Workgroup) are scanned. In case of local user (no administrative rights), read and write access should be there. Such user will not have access to the computers of other domain/workgroup. For system of same domain/workgroup this user may logon successful on providing right username and password but scan is not performed for the system. In this case the system running this software will only be scanned. © Lepide Software Private Limited Page 10 Lepide Software Asset Management 2. I NSTALLATION AND U N - INSTALLATION After knowing the pre-requisites for installing the software, you can download and install the software on your computer system. You can also un-install the software at any point of time. Like installation, uninstallation process is also simple and easy. 2.1 INSTALL LEPIDE SOFTWARE ASSET MANAGEMENT Download Lepide Software Asset Management Software from our website and save it to a disk location. Also make sure that the host computer meets the entire system requirements and has sufficient memory available. 1. Double click the Setup.exe and Run the software. 2. Follow the On-Screen instructions. The setup install completion screen will be displayed. 3. Click Finish, main window of the Lepide Software Asset Management Software will be launched. 2.2 UN-INSTALL LEPIDE SOFTWARE ASSET MANAGEMENT SOFTWARE You can uninstall Lepide Software Asset Management Software in two ways from your computer system: From the Windows Start menu From the Control Pane While uninstalling, always make sure that the software is not working in your system background. To uninstall from the Windows Start menu 1. Click Start > All Programs > Lepide Software Asset Management > Uninstall Lepide Software Asset Management. 2. A warning message will be displayed before un-installing the software. Click Yes to finish the process. Lepide Software Asset Management Software will be successfully un-installed from your computer system. To uninstall from the Control Panel 1. Click Start menu > Control Panel. 2. Double-click Add or Remove Programs Select Lepide Software Asset Management and click Remove. 3. A warning message will be displayed before un-installing the software. Click Yes to finish the process. Lepide Software Asset Management Software will be successfully un-installed from your computer system. © Lepide Software Private Limited Page 11 Lepide Software Asset Management 3. U NDERSTANDING THE U SER I NTERFACE Now that Lepide Software Asset Management software has been installed on your computer system, you can start using the software after getting acquainted with the software interface. To make the software user friendly, its user interface comprises menu bar, tool bar, buttons, left panel and right panel. Going through one by one to make the software interface more clear. 3.1 LAUNCHING SCREEN OF LEPIDE SOFTWARE ASSET MANAGEMENT As you launch Lepide Software Asset Management, the screen appears which is divided in two sections: Left panel and Right panel as shown in figure 3.1: Figure 3.1: Launching Screen of Lepide Software Asset Management Left panel: The left panel contains the links that navigates you to the respective window. Right panel: The Right panel provides the steps used to carry out the entire operation of tracking licenses starting from defining the database location to the generation of reports. 3.2 MENU BAR The menu bar of Lepide Software Asset Management comprises five menus, namely: © Lepide Software Private Limited Page 12 Lepide Software Asset Management File Menu View Menu License Menu Database Menu Help Menu File Menu: File menu of Lepide Software Asset Management is shown in Figure 3.2: Figure 3.2: File Menu Table 3.1 lists the options of File menu MENU OPTIONS DESCRIPTION Home Navigates you to the home page of Lepide Software Asset Management software Reports Displays detailed analysis of compliance scan results for network computers in graphical and tabular format License Management Enables you to configure new licenses for various software applications and assign licenses to different copies of software installed on network computers Table 3.1: File Menu View Menu View menu of Lepide Software Asset Management is shown in Figure 3.3: Figure 3.3: View Menu Table 3.2 lists the options of View menu. © Lepide Software Private Limited Page 13 Lepide Software Asset Management MENU OPTIONS DESCRIPTION Toolbar Show or hide the tool bar options Status Bar Show or hide the status bar Show License Information Show or hide the License Information Window Show Quick Links Show or hide the Quick Links window Show Computer Network Show or hide the Computer Networks window Table 3.2: View Menu License Menu License menu of Lepide Software Asset Management is shown in Figure 3.4: Figure.3.4: License Menu Table 3.3 lists the options of License menu MENU OPTION DESCRIPTION Activate License Enables you to activate the license to convert from demo version to full version Table 3.3: License Menu Database Menu Database menu of Lepide Software Asset Management is shown in Figure 3.5: Figure.3.5: Database Menu Table 3.4 lists the options of Database menu MENU OPTION Select Database DESCRIPTION Enables you to define a new disk location to save the application database Table 3.4: Database Menu Help Menu © Lepide Software Private Limited Page 14 Lepide Software Asset Management Help menu of Lepide Software Asset Management is shown in Figure 3.6: Figure.3.6: Help Menu Table 3.5 lists the options of Help menu: MENU OPTION DESCRIPTION Help Topics Enables you to view user help manual for Lepide Software Asset Management Software Homepage Navigates you to the website of Lepide Software Asset Management About Lepide Software Asset Management Displays version, support and license information of Lepide Software Asset Management Table 3.5: Help Menu 3.3 TOOL BAR The tool bar in Lepide Software Asset Management is displayed below the menu bar. The tool bar provides a convenient and user friendly method to perform various software related tasks that can otherwise be performed with the help of menu bar. Table 3.6 lists the options available on the tool bar of Lepide Software Asset Management software: TOOL BAR ICON TOOL BAR ICON DESCRIPTION Click to go the home page of Lepide Software Asset Management software Click to view detailed analysis of compliance scan results for network computers in graphical and tabular format Click to configure new licenses for various software applications and assign licenses to different copies of software installed on network computers Click to show or hide the License Information Window Click to show or hide the Quick Links window. Click to show or hide the Computer Networks © Lepide Software Private Limited Page 15 Lepide Software Asset Management window Click to activate the License to convert the demo version to full version Click to define a new disk location to save the application database Click to view user help manual for Lepide Software Asset Management Click to view the web sites of Lepide Software Asset Management Click to know version, support and license information of Lepide Software Asset Management Click to hide or unhide the status-bar Table 3.6: Tool-Bar Options 3.4 LEFT PANEL When you launch the software, you see that the left panel comprises three sections: Home, Reports, and License Management. These sections contain several links that are used for performing various tasks associated with the software. Like tool-bar and menu bar, left panel also provides a convenient and userfriendly method to perform certain actions associated with the software. When you click Reports, the left panel gets divided in two sections: Network computers and Quick Links, as shown in figure 3.7: © Lepide Software Private Limited Page 16 Lepide Software Asset Management Figure.3.7: Left Panel of Reports Section Description of Network Computers section: Network computers section displays the computers on the network which you have added for license management and license assignment. It displays all the added computers in a hierarchical manner. You can also perform certain tasks by right clicking the computer name and then selecting the required option. Description of Quick Links section: The Quick Links section contains several options that vary according to the object selected in the Network Computers section. When you click License Management, the left panel displays License Management options that include Hide Record and View/unhide Record, as shown in figure 3.8: Figure.3.8: Left Panel of License Management Section 3.5 RIGHT PANEL As you launch the software, the right panel of the launching screen displays the steps required to start using the software. Once you navigate to any other section, such as Reports or License Management, the right pane displays the screen related to that section. The steps available in the right panel of launching screen are illustrated below: Step 1: Database selection: Change the location of the database in which the software stores all the information. This feature helps to change the database location and then get started with adding new groups and new computers to the group(s) Step 2: Create Groups: Creates groups where computers are added from the network Click the Add Groups link from Create Groups section in right panel. After creating group, add the computers from the network. To add computers in the group, navigate to the Reports section and add computers from the network by right clicking the group name and selecting Add computer option. Step 3: Scan computers: After the addition of network computers, scan the computers for tracking licenses. Know more…. Step 4: Manage Licenses: Navigates to the License Management section where all the licenses for different software are displayed in the can be configured in the Edit License Information section of the screen. Know more….. Step 5: Assign Licenses: Navigates to the License Assignment section where the licenses are assigned for a specific computer. Know more….. Step 6: View Generated Reports: Navigates to the Reports section where various types of reports can be viewed and analyzed Know more…….. 3.6 BUTTONS USED © Lepide Software Private Limited Page 17 Lepide Software Asset Management There are various buttons used in the Lepide Software Asset Management software to let you easily perform various tasks related to the software. Table 3.7 lists the buttons used in the Lepide Software Asset Management software. DESCRIPTION BUTTONS USED Prints the reports Saves the reports in .XLS format Saves the reports in .RTF format Saves the reports in .HTML format Saves the reports in .PDF format Displays the query made by the user Delete the selected computer from the group Table 3.7: Buttons Used 3.7 STATUS BAR The status of Lepide Software Asset Management is displayed at the bottom of the software interface and it notifies the user when the application is ready to be used. The status-bar also tells the user whether Caps Lock, Num Lock or Scroll Lock is ON or OFF. Figure 3.9 displays the status bar of Lepide Software Asset Management: Figure 3.9: Status Bar 3.8 CUSTOMIZING THE USER INTERFACE You can customize the user interface of Lepide Software Asset Management by using the options available in the view menu. To make the tool bar appear or disappear, click View>>Toolbars>>Standard, as shown in figure 3.10: © Lepide Software Private Limited Page 18 Lepide Software Asset Management Figure 3.10: Hide or Unhide Tool bar To add or remove a button from the tool-bar, click >>Add or Remove Buttons >>Standard and selecting the button you want to add or remove. To hide or unhide the status bar, click View >>Status Bar. To show or hide Quick Links section in the Reports screen, Click View >>Show Quick Links. To show or hide the Computer Networks section in the Reports screen, click View >>Show Computer Network. © Lepide Software Private Limited Page 19 Lepide Software Asset Management 4. G ETTING S TARTED WITH L EPIDE S OFTWARE A SSET M ANAGEMENT Now you have complete understanding of the software interface, you just need to follow the steps mentioned in the coming sections. 4.1 DEFINE DATABASE LOCATION You can modify the database location of Lepide Software Asset Management and provide a location to save all the data related to the software. Once you change the database location, you need to re-start the software to have the selected database into effect. 4.1.1 DEFINE CUSTOM DATABASE LOCATION You can define the custom database location in two ways. Firstly, you can select custom database location from the Welcome screen>Select custom location to save the location section. Secondly, you can select Select Database from the Database menu in the menu bar. To select a custom database location: 1. Click Database>>Select Database in the menu bar. Figure 4.1: Select Custom Database Location 2. Browse and select the location and click OK. By default, Lepide Software Asset Management software creates and saves database at the location where software is installed i.e.”C:\Program Files\Lepide Software Asset Management” folder. 4.1.2 COPY DATABASE TO NEW LOCATION The need of copying existing database to new location arises as if the database location is modified, Lepide Software Asset Management will remove the entire Computer Network tree and all the graphs, reports and installed licenses information will get removed. To view the same network tree and its associated information, copying the old database to the new location becomes mandatory. To move the database, copy the existing database folders– DB, LicMgtDB, and MainDB– from the original location–default location: C:\Program Files\Lepide Software Asset Management\DB– to the new database location. © Lepide Software Private Limited Page 20 Lepide Software Asset Management 4.2 CREATING GROUP(S) Create Groups is the first step where it lets you add computers from network in the group. You can create groups that belong to the same team, same department or same project etc. Managing assets of an organization based on groups is an easy, efficient and convenient way to track and manage software licenses in an organization. 4.2.1 CREATE A GROUP To create a group, perform the following steps: 1. Click Reports and then right click Computer Network and then select Add New Group. Figure 4.2: Add a New Group 2. The Add Group window appears Type the name of the Group and click Add. Figure 4.3: Type Group Name 3.The defined group will get added on the Computer Network tree, as shown in figure 4.4: © Lepide Software Private Limited Page 21 Lepide Software Asset Management Figure 4.4: Group added to Computer Network Similarly you can add more computers to the network tree. Alternatively, you can directly create group by navigating Add Groups link from the main window of the software. You need to click Refresh from the Quick Links section to view the added groups in the Computer Network section 4.2.2 ADDING NETWORK COMPUTER(S) TO GROUP(S) After creation of groups, next step is the addition of computers to the network. To add computers, perform the following steps: 1. Right-click the group name to which you want to add computers and then select Add Computer to launch the Add Computer wizard. 2. Click Next to start scanning of the network computers. 3. Browse the network and expand the network name to view the computers present in the selected network, as shown in figure 4.5: © Lepide Software Private Limited Page 22 Lepide Software Asset Management Figure 4.5: Select Computers from Network 4. Select the computers from the network to add to the selected group and click Next. © Lepide Software Private Limited Page 23 Lepide Software Asset Management Figure 4.6: Authenticate UserName and Password 5. Type the username and password in the UserName and Password field to authenticate the selected computers from network. You can check the account authentication by clicking the Click to Check option. If the account is authenticated, a window gets displayed with the message: Figure 4.7: Log on Successful Lepide Software Asset Management will display the Logon Successful message if the provided user credentials are correct; if incorrect, it will display the following message: © Lepide Software Private Limited Page 24 Lepide Software Asset Management Figure 4.8: Log on Failure If you see the logon failure message, recheck the provided username and password with network connectivity of the selected computer system. 6. Click Next .software will display the quick overview of the selected computers. 7. Click Finish to complete the process of adding computers. After successfully adding computers to a group, click Refresh from the Quick Links section to regenerate the network tree in the Computer Network section as shown in figure 4.9: Figure 4.9: Selected Computers added to Group Alternatively, you can also add computers from the Quick Links section. Select the group name to which you want to add computers and then click Add Group in the Quick Links section. You need to click Refresh from the Quick Links section to view the added computers in the Computer Network section. 4.2.3 MANAGE COMPUTER/GROUP/SERVER OPTIONS © Lepide Software Private Limited Page 25 Lepide Software Asset Management The options for a computer can be managed by two ways: Right-click the computer name in the left panel of the Reports section. Select the computer and click any option from Quick Links section. When you select computer name, the related options to perform any operation or modification get activated in the Quick Links section of the left panel. Table 4.1: shows the options that get activated in Quick Links section when a computer name is selected: DESCRIPTION COMPUTER OPTIONS Refresh Refresh the software Scan Selected Computer for Inventory Delete Computer Scans the selected computer for inventory Delete the computer from the group Properties Displays the User Property dialogue box where you can easily modify and save the new username and password if any changes are made Figure 4.10:User Property Table 4.1: Computer Options The options for a group can be managed by two ways: Right-click the group name in the left pane of the Reports section. © Lepide Software Private Limited Page 26 Lepide Software Asset Management Select the group and click any option from Quick Links section. When you select group name, the related options to perform any operation or modification get activated in the Quick Links section of the left panel. Table 4.2: shows the options that get activated in Quick Links section when a group name is selected: DESCRIPTION GROUP OPTIONS Refresh Refresh the software Add Computer Adds the computer to the selected group Delete Group Deletes the selected group Delete Server in this Group Deletes the associated server of the selected group Delete Computer Select and delete any computer from the selected group Figure 4.11:Delete Computer Scan All Computer Present in Group Scans all the computers present in the selected group Table 4.2: Group Options The options for a server can be managed by two ways: Right-click the server name in the left panel of the Reports section. Select the server and click any option from Quick Links section. When you select server name, the related options to perform any operation or modification get activated in the Quick Links section of the left panel. © Lepide Software Private Limited Page 27 Lepide Software Asset Management Table 4.3: shows the options that get activated in Quick Links section when a server name is selected: DESCRIPTION SERVER OPTIONS Refresh Refresh the software Add Computer Adds the computer from the network in the selected server Delete Computer Select and delete any computer from the selected group Delete Server Deletes the selected server Scan All Computer Present in Server Scans all the computers present in the selected server Table 4.3: Server Options 4.2.4 SCANNING NETWORK COMPUTERS FOR SOFTWARE ASSETS After the addition of network computers to the selected group, next step is the scanning computers for software assets Scanning for computers/groups, which provides details of all installed software's that provides software publisher, software name, software version, number of installed software's and software location. Every time you scan the computers, you get the updated information of your software assets. The scanning options are: Scan Group for Inventory (all group computers). Scan All Computers present in Group. Scan All Computer present in Server. Scan selected Computer for Inventory. 4.2.4.1 SCAN A COMPUTER To scan a computer to track software assets on LAN: 1. Right click computer name from group in the Network Computers window of the Reports section and then select Scan Selected Computer for Inventory. OR 2. Click the computer name from group in the Network Computers window of the Reports section and then Scan Selected Computer for Inventory from the Quick Links window. Software will display the scan results. 3. View the scan results and click OK when the scanning gets completed. Lepide Software Asset Management Software will display an error message when it is unable to scan the selected computer. © Lepide Software Private Limited Page 28 Lepide Software Asset Management 4.2.4.2 SCAN A GROUP To scan a group to track software assets for the listed computers in the selected group, follow these simple steps: 1. Right click group name in the Network Computers window of the Reports section and then Scan All Computer Present in Group. OR 2. Click group name in the Network Computers window of the Reports section and then Scan All Computer Present in Group from the Quick Links window. Software will display the scan results. 3. View the scan results and click OK when the scanning gets completed. Lepide Software Asset Management Software will display an error message when it is unable to scan the selected computer. 4.2.4.3 SCAN A SERVER To scan a server to track software assets for the network computers that exists in the server: 1. Right click server name in the Network Computers window of the Reports section and then Scan All Computers Present in Server. OR 2. Click server name in the Network Computers window of the Reports section and then Scan All Computer Present in Server from the Quick Links window. Software will display the scan results. 3. View the scan results and click OK when the scanning gets completed. Lepide Software Asset Management Software will display an error message when it is unable to scan the selected computer. 4.2.4.4 SCAN ENTIRE NETWORK To scan entire network to track software assets for the computers that exists in all the groups and servers: 1. Right click Computer Network in the Network Computers window of the Reports section and then Scan All Computer Scan Group for Inventory (all group computers). OR 2. Click Computer Network in the Network Computers window of the Reports section and then Scan All Computer Scan Group for Inventory (all group computers)from the Quick Links window. Software will display the scan results. 3. View the scan results and click OK when the scanning gets completed. © Lepide Software Private Limited Page 29 Lepide Software Asset Management Lepide Software Asset Management Software will display an error message when it is unable to scan the selected computer. 4.3 CONFIGURING LICENSES After the scanning gets over, Lepide Software Asset Management displays the software licenses installed on the computers which exist in the Computers Network. The next step is to configure the software licenses for managing the available software licenses. 4.3.1 VIEW TRACKED LICENSES You can view Software License details for all the software installed on the network by clicking License Management on the launching screen of Lepide Software Asset Management. The License Management screen is divided into two tabs: License Management and License Assignment. The License Management tab displays the information related to the software licenses installed on the network. From this section, you can easily manage the entire available software licenses. Figure 4.12: View Tracked Software Licenses Table 4.4 shows the description of fields provided in the License Management tab: FIELDS Publisher Software Name © Lepide Software Private Limited DESCRIPTION Displays the publisher name of the all the installed software's Displays the names of all installed software's Page 30 Lepide Software Asset Management Version Displays the version of installed software’s. If the version is not mentioned in the software, then it will display N/A License Difference Displays the License difference which is the difference between Number of Licenses and License Used. Positive value of license difference indicates under compliance, negative value indicates over compliance and zero values indicate compliance The positive difference denotes number of licenses for particular software that have not been assigned to any computer Software displays 'Free Software' if any software license is defined as FREE License Used Number of Licenses Displays the number of software Licenses installed across a network Displays the total number of licenses available for particular software Initially data in this field is zero when you scan the computer network for the first time. Once the license are managed from the Edit License Information, it will show you the number of available licenses Table 4.4: License Management Tab Description 4.3.2 MANAGE NEW LICENSE INFORMATION All the licenses for different software are displayed in the License Management tab and can be configured in the Edit License Information tab of the screen. 4.3.2.1 MANAGE LICENSE INFORMATION FOR FREE SOFTWARE To manage new license record for free software, perform the following steps: 1. In License Management tab, select software name. 2. Select Free Software from the License Type combo box in the Edit License Information window, as shown in figure 4.13: © Lepide Software Private Limited Page 31 Lepide Software Asset Management Figure 4.13: Manage License Record for Free Software’s 3. Provide the Extra Comment field with an appropriate comment (not mandatory) to help you remember the record. 4. Click button. OR 1. Select the software name and click Add in the Edit License Information window. Figure 4.14: Select License Type 2. Select the License Type as Free Software. Any other information can be typed in Extra Comment field can be saved. 3. Click Add to save the updated information. Free software licenses do not require information for License Serial, Number of License, Purchase Date and Expiry Date fields. From this Add/Modify window, you can modify the License Record information. In case of free software, only Extra Comments field needs to be modified. 4.3.2.2 MANAGE LICENSE INFORMATION FOR LICENSED SOFTWARE To manage new License Record for the licensed software’s .Perform the following steps: © Lepide Software Private Limited Page 32 Lepide Software Asset Management 1. In License Management tab, select software name. 2. Select Licensed Software from the License Type combo box in the Edit License Information section. Figure 4.15: Manage License Record for Licensed software’s 3. Type the License Serial and Number of Licenses in their respective fields. 4. Click the Purchase Date combo box and select the date of purchasing the software license. 5. Click the Expiry Date combo box and select the expiry date of the software license. 6. Provide the information in Extra Comment field with an appropriate comment (not mandatory) to help you remember the record. 7. Click button. Purchase Date should always be less than Expiry Date. OR 1. Select software name from the License Management list. 2. Click Add in the Edit License Information section. The Add/Modify License Information window will appear. © Lepide Software Private Limited Page 33 Lepide Software Asset Management Figure 4.16: Add/Modify Licensed software information 3. Enter the field descriptions: License Serial, Number of User, License Type, Purchase Date, Expiry Date, and Extra Comment. 4. Click Add to save the updated information. Delete License Information 1. To delete License Information, select the software name from the License Management list. 2. Click Delete in the Edit License Information section. 3. Click OK to confirm the action. Modify License Information 1. To modify License Information, select the software name from the License Management list. 2. Click Modify in the Edit License Information section. 3. The Add/ Modify window appear where do the changes you need to do for the selected software. 4. Click Modify. 4.3.2.3 CUSTOMIZE RECORD VIEW To customize and view specific license record information for software, version, number of licenses, license difference, publisher etc, click the combo box before any License Management field and select (Customize). © Lepide Software Private Limited Page 34 Lepide Software Asset Management Figure 4.17: Filter View Lepide Software Asset Management will display the Custom Search window as shown in figure 4. 18: Figure 4.18: Apply Filter and Customize Records Select <software Name> from the 'Filter Items' list and transfer it to Customize List section with the help of left and right arrows. Click OK to view the customized results. Click Remove Filter to remove any existing filters from the custom search. To view the customization history, click the (Query Viewer) button. 4.3.3 OTHER LICENSE MANAGEMENT OPTIONS © Lepide Software Private Limited Page 35 Lepide Software Asset Management Apart from managing license records for free and licensed software’s, there are other useful options that are included in Lepide Software Asset Management These options are Hide Query, Unhide Query, Save license Records and Print License Records. 4.3.3.1 HIDE RECORD To hide a license record from the software license list, select the record from list and click the Hide Record link in the left panel of the License Management tab as shown in figure 4.19: Figure 4.19: Hide Record 4.3.3.2 UNHIDE RECORD 1. To unhide a hidden record, click the Unhide Record link in the left panel of the License Management tab. View/Unhide Records window will appear to unhide the hidden records as shown in figure 4.20: Figure 4.20: Unhide Hidden Records 2. Select the appropriate record to be unhidden from the list and click Unhide Selected OR Select All to unhide all the hidden records that are listed in the View/Unhide Records window. © Lepide Software Private Limited Page 36 Lepide Software Asset Management 4.3.3.3 VIEW QUERY The query viewer displays the query used to filter the customized view of the license record list. You can access the query viewer by clicking the as shown in figure 4.21: button above the records list in the License Management tab, Figure 4.21: View Query Used to Customize Record 4.3.3.4 SAVE LICENSE RECORD The License Records can be saved in four different saving formats License Records can be saved in .xls, .html, .rtf and .pdf format to view with MS Excel, Internet Explorer, MS word and Acrobat reader respectively. Several buttons are provided in the software to save the license records in different formats: To save the records in CSV format: 1. Click button. 2. Browse to the desired location and click OK. To save the records in RTF format: 1. Click button. 2. Browse to the desired location and click OK. To save the records in HTML format: 1. Click button. © Lepide Software Private Limited Page 37 Lepide Software Asset Management 2. Browse to the desired location and click OK. To save the records in PDF format: 1. Click button. 2. Browse to the desired location and click OK. 4.3.3.5 PRINT LICENSE RECORD To print the license records list click the button above the records list in the License Management tab. 4.4 ASSIGNING LICENSES Tracking and assigning license serial to individual computers helps in knowing the exact License Serial installed on the computer. It not only helps to achieve software compliance, but also provides the required information which helps to enforce company policies that would otherwise require countless hours and huge strength of work force to monitor and maintain software licenses records. 4.4.1 VIEW LIST OF INSTALLED LICENSES To View the list of software installed on a computer: 1. Click the License Assignment tab in the License Management section of the software interface. 2. Select any computer name from the left panel, for which you want to view installed software information. 3. View the list of software installed on the computer and its related information in the right panel as sown in figure 4.22: © Lepide Software Private Limited Page 38 Lepide Software Asset Management Figure 4.22: View Installed Software License Information Description of the fields in the License Assignment Tab Table 4.5 shows the description of fields provided in the License Assignment tab: FIELDS DESCRIPTION Software Name Software Version Publisher Displays the name of the installed software's Displays version of the software Displays name of the software publisher License Serial Displays Serial number of the license used for the software Initially, it displays the Not Assigned until you assign the license serials to the computers which exists in the network Table 4.5: License Assignment Fields Description 4.4.2 ASSIGN LICENSE TO A COMPUTER To assign a license to a particular computer 1. Click the License Management tab in the License Management section of the software interface. © Lepide Software Private Limited Page 39 Lepide Software Asset Management 2. Select the computer name from the left panel of the window to which you want to assign the software license. 3. Click the License Serial combo box and select the license serial (Free Software or License Key) as shown in figure 4.23: Figure: 4.23: Assign License to Specific Computer 4. Click to save the changes. Always perform save operation after making changes in this tab, otherwise changes will not be updated in the database. 4.4.2.1 CUSTOMIZE ASSIGNMENT LIST VIEW To customize the view of the license assignment list for software, version, publisher etc, click the combo box before any License Assignment field and select (Customize).A filtered view of the list will be displayed after you apply filters. 1. Click the combo box. 2. Select Customize. Custom Search window will appear. 3. Define the filters for custom search and click OK and view the customized items. 4.4.2.2 SAVE ASSIGNMENT LIST VIEW List of assigned licenses (Free software or License Key) can be saved in different formats as per your requirements. Several buttons are provided in the software to save the license records in different formats. © Lepide Software Private Limited Page 40 Lepide Software Asset Management To save the records in CSV format: 1. Click button. 2. Browse to the desired location and click OK. To save the records in RTF format: 1. Click button. 2. Browse to the desired location and click OK. To save the records in HTML format: 1. Click button. 2. Browse to the desired location and click OK. To save the records in PDF format: 1. Click button. 2. Browse to the desired location and click OK. 4.4.2.3 PRINT ASSIGNMENT LIST VIEW To print the list of assigned license record, click the button at the top of the interface. 4.4.2.4 DELETE SELECTED COMPUTER FROM THE GROUP License Assignment section provides a button to delete the selected computer. To delete the computer from the License Assignment tab, click the button present above the License Assignment tab. The deleted computer remains in its assigned group in the Reports section. The computer can again be listed for license assignment by re-scanning the parent group of the computer. 4.5 REPORTS Reports are the description of all the software assets details in printable format. Reports help to view and analyze the details of all installed software's across network. 4.5.1 ABOUT LEPIDE SOFTWARE ASSET MANAGEMENT REPORTS Reports in Lepide Software Asset Management are classified as Quick Overview report (compliance report), Installed Licenses Report, Software Location Report, Software Validity Report and Detailed Report. Based on these reports, you can take informed decisions while purchasing or renewing licensed software. © Lepide Software Private Limited Page 41 Lepide Software Asset Management 4.5.2 VIEW GRAPHICAL COMPLIANCE You can view detailed compliance report for a network, group or specific computers in the Reports section of Lepide Software Asset Management Software. The Quick Overview tab in the Reports section of the software provides overview of all the configured and assigned software licenses on network. Graphical compliance reports for a Computer, Server, Group and Entire Network are easily printed. Figure 4.24 shows the compliance reports in the Quick Overview tab: Figure 4.24: Compliance Report Description of the figure 4.24 Point 1 displays percentile information for Licensed, Un-Licensed and Free Software. Point 2 displays top four computers which has the maximum percentage of licensed software's installed in the entire network of computers. Point 3 displays top four computers which has the maximum percentage of un-licensed software's installed in the entire network of computers. Point 4 displays the information of the entire network created in the software. It displays total number of groups, total servers and total computers in a network. Following are the reports generated and displayed by the software in Quick Overview tab: Compliance report for a Computer Compliance report for a Server Compliance report for a Group © Lepide Software Private Limited Page 42 Lepide Software Asset Management Compliance report for Entire Network 4.5.2.1 COMPLIANCE REPORT FOR ENTIRE NETWORK You can view the graphical compliance report for the entire network by clicking Reports on the launching screen of Lepide Software Asset Management Software. Click Computer Network from the Network Compliance section to view the report, as shown in figure 4.25: Figure 4:25: Graphical Compliance Report for Entire Network 4.5.2.2 COMPLIANCE REPORT FOR SERVER You can view the graphical compliance report for a server by clicking Reports on the launching screen of Lepide Software Asset Management. Expand the Computer Network in the Network Computers pane and select the desired server name to view the report as shown in figure 4.26: © Lepide Software Private Limited Page 43 Lepide Software Asset Management Figure 4.26: Graphical Compliance Report for Server 4.5.2.3 COMPLIANCE REPORT FOR GROUP You can view the graphical compliance report for a group by clicking Reports on the launching screen of Lepide Software Asset Management. Select the desired group from the Network computers pane to view the report as shown in figure 4.27: © Lepide Software Private Limited Page 44 Lepide Software Asset Management Figure 4.27: Graphical Compliance Report for Group 4.5.2.4 COMPLIANCE REPORT FOR A COMPUTER You can view the graphical compliance report for specific computer by clicking Reports on the launching screen of Lepide Software Asset Management. Select the desired computer name from the Network computers pane to view the report as shown in figure 4.28: © Lepide Software Private Limited Page 45 Lepide Software Asset Management Figure 4:28: Graphical Compliance Report for Computer 4.5.3 VIEW INSTALLED LICENSE REPORT To view the list of all the installed licenses on the network, click the Installed Licenses link in the left pane on the launching screen of the software, as shown in figure 4.29: © Lepide Software Private Limited Page 46 Lepide Software Asset Management Figure 4.29: Report of Installed Licenses Installed Licenses Report contains the information for all the installed licenses across a network not the licenses installed to a specific computer, group or server 4.5.4 VIEW SOFTWARE LOCATION REPORT To view physical location of all the installed software on the network as shown in figure 4.30, click the Software Location link in the left pane on the launching screen. © Lepide Software Private Limited Page 47 Lepide Software Asset Management Figure 4.30: Report of Software Location 4.5.5 VIEW SOFTWARE VALIDITY REPORT To view validity of all the software installed on the network, click the Software Validity link in the left pane on the launching screen of the software .The software validity report displays the number of days remaining for software to expire and its validity status. The validity status can be Never Expiring, Expired or the number of days which are left for expiry. Figure 4.31 shows the Software Validity report. © Lepide Software Private Limited Page 48 Lepide Software Asset Management Figure 4:31: Software Validity Report For Free software's Displays the message Never Expiring. For Licensed software's Displays Expired if the software is expired. Displays Number of days left for the software to be expired. 4.5.6 VIEW DETAIL REPORT To view the detailed compliance report for a network, you will need to click Detailed Report in the left pane on the launching screen of the interface. The detailed report displays information such as, domain name, computer name, last scan date, software name, software version, publisher name, and license serial for all the computers in a group. You can also view the detailed compliance report for a particular computer by selecting that computer in the left pane of the Network Computer section. Figure 4.32 shows the Detailed Report for a group: © Lepide Software Private Limited Page 49 Lepide Software Asset Management Figure 4:32: Detailed Report 4.5.7 EXPORTING REPORTS TO DIFFERENT FORMATS Lepide Software Asset Management software provides four different formats to export the reports that are generated in the software. To save the reports in CSV format: 1. Click button. 2. Browse to the desired location and click OK. To save the reports in RTF format: 1. Click button 2. Browse to the desired location and click OK. To save the reports in HTML format: 1. Click button. 2. Browse to the desired location and click OK. To save the reports in PDF format: © Lepide Software Private Limited Page 50 Lepide Software Asset Management 1. Click button. 2. Browse to the desired location and click OK. 4.5.8 PRINT REPORTS To print any report, click the button present below the tabs. 4.5.9 VIEW SETTINGS Settings tab displays the Scan Date for which the computers have been scanned. All the scan information is displayed in this tab. To view settings of all the computers on the network, click the Settings link in the left panel on the launching screen of the software interface. By default all the computers on the scanned groups will be displayed. You can view a list for a specific computer by selecting that computer from the left panel. Every computer in the list is accompanied by a checkbox. You can select multiple computers and delete the selected computers by clicking the Delete Selected link available below the list. Click Delete All to delete all the computers. Figure 4.33 shows the list of scans performed on the network computers: Figure 4:33: View Settings © Lepide Software Private Limited Page 51 Lepide Software Asset Management 5. SUPPORT I NFORMATION This section deals with the support information and specific queries pertaining to using Lepide Software Asset Management. 5.1 TROUBLESHOOTING Question 1.Software is displaying errors while scanning. What could be the reason? Answer 1. If scan error message is appearing, then you need to perform check of the following: Verify the provided user login credentials provided to the software. Network is in healthy situation. The targeted user computer is in working condition while performing the scan process. Question 2.I am unable to create any group? Answer 2. Before adding or creating a new group, please ensure that the computer system where Lepide Software Asset Management is installed and running has read and write permissions. Without the write permissions, software will not perform the activity of creating groups. Question 3.The Quick Overview, Settings, Detail Report tabs are not visible for a computer in a group. Why is it so? Answer 3.To view all the tabs for reports section, the targeted computer should have been at least scanned once with Lepide Software Asset Management Software. If in case you can only view the Pie reports and not the detailed reports then check the Settings tab Main Window > Settings. The scanning details might have been deleted from the list for that specific computer. Re-scan the computer and the required tabs will be visible again. Question 4.License Management tab does not display any information. Answer 4.The License Management tab displays information when at least one computer system is managed in a group and is scanned. Question 5.License Management tab is not displaying software information which was visible before. How to make it visible again? Answer 5.This happens when certain information has been hidden through the Hide Records function. Unhide that software record which will then become visible again. Question 6.I am unable to save reports in any format? Answer 6.Before saving reports in any file format, check if the system has full read and write access permissions. Question 7.Why the system visible in License Assignment tab becomes invisible later on? Answer 7.License Assignment tab helps to assign licenses. When the system is managed in any group, it automatically appears in the License Assignment tab too. If in any event, a system has been deleted from any group, then it will automatically disappear from the License Assignment tab. © Lepide Software Private Limited Page 52 Lepide Software Asset Management 5.2 TECHNICAL SUPPORT Round the Clock support to solve the technical and software related queries Telephone Support: Help line: +91-9818718513 Email Support: For General Queries: [email protected] For Sales: [email protected] For Technical Support: [email protected] © Lepide Software Private Limited Page 53 Lepide Software Asset Management 6. P URCHAS E This section deals with the purchase process of Lepide Software Asset Management software 6.1 ABOUT FREE TRIAL VERSION Download Free Trial version of Lepide Software Asset Management Software and experience effective software asset management in your organization. Fully functional evaluation version of the software will help to track 50 computers for a period of 30 days, after that Licensed Full version of the software is required to be purchased for continued performance. 6.2 PURCHASING LICENSES FOR FULL VERSION You must purchase Lepide Software Asset Management Software in order to track more than 50 user computers without any software expiry limitation To purchase Lepide Software Asset Management or to convert evaluation version in Full version you need to have an authentication code. This authentication code is provided to you when you make the purchase payment and receive an order number from our authorized reseller. Following are the steps through which you can purchase the software 1. Select Activate License option from the License menu - Registration window will appear in front of you: Figure 6.1: Activate Software 2. As you do not have the Authentication Code to enter, check the I dont have Authentication Code checkbox: © Lepide Software Private Limited Page 54 Lepide Software Asset Management Figure 6.2: Get Authentication Code In this window, fill in the fields: Email Address: In this field, you need to enter your email address, which you have used to register Lepide Software Asset Management. Order Number: In this field you need to enter the Order Number which has been provided to you by our authorized reseller at the time of making purchase payment of the software. Number of Client: Enter the Number of computer systems which you want to manage. We will send you the license based on the number entered in this field. For instance, if you enter 15 in the Number of client field, then we will send you the license type for 15 clients. After this you can manage licenses of 15 computers at a time. 3. Click the Get Authentication code button. As you click the button, Lepide Software Asset Management will create a Lepide Software Asset ManagementRegistration.Info file which you need to e-mail us at the e-mail address mentioned in the software interface. Our Sales team will receive your email and send you the authentication code via email, which has to be entered in the Registration window You will receive the authentication code on the email address that was provided by you . 4. Click License>>Activate License and use the received authentication code to activate evaluation version to full version. Figure 6.3: Enter Authentication Code © Lepide Software Private Limited Page 55 Lepide Software Asset Management 7. L EGAL N OTICES This section comprises the legal specification about Lepide Software Asset Management and the company LEPIDE SOFTWARE. 7.1 COPYRIGHT NOTICE Lepide Software Private Limited, Lepide, accompanied user manual and documentation are copyright of Lepide Software Private Limited, with all rights reserved under the copyright laws. This user manual cannot be reproduced in any form without the prior written permission of Lepide Software Private Limited. No Patent Liability is assumed, however, with respect to the use of the information contained herein. © LEPIDE SOFTWARE PRIVATE LIMITED. All rights reserved. 7.2 DISCLAIMER The Information contained in this manual including but not limited to any product specifications is subject to change without notice. Lepide Software Private Limited provides no warranty with regard to this manual or any other information contained here in and here by expressly disclaims any implied warranties of merchantability or fitness for any particular purpose with regard to any of the foregoing. Lepide Software Private Limited assumes no liability for any damages incurred directly or indirectly from any technical or typographical errors or omissions contained here in or for discrepancies between the product and the manual In no event shall Lepide Software Private Limited be liable for any incidental, consequential special or exemplary damages, whether based on tort, contract or otherwise, arising out of or in connection with this manual or any other information contained here in or the use there of 7.3 TRADEMARK S Lepide Software Asset Management Software is a copyright work of LEPIDE SOFTWARE PRIVATE LIMITED Windows 95®, Windows 98®, Windows ME®, Windows NT®, Windows 2000 Server®, Windows 2000 Advanced Server®, Windows 2003 Server®, Windows XP®, Windows Vista® and MS-DOS, are registered trademarks of Microsoft Corporation. All other brand and product names are trademarks or registered trademarks of their respective companies 7.4 LICENSE AGREEMENT Lepide Software Asset Management Software is Copyright © by Lepide Software Private Limited All Rights Reserved Your Agreement to this License You should carefully read the following terms and conditions before using, installing or distributing this software, unless you have a different license agreement signed by Lepide Software Private Limited. If you do not agree to all of the terms and conditions of this License, then: do not copy, install, distribute or use any copy of Lepide Software Asset Management Software with which this License is included. The terms and conditions of this License describe the permitted use and users of each Licensed Copy of Lepide Software Asset Management Software. For purposes of this License, if you have a valid single-copy license, you have the right to use a single Licensed Copy of Lepide Software Asset Management Software; if you or your organization has a valid multi-user license, then you or your organization have - has the right to © Lepide Software Private Limited Page 56 Lepide Software Asset Management use up to a number of Licensed Copies of Lepide Software Asset Management Software equal to the number of copies indicated in the documents issued by Lepide Software Private Limited when granting the license. Scope of the License Each Licensed Copy of Lepide Software Asset Management Software may either be used by a single person or used non-simultaneously by multiple people who use the software personally installed on a single workstation. This is not a concurrent use license. All rights of any kind in Lepide Software Asset Management Software, which are not expressly granted in this License, are entirely and exclusively reserved to and by Lepide Software Private Limited. You may not rent, lease, modify, translate, reverse engineer, decompile, disassemble, or create derivative works based on, Lepide Software Asset Management Software, nor permit anyone else to do so. You may not make access to Lepide Software Asset Management Software available to others in connection with a service bureau, application service provider, or similar business, nor permit anyone else to do so. Warranty Disclaimers and Liability Limitations Lepide Software Asset Management Software, and any and all accompanying software, files, data and materials, are distributed and provided AS IS and with no warranties of any kind, whether expressed or implied. In particular, there is no warranty for any harm, destruction, impairment caused to the system where Lepide Software Asset Management Software is installed. You acknowledge that good data processing procedure dictates that any program, including Lepide Software Asset Management Software, must be thoroughly tested with non-critical data before there is any reliance on it, and you hereby assume the entire risk of all use of the copies of Lepide Software Asset Management Software covered by this License. This disclaimer of warranty constitutes an essential part of this License. In addition, in no event does Lepide Software Pvt. Ltd. authorize you or anyone else to use Lepide Software Asset Management Software in applications or systems where Lepide Software Asset Management Software failure to perform can reasonably be expected to result in a significant physical injury, or in loss of life. Any such use is entirely at your own risk, and you agree to hold Lepide Software Pvt. Ltd. harmless from any and all claims or losses relating to such unauthorized use. General This License is the complete statement of the agreement between the parties on the subject matter, and merges and supersedes all other or prior understandings, purchase orders, agreements and arrangements. This License shall be governed by the laws of the State of Delhi. Exclusive jurisdiction and venue for all matters relating to this License shall be in courts and for a located in the State of Delhi, and you consent to such jurisdiction and venue. There are no third party beneficiaries of any promises, obligations or representations made by Lepide Software Pvt. Ltd. herein. Any waiver by Lepide Software Pvt. Ltd of any violation of this License by you shall not constitute, nor contribute to, a waiver by Lepide Software Pvt. Ltd. of any other or future violation of the same provision, or any other provision, of this License. © Lepide Software Private Limited Page 57


