1
96M11680
Precautions on Regulations and Standards
CSA Certificate
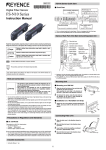
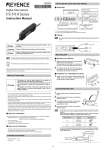
Digital Photoelectric Sensor
PS-N10 series complies with the following CSA and UL standards and has been certified by
CSA (Class 2252 05 / Class 2252 85). (CSA mark is attached only to the sensor amplifier certified by CSA.)
• Applicable standard: CAN/CSA C22.2 No.61010-1
UL61010-1
Pollution Degree: 3
Overvoltage Category: I
• Use the following power supply.
CSA/UL certified power supply that provides Class 2 output as defined in the CEC (Canadian
Electrical Code) and NEC (National Electrical Code), or CSA/UL certified power supply that
has been evaluated as a Limited Power Source as defined in CAN/ CSA-C22.2 No. 60950-1/
UL60950-1
• Use this product at the altitude of 2000 m or less.
• Indoor use only.
• The sensor head cable and the sensor head connection cable must be installed with avoiding
mechanical damage (e.g.: crushing).
• The power/input-output cable for amplifier unit is for internal wiring only. The amplifier must
be installed inside of an approved enclosure or install power/input-output cable for amplifier
with approved protection.
• The following cables are rated 30 V.
- sensor head cable
- sensor head connection cable
- power/input-output cable for amplifier unit
Install these cables where it is separated from the circuit over 30 V.
PS-N10 Series
Instruction Manual
CE Marking
Read this instruction manual before using the product in order to achieve maximum performance. Follow instruction or you may be exposed to hazards.
Keep this instruction manual in a safe place after reading it so that it can be used
at any time.
Keyence Corporation has confirmed that this product complies with the essential requirements
of the applicable EC Directive, based on the following specifications.
Be sure to consider the following specifications when using this product in a member state of the
European Union.
z
DANGER
It indicates a hazardous situation which, if not avoided, will result in
death or serious injury.
WARNING
It indicates a hazardous situation which, if not avoided, could result in
death or serious injury.
•
CAUTION
It indicates a hazardous situation which, if not avoided, could result in
minor or moderate injury.
•
NOTICE
It indicates a situation which, if not avoided, could result in product
damage as well as property damage.
Important
It indicates cautions and limitations that must be followed during operation.
Point
It indicates additional information on proper operation.
Reference
EMC Directive (2004/108/EC)
• Applicable standard EMI :
60947-5-2, Class A
EMS : 60947-5-2
When connecting with the NU-CL1, always install in a conductive enclosure (control panel,
etc.), and wrap a ferrite core (E04SR401938 manufactured by Seiwa Electric Mfg. Co., Ltd.)
one turn around the sensor head cable.
When extending the Sensor Head Cable of the PS-47(C)/49(C)/05/52(C)/55(C)/56/58, cover
the entire Sensor Head Cable with conductive piping (for example with metal piping). Also,
ground the end part of the piping (the sensor amplifier side).
Remarks: These specifications do not give any guarantee that the end-product with this product incorporated complies with the essential requirements of the EMC Directive.
The manufacturer of the end-product is solely responsible for the compliance of the
end-product itself according to the EMC Directive.
Included Accessories
Sensor Amplifier
It indicates tips for better understanding or useful information.
Instruction manual x 1
Sensor head connector x 1
See "PS-N10 Series User's Manual" for details on the features of the PS-N10 series and
detailed instructions for configuration.
Safety Information for PS-N10 Series.
• This product is only intended to detect object(s). Do not use
WARNING
this product for the purpose of protecting a human body or a
part of the human body.
• This product is not intended for use as an explosion-proof
product. Do not use this product in a hazardous location and/or
potentially explosive atmosphere.
• This product uses DC power. Do not apply AC power. The product may explode or burn if an AC voltage is applied.
• Do not wire the amplifier line along with power lines or high-ten-
NOTICE
sion lines, as the sensor may malfunction or be damaged due to
noise.
• When using a commercially available switching regulator,
ground the frame ground terminal and ground terminal.
• Do not use the PS-N10 series outdoors, or in a place where
extraneous light can enter the light-receiving element directly.
• Due to individual dispersion characteristics and the difference
in sensor head models, the maximum sensing distance or displayed value may not be the same on all units.
1
Sensor Head
z
z
PS-45
PS-46
Mounting bracket set
Receiver
Receiver
Transmitter
z
Nut x 2
Spring washer x 2
Flat washer x 2
M2 x 10 screw x 2
Mounting bracket x 1
Plate nut x 1
M3 x 12 screw x2
Transmitter
PS-47/PS-47C*1
z
PS-48
Mounting bracket x 1
Transmitter
Receiver
Receiver
z
Transmitter
PS-49/PS-49C*1
z
PS-05
Transmitter (T)
Receiver (R)
Transmitter
Receiver
Holder
z
PS-52/PS-52C*1
z
Transmitter (T)
Nut x 2
Spring washer x 2
Flat washer x 2
M3 x 14 screw x 2
For fixing the head
Spring washer x 4
M3 x 10 screw x 4
For fixing the holder
PS-55/PS-55C*1
Receiver (R)
Transmitter (T)
Receiver (R)
Nut x 4
Spring washer x 4
Flat washer x 4
M2 x 10 screw x 4
z
z
PS-56
Transmitter (T)
PS-58
Receiver (R)
Transmitter (T)
Receiver (R)
Mounting bracket x 2
Transmitter (T)
Receiver (R)
Mounting bracket x 2
Nut x 4
Spring washer x 4
Flat washer x 4
M2 x 10 screw x 4
z
PS-201/PS-201C*1
Transmitter(T) Receiver (R)
z
z
PS-202
Mounting bracket x 2
z
PS-205
PS-206
Receiver
Receiver
Transmitter
Transmitter
*1 A sensor head connector is attached to the end of the cable for the sensor heads with model names containing the suffix C.
2
PS-N10 Series Quick Start
Connecting the Sensor Head to the Sensor Amplifier
Quick Start
Installing the Sensor Head Connector
Up
1
Mode/Output *2
Fine sensitivity adjustment
Down
Process the cable ends as shown below. The core wire conductors are stripped so
that they are exposed at the time of shipment. Be sure to process the cables without
Press the [MODE] button once, then
use
to select L-on or D-on
removing the insulation from the cable ends.
Preset function
SEL
Configure easily
with a single press
when receiving light
M
10 mm or longer
Setting value Light intensity
Power select switch *1
Sensitivity setting
SEL
2
M
Standard ⇔ MEGA (fixed)
Press once each for workpiece/no workpiece
Cable
core
Shielded wire
Move the upper left part of the connector in the direction of the arrow and then open
the connector.
*1 Not available for 0-line types.
*2 Press and hold the [MODE] button to make advanced setting changes.
Names of Each Part of the Main Unit and Expansion Unit
3
Head lock lever
Fully insert the cables with the shielded wires standing upright. Next, bend the
shielded wires along the grooves in the direction of the arrow.
SET button (SET)
Operation status indicators
PST indicator Sub screen
DTM indicator (Displayed in green)
Digital display
Main screen
Manual button
(
)
Power
selection switch
Red wire
White wire
4
(Displayed in red)
Close the connector to crimp the cables. Return the upper part of the connector to its
original position and then lock it.
Expansion
protective cover
Expansion connector
MODE button (MODE)
Preset button (PRESET)
5
Power select switch
Cable*
Dust cover
Using nippers, cut off the ends of cables protruding from the connector.
* On the PS-N11Cx / N12Cx, this is an M8 connector rather than a cable. Not available for 0-line
types.
Mounting Unit
Mounting on a DIN Rail
1
2
Align the claw at the bottom of the main body
with the DIN rail, as shown on the right.
While pushing the main body in the direction
of the arrow 1, push down in the direction of
arrow 2.
NOTICE
3
Connecting the Sensor Head
2
To dismount the sensor, raise the main body
in the direction of the arrow 3 while pushing
the main body in the direction of arrow 1.
Crimp the cables no more than three times. Excessively crimping the
cables may result in a bad connection.
1
1
Open the dust cover, and move the
head lock lever down.
Installation on a Wall (Main Unit Only)
1
2
Attach the unit to the optional mounting
bracket (OP-73880), and secure with two M3
screws as shown on the right.
3
3
Lift the hook up, and insert the connector completely.
Lower the hook to the
position shown in the
drawing, and secure
the head lock lever by
pushing up.
PS-201(C)/202
Mounting the Sensor Head
Use the supplied fixing bracket or similar bracket. Install the M3 screws.
PS-45
Use the supplied fixing brackets. There are two ways to mount the sensor head. Make sure the
tightening torque does not exceed 0.6 Nm.
CAUTION
PS-205/206
PS-46/52(C)/56
Install the M4 screws. Make sure the tightening torque does not exceed 0.5 Nm.
Use the supplied screws or other similar screws. Make sure the tightening torque does not
exceed the following values:
PS-46/56: 0.3 Nm or less
PS-52: 0.15 Nm or less
CAUTION
PS-47(C)/49(C)/55(C)
Install the M3 screws. Make sure the tightening torque does not exceed 0.6 Nm.
PS-48/58
Install the M3 screws when using the supplied fixing brackets.
Make sure to observe the following requirements when using setscrews to mount the sensor
head:
M3 setscrew (flat or dented head)
L
Model
L
PS-48
5 mm or longer
PS-58
7 mm or longer
Tightening torque
0.15 Nm or less
CAUTION
• Do not use setscrews to install the bracket.
• Do not bend the 20 mm cable that runs from the end of the sensor
head. Maintain a minimum bend radius of 25 mm.
Note If you place the reflective PS-48 in the mounting hole, it is
affected by the light reflected from inside the hole. Place the front side
of the PS-48 so that it sticks out of the mounting hole, as shown above.
PS-05
When installing the holder, use the supplied screws and spring washers or other similar parts, as
shown on the right. Make sure the tightening torque does not exceed 0.5 Nm.
When fixing the PS-05 to the holder, use the supplied screw, nuts, spring washer, and flat
washer or other similar parts, as shown on the right. Make sure the tightening torque does not
exceed 0.5 Nm.
4
Do not bend the 20 mm cable that runs from the end of the sensor
head. Maintain a minimum bend radius of 25 mm.
Connecting Multiple Amplifiers
Other Calibration Methods
Increased Resistance to Dust and Dirt
Up to 16 expansion units can be connected to one main unit. Note, however, that the 2 output
type is handled as two expansion units.
CAUTION
Point
1
2
z
Mount on DIN rail and install on metal surface when connecting to multiple amplifiers or mounting main units together.
Maximum Sensitivity Calibration
In the state shown below, press and hold the [SET] button for three seconds or more. Stop pushing when "SET" flashes. The sensitivity is set slightly higher than the received light intensity.
Thru-Beam Model
• Contact your nearest KEYENCE office when connecting units other
than the N-bus (name of KEYENCE’s wire-saving system) compatible
sensor amplifier, including PS-N10 Series, or the NU Series communication module.
• Turn the power off before connecting multiple expansion units.
• Do not touch the expansion connector with your bare hands.
• When using the PS-N10 series as a main unit, verify that expansion
products used (other than PS-N10 series expansion units) can operate within the power voltage range of the PS-N10 series.
: with workpiece
Reflective Model : without workpiece
Remove the protection covers from the main unit
Calibrate with a Moving Workpiece
and expansion unit(s).
z
Full Auto Calibration
Press and hold the [SET] button with no workpiece in place. While "SET" is flashing, pass a
workpiece through. (Continue pressing the [SET] button while the workpiece passes
through.)
Install the amplifiers on the DIN rail, one at a time.
Common to
Thru-Beam Model and Reflective Model
2
3
4
5
1
Slide the main unit and expansion unit(s) together.
Engage the two claws of the expansion unit with
the recesses on the main unit side until you hear/
feel a click.
Attach the end units (option: OP-26751) to the DIN
rail in the same way as step (2).
Workpiece Positioning
Secure the amplifiers between the end units.
Tighten the screws at the top (two screws per unit)
with a Phillips screwdriver to fix the end units.
z
Positioning Calibration
Press the [SET] button with no workpiece.
Place the workpiece in the location you wish to position it. Press and hold the [SET] button
for at least 3 seconds. Release the button when "SET" flashes.
Common to
Thru-Beam Model and Reflective Model
OP-26751 (a set of two)
Calibration Method
Workpiece
To Detect Small Differences
z
Two-point Calibration
Two-point calibration is the basic method of calibration.
Press the [SET] button once without the workpiece, and then press it once again with the
workpiece.
Common to
Thru-Beam Model and Reflective Model
1
Press the [SET] button with no workpiece.
[SET] will be displayed on the sub-menu (green display).
SEL
2
M
Press the [SET] button with a workpiece.
When complete, the values will be set and the submenu (green display) will flash. The set
point will be calibrated to the mid-point between the light intensity when there is no workpiece, and the light intensity when there is a workpiece.
SEL
M
Workpiece
If "----" flashes for two seconds on the main screen, the light intensity is too small between
conditions when the workpiece is absent and when it is present. These values will be set,
but there is the possibility that detection may become unstable.
5
z
Simple Setup Functions
Maximum Sensitivity Preset Function
This function sets conditions that will serve as reference to ".
0" and adjusts conditions with
0". This is useful when you would like to perform detecslightly higher light intensity to "100.
tion using the background as a reference with reflective models.
Under the following conditions, press and hold the [PRESET] button for 3 seconds or more.
Then release your finger when "Auto" flashes.
Simple Display: Adjusting the Current Value to 100.0
With the PS-N10 Series, the current value can be set to 100.0 through simple key operations.
Using a constant current value is useful for predictive maintenance allowing you to find the sensor amplifier for which the received light intensity has decreased.
Thru-Beam Model : with workpiece
• Neither preset function below can be used in combination with the
zero shift function. Always disable the zero shift function before
using the preset function.
• The preset function is not suitable for detecting workpieces which
have a small received light intensity, such as transparent workpieces, etc.
• Refer to the "PS-N10 Series User's Manual" for the operation method
of analog output in respect to the preset display.
Point
SEL
M
Press and hold for 3 seconds or more
Reflective Model : without workpiece
Reference
z
Press and hold the [PRESET] button to disable each preset function.
SEL
M
Preset Function
This function calibrates the current value to "100.
0" when the [PRESET] button is pressed
in the light-ON state.
Press and hold for 3 seconds or more
• The maximum value for the light intensity while the [PRESET] button is being pressed is
Press [PRESET] button once
SEL
•
•
M
Green PST lights up
SEL
Point
M
z
Setting value
0"
is "50.
Reference
z
set to ".
0", and light-intensity that is slightly higher than the maximum value at that time
will be adjusted "100.
0".
The setting value is "50.
0"
The green PST indicator will light up.
Cannot be executed when the Preset function is already being used
(when the PST indicator is flashing). Press and hold the [PRESET]
button to disable the Preset function before executing this function.
Full Auto Preset Function
This function automatically differentiates between two conditions (presence/absence of
0" and ".
0". This is effective for cases
workpiece) and adjusts the current values to "100.
when the workpiece is moving at high-speed.
Press and hold the [PRESET] button with no workpiece in place. While "Auto" is flashing,
pass a workpiece through. (Continue pressing the [PRESET] button while the workpiece
passes through.)
Current value is
"100.
0"
• This function is especially useful when performing simple detection
(sensor beam completely interrupted by a non-transparent object)
using the thru-beam model / retro-reflective model sensor heads.
When using multiple Neo Series units, the display can be easily standardized with this function.
Common to Thru-Beam Model and Reflective Model
Target-Preset Function
This function calibrates the current value to ".
0".
After the preset function has been executed to display "100.
0", execute this function to display ".
0". Two random points can be calibrated to "100.0" and ".
0".
Important
SEL
Press and hold until
"Auto" flashes
The target-preset function can be used in combination with the
standard preset function (when use of the preset function is valid).
If the
button and [PRESET] button are pressed simultaneously, the current value is set
0" at that point. The value set to "100.
0" with the [PRESET] function does not change.
to ".
SEL
M
While pressing the [PRESET] button,
pass a workpiece through
100.0
Settings complete
3.0
.0
M
• Near-maximum values while the [PRESET] button is being pressed and held are
adjusted to "100.
0" and near-minimum values are adjusted to ".
0" .
• The setting value is changed to "50.
0"
• The green PST indicator will light up.
[PRESET] +
Green PST
lights up
Point
SEL
Cannot be executed when the Preset function is already being used
(when the PST indicator is flashing). Press and hold the [PRESET]
button to disable the Preset function before executing this function.
M
Set Current Value to "0"
SEL
z
M
Zero Shift Function
This function is primarily used with reflective models.
Press the [PRESET] button and [
] button at the same time.
Current value is ".
0"
SEL
M
Green PST lights up
SEL
M
Current value is "0"
• The current value becomes ".
0".
• The Green PST lights up.
Point
6
The zero shift function cannot be used in combination with
either preset function. To use the zero shift function, you must
first disable the preset function.
z
Disable the Zero Shift Function
Error Displays and Corrective Actions
Press and hold the [PRESET] button to disable the zero shift function.
Reference
The light intensity may not be set to ".
0" when the reflective model sensor head is first installed.
In this case, using the zero shift function to set the state with no target
present to ".
0" will make it easier to see the difference in light intensities.
Error display
Cause
Solution
• Check the load and return the curOvercurrent in the control output.
ErC
rent within the rated range.
• Check that the output wire is not
contacting any other wire or frame.
Output Switch
• Check that the sensor head is
connected.
• Check sensor head cable for dam-
Either light-ON (L-on) mode or dark-ON (D-on) mode can be selected.
age.
Sensor head cable is broken or
is not connected.
• Check the sensor head cable con-
ErE
Internal data write / load failed.
Turn the power OFF and ON. If the
data is not recovered, initialize the
settings.
Loc
Key lock function is enabled, or
the power mode was fixed to
MEGA mode using the selector
switch.
• Release the key lock.
• Check that the sensor amplifier
The DTM indicator
flashes.
Correction error in DATUM1 or
DATUM 2 mode.
See "PS-N10 Series UserÊs Manual"
for details.
ErH
While the current value is displayed,
nector for damage or loose connections.
After checking, turn the power
OFF and ON.
press the [MODE] button once.
SEL
Use
to switch the output (L-on/D-on), then press the [MODE] button again.
The output change completes, and the display returns to the current value.
Initializing the Settings
Initialization Method
For errors other than the above, contact your nearest KEYENCE office.
Press and hold the [SET] and
[PRESET] buttons simultaneously
for more than three seconds.
Connecting to External Devices
SEL
M
Cable Type
PS-N11N / N12N
Press and hold for 3 seconds or more
PS-N11P / N12P
Input / output circuit diagram
Power mode
Load
(Control output)
3.3 VDC
Short-circuit current
TURBO
Pink
*1 PS-N11N only
*1 PS-N11P only
Std (Normal)
Setting value
50
Output switch
L-on
PS-N11CN / N12CN
M8 Connector Type
PS-N11CP / N12CP
Activating Key Lock
2
Load
Short-circuit current
SEL
10-30 VDC
①*1
PLC, etc.
④
(Control output )
PLC, etc. 1 mA or less
Short-circuit current
2 mA or less
②
0V
0V
③*1
*1 PS-N11CN only
*1 PS-N11CP only
M
M8 connector pin layout
2
1
4
M8 connector pin layout
3
2
4
1
Socket Cable (Sold Separately)
Press and hold the [MODE] button
and
(or
) simultaneously for
three seconds or more.
The screen displays "unL", enabling
key operation.
3.3 VDC
③*1
Deactivating Key Lock
1
④
(Control output)
②
Press and hold the [MODE] button
and
(or
) simultaneously for
three seconds or more.
The screen displays "Loc", disabling
key operation.
①*1
Input / output circuit diagram
10-30 VDC
Sensor main circuit
The key lock function disables button operation to prevent unauthorized use.
Overcurrent protection circuit
Sensor main circuit
Key Lock
2
0V
Blue*1
Input / output circuit diagram
1
Black
0V
Blue*1
Initial value
PLC, etc.
Short-circuit current
2 mA or less
(Control output)
PLC, etc. 1 mA or less
Pink
Setting
Detection mode
Black
10-30 VDC
Brown*1
Load
Initial Settings
Overcurrent protection circuit
Use the
to select "iNiT", then press the [MODE] button.
After initialization is complete, the display returns to the current value.
Brown*1
Sensor main circuit
z
to select "RST", then press the [MODE] button.
Use the
Sensor main circuit
2
3
Input / output circuit diagram
10-30 VDC
Overcurrent protection circuit
1
selector switch is set to MEGA
mode.
Overcurrent protection circuit
2
M
Load
1
For PS-N11Cx / N12Cx
SEL
Pin and wire color table
Connected
Wire color
pin No.
M
OP-73864
(Cable length: 2 m)
4
OP-73865
(Cable length: 10 m)
7
3
2
1
1
2
3
4
Brown
White
Blue
Black
3
Display Settings (diSP)
Function Configuration
See "PS-N10 Series User's Manual" for details on each function.
Basic Setting
Normal display method
MODE
Press and hold
Reverse display
for 3 seconds or more
Sub-display off
TURBO mode
Extension display
SUPER mode
Bar display
ULTRA mode
Excess gain (%) display
MEGA mode
Light intensity hold display *1
Excess gain hold (%) display *1
Normal sensitivity setting method
Percentage Calibration*1
L-on / D-on display
Zero-shift calibration
Settings complete
Enable the saturation of the
Preset function *2
Disable the saturation of the
Preset function
Go to detection setup mode
Settings complete
Go to display setup mode
Go to system setup mode
Go to system setup mode
Go to detection setup mode
Return to normal display
*1 You can press the
MODE
Return to display setup mode
button to set between the range of -99P and 99P.
Return to normal display
*1 Press the
Detection Settings (Func)
*2 Press the
Timer OFF
Off-delay timer *1
On-delay timer *1
One-shot timer *1
Normal (light intensity)
detection mode
DATUM1 mode *2
DATUM2 mode *2
Area detection mode
Rising Edge Detection Mode
Falling Edge Detection Mode
External input off
*4
External calibration input
Preset input
Zero shift input
Reset input
Light transmission OFF input
Pause mode transition input *3
Sleep mode transition input
MODE
Settings complete
Go to display setup mode
Go to system setup mode
Return to detection
setup mode
Return to normal display
*1 Press the
MODE
button to set between the range of 1 and 9999(ms).
MODE
*2 Press the
button to set the adjustment sensitivity to a range of between
LEu3 and set the warning output level to a range of between OP and 100P.
MODE
*3 Press the
button to toggle between oFF/oN/KEEP.
LEu1 and
*4 This display does not appear on the cable-type expansion unit (PS-N12N/N12P).
8
MODE
MODE
button to toggle between Std/P~P_/b~b_/P_b~/P~b_.
button to set between the range of 100P and 200P.
System Settings (SYS)
Eco feature off
Enable eco feature
Reduce power consumption
(response time 4 times slower)
Standard current value display
Maximum current value display
(4 times hysteresis)
Normal operation
Twice the number of
interference-prevention units as STD
(response time 2 times slower)
*1
Disable common key operations
Enable common key operations
Disable long mode
*2
Enable long mode
Settings complete
Go to detection setup mode
Go to display setup mode
Return to system setup mode
Return to normal display
*1 Main unit only.
*2 The PS-47(C), PS-48, PS-49(C), PS-58 and PS-206 do not support long-distance detection
mode. Do not select long-distance detection mode when using these sensor heads.
Reference
• Press the
MODE
button and the
previous setting.
• When the
MODE
button simultaneously to return to the
button is held down, the settings will end.
9
Specifications
Transparent Sensor Heads
Thru-beam type
Type
Long distance
Model *1
Detection
distance*2
(mm)
Adjustable axis
General-purpose
Cylinder
Environmentally resistant type
Long distance
Built-in groove
Flat
PS-55(C)
PS-05
PS-58
PS-52(C)
PS-56
PS-201(C)
PS-202
MEGA
3600 (6000)
3600 (6000)
1000
1200 (1500)
750 (900)
3600 (6000)
900 (1000)
ULTRA
2800 (5000)
2800 (5000)
900
800 (1000)
500 (600)
2800 (5000)
700 (900)
SUPER
2200 (4200)
2200 (4200)
750
400 (650)
400 (450)
2200 (4200)
600 (800)
TURBO
2000 (4000)
2000 (4000)
Smallest detectable
object*3
Light source
LED Class
Protection
structure
Operating
ambient
Environtemperature
mental
Operating
resistance
ambient
luminance
Vibration
resistance
Weight
(2 m cable included)
Ф 1 mm opaque
700
300 (600)
300 (400)
2000 (4000)
500 (750)
Ф 0.5 mm opaque
Ф 0.3 mm opaque
Ф 0.3 mm opaque
Ф 0.8 mm opaque
Ф 0.5 mm opaque
Infrared LED
Class 1 LED Product (IEC60825-1)
IP64
IP67
-
IP67
-10ºC to +60ºC (no freezing)
Incandescent lamp: 4,000 lx or less; sunlight: 12,000 lx or less
10 to 55 Hz, compound amplitude 1.5 mm, 2 hours for each axis (X, Y, and Z)
Approx. 30 g
Approx. 30 g
Approx. 30 g
Approx. 30 g
Approx. 30 g
Approx. 40 g
Approx. 40 g
*1 A sensor head connector is attached to the end of the cable for the sensor heads with model names containing the suffix C.
*2 The values in parentheses indicate the detection distance when long-distance detection mode is enabled and a 5 m sensor head cable is used.
*3 The size of a workpiece that can be detected at the maximum detection distance.
Reflective Sensor Heads
Diffuse reflective type
Type
Long distance
General-purpose
Flat
Cylinder
PS-45
PS-46
PS-48
PS-205
PS-206
MEGA
600 (900)
200 (250)
75
600 (900)
250
Model *1
Detection
distance *2
(mm)
ULTRA
400 (600)
150 (200)
45
400 (600)
180
SUPER
250 (450)
120 (160)
30
250 (450)
100
TURBO
200 (400)
100 (140)
25
200 (400)
70
φ-
-
φ-
-
-
-
-
-
-
Ф 6 mm
when the detection
distance is 70 mm
Smallest detectable
object *3
Spot diameter
Light source
LED Class
Protection
structure
Operating
ambient
Environtemperature
mental
Operating
resistance
ambient
luminance
Vibration
resistance
Weight
(2 m cable included)
Limited reflective type
General-purpose
Small spot
Long distance
Environmentally resistant
Long distance
Narrow vision
Infrared LED
PS-47(C)
PS-49(C)
10μ4
32 to 53
Ф 0.03 mm copper
wire
Ф 0.1 mm copper
wire
Ф 8 mm
when the detection
distance is 10 mm
Red LED
Ф 1.5 mm
when the detection
distance is 50 mm
Class 1 LED Product (IEC60825-1)
IP64
-
IP67
-10ºC to +50ºC
(no freezing)
-10ºC to +60ºC (no freezing)
Incandescent lamp: 4,000 lx or less; sunlight:
5,000 lx or less
Incandescent lamp: 4,000 lx or less; sunlight: 12,000 lx or less
10 to 55 Hz, compound amplitude 1.5 mm, 2 hours for each axis (X, Y, and Z)
Approx. 30 g
Approx. 30 g
Approx. 40 g
Approx. 60 g
Approx. 60 g
*1 There is a sensor head connector attached to the end of the cable for the sensor heads with model names containing the suffix C.
*2 The values in parentheses indicate the detection distance when long-distance detection mode is enabled.
*3 The values obtained by optimizing the detection distance and sensitivity.
10
Approx. 30 g
Approx. 30 g
Sensor Amplifier
Cable / Connector
Cable
Main unit / Expansion unit
Main unit
NPN
PNP
PS-N11N
PS-N11P
Control output
1 output
1 output
External input
1 input
Model
Response time
Output operation
Timer function
NPN output
Control output
PNP output
External input
Expansion units
Protection circuit
Number of interference prevention units
Power voltage*4
Rated
Expansion unit
PS-N11CN
PS-N11CP
1 output
1 output
N/A *1
PS-N10
24 VDC (operating voltage 10-30 VDC (including ripple)), ripple (P-P) 10 % or less, Class 2 or LPS
Normal: 810 mW or less (28 mA or less at 24 and 30 V, 34 mA or less at 12 V)
Eco on: 700 mW or less (24 mA or less at 24 and 30 V, 27 mA or less at 12 V)
Eco full: 490 mW or less (17 mA or less at 24 and 30 V, 20 mA or less at 12 V)
Normal: 860 mW or less (30 mA or less at 24 and 30 V, 35 mA or less at 12 V)
Eco on: 750 mW or less (26 mA or less at 24 and 30 V, 28 mA or less at 12 V)
Eco full: 540 mW or less (19 mA or less at 24 and 30 V, 21 mA or less at 12 V)
Operating ambient
temperature
Operating ambient
humidity
Vibration resistance
- 20°ºC to + 55°ºC (no freezing) *3
35 to 85 % RH (no condensation)
10 to 55 Hz, compound amplitude 1.5 mm, 2 hours for each of X, Y, Z axes
500 m/s2, 3 times for each of X, Y, Z axes
Amplifier body and dust cover material: Polycarbonate
PVC
Shock resistance
Housing
Cable
Housing dimensions
Weight
0-line
Expansion unit
PS-N12CN
PS-N12CP
No-voltage input (with/without contact), Input time 2 ms (ON)/20 ms (OFF) or more *2
Up to 16 units (a total of 17 units connected)
Protection against reverse power connection, output overcurrent, output surge, and output wiring error
TURBO/SUPER/ULTRA/MEGA: 4 (These numbers double when "Double" is selected.)
PNP*5
Environmental
resistance
Main unit
N/A
1 input
1 input
N/A
500 μs (TURBO)/1 ms (SUPER)/4 ms (ULTRA)/16 ms (MEGA)
Light-ON/Dark-ON
Timer OFF, OFF delay, ON delay, One-shot
Timer variable (1 ms to 9999 ms) Maximum error to setting value is μ10 % or less
NPN open collector 30 V, Max: 100 mA or less (for standalone operation)/20 mA or less (for expansion)
Residual voltage 1 V or less (Output current: 10 mA or less)/2 V or less (Output current: 10 to 100 mA)
PNP open collector 30 V, Max: 100 mA or less (standalone operation)/20 mA or less (for expansion)
Residual voltage 1.2 V or less (Output current: 10 mA or less)/2.2 V or less (Output current: 10 to 100 mA)
NPN*5
Material
M8 Connector
Expansion unit
PS-N12N
PS-N12P
Approx. 75 g
H 32.6 mm x W 9.8 mm x L 78.7 mm
Approx. 65 g
Approx. 20 g
Approx. 20 g
Approx. 20 g
*1 Counted as one output when units are added to NU series communication units.
*2 Input time is 25 ms (ON)/25 ms (OFF) only when an external tuning input is selected.
*3 The operating ambient temperature varies as shown below when units are added. For expansion, be sure to mount the units on the DIN rail (metallic plate) and
prevent the output current for each unit from exceeding 20 mA.
- 20ºC to + 55ºC for 1 or 2 units added, - 20ºC to + 50ºC for 3 to 10 units added, - 20ºC to + 45ºC for 11 to 16 units added
*4 When connecting nine or more expansion units, ensure that the power voltage is 20 V or more.
*5 The maximum power consumption including load is 29.3 W.
*6 Use with the over current protection device which is rated 30 V or more and not more than 1 A.
11
WARRANTIES AND DISCLAIMERS
(1) KEYENCE warrants the Products to be free of defects in materials and
workmanship for a period of one (1) year from the date of shipment. If any
models or samples were shown to Buyer, such models or samples were used
merely to illustrate the general type and quality of the Products and not to
represent that the Products would necessarily conform to said models or
samples. Any Products found to be defective must be shipped to KEYENCE
with all shipping costs paid by Buyer or offered to KEYENCE for inspection and
examination. Upon examination by KEYENCE, KEYENCE, at its sole option, will
refund the purchase price of, or repair or replace at no charge any Products
found to be defective. This warranty does not apply to any defects resulting
from any action of Buyer, including but not limited to improper installation,
improper interfacing, improper repair, unauthorized modification,
misapplication and mishandling, such as exposure to excessive current, heat,
coldness, moisture, vibration or outdoors air. Components which wear are not
warranted.
(2) KEYENCE is pleased to offer suggestions on the use of its various Products.
They are only suggestions, and it is Buyer's responsibility to ascertain the
fitness of the Products for Buyer's intended use. KEYENCE will not be
responsible for any damages that may result from the use of the Products.
(3) The Products and any samples ("Products/Samples") supplied to Buyer are not
to be used internally in humans, for human transportation, as safety devices or
fail-safe systems, unless their written specifications state otherwise. Should
any Products/Samples be used in such a manner or misused in any way,
KEYENCE assumes no responsibility, and additionally Buyer will indemnify
KEYENCE and hold KEYENCE harmless from any liability or damage
whatsoever arising out of any misuse of the Products/Samples.
(4) OTHER THAN AS STATED HEREIN, THE PRODUCTS/SAMPLES ARE
PROVIDED WITH NO OTHER WARRANTIES WHATSOEVER. ALL
EXPRESS, IMPLIED, AND STATUTORY WARRANTIES, INCLUDING,
WITHOUT LIMITATION, THE WARRANTIES OF MERCHANTABILITY,
FITNESS FOR A PARTICULAR PURPOSE, AND NON-INFRINGEMENT OF
PROPRIETARY RIGHTS, ARE EXPRESSLY DISCLAIMED.
IN NO EVENT SHALL KEYENCE AND ITS A FFILIATED ENTITIES BE
LIABLE TO ANY PERSON OR ENTITY FOR ANY DIRECT, INDIRECT,
INCIDENTAL, PUNITIVE, SPECIAL OR CONSEQUENTIAL DAMAGES
(INCLUDING, WITHOUT LIMITATION, ANY DAMAGES RESULTING FROM
LOSS OF USE, BUSINESS INTERRUPTION, LOSS OF INFORMATION,
LOSS OR INACCURACY OF DATA, LOSS OF PROFITS, LOSS OF
SAVINGS, THE COST OF PROCUREMENT OF SUBSTITUTED GOODS,
SERVICES OR TECHNOLOGIES, OR FOR ANY MATTER ARISING OUT OF
OR IN CONNECTION WITH THE USE OR INABILITY TO USE THE
PRODUCTS, EVEN IF KEYENCE OR ONE OF ITS AFFILIATED ENTITIES
WAS ADVISED OF A POSSIBLE THIRD PARTYÊS CLAIM FOR DAMAGES
OR ANY OTHER CLAIM AGAINST BUYER. In some jurisdictions, some of the
foregoing warranty disclaimers or damage limitations may not apply.
BUYER'S TRANSFER OBLIGATIONS:
If the Products/Samples purchased by Buyer are to be resold or delivered to a
third party, Buyer must provide such third party with a copy of this document,
all specifications, manuals, catalogs, leaflets and written information provided
to Buyer pertaining to the Products/Samples.
E 1110-2
www.keyence.com
Copyright (c) 2011 KEYENCE CORPORATION. All rights reserved.
11679E 1041-1 96M11680 Printed in Japan
12